1
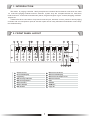
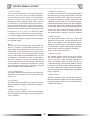
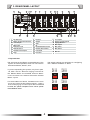
FRONT PANEL LAYOUT
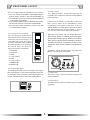
1. Source Select
The source select button (1) is used to select the
source for the zone. Each zone has a separate
source selection button. There are 9 selectable
sources: Line sources 1 through 8 and a local
Microphone source.A different local source (remote
in wall mixer or source select/volume control)can
beconnected to each zone. A zone cannot select
the local source connected to another zone.Pressing
the source select button will cycle through all zones
5. MlCl Priority Button
The MIC1 Priority button (5) will enable/disable
the MIC1priority paging function.When enabled,
MIC1will override zones 1-8and all local inputs,
if a signal is present on the MIC1 input.When dis
-abled,MIC1 will mix with lines 1-8 and local inputs
if required.This Microphone input has been designed
to give global priority over all other inputs if enabled
via the front panel. The MIC1 priority setting is not
saved when the T-8000 is switched off, and will
return to its default state on powered back on.
The default state of the MIC1 Priority is disabled.
in sequence:1, 2, 3, 4, 5, 6,7, 8, L,and OF.To select
a required source, press the source select button
(1). Once the display shows the desired source, press
6. Music Volume
The Music Volume control knob (6) controls the
selected source (zones 1-8 and local input) input
level. If the system is used with Remote Control
Panels, the Music Volume knob will be disabled
for zones where a remote control panel is connected.
Source Music Volume level will be controlled
at the remote control panel only.
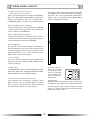
the ENTER (14) buttonto confirm and the change to
the selected source.
Note:
The source will only change after the ENTER (14)
button is pressed. If the ENTER(14) button is not
pressed,the source selection will return to previous
setting after 10 seconds.When the system is used
in conjunction with remote control panels,the zone
source select button will be disabled when a remote
controlpanel is connected to a zone .In this instance,
the source selection can only be controlled via the
remote control panel in the event power is lost,the last
source selection settings are automatically saved
and the unit will return to its previously configured
source selections when powered back on.
7. Master Volume
The Master Volume control knob (7) will control
the combined MIC1 and Source Output Volume
Level, if the MIC1 input has been enabled for a
zone. The Master Volume control knob will not
control the Paging Console Public Address Volume
Level,or the Line 8 Source Input Volume Level when
the Line 8 Source Input Priority Function is enabled.
This function has been designedasa global BGM
input if required.
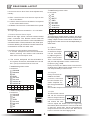
2. Zone LED Display
The Single Digit Zone LED Display will display the
selected source number: lines 1-8 and local input
shown as L.
8. MIC1 Volume
The MIC1 Volume control knob (8) will control the
MIC1 input level if this global mic has been configured
to operate within the zone.ITC Commercial Series
T-8000 User Manual.
3. Page Busy
The Zone Page Busy indicator LED (3) will illuminate
amber to indicate a paging microphone is paging to
this zone.
4. MIC1 Priority Indicator
The MIC1 Priority Indicator LED (4) will illuminate
blue indicating the Zone MIC1 priority paging func
-tion is enabled.
2