1
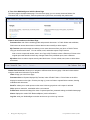
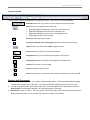
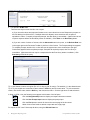
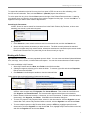
Accessing Documents in WebIntelligence InfoView XI 3.1 Overview: WebIntelligence InfoView XI 3.1 Objectives This guide is designed to help users learn how to access WebIntelligence (WebI) InfoView XI 3.1, navigate in the software, and become familiar with its features in order to run reports. A condensed two-page reference to the most common WebI functions is also available: http://ecg-doc.unh.edu/mr/webi_reader_quickguide.pdf. You must be logged into the VPN to view it. For Assistance For help with WebI, call the UNH IT Service Desk at 862-4242 or visit the WebI support form at https://itsupport.unh.edu/webi. For Flash videos demonstrating common WebI functions, go to http://www.usnhgateway.org, choose Documentation > WebIntelligence/BusinessObjects > Video Tutorials and choose a tutorial to watch. What is WebIntelligence InfoView? a web-based management reporting tool developed by SAP BusinessObjects, accessed via a browser a reporting tool providing USNH administrative data like Banner Finance and HR, and UNH data like Advancement OR Student Undergrad and Grad School data. Data returned on reports in WebI usually reflects the source system as of the last business day, except for a few live reports. a tool which allows you to share documents with other WebI users Terms Document: a formatted file with data returned by a query; “document” and “report” are synonymous Management Reporting tool: software allowing data extraction without the need for users to write code My Favorites: the area in InfoView WebIntelligence where you can save documents Public Folders: the area where published (corporate) documents are accessed Query: an inquiry put to the database to retrieve specified data. Users specify criteria for the data that returns; however, WebIntelligence will limit the number of rows and amount of time allowed for a query, Inbox: the area where documents sent by other WebIntelligence users are received and stored in case a user inadvertently requests a large volume of data. Refresh: a command asking the database to retrieve up-to-date report data or list of documents Report: a formatted file with data returned by a query; “report” and “document” are synonymous Repository: a library of published documents VPN: Virtual Private Network, a utility creating a secure tunnel between a computer and the web What software is supported for use with WebIntelligence XI 3.1? For info on supported versions of software used with WebI, such as browsers, see the Management Reporting team informational webpage at: http://ecg-doc.unh.edu/mr/mr_index.html. Accessing WebIntelligence 1. Open Internet Explorer and log into the USNH Enterprise VPN from the Enterprise Systems Gateway webpage http://www.usnhgateway.org by clicking the link “Access USNH Enterprise VPN Here”. 2 Management Reporting Team Last updated November 19, 2013 WebIntelligence InfoView XI 3.1 Note: Maximize browser window for best viewing. 2. After logging into the VPN, you will return to the Gateway page. 3. Click the Gateway Quick Links drop-down menu and choose Access WebIntelligence. 4. The BusinessObjects InfoView login screen appears. Important messages are listed in the Announcements box at the top. 5. In the User Name box, enter your WebI username. Usernames are not case-sensitive. 6. In the Password box, enter your WebI password. Passwords are case-sensitive. 7. Click Log On. The WebI InfoView Home page displays after you log in successfully. Do not share your login information. If you colleagues need an account, advise them to contact their supervisor. 3 A Tour of the WebIntelligence InfoView Home Page The Home page is the default start page. From the Home page, you can access document folders, like “Document List” or “My Favorites”; retrieve reports sent to your Inbox; and modify user preferences. Links to other locations on the Home Page: Document List: main folder containing public and personal documents. In Public folders and subfolders, WebI users can access documents to retrieve data but cannot modify or delete reports. My Favorites: personal storage area where you can save documents from your Inbox or Public Folders. Only you can access this area. You can refresh, send, and delete reports in My Favorites. Note: to save a report with results, save it as a Copy to My Favorites; to have a Shortcut or Pointer to the original report and therefore include any changes made to the published report, save a Shortcut. My Inbox: where to retrieve reports sent by other WebI users. You can refresh, send, save or delete Inbox documents. Header Panel menu bar: allows you to navigate to different areas from any page. Hide and unhide this bar using the small arrow below the Log Out button. Home: brings you to the Home page Document List: its left panel displays My Favorites, Inbox & Public Folders. Click a folder on the left to display its contents on the right. Click the plus sign (+) next to a folder to expand folder contents, showing subfolders and documents. Send To: allows you to send reports to other users’ Inboxes; grayed out until a report is selected Help: opens an extensive, searchable online user's manual Preferences: determines settings like views of reports/report lists, password settings, and default start page About: displays the vendor SAP BusinessObjects’ product information Log Out: ends your WebIntelligence session and returns you to the Log in screen 4 Management Reporting Team Last updated November 19, 2013 WebIntelligence InfoView XI 3.1 Setting Preferences From the Home page or Header Panel menu bar, select Preferences to customize settings. There are four sections you can customize: General, Change Password, Web Intelligence and Desktop Intelligence. General section: 1. In InfoView Start Page, select a different page as your default first page if you wish to change it from the Home page. Categories are not used. 2. In Document Navigation View, leave Folder as the view. 3. Set the number of objects (max) per page: max number of reports shown in a report list. Recommended number is a minimum of 30. Use the Delete button in this box to remove the number currently store rather than the Backspace button; Backspace will bring you out of the Preferences screen. 4. In Document List Display you can select information to display about reports. We recommend unchecking all items as they do not add useful information and cause the document list to become overly long. 5. In Document Viewing, select how you want to view documents: In the InfoView portal: displays documents in a single browser window In a single fullscreen browser window, one document at a time: documents open in another window that is reused In multiple fullscreen browser windows, one window for each document: each document opens in a new window Change Password section: 1. To change password, click the Change Password section 2. Type your old password in the Old Password box 3. Type a new password in the New Password box and again in the Confirm New Password box 4. Click OK. You will use the new password the next time that you log on. Passwords must be 7 or more characters and can include letters, numbers & special characters. Passwords are case-sensitive. WebIntelligence section: 1. Select a view format for reports (this sets a default but you can toggle between views when in a report): Web (default): best view for sending and saving; allows you to view reports in HTML format Interactive: lets you view documents in HTML format and do some manipulation of report results (for WebI report types only) PDF: best view for viewing and printing. Allows you to view, refresh and print reports in PDF format and use Adobe tools. You must have Acrobat Reader installed to use this view. 2. Select a priority for saving to Microsoft Excel: Prioritize the formatting of the documents: displays data in a format similar to WebIntelligence Prioritize easy data processing in Excel: displays data in a text format 5 Desktop Intelligence section: In the Select a default view format area, select a format for viewing reports (this sets a default, but you can still toggle between views when in a report): Web: best view for sending and saving; allows you to view reports in HTML format PDF: best view for viewing and printing reports. Allows you to view, refresh and print reports in PDF format and use Adobe tools. You must have Acrobat Reader installed to use this view. Desktop Intelligence format (Windows Only): not applicable for most users. You must have Desktop Intelligence, a report creator tool, installed and access to report creation to use this option. After changing preferences in any section, click OK to save changes. Using WebIntelligence Help To access the vendor’s Help information, click Help in the Header Panel navigation bar. You can explore Help topics by clicking Contents, Index, and Search buttons. To exit, close the Help browser window. Viewing Public, My Favorites, or Inbox Documents 1. From the Home page or Header Panel, click Document List. The Tree Panel (left pane) displays My Favorites, Inbox, & Public Folders. 2. To expand contents of My Favorites and Public Folders, click the plus sign (+). Subfolders display in the tree panel on the left. 3. Click a folder to display its contents in the Details Panel. You can limit your display to certain document types by clicking the Type column header and selecting formats. WebIntelligence and Desktop Intelligence are the two document formats used. Note: Documents displayed and functions you can perform are determined by your account security. InfoView Workspace Toolbar The InfoView Workspace toolbar is displayed when viewing the Document List: Switch to Folders Shows folders in the Tree panel Refresh Refreshes the view of the Document List New Allows you to create new folders in My Favorites Organize Allows you to cut, copy, paste, or delete a selected document Actions Allows you to view a document or its properties Search Allows you to search for documents by title word Allows you to navigate between pages in the Document List 6 Management Reporting Team Last updated November 19, 2013 WebIntelligence InfoView XI 3.1 Document Toolbar The Document Toolbar is displayed when viewing a document. From here you can do the following: Document menu lets you to close or save a document (see Save section) View menu lets you toggle the document view: Quick Display Mode displays the document in the default view Page Mode displays the document in a paginated view Draft Mode displays the document in a non-paginated view PDF displays a PDF of the document Saves the document in My Favorites Find text in tables & cells on this page searches for text in the current page Undo reverses a previous action; Redo repeats an action Zoom allows you to zoom in or out on the document Navigation allows you to move through the pages of a document Refresh Data obtains the most up-to-date data from the data source Opens the document in a new window Hides the Header Panel menu bar Close closes a report. If it has data, a box asks for confirmation; you can click OK Working with Documents 1. Click a folder on the left. Use + and - signs to expand/collapse folders. Clicking a folder/subfolder displays contents in the Details Panel on the right. You will only see folders containing reports you can access. 2. To view a report description before opening the report, choose the Open icon on the toolbar and choose Encyclopedia. The description displays in an Encyclopedia pane on the right. 3. Double-click a report to open it. The report opens in the default view you have set. Public folder reports are shells containing no data, so it is normal for the report to be empty until refreshed. 7 4. For reports in HTML view: There are two ways to enter criteria to run a report: a) If you know the values and response formats to use, enter values in the User Response Input pane on the left, tabbing from field to field. If multiple values are allowed, use a semicolon and no space to separate the values. Complete all required prompts, else Run Query is unavailable. (Optional and do not require a response before the Run Query button is available.) Click Enter or the Run Query button. b) If you are unsure of values or formats, click the Advanced button in the pane, or the Refresh Data icon in the upper right on the Document Toolbar to pick from a list of values. The Prompts dialog box appears. To complete prompts, double-click, or click then use the right arrow to move a selection to the right. Checkmarks appear beside completed prompts. Complete all required prompts, else Run Query is unavailable. (Optional and do not require a response before the Run Query button is available.) Click Run Query to launch the query. Tip 1: Use Search to narrow a long list (Ex: UC* for Org or KIN* for major). The asterisk (*) is the wildcard used. Tip 2: To pick multiple non-consecutive values, hold the CTRL key and click each value. To pick consecutive values, click the first value, hold the Shift key, and click the last value. Click the right arrow to add selections. In Web, or HTML, view, the following icons appear at the bottom of the left pane: Click the Navigation Map button to display and expand document contents Click the User Prompt Input button to display the prompt input Click the Find button to search for text on the current page of the document. Switch View to Draft mode to search a report tab as a single page. For reports in PDF view: Follow step 4b above, using the Refresh Data icon. 8 Management Reporting Team Last updated November 19, 2013 WebIntelligence InfoView XI 3.1 To expand all bookmarks on the left for every level in a report in PDF view at once, after refreshing, click the first level of bookmarks. Then, hold the Shift and * (asterisk) keys at the same time. To exit a report from any view, click the Close button to the right of the Refresh Document button. A warning may appear when you choose to close, asking if you wish to navigate form the page. You can click OK to it. It appears in case you want to save results to My Favorites. Searching for Documents In WebI, Search is used to search for documents from in the Public Folders, My Favorites, or Inbox area matching your criteria, by title and/or keyword. Using Search 1. In the Search box, enter criteria such as a word in a document’s title, and click the Search icon. 2. Search will only retrieve documents you have access to. The folder currently selected is searched. Until you navigate away from search results, subsequent searches are executed on prior search results. Each result is saved in the Tree panel and you can access it until you log out. Working with Folders My Favorites is an area you can save populated reports in WebI. You can create and delete folders/subfolders here, and copy, move, rename, or delete folders and reports. You can also create shortcuts to Public reports. To create a subfolder in My Favorites: 1. Select My Favorites and click New, then Folder in the InfoView toolbar 2. A dialog box appears, allowing you to name the folder. To rename, right-click and choose Properties. Edit the name and click OK. 3. Click Refresh in the Workspace toolbar to view the renamed folder Other actions that can be performed on folders and documents: Copy/Paste a Shortcut: allows you to create a pointer to a report in another location. To create a shortcut, select a report and click Organize, then Create Shortcut. Then, select the new folder and click Organize, then Paste Shortcut. The document title appears with a shortcut icon beside it. Delete: deletes a folder and contents, a document, or a set of documents. To delete, select the folder or document(s), click Organize, then Delete. Click OK in the confirmation dialog box. To move one report to a My Favorites folder, select it in the document list, click the Organize icon and choose Cut. Then, select a My Favorites folder on the left, click the Organize icon and choose Paste. To move multiple reports to a My Favorites folder, press the CTRL key, highlight reports from the document list, click the Organize icon and choose Cut. Then, highlight a My Favorites folder on the left, and click the Organize icon and choose Paste. 9 Copy vs. Shortcut: A Copy makes a duplicate file unlinked to the original. A Shortcut is a pointer to the original report. If the original changes, a Copy would not reflect that change but a Shortcut would. If you will rerun a published report from My Favorites, you should save as a Shortcut in case the original changes. However, if you need to save results in the report, choose Save As, which saves a Copy to My Favorites. When sending a report to another user, send as Copy and NOT Shortcut (Copy is default). Saving Documents You can save a document to My Favorites or to a secure network drive. A saved document provides a snapshot of data and, if saved as a format like Excel or CSV, can be formatted. If you save a Public Folder report to My Favorites, you can rerun but not modify it. Important: You may see a flashing yellow bar above the report when you choose to save it in another format (such as Excel) to a network drive. Choosing to allow the save in the yellow bar takes you to the Home page and you must rerun the report. To avoid this, prior to clicking the Document menu, hold the CTRL key during the entire Save process. To save a report: 1. Press the Ctrl key and keep it held throughout the save process. 2. Click the Document menu in the Document toolbar. 3. Choose a Save option: a. Save as: saves entire report (all report tabs) in WebI format to My Favorites. A dialog box appears where you can navigate to a folder, rename (keep report number in the title), choose whether to overwrite a document with the same name and edit the description. b. Save to my computer as: saves all report tabs as Excel, PDF or CSV format c. Save report to my computer as: saves active (selected) report tab only in Excel or PDF format 4. If saving to My Favorites, click OK to complete the Save. If saving in another format to a network drive, choose to Open or Save it in the dialog box that appears. Sending and Receiving Reports within WebIntelligence You can share reports with other users by sending to their WebI Inbox. To send a report with saved data, you must first run it and save to My Favorites; otherwise, recipients will get a blank report. To send a report: 1. Select the report title. In the InfoView toolbar, select Send To, then Business Objects Inbox. 10 Management Reporting Team Last updated November 19, 2013 WebIntelligence InfoView XI 3.1 A screen with the report properties appears: 2. Uncheck “Use default settings” to display the User search screen. 3. In the Search Title box, enter all or part of a WebI username, click the search icon, and highlight a user. 4. Add highlighted username(s) to the Selected box using the right arrow. You can send to multiple users. 5. You must choose Copy (default) as the Send As type. 6. Click Submit. Recipients are not notified of a sent report, so you should let them know it was sent. Managing Your Inbox Your Inbox contains documents sent by other WebI users. 1. To access, click My Inbox on the Home page or Inbox in the Document List panel. Inbox contents display in the Details panel on the right. The number of Inbox documents displayed at one time is determined by your Preferences. Use Page scroll to move through Inbox pages or Search to find reports. Inbox contents cannot be organized into folders. Documents in your Inbox are identified with the following icons: Desktop Intelligence document WebIntelligence document Unopened Inbox document Opened Inbox document Shortcut to document 2. To open a document in your Inbox, double-click its title or right-click its title and select View. 11 3. To save Inbox documents, use steps in the Saving Documents section of this guide, and to send Inbox documents to other users, use steps in the Sending and Receiving Documents section of this guide. 4. Using Organize on the InfoView toolbar, you can select Inbox reports to copy, cut, create shortcuts in My Favorites, or to delete. You can also right-click a document in the Inbox to View, Mark as Unread, Copy, Cut, Create Shortcut, or Delete. Inbox contents can be sorted by clicking a column header. Printing Documents To print a document in WebI: 1. *Recommended method: If not in PDF view, click the View menu and choose PDF mode. Once in PDF mode, use the Print icon on the Adobe toolbar to print the document. The Print range setting defaults to All, and the page # total is the total number of pages for ALL report tabs. 2. In Web (HTML) view: (If you use a popup blocker, you must hold the CTRL key before the next steps. If you do not do this, clicking the yellow Information bar will bring you to the Home page.) Click the Export to PDF for Printing icon in the Document toolbar. The Open/Save/Cancel dialog box appears and if you choose open, the report displays in a separate instance of Acrobat reader. IMPORTANT: If you do not want to print all report tabs, you have several options: a) In the Print dialog box’s Print Range section, change from "All" to "Pages" and specify a range of pages (you can determine the range by navigating the report via bookmarks on the left). b) From Web (HTML) view, click the report tab you want to print. Hold the CTRL key (to bypass browser interference), choose the Document menu, choose Save report to my computer as, and choose PDF. Keep holding CTRL and click Open in the dialog box to open the one tab in a new Acrobat instance, and print from there. c) From PDF view, click the View in HTML format button on the toolbar, click the View menu on the toolbar, and choose Draft mode. Highlight text on the report and click CTRL+C to copy. Open a program like Excel and click CTRL+V to paste. (This option is best for short sections of report tabs). You may need to change print properties in the dialog box (orientation, page scaling, etc.) to print properly. 12 Management Reporting Team Last updated November 19, 2013