1
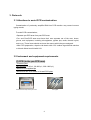
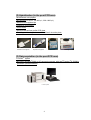
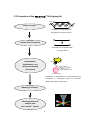
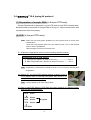
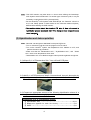
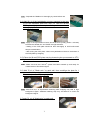
Revised in Aug. 2008.
Issued in Jun. 2005.
WAKFlow HLA Typing kit
®
Instruction manual
Research use only
4thEdition
Contents
1. Principles of HLA typing........................................................... 1
2. Kit components and storage conditions................................... 1
3. Protocols.................................................................................. 2
3.1 Attentions to avoid PCR contamination......................... 2
3.2 Instrument and equipment requirements ...................... 2
3.3 Procedure of the WAKFlow® HLA typing kit ............... 4
3.4 WAKFlow® HLA typing kit protocol............................. 5
(1) Preparation of sample DNA
(2) PCR
(3) Hybridization and data acquisition
(4) Data analysis
4. Warning or caution................................................................... 8
1. Principles of HLA typing
The WAKFlow® HLA typing kit is based on the reverse sequence-specific
oligonucleotide probes (SSO) method coupled with xMAP technology designed for use with
the Luminex® system (http://www.luminexcorp.com/) to identify HLA alleles encoded by
sample DNA.
The target DNA is first amplified by polymerase chain reaction (PCR) with biotinylated
primers specifically designed for each HLA locus. The PCR product is denatured and
hybridized to complementary oligonucleotide probes immobilized on fluorescently coded
microsphere beads. At the same time, the biotinylated PCR product is labeled with
phycoerythrin-conjugated streptavidin to allow it to be detected by the Luminex® system.
The entire process is performed in a single well of a 96-well PCR plate; thus, 96 samples
can be treated at one time. The HLA alleles are assigned by analysis of the reaction
(hybridization) pattern of the target sample using the WAKFlow® HLA typing software.
2. Kit components and storage conditions
Product
WAKFlow
Size
®
HLA typing kit
Amplification Package
96 tests / kit
Store below –15℃
①. PCR pre-mix (specific for each HLA locus)・・・・・・・・・・・・・・・1,323μL (2 tubes)
②. DNA Polymerase Soln. (specific for each HLA locus) ・・・・・・・・・・・・・・54μL (1 tube)
Detection Package
Store at 2∼8℃
③. Denaturation Soln. ・・・・・・・・・・・・・・・・・・・・・・・・・・・・・・・・・・・・・・・・・1,000μL (1 tube)
④. Hybridization Soln. ・・・・・・・・・・・・・・・・・・・・・・・・・・・・・・・・・・・・・・・・・2,200μL (1 tube)
⑤. Beads mix (specific for each HLA locus)・・・・・・・・・・・・・・・・・・・・・・・・330μL (1 tube)
⑥. SAPE (Phycoerythrin-conjugated Streptavidin) ・・・・・・・・・・・・・・・・・・220μL (1 tube)
⑦. Wash Soln. ・・・・・・・・・・・・・・・・・・・・・・・・・・・・・・・・・・・・・・・・・・・・・・・・・・50 mL (1 tube)
・ Plate Sealing Sheet・・・・・・・・・・・・・・・・・・・・・・・・・・・・・・・・・・・・・・・・・・・・・・・・・・2 sheets
Note
・PCR Pre-mix and DNA polymerase soln. should be stored below -15oC for longer storage.
・⑤ Beads mix and ⑥ SAPE must be stored at 2 - 8oC under dark conditions.
・Do not mix components from different lots or products.
1
3. Protocols
3.1 Attentions to avoid PCR contamination.
Contamination of previously amplified DNA into PCR reaction may cause incorrect
typing results.
To avoid PCR contamination;
・Separate pre-PCR area from post-PCR area.
・Pre- and Post-PCR area must have their own separate set of lab coat, shoes,
gloves, and equipment, including micropipettes, pipette tips, racks, thermal cycler,
and so on. These items should not leave the area to which they are assigned.
・After PCR preparation, wipe the lab bench with 0.5% sodium hypochloride solution
or bleach diluted ten-fold with H2O.
3.2 Instrument and equipment requirements.
(1) PCR (in the pre-PCR area)
・Thermal cycler
・Micropipette (2~20μL, 20~200μL, 200~1000μL)
・Sterilized micropipette tips
・Sterilized 0.2mL PCR tubes or 96-well PCR plate
Micropipett
Gold-96well GeneAmp® PCR System 9700
2
(2) Hybridization (in the post-PCR area)
・Multichannel micropipette
・Micropipette (2~20μL, 20~200μL, 200~1000μL)
・Sterilized micropipette tips
・Repetitive micropipette
・Vortex mixer
・Sterilized 96-well low profile PCR plate
・Centrifuge with swing bucket rotor for 96-well microtiter-plate
Multichannel micropipette
Repetitive micropipette
Vortex mixer
Centrifuge
(3) Data acquisition (in the post-PCR area)
・LuminexⓇ system
・MicrosoftⓇWindowsⓇ2000 or XP personal computer with IntelⓇPentiumⓇIII 500MHz
processor (Recommended)
Luminex System
3
3.3 Procedure of the WAKFlow® HLA typing kit.
Biotin
PCR (1.5 hours)
Amplification of target genes with
biotinylated locus-specific primers.
Denaturation (5 minutes)
Denaturation of the amplified DNA
into single strand.
Neutralization,
SAPE
Hybridization, and
fluorescent labeling
PCR amplicon
(30 minutes)
oligonucleotide probe
microshere bead
Hybridization of denatured DNA to oligonucletide probes
immobilized on microshpere beads and fluorescent
labeling with SAPE in a single step.
Washing (5 minutes)
Data acquisition and
analysis with
the LuminexⓇ system
4
3.4 WAKFlow® HLA typing kit protocol
(1) Preparation of sample DNA (in the pre-PCR area)
Sample DNA should be prepared in a pre PCR area to avoid PCR contamination.
Recommended concentration of sample DNA is 20 ng/μL. Adjust concentration with
nuclease-free water if necessary.
(2) PCR (in the pre-PCR area)
Note ・Wear lab coat and gloves dedicated for the pre-PCR area to avoid PCR
contamination.
・Enter the PCR program below into your thermal cycler. Turn on the thermal
cycler to warm up heated lid.
・Mix thoroughly "PCR Pre-mix" before use.
2-1 Prepare the appropriate amount of the following reaction mixture.
Components of a 1x PCR mixture
① PCR Pre-mix (specific for each HLA locus)・・・・・・・・・・・・・・24.5μL
② DNA Polymerase Soln. (specific for each HLA locus)・・・・・・・0.5μL
Note ・Preparation of PCR reaction should be done on ice to avoid non-specific gene
amplification.
2-2 Aliquot 25 μL of the PCR reaction mixture of step 2-1 into a
PCR reaction tube or a 96-well PCR plate, then add 2μL of
sample DNA prepared in step 1.
Note ・Change pipette tip for each sample DNA.
2-3 Cap or seal PCR tubes or PCR plate and place samples in a thermal cycler,
then run the program below.
93oC 3 min.
↓
93oC 30 sec.
60oC 30 sec.
72oC 30 sec.
↓
o
4 C Hold
40 cycles
5
Note ・This PCR reaction may take about 1.5 hours when utilizing the GeneAmp®
PCR System 9700 Gold-96-well. For another type of thermal cycler, it may be
necessary to optimize the PCR cycle empirically.
・For the GeneAmp® PCR System 9700 Gold-96-well, set “Reaction volume” to
27μL and “Ramp Speed” to MAX mode on the 「Selection Method Options」
window before starting the PCR reaction.
・The reaction mixture should be stored at 4℃ when it does not proceed to
hybridization process immediately after PCR. Storage at room temperature may
cause low signals.
(3) Hybridization and data acquisition
Note ・Wear lab coat and gloves dedicated for the post-PCR area
・Turn on a thermal cycler and run the program of 55oC HOLD.
・Turn on the Luminex® system, set temperature of XY Platform to 37℃, and
perform the warm-up procedure.
・Make sure that the "Denaturation soln.", "Hybridization soln.", and "Wash
soln." are at room temperature when used.
・Denaturation soln. is an alkaline reagent. Wear protective glasses and gloves.
3-1) Aliquot 5μL of "Denaturation Soln." into a 96-well PCR plate.
3-2) Add 5μL of PCR product of step 2-3 into each well, then mix thoroughly by
pipetting or vortex, and incubate at room temperature for 5 –10 minutes.
3-3) Prepare an appropriate amount of the following hybridization mixture in a
sample tube, and mix thoroughly by vortex.
Components of a 1x hybridization mixture
④ Hybridization Soln. ・・・・・・・・・・・・・・・・・・・・・・・・・・・・・・・・・・・・・・・・20μL
⑤ Beads mix (specific for each HLA locus)・・・・・・・・・・・・・・・・・・・・3μL
⑥ SAPE ・・・・・・・・・・・・・・・・・・・・・・・・・・・・・・・・・・・・・・・・・・・・・・・・・・・・2μL
6
Note ・Suspend the "Beads mix" thoroughly by vortex before use.
3-4) Add 25μL of the hybridization mixture prepared in the step
3-3 to the denatured DNA from step 3-2. Seal the 96-well
PCR plate tightly with a plate-sealing sheet, and mix
thoroughly by vortex.
Note ・Apply of the hybridization mixture should be done quickly (within 3 minutes)
because the “Beads mix” and "SAPE" are light sensitive.
・Sealing of the PCR plate should be done thoroughly to avoid well-to-well
sample contamination.
・After mixing the PCR plate, collect the hybridization mixture to the bottom of
the PCR plate by snapping.
3-5) Place the 96-well PCR plate onto the thermal cycler pre-warmed to 55oC,
tighten the lid, and then incubate for 30 minutes.
Note ・Make sure that the Luminex® system has been warmed up and ready for
measurement of fluorescent signal.
3-6) Add 75μL of "Wash soln." to each well, then centrifuge the plate for 1
minute at 3,000 rpm (approx. 1000x g).
Remove supernatant by snapping.
Note ・More than 5μL of supernatant remaining after snapping may lead to high
background signal. Additional washing step may be effective to lower the
background signal.
3-7) Add 75 μL of "Wash soln." to each well.
7
3-8) Make sure that XY Platform is set at 37℃. Eject the plate stage from the
Luminex® XY Platform, place the PCR plate in step 3-7, and then retract the
stage.
3-9) Choose a template file corresponding to the
product lot, enter number of samples, and then
start data acquisition.
(4) Data acquisition and analysis
Note ・Data acquisition should be carried out immediately. Store the samples under
dark condition at 37℃, if they are not measured immediately. It will be cause of
non-specific hybridization if XY Platform and sample plate are left at room
temperature.
4-1) Open an output.CSV file, which is automatically created after data
acquisition, with WAKFlow® typing software, and perform genotyping.
Positive or negative reaction is assigned based on the pre-set cut-off value
for each typing probe. A fluorescent signal higher than the cut-off value is
defined as a positive reaction. HLA alleles are assigned automatically by
matching the pattern of positive and negative reactions of each bead.
HLA alleles used for the WAKFlow® HLA typing kit are cited from the
report of the Anthony Nolan Research Institute HLA Informatics Group
(http://www.anthonynolan.org.uk/HIG/index.html), and updated in January
every year.
4. Warning or caution
1) This product is for research use only. Do not use for the diagnosis and prognosis
of disease.
2) Do not use expired reagents.
3) Denaturation Soln. and Hybridization Soln. are corrosive and may cause burns. In
case of contact with reagents, immediately wash the eyes or skin with a large
8
amount of water. Call a physician in case of burns, inhalation, ingestion and so
on.
4) Pay attentions to PCR contamination. This may cause incorrect typing results.
For the detail, see section 3.1 Attentions to avoid PCR contamination.
5) The specifications may be changed to improve the kit without notice.
≪Effective period≫
12 months
≪Packaging unit≫
96 tests / kit
(indicated on product box)
≪Manufactured by≫
1624 Shimokotachi, Koda-cho, Akitakata city, Hiroshima 739-1195 Japan
E-Mail: [email protected]
URL: http://www.wakunagahla.jp/
9