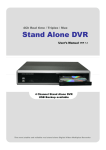
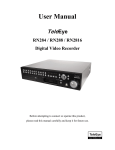
Download CCT716 DVR
Transcript
4Ch Real time / Triplex / Mux
CCT716
DVR
4 Channel Stand Alone DVR
USB Backup available
CD-WRITER
NETWORKABLE
VGA MONITOR CONNECTION
PTZ CONTROL
User’s Manual
VER 1.2
The most stable and reliable real stand alone Digital Video Multiplex Recorder
4Ch Real time/Triplex/Mux
- Stand Alone DVR
Installation & Safeguards
INSTALLATION & SAFEGUARDS
All the safety and operating instructions should be read before the unit is operated.
Installation
1. To prevent electric shock or other hazards, do not expose units to rain, moisture or dust.
2. Place this unit in a well-ventilated place and do not place heat-generating objects on the unit.
3. This unit should not be located in an area where it is likely to be subjected to vibration.
Before You Start
1. Ensure the power switch is in the OFF position prior to starting.
2. Do not attempt to open or remove the covers. This may expose you to dangerous voltage or
other hazards.
3. Installation should be performed by a qualified service person only.
4. This unit should be operated only from the type of power source indicated on the manufacturer’
s
label and with the power supply included with the unit.
Notice
1. If you need to change the TIME/DATE always clear the HDD. If you don’
t follow this step first, it
may
cause non recording on the HDD or inhibit the use of menu settings . Even though it may appear
to be
recording, you may find you cannot search recorded data.
2. When it comes to HDD capacity, you can use large capacity HDDs.
3. The jumper setting for the CD-RW must be master.
4. When you set the record setup, you have to set the Record Configuration and also Schedule
Setup. This unit records as per the Record type & Schedule setup. The default setting value for
Schedule setup is Continuous mode.
1
4Ch Real time/Triplex/Mux
- Stand Alone DVR
Contents
Contents
CHAP. 1
Features & Package Contents
----------------------------------------------------------------
4
1-1.
Features
----------------------------------------------------------------
4
1-2.
Package Contents
----------------------------------------------------------------
5
Function of Each Button
----------------------------------------------------------------
6
2-1.
Front
----------------------------------------------------------------
6
2-2.
Rear
----------------------------------------------------------------
7
Installation
----------------------------------------------------------------
8
3-1.
Installation Configuration
----------------------------------------------------------------
8
3-2.
Detailed Installation
----------------------------------------------------------------
9
1)
HDD(Hard Disk Drive)
----------------------------------------------------------------
9
2)
Camera
----------------------------------------------------------------
9
3)
Monitor
----------------------------------------------------------------
10
4)
Power
----------------------------------------------------------------
10
5)
Other External Device
----------------------------------------------------------------
11
6)
RS-232 ASCII-Code
----------------------------------------------------------------
11
Operation
----------------------------------------------------------------
12
4-1.
System Log In
----------------------------------------------------------------
12
4-2.
Factory Default
----------------------------------------------------------------
12
4-3.
Display Configuration
----------------------------------------------------------------
13
4-4.
Live View Setup
----------------------------------------------------------------
14
1)
Full / Multiple View
----------------------------------------------------------------
14
2)
SEQ
----------------------------------------------------------------
14
3)
PIP View
----------------------------------------------------------------
14
4)
ZOOM View
----------------------------------------------------------------
14
4-5.
Record
----------------------------------------------------------------
15
4-6.
Playback
----------------------------------------------------------------
15
4-7.
Search
----------------------------------------------------------------
16
4-8.
PTZ Camera Operation
----------------------------------------------------------------
17
4-9.
Data Back-up
----------------------------------------------------------------
17
CHAP. 2
CHAP. 3
CHAP. 4
2
4Ch Real time/Triplex/Mux
CHAP. 5
- Stand Alone DVR
Contents
Set up
----------------------------------------------------------------
18
5-1.
General Operation
----------------------------------------------------------------
18
5-2.
Display Setup
----------------------------------------------------------------
19
1)
VGA Setup
----------------------------------------------------------------
19
2)
Screen Display Setup
----------------------------------------------------------------
19
3)
OSD Setup
----------------------------------------------------------------
20
Record
----------------------------------------------------------------
21
1)
Record Setup
----------------------------------------------------------------
21
2)
Schedule Setup
----------------------------------------------------------------
22
Configuration
----------------------------------------------------------------
23
1)
HDD Management
----------------------------------------------------------------
23
2)
Time/Date Setup
----------------------------------------------------------------
24
3)
Camera Setup
----------------------------------------------------------------
24
4)
Motion Setup
----------------------------------------------------------------
25
5)
Interval Setup
----------------------------------------------------------------
26
6)
Alarm Setup
----------------------------------------------------------------
26
7)
Password Setup
----------------------------------------------------------------
26
External Device Setup
----------------------------------------------------------------
27
1)
TCP/IP Setup
----------------------------------------------------------------
27
2)
Pan Tilt Zoom Setup
----------------------------------------------------------------
28
3)
Spot Setup
----------------------------------------------------------------
28
Back up
----------------------------------------------------------------
29
1)
CDR Setup
----------------------------------------------------------------
29
2)
USB Setup
----------------------------------------------------------------
29
Firmware Upgrade
----------------------------------------------------------------
30
Network Setup
----------------------------------------------------------------
31
6-1.
Network Configuration
----------------------------------------------------------------
31
6-2.
Remote Viewer Program
----------------------------------------------------------------
32
6-3.
Backup CD Player
----------------------------------------------------------------
37
CHAP. 7
Web Viewer Setup
----------------------------------------------------------------
39
7-1.
Web Viewer
----------------------------------------------------------------
39
7-2.
Web Backup Player
----------------------------------------------------------------
40
CHAP. 8
Specifications
----------------------------------------------------------------
42
8.1.
Specifications
----------------------------------------------------------------
42
8.2
Record Timetable
----------------------------------------------------------------
43
5-3.
5-4.
5-5.
5-6.
5-7.
CHAP. 6
3
4Ch Real time/Triplex/Mux
- Stand Alone DVR
CHAP 1. Features & Package Contents
CHAP 1. Features & Package Contents
1-1. Features
Live Display
Real time display per camera
Auto Sequence
PIP (Picture in picture)
Digital Zoom
Simple playback mode
Simple PTZ camera control
Record
Variable Record resolution (For higher picture quality or higher recording speed)
Efficient Image Quality setting in 5 steps
Schedule recording
Event Record by alarm and motion detection
Network
Monitoring and Search using Remote Viewer via network
Playback
Search and playback by recorded data size and date/time
Various steps in forward playback speed (X2, X4, X8, X16, X32 fast playback. 1/16, 1/8 ,1/4,
1/2 slow playback)
Various steps in backward playback speed (X2, X4, X8, X16, X32 fast playback. 1/16, 1/8, 1/4,
1/2 slow playback)
Data backup
Simple backup using CD-RW
Remote viewer backup in AVI and JPEG file formats
Supports large capacity Hard Drives
USB Back-Up Device
Others
Supports UNI-CODE
Supports SPOT Monitor
PAL/NTSC Auto detection
4
4Ch Real time/Triplex/Mux
- Stand Alone DVR
CHAP 1. Features & Package Contents
1-2. Package Contents
DIG IT A L V ID E O R E C O R D E R
US B
P O WE R
HD D A C T IV E
1. DVR Main Unit
2. Power Cable
5. Software CD
3. Power Adapter
4. User’
s Manual
6. Rubber Pad
7. HDD absorber
8. Bolts
Package Contents
9. Mouse
Description
1. DVR Main Unit
Stand-Alone Digital Video Recorder
2. Power Cable
AC power supply to adapters for 12V DC power
3. Power Adapter
DC power supply
4. User’
s Manual
User’
s Manual
5. Software CD
Remote Viewer Software & Backup CD Player
6. Rubber Pad
Prevent DVR from slipping. Attach it to the bottom of main unit
7. HDD absorber
Absorbing the mechanical shock of HDD against the case bottom
8. Bolts
Bolts for fixing HDD
9. Mouse
A mouse controlling all functions of DVR
5
4Ch Real time/Triplex/Mux
- Stand Alone DVR
CHAP 2. Function of Each Button
1
2
CHAP 2. Function of Each Button
2-1. Front
3
4
Name
Function
1. USB Device
Used for updating Firmware
2. USB HOST
Used for Data Backup
3. LED Lamps
Shows status of operation
4. CD –RW
Used for Data Backup and Firmware upgrade
6
4Ch Real time/Triplex/Mux
- Stand Alone DVR
CHAP 2. Function of Each Button
2-2. Rear
9
4
5
CH 1
C H2
MO NIT O R
CH 3
CH4
S POT
P S /2
6
7
FUNCTION
CA UTIO N
RIS K O F E L EC T RIC
S HO C K . DO NO T O P EN !
CA UTION : T O REDUC E T HE RIS K OF EL E CT RICA L S HOCK . DO NOT OP E N C OV E RS .
NO USE R S E RV IC EAB LE PA RTS INS IDE
.RE F ER S ERV IC ING T O QUAL IFIE D
SE RVIC E P E RSO NNE L
.
WA RNNIG : T O P REV E NT F IRE OR SHOCK HAZ A RD. DO NOT EX P OS E UNITS NOT
SP E CIF IC AL L Y DES IGNE D F OR OUTDOOR USE TO RAIN OR MOIS TURE.
1
AL ARM D1
2
AL ARM D2
3
AL ARM D3
4
AL ARM D4
5
G ND
6
RELAY NC
7
RELAY CO M
8
RS 48 5 D+
9
RS 48 5 D-
VG A
RS - 232C
E T HE RNE T
1
2
Name
1
RS 485
3
DC 12V
8
Function
Connection with PTZ camera or other external device using RS 485
interface
RELAY Output
Relay out terminal
SENSOR Input
Sensor input terminal
2
RS-232C
3
ETHERNET
4
CAMERA Input
5
MONITOR
Output
Connection with Composite Monitor (NTSC / PAL)
6
SPOT Monitor
Output
Connection with Composite Monitor (NTSC / PAL)
7
PS/2
8
DC Power
9
VGA
Connection to allow control by PC (Not supported)
Connection to ETHERNET device
Connection with camera (NTSC / PAL)
Connection with PS/2 MOUSE
DC over 12V adapter
Connection to VGA Monitor (CRT type or TFT LCD monitor)
7
4Ch Real time/Triplex/Mux
- Stand Alone DVR
CHAP.3 Installation
3-1. Installation Configuration
8
CHAP. 3
Installation
4Ch Real time/Triplex/Mux
- Stand Alone DVR
CHAP. 3
Installation
3-2. Detailed Installation
1) HDD
MA IN B OA R D
H D D1
(M A S TE R )
C D- R W
(MA S TE R )
1. Connect Main Board and HDD1 using IDE cable and HDD power cable.
2. The jumper setting of HDD should be on Master when you install HDD.
3. Stick the HDD absorber (included in package) on the bottom of case and then install the
HDD on top of them by using the bolts (included in package).
4. Screws must be inserted from outside of the case bottom.
2) Camera
DC
LE V E L
V .P
C H1
CH 2
MO NIT O R
VIDEO
DC
V IDE O
LENS
C H3
CH 4
SPOT
P S /2
AC24V /DC12
DC 12V
Rear view of CAMERA
Connect camera to the camera input on rear panel of DVR marked CAMERA IN.
9
4Ch Real time/Triplex/Mux
- Stand Alone DVR
CHAP. 3
Installation
3) Monitor
C H1
C H 2 MO NITO R
C H3
CH 4
V ID E O A
SPOT
P S /2
DC 12V
IN
OU T
V ID E O B
IN
OU T
Connect the video output marked MONITOR to Video-In of Main monitor.
4) Power
C H1
C H 2 MO NITO R
C H3
CH 4
SPOT
P S /2
DC 12V
12V DC power adapter
10
V ID E O C
IN
OU T
4Ch Real time/Triplex/Mux
- Stand Alone DVR
CHAP. 3
Installation
5) Other External Device
FUNCTION
1
ALARM D 1
2
ALARM D 2
3
ALARM D 3
4
ALARM D 4
5
G ND
6
RELAY NC
7
RELAY CO M
8
RS 485 D+
9
RS 485 D-
PC
RS - 232 C
E T HE RNE T
FUNC T IO N
PAN/TILT
CAMERA
PTZ
CAMERA
SENSOR
SIREN
RS-485 : Control external device like PTZ camera.
(Pin No.8 & No.9 at D-SUB).
RELAY Output : Relay Output (Pin No.6 & No.7 at D-SUB).
SENSOR Input : Sensor Input –Alarm Input (Pin No.1 ~ No.4 at D-SUB).
ETHERNET : Connection to LAN, WAN t.
1.
ALARM 01
2.
ALARM 02
3.
ALARM 03
4.
ALARM 04
7.
RELAY COM
5.
GROUND
8.
RS485D +
6.
RELAY NC
9.
RS485D -
5 4 3 2 1
9 8 7 6
6) RS-232C ASCII-code
Following ASCII-Codes (Hexa-Code) are for programmers who want to control DVR unit via the
RS232C Port using keyboard of PC. ASCII-Code is 1 Byte.
‘
R’
DOWN
‘
J’
PTZ
‘
T’
CH1
‘
1’
‘
S’
LEFT
‘
H’
ZOOM
‘
Z’
CH2
‘
2’
‘
P’
RIGHT
‘
K’
FRZ
‘
F’
CH3
‘
3’
Pause
‘
A’
NEXT
‘
N’
MODE
‘
D’
CH4
‘
4’
SERCH
‘
E’
ENTER
0x0d
PIP
‘
I’
MENU
‘
M’
-
‘
<‘
SEQ
‘
Q’
UP
‘
U’
+
‘
>’
STOP
NOTE: Whilst RS-232C is available this is not supported for technical advice.
11
4Ch Real time/Triplex/Mux
- Stand Alone DVR
CHAP. 4
Operation
4-1. System Log-In
1) Move a cursor to lower right hand corner of
display by using a mouse, then you will see
‘
Menu’Icon. Click the ‘
Menu’Icon to log in.
2) Then, you will see ‘
DVR Log-In’message
shown right.
3) You may log in as a ADMIN, MANAGER, or
USER1 ~ USER8.
4) Input your password (Max. 8 digits are
available for password)
5) To exit, click ‘
EXIT’button.
DVR LOG-IN
USER ID
USER PW
0
1
ADMIN
________
2
3
4
5
ENTER
6
7
8
9
EXIT
If the password entered matches previously set password, you can log into ‘
MAIN MENU’
. If
an incorrect password is entered, you will see “PW IS NOT CORRECT”message on display.
The factory default password is none. Just click [ENTER] for first time initial log in.
-Factory default password
ADMIN : (Blank)
For security reasons, be sure to make note of your own password.
4-2. Factory Default
Before first operation, you must check out each channel is displaying properly and log in
‘
Main Menu’and set Time/Date and set HDD clear.
1. HDD Management
HDD MANAGEMENT
CAMERA SETUP
MOTION SETUP
ALARM SETUP
INTERVAL SETUP
TIME/DATE SETUP
PASSWORD SETUP
MODEL
SERIAL
BLOCKS
SIZE
SPEED
--------------OVERWRITE
CLEAR
ESC
12
4Ch Real time/Triplex/Mux
- Stand Alone DVR
CHAP. 4
Operation
4-3. Display Configuration
ETHERNET Status
connected
Disconnected
Remote Search
HDD Status
In Live Mode:
Amount of Recorded data
In Playback Mode:
Amount of data displayed
Current Date/ Time
2005 /07 / 21
Camera Title
CAM01
CAM02
CAM03
CAM04
22 : 05: 18
PLAY
SEARCH
Alarm Record
SEQUENCE
Motion Record
ZOOM
1
2
3
4
PIP
PTZ
Continuous Record
P TZ
PTZ
MENU
Live Display
HDD Status
In Playback Mode:
Amount of data displayed
2005 /07 / 21
1
1X
22 : 05: 18
CAM01
CAM02
CAM03
CAM04
2
3
Status of DVR
Forward Playback
Backward Playback
Pause
1/4~1/2 Times slow Playback
1/4~1/2 Times slow backward
Playback speed up
Playback speed down
SEARCH
STOP
4
Playback Display
13
4Ch Real time/Triplex/Mux
- Stand Alone DVR
CHAP. 4
Operation
4-4. Live View Setup
1) Full / Multiple View
CHAP. 4
Move cursor to ‘
split icon’on the lower left corner of display and click it to view quad mode.
To enlarge each channel, click 1,2,3,4 Icon. Then, you will see channel in full screen mode.
Full Screen
Full Screen
2) SEQ
Click ‘
SEQ’icon. It automatically displays full screen images in sequence.
You can setup SEQ time interval on setup menu. (SCREEN SETUP –SEQEUNCE INTERVAL)
CH04
CH03
CH02
CH01
3) Picture in Picture (PIP View)
CAM01
When it is in full screen display mode, you can see other camera in a
small window by clicking [PIP] icon, The other camera in small window
is rotating in sequence to next number of camera and you can set the
rotating time interval as per the procedure in Main Menu - SCREEN
SETUP - PIP INTERVAL.
4) ZOOM View
In live mode, if you click [ZOOM] icon, images are displayed twice normal size.
While using [ZOOM] mode, you can move the enlargement area by using a mouse.
To exit ZOOM mode, click ZOOM] icon again.
14
CAM02
4Ch Real time/Triplex/Mux
- Stand Alone DVR
CHAP. 4
Operation
4-5. Record
It records as a setting made by a user in Schedule Mode.
- Schedule Record
Go to MAIN MENU-SCHEDULE SETUP and setup schedule as you want. It records as a setting.
- Record Icon in Red indicates Schedule Record, Motion record, and alarm record.
Record [RED]
2005 /07 / 21
22 : 05 : 18
Stop recording [WHITE]
1
CAM01
CAM02
CAM03
CAM04
2
3
4
PT Z
- This DVR unit does not record in following conditions ;
When Overwrite function is off and the HDD is full
When you backup recorded images during CDRW burning.
When you update the firmware
When you are in HDD Management menu mode
4-6. Playback
1. In record mode or stop mode, click [click] to play the recorded data in 1x speed.
2. How to use a mouse
Left button mouse is used for all commands in the menu.
You can adjust playback speed by moving the mouse wheel button up and down.
1/16x:16 times slower than normal playback speed.
1/8x : 8 times slower than normal playback speed.
1/4x : 4 times slower than normal playback speed.
1/2x : 2 times slower than normal playback speed.
1x : Normal playback speed
2x : 2 times faster than normal playback speed..
4x : 4 times faster than normal playback speed.
8x : 8 times faster than normal playback speed.
16x :16 times faster than normal playback speed.
32x :32 times faster than normal playback speed.
15
4Ch Real time/Triplex/Mux
- Stand Alone DVR
CHAP. 4
Operation
4-7. SEARCH
There are three search methods controlled by the mouse wheel control or left and right mouse
button.
When you click the [SEARCH] icon, you see a window shown below.
Select target data by selecting one of the search modes.
In PERCENT SEARCH Mode, you can select data by clicking on the bar.
To move to the previous mode, click ‘
ESC’
.
1. PERCENT SEARCH
Search by percentage of total recorded data. It starts from image corresponding to set % of
data
on the search bar.
2. TIME/DATE SEARCH
Search by time & date. Playback starts from the time & date selected.
3. EVENT SEARCH
Search by event list (Motion, Alarm, Video Loss)
SEARCH
PERCENT SEARCH
PERCENT SEARCH
TIME/DATE SEARCH
EVENT SEARCH
START
END
TARGET
EXIT
2006 / JUL / 09 PM 01 : 58 : 56
2006 / JUL / 10 PM 11 : 58 : 56
2006 / JUL / 09 PM 05 : 58 : 56
PERCENT
020 %
SEARCH MAIN MENU
PLAY
ESC
PERCENT SEARCH
EVENT SEARCH
TIME/DATE SEARCH
START
END
2006 / JUL / 09 PM 01 : 58 : 56
2006 / JUL / 10 PM 11 : 58 : 56
TARGET
2006 / JUL / 09 PM 05 : 58 : 56
PLAY
ESC
DATE/TIME
CHANNEL EVENT
-------------------------------------/--/-- --:--:--------/--/-- --:--:--------/--/-- --:--:--------/--/-- --:--:--------/--/-- --:--:--------/--/-- --:--:--------/--/-- --:--:----PAGE
000/000
ESC
TIME/DATE SEARCH
EVENT SEARCH
16
4Ch Real time/Triplex/Mux
- Stand Alone DVR
CHAP. 4
Operation
4-8. PAN/TILT/ZOOM Camera Operation
Click [PTZ] icon to control a PTZ camera. PAN/TILT is controlled by Left & Right buttons and
Zoom In & Out is controlled by the mouse wheel. You can control a PTZ camera in 8 different
directions as shown below.
4-9. Data Backup
Click [MENU] icon first.
1. Insert empty CD-R media into CD writer and select the start time & date from which you want to
back up.
The START & END time / date in HDD sub-menu shows start and end range of recordings. This is
not selectable or editable.
2. To set start time of back-up and back-up data size of CD-R media inserted, use a mouse.
End of back-up time will be calculated automatically as per start time & date and the back-up
data size
you set. You can select the back-up data size (size of back-up data from start of back-up), but
END of back-up time is automatically determined by DVR itself.
3. Click ‘
BURN’to commence burning a CD.
4. When burning is complete, CD-R media will eject automatically. For a continuing backup, the next
CD
back-up should specify the end time of the previous backup as the start time of the subsequent
backup.
If you need another back-up, repeat the above procedure. To stop backup, click ‘
ESC’
.
While you are burning a CD, it is impossible to cancel the burning process.
During burning process, DVR does not record.
5. You can verify the back-up CD and install the Backup CD Player on your PC to view the backup
data.
BACK-UP
BACK-UP
HDD
START
END
2006/JUL/08 AM10:10:23
2006/JUL/09 AM08:12:23
HDD
START
END
CD-R
START
END
SIZE
2006/JUL/08 PM12:04:12
2006/JUL/08 PM08:12:23
700MB -> 0MB
CD-R
START
END
SIZE
BURN
ESC
2006/JUL/08 PM 12:04:12
2006/JUL/08 PM 08:12:23
2005/AUG/07 AM04:04:12
2005/AUG/08 PM08:12:23
700 MB - > 700MB
BURN
17
ESC
4Ch Real time/Triplex/Mux
- Stand Alone DVR
CHAP. 5 Set up
CHAP. 5 Set up
5-1. General Operation
Click [MENU] icon and input user password to log in.
Mouse buttons
Mouse Wheel
Functions
Up and down for selecting menu Menu mode options
Up and down for selecting Playback speed
Zoom in and out in PAN/TILT/ZOOM mode
Right
Decrease the value in Menu option
Left
Increase the value in Menu option
Execute functions by clicking icons
MAIN MENU
RECORD
CONFIGURATION
EXTERNAL DEVICE
BACK –UP
FIRMWARE UPGRADE
LANGUAGE
ENGLISH
EXIT
MAIN MENU
18
4Ch Real time/Triplex/Mux
- Stand Alone DVR
CHAP. 5 Set up
5-2. DISPLAY SETUP
This is setup menu for the screen display.
If you click ‘
DISPLAY SETUP’you can change display values as shown below.
DISPLAY SETUP
VGA SETUP
SCREEN DISPLAY
OSD SETUP
ESC
1) VGA SETUP
VGA SETUP
RESOLUTION
800 X 600 / 75Hz
DEFAULT
ESC
VGA SETUP : Connection to a VGA monitor (CRT/TFT LCD), if optional VGA board is fixed on
the main board.
You can set ‘
RESOLUTION’for VGA as shown below.
*If there is no VGA option board fixed on the main board or not detected correctly, it displays
“No VGA BOARD”
640X480 / 75Hz
800X600 / 75Hz
1024X768 / 75Hz
1280X1024 / 75Hz
640X480 / 60Hz
800X600 / 60Hz
1024X768 / 60Hz
1280X1224 / 60Hz
2) SCREEN DISPLAY
SCREEN DISPLAY
VERTICAL POSITION
HORIZONTAL POSITION
BOARDER ENABLE
BOARDER WIDTH
BOARDER COLOR
24
00
ON
01
GRAY
DEFAULT
19
ESC
4Ch Real time/Triplex/Mux
2005 /07 / 21
1
- Stand Alone DVR
22 : 05 : 18
CAM01
CAM02
CAM03
CAM04
2
3
CHAP. 5 set up
4
VERTICAL POSITION : 0 ~ 63
HORIZONTAL POSITION : 0 ~ 63
BORDER ENABLE : ON/OFF
BORDER WIDTH : 1 ~ 10
BORDER COLOR : COLOR SELECT
PTZ
3) OSD SETUP
OSD SETUP
TOP OSD OFFSET
BOTTOM OSD OFFSET
0
0
DEFAULT
2005 /07 / 21
1
ESC
TOP OSD OFFSET : -10 ~ 9
22 : 05 : 18
CAM01
CAM02
CAM03
CAM04
2
3
4
PTZ
20
BOTTOM OSD OFFSET : -10 ~ 9
4Ch Real time/Triplex/Mux
- Stand Alone DVR
CHAP. 5 Set up
5-3. RECORD
This is the most important configuration in the DVR.
When you select ‘
RECORD SETUP’in the main
menu, you can see the window as shown on the
right.
RECORD
RECORD SETUP
SCHEDULE SETUP
1) RECORD SETUP
ESC
You can change setup values using a mouse.
RECORD SETUP
CHANNEL
RESOLUTION
QUALITY
FRAME RATE
DEFAULT
CH 1
352 * 288
HIGHEST
30.0 FPS
ALL-DEFAULT
ESC
(1)CHANNEL : CHANNEL select
(2) RESOLUTION : Set recording resolution
- 704x240(NTSC) , 704x288(PAL)
- 352x240(NTSC) , 352x288(PAL) [ DEFAULT ]
(3) QUALITY : Set recording picture quality.
(There are five quality steps)
- LOWEST
-
LOW
NORMAL [DEFAULT]
HIGH
HIGHEST
To send more images via IP network and longer recording time, set Quality at ‘
LOW’or
‘
NORMAL’
and record at 352x288.
Data size of image in PAL system is a little bigger than NTSC system, but the total recording
time is
same as in NTSC system.
(4) FRAME RATE : Set FRAME
1 ~ 30 FPS(NTSC) [ DEFAULT 7.5 FPS ]
1 ~ 25 FPS(PAL) [ DEFAULT 7.5 FPS ]
21
4Ch Real time/Triplex/Mux
- Stand Alone DVR
CHAP. 5 Set up
2) SCHEDULE SETUP
Unless you selected other recording mode, DVR system records in Schedule Recording mode. In
Schedule Recording mode, you set type of recording by 1 hour time interval.
Default frame rate for continuous recording speed is 30 FPS.
Set Recording time interval for a day of the week and recording type (1 hour time interval)
SCHEDULE SETUP
CHANNEL
TYPE
A LL
0
CH 1
CONTINUE
1 2 3 4 5 6 7 8 9 0 1 2 3 4 5 6 7 8 9 0 1 2 3
1 hour interval
S UN
MON
Click ‘
ALL’to set the
same setting value
24 hours a day and
7 days a week.
TUE
WE D
TRU
FRI
SAT
C
M
DEFAULT
DATE
RED
BLUE
A
M&A
ALL - DEFAULT
GREEN
ESC
YELLOW
TYPE : Set up Recording type
CONTINUE: 24 hour recording
ALARM: Alarm recording
MOTION : motion recording
MOTION & ALARM : Motion & Alarm recording
Each type is indicated in different coloured boxes.
You can set up schedule by dragging a mouse and all blocks can be activated or deactivated
by using ‘
ALL’button.
Default setting is continuous recording.
22
4Ch Real time/Triplex/Mux
- Stand Alone DVR
CHAP. 5 Set up
5-4. CONFIGURATION
When you click ‘
CONFIGURATION’on the
main menu, you can go to ‘
CONFIGURATION’
menu as shown on the right.
CONFIGURATION
HDD MANAGEMENT
CAMERA SETUP
MOTION SETUP
ALARM SETUP
INTERVAL SETUP
TIME/DATE SETUP
PASSWORD SETUP
ESC
1) HDD MANAGEMENT
You can see HDD Model name, serial number, number of blocks and size of HDD. You can also
clear HDD. (While you are in this HDD MANAGEMENT Mode, DVR does NOT record.)
HDD MANAGEMENT
MODEL
MAXTOR 6Y080L0
SERIAL
S3243212
BLOCKS
320173056 LBA
SIZE
160 GB
SPEED
PIO4
------------------------------OVERWRITE
DISABLE
CLEAR
MODEL : HDD MODEL NAME
SERIAL : HDD SERIAL No.
BLOCKS : HDD LBA BLOCK Number
SIZE : HDD TOTAL SIZE
SPEED : HDD MODE
OVERWRITE : ENABLE, DISABLE
23
ESC
4Ch Real time/Triplex/Mux
- Stand Alone DVR
CHAP. 5 Set up
2) TIME/DATE SETUP
In this setup, you can select date/time of DVR
system and display format.
You can adjust values by using a mouse wheel or
left/right button of the mouse.
For the first time installation, date/time setup
must be completed first.
DATE FORMAT : DATE(ASIAN/EUROPEAN
/AMERICAN)
HOUR FORMAT : (12H/24H)
MONTH FORMAT : (ENGLISH,NUMERIC)
TIME/DATE SETUP
DATE
TIME
2007/JUL/08
15:41 :45
DATE FORMAT
EUROPEAN HOUR FORMAT
24HOUR
MONTH FORMAT
ENGLISH
DEFAULT
ESC
3) CAMERA SETUP
You can setup values for each camera.
CAMERA SETUP
CHANNEL
TITLE
CAM01___
BRIGHTNESS
CONTRAST
0
SATURATION
HUE
0
DEFAULT
CH1
0
0
ALL-DEFAULT
ESC
(1) CHANNEL : You can select a channel which you want to change values.
(2) TITLE : You can name each camera with an 8 digit field (numbers or letters combination).
Move a cursor onto a location that you want and choose numbers or letters by
using mouse wheel or left/right button of mouse. To exit to the previous menu
mode, click ‘
ESC’
.
DEFAULT = CAM01___ ~ CAM03___
(3) COLOUR : You can adjust colour of image display of each camera by the mouse.
BRIGHTNESS : Adjusting brightness ( -32 ~ + 31 ) [ DEFAULT = 0 ]
CONTRAST : Adjusting contrast ( -32 ~ + 31 ) [ DEFAULT = 0 ]
SATURATION : Adjusting saturation ( -32 ~ + 31 ) [ DEFAULT = 0 ]
HUE : Adjusting hue ( -32 ~ + 31 ) [ DEFAULT = 0 ]
(4) Executing Buttons
ALL : Initialising all values for all channels as a default setting value.(CH1 ~ CH4)
DEFAULT : Initializing all values for the applied channel only as a default setting value.
ESC : Used to exit
24
4Ch Real time/Triplex/Mux
- Stand Alone DVR
CHAP. 5 Set up
4) MOTION SETUP
MOTION SETUP
CHANNEL
SENSITIVITY
DURATION
DETECT
CELL NUM.
CH1
5
05
01
DEFAULT
ALL-DEFAULT
ESC
MOTION SETUP : You can change values using mouse wheel and left/right buttons of mouse.
- SENSITIYITY : Adjusting sensitivity of a movement. You can adjust level 1 ~ level 5. [DEFAULT : 1]
- DURATION : Whenever motion is detected and it is set in Motion Recording mode, the
DVR records for a certain time being from the point of time when motion is detected.
(1 sec.~99 sec.) [DEFAULT : 1 sec.]
- DETECT CELL NUM. : Select the minimum number of CELLs for MOTION EVENT to be activated.
- ALL-DEFAULT: Default setup for all channels
MOTION MASK SETUP : Set motion detection area.
- CELL : Move to the location which you don’
t want to detect and then click it by using left button.
Motion is detected, when the cell is activated. Motion is not detected on non-activated cells.
- BLOCK ON : Select non detection area by block. (The blocked cells are non-activated area)
By clicking left button and dragging a mouse, you can block the cells.
The right button is used to delete the blocked cells.
To save the setting value and exit, click ‘
ESC’
.
- BLOCK OFF : Select detection area by using the right button of a mouse.
The right button is used to delete the blocked cells.
To save the setting value and exit, click ‘
ESC’
.
Blocked Area
(non-motion detection area)
Non-Blocked Area
(motion detection area)
25
4Ch Real time/Triplex/Mux
- Stand Alone DVR
CHAP. 5 Set up
5) INTERVAL SETUP
See the switching time interval for SEQ or PIP function.
(1 sec. ~99 sec.)
INTERVAL SETUP
SEQUENCE SCREEN :Set the sequencing time
SEQUENCE SCREEN
interval in live full screen mode. PIP SCREEN
01 SEC
01 SEC
EVENT UPDATE
600 SEC
PIP SCREEN : Set the sequencing time interval
of PIP window.
DEFAULT
ESC
EVENT UPDATE : Set the minimum time interval of event
to be listed on EVENT LIST.
If EVENT UPDATE time is set at 5 sec, only events lasting longer than 5 s
econds
are listed.
6) ALARM SETUP
Set type of alarm sensors connected to DVR unit.
N.O represents Normally Open type and N.C Norm
ally
Close type.
INPUT : Select NORMAL OPEN, NORMAL CLOSE,
or DISABLE.
DISABLE represents not to use alarm sensor
connected to DVR.
ALRAM SETUP
CHANNEL
CH1
INPUT
DISABLE
DURATION
01 SEC
ALL-DEFAULT
DEFAULT
ESC
DURATION : Set the duration of alarm when an ALARM
is activated. (0 sec. ~ 300 sec.)
7) PASSWORD SETUP
Set user ID and Password.
You can make up to an 8 digit number combination
for a password by clicking number ‘
0’~ ‘
9’in
password setup menu.
To change password, you need to click ‘
USER
PW’first to activate the menu.
You must input current password and then
input new password.
And input again new password to confirm.
PASSWORD SETUP
USER ID
ADMIN
USER PW
--------
NEW PW
--------
CONFIRM
--------
0
1
2
3
4
5
6
7
ENTER
Number selection for password
Changing the user Password is recommended for security purposes.
26
8
9
ESC
4Ch Real time/Triplex/Mux
- Stand Alone DVR
CHAP. 5 Set up
5-5. EXTERNAL DEVICE
EXTERNAL DEVICE
Set parameters of external devices connected to DVR
like Ethernet, PTZ camera, Spot monitor etc.
If you click ETERNAL DEVICE on the main menu, then
you will see the window shown on the right.
TCP/IP SETUP
PAN/TILT SETUP
SPOT SETUP
ESC
1) TCP/IP SETUP
TCP/IP SETUP
TCP/IP function enables you to see live
pictures and recorded pictures via internet.
IP SETUP
DDNS SETUP
CONNECTION SETUP
ESC
(1) IP SETUP :
IP SETUP
Shows the network information assigned to
the DVR unit. If the DHCP setup status is
AUTOMATIC, you can set the IP port only
and if the DHCP setup status is MANUAL,
you must set all parameters.
If IP port number is blocked, a network
specialist’
s advice is needed.
MAC ADDRESS
DHCP MODE
IP PORT
IP ADDRESS
GATEWAY
SUBNET
00-0A-A2-00-FD-63
MANUAL
IP DETECT
50000
192.168.001.160
192.168.001.001
255.255.255.000
DEFAULT
27
ESC
4Ch Real time/Triplex/Mux
- Stand Alone DVR
CHAP. 5 Set up
2) PAN/TILT SETUP
COMMAND SETUP
PAN/TILT SETUP
COMMAND SETUP
SPEED SETUP
CHANNEL
MODEL
PTZ ID
BAUDRATE
CMD DELAY
ß PTZ Camera setup
ß PTZ Speed setup
ESC
COMMAND
LENGTH
CODE
PAN/TILT SETUP
PAN SPEED
TILT SPEED
ZOOM SPEED
FOCUS SPEED
7
7
7
7
DEFAULT
1)
2)
3)
4)
5)
DEFAULT
01
PELCO-D
000
2400 BPS
1 MSEC
PAN/TILT STOP
16
00 00 00 00
00 00 00 00
00 00 00 00
00 00 00 00
ALL-DEFAULT
ESC
ESC
CHANNEL : Select channel
MODEL : Select camera model (protocol type) per each channel
PTZ ID : Select PTZ ID (per each channel)
BAUDRATE : Select data transmission speed
CMD DELAY : Select command delay time
3) SPOT SETUP
(1) SWITCHING INTERVAL
Channel switching time (01 sec. ~ 99 sec.)
SPOT SETUP
SWITCH INTERVAL
ALARM POP UP
MOTION POP UP
EVENT POP UP DURATION
03 SEC
ON
ON
05 SEC
DEFAULT
ESC
(2) ALARM POP-UP
When ALARM is detected, the image of channel
connected with Alarm sensor pops up.
Set ALARM detection pop-up (ON/OFF)
(3) MOTION POP-UP
Set MOTION detection pop-up (ON/OFF)
EVENT POP-UP DURATION
Set EVENT POP-UP DURATION
If events (MOTION or ALARM) happen on several channels at the same time, channel No.
1 has the first priority to pop up. For example, if events happen on channel No. 1,
channel No. 2, and channel No. 4 at the same time, channel No. 1 pops up. If the motion
disappears on channel No. 1, then channel No. 2 pops up for the duration that you set.
However, even though motion happens on channel No. 1 again within the duration,
channel No. 2 still displays. If motion on channel No.1 keeps on going even after the
duration, channel No. 1 pops up again.
28
4Ch Real time/Triplex/Mux
- Stand Alone DVR
CHAP. 5 Set up
5-6. BACK-UP
1) CDR SETUP
You can back up the recorded data to CD using CD writer installed in DVR.
Refer to [START] and [END] of data on HDD and set copy from time, [START], and size of
data copied, [SIZE], and move to BURN and click it to start copy.
BACK-UP
BACK-UP
HDD
START
END
2006/JUL/08 AM10:10:23
2006/JUL/09 AM08:12:23
HDD
START
END
CD-R
START
END
SIZE
2006/JUL/08 PM12:04:12
2006/JUL/08 PM08:12:23
700MB -> 0MB
CD-R
START
END
SIZE
BURN
ESC
2006/JUL/08 PM 12:04:12
2006/JUL/08 PM 08:12:23
2005/AUG/07 AM04:04:12
2005/AUG/08 PM08:12:23
700 MB -> 700MB
BURN
ESC
System Status Messages :
1. INPUT BLANK CD : CD writer has no blank CD.
2. CD-R MEDIA IS DETECTED : A blank CD-R media has been inserted and detected.
CD-RW BURNING START
CD-RW BURNING LEAD-IN
CD-RW BURNING IMAGE DATA
CD-RW BURNING CLOSE TRACK
CD-RW BURNING COMPLETE
3. When burning is completed, CD-R media will be ejected automatically.
4. To copy more images, repeat above process. In the next back-up process, [START] time in CD-R
sub-menu shall be [END] time in previous back-up, and you can copy images in series to as many
CDs as many as you want.
2) USB SETUP
User can back up the recorded data to USB Media using USB (HOST) port on front panel of DVR.
Refer to [START] and [END] of data on HDD and set start and end time of data to USB Media
( Memory Stick or USB HDD ). Select backup file size, and move to BACKUP and press [ENTER]
Button to start copy.
USB HDD control only : Partition can be selectable by Ch button 1~4.
USB SETUP
USB SETUP
HDD
HDD
[START] 2005/AUG/07 AM04:04:12
[ END ] 2005/AUG/08 PM08:12:23
[START] 2005/AUG/07 AM04:04:12
[ END ] 2005/AUG/08 PM08:12:23
USB MEDIA
[START] 2005/AUG/07 AM04:04:12
[ END ] 2005/AUG/08 PM08:12:23
[ SIZE ] 00000MB
Status message
USB MEDIA
118M , 28M , P:1
[START] 2005/AUG/07 AM04:04:12
[ END ] 2005/AUG/08 PM08:12:23
[ SIZE ] 28 MB - > 28MB
BACKUP
BACKUP
USB STORAGE IS CHECKING…
START WRITING IN USB STORAGE
EXIT : [MENU]
EXIT : [MENU]
SIZE , FREE SPACE, PARTITION
29
4Ch Real time/Triplex/Mux
- Stand Alone DVR
CHAP. 5 Set up
System Status Messages
(1) If MEMORY STICK is not inserted :
- USB STORAGE IS CHECKING…
- USB STORAGE IS NOT AVAILABLE
- RE-CONNECT THE USB STORAGE
- CONECT THE OTHER USB STORAGE
(2) When MEMORY STICK or USB HDD is recognized
- USB STORAGE IS CHECKING …
- THERE IS A FREE SPACE ON STORAGE
- USB STORAGE IS AVAILABLE
(3) During Back-Up
- CHANGE WRITE PROTECT MODE
- START WRITING IN USB STORAGE
- FINISH WRITING IN USB STORAGE
(4) Error Message
- THERE IS A PROBLEM ON USB PORT (If USB PORT fails to work properly)
- USB STORAGE IS FULL (When USB is full)
- FILE SYSTEM IS NOT SUPPORTED (If File System is not supported)
- SIZE IS LARGER THAN FREE SIZE (If back-up size is larger than free space)
Back-Up procedure is the same as CDR Back-Up.
If Back-Up size is larger than 2GB, it creates several files. (It saves in 2GB size files).
5-7. FIRMWARE UPGRADE
You can upgrade your DVR with new firmware by using the CD-RW.
Go to FIRMWARE UPGRADE menu and insert a CD containing new firmware.
First, you click ‘
CD-CHECK’
. After finishing ‘
CD-CHECK’
, click ‘
UPGRADE’
. After you see the
message ‘
POWER OFF AND POWER ON’at the bottom, turn off and on your DVR unit to finish
upgrading and restart the system.
FIRMWARE UPGRADE
CURRENT VER
UPGRADE VER
DVR LOG-IN
VER 1.01.03
FIRMWARE CD CHECK OK
MEMORY ALLOCATE OK
READ CD-R IMAGE OK
CD-R IMAGE CRC
CURRENT IMAGE CRC
0
16B1
503D
ERASE FLASH SECTOR OK
WRITE FLASH SECTOR OK
UPDATE IMAGE CRC
NOW POWER OFF AND POWER ON
CD-CHECK
USER ID
USER PW
UPGRADE
16B1
ESC
30
1
ADMIN
________
2
3
4
5
ENTER
6
7
8
9
EXIT
4Ch Real time/Triplex/Mux
- Stand Alone DVR
CHAP. 6 Network Setup
CHAP. 6 Network Setup
6-1. Network Configuration
1.
2.
3.
4.
Modem/Router
The first step is to establish the local IP address in the modem/router. Typically this may
be
192.168.000.001 or 192.168.001.001 Refer to the instructions supplied with the
modem/router. The local IP address for the NET800 ADSL modem/router is
192.168.001.001
Note that it is not necessary to enter leading zeros.
PC Setup
Now setup the IP address settings in the PC. The settings must be in the same range as
the modem/router. The Subnet Mask defines the network range so if this is set at
255.255.255.000 in the router it means that for all units to be seen in this network, the
first three levels of the IP address must be the same and the last level must be unique.
Go into the Control Panel, Network Connections, LAN connections, properties and then
highlight TCP/IP and click properties again. Now click “Set the following IP address.”
IP Address
192.168.001.100
Subnet Mask
255.255.255.000
Gateway (The modem/router local IP address) 192.168.001.001
Now exit.
DVR Setup
Now setup the IP address settings in the DVR. Again the settings must be in the same
range as the modem/router. The Subnet Mask defines the network range so if this is set
at 255.255.255.000 it means that for all units to be seen in this network, the first three
levels of the IP address must be the same and the last level must be unique.
IP Address
192.168.001.160
Subnet Mask
255.255.255.000
Gateway (The modem/router local IP address) 192.168.001.001 Exit &
Reboot.
PC Remote Viewer Software Setup (Local Connection)
Load the Remote Viewer program to your PC. Press the Power button followed by the
Setting button and ensure internal IP address of the DVR (e.g 192.168.001.160) is
entered and the port number. Refer to IP/PORT Setting Screen. Press OK and then press
CONNECT. If you can get the local connection to work you can then go to next step.
Modem/Router LAN/Internet Setup (STEPS 5 ~ 8 ARE FOR INTERNET CONNECTIVITY)
5.
6.
7.
If you are using the NET800 ADSL modem/router then refer to the instruction booklet
regarding configuring the modem/router. You will need to acquire a static IP address,
username and password from your Internet Service Provider. When you have setup the
WAN configuration and tested the Internet connection is working okay then proceed to
the next step. If you are not using the NET800 product range then you must use refer to
the instruction manual supplied with your modem/router.
Modem/Router Port Forwarding
Follow the instructions for the modem/router for setting client and firewall rules. This is to
setup the firewall rule for external connectivity via the Internet. Ensure you save the
modem/router settings correctly.
PC Remote Viewer Software Setup (External Connection)
Load the Remote Viewer program to your
31 remote PC. Press the Power button followed by
the Setting button and ensure STATIC IP address of the DVR is entered and the port
4Ch Real time/Triplex/Mux
- Stand Alone DVR
CHAP. 6 Network Setup
6-2. Remote Viewer program
MAIN INTERFACE
1
6
7
8
5
2
3
4
1. Power button : Press the Power switch to exit the program. Please press Disconnect before pressing
the Power switch.
2. Connect button : Press the Connect button to view the live images from the DVR. These are the same
images being displayed on the monitor of the DVR, with a delay depending on your
Internet connection at both the DVR location and from where you’
re currently accessing.
3. Disconnect button : Press this button to disconnect from the DVR unit. Then you may power off the
software.
4. Screen Division button : Select how many channels to view simultaneously (single, 4-split).
When you select a view you will see the Channel Numbers highlighted
which determine what channels are currently being viewed.
5. Channel number button : Select the channel that you want to view based on what Screen Division
view is enabled.
6. Status window : Displays the current time and date. The date is in the format : Year/Month/Day.
You will also see the status of your connection.
7. Setting, Playback, and Sequence buttons ; a. Setting : Enables the software configuration screen.
b. Playback : Enables the remote playback screen.
c. Sequence : When in single channel view, hitting the sequence button will sequence
through all active channels at a speed specified in the settings menu.
8. PTZ control : You can control a PTZ camera via the software with these controls.
a. First, you must input or configure the specific PTZ protocol in the software in
order to communicate with the PTZ device.
b. When you press any of the controls for the PTZ, please press and hold the button
for 1-2 seconds per instance to compensate for the data transmission rate. If you
do not and instead simply click the PTZ buttons, you may get undesired results
such as repeated operations.
c. The plus and minus buttons send the PTZ commands to the corresponding PTZ
camera ID.
32
4Ch Real time/Triplex/Mux
- Stand Alone DVR
CHAP. 6 Network Setup
IP/PORT Setting Screen
IP List
MANUAL
DDNS
Input IP address and PORT manually
Receive IP address and PORT from DDNS Server.
For further information of DDNS, please contact your vendor.
NOTE: We do not support DDNS.
Name
Address
PORT
USER ID
Password
Name of IP address on the list.
Input IP address which is set in DVR
Input PORT which is set in DVR
Input ID which is set in DVR. (Please input ‘
admin’
.)
Input password which is set in DVR
IP List
It shows IP list which users input manually.
Select Button Select IP and PORT on the list.
Save Button Save IP and PORT on the list.
Delete Button Delete IP and PORT on the list.
33
4Ch Real time/Triplex/Mux
- Stand Alone DVR
CHAP. 6 Network Setup
SAVE Setting Screen
Circular Monitoring Interval : This indicates the speed of the channel sequence when the
SEQUENCE button is used from the main interface.
Scan Rate
: Set speed of playback.
Set Path to Save Downloaded image : Determines the location and folder on your PC where the
downloaded video clips are stored.
Run in full screen mode : When checked, this will enable the program to re-adjust the interface to
completely fill your computer screen.
34
4Ch Real time/Triplex/Mux
PLAYBACK
- Stand Alone DVR
CHAP. 6 Network Setup
interface through Remote Viewer
2
1
3
7
8
9
10
4
5
6
Function of each button in Search window.
1. Exit : Exit to live window.
2. Full screen : Select a certain camera to view in full screen.
3. Quad : To view quad mode (4 channels at the same time)
4. Time : The recording time & date information of the pictures which are being played.
5. Channel selection : Select each camera.
6. Time selection : Select a time from which user wants playback. The playback will be started from
this point (drag the pointer using mouse)
7. Start and end time : Indicate record starting time and end time of images on HDD
8. Other operating button : Refer to the next page description.
35
4Ch Real time/Triplex/Mux
- Stand Alone DVR
CHAP. 6 Network Setup
: Play fast backward
: Move to the start of recording
: Play backward(1X)
: Move to the previous hour
: Play forward(1X)
: Move to the next hour
: Play fast forward
: Move to the end of recording
: Stop playback
9. Command button.
a) SAVE : After pressing the Stop button, click SAVE button to save the currently viewed image in jpg
format.
b) PRINT : After pressing the Stop button, click PRINT button to print the currently viewed image.
c) RECORD : Press this button to download playback images transmitted from DVR unit into your
PC. User can see saved images using Windows Media Player.
10. Calendar
Use this to select the date you wish to search. The filled in square outlines the date that is at the
beginning of the hard drives. The outlined square indicates the data at the end of the hard drives.
Select the date you wish to view. Verify a filled in square for that particular date. If an invalid date is
selected it will default to the beginning of the hard drive(s).
36
4Ch Real time/Triplex/Mux
- Stand Alone DVR
CHAP. 6 Network Setup
6-3. Back-up CD Player
1
9
2
3
10
b
c
e
a
4
g
d
f
8
5
7
6
DVR units have a built-in CD-RW, and user can copy images to CD.
Using back-up CD player, user can see images on back-up CD, and function of each button in
Back-up CD player is as below.
1. Time : Current time.
2. Status Window : Start & End of time & date, Status of operating button.
When user play forward/backward, recorded time will appear.
3. Play Speed button : User can adjust play speed by pressing up/down button.
Speed (1/4X, 1/2X, 1X, 2X, 4X, 8X, 16X) Delay : (1, 2, 4, 8, 16, 32)
4. Operation button : User can search recorded data using these buttons.
a) Move the slide bar to start position
b) Play fast backward in preset speed
c) Play backward at 1x speed
d) Pause
e) Play forward at 1x speed
f ) Play fast forward in preset speed
g) Move the slide bar to end position
5. Function button
a) OPEN : Open the Back-up CD Player.
b) EDIT : User can edit, save and print recorded images in Edit mode. This edit button will work
when you select one of 16 cameras.
c) EXIT : Exit from Back-up CD Player.
6. Channel button : Select channel to see pictures in full screen.
7. Slide Bar : Move to a point from where playback is required.
8. Page button : This button only works when screen-division is 4-split in an 8 ch DVR, or 4-split or
8-split in a 16 ch DVR. Moves to next page.
9. Screen division : 1/4
37
4Ch Real time/Triplex/Mux
- Stand Alone DVR
CHAP. 6 Network Setup
When you open the file, the audio menu OSD will come up automatically.
- on : check to output recorded sound, then choose the audio channel 1,2,3 or 4
- skip : skip images forward.
* During playback, you can control
only.
* During playback, only one channel is displayed and cannot be changed to multi or full screen.
Image EDIT
1
Contrast
a
a
Sharpness
2
b
b
Blur
Brightness
Save Print
a
Exit
b
1. Image Edit Status Window : Shows record time & date, Image size, Command status.
2. Edit Button : User can adjust colour tone of copied images using this button.
- Contrast :
a) make bright part of image brighter and dark part of image darker
b) To reduce light and shade, lower contrast a little
- Brightness
a) make an image brighter
b) make an image darker
- Sharpness : give sharp-edge effect
- Blur : make an image soft
3. Function button
a) Save : User can save an image in JPEG format. It is saved in the folder where you installed
back-up CD player.
b) Print : User can print the current image selected
c) EXIT : Return to Back-up CD Player mode.
38
c
3
4Ch Real time/Triplex/Mux
- Stand Alone DVR
CHAP. 7 Web Viewer
Setup
7-1. Web Viewer
1) Please click the following icon to execute Web-Viewer.
*If ActiveX control installation is required for the first time access, please click ‘
Yes’
.
Click
2) The following Web-Viewer will pop up. Press ‘
connect’button to see the Live image.
3) You can see the Live image as shown below.
39
4Ch Real time/Triplex/Mux
- Stand Alone DVR
CHAP. 7 Web Viewer
Setup
7-2. Web Backup Player
1) To execute Web Backup Player, click web viewer icon on the right.
* *If ActiveX control installation is required for the first time access, please click ‘
Yes’
.
2) The following Web-Viewer will pop up. Press ‘
open’button to open the backup image file.
3) Choose one backup data file and click ‘
open’button on window.
40
4Ch Real time/Triplex/Mux
- Stand Alone DVR
4) You can see Backup images shown as below.
41
CHAP. 7 Web Viewer
Setup
4Ch Real time/Triplex/Mux
- Stand Alone DVR
CHAP 8. Specifications
CHAP. 8 Specifications
•MJPEG Compression Algorithm
•Real time live display in all channels
•Triplex (Playback/Recording/Ethernet)
•Web monitoring and download through network
•Easy control by Mouse
•USB (Device) port for firmware upgrade
•Easy PTZ Camera (MOUSE)
•Password protection
•Web control
Multiplex function
Storage
US B
P O WE R
H D D A C T IV E
Triplex (Playback/Recording/Ethernet)
Internal
HDD
High capacity HDD support
CD-RW
For Backup
Inputs
Composite
4Ch
Outputs
Composite
2Ch (Monitor / SPOT)
Capacity
Video
D IG IT A L V ID E O R E C O R DE R
Compression
MJPEG
Compression Rate
LOWEST
LOW
NORMAL
HIGH
HIGHEST
Live Display Speed
Real Time Live Display
Recording Mode
Time, Motion, Schedule, Alarm
Search
Event Search, Date/time Search, Percent Search
Recording Speed (NTSC/PAL)
Max. 120IPS(NTSC) 100IPS(PAL)
Recording Resolution (NTSC/PAL)
Half D1 (704x240/704x288), CIF (352x240/352x288)
Switching Interval
1~99 Sec selectable
Live Division Screen
1 / 4 Split
Digital Zoom, PIP in live mode
Alarm
Inputs
4 Alarm (NO/NC Selectable )
Outputs
1 (NO/NC)
Post Alarm
Alarm output duration : 1 ~ 99 Sec selectable
Network
Ethernet (TCP/IP), Web viewer included
Backup
CD-RW Back up, Download via IP Network
PTZ Control
RS-485, MOUSE(PAN/TILT/ZOOM)
Firmware upgrade
Serial I/F
USB Port for firmware upgrade, CD-R
RS-485
For PTZ Camera Control
RS-232C
For operation using keyboard of PC (not supported)
Power Requirements
Weight
Dimensions (WXHXD)mm
Packing
Design and specifications are subjected to changes without notice.
42
4Ch Real time/Triplex/Mux
RECORDING TIMETABLE
FRAME RATE
- Stand Alone DVR
704 x 288
80Gb
160Gb
25
14.6 HR
1.2 DYS
12.5
1.2 DYS
2.4 DYS
8.3
1.8 DYS
6.2
LOWEST RESOLUTION
500Gb
600G
750Gb
2.2 DYS
3.8 DYS
4.5 DYS
5.6 DYS
3.8 DYS
4.4 DYS
7.6 DYS
9.0 DYS
11.2 DYS
3.6 DYS
5.7 DYS
6.6 DYS
11.4 DYS
13.5 DYS 16.8 DYS
2.4 DYS
4.8 DYS
7.6 DYS
8.8 DYS
15.2 DYS
17.0 DYS
5.0
3.0 DYS
6.0 DYS
9.5 DYS
11.0 DYS
19.0 DYS
22.5 DYS 28 DYS
4.1
3.6 DYS
7.2 DYS
11.4 DYS
13.2 DYS
22.8 DYS
27.0 DYS 1 MTH
3.5
4.2 DYS
8.4 DYS
13.3 DYS
15.4 DYS
26.6 DYS
1 MTH
2.0
7.6 DYS
15.0 DYS
23.7 DYS
27.5 DYS
1.5 MTHS
1.8 MTHS 2.2 MTHS
1.0
15.2 DYS
30.0 DYS
1.5 MTHS 1.7 MTHS
3.0 MTHS
3.6 MTHS 4.5 MTHS
RECORDING TIMETABLE
FRAME RATE
704 x 288
250Gb
300Gb
1.9 DYS
AVERAGE IMAGE CONTENT
LOW RESOLUTION
80Gb
160Gb
250Gb
300Gb
25
13.3 HR
1.1 DYS
1.7 DYS
12.5
1.1 DYS
2.2 DYS
8.3
1.6 DYS
6.2
22.4 DYS
1.2 MTHS
AVERAGE IMAGE CONTENT
500Gb
600G
750Gb
2.0 DYS
3.4 DYS
4.1 DYS
5.1 DYS
3.4 DYS
4.0 DYS
6.8 DYS
8.2 DYS
10.2 DYS
3.3 DYS
5.1 DYS
6.0 DYS
10.2 DYS
12.3 DYS 15.3 DYS
2.2 DYS
4.4 DYS
6.8 DYS
8.0 DYS
13.6 DYS
16.4 DYS
20.4 DYS
5.0
2.7 DYS
5.5 DYS
8.5 DYS
10.0 DYS
17.0 DYS
20.5 DYS
25.5 DYS
4.1
3.3 DYS
6.6 DYS
10.2 DYS
12.0 DYS
20.4 DYS
24.6 DYS
30.6 DYS
3.5
3.8 DYS
7.7 DYS
11.9 DYS
14.0 DYS
23.8 DYS
28.7 DYS
1.1 MTHS
2.0
6.9 DYS
13.7 DYS
21.2 DYS
25.0 DYS
1.3 MTHS
1.6 MTHS 2.0 MTHS
1.0
13.8 DYS
27.4 DYS
1.3 MTHS 1.6 MTHS
2.7 MTHS
3.3 MTHS 4.1 MTHS
RECORDING TIMETABLE
FRAME RATE
704 x 288
80Gb
160Gb
25
11.9 HRS
12.5
NORMAL RESOLUTION
AVERAGE IMAGE CONTENT
250Gb
300Gb
500Gb
23.9 HRS
1.5 DYS
1.8 DYS
3.1 DYS
3.7 DYS
4.6 DYS
23.8 HRS
1.9 DYS
3.0 DYS
3.6 DYS
6.2 DYS
7.4 DYS
9.2 DYS
8.3
1.4 DYS
2.9 DYS
4.5 DYS
5.4 DYS
9.3 DYS
11.1 DYS
13.8 DYS
6.2
1.9 DYS
3.9 DYS
6.0 DYS
7.2 DYS
12.4 DYS
14.8 DYS
18.4 DYS
5.0
2.4 DYS
4.9 DYS
7.5 DYS
9.0 DYS
15.5 DYS
18.5 DYS
23.0 DYS
4.1
2.9 DYS
5.9 DYS
9.0 DYS
10.8 DYS
18.6 DYS
22.2 DYS
27.6 DYS
3.5
3.4 DYS
6.9 DYS
10.5 DYS
12.6 DYS
21.7 DYS
25.9 DYS
1.0 MTH
2.0
6.1 DYS
12.4 DYS
18.7 DYS
22.5 DYS
1.2 MTHS
1.4 MTHS 1.8 MTHS
1.0
12.3 DYS
24.8 DYS
1.2 MTHS 1.4 MTHS
2.5 MTHS
2.9 MTHS 3.7 MTHS
43
600G
750Gb
4Ch Real time/Triplex/Mux
RECORDING TIMETABLE
704 x 288
FRAME RATE
- Stand Alone DVR
HIGH RESOLUTION
80Gb
160Gb
25
10.3 HRS
12.5
AVERAGE IMAGE CONTENT
250Gb
300Gb
500Gb
20.7 HRS
1.3 DYS
1.6 DYS
2.6 DYS
3.2 DYS
4.0 DYS
20.6 HRS
1.7 DYS
2.6 DYS
3.2 DYS
5.2 DYS
6.4 DYS
8.0 DYS
8.3
1.2 DYS
2.5 DYS
3.9 DYS
4.8 DYS
7.8 DYS
9.6 DYS
12.0 DYS
6.2
1.7 DYS
3.4 DYS
5.2 DYS
6.4 DYS
10.4 DYS
12.8 DYS
16.0 DYS
5.0
2.1 DYS
4.3 DYS
6.5 DYS
8.0 DYS
13.0 DYS
16.0 DYS
20.0 DYS
4.1
2.5 DYS
5.1 DYS
7.8 DYS
9.6 DYS
15.6 DYS
19.2 DYS
24.0 DYS
3.5
3.0 DYS
6.0 DYS
9.1 DYS
11.2 DYS
18.2 DYS
22.4 DYS
28.0 DYS
2.0
5.3 DYS
10.7 DYS
16.2 DYS
20.0 DYS
1.0 MTH
1.2 MTHS
1.6 MTHS
1.0
10.7 DYS
21.5 DYS
1.0 MTH
1.2 MTHS
2.0 MTHS
2.5 MTHS 3.2 MTHS
RECORDING TIMETABLE
FRAME RATE
704 x 288
HIGHEST RESOLUTION
600G
750Gb
AVERAGE IMAGE CONTENT
80Gb
160Gb
250Gb
300Gb
500Gb
600G
750Gb
25
8.7 HRS
17.5 HRS
1.1 DAY
1.3 DYS
2.2 DYS
2.7 DYS
3.4 DYS
12.5
17.4 HRS
1.4 DYS
2.2 DYS
2.6 DYS
4.4 DYS
5.4 DYS
6.8 DYS
8.3
1.0 DAY
2.1 DYS
3.3 DYS
3.9 DYS
6.6 DYS
8.1 DYS
10.2 DYS
6.2
1.4 DYS
2.9 DYS
4.4 DYS
5.2 DYS
8.8 DYS
10.8 DYS
13.6 DYS
5.0
1.8 DYS
3.6 DYS
5.5 DYS
6.5 DYS
11.0 DYS
13.5 DYS
17.0 DYS
4.1
2.1 DYS
4.3 DYS
6.6 DYS
7.8 DYS
13.2 DYS
16.2 DYS
20.4 DYS
3.5
2.5 DYS
5.1 DYS
7.7 DYS
9.1 DYS
15.4 DYS
18.9 DYS
23.8 DYS
2.0
4.5 DYS
9.1 DYS
13.7 DYS
16.2 DYS
27.5 DYS
1.0 MTH
1.3 MTHS
1.0
9.1 DYS
18.2 DYS
27.5 DYS
1.0 MTH
1.7 MTHS
2.1 MTHS 2.7 MTHS
SPECIAL NOTE:
The timings shown for the various hard drives are based on 704 x 288 resolution and average image content. Ave
rage image content can vary considerably as images are in MJPEG compression.
Example A: Large area of same colour and image content such as a ceiling could provide up to 50% reduction in
total disk space but a component PCB board could increase disk requirements by 100%.
The timings given are therefore only a guide.
To calculate timings using the lower resolution setting of 352 x 288 multiply the record time by 1.8
44


