1
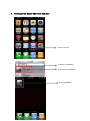
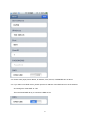
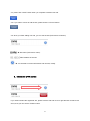
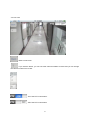
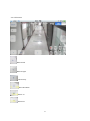
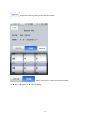
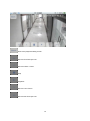
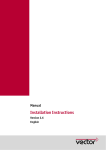
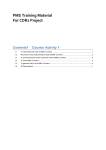
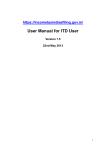
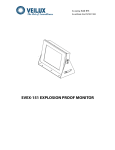
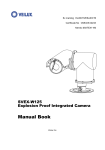
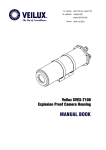
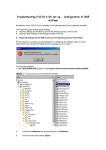
Smart RMS User’s Guide Version ID: V1.2 Date: March , 2011 Author: Veilux ****Please note you will need to go to Veilux website to the download section and download the DVRNet.dll file. If you need help on doing this please contact Veilux for help. The Smart RMS software is on the APP store. Please unzip the file and copy DVRNet.dll into C:\Program Files\DVR\CommonFiles\Bin The s/w version should be V4.0.2.2 only or next version for Smart RMS.\ The live viewer will be shown after converting to MJPEG if the setting would be MPEG or H.264. But please note that the play back is able to when you record by MJPEG only at the moment. 1 Table of Contents 1. How to get the Smart RMS from APP store--------------------------- 3 2. Add new site (DVR server) ---------------------------------------------- 4 3. Delete site (DVR server) ------------------------------------------------- 6 4. Live view, Playback, PTZ control----------------------------------------- 7 5. DDNS (DNS) setting ------------------------------------------------------13 2 1. How to get the “Smart RMS” from App store. 1) Run App store 2) Search “SmartRMS”. 3) Download “SmartRMS”. 4) Run SmartRMS. 3 2. Add new site (DVR server) : Add new site (DVR server). : DNS setting. 2-1. Please click button to add (register) new site (DVR server). 4 2-2. Please write (input) Server Name, IP Address, Port, User ID, PASSWORD etc as above. 2-3. If you want to use DNS server, please input the IP address of the DNS server in the IP Address. And change the “DNS USE” to “ON” Then the Smart RMS will try to connect the DNS server. . 5 2-4. please click “SAVE” button when you complete to add the new site. 2-5. if you want to cancel to add the site, please click the “Cancel” button. 2-6. when you finish adding new site, you can see the site (DVR server as follows) Site name (DVR server name). IP address of the site. You are able to see the information and can edit, modify. 3. Delete site (DVR server) If you want to delete the registered site, please click the site and move to right direction as above red arrow, then you can see the “Delete” button. 6 4. Live view, Playback, PTZ control 4-1. Please select the site which you want to connect. move to live view. able to playback. back to previous menu screen. 7 4-2 Live View : Back to main menu. : If you click the button, you can see other camera numbers as below and you can change the camera number for live view. : On of the PTZ control button. : Off of the PTZ control button 8 4-3. PTZ control. Move to left. Move to right. Move to up. Move to bottom. Zoom –in. Zoom out. 9 : Relay out (no activated). : Relay out button (activated) 4-4 Playback. : selected date. : Selected time and camera number. : Able to change the date and time for the playback data. Move to main menu. 10 Playback the data by setting of the time and camera. : Able to set the hour, minute and camera number. 07 hour, 5 minute, 7 camera number 11 Back to the playback setting screen. Move to first frame per hour. Move to before 1 frame. Stop Playback Move to next 1 frame Move to last frame per hour. 12 5. DNS setting IP address for DDNS server (or DNS server). Port number. DDNS: when you use DIGI-IT DNS server service. DNS : when you use general DNS server service Save the DNS server setting. Back to main menu 13