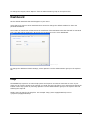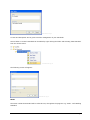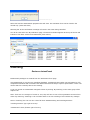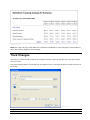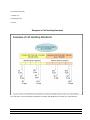
1
ASPIRE ASPIRE User Manual Version 1.11.0.18 Contents Contents ..................................................................................................................................... 3 Installation Overview ................................................................................................................. 4 Installing the Server Software .................................................................................................... 4 Step 1 ........................................................................................................................... 4 Installing the Client Software .................................................................................................... 5 STEP 2......................................................................................................................... 5 Installing the Database ............................................................................................................... 5 Step 3 ........................................................................................................................... 6 Updating the ASPIRE database................................................................................................. 6 Installing the client product ASPIRE ........................................................................... 7 License ..................................................................................................................................... 11 Backing up the Database.......................................................................................................... 11 Media File Locations ............................................................................................................... 12 Attachments File Locations ..................................................................................................... 13 Database................................................................................................................................... 13 Targets ..................................................................................................................................... 14 Dashboard ................................................................................................................................ 15 Help ......................................................................................................................................... 15 Organization ............................................................................................................................ 17 Users ........................................................................................................................................ 21 Password Protection................................................................................................................. 27 User Groups ............................................................................................................................. 29 Standards ................................................................................................................................. 32 AutoFail. .................................................................................................................................. 37 AutoFail Profile (Standard Level) ........................................................................................... 37 Attributes and Definitions ........................................................................................................ 38 Contact Types .......................................................................................................................... 41 Learning Templates ................................................................................................................. 42 Learning Sessions .................................................................................................................... 49 Bookmarks ............................................................................................................................... 55 Completing the Learning Session ............................................................................................ 59 Assigning a Learning Session .................................................................................................. 61 History of Assignments ........................................................................................................... 62 Learning with Learning Sessions ............................................................................................. 64 Creating an Evaluation............................................................................................................. 66 Bookmarks ............................................................................................................................... 75 Completing the Evaluation ...................................................................................................... 79 Printing an Evaluation ............................................................................................................. 81 InstantCoach ............................................................................................................................ 83 Coaching .................................................................................................................................. 85 Reports Overview .................................................................................................................... 95 League Tables .......................................................................................................................... 96 Training Needs Analysis .......................................................................................................... 99 Headline Scores Tracking ...................................................................................................... 100 Evaluations Tracking ............................................................................................................. 103 Definitions Tracking .............................................................................................................. 105 Track Changes ....................................................................................................................... 106 Evaluator Skills ...................................................................................................................... 109 Evaluator Productivity ........................................................................................................... 111 Coaching Productivity ........................................................................................................... 112 Coaching Objectives .............................................................................................................. 113 Exporting Data ....................................................................................................................... 115 ASPIRE User Manual 3 Seven Step Guide to Implementing a Quality Monitoring Programme ................................. 117 Step One: Communication ..................................................................................................... 119 Step Two: Develop the Call Handling Standard .................................................................... 121 Step Three: Gaining Commitment ......................................................................................... 123 Step Four: Consistent Evaluation........................................................................................... 125 Step Five: Feeding back the evaluation results ...................................................................... 127 Step Six: Coaching ................................................................................................................ 129 Step Seven: Using the Reports ............................................................................................... 131 Appendix ............................................................................................................................... 133 Installation Overview ASPIRE is a Client/Server application. The database is installed on a central server and the client application is installed onto every PC that requires access to the data. There are 2 parts to installing „ASPIRE‟ before it is ready to use. 1. Installing the Server Software 2. Installing the Client Software Installing the Server Software Step 1 Do you have SQL Server 2005 installed? If yes, go to Step 2 If you do not have an edition of SQL Server 2005 you can get a legal free version. The free version is called SQL Server 2005 Express edition. The only restriction it has is that the maximum size the database can grow to is 4GB. Please follow these instructions to obtain and install this free edition. When run, these files will install SQL Server 2005 Express edition. 1. Install SQL Server 2005 Express from http://www.microsoft.com/DownLoads/details.aspx?familyid=220549B5-0B07-4448-8848DCC397514B41&displaylang=en 2. Then install SQL Server 2005 Express SP3 from http://www.microsoft.com/DownLoads/details.aspx?familyid=3181842A-4090-4431-ACDD9A1C832E65A6&displaylang=en Please note, when installing SQL Server 2005 Express edition please make sure of the following:- 4 It is set up in mixed mode (allows both SQL Server and Windows Authentication) It is set up to allow local and remote connections using both TCP/IP and named pipes ASPIRE User Manual Installing the Client Software Prerequisites Before installing the client software you must make sure that the following is installed on each PC and a sound card enabled. Windows Media Player 9 (or later) Other prerequisites are installed automatically by the installation program. These are: Microsoft .NET Framework 2.0 Microsoft Data Access Components (MDAC) 2.8 Crystal Reports for .NET Framework 2.0 Installing You can install the client software on as many PC's as you like. The installation program will check whether the prerequisites are installed and start their installation if necessary (with the exception of Windows Media Player). Accept all default settings. The installation may take several minutes but you can continue to do other tasks during this time. After installation the application will start automatically. STEP 2 Installing the Database To install the database, download the installation program by clicking on this link http://download.qualtrak.com/ASPIRE_Database_Setup.exe. When it has finished downloading please run it and follow the on screen instructions. The following commentary walks you through installing the ASPIRE database:Please select the SQL Server and if applicable the name of the instance you want to install the ASPIRE database on. From the screen above you can see that I am choosing to install the ASPIRE database on the SQL Server named „GKITCHEN4‟ on an instance named „SQLEXPRESS‟. If I do not want to install the ASPIRE database on an instance but do want to install it on the SQL Server named „GKITCHEN4‟ I would make the following selection instead:- ASPIRE User Manual 5 Fig 1 From the screen above you can see that I am choosing to install the ASPIRE database on the SQL Server named „GKITCHEN4‟ on an instance named „SQLEXPRESS‟. If I do not want to install the ASPIRE database on an instance but do want to install it on the SQL Server named „GKITCHEN4‟ I would make the following selection instead:- Fig 2 Step 3 Updating the ASPIRE database During this step you will be updating the ASPIRE database. The difference between this and step 2 is that over time we add further functionality to ASPIRE and sometimes this requires a change to the database. These changes are made to your database by running the following link. Please download and run this file - http://download.qualtrak.com/ASPIRE_Database_Update.exe 6 ASPIRE User Manual Fig 3 Please select the Server and if applicable the name of the instance you have installed ASPIRE on. In the example above I have a SQL Server named „GKITCHEN4‟. On this server I have an instance named „SQLEXPRESS‟. It is here that I have installed my ASPIRE database. If I had not have installed the ASPIRE database on the instance named „SQLEXPRESS‟ but I had installed it on the SQL Server named „GKITCHEN4‟ then I would have selected GKITCHEN4 from the list. This can be seen here:- Fig 4 Installing the client product ASPIRE Please download and run this file - http://download.qualtrak.com/ASPIRE_Setup.exe When you run Aspire for the first time on your desktop computer you will be presented with the screen below. What Aspire is doing is asking you to provide information that will allow it to communicate with the ASPIRE database. There are many ways you can provide Aspire with this information. We have included examples on this screen to help you. ASPIRE User Manual 7 Fig 5 In this example above I want to connect to the ASPIRE database that in on the SQL Server named „GKITCHEN4‟ on an instance named „SQLEXPRESS‟. If my database is not on an instance named „SQLEXPRESS‟ but is on the SQL Server named „GKITCHEN4‟ I enter the following instead:- Fig 6 When you press the „OK‟ button to save this information you will be asked to run Aspire again:- 8 ASPIRE User Manual Fig 7 When you run Aspire again you will be presented with the login page:- Log on fig 1 First Client application to connect to the database If you are the first client application to connect to this database, the installation program will then attempt to validate the license. The license will have been setup in advance by your supplier. Val. License fig 1 ASPIRE User Manual 9 Validate License You will require an internet connection to validate the license but this can be done from any one of the client installations. You will not be able to use ASPIRE until the license has been validated. The validation result window shows information about your license such as effective date and the number of licensed users. You can see this information at any time by selecting 'About' from the Help group on the explorer bar. Next, you will be prompted to create the default file locations for media files. Create default file locations for Media files 1 Media Files Fig Browse Folder When working with pre-saved calls, we can browse our organisations network file system in a Windows Explorer style dialog box and select any file which my users have permission to access. I can apply a default setting here for all users. (*this can be overwritten for individual users if required) The default Browse Folder will be the starting point for search for new media (i.e. this default folder will be displayed first). * To overwrite the default Media setting, select „Edit User‟ from within „Users‟ 10 ASPIRE User Manual Saved Media Folder When an evaluation is saved for the first time, the associated media file is renamed with the evaluation reference. This makes the file name unique. It is then moved to a central location so that all media files are in one place and can be accessed by other users. This location is specified by setting the Saved Media Folder. This setting will apply to all users of ASPIRE but can be overwritten for each user. If you are using an integrated recorder, a copy of the call is made and saved in this folder. Select „OK‟ to save these settings You will now be presented with the logon screen. License The License is provided on a per active user basis. You can install the client application on as many machines as you like but the database will only allow you to enter as many active users as the license allows. You can also check your current license at any time by selecting „About‟ from the Help group on the explorer bar. License Fig 1 To make changes to the license such as extend a trial period, increase the number of users, you need to contact your supplier who will update the license information held for your organization. Once this has been done, you can click on 'Validate License' from the Help group on the explorer bar and the changes will be immediately updated. This requires and internet connection. Backing up the Database Backup We recommend you create a daily backup of the database. It is your responsibility to make sure the ASPIRE data files are included in your backup strategy. ASPIRE does not automate the backup of data. ASPIRE User Manual 11 Restoring the Database In the event of data loss or data corruption, you can restore the database from your latest backup. Media File Locations When evaluating an agent‟s performance you can either get the calls from an integrated call recorder or use pre-saved calls on your computer or network. The following pre-saved media files can be imported for evaluation: Audio (.wav, .wma, .mp3) Video (.asf, .avi, .mpg, .wmv) Once you complete and save the evaluation the media file will be given a unique name and moved to a central location. These file locations can be edited by selecting 'Options' from the Administration group on the explorer bar. Options Fig 1 Browse Folder When working with pre-saved calls, you can browse your network file system in a Windows Explorer style dialog box and select any file which you have permission to access. The default Browse Folder can be entered to set the starting point for search for new media (i.e. this default folder will be displayed first). This setting will apply to all users of but can be overwritten for each user. See the section on users for more information. Saved Media Folder When an evaluation is saved for the first time, the associated media file is renamed with the evaluation reference. This makes the file name unique. It is then moved to a central location so that all media files 12 ASPIRE User Manual are in one place and can be accessed by other users. This location is specified by setting the Saved Media Folder. This setting will apply to all users of but can be overwritten for each user. See the section on users for more information. If you are using an integrated recorder, a copy of the call is made and saved in this folder. Attachments File Locations Options Fig 2 Attachments Media Folder When a file is added to a bookmark as an attachment it will be saved to this folder. The folder should be created on a central location so that all attachments are in one place and can be accessed by other users. Database Database Connection When the application is installed for the first time, you are prompted for the name of the server that runs the database and this should never change. The Database can be changed but is only used for troubleshooting and advanced settings and will only be used by the Administrator in conjunction with your suppliers support personnel. ASPIRE User Manual 13 Options Fig 3 To change the database, select 'Options' from the Administration group on the explorer bar. Enter the name of the server, including an instance name (if required), and click. Your changes will not take effect until you restart the application. WARNING: The ASPIRE license is controlled by the database and changing this property could stop the application from working. Targets Use the evaluator targets to set the number of evaluations and coaching sessions Managers should carry out for each agent per calendar month. These targets will be made visible to my Managers on their Dashboard. Options Fig 4 14 ASPIRE User Manual To change the Targets, select 'Options' from the Administration group on the explorer bar. Dashboard Set the default Standard that should appear to your Users. Users that have access to other standards have control to change the default standard on their own personal Dashboard. The number of months set will determine the timeframe of the Evaluations that the data will be extracted from. The data will be displayed in Strengths and weaknesses on the users Dashboard. Options Fig 5 To change the dashboard default settings, select 'Options' from the Administration group on the explorer bar. Help The ASPIRE help system is an online help system and requires an internet connection to view. If your client pc's do not have access to the internet you could copy the help files to your network and change the location of the help system by selecting 'Options' from the Administration group on the explorer bar and selecting the Help tab. Simply enter the URL for the help files. For example: http://www.myapplicationhelp.com or \\myserver\myapplicationhelp. ASPIRE User Manual 15 Options Fig 6 16 ASPIRE User Manual Organization Overview The organization structure is replicated within ASPIRE to produce reports and manage the enterprise wide performance management process. Typically users are allocated to a team, teams to a department, departments to a contact center, contact centers to a division, divisions to a country and countries to a group. Organisation Fig.1 Organizational units work in a hierarchy whereby the largest groups must be created first i.e. Company, followed by Contact Centre, then a Team, and so on. Each unit may contain one or more organizational units. These are represented with a folder icon. A Team is a special type of organization unit. It is the same in every way except that users can only be assigned to a Team. So you can think of a Team as an „end point‟ to a branch of your organization. Creating Units To create an organizational unit within an existing unit, highlight the unit by right clicking and select the „New Unit‟ from the context menu. Organisation Fig.2 To create a new unit as a root, or top level unit, right click in the white space on the screen and select „New Unit‟ from the context menu. ASPIRE User Manual 17 Organisation Fig.3 Enter a name for your new unit and an optional description. Then click „OK‟ to update the organization tree to reflect the changes. Teams are created in the same way. Moving Units Should you wish to move an organization unit, you can simply „drag and drop‟ it into different unit to make it a sub branch of the destination unit or drop it into white space to make it a root or top level unit. Organisation Fig.4 You are prompted to confirm the move so you have an opportunity to cancel if you made a mistake. Deleting Units If you wish to delete one of your organizational units, simply right click the unit and select „Delete Unit‟ from the context menu. You cannot delete a unit that contains other organizational units. These must be moved or deleted first. Assign user to team To assign a user to a team, right click the desired Team and select „Assign User to Team‟ from the context menu. 18 ASPIRE User Manual Organisation Fig.5 The Select User screen will appear. Organisation Fig.6 To select a user, enter their last name and click on „Search‟ to produce matching results. You can also enter part of the last name to produce more matches (e.g. entering „w‟ will return all users whose last name starts with the letter „w‟). Leaving the search criteria blank will return all users. Select the user you wish to assign and click the „OK‟ button. This will update the organization tree to reflect the changes. The User will automatically be made member of the ‘Agents User Group’ when they are assigned to a Team. Add Manager to Team Right click the team you wish to add the manager to and select „Edit Team„ from the context menu. ASPIRE User Manual 19 From the Team properties box select the Managers tab and „Add‟ The Select User search box will appear To select a user, enter their last name and click on „Search‟ to produce matching results. You can also enter part of the last name to produce more matches (e.g. entering „w‟ will return all users whose last name starts with the letter „w‟). Leaving the search criteria blank will return all users. Select the user you wish to add as a Manager to this Team and click the „OK‟ button. The Organisation view will refresh with the Manager icon displayed within the Team. 20 ASPIRE User Manual A user can be added to any Team and/or any Unit as a Manager. This action will give the user (referred to a manager in this context) scope over that Unit or Team. This means they will be able to „work with‟ any users who belong to Teams that belong to the managed Unit(s). This scope cascades down the tree to all sub-branches. When a user is added to a Team as a Manager they automatically become members of the ‘ Managers User Group’ to give them permissions over the users in their scope. Users User Maintenance is accessed by selecting 'Users' from the Administration group in the explorer bar. Add New User Users Fig.1 To add a new user press New User on the menu bar. ASPIRE User Manual 21 Users Fig.2 Personal Details First Name, Last Name, Username and Gender are compulsory fields. The remainder can be completed as required. After you have saved the new user you can then reopen the user in edit mode. Employment Details Users Fig.3 None of the fields on the Employment Details Tab are compulsory. 22 ASPIRE User Manual Check „Active‟ to assign one of your user licenses to this user. They will then be able to use ASPIRE and be evaluated and coached. For more information on licensing see „Licenses‟. Media Tab Users Fig.7 The media folders tab allows the default settings to be overridden for each user. This is especially useful if Managers download calls from their call recorder for their own agents and stores them on their local PC before evaluating. In this scenario they can override the Used Media Folder to point to a folder on their own PC. The following pre-saved media files can be imported for evaluation: Audio (.wav, .wma, .mp3) Video (.asf, .avi, .mpg, .wmv) Once you complete and save the evaluation the media file will be given a unique name and moved to a central location. ASPIRE User Manual 23 Recorder Tab The User ID and Channel fields in the Recorder Details section are used in conjunction with either your integrated call recorder or Media File Maps (depending on your configuration) for the random selection of calls for evaluation. If you have an integrated call recorder you can enter the user identifiers and/or recorder channel here. Depending on your configuration this could be imported automatically from the call recorder. Alternatively, you can enter any information here such as a folder name that a Media File Map can use to find calls for this user. Photo Tab The Photo tab can be used to ad a photo of the employee. Click „OK‟ to save and create the new user. Once the user has been created you can then assign them to Teams, make them managers of different units within your organization or add them to User Groups to control what they have permission to do within ASPIRE. Once users have been assigned to teams or made Manager of a team three additional tabs will appear on their user profile. 1. User Groups 2. Assignment 3. Manager of. User Groups tab The User Groups tab show which User Groups the selected user belongs to. A User will automatically be made member of the ‘Agents User Group’ when they are assigned to a Team. A user will automatically be made a member of the ‘Manger User Group’ when they are added to a team as a Manager (see Assign User to Team & Add Manager to Team) 24 ASPIRE User Manual Users Fig.4 User Groups define what permission the user has within each part of the application. The permissions are defined at Read, Edit, Create and Delete levels. For more information, see User Groups. Assignment tab The assignment tab show which Teams the selected user is assigned to. ASPIRE User Manual 25 Users Fig.5 When a user is assigned to a Team they are then made available to managers of that Team and its parent Units. Reports will include this user‟s results in all analysis for this Team and its parent Units. When a user is assigned to a Team they are automatically added to the Agents User Group to give them limited permission on the system, such as viewing their own evaluations. A user e.g. advisor can belong to more than one team. This is particularly helpful where for example an advisor in an outsourcing contact centre is involved with more than one campaign. This does not require additional licenses. Manager Of tab The „Manager Of‟ tab show which organizational units the selected user manages. Users Fig.6 26 ASPIRE User Manual A user can be assigned to any Team and/or any Unit as a Manager. This action will give the user (referred to a manager in this context) scope over that Unit or Team. This means they will be able to „work with‟ any users who belong to Teams that belong to the managed Unit(s). This scope cascades down the tree to all sub-branches. When a user is assigned as a manager, they are automatically added to the Managers User Group to give them permissions over the users in their scope. This is especially useful if Team Leaders download calls from their call recorder for their own agents and stores them on their local PC before evaluating. In this scenario they can override the Used Media Folder to point to a folder on their own PC. Password Protection Once a user has been created they are able to log onto ASPIRE using their assigned username and a blank password. The user name is not case sensitive but the password is case sensitive. Change Password New users should immediately create a password when they first log on. To do this, click on „Change Password‟ on the home page. Users Fig.8 Enter the current password or leave blank if you are creating a password for the first time. Then enter the new password and confirm in the boxes provided. The password can be up to 20 characters in length. Click OK to confirm. You will then need to enter the new password next time you log on to ASPIRE. Clear Password If a user has forgotten their password or left the organization, their manager can clear their password. Clr password Fig.1 In user maintenance, this is done by selecting the user in the grid and clicking „Clear Password from the menu. ASPIRE User Manual 27 Clr password Fig.2 This can also be done from Organization maintenance by right-clicking on the user and selecting „Clear Password‟ from the context menu. The user can then log on with just their username and a blank password. They should then create a new password as described above. 28 ASPIRE User Manual User Groups User Groups define the levels of permission users have within each part of the application. Permissions Levels are defined as Read, Change, Create and Delete. ASPIRE provides 3 built-in User Groups: Agent Users are automatically joined to the Agents User Group when they are assigned to a Team. Predefined permissions allow access to limited areas of the program and these permissions can be edited to suit your requirements. Manager Users are automatically joined to the Managers User Groups when they are made Manager of a team or organizational unit. Predefined permissions allow access to selected areas of the program and these permissions can be edited to suit your requirements. Administrator Users must be specifically added to the Administrators group. The predefined permissions for this group cannot be edited. These User Groups have been named the same as the terms used for User roles for simplicity. In theory a User Group can be given any name for example, you could have a User Group called „Self Evaluators‟ whose only permissions are to carry out evaluations of their own calls. Another User Group might be „Authors‟ whose only permissions are to create Learning Templates. User Groups Fig. 1 The Built-in User Groups cannot be deleted. To view or edit a User Group‟s permission, highlight the group and then click the „Edit‟ button, or double click the User Group. ASPIRE User Manual 29 User Groups Fig. 2 You can create your own User Groups and give them a name and description. For the built-in groups, you can edit the description but not the name. User Groups Fig. 3 The permissions tab shows what level of permission is granted for the selected User Group for each area of ASPIRE. Where the check boxes are disabled or „greyed out‟, that permission level is not available. To have permissions within the „Unit Maintenance‟ area of the application users must also belong to the „Manager‟ User Group. Limit Scope Scope refers to the units, teams and users whom you manage. 30 ASPIRE User Manual If you are granted Read Permission on User Maintenance and Limit Scope is checked, when you open User Maintenance you will be able to see only the users that belong to Teams that you manage, either directly or through the management of parent organizational units. If Limit Scope is unchecked then you will be able to see all users. (The logged in user must also be a member of the Manager Group to have access to Unit Maintenance) Application Area Definition Table Area Definition Permission can be grated to: Unit Maintenance Organisation structure: Unit/Team/User Read, Change, Create, Delete User Maintenance User profiles Read, Change, Create, Delete User Groups Read, Change, Create, Delete System Parameters Group profiles, roles within the application File locations: Media, Attachments, Database, Help, Targets and Dashboard Standards Standards/Evaluation Templates and Contact Types Read, Change, Create, Delete Evaluation Evaluations for managed users Read, Change, Create, Delete Self Evaluation Coaching Read, Change, Create, Delete Read, Change, Create, Delete Learning Evaluations for yourself Coaching Session and InstantCoach for managed users Learning Sessions assigned to you and managed users (My Learning/Learning Assignments) Publishing Assign Learning Session to managed users Read, Change, Create, Delete Reporting Reports Learning Templates (Learning Templates are designed to enable Learning Sessions to be created) Learning Sessions (Sessions can only be created from active Learning Templates) Read, Change, Create, Delete Author Templates Author Learning Sessions Read, Change Read, Change, Create, Delete Read, Change, Create, Delete Read, Change, Create, Delete A Learning Template is a collection of questions that can be used as the basis for all Learning Sessions. A Learning session is a module that enables users to answer a set of preset questions. Their answers can then immediately be compared to how an 'expert' would have answered those same questions. The questions may refer to a Media file that can be added to the Learning Session or to the company standards. Or indeed any subject your experts wish to design a Learning Template on. *Managed users refers to the Users that belong to the teams or Units that you are a manager of. ASPIRE User Manual 31 Standards Designing a standard We strongly advise that you read „Step Two‟ of the seven step guide to implementing a quality monitoring programme before designing your standard. A standard is an evaluation template made up of measurable statements (definitions/questions) that are grouped together under „attributes‟/‟family of questions‟/‟collections‟ … You would typically create different Standards for specific departments. For example, a question about selling techniques would not necessarily apply to a call taken by a service department. An advisor‟s performance is evaluated against a series of definitions (questions) Definitions are grouped together under attributes to make up a Standard (evaluation template.) To view Standards select Standards from the Administration Group in the explorer bar. By default, inactive templates are hidden when you first open the standards screen. You can toggle between showing and hiding inactive standards by clicking on the Show all button. Management of Standards Standards are organized in folders. To create a new Standard you must first create a folder in which the standard will reside. Right click anywhere in the white space and select „New Folder‟ from the context menu. 32 ASPIRE User Manual Standards Fig.1 A name and description can be given to aid the management of your standards. Once a folder is created a standard can be added by right clicking the folder and selecting „New Standard‟ from the context menu. Standards Fig.2 The following screen will appear: Standards Fig.3 Name The name is what the Standard will be referred to as, throughout the program. E.g. „Sales - Call Handling Standard‟ ASPIRE User Manual 33 Description You can also enter a description with more detail about the standard and who it is designed for. Scoring Mode ASPIRE provides the following scoring modes for evaluation: Yes / No Yes / No / Not Applicable Yes / Partial / No / Not Applicable Sliding Scale 0 - 5 Sliding Scale 1 - 5 Points Note that the scoring mode cannot be changed once a call has been evaluated against a Standard. The same scoring mode will be applied for all the definitions in that given standard. The scoring mode you use will dictate how your questions are worded. For example, you couldn‟t score the question “How well did the agent put the customer at ease” with a Yes or No. This would be more suited to a Sliding Scale. Yes/No When you evaluate against a standard with a Yes/No scoring mode, you score each definition either Yes or No, giving values as follows: Standards Fig.4 Score No Yes Percentage of Points 0% 100% Yes / No / Not Applicable When you evaluate against a standard with a Yes/No/NA scoring mode, you score each definition either Yes, No or Not Applicable, giving values as follows: Standards Fig.5 Score No Yes NA Percentage of Points 0% 100% Points removed from calculation Yes /Part / No / Not Applicable When you evaluate against a standard with a Yes/Part/No/NA scoring mode, you score each definition either Yes, Partially, No or Not Applicable, giving values as follows: Score No Y/N 34 Percentage of Points 0% 0% ASPIRE User Manual Standards Fig.6 Yes NA 100% Points removed from calculation The purpose of scoring Y/N (or partially) is to acknowledge that the definition is on the way to being scored „Yes‟ but not allow any points for it. This can be useful when reporting on definitions – see the section on reporting for more information. Sliding Scale 0 – 5 When you evaluate against a standard with a Sliding Scale 0 -5 scoring mode, you score each definition on a sliding scale of 0 to 5, giving the following values. Standards Fig.7 Score 0 1 2 3 4 5 NA Percentage of Points 0% 20% 40% 60% 80% 100% Points removed from calculation Sliding Scale 1 - 5 When you evaluate against a standard with a Sliding Scale 1 – 5 scoring mode, you score each definition on a sliding scale of 1 to 5, giving values as follows: Standards Fig.8 Score 1 2 3 4 5 NA Percentage of Points 0% 25% 50% 75% 100% Points removed from calculation So if you score 4 to a definition worth 10 points, 75% of the points would be awarded, making 7.5 in this example. When all the questions have been answered a percentage is calculated from the total points available. If a question is scored NA, the points for that question are taken away from the total points available. Points When you evaluate against a standard with a Points scoring mode, each definition can be scored with a numeric value from 0 to 9. The total score is not calculated as a percentage but as a straight forward sum of the points scored. Activate a standard The Standard cannot become Active until the Attributes and Definitions have been added. ASPIRE User Manual 35 To Activate a Standard Once the Attributes and Definitions have been added to the Standard right click the Standard icon and select „Edit Standard‟ from the context menu The Standard Properties box will appear: Tick the „Active‟ check box and select „OK‟ to save and close. As your organization structure changes and new products are introduced, you will want to change the Standards against which your advisors are evaluated. Instead of deleting a standard, you should mark it as inactive. This means you can retain historical scores for your advisors and teams. To Inactivate a Standard Right click the Standard icon and select „Inactivate‟ from the context menu 36 ASPIRE User Manual By default, inactive templates are hidden when you first open the standards screen. You can toggle between showing and hiding inactive standards by clicking on the Show all button. Standards Fig.9 AutoFail. The AutoFail feature has been made available to enable organisations to highlight critical errors for example an agent‟s failure to adhere to the Data Protection Act. A definition selected as an AutoFail will result in an evaluation‟s headline score being set to „0‟% It is the „No‟ or „0‟ (for the 0 – 5 scoring mode) score on an Evaluation that triggers the AutoFail (Points value and 1 – 5 scoring modes do not support the AutoFail feature.) The AutoFail profile can be set at Definition, Attribute or Standard level. An AutoFail profile at the Standard Level will take precedence over any AutoFail profile at Attribute level and Attribute level will take precedence over Definition Level. The scope for each is what is immediately below it. So for instance, an Attribute AutoFail is concerned with only those AutoFail Definitions it houses. Whereas an AutoFail profile at Standard level is concerned with all AutoFail Definitions. In Summary, if AutoFail is set at standard level then it is the number of Attributes that trigger an Autofail and not the number of Definitions. If AutoFail is set at Attribute level it is the number of Definitions within that Attribute that trigger the Attribute to fail. If set at Definition level then it is that Definition that will trigger the AutoFail. AutoFail Profile (Standard Level) The AutoFail profile will govern how many AutoFail Attributes it will take for the AutoFail to trigger. The „AutoFail Attributes Selection Slider‟ (Fig.10) indicates from 0 to „X‟ (x = total number of AutoFail Attributes within the Standard). In this example there are 3 Attributes within the Standard tagged to trigger AutoFail. (This is indicated by the figure on the right of the slider). The Slide is set to „1‟ (slider setting is displayed on the left) indicating that if only 1 Autofail Attribute fails, an AutoFail will be triggered, and the headline score set to zero. Note: The Autofail Check box will be disabled (greyed out) until Attributes and definitions are added to the standard. The „AutoFail Attributes Selection Slider‟ will automatically display the number (To the right of slide bar) of Autofail Attributes added to a Standard. The number to the left will change as the slider is moved to left or right. Standards Fig.10 ASPIRE User Manual 37 Attributes and Definitions (Collections/Family of Q’s and Questions/Measurable statements) Attributes are groups/collections of definitions/questions that make up the standard. Before a definition/question can be created you must first create an attribute/collection for it to belong to. Right click the Standard icon and select „New Attribute‟ from the context menu. Att & Def. Fig.1 The New Attribute window will appear: Att & Def. Fig.2 The name of the attribute/collection will be displayed as a subheading on the Evaluation form. The Interpretation box can be used to expand on the meaning of the Attribute and is also accessible from the evaluation form. The AutoFail check box can be used to create the profile (at Attribute level), this will govern how many AutoFail Definitions, housed within this Attribute, it will take for the Attribute to fail. – The „AutoFail Definitions Selection Slider‟ indicates from 0 to „X‟ the total number of AutoFail definitions within the Attribute. 38 ASPIRE User Manual Note: The AutoFail Check box will be disabled (greyed out) until definitions are added. The slide bar will automatically display markers to indicate the number of Autofail definitions added to an Attribute. The first Marker on the slide bar is ‘0’ Example: We have created 10 Definition within one Attribute, 4 of them have been selected to trigger an Autofail. If we leave the AutoFail check box in the Attribute properties box blank, anyone of the 4 definition will trigger an Autofail. If we tick the check box we must slide the bar to the desired marker. In this example the Slide is set to „3‟ indicating that 3 AutoFail definitions should be scored „No‟ to trigger an AutoFail. Definitions Once an attribute is created, definitions can be added by right clicking the Attribute and selecting „New Definition‟ from the drop down menu. Att & Def. Fig.3 The New Definition window will appear: ASPIRE User Manual 39 Att & Def. Fig.4 Text: This is where you should enter the definition text (question) max 255 characters. Interpretations/notes: Provide extra detail to help the evaluator score a particular definition. This helps to bring the interpretation of different evaluators together so all agents are treated fairly. Interpretations are available to evaluators when using the „evaluation form‟ as „read only‟ and accessed by clicking the adjoining blue button. E.g. the definition/question may be „Takes the caller‟s address detail ‟the interpretation/note could be: Must include House number, and postcode. Points: A value should be given to each definition. If you feel one definition is more important than another, it can be weighted to have a greater impact on the score. Auto fail: The AutoFail check box should be checked if the definition is to trigger an Autofail. Att & Def. Fig.5 If the Auto fail check box is ticked you should choose from the drop down menu whether the Evaluation should be continued (all definitions scored) or stopped. We recommend that where you have a number of AutoFail Definitions within one standard you select the same option (e.g. Stop Evaluation) for all. Select “OK” to exit the New Definition window to save your changes. 40 ASPIRE User Manual To edit existing definitions right click the definition and select „Edit Definition‟ from the context menu. Position the cursor in the text box you wish to edit and edit accordingly. The AutoFail check box cannot be edited (unchecked) once evaluations have been created against the standard. Make the Standard inactive and duplicate it. The duplicate can be edited and used to replace the original. Maximum Number of definitions. You can have up to a maximum of 255 definitions in a Standard, however, we would not recommend exceeding 25-30 questions as it makes evaluation very time consuming. Moving Attributes and Definitions Should you wish to move an attribute or definition into a different position after they have been created you can do so by right clicking the attribute or definition and selecting either Move Up or Move Down from the context menu. This is only available if no evaluations have been carried out against the standard. Good Practice When starting with a new standard invariably there will be a need to make changes during the early weeks/months. If the changes require adding or subtracting definitions and attributes, or changing the weightings, the only available option is to start again with the revised standard. To avoid having to retype the standard with the minor changes, we have provided a duplication function. Contact Types Contact Types can be assigned to evaluations as a way of grouping different types of calls. For example, you could use Contact Types to store your customer names or the type of call such as complaint, customer support, new business etc. You can then filter for different contact types when reporting. Create Contact Type To create contact types, select Contact Types from the Administration group of the explorer bar and then right click in the white space and select New Contact Type from the context menu. Contact types Fig.1 You can also right click on an existing contact type to create a sub contact type. Contact Types can be nested as many times as you like. ASPIRE User Manual 41 Contact types Fig.2 Enter a name for the Contact Type and click OK to save your changes. Delete Contact Type To delete contact types, select Contact Types from the Administration group of the explorer bar and highlight the contact type you wish to delete, right click and select „Delete Contact Type‟ from the context menu. (note: If a Contact type is deleted it will be removed from any evaluation forms it has been assigned to) Learning Templates Learning Templates are used as the basis for all Learning Sessions. To view the Learning Templates, select Learning Templates from the Administration Group in the explorer bar. 42 ASPIRE User Manual Learning Templates are organized in folders. To create a new Template you must first create a folder in which the Template will reside. Right click anywhere in the white space and select „New Folder‟ from the context menu. A name and description can be given to aid the management of your templates. Once a folder is created a Template can be added by right clicking the folder and selecting „New Learning Template‟ from the context menu. The following screen will appear: Name ASPIRE User Manual 43 The name is what the Learning Template will be referred to as, throughout the program. Description You can also enter a description with more detail about the template and who it is designed for. Active / Inactive The default when creating a Learning Template will be set to inactive. Before the template can be used to create a Learning session it must be set to active. By default, inactive templates are hidden when you first open the Learning Templates screen. You can toggle between showing and hiding inactive templates by clicking on the Show all button. 44 ASPIRE User Manual Groups and Questions A group is a collection of questions that make up the Learning template. Before a question can be created you must first create a group for it to belong to. Right click the Learning template icon and select „New Group‟ from the context menu. The New Group window will appear: The name of the group will be displayed as a subheading on the Learning Template form. The Interpretation box can be used to expand on the meaning of the group. Interpretations are available to learners when completing a „Learning Session‟ as „read only‟ and accessed by clicking the adjoining blue button icon ASPIRE User Manual 45 Once a group is created, questions can be added by right clicking the group icon and selecting „new question‟ from the drop down menu. The New question window will appear: 46 ASPIRE User Manual Text The question text must be entered (max 255 characters) Remember the question should fit neatly on the screen and anything up to 100 characters may make for easier viewing. Interpretations/Question extensions Interpretation provides extra detail to help the Learner answer a particular question. Interpretations/Question extensions are available to learners when completing a „Learning Session‟ as „read only‟ and accessed by clicking the adjoining Icon. Select “OK” to exit the „New question‟ window and save your changes. To edit existing questions right click the question and select „Edit question‟ from the context menu. Position the cursor in the text box you wish to edit and edit accordingly. Maximum number of questions. You can have up to a maximum of 255 questions in a template, however, we would not recommend exceeding 10-20 questions. Moving Groups and questions Should you wish to move a group of questions into a different position after they have been created you can do so by right clicking the Group or question and selecting either Move Up or Move Down from the context menu. ASPIRE User Manual 47 Moving Folders and Templates Should you wish to move a Folder or Template, you can simply „drag and drop‟ it into different location. A Template can be moved to another folder and a Folder can be moved to become a sub folder or dropped into the white space to make it a root or top level Folder. (The user‟s view of Folders and Templates is dependent on their position within the organisation hierarchy) You are prompted to confirm the move so you have an opportunity to cancel if you made a mistake. Deleting Folders & Templates If you wish to delete one of your Folders or Templates, simply right click the unit and select „Delete Folder/Template‟ from the context menu. You cannot delete a Folder that contains other folders or Templates. These must be moved or deleted first. You cannot delete a Template once it has been used to create a Learning Session. 48 ASPIRE User Manual Learning Sessions A Learning session is a module that enables users to answer a set of preset questions. Their answers can then immediately be compared to how an 'expert' would have answered those same questions. The questions may refer to a Media file that can be added to the Learning Session or to the company standards. Or indeed any subject your experts wish to design a Learning Template on. To view the Learning Sessions select Learning Sessions from the Administration Group in the explorer bar. Learning Sessions are organized in folders. To create a new Session you must first create a folder in which the session will reside. Right click anywhere in the white space and select „New Folder‟ from the context menu. A name and description can be given to aid the management of your Learning Sessions. Once a folder is created a Session can be added by right clicking the folder and selecting „New Learning Session‟ from the context menu. ASPIRE User Manual 49 The following screen will appear: Highlight the Learning Template you wish to use to create the Learning Session. Only „Active‟ templates will be visible. Complete the name and description text boxes. Click OK to close the Learning Session properties box and save your changes. Author a Learning Session Once the session has been created the expert answers, bookmarks, attachments and media file will need to be added. Right click the Learning session you wish to Author and select „Author‟ from the context menu. The Learning Session template form will open 50 ASPIRE User Manual The Session Name, Creation date, Template and Author is displayed in the Learning Detail box (Top, left). The authoring of the session can be cancelled by pressing the Cancel button on the menu bar. An incomplete Session can be saved and completed at a later time by pressing the Save and Close button on the menu bar. A Learning Session cannot be assigned until it has been fully completed. Attaching a Media File To select a media file click on Search Media in the menu bar. This opens up the following screen from which a file can be selected. The media file is loaded into Aspire and the media file name is also shown (Source). ASPIRE User Manual 51 The media file can now be controlled from within Aspire. The Author is now ready to begin. Reject Media If the media file is not suitable you can reject it by clicking Reject Media on the menu bar. You must enter a reason why you are rejecting the media file. This will help you or other Authors if they try to select this media file again. Setting the expert response to a Question On the session template form you have the list of Groups and Questions. 52 ASPIRE User Manual A round blue button icon to the left of the Group signifies an Interpretation Note which gives more information about the Group. A thought bubble & blue button icon to the left of the Question signifies an Interpretation/Question extension which gives more information about the question. Click the button to open the interpretation/Question extension which is read only. The Author will set the answers to Yes or NO. If you do not wish the learner to answer an individual question or a whole group of questions then N/A should be selected. If N/A is selected the question(s) will not be displayed to the Learner. ASPIRE User Manual 53 Bookmarks Using Bookmarks Aspire has been developed predominantly with the emphasis on learning and development. Therefore it is important to help the Learner both to discover and to be encouraged. To this end we have included Bookmarks which can be added against each Question. Bookmarks are used to back-up whatever result we give with evidence. A Bookmark can consist of, text only, or text plus audio/sound-bite. Text Only Bookmark Point the cursor anywhere along the Question line including the scoring section and right click. Select „Create Bookmark‟ from the context menu and the Bookmark window opens. You will notice that at the top of the Bookmark window the Question is shown. Enter your Bookmark text in the box provided. ASPIRE User Manual 55 The Bookmark symbol within the bookmark window has a name which is defaulted to be the first name of the Author. This can be changed by right clicking the bookmark symbol and selecting „Rename‟ from the context menu. Overwrite the default name with a new more descriptive name. Aspire gives you the option to add as many Bookmarks as you like for each Question. Simply right click an existing bookmark and select „New Bookmark‟ from the context menu. When you have finished adding Bookmarks against the Question you must press OK to save the entries. Attachments You can also attach a file to the bookmark by clicking the browse button in the Attachment box. You can browse your computer for a file to attach - this can be any kind of file such as a word document, spreadsheet, audio or video file, PowerPoint presentation, SWF file etc. Bear in mind that you need to have a program installed on your computer to open the type of file you have attached, for example, if you attach a PowerPoint file to the bookmark then you must have Microsoft PowerPoint installed on your computer to view the presentation. You can also add a hyperlink as an attachment. Type the „hyperlink‟, in the attachment box. You must enter the full URL beginning with http:// or https://. We recommend that you copy the URL from the address bar in your internet browser. To open or view the file you have attached, click on the Open button in the attachments box. 56 ASPIRE User Manual Bookmarks with Text and Audio/Sound-bite In addition to adding a text comment this can be augmented with a „sound-bite‟ from the Media File which highlights the evidence used by the Author. This is a powerful learning opportunity as it allows the learner to listen, learn and understand what it is exactly they need to focus on. To set the audio bookmark open the bookmark window then use the media player controls on the Learning Session form to pause the media player at the start of the sound-bite, press „Set Start‟ in the bookmark window. To set the end point of the audio bookmark press the Play button on the media player and press „Set End‟ when you have reached the end of the clip you wish to use or press the media player‟s pause button then the „Set End‟ button. ASPIRE User Manual 57 You can now play the sound bite by clicking the Play button. You can also fine-tune the start and end positions of the audio bookmark by clicking the start and end point selectors above and below the timeline. As with „Text Only‟ bookmarks, a user can add as many or as few audio bookmarks as they wish for each Question. Bookmarks can be a mixture of Text Only and Audio. 58 ASPIRE User Manual When finished press OK and this will close the window and save. Moving Folders and Learning Sessions Should you wish to move a Folder or Learning Session, you can simply „drag and drop‟ it into different location. A Session can be moved to another folder and a Folder can be moved to become a sub folder or dropped into the white space to make it a root or top level Folder. (The user‟s view of Folders and Sessions is dependent on their position within the organisation hierarchy) You are prompted to confirm the move so you have an opportunity to cancel if you made a mistake. Deleting Folders & Templates If you wish to delete one of your Folders or Session, simply right click the Folder/Session and select „Delete Folder/Learning Session‟ from the context menu. You cannot delete a Folder that contains other folders or Learning Sessions. These must be moved or deleted first. You cannot delete a Learning Session once it has been assigned as Learning. Completing the Learning Session Comments Box The Question bookmarks are specific whilst the Comments box (bottom left) can be used for general comments about the Media File or Learning Session as a whole. These comments will be visible to the learner as soon as they open the Learning Session, rather than after they have completed the session, as with bookmark comments. ASPIRE User Manual 59 When the Learning Session has been completed press Save and Close button on the menu bar. If one or more Questions have not been scored you will get the following message. Press No and look for the question(s) without a response. Saving a Non-completed Learning Session You have the option of saving an incomplete Learning Session e.g. if you need to move onto another task. Press Save and Close. The message box above will appear select 'Yes' to save and close. Completed Learning Sessions Once all the Questions have a response and a media file (if required) has been loaded you can choose to assign it immediately or save and close. Select Save and Close button on the menu bar. The completed Learning Session form can be opened by right clicking the Learning session and selecting „Author‟ from the context menu. Once the Learning Session has been assigned to at least 1 learner it becomes read only and further changes to the scoring or bookmarks cannot be made. The saved Learning Session can be viewed and „Assigned‟ to additional learners To view a Learning Session that has already been „Assigned‟ to a least 1 learner select „View‟ from the context menu. To „Assign‟ a Learning Session that has already been „Assigned to at least 1 learner select „Assign Learning Session‟ from the context menu. 60 ASPIRE User Manual Assigning a Learning Session When you are happy that the Learning Session form has been completed correctly you can distribute it to people within your organisation. Open the Learning Session you wish to use, and from the menu bar, select „Assign Learning Session'. You can either select an Individual, Team or Unit depending on your position within the organisational structure Click OK when you are ready. You can then enter comments about this Learning Session that will appear to the learner. This can be any comments or instructions to assist the learner. Click „Send Learning Session‟ when you are ready. ASPIRE User Manual 61 You will receive confirmation of how many Learners the session has been assigned to. These will now be available to the users when they next logon. History of Assignments The history of those users a learning session has been assigned to is available by right clicking the Learning Session and selecting „History‟ from the context menu. 62 ASPIRE User Manual The Learning Assignment History box is displayed. The information can be sorted by dragging the column header to the top of the Learning Assignment History box. ASPIRE User Manual 63 Learning with Learning Sessions A user can access learning assigned to them by clicking „My Learning‟ in the Home group of the explorer bar. Note: If the user is a manager of a team or unit, they will have an extra item called Learning Assignments which will allow them to see the learning of users whom they manage. Double-click the learning Session to open it. You will be presented with a Learning Session form. Play the Media file, if attached, and add your response to the questions. When you have finished, click 'Finish' in the toolbar. 64 ASPIRE User Manual This will give you your alignment index which is calculated from the number of answers you matched with the 'expert' Author. Your answers are represented with the shaded background and the expert evaluators answers will be highlighted with a green boarder. You can now compare your answers and also view any of the expert bookmarks to give you more insight into why the expert answered the question in a particular way. Click the bookmark icon ASPIRE User Manual to open the bookmark window and view the expert bookmarks. 65 Saving a Incomplete Learning Session You have the option of saving an incomplete Learning Session e.g. if you need to move onto another activity. Select „Finish‟ from the menu bar. The following prompt will appear, select „Yes‟ The incomplete Learning Session will show progress as less than 100% Creating an Evaluation An evaluation can only be undertaken by a user with manager permission for a team or unit. Evaluations are accessed from the „Evaluations‟ icon within the Home group of the explorer bar. Evaluation Fig.1 From the „Evaluations‟ page the Manager can see the organisation tree and will be able to „Create‟ or „View‟ evaluations for those agents that belong to the Teams she/he is a manager of. Evaluation Fig.2 Select the User (Agent) you wish to evaluate, from the organisation tree. If evaluations already exist for this user they will appear as a list on the right of the screen (the newest at the top.) To open an existing evaluation double click the appropriate reference or highlight the evaluation and choose „Open‟ from the menu bar. 66 ASPIRE User Manual To create a new evaluation simply select the user you wish to evaluate and choose „New‟ from the menu bar. The „Select Standard‟ box will appear listing the Call Handling Standards currently available. In some organisation there will only be one Call Handling Standard but there can be several e.g. outsourcing, call centres may require a number a different templates. Select the Standard you wish to use and press „OK‟ If you would like to listen to the media file before selecting the „Standard‟ press „Select Later‟ Evaluation Fig.3 If the „Standard‟ had been selected the Evaluation template will be loaded onto the page. You can now select a media file and begin to Evaluate. Evaluation Fig.4 ASPIRE User Manual 67 If a „Standard‟ has not yet been selected a „blank Evaluation form‟ will be loaded onto the page. Note : The standard can be changed at any time before the evaluation has been saved. Any bookmarks or scores will be lost if you choose to change the standard partway through scoring. Evaluation Information The User, Employee Reference, Evaluator, Date and Standard information is displayed. The reference will also be displayed but not until evaluation has been saved. The reference number is made up of the first 5 characters of the Agents Surname, the year, the month and the next available number e.g. Agent/10/04/1 The Contact Type is optional and can be used to group different types of calls. For example, you could use Contact Types to store your customer names or the type of call such as complaint, customer support, new business etc. To assign a Contact Type to the evaluation form click on the browse button in the Contact Type box and select from the list presented. Evaluation Fig.5 To clear the contact type from the Evaluation form, highlight the contact type and press „Delete‟ on your keyboard. 68 ASPIRE User Manual The score is hidden by default and can be shown/hidden by clicking „Show Score on the menu bar. The evaluation can be cancelled by pressing the Cancel button on the menu bar. An incomplete evaluation can be saved and completed at a later time by pressing the Save and Close button on the menu bar. Attaching a Media File You can either select the call manually or let ASPIRE randomly select a call for evaluation. (Random selection is only available when ASPIRE is integrated with a voice recorder) Evaluation Fig.6 Search for Media File Manually To select a call manually, click on Search Media in the menu bar. This opens up the following screen from which a call can be selected. ASPIRE User Manual 69 Evaluation Fig.7 The call is loaded into ASPIRE and the media file name is also displayed (Source). Evaluation Fig.8 The media file can now be controlled from within ASPIRE. The evaluator is now ready to begin. Automatically Present Random Media File (Random selection is only available when ASPIRE is integrated with a voice recorder) ASPIRE can present a random call for evaluation based on the evaluation selection criteria. Evaluation Fig.9 70 ASPIRE User Manual The default is to search for calls in the last 14 days using the default Media File Map unless this has been overridden for the currently logged on user. Both the Media File Map and the date range can be fine tuned at this point by the evaluator. Note: If the Media File Map does not have any mappings to date information, any date range in the selection criteria will be disregarded. Click on Random Media from the menu bar to load a call. Evaluation Fig.10 You will see a message box showing that a media file has been selected at random and the number of media files found that matched the criteria. Note: ASPIRE will not select media files that have previously been evaluated or that have previously been rejected for evaluation. If no media was found you will see the following message: Evaluation Fig.11 You can either adjust your selection criteria; make sure calls have been exported to the folder referenced by the Media File Map or Search for a media file manually. Reject Media If the media file presented is not suitable for evaluation, for example it may be an internal call or it may be too short, you can reject it by clicking Reject Media on the menu bar. Evaluation Fig.12 You must enter a reason why you are rejecting this media file. This will help you or other evaluators if they try to select this media file again for evaluation. ASPIRE User Manual 71 Evaluating a Definition If you have not already selected the Standard you wish to use you should select it now. Press the Standard button (to the right of the „Select Standard‟ label) and the Standard list box will appear. Select the Standard you wish to use and press „OK‟ Note : The standard can be changed at any time before the evaluation has been saved. Any bookmarks or scores will be lost if you choose to change the standard partway through scoring. The Standard will be loaded onto the page and you can start Evaluating. 72 ASPIRE User Manual In the evaluation grid, on the evaluation form you will see the list of Attributes and Definitions/questions. Evaluation Fig.13 A round blue information button to the left of the Attribute or Definition signifies an Interpretation Note exists, the note can contain information/guidance notes about the attribute or definition. Evaluation Fig.14 Click the button to open the interpretation note. Interpretation notes are created by the Administrator when designing the Standard and are in read only format when viewed from the Evaluation form. The AutoFail icon will appear next to those Definitions that have been selected in the Standard design (by the Administrator) to trigger an AutoFail. The evaluator will listen to the call and will be looking for evidence that the standard for each Definition/Question has been met. The Definition will be assessed (based on the evidence) that it either meets excellence in which case the Yes button is pressed, it does not meet excellence in which case the No button is pressed. ASPIRE User Manual 73 In some cases there is no applicable evidence for that Definition in which case the NA button will be selected. Evaluation Fig.15 If one of the alternative scoring modes is used e.g. 1-5, then the same principles apply. Scoring an AutoFail Definition When you select „No‟ at a Definition that has been tagged as AutoFail you will be presented with the following message. AutoFail Fig.1 Select „Yes‟ to continue with your original score, select „No‟, if it was selected in error. If the Autofail profile was setup to „Continue Evaluation‟ after an Autofail is triggered you will be presented with the following message: AutoFail Fig.2 If the Autofail profile was setup to „Stop Evaluation‟ after an Autofail is triggered you will be presented with this message: AutoFail Fig.3 74 ASPIRE User Manual Bookmarks Using Bookmarks to Identify Evidence ASPIRE has been developed predominantly with the emphasis on learning and development as opposed to a traditional „monitoring/auditing‟ tool. Therefore it‟s important to help the advisor both to learn and to be encouraged. To this end we have included Bookmarks which can be added against each Definition/Question. A Bookmark can consist of; text only, text plus audio/sound-bite, Text plus an attachment or a combination of all 3. Text Only Bookmark Point the cursor anywhere along the Definition line including the scoring section and right click. Bookmark Fig.1 Select „Create Bookmark‟ from the context menu and the Bookmark window opens. Bookmark Fig.2 You will notice that at the top of the Bookmark window the Definition name is shown. Enter your Bookmark text in the box provided. (Max approx 130 words) The Bookmark symbol has a name which is defaulted to be the first name of the evaluator. This can be changed by right clicking the bookmark symbol and selecting „Rename‟ from the context menu. ASPIRE User Manual 75 Bookmark Fig.3 Overwrite the default name with a new more descriptive name. ASPIRE gives you the option to add as many Bookmarks as you like for each Definition. Simply right click an existing bookmark and select „New Bookmark‟ from the context menu. When you have finished adding Bookmarks against the Definition you must press OK to save the entries. Attachments You can also attach a file to the bookmark by clicking the browse button in the Attachment box. You can browse your computer for a file to attach - this can be any kind of file such as a word document, spreadsheet, audio or video file, PowerPoint presentation etc. Bear in mind that you need to have a program installed on your computer to open the type of file you have attached, for example, if you attach a PowerPoint file to the bookmark then you must have Microsoft PowerPoint installed on your computer to view the presentation. You can also add a hyperlink as an attachment. To do this, type the hyperlink in the attachment box, you must enter the full URL beginning with http:// or https://. We recommend that you copy the URL from the address bar in your internet browser. To open or view the file you have attached, click on the Open button in the attachments box. Bookmark Fig.4 Bookmarks with Text and Audio/Sound-bite 76 ASPIRE User Manual In addition to adding a text comment this can be augmented with a „sound-bite‟ from the call which highlights the evidence used by the evaluator. This is a powerful learning opportunity as it allows the learner to listen, learn and understand what it is exactly they need to do differently or more of (if the Bookmarks are supporting a Yes score.) Similar to the above, multiple Bookmarks can be added against a Definition. Bookmark Fig.5 With the Bookmark Properties box still open pause the Media Player at the start of the section you wish to clip and select the „Set Start‟ button. Bookmark Fig.6 The Bookmark Properties box refreshes to indicate that a start position has been set. Notice the bookmark symbol also changes to a speaker icon. You will now have to set the end point of the audio bookmark by pressing the Play button on the media player and pressing „Set End‟ when you have reached the end of the clip you wish to use. You can also press the player‟s pause button then the Set End button. ASPIRE User Manual 77 Bookmark Fig.7 You can now play the sound bite by clicking the Play button. You can also fine-tune the start and end positions of the audio bookmark by clicking the start and end point selectors above and below the timeline. Bookmark Fig.8 Similar to Text Only, you can add as many audio bookmarks as required for each Definition. Bookmarks can be a mixture of Text Only and Audio. When finished press OK and this will close the window and save. 78 ASPIRE User Manual Completing the Evaluation Comments Box The Definition bookmarks are specific, whilst the Comments box (bottom left), are general comments about the evaluation as a whole. (Max no of characters 1k, approx 130 words) Completing the Evaluation Fig.1 When the evaluation has been completed press the Save and Close button on the menu bar. If one or more Definitions have not been scored you will get the following message. Completing the Evaluation Fig.2 Press No and look for the Definition(s), which have been left unscored. Saving a Non-complete Evaluation You have the option of saving an incomplete evaluation. If for example you need to move onto another task. Press Save and Close. You will be prompted to continue (as above). Press Yes. Completing the Evaluation Fig.3 The incomplete evaluation will be stored on the Evaluations page and a yellow triangle icon will highlight that it remains incomplete. ASPIRE User Manual 79 Completed Evaluation Once all the Definitions have been scored and the evaluation saved the yellow triangle disappears. Completing the Evaluation Fig.4 The evaluation form can be opened by double clicking the symbol in the Reference column. Past evaluations are listed with the latest at the top. Hide/Show Score The score can be displayed or hidden by pressing the Show / Hide Score button on the menu bar. Completing the Evaluation Fig.5 This is a useful feature when used during the feedback stage. Access to the Evaluation The advisor can log on and view the evaluation, including playing the call but cannot edit the evaluation. When the evaluator or a „manager‟ at a higher level is logged on they can edit the evaluation. This is particularly useful during the coaching/feedback session as it enables the evaluator to be open to input from the advisor. Together they may agree that a change to the evaluation is justified. The default settings for Agent and Manager Permissions can be edited. See the section on User Groups for more information. 80 ASPIRE User Manual Printing an Evaluation To print the form press Print Preview. Printing an Evaluation Fig.1 You are prompted to include the text for each bookmark that has been added to each definition/question. Select „Yes‟ or „No‟ to proceed as required. Printing an Evaluation Fig.2 If the score is hidden on the evaluation screen then the score will not be included in the print out. The print out also includes the general Comments at the end of the report. Printing an Evaluation Fig.3 To print the evaluation click „Print Report‟ from the menu bar. There is also the option to Export the Report in a number of formats: PDF, Excel, Word and RTF. The Excel option enables you to combine the data with other data sources e.g. balanced scorecard. See Exporting Data. ASPIRE User Manual 81 InstantCoach InstantCoach is a module that enables Managers to evaluate real calls and send immediate feedback to their Agents. Create an InstantCoach The first step in creating an InstantCoach is to carry out an evaluation. When you are happy that the call has been evaluated correctly and you have added sufficient bookmarks with effective feedback you can create the InstantCoach. An InstantCoach can only be sent once the evaluation is saved. (Although you have the option of sending part of the Evaluation as an InstantCoach the evaluation must still be completed in full) When „InstantCoach‟ is selected from the menu bar a message appears to confirm that the evaluation will be saved. InstantCoach Fig.1 Once you have selected ‟OK‟ you will be presented with the InstantCoach properties box, you can choose to include „All‟ or some of the definitions and to „Show the Score‟ InstantCoach Fig.2 ASPIRE User Manual 83 If you select „Partial‟ you will be presented with a list of definitions from which to make a selection InstantCoach Fig.3 Once you have made your selection you can enter comments in the „Comments‟ text box for the assigned agent to view. Press the „Send‟ button and the following message will appear InstantCoach Fig.4 If you select „Yes‟ a further confirmation message can be seen. 84 ASPIRE User Manual InstantCoach Fig.5 Select „OK‟ and the InstantCoach properties box will close. The evaluation form can be closed in the normal way. (Save and Close) Selecting „No‟ at the confirmation message will result in the action being cancelled. You will be returned to the „My Evaluation‟ page. The Saved evaluation appears at the top of the list and indicates it has been used as an InstantCoach (final column) InstantCoach Fig.6 Coaching Review an InstantCoach InstantCoach packages are created from the „Evaluations form‟ page. Use InstantCoach to give the user immediate feedback, a Manager/Team Leader can send partial or fully completed Evaluations with comments and attachments that will help to improve performance. There is no need to wait for a monthly One to One meeting. A user can access an InstantCoach assigned to them by clicking „My Coaching‟ in the Home group of the explorer bar. Note: If the user is a manager of a team or unit, they will have a view of the organisation structure from within ‘My Coaching’. Selecting a user will allow them to see the Coaching of users whom they manage. Once in „Coaching‟ the user can see a list of all their InstantCoaching and Coaching Sessions. ‘Coaching Sessions’ (top right of screen) ‘InstantCoach’ forms (bottom right of screen) ASPIRE User Manual 85 Coaching Fig.1 InstantCoach packages displayed here in green text have been reviewed by the user those in red are yet to be reviewed. Double click the InstantCoach to open it. Coaching Fig.2 The InstantCoach form is similar to that of the Evaluation form. We can see the Evaluation Information (top left) and the InstantCoach details immediately below that. The user can use the media controls to play the media file and read any comments made by the Manager. In this example we can also see that the Manager has created a bookmark against definition 4 „Speaks Clearly. To view the bookmark, double click the bookmark icon. 86 ASPIRE User Manual Coaching Fig.3 The Bookmark properties box will open and display the text, audio or attachments that the manager has added. Bookmarks with Text and Audio/Sound-bite Text comment can be augmented with a „sound-bite‟ from the call which highlights the evidence used by the Manager to demonstrate a behavior. This is a powerful learning opportunity as it allows the learner to listen, learn and understand what it is exactly they need to do differently or more of (if the Bookmarks are supporting a „Yes‟ score.) Attachments A file can also be attached to the bookmark - this can be any kind of file such as a word document, spreadsheet, audio or video file, PowerPoint presentation etc. Bear in mind that you need to have a program installed on your computer to open the type of file that has been attached, for example, if a PowerPoint file has been attached to the bookmark then you must have Microsoft PowerPoint installed on your computer to view the presentation. A hyperlink can also be added as an attachment. To open or view the file that has been attached, click on the Open button in the attachments box. Bookmark Response When the Bookmarks and comments have been reviewed the User can choose to respond with bookmarks of their own. With the original bookmark open right click the bookmark icon (Manager‟s name) and select „New Bookmark‟ from the context menu. ASPIRE User Manual 87 Coaching Fig.4 A new bookmark properties box will open. Coaching Fig.5 Enter comments in the Text box and choose to add audio clips or attachments. To add an Audio clip pause the Media Player at the start of the section you wish to clip and select the „Set Start‟ button from within the Bookmark properties box. Coaching Fig.6 88 ASPIRE User Manual The Bookmark Properties box refreshes to indicate that a start position has been set. Press the play button on the Media Player to play the section of the call you want to set. Coaching Fig.7 At the end of the section press the „Set End‟ button. Coaching Fig.8 If the section starts too soon or cuts off part of a sentence, adjust the start and end time in 1 second increments, by simply selecting the Start or End arrow head and pressing the + or - buttons. Select „OK‟ to save. The two bookmarks can then be reviewed by both User and Manager. Coaching Fig.9 ASPIRE User Manual 89 Completing the Review Once the InstantCoach has been reviewed and any Bookmarks added, select „Reviewed‟ from the menu bar. Coaching Fig.10 You are returned to the „My Coaching‟ page and the newly reviewed InstantCoach has changed from red text to green, a review date will also appear in the Reviewed date column. Coaching Fig.11 90 ASPIRE User Manual Coaching Sessions ASPIRE includes a module to capture the outcomes of the coaching feedback. We assume this will take the form of a one to one and using coaching principles such as the team leader/coach helping the advisor to discover the learning points for themselves and together to agree the areas to build on and those areas to improve. We provide you with the means to capture the observations and agreements online. The coach logs on and selects „My Coaching‟ from the Home tab on the navigation panel. They will also open up the evaluated calls, which are to be reviewed. This enables the coach to switch from calls to the coaching screen via the tabs. Once in „Coaching‟ the Manager can view the organisation tree and can choose to „Open‟ or start a „New‟ Coaching Session for those agents that belong to the Teams he is a manager of. Highlight a team member from within the organisation tree and the list of Coaching Sessions for the selected Agent will appear on the right hand side of the page. Coaching Fig.12 The Coaching Session displayed in red text indicates that „Objectives‟ are still outstanding or were not completed on time. The coaching sessions colour code. If % completed on time is less than 25% the row is red, if % completed on time is less than 50% the row is orange Double click a Coaching Session to open the coaching form. Objectives should be updated before a new session is started. Start a New Coaching Session Select „New‟ from the menu bar to create a New Session. ASPIRE User Manual 91 Coaching Fig.13 A „blank Coaching Session‟ will appear. Any objectives that had been deferred from the previous session will be brought forward to the current session. At this stage you are able to add comments, observations etc. These may be the points that have been discussed during the review of the evaluated calls. (Max 4k.approx 520 words) Agreeing Objectives Many companies have adopted the practice of setting objectives, which are based on the SMART criteria. SMART is the acronym for Specific, Measurable, Achievable and Relevant. To add an objective press „Add Objective‟ from the menu bar. You can give each objective an owner (Manager or Agent) and select a date to complete. All Objectives must be saved individually. 92 ASPIRE User Manual Coaching Fig.14 Printing the Coaching Session When the objectives have been agreed, and the evaluations reviewed a hard copy of the Coaching Session can be printed. Select „Print Preview‟ from the menu bar. Print a hard copy for the Agent or Export the report to another location. You can export the form by pressing Export Report and save it in PDF, Word, Excel or RTF format. Coaching Fig.15 Close the Print Preview to return to the Coaching Session. Save the Coaching Session by pressing „Save and Close‟ from the menu bar. Coaching Fig.16 ASPIRE User Manual 93 Coaching Fig.17 The most recent Coaching Session will now be displayed at the top of the list in the Coaching Sessions screen. 94 ASPIRE User Manual Reports Overview Report Name Description By Standard By Date Range By Contact Type By Individual By Team By Unit League Tables Completed evaluations, average scores for individuals and teams managed by X Yes Yes Yes Training Needs Identify strengths and weaknesses for individuals, teams, departments, call centers etc Yes Yes Yes Yes Yes Yes Headline Scores Tracking Tracks the headline quality scores for individuals, teams, departments, call centers etc Yes Yes Yes Yes Yes Yes Evaluations Tracking Analysis Tracks the headline quality scores and number of calls evaluated for teams, departments, call centers and Evaluators Yes Yes Yes Yes Yes Definitions Tracking Analysis Looks at the trend at question (skill) level at individual call and time periods Yes Yes Yes Yes Yes Yes Track Changes Tracks any changes to the score of an Evaluation Yes Yes Yes Yes Yes Evaluator Skills Analysis Compares the Evaluators' evaluation behaviors and identifies deviations at question (skill) level Yes Yes Yes Evaluator Productivity Computes number of evaluations completed by different Evaluators and for individuals, teams, departments, call center etc. Yes Yes Yes Coaching Productivity Computes number of Coaching Sessions completed by ASPIRE User Manual Yes By Evaluator Yes Yes Yes Yes Yes Yes Yes 95 different Managers for teams, departments, call center etc. Coaching Objectives Computes number of Coaching Objectives completed for individuals, teams, departments, call center etc. Yes Yes Yes League Tables The League Tables are accessed from the Reports menu in the Explorer Bar on the left hand side of the screen. Reports Fig. 1 Note: The report will only output data from evaluations belonging to users of Teams to whom the currently logged on user manages. League Tables can be generated in the following formats: Completed Evaluations for all Users Produces a list of all evaluations within the specified dates, by Score descending: So the highest score will be at the top of the list and the lowest score at the bottom. Average scores for every User Produces a list of average scores for all users. So if an agent has had five evaluations within the specified period, they will appear once in the table showing the average score of the five evaluations. 96 ASPIRE User Manual Average scores for every Team Produces a list all Teams, with the averaged scores of all member users. Standard Select the Standard for the evaluations you wish to include in the report by clicking the Browse button in the Standard box and selecting from the list. This is compulsory. Contact Type Select the Contact Type for the evaluations you wish to include in the report by clicking the Browse button in the Contact Type box and selecting from the Contact Type Screen. Remember, Contact Types can be nested so if you select a „parent type‟, the report will include evaluations that have a contact type that is a child of the select type. Selecting a Contact Type is optional. Click on OK to preview the report. Reports Fig.2 ASPIRE User Manual 97 Training Needs Analysis This report analyses the performance of an individual, team or organizational unit at definition/question level. Reports Fig.3 Select the Standard for the evaluations you wish to include in the report by clicking the Browse button in the Standard box and selecting from the list. This is compulsory. Select the Contact Type for the evaluations you wish to include in the report by clicking the Browse button in the Contact Type box and selecting from the Contact Type Screen. Remember, Contact Types can be nested so if you select a „parent type‟, the report will include evaluations that have a contact type that is a child of the select type. Selecting a Contact Type is optional. Finally, select a date range. For example, it could be the previous month, a three-month period for use in a quarterly Performance Development Review (PDR) or a 12-month period for an annual appraisal. ASPIRE User Manual 99 Reports Fig.4 Headline Scores Tracking The Headline Scores Tracking report shows a graphical representation of an Organizational Unit, Team or User‟s performance over a specified period of time. Reports Fig.5 You can select either to analyze the performance of all users that the currently logged on user manages or specify the Unit, Team or User by clicking the Browse button. Select the Standard for the evaluations you wish to include in the report by clicking the Browse button in the Standard box and selecting from the list. This is compulsory. Select the Contact Type for the evaluations you wish to include in the report by clicking the Browse button in the Contact Type box and selecting from the Contact Type Screen. Remember, Contact Types can be 100 ASPIRE User Manual nested so if you select a „parent type‟, the report will include evaluations that have a contact type that is a child of the select type. Selecting a Contact Type is optional. Finally, select a date range and click OK to preview the report. Reports Fig.6 ASPIRE User Manual 101 Evaluations Tracking This report is a summary of all evaluations completed by an evaluator over a specified period of time. It can be used to analyze the average overall score of a Team or Unit and will also be useful in highlighting evaluation inconsistencies amongst Evaluators. The Evaluations Tracking report is accessed from the Reports menu in the Explorer Bar on the left hand side of the screen. Reports Fig.7 You can select either to analyze the average overall scores filtered by Evaluator or Unit/Team. To filter by Evaluator: Select the Evaluator by checking the appropriate box and clicking the Browse button. Enter their last name and click on „Search‟ to produce matching results. You can also enter part of the last name to produce more matches (e.g. entering „w‟ will return all users whose last name starts with the letter „w‟). Leaving the search criteria blank will return all users. Select the Evaluator and click the „OK‟ button. To filter by Unit/Team: Select the Unit/Team by checking the appropriate box and clicking the Browse button. From the organization structure select the Unit/Team and click the „OK‟ button. Select the Standard by clicking the Browse button. If no Standard is selected from the drop down menu all evaluations from all standards will be included in the report. This is optional. ASPIRE User Manual 103 Select a Contact Type If no contact type is selected from the drop down menu all contact types will be included in the report. This is optional. Finally, a date and grouping option must be selected. Once a grouping option has been selected the report will display data from the previous 12 weeks, months or years up to and including the selected date. Select OK to preview the report. Reports Fig.8 When selecting by Evaluator the average score is the average overall score for each team within each period. When selecting by Unit/Team the average score is the average of the overall score for evaluations completed by each evaluator within each period Note: The report will only output data from evaluations completed by users belonging to Units/Teams to whom the currently logged on user manages. 104 ASPIRE User Manual Definitions Tracking This report is a summary of evaluations completed for a user, team or organizational unit over a specified period of time. The report can be used to drill down and track the performance of a user team or organizational unit at definition level. The Definitions Tracking Analysis report is accessed from the Reports menu in the Explorer Bar on the left hand side of the screen. Reports Fig.9 Select the Unit, Team or User by clicking the Browse button and selecting from the organization tree. Click OK Select the Standard for the evaluations you wish to analyze by clicking the Browse button. Select a Contact Type If no contact type is selected from the drop down menu all contact types will be included in the report. This is optional. Finally, a date and grouping option must be selected. Once a grouping option has been selected the report will display data from the previous 12 weeks, months years or Evaluations (Evaluations can only be selected as a grouping order in the case of a user being selected over a Team or Unit) Select OK to preview the report. ASPIRE User Manual 105 Reports Fig.10 Note: The report will only output data from evaluations completed by users belonging to Units/Teams to whom the currently logged on user manages. Track Changes This report is a list of changes made to all evaluations within a given period after they have been saved for the 1st time. The Track Changes Report is accessed from the Reports menu in the Explorer Bar on the left hand side of the screen. Reports Fig.11 106 ASPIRE User Manual Select the Unit, Team or User by clicking the Browse button and selecting from the organization tree. Select the Standard or leave blank to view all Standards. Finally select a date range and click OK to view the report. Reports Fig.12 Note: This report can also be viewed from within the evaluation form. ASPIRE User Manual 107 Evaluator Skills The report is a summary of evaluations completed by a user with Evaluator permissions for a given standard over a specified period of time. The report can be used to drill down and track the consistency of Evaluator understanding at definition level and is useful in highlighting evaluation inconsistencies amongst Evaluators. The Evaluator Skills Analysis report is accessed from the Reports menu in the Explorer Bar on the left hand side of the screen. Reports Fig.13 Select the Evaluator or Evaluators by clicking the add button. Enter their last name and click on „Search‟ to produce matching results. You can also enter part of the last name to produce more matches (e.g. entering „w‟ will return all users whose last name starts with the letter „w‟). Leaving the search criteria blank will return all users. Select the Evaluator and click the „OK‟ button. To add more than 1 evaluator at the same time hold down the shift key to select continuous Evaluators or hold the ctrl key to select intermittent Evaluators. Up to a maximum of 12 Evaluators can be displayed on any one report. ASPIRE User Manual 109 Select the Standard for the evaluations you wish to include in the report by clicking the Browse button in the Standard box and selecting from the list. This is compulsory. Select a Contact Type. If no contact type is selected from the drop down menu all contact types will be included in the report. This is optional. Finally, select a date range. Select OK to preview the report. Reports Fig.14 Note: The report will only output data from evaluations completed by users belonging to Units/Teams to whom the currently logged on user manages. 110 ASPIRE User Manual Evaluator Productivity The report is a summary of evaluations completed by a user with Evaluator permissions over a specified period of time. The Evaluator Productivity report is accessed from the Reports menu in the Explorer Bar on the left hand side of the screen. Reports Fig.15 Select the Evaluator by clicking the browse button. Enter their last name and click on „Search‟ to produce matching results. You can also enter part of the last name to produce more matches (e.g. entering „w‟ will return all users whose last name starts with the letter „w‟). Leaving the search criteria blank will return all users. Alternatively, select a Unit or Team. Select the Evaluator and click the „OK‟ button. Select the Standard for the evaluations you wish to include in the report by clicking the Browse button in the Standard box and selecting from the list. . If no standard is selected all standards will be included in the report. Select a Contact Type. If no contact type is selected from the drop down menu all contact types will be included in the report. This is optional. Finally, select a date range. ASPIRE User Manual 111 Select OK to preview the report. Reports Fig.16 Note: The report will only output data from evaluations completed by users belonging to Units/Teams to whom the currently logged on user manages. Coaching Productivity The report is a summary of Coaching Sessions completed by a user with coaching permissions over a specified period of time. The report is accessed from the Reports menu in the Explorer Bar on the left hand side of the screen. Reports Fig.17 Select the Coach by clicking the browse button. Enter their last name and click on „Search‟ to produce matching results. You can also enter part of the last name to produce more matches (e.g. entering „w‟ will return all users whose last name starts with the letter „w‟). Leaving the search criteria blank will return all users. 112 ASPIRE User Manual Alternatively, select a Unit or Team. Select a date range. Select OK to preview the report. Reports Fig.18 Note: The report will only output data from Coaching Session completed by users belonging to Units/Teams to whom the currently logged on user manages. Coaching Objectives The report is a summary of Coaching Objectives planned and completed over a specified period of time. The report is accessed from the Reports menu in the Explorer Bar on the left hand side of the screen. ASPIRE User Manual 113 Reports Fig.19 Select the Unit or Team by clicking the browse button. Select a date range. Select OK to preview the report. Reports Fig.20 Note: The report will only output data from Coaching Session completed by users belonging to Units/Teams to whom the currently logged on user manages. 114 ASPIRE User Manual Exporting Data When previewing any report, you have the option to export the data to the following formats: Adobe Acrobat (.PDF) Microsoft Excel (.xls) Microsoft Word (.doc) Rich Text Format (.rtf) Exporting Data Fig.1 Click the Export Report button from the menu. Exporting Data Fig.2 Browse to the folder where you would like the report saved and provide a file name. Then select the required format from the Save as type drop down box. ASPIRE User Manual 115 Seven Step Guide to Implementing a Quality Monitoring Programme The following Guide has been prepared by QUALTRAK to help you implement a successful quality monitoring program using. The following guidelines will take you through the process of implementing the program in easy step by step stages. The objectives are to help you set up a program that: Aligns the quality programme with your business objectives Gains the support and commitment of the employees Creates continuous development for the staff Makes monitoring and coaching enjoyable and rewarding Why implement a Quality Monitoring program? With manpower costs being the biggest cost in call centers, typically over 60%, optimizing the performance of the advisors is a critical factor in managing a successful call center. Many call centers are recognized and managed as „profit centers‟. Advisor performance impacts in so many areas. For example, by creating customer loyalty leading to reduced customer churn. Customers buy from people, and if the experience is enjoyable and satisfying, that customer will not only remain loyal to the Brand, but will also tell others of his experience, thus leading to more customers. Loyal customers will also return and buy more. They are also more open to being up and cross sold. Good advisor performance makes a positive impact in minimizing repeat calls by being committed to resolve the customer‟s need first time. Also, high performing advisors can achieve the same outcomes in a shorter talk time by applying good listening, questioning and rapport building skills, to name but a few. Step One Communication Step Two Develop the call handling standard Step Three Gain commitment to the standard Step Four Consistent evaluation Step Five Feeding back the evaluation results Step Six Coaching Step Seven Using the reports ASPIRE User Manual 117 Step One: Communication If you are introducing Quality Monitoring for the first time in your call centre, it is important to communicate your plans openly and positively in order to avoid unnecessary fears such as „big brother‟. You want to use Quality Monitoring in a positive way and therefore communicate your vision, how you plan to do it, why this is important and the benefits for the company, the customers and the employees. If the staff misinterprets your motives, this can lead to fear, negative rumours etc. It will pay dividends by communicating effectively from the beginning. Team leaders are crucial in the success of a quality program. They are the role models and key influencers in raising the performance of their team. They need to be convinced of the benefits and the importance of their personal contribution. ASPIRE User Manual 119 Step Two: Develop the Call Handling Standard This is the cornerstone of the quality program and should be undertaken with a great deal of care. The standard will be the basis by which advisors will be monitored. We recommend that you consider using a team to develop the standard comprising of both advisors and team leaders. Select members who are recognized as being role models. Make this team responsible for developing and owning the standard. A good process is for the team (about 8-10 is an effective size) to spend a day away from the phones envisioning what an excellent call handling experience looks like. They should select a facilitator who will guide the team in achieving their aim. Start off the day by brain storming what an ideal call will include. The facilitator should remind the team that they should come up with short statements or words that describe what happens during the call i.e. the call structure or process, and also what are the positive behaviours (soft skills) that lead to a memorable customer experience. The statements or words will need to be sorted into process and behaviours. Arrange the process statements into some kind of logical order. For example: Call opening Gathering information Confirming understanding Proposing a solution Gaining commitment Overcoming objections Closing the call An excellent call is not based only on what is said but HOW it is said i.e. the behaviours used. This is possibly the more difficult aspect of good call handling, but when the right behaviours are used at the right time, they will make a lasting impression on the customer and lead to a better outcome. When deciding on which behaviours to use, the team should think about the company‟s stated Brand Values? “We are easy to do business with” needs to translate into behaviours which support this Value e.g. using simple and clear language and no jargon. To assist your team in selecting the right behaviours, we have included what QUALTRAK have identified as the core behaviors for call handling excellence. Feel free to use these if you find them helpful. Soft Skill Behaviours From the brainstormed list, place the statements into family groups, remove any duplication and convert the final core into measurable statements (definitions). Each statement should be based on a single measurable factor i.e. avoid multiple factor statements because this will make evaluation difficult. For example: “Is polite and uses clear language” during a call an agent can score positively for „polite‟ but negatively for „using clear language‟. Now place the statements (definitions) into the two groups: Process and Behaviors (impression). Ask the team to decide which is more important – What you say (process) or how you say it (impression). Ask them to divide 200 points between the two. In most cases the team will conclude that both are equally important. Now ask the team to decide how to distribute the allocated points for each group between the various questions. These then become the weightings which are used in. ASPIRE User Manual 121 To assist your team in selecting the right behaviors, we have included below families of core behaviors. Within each family you can define a number of core behaviours. For example, included in the 'Use of voice' family you can include: Sounds enthusiastic, Sounds friendly, etc. You need to identify the core behaviors which define call handling excellence. Examples of Call Handling Standards Note of warning! Remember the most important thing is not coming up with the right list but ensuring that the evaluation is based on excellence i.e. awarding a YES (or a 5) only if the skill or behavior has been applied to an excellence level throughout the call. Failure to adhere to this principle will lead to highly inflated scores which are not merited. Scoring mode The scoring mode you use will dictate how your questions are worded. For example, you couldn‟t score the question “How well did the agent put the customer at ease” with a Yes or No. This would be more suited to a Sliding Scale. 122 ASPIRE User Manual Step Three: Gaining Commitment Share the draft call handling standard with all employees and ask them if they feel anything has been left out or something is not clear. The team should collect their input formally and review at their next meeting. All employees should be included in the consultation stage. Team leaders, call centre managers, training managers, marketing managers etc. At the follow up meeting, the agenda is to review the various suggestions and agree any modifications to the draft. The next agenda item is to produce Interpretations/notes for each definition. (Interpretations provide extra detail to help the evaluator score a particular definition) For each definition get the team to agree what they will be looking for in order to score positive i.e. what evidence. Do this for every definition. Next, test the standard by collectively scoring a number of calls. In particular test the interpretation notes. During this stage the interpretation notes will expand and become more useful. The Interpretation Notes are entered against each definition on the Evaluation standard. Evaluators should be trained to refer to the Interpretation Notes and not to apply their own interpretation to the questions. This ensures that all the evaluators „sing from the same hymn sheet‟! Failure to do this leads to inconsistency in scoring by different evaluators. Your call centre may have more than one department e.g. telemarketing and customer service. If that‟s the case we recommend that it is best to develop the standards together in order to make sure they are consistent with each other. This requires the team to include representatives from all the departments. Working together is particularly important to ensure that the Standards define a common customer experience. We recommend that this team is empowered by the company to be the custodians of the standard and be responsible for agreeing what goes into the Interpretation Notes. You are now ready to transfer the standard(s) and Interpretation Notes into the Evaluation standard. ASPIRE User Manual 123 Step Four: Consistent Evaluation Unless calls are evaluated correctly and consistently, the quality monitoring program could result in inappropriate communication of quality standards. This is a common weakness in many call centers. With weak evaluation skills, the quality scores may be unjustifiably inflated. For example, it is very easy to end up with scores up in the high 80s or 90s. This gives an optimistic picture of the agents‟ performance. This may be justified but all too often high scores are due to weak evaluation i.e. allowing „excellence‟ to be diluted. The implication to the company is highly detrimental. For example, by communicating high scores, the employees and team leaders have a false sense of their performance and it is difficult to achieve organizational stretch. It means that the company has made the investment in quality monitoring but is not benefiting fully by presenting a false picture to the employees. Many companies end up with Customer Satisfaction survey results that are significantly lower than the quality monitoring results. It is important that quality monitoring should be a predictive indicator of customer satisfaction We strongly recommend that before the start of the quality program you ensure that adequate training has been given to the evaluators. The training should ideally be in small groups (up to 8 members) and facilitated by two people (perhaps who came from the original team that developed the standard) who act as „reference‟ facilitators in training all evaluators. The facilitators will reinforce the importance of the evaluation being based on excellence i.e. awarding a YES (or a 5) only if the skill or behavior has been applied to an excellence level throughout the call. It is important to establish the principle of using only the „Interpretation Notes‟ as interpretation on how to evaluate a call. The process is similar to calibrating a measuring instrument such as a Voltmeter against a „master Voltmeter‟. Once the evaluators can demonstrate consistency of scoring they are ready to evaluate their advisors‟ calls. Occasionally (more frequently in the early days) an evaluator will come across a call that requires additional guidelines in scoring certain questions. The evaluator should be made responsible to use their best judgment on that occasion but to bring up the call at the next calibration (sometimes called levelling) meeting. It should then be the consensus of the meeting which decides whether an additional guideline should be added to the Interpretation Note. This discipline will ensure that everyone is evaluating using common rules. Spending a couple of hours every two months in calibration meetings is a sound investment. ASPIRE User Manual 125 Step Five: Feeding back the evaluation results Before we consider how results should be fed back to the advisors, let us consider the question about how many calls should be evaluated and the frequency. When a call centre has an effective quality program, you find that the employees and team leaders are very positive and look forward to their regular coaching sessions. It is therefore important that you should consider realistically how much time can be allocated to evaluating calls and giving feedback (coaching). A mistake that is easily made is to ask team leaders to evaluate many calls but then they don‟t have any time to do justice to the feedback sessions. After all performance improvement doesn‟t come about through evaluating calls but how well the data is used to motivate and inspire the advisor. It is sad to come across instances where the team leaders are targeted to evaluate X calls per month. They achieve this because their bonus might be linked to this target but when you examine the quality of the feedback it is often very limiting in its time and impact. Calls are evaluated to produce a record of the call center and team‟s performance. Calls are also evaluated to provide some evidence from which the advisor, with the support of their team leader, identify for themselves 2 or 3 improvement goals to work on. It is our experience that 2 calls are normally sufficient to use for an effective coaching session from which will come the advisor‟s self-selected improvement goals. Ideally the feedback sessions should last about 45 minutes. This is sufficient time to review a couple of calls and guide the advisor in identifying their improvement goals. Once the evaluator becomes competent in evaluating calls, they will typically take about 20 minutes to evaluate a 3-5 minute call, including bookmark/comments against a number of definitions. If you accept these time requirements, you can decide the frequency of the coaching sessions. Do the usual call center pressures and resources allow for a monthly session or bi-monthly? It is better to under promise and over deliver! You can always begin with less frequent coaching and increase the frequency once you have a good understanding of the resource requirements for monitoring and coaching. ASPIRE User Manual 127 Step Six: Coaching The application includes a Coaching module to help you manage the feedback process. Use this to capture the agreements and summaries of the coaching session. Start the coaching session by reviewing the previous actions and if any have not been completed you can decide whether the action is still relevant in which case it can be rolled over into the current coaching session. Then you can review the calls. Good coaching practice requires the coach to helping the coachee to identify for themselves their desired goals. It is much more effective to let the advisor discover these for themselves. A good technique is to follow these steps: Play the call without revealing the score. Ask the advisor for their opinion of the call Start off with what they did well and give praise This can be followed by asking for improvement opportunities Return to more praise Review the evaluation and the score Repeat possibly with a second call Ask the advisor to identify 2 or 3 improvement goals Agree the associated actions and required support Capture all these on the Coaching form Print a copy and both sign as a commitment to each other In some cases call centre managers may decide that good performers don‟t require coaching as often as poor performers. This can have a detrimental effect by withholding the satisfaction of receiving praise. Lack of feedback is often cited as a key reason why good people leave an organization! The quality of the coaching will determine the true value of the quality monitoring program and the associated investment. Monitoring on its own is not sufficient. It needs to be used to motivate and inspire the employee to want to rise to higher levels of performance. That requires excellent coaching. We have included some guide notes of what constitutes an excellent coaching experience. The Excellent Coaching Experience developed by QUALTRAK. You can use the list to create your own vision of coaching excellence. For example: 1. Rapport a) Adapts vocal tones (pace and volume) to coachee b) Uses appropriate language for coachee (level of technicality, vocabulary) c) Demonstrates empathy d) Maintains open body language e) Uses non-verbal encouragements, e.g. smiles, nods We hope that you find these helpful and will provide you with the framework for training the team leaders in delivering excellent coaching. ASPIRE User Manual 129 Step Seven: Using the Reports Use the reports to identify individual and group training needs and to set targets. Consider how you would like to use performance data. Some call centers place an emphasis on league tables and highlighting the „Top performer of the month‟. This can have a negative effect because there can only be one winner by taking this approach. An alternative approach is to stress the „continuous improvement‟ philosophy. That way everyone can be a winner irrespective of their starting point. Another sound principle is consistency. You want to encourage advisors and team leaders to concentrate on sustaining the improvements made. The Definition Analysis Report can be used to identify the strengths and weaknesses of the call centre by analyzing the data over several months. The results can be used to agree which definitions (skills) the call centre will concentrate on during the next period. It is good practice for the manager and team leaders to agree each quarter the 2 or 3 improvement goals based on the analysis of each definition. It is a good idea to start by focusing on the „quick wins‟ i.e. the easy skills that can be raised to a high level of consistency over a short period of time. This will lead to encouragement and a satisfaction that will motivate the team to go forward and work on more complex skills. In addressing some of the skills which show being applicable to most employees, the need can be met by organizing call centre wide training courses. In other cases, the best solution is to rely on addressing the needs during coaching sessions. By adopting this approach you end up creating a bottom up and top down focus on performance improvement i.e. team leaders working on a one to one with their advisors and the call centre manager working with their team leaders to improving the overall performance. Another way to use the reporting capability is during annual appraisals or quarterly reviews (sometime called PDRs). A report can be produced analyzing the strengths and weaknesses over the appropriate timeframe and used as part of the appraisal/review. ASPIRE User Manual 131 Appendix Soft Skill Behaviors 1. Use of voice 2. Use of language 3. Is Focused 4. Listening 5. Building Rapport 6. Going the extra mile The Excellent Coaching Experience Interpersonal skills 1. Rapport 2. Questioning 3. Listening 4. Positive and motivational approach 5. Integrity 6. Coachee focus 7. Time management Structure of session 1. Preparation / personal organization 2. Introduction 3. Review of Previous Objectives 4. Assessing current performance (recorded calls) 5. Setting objectives ASPIRE User Manual 133 6. Records outcomes 7. Follow-up 8. Anything else? 9. Close Examples of Call Handling Standards You may wish to use the following examples as models and adapt these to meet your requirements. 134 ASPIRE User Manual Example 1 1. Opened call appropriately a) Used appropriate greeting i.e. “Good morning / afternoon” b) Introduced company name c) Offered to help d) Gave own name (in early part of call) 2. Used questioning to obtain information a) Used appropriate questions (open, probing, closed etc.) to stimulate flow of conversation b) Identified purpose of call and customer‟s needs 3. Closed call positively a) Asked if any further help required b) Positively thanked customer for calling c) Mentioned company name 4. Sounded enthusiastic and positive a) By varying pitch and pace of voice b) By using positive words and phrases c) By showing genuine interest in the call 5. Spoke clearly and gave concise information a) Spoke clearly b) Did not rush caller c) Sounded confident, avoided hesitation (the way the information is given) d) Avoided unnecessary jargon without explanation e) Did not overload caller with irrelevant information 6. Controlled the call a) Took control of the call from start to finish b) Guided customer towards a booking, if applicable c) Identified when caller digressed and used skilled questioning to return them to the point 7. Sounded knowledgeable and informed a) Was quickly able to locate and communicate information b) Competently dealt with questions other than objections c) Appeared familiar with company‟s products & services 8. Listened effectively a) Used listening noises to show attention to caller b) Did not interrupt caller c) Accurately grasped caller‟s needs d) Did not ask caller to repeat information already given 9. Displayed empathy/Built rapport with customer a) Avoided long silences b) Used customer‟s name during the call but did not overuse c) Did not sound patronizing d) Attempted to build rapport with customer 10. Gave an excellent impression of (Company) ASPIRE User Manual 135 Example 2 Process 1. Opened call appropriately a) Used appropriate greeting, i.e. “Good morning/afternoon” b) Introduced company name c) Offered to help d) Gave own name (in early part of call) Notes: This section needs to be agreed with the client. For competitor Benchmark use discretion. All information given in the process side of the call needs to be clearly heard, if not audible score as NO. 2. If put on hold with agreement and explanation a) Explained reason for hold/transfer and obtained caller‟s agreement b) Offered to call back if necessary c) Periodically returned to customer while on hold to update d) Thanked the customer for holding 3. Used questioning to obtain information a) Used appropriate questions (open, probing, closed etc.) to stimulate flow of conversation b) Identified purpose of call and customer‟s needs Notes: Did the agent use assumptive phrases? Did the agent gather all the info he needed to carry out the enquiry? E.g. number of passengers, number of seats, adults or children, preference of airline, times etc. 4. Established customer details a) xxx 5. Established product details a) xxx 6. Requested Media Source a) Asked customer where they heard about the company 7. Matched customer‟s requirements a) Uses features and benefits to recommend most appropriate product for the customer Notes: e.g. Business class features to suit a business customer: flexible ticket, fast track check-in and the benefits to the customer of these features 8. Present price confidently a) Did not lead up to price with negative words and phrases b) Quoted price without hesitation c) Advised caller of what‟s included in the price Notes: “Oh, it‟s coming out a little bit expensive…..” See above! e.g. Airport tax, VAT, food, insurance, this that and the other 9. Handled objections positively (if applicable) a) Acknowledged objection b) Gave a positive response to objection i.e. quality product etc. c) Offered suitable alternatives/suggestions where possible d) Checked caller‟s satisfaction (unless caller indicated they are satisfied) 136 ASPIRE User Manual Notes: Agent needs to express that they understand the customer; they can hear what the customer is saying 10. Recognized the opportunity to close the sale a) Responds to customer‟s buying signal Notes: Response should be quick! If slow consider scoring N at 11 b) 11. Gained Customer commitment a) Asked for the booking/sale b) Asked positively for the booking/sale Notes: In response to buying signal. With confidence. Hesitation is specific to giving the price, as opposed to a slight communication „er‟. Fear of the price gets a „no‟. 12. Recognized opportunities to cross/up sell a) Recognized opportunities during the call when another product/service may be appropriate b) Positively offered cross-sell product Notes: All agents should offer extras even if a booking or sale is not made. 13. Offered alternatives/solutions a) If original request unavailable, explained why b) Sought to offer suitable alternative or solution c) Convey benefit of what you‟ve offered 14. Summarized outcome of call a) Provided booking reference b) Summarized relevant details/agree next steps Notes: Some summary should be made even if the call has not resulted in a booking. Some encouragement for the customer to return. 15. Closed call positively a) Asked if any further help required b) Positively thanked customer for calling c) Mentioned company name Notes: Asks positively. More than „Thanks then‟ Impression (Behaviors) 16. Sounded enthusiastic and positive a) By varying pitch and pace of voice b) By using positive words and phrases c) By showing genuine interest in the call. Notes: The key word is genuine 17. Sounded friendly a) Used warm, welcoming tone of voice b) Was willing to help c) Was polite ASPIRE User Manual 137 Notes: Throughout 18. Spoke clearly and gave concise information a) Spoke clearly b) Did not rush caller c) Sounded confident, avoided hesitation (the way the information is given) d) Avoided unnecessary jargon without explanation e) Did not overload caller with irrelevant information Notes: Can you hear what is said? Think carefully whether the word would be understood by a real customer 19. Controlled the call a) Took control of the call from start to finish b) Guided customer towards a booking, if applicable c) Identified when caller digressed and used skilled questioning to return them to the point Notes: Proactively guided to the booking 20. Sounded knowledgeable and informed a) Was quickly able to locate and communicate information b) Competently dealt with questions other than objections (must be proactive) c) Appeared familiar with company‟s products & services Notes: If there are silences before giving information, this should be scored down. 21. Listened effectively a) Used listening noises to show attention to the caller b) Did not interrupt the caller c) Accurately grasped caller‟s needs d) Did not ask caller to repeat information already given 22. Displayed empathy/Built rapport with the customer a) Avoided long silences b) Used customer‟s name during the call but did not overuse c) Did not sound patronizing d) Attempted to build rapport with customer 23. Overall, gave an exceptional impression of <xxx> Notes: And we mean exceptional!!!! Example 3 1. Use of voice a) Sounds enthusiastic Lots of energy in the voice with a varied tone b) Sounds friendly Warm and natural tone c) Sounds confident Sounds certain, maintains volume and avoids hesitation 138 ASPIRE User Manual d) Speaks clearly Articulates clearly. No mumbling and pace not too fast. 2. Use of language a) Is polite For example uses „please‟ and „thank you‟. Sincerely apologizes when necessary. Is not rude or patronizing. b) Uses positive words and phrases Such as „I will‟, „Certainly‟, „I can‟ etc. c) Avoids negative words and phrases Such as „Unfortunately‟, „Can‟t‟, „No problem‟, „Bear with me‟, „I‟m afraid‟ etc. Also avoids that imply uncertainty. d) Uses clear language Uses simple language, with easy to understand explanations. Avoids jargon, unless explained. Uses short sentences and plain English. 3. Is Focused a) Uses questioning skills Uses questions at the right time to gain the necessary information b) Leads the conversation Purposefully leads the customer through the call. Structures the call and does not jump from one thing to another. Re-directs the customer back to the point, if they wander off track. c) Gives only relevant information d) Keeps the conversation flowing by avoiding unnecessary silences Keeps the customer informed at all times of what they are doing. Avoids any silences of more than 6/7 seconds. e) Takes personal responsibility for the call Gives a „will do‟ feel to the call 4. Listening a) Confirms understanding of the customer‟s needs Reiterates key points to give the customer confidence that their needs are understood b) Captures information first time without asking the customer to repeat When information is given clearly, it is captured first time. If the customer is unclear, can ask for clarification c) Uses verbal acknowledgements Varied, responsive, appropriate and timely d) Allows the customer to speak without interruption Does not interrupt or talk over the customer 5. Building Rapport a) Shows genuine interest in the customer b) Adapts to the customer Responds to the customer‟s style and mood by tailoring language, pace and tone. c) Uses the customer‟s name Should be used at least once during the call 6. Going the extra mile (2) a) Creates a positive and memorable experience Was the call a pleasurable experience and would the customer recommend the advisor/company to others? b) Increases the customer‟s awareness Did the employee increase the customer‟s awareness of the company‟s products/services in a positive manner and at the appropriate time? Should sound genuine and not scripted. ASPIRE User Manual 139 Example 4 Process 1. Opened call appropriately a) Thanked customer for calling b) Introduced company name c) Offered to help d) Gave own name (in early part of call) 2. If put on hold with agreement and explanation a) Explained reason for hold / transfer and obtained caller‟s agreement b) Offered to call back if necessary c) Periodically returned to customer while on hold to update d) Thanked the customer for holding 3. Used questioning to obtain information a) Used appropriate questions (open, probing, closed etc.) to stimulate flow of conversation b) Identified purpose of call and customer‟s needs 4. Established customer details a) Customer Number b) Agent should ask customer to confirm their name and address as a security check 5. Matched customer‟s requirements a) Agent responds to customers requirements 6. Handled objections positively (if applicable) a) Acknowledged objection b) Gave a positive response to objection i.e. quality product etc. c) Offered suitable alternatives / suggestions where possible d) Checked caller‟s satisfaction (unless caller indicates they are satisfied) 7. Offered alternatives / solutions a) If original request unavailable, explained why b) Sought to offer suitable alternative or solution 8. Summarized outcome of call a) Summarized main elements of call b) Agree actions and set expectations 9. Closed call positively a) Asked if any further help required b) Positively thanked customer for calling c) Mentioned company name Impression 10. Sounded enthusiastic and positive a) By varying pitch and pace of voice b) By using positive words and phrases c) By showing genuine interest in the call 11. Sounded friendly a) Used warm, welcoming tone of voice 140 ASPIRE User Manual b) Was willing to help c) Was polite 12. Spoke clearly and gave concise information a) Spoke clearly b) Did not rush caller c) Sounded confident, avoided hesitation (the way the information is given) d) Avoided unnecessary jargon without explanation e) Did not overload caller with irrelevant information 13. Controlled the call a) Took control of the call from start to finish b) Identified when caller digressed and used skilled questioning to return them to the point 14. Sounded knowledgeable and informed a) Was quickly able to locate and communicate information b) Competently dealt with questions other than objections c) Appeared familiar with company‟s products & services 15. Listened effectively a) Used listening noises to show attention to caller b) Did not interrupt caller c) Accurately grasped caller‟s needs d) Did not ask caller to repeat information already given 16. Displayed empathy/Built rapport with customer a) Avoided long silences b) Used customer‟s name during the call but did not overuse c) Did not sound patronizing d) Attempted to build rapport with customer 17. Overall, gave an exceptional impression of xxxx Example 5 1. Opened call appropriately a) Used appropriate greeting i.e. “Good morning / afternoon” b) Introduced company name c) Offered to help d) Gave own name (in early part of call) 2. Used questioning to obtain information a) Used appropriate questions (open, probing, closed etc.) to stimulate flow of conversation b) Identified purpose of call and customer‟s needs 3. Matched customer‟s requirements a) Uses features and benefits to recommend most appropriate product for the customer 4. Presented price confidently a) Did not lead up to price with negative words and phrases b) Quoted price without hesitation c) Advised caller of what‟s included in price ASPIRE User Manual 141 5. Recognised opportunities to close the sale a) Responds to customer‟s buying signals b) Ask for the booking/Sale 6. Recognised opportunities to cross / up sell a) Recognised opportunities during call where another product / service may be appropriate b) Positively offered cross sell product c) Offered alternatives if original request not available 7. Sounded enthusiastic and positive a) By varying pitch and pace of voice b) By using positive words and phrases c) By showing genuine interest in the call 8. Spoke clearly and gave concise information a) Spoke clearly b) Did not rush or interrupt caller c) Sounded confident, avoided hesitation (the way the information is given) d) Avoided unnecessary jargon without explanation e) Did not overload caller with irrelevant information 9. Controlled the call a) Took control of the call from start to finish b) Guided customer towards a booking, if applicable c) Identified when caller digressed and used skilled questioning to return them to the point 10. Displayed empathy/Built rapport with customer a) Avoided long silences b) Used customer‟s name during the call but did not overuse c) Did not sound patronising d) Attempted to build rapport with customer 142 ASPIRE User Manual