1
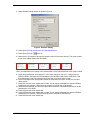
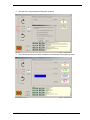
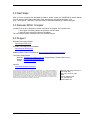
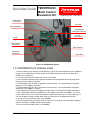
11. Select Emulator dialog options as shown in figure 4.
Figure 4: Emulator Setting
12. Select [menu] Debug>>Download>>All Download Modules
13. Select [menu] Debug>>
Reset Go
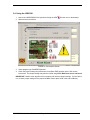
14. Observe the LCD sequence through the splash screens for the demo start-up. The motor is ready
to run when display reaches the last screen.
Renesas
Technlgy
YMCRPR8C
6-Step
Back-EMF
APPL
Carrier
12kHz
C: nnnn
M: 0000
Note: nnnn depends on the setting of the potentiometer, which sets the desired motor speed in RPM.
15. Adjust the potentiometer and watch the C: nnnn value change on the LCD. It will go from the
Minimum RPM to the Maximum RPM available in the Hall demo code (500 to 3000 RPM). Dial
the potentiometer until LCD reads the speed at which you wish the motor to start.
16. The three switches SW1 through SW3 control the motor demo as shown in table 2 in the HALL
demo section.
17. Press SW1 and the motor should start to rotate. The M: display will display the speed in RPM as
measured by the software. RPM should be negative to indicate the CCW direction.
18. Rotate the potentiometer and the motor speed should track the commanded speed as set by the
potentiometer, ±100 RPM.
19. Press SW2 and the motor should stop.
20. Press SW3 and the motor should start to rotate. The M: display will display the speed in RPM as
measured by the software. RPM should be positive to indicate the CW direction.
21. Press SW2 and the motor should stop.
YMCRPR8C25 Quick Start Guide, rev. 1.1 Page 5 of 9