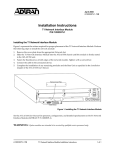
1
ATLAS 550
System Manual
61200305L1-1F
October 2002
1200305L1
ATLAS 550 Chassis - AC Power (Domestic Version)
1200306L1
ATLAS 550 Chassis - AC Power (International Version)
1200550L1
ATLAS 550 Chassis - DC Power (Domestic Version)
Trademarks
Any brand names and product names included in this manual are trademarks, registered trademarks, or
trade names of their respective holders.
To the Holder of the Manual
The contents of this manual are current as of the date of publication. ADTRAN reserves the right to change
the contents without prior notice.
In no event will ADTRAN be liable for any special, incidental, or consequential damages or for
commercial losses even if ADTRAN has been advised thereof as a result of issue of this publication.
901 Explorer Boulevard
P.O. Box 140000
Huntsville, AL 35814-4000
Phone: (256) 963-8000
©2002 ADTRAN, Inc.
All Rights Reserved.
Printed in U.S.A.
Running H/F 1 (doc title)
© 2002 ADTRAN, Inc.
About this Manual
This manual provides a complete description of the ATLAS 550 system and system software. The purpose
of this manual is to provide the technician, system administrator, and manager with general and specific
information related to the planning, installation, operation, and maintenance of the ATLAS 550. This
manual is arranged so that needed information can be quickly and easily found. The following is an
overview of the contents.
Section 1
System Description . . . . . . . . . . . . . . . . . . . . . . . . . . . . . . . . . . . . . . . . 15
Provides managers with an overview of the ATLAS 550 system.
Section 2
Engineering Guidelines . . . . . . . . . . . . . . . . . . . . . . . . . . . . . . . . . . . . . 23
Provides equipment dimensions, power requirements, front panel design, rear panel
design, LEDs, and at-a-glance specifications.
Section 3
Network Turnup Procedure . . . . . . . . . . . . . . . . . . . . . . . . . . . . . . . . . . 51
Provides shipment contents list, grounding instructions, mounting options, and specifics
of supplying power to the unit.
Section 4
User Interface Guide . . . . . . . . . . . . . . . . . . . . . . . . . . . . . . . . . . . . . . . 61
Provides detailed descriptions of all menu options and configuration parameters available
for the ATLAS 550.
Section 5
Detail Level Procedures. . . . . . . . . . . . . . . . . . . . . . . . . . . . . . . . . . . . 315
Provides instructions on how to perform basic unit functions such as:
Connection
Log-in
Adding/removing telnet users and changing passwords
Setting IP parameters and verifying LAN communication
Telnet
Firmware Upgrade
Saving and loading configuration files
Section 6
Configuration Guides. . . . . . . . . . . . . . . . . . . . . . . . . . . . . . . . . . . . . . 363
Provides detailed instructions for configuring the ATLAS 550 for the most common
applications.
Section 7
System Event Logging. . . . . . . . . . . . . . . . . . . . . . . . . . . . . . . . . . . . . 377
Explains the System Event Logging messages for the ATLAS 550 and provides
instructions for configuring the Event Log.
Section 8
ADTRAN Utilities . . . . . . . . . . . . . . . . . . . . . . . . . . . . . . . . . . . . . . . . . 391
Provides instructions for configuring and using the ADTRAN Utilities software programs
including Telnet, VT100, Syslog, and TFTP.
© 2002 ADTRAN, Inc.
Running H/F 1 (doc title)
Section 9
MIB . . . . . . . . . . . . . . . . . . . . . . . . . . . . . . . . . . . . . . . . . . . . . . . . . . . . 401
Provides instructions for configuring and using the ADTRAN Utilities software programs
including Telnet, VT100, Syslog, and TFTP.
Revision History
This is the 5th issue of this manual. Revisions made include the following:
•
•
•
•
•
Addition of the Octal Basic Rate ISDN (S/T Interface) Option Module and associated menus in the Dial
Plan
Addition of the DC-powered ATLAS 550 chassis
Corrected menus for the Octal BRI (U-Interface) Option Module in the Dial Plan
Changed the name of the NxT1 HSSI Option Module to the NxT1 HSSI/V.35 Option Module
Addition of the Ethernet Switch Option Module and associated menus
Running H/F 1 (doc title)
© 2002 ADTRAN, Inc.
Notes provide additional useful information.
Cautions signify information that could prevent service interruption.
Warnings provide information that could prevent damage to the equipment or
endangerment to human life.
Safety Instructions
When using your telephone equipment, please follow these basic safety precautions to reduce the risk of
fire, electrical shock, or personal injury:
1. Do not use this product near water, such as a bathtub, wash bowl, kitchen sink, laundry tub, in a
wet basement, or near a swimming pool.
2. Avoid using a telephone (other than a cordless-type) during an electrical storm. There is a remote
risk of shock from lightning.
3. Do not use the telephone to report a gas leak in the vicinity of the leak.
4. Use only the power cord, power supply, and/or batteries indicated in the manual. Do not dispose of
batteries in a fire. They may explode. Check with local codes for special disposal instructions.
Save These Important Safety Instructions
© 2002 ADTRAN, Inc.
Running H/F 1 (doc title)
Affidavit Requirements for Connection to Digital Services
•
•
•
An affidavit is required to be given to the telephone company whenever digital terminal equipment
without encoded analog content and billing protection is used to transmit digital signals containing
encoded analog content which are intended for eventual conversion into voiceband analog signals and
transmitted on the network.
The affidavit shall affirm that either no encoded analog content or billing information is being
transmitted or that the output of the device meets Part 68 encoded analog content or billing protection
specifications.
End user/customer will be responsible for filing an affidavit with the local exchange carrier when
connecting unprotected customer premise equipment (CPE) to 1.544 Mbps or subrate digital services.
Until such time as subrate digital terminal equipment is registered for voice applications, the affidavit
requirement for subrate services is waived.
Running H/F 1 (doc title)
© 2002 ADTRAN, Inc.
Affidavit for Connection of Customer Premises Equipment
to 1.544 Mbps and/or Subrate Digital Services
For the work to be performed in the certified territory of ___________________ (telco name)
State of ________________
County of ________________
I, _______________________ (name), ____________________________________ (business address),
____________________ (telephone number) being duly sworn, state:
I have responsibility for the operation and maintenance of the terminal equipment to be connected
to 1.544 Mbps and/or ________ subrate digital services. The terminal equipment to be connected
complies with Part 68 of the FCC rules except for the encoded analog content and billing protection
specifications. With respect to encoded analog content and billing protection:
( ) I attest that all operations associated with the establishment, maintenance, and adjustment of the digital
CPE with respect to analog content and encoded billing protection information continuously complies
with Part 68 of the FCC Rules and Regulations.
( ) The digital CPE does not transmit digital signals containing encoded analog content or billing
information which is intended to be decoded within the telecommunications network.
( ) The encoded analog content and billing protection is factory set and is not under the control of the
customer.
I attest that the operator(s)/maintainer(s) of the digital CPE responsible for the establishment,
maintenance, and adjustment of the encoded analog content and billing information has (have) been
trained to perform these functions by successfully having completed one of the following (check
appropriate blocks):
( ) A. A training course provided by the manufacturer/grantee of the equipment used to encode analog
signals; or
( ) B. A training course provided by the customer or authorized representative, using training materials
and instructions provided by the manufacturer/grantee of the equipment used to encode analog
signals; or
( ) C. An independent training course (e.g., trade school or technical institution) recognized by the
manufacturer/grantee of the equipment used to encode analog signals; or
( ) D. In lieu of the preceding training requirements, the operator(s)/maintainer(s) is (are) under the
control of a supervisor trained in accordance with _________ (circle one) above.
© 2002 ADTRAN, Inc.
Running H/F 1 (doc title)
I agree to provide ______________________ (telco’s name) with proper documentation to
demonstrate compliance with the information as provided in the preceding paragraph, if so
requested.
_________________________________Signature
_________________________________Title
_________________________________ Date
Transcribed and sworn to before me
This ________ day of _______________, _______
_________________________________
Notary Public
My commission expires:
_________________________________
Running H/F 1 (doc title)
© 2002 ADTRAN, Inc.
FCC regulations require that the following information be provided in this manual:
1. This equipment complies with Part 68 of FCC rules. On the back of the equipment housing is a
label showing the FCC registration number and ringer equivalence number (REN). If requested,
provide this information to the telephone company.
2. If this equipment causes harm to the telephone network, the telephone company may temporarily
discontinue service. If possible, advance notification is given; otherwise, notification is given as
soon as possible. The telephone company will advise the customer of the right to file a complaint
with the FCC.
3. The telephone company may make changes in its facilities, equipment, operations, or procedures
that could affect the proper operation of this equipment. Advance notification and the opportunity
to maintain uninterrupted service are given.
4. If experiencing difficulty with this equipment, please contact ADTRAN for repair and warranty
information. The telephone company may require this equipment to be disconnected from the
network until the problem is corrected or it is certain the equipment is not malfunctioning.
5. This unit contains no user-serviceable parts.
6. An FCC compliant telephone cord with a modular plug is provided with this equipment. This
equipment is designed to be connected to the telephone network or premises wiring using an FCC
compatible modular jack, which is Part 68 compliant.
7. The following information may be required when applying to the local telephone company for a
dial-up line for the V.34 modem:
Service Type
REN
FIC
USOC
Loop Start
1.6B/0.8A
02LS2
RJ-11C
8. The REN is useful in determining the quantity of devices you may connect to your telephone line
and still have all of those devices ring when your number is called. In most areas, the sum of the
RENs of all devices should not exceed five. To be certain of the number of devices you may
connect to your line as determined by the REN, call your telephone company to determine the
maximum REN for your calling area.
9. This equipment may not be used on coin service provided by the telephone company. Connection
to party lines is subject to state tariffs. Contact your state public utility commission or corporation
commission for information.
© 2002 ADTRAN, Inc.
Running H/F 1 (doc title)
Federal Communications Commission Radio Frequency Interference Statement
This equipment has been tested and found to comply with the limits for a Class A digital device, pursuant
to Part 15 of the FCC Rules. These limits are designed to provide reasonable protection against harmful
interference when the equipment is operated in a commercial environment. This equipment generates,
uses, and can radiate radio frequency energy and, if not installed and used in accordance with the
instruction manual, may cause harmful interference to radio frequencies. Operation of this equipment in a
residential area is likely to cause harmful interference in which case the user will be required to correct the
interference at his own expense.
Shielded cables must be used with this unit to ensure compliance with Class A FCC limits.
Changes or modifications to this unit not expressly approved by the party
responsible for compliance could void the user’s authority to operate the equipment.
Running H/F 1 (doc title)
© 2002 ADTRAN, Inc.
Industry Canada Compliance Information
Notice: The Industry Canada label applied to the product (identified by the Industry Canada logo or the
“IC:” in front of the certification/registration number) signifies that the Industry Canada technical
specifications were met.
Notice: The Ringer Equivalence Number (REN) for this terminal equipment is supplied in the
documentation or on the product labeling/markings. The REN assigned to each terminal device indicates
the maximum number of terminals that can be connected to a telephone interface. The termination on an
interface may consist of any combination of devices subject only to the requirement that the sum of the
RENs of all the devices should not exceed five (5).
Canadian Emissions Requirements
This digital apparatus does not exceed the Class A limits for radio noise emissions from digital apparatus
as set out in the interference-causing equipment standard entitled “Digital Apparatus,” ICES-003 of the
Department of Communications.
Cet appareil numérique respecte les limites de bruits radioelectriques applicables aux appareils numériques
de Class A prescrites dans la norme sur le materiel brouilleur: “Appareils Numériques,” NMB-003 edictee
par le ministre des Communications.
© 2002 ADTRAN, Inc.
Running H/F 1 (doc title)
Warranty and Customer Service
ADTRAN will repair and return this product within 5 years from the date of shipment if it does not meet its
published specifications or fails while in service. For detailed warranty, repair, and return information refer
to the ADTRAN Equipment Warranty and Repair and Return Policy Procedure.
Return Material Authorization (RMA) is required prior to returning equipment to ADTRAN.
For service, RMA requests, or further information, contact one of the numbers listed at the end of this
section.
LIMITED PRODUCT WARRANTY
ADTRAN warrants that for 5 years from the date of shipment to Customer, all products manufactured by
ADTRAN will be free from defects in materials and workmanship. ADTRAN also warrants that products
will conform to the applicable specifications and drawings for such products, as contained in the Product
Manual or in ADTRAN's internal specifications and drawings for such products (which may or may not be
reflected in the Product Manual). This warranty only applies if Customer gives ADTRAN written notice of
defects during the warranty period. Upon such notice, ADTRAN will, at its option, either repair or replace
the defective item. If ADTRAN is unable, in a reasonable time, to repair or replace any equipment to a
condition as warranted, Customer is entitled to a full refund of the purchase price upon return of the
equipment to ADTRAN. This warranty applies only to the original purchaser and is not transferable
without ADTRAN's express written permission. This warranty becomes null and void if Customer
modifies or alters the equipment in any way, other than as specifically authorized by ADTRAN.
EXCEPT FOR THE LIMITED WARRANTY DESCRIBED ABOVE, THE FOREGOING
CONSTITUTES THE SOLE AND EXCLUSIVE REMEDY OF THE CUSTOMER AND THE
EXCLUSIVE LIABILITY OF ADTRAN AND IS IN LIEU OF ANY AND ALL OTHER
WARRANTIES (EXPRESSED OR IMPLIED). ADTRAN SPECIFICALLY DISCLAIMS ALL OTHER
WARRANTIES, INCLUDING (WITHOUT LIMITATION), ALL WARRANTIES OF
MERCHANTABILITY AND FITNESS FOR A PARTICULAR PURPOSE. SOME STATES DO NOT
ALLOW THE EXCLUSION OF IMPLIED WARRANTIES, SO THIS EXCLUSION MAY NOT APPLY
TO CUSTOMER.
In no event will ADTRAN or its suppliers be liable to the Customer for any incidental, special, punitive,
exemplary or consequential damages experienced by either the Customer or a third party (including, but
not limited to, loss of data or information, loss of profits, or loss of use). ADTRAN is not liable for
damages for any cause whatsoever (whether based in contract, tort, or otherwise) in excess of the amount
paid for the item. Some states do not allow the limitation or exclusion of liability for incidental or
consequential damages, so the above limitation or exclusion may not apply to the Customer.
Running H/F 1 (doc title)
© 2002 ADTRAN, Inc.
Customer Service, Product Support Information, and Training
ADTRAN will repair and return this product if within 5 years from the date of shipment the product does
not meet its published specification or the product fails while in service.
A return material authorization (RMA) is required prior to returning equipment to ADTRAN. For service,
RMA requests, training, or more information, use the contact information given below.
Repair and Return
If you determine that a repair is needed, please contact our Customer and Product Service (CAPS)
department to have an RMA number issued. CAPS should also be contacted to obtain information
regarding equipment currently in house or possible fees associated with repair.
CAPS Department
(256) 963-8722
Identify the RMA number clearly on the package (below address), and return to the following address:
ADTRAN Customer and Product Service
901 Explorer Blvd. (East Tower)
Huntsville, Alabama 35806
RMA # _____________
Pre-Sales Inquiries and Applications Support
Your reseller should serve as the first point of contact for support. If additional pre-sales support is needed,
the ADTRAN Support web site provides a variety of support services such as a searchable knowledge
base, latest product documentation, application briefs, case studies, and a link to submit a question to an
Applications Engineer. All of this, and more, is available at:
http://support.adtran.com
When needed, further pre-sales assistance is available by calling our Applications Engineering
Department.
Applications Engineering (800) 615-1176
© 2002 ADTRAN, Inc.
Running H/F 1 (doc title)
Post-Sale Support
Your reseller should serve as the first point of contact for support. If additional support is needed, the
ADTRAN Support web site provides a variety of support services such as a searchable knowledge base,
updated firmware releases, latest product documentation, service request ticket generation and
trouble-shooting tools. All of this, and more, is available at:
http://support.adtran.com
When needed, further post-sales assistance is available by calling our Technical Support Center. Please
have your unit serial number available when you call.
Technical Support
(888) 4ADTRAN
Installation and Maintenance Support
The ADTRAN Custom Extended Services (ACES) program offers multiple types and levels of installation
and maintenance services which allow you to choose the kind of assistance you need. This support is
available at:
http://www.adtran.com/aces
For questions, call the ACES Help Desk.
ACES Help Desk
(888) 874-ACES (2237)
Training
The Enterprise Network (EN) Technical Training Department offers training on our most popular
products. These courses include overviews on product features and functions while covering applications
of ADTRAN's product lines. ADTRAN provides a variety of training options, including customized
training and courses taught at our facilities or at your site. For more information about training, please
contact your Territory Manager or the Enterprise Training Coordinator.
Running H/F 1 (doc title)
Training Phone
(800) 615-1176, ext. 7500
Training Fax
(256) 963-6700
Training Email
[email protected]
© 2002 ADTRAN, Inc.
SYSTEM DESCRIPTION
This section of ADTRAN’s ATLAS 550 System Manual is designed for use by network engineers,
planners, and designers for overview information about the ATLAS 550.
It contains general information and describes physical and operational concepts, card functions, network
relationships, provisioning, testing, alarm status, and system monitoring. This section should be used in
conjunction with Section 2, Engineering Guidelines, of the system manual.
CONTENTS
System Overview . . . . . . . . . . . . . . . . . . . . . . . . . . . . . . . . . . . . . . . . . . . . . . . . . . . . . . . . . . . . . . . 16
Features and Benefits . . . . . . . . . . . . . . . . . . . . . . . . . . . . . . . . . . . . . . . . . . . . . . . . . . . . . . . . . . . 16
Configuration and Management . . . . . . . . . . . . . . . . . . . . . . . . . . . . . . . . . . . . . . . . . . . . . . . . . 16
Software Upgradeable . . . . . . . . . . . . . . . . . . . . . . . . . . . . . . . . . . . . . . . . . . . . . . . . . . . . . . . . 16
Signaling Support . . . . . . . . . . . . . . . . . . . . . . . . . . . . . . . . . . . . . . . . . . . . . . . . . . . . . . . . . . . . 16
ISDN Switch Types . . . . . . . . . . . . . . . . . . . . . . . . . . . . . . . . . . . . . . . . . . . . . . . . . . . . . . . . . . . 17
Dedicated Connection Maps . . . . . . . . . . . . . . . . . . . . . . . . . . . . . . . . . . . . . . . . . . . . . . . . . . . . 17
Switched Connection Maps. . . . . . . . . . . . . . . . . . . . . . . . . . . . . . . . . . . . . . . . . . . . . . . . . . . . . 17
Testing . . . . . . . . . . . . . . . . . . . . . . . . . . . . . . . . . . . . . . . . . . . . . . . . . . . . . . . . . . . . . . . . . . . . 17
Performance Monitoring . . . . . . . . . . . . . . . . . . . . . . . . . . . . . . . . . . . . . . . . . . . . . . . . . . . . . . . 17
Frame Relay . . . . . . . . . . . . . . . . . . . . . . . . . . . . . . . . . . . . . . . . . . . . . . . . . . . . . . . . . . . . . . . . 17
PPP Switching. . . . . . . . . . . . . . . . . . . . . . . . . . . . . . . . . . . . . . . . . . . . . . . . . . . . . . . . . . . . . . . 17
Option Modules . . . . . . . . . . . . . . . . . . . . . . . . . . . . . . . . . . . . . . . . . . . . . . . . . . . . . . . . . . . . . . . . 18
T1/PRI Network Interface Module (P/N 1200307L1). . . . . . . . . . . . . . . . . . . . . . . . . . . . . . . . . . 18
E1/PRA Network Interface Module (P/N 1200308L1) . . . . . . . . . . . . . . . . . . . . . . . . . . . . . . . . . 19
Modem Management Network Module (P/N 1200341L1). . . . . . . . . . . . . . . . . . . . . . . . . . . . . . 19
BRI DBU Network Interface Module (P/N 1200327L1) . . . . . . . . . . . . . . . . . . . . . . . . . . . . . . . . 19
Dual Nx 56/64 Option Module (P/N 1200311L1). . . . . . . . . . . . . . . . . . . . . . . . . . . . . . . . . . . . . 19
Dual USSI Option Module (P/N 1200754L1). . . . . . . . . . . . . . . . . . . . . . . . . . . . . . . . . . . . . . . . 19
Dual/Quad T1/PRI Option Module (P/N 1200314L1/1200755L1) . . . . . . . . . . . . . . . . . . . . . . . . 19
Quad Basic Rate ISDN (U-Interface) Option Module (P/N1200315L1) . . . . . . . . . . . . . . . . . . . 19
Quad Basic Rate ISDN (S/T-Interface) Option Module (P/N 1200764L1) . . . . . . . . . . . . . . . . . 19
Octal/Quad FXS Option Module (P/N 1200309L1/1200328L1) . . . . . . . . . . . . . . . . . . . . . . . . . 20
Octal/Quad FXO Option Module (P/N 1200310L1/1200329L1) . . . . . . . . . . . . . . . . . . . . . . . . . 20
Octal E&M Option Module (P/N 1200313L1) . . . . . . . . . . . . . . . . . . . . . . . . . . . . . . . . . . . . . . . 20
Legacy Data Option Module (P/N 1200342L1) . . . . . . . . . . . . . . . . . . . . . . . . . . . . . . . . . . . . . . 20
NxT1 HSSI/V.35 Option Module (P/N 1200346L2) . . . . . . . . . . . . . . . . . . . . . . . . . . . . . . . . . . . 20
Octal Ethernet Switch Option Module (P/N 1200766L1). . . . . . . . . . . . . . . . . . . . . . . . . . . . . . . 20
Resource Host Module (P/N 1200324L1) . . . . . . . . . . . . . . . . . . . . . . . . . . . . . . . . . . . . . . . . . . 20
4,8,16,24 Channel Voice Compression Resource Modules (P/N 1200312Lx) . . . . . . . . . . . . . . 21
32 Channel ADPCM Resource Module (P/N 1200752L1) . . . . . . . . . . . . . . . . . . . . . . . . . . . . . 21
Nx 56/64 BONDing Resource Module (P/N 1200326L1) . . . . . . . . . . . . . . . . . . . . . . . . . . . . . . 21
61200305L1-1F
© 2002 ADTRAN, Inc.
15
Section 1, System Description
1.
ATLAS 550 System Manual
SYSTEM OVERVIEW
The ATLAS 550 is a modular, highly scalable platform that provides robust solutions for the wide-area
communication needs of small-to-medium corporations and network access providers. The ATLAS 550 is
an Integrated Access System with extensive support of dedicated bandwidth management and access
switching. It contains a high-performance CPU and powerful communications drivers which support
applications such as frame relay, dial-backup, and PPP (point-to-point protocol).
The ATLAS 550 architecture also includes a packet and circuit switching bussing scheme. The result is a
system capable of supporting bandwidth requirements of up to 9 T1 circuits or 5 Primary Rate ISDN (PRI)
circuits. Designed for standalone, rackmount, or wallmount installations, the ATLAS 550 base unit
provides two hot-swappable network interfaces and four expansion slots that accommodate hot-swappable
option modules for a variety of applications. A 10/100BaseT Ethernet connection for IP routing and
network management is standard with the ATLAS 550 base unit.
With the ATLAS 550, you can consolidate your voice, data, and video applications into a single platform
while optimizing wide area bandwidth and reducing equipment costs. The ATLAS 550 architecture and the
four expansion slots allow for a variety of modules, making it one of the most versatile access systems on
the market.
2.
FEATURES AND BENEFITS
The following is a brief list of ATLAS 550 features and benefits:
Configuration and Management
•
•
•
•
•
VT100 Emulation
SNMP, per MIB II (RFC1213), DS1/E1 MIB (RFC1406), Frame Relay MIB (RFC1315), and
ADTRAN private MIBs
Telnet
Dial up remote management via optional Modem Management Network Module (P/N 1200341L1)
Six levels of password protection and privileges
Software Upgradeable
•
•
•
Flash memory
TFTP download
XMODEM via control port
Signaling Support
•
•
•
•
16
ISDN D Channel
Robbed bit, E&M, Ground Start, Loop Start
Convert between Robbed Bit Signaling and ISDN D Channel
Direct Inward Dialing
© 2002 ADTRAN, Inc.
61200305L1-1F
ATLAS 550 System Manual
Section 1, System Description
ISDN Switch Types
•
5ESS™, DMS-100™, National ISDN, 4ESS™, EuroISDN
Dedicated Connection Maps
•
•
•
•
Up to five connection maps
Time of day/day of week configurable
Preserves signaling through cross-connect
No effect on non-configured channels
Switched Connection Maps
•
Inbound and outbound call filtering and blocking
Testing
•
•
Local and remote: payload/line, V.54
Patterns: 511, QRSS, all ones, all zeros
(depending on installed modules)
(depending on installed modules)
Performance Monitoring
•
•
•
Reports: Information stored for last 24 hours in 15 minute increments
Performance statistics per TR54016, T1.403, RFC1406
Alarm reporting per TR54016, T1.403
Frame Relay
•
•
•
•
•
•
Routes Internet Protocol (IP) traffic between a public frame relay network, a private frame relay network, or a point-to-point (PPP) network and the Ethernet port.
Concentrates IP traffic from a public or private frame relay network to one or more serial ports (V.35).
The protocol passed over the serial port is frame relay (RFC 1490 encapsulation).
Passes Systems Network Architecture (SNA), Bisync, and other legacy protocols between a public or
private frame relay network and an external DTE running frame relay to ATLAS.
Performs voice compression/decompression (G.723.1) and interfaces to either a Private Branch Exchange (PBX) or the Public Switched Telephone Network (PSTN). (This feature requires an additional
option module, the VCOM Module—P/N 1200312Lx.)
Performs voice packetization (G.711 or Transparent) or voice compression/decompression (G.726) and
interfaces to either a Private Branch Exchange (PBX) or the PSTN. (This feature requires an additional
option module, the 32 Channel ADPCM Resource Module - P/N 1200752L1.)
Supports LMI, Annex D, or Annex A signaling on frame relay connections.
PPP Switching
•
•
•
•
Supports up to 100 simultaneous PPP connections.
Performs PAP, CHAP, or EAP authentication methods on a per connection basis.
Includes keepalive functionality for PPP connections.
Provides capability for numbered or unnumbered PPP interfaces.
61200305L1-1F
© 2002 ADTRAN, Inc.
17
Section 1, System Description
3.
ATLAS 550 System Manual
OPTION MODULES
The ATLAS 550 has 25 option modules:
•
•
•
•
•
•
•
•
•
•
•
•
•
•
•
•
•
•
•
T1/PRI Network Interface Module (P/N 1200307L1)
E1/PRA Network Interface Module (P/N 1200308L1)
Modem Management Network Module (P/N 1200341L1)
BRI DBU Network Interface Module (P/N 1200327L1)
Dual Nx 56/64 Option Module (P/N 1200311L1)
Dual USSI Option Module (P/N 1200754L1)
Dual/Quad T1/PRI Option Module (P/N 1200314L1/1200755L1))
Quad Basic Rate ISDN (U-Interface) Option Module (P/N1200315L1)
Quad Basic Rate ISDN (S/T-Interface) Option Module (P/N1200764L1)
Octal/Quad FXS Option Module (P/N 1200309L1/1200328L1)
Octal/Quad FXO Option Module (P/N 1200310L1/1200329L1)
Octal E&M Option Module (P/N 1200313L1)
Octal Ethernet Switch Option Module (P/N 1200766L1)
Resource Host Module (P/N 1200324L1)
4,8,16,24 Channel Voice Compression Resource Modules (P/N 1200312Lx)
32 Channel ADPCM Resource Module (P/N 1200752L1)
Nx 56/64 BONDing Resource Module (P/N 1200326L1)
Legacy Data Option Module (P/N 1200342L1)
NxT1 HSSI/V.35 Option Module (P/N 1200346L2)
Each option module is hot-swappable with configuration restored upon replacement.
Replacing an option module with a different module type will result in configuration loss.
Each option module has a variety of performance and alarm status information. Several features of each
module are user-configurable, although default values reflect the most common configurations. All option
modules contain an extensive self-test as well as tests designed for the technology they incorporate.
T1/PRI Network Interface Module (P/N 1200307L1)
The T1/PRI Network Interface Module provides one channelized T1 or PRI interface. This interface
operates in DS-1 or DSX-1 mode and can deliver timing for the system. The ATLAS 550 domestic system
(P/N 1200305L1) ships with one installed T1/PRI Network Interface Module.
18
© 2002 ADTRAN, Inc.
61200305L1-1F
ATLAS 550 System Manual
Section 1, System Description
E1/PRA Network Interface Module (P/N 1200308L1)
The E1/PRA Network Interface Module provides one channelized E1 or PRA interface using either a
standard DB-15 or BNC connector. This interface operates in CCS or CAS signaling mode and can deliver
timing for the system. The ATLAS 550 international system (P/N 1200306L1) ships with one installed
E1/PRA Network Interface Module.
Modem Management Network Module (P/N 1200341L1)
The Modem Management Network Module provides a single analog interface (RJ-11) for dial-up remote
management of the ATLAS 550 System. The internal modem supports connection rates from 2400 to
33.6 K and performs standard data modulation, error correction, and data compression.
BRI DBU Network Interface Module (P/N 1200327L1)
The BRI DBU Network Interface Module provides a single Basic Rate ISDN (BRI) U interface, capable of
operating in either NT or LT mode and can deliver timing for the system. The BRI DBU Network Interface
Module supports two independent calls or one BONDed call. All BONDing functionality is provided on
the module so a BONDing resource module (1200326L1) is not required.
Dual Nx 56/64 Option Module (P/N 1200311L1)
The Dual Nx 56/64 Module provides two synchronous V.35 DTE ports that can operate from 56 K to
2.048 Mbps in steps of 56 or 64 kbps. Either port can deliver timing for the system.
Dual USSI Option Module (P/N 1200754L1)
The Dual USSI Option Module provides two synchronous DTE ports that can operate from 56 K to
2.048 Mbps in steps of 56 or 64 kbps. Either port can deliver timing for the system. The Dual USSI Option
Module can provide the following interfaces using the appropriate adapter cables: EIA-530, EIA-530A,
RS-449, RS-232, and CCITT X.21.
Dual/Quad T1/PRI Option Module (P/N 1200314L1/1200755L1)
The Dual/Quad T1/PRI Module provides two or four channelized T1 or PRI interfaces. Each interface can
operate independently in DS-1 or DSX-1 mode, and any port can deliver timing for the system.
Quad Basic Rate ISDN (U-Interface) Option Module (P/N1200315L1)
The Quad Basic Rate ISDN (U) Module provides four Basic Rate ISDN (BRI) U interfaces, each capable
of operating in either NT or LT mode. Any port (operating in NT mode) can deliver timing for the system.
Quad Basic Rate ISDN (S/T-Interface) Option Module (P/N 1200764L1)
The Quad Basic Rate ISDN (S/T) Module provides four Basic Rate ISDN (BRI) S/T interfaces, each
capable of operating in either NT (future) or LT mode. Any port (operating in NT (future) mode) can
deliver timing for the system.
61200305L1-1F
© 2002 ADTRAN, Inc.
19
Section 1, System Description
ATLAS 550 System Manual
Octal/Quad FXS Option Module (P/N 1200309L1/1200328L1)
The Octal/Quad FXS Option Modules provide eight or four analog voice-grade interfaces. Each interface
provides talk battery, off-hook supervision, E&M signaling conversion, and ringing in loop-start or
ground-start operation. Call progress tones, where necessary, are provided to the modules by the
ATLAS 550 base unit.
Octal/Quad FXO Option Module (P/N 1200310L1/1200329L1)
The Octal/Quad FXO Option Modules provide eight or four analog voice-grade interfaces. Each interface
supports loop-start and ground-start operation. Applications include termination of analog PSTN trunks
and connections to PBX station-side interfaces (OPX).
Octal E&M Option Module (P/N 1200313L1)
The Octal E&M Option Module provides eight analog voice-grade interfaces, either 2-wire or 4-wire, for
use as tie-trunks, using E&M signaling or as dedicated transmission only (TO) interfaces for additional
data services. E&M signaling types 1-5 are supported.
Legacy Data Option Module (P/N 1200342L1)
The Legacy Data Option Module provides four EIA-232 or V.35 interfaces (or any combination up to four)
for sync or async packet data applications. Protocols supported include SNA/SDLC, frame relay, PPP,
transparent bit-oriented (TBOP), and transparent async. The Legacy Data Option Module includes an
adapter cable to provide four EIA-232 (DB-25) interfaces. An optional V.35 adapter cable
(P/N 1200348L1) is also available.
NxT1 HSSI/V.35 Option Module (P/N 1200346L2)
The NxT1 HSSI/V.35 Option Module aggregates bandwidth of up to eight T1s into a single logical channel
on the HSSI or V.35 (using an optional adapter cable) interface. The NxT1 HSSI/V.35 Option Module
supports point-to-point T1 applications only. Any of the four built-in T1 ports of the NxT1 HSSI/V.35
Option Module can provide timing for the ATLAS 550 system.
Octal Ethernet Switch Option Module (P/N 1200766L1)
The Octal Ethernet Switch Option Module provides eight interfaces that can operate as 10BaseT or
100BaseTX. Each interface uses auto-negotiation to support Ethernet traffic at 10 Mbps or 100 Mbps,
half-duplex or full-duplex. Automatic MDI/MDIX crossover is provided to simplify LAN connections.
Resource Host Module (P/N 1200324L1)
The Resource Host Module provides an inexpensive way to use a desired plug-on resource module, such as
the Voice Compression Module, when a plug-in module is not necessary. This module has no other
functionality except to act as the base for the plug-on resource modules.
20
© 2002 ADTRAN, Inc.
61200305L1-1F
ATLAS 550 System Manual
Section 1, System Description
4,8,16,24 Channel Voice Compression Resource Modules (P/N 1200312Lx)
The Voice Compression Module (VCOM Module) combines with other ATLAS 550 components to
implement voice over frame relay (VoFR) capability. The Voice Compression Resource Modules support
4, 8, 16, or 24 simultaneous compressed calls using G.723.1 or Netcoder compression algorithms.
32 Channel ADPCM Resource Module (P/N 1200752L1)
The 32 Channel ADPCM Resource Module (ADPCM-32) combines with other ATLAS 550 components
to implement packet voice capability over frame relay. The 32 Channel ADPCM Resource Module
supports up to 32 simultaneously compressed or packetized calls using G.726, G.711, or Transparent
algorithms.
Nx 56/64 BONDing Resource Module (P/N 1200326L1)
The Nx 56/64 BONDing Resource Option Module supports multiple, independent BONDing sessions with
each session capable of using from 2 to 32 channels of 56 K or 64 K data. The Nx 56/64 BONDing
Resource Module combines with other ATLAS 550 components to provide a flexible disaster recovery
system.
61200305L1-1F
© 2002 ADTRAN, Inc.
21
Section 1, System Description
22
ATLAS 550 System Manual
© 2002 ADTRAN, Inc.
61200305L1-1F
ENGINEERING GUIDELINES
CONTENTS
Equipment Dimensions . . . . . . . . . . . . . . . . . . . . . . . . . . . . . . . . . . . . . . . . . . . . . . . . . . . . . . . . . . 25
Power Requirements . . . . . . . . . . . . . . . . . . . . . . . . . . . . . . . . . . . . . . . . . . . . . . . . . . . . . . . . . . . . 25
Reviewing the Front Panel Design . . . . . . . . . . . . . . . . . . . . . . . . . . . . . . . . . . . . . . . . . . . . . . . . . 25
ACO Switch. . . . . . . . . . . . . . . . . . . . . . . . . . . . . . . . . . . . . . . . . . . . . . . . . . . . . . . . . . . . . . . . . 25
CRAFT Port. . . . . . . . . . . . . . . . . . . . . . . . . . . . . . . . . . . . . . . . . . . . . . . . . . . . . . . . . . . . . . . . . 26
Front Panel LEDs . . . . . . . . . . . . . . . . . . . . . . . . . . . . . . . . . . . . . . . . . . . . . . . . . . . . . . . . . . . . 26
Reviewing the Rear Panel Design . . . . . . . . . . . . . . . . . . . . . . . . . . . . . . . . . . . . . . . . . . . . . . . . . . 29
AC System . . . . . . . . . . . . . . . . . . . . . . . . . . . . . . . . . . . . . . . . . . . . . . . . . . . . . . . . . . . . . . . . . 29
DC System . . . . . . . . . . . . . . . . . . . . . . . . . . . . . . . . . . . . . . . . . . . . . . . . . . . . . . . . . . . . . . . . . 29
CONTROL IN Port . . . . . . . . . . . . . . . . . . . . . . . . . . . . . . . . . . . . . . . . . . . . . . . . . . . . . . . . . . . 30
CONTROL OUT Port . . . . . . . . . . . . . . . . . . . . . . . . . . . . . . . . . . . . . . . . . . . . . . . . . . . . . . . . . 30
Ethernet Connection . . . . . . . . . . . . . . . . . . . . . . . . . . . . . . . . . . . . . . . . . . . . . . . . . . . . . . . . . . 31
Alarm Relay Connection . . . . . . . . . . . . . . . . . . . . . . . . . . . . . . . . . . . . . . . . . . . . . . . . . . . . . . . 31
External Alarm Relay Monitor Connection . . . . . . . . . . . . . . . . . . . . . . . . . . . . . . . . . . . . . . . . . 32
Network Interface Modules . . . . . . . . . . . . . . . . . . . . . . . . . . . . . . . . . . . . . . . . . . . . . . . . . . . . . . . 32
T1/PRI Network Interface Module (P/N 1200307L1). . . . . . . . . . . . . . . . . . . . . . . . . . . . . . . . . . 32
E1/PRA Network Interface Module (P/N 1200308L1) . . . . . . . . . . . . . . . . . . . . . . . . . . . . . . . . . 33
Modem Management Network Module (P/N 1200341L1). . . . . . . . . . . . . . . . . . . . . . . . . . . . . . 34
BRI DBU Network Module (P/N 1200327L1) . . . . . . . . . . . . . . . . . . . . . . . . . . . . . . . . . . . . . . . 35
Option Module Interfaces . . . . . . . . . . . . . . . . . . . . . . . . . . . . . . . . . . . . . . . . . . . . . . . . . . . . . . . . 35
Octal/Quad FXS Option Module (P/N 1200309L1/1200328L1) . . . . . . . . . . . . . . . . . . . . . . . . . 35
Octal/Quad FXO Option Module (P/N 1200310L1/1200329L1) . . . . . . . . . . . . . . . . . . . . . . . . . 36
Dual Nx 56/64 Option Module (P/N 1200311L1). . . . . . . . . . . . . . . . . . . . . . . . . . . . . . . . . . . . . 36
Dual USSI Option Module (P/N 1200754L1). . . . . . . . . . . . . . . . . . . . . . . . . . . . . . . . . . . . . . . . 37
Octal E&M Option Module (P/N 1200313L1) . . . . . . . . . . . . . . . . . . . . . . . . . . . . . . . . . . . . . . . 41
Dual/Quad T1/PRI Option Module (P/N 1200314L1/1200755L1) . . . . . . . . . . . . . . . . . . . . . . . . 42
Quad BRI (U-Interface) Option Module (P/N 1200315L1) . . . . . . . . . . . . . . . . . . . . . . . . . . . . . 42
Quad BRI ISDN (S/T Interface) Option Module (P/N 1200764L1) . . . . . . . . . . . . . . . . . . . . . . . 43
NxT1 HSSI Option Module (P/N 1200346L1) . . . . . . . . . . . . . . . . . . . . . . . . . . . . . . . . . . . . . . . 43
NxT1 HSSI/V.35 Option Module (P/N 1200346L2) . . . . . . . . . . . . . . . . . . . . . . . . . . . . . . . . . . . 44
Legacy Data Option Module (P/N 1200342L1) . . . . . . . . . . . . . . . . . . . . . . . . . . . . . . . . . . . . . . 45
Octal Ethernet Switch Option Module (P/N 1200766L1). . . . . . . . . . . . . . . . . . . . . . . . . . . . . . . 46
At-A-Glance Specifications . . . . . . . . . . . . . . . . . . . . . . . . . . . . . . . . . . . . . . . . . . . . . . . . . . . . . . . 47
FIGURES
Figure 1.
Figure 2.
Figure 3.
ATLAS 550 Front Panel Layout . . . . . . . . . . . . . . . . . . . . . . . . . . . . . . . . . . . . . . . . . . . 25
ATLAS 550 (AC System) Rear Panel . . . . . . . . . . . . . . . . . . . . . . . . . . . . . . . . . . . . . . 29
ATLAS 550 (DC System) Rear Panel . . . . . . . . . . . . . . . . . . . . . . . . . . . . . . . . . . . . . . 29
61200305L1-1F
© 2002 ADTRAN, Inc.
23
Section 2, Engineering Guidelines
ATLAS 550 System Manual
TABLES
Table 1.
Table 2.
Table 3.
Table 4.
Table 5.
Table 6.
Table 7.
Table 8.
Table 9.
Table 10.
Table 11.
Table 12.
Table 13.
Table 14.
Table 15.
Table 16.
Table 17.
Table 18.
Table 19.
Table 20.
Table 21.
Table 22.
Table 23.
Table 24.
Table 25.
Table 26.
Table 27.
Table 28.
Table 29.
Table 31.
Table 30.
Table 32.
Table 33.
24
CRAFT Port Pinout . . . . . . . . . . . . . . . . . . . . . . . . . . . . . . . . . . . . . . . . . . . . . . . . . . . . . 26
ATLAS 550 Front Panel Description . . . . . . . . . . . . . . . . . . . . . . . . . . . . . . . . . . . . . . . . 26
ATLAS 550 LEDs . . . . . . . . . . . . . . . . . . . . . . . . . . . . . . . . . . . . . . . . . . . . . . . . . . . . . . 27
CONTROL IN Pinout . . . . . . . . . . . . . . . . . . . . . . . . . . . . . . . . . . . . . . . . . . . . . . . . . . . . 30
CONTROL OUT Pinout . . . . . . . . . . . . . . . . . . . . . . . . . . . . . . . . . . . . . . . . . . . . . . . . . . 30
Ethernet Pinout . . . . . . . . . . . . . . . . . . . . . . . . . . . . . . . . . . . . . . . . . . . . . . . . . . . . . . . . 31
Alarm Relay Connector Pinout . . . . . . . . . . . . . . . . . . . . . . . . . . . . . . . . . . . . . . . . . . . . 31
External Relay Monitor Connector Pinout . . . . . . . . . . . . . . . . . . . . . . . . . . . . . . . . . . . . 32
T1/PRI Network Interface Module RJ-48C Pinout . . . . . . . . . . . . . . . . . . . . . . . . . . . . . . 32
T1/PRI Network Interface 15-pin Male D-connector Pinout . . . . . . . . . . . . . . . . . . . . . . 33
E1/PRA Network Interface 15-pin Female D-connector Pinout . . . . . . . . . . . . . . . . . . . 34
Modem Management Network Module 6-pin Modular Jack Pinout . . . . . . . . . . . . . . . . . 34
BRI Pinout . . . . . . . . . . . . . . . . . . . . . . . . . . . . . . . . . . . . . . . . . . . . . . . . . . . . . . . . . . . . 35
FXS Pinout . . . . . . . . . . . . . . . . . . . . . . . . . . . . . . . . . . . . . . . . . . . . . . . . . . . . . . . . . . . 35
FXO Pinout . . . . . . . . . . . . . . . . . . . . . . . . . . . . . . . . . . . . . . . . . . . . . . . . . . . . . . . . . . . 36
V.35 Winchester Pinout . . . . . . . . . . . . . . . . . . . . . . . . . . . . . . . . . . . . . . . . . . . . . . . . . . 36
DB-78 Connector Pinout . . . . . . . . . . . . . . . . . . . . . . . . . . . . . . . . . . . . . . . . . . . . . . . . . 37
EIA-530 Connector Pinout . . . . . . . . . . . . . . . . . . . . . . . . . . . . . . . . . . . . . . . . . . . . . . . 38
EIA-530A Connector Pinout . . . . . . . . . . . . . . . . . . . . . . . . . . . . . . . . . . . . . . . . . . . . . . 39
RS-449/V.36 Connector Pinout . . . . . . . . . . . . . . . . . . . . . . . . . . . . . . . . . . . . . . . . . . . . 39
RS-232 Connector Pinout . . . . . . . . . . . . . . . . . . . . . . . . . . . . . . . . . . . . . . . . . . . . . . . . 40
CCITT X.21/V.11 Connector Pinout . . . . . . . . . . . . . . . . . . . . . . . . . . . . . . . . . . . . . . . . 41
E&M Pinout . . . . . . . . . . . . . . . . . . . . . . . . . . . . . . . . . . . . . . . . . . . . . . . . . . . . . . . . . . . 41
Trunk Circuit Connections for Various E&M Signaling Types . . . . . . . . . . . . . . . . . . . . . 42
T1/PRI Pinout . . . . . . . . . . . . . . . . . . . . . . . . . . . . . . . . . . . . . . . . . . . . . . . . . . . . . . . . . 42
BRI Pinout (U-Interface) . . . . . . . . . . . . . . . . . . . . . . . . . . . . . . . . . . . . . . . . . . . . . . . . . 42
BRI Pinout (S/T Interface) . . . . . . . . . . . . . . . . . . . . . . . . . . . . . . . . . . . . . . . . . . . . . . . . 43
HSSI (SCSI-50) Connection Pinout . . . . . . . . . . . . . . . . . . . . . . . . . . . . . . . . . . . . . . . . 43
HSSI/V.35 Connection Pinout . . . . . . . . . . . . . . . . . . . . . . . . . . . . . . . . . . . . . . . . . . . . . 44
EIA-232 and V.35 Connection Pinouts . . . . . . . . . . . . . . . . . . . . . . . . . . . . . . . . . . . . . . 45
T1 Network Connection Pinout . . . . . . . . . . . . . . . . . . . . . . . . . . . . . . . . . . . . . . . . . . . . 45
Ethernet Pinout . . . . . . . . . . . . . . . . . . . . . . . . . . . . . . . . . . . . . . . . . . . . . . . . . . . . . . . . 46
Specifications . . . . . . . . . . . . . . . . . . . . . . . . . . . . . . . . . . . . . . . . . . . . . . . . . . . . . . . . . 47
© 2002 ADTRAN, Inc.
61200305L1-1F
ATLAS 550 System Manual
1.
Section 2, Engineering Guidelines
EQUIPMENT DIMENSIONS
The ATLAS 550 base unit is 17.08” W, 11.67” D, and 3.47” H. All other equipment (option modules) fit
inside the base unit.
2.
POWER REQUIREMENTS
The ATLAS 550 has a maximum power consumption of 60 W and a maximum current draw of 2 A (AC
System) or 5 A (DC System) regardless of the configuration of option modules installed in the base unit.
3.
REVIEWING THE FRONT PANEL DESIGN
The front panel contains the Alarm Cut-off (ACO) switch, the CRAFT port, and the controller and module
status LEDs. The LEDs provide visual information about the ATLAS 550 base unit and any option module
that may be installed. Figure 1 identifies the ACO switch, the CRAFT port, and the LEDs.
Network Module
Status LEDs
Option Module
Slot Numbers
ATLAS 550
1
2
1
POWER
OK
OK
STATUS
SYSTEM
TEST
TEST
ONLINE
ERROR
TEST
ETHERNET
ERROR
REMOTE
ALARM
ALARM
2
3
4
MODULES
NETWORK
CRAFT
ACO
Controller
Status
LEDs
Alarm
Cut-off
Switch
CRAFT
Port
Module Status LEDs
Figure 1. ATLAS 550 Front Panel Layout
ACO Switch
The ACO switch deactivates (clears) the Alarm Relay, located on the rear panel of the ATLAS 550, after an
alarm condition has occurred. If an alarm condition is corrected and then reoccurs, the Alarm Relay will
re-energize.
61200305L1-1F
© 2002 ADTRAN, Inc.
25
Section 2, Engineering Guidelines
ATLAS 550 System Manual
CRAFT Port
Use the CRAFT port to configure the system via an EIA-232 connection. The CRAFT port provides the
same functions and operations as the CONTROL IN port located on the rear panel of the ATLAS 550. The
connector type is shown below, and Table 1 gives the CRAFT port pinout.
Connector type
RJ-48C
Table 1. CRAFT Port Pinout
PIN
NAME
DESCRIPTION
1
GND
Ground - connected to unit chassis
2
RTS
Request to send - flow control
3
RXDATA
4
DTR
5
TXDATA
6
CD
7
UNUSED
8
CTS
Data received by the ATLAS 550
Data terminal ready
Data transmitted by the ATLAS 550
Carrier detect
—
Clear to send - flow control
Front Panel LEDs
With the ATLAS 550 powered-up, the front panel LEDs provide visual information about the status of the
ATLAS 550 and any option modules that may be installed. Table 2 provides a brief description of the front
panel features, and Table 3 on page 27 provides detailed information about the LEDs.
Table 2. ATLAS 550 Front Panel Description
Feature
Controller Status LEDs
Displays the general status of the entire ATLAS 550. (See Table 3 on page 27.)
Power
Indicates the unit is on or off.
System
Indicates the status of the system.
Ethernet
Indicates the status of the Ethernet port.
Remote
Indicates whether a user is logged into the unit.
Network Module LEDs
26
Description
Displays the status of the network interface. (See Table 3 on page 27.) All
LEDs are off if no network module is installed.
OK
Indicates that the network interface is operating correctly.
Test
Indicates that the network interface is in test mode.
Error
Blinks to indicate the occurrence of error events.
Alarm
Indicates an alarm condition on the network interface.
© 2002 ADTRAN, Inc.
61200305L1-1F
ATLAS 550 System Manual
Section 2, Engineering Guidelines
Table 2. ATLAS 550 Front Panel Description (Continued)
Feature
Description
Option Module LEDs
Displays (by row) the operational condition of each module installed in the
option slots. (See Table 3 on page 27.) All LEDs will be off if no option
module is installed.
Status
Indicates the operational condition of modules installed in the option slots.
Online
Indicates whether the module is available for use or is currently in use. If
the module is manually taken offline, this LED is turned off.
Test
Indicates that one or more ports within a module are in test.
ACO Switch
Clears the Alarm Relay connection located on the rear panel of the ATLAS
550.
CRAFT Port
Allows the ATLAS 550 to connect to a computer or modem using the
CRAFT port (an RJ-45 port).
Table 3. ATLAS 550 LEDs
For these LEDs...
This color light...
Indicates that...
Power
Green
the unit is on.
Off
the unit is off.
Green (solid)
the physical link is up.
Green (flashing)
there is activity on the LAN.
Off
the physical link is down - no Ethernet connection.
Yellow
a user is logged in the system via CONTROL/CRAFT
port or via Ethernet.
Off
there are no users logged into the system.
Green (solid)
no diagnosed system faults were found.
Green (fast blink)
a flash download is in progress.
Yellow (solid)
a fault was diagnosed, but the condition no longer exists.
The condition will be recorded in the system log.
Red (solid)
an error condition with either the power supply or the
system temperature is present.
Red (fast blink)
a fatal error occurred during flash download.
Off
power is not currently supplied to the system.
Ethernet
Remote
System
61200305L1-1F
© 2002 ADTRAN, Inc.
27
Section 2, Engineering Guidelines
ATLAS 550 System Manual
Table 3. ATLAS 550 LEDs (Continued)
For these LEDs...
This color light...
Indicates that...
Network Module
Status
Green (solid)
the network interface is operating normally with error-free
operation. If the interface experiences alarms, the OK
LED remains off.
Yellow (solid)
the interface is operating in a test mode. This includes a
self-test, a test pattern, or a test loopback. When
illuminated, this LED also indicates that normal data flow
is not occurring in the module ports.
Red (blink)
an error such as BPV (bipolar violation), OOF (out of
frame), or CRC (cyclic redundancy check) has occurred.
Red (solid)
an alarm condition has been detected. When the alarm
condition is no longer valid, the OK LED illuminates. To
view an alarm condition, select the active alarm menu
item. If the alarm conditions have been corrected, you
can view the alarm which caused the activation of the
ALARM LED in the system log.
Green (solid)
one or both modules (in the case of a Resource Module)
are OK.
Green (fast blink)
one or both modules (in the case of a Resource Module)
have been set offline by the user.
OR
one or both modules (in the case of a Resource Module)
have invalid flash memory.
Red (solid)
a port on the installed module is currently in alarm.
Red (fast blink)
one module has no response, has been removed, or is
not supported.
Red (slow blink)
one module is not ready.
Off
no module occupies the slot.
Green (solid)
one or both modules (in the case of a Resource Module)
have an active connection.
Green (fast blink)
one module has invalid flash memory or is downloading
firmware.
Green (slow blink)
one module has an active connection.
Yellow (solid)
one module is in a test mode.
Module Status
Module Online
Module Test
28
© 2002 ADTRAN, Inc.
61200305L1-1F
ATLAS 550 System Manual
4.
Section 2, Engineering Guidelines
REVIEWING THE REAR PANEL DESIGN
AC System
The ATLAS 550 (AC System) rear panel contains four slots for housing option modules which provide a
variety of additional resources and data ports. All slots are functionally identical. The ATLAS 550 also
contains two slots for housing network modules (see Figure 2).
Option Slots (1-4)
1
Supplemental
Earth
Ground Lug
Power
Switch
3
O I
O
I
CAUTION: FOR CONTINUED PROTECTION
AGAINST RISK OF FIRE, REPLACE ONLY
WITH SAME TYPE AND RATING OF FUSE.
90-240VAC, 2A, 50/60Hz
4
2
ALL EMPTY SLOTS MUST BE
COVERED WITH BLANK PANELS
NETWORK 1
NETWORK
NETWORK 2
IN
IN
OUT
CONTROL
OUT
500 Series
TEST
T1 NETWORK MODULE
FUSE RATING: 2A/250V SLO-BLO
ETHERNET
MON
NETWORK
IN
RJ-48C
Ethernet
10/100BaseT
Connection
Port
Network Slots
OUT
RELAY
ALARM
MON
NC NO COM GND
AC Power
Receptacle
Alarm Relay
Connection
External Alarm Relay
Monitor Connection
Control
In
Control
Out
Figure 2. ATLAS 550 (AC System) Rear Panel
DC System
The ATLAS 550 (DC System) rear panel contains four slots for housing option modules which provide a
variety of additional resources and data ports. All slots are functionally identical. The ATLAS 550 also
contains two slots for housing network modules (see Figure 3).
Supplemental
Earth
Ground Lug Power
Switch
Option Slots (1-4)
1
3
O
I
ALL EMPTY SLOTS MUST BE
COVERED WITH BLANK PANELS
22
Ð
4
INPUT:
24Ð48V
NETWORK 1
NETWORK
T1 NETWORK MODULE
IN
OUT
MON
IN
TEST
FUSE:
5A/48VDC
,4A
USE COPPER CONDUCTORS ONLY
NETWORK 2
NETWORK
ETHERNET
OUT
DC Power
Terminal
Block
CONTROL
RELAY
500 Series
IN
Network Slots
CAUTION: FOR CONTINUED PROTECTION
AGAINST RISK OF FIRE, REPLACE ONLY
WITH SAME TYPE AND RATING OF FUSE.
+
OUT
MON
ALARM
NC NO COM GND
Alarm
RJ-48C
Relay Connection
Control In
Ethernet
Control Out
10/100BasetT
External Alarm Relay
Connection Port
Monitor Connection
Figure 3. ATLAS 550 (DC System) Rear Panel
61200305L1-1F
© 2002 ADTRAN, Inc.
29
Section 2, Engineering Guidelines
ATLAS 550 System Manual
CONTROL IN Port
The CONTROL IN port (RJ-45) connects to a computer or modem or to another ATLAS 550 unit. The
CONTROL port input provides the following functions:
•
•
•
•
Accepts EIA-232 input from a PC or a modem (for controlling the ATLAS 550)
Operates at 2400, 9600, 19200, or 38400 bps
Acts as input for either VT100 terminal or PC (with terminal emulation software) control
Acts as an interface for flash memory software downloads and configuration transfers using XMODEM
The CONTROL IN connection follows, and Table 4 shows the pinout.
Connector type
RJ-48C
Table 4. CONTROL IN Pinout
PIN
NAME
DESCRIPTION
1
GND
Ground - connected to unit chassis
2
RTS
Request to send - flow control
3
RXDATA
Data received by the ATLAS 550
4
DTR
Data terminal ready
5
TXDATA
Data transmitted by the ATLAS 550
6
CD
Carrier detect
7
UNUSED
—
8
CTS
Clear to send - flow control
CONTROL OUT Port
The CONTROL OUT port (RJ-48C) connects to other ADTRAN products’ CHAIN IN connectors. The
CONTROL port output provides the following:
•
•
•
EIA-232 output to chain control to other ADTRAN equipment, such as a TSU 120 or another ATLAS
2400, 9600, 19200, or 38400 bps operation
Automatic setup; no user input required
The CONTROL OUT connection follows, and Table 5 shows the pinout.
Connector type
RJ-48C
Table 5. CONTROL OUT Pinout
PIN
30
NAME
DESCRIPTION
1
GND
Ground - connected to unit chassis. Connects to GND of next unit.
2
UNUSED
—
© 2002 ADTRAN, Inc.
61200305L1-1F
ATLAS 550 System Manual
Section 2, Engineering Guidelines
Table 5. CONTROL OUT Pinout (Continued)
PIN
NAME
DESCRIPTION
3
TX DATA
Data transmitted to chained units by the ATLAS 550. Connects to RX
DATA of the next unit.
4
UNUSED
—
5
RX DATA
Data received from chained units by the ATLAS 550. Connects to TX
DATA of the next unit.
6,7,8
UNUSED
—
Ethernet Connection
The Ethernet port (RJ-48C) provides a 10/100BaseT Ethernet LAN connection, which is used for IP
routing, TFTP, SNMP, and telnet connections. The network connection follows, and Table 6 shows the
pinout.
Connector type (USOC)
RJ-48C
Table 6. Ethernet Pinout
PIN
NAME
DESCRIPTION
1
TX1
Transmit Positive
2
TX2
Transmit Negative
3
RX1
Receive Positive
4, 5
UNUSED
—
6
RX2
Receive Negative
7, 8
UNUSED
—
Alarm Relay Connection
This connection alerts the user when a selected alarm condition exists. The 4-pin, removable terminal
block connects with external wiring. Refer to DLP-014, Connecting the Alarm Contacts for detailed
instructions. Clear the alarm condition by pressing the Alarm Cut-Off (ACO) switch located on the front
panel of the ATLAS 550.
Table 7 shows the pinout for the Alarm Relay connector.
Table 7. Alarm Relay Connector Pinout
Pin
Name
Description
1
Normally Closed (NC)
Opens when a selected alarm condition is present.
2
Normally Open (NO)
Closes when a selected alarm condition is present.
3
Common (COM)
Common connection between external circuitry and NC or NO
terminal.
4
Chassis Ground (GND)
61200305L1-1F
© 2002 ADTRAN, Inc.
31
Section 2, Engineering Guidelines
ATLAS 550 System Manual
External Alarm Relay Monitor Connection
This connection alerts the user when a selected external alarm condition exists. This connection could be
used to monitor a UPS with dry contacts or another ATLAS 550. The 2-pin, removable terminal block
connects with external wiring. Refer to DLP-014, Connecting the Alarm Contacts for detailed instructions.
Clear the alarm condition by pressing the ACO switch located on the front panel of the ATLAS 550.
Table 8 shows the pinout for the External Alarm Relay connector.
Table 8. External Relay Monitor Connector Pinout
Pin
Name
Description
1
Alarm Out
Outputs EIA-232 level signal for connection to external alarm contacts.
2
Alarm In
Monitors signal coming from external alarm contacts.
5.
NETWORK INTERFACE MODULES
The ATLAS 550 provides two Network Interface Slots that allow different types of interfaces to be used.
The following is a discussion of the available Network Interface Modules.
T1/PRI Network Interface Module (P/N 1200307L1)
The T1/PRI Network Interface (NI) Module provides a single T1/PRI port and complies with the applicable ANSI and AT&T® standards. The T1/PRI Network Interface Module provides the following functions:
•
•
•
•
•
•
AMI or B8ZS coding
Manual line build-out
D4 or ESF framing
Network performance monitoring and reporting
Test loopbacks with QRSS generation and checking
Extensive self-testing
The network connections follow, with the pinouts shown in Table 9 below and Table 10 on page 33.
Connector type
(USOC) RJ-48C
Table 9. T1/PRI Network Interface Module RJ-48C Pinout
PIN
32
NAME
DESCRIPTION
1
R1
RXDATA-RING
Receive data from the network
2
T1
RXDATA-TIP
Receive data from the network
3
—
UNUSED
—
4
R
TXDATA-RING
Transmit data toward the network
5
T
TXDATA-TIP
Transmit data toward the network
6, 7, 8
—
UNUSED
—
© 2002 ADTRAN, Inc.
61200305L1-1F
ATLAS 550 System Manual
Connector type
Section 2, Engineering Guidelines
15-pin Male D-connector
Table 10. T1/PRI Network Interface 15-pin Male D-connector Pinout
PIN
NAME
DESCRIPTION
1
T
TXDATA-TIP
Transmit data toward the network
2
—
UNUSED
—
3
T1
RXDATA-TIP
Receive data from the network
4, 5, 6, 7
—
UNUSED
—
8
FG
FRAME GROUND
Grounded to chassis
9
R
TXDATA-RING
Transmit data toward the network
10
—
UNUSED
—
11
R1
RXDATA-RING
Receive data from the network
12, 13, 14
—
UNUSED
—
15
FG
FRAME GROUND
Grounded to chassis
Test Interface
The NETWORK IN and OUT Bantam test jacks provide intrusive test capability for the incoming T1. By
connecting test equipment to these jacks, the T1 connection breaks and the test equipment terminates the
incoming T1. The MON IN and OUT Bantam test jacks provide a bridged access jack for nonintrusive
monitoring of the incoming T1. When connected to this jack, configure the test equipment for bridged termination.
E1/PRA Network Interface Module (P/N 1200308L1)
The E1/PRA Network Interface (NI) Module provides a single E1/PRA port the following functions:
•
•
•
•
•
•
•
AMI or HDB3 coding
Manual line build-out
NFAS, FAS, TS16 MF and CRC-4 framing
Supports CCS or CAS signaling
Network performance monitoring and reporting
Test loopbacks with QRSS generation and checking
Extensive self-testing
The network connection follows, with the pinout shown in Table 11 on page 34.
61200305L1-1F
© 2002 ADTRAN, Inc.
33
Section 2, Engineering Guidelines
Connector type
ATLAS 550 System Manual
15-pin Female D-connector
Table 11. E1/PRA Network Interface 15-pin Female D-connector Pinout
PIN
NAME
1
R
DESCRIPTION
TXDATA-RING
Transmit data toward the network
2,4,5,7
FG
FRAME GROUND
Grounded to chassis
3
R1
RXDATA-RING
Receive data from the network
6,8,10,12
13,14,15
—
UNUSED
—
9
T
TXDATA-TIP
Transmit data toward the network
11
T1
RXDATA-TIP
Receive data from the network
Test Interface
The NETWORK IN and OUT Bantam test jacks provide intrusive test capability for the incoming E1. By
connecting test equipment to these jacks, the E1 connection breaks and the test equipment terminates the
incoming E1. The MON IN and OUT Bantam test jacks provide a bridged access jack for nonintrusive
monitoring of the incoming E1. When connected to this jack, configure the test equipment for bridged
termination.
Modem Management Network Module (P/N 1200341L1)
The Modem Management Network Module provides a single 6-pin modular jack. The Modem
Management Network Module provides the following functions:
•
•
•
•
V.34, V.32bis, V.32, V.22, V.23, and V.21 data modulation schemes
Connection rates from 2400 to 33.6K baud
V.42 LAPM, MNP 2-4, and MNP 10 error correction methods
V.42bis and MNP 5 data compression algorithms
The network connection follows, with the pinout shown in Table 12 below.
Connector Type
(USOC) RJ-11C
Table 12. Modem Management Network Module 6-pin Modular Jack Pinout
34
PIN
NAME
DESCRIPTION
1, 2, 3, 6
Unused
—
4
Ring
Ring to and from the analog interface
5
Tip
Tip to and from the analog interface
© 2002 ADTRAN, Inc.
61200305L1-1F
ATLAS 550 System Manual
Section 2, Engineering Guidelines
BRI DBU Network Module (P/N 1200327L1)
The BRI DBU Network Module provides a single 8-pin jack to connect to a standard BRI U-interface circuit. All BONDing functionality for 2B+D operation is provided on the module. Table 13 shows the pinout
for this connection.
Connector Type
(USOC) RJ-49C
Table 13. BRI Pinout
6.
PIN
NAME
1, 2, 3, 6, 7, 8
Unused
4
Ring
5
Tip
DESCRIPTION
—
Ring to and from the Network Interface
Tip to and from the Network Interface
OPTION MODULE INTERFACES
Octal/Quad FXS Option Module (P/N 1200309L1/1200328L1)
Each port of the Octal/Quad FXS Option Module has a single 8-pin modular jack. Connector pinout is
compatible with (USOC) RJ-11C and is shown in Table 14.
Connector Type
(USOC) RJ-11C
Table 14. FXS Pinout
PIN
NAME
1, 2, 3, 6, 7, 8
Unused
—
4
Ring
Ring to and from the analog phone interface
5
Tip
Tip to and from the analog phone interface
61200305L1-1F
DESCRIPTION
© 2002 ADTRAN, Inc.
35
Section 2, Engineering Guidelines
ATLAS 550 System Manual
Octal/Quad FXO Option Module (P/N 1200310L1/1200329L1)
Each port of the Octal/Quad FXO Option Module has a single 8-pin modular jack. Connector pinout is
compatible with (USOC) RJ-11C and is shown in Table 15.
Connector Type
(USOC) RJ-11C
Table 15. FXO Pinout
PIN
NAME
DESCRIPTION
1, 2, 3, 6, 7, 8
Unused
—
4
Ring
Ring to and from the analog phone interface
5
Tip
Tip to and from the analog phone interface
Dual Nx 56/64 Option Module (P/N 1200311L1)
Each port of the Dual Nx 56/64 Option Module has a V.35 Winchester-style connection as defined in
Table 16.
Table 16. V.35 Winchester Pinout
36
Pin
CCITT
DESCRIPTION
A
101
Protective ground (PG)
B
102
Signal ground (SG)
C
105
Request to send (RTS) from DTE
D
106
Clear to send (CTS) to DTE
E
107
Data set ready (DSR) to DTE
F
109
Received line signal detector (DCD) to DTE
H
—
Data terminal ready (DTR) from DTE
J
—
Ring indicator (RI)
R
104
Received data (RD-A) to DTE
T
104
Received data (RD-B) to DTE
V
115
RX clock (RC-A) to DTE
X
115
RX clock (RC-B) to DTE
P
103
Transmitted data (TD-A) from DTE
S
103
Transmitted data (TD-B) from DTE
Y
114
TX clock (TC-A) to DTE
AA
114
TX clock (TC-B) to DTE
© 2002 ADTRAN, Inc.
61200305L1-1F
ATLAS 550 System Manual
Section 2, Engineering Guidelines
Table 16. V.35 Winchester Pinout (Continued)
Pin
CCITT
DESCRIPTION
U
113
External TX clock (ETC-A) from DTE
W
113
External TX clock (ETC-B) from DTE
NN
—
Test mode (TM) to DTE
Dual USSI Option Module (P/N 1200754L1)
Tables 17 through 22 show pinouts for the available interfaces of the Dual USSI Option Module and the
system part numbers required for ordering.
Table 17. DB-78 Connector Pinout
PIN
SIGNAL DESCRIPTION
PIN
SIGNAL DESCRIPTION
1
RXD-A 2
41
RTS-B 2
2
RXD-B 2
42
GND
3
RXC-A 2
43—48
NOT USED
4
RXC-B 2
49
MOD2
5
TXD-A 2
50
MOD0
6
TXD-B 2
51
EXT-TXC-A 1
7
TXC-A 2
52
DTR-B 1
8
TXC-B 2
53
DTR-A 1
9
EXT-TXC-A 2
54
DCD-B 1
10
EXT-TXC-B 2
55
DCD-A 1
11—17
NOT USED
56
DSR-B/RI 1
18
GND
57
DSR-A 1
19
GND
58
CTS-B 1
20
CHASIS GND
59
CTS-A 1
21
CTS-A 2
60
CHASIS GND
22
CST-B 2
61
GND
23
DSR-A 2
62—68
NOT USED
24
DSR-B/RI 2
69
MOD1
25
DCD-A 2
70
EXT-TXC-B 1
26
DCD-B 2
71
TXC-B 1
27
DTR-A 2
72
TXC-A 1
28
DTR-B 2
73
TXD-B 1
29—37
NOT USED
74
TXD-A 1
38
RTS-A 1
75
RXC-B 1
Note: 1 or 2 indicates the port on the USSI Module
61200305L1-1F
© 2002 ADTRAN, Inc.
37
Section 2, Engineering Guidelines
ATLAS 550 System Manual
Table 17. DB-78 Connector Pinout (Continued)
PIN
SIGNAL DESCRIPTION
PIN
SIGNAL DESCRIPTION
39
RTS-B 1
76
RXC-A 1
40
RTS-A 2
77
RXD-B 1
78
RXD-A 1
Note: 1 or 2 indicates the port on the USSI Module
Connector type
EIA-530
System part number
4200754L2
Table 18. EIA-530 Connector Pinout
PIN
SIGNAL DESCRIPTION
PIN
SIGNAL DESCRIPTION
1
Shield (Ground)
13
Clear to Send (B)
2
Transmit Data (A)
14
Transmit Data (B)
3
Received Data (A)
15
Transmit Clock (A)
4
Request to Send (A)
16
Received Data (B)
5
Clear to Send (A)
17
Receive Clock (A)
6
DCE Ready (A)
18
Local Loopback *
7
Signal Ground
19
Request to Send (B)
8
Carrier Detect (A)
20
DTE Ready (A)
9
Received Clock (B)
21
Remote Loopback *
10
Carrier Detect (B)
22
DCE Ready (B)
11
Ext. Transmit Clock (B)
23
DTE Ready (B)
12
Transmit Clock (B)
24
Ext. Transmit Clock (A)
25
Test Mode *
* Ignored by Dual USSI Module
38
© 2002 ADTRAN, Inc.
61200305L1-1F
ATLAS 550 System Manual
Section 2, Engineering Guidelines
Connector type
EIA-530A
System part number
4200754L2
Table 19. EIA-530A Connector Pinout
PIN
SIGNAL DESCRIPTION
PIN
SIGNAL DESCRIPTION
1
Shield (Ground)
13
Clear to Send (B)
2
Transmit Data (A)
14
Transmit Data (B)
3
Received Data (A)
15
Transmit Clock (A)
4
Request to Send (A)
16
Received Data (B)
5
Clear to Send (A)
17
Receive Clock (A)
6
DCE Ready (A)
18
Local Loopback *
7
Signal Ground
19
Request to Send (B)
8
Carrier Detect (A)
20
DTE Ready (A)
9
Received Clock (B)
21
Remote Loopback *
10
Carrier Detect (B)
22
Ring Indicator
11
Ext. Transmit Clock (B)
23
Signal Ground
12
Transmit Clock (B)
24
Ext. Transmit Clock (A)
25
Test Mode *
* Ignored by Dual USSI Module
Connector type
RS-449/V.36
System part number
4200754L1
Table 20. RS-449/V.36 Connector Pinout
PIN
SIGNAL DESCRIPTION
PIN
SIGNAL DESCRIPTION
1
Shield (Ground)
19
Signal Ground
2
Signaling Rate Indicator *
20
Receive Common *
3
Not Used
21
Not Used
4
Transmit Data (A)
22
Transmit Data (B)
5
Transmit Clock (A)
23
Transmit Clock (B)
6
Received Data (A)
24
Receive Data (B)
7
Request to Send (A)
25
Request to Send (B)
8
Receive Clock (A)
26
Receive Clock (B)
9
Clear to Send (A)
27
Clear to Send (B)
10
Local Loopback *
28
Terminal in Service *
11
DCE Ready (A)
29
DCE Ready (B)
* Ignored by Dual USSI Module
61200305L1-1F
© 2002 ADTRAN, Inc.
39
Section 2, Engineering Guidelines
ATLAS 550 System Manual
Table 20. RS-449/V.36 Connector Pinout (Continued)
PIN
SIGNAL DESCRIPTION
PIN
SIGNAL DESCRIPTION
12
DTE Ready (A)
30
DTE Ready (B)
13
Carrier Detect (A)
31
Carrier Detect (B)
14
Remote Loopback *
32
Select Standby *
15
Ring Indicator
33
Signal Quality *
16
Select Frequency *
34
New Signal *
17
Ext. Transmit Clock (A)
35
Ext. Transmit Clock (B)
18
Test Mode *
36
Standby/Indicator *
37
Send Common *
* Ignored by Dual USSI Module
Connector type
RS-232
System part number
4200754L4
Table 21. RS-232 Connector Pinout
PIN
SIGNAL DESCRIPTION
PIN
SIGNAL DESCRIPTION
1
Shield (Ground)
14
Sec. Transmit Data
2
Transmit Data
15
DCE Transmit Clock
3
Received Data
16
Sec. Received Data
4
Request to Send
17
Receive Signal Element Timing
5
Clear to Send
18
Not used
6
Data Set Ready
19
Sec. Request to Send
7
Signal Ground
20
Data Terminal Ready
8
Received Line Signal Detector
21
Signal Quality Detector *
9
+ Voltage *
22
Ring Indicator
10
- Voltage *
23
Data Signal Rate Selector *
11
Not used
24
DTE Transmit Clock
12
Sec. Received LIne Signal Indicator
25
Not used
13
Sec. Clear to Send
* Ignored by Dual USSI Module
40
© 2002 ADTRAN, Inc.
61200305L1-1F
ATLAS 550 System Manual
Section 2, Engineering Guidelines
Connector type
CCITT X.21/V.11
System part number
4200754L3
Table 22. CCITT X.21/V.11 Connector Pinout
PIN
SIGNAL DESCRIPTION
PIN
SIGNAL DESCRIPTION
1
Shield (Ground)
8
Signal Ground
2
Transmit Data (A)
9
Transmit Data (B)
3
Request to Send (A)
10
Request to Send (B)
4
Received Data (A)
11
Received Data (B)
5
Carrier Detect (A)
12
Carrier Detect (B)
6
Transmit/Receive Clock (A)
13
Transmit/Received Clock (B)
7
Ext. Transmit Clock (A)
14
Ext. Transmit Clock (B)
15
Not Used
Octal E&M Option Module (P/N 1200313L1)
Each port of the Octal E&M Option Module has a single 8-pin modular jack. A suitable mating connector
is AMP # 2-383021-5. The Octal E&M module is an E-lead originate signaling circuit suitable for connection to an M-lead originate trunk circuit. The pinout is shown in Table 23, and the E&M signaling types are
shown in Table 24.
Table 23. E&M Pinout
PIN
Signal
1
Ring
2
Tip
3
E
4
SG
Signal Ground
5
SB
Signal Battery
6
M
Network Originate
7
Tip 1
8
Ring 1
61200305L1-1F
DESCRIPTION
VF input (4W mode, 600Ω nominal)
Tip/Ring (2W mode, 600Ω + 2.1 6uF nominal)
Customer Originate
VF output (4W mode, 600Ω nominal)
© 2002 ADTRAN, Inc.
41
Section 2, Engineering Guidelines
ATLAS 550 System Manual
Table 24. Trunk Circuit Connections for Various E&M Signaling Types
Trunk Circuit Connections
Signaling Type
E
M
SB
SG
Type I
Pin 3
Pin 6
NC
NC
Type II
Pin 3
Pin 6
Pin 4
Pin 5
Type III
Pin 3
Pin 6
Pin 4
Pin 5
Type IV
Pin 3
Pin 6
Pin 4
Use Frame Ground
Type V
Pin 3
Pin 6
NC
NC
Dual/Quad T1/PRI Option Module (P/N 1200314L1/1200755L1)
Each port of the Dual/Quad T1/PRI Option Module uses a single, 8-position modular jack to connect to the
T1 or PRI circuit. Table 25 gives the pinout for this jack.
Connector Type
(USOC) RJ-48C
Table 25. T1/PRI Pinout
PIN
NAME
DESCRIPTION
1
R1
RXDATA-RING
Receive data from the network
2
T1
RXDATA-TIP
Receive data from the network
3
—
UNUSED
—
4
R
TXDATA-RING
Send data towards the network
5
T
TXDATA-TIP
Send data towards the network
6,7,8
—
UNUSED
—
Quad BRI (U-Interface) Option Module (P/N 1200315L1)
Each port of the Quad BRI (U-Interface) Option Module uses a single RJ-48C jack to connect to a standard
BRI U-interface circuit. Table 26 shows the network pinout connection.
Connector Type
(USOC) RJ-48C
Table 26. BRI Pinout (U-Interface)
42
PIN
NAME
1, 2, 3, 6, 7, 8
Unused
4
Ring
5
Tip
DESCRIPTION
—
Ring to and from the Network Interface
Tip to and from the Network Interface
© 2002 ADTRAN, Inc.
61200305L1-1F
ATLAS 550 System Manual
Section 2, Engineering Guidelines
Quad BRI ISDN (S/T Interface) Option Module (P/N 1200764L1)
Each port of the Quad BRI ISDN (S/T Interface) Option Module uses a single RJ-45 jack to connect to a
standard BRI S/T interface circuit. The Quad BRI ISDN (S/T Interface) Option Module is only available
for use in NT mode (User Term) applications. Table 27 shows the network pinout connection. The required
wiring connection follows:
Connector Type
(USOC) RJ-45
Table 27. BRI Pinout (S/T Interface)
PIN
NAME
DESCRIPTION
1, 2, 7, 8
Unused
—
3, 6
Receive
Receive for User Term (NT Mode)
4, 5
Transmit
Transmit for User Term (NT Mode)
NxT1 HSSI Option Module (P/N 1200346L1)
The NxT1 HSSI Option Module uses a single 50-pin SCSI-II interface to combine up to 8 T1s of data (4
from the NxT1 HSSI Module T1 ports and 4 from other T1 ports installed in the system). Table 28 (below)
and Table 30 on page 45 give the pinouts for the SCSI-II and RJ-48C (T1) connectors, respectively.
Table 28. HSSI (SCSI-50) Connection Pinout
PIN# (+ side)
PIN# (- side)
1
26
SG - Signal Ground
2
27
RT - Receive Timing
3
28
CA - DCE Available
4
29
RD - Receive Data
5
30
LC - Loopback Circuit C
6
31
ST - Send Timing
7
32
SG - Signal Ground
8
33
TA - DTE Available
9
34
TT - Terminal Timing
10
35
LA - Loopback Circuit A
11
36
SD - Send Data
12
37
LB - Loopback Circuit B
13
38
SG - Signal Ground
14-18
39-43
61200305L1-1F
DESCRIPTION
Ancillary to DCE (Reserved)
© 2002 ADTRAN, Inc.
43
Section 2, Engineering Guidelines
ATLAS 550 System Manual
Table 28. HSSI (SCSI-50) Connection Pinout (Continued)
19
44
SG - Signal Ground
20-23
45-48
24
49
TM - Test Mode
25
50
SG - Signal Ground
Ancillary to DTE (Reserved)
NxT1 HSSI/V.35 Option Module (P/N 1200346L2)
V.35 is possible with the NxT1 HSSI Option Module with an appropriate adapter cable (ADTRAN P/N
3125I081@A); however, some HSSI menu options will be unavailable in this mode (see User Interface
Guide section for details). Table 29 (below) and Table 30 on page 45 give the pinouts for the V.35 and
RJ-48C (T1) connectors, respectively.
Table 29. HSSI/V.35 Connection Pinout
PIN# (+ side)
PIN# (- side)
DIRECTION
1
26
—
HSSI SG - Signal Ground
2
27
O
HSSI RT - Receive Timing
3
28
O
HSSI CA - DCE Available
4
29
O
HSSI RD - Receive Data
5
30
O
HSSI LC - Loopback Circuit C
6
31
O
HSSI ST - Send Timing
7
32
—
HSSI SG - Signal Ground
8
33
I
HSSI TA - DTE Available
9
34
I
HSSI TT - Terminal Timing
10
35
I
HSSI LA - Loopback Circuit A
11
36
I
HSSI SD - Send Data
12
37
I
HSSI LB - Loopback Circuit B
13
38
—
HSSI SG - Signal Ground
—
39
—
Ancillary to DCE (Reserved)
14
—
I
V.35 RTS - Request to Send
15
40
I
V.35 TT Terminal Timing
16
41
I
V.35 SD Send Data
—
42
O
V.35 DCD - Data Carrier Detect
17-18
43
—
Ancillary to DCE (Reserved)
19
44
—
HSSI SG - Signal Ground
20
45
O
V.35 ST - Send Timing
21
46
O
V.35 - Receive Timing
44
DESCRIPTION
© 2002 ADTRAN, Inc.
61200305L1-1F
ATLAS 550 System Manual
Section 2, Engineering Guidelines
Table 29. HSSI/V.35 Connection Pinout (Continued)
22
47
O
V.35 RD - Receive Data
23
—
O
V.35 CTS - Clear to Send
—
48
I
V.35 Ground/Present
24
49
O
TM - Test Mode
25
50
SG - Signal Ground
Table 30. T1 Network Connection Pinout
PIN
NAME
DESCRIPTION
1
R1
RXDATA-RING
Receive data from the network
2
T1
RXDATA-TIP
Receive data from the network
3
—
UNUSED
—
4
R
TXDATA-RING
Send data towards the network
5
T
TXDATA-TIP
Send data towards the network
6,7,8
—
UNUSED
—
Legacy Data Option Module (P/N 1200342L1)
The Legacy Data Option Module provides four EIA-232 or V.35 interfaces (or any combination up to four)
for sync or async packet data applications. Table 31 gives the pinouts for both the EIA-232 and V.35
connections.
Connector Types
EIA-232 and V.35
Table 31. EIA-232 and V.35 Connection Pinouts
EIA-232 PIN
V.35 PIN
CCITT/V.24 PIN
-
A
101
Protective ground (PG)
7
B
102
Signal ground (SG)
4
C
105
Request to send (RTS) from DTE
5
D
106
Clear to send (CTS) to DTE
6
E
107
Data set ready (DSR) to DTE
8
F
109
Received line signal detector (DCD) to
DTE
20
H
108/2
61200305L1-1F
© 2002 ADTRAN, Inc.
DESCRIPTION
Data terminal ready (DTR) from DTE
45
Section 2, Engineering Guidelines
ATLAS 550 System Manual
Table 31. EIA-232 and V.35 Connection Pinouts (Continued)
22
J
125
Ring indicator (RI) to DTE
3
R
104
Received data (RD-A) to DTE
3
T
104
Received data (RD-B) to DTE
17
V
115
RX clock (RC-A) to DTE
17
X
115
RX clock (RC-B) to DTE
2
P
103
Transmitted data (TD-A) from DTE
2
S
103
Transmitted data (TD-B) from DTE
15
Y
114
TX clock (TC-A) to DTE
15
AA
114
TX clock (TC-B) to DTE
24
U
113
External TX clock (ETC-A) from DTE
24
W
113
External TX clock (ETC-B) from DTE
-
NN
142
Test mode (TM) to DTE
Octal Ethernet Switch Option Module (P/N 1200766L1)
The Octal Ethernet Switch Option Module provides eight (RJ-48C) interfaces that can operate as 10BaseT
or 100BaseTX. Table 32 gives the pinout for the Ethernet connection.
Table 32. Ethernet Pinout
PIN
46
NAME
DESCRIPTION
1
TX1
Transmit Positive
2
TX2
Transmit Negative
3
RX1
Receive Positive
4, 5
UNUSED
—
6
RX2
Receive Negative
7, 8
UNUSED
—
© 2002 ADTRAN, Inc.
61200305L1-1F
ATLAS 550 System Manual
7.
Section 2, Engineering Guidelines
AT-A-GLANCE SPECIFICATIONS
Table 33 lists the specifications for the ATLAS 550 system.
Table 33. Specifications
Application
Feature
Specification
TDM Applications
TDM bandwidth
14 Mbps Full duplex
Dedicated map connections
160 Dedicated map connections in each of
the 5 maps
ISDN signaling types
National ISDN
Switching Applications
Lucent 5E
AT&T 4ESS (PRI Only)
Northern DMS-100 (Nortel Custom)
EuroISDN
T1 signaling types
Loop-Start
Ground-Start
E&M Wink
E&M Immediate
Feature Group D
DSP Features
DTMF tones support
FSK Caller ID support
Progress tone generation
32 available DSP channels
BRI Connections
17 BRI connections
PRI Connections
10 PRI connections
RBS T1 Connections
10 RBS T1 connections
Packet throughput
4000 pkts/sec (minimum)
Management signaling
interfaces
UNI (user and network)
Frame Relay
61200305L1-1F
NNI
© 2002 ADTRAN, Inc.
47
Section 2, Engineering Guidelines
ATLAS 550 System Manual
Table 33. Specifications (Continued)
Application
Feature
Management signaling types
Specification
ANSI T1.617-D (Annex D)
ITU-T Q.933-A (Annex A)
LMI (Group of four)
Auto
Encapsulation
RFC 1490
PVC support
300 PVCs
Congestion control
FECN / BECN
Discard eligible (DE)
Quality of service (QOS)
Prioritization on a per-PVC basis
Testing (ADTRAN proprietary)
PVC loopback
Round trip delay measurement
SNMP support
RFC 1315
Connection support
100 connections
Authentication support
PAP
PPP
CHAP
EAP
Keepalive support
On/Off
Interface support
Numbered interfaces
Un-numbered interfaces
IP Routing
Route discovery
RIP V1
RIP V2
ICMP
ARP
IARP
UDP Relay
SNMP support
RFCs 1155-SMI, 1158-MIB, 1212, 1213,
1215, 1315, 1406
Adtran Enterprise MIBs
48
© 2002 ADTRAN, Inc.
61200305L1-1F
ATLAS 550 System Manual
Section 2, Engineering Guidelines
Table 33. Specifications (Continued)
Application
Feature
Specification
Voice Compression
Algorithm
Voice Compression Module
G.723.1 or Netcoder (proprietary)
ADPCM-32 Module
G.711, G.726 (16K/32K),
Transparent (proprietary)
Number of channels supported Up to 32 compression channels
PCM coding
µ-Law, A-Law (future)
Fax support
9600 bps
Modem Support
(ADPCM-32 Module only)
G.711, Transparent
V.34 @ 28.8 bps
FAX @ 14.4 bps
The rates shown at the right
are maximum rates. Under
certain conditions, these rates
may not be realized.
DTMF generation and
detection
61200305L1-1F
ADPCM 32
V.32 @ 14.4 bps
FAX @ 14.4 bps
ADPCM 16
V.21 @ 300 bps
V.22 @ 1200 bps
FAX NOT RECOMMENDED
TIA 464A
© 2002 ADTRAN, Inc.
49
Section 2, Engineering Guidelines
50
ATLAS 550 System Manual
© 2002 ADTRAN, Inc.
61200305L1-1F
NETWORK TURNUP PROCEDURE
CONTENTS
Introduction . . . . . . . . . . . . . . . . . . . . . . . . . . . . . . . . . . . . . . . . . . . . . . . . . . . . . . . . . . . . . . . . . . . . 52
Tools Required . . . . . . . . . . . . . . . . . . . . . . . . . . . . . . . . . . . . . . . . . . . . . . . . . . . . . . . . . . . . . . . . . 52
Unpack and Inspect the System . . . . . . . . . . . . . . . . . . . . . . . . . . . . . . . . . . . . . . . . . . . . . . . . . . . 52
Contents of ADTRAN Shipments . . . . . . . . . . . . . . . . . . . . . . . . . . . . . . . . . . . . . . . . . . . . . . . . 52
Grounding Instructions . . . . . . . . . . . . . . . . . . . . . . . . . . . . . . . . . . . . . . . . . . . . . . . . . . . . . . . . . . 53
Supplying Power to the Unit . . . . . . . . . . . . . . . . . . . . . . . . . . . . . . . . . . . . . . . . . . . . . . . . . . . . . . 53
AC Powered Systems . . . . . . . . . . . . . . . . . . . . . . . . . . . . . . . . . . . . . . . . . . . . . . . . . . . . . . . . . 53
DC Powered Systems . . . . . . . . . . . . . . . . . . . . . . . . . . . . . . . . . . . . . . . . . . . . . . . . . . . . . . . . . 54
Mounting Options . . . . . . . . . . . . . . . . . . . . . . . . . . . . . . . . . . . . . . . . . . . . . . . . . . . . . . . . . . . . . . . 54
Installing Network and Option Modules . . . . . . . . . . . . . . . . . . . . . . . . . . . . . . . . . . . . . . . . . . . . . 54
Instructions for Installing the ATLAS 550 Network and Option Modules. . . . . . . . . . . . . . . . . . . 55
Module Shipping Contents . . . . . . . . . . . . . . . . . . . . . . . . . . . . . . . . . . . . . . . . . . . . . . . . . . . . . . . 55
T1/PRI Network Interface Module (P/N 1200307L1). . . . . . . . . . . . . . . . . . . . . . . . . . . . . . . . . . 55
E1/PRA Network Interface Module (P/N 1200308L1) . . . . . . . . . . . . . . . . . . . . . . . . . . . . . . . . . 55
Modem Management Network Module (P/N 1200341L1). . . . . . . . . . . . . . . . . . . . . . . . . . . . . . 56
BRI DBU Network Module (P/N 1200327L1) . . . . . . . . . . . . . . . . . . . . . . . . . . . . . . . . . . . . . . . 56
Dual/Quad T1/PRI Option Module (P/N 1200314L1/1200755L1) . . . . . . . . . . . . . . . . . . . . . . . . 56
Dual Nx 56/64 Option Module (P/N 1200311L1). . . . . . . . . . . . . . . . . . . . . . . . . . . . . . . . . . . . . 56
Dual USSI Option Module System (P/N 4200754Lx) . . . . . . . . . . . . . . . . . . . . . . . . . . . . . . . . . 57
Quad Basic Rate ISDN (U-Interface) Option Module (P/N 1200315L1) . . . . . . . . . . . . . . . . . . . 57
Quad Basic Rate ISDN (S/T Interface) Option Module (P/N 1200764L1). . . . . . . . . . . . . . . . . . 57
Octal/Quad FXS Option Module (P/N 1200309L1/1200328L1) . . . . . . . . . . . . . . . . . . . . . . . . . 57
Octal/Quad FXO Option Module (P/N 1200310L1/1200329L1) . . . . . . . . . . . . . . . . . . . . . . . . . 58
Octal E&M Option Module (P/N 1200313L1) . . . . . . . . . . . . . . . . . . . . . . . . . . . . . . . . . . . . . . . 58
Legacy Data Option Module (P/N 1200342L1) . . . . . . . . . . . . . . . . . . . . . . . . . . . . . . . . . . . . . . 58
NxT1 HSSI Option Module (P/N 1200346L1) with V.35 Support
(P/N 1200346L2). . . . . . . . . . . . . . . . . . . . . . . . . . . . . . . . . . . . . . . . . . . . . . . . . . . . . . . . . . . . . 58
Ethernet Switch Option Module (P/N 1200766L1) . . . . . . . . . . . . . . . . . . . . . . . . . . . . . . . . . . . 59
Resource Host Module (P/N 1200324L1) . . . . . . . . . . . . . . . . . . . . . . . . . . . . . . . . . . . . . . . . . . 59
4,8,16,24 Channel Voice Compression Resource Modules (P/N 1200312Lx) . . . . . . . . . . . . . . 59
32 Channel ADPCM Resource Module (P/N 1200752L1) . . . . . . . . . . . . . . . . . . . . . . . . . . . . . 59
Nx 56/64 BONDing Resource Module (P/N 1200326L1) . . . . . . . . . . . . . . . . . . . . . . . . . . . . . . 59
FIGURES
Figure 1.
ATLAS 550 Slot Designation (Rear Panel) . . . . . . . . . . . . . . . . . . . . . . . . . . . . . . . . . . 54
61200305L1-1F
© 2002 ADTRAN, Inc.
51
Section 3, Network Turnup Procedure
1.
ATLAS 550 System Manual
INTRODUCTION
This section discusses the installation process for the ATLAS 550 system.
2.
TOOLS REQUIRED
The tools required for installation of the ATLAS 550 unit are:
•
•
#2 Phillips-head screwdriver
Flat-head screwdriver (for installing modules)
To prevent electrical shock, do not install equipment in a wet location or during a
lightning storm.
Electronic modules can be damaged by static electrical discharge. Before handling
modules, wear an antistatic discharge wrist strap to prevent damage to electronic
components. Place modules in antistatic packing material when transporting or storing.
When working on modules, always place them on an approved antistatic mat that is
electrically grounded.
3.
UNPACK AND INSPECT THE SYSTEM
The ATLAS 550 is shipped in its own cardboard shipping carton. Open the carton carefully and avoid deep
penetration into the carton with sharp objects.
After unpacking the unit, inspect it for possible shipping damage. If the equipment has been damaged in
transit, immediately file a claim with the carrier, then contact ADTRAN Customer Service (see the contact
information in the front of this manual).
Contents of ADTRAN Shipments
Your ADTRAN shipment includes the following items:
•
•
•
•
•
•
The ATLAS 550 unit
The ATLAS 550 System CD
AC power cord - ADTRAN P/N 3127031 (with AC systems)
19” rackmount brackets and screws
RJ-45 to DB-9 adapter - ADTRAN P/N 3196ADPT001
RJ-45 to DB-25 adapter - ADTRAN P/N 3196ADPT006
•
Customers must supply the Ethernet cable.
52
© 2002 ADTRAN, Inc.
61200305L1-1F
ATLAS 550 System Manual
4.
Section 3, Network Turnup Procedure
GROUNDING INSTRUCTIONS
The following provides grounding instruction information from the Underwriters’ Laboratory UL60950
Standard for Safety of Information Technology Equipment Including Electrical Business Equipment, Third
Edition, of December 1, 2000.
An equipment grounding conductor that is not smaller in size than the ungrounded branch-circuit supply
conductors is to be installed as part of the circuit that supplies the product or system. Bare, covered, or
insulated grounding conductors are acceptable. Individually covered or insulated equipment grounding
conductors shall have a continuous outer finish that is either green, or green with one or more yellow
stripes. The equipment grounding conductor is to be connected to ground at the service equipment.
The attachment-plug receptacles in the vicinity of the product or system are all to be of a grounding type,
and the equipment grounding conductors serving these receptacles are to be connected to earth ground at
the service equipment.
A supplementary equipment grounding conductor shall be installed between the product or system and
ground that is in addition to the equipment grounding conductor in the power supply cord.
The supplementary equipment grounding conductor shall not be smaller in size than the ungrounded
branch-circuit supply conductors. The supplementary equipment grounding conductor shall be connected
to the product at the terminal provided, and shall be connected to ground in a manner that will retain the
ground connection when the product is unplugged from the receptacle. The connection to ground of the
supplementary equipment grounding conductor shall be in compliance with the rules for terminating
bonding jumpers at Part K or Article 250 of the National Electrical Code, ANSI/NFPA 70. Termination of
the supplementary equipment grounding conductor is permitted to be made to building steel, to a metal
electrical raceway system, or to any grounded item that is permanently and reliably connected to the
electrical service equipment ground.
The supplemental grounding conductor shall be connected to the equipment using a number 8 ring terminal
and should be fastened to the grounding lug provided on the rear panel of the equipment. The ring terminal
should be installed using the appropriate crimping tool (AMP P/N 59250 T-EAD Crimping Tool or
equivalent).
5.
SUPPLYING POWER TO THE UNIT
AC Powered Systems
The AC powered ATLAS 550 comes equipped with a detachable 6-foot power cord with a 3-prong plug for
connecting to a grounded power receptacle. As shipped, the ATLAS 550 is set to factory default
conditions. After installing the unit and any option modules, the ATLAS 550 is ready for power-up. To
power-up the unit, ensure that the unit is properly connected to an appropriate power source and turn on the
unit using the on/off switch on the rear panel.
•
61200305L1-1F
•
Power to the ATLAS 550 AC system must be from a grounded 90-130/190-240 VAC,
50/60 Hz source.
The power receptacle uses double-pole, neutral fusing.
•
Maximum recommended ambient operating temperature is 45 oC.
© 2002 ADTRAN, Inc.
53
Section 3, Network Turnup Procedure
ATLAS 550 System Manual
DC Powered Systems
The DC powered ATLAS 550 comes equipped with a DC power supply to furnish the voltages necessary
for proper backplane operation. As shipped, the ATLAS 550 is set to factory default conditions. After
installing the unit and any option modules, the ATLAS 550 is ready for power-up.
•
•
•
•
•
6.
Power to the ATLAS 550 DC system must be from a reliably grounded -48 VDC or
+24 VDC source which is electrically isolated from the AC source.
This unit shall be installed in accordance with Article 400 and 364.8 of the NEC NFPA
70.
The branch circuit overcurrent protection shall be a fuse or circuit breaker rated minimum 60 VDC, maximum 10A.
A readily accessible disconnect device that is suitably approved and rated shall be incorporated in the field wiring.
Maximum recommended ambient operating temperature is 45 oC.
MOUNTING OPTIONS
The ATLAS 550 unit may be installed for tabletop, 19-inch or 23-inch rackmount, or wallmount
configuration. ADTRAN includes 19-inch rackmount ears with the ATLAS 550 shipment (23-inch
rackmount ears are sold separately). For a rackmount installation, the ATLAS 550 allows flush-face
mount, face-forward mount, center mount, and rear mount. The rackmount ears may also be turned face
down for wall mounting. When wall mounted, the ATLAS 550 unit may be installed with either side up
and the front and rear panels facing sideways. For more details on wall mounting the ATLAS 550, please
refer to the ATLAS 550 Installation Guide (61200305L1-19A) provided on the documentation CD.
Be careful not to upset the stability of the equipment mounting rack when installing this
product.
7.
INSTALLING NETWORK AND OPTION MODULES
Figure 1 shows the option slot numbering designation as viewed from the rear of the ATLAS 550.
1
3
SLOT 1
SLOT 3
O
O I
I
4
2
ALL EMPTY SLOTS MUST BE
COVERED WITH BLANK PANELS
SLOT 4
SLOT 2
NETWORK 1
NETWORK 2
FUSE RATING: 2A/250V SLO-BLO
ETHERNET
Network Slot 1
Network Slot 2
CONTROL
IN
OUT
CAUTION: FOR CONTINUED PROTECTION
AGAINST RISK OF FIRE, REPLACE ONLY
WITH SAME TYPE AND RATING OF FUSE.
90-240VAC, 2A, 50/60Hz
RELAY
ALARM
MON
NC NO COM GND
Figure 1. ATLAS 550 Slot Designation (Rear Panel)
54
© 2002 ADTRAN, Inc.
61200305L1-1F
ATLAS 550 System Manual
Section 3, Network Turnup Procedure
Option modules are intended to be serviced by qualified service personnel only.
Instructions for Installing the ATLAS 550 Network and Option Modules
Instructions for Installing the ATLAS 550 Option Modules
Step
8.
Action
1
Remove the cover plate from the appropriate option slot of the ATLAS 550 rear panel.
2
Slide the Option Module into the option slot until the module is firmly seated against the front of
the chassis.
3
Secure the thumbscrews at both edges of the module. Tighten with a screwdriver.
4
Connect the cables to the associated device(s).
5
Complete installation of remaining modules and unit as specified in the appropriate sections of
this Network Turnup Procedure.
MODULE SHIPPING CONTENTS
This section provides shipping content information for all available ATLAS 550 option, network, and
resource modules.
T1/PRI Network Interface Module (P/N 1200307L1)
Shipping Contents
The ADTRAN shipment of the T1/PRI Network Interface Module includes the following items:
•
•
•
•
T1/PRI Network Interface Module
T1/PRI Network Interface Module Quick Start Guide
One T1 cable (RJ-48C to RJ-48C), ADTRAN P/N 3125M008
One T1 crossover cable (RJ-48C to RJ-48C), ADTRAN P/N 3125M010
E1/PRA Network Interface Module (P/N 1200308L1)
Shipping Contents
The ADTRAN shipment of the E1/PRA Network Interface Module includes the following items:
•
•
•
E1/PRA Network Interface Module
E1/PRA Network Interface Module Quick Start Guide
RJ-45 to DB-15 adapter, ADTRAN P/N 3196028
61200305L1-1F
© 2002 ADTRAN, Inc.
55
Section 3, Network Turnup Procedure
ATLAS 550 System Manual
Modem Management Network Module (P/N 1200341L1)
Shipping Contents
The ADTRAN shipment of the Modem Management Network Module includes the following items:
•
•
•
Modem Management Network Module
Modem Management Network Module Quick Start Guide
One 7-foot cable (RJ-11 to RJ-11), ADTRAN P/N 3127014
BRI DBU Network Module (P/N 1200327L1)
Shipping Contents
The ADTRAN shipment of the BRI DBU Network Module includes the following items:
•
•
•
BRI DBU Network Module
BRI DBU Network Module Quick Start Guide
One 7-foot cable (RJ-45 to RJ-11), ADTRAN P/N 3125M007
Dual/Quad T1/PRI Option Module (P/N 1200314L1/1200755L1)
Shipping Contents
The ADTRAN shipment of the Dual/Quad T1/PRI Option Module includes the following items:
•
•
•
•
Dual/Quad T1/PRI Option Module
Dual/Quad T1/PRI Option Module Quick Start Guide
Two/Four T1 cables (RJ-48C to RJ-48C), ADTRAN P/N 3125M008
Two T1 crossover cables (RJ-48C to RJ-48C), ADTRAN P/N 3125M010
Dual Nx 56/64 Option Module (P/N 1200311L1)
Shipping Contents
The ADTRAN shipment of the Dual Nx 56/64 Option Module includes the following items:
•
•
Dual Nx 56/64 Option Module
Dual Nx 56/64 Option Module Quick Start Guide
Customer Provides
•
56
DTE cables
© 2002 ADTRAN, Inc.
61200305L1-1F
ATLAS 550 System Manual
Section 3, Network Turnup Procedure
Dual USSI Option Module System (P/N 4200754Lx)
Shipping Contents
The ADTRAN shipment of the Dual USSI Option Module System includes the following items:
•
•
Dual USSI Option Module System
Dual USSI Option Module System Quick Start Guide
And one of the following:
•
•
•
•
RS-449/V.36 (System P/N 4200754L1)
EIA-530/530A to DB-78 Cable (System P/N 4200754L2)
CCITT X.21/V.11 (System P/N 4200754L3)
RS-232 (System P/N 4200754L4)
Quad Basic Rate ISDN (U-Interface) Option Module (P/N 1200315L1)
Shipping Contents
The ADTRAN shipment of the Quad Basic Rate ISDN (U-Interface) Option Module includes the
following items:
•
•
•
Quad Basic Rate ISDN (U-Interface) Option Module
Quad Basic Rate ISDN (U-Interface) Option Module Quick Start Guide
Four RJ-45-to-RJ-11 cables, ADTRAN P/N 3125M007
Quad Basic Rate ISDN (S/T Interface) Option Module (P/N 1200764L1)
Shipping Contents
The ADTRAN shipment of the Quad Basic Rate ISDN (S/T Interface) Option Module includes the
following items:
•
•
•
Quad Basic Rate ISDN (S/T Interface) Option Module
Quad Basic Rate ISDN (S/T Interface) Option Module Quick Start Guide
Four RJ-45-to-RJ-11 cables, ADTRAN P/N 3125M007
Octal/Quad FXS Option Module (P/N 1200309L1/1200328L1)
Shipping Contents
The ADTRAN shipment of the Octal/Quad FXS Option Module includes the following items:
•
•
Octal/Quad FXS Option Module
Octal/Quad FXS Option Module Quick Start Guide
61200305L1-1F
© 2002 ADTRAN, Inc.
57
Section 3, Network Turnup Procedure
ATLAS 550 System Manual
Octal/Quad FXO Option Module (P/N 1200310L1/1200329L1)
Shipping Contents
The ADTRAN shipment of the Octal/Quad FXO Option Module includes the following items:
•
•
Octal/Quad FXO Option Module
Octal/Quad FXO Option Module Quick Start Guide
Octal E&M Option Module (P/N 1200313L1)
Shipping Contents
The ADTRAN shipment of the Octal E&M Option Module includes the following items:
•
•
Octal E&M Option Module
Octal E&M Option Module Quick Start Guide
Legacy Data Option Module (P/N 1200342L1)
Shipping Contents
The ADTRAN shipment of the Legacy Data Option Module includes the following items:
•
•
•
Legacy Data Option Module
Legacy Data Option Module Quick Start Guide
One DB-78 to DB-25 (four interfaces) cable, ADTRAN P/N 3125I051
Optional Accessories include the following:
•
DB-78 to V.35 (four interfaces) cable, ADTRAN P/N 1200348L1
NxT1 HSSI Option Module (P/N 1200346L1) with V.35 Support
(P/N 1200346L2)
Shipping Contents
The ADTRAN shipment of the NxT1 HSSI Option Module includes the following items:
•
•
•
NxT1 HSSI Option Module
NxT1 HSSI Option Module Quick Start Guide
Four T1 cables (RJ-45 to RJ-45), ADTRAN P/N 3125M008
Optional accessories include the following:
•
58
SCSI-II (50 pin) to V.35 cable, ADTRAN P/N 1200763L1
© 2002 ADTRAN, Inc.
61200305L1-1F
ATLAS 550 System Manual
Section 3, Network Turnup Procedure
Ethernet Switch Option Module (P/N 1200766L1)
Shipping Contents
The ADTRAN shipment of the Ethernet Switch Option Module includes the following items:
•
•
•
Ethernet Switch Option Module
Ethernet Switch Option Module Quick Start Guide
One RJ-45 to RJ-45 (8 pin) Ethernet cable, ADTRAN P/N 3127017
Resource Host Module (P/N 1200324L1)
Shipping Contents
The ADTRAN shipment of the Resource Host Module includes the following items:
•
•
Resource Host Module
Resource Host Module Quick Start Guide
4,8,16,24 Channel Voice Compression Resource Modules (P/N 1200312Lx)
Shipping Contents
The ADTRAN shipment of the 4,8,16,24 Channel Voice Compression Resource Modules includes the
following items:
•
•
4,8,16,24 Channel Voice Compression Resource Modules
4,8,16,24 Channel Voice Compression Resource Modules Quick Start Guide
32 Channel ADPCM Resource Module (P/N 1200752L1)
Shipping Contents
The ADTRAN shipment of the 32 Channel ADPCM Resource Module includes the following items:
•
•
32 Channel ADPCM Resource Module
32 Channel ADPCM Resource Module Quick Start Guide
Nx 56/64 BONDing Resource Module (P/N 1200326L1)
Shipping Contents
The ADTRAN shipment of the Nx 56/64 BONDing Resource Module includes the following items:
•
•
Nx 56/64 BONDing Resource Module
Nx 56/64 BONDing Resource Module Quick Start Guide
61200305L1-1F
© 2002 ADTRAN, Inc.
59
Section 3, Network Turnup Procedure
60
ATLAS 550 System Manual
© 2002 ADTRAN, Inc.
61200305L1-1F
USER INTERFACE GUIDE
This section of ADTRAN’s ATLAS 550 System Manual is designed for use by network administrators and
others who will configure and provision the system. It contains information about navigating the VT100
user interface, configuration information, and menu descriptions.
CONTENTS
Navigating the Terminal Menu . . . . . . . . . . . . . . . . . . . . . . . . . . . . . . . . . . . . . . . . . . . . . . . . . . . . 64
Terminal Menu Window . . . . . . . . . . . . . . . . . . . . . . . . . . . . . . . . . . . . . . . . . . . . . . . . . . . . . . . 64
Navigating using the Keyboard Keys . . . . . . . . . . . . . . . . . . . . . . . . . . . . . . . . . . . . . . . . . . . . . 66
Terminal Menu and System Control . . . . . . . . . . . . . . . . . . . . . . . . . . . . . . . . . . . . . . . . . . . . . . . . 68
Selecting the Appropriate Menu . . . . . . . . . . . . . . . . . . . . . . . . . . . . . . . . . . . . . . . . . . . . . . . . . 68
Security Levels . . . . . . . . . . . . . . . . . . . . . . . . . . . . . . . . . . . . . . . . . . . . . . . . . . . . . . . . . . . . . . 69
Menu Descriptions . . . . . . . . . . . . . . . . . . . . . . . . . . . . . . . . . . . . . . . . . . . . . . . . . . . . . . . . . . . . . . 69
System Info . . . . . . . . . . . . . . . . . . . . . . . . . . . . . . . . . . . . . . . . . . . . . . . . . . . . . . . . . . . . . . . . . 70
System Status . . . . . . . . . . . . . . . . . . . . . . . . . . . . . . . . . . . . . . . . . . . . . . . . . . . . . . . . . . . . . . . 72
System Config. . . . . . . . . . . . . . . . . . . . . . . . . . . . . . . . . . . . . . . . . . . . . . . . . . . . . . . . . . . . . . . 79
System Utility . . . . . . . . . . . . . . . . . . . . . . . . . . . . . . . . . . . . . . . . . . . . . . . . . . . . . . . . . . . . . . . 92
Modules. . . . . . . . . . . . . . . . . . . . . . . . . . . . . . . . . . . . . . . . . . . . . . . . . . . . . . . . . . . . . . . . . . . 102
Modules Menu (T1/PRI Network Interface Module) . . . . . . . . . . . . . . . . . . . . . . . . . . . . . . . . . 104
Modules Menu (E1/PRA Network Interface Module) . . . . . . . . . . . . . . . . . . . . . . . . . . . . . . . . 111
Modules Menu (Modem Management Network Module) . . . . . . . . . . . . . . . . . . . . . . . . . . . . . 116
Modules Menu (BRI DBU Network Interface Module). . . . . . . . . . . . . . . . . . . . . . . . . . . . . . . . 118
Modules Menu (Dual/Quad T1/PRI Option Modules) . . . . . . . . . . . . . . . . . . . . . . . . . . . . . . . . 123
Modules Menu (Dual Nx56/64 Option Module) . . . . . . . . . . . . . . . . . . . . . . . . . . . . . . . . . . . . . 130
Modules Menu (Dual USSI Option Module) . . . . . . . . . . . . . . . . . . . . . . . . . . . . . . . . . . . . . . . 137
Modules Menu (Quad Basic Rate ISDN (U Interface) Option Module) . . . . . . . . . . . . . . . . . . . 144
Modules Menu (Quad Basic Rate ISDN (S/T Interface) Option Module) . . . . . . . . . . . . . . . . . 147
Modules Menu (Quad/Octal FXS Option Module). . . . . . . . . . . . . . . . . . . . . . . . . . . . . . . . . . . 150
Modules Menu (Quad/Octal FXO Option Module) . . . . . . . . . . . . . . . . . . . . . . . . . . . . . . . . . . 154
Modules Menu (Octal E&M Option Module) . . . . . . . . . . . . . . . . . . . . . . . . . . . . . . . . . . . . . . . 158
Modules Menu (Legacy Data Option Module). . . . . . . . . . . . . . . . . . . . . . . . . . . . . . . . . . . . . . 162
Modules Menu (NxT1 HSSI and NxT1 HSSI/V.35 Option Modules). . . . . . . . . . . . . . . . . . . . . 165
Modules Menu (Ethernet Switch Module) . . . . . . . . . . . . . . . . . . . . . . . . . . . . . . . . . . . . . . . . . 175
Modules Menu (Resource Host Module). . . . . . . . . . . . . . . . . . . . . . . . . . . . . . . . . . . . . . . . . . 176
Modules Menu (VCOM Option Module) . . . . . . . . . . . . . . . . . . . . . . . . . . . . . . . . . . . . . . . . . . 176
Modules Menu (32 Channel ADPCM Resource Module) . . . . . . . . . . . . . . . . . . . . . . . . . . . . . 182
Modules Menu (Nx 56/64 BONDing Resource Module) . . . . . . . . . . . . . . . . . . . . . . . . . . . . . . 187
Packet Manager . . . . . . . . . . . . . . . . . . . . . . . . . . . . . . . . . . . . . . . . . . . . . . . . . . . . . . . . . . . . 190
Router . . . . . . . . . . . . . . . . . . . . . . . . . . . . . . . . . . . . . . . . . . . . . . . . . . . . . . . . . . . . . . . . . . . . 218
Dedicated Maps . . . . . . . . . . . . . . . . . . . . . . . . . . . . . . . . . . . . . . . . . . . . . . . . . . . . . . . . . . . . 233
Dedicated Maps (T1/PRI Network or Dual/Quad T1/PRI Modules) . . . . . . . . . . . . . . . . . . . . . 236
Dedicated Maps (E1/PRA Network Interface). . . . . . . . . . . . . . . . . . . . . . . . . . . . . . . . . . . . . . 237
Dedicated Maps (Quad/Octal FXS Module) . . . . . . . . . . . . . . . . . . . . . . . . . . . . . . . . . . . . . . . 239
Dedicated Maps (Quad/Octal FXO Module) . . . . . . . . . . . . . . . . . . . . . . . . . . . . . . . . . . . . . . . 242
Dedicated Maps (Dual Nx 56/64 Module) . . . . . . . . . . . . . . . . . . . . . . . . . . . . . . . . . . . . . . . . . 243
Dedicated Maps (Dual USSI Module) . . . . . . . . . . . . . . . . . . . . . . . . . . . . . . . . . . . . . . . . . . . . 244
Dedicated Maps (Octal E&M Module). . . . . . . . . . . . . . . . . . . . . . . . . . . . . . . . . . . . . . . . . . . . 244
61200305L1-1F
© 2002 ADTRAN, Inc.
61
Section 4, User Interface Guide
ATLAS 550 System Manual
Dedicated Maps (NxT1 HSSI and NxT1 HSSI/V.35 Modules) . . . . . . . . . . . . . . . . . . . . . . . . .
Dedicated Maps (Legacy Data Module) . . . . . . . . . . . . . . . . . . . . . . . . . . . . . . . . . . . . . . . . . .
Dedicated Maps (Pkt Endpt - Packet Endpoint) . . . . . . . . . . . . . . . . . . . . . . . . . . . . . . . . . . . .
Dedicated Maps (Pkt Voice - Packet Voice Endpoint) . . . . . . . . . . . . . . . . . . . . . . . . . . . . . . .
Circuit Status. . . . . . . . . . . . . . . . . . . . . . . . . . . . . . . . . . . . . . . . . . . . . . . . . . . . . . . . . . . . . . .
Dial Plan . . . . . . . . . . . . . . . . . . . . . . . . . . . . . . . . . . . . . . . . . . . . . . . . . . . . . . . . . . . . . . . . . .
Dial Plan (T1 Network and Dual/Quad T1/PRI Modules) . . . . . . . . . . . . . . . . . . . . . . . . . . . . .
Dial Plan (E1/PRA Network Module). . . . . . . . . . . . . . . . . . . . . . . . . . . . . . . . . . . . . . . . . . . . .
Dial Plan (BRI DBU Network Interface and Quad BRI/U Modules). . . . . . . . . . . . . . . . . . . . . .
Dial Plan (Quad/Octal FXS Module) . . . . . . . . . . . . . . . . . . . . . . . . . . . . . . . . . . . . . . . . . . . . .
Dial Plan (Quad/Octal FXO Module) . . . . . . . . . . . . . . . . . . . . . . . . . . . . . . . . . . . . . . . . . . . . .
Dial Plan (Octal E&M Module) . . . . . . . . . . . . . . . . . . . . . . . . . . . . . . . . . . . . . . . . . . . . . . . . .
Dial Plan (Dual Nx56/64 Module) . . . . . . . . . . . . . . . . . . . . . . . . . . . . . . . . . . . . . . . . . . . . . . .
Dial Plan (Dual USSI Module). . . . . . . . . . . . . . . . . . . . . . . . . . . . . . . . . . . . . . . . . . . . . . . . . .
Dial Plan (Quad BRI S/T Module) . . . . . . . . . . . . . . . . . . . . . . . . . . . . . . . . . . . . . . . . . . . . . . .
Dial Plan (Pkt Endpt - Packet Endpoints) . . . . . . . . . . . . . . . . . . . . . . . . . . . . . . . . . . . . . . . . .
Dial Plan (Ckt Backup - Circuit Backup Endpoints). . . . . . . . . . . . . . . . . . . . . . . . . . . . . . . . . .
Dial Plan (Pkt Voice - Packet Voice Endpoint) . . . . . . . . . . . . . . . . . . . . . . . . . . . . . . . . . . . . .
245
246
247
248
250
253
265
280
285
288
292
297
300
301
303
304
307
310
FIGURES
Figure 1.
Figure 2.
Figure 3.
Figure 4.
Figure 5.
Figure 6.
Figure 7.
Figure 8.
Figure 9.
Figure 10.
Figure 11.
Figure 12.
Figure 13.
Figure 14.
Figure 15.
Figure 16.
Figure 17.
Figure 18.
Top-Level Terminal Menu Window . . . . . . . . . . . . . . . . . . . . . . . . . . . . . . . . . . . . . . . . 64
Alternate Menu View . . . . . . . . . . . . . . . . . . . . . . . . . . . . . . . . . . . . . . . . . . . . . . . . . . . 65
System Info Menu . . . . . . . . . . . . . . . . . . . . . . . . . . . . . . . . . . . . . . . . . . . . . . . . . . . . . 70
System Status Menu . . . . . . . . . . . . . . . . . . . . . . . . . . . . . . . . . . . . . . . . . . . . . . . . . . . 72
System Config Menu . . . . . . . . . . . . . . . . . . . . . . . . . . . . . . . . . . . . . . . . . . . . . . . . . . . 79
System Utility Menu . . . . . . . . . . . . . . . . . . . . . . . . . . . . . . . . . . . . . . . . . . . . . . . . . . . . 92
View Selftest Log . . . . . . . . . . . . . . . . . . . . . . . . . . . . . . . . . . . . . . . . . . . . . . . . . . . . . . 97
Modules Menu . . . . . . . . . . . . . . . . . . . . . . . . . . . . . . . . . . . . . . . . . . . . . . . . . . . . . . . 102
T1/PRI Loopback Test Diagram. . . . . . . . . . . . . . . . . . . . . . . . . . . . . . . . . . . . . . . . . . 109
E1/PRA Network Loopback Test Diagram . . . . . . . . . . . . . . . . . . . . . . . . . . . . . . . . . . 116
T1/PRI Loopback Test Diagram. . . . . . . . . . . . . . . . . . . . . . . . . . . . . . . . . . . . . . . . . . 128
T1/PRI Loopback Test Diagram. . . . . . . . . . . . . . . . . . . . . . . . . . . . . . . . . . . . . . . . . . 169
HSSI Interface Loopback Test Diagram. . . . . . . . . . . . . . . . . . . . . . . . . . . . . . . . . . . . 171
Packet Manager Menu . . . . . . . . . . . . . . . . . . . . . . . . . . . . . . . . . . . . . . . . . . . . . . . . . 190
Router Menu (IP Selected). . . . . . . . . . . . . . . . . . . . . . . . . . . . . . . . . . . . . . . . . . . . . . 218
Dedicated Maps Menu . . . . . . . . . . . . . . . . . . . . . . . . . . . . . . . . . . . . . . . . . . . . . . . . . 233
Circuit Status Menu . . . . . . . . . . . . . . . . . . . . . . . . . . . . . . . . . . . . . . . . . . . . . . . . . . . 250
Dial Plan Menu. . . . . . . . . . . . . . . . . . . . . . . . . . . . . . . . . . . . . . . . . . . . . . . . . . . . . . . 253
TABLES
Table 1.
Table 2.
Table 3.
Table 4.
Table 5.
Table 6.
62
Password Security Levels . . . . . . . . . . . . . . . . . . . . . . . . . . . . . . . . . . . . . . . . . . . . . . . . 69
ATLAS 550 System Controller Self-Test Log . . . . . . . . . . . . . . . . . . . . . . . . . . . . . . . . . 97
FXS 2W State Table . . . . . . . . . . . . . . . . . . . . . . . . . . . . . . . . . . . . . . . . . . . . . . . . . . . 152
FXO 2W State Table . . . . . . . . . . . . . . . . . . . . . . . . . . . . . . . . . . . . . . . . . . . . . . . . . . . 156
E&M 2W State Table . . . . . . . . . . . . . . . . . . . . . . . . . . . . . . . . . . . . . . . . . . . . . . . . . . . 160
IP Statistics . . . . . . . . . . . . . . . . . . . . . . . . . . . . . . . . . . . . . . . . . . . . . . . . . . . . . . . . . . 227
© 2002 ADTRAN, Inc.
61200305L1-1F
ATLAS 550 System Manual
Table 7.
Table 8.
Table 9.
Table 10.
Section 4, User Interface Guide
ICMP Statistics . . . . . . . . . . . . . . . . . . . . . . . . . . . . . . . . . . . . . . . . . . . . . . . . . . . . . . . 229
TCP Statistics . . . . . . . . . . . . . . . . . . . . . . . . . . . . . . . . . . . . . . . . . . . . . . . . . . . . . . . . 230
UDP Statistics . . . . . . . . . . . . . . . . . . . . . . . . . . . . . . . . . . . . . . . . . . . . . . . . . . . . . . . . 231
IP Fast Cache Statistics . . . . . . . . . . . . . . . . . . . . . . . . . . . . . . . . . . . . . . . . . . . . . . . . 231
61200305L1-1F
© 2002 ADTRAN, Inc.
63
Section 4, User Interface Guide
1.
ATLAS 550 System Manual
NAVIGATING THE TERMINAL MENU
Log in to the ATLAS 550 by connecting one end of the supplied silver cable to the RJ-45 interface labeled
CONTROL IN (located on the rear panel of the unit) or CRAFT (located on the front of the unit) and the
other to the supplied RJ-45 to DB-9 adapter. Connect the DB-9 (female) to a VT100 terminal or PC with
VT100 emulator software. Configure the terminal settings for 9600 data rate, no parity, 8 data bits, 1 stop
bit, and no flow control.
After connecting to the unit and beginning a terminal session, a login screen appears. The default password
for the ATLAS 550 is (all lowercase) password. (Refer to DLP-002, Logging in to the System for detailed
instructions.)
Terminal Menu Window
After logging in, all menu items and data fields are displayed in the terminal menu window (see Figure 1),
through which you have complete control of the ATLAS 550.
Menu Path
Left Pane
Right Pane
SYS
^A=more
Extended Help
Network Status
Slot Status
Navigation Help
System Time
Tool Tip
Figure 1. Top-Level Terminal Menu Window
Menu Path
The first line of the terminal menu window (the menu path) shows the session’s current position (path) in
the menu structure. For example, Figure 1 shows the top-level menu with the cursor on the SYSTEM INFO
submenu; therefore, the menu path reads ATLAS 550/SYSTEM INFO.
Window Panes
When you first start a terminal menu session, the terminal menu window is divided into left and right
panes. The left pane shows the list of available submenus, while the right pane shows the contents of the
currently selected submenu.
64
© 2002 ADTRAN, Inc.
61200305L1-1F
ATLAS 550 System Manual
Section 4, User Interface Guide
You can view the terminal windows in two ways: with fields and submenus displaying horizontally across
the right pane, or with fields and submenus displaying vertically down the right pane. Viewing submenus
vertically rather than horizontally allows you to see information at a glance rather than scrolling
horizontally across the window. To change the view, move your cursor to an index number and press
<Enter>. Figure 2 shows this alternate view. Fields and submenu names may vary slightly in this view.
Figure 2. Alternate Menu View
Window Pane Navigation
Use the following chart to assist you in moving between and within the two window panes.
To do this...
Press this key...
Move from left pane to right pane
Tab
Enter
Right arrow
Move from right pane to left pane
Tab
Escape
Left arrow
Backspace
Move within each pane
Up arrow
Down arrow
Left arrow
Right arrow
61200305L1-1F
© 2002 ADTRAN, Inc.
65
Section 4, User Interface Guide
ATLAS 550 System Manual
Right Window Pane Notation
The right window pane shows the contents of the currently selected menu. These contents include both
submenu items and data fields. Some submenus contain additional submenus and some data fields
contain additional data fields. The following chart explains the notation used to identify these
additional items.
This notation...
Means that...
[+]
More items are available when selected
[DATA]
More items are available when selected
<+ >
An action is to be taken, such as activating a test
Highlighted menu item
You can enter data in this field
Underlined field
The field contains read-only information
Additional Terminal Menu Window Features
•
•
•
•
•
•
SYS - displays status information about the system controller
Tool Tip - provides a brief description of the currently selected (highlighted) command
Network Status - displays status information, such as OK, WARN, or ALRM about network slots 1-2
Slot Status - displays status information, such as OK, WARN, or ALRM about option slots 1-4
Extended Help - displays information (when available) about selected commands (CTRL+A)
Navigation Help - lists characters used for navigating the terminal menu and session management
(CTRL+Z)
System Time - displays current time
•
Navigating using the Keyboard Keys
You can use various keystrokes to move through the terminal menu, to manage a terminal menu session,
and to configure the system. Press <CTRL+Z > to activate a pop-up screen listing the navigation
keystrokes.
Moving through the Menus
To do this...
Press this key...
Return to the home screen
H
Jump between two menu items
Press < J > while the cursor is located on a menu item, and you jump back to the
main screen.
Go to another menu item, press < J >, and you jump back to the screen that was
displayed the first time you pressed < J >.
Press < J > anytime you want to jump between these items.
J
Select items
Arrows
Edit a selected menu item
66
Enter
© 2002 ADTRAN, Inc.
61200305L1-1F
ATLAS 550 System Manual
Section 4, User Interface Guide
To do this...
Press this key...
Cancel an edit
Escape
Close pop-up help screen
Escape
Move between the left and right panes
Tab
Arrows
Move to the top of a screen
A
Move to the bottom of a screen
Z
Ascend one menu level
Backspace
Session Management Keystrokes
To do this...
Press this key...
Log out of a session
CTRL+L
Invalidate the password entry and return to the login screen
CTRL+S
Refresh the screen
To save time, only the portion of the screen that has changed is refreshed. This
option should only be necessary if the display picks up incorrect characters caused
by disconnecting and reconnecting the terminal session.
CTRL+R
View Extended Data
Display data fields too large for display window.
CTRL+V
Configuration Keystrokes
To do this...
Press this key...
Restore factory default settings.
F
This setting restores the factory defaults based on the location of the cursor. If the
cursor is on a module line (in the MODULES menu), then only the selected module is
updated to factory defaults.
Copy selected items to the clipboard.
The amount of information you can copy depends on the cursor location when you
press <C>:
If the cursor is over an editable field, only that item is copied.
If the cursor is over the index number of a list, then all of the items in the row of
the list are copied. For example, if the cursor is over the SLOT # field in the
MODULES screen, all of the information associated with the slot is copied.
C
Paste the item stored in the clipboard, if the information is compatible.
You must confirm all pastes - except those to a single editable field.
P
61200305L1-1F
© 2002 ADTRAN, Inc.
67
Section 4, User Interface Guide
ATLAS 550 System Manual
To do this...
Press this key...
Increment the value of certain types of fields by one when you paste information
into those fields.
>
Decrement the value of certain types of fields by one when you paste information
into those fields.
<
Insert a new list item.
For example, add a new item to the DEDICATED MAP connection list by pressing <I>
while the cursor is over the index number.
I
Delete a list item.
For example, delete an item from the DEDICATED MAP connection list by pressing
<D> while the index number is active.
D
Getting Help
The bottom line of the terminal menu window contains context-sensitive help information. When the
cursor is positioned over a set of configuration items, a help message displays (when available) providing a
description of the item. When more detailed help is available for a particular item, ^A displays at the
bottom of the window. At this point, pressing <CTRL+A> displays a pop-up help screen with information
about the item.
Press <CTRL+Z> to activate a help screen that displays the available keystrokes you can use to navigate
the terminal menu.
2.
TERMINAL MENU AND SYSTEM CONTROL
Selecting the Appropriate Menu
The terminal menu is the access point to all other operations. Each terminal menu item has several
functions and submenus that identify and provide access to specific operations and parameters. Use the
chart below to help select the appropriate terminal menu.
To do this...
Go to this menu...
Review and monitor general system information for the ATLAS 550
SYSTEM INFO
Review and monitor system status for the ATLAS 550
SYSTEM STATUS
Set up the operational configuration for the ATLAS 550
SYSTEM CONFIG
Update settings, transfer files, perform system diagnostics, and reboot
the ATLAS 550
SYSTEM UTILITY
Review and configure settings for each installed module, including the
ATLAS 550 built-in network ports
MODULES
68
© 2002 ADTRAN, Inc.
61200305L1-1F
ATLAS 550 System Manual
Section 4, User Interface Guide
To do this...
Go to this menu...
Define and configure all layer 2 connections including Frame Relay and PACKET MANAGER
PPP endpoints
Define, configure and monitor all ATLAS 550 Router functions
ROUTER
Assign dedicated connections between any two ports in the ATLAS 550 DEDICATED MAPS
Access Dial Backup functions including monitoring the status of backup CIRCUIT STATUS
links, manually forcing a backup switch, and restoring a primary
connection
Set global ATLAS 550 switch parameters or set individual parameters
for each port in the ATLAS 550 that handles a switched call
DIAL PLAN
Security Levels
To edit terminal menu items, you must have a password and the appropriate security level. Table 1
describes the six security levels.
Table 1. Password Security Levels
Security Level
3.
Description
5
Read-only permission for all menu items - minimum rights
4
Read permission for all menu items and permission to use test commands
3
Access to all commands except passwords, flash download, authentication
methods, and interface configurations
2
Access to all commands except passwords, flash download, and authentication
methods
1
Access to all commands except passwords
0
Permission to edit every menu item, including creating and editing passwords maximum rights
MENU DESCRIPTIONS
The remainder of this section describes ATLAS 550 menu and submenu options
To help you follow the terminal menu hierarchy, the following notations are used:
MENUS > SUBMENUS > SUB-SUBMENUS
61200305L1-1F
© 2002 ADTRAN, Inc.
69
Section 4, User Interface Guide
ATLAS 550 System Manual
SYSTEM INFO
The SYSTEM INFO menu provides basic information about the unit as well as data fields for editing
information. Figure 3 displays the submenus and data fields that are available when you select this menu
item.
Figure 3. System Info Menu
SYSTEM INFO > SYSTEM NAME
Write security: 3; Read security: 5
Provides a user-configurable text string for the name of the ATLAS 550. This name can help you
distinguish between different installations. You can enter up to 40 alphanumeric characters in this field,
including spaces and special characters (such as an underbar).
SYSTEM INFO > SYSTEM LOCATION
Write security: 3; Read security: 5
Provides a user-configurable text string for the location of the ATLAS 550. This field is to help you keep
track of the physical location of the unit. You can enter up to 40 alphanumeric characters in this field,
including spaces and special characters (such as an underbar).
SYSTEM INFO > SYSTEM CONTACT
Write security: 3; Read security: 5
Provides a user-configurable text string for a contact name. You can use this field to enter the name, phone
number, or e-mail address of a person responsible for the ATLAS 550 system. You can enter up to 40
alphanumeric characters in this field, including spaces and special characters (such as an underbar).
70
© 2002 ADTRAN, Inc.
61200305L1-1F
ATLAS 550 System Manual
Section 4, User Interface Guide
SYSTEM INFO > FIRMWARE REVISION
Read security: 5
Displays the current firmware revision level of the controller.
SYSTEM INFO > SYSTEM UPTIME
Read security: 5
Displays the length of time the ATLAS 550 system has been running. Each time you reset the system, this
value resets to 0 days, 0 hours, 0 min and 0 secs.
SYSTEM INFO > STARTUP MODE
Read security: 5
Displays details about the last system startup. For example, rebooting the ATLAS 550 from the SYSTEM
UTILITY menu will cause this field to read WARM REBOOT.
SYSTEM INFO > CURRENT TIME/DATE (24HR)
Write security: 3; Read security: 5
Displays the current date and time, including seconds. To edit this field, place the cursor on the field and
press <Enter>. Then, enter the time in a 24-hour format (such as 23:00:00 for 11:00 pm), and the date in
mm-dd-yyyy format (for example, 10-30-1998). Press <Enter> when you are finished to accept the change.
SYSTEM INFO > INSTALLED MEMORY
Read security: 5
Displays the type and amount of memory in use (including Flash memory and DRAM).
SYSTEM INFO > SERIAL NUMBER
Read security: 5
Displays the serial number for the unit. The serial number of the ATLAS 550 will automatically display in
this field.
SYSTEM INFO > BOOT ROM REV
Read security: 5
Displays the boot ROM revision.
61200305L1-1F
© 2002 ADTRAN, Inc.
71
Section 4, User Interface Guide
ATLAS 550 System Manual
SYSTEM STATUS
The SYSTEM STATUS menu provides the user with status information about the ATLAS 550 operational
parameters including logged system events and timing. Figure 4 displays the submenus and data fields that
are available when you select this menu item.
Figure 4. System Status Menu
SYSTEM STATUS > EVENT LOG
Read security: 5
Displays the last 349 warning or failure messages sent, including the day, date, and priority of the message.
The most recent messages display at the top of the list. The following read-only fields are available to
review:
SYSTEM STATUS > EVENT LOG > TIME
Read security: 5
Displays the date (mm/dd) and the time (hh:mm:ss) that the event occurred.
SYSTEM STATUS > EVENT LOG > CAT
Read security: 5
Displays the severity of the event. The possible categories are CRITICAL, MAJOR, MINOR, WARNING,
NORMAL, and INFO. You can specify which types of errors you want the system to log with the System
Event Logging option. See Section 7, System Event Logging, for details.
72
© 2002 ADTRAN, Inc.
61200305L1-1F
ATLAS 550 System Manual
Section 4, User Interface Guide
SYSTEM STATUS > EVENT LOG > SRC
Read security: 5
Displays the source of the event.
SYSTEM STATUS > EVENT LOG > SLOT
Read security: 5
Displays the slot number in which the event occurred. If this field displays (0), the event that occurred was
on one of the two built-in network ports.
SYSTEM STATUS > EVENT LOG > PORT
Read security: 5
Displays the port in which the event occurred.
SYSTEM STATUS > EVENT LOG > EVENT DESCRIPTION
Read security: 5
Displays a description of the event.
SYSTEM STATUS > CLEAR SYSTEM EVENT LOG
Write security: 3; Read security: 3
Clears the event log. When you select this command, the following prompt displays:
Confirm (y/n)
This will clear the entire event log.
Select Y to clear the log or N to exit the command.
If you clear the event log, you cannot retrieve the data.
SYSTEM STATUS > CLEAR SYSTEM LED
Write security: 3; Read security: 3
Changes the color of the SYSTEM LED on the front panel from yellow (indicating a previous error) to
green (OK). The SYSTEM LED turns red if the ATLAS 550 detects a major system failure. If the failure
condition clears, the LED turns yellow to warn of the past failure.
SYSTEM STATUS > ETHERNET PORT
Read security: 5
Displays status information about the ETHERNET port. An asterisk (*) indicates activity for the item. The
following read-only fields are available to review:
61200305L1-1F
© 2002 ADTRAN, Inc.
73
Section 4, User Interface Guide
ATLAS 550 System Manual
SYSTEM STATUS > ETHERNET PORT > I/F STATUS
Read security: 5
Indicates the current status of the ETHERNET port.
SYSTEM STATUS > ETHERNET PORT > TX FRAMES
Read security: 5
Indicates the number of frames transmitted from the ETHERNET port since system startup.
SYSTEM STATUS > ETHERNET PORT > RX FRAMES
Read security: 5
Indicates the number of frames received on the ETHERNET port since system startup.
SYSTEM STATUS > ETHERNET PORT > ETHERNET RATE
Read security: 5
Indicates whether the Ethernet network is 10 or 100BaseT.
SYSTEM STATUS > CHAIN PORT
Write security: 2; Read security: 5
Displays the status of the RJ-45 (female) CONTROL IN (Chain) port.
SYSTEM STATUS > CHAIN PORT > SIGNAL LEADS
Read security: 5
Displays the state of the CONTROL IN (Chain) port signals (RTS, CTS, DTR, and DCD).
SYSTEM STATUS > CHAIN PORT > TX BYTES
Read security: 5
Displays the number of bytes transmitted from the CONTROL IN (Chain) port.
SYSTEM STATUS > CHAIN PORT > RX BYTES
Read security: 5
Displays the number of bytes received by the CONTROL IN (Chain) port.
SYSTEM STATUS > CHAIN PORT > OVERRUN ERRS
Read security: 5
Displays the number of overrun errors received by the CONTROL IN (Chain) port.
SYSTEM STATUS > CHAIN PORT > FRAMING ERRS
Read security: 5
Displays the number of framing errors received by the CONTROL IN (Chain) port.
74
© 2002 ADTRAN, Inc.
61200305L1-1F
ATLAS 550 System Manual
Section 4, User Interface Guide
SYSTEM STATUS > CHAIN PORT > CLEAR COUNTERS
Write security: 5; Read security: 5
Clears the CONTROL IN (Chain) port statistics. Press Y to activate this command.
SYSTEM STATUS > SYSTEM TEMPERATURE ALARMS
Read security: 5
Indicates that the internal temperature of the unit has exceeded normal operating limits. The two thresholds
indicate that the internal temperature is greater than 70ºC and greater than 85ºC. If one of these thresholds
is exceeded, a warning will be placed in the EVENT LOG (see Section 7, System Event Logging for more
details) but no other action will be taken. The following status symbols are used:
[–]
Normal condition
[*]
Failure condition
[!]
No Information Available
SYSTEM STATUS > SYSTEM POWER ALARMS
Read security: 5
Indicates that the -58V and/or -24V power supplies are not functional. These power supplies are
continuously monitored to determine failures. If one of these supplies fails, a message will be placed in the
EVENT LOG (see Section 7, System Event Logging for more details). The following status symbols are
used:
[–]
Normal condition
[*]
Failure condition
[!]
No Information Available
SYSTEM STATUS > SYSTEM TIMING SOURCE
Read security: 5
Indicates which timing source (primary or backup) is currently being used by ATLAS 550 and whether the
system is locked onto this source. If the display does not indicate locked, the ATLAS 550 does not have a
valid source of timing and cannot reliably transfer data. Review the current setting for system timing
source in the SYSTEM CONFIG menu. See System Config > Primary Timing Source on page 79 and System
Config > Backup Timing Source on page 79 for details.
SYSTEM STATUS > RESOURCE USAGE
Write security: 5; Read security: 5
Provides resource usage tracking for dynamic resources throughout the system. This includes current,
average, and minimum availability for both analog and digital resources.
61200305L1-1F
© 2002 ADTRAN, Inc.
75
Section 4, User Interface Guide
ATLAS 550 System Manual
SYSTEM STATUS > RESOURCE USAGE > DATA TABLES
Read security: 5
Displays resource usage for dynamic resources throughout the system in a table format.
SYSTEM STATUS > RESOURCE USAGE > DATA TABLES > RESOURCE TYPE
Read security: 5
Displays types of dynamically allocated resources being tracked throughout the system. Examples are
ANALOG (analog modem resource), DIGITAL (digital call resource), and PKT VOICE (packet voice
compression resource).
SYSTEM STATUS > RESOURCE USAGE > DATA TABLES > CURRENT
Read security: 5
Shows the number of resources available (not in use) and the total number of resources. If a resource is
taken offline, it is not included in the total.
SYSTEM STATUS > RESOURCE USAGE > DATA TABLES > AVERAGE
Read security: 5
Shows the average number of resources available since the statistics were last reset.
SYSTEM STATUS > RESOURCE USAGE > DATA TABLES > MIN
Read security: 5
Shows the fewest number of resources available since the last reset.
SYSTEM STATUS > RESOURCE USAGE > DATA TABLES > 0 (ZERO) AVAIL
Read security: 5
Provides a count of the number of times the quantity of available resources reached 0.
SYSTEM STATUS > RESOURCE USAGE > DATA TABLES > HR DATA
Read security: 5
Displays the AVERAGE, MINIMUM, and 0 AVAILABLE data broken down in hour increments for a 24-hour
period.
SYSTEM STATUS > RESOURCE USAGE > DATA TABLES > RESET
Write security: 4; Read security: 5
Activates the reset of all accumulated availability statistics for the selected resource.
SYSTEM STATUS > RESOURCE USAGE > CONFIG
Write security: 3; Read security: 5
Configures the statistics displayed under data tables.
76
© 2002 ADTRAN, Inc.
61200305L1-1F
ATLAS 550 System Manual
Section 4, User Interface Guide
SYSTEM STATUS > RESOURCE USAGE > CONFIG > DISPLAY FORMAT
Write security: 3; Read security: 5
Sets the display format for all RESOURCE USAGE statistics to either RAW DATA or PERCENTAGES.
SYSTEM STATUS > RESOURCE USAGE > CONFIG > RESET MODE
Write security: 3; Read security: 5
Sets the reset mode for the RESOURCE USAGE statistics to one of the following:
DAILY
performs reset daily at 12:00 AM
WEEKLY
performs reset on Saturday night, 12:00 AM
MANUAL
disables automatic reset of the resource usage statistics
SYSTEM STATUS > TRUNK USAGE
Write security: 5; Read security: 5
Indicates trunk use as NET TERM PRI (Primary Rate ISDN circuits configured as NETWORK TERM), NET
TERM RBS (T1/RBS trunks configured as NETWORK TERM); USER TERM PRI (Primary Rate ISDN circuits
configured as USER TERM), USER TERM RBS (T1/RBS trunks configured as USER TERM).
SYSTEM STATUS > TRUNK USAGE > DATA TABLES
Read security: 5
Display for collected resource usage data.
SYSTEM STATUS > TRUNK USAGE > DATA TABLES > TRUNK TYPE
Read security: 5
Displays types of trunks in the system. Examples include: NETRBS (T1/RBS trunks configured as
NETWORK TERM), NETPRI (Primary Rate ISDN circuits configured as NETWORK TERM), USERRBS (T1/RBS
trunks configured as USER TERM), and USERPRI (Primary Rate ISDN circuits configured as USER TERM).
SYSTEM STATUS > TRUNK USAGE > DATA TABLES > CURRENT
Read security: 5
Shows the number of resources available (not in use) and the total number of resources. If a resource is
taken offline, it is not included in the total.
SYSTEM STATUS > TRUNK USAGE > DATA TABLES > AVERAGE
Read security: 5
Shows the average number of resources available since the statistics were last reset.
SYSTEM STATUS > TRUNK USAGE > DATA TABLES > MIN
Read security: 5
Shows the fewest number of resources available since the last reset.
61200305L1-1F
© 2002 ADTRAN, Inc.
77
Section 4, User Interface Guide
ATLAS 550 System Manual
SYSTEM STATUS > TRUNK USAGE > DATA TABLES > 0 (ZERO) AVAIL
Read security: 5
Provides a count of the number of times the quantity of available resources reached 0.
SYSTEM STATUS > TRUNK USAGE > DATA TABLES > SLT/PRT
Read security: 5
Displays the usage data broken down by slots and ports.
SYSTEM STATUS > TRUNK USAGE > DATA TABLES > RESET
Write security: 4; Read security: 5
Activates the reset of all accumulated availability statistics.
SYSTEM STATUS > TRUNK USAGE > CONFIG
Write security: 5; Read security: 5
Configures the statistics displayed under data tables.
SYSTEM STATUS > TRUNK USAGE > CONFIG > DISPLAY FORMAT
Write security: 5; Read security: 5
Sets the display format for all TRUNK USAGE statistics to either RAW DATA or PERCENTAGES.
SYSTEM STATUS > TRUNK USAGE > CONFIG > RESET MODE
Write security: 3; Read security: 5
Sets the reset mode for the TRUNK USAGE statistics to one of the following:
78
DAILY
performs reset daily at 12:00 AM
WEEKLY
performs reset on Saturday night, 12:00 AM
MANUAL
disables automatic reset of the trunk usage statistics
© 2002 ADTRAN, Inc.
61200305L1-1F
ATLAS 550 System Manual
Section 4, User Interface Guide
SYSTEM CONFIG
The SYSTEM CONFIG menu allows you to set up the ATLAS 550 operational configuration. Figure 5 shows
the items included in this menu.
Figure 5. System Config Menu
SYSTEM CONFIG > PRIMARY TIMING SOURCE
Write security: 1; Read security: 5
Selects the primary timing source. You can select either INTERNAL or any port available on the system that
is capable of providing timing. Please refer to the specific module information to determine if a port can
provide timing for the system.
SYSTEM CONFIG > BACKUP TIMING SOURCE
Write security: 1; Read security: 5
Selects the secondary timing source. You can select either INTERNAL or any port available on the system
that is capable of providing timing. Please refer to the specific module information to determine if a port
can provide timing for the system. The ATLAS 550 uses the backup timing source if the primary timing
source goes into alarm. The BACKUP TIMING SOURCE should be different from the PRIMARY TIMING SOURCE
for the most reliable operation.
SYSTEM CONFIG > ADLP ADDRESS
Write security: 2; Read security: 5
Shows the system ADTRAN Data Link Layer Protocol (ADLP) address for connecting remote devices to
ADTRAN management software. The allowable range is between 2 and 65520. Enter a value not used by
any other ADTRAN units controlled by the management software.
61200305L1-1F
© 2002 ADTRAN, Inc.
79
Section 4, User Interface Guide
ATLAS 550 System Manual
SYSTEM CONFIG > SESSION TIMEOUT
Write security: 3; Read security: 5
Defines the number of seconds the terminal session must remain idle before the session times out (valid
range 0 to 65535). You can enter zero to deactivate this option (the session will never time out).
SYSTEM CONFIG > MAX TELNET SESSIONS
Write security: 3; Read security: 5
Defines the maximum number of Telnet sessions that can be active at the same time. Enter a number
between 0 and 12 in this field.
If you enter zero in this field, you will not be able to use Telnet. Only enter zero if you want
to completely lock out Telnet access.
SYSTEM CONFIG > ETHERNET PORT
Write security: 2; Read security: 5
Provides a way to configure various settings for the ETHERNET port. The following options are available
for review and editing:
SYSTEM CONFIG > ETHERNET PORT > PORT NAME
Write security: 2; Read security: 5
Defines the name of the ETHERNET port. Enter up to 16 alphanumeric characters in this field, including
spaces and special characters (such as underbar). This field may be left blank.
SYSTEM CONFIG > ETHERNET PORT > IP ADDRESS
Write security: 2; Read security: 5
Lists the address assigned to the base ETHERNET port. This address is in dotted decimal notation (four
decimal numbers, each in the range of 0 to 255, separated by periods). This value is set to 10.0.0.1 by
default. The IP address is used for the 10/100BaseT ETHERNET interface. Obtain the correct IP address
from your LAN administrator.
SYSTEM CONFIG > ETHERNET PORT > DEFAULT GATEWAY
Write security: 2; Read security: 5
Defines or changes the default gateway. Enter the default gateway address by entering a decimal number
into the appropriate field and then pressing <Enter> to move to the next field. You will need a default
gateway if the LAN contains multiple segments. This address is in dotted decimal notation (four decimal
numbers, each in the range of 0 to 255, separated by periods). This value is set to 0.0.0.0 by default.
Contact your LAN administrator for the appropriate address.
SYSTEM CONFIG > ETHERNET PORT > SUBNET MASK
Write security: 2; Read security: 5
Defines which part of a destination IP address contains the network number. This address is in dotted
decimal notation (four decimal numbers, each in the range of 0 to 255, separated by periods). This value is
80
© 2002 ADTRAN, Inc.
61200305L1-1F
ATLAS 550 System Manual
Section 4, User Interface Guide
set to 255.255.255.0 by default. This part of the destination IP address is used along with the ATLAS 550
IP address to determine which nodes must be reached through the default IP gateway.
SYSTEM CONFIG > ETHERNET PORT > MAC ADDRESS
Read security: 5
Displays the system Ethernet Media Access Control (MAC) address. This field is read-only.
SYSTEM CONFIG > ETHERNET PORT > ETHERNET SPEED
Write security: 2; Read security: 5
Defines the rate at which the ETHERNET port operates. Choose from 10 MBPS or AUTO 10/100. When the
unit is set for AUTO 10/100, the ATLAS 550 auto-detects the data rate of the LAN and sets itself to that rate,
either 10 or 100 Mbps.
SYSTEM CONFIG > ETHERNET PORT > DHCP STATUS
Read security: 5
Displays the current status of the DHCP client in the ATLAS 550. The following states are possible (per
RFC 2131): INIT, SELECTING, REQUESTING, BOUND, RENEWING, REBINDING, INIT-REBOOT, REBOOTING, and
NON-INIT.
SYSTEM CONFIG > ETHERNET PORT > LEASE EXPIRES
Read security: 5
Displays the date and time the current IP address lease will expire and a new one will be necessary.
SYSTEM CONFIG > ETHERNET PORT > RELEASE
Write security: 2; Read security: 5
Forces the ATLAS 550 to release the currently assigned IP address.
Once the IP address is manually released, the ATLAS 550 will not be available for Telnet
access until a manual renew is performed.
SYSTEM CONFIG > ETHERNET PORT > RENEW
Write security: 2; Read security: 5
Forces the ATLAS 550 to send a message to the DHCP server requesting a new IP address lease.
SYSTEM CONFIG > CHAIN PORT
Write security: 2; Read security: 5
Accepts input for configuring the CONTROL IN (Chain) port located on the rear of the unit.
61200305L1-1F
© 2002 ADTRAN, Inc.
81
Section 4, User Interface Guide
ATLAS 550 System Manual
SYSTEM CONFIG > CHAIN PORT > PORT NAME
Write security: 2; Read security: 5
Defines the name of the CONTROL IN (Chain) port. You can leave this field blank.
SYSTEM CONFIG > CHAIN PORT > PORT TYPE
Write security: 2; Read security: 5
Specifies whether you use DIRECT or DIAL mode. DIRECT mode is used when connecting to a VT100
terminal, and DIAL mode is used for modem access.
SYSTEM CONFIG > CHAIN PORT > PORT SPEED
Write security: 2; Read security: 5
Specifies the baud rate of the port. Select either 2400, 9600, 19200, or 38400. If you are using DIAL for
PORT TYPE, ensure that the PORT SPEED setting matches the modem baud rate.
SYSTEM CONFIG > CHAIN PORT > MODEM INITIALIZATION STRING
Write security: 2; Read security: 5
Specifies the initialization string for the modem. Refer to your modem documentation for acceptable
initialization strings. The default value will configure most modems to the appropriate configuration for
the ATLAS 550.
SYSTEM CONFIG > CHAIN PORT > INITIALIZE MODEM
Write security: 4; Read security: 5
Sends the modem initialization string to the modem. When you select this command, the following
message displays: PLEASE VERIFY A MODEM IS CONNECTED TO THE CHAIN PORT BEFORE CONTINUING.
CONFIRM (Y/N). Ensure that a modem is connected before selecting Y.
SYSTEM CONFIG > ADMIN PORT > FLOW CONTROL
Write security: 2; Read security: 5
This option sets the flow control for the CONTROL IN (Chain) port. You may configure the CONTROL IN
(Chain) port flow control for NONE or HARDWARE.
SYSTEM CONFIG > SNMP
Write security: 3; Read security: 5
Provides a way to configure SNMP access for the ATLAS 550. The following options are available for
review and editing:
SYSTEM CONFIG > SNMP > SNMP ACCESS
Write security: 3; Read security: 5
Defines whether SNMP access to the ATLAS 550 is ENABLED or DISABLED. Select the appropriate option
for your application.
82
© 2002 ADTRAN, Inc.
61200305L1-1F
ATLAS 550 System Manual
Section 4, User Interface Guide
SYSTEM CONFIG > SNMP > SNMP COMMUNITIES
Write security: 3; Read security: 5
Defines SNMP manager(s) characteristics as follows:
SYSTEM CONFIG > SNMP > SNMP COMMUNITIES > IP ADDRESS
Write security: 3; Read security: 5
Specifies the IP address of the network manager.
SYSTEM CONFIG > SNMP > SNMP COMMUNITIES > PRIVILEGES
Write security: 3; Read security: 5
Defines the GET (read-only) and GET/SET (read and write) privileges.
SYSTEM CONFIG > SNMP > SNMP COMMUNITIES > GET NAME
Write security: 3; Read security: 5
Defines the community name for GET access. This value must match the GET name defined on the network
management station (NMS). PUBLIC is the default name.
SYSTEM CONFIG > SNMP > SNMP COMMUNITIES > SET NAME
Write security: 3; Read security: 5
Defines the community name for SET access. This value must match either the GET or SET name defined
on the network management station (NMS). PUBLIC is the default name.
SYSTEM CONFIG > SNMP > TRAP TRANSMISSION
Write security: 3; Read security: 5
Enables and disables SNMP trap transmission.
SYSTEM CONFIG > SNMP > AUTHEN TRAP TRANSMISSION
Write security: 3; Read security: 5
Enables and disables the authentication failure trap. The authentication failure trap is sent (when ENABLED)
each time authenticated access to the ATLAS 550 fails.
SYSTEM CONFIG > SNMP > TRAPS DESTINATION
Write security: 3; Read security: 5
Defines the destination for SNMP traps as follows:
SYSTEM CONFIG > SNMP > TRAPS DESTINATION > IP ADDRESS
Write security: 3; Read security: 5
Identifies the IP address for the network management station (NMS) to send traps to.
61200305L1-1F
© 2002 ADTRAN, Inc.
83
Section 4, User Interface Guide
ATLAS 550 System Manual
SYSTEM CONFIG > SNMP > TRAPS DESTINATION > COMMUNITY
Write security: 3; Read security: 5
Defines the community name for trap destinations. This name must match the community name defined on
the network management station (NMS).
SYSTEM CONFIG > SNMP > TRAPS DESTINATION > TRAP FILTERING
Write security: 3; Read security: 5
Sets the minimum severity level required for a system event to generate an SNMP trap. If a trap event occurs
with a severity level equal to or more severe than the trap type’s current threshold setting, the event is sent as
an SNMP trap. (Refer to the ADTRAN Technical Support web page (www.adtran.com) for a listing of all
MIBs containing traps and their severity levels.) The available selections for the threshold levels are:
DISABLED, CRITICAL, MAJOR, MINOR, WARNING, NORMAL, and INFO.
SYSTEM CONFIG > SNMP > TRAPS DESTINATION > STATION TYPE
Write security: 3; Read security: 5
To deliver the SNMP trap packet with the COMMUNITY NAME unchanged, define the STATION TYPE as
NORMAL. If you are using T-Watch PRO, define the STATION TYPE as T-WATCH MGMT and append the
COMMUNITY NAME with “.ADLP ADDRESS.” Within the SNMP trap packet, this field is automatically
updated before it is sent to the management station.
SYSTEM CONFIG > SNMP > DS1 CURRENT PERF THRESHOLDS
Write security: 3; Read security: 5
Defines performance threshold values for DS1 Line and Path statistics recorded in a 15-minute interval.
Refer to the ADTRAN Enterprise MIB and the DS1 Extension MIB (available on the documentation CD or
the ADTRAN website at www.adtran.com) for more MIB-specific information. If a statistic value exceeds
its threshold value, then the corresponding Alert Trap will be sent if the Alert Event is armed and Alert Traps
are enabled. These thresholds apply to all DS1 interfaces in the system.
SYSTEM CONFIG > SNMP > DS1 CURRENT PERF THRESHOLDS > CURRENT ES THRSH
Write security: 3; Read security: 5
The DS1 performance monitor Threshold Value for the Current 15 minute Errored Seconds (ES) parameter.
The default value is 65 for an approximate BER level of 10E-5.
SYSTEM CONFIG > SNMP > DS1 CURRENT PERF THRESHOLDS > CURRENT SES THRSH
Write security: 3; Read security: 5
The DS1 performance monitor Threshold Value for the Current 15 minute Severely Errored Seconds (SES)
parameter. The default value is 10 for an approximate BER level of 10E-5.
SYSTEM CONFIG > SNMP > DS1 CURRENT PERF THRESHOLDS > CURRENT SEFS THRSH
Write security: 3; Read security: 5
The DS1 performance monitor Threshold Value for the Current 15 minute Severely Errored Framing
Seconds (SEFS) parameter. The default value is 2 for an approximate BER level of 10E-5.
84
© 2002 ADTRAN, Inc.
61200305L1-1F
ATLAS 550 System Manual
Section 4, User Interface Guide
SYSTEM CONFIG > SNMP > DS1 CURRENT PERF THRESHOLDS > CURRENT UAS THRSH
Write security: 3; Read security: 5
The DS1 performance monitor Threshold Value for the Current 15 minute Unavailable Seconds (UAS)
parameter. The default value is 10 for an approximate BER level of 10E-5.
SYSTEM CONFIG > SNMP > DS1 CURRENT PERF THRESHOLDS > CURRENT CSS THRSH
Write security: 3; Read security: 5
The DS1 performance monitor Threshold Value for the Current 15 minute Controlled Slip Seconds (CSS)
parameter. The default value is 1 for an approximate BER level of 10E-5.
SYSTEM CONFIG > SNMP > DS1 CURRENT PERF THRESHOLDS > CURRENT PCV THRSH (D4)
Write security: 3; Read security: 5
The DS1 performance monitor Threshold Value for the Current 15 minute Path Code Violations (PCV)
parameter, when the Line Type is Super Frame (AT&T D4 format) DS1. The default value is 72 framing
errors for an approximate BER level of 10E-5.
SYSTEM CONFIG > SNMP > DS1 CURRENT PERF THRESHOLDS > CURRENT PCV THRSH
(ESF)
Write security: 3; Read security: 5
The DS1 performance monitor Threshold Value for the Current 15 minute Path Code Violations (PCV)
parameter, when the Line Type is Extended Super Frame DS1. The default value is 13,296 CRC errors for
an approximate BER level of 10E-5.
SYSTEM CONFIG > SNMP > DS1 CURRENT PERF THRESHOLDS > CURRENT LES THRSH
Write security: 3; Read security: 5
The DS1 performance monitor Threshold Value for the Current 15 minute Line Errored Seconds (LES)
parameter. The default value is 65 for an approximate BER level of 10E-5.
SYSTEM CONFIG > SNMP > DS1 CURRENT PERF THRESHOLDS > CURRENT LCV THRSH
Write security: 3; Read security: 5
The DS1 performance monitor Threshold Value for the Current 15 minute Line Code Violations (LCV)
parameter. The default value is 13,340 for an approximate BER level of 10E-5.
SYSTEM CONFIG > SNMP > DS1 TOTAL PERF THRESHOLDS
Write security: 3; Read security: 5
Defines performance threshold values for DS1 Line and Path statistics. Refer to the ADTRAN Enterprise
MIB and DS1 Extension MIB (available on the ADTRAN website at www.adtran.com) for more MIB
specific information. If a statistic value exceeds its threshold value, then the corresponding Alert Trap will
be sent if the Alert Event is armed and Alert Traps are enabled. These thresholds apply to all DS1
interfaces in the system.
61200305L1-1F
© 2002 ADTRAN, Inc.
85
Section 4, User Interface Guide
ATLAS 550 System Manual
SYSTEM CONFIG > SNMP > DS1 TOTAL PERF THRESHOLDS > TOTAL ES THRSH
Write security: 3; Read security: 5
The DS1 performance monitor Threshold Value for the Total Errored Seconds (ES) parameter. The default
value is 648 for an approximate BER level of 10E-5.
SYSTEM CONFIG > SNMP > DS1 TOTAL PERF THRESHOLDS > TOTAL SES THRSH
Write security: 3; Read security: 5
The DS1 performance monitor Threshold Value for the Total Severely Errored Seconds (SES) parameter.
The default value is 100 for an approximate BER level of 10E-5.
SYSTEM CONFIG > SNMP > DS1 TOTAL PERF THRESHOLDS > TOTAL SEFS THRSH
Write security: 3; Read security: 5
The DS1 performance monitor Threshold Value for the Total Severely Errored Framing Seconds (SEFS)
parameter. The default value is 17 for an approximate BER level of 10E-5.
SYSTEM CONFIG > SNMP > DS1 TOTAL PERF THRESHOLDS > TOTAL UAS THRSH
Write security: 3; Read security: 5
The DS1 performance monitor Threshold Value for the Total Unavailable Seconds (UAS) parameter. The
default value is 10 for an approximate BER level of 10E-5.
SYSTEM CONFIG > SNMP > DS1 TOTAL PERF THRESHOLDS > TOTAL CSS THRSH
Write security: 3; Read security: 5
The DS1 performance monitor Threshold Value for the Total Controlled Slip Seconds (CSS) parameter.
The default value is 4 for an approximate BER level of 10E-5.
SYSTEM CONFIG > SNMP > DS1 TOTAL PERF THRESHOLDS > TOTAL PCV THRSH (D4)
Write security: 3; Read security: 5
The DS1 performance monitor Threshold Value for the Total Path Code Violations (PCV) parameter, when
the Line Type is Super Frame (AT&T D4 format) DS1. The default value is 691 framing errors for an
approximate BER level of 10E-5.
SYSTEM CONFIG > SNMP > DS1 TOTAL PERF THRESHOLDS > TOTAL PCV THRSH (ESF)
Write security: 3; Read security: 5
The DS1 performance monitor Threshold Value for the Total Path Code Violations (PCV) parameter, when
the Line Type is Extended Super Frame DS1. The default value is 132,960 CRC errors for an approximate
BER level of 10E-5.
SYSTEM CONFIG > SNMP > DS1 TOTAL PERF THRESHOLDS > TOTAL LES THRSH
Write security: 3; Read security: 5
The DS1 performance monitor Threshold Value for the Total Line Errored Seconds (LES) parameter. The
default value is 648 for an approximate BER level of 10E-5.
86
© 2002 ADTRAN, Inc.
61200305L1-1F
ATLAS 550 System Manual
Section 4, User Interface Guide
SYSTEM CONFIG > SNMP > DS1 TOTAL PERF THRESHOLDS > TOTAL LCV THRSH
Write security: 3; Read security: 5
The DS1 performance monitor Threshold Value for the Total Line Code Violations (LCV) parameter. The
default value is 133,400 for an approximate BER level of 10E-5.
SYSTEM CONFIG > SNMP > ASP ENDPOINT COMMUNITIES
Write security: 0; Read security: 0
Configures the ADLP list used when accepting incoming traps from remote ADTRAN TSU 100 Series or
ISU 512 units. For a trap to be recognized and sent to the network management station (NMS) listed in the
TRAPS DESTINATION field, the remote unit must be listed in the ASP ENDPOINT COMMUNITIES list. The ADLP
ADDRESS and ADLP PASSWORD parameters must be configured.
SYSTEM CONFIG > SNMP > ASP ENDPOINT COMMUNITIES > ADLP ADDRESS
Write security: 0; Read security: 0
Enter the ADLP address (Unit ID) of the remote unit. Only traps containing an ADLP address listed here
will be accepted.
SYSTEM CONFIG > SNMP > ASP ENDPOINT COMMUNITIES > ADLP PASSWORD
Write security: 0; Read security: 0
Enter the ADLP password (Unit Password) of the remote unit. The password will be verified before traps
will be accepted from the remote unit.
SYSTEM CONFIG > SNMP > SNMP/ASP PROXY
Write security: 0; Read security: 0
Enables or disables Get_Request capabilities for remote units. When enabled, this feature allows SNMP
requests to be sent from the network management station (NMS) through the ATLAS 550 to the selected
remote unit. Remote units must be ADTRAN TSU 100 Series or ISU 512 products. All remote units must
be listed in the ASP ENDPOINT COMMUNITIES list.
SYSTEM CONFIG > SNMP > SNMP/ASP POLLING
Write security: 0; Read security: 0
Enables or disables trap polling through the ATLAS 550 to remote ADTRAN TSU 100 Series or ISU 512
units. When enabled, this feature allows the ATLAS 550 to forward any traps received from remote units to
the network management station (NMS) listed in the TRAPS DESTINATION field. The remote unit must be
listed in the ASP ENDPOINT COMMUNITIES for the traps to be forwarded.
SYSTEM CONFIG > EVENT LOGGING
Write security: 3; Read security: 5
Sets the system event severity level threshold for each of the ATLAS 550 system event types. When a
system event occurs, the event is logged if the event’s severity level is equal to or more severe than the
event type’s current threshold setting. See Section 7, System Event Logging, for detailed information on the
system events.
61200305L1-1F
© 2002 ADTRAN, Inc.
87
Section 4, User Interface Guide
ATLAS 550 System Manual
SYSTEM CONFIG > SYSLOG SETUP
Write security: 3; Read security: 3
Configures the ATLAS 550 Syslog client for use with a Syslog server (supplied with ADTRAN Utilities or
available on most UNIX platforms).
SYSTEM CONFIG > SYSLOG SETUP > TRANSMISSION
Write security: 3; Read security: 3
Enables or disables the transmission of log events to the external Syslog server.
SYSTEM CONFIG > SYSLOG SETUP > HOST IP ADDRESS
Write security: 3; Read security: 3
Lists the IP address of the external server that is running the Syslog host daemon.
SYSTEM CONFIG > SYSLOG SETUP > HOST FACILITY
Write security: 3; Read security: 3
Specifies the facility destination of log events. Facilities are located on the host and are managed by the
Syslog host daemon running on either a UNIX machine or a PC. For details on the ADTRAN syslog server
host facilities, please refer to Section 8, ADTRAN Utilities.
SYSTEM CONFIG > REAL TIME CLOCK
Write security: 3; Read security: 5
Provides access to the two options listed below. You can review and edit these options.
SYSTEM CONFIG > REAL TIME CLOCK > CURRENT TIME/DATE
Write security: 3; Read security: 5
Displays the current date and time, including seconds. To edit this field, enter the time in 24-hour format
(such as 23:00:00 for 11:00 pm), and enter the date in mm-dd-yyyy format (for example, 09-23-1998).
SYSTEM CONFIG > REAL TIME CLOCK > AUTO DAYLIGHT SAVINGS
Write security: 3; Read security: 5
When enabled, automatically updates the time and date when Daylight Savings Time starts and when
Standard Time ends.
SYSTEM CONFIG > ACCESS PASSWORDS
Write security: 0; Read security: 0
Provides a way to edit passwords and to add new users and passwords. All menu items are protected by
passwords of varying security levels. By assigning different passwords to different security levels, the
ATLAS 550 system administrator can control which users can change various menu items. You can assign
multiple passwords at the same access level. This way, different users with the same access privileges can
have different passwords. The six password security levels are described in Table 1 on page 69.
88
© 2002 ADTRAN, Inc.
61200305L1-1F
ATLAS 550 System Manual
Section 4, User Interface Guide
SYSTEM CONFIG > ACCESS PASSWORDS > LABEL
Write security: 0; Read security: 0
Defines a username. The defined username is for labeling purposes only; it is not used for access into the
system.
SYSTEM CONFIG > ACCESS PASSWORDS > PASSWORD
Write security: 0; Read security: 0
Allows you to change the password (the default password is “password”). The current password displays
as a series of asterisks (********). The password can contain up to a combination of 12 case-sensitive
alphanumeric characters, spaces, or special characters.
SYSTEM CONFIG > ACCESS PASSWORDS > ACCESS RIGHTS
Write security: 0; Read security: 0
Defines the password level for the corresponding label. You can select from six different password levels
(see Table 1 on page 69).
SYSTEM CONFIG > ACCESS PASSWORDS > ACTIVE
Read security: 0
Displays the number of users currently logged into the system (listed for each configured LABEL).
SYSTEM CONFIG > LICENSES
Write security: 0; Read security: 0
(Not currently used.) Provides menus to enable the optional ATLAS 550 feature upgrades.
FEATURE
Names the ATLAS 550 feature upgrade.
LICENSE KEY
Displays the license key of the feature upgrade.
SERIAL NUMBER
Displays the serial number of the feature upgrade.
LIC CNT
Displays the number of instances of the feature that the license
provides. This field may not be applicable for a given feature -- if it is
not, this field is blank.
STATUS
Reflects the status, PERMANENT or TEMPORARY, of the feature upgrade
license key.
SYSTEM CONFIG > BONDING CONFIG
Write security: 3; Read security: 5
Displays the configuration submenus available for the BONDing Module. This configuration is shared
among all BONDing Modules.
SYSTEM CONFIG > BONDING CONFIG > TXINIT TIMER
Write security: 3; Read security: 5
Specifies the length of time the originating endpoint attempts to detect the BONDING negotiation pattern
from the answering endpoint before deciding the BONDING call has failed.
61200305L1-1F
© 2002 ADTRAN, Inc.
89
Section 4, User Interface Guide
ATLAS 550 System Manual
SYSTEM CONFIG > BONDING CONFIG > TXFA TIMER
Write security: 3; Read security: 5
Specifies the length of time both endpoints attempt to detect the BONDING frame pattern when a call is
connected before deciding the BONDING call has failed. When interoperating with other manufacturers'
BONDING equipment, it may be necessary to change this time so that it matches TXADD01.
SYSTEM CONFIG > BONDING CONFIG > TXADD01 TIMER
Write security: 3; Read security: 5
Specifies the length of time both endpoints wait for additional calls to be connected at the end of
negotiation before deciding that the BONDING call has failed. The factory default setting is sufficient for
most calls to connect, although when dialing overseas it may be necessary to lengthen this timer to allow
for slower call routing.
SYSTEM CONFIG > BONDING CONFIG > TXDEQ TIMER
Write security: 3; Read security: 5
Specifies the length of time both endpoints attempt to equalize the network delay between the bearer
channels (B channels) before deciding the BONDING call has failed.
SYSTEM CONFIG > BONDING CONFIG > TANULL TIMER
Write security: 3; Read security: 5
Specifies the length of time the answering endpoint attempts to detect the BONDING negotiation pattern
from the originating endpoint before deciding the BONDING call has failed. It may be necessary to
shorten this timer if the DTE equipment using the BONDING module also has timer constraints for
completing non-BONDING parameter negotiation.
SYSTEM CONFIG > BONDING CONFIG > TCID TIMER
Write security: 3; Read security: 5
Specifies the length of time both endpoints attempt to negotiate an agreeable value for bearer channels (B
channels) and channel capacities before deciding the BONDING call has failed.
SYSTEM CONFIG > BONDING CONFIG > CALL STAGGER
Write security: 3; Read security: 5
Specifies the amount of delay between placing calls for outgoing BONDING sessions. The following call
stagger values are available: NO STAGGER, 500 MS, 1 SEC, and 2 SEC
SYSTEM CONFIG > ALARM RELAY RESET
Write security: 3; Read security: 5
Clears the Alarm Relay located on the rear panel of the ATLAS 550. Activating the software Alarm Relay
Reset functions the same as manually pressing the ACO switch located on the ATLAS 550 front panel.
90
© 2002 ADTRAN, Inc.
61200305L1-1F
ATLAS 550 System Manual
Section 4, User Interface Guide
SYSTEM CONFIG > ALARM RELAY THRESHOLD
Write security: 3; Read security: 5
Defines which threshold sets the Alarm Relay. These thresholds include CRITICAL, MAJOR, MINOR,
WARNING, and NORMAL. If an alarm occurs that is greater than or equal to the threshold selected, the Alarm
Relay will set. For example, if the threshold is set for MAJOR, then ALL MAJOR alarms and ALL CRITICAL
alarms will set the Alarm Relay. There is one exception – setting the threshold to NORMAL will not set the
Alarm Relay for NORMAL events. No NORMAL events set the Alarm Relay.
61200305L1-1F
© 2002 ADTRAN, Inc.
91
Section 4, User Interface Guide
ATLAS 550 System Manual
SYSTEM UTILITY
Use the SYSTEM UTILITY menu to view and set the system parameters shown in Figure 6.
Figure 6. System Utility Menu
SYSTEM UTILITY > UPDATE FIRMWARE
Write security: 1; Read security: 5
Updates firmware when ATLAS 550 enhancements are released. Two transfer methods are available for use in
updating any modules that contain Flash memory—including the ATLAS 550 system controller. The first
transfer method uses the ATLAS 550 serial CRAFT or CONTROL IN (Chain) port of the system controller and
XMODEM protocol. The second transfer method uses the ATLAS 550 built-in ETHERNET port of the system
controller and Trivial File Transfer Protocol (TFTP). For more details on updating firmware, please refer to
DLP-006 and DLP-007.
SYSTEM UTILITY > UPDATE FIRMWARE > MODULE SLOT
Write security: 1; Read security: 5
Displays the slot you selected for firmware updating. When this option first appears, NONE SELECTED
displays. When you move the cursor to this field and press <Enter>, a dialog box opens, allowing you to
select SLOT 0 (ATLAS 550 system controller), NTWK 1 or 2 (if an upgradeable network module is
installed), SLOT 1 through SLOT 4 (if an upgradeable module is installed), RSRC 1 through 4 (if an
upgradeable resource module is installed), or ALL MODULES OF A TYPE.
SYSTEM UTILITY > UPDATE FIRMWARE > MODULE TYPE
Write security: 1; Read security: 5
Reflects the module type selected in MODULE SLOT. The selections only include upgradeable modules.
92
© 2002 ADTRAN, Inc.
61200305L1-1F
ATLAS 550 System Manual
Section 4, User Interface Guide
SYSTEM UTILITY > UPDATE FIRMWARE > TRANSFER METHOD
Write security: 1; Read security: 5
Lists the two transfer methods for updating firmware after selecting a module slot: XMODEM and TFTP.
XMODEM transfers files by connecting to a communications program that supports XMODEM uploads to
the terminal interface. TFTP transfers files by specifying an appropriate server address and filename.
SYSTEM UTILITY > UPDATE FIRMWARE > TFTP SERVER IP ADDRESS
Write security: 1; Read security: 5
(Available for TFTP transfers only.) Configures the IP address of the TFTP Server on which the update file
resides. The ATLAS 550 uses this field to locate the network server on which the update file resides.
SYSTEM UTILITY > UPDATE FIRMWARE > TFTP SERVER FILENAME
Write security: 1; Read security: 5
(Available for TFTP transfers only.) Identifies the name of the update file to retrieve from the TFTP
Server. Enter the full path name and filename for the file.
SYSTEM UTILITY > UPDATE FIRMWARE > RESTART SCHEDULE
Write security: 1; Read security: 5
Indicates when to restart the updated module to invoke the new software, after selecting a module slot. The
two options include RESTART IMMEDIATELY AFTER UPDATE and RESTART AT SPECIFIED DATE AND TIME.
SYSTEM UTILITY > UPDATE FIRMWARE > RESTART SCHEDULE > RESTART IMMEDIATELY
AFTER UPDATE
Write security: 1; Read security: 5
Automatically restarts the module or unit (when SLOT 0 is selected) immediately after the update is
complete.
SYSTEM UTILITY > UPDATE FIRMWARE > RESTART SCHEDULE > RESTART AT SPECIFIED DATE
AND TIME
Write security: 1; Read security: 5
Lets you specify a date and time to automatically restart the updated module or unit (when SLOT 0 is
selected). When you select this option, a new field called RESTART DATE AND TIME displays below the
current field.
RESTART DATE AND TIME
Write security: 1; Read security: 5
(Available only when configured for RESTART AT SPECIFIED DATE AND TIME.) Defines the date and
time to restart the system after updating. Enter the time using a 24-hour format (e.g., 23:25:30 for
11PM, 25 minutes, 30 seconds). Enter the date in mm-dd-yyyy format (e.g.,11-08-2000).
61200305L1-1F
© 2002 ADTRAN, Inc.
93
Section 4, User Interface Guide
ATLAS 550 System Manual
SYSTEM UTILITY > UPDATE FIRMWARE > CURRENT UPDATE STATUS
Read security: 5
(Available for TFTP updates only.) Indicates progress or problems encountered during the current update
process. The field displays IDLE if no update is in progress or when the update is successfully completed.
At the end of a successful update, the contents of this field are copied into PREVIOUS UPDATE STATUS. For a
detailed listing of these messages, please refer to DLP-006, Updating the Firmware Using TFTP.
If you are updating several modules at the same time (if MODULE SLOT is set to ALL MODULES OF A TYPE),
this option displays [+], indicating that this field contains submenu items. The following submenus
display:
SLT
Indicates the slot number.
TYPE
Defines the type of module for each slot.
CURRENT STATUS
Indicates the status of the current update.
PREVIOUS STATUS
Indicates the status of the previous update.
PREVIOUS TIME
Indicates the time of the previous update.
SYSTEM UTILITY > UPDATE FIRMWARE > PREVIOUS UPDATE STATUS
Read security: 5
Displays the status of the previous update, after selecting a module slot. If a firmware update has not been
attempted for a particular slot, this field reads HAS NOT BEEN ATTEMPTED. Following a successful update,
the field reads MODULE UPDATE COMPLETE. If an update was unsuccessful, the appropriate error message
displays.
SYSTEM UTILITY > UPDATE FIRMWARE > BEGIN FIRMWARE UPDATE
Write security: 1; Read security: 5
Begins updating the firmware for the selected modules. To start this action, enter Y to begin or enter N to
cancel. You can also cancel the operation after the update has begun. For XMODEM updates, cancel the
process via the terminal emulation software (consult your documentation for the information on how to do
this). For TFTP updates, you can cancel the process by selecting CANCEL UPDATE from this field.
SYSTEM UTILITY > UPDATE STATUS
Read security: 5
Displays the status of the current firmware update. These fields are identical to those defined above in
CURRENT UPDATE STATUS.
SYSTEM UTILITY > CONFIG TRANSFER
Write security: 3; Read security: 5
Allows configuration files to be saved and shared among ATLAS 550 units. Two transfer methods are
available for use when transferring configuration files to or from the unit. The first transfer method uses
the ATLAS 550 serial CRAFT or CONTROL IN (Chain) port of the base unit and XMODEM protocol. The
second transfer method uses the ATLAS 550 built-in 10/100BaseT ETHERNET port and Trivial File
Transfer Protocol (TFTP).
94
© 2002 ADTRAN, Inc.
61200305L1-1F
ATLAS 550 System Manual
Section 4, User Interface Guide
To support these TFTP transfers, ADTRAN delivers a TFTP Server (as part of ADTRAN Utilities) on the
ATLAS 550 documentation CD. You can install the ADTRAN Utilities software on any PC running
Microsoft Windows, and use the TFTP server for TFTP transfers to/from the ATLAS 550.
Only one configuration transfer session (upload or download) can be active at a time. The TCP/IP
parameters are not saved or overwritten as part of an ATLAS 550 unit’s transferred configuration;
therefore, identical configurations can be sent to multiple units. For complete details on configuration
transfers to/from the ATLAS 550, please refer to DLP-008, DLP-009, DLP-010, and DLP-011.
SYSTEM UTILITY > CONFIG TRANSFER > TRANSFER METHOD
Write security: 3; Read security: 5
Displays the method used to transfer the configuration file to or from a server. Select TFTP to transfer files
using the 10/100BaseT ETHERNET port, or select XMODEM to use the CRAFT or CONTROL IN (Chain)
interfaces and a program such as Windows HyperTerminal.
SYSTEM UTILITY > CONFIG TRANSFER > TFTP SERVER IP ADDRESS
Write security: 3; Read security: 5
Specifies the IP address of the TFTP server. Get this address information from your System Administrator.
SYSTEM UTILITY > CONFIG TRANSFER > TFTP SERVER FILENAME
Write security: 3; Read security: 5
Defines the name of the configuration file that you transfer to or retrieve from the TFTP server. The default
name is at550.cfg, but it is editable.
SYSTEM UTILITY > CONFIG TRANSFER > CURRENT TRANSFER STATUS
Read security: 5
Indicates the current status of the transfer.
SYSTEM UTILITY > CONFIG TRANSFER > PREVIOUS TRANSFER STATUS
Read security: 5
Indicates the status of the previous transfer.
SYSTEM UTILITY > CONFIG TRANSFER > LOAD AND USE CONFIG
Write security: 3; Read security: 5
Retrieves the configuration file specified in the TFTP SERVER FILENAME field from the server. To start this
command, enter Y. To cancel this command, enter N.
If you execute this command, the ATLAS 550 retrieves the configuration file, reboots, then
restarts using the new configuration.
61200305L1-1F
© 2002 ADTRAN, Inc.
95
Section 4, User Interface Guide
ATLAS 550 System Manual
SYSTEM UTILITY > CONFIG TRANSFER > SAVE CONFIG REMOTELY
Write security: 3; Read security: 5
Saves the configuration file specified in TFTP SERVER FILENAME to the server identified in TFTP SERVER
IP ADDRESS. To start this command, enter Y. To cancel this command, enter N.
SYSTEM UTILITY > SYSTEM UTILIZATION
Write security: 0; Read security: 0
Displays statistics related to the ATLAS 550 internal operating system. Please check with ADTRAN
Technical Support before attempting to use this menu.
SYSTEM UTILITY > SYSTEM SELFTEST
Write security: 3; Read security: 5
Initiates a system self-test. The self-test consists of memory tests and data integrity tests for each installed
module.
Self-tests disrupt data flow.
SYSTEM UTILITY > SYSTEM SELFTEST > SELFTEST
Write security: 3; Read security: 5
Activates the self-test. To confirm self-test activation, press Y; to cancel the self-test press N.
SYSTEM UTILITY > SYSTEM SELFTEST > SELECTED TESTS
Write security: 3; Read security: 5
Allows the user to select a system-wide test or an individual card test. Choose from ALL TESTS, SLOT: 0
SYS CTRL, or any other installed option/network/resource module.
SYSTEM UTILITY > SYSTEM SELFTEST > CURRENT TEST STATUS
Write security: 3; Read security: 5
Displays which part of self-test is currently active. See System Utility > System Selftest > View Selftest Log
for details on individual tests.
SYSTEM UTILITY > SYSTEM SELFTEST > CURRENT SLOT/PORT
Write security: 3; Read security: 5
Displays which slot and port is currently being tested.
SYSTEM UTILITY > SYSTEM SELFTEST > VIEW SELFTEST LOG
Read security: 5
Displays time-stamped log of the tests conducted and the Pass/Fail results. Self-tests verify data integrity
and processor control to each port. Each port is looped back and a data pattern is sent and tested.
96
© 2002 ADTRAN, Inc.
61200305L1-1F
ATLAS 550 System Manual
Section 4, User Interface Guide
The result of the self-test on each installed port is listed with Pass/Fail results. Figure 7 depicts a typical
test log. The fields included in the log are described below the figure.
Figure 7. View Selftest Log
The self-test log includes the following fields:
IDX
Index number of the log.
TIME
Time and date of the log entry.
SL
ATLAS 550 slot number.
PT
ATLAS 550 port number.
EVENT
Event description.
RESULT
Show PASS/FAIL results.
The tests associated with the system controller are shown in Table 2.
Table 2. ATLAS 550 System Controller Self-Test Log
THIS EVENT...
LOGS THIS RESULT...
Flash
Flash memory checksum verified
BootRom
Boot ROM checksum verified
DSP RAM
Memory associated with the Digital Signal Processor
RTC RAM
Memory associated with the real time clock
NV Batt
Tests the battery associated with non-volatile memory
TDM RAM
Memory associated with mapping TDM bandwidth
DRAM
Dynamic RAM used for program execution
HDLC
The High-Level Data Link Controllers
Card Tst
Tests the data path for each slot in the system with an installed module.
61200305L1-1F
© 2002 ADTRAN, Inc.
97
Section 4, User Interface Guide
ATLAS 550 System Manual
SYSTEM UTILITY > SYSTEM SELFTEST > CLEAR SELFTEST LOG
Write security: 3; Read security: 5
Clears the self-test log.
Self-test log messages are not available once the log is cleared.
SYSTEM UTILITY > PING
Write security: 5; Read security: 5
Allows you to send pings (ICMP echo requests) to devices accessible via the ETHERNET interface.
Only one ping session can be active at a time.
SYSTEM UTILITY > PING > IP ADDRESS
Write security: 5; Read security: 5
Specifies the IP address to ping.
SYSTEM UTILITY > PING > COUNT
Write security: 5; Read security: 5
Specifies the number of pings to send. The default value is 4, and the maximum value is 99.
SYSTEM UTILITY > PING > SIZE (BYTES)
Write security: 5; Read security: 5
Specifies the size in bytes of the data portion of the ping request. The default value is 64 bytes, and the
maximum size is 1024 bytes.
SYSTEM UTILITY > PING > TIMEOUT (MS)
Write security: 5; Read security: 5
Specifies the time in milliseconds to wait for the ping reply before timing out. The default
timeout is 3 seconds (3000), and the maximum timeout value is 10 seconds (10,000).
SYSTEM UTILITY > PING > ROUND TRIP MIN
Read security: 5
Displays the minimum round trip time of the ping request/reply of the current set of pings.
SYSTEM UTILITY > PING > ROUND TRIP AVG
Read security: 5
Displays the average round trip time of the ping request/reply of the current set of pings.
98
© 2002 ADTRAN, Inc.
61200305L1-1F
ATLAS 550 System Manual
Section 4, User Interface Guide
SYSTEM UTILITY > PING > ROUND TRIP MAX
Read security: 5
Displays the maximum round trip time of the ping request/reply of the current set of pings.
SYSTEM UTILITY > PING > TX STATS
Read security: 5
Displays the number of ping requests transmitted (n TXED), the number of ping replies received (n RXED),
and the number of ping requests that were lost (n LOST).
SYSTEM UTILITY > PING > RESET STATS
Write security: 5; Read security: 5
Resets all ping statistics to zero. If the ping client is active, this menu will stop it.
SYSTEM UTILITY > PING > START/STOP
Write security: 5; Read security: 5
If the ping client is currently idle, this menu sends pings to the specified address. If the ping client is active,
the menu either starts or stops sending pings.
SYSTEM UTILITY > ATEL CLIENT
Write security: 5; Read security: 5
Allows a user to remotely configure ADTRAN TSUs using ADLP over the inband management channel
on a V.35 port. This feature only allows for remote sessions through the ATLAS 550 to the TSUs – not vice
versa.
SYSTEM UTILITY > ATEL CLIENT > ATEL ADDRESS
Write security: 5; Read security: 5
Defines the ADLP address (Unit ID) assigned to the remote unit you are trying to connect to. The valid
range is 2 to 65520.
SYSTEM UTILITY > ATEL CLIENT > CONNECT
Write security: 5; Read security: 5
Activator used to start an ATEL client session to the remote unit configured in the ATEL ADDRESS field.
SYSTEM UTILITY > TELNET CLIENT
Write security: 5; Read security: 5
Allows a user to open a Telnet session to any device listed in the ATLAS 550 route table.
SYSTEM UTILITY > TELNET CLIENT > ADDRESS
Write security: 5; Read security: 5
Defines the IP address assigned to the remote unit you are trying to connect to.
61200305L1-1F
© 2002 ADTRAN, Inc.
99
Section 4, User Interface Guide
ATLAS 550 System Manual
SYSTEM UTILITY > TELNET CLIENT > ESCAPE CHAR
Write security: 5; Read security: 5
Defines the Telnet client escape character. Typing the combination characters will close the active telnet
session to the remote unit specified in the ADDRESS field.
Option
Keystroke
^]
<Ctrl > + ]
^\
<Ctrl > + \
^[
<Ctrl > + [
^^
<Ctrl > + <Shift > + 6
^_
<Ctrl > + <Shift > + -
SYSTEM UTILITY > TELNET CLIENT > PORT
Write security: 5; Read security: 5
Defines the IP port used in the remote login session. Default (for Telnet) is 23.
SYSTEM UTILITY > TELNET CLIENT > CONNECT
Write security: 5; Read security: 5
Activator used to start a Telnet session to the remote unit configured in the ADDRESS field.
SYSTEM UTILITY > CLIENT STATUS
Write security: 5; Read security: 5
Displays status from current Telnet client sessions.
SYSTEM UTILITY > CLIENT STATUS > USER NAME
Displays the username (from access passwords list) that has an active Telnet client session.
SYSTEM UTILITY > CLIENT STATUS > SESSION ID
Displays the remote unit’s IP address followed by the IP port of an active Telnet client session (in the
format IP.IP.IP.IP:PORT).
SYSTEM UTILITY > REBOOT SYSTEM
Write security: 0; Read security: 0
Reboots the ATLAS 550 system. When you select this command, the following message displays:
** WARNING ** This will reboot the entire system and service will be interrupted!
Press Y to reboot the system or N to cancel the command.
100
© 2002 ADTRAN, Inc.
61200305L1-1F
ATLAS 550 System Manual
Section 4, User Interface Guide
SYSTEM UTILITY > FACTORY DEFAULT SYSTEM
Write security: 0; Read security: 0
Resets the entire system to the factory default settings. To reset the system, press Y. To cancel this
command, press N. When you select this command, the following message displays:
This will delete all configuration settings. ADTRAN recommends making a backup
copy of the configuration before defaulting the system.
61200305L1-1F
© 2002 ADTRAN, Inc.
101
Section 4, User Interface Guide
ATLAS 550 System Manual
MODULES
Write security: 3; Read security: 5
The MODULES menu provides status information and menu options that allow you to configure and control
the installed option modules as well as the network ports (see Figure 8).
Figure 8. Modules Menu
If you install a module in a slot, then want to install a different type of module in the slot,
you must set this field to EMPTY before selecting another module type.
If a module is installed, the module type automatically shows the name of the installed
module, and it cannot be set to any other option.
MODULES > SLT
Read security: 5
Identifies the slot number. Slot 0 refers to the ATLAS 550 Base Unit.
The ATLAS 550 has three types of slots: network slots, option module slots, and resource module slots.
The two network slots are designated NTW1 and NTW2. The four option module slots are designated SLT1
through 4, and the four resource module slots are designated RSC1 through 4. Resource modules are
installed onto any option module, but not onto network modules.
102
© 2002 ADTRAN, Inc.
61200305L1-1F
ATLAS 550 System Manual
Section 4, User Interface Guide
MODULES > TYPE
Write security: 3; Read security: 5
Displays the type of module actually installed in the slot or the type of module you plan to install in the
slot. The ATLAS 550 controller automatically detects the type of module installed in each slot, and the
TYPE field automatically defaults to the installed module type. You can also use this field to preconfigure a
unit before actually installing modules by specifying the module that you want to install in each slot.
To use this option, navigate to the field you want to edit and press <Enter>. For empty slots, a list of all the
available module types displays. Select the one you want and it displays in the TYPE field. If this field is
already configured with a module, you can only set this field to EMPTY. To change from one module type to
another, you must first set the field to EMPTY.
MODULES > MENU
Read security: 5
Displays additional status and configuration menus for the ATLAS 550 controller or selected module. To
access the submenus for this item, use the arrow keys to scroll to the MENU column for the module you
want to edit, and press <Enter>. For detailed information on each submenu item for a particular module,
refer to the modules menus discussion for the appropriate option or resource module.
MODULES > ALARM
Read security: 5
Displays whether there is an alarm condition on the ATLAS 550 controller or selected module. Press
<Enter> to access the ALARM menu. For detailed information on each submenu item for a particular
module, refer to the following sections for the appropriate option or resource module alarm menu
discussions.
MODULES > TEST
Read security: 5
Displays whether the ATLAS 550 controller or selected module is executing a test. Press <Enter> to access
the TEST menu. This option will allow you to set up and initiate tests. You may also access this menu
through the MENU submenu on this screen. For detailed information on each submenu item for a particular
module, refer to the TEST sections for the appropriate option or resource module test menu discussions.
MODULES > STATE
Read security: 5
Displays whether the ATLAS 550 controller or selected module is online or offline. Even though a module
is physically installed, it must be marked ONLINE for it to be considered an available resource. This
parameter allows an installed module to be marked OFFLINE, which may be useful in system
troubleshooting. If you choose OFFLINE, the module will not be in alarm condition, but will display
OFFLINE. While in OFFLINE, the STATUS LED will flash green. A module will automatically change to the
ONLINE state when installed.
61200305L1-1F
© 2002 ADTRAN, Inc.
103
Section 4, User Interface Guide
ATLAS 550 System Manual
MODULES > STATUS
Read security: 5
Displays status information on the installed modules as follows:
ONLINE
The module is enabled and is responding to the system
controller’s status polls. This is the normal response of the
system.
NO RESPONSE
The module is enabled but is not responding to the system
controller’s status polls. This response indicates a problem in
the system or that the module is not properly installed.
EMPTY
The system controller has not detected the presence of a module
in the system, nor has a module been manually enabled for this
option slot.
OFFLINE
The module is installed but has been taken offline by a user. The
module is still responding to controller polls.
OFFLINE/NO RESPONSE
The module is installed but has been taken offline by a user. The
module is not responding to controller polls.
NOT SUPPORTED
The module is not supported by the current system
configuration.
MODULES > REV
Read security: 5
Displays the hardware revision of the ATLAS 550 and other installed modules.
MODULES MENU (T1/PRI NETWORK INTERFACE MODULE)
This section provides detailed information on the MODULES menu and submenus for the T1/PRI Network
Interface Module. The ATLAS 550 system controller automatically detects the presence of the T1/PRI
Network Interface Module when it is installed in the system (listed as T1/PRI-1). To see the menus for the
T1/PRI Network Interface Module via the terminal menu, use the arrow keys to scroll to the MODULES
menu and press <Enter> to access the module choices. Refer to the T1/PRI Network Interface Module
Quick Start Guide for a menu tree containing a complete listing of menus.
MODULES (T1/PRI-1) > INFO
Read security: 5
Displays general information about the T1/PRI Network Interface Module as follows:
MODULES (T1/PRI-1) > INFO > PART NUMBER
Read security: 5
Displays the part number of the T1/PRI Network Interface Module.
104
© 2002 ADTRAN, Inc.
61200305L1-1F
ATLAS 550 System Manual
Section 4, User Interface Guide
MODULES (T1/PRI-1) > INFO > SERIAL NUMBER
Read security: 5
Displays the module’s serial number.
MODULES (T1/PRI-1) > INFO > ASSEMBLY REVISION
Read security: 5
Displays the assembly revision of the module.
MODULES (T1/PRI-1) > ALARM STATUS
Read security: 5
Displays the current T1 alarm status.
MODULES (T1/PRI-1) > ALARM STATUS > PRT
Read security: 5
Indicates the port number.
MODULES (T1/PRI-1) > ALARM STATUS > ALARMS
Read security: 5
Displays an alarm condition on the ATLAS 550 unit. Press <Enter> to access this menu item.
LOS
Indicates a loss of signal detected on port interface.
RED
Indicates inability to frame data received on the port. Alternately
referred to as Out of Frame (OOF).
YELLOW
Receiving remote alarm (RAI) on port.
BLUE
Receiving unframed all ones from the port Alarm Indicator Signal
(AIS).
DS0 ALARM
Displays per-DS0 alarm status; that is, at least one DS0 channel is in
alarm if an asterisk (*) appears. These alarms usually indicate the failure
to receive the protocol that has been configured for the DS0.
RX LEVEL (RECEIVE
LEVEL)
Indicates the strength of the signal (in dB) received on the port.
61200305L1-1F
© 2002 ADTRAN, Inc.
105
Section 4, User Interface Guide
ATLAS 550 System Manual
MODULES (T1/PRI-1) > DS0 STATUS
Read security: 5
The DS0 status indicates usage on a DS0 basis. These options are read-only:
-
Unallocated
*
Inactive
+
Signaling mismatch
A
Active B Channel
D
Active D Channel
M
Maintenance
N
Dedicated (nailed)
O
Off hook - originate (RBS)
R
Ringing (RBS); Restart (ISDN)
W
Waiting dial tone
MODULES (T1/PRI-1) > DS0 ALARMS
Read security: 5
Displays per-DS0 alarm status. These alarms usually indicate the failure to receive the protocol that has
been configured for the DS0.
-
No Alarm DS0
D
D Channel Alarm (ISDN)
F
Frame Alarm (packet)
T
TBOP Alarm (packet)
P
PPP Alarm (packet)
MODULES (T1/PRI-1) > SIG STATUS
Read security: 5
Read-only field that indicates signaling of all 24 DS0s. The A/B bits for Rx (receive) and Tx (transmit)
DS0s are shown. Dashes display for those DS0s where robbed bit signaling (RBS) is not being transferred
by the ATLAS 550.
106
© 2002 ADTRAN, Inc.
61200305L1-1F
ATLAS 550 System Manual
Section 4, User Interface Guide
MODULES (T1/PRI-1) > PERFORMANCE CURRENT
Write security:3; Read security: 5
The performance fields (either CURRENT, 15-MINUTE total, or 24-HOUR total) provide status on key
performance measures as specified in ANSI T1.403 and AT&T TR54016 for the T1/PRI port. Except for
CLR, these fields are all read-only. The monitored parameters include the following:
PRT
Displays the port number
CLR
Clears performance information for the selected port
ES
Errored Second (ES) is a second with one or more error events OR one or more
Out Of Frame events OR one or more Controlled Slips
BES
Bursty Errored Second (BES) is a second with more than one, but less than 320
error events
SES
Severely Errored Second (SES) is a second with 320 or more error events OR
one or more Out Of Frame events
SEFS
Severely Errored Frame Second is a second that contains four consecutive
errored framing patterns.
LOFC
Loss of Frame Count is a count of seconds in which a valid framing pattern could
not be obtained.
CSS
Controlled Slip Second
UAS
Unavailable Second
LCV
Line Code Violation
PCV
Path Code Violation
LES
Line Errored Second
MODULES (T1/PRI-1) > PERFORMANCE 15MIN
Write security:3; Read security: 5
Stores the performance data for the previous 15-minute window. Refer to Modules (T1/PRI-1) >
Performance Current for a detailed description of these fields.
MODULES (T1/PRI-1) > PERFORMANCE 24HR
Write security:3; Read security: 5
Stores the performance data for the previous 24-hour window. Refer to Modules (T1/PRI-1) >
Performance Current for a detailed description of these fields.
61200305L1-1F
© 2002 ADTRAN, Inc.
107
Section 4, User Interface Guide
ATLAS 550 System Manual
MODULES (T1/PRI-1) > CONFIGURATION
Write security:3; Read security: 5
All of the following configurable parameters apply to whether the port is connected to a Primary Rate
ISDN circuit or a channelized T1 circuit.
MODULES (T1/PRI-1) > CONFIGURATION > PRT
Read security: 5
Displays the port number.
MODULES (T1/PRI-1) > CONFIGURATION > PORT NAME
Write security: 3; Read security: 5
Accepts any alpha-numeric name up to 16 characters long, to uniquely identify each port on the
ATLAS 550.
MODULES (T1/PRI-1) > CONFIGURATION > FRAME
Write security: 2; Read security: 5
This field must be set to match the frame format of the circuit to which it is connected, available from the
network supplier. Choose either D4 or ESF.
MODULES (T1/PRI-1) > CONFIGURATION > CODE
Write security: 2; Read security: 5
Set this field to match the line code of the circuit to which it is connected (this information is available
from the network supplier). Choose either AMI (Alternate Mark Inversion) or B8ZS (Bipolar Eight Zero
Substitution).
MODULES (T1/PRI-1) > CONFIGURATION > TX YEL
Write security: 3; Read security: 5
Controls the transmission of yellow alarms. Choose either ON or OFF.
MODULES (T1/PRI-1) > CONFIGURATION > TX PRM
Write security: 3; Read security: 5
Controls the sending of performance report messaging (PRM) data on the facility data link (FDL). The
PRM data continues to be collected even if XMIT PRM is turned off (possible only with ESF format).
Choose either ON or OFF.
MODULES (T1/PRI-1) > CONFIGURATION > LBO
Write security: 2; Read security: 5
Selects the Line Build Out (LBO) for the network interface. When connecting an ATLAS 550 port to a
DSX-1 interface, this parameter is typically set to match the distance (in feet) between the ATLAS 550 and
the device with which it is connecting. When you select this item, a list of choices displays (0 dB, -7.5 dB,
-15 dB, -22 dB, 266 FT, 399 FT, 533 FT, 655 FT). Select the appropriate option.
108
© 2002 ADTRAN, Inc.
61200305L1-1F
ATLAS 550 System Manual
Section 4, User Interface Guide
MODULES (T1/PRI-1) > CONFIGURATION > LB ACCEPT
Write security: 3; Read security: 5
Sets unit to accept or reject the in-band loop up and loop down codes as defined in ANSI T1.403. This is a
line loopback. Choose either ACCEPT or IGNORE.
MODULES (T1/PRI-1) > CONFIGURATION > PULSE DENSITY
Write security: 3; Read security: 5
Choose either ON or OFF. When ON, Pulse Density Enforcer causes the ATLAS 550 to monitor for ones
(1s) density violations and insert a one (1) when needed to maintain ones at 12.5%. This data insertion will
cause data errors.
MODULES (T1/PRI-1) > CONFIGURATION > ADLP OVER FDL
Write security: ADTRAN Use Only; Read security: 5
The ADTRAN Data Link Protocol (ADLP) provides a communications link between ADTRAN
equipment over point-to-point or multidrop connections that can be used for configuring and monitoring
remote ADTRAN devices. Choose ENABLE to activate the ADLP over the FDL for the DS1 interface.
MODULES (T1/PRI-1) > TEST
Write security: 5; Read security: 5
These options initiate different types of tests and display test results.
MODULES (T1/PRI-1) > TEST > PRT
Read security: 5
Displays the port number.
MODULES (T1/PRI-1) > TEST > LOC LB
Write security: 4; Read security: 5
Initiates a loopback on near-end (local) port (see Figure 9). The following options are available:
LINE
Metallic loopback
PAYLD
Payload loopback - framing and clocking are regenerated
T1/PRI
NI CSU
DS1
Payload Loopback
Line Loopback
Figure 9. T1/PRI Loopback Test Diagram
61200305L1-1F
© 2002 ADTRAN, Inc.
109
Section 4, User Interface Guide
ATLAS 550 System Manual
MODULES (T1/PRI-1) > TEST > REMOTE LB
Write security: 4; Read security: 5
Sends loopback code to remote CSU. The following options are available:
Selection
AT&T INBAND LINE
Framing
Description
ESF/D4
Full 1.544 Mbps loopback of the signal received from the network
(metallic loopback).
ANSI FDL LINE
ESF
Full 1.544 Mbps loopback of the signal received from the network.
Initiated through loopback activation transmission over the facility
data link (FDL).
ANSI FDL PYLD
ESF
1.536 Mbps loopback of the payload data received from the network
maintaining bit-sequence integrity for the information bits by
synchronizing (regenerating) the timing. Initiated through loopback
activation transmission over the facility datalink (FDL).
INBAND NIU
ESF/D4
Full 1.544 Mbps loopback of the signal received from the network
after passing through the T1 framer of the remote unit.
MODULES (T1/PRI-1) > TEST > PATTERN
Write security: 4; Read security: 5
Test pattern to be transmitted out the port. The following options are available:
ALL ONES
Framed ones
ALL ZEROS
Framed zeros
QRSS
Pseudo-random pattern with suppression of excess zeros
MODULES (T1/PRI-1) > TEST > QRSS/RLB RESULTS
Write security: 3; Read security: 5
Displays current status of T1 tests including information regarding loopbacks and test patterns. When
displaying test pattern status, the display string is composed of pattern sync status and errored seconds.
NONE
No sync.
LOS
Sync has been lost.
SYNC
Pattern is synchronized.
ES
Number of seconds with at least one bit error.
MODULES (T1/PRI-1) > TEST > CLR
Write security: 3; Read security: 3
Clears error counters on test pattern results menu.
MODULES (T1/PRI-1) > TEST > INJ
Write security: 3; Read security: 3
Injects errors into transmitted test pattern.
110
© 2002 ADTRAN, Inc.
61200305L1-1F
ATLAS 550 System Manual
Section 4, User Interface Guide
MODULES MENU (E1/PRA NETWORK INTERFACE MODULE)
This section provides detailed information on the MODULES menu and submenus for the E1/PRA Network
Interface Module. The ATLAS 550 system controller automatically detects the presence of the E1/PRA
Network Interface Module when it is installed in the system (listed as E1/PRA-1). To see the menus for the
E1/PRA Network Interface Module via the terminal menu, use the arrow keys to scroll to the MODULES
menu and press <Enter> to access the module choices. Refer to the E1/PRA Network Interface Module
Quick Start Guide for a menu tree containing a complete listing of menus.
MODULES (E1/PRA-1) > INFO
Read security: 5
Displays general information about the E1/PRA Network Interface Module.
MODULES (E1/PRA-1) > INFO > PART NUMBER
Read security: 5
Displays the part number of the E1/PRA Network Interface Module.
MODULES (E1/PRA-1) > INFO > SERIAL NUMBER
Read security: 5
Displays the module’s serial number.
MODULES (E1/PRA-1) > INFO > ASSEMBLY REVISION
Read security: 5
Displays the assembly revision of the module.
MODULES (E1/PRA-1) > INFO > E1 FRAMER REVISION
Read security: 5
Displays the E1 framer hardware revision.
MODULES (E1/PRA-1) > ALARM STATUS
Read security: 5
Displays the current E1 alarm status.
MODULES (E1/PRA-1) > PRT
Read security: 5
Indicates the port number. The E1/PRA Network Interface Module is a single-port device.
61200305L1-1F
© 2002 ADTRAN, Inc.
111
Section 4, User Interface Guide
ATLAS 550 System Manual
MODULES (E1/PRA-1) > ALARMS
Read security: 5
Displays the alarm type, as listed below.
LOS
(Loss of Signal) No signal detected on port interface.
LOF
(Loss of Framing) The receiver is unable to synchronize to the FAS
framing pattern of the received signal.
LOMF
(Loss of Multi-frame) The receiver is unable to synchronize to the TS15
multi-frame pattern of the received signal.
CRC4
(Loss of CRC-4 Framing) The receiver is unable to synchronize to the
CRC-4 frame pattern of the received signal.
AIS
(Alarm Indication Signal) An upstream failure has been detected and all
ones are being received.
REM
(Remote Frame Alarm) Loss of frame alarm being received from far
end.
REMMF
(Remote Multi-Frame Alarm) Loss of multi-frame alarm being received
from far end.
MODULES (E1/PRA-1) > TS0 ALARMS
Read security: 5
Displays per-TS0 alarm status. These alarms usually indicate the failure to receive the protocol that has
been configured for the TS0.
-
No Alarm TS0
D
D Channel Alarm (ISDN)
F
Frame Alarm (packet)
T
TBOP Alarm (packet)
P
PPP Alarm (packet)
MODULES (E1/PRA-1) > TS0 STATUS
Read security: 5
The TS0 status indicates usage on a TS0 basis for each port. These options are read-only:
112
•
Idle
N
Dedicated (nailed) TS0
–
Inactive
O
Off hook detected
A
Active call on this TS0
R
Ringing detected
D
Active D Channel TS0
S
Signaling
M
Maintenance TS0
© 2002 ADTRAN, Inc.
61200305L1-1F
ATLAS 550 System Manual
Section 4, User Interface Guide
MODULES (E1/PRA-1) > SIG STATUS
Read security: 5
Displays the state of the A/B/C/D signaling bits for the E1/PRA Network Interface Module. Dashes
indicate TS0s where signaling is not being transferred by the ATLAS 550.
MODULES (E1/PRA-1) > PERFORMANCE CURRENT
Write security:5; Read security: 5
The performance fields (either current, 15-minute total, or 24-hour total) provide status on key
performance measures as specified in G.821 and RFC 1406 for the E1/PRA port as follows:
PRT
Displays the port number
CLR
Clears performance information for the selected port
ES
Errored Second (ES) is a second with one or more error events OR one or more Out
Of Frame events OR one or more Controlled Slips
BES
Bursty Errored Second (BES) is a second with more than one, but less than 320 error
events
SES
Severely Errored Second (SES) is a second with 320 or more error events OR one or
more Out Of Frame events
UAS
Unavailable Second
CSS
Controlled Slip Second
SEFS
Severely Errored Frame Second is a second that contains four consecutive errored
framing patterns
DM
Degraded Minutes is the number of minutes with a bit error rate of 10-6 or greater
LCV
Line Code Violation
PCV
Path Code Violation
LES
Line Errored Second
LOFC
Loss of Frame Count is a count of seconds in which a valid framing pattern could not
be obtained
MODULES ((E1/PRA-1) > PERFORMANCE 15MIN
Write security:5; Read security: 5
Stores the performance data for the previous 15-minute window. Refer to Modules (E1/PRA-1) >
Performance Current for a detailed description of these fields.
MODULES (E1/PRA-1) > PERFORMANCE 24HR
Write security:5; Read security: 5
Stores the performance data for the previous 24-hour window. Refer to Modules (E1/PRA-1) >
Performance Current for a detailed description of these fields.
61200305L1-1F
© 2002 ADTRAN, Inc.
113
Section 4, User Interface Guide
ATLAS 550 System Manual
MODULES (E1/PRA-1) > CONFIGURATION
Write security:5; Read security: 5
All of the following configurable parameters apply whether the port is connected to a Primary Rate Access
circuit or a channelized E1 circuit.
MODULES (E1/PRA-1) > CONFIGURATION > PRT
Write security:3; Read security: 5
Displays the port number.
MODULES (E1/PRA-1) > CONFIGURATION > PORT NAME
Write security: 3; Read security: 5
Accepts any alpha-numeric name up to 16 characters long, to uniquely identify the E1/PRA port.
MODULES (E1/PRA-1) > CONFIGURATION > NFAS
Write security: 3; Read security: 5
If enabled, the network interface receiver requires the NFAS word (TS0 0 in odd frames) and the FAS word
(TS0 0 in even frames) for frame sync. When disabled, only the FAS word is needed for frame sync.
MODULES (E1/PRA-1) > CONFIGURATION > TS16 MF
Write security: 3; Read security: 5
If enabled, the receiver requires MFAS word in TS16 to achieve sync (CAS signaling). The transmitter
outputs MFAS word in TS16 (CCS signaling).
MODULES (E1/PRA-1) > CONFIGURATION > CRC-4
Write security: 3; Read security: 5
Transmits the CRC-4 checksum bits in the outgoing E1 data stream, when enabled. Also, checks the
received signal for errors.
MODULES (E1/PRA-1) > CONFIGURATION > AUTO ALARM
Write security: 3; Read security: 5
Transmits a remote alarm when framing is lost (when Red Alarm Generation is on), and transmits an AIS
alarm when all ones are received (when RCM AIS Generation is on).
MODULES (E1/PRA-1) > CONFIGURATION > CODE
Write security: 3; Read security: 5
Allows selection of line coding. HDB3 is normally the only coding method used on public networks. AMI
may be selected for testing purposes.
MODULES (E1/PRA-1) > CONFIGURATION > TS0 SPARE
Write security: 3; Read security: 5
TS0 bits Sa4 through Sa8 in frames not containing the Frame Alignment Signal may be used in specific
applications, but should be set to 1s when crossing an international border. Enter a decimal number whose
5 LSB (least significant bits) are to be used for all Sa4 and Sa8 bits. Refer to CCITT G.704 for more
114
© 2002 ADTRAN, Inc.
61200305L1-1F
ATLAS 550 System Manual
Section 4, User Interface Guide
information.
MODULES (E1/PRA-1) > CONFIGURATION > TS16 SPARE
Write security: 3; Read security: 5
TS16 in CAS frame 0 contains 3 spare bits: 0000XYXX where ‘X’ marks a spare bit and ‘Y’ marks an
alarm indications to the remote end. Enter a decimal number whose masked 4 LSB (least significant bits)
are inserted into TS0 in CAS frame 0. Refer to CCITT G.704 for more information.
MODULES (E1/PRA-1) > CONFIGURATION > INTL BIT
Write security: 3; Read security: 5
Bit 0 in all non-CRC4 frames is reserved for international use. They may be used nationally if the path
does not cross an international border. If not specifically used, the bits should be set to ‘1’ on paths
crossing a border. Enter the international bit value of 0 or 1. Refer to CCITT G.704 for more information.
MODULES (E1/PRA-1) > CONFIGURATION > LINE BUILD OUT
Write security: 3; Read security: 5
Sets the line build out for the E1 interface to either 75 Ω (BALANCED or UNBALANCED) or 120 Ω (BALANCED
or UNBALANCED).
MODULES (E1/PRA-1) > TEST
Write security: 5; Read security: 5
These options initiate different types of tests and display test results.
MODULES (E1/PRA-1) > TEST > PRT
Write security: 4; Read security: 5
Displays the port number.
MODULES (E1/PRA-1) > TEST > LOC LB
Write security: 4; Read security: 5
Causes loopback on near-end (local) port (see Figure 10). The following options are available:
NONE
No loopback active
LINE
Metallic loopback
61200305L1-1F
© 2002 ADTRAN, Inc.
115
Section 4, User Interface Guide
ATLAS 550 System Manual
E1/PRA
NI CSU
Line Loopback
Figure 10. E1/PRA Network Loopback Test Diagram
MODULES (E1/PRA-1) > TEST > PATTERN
Write security: 4; Read security: 5
Test pattern to be transmitted out the port. The following options are available:
ALL ONES
Framed ones
ALL ZEROS
Framed zeros
QRSS
Pseudo-random pattern with suppression of excess zeros
MODULES (E1/PRA-1) > TEST > QRSS RESULTS
Write security: 4; Read security: 5
Test pattern results that indicate sync and errors of received data pattern.
MODULES (E1/PRA-1) > TEST > CLR
Write security: 4; Read security: 5
Clears test results on QRSS RESULTS field.
MODULES (E1/PRA-1) > TEST > INJ
Write security: 4; Read security: 5
Injects errors into transmitted test pattern. Return receipt of the errors is displayed in the QRSS RESULTS
field.
MODULES MENU (MODEM MANAGEMENT NETWORK MODULE)
The ATLAS 550 system controller automatically detects the presence of the Modem Management Network
Module when it is installed in the system (listed as MODMMGMT). To see the menus for the Modem
Management Network Module via the terminal menu, use the arrow keys to scroll to the MODULES menu
and press <Enter> to access the module choices. Refer to the Modem Management Network Module Quick
Start Guide for a menu tree containing a complete listing of menus.
116
© 2002 ADTRAN, Inc.
61200305L1-1F
ATLAS 550 System Manual
Section 4, User Interface Guide
MODULES (MODMMGMT) > INFO
Read security: 5
Provides information about the module part number, serial number, and assembly revision.
MODULES (MODMMGMT) > INFO > PART NUMBER
Read security: 5
Displays the part number of the module.
MODULES (MODMMGMT) > INFO > SERIAL NUMBER
Read security: 5
Displays the serial number of the module.
MODULES (MODMMGMT) > INFO > ASSEMBLY REVISION
Read security: 5
Displays the assembly revision.
MODULES (MODMMGMT) > STATUS
Read security: 5
Provides status information about the analog network interface.
MODULES (MODMMGMT) > STATUS > SIGNAL LEADS
Read security: 5
Displays the state of the analog port signals including RTS (Request To Send), CTS (Clear To Send), DCD
(Data Carrier Detect), and DTR (Data Transmit Ready).
MODULES (MODMMGMT) > STATUS > TX BYTES
Read security: 5
Displays the number of bytes transmitted from the analog port to the network.
MODULES (MODMMGMT) > STATUS > RX BYTES
Read security: 5
Displays the number of bytes received by the analog port from the network.
MODULES (MODMMGMT) > STATUS > OVERRUN ERRS
Read security: 5
Displays the number of overrun errors received by the analog port.
MODULES (MODMMGMT) > STATUS > FRAMING ERRS
Read security: 5
Displays the number of framing errors received by the analog port.
61200305L1-1F
© 2002 ADTRAN, Inc.
117
Section 4, User Interface Guide
ATLAS 550 System Manual
MODULES (MODMMGMT) > STATUS > CLEAR COUNTERS
Write security: 5; Read security: 5
Clears the analog port statistics. Press <Enter> to activate this command.
MODULES (MODMMGMT) > STATUS > HANGUP MODEM
Write security: 5; Read security: 5
Disconnects the active dialup modem session. Press <Enter> to activate this command.
MODULES (MODMMGMT) > STATUS > CONNECT RATE
Read security: 5
Displays the connection rate for the active dialup modem session.
MODULES (MODMMGMT) > CONFIGURATION
Write security: 3; Read security: 5
All of the following configurable parameters apply to the analog port located on the Modem Management
Network Module.
MODULES (MODMMGMT) > CONFIGURATION > PORT NAME
Write security: 2; Read security: 5
Accepts any alpha-numeric name up to 16 characters long, to uniquely identify the analog port on the
Modem Management Network Module.
MODULES (MODMMGMT) > CONFIGURATION > RINGS TO ANSWER
Write security: 2; Read security: 5
Configures the number of rings before the Auto Answer functionality is invoked.
MODULES (MODMMGMT) > TEST
Write security: 5; Read security: 5
Provides testing capabilities for the internal modem.
MODULES (MODMMGMT) > TEST > DETECT DIAL TONE
Write security: 5; Read security: 5
Causes the internal modem to go off-hook to detect dial tone on the analog line.
MODULES (MODMMGMT) > TEST > DIAL TONE DETECTED
Read security: 5
Displays the results of the last DETECT DIAL TONE test.
MODULES MENU (BRI DBU NETWORK INTERFACE MODULE)
The ATLAS 550 system controller automatically detects the presence of the Basic Rate ISDN (BRI) DBU
118
© 2002 ADTRAN, Inc.
61200305L1-1F
ATLAS 550 System Manual
Section 4, User Interface Guide
Network Interface Module when it is installed in the system (listed as DBU). To see the menus for the BRI
DBU Network Interface Module via the terminal menu, use the arrow keys to scroll to the MODULES menu
and press <Enter> to access the module choices. Refer to the BRI DBU Network Interface Module Quick
Start Guide for a menu tree containing a complete listing of menus.
MODULES (DBU) > INFO
Read security: 5
Provides information about the module part number, serial number, and assembly revision.
MODULES (DBU) > INFO > PART NUMBER
Read security: 5
Displays the part number of the module.
MODULES (DBU) > INFO >SERIAL NUMBER
Read security: 5
Displays the serial number of the module.
MODULES (DBU) > INFO >ASSEMBLY REVISION
Read security: 5
Displays the assembly revision.
MODULES (DBU) > INFO >FIRMWARE REVISION
Read security: 5
Displays the current firmware revision of the BRI DBU Network Interface Module.
MODULES (DBU) > BONDING STATUS
Read security: 5
Indicates the current status of a particular BONDING session.
MODULES (DBU) > BONDING STATUS > STATUS
Read security: 5
Displays the current status of the BONDING session. The following states are available:
IDLE
Indicates the number of Idle BONDING resources for a particular
BONDING engine.
RESERVED
BONDING resources reserved for a BONDING session that is in the process
of coming up.
NEGOTIATING
A single channel is connected and negotiating the BONDING call for a
particular BONDING session.
61200305L1-1F
© 2002 ADTRAN, Inc.
119
Section 4, User Interface Guide
ATLAS 550 System Manual
ADD CHANNELS
The initial BONDING negotiation was successful, and the ATLAS 550 is in
the process of adding channels to the BONDING session.
BONDING
The remaining channels were brought up successfully, and the BONDING
session is now ready to pass data.
TERMINATED
The BONDING session has been terminated for some reason and is in the
process of freeing BONDING resources.
MODULES (DBU) > BONDING STATUS > NUMBCHANNELS
Read security: 5
Displays the number of bearer channels used in this BONDING session. When the number is displayed in
the format X/Y, Y is the number of BONDING resources reserved for this session, and X is the number of
calls belonging to this session that are up. If just a number is displayed, then all calls are up and the number
displayed is the number of BONDING resources in use for this session.
MODULES (DBU) > BONDING STATUS > DATA RATE
Read security: 5
Displays the data rate for this BONDING session. The number in the parentheses is the data rate of the
individual bearer channels.
MODULES (DBU) > BONDING STATUS > BONDED EP
Read security: 5
Displays the slot and port of the terminating endpoint that is using this BONDING session.
MODULES (DBU) > BONDING CONFIGURATION
Write security: 3; Read security: 5
All of the following configurable parameters apply to the BRI DBU Network Interface Module. In most
applications the default values will be correct.
MODULES (DBU) > BONDING CONFIGURATION > TXINIT TIMER
Write security: 3; Read security: 5
Specifies the length of time the originating endpoint attempts to detect the BONDING negotiation pattern
from the answering endpoint before deciding the BONDING call has failed.
MODULES (DBU) > BONDING CONFIGURATION > TXFA TIMER
Write security: 3; Read security: 5
Specifies the length of time both endpoints attempt to detect the BONDING frame pattern when a call is
connected before deciding the BONDING call has failed. When interoperating with other manufacturers'
BONDING equipment, it may be necessary to change this time so that it matches TXADD01.
120
© 2002 ADTRAN, Inc.
61200305L1-1F
ATLAS 550 System Manual
Section 4, User Interface Guide
MODULES (DBU) > BONDING CONFIGURATION > TXADD01 TIMER
Write security: 3; Read security: 5
Specifies the length of time both endpoints wait for additional calls to be connected at the end of
negotiation before deciding that the BONDING call has failed. The factory default setting is sufficient for
most calls to connect, although when dialing overseas it may be necessary to lengthen this timer to allow
for slower call routing.
MODULES (DBU) > BONDING CONFIGURATION > TXDEQ TIMER
Write security: 3; Read security: 5
Specifies the length of time both endpoints attempt to equalize the network delay between the bearer
channels before deciding the BONDING call has failed.
MODULES (DBU) > BONDING CONFIGURATION > TANULL TIMER
Write security: 3; Read security: 5
Specifies the length of time the answering endpoint attempts to detect the BONDING negotiation pattern
from the originating endpoint before deciding the BONDING call has failed. It may be necessary to
shorten this timer if the DTE equipment using the BONDING module also has timer constraints for
completing non-BONDING parameter negotiation.
MODULES (DBU) > BONDING CONFIGURATION > TCID TIMER
Write security: 3; Read security: 5
Specifies the length of time both endpoints attempt to negotiate an agreeable value for bearer channels and
channel capacities before deciding the BONDING call has failed.
MODULES (DBU) > BONDING CONFIGURATION > CALL STAGGER
Write security: 3; Read security: 5
Specifies the amount of delay between placing calls for outgoing BONDING sessions. The following call
stagger values are available: NO STAGGER, 500 MS, 1 SEC, and 2 SEC.
MODULES (DBU) > BRI ALARM
Read security: 5
Displays the alarm status for the selected BRI DBU Network Interface Module.
MODULES (DBU) > BRI ALARM > PHYSICAL ALARM
Read security: 5
Displays the current alarm status of the Basic Rate ISDN (BRI) interface.
LAYER 1
61200305L1-1F
A layer one alarm is indicated by an asterisk (*) when the BRI physical layer is not
active. An L1 alarm is present when problems are detected with the endpoint or with
cabling.
© 2002 ADTRAN, Inc.
121
Section 4, User Interface Guide
ATLAS 550 System Manual
MODULES (DBU) > BRI CHANNEL STATUS
Read security: 5
Displays the status of the individual bearer (B) channels on the Basic Rate ISDN (BRI) interface.
MODULES (DBU) > BRI CHANNEL STATUS > PRT
Read security: 5
Indicates the port number.
MODULES (DBU) > BRI CHANNEL STATUS > CHA
Read security: 5
(Channel) Displays the status of individual channels. The following symbols may display:
-
Unallocated channel
.
Inactive channel
B
Active B channel
D
Active D channel
MODULES (DBU) > PERFORMANCE CURRENT
Write security: 3; Read security: 5
The performance field provides status on key performance measures for the Basic Rate ISDN (BRI)
interface. All fields (except RESET) are read-only. The monitored parameters include the following:
PRT
Displays the port number
RESET
Resets the NEBE and FEBE statistics
NEBE CURRENT
Near-end block errors
FEBE CURRENT
Far-end block errors
MODULES (DBU) > BRI CONFIGURATION
Write security: 3; Read security: 5
All of the following configurable parameters apply to the Basic Rate ISDN (BRI) interface on the BRI
DBU Network Interface Module.
MODULES (DBU) > BRI CONFIGURATION > PRT
Read security: 5
Displays the port number.
MODULES (DBU) > BRI CONFIGURATION > PORT NAME
Write security: 3; Read security: 5
Accepts any alpha-numeric name up to 16 characters long, to uniquely identify the Basic Rate ISDN (BRI)
interface on the BRI DBU Network Interface Module.
122
© 2002 ADTRAN, Inc.
61200305L1-1F
ATLAS 550 System Manual
Section 4, User Interface Guide
MODULES (DBU) > BRI TEST
Write security: 4; Read security: 5
The following options initiate tests and display test results.
MODULES (DBU) > BRI TEST > LOCAL LOOPBACK
Write security: 3; Read security: 5
Activates a local loopback of the Basic Rate ISDN (BRI) U interface toward the network. The following
options are available:
NONE
No active loopback
LOOPBACK B1
Loops the first B channel of the interface
LOOPBACK B2
Loops the second B channel of the interface
LOOPBACK B1 & B2
Loops both B channels of the interface
LOOPBACK ALL
Loops the entire physical interface (2B + D)
MODULES MENU (DUAL/QUAD T1/PRI OPTION MODULES)
This section provides detailed information on the MODULES menu and submenus for the Dual/Quad T1/PRI
Option Modules. The ATLAS 550 system controller automatically detects the presence of the Dual/Quad
T1/PRI Option Modules when they are installed in the system (Dual is listed as T1/PRI-2 and the Quad is
listed as T1/PRI-4). All menus detailed in this section that apply to both modules are listed as T1/PRI-2/4.
To see the menus for the Dual/Quad T1/PRI Option Modules via the terminal menu, use the arrow keys to
scroll to the MODULES menu and press <Enter> to access the module choices. Refer to the Dual/Quad
T1/PRI Option Modules Quick Start Guide for a menu tree containing a complete listing of menus.
MODULES (T1/PRI-2/4) > INFO
Read security: 5
Displays general information about the T1/PRI Network Interface Module as follows:
MODULES (T1/PRI-2/4) > INFO > PART NUMBER
Read security: 5
Displays the part number of the T1/PRI Network Interface Module.
MODULES (T1/PRI-2/4) > INFO > SERIAL NUMBER
Read security: 5
Displays the module’s serial number.
MODULES (T1/PRI-2/4) > INFO > ASSEMBLY REVISION
Read security: 5
Displays the assembly revision of the module.
61200305L1-1F
© 2002 ADTRAN, Inc.
123
Section 4, User Interface Guide
ATLAS 550 System Manual
MODULES (T1/PRI-2/4) > INFO > PLL STATUS
Read security: 5
Indicates whether the module phase lock loop is locked to its specific source.
MODULES (T1/PRI-2/4) > ALARM STATUS
Read security: 5
Displays the current T1 alarm status.
MODULES (T1/PRI-2/4) > ALARM STATUS > PRT
Read security: 5
Indicates the port number.
MODULES (T1/PRI-2/4) > ALARM STATUS > ALARMS
Read security: 5
Displays an alarm condition on the ATLAS 550 unit. Press <Enter> to access this menu item.
LOS
Indicates a loss of signal detected on port interface.
RED
Indicates inability to frame data received on the port. Alternately referred to
as Out of Frame (OOF).
YELLOW
Receiving remote alarm (RAI) on port.
BLUE
Receiving unframed all ones from the port Alarm Indicator Signal (AIS).
DS0 ALARM
Displays per-DS0 alarm status; that is, at least one DS0 channel is in alarm if
an asterisk (*) appears. These alarms usually indicate the failure to receive
the protocol that has been configured for the DS0.
RX LEVEL
Indicates the strength of the signal (in dB) received on the port.
(RECEIVE LEVEL)
MODULES (T1/PRI-2/4) > DS0 STATUS
Read security: 5
The DS0 status indicates usage on a DS0 basis. These options are read-only:
124
-
Unallocated
M
Maintenance
*
Inactive
N
Dedicated (nailed)
+
Signaling mismatch
O
Off hook - originate (RBS)
A
Active B Channel
R
Ringing (RBS); Restart (ISDN)
D
Active D Channel
W
Waiting dial tone
© 2002 ADTRAN, Inc.
61200305L1-1F
ATLAS 550 System Manual
Section 4, User Interface Guide
MODULES (T1/PRI-2/4) > DS0 ALARMS
Read security: 5
Displays per-DS0 alarm status. These alarms usually indicate the failure to receive the protocol that has
been configured for the DS0.
61200305L1-1F
-
No Alarm DS0
D
D Channel Alarm (ISDN)
F
Frame Alarm (packet)
T
TBOP Alarm (packet)
P
PPP Alarm (packet)
© 2002 ADTRAN, Inc.
125
Section 4, User Interface Guide
ATLAS 550 System Manual
MODULES (T1/PRI-2/4) > SIG STATUS
Read security: 5
Read-only field that indicates signaling of all 24 DS0s. The A/B bits for Rx (receive) and Tx (transmit)
DS0s are shown. Dashes display for those DS0s where robbed bit signaling (RBS) is not being transferred
by the ATLAS 550.
MODULES (T1/PRI-2/4) > PERFORMANCE CURRENT
Write security:3; Read security: 5
The performance fields (either current, 15-minute total, or 24-hour total) provide status on key
performance measures as specified in ANSI T1.403 and AT&T TR54016 for the T1/PRI port. Except for
CLR, these fields are all read-only. The monitored parameters include the following:
PRT
Displays the port number
CLR
Clears performance information for the selected port
ES
Errored Second (ES) is a second with one or more error events OR one or more
Out Of Frame events OR one or more Controlled Slips
BES
Bursty Errored Second (BES) is a second with more than one, but less than 320
error events
SES
Severely Errored Second (SES) is a second with 320 or more error events OR
one or more Out Of Frame events
SEFS
Severely Errored Frame Second is a second that contains four consecutive
errored framing patterns.
LOFC
Loss of Frame Count is a count of seconds in which a valid framing pattern
could not be obtained.
CSS
Controlled Slip Second
UAS
Unavailable Second
LCV
Line Code Violation
PCV
Path Code Violation
LES
Line Errored Second
MODULES (T1/PRI-2/4) > PERFORMANCE 15MIN
Write security:3; Read security: 5
Stores the performance data for the previous 15-minute window. Refer to Modules (T1/PRI-2/4) >
Performance Current for a detailed description of these fields.
MODULES (T1/PRI-2/4) > PERFORMANCE 24HR
Write security:3; Read security: 5
Stores the performance data for the previous 24-hour window. Refer to Modules (T1/PRI-2/4) >
Performance Current for a detailed description of these fields.
126
© 2002 ADTRAN, Inc.
61200305L1-1F
ATLAS 550 System Manual
Section 4, User Interface Guide
MODULES (T1/PRI-2/4) > CONFIGURATION
Write security:3; Read security: 5
All of the following configurable parameters apply to whether the port is connected to a Primary Rate
ISDN (PRI) circuit or a channelized T1 circuit.
MODULES (T1/PRI-2/4) > CONFIGURATION > PRT
Read security: 5
Displays the port number.
MODULES (T1/PRI-2/4) > CONFIGURATION > PORT NAME
Write security: 3; Read security: 5
Accepts any alpha-numeric name up to 16 characters long, to uniquely identify each port on the
ATLAS 550.
MODULES (T1/PRI-2/4) > CONFIGURATION > FRAME
Write security: 2; Read security: 5
This field must be set to match the frame format of the circuit to which it is connected, available from the
network supplier. Choose either D4 or ESF.
MODULES (T1/PRI-2/4) > CONFIGURATION > CODE
Write security: 2; Read security: 5
Set this field to match the line code of the circuit to which it is connected (this information is available
from the network supplier). Choose either AMI (Alternate Mark Inversion) or B8ZS (Bipolar Eight Zero
Substitution).
MODULES (T1/PRI-2/4) > CONFIGURATION > TX YEL
Write security: 3; Read security: 5
Controls the transmission of yellow alarms. Choose either ON or OFF.
MODULES (T1/PRI-2/4) > CONFIGURATION > TX PRM
Write security: 3; Read security: 5
Controls the sending of performance report messaging (PRM) data on the facility data link (FDL). The
PRM data continues to be collected even if XMIT PRM is turned off (possible only with ESF format).
Choose either ON or OFF.
MODULES (T1/PRI-2/4) > CONFIGURATION > LBO
Write security: 2; Read security: 5
Selects the Line Build Out (LBO) for the network interface. When connecting an ATLAS 550 port to a
DSX-1 interface, this parameter is typically set to match the distance (in feet) between the ATLAS 550 and
the device with which it is connecting. When you select this item, a list of choices displays (0 dB, -7.5 dB,
-15 dB, -22 dB, 266 FT, 399 FT, 533 FT, 655 FT). Select the appropriate option.
61200305L1-1F
© 2002 ADTRAN, Inc.
127
Section 4, User Interface Guide
ATLAS 550 System Manual
MODULES (T1/PRI-2/4) > CONFIGURATION > LB ACCEPT
Write security: 3; Read security: 5
Sets unit to accept or reject the in-band loop up and loop down codes as defined in ANSI T1.403. This is a
line loopback. Choose either ACCEPT or IGNORE.
MODULES (T1/PRI-2/4) > CONFIGURATION > PULSE DENSITY
Write security: 3; Read security: 5
Choose either ON or OFF. When ON, Pulse Density Enforcer causes the ATLAS 550 to monitor for ones
(1s) density violations and insert a one (1) when needed to maintain ones at 12.5%. This data insertion will
cause data errors.
MODULES (T1/PRI-2/4) > CONFIGURATION > ADLP OVER FDL
Write security: ADTRAN Use Only; Read security: 5
The ADTRAN Data Link Protocol (ADLP) provides a communications link between ADTRAN
equipment over point-to-point or multidrop connections that can be used for configuring and monitoring
remote ADTRAN devices. Choose ENABLE to activate the ADLP over the FDL for the DS1 interface.
MODULES (T1/PRI-2/4) > TEST
Write security: 5; Read security: 5
These options initiate different types of tests and display test results.
MODULES (T1/PRI-2/4) > TEST > PRT
Read security: 5
Displays the port number.
MODULES (T1/PRI-2/4) > TEST > LOC LB
Write security: 4; Read security: 5
Initiates a loopback on near-end (local) port (see Figure 9). The following options are available:
LINE
Metallic loopback
PAYLD
Payload loopback - framing and clocking are regenerated
T1/PRI
NI CSU
DS1
Payload Loopback
Line Loopback
Figure 11. T1/PRI Loopback Test Diagram
128
© 2002 ADTRAN, Inc.
61200305L1-1F
ATLAS 550 System Manual
Section 4, User Interface Guide
MODULES (T1/PRI-2/4) > TEST > REMOTE LB
Write security: 4; Read security: 5
Sends loopback code to remote CSU. The following options are available:
Selection
AT&T INBAND LINE
Framing
Description
ESF/D4
Full 1.544 Mbps loopback of the signal received from the network
(metallic loopback).
ANSI FDL LINE
ESF
Full 1.544 Mbps loopback of the signal received from the network.
Initiated through loopback activation transmission over the facility
data link (FDL).
ANSI FDL PYLD
ESF
1.536 Mbps loopback of the payload data received from the network
maintaining bit-sequence integrity for the information bits by
synchronizing (regenerating) the timing. Initiated through loopback
activation transmission over the facility datalink (FDL).
INBAND NIU
ESF/D4
Full 1.544 Mbps loopback of the signal received from the network
after passing through the T1 framer of the remote unit.
MODULES (T1/PRI-2/4) > TEST > PATTERN
Write security: 4; Read security: 5
Test pattern to be transmitted out the port. The following options are available:
ALL ONES
Framed ones
ALL ZEROS
Framed zeros
QRSS
Pseudo-random pattern with suppression of excess zeros
MODULES (T1/PRI-2/4) > TEST > QRSS/RLB RESULTS
Write security: 3; Read security: 5
Displays current status of T1 tests including information regarding loopbacks and test patterns. When
displaying test pattern status, the display string is composed of pattern sync status and errored seconds.
NONE
No sync.
LOS
Sync has been lost.
SYNC
Pattern is synchronized.
ES
Number of seconds with at least one bit error.
MODULES (T1/PRI-2/4) > TEST > CLR
Write security: 3; Read security: 3
Clears error counters on test pattern results menu.
MODULES (T1/PRI-2/4) > TEST > INJ
Write security: 3; Read security: 3
Injects errors into transmitted test pattern.
61200305L1-1F
© 2002 ADTRAN, Inc.
129
Section 4, User Interface Guide
ATLAS 550 System Manual
MODULES MENU (DUAL NX56/64 OPTION MODULE)
The ATLAS 550 system controller automatically detects the presence of the Dual Nx 56/64 Option Module
when it is installed in the system (listed as V35NX-2). To see the menus for the Dual Nx 56/64 Option
Module via the terminal menu, use the arrow keys to scroll to the MODULES menu and press <Enter> to
access the module choices. Refer to the Dual Nx 56/64 Option Module Quick Start Guide for a menu tree
containing a complete listing of menus.
MODULES (V35NX-2) > INFO
Read security: 5
Provides information about the module part number, serial number, and assembly revision.
MODULES (V35NX-2) > INFO > PART NUMBER
Read security: 5
Displays the part number of the module.
MODULES (V35NX-2) > INFO > SERIAL NUMBER
Read security: 5
Displays the serial number of the module.
MODULES (V35NX-2) > INFO > ASSEMBLY REVISION
Read security: 5
Displays the assembly revision of the installed module.
MODULES (V35NX-2) > ALARM STATUS
Read security: 5
Displays the current alarm status.
MODULES (V35NX-2) > ALARM STATUS > PRT
Read security: 5
Indicates the port number.
MODULES (V35NX-2) > ALARM STATUS > ALARMS
Read security: 5
Displays an alarm condition on the ATLAS 550 unit.
130
SLIP
A rate mismatch exists between the DTE clock and the network-side clock (as
set by DS0 assignment).
PLL
The Nx port is not able to lock onto the clock provided by the network interface.
ZERO
The DTE is sending an excessive number of consecutive zeroes to the network
interface.
NO EXT CLK
The DTE is not providing an external transmit clock. This alarm displays only if
the Nx port is configured to get its transmit clock from the DTE.
PKT EP ALM
A packet endpoint has detected missing or incorrect framing.
© 2002 ADTRAN, Inc.
61200305L1-1F
ATLAS 550 System Manual
Section 4, User Interface Guide
MODULES (V35NX-2) > DTE STATUS
Read security: 5
Shows the status of key DTE interface signals. An asterisk (*) indicates the presence of a signal and a
hyphen (-) indicates no signal present.
MODULES (V35NX-2) > DTE STATUS > PRT
Read security: 5
Operating port number. There are 2 available interfaces on the Dual Nx56/64 Option Module.
MODULES (V35NX-2) > DTE STATUS > DTE STATUS
Read security: 5
The following signals are monitored (these options are read-only).
RTS
Request to send from DTE.
CTS
Clear to send to DTE.
DTR
Data terminal ready from DTE.
DSR
Data set ready to DTE.
DCD
Data carrier detect to DTE.
RI
Ring indicate to DTE.
TD
Transmit data from the DTE.
RD
Receive data toward the DTE.
EC
External clock present.
MODULES (V35NX-2) > DATA RATE
Read security: 5
Displays the data rate at which each Nx port is currently operating. A port’s data rate is determined by the
number of DS0s assigned to it and the rate per DS0 associated with the active maps.
MODULES (V35NX-2) > DATA RATE > PORT
Read security: 5
Operating port number. There are 2 available interfaces on the Dual Nx56/64 Option Module.
MODULES (V35NX-2) > DATA RATE > RATE
Read security: 5
This read-only field displays the data rate for the selected port.
61200305L1-1F
© 2002 ADTRAN, Inc.
131
Section 4, User Interface Guide
ATLAS 550 System Manual
MODULES (V35NX-2) > INBAND STATS
Read security: 5
Provides information on the following inband channel statistics.
MODULES (V35NX-2) > INBAND STATS > PORT
Read security: 5
Operating port number. There are 2 available interfaces on the Dual Nx56/64 Option Module.
MODULES (V35NX-2) > INBAND STATS > RX FRAMES
Read security: 5
The number of frames received on the operating port since system startup.
MODULES (V35NX-2) > INBAND STATS > TX FRAMES
Read security: 5
The number of frames transmitted from the operating port since system startup.
MODULES (V35NX-2) > INBAND STATS > RX BYTES
Read security: 5
The number of bytes received on the operating port since system startup.
MODULES (V35NX-2) > INBAND STATS > TX BYTES
Read security: 5
The number of bytes transmitted from the operating port since system startup.
MODULES (V35NX-2) > INBAND STATS > RESET STATS
Write security: 5; Read security: 5
Clears inband statistic results.
MODULES (V35NX-2) > PLL/FIFO
Read security: 5
Displays the Phase Lock Loop (PLL) and FIFO status.
MODULES (V35NX-2) > PLL/FIFO > PORT
Read security: 5
Indicates the operating port. There are 2 available interfaces on the Dual Nx56/64 Option Module.
132
© 2002 ADTRAN, Inc.
61200305L1-1F
ATLAS 550 System Manual
Section 4, User Interface Guide
MODULES (V35NX-2) > PLL/FIFO > PLL/FIFO
Read security: 5
Displays the state of the PLL and FIFO systems.
LOCK
PLL is locked (This is required to transfer data.)
RXE
Receive data FIFO empty.
RXF
Receive data FIFO full.
TXE
Transmit data FIFO empty.
TXF
Transmit data FIFO full.
MODULES (V35NX-2) > CONFIGURATION
Write security: 3; Read security: 5
All of the following configurable parameters apply to the individual V.35 ports.
MODULES (V35NX-2) > CONFIGURATION > PRT
Read security: 5
Displays the port number. There are 2 available interfaces on the Dual Nx56/64 Option Module.
MODULES (V35NX-2) > CONFIGURATION > PORT NAME
Write security: 3; Read security: 5
Accepts any alpha-numeric name up to 17 characters long, to uniquely identify each port on the Dual
Nx56/64 Option Module.
MODULES (V35NX-2) > CONFIGURATION > CLK +/Write security: 3; Read security: 5
Controls the clock used by the ATLAS 550 to accept the transmit (TX) data from the DTE. This is usually
set to NORMAL. If the interface cable is long, causing a phase shift in the data, the clock can be set to
INVERTED. This switches the phase of the clock, which compensates for a long cable.
MODULES (V35NX-2) > CONFIGURATION > DATA
Write security: 3; Read security: 5
Controls the inverting of the DTE data. This inversion can be useful when operating with a high-level data
link control (HDLC) protocol (often used as a means to ensure 1s density). Select either NORMAL or
INVERTED. Data inversion configuration must match at both ends of the circuit.
MODULES (V35NX-2) > CONFIGURATION > CTS
Write security: 3; Read security: 5
Determines the behavior of the Clear To Send (CTS) signal. If set to NORMAL, CTS will follow the value of
Request To Send (RTS). If set to FORCED ON, CTS will always be asserted.
61200305L1-1F
© 2002 ADTRAN, Inc.
133
Section 4, User Interface Guide
ATLAS 550 System Manual
MODULES (V35NX-2) > CONFIGURATION > DCD
Write security: 3; Read security: 5
Determines the behavior of the Data Carrier Detect (DCD) signal, also called RLSD on V.35 interfaces. If
set to NORMAL, DCD will generally be asserted when the interface is capable of passing data. If set to
FORCED ON, DCD will always be asserted. If set to REMOTE RTS, the value of DCD will track the value of
the remote unit’s RTS signal. Note that this feature requires the Inband control channel to be ENABLED.
MODULES (V35NX-2) > CONFIGURATION > DSR
Write security: 3; Read security: 5
Determines the behavior of the Data Set Ready (DSR) signal. If set to NORMAL, DSR will generally be
asserted when the interface is capable of passing data. If set to FORCED ON, DSR will always be asserted. If
set to REMOTE DTR, the value of DSR will track the value of the remote unit’s DTR signal. This remote
feature requires the Inband control channel to be ENABLED.
MODULES (V35NX-2) > CONFIGURATION > DTR
Write security: 3; Read security: 5
Determines whether the ATLAS 550 treats a connection as permanent (IGNORE) or connects only when
Data Terminal Ready (DTR) is active (CONNECT ON DTR). Select either IGNORE or CONNECT ON DTR.
MODULES (V35NX-2) > CONFIGURATION > 0 INH
Write security: 3; Read security: 5
When the port detects an uninterrupted string of 0s being transmitted for more than one second, setting this
parameter to ON will cause the ATLAS 550 to send 1s toward the network.
MODULES (V35NX-2) > CONFIGURATION > INBAND
Write security: 3; Read security: 5
Creates an inband management channel by robbing 8 kbps bandwidth from the port’s allocated bandwidth.
This channel can be used for management for ADTRAN products that are not co-located with the ATLAS.
Consult the manual for ADTRAN T1 equipment for details on using this feature.
MODULES (V35NX-2) > CONFIGURATION > SEND LEADS
Write security: 3; Read security: 5
Sends the state of the DTE leads to the remote unit whenever any of the leads change state. If any leads on
the remote unit are set to track a remote signal, this option must be enabled. The DTE lead states are
conveyed using the Inband control channel, which must be enabled.
RTS
V.54
LOOPBACK
511 TEST
ON
SELF
TEST
ACTIVE
NETWORK
TEST
ACTIVE
NO DS0
MAPPED
NETWORK
ALARM
CTS
Follows
Off
Off
Off
Off
Off
Off
DCD
—
—
—
Off
Off
Off
Off
SIGNAL
134
© 2002 ADTRAN, Inc.
61200305L1-1F
ATLAS 550 System Manual
DSR
—
Section 4, User Interface Guide
Off
Off
Off
Off
Off
—
— = Do not care
Force On = On under all conditions
MODULES (V35NX-2) > DIAL
Write security: 3; Read security: 5
Dials an Nx port that is configured to ignore DTR.
MODULES (V35NX-2) > DIAL > PRT
Read security: 5
Displays the port number. There are 2 available interfaces on the Dual Nx56/64 Option Module.
MODULES (V35NX-2) > DIAL > MODE
Write security: 3; Read security: 5
Configures the dialing mode. The following options are available:
PERSISTENT
Redial whenever the call is cleared or if the call fails.
ONE TIME
Attempt the call only once.
MODULES (V35NX-2) > DIAL > DIAL
Write security: 0; Read security: 0
Signals the Nx port to dial/clear the call.
MODULES (V35NX-2) > DIAL > SRC ID
Write security: 3; Read security: 5
Indicates the SOURCE ID of the number to be dialed. Configure this field in the Nx INTERFACE
CONFIGURATION section of the DIAL PLAN.
MODULES (V35NX-2) > DIAL > NUMBER
Write security: 3; Read security: 5
Indicates the number to be dialed. Configure this field in the Nx INTERFACE CONFIGURATION section of the
DIAL PLAN.
MODULES (V35NX-2) > TEST
Write security: 4; Read security: 5
These options initiate different types of tests and display test results.
MODULES (V35NX-2) > TEST > PORT
Indicates operating port. There are 2 available interfaces on the Dual Nx56/64 Option Module.
61200305L1-1F
© 2002 ADTRAN, Inc.
135
Section 4, User Interface Guide
ATLAS 550 System Manual
MODULES (V35NX-2) > TEST > LOOPBACK
Write security: 4; Read security: 5
Test pattern to be transmitted out the port. The following options are available:
NO LOOPBACK
No active loopback.
LOCAL LOOPBACK
Activates both a local loopback (back toward the DTE) and a port
loopback (toward the network).
REMOTE LOOPBACK
V.54 loopback code to be sent to the far end, and if the device at the far
end supports V.54, the device activates a loopback on detection of the
V.54 code.
MODULES (V35NX-2) > TEST > LOOPBACK STATUS
Read security: 5
This read-only option indicates a port’s current loopback status by displaying any of the following status
messages:
NO LOOPBACK ACTIVE
REMOTE LOOP-UP FAILED
LOOPING UP REMOTE UNIT
PORT LOOPED FROM REMOTE SOURCE
REMOTE UNIT LOOPED BACK
PORT LOOPBACK ACTIVE
LOOPING DOWN REMOTE UNIT
MODULES (V35NX-2) > TEST > 511
Write security: 4; Read security: 5
Controls the activation of the 511 test pattern generator and detector.
MODULES (V35NX-2) > TEST > 511 RESULT
Read security: 5
Displays the results of the 511 test. This option is read-only. Clear these results by pressing <Enter> when
CLR is selected.
NONE
Pattern is not synchronized.
LOS
At one point the pattern was synchronized, but is currently not
synchronized.
SYNC
Pattern is synchronized.
ES
Number of seconds with at least one bit error.
MODULES (V35NX-2) > TEST > INJECT
Write security: 4; Read security: 4
Injects errors into transmitted test pattern.
136
© 2002 ADTRAN, Inc.
61200305L1-1F
ATLAS 550 System Manual
Section 4, User Interface Guide
MODULES (V35NX-2) > TEST > CLR
Write security: 4; Read security: 4
Clears error counters on test pattern results menu.
MODULES MENU (DUAL USSI OPTION MODULE)
The ATLAS 550 system controller automatically detects the presence of the Dual USSI Option Module
when it is installed in the system (listed as USSI-2). To see the menus for the Dual USSI Option Module
via the terminal menu, use the arrow keys to scroll to the MODULES menu and press <Enter> to access the
module choices. Refer to the Dual USSI Option Module Quick Start Guide for a menu tree containing a
complete listing of menus.
MODULES (USSI-2) > INFO
Read security: 5
Provides information about the module part number, serial number, and assembly revision.
MODULES (USSI-2) > INFO > PART NUMBER
Read security: 5
Displays the part number of the module.
MODULES (USSI-2) > INFO > SERIAL NUMBER
Read security: 5
Displays the serial number of the module.
MODULES (USSI-2) > INFO > ASSEMBLY REVISION
Read security: 5
Displays the assembly revision of the installed module.
MODULES (USSI-2) > ALARM STATUS
Read security: 5
Displays the current alarm status.
MODULES (USSI-2) > ALARM STATUS > PRT
Read security: 5
Indicates the port number. There are 2 available interfaces on the Dual USSI Option Module.
61200305L1-1F
© 2002 ADTRAN, Inc.
137
Section 4, User Interface Guide
ATLAS 550 System Manual
MODULES (USSI-2) > ALARM STATUS > ALARMS
Read security: 5
Displays an alarm condition on the ATLAS 550 unit.
SLIP
A rate mismatch exists between the DTE clock and the network-side
clock (as set by DS0 assignment).
PLL
The USSI port is not able to lock onto the clock provided by the
network interface.
ZERO
The DTE is sending an excessive number of consecutive zeroes to the
network interface.
NO EXT CLK
The DTE is not providing an external transmit clock. This alarm
displays only if the USSI port is configured to get its transmit clock
from the DTE.
PKT EP ALM
A packet endpoint has detected missing or incorrect framing.
MODULES (USSI-2) > DTE STATUS
Read security: 5
Shows the status of key DTE interface signals. An asterisk (*) indicates the presence of a signal and a
hyphen (-) indicates no signal present.
MODULES (USSI-2) > DTE STATUS > PRT
Read security: 5
Operating port number. There are 2 available interfaces on the Dual USSI Option Module.
MODULES (USSI-2) > DTE STATUS > DTE STATUS
The following signals are monitored (these options are read-only):
RTS
Request to send from DTE.
CTS
Clear to send to DTE.
DTR
Data terminal ready from DTE.
DSR
Data set ready to DTE.
DCD
Data carrier detect to DTE.
RI
Ring indicate to DTE.
TD
Transmit data from the DTE.
RD
Receive data toward the DTE.
EC
External clock present.
MODULES (USSI-2) > DATA RATE
Read security: 5
Displays the data rate at which each USSI port is currently operating. A port’s data rate is determined by
the number of DS0s assigned to it and the rate per DS0 associated with the active maps.
138
© 2002 ADTRAN, Inc.
61200305L1-1F
ATLAS 550 System Manual
Section 4, User Interface Guide
MODULES (USSI-2) > DATA RATE > PORT
Read security: 5
Displays operating port. There are 2 available interfaces on the Dual USSI Option Module.
MODULES (USSI-2) > DATA RATE > RATE
Read security: 5
Displays the data rate of the selected port.
MODULES (USSI-2) > INBAND STATS
Write security: 5; Read security: 5
Provides information on the inband channel statistics.
MODULES (USSI-2) > INBAND STATS > PORT
Read security: 5
Operating port number. There are 2 available interfaces on the Dual USSI Option Module.
MODULES (USSI-2) > INBAND STATS > RX FRAMES
Read security: 5
The number of frames received on the operating port since system startup.
MODULES (USSI-2) > INBAND STATS > TX FRAMES
Read security: 5
The number of frames transmitted from the operating port since system startup.
MODULES (USSI-2) > INBAND STATS > RX BYTES
Read security: 5
The number of bytes received on the operating port since system startup.
MODULES (USSI-2) > INBAND STATS > TX BYTES
Read security: 5
The number of bytes transmitted from the operating port since system startup.
MODULES (USSI-2) > INBAND STATS > RESET STATS
Write security: 5; Read security: 5
Clears inband statistic results.
MODULES (USSI-2) > PLL/FIFO
Read security: 5
Displays the Phase Lock Loop (PLL) and FIFO status.
61200305L1-1F
© 2002 ADTRAN, Inc.
139
Section 4, User Interface Guide
ATLAS 550 System Manual
MODULES (USSI-2) > PLL/FIFO > PORT
Read security: 5
Indicates the operating port. There are 2 available interfaces on the Dual USSI Option Module.
MODULES (USSI-2) > PLL/FIFO > PLL/FIFO
Read security: 5
Displays the state of the PLL and FIFO systems.
LOCK
PLL is locked (This is required to transfer data.)
RXE
Receive data FIFO empty.
RXF
Receive data FIFO full.
TXE
Transmit data FIFO empty.
TXF
Transmit data FIFO full.
MODULES (USSI-2) > CONFIGURATION
Write security: 3; Read security: 5
All of the following configurable parameters apply to the individual USSI ports.
MODULES (USSI-2) > CONFIGURATION > PRT
Read security: 5
Displays the port number. There are 2 available interfaces on the Dual USSI Option Module.
MODULES (USSI-2) > CONFIGURATION > PORT NAME
Write security: 3; Read security: 5
Accepts any alpha-numeric name up to 16 characters long, to uniquely identify each port on the Dual USSI
Option Module.
MODULES (USSI-2) > CONFIGURATION > CLK +/Write security: 3; Read security: 5
Controls the clock used by the ATLAS 550 to accept the transmit (TX) data from the DTE. This is usually
set to NORMAL. If the interface cable is long, causing a phase shift in the data, the clock can be set to
INVERTED. This switches the phase of the clock, which compensates for a long cable.
MODULES (USSI-2) > CONFIGURATION > DATA
Write security: 3; Read security: 5
Controls the inverting of the DTE data. This inversion can be useful when operating with a high-level data
link control (HDLC) protocol (often used as a means to ensure 1s density). Select either NORMAL or
INVERTED. Data inversion configuration must match at both ends of the circuit.
140
© 2002 ADTRAN, Inc.
61200305L1-1F
ATLAS 550 System Manual
Section 4, User Interface Guide
MODULES (USSI-2) > CONFIGURATION > CTS
Write security: 3; Read security: 5
Determines the behavior of the Clear To Send (CTS) signal. If set to NORMAL, CTS will follow the value of
Request To Send (RTS). If set to FORCED ON, CTS will always be asserted.
MODULES (USSI-2) > CONFIGURATION > DCD
Write security: 3; Read security: 5
Determines the behavior of the Data Carrier Detect (DCD) signal, also called RLSD on some interfaces. If
set to NORMAL, DCD will generally be asserted when the interface is capable of passing data (consult the
ATLAS 550 User Manual for exact conditions.) If set to FORCED ON, DCD will always be asserted. If set to
REMOTE RTS, the value of DCD will track the value of the remote unit’s RTS signal. Note that this feature
requires the Inband control channel to be ENABLED.
MODULES (USSI-2) > CONFIGURATION > DSR
Write security: 3; Read security: 5
Determines the behavior of the Data Set Ready (DSR) signal. If set to NORMAL, DSR will generally be
asserted when the interface is capable of passing data. If set to FORCED ON, DSR will always be asserted. If
set to REMOTE DTR, the value of DSR will track the value of the remote unit’s DTR signal. This remote
feature requires the Inband control channel to be ENABLED.
MODULES (USSI-2) > CONFIGURATION > DTR
Write security: 3; Read security: 5
Determines whether the ATLAS 550 treats a connection as permanent (IGNORE) or connects only when
Data Terminal Ready (DTR) is active (CONNECT ON DTR). Select either IGNORE or CONNECT ON DTR.
MODULES (USSI-2) > CONFIGURATION > 0 INH
Write security: 3; Read security: 5
When the port detects an uninterrupted string of 0s being transmitted for more than one second, setting this
parameter to ON will cause the ATLAS 550 to send 1s toward the network.
MODULES (USSI-2) > CONFIGURATION > INBAND
Write security: 3; Read security: 5
Creates an inband management channel by robbing 8 kbps bandwidth from the port’s allocated bandwidth.
This channel can be used for management for ADTRAN products that are not co-located with the ATLAS.
Consult the manual for ADTRAN T1 equipment for details on using this feature.
MODULES (USSI-2) > CONFIGURATION > SEND LEADS
Write security: 3; Read security: 5
Sends the state of the DTE leads to the remote unit whenever any of the leads change state. If any leads on
the remote unit are set to track a remote signal, this option must be enabled. The DTE lead states are
61200305L1-1F
© 2002 ADTRAN, Inc.
141
Section 4, User Interface Guide
ATLAS 550 System Manual
conveyed using the Inband control channel, which must be enabled.
SIGNAL
CTS
DCD
DSR
RTS
V.54
LOOPBACK
511 TEST
ON
SELF
TEST
ACTIVE
NETWORK
TEST
ACTIVE
NO DS0
MAPPED
NETWORK
ALARM
Follows
Off
Off
Off
Off
Off
Off
—
—
—
Off
Off
Off
Off
—
Off
Off
Off
Off
Off
—
— = Do not care
Force On = On under all conditions
MODULES (USSI-2) > DIAL
Write security: 3; Read security: 5
Dials a USSI port that is configured to ignore DTR.
MODULES (USSI-2) > DIAL > PRT
Read security: 5
Displays the port number. There are 2 available interfaces on the Dual USSI Option Module.
MODULES (USSI-2) > DIAL > MODE
Write security: 3; Read security: 5
Configures the dialing mode. The following options are available:
PERSISTENT
Redial whenever the call is cleared or if the call fails.
ONE TIME
Attempt the call only once.
MODULES (USSI-2) > DIAL > DIAL
Write security: 0; Read security: 0
Signals the USSI port to dial/clear the call.
MODULES (USSI-2) > DIAL > SRC ID
Write security: 3; Read security: 5
Indicates the SOURCE ID of the number to be dialed. Configure this field in the USSI INTERFACE
CONFIGURATION section of the DIAL PLAN.
MODULES (USSI-2) > DIAL > NUMBER
Write security: 3; Read security: 5
Indicates the number to be dialed. Configure this field in the USSI INTERFACE CONFIGURATION section of
the DIAL PLAN.
MODULES (USSI-2) > TEST
Write security: 4; Read security: 5
These options initiate different types of tests and display test results.
142
© 2002 ADTRAN, Inc.
61200305L1-1F
ATLAS 550 System Manual
Section 4, User Interface Guide
MODULES (USSI-2) > TEST > PORT
Write security: 5; Read security: 5
Displays the port number.
MODULES (USSI-2) > TEST > LOOPBACK
Write security: 4; Read security: 5
Test pattern to be transmitted out the port. The following options are available:
NO LOOPBACK
No active loopback.
LOCAL LOOPBACK
Activates both a local loopback (back toward the DTE) and a port
loopback (toward the network).
REMOTE LOOPBACK
V.54 loopback code to be sent to the far end, and if the device at the far
end supports V.54, the device activates a loopback on detection of the
V.54 code.
MODULES (USSI-2) > TEST > LOOPBACK STATUS
Read security: 5
This read-only option indicates a port’s current loopback status by displaying any of the following status
messages:
NO LOOPBACK ACTIVE
REMOTE LOOP-UP FAILED
LOOPING UP REMOTE UNIT
PORT LOOPED FROM REMOTE SOURCE
REMOTE UNIT LOOPED BACK
PORT LOOPBACK ACTIVE
LOOPING DOWN REMOTE UNIT
MODULES (USSI-2) > TEST > 511
Write security: 4; Read security: 5
Controls the activation of the 511 test pattern generator and detector.
MODULES (USSI-2) > TEST > 511 RESULT
Read security: 5
Displays the results of the 511 test. This option is read-only. Clear these results by pressing <Enter> when
CLR is selected.
NONE
Pattern is not synchronized.
LOS
At one point the pattern was synchronized, but is currently not
synchronized.
SYNC
Pattern is synchronized.
ES
Number of seconds with at least one bit error.
MODULES (USSI-2) > TEST > INJECT
Write security: 4; Read security: 4
Injects errors into transmitted test pattern.
61200305L1-1F
© 2002 ADTRAN, Inc.
143
Section 4, User Interface Guide
ATLAS 550 System Manual
MODULES (USSI-2) > TEST > CLR
Write security: 4; Read security: 4
Clears error counters on test pattern results menu.
MODULES (USSI-2) > DTE INTERFACE
Write security: 5; Read security: 5
Configures the Dual USSI Module for the appropriate interface type. Select the parameters matching the
interface cable being used.
MODULES (USSI-2) > DTE INTERFACE > PRT
Read security: 5
Displays the port number.
MODULES (USSI-2) > DTE INTERFACE > DTE INTERFACE MODE
Write security: 3; Read security: 5
Configures the Dual USSI Module interface type. The following options are available:
AUTO
The ATLAS 550 will automatically detect the interface type. The
cable must be connected before the interface can be determined.
EIA-530A
Configures the interface for EIA-530A use.
EIA-530\RS-449\V.36
Configures the interface for EIA-530, RS-449, or V.36 use.
X.21/V.11
Configures the interface for X.21 or V.11 use.
RS-232
Configures the interface for RS-232 use.
The following Dual USSI Option Module Systems are available (each includes the
appropriate interface cable):
•
•
•
•
RS-449/V.36 System (P/N 4200754L1)
EIA-530/530A System (P/N 4200754L2)
X.21/V.11 System (P/N 4200754L3)
RS-232 System (P/N 4200754L4)
MODULES (USSI-2) > DTE INTERFACE > CURRENT DTE TYPE
Read security: 5
Displays the current configuration of the Dual USSI Module DTE Interface.
MODULES MENU (QUAD BASIC RATE ISDN (U INTERFACE) OPTION MODULE)
The ATLAS 550 system controller automatically detects the presence of the Quad BRI (U Interface)
Option Module when it is installed in the system (listed as U-BRI-4). To see the menus for the Quad BRI
(U Interface) Option Module via the terminal menu, use the arrow keys to scroll to the MODULES menu and
press <Enter> to access the module choices. Refer to the Quad BRI (U Interface) Option Module Quick
Start Guide for a menu tree containing a complete listing of menus.
144
© 2002 ADTRAN, Inc.
61200305L1-1F
ATLAS 550 System Manual
Section 4, User Interface Guide
MODULES (U-BRI-4) > INFO
Read security: 5
Provides information about the module part number, serial number, and assembly revision.
MODULES (U-BRI-4) > INFO > PART NUMBER
Read security: 5
Displays the part number of the module.
MODULES (U-BRI-4) > INFO > SERIAL NUMBER
Read security: 5
Displays the serial number of the module.
MODULES (U-BRI-4) > INFO > ASSEMBLY REVISION
Read security: 5
Displays the assembly revision of the installed module.
MODULES (U-BRI-4) > ALARMS
Read security: 5
Displays the alarm status for each U interface on the installed module.
MODULES (U-BRI-4) > ALARMS > PRT
Read security: 5
Indicates the port number. There are 4 available interfaces on the Quad BRI-U Option Module.
MODULES (U-BRI-4) > ALARMS > ALARMS
Read security: 5
Displays the current alarm status of each Basic Rate ISDN (BRI) U interface.
L1 DOWN
A layer one alarm is indicated by an asterisk (*) when the BRI U
physical layer is not active. An L1 alarm is present when problems are
detected with the endpoint or a cabling problem.
MODULES (U-BRI-4) > CHANNEL STATUS
Read security: 5
Displays the status of each of the Basic Rate ISDN (BRI) U interfaces.
MODULES (U-BRI-4) > CHANNEL STATUS > PRT
Read security: 5
Indicates the port number. There are 4 available interfaces on the Quad BRI-U Option Module.
61200305L1-1F
© 2002 ADTRAN, Inc.
145
Section 4, User Interface Guide
ATLAS 550 System Manual
MODULES (U-BRI-4) > CHANNEL STATUS > CHA
Read security: 5
(Channel) Displays the status of individual channels. The following symbols may display:
-
Unallocated channel
.
Inactive channel
A
Active B channel
D
Active D channel
MODULES (U-BRI-4) > PERFORMANCE CURRENT
Write security: 3; Read security: 5
The performance field provides status on key performance measures for each of the four Basic Rate ISDN
(BRI) ports (U interfaces). These fields are all read-only.
PRT
Displays the port number.
NEBE
Near-end block errors
FEBE
Far-end block errors
MODULES (U-BRI-4) > CONFIGURATION
Write security: 3; Read security: 5
All of the following configurable parameters apply to the individual Basic Rate ISDN (BRI) U interfaces.
MODULES (U-BRI-4) > CONFIGURATION > PRT
Read security: 5
Displays the port number. There are 4 available interfaces on the Quad BRI-U Option Module.
MODULES (U-BRI-4) > CONFIGURATION > PORT NAME
Write security: 3; Read security: 5
Accepts any alpha-numeric name up to 16 characters long, to uniquely identify each port on the installed
module.
MODULES (U-BRI-4) > TEST
Write security: 5; Read security: 5
These options initiate different types of tests and display test results.
MODULES (U-BRI-4) > TEST > PRT
Write security: 5; Read security: 5
Displays the port number. There are 4 available interfaces on the Quad BRI-U Option Module.
146
© 2002 ADTRAN, Inc.
61200305L1-1F
ATLAS 550 System Manual
Section 4, User Interface Guide
MODULES (U-BRI-4) > TEST > LOCAL LOOPBACK
Write security: 4; Read security: 5
Activates a local loopback of the U interface toward the network. The following options are available:
NONE
No active loopback.
LOOPBACK B1
Loops the first B channel of the interface.
LOOPBACK B2
Loops the second B channel of the interface.
LOOPBACK B1 & B2
Loops both B channels of the interface.
LOOPBACK 2B+D
Loops the entire physical interface.
MODULES MENU (QUAD BASIC RATE ISDN (S/T INTERFACE) OPTION MODULE)
The ATLAS 5500 system controller automatically detects the presence of the Quad BRI (S/T Interface)
Option Module when it is installed in the system (listed as ST-BRI-4). To see the menus for the Quad BRI
(S/T Interface) Option Module via the terminal menu, use the arrow keys to scroll to the MODULES menu
and press <Enter> to access the module choices. Refer to the Quad BRI (S/T Interface) Option Module
Quick Start Guide for a menu tree containing a complete listing of menus.
MODULES (ST-BRI-4) > INFO
Write security: 5; Read security: 5
Provides information about the module part number, serial number, and assembly revision.
MODULES (ST-BRI-4) > INFO > PART NUMBER
Read security: 5
Displays the part number of the module.
MODULES (ST-BRI-4) > INFO > SERIAL NUMBER
Read security: 5
Displays the serial number of the module.
MODULES (ST-BRI-4) > INFO > ASSEMBLY REVISION
Read security: 5
Displays the assembly revision of the installed module.
MODULES (ST-BRI-4) > ALARMS
Write security: 5; Read security: 5
Displays the alarm status for each S/T interface on the installed module.
MODULES (ST-BRI-4) > ALARMS > PRT
Write security: 5; Read security: 5
Indicates the port number. There are 4 available interfaces on the Quad BRI-S/T Option Module.
61200305L1-1F
© 2002 ADTRAN, Inc.
147
Section 4, User Interface Guide
ATLAS 550 System Manual
MODULES (ST-BRI-4) > ALARMS > ALARMS
Write security: 5; Read security: 5
Displays the current alarm status of each Basic Rate ISDN (BRI) S/T interface.
L1 DOWN
A layer one alarm is indicated by an asterisk (*) when the BRI S/T
physical layer is not active. An L1 alarm is present when problems are
detected with the endpoint or a cabling problem.
MODULES (ST-BRI-4) > ALARMS > CHANNEL
Write security: 5; Read security: 5
Displays the alarm status of the bearer (B) channels and the datalink (D) channel. A hyphen (–) indicates
no active channel alarm and D indicates an active D channel alarm.
MODULES (ST-BRI-4) > CHANNEL USAGE
Read security: 5
Displays the channel status of the bearer (B) channels and the datalink (D) channel for each Basic Rate
ISDN (BRI) S/T interface.
MODULES (ST-BRI-4) > CHANNEL USAGE > PRT
Write security: 5; Read security: 5
Indicates the port number. There are 4 available interfaces on the Quad BRI-S/T Option Module.
MODULES (ST-BRI-4) > CHANNEL USAGE > CHA
Write security: 5; Read security: 5
(Channel) Displays the status of individual channels. The following symbols may display:
-
Unallocated channel
.
Inactive channel
A
Active B channel
D
Active D channel
MODULES (ST-BRI-4) > CONFIGURATION
Write security: 5; Read security: 5
Allows the user to personally identify each port with an appropriate name.
MODULES (ST-BRI-4) > CONFIGURATION > PRT
Write security: 5; Read security: 5
Displays the port number. There are 4 available interfaces on the Quad BRI-S/T Option Module.
MODULES (ST-BRI-4) > CONFIGURATION > PORT NAME
Write security: 3; Read security: 5
Accepts any alpha-numeric name up to 16 characters long, to uniquely identify each port on the Octal BRI
148
© 2002 ADTRAN, Inc.
61200305L1-1F
ATLAS 550 System Manual
Section 4, User Interface Guide
S/T Option Module.
MODULES (ST-BRI-4) > CONFIGURATION > LINE TERMINATION
Write security: 3; Read security: 5
Termination resistors in both the transmit and receive paths (100 Ω) are required (per CCITT I.430, ETSI
ETS 300012, and ANSI T1.605) for all Basic Rate ISDN (BRI) S/T interfaces operating in NT mode (User
Term) and TE mode (Network Term) in point-to-point applications. ANSI T1.605 provides examples of
S/T interfaces configured in a multi-point NT1 star operation. The NT1 star mode allows a single NT
device to support multiple T interfaces (TE devices). Custom cables are required for this type of
application, and are not available for purchase (from ADTRAN) for the ATLAS 550.
This parameter should be left in the default state for most applications.
MODULES (ST-BRI-4) > CONFIGURATION > PS1 LINE POWER
Write security: 3; Read security: 5
The ATLAS 550 is capable of providing 1W (at 40 V) power on each Basic Rate ISDN (BRI) S/T interface
to provide line power (phantom power) to TE equipment. Set this parameter to ON only if the TE
equipment connected to the S/T interface requires line power.
Do not enable line power on a BRI S/T interface configured for TE mode (Network
Term). Setting this parameter to ON in a TE configuration (Network Term) may result
in damage to the module.
MODULES (ST-BRI-4) > TEST
Write security: 5; Read security: 5
These options initiate different types of tests and display test results.
MODULES (ST-BRI-4) > TEST > PRT
Write security: 5; Read security: 5
Identifies the port number. There are 4 available interfaces on the Quad BRI-S/T Option Module.
61200305L1-1F
© 2002 ADTRAN, Inc.
149
Section 4, User Interface Guide
ATLAS 550 System Manual
MODULES (ST-BRI-4) > TEST > LOCAL LOOPBACK
Write security: 4; Read security: 5
Activates a local loopback toward the S/T interface. The following options are available:
NONE
•
No active loopback.
LOOPBACK B1
•
Loops the first B channel of the interface.
LOOPBACK B2
•
Loops the second B channel of the interface.
LOOPBACK B1 + B2
•
Loops both B channels of the interface.
LOOPBACK 2B+D
•
Loops the entire physical interface.
MODULES MENU (QUAD/OCTAL FXS OPTION MODULE)
The ATLAS 550 system controller automatically detects the presence of the Quad/Octal FXS Option
Modules when they are installed in the system (Quad is listed as FXS-4 and the Octal is listed as FXS-8).
All menus in this section that apply to both modules are listed as FXS-4/8. To see the menus for the
Quad/Octal FXS Option Module via the terminal menu, use the arrow keys to scroll to the MODULES menu
and press <Enter> to access the module choices. Refer to the Quad/Octal FXS Option Module Quick Start
Guide for a menu tree containing a complete listing of menus.
MODULES (FXS-4/8) > INFO
Read security: 5
Provides information about the module part number, serial number, and assembly revision.
MODULES (FXS-4/8) > INFO > PART NUMBER
Read security: 5
Displays the part number of the module.
MODULES (FXS-4/8) > INFO > SERIAL NUMBER
Read security: 5
Displays the serial number of the module.
MODULES (FXS-4/8) > INFO > ASSEMBLY REVISION
Read security: 5
Displays the assembly revision of the module.
MODULES (FXS-4/8) > INFO > PROCESSOR ID
Read security: 5
Displays the processor ID of the selected module.
MODULES (FXS-4/8) > STATUS
Read security: 5
Displays the status of each of the FXS ports.
150
© 2002 ADTRAN, Inc.
61200305L1-1F
ATLAS 550 System Manual
Section 4, User Interface Guide
MODULES (FXS-4/8) > STATUS > PRT
Read security: 5
Indicates the port number. There are 4 available interfaces on the Quad FXS Option Module and 8 on the
Octal FXS Option Module.
MODULES (FXS-4/8) > STATUS > STATUS
Read security: 5
Displays the call status of each voice port. This field may display the following:
IDLE
The FXS port is in an idle state for LS configurations, and tip is
grounded in GS configurations.
RING GROUND
The FXS port has detected ring ground.
OFF HOOK
The FXS port has detected an off hook condition (loop current flowing).
REVERSE BATTERY
The FXS port has reversed T/R polarity.
RINGING
The FXS port is detecting ringing condition on the interface.
TIP-OPEN
The FXS port tip conductor is high impedance. This is an idle condition
for GS trunks.
UNKNOWN
No information about the FXS port is available.
INACTIVE
The port is preconfigured, but the FXS module is not present.
AVAILABLE
The FXS port is present and available for use.
NOT AVAILABLE
The FXS port is present, but not available for use.
DISABLED
The FXS module is present, but the port is not mapped.
TEST
This generic FXS port test indicator is used when multiple tests are
being run or the test is not a 2W test.
ACTIVE
Active test is currently running.
OFF HOOK
Active/Reverse Battery test is running, but an off hook condition is
detected.
RINGING
Ringing test is currently running.
REV. BAT
Reverse Battery test is currently running.
TIP OPEN
Tip Open test is currently running.
RING GND
Tip Open test is currently running, but ring ground is detected.
DISABLED
An active test is running on an FXS port that is not currently mapped.
(-R) TRIP
Ringing test is currently running, but an off hook condition is detected.
MODULES (FXS-4/8) > STATUS > RX ABCD
Read security: 5
Receive Signaling bits have local significance only, and represent signaling between the ATLAS 550
61200305L1-1F
© 2002 ADTRAN, Inc.
151
Section 4, User Interface Guide
ATLAS 550 System Manual
Controller and the voice port if the port is configured in the DIAL PLAN. The bit pattern is formatted ESF
RBS.
MODULES (FXS-4/8) > STATUS > TX ABCD
Read security: 5
Transmit Signaling bits have local significance only, and represent signaling between the ATLAS 550
Controller and the voice port if the port is configured in the DIAL PLAN. The bit pattern is formatted ESF
RBS.
MODULES (FXS-4/8) > TEST
Write security: 4; Read security: 5
These options initiate different types of tests and display test results.
MODULES (FXS-4/8) > TEST > PORT
Write security: 5; Read security: 5
Displays the operating port. There are 4 available interfaces on the Quad FXS Option Module and 8 on the
Octal FXS Option Module.
MODULES (FXS-4/8) > TEST > TEST 2W
Write security: 4; Read security: 5
Activates 2W (FXS) tests on a per-port basis. Options include OFF, ACTIVE, TIP OPEN, REV. BATTERY,
DISABLED, and RINGING. The 2W tests will disrupt the active call on the selected FXS port. Table 3 displays
the state of the 2W conductors during each test.
Table 3. FXS 2W State Table
TEST
TIP OUTPUT
RING OUTPUT
Off
No test active
No test active
Active
Ground
Supervision voltage
Tip Open
High impedance
Supervision voltage
Rev. Battery
Supervision voltage
Ground
Disabled*
High impedance
High impedance
Ringing
Ringing voltage
Ringing voltage
* Disables the output of the FXS port; it does not disable the test.
152
© 2002 ADTRAN, Inc.
61200305L1-1F
ATLAS 550 System Manual
Section 4, User Interface Guide
MODULES (FXS-4/8) > TEST > TX ABCD
Write security: 4; Read security: 5
Forces the Transmit Robbed Bit Signaling (Tx RBS) to a specified value. Values include OFF, 0000, 0101,
1010, or 1111.
Calls may be affected when activating the Tx ABCD test. This test is not valid when the
port is used in the DIAL PLAN.
MODULES (FXS-4/8) > TEST > 1KHZ TONE
Write security: 3; Read security: 5
Sends a 1kHz tone into the following locations, based on test selection: NEAR sends the tone out the FXS
port, while FAR sends the tone into the digital PCM stream of the ATLAS 550 controller. These tests are
useful for verifying a voice path.
MODULES (FXS-4/8) > TEST > LOOPBACK
Write security: 3; Read security: 5
Activates loopback tests on a per-port basis.
OFF
Normal operation.
ANALOG
Loops the 2W test on itself.
DIGITAL
Loops digital data entering the FXS from the ATLAS controller on
itself.
BOTH
Processes both analog and digital loopback tests.
Loopback tests disrupt the call in progress on the selected FXS port.
MODULES (FXS-4/8) > CONFIG
Write security: 3; Read security: 5
All of the following configurable parameters apply to the individual FXS ports.
MODULES (FXS-4/8) > CONFIG > PRT
Read security: 5
Displays the port number. There are 4 available interfaces on the Quad FXS Option Module and 8 on the
Octal FXS Option Module.
MODULES (FXS-4/8) > CONFIG > PORT NAME
Write security: 3; Read security: 5
Accepts any alpha-numeric name up to 16 characters long, to uniquely identify each port on the FXS
Option Module.
61200305L1-1F
© 2002 ADTRAN, Inc.
153
Section 4, User Interface Guide
ATLAS 550 System Manual
MODULES (FXS-4/8) > CONFIG > RX GAIN
Write security: 3; Read security: 5
Adjusts the (+)Gain and (-)Attenuation of the relative signal received by the FXS. The range includes 0
(loudest), -3, and -6dB (softest).
MODULES (FXS-4/8) > CONFIG > TX GAIN
Write security: 3; Read security: 5
Adjusts the (+)Gain and (-)Attenuation of a digital signal transmitted by the FXS into the digital PCM
stream. The range includes +3 (loudest), 0, -3, and -6 dB (softest).
When the digital signal is connected through the PSTN, a setting of -3 dB should be used.
MODULES (FXS-4/8) > CONFIG > 2W IMPEDANCE
Read security: 5
2-wire input impedance is set to 600 Ω +2.16 µF. This is a read-only field.
MODULES (FXS-4/8) > CONFIG > CODING SCHEME
Read security: 5
Displays the current PCM coding scheme. Currently only µ-LAW is supported.
MODULES MENU (QUAD/OCTAL FXO OPTION MODULE)
The ATLAS 550 system controller automatically detects the presence of the Octal/Quad FXO Option
Module when they are installed in the system (Quad is listed as FXO-4 and the Octal is listed as FXO-8).
All menus in this section that apply to both modules are listed as FXS-4/8. To see the menus for the
Octal/Quad FXO Option Module via the terminal menu, use the arrow keys to scroll to the MODULES menu
and press <Enter> to access the module choices. Refer to the Quad/Octal FXO Option Module Quick Start
Guide for a menu tree containing a complete listing of menus.
MODULES (FXO-4/8) > INFO
Read security: 5
Provides information about the module part number, serial number, and assembly revision.
MODULES (FXO-4/8) > INFO > PART NUMBER
Read security: 5
Displays the part number of the module.
MODULES (FXO-4/8) > INFO > SERIAL NUMBER
Read security: 5
Displays the serial number of the module.
154
© 2002 ADTRAN, Inc.
61200305L1-1F
ATLAS 550 System Manual
Section 4, User Interface Guide
MODULES (FXO-4/8) > INFO > ASSEMBLY REVISION
Read security: 5
Displays the assembly revision of the module.
MODULES (FXO-4/8) > INFO > FIRMWARE REVISION
Read security: 5
Displays the current firmware revision of the selected module.
MODULES (FXO-4/8) > INFO > PROCESSOR ID
Read security: 5
Displays the processor ID of the selected module.
MODULES (FXO-4/8) > STATUS
Read security: 5
Displays the status of each of the FXO ports.
MODULES (FXO-4/8) > STATUS > PRT
Read security: 5
Indicates the port number. There are 4 available interfaces on the Quad FXO Option Module and 8 on the
Octal FXO Option Module.
MODULES (FXO-4/8) > STATUS > STATUS
Read security: 5
Displays the call status of each voice port. This field may display the following:
IDLE
The FXO port is in an idle state for LS configurations, and tip is
grounded in GS configurations.
RING GROUND
The FXO port has detected ring ground.
OFF HOOK
The FXO port has detected an off hook condition (loop current flowing).
REVERSE BATTERY
The FXO port has reversed T/R polarity.
RINGING
The FXO port is detecting ringing condition on the interface.
TIP-OPEN
The FXO port tip conductor is high impedance. This is an idle condition
for GS trunks.
UNKNOWN
No information about the FXO port is available.
INACTIVE
The port is preconfigured, but the FXO module is not present.
AVAILABLE
The FXO port is present and available for use.
NOT AVAILABLE
The FXO port is present, but not available for use.
DISABLED
The FXO module is present, but the port is not mapped.
TEST
This generic FXO port test indicator is used when multiple tests are being
run or the test is not a 2W test.
61200305L1-1F
© 2002 ADTRAN, Inc.
155
Section 4, User Interface Guide
ATLAS 550 System Manual
LO
Loop open test is currently running.
LC-T/R OK
Loop closed test is currently running and normal T/R polarity is detected.
LC-NO BATTERY
Loop closed test is currently running and no loop batter is detected.
LC-T/R ROLLED
Loop closed test is currently running and reverse T/R polarity is detected.
RING GND
Tip Open test is currently running, but ring ground is detected.
MODULES (FXO-4/8) > STATUS > RX ABCD
Read security: 5
Receive Signaling bits have local significance only, and represent signaling between the ATLAS 550
Controller and the voice port if the port is configured in the DIAL PLAN. The bit pattern is formatted ESF
RBS.
MODULES (FXO-4/8) > STATUS > TX ABCD
Read security: 5
Transmit Signaling bits have local significance only, and represent signaling between the ATLAS 550
Controller and the voice port if the port is configured in the DIAL PLAN. The bit pattern is formatted ESF
RBS.
MODULES (FXO-4/8) > TEST
Write security: 4; Read security: 5
The TEST options initiate different types of tests and display test results.
MODULES (FXO-4/8) > TEST > PORT
Write security: 5; Read security: 5
Displays the operating port. There are 4 available interfaces on the Quad FXO Option Module and 8 on the
Octal FXO Option Module.
MODULES (FXO-4/8) > TEST > TEST 2W
Write security: 4; Read security: 5
Activates 2W (FXO) tests on a per-port basis. Options include OFF, LOOP OPEN, LOOP CLOSED, and RING
GROUND. The 2W tests will disrupt the active call on the selected FXO port. Table 3 displays the state of
the 2W conductors during each test.
Table 4. FXO 2W State Table
156
TEST
TIP OUTPUT
RING OUTPUT
Off
No test active
No test active
Loop Open
High impedance
High impedance
Loop Closed
Off-hook impedance
Off-hook impedance
Ring Ground
High impedance
R to ground
© 2002 ADTRAN, Inc.
61200305L1-1F
ATLAS 550 System Manual
Section 4, User Interface Guide
MODULES (FXO-4/8) > TEST > TX ABCD
Write security: 4; Read security: 5
Forces the Transmit Robbed Bit Signaling (Tx RBS) to a specified value. Values include OFF, 0000, 0101,
1010, or 1111.
Calls may be affected when activating the Tx ABCD test. This test is not valid when the
port is used in the DIAL PLAN.
MODULES (FXO-4/8) > TEST > 1KHZ TONE
Write security: 3; Read security: 5
Sends a 1kHz tone into the following locations, based on test selection: NEAR sends the tone out the 2W
FXO port, while FAR sends the tone into the digital PCM stream of the ATLAS 550 controller. These tests
are useful for verifying a voice path.
MODULES (FXO-4/8) > TEST > LOOPBACK
Write security: 3; Read security: 5
Activates loopback tests on a per-port basis.
OFF
Normal operation.
ANALOG
Loops the 2W test on itself.
DIGITAL
Loops digital data entering the FXO from the ATLAS controller on
itself.
BOTH
Processes both analog and digital loopback tests.
Loopback tests disrupt the call in progress on the selected FXO port.
MODULES (FXO-4/8) > CONFIG
Write security: 3; Read security: 5
All of the following configurable parameters apply to the individual FXO ports.
MODULES (FXO-4/8) > CONFIG > PRT
Read security: 5
Displays the port number. There are 4 available interfaces on the Quad FXO Option Module and 8 on the
Octal FXO Option Module.
MODULES (FXO-4/8) > CONFIG > PORT NAME
Write security: 3; Read security: 5
Accepts any alpha-numeric name up to 16 characters long, to uniquely identify each port on the FXO
61200305L1-1F
© 2002 ADTRAN, Inc.
157
Section 4, User Interface Guide
ATLAS 550 System Manual
Option Module.
MODULES (FXO-4/8) > CONFIG > RX GAIN
Write security: 3; Read security: 5
Adjusts the (+)Gain and (-)Attenuation of the relative signal received by the FXO port (Digital-to-Analog).
The range includes 0 (loudest), -3, and -6dB (softest).
MODULES (FXO-4/8) > CONFIG > TX GAIN
Write security: 3; Read security: 5
Adjusts the (+)Gain and (-)Attenuation of a digital signal transmitted by the FXO into the digital PCM
stream. The range includes +3 (loudest), 0, -3, and -6 dB (softest).
When the digital signal is connected through the PSTN, a setting of -3 dB should be used.
MODULES (FXO-4/8) > CONFIG > 2W IMPEDANCE
Read security: 5
2-wire input impedance is set to 600 Ω +2.16 µF. This is a read-only field.
MODULES (FXO-4/8) > CONFIG > CODING SCHEME
Read security: 5
Displays the current PCM coding scheme. Currently only µ-LAW is supported.
MODULES MENU (OCTAL E&M OPTION MODULE)
The ATLAS 550 system controller automatically detects the presence of the Octal E&M Option Module
when it is installed in the system (listed as E&M-8). To see the menus for the Octal E&M Option Module
via the terminal menu, use the arrow keys to scroll to the MODULES menu and press <Enter> to access the
module choices. Refer to the Octal E&M Option Module Quick Start Guide for a menu tree containing a
complete listing of menus.
MODULES (E&M-8) > INFO > PART NUMBER
Read security: 5
Displays the part number of the module.
MODULES (E&M-8) > INFO > SERIAL NUMBER
Read security: 5
Displays the serial number of the module.
158
© 2002 ADTRAN, Inc.
61200305L1-1F
ATLAS 550 System Manual
Section 4, User Interface Guide
MODULES (E&M-8) > INFO > ASSEMBLY REVISION
Read security: 5
Displays the assembly revision of the module.
MODULES (E&M-8) > INFO > FIRMWARE REVISION
Read security: 5
Displays the current firmware revision of the selected module.
MODULES (E&M-8) > INFO > PROCESSOR ID
Read security: 5
Displays the processor ID of the selected module.
MODULES (E&M-8) > STATUS
Read security: 5
Displays the status of each of the eight E&M ports.
MODULES (E&M-8) > STATUS > PRT
Read security: 5
Displays the operating port number. There are eight available ports on the Octal E&M Option Module
MODULES (E&M-8) > STATUS > STATUS
Read security: 5
Displays the call status of each voice port. This field displays one of the following messages:
INACTIVE
The port is pre-configured, but the E&M module is not present.
DISABLED
The E&M module is present, but the port is not mapped.
UNKNOWN
Information about the port is not available.
IDLE
The selected trunk is configured but currently not in use.
E-LEAD ASSERTED
The E-Lead is asserted, indicating a far-end seizure.
M-LEAD ASSERTED
An M-Lead current has been detected, indicating a near-end seizure.
TO
The port is configured for Transmission Only mode.
CALL IN PROGRESS
Indicates there is a current, active call on the selected E&M port.
TEST E-LEAD OPEN
Forces an on-hook situation for testing purposes.
TEST E-LEAD
CLOSED
Forces an off-hook situation for testing purposes.
TEST
Generic test indicator.
TEST-UNKNOWN
The port is in test mode, but additional information about the active test
is not available.
61200305L1-1F
© 2002 ADTRAN, Inc.
159
Section 4, User Interface Guide
ATLAS 550 System Manual
MODULES (E&M-8) > STATUS > RX ABCD
Read security: 5
Receive Signaling bits have local significance only, and represent signaling between the ATLAS 550
Controller and the voice port if the port is configured in the DIAL PLAN. The bit pattern is formatted ESF
RBS.
MODULES (E&M-8) > STATUS > TX ABCD
Read security: 5
Transmit Signaling bits have local significance only, and represent signaling between the ATLAS 550
Controller and the voice port if the port is configured in the DIAL PLAN. The bit pattern is formatted ESF
RBS.
MODULES (E&M-8) > TEST
Write security: 4; Read security: 5
These options initiate different types of tests and display test results.
MODULES (E&M-8) > TEST > PORT
Write security: 5; Read security: 5
Displays the operating port.
MODULES (E&M-8) > TEST > TEST 2W
Write security: 4; Read security: 5
Activates 2W (E&M) tests on a per-port basis. Options include OFF (no tests are active), E-LEAD OPEN, and
E-LEAD CLOSED. The 2W tests will disrupt the active call on the selected E&M port. Table 5 displays the
state of the 2W conductors during each test.
Table 5. E&M 2W State Table
TEST
MODULE OUTPUT
Off
E-lead follows the Rx (received) signaling bits
E-Lead Open
Forces an on-hook situation on the port
E-Lead Closed
Forces an off-hook situation on the port
MODULES (E&M-8) > TEST > TX ABCD
Write security: 4; Read security: 5
Forces the Transmit Robbed Bit Signaling (Tx RBS) to a specified value. Values include OFF, 0000, 0101,
1010, or 1111.
Calls may be affected when activating the Tx ABCD test. This test is not valid when the
port is used in the DIAL PLAN.
160
© 2002 ADTRAN, Inc.
61200305L1-1F
ATLAS 550 System Manual
Section 4, User Interface Guide
MODULES (E&M-8) > TEST > 1KHZ TONE
Write security: 3; Read security: 5
Sends a 1kHz tone into the following locations, based on test selection: NEAR sends the tone out the E&M
VF port, while FAR sends the tone into the digital PCM stream of the ATLAS 550 controller. These tests
are useful for verifying a voice path.
MODULES (E&M-8) > TEST > LOOPBACK
Write security: 3; Read security: 5
Activates loopback tests on a per-port basis.
OFF
Normal operation.
ANALOG
Loops the 2W test on itself.
DIGITAL
Loops digital data entering the E&M from the ATLAS controller on itself.
Loopback tests disrupt the call in progress on the selected E&M port.
MODULES (E&M-8) > CONFIG
Write security: 3; Read security: 5
All of the following configurable parameters apply to the individual E&M ports.
MODULES (E&M-8) > CONFIG > PORT
Read security: 5
Displays the port number.
MODULES (E&M-8) > CONFIG > PORT NAME
Write security: 3; Read security: 5
Accepts any alpha-numeric name up to 16 characters long, to uniquely identify each port on the Octal
E&M Option Module.
MODULES (E&M-8) > CONFIG > SIG IFCE
Write security: 3; Read security: 5
Selects signaling interface operation. The module supports all E&M types (TYPE I through TYPE V), as well
as Transmission Only (TO) mode. Press-to-talk (PTT) mode is functionally identical to the E&M TYPE V
mode.
MODULES (E&M-8) > CONFIG > VF IFCE
Write security: 3; Read security: 5
Selects either 4-wire or 2-wire output at the VF interface. The range includes +6 dB (loudest) to -12 dB
(softest).
61200305L1-1F
© 2002 ADTRAN, Inc.
161
Section 4, User Interface Guide
ATLAS 550 System Manual
MODULES (E&M-8) > CONFIG > RX GAIN
Write security: 3; Read security: 5
Adjusts the level of the signal output at the VF interface. The range includes +6 dB (loudest) to -12 dB
(softest).
MODULES (E&M-8) > CONFIG > TX GAIN
Write security: 3; Read security: 5
Adjusts the encoded level of the signal transmitted by the module into the digital PCM stream toward the
network. The range includes +6 dB (loudest) to -12 dB (softest).
When the digital signal is connected through the PSTN, a setting of -3 dB should be used.
MODULES (E&M-8) > CONFIG > CODING SCHEME
Read security: 5
Displays the current PCM coding scheme. Currently only µ-LAW is supported.
MODULES MENU (LEGACY DATA OPTION MODULE)
The ATLAS 550 system controller automatically detects the presence of the Legacy Data Option Module
when they are installed in the system (listed as LEGACY-4). To see the menus for the Legacy Data Option
Module via the terminal menu, use the arrow keys to scroll to the MODULES menu and press <Enter> to
access the module choices. Refer to the Legacy Data Option Module Quick Start Guide for a menu tree
containing a complete listing of menus.
MODULES (LEGACY-4) > INFO > PART NUMBER
Read security: 5
Displays the part number of the module.
MODULES (LEGACY-4) > INFO > SERIAL NUMBER
Read security: 5
Displays the serial number of the module.
MODULES (LEGACY-4) > INFO > ASSEMBLY REVISION
Read security: 5
Displays the assembly revision of the module.
MODULES (LEGACY-4) > INFO > FIRMWARE REVISION
Read security: 5
Displays the current firmware revision of the selected module.
162
© 2002 ADTRAN, Inc.
61200305L1-1F
ATLAS 550 System Manual
Section 4, User Interface Guide
MODULES (LEGACY-4) > INFO > PROCESSOR ID
Read security: 5
Displays the processor ID of the selected module.
MODULES (LEGACY-4) > SIGNAL STATUS
Read security: 5
Shows the status of key DTE interface signals. An asterisk (*) indicates the presence of a signal and a
hyphen (-) indicates no signal present.
MODULES (LEGACY-4) > SIGNAL STATUS > PORT
Read security: 5
Displays the operating port number. There are four available ports on the Legacy Data Option Module.
MODULES (LEGACY-4) > SIGNAL STATUS > DTE SIGNALS
Read security: 5
The following signals are monitored (these options are read-only):
DTR
Data terminal ready from DTE
DCD
Data carrier detect to DTE
DSR
Data set ready to DTE
CTS
Clear to send to DTE
RTS
Request to send from DTE
MODULES (LEGACY-4) > PORT STATS
Write security: 5; Read security: 5
Shows statistics for each port of the Legacy Data Option Module including a frame count of transmitted
and received frames, errors, and async/sync statistics.
MODULES (LEGACY-4) > PORT STATS > PRT
Read security: 5
Displays the operating port number. There are four available ports on the Legacy Data Option Module.
MODULES (LEGACY-4) > PORT STATS > CLR
Write security: 3; Read security: 5
Clears all statistics for the selected port of the Legacy Data Option Module.
MODULES (LEGACY-4) > PORT STATS > FR IN
Read security: 5
(Frames In) Displays the total received frames since the last reset.
MODULES (LEGACY-4) > PORT STATS > FR OUT
Read security: 5
(Frames Out) Displays the total transmitted frames since the last reset.
61200305L1-1F
© 2002 ADTRAN, Inc.
163
Section 4, User Interface Guide
ATLAS 550 System Manual
MODULES (LEGACY-4) > PORT STATS > ERR FR
Read security: 5
(Errored Frames) Displays the total errored received frames since the last reset.
MODULES (LEGACY-4) > PORT STATS > OVER ERR
Read security: 5
(Overrun Errors) Displays a count of the receive FIFO (first in first out) buffer overrun frames. Overrun
frames indicate that the external clock for the port may be too fast.
MODULES (LEGACY-4) > PORT STATS > DCD LOSS ERR
Read security: 5
(DCD Loss Errors) Displays the total time the data carrier detect signal on the port was lost since the last
reset.
MODULES (LEGACY-4) > PORT STATS > ASYNC/SYNC STATS
Read security: 5
Displays additional statistics for ports configured for Async operation.
MODULES (LEGACY-4) > PORT STATS > ASYNC/SYNC STATS > FR ERR
Read security: 5
(Errored Frames) Displays the total errored received frames since the last reset.
MODULES (LEGACY-4) > PORT STATS > ASYNC/SYNC STATS > PAR ERR
Read security: 5
(Parity Errors) Displays the total number of received frames containing parity errors.
MODULES (LEGACY-4) > PORT STATS > ASYNC/SYNC STATS > BREAKS
Read security: 5
Displays the total number of async break characters received on the port.
MODULES (LEGACY-4) > TEST > PRT
Read security: 5
Displays the operating port number. There are four available ports on the Legacy Data Option Module.
MODULES (LEGACY-4) > TEST > DTE LOCAL LOOPBACK
Write security: 4; Read security: 5
Initiates a DTE local loopback towards the user equipment at the DB-78 port. When ENABLED, all data
164
© 2002 ADTRAN, Inc.
61200305L1-1F
ATLAS 550 System Manual
Section 4, User Interface Guide
received from the DTE will be echoed back to the DTE.
Enabling this test will disrupt data flow on the selected port.
MODULES MENU (NXT1 HSSI AND NXT1 HSSI/V.35 OPTION MODULES)
The ATLAS 550 system controller automatically detects the presence of the NxT1 HSSI and NxT1
HSSI/V.35 Option Modules when they are installed in the system (NxT1 HSSI listed as NXT1 HSSI and
NxT1 HSSI/V.35 listed as NXHSSV35). All menus listed below as NXT1 HSSI apply to both the NxT1
HSSI and NxT1 HSSI/V.35 Option Modules unless otherwise specified.To see the menus for the NxT1
HSSI and NxT1 HSSI/V.35 Option Modules via the terminal menu, use the arrow keys to scroll to the
MODULES menu and press <Enter> to access the module choices. V.35 is available (on the 1200346L2
module only) when using the optional adapter cable (ADTRAN P/N 3125I081). Some of the following
menus do not apply when configured for V.35 mode. Refer to the NxT1 HSSI/V.35 Option Module Quick
Start Guide for a menu tree containing a complete listing of menus.
MODULES (NXT1 HSSI) > INFO
Read security: 5
Provides information about the module part number, serial number, and board revision.
MODULES (NXT1 HSSI) > INFO > PART NUMBER
Read security: 5
Displays the part number of the module.
MODULES (NXT1 HSSI) > INFO > SERIAL NUMBER
Read security: 5
Displays the serial number of the module.
MODULES (NXT1 HSSI) > INFO > ASSEMBLY REVISION
Read security: 5
Displays the assembly revision of the installed module.
MODULES (NXT1 HSSI) > INFO > FIRMWARE REVISION
Read security: 5
Displays the firmware revision of the installed module.
MODULES (NXT1HSSI) > T1 MENUS
Read security: 5
Provides information about the four T1 interfaces located on the NxT1 HSSI and NxT1 HSSI/V.35 Option
Modules.
61200305L1-1F
© 2002 ADTRAN, Inc.
165
Section 4, User Interface Guide
ATLAS 550 System Manual
MODULES (NXT1HSSI) > T1 MENUS > ALARM STATUS
Read security: 5
Displays the current alarm status for each of the built-in T1 ports located on the NxT1 HSSI and NxT1
HSSI/V.35 Option Modules.
MODULES (NXT1HSSI) > ALARM STATUS > PRT
Read security: 5
Indicates the operating port number for the selected T1 interface. There are four available T1 interfaces on
the NxT1 HSSI and NxT1 HSSI/V.35 Option Modules.
MODULES (NXT1HSSI) > ALARM STATUS > ALARMS
Read security: 5
Provides a listing of possible alarm conditions on the T1 interface. An asterisk (*) indicates the presence of
an alarm condition and a hyphen (-) indicates no active alarm. The following alarms are monitored:
LOS
Indicates a loss of signal detected on the port interface.
RED
Indicates the inability to frame data received on the port. Alternately
referred to as Out of Frame (OOF).
YELLOW
Receiving a remote alarm (RAI) on the interface from the far end.
BLUE
Receiving unframed all ones from the port Alarm Indicator Signal (AIS).
DS0 ALARM
Displays per-DS0 alarm status; that is, at least one DS0 channel is in
alarm if an asterisk (*) appears. These alarms usually indicate the failure
to receive the protocol that has been configured for the DS0.
MODULES (NXT1HSSI) > ALARM STATUS > RX LEVEL
Read security: 5
(Receive Level) Indicates the strength of the signal received on the port (in dB).
MODULES (NXT1HSSI) > PERFORMANCE CURRENT
Write security:3; Read security: 5
The performance fields (either current, 15-minute total, or 24-hour total) provide status on key
performance measures as specified in ANSI T1.403 and AT&T TR54016 for the T1/PRI port. Except for
CLR, these fields are all read-only. The monitored parameters include the following:
166
PRT
Displays the port number
CLR
Clears performance information for the selected port
ES
Errored Second (ES) is a second with one or more error events OR one or more Out Of
Frame events OR one or more Controlled Slips
BES
Bursty Errored Second (BES) is a second with more than one, but less than 320 error
events
SES
Severely Errored Second (SES) is a second with 320 or more error events OR one or
more Out Of Frame events
© 2002 ADTRAN, Inc.
61200305L1-1F
ATLAS 550 System Manual
Section 4, User Interface Guide
SEFS
Severely Errored Frame Second is a second that contains four consecutive errored
framing patterns.
LOFC
Loss of Frame Count is a count of seconds in which a valid framing pattern could not
be obtained.
CSS
Controlled Slip Second
UAS
Unavailable Second
LCV
Line Code Violation
PCV
Path Code Violation
LES
Line Errored Second
MODULES (NXT1HSSI) > PERFORMANCE 15MIN
Write security:3; Read security: 5
Stores the performance data for the previous 15-minute window. Refer to Modules (NxT1HSSI) >
Performance Current for a detailed description of these fields.
MODULES (NXT1HSSI) > PERFORMANCE 24HR
Write security:3; Read security: 5
Stores the performance data for the previous 24-hour window. Refer to Modules (NxT1HSSI) >
Performance Current for a detailed description of these fields.
MODULES (NXT1HSSI) > CONFIGURATION
Write security:3; Read security: 5
All of the following configurable parameters apply to whether the port is connected to a Primary Rate
ISDN circuit or a channelized T1 circuit.
MODULES (NXT1HSSI) > CONFIGURATION > PORT
Read security: 5
Displays the operating port number. There are four available T1 ports on the NxT1 HSSI and NxT1
HSSI/V.35 Option Modules.
MODULES (NXT1HSSI) > CONFIGURATION > PORT NAME
Write security: 3; Read security: 5
Accepts any alpha-numeric name up to 16 characters long, to uniquely identify each T1 port on the NxT1
HSSI and NxT1 HSSI/V.35 Option Modules.
MODULES (NXT1HSSI) > CONFIGURATION > FRAME
Write security: 2; Read security: 5
This field must be set to match the frame format of the circuit to which it is connected, available from the
network supplier. Choose either D4 or ESF.
61200305L1-1F
© 2002 ADTRAN, Inc.
167
Section 4, User Interface Guide
ATLAS 550 System Manual
MODULES (NXT1HSSI) > CONFIGURATION > CODE
Write security: 2; Read security: 5
Set this field to match the line code of the circuit to which it is connected (this information is available
from the network supplier). Choose either AMI (Alternate Mark Inversion) or B8ZS (Bipolar Eight Zero
Substitution).
MODULES (NXT1HSSI) > CONFIGURATION > TX YEL
Write security: 3; Read security: 5
Controls the transmission of yellow alarms. Choose either ON or OFF.
MODULES (NXT1HSSI) > CONFIGURATION > LBO
Write security: 2; Read security: 5
Selects the Line Build Out (LBO) for the network interface. When connecting an ATLAS 550 port to a
DSX-1 interface, this parameter is typically set to match the distance (in feet) between the ATLAS 550 and
the device with which it is connecting. When you select this item, a list of choices displays (0 dB, -7.5 dB,
-15 dB, -22 dB, 266 FT, 399 FT, 533 FT, 655 FT). Select the appropriate option.
MODULES (NXT1HSSI) > TEST
Write security: 5; Read security: 5
These options initiate different types of tests and display test results.
MODULES (NXT1HSSI) > TEST > PORT
Read security: 5
Displays the operating port number. There are four available T1 interfaces on the NxT1 HSSI and NxT1
HSSI/V.35 Option Modules.
MODULES (NXT1HSSI) > TEST > LOC LB
Write security: 4; Read security: 5
Initiates a loopback on near-end (local) port (see Figure 12). The following options are available:
168
LINE
Metallic loopback
PAYLD
Payload loopback - framing and clocking are regenerated
© 2002 ADTRAN, Inc.
61200305L1-1F
ATLAS 550 System Manual
Section 4, User Interface Guide
T1/PRI
NI CSU
DS1
Payload Loopback
Line Loopback
Figure 12. T1/PRI Loopback Test Diagram
MODULES (NXT1HSSI) > IMUX MENUS
Read security: 5
Contains the inverse muxing configuration parameters for the NxT1 HSSI Option Module.
MODULES (NXT1HSSI) > IMUX MENUS > STATUS
Read security: 5
Displays status information for the T1 data streams mapped to the HSSI interface.
MODULES (NXT1HSSI) > IMUX MENUS > STATUS > PORT
Read security: 5
Indicates the port number. Displays the port number for the T1s mapped to the HSSI interface. Ports 1
through 4 are the T1 interfaces located on the NxT1 HSSI or NxT1 HSSI/V.35 Option Modules. Ports 5
through 8 are T1s mapped to the NxT1 HSSI or NxT1 HSSI/V.35 Option Modules in the DEDICATED MAPS.
MODULES (NXT1HSSI) > IMUX MENUS > STATUS > LINK
Read security: 5
Displays status information for the T1 data streams mapped to the HSSI interface.The following status
messages may be displayed:
IN TEST
The T1 interface originating the T1 data stream is in test mode.
IN ALARM
The T1 interface originating the T1 data stream is in test mode.
OK
The T1 data stream is performing normal operation.
INACTIVE
The T1 data stream is not mapped to the HSSI interface.
MODULES (NXT1HSSI) > IMUX MENUS > CONFIG
Write security: 5; Read security: 5
Contains parameters to include T1 data streams to the HSSI interface.
61200305L1-1F
© 2002 ADTRAN, Inc.
169
Section 4, User Interface Guide
ATLAS 550 System Manual
MODULES (NXT1HSSI) > IMUX MENUS > CONFIG > PORT
Read security: 5
Indicates the port number. Displays the port number for the T1s mapped to the HSSI interface. Ports 1
through 4 are the T1 interfaces located on the NxT1 HSSI or NxT1 HSSI/V.35 Option Module. Ports 5
through 8 are T1s mapped to the NxT1 HSSI or NxT1 HSSI/V.35 Option Module in the DEDICATED MAPS.
MODULES (NXT1HSSI) > IMUX MENUS > CONFIG > GRP ASSOC
(Group Association) Associates T1s (either mapped to this card and/or the on-board T1s) with the HSSI
interface data stream. To add the T1 to the data stream, select the GROUP1 option.
MODULES (NXT1HSSI) > IMUX MENUS > CONFIG > SCRAMBLE
Enabling the SCRAMBLE option configures the NxT1 HSSI Module to prevent ones density violations when
transmitting ADTRAN IMUX headers on a T1 circuit with AMI line coding.
Use extreme caution when disabling the SCRAMBLE option. ADTRAN recommends
enabling the SCRAMBLE option for normal use.
MODULES (NXT1HSSI) > HSSI MENUS
Read security: 5
Provides status, configuration, and testing parameters for the 50-pin SCSI-II HSSI interface.
MODULES (NXT1HSSI) > HSSI MENUS > STATUS
Read security: 5
Displays the current status of the HSSI interface.
MODULES (NXT1HSSI) > HSSI MENUS > STATUS > PORT
Read security: 5
Indicates the operating port number. There is one available HSSI interface on the NxT1 HSSI and NxT1
HSSI/V.35 Option Modules.
MODULES (NXT1HSSI) > HSSI MENUS > STATUS > IFCE TYPE
Read security: 5
(Interface Type) Displays the current configuration of the module interface as either HSSI, V.35,or
UNKNOWN. The V.35 interface is only available using the NxT1 HSSI/V.35 Option Module
(P/N 1200346L2).
MODULES (NXT1HSSI) > HSSI MENUS > STATUS > LOOPBACK
Read security: 5
Displays the current loopback status of the HSSI interface. The following loopback status messages may
170
© 2002 ADTRAN, Inc.
61200305L1-1F
ATLAS 550 System Manual
Section 4, User Interface Guide
The following loopback status messages may display:
LOCAL DTE
LOOPBACK
A local DTE Loopback occurs at the DTE port of the DCE, and is used
to test the link between the DTE and the DCE (NxT1 HSSI or NxT1
HSSI/V.35 Option Modules).
LOCAL LINE
LOOPBACK
A local line loopback occurs in the IMUX engine and is sued to test
functionality between the DTE and the IMUX engine.
REMOTE LINE
LOOPBACK
A remote line loopback occurs at the T1 interface and is used to test
functionality between the DTE and the T1 interfaces.
Figure 13. HSSI Interface Loopback Test Diagram
61200305L1-1F
© 2002 ADTRAN, Inc.
171
Section 4, User Interface Guide
ATLAS 550 System Manual
MODULES (NXT1HSSI) > HSSI MENUS > STATUS > CA
Read security: 5
(Not applicable when using the NxT1 HSSI/V.35 Option Module - P/N 1200346L2.) Displays the status of
the data Communications equipment Available (CA) signal from the DCE. CA will be asserted by the
DCE, independently of TA, when the DCE is prepared to both send and receive data to and from the DTE.
This indicates that the DCE has obtained a valid data communications channel. Data transmission should
not commence until TA has also been asserted by the DTE.
MODULES (NXT1HSSI) > HSSI MENUS > STATUS > LA AND LB
Read security: 5
Displays the status of the loopback circuit A and B signals. LA and LB are asserted by the DTE to enable a
loopback on the DCE and its associated data communications channel. There are four loopback options:
LA
LB
LOOPBACK
Off
Off
No Loopback Active
On
On
Local DTE Loopback is Active
On
Off
Local Line Loopback is Active
Off
On
Remote Line Loopback is Active
MODULES (NXT1HSSI) > HSSI MENUS > STATUS > LC
Read security: 5
Displays the status of the loopback circuit C signal. LC is an optional loopback request signal from the
DCE to the DTE, requesting the DTE to provide a loopback path to the DCE.
MODULES (NXT1HSSI) > HSSI MENUS > STATUS > TA
Read security: 5
Displays the status of the data Terminal equipment AVAILABLE signal. TA will be asserted by the DTE
(independently of CA) when the DTE is prepared to both send and receive data to and from the DCE. Valid
data transmission should not commence until CA has also been asserted by the DCE. If the data
communications channel requires a keep alive data pattern when the DTE is disconnected, then the DCE
shall supply this pattern while TA is de-asserted.
When using the NxT1 HSSI Module (1200346L2 only) in V.35 mode, TA displays the status of the Request to
Send (RTS) signal. When RTS is active in a V.35 configuration, Clear to Send (CTS) is also active.
MODULES (NXT1HSSI) > HSSI MENUS > STATUS > RX RATE
Read security: 5
Displays the current average receive data rate on the HSSI interface.
MODULES (NXT1HSSI) > HSSI MENUS > STATUS > TX RATE
Read security: 5
Displays the current average transmit data rate on the HSSI interface.
172
© 2002 ADTRAN, Inc.
61200305L1-1F
ATLAS 550 System Manual
Section 4, User Interface Guide
MODULES (NXT1HSSI) > HSSI MENUS > CONFIG
Write security: 5; Read security: 5
Provides configuration parameters for the HSSI interface including data clocking.
When using the NxT1 HSSI/V35 Module in V.35 mode, Data Set Ready (DSR) and Data
Carrier Detect (DCD) are always active.
MODULES (NXT1HSSI) > HSSI MENUS > CONFIG > PORT NAME
Read security: 5
Accepts any alpha-numeric name up to 16 characters long, to uniquely identify the HSSI interface on the
NxT1 HSSI and NxT1 HSSI/V.35 Option Modules
MODULES (NXT1HSSI) > HSSI MENUS > CONFIG > TX CLK
Write security: 5; Read security: 5
Controls the clock used by the NxT1 HSSI/V.35 Module to accept the transmit (TX) data from the DTE.
This is usually set to NORMAL. If the interface cable is long, causing a phase shift in the data, the clock can
be set to INVERTED. This switches the phase of the clock, which compensates for a long cable.
MODULES (NXT1HSSI) > HSSI MENUS > CONFIG > CTS (V.35)
Write security: 5; Read security: 5
(Available only on the NxT1 HSSI/V.35 Option Module - P/N 1200346L2.) Determines the behavior of the
Clear To Send (CTS) signal. If set to NORMAL, CTS will follow the Request To Send (RTS) signal. If set to
FORCED ON, CTS will always be asserted.
MODULES (NXT1HSSI) > HSSI MENUS > CONFIG > DSR (V.35)
Write security: 5; Read security: 5
(Available only on the NxT1 HSSI/V.35 Option Module - P/N 1200346L2.) Determines the behavior of the
Data Set Ready (DSR) signal. If set to NORMAL, DSR will generally be asserted when the interface is
capable of passing data. If set to FORCED ON, DSR will always be asserted. If set to REMOTE DTR, the value
of DSR will track the value of the remote unit’s DTR signal.
MODULES (NXT1HSSI) > HSSI MENUS > CONFIG > IFCE AUTO DEACT
Write security: 5; Read security: 5
This feature allows a user to set an active DS1 threshold that is used to control the status of the module’s
DTE interface. If the number of active DS1 links falls below the threshold while this setting is Enabled, the
module’s DTE interface will be deactivated. The module will not automatically restore operation on the
DTE interface until the number of DS1 links reaches the threshold value. The DTE interface may be
manually activated.
The Interface Automatic Deactivation feature is not available when CA (data
Communication equipment Available signal) is configured OFF or DCD (Data Carrier
Detect) is configured FORCED ON.
61200305L1-1F
© 2002 ADTRAN, Inc.
173
Section 4, User Interface Guide
ATLAS 550 System Manual
MODULES (NXT1HSSI) > HSSI MENUS > CONFIG > DCD (V.35)
Write security: 5; Read security: 5
(Available only on the NxT1 HSSI/V.35 Option Module - P/N 1200346L2.) Determines the behavior of the
Data Carrier Detect (DCD) signal (also called RLSD on some interfaces). If se tot Normal, DCD will
generally be asserted when the interface is capable of passing data. If set to Forced On, DCD will always
be asserted. If set to Remote RTS, the value of DCD will track the value of the remote unit’s RTS signal.
DCD is not configurable when the Interface Automatic Deactivation (IFCE AUTO DEACT)
feature is ON.
MODULES (NXT1HSSI) > HSSI MENUS > CONFIG > CA
Write security: 5; Read security: 5
(Not applicable in V.35 mode.) Asserts the data Communications equipment AVAILABLE signal from the
DCE. CA will be asserted by the DCE, independently of TA, when the DCE is prepared to both send and
receive data to and from the DTE. This indicates that the DCE has obtained a valid data communications
channel. Data transmission should not commence until TA has also been asserted by the DTE.
MODULES (NXT1HSSI) > HSSI MENUS > TEST
Write security: 4; Read security: 5
Provides access to testing functionality for the HSSI and HSSI/V.35 interfaces for the NxT1 HSSI or NxT1
HSSI/V.35 Option Modules.
MODULES (NXT1HSSI) > HSSI MENUS > TEST > PORT
Read security: 5
Indicates the operating port number. The NxT1 HSSI and NxT1 HSSI/V.35 Option Modules have one
available HSSI (or HSSI/V.35) interface.
MODULES (NXT1HSSI) > HSSI MENUS > TEST > LOCAL LPBK
Write security: 4; Read security: 5
Activates a local loopback on the HSSI interface. The following local loopbacks are available:
174
LOCAL LINE
Activates a loopback of the received T1 data streams at the DTE interface.
T1 FRAMER
Activates a loopback of the received T1 data streams after the data has been
processed by the T1 framer located on the NxT1 HSSI or NxT1 HSSI/V.35
Option Modules. All data received during an active T1 FRAMER local loopback
will be regenerated (re-framed) and transmitted back out the DTE interface.
LOCAL DTE
Activates a loopback of all data received at the DTE. All data received during
an active LOCAL DTE loopback will be echoed out the DTE interface.
© 2002 ADTRAN, Inc.
61200305L1-1F
ATLAS 550 System Manual
Section 4, User Interface Guide
MODULES (NXT1HSSI) > HSSI MENUS > TEST > REMOTE LPBK (HSSI)
Write security: 4; Read security: 5
Transmits a loopback request to the remote DTE interface. The following local loopbacks are available:
EXTERNAL DCE
Transmits a loopback request to the remote DTE interface. All data
transmitted out the HSSI (or HSSI/V.35) DTE interface will be echoed back
by the remote DCE equipment.
MODULES MENU (ETHERNET SWITCH MODULE)
The ATLAS 550 system controller automatically detects the presence of the Ethernet Switch Module when
it is installed in the system (listed as ENET-8). To see the menus for the Ethernet Switch Module via the
terminal menu, use the arrow keys to scroll to the MODULES menu and press <Enter> to access the module
choices. Refer to the Ethernet Switch Module Quick Start Guide for a menu tree containing a complete
listing of menus.
MODULES (ENET-8) > INFO
Read security: 5
Provides information about the module part number, serial number and assembly revision.
MODULES (ENET-8) > INFO > PART NUMBER
Read security: 5
Displays the part number of the module.
MODULES (ENET-8) > INFO > SERIAL NUMBER
Read security: 5
Displays the serial number of the module.
MODULES (ENET-8) > INFO > ASSEMBLY REVISION
Read security: 5
Displays the assembly revision of the installed module.
MODULES (ENET-8) > STATUS
Read security: 5
Displays the status of each Ethernet port located on the Ethernet Switch Option Module.
MODULES (ENET-8) > STATUS > PORT
Read security: 5
Indicates the operating port number. There are eight available Ethernet interfaces on the Ethernet Switch
Option Module.
MODULES (ENET-8) > STATUS > LINK STATUS
Read security: 5
Indicates whether there is an active Ethernet link connected to the interface. An active connection is
indicated with a LINK UP status message. LINK DOWN indicates there is no active Ethernet connection on the
61200305L1-1F
© 2002 ADTRAN, Inc.
175
Section 4, User Interface Guide
ATLAS 550 System Manual
interface.
MODULES (ENET-8) > STATUS > SPEED
Read security: 5
Displays the current speed of the Ethernet interface. All Ethernet interfaces on the Ethernet Switch Option
Module are capable of 10BaseT (listed as 10 MBPS) and 100BaseTX (listed as 100 MBPS) operation.
MODULES MENU (RESOURCE HOST MODULE)
The ATLAS 550 system controller automatically detects the presence of the Resource Host Module when
it is installed in the system (listed as RSC HOST). To see the menus for the Resource Host Module via the
terminal menu, use the arrow keys to scroll to the MODULES menu and press <Enter> to access the module
choices. Refer to the Resource Host Module Quick Start Guide for a menu tree containing a complete
listing of menus.
MODULES (RSC HOST) > INFO
Read security: 5
Provides information about the module part number, serial number and assembly revision.
MODULES (RSC HOST) > INFO > PART NUMBER
Read security: 5
Displays the part number of the module.
MODULES (RSC HOST) > INFO > SERIAL NUMBER
Read security: 5
Displays the serial number of the module.
MODULES (RSC HOST) > INFO > ASSEMBLY REVISION
Read security: 5
Displays the assembly revision of the installed module.
MODULES MENU (VCOM OPTION MODULE)
The ATLAS 550 system controller automatically detects the presence of the Voice Compression (VCOM)
Resource Module when it is installed in the system (listed as VCOM-X where x is 4 for 1200312L1, 8 for
1200312L2, 16 for 1200312L3, and 24 for 1200312L4). To see the menus for the VCOM Resource
Module via the terminal menu, use the arrow keys to scroll to the MODULES menu and press <Enter> to
access the module choices. Refer to the VCOM Resource Module Quick Start Guide for a menu tree
containing a complete listing of menus.
MODULES (VCOM-X) > INFO
Read security: 5
Provides information about the module part number, serial number and assembly revision.
176
© 2002 ADTRAN, Inc.
61200305L1-1F
ATLAS 550 System Manual
Section 4, User Interface Guide
MODULES (VCOM-X) > INFO > PART NUMBER
Read security: 5
Displays the part number of the module.
MODULES (VCOM-X) > INFO > SERIAL NUMBER
Read security: 5
Displays the serial number of the module.
MODULES (VCOM-X) > INFO > ASSEMBLY REVISION
Read security: 5
Displays the assembly revision of the installed module.
MODULES (VCOM-X) > INFO > FIRMWARE REVISION
Read security: 5
Displays the current firmware revision of the selected module.
MODULES (VCOM-X) > STATUS
Read security: 5
Displays the status of each of the voice compression resources.
MODULES (VCOM-X) > STATUS > DEVICE
Read security: 5
Indicates the resource number of the packet voice device listed. On the ATLAS 550, packet voice devices
are numbered 1-24.
MODULES (VCOM-X) > STATUS > STATUS
Read security: 5
Indicates the condition of the individual packet voice device. This field may display the following:
N/A
This device is not populated on the selected VCOM Resource Module.
AVAILABLE
This resource is available for voice compression and functioning
properly. If a VCOM-4 Option Module is installed, 4 voice compression
resources will be AVAILABLE and the rest will display N/A. The same
principle applies to the VCOM-8, 24, and 32 Option Modules.
PENDING
This resource is currently changing state.
BUSY
This resource is currently in use.
TESTING
This resource is currently being tested and is not available for use.
FAILED
This resource has failed testing and is not available for use.
RELOADED
This resource was reinitialized after excessive errors.
61200305L1-1F
© 2002 ADTRAN, Inc.
177
Section 4, User Interface Guide
ATLAS 550 System Manual
MODULES (VCOM-X) > STATUS > ALGORITHM
Read security: 5
Denotes the voice compression algorithm being used by the packet voice device. Any packet voice device
can use any available compression algorithm. When ATLAS 550 chooses a packet voice device for a
particular call, the voice compression algorithm is set to match the dial plan endpoint configuration. Refer
to the Frame Relay menu section of this manual for more information.
N/A
This device has not been assigned a voice compression algorithm.
G.723.1
CCITT G.723.1 compression; 6.3 kbps bandwidth.
NETCODER
Proprietary NETCODER compression; 6.4 kbps bandwidth.
Some voice compression standards may be used only under specific licensing
arrangements due to existing patents. The ATLAS 550 provides complete management of
these licensed resources; therefore, users are not required to take additional steps to
ensure conformance with licensing provisions. For example, the ATLAS 550 manages its
resources so users never exceed the maximum licensed number of simultaneous
connections.
MODULES (VCOM-X) > STATUS > SILENCE
Read security: 5
Voice endpoints continue to originate frame relay traffic during periods of relative silence. The
ATLAS 550 expects to receive such silence frames; therefore, silence compression is DISABLED by default.
Some voice endpoints can be configured so that no silence frames are transmitted during periods of relative
silence. For compatibility with these devices, the ATLAS 550 can be configured to expect that silence
suppression is ENABLED; thus, no frame relay traffic is generated during periods of silence. Both voice
endpoints must agree on the silence suppression setting.
MODULES (VCOM-X) > STATUS > CONNECTION
Read security: 5
Helps identify a suspect packet voice device if a particular call reports poor quality. The displayed packet
identifier and the dial plan endpoint identify the call using this packet voice device.
MODULES (VCOM-X) > STATUS > FRAME TYPE
Read security: 5
Displays the kind of frame the ATLAS 550 receives from the frame relay endpoint connected to the
VCOM channel, allowing users to monitor the kind of data being carried on the network and processed by
the ATLAS 550. (The ATLAS 550 interprets the most-recently received frame from the endpoint.)
During a voice connection, the frame type displays as VOICE. For a FAX connection, a variety of frame
types display. Initially, VOICE displays indicating that although the call has completed, the answering FAX
machine has not yet announced its 2100 HZ tone. After completing the 2100 Hz, both FAX endpoints
repeat a V.21 cycle for each page of the FAX document.
178
© 2002 ADTRAN, Inc.
61200305L1-1F
ATLAS 550 System Manual
Section 4, User Interface Guide
Each packet the ATLAS 550 receives from its connected frame relay endpoint is classified into one of the
following groups:
BLANK
No frame has yet been received from the endpoint, or a FAX connection
is between protocol states.
DTMF
Dual-tone, multi-frequency (DTMF) digit received.
VOICE
Receiving voice frames. A connection to a FAX endpoint shows a
VOICE status until the FAX protocol is established.
2100 HZ TONE
FAX single-frequency tone detected indicating the beginning of a FAX
session.
V.21
FAX single-frequency tone detected indicating the beginning of a FAX
page.
V.27TER (2400 BPS)
FAX data reception of 2400 bps using protocol V.27ter.
V.27TER (4800 BPS)
FAX data reception of 4800 bps using protocol V.27ter.
V.29 (7200 BPS)
FAX data reception of 7200 bps using protocol V.29.
V.29 (9600 BPS)
FAX data reception of 9600 bps using protocol V.29.
V.33 (12000 BPS)
FAX data reception of 12000 bps using protocol V.33.
V.33 (14400 BPS)
FAX data reception of 14400 bps using protocol V.33.
MODULES (VCOM-X) > CONFIG
Write security: 4; Read security: 5
Provides diagnostic tools for suspected problems; under normal operation, users do not configure the
packet voice devices.
MODULES (VCOM-X) > CONFIG > CONFIGURE VCOM DEVICES
Write security: 4; Read security: 5
Contains configuration parameters for individual VCOM devices.
MODULES (VCOM-X) > CONFIG > CONFIGURE VCOM DEVICES > DEVICE
Read security: 5
Indicates the resource number of the packet voice device listed. On the ATLAS 550, packet voice devices
are numbered 1-24.
MODULES (VCOM-X) > CONFIG > CONFIGURE VCOM DEVICES > STATE
Write security: 4; Read security: 5
Controls the configuration state of the individual packet voice device. The ATLAS 550 determines the
initial configuration state of each device. ATLAS uses this configuration information to determine which
packet voice devices are functional and may be used, which are defective and should not be used, or which
are not present on the module and should not be used. Users who suspect an individual packet voice device
of improper operation can manually disable that device to prevent ATLAS from attempting to use it. The
61200305L1-1F
© 2002 ADTRAN, Inc.
179
Section 4, User Interface Guide
ATLAS 550 System Manual
possible states are defined below.
DEFERRED
Devices which fail built-in testing are automatically marked as
DEFERRED, indicating that the ATLAS 550 declines to use the device.
AVAILABLE
The device is properly functioning and can be used when required. The
ATLAS 550 automatically marks devices that pass built-in testing as
AVAILABLE.
DISABLED
Marking a device as DISABLED prevents the ATLAS 550 from
attempting to use it. You can mark a device currently in use as disabled
without disturbing the connection, but the device will not be eligible for
use in future calls until you re-mark it as AVAILABLE. This is helpful if
you suspect that a particular device is malfunctioning and do not want
any calls routed to it.
MODULES (VCOM-X) > CONFIG > GAIN SETTINGS
Write security: 5; Read security: 5
Contains the configuration for output and input gain for the VCOM Resource Module.
MODULES (VCOM-X) > CONFIG > GAIN SETTINGS > OUTPUT GAIN
Write security: 3; Write security: 5
Output gain is applied in the receive direction. Choices range from +12 dB (loudest) to -12 dB (softest) in
3 dB increments. This setting takes affect immediately.
MODULES (VCOM-X) > CONFIG > GAIN SETTINGS > INPUT GAIN
Write security: 3; Write security: 5
Input gain is applied in the transmit direction. Choices range from -12 dB (softest) to +12 dB (loudest) in
3 dB increments. This setting does not affect currently active calls.
MODULES (VCOM-X) > CONFIG > CURRENT FAX STATUS
Write security: 5; Read security: 5
Enables or disables fax over packet capability using the voice compression module.
MODULES (VCOM-X) > STATISTICS
Write security: 4; Read security: 5
These options initiate different types of tests and display test results.
MODULES (VCOM-X) > STATISTICS > DEVICE
Read security: 5
Indicates the resource number of the packet voice device listed. On the ATLAS 550, packet voice devices
are numbered 1-24.
180
© 2002 ADTRAN, Inc.
61200305L1-1F
ATLAS 550 System Manual
Section 4, User Interface Guide
MODULES (VCOM-X) > STATISTICS > USAGE TIME
Read security: 5
Measures the total elapsed time that a packet voice device has the status BUSY. The time is expressed with
millisecond precision. Available packet voice devices are assigned new connections using a round-robin
technique where all other available packet voice devices must be used before a given device is assigned a
new connection. This scheme tends to use all packet voice devices evenly. If a given device shows
significantly less elapsed usage time than other packet voice devices on the same ATLAS 550, that device
may be faulty.
MODULES (VCOM-X) > STATISTICS > ATLAS FRMS
Read security: 5
(ATLAS Frames) Counts every frame that the ATLAS 550 sends to or receives from the packet voice
device. This count indicates activity but does not indicate the actual amount of frame relay data exchanged.
The total number of frames handled by the packet voice device is given by the following equation:
Frames ( ATLAS )Total = Frames ATLAS + Frames ( ATLAS )Dropped
See the ATLAS DROP definition below for a description of the term: Frames ( ATLAS )Dropped
MODULES (VCOM-X) > STATISTICS > ATLAS DROP
Read security: 5
A counter that measures each frame that is dropped or discarded during communication between the
ATLAS 550 and the packet voice device; i.e., ATLAS Frames Dropped. The exchange protocol is designed
so that no frames should be discarded during this operation. A consistent pattern of dropped frames by a
given packet voice device may indicate a faulty packet voice device or an overloaded ATLAS 550 system.
The discarded frame indicated by this value does not reflect network-level performance
management, but indicates an anomalous condition within the ATLAS 550 unit.
Persistently dropped frames may indicate a problem with the ATLAS 550 unit or the Voice
Compression Resource Module.
MODULES (VCOM-X) > STATISTICS > VCOM FRMS
Read security: 5
Counts every frame successfully sent to or received from the ATLAS 550 system controller. This is an
indication of activity but does not indicate the actual amount of packet data exchanged. The following
equation gives the total number of frames handled for this packet voice device by the ATLAS 550:
Frames ( VCOM )Total = Frames VCOM + Frames ( VCOM )Dropped
See the VCOM DROP definition below for a description of the term: Frames ( VCOM )Dropped
61200305L1-1F
© 2002 ADTRAN, Inc.
181
Section 4, User Interface Guide
ATLAS 550 System Manual
MODULES (VCOM-X) > STATISTICS > VCOM DROP
Read security: 5
Counter that measures each frame dropped or discarded by ATLAS 550 during communication with the
ATLAS 550 system controller about a packet voice device. The exchange protocol is designed so that no
frames should be discarded during this operation. A consistent pattern of dropped frames by a given packet
voice device may indicate a faulty packet voice device or an overloaded ATLAS 550 system.
The discarded frame indicated by this value does not reflect network-level performance
management but indicates an anomalous condition within the ATLAS 550 unit. Persistently
dropped frames may indicate a problem with the ATLAS 550 unit or the VCOM module.
MODULES (VCOM-X) > STATISTICS > CLEAR
Write security: 4; Read security: 5
Resets the elapsed usage time and frame counters for this packet voice device. Ordinarily, users won’t reset
these performance measurements. However, this feature can be useful when testing that a suspected
problem has been resolved and when zeroing the various counters would make observing future events
easier.
Resetting these performance counters has no effect on the performance values accessible
via the SNMP network management interface.
MODULES (VCOM-X) > STATISTICS > RELOADS
Write security: 4; Read security: 5
Number of times since module reboot that this device has been reloaded due to a failure.
MODULES MENU (32 CHANNEL ADPCM RESOURCE MODULE)
The ATLAS 550 system controller automatically detects the presence of the 32 Channel ADPCM Resource
Module when it is installed in the system (listed as ADPCM-32). To see the menus for the 32 Channel
ADPCM Resource Module via the terminal menu, use the arrow keys to scroll to the MODULES menu and
press <Enter> to access the module choices. Refer to the 32 Channel ADPCM Resource Module Quick
Start Guide for a menu tree containing a complete listing of menus.
MODULES (ADPCM-32) > INFO
Read security: 5
Provides information about the module part number, serial number and assembly revision.
MODULES (ADPCM-32) > INFO > PART NUMBER
Read security: 5
Displays the part number of the module.
182
© 2002 ADTRAN, Inc.
61200305L1-1F
ATLAS 550 System Manual
Section 4, User Interface Guide
MODULES (ADPCM-32) > INFO > SERIAL NUMBER
Read security: 5
Displays the serial number of the module.
MODULES (ADPCM-32) > INFO > ASSEMBLY REVISION
Read security: 5
Displays the assembly revision of the installed module.
MODULES (ADPCM-32) > INFO > FIRMWARE REVISION
Read security: 5
Displays the current firmware revision of the selected module.
MODULES (ADPCM-32) > STATUS
Read security: 5
Displays the status of each of the packet voice resources.
MODULES (ADPCM-32) > STATUS > DEVICE
Read security: 5
Indicates the resource number of the packet voice device listed. On the ATLAS 550, packet voice devices
are numbered 1-24.
MODULES (ADPCM-32) > STATUS > STATUS
Read security: 5
Indicates the condition of the individual packet voice device. This field may display the following:
N/A
This device is not populated on the selected 32 Channel ADPCM
Resource Module.
AVAILABLE
This resource is available for voice compression and functioning
properly.
PENDING
This resource is currently changing state.
BUSY
This resource is currently in use.
TESTING
This resource is currently being tested and is not available for use.
FAILED
This resource has failed testing and is not available for use.
RELOADED
This resource was reinitialized after excessive errors.
61200305L1-1F
© 2002 ADTRAN, Inc.
183
Section 4, User Interface Guide
ATLAS 550 System Manual
MODULES (ADPCM-32) > STATUS > ALGORITHM
Read security: 5
Denotes the voice compression algorithm being used by the packet voice device. Voice data may be
encoded using any of a variety of compression algorithms or codecs. The codec for an individual call is
selected when the connection is configured. When ATLAS 550 assigns a packet voice device to a
particular call, the that packet voice devise is switched to the proper codec. Refer to the Frame Relay menu
section of this manual for more information.
Some voice compression standards may be used only under specific licensing
arrangements due to existing patents. The ATLAS 550 provides complete management of
these licensed resources; therefore, users are not required to take additional steps to
ensure conformance with licensing provisions. For example, the ATLAS 550 manages its
resources so users never exceed the maximum licensed number of simultaneous
connections.
MODULES (ADPCM-32) > STATUS > CONNECTION
Read security: 5
Helps identify a suspect packet voice device if a particular call reports poor quality. The displayed packet
identifier and the dial plan endpoint identify the call using this packet voice device.
MODULES (ADPCM-32) > CONFIG
Write security: 4; Read security: 5
Provides diagnostic tools for suspected problems; under normal operation, users do not configure the
packet voice devices.
MODULES (ADPCM-32) > CONFIG > CONFIGURE ADPCM-32 DEVICES
Write security: 4; Read security: 5
Contains configuration parameters for individual ADPCM-32 devices.
MODULES (ADPCM-32) > CONFIG > CONFIGURE ADPCM-32 DEVICES > DEVICE
Read security: 5
Indicates the resource number of the packet voice device listed. On the ATLAS 550, packet voice devices
are numbered 1-24.
MODULES (ADPCM-32) > CONFIG > CONFIGURE ADPCM-32 DEVICES > STATE
Write security: 3; Read security: 5
Controls the configuration state of the individual packet voice device. The ATLAS 550 determines the
initial configuration state of each device. ATLAS uses this configuration information to determine which
packet voice devices are functional and may be used, which are defective and should not be used, or which
are not present on the module and should not be used. Users who suspect an individual packet voice device
of improper operation can manually disable that device to prevent ATLAS from attempting to use it. The
184
© 2002 ADTRAN, Inc.
61200305L1-1F
ATLAS 550 System Manual
Section 4, User Interface Guide
possible states are defined below.
DEFERRED
Devices which fail built-in testing are automatically marked as
DEFERRED, indicating that the ATLAS 550 declines to use the device.
AVAILABLE
The device is properly functioning and can be used when required. The
ATLAS 550 automatically marks devices that pass built-in testing as
AVAILABLE.
DISABLED
Marking a device as DISABLED prevents the ATLAS 550 from
attempting to use it. You can mark a device currently in use as disabled
without disturbing the connection, but the device will not be eligible for
use in future calls until you re-mark it as AVAILABLE. This is helpful if
you suspect that a particular device is malfunctioning and do not want
any calls routed to it.
MODULES (ADPCM-32) > STATISTICS
Write security: 5; Read security: 5
These options initiate different types of tests and display test results.
MODULES (ADPCM-32) > STATISTICS > DEVICE
Read security: 5
Indicates the resource number of the packet voice device listed. On the ATLAS 550, packet voice devices
are numbered 1-24.
MODULES (ADPCM-32) > STATISTICS > USAGE TIME
Read security: 5
Measures the total elapsed time that a packet voice device has the status BUSY. The time is expressed with
millisecond precision. Available packet voice devices are assigned new connections using a round-robin
technique where all other available packet voice devices must be used before a given device is assigned a
new connection. This scheme tends to use all packet voice devices evenly. If a given device shows
significantly less elapsed usage time than other packet voice devices on the same ATLAS 550, that device
may be faulty.
MODULES (ADPCM-32) > STATISTICS > ATLAS FRMS
Read security: 5
(ATLAS Frames) Counts every frame that the ATLAS 550 sends to or receives from the packet voice
device. This count indicates activity but does not indicate the actual amount of frame relay data exchanged.
The total number of frames handled by the packet voice device is given by the following equation:
Frames ( ATLAS )Total = Frames ATLAS + Frames ( ATLAS )Dropped
See the ATLAS DROP definition below for a description of the term: Frames ( ATLAS )Dropped
61200305L1-1F
© 2002 ADTRAN, Inc.
185
Section 4, User Interface Guide
ATLAS 550 System Manual
MODULES (ADPCM-32) > STATISTICS > ATLAS DROP
Read security: 5
A counter that measures each frame that is dropped or discarded during communication between the
ATLAS 550 and the packet voice device; i.e., ATLAS Frames Dropped. The exchange protocol is designed
so that no frames should be discarded during this operation. A consistent pattern of dropped frames by a
given packet voice device may indicate a faulty packet voice device or an overloaded ATLAS 550 system.
The discarded frame indicated by this value does not reflect network-level performance
management, but indicates an anomalous condition within the ATLAS 550 unit.
Persistently dropped frames may indicate a problem with the ATLAS 550 unit or the Voice
Compression Resource Module.
MODULES (ADPCM-32) > STATISTICS > ADPCM-32 FRMS
Read security: 5
Counts every frame successfully sent to or received from the ATLAS 550 system controller. This is an
indication of activity but does not indicate the actual amount of packet data exchanged. The following
equation gives the total number of frames handled for this packet voice device by the ATLAS 550:
Frames ( ADPCM )Total = Frames ADPCM + Frames ( ADPCM )Dropped
See the ADPCM-32 DROP definition below for a description of the term: Frames ( ADPCM )Dropped
MODULES (ADPCM-32) > STATISTICS > ADPCM-32 DROP
Read security: 5
Counter that measures each frame dropped or discarded by ATLAS 550 during communication with the
ATLAS 550 system controller about a packet voice device. The exchange protocol is designed so that no
frames should be discarded during this operation. A consistent pattern of dropped frames by a given packet
voice device may indicate a faulty packet voice device or an overloaded ATLAS 550 system.
The discarded frame indicated by this value does not reflect network-level performance
management but indicates an anomalous condition within the ATLAS 550 unit. Persistently
dropped frames may indicate a problem with the ATLAS 550 unit or the 32 Channel
ADPCM Resource Module.
MODULES (ADPCM-32) > STATISTICS > CLEAR
Write security: 3; Read security: 5
Resets the elapsed usage time and frame counters for this packet voice device. Ordinarily, users will not
reset these performance measurements. However, this feature can be useful when testing that a suspected
problem has been resolved and when zeroing the various counters would make observing future events
easier.
Resetting these performance counters has no effect on the performance values accessible
via the SNMP network management interface.
186
© 2002 ADTRAN, Inc.
61200305L1-1F
ATLAS 550 System Manual
Section 4, User Interface Guide
MODULES MENU (NX 56/64 BONDING RESOURCE MODULE)
The ATLAS 550 system controller automatically detects the presence of the Nx 56/64 BONDing Resource
Module when it is installed in the system (listed as BONDING). To see the menus for the Nx 56/64
BONDing Resource Module via the terminal menu, use the arrow keys to scroll to the MODULES menu and
press <Enter> to access the module choices. Refer to the Nx 56/64 BONDing Resource Module Quick Start
Guide for a menu tree containing a complete listing of menus.
MODULES (BONDING) > INFO
Read security: 5
Provides information about the module part number, serial number and assembly revision.
MODULES (BONDING) > INFO > PART NUMBER
Read security: 5
Displays the part number of the module.
MODULES (BONDING) > INFO > SERIAL NUMBER
Read security: 5
Displays the serial number of the module.
MODULES (BONDING) > INFO > BOARD REVISION
Read security: 5
Displays the board revision of the installed module.
MODULES (BONDING) > INFO > FIRMWARE REVISION
Read security: 5
Displays the current firmware revision of the Nx 56/64 BONDing Resource Module.
MODULES (BONDING) > STATUS
Read security: 5
Indicates the current status of a particular BONDING session.
MODULES (BONDING) > STATUS > STATUS
Read security: 5
Displays the current status of the BONDING session.
IDLE
Indicates the number of Idle BONDING resources for a particular
BONDING engine.
RESERVED
BONDING resources reserved for a BONDING session that is in the process
of coming up.
NEGOTIATING
A single channel is connected and negotiating the BONDING call for a
particular BONDING session.
ADD CHANNELS
The initial BONDING negotiation was successful, and the ATLAS 550 is in
the process of adding channels to the BONDING session.
61200305L1-1F
© 2002 ADTRAN, Inc.
187
Section 4, User Interface Guide
ATLAS 550 System Manual
BONDING
The remaining channels were brought up successfully, and the BONDING
session is now ready to pass data.
TERMINATED
The BONDING session has been terminated for some reason and is in the
process of freeing BONDING resources.
MODULES (BONDING) > STATUS > NUMBCHANNELS
Read security: 5
Displays the number of bearer channels used in this BONDING session. When the number is displayed in
the format X/Y, Y is the number of BONDING resources reserved for this session, and X is the number of
calls belonging to this session that are up. If just a number is displayed, then all calls are up, and the
number displayed is the number of BONDING resources in use for this session.
MODULES (BONDING) > STATUS > DATA RATE
Read security: 5
Displays the data rate for this BONDING session. The number in the parenthesis is the data rate of the
individual bearer channels.
MODULES (BONDING) > STATUS > BONDED EP
Read security: 5
Displays the slot and port of the terminating endpoint that is using this BONDING session.
MODULES (BONDING) > CONFIGURATION
Write security: 3; Read security: 5
All of the following configurable parameters apply to the Nx 56/64 BONDing Resource Module. In most
applications the default values will be correct.
MODULES (BONDING) > CONFIGURATION > TXINIT TIMER (SEC)
Write security: 3; Read security: 5
Specifies the length of time the originating endpoint attempts to detect the BONDING negotiation pattern
from the answering endpoint before deciding the BONDING call has failed.
MODULES (BONDING) > CONFIGURATION > TXFA TIMER (SEC)
Write security: 3; Read security: 5
Specifies the length of time both endpoints attempt to detect the BONDING frame pattern when a call is
connected before deciding the BONDING call has failed. When interoperating with other manufacturers'
BONDING equipment, it may be necessary to change this time so that it matches TXADD01.
MODULES (BONDING) > CONFIGURATION > TXADD01 TIMER (SEC)
Write security: 3; Read security: 5
Specifies the length of time both endpoints wait for additional calls to be connected at the end of
negotiation before deciding that the BONDING call has failed. The factory default setting is sufficient for
most calls to connect, although when dialing overseas it may be necessary to lengthen this timer to allow
for slower call routing.
188
© 2002 ADTRAN, Inc.
61200305L1-1F
ATLAS 550 System Manual
Section 4, User Interface Guide
MODULES (BONDING) > CONFIGURATION > TXDEQ TIMER (SEC)
Write security: 3; Read security: 5
Specifies the length of time both endpoints attempt to equalize the network delay between the bearer
channels before deciding the BONDING call has failed.
MODULES (BONDING) > CONFIGURATION > TANULL TIMER (SEC)
Write security: 3; Read security: 5
Specifies the length of time the answering endpoint attempts to detect the BONDING negotiation pattern
from the originating endpoint before deciding the BONDING call has failed. It may be necessary to
shorten this timer if the DTE equipment using the BONDING module also has timer constraints for
completing non-BONDING parameter negotiation.
MODULES (BONDING) > CONFIGURATION > TCID TIMER (SEC)
Write security: 3; Read security: 5
Specifies the length of time both endpoints attempt to negotiate an agreeable value for bearer channels and
channel capacities before deciding the BONDING call has failed.
MODULES (BONDING) > CONFIGURATION > CALL STAGGER
Write security: 3; Read security: 5
Specifies the amount of delay between placing calls for outgoing BONDING sessions. The following call
stagger values are available:
NO STAGGER
There is no delay between the call dialing of a BONDING session.
500 MS
Wait approximately ½ second between the call dialing of a BONDING
session.
1 SEC.
Wait approximately 1 second between the call dialing of a BONDING
session.
2 SEC.
Wait approximately 2 seconds between the call dialing of a BONDING
session.
61200305L1-1F
© 2002 ADTRAN, Inc.
189
Section 4, User Interface Guide
ATLAS 550 System Manual
PACKET MANAGER
The PACKET MANAGER submenus define and configure all layer 2 connections, including frame relay
endpoints (Figure 14). These submenus include PACKET ENDPNTS, PACKET CNCTS, CNCTS SORT and FRAME
RELAY IQ.
Figure 14. Packet Manager Menu
PACKET MANAGER > PACKET ENDPNTS
Read security: 5
Defines, monitors, and tests a packet endpoint. Submenus include STATUS, PERFORMANCE, CONFIG, TEST,
ENDPNT COUNT, and ENDPNTS SORT.
PACKET MANAGER > PACKET ENDPNTS > STATUS
Read security: 5
Displays the status of each packet endpoint including the packet endpoint name, the protocol type, the
signaling role, the signaling type, the signaling activity, and the connections. The configuration choices are
given below.
PACKET MANAGER > PACKET ENDPNTS > STATUS > ENDPNT NAME
Read security: 5
Displays the packet endpoint name as defined in the PACKET ENDPNTS/CONFIG menu.
190
© 2002 ADTRAN, Inc.
61200305L1-1F
ATLAS 550 System Manual
Section 4, User Interface Guide
PACKET MANAGER > PACKET ENDPNTS > STATUS > PROTOCOL
Read security: 5
Displays the layer 2 protocol for this packet endpoint. FR indicates this packet endpoint is configured for
frame relay. TBOP indicates this packet endpoint is configured for Transparent Bit Oriented Protocol
(TBOP). PPP indicates this packet endpoint is configured for the Point-to-Point Protocol. SDLC indicates
this packet endpoint is configured for SDLC signaling.
SDLC signaling is only available using the Legacy Data Option Module (P/N 1200342L1).
PACKET MANAGER > PACKET ENDPNTS > STATUS > SIG ROLE
Read security: 5
Displays the frame relay signaling role for this packet endpoint. The following options indicate the
signaling role for this packet endpoint. These settings are not applicable for PPP.
USER
Indicates the user side of the User to Network Interface (UNI).
NETWORK
Indicates the network side of the UNI.
BOTH
Indicates the packet endpoint is operating in Network to Network
Interface (NNI) mode.
PACKET MANAGER > PACKET ENDPNTS > STATUS > SIG TYPE
Read security: 5
Displays the frame relay signaling type used on this packet endpoint. This setting is not applicable for PPP,
TBOP, or SDLC endpoints.
ANNEX A
Signaling using ITU-T Q.933-A.
ANNEX D
Signaling using ANSI T1.617-D.
LMI
Signaling using Group of Four.
PACKET MANAGER > PACKET ENDPNTS > STATUS > SIG STATE - FRAME RELAY
Read security: 5
(Valid only for Frame Relay endpoints.) Indicates the frame relay signaling state on this packet endpoint.
The possible states are defined below.
UP
Indicates that there is active frame relay signaling on this endpoint. The
packet endpoint must be defined by the frame relay configuration
settings to show active frame relay signaling.
DOWN
The packet endpoint stays in this state only when the physical line is
down.
61200305L1-1F
© 2002 ADTRAN, Inc.
191
Section 4, User Interface Guide
ATLAS 550 System Manual
PACKET MANAGER > PACKET ENDPNTS > STATUS > SIG STATE - PPP
Read security: 5
(Valid only for PPP endpoints.) Indicates the status of the PPP negotiation.The possible states are defined
below.
INITIAL
This is the first state of LCP negotiation. If the packet endpoint is
connected to a physical port in the DEDICATED MAP, this state will
usually transition to the STARTING state to begin the PPP negotiation.
STARTING
The packet endpoint stays in this state only when the physical line is
down.
REQ - SENT
The packet endpoint has sent an LCP configuration request to the peer
and is waiting for an “acknowledge.”
ACK - RECVD
The packet endpoint has received an “acknowledge” from the peer for
the sent configuration request.
ACK - SENT
The packet endpoint has acknowledged the peer’s configuration request,
but the peer has not acknowledged us.
OPENED
LCP negotiation on the packet endpoint has finished; authentication, if
enabled, occurs now.
CLOSING
The packet endpoint has sent the peer a “terminate” request and is
waiting for the peer’s acknowledgement.
CLOSED
The packet endpoint has received the peer’s acknowledgement to the
sent terminate request; this is followed by the initial state.
STOPPING
The packet endpoint has received a terminate request from the peer.
STOPPED
The packet endpoint has acknowledged the peer’s terminate request.
NOT CONNECTED
The packet endpoint is not connected to the router in the PACKET CNCTS
menu.
PACKET MANAGER > PACKET ENDPNTS > STATUS > CURRENT PORT
Read security: 5
Displays the connections for the packet endpoint. The letter U in this field indicates that this packet
endpoint is used in the PACKET CNCTS map. The remainder of the field indicates the physical port this
packet endpoint is connected to in the DEDICATED MAP. If the port is a channelized interface such as a T1,
the DS0 assignment is also provided.
PACKET MANAGER > PACKET ENDPNTS > PERFORMANCE
Write security: 3; Read security: 5
Displays performance information for each packet endpoint including the endpoint name, the protocol
used, link stats, and sublink stats.
PACKET MANAGER > PACKET ENDPNTS > PERFORMANCE > ENDPNT NAME
Read security: 5
Displays the packet endpoint name as defined in the PACKET ENDPNTS/CONFIG menu (see also Packet
192
© 2002 ADTRAN, Inc.
61200305L1-1F
ATLAS 550 System Manual
Section 4, User Interface Guide
Manager > Packet Endpnts > Config > Endpnt Name on page 196).
PACKET MANAGER > PACKET ENDPNTS > PERFORMANCE > PROT
Read security: 5
Displays the layer 2 protocol for this packet endpoint. FR indicates this packet endpoint is configured for
frame relay. TBOP indicates this packet endpoint is configured for Transparent Bit Oriented Protocol
(TBOP). PPP indicates this packet endpoint is configured for the Point-to-Point Protocol. SDLC indicates
this packet endpoint is configured for SDLC signaling.
SDLC signaling is only available using the Legacy Data Option Module (P/N 1200342L1).
PACKET MANAGER > PACKET ENDPNTS > PERFORMANCE > LINK STATS - FRAME RELAY
Write security: 3; Read security: 5
Displays layer 2 performance statistics. The statistics fields for frame relay reflect the total count since last
cleared. The available statistic information is discussed below.
TX PACKETS
Total number of frame relay packets transmitted through this packet
endpoint, including both user data (on all PVCs) and signaling.
RX PACKETS
Total number of frame relay packets received through this packet
endpoint on all PVCs.
STATE CHANGES
Total number of times that frame relay signaling has gone active or
inactive.
SIGNALING ERRORS
Total number of signaling frames received with PVC signaling protocol
violations.
SIGNALING TIMEOUTS Number of times signaling polls were not received in the time specified
in T391 in the PACKET ENDPTS/CONFIG menu.
ASYNC STATUS TX
Full status not transmitted during the normal full status cycle. An
asynchronous status message is used to quickly activate a link.
ASYNC STATUS RX
Full status not received during the normal full status cycle. An
asynchronous status message is used to quickly activate a link.
FULL STATUS TX
Number of full status polls transmitted by this packet endpoint.
FULL STATUS RX
Number of full status polls received by this packet endpoint.
LINK INTEGRITY
STATUS TX
Number of link integrity polls transmitted by this packet endpoint.
LINK INTEGRITY
STATUS RX
Number of link integrity polls received by this packet endpoint.
CLEAR COUNTERS
Clears all values in this submenu.
61200305L1-1F
© 2002 ADTRAN, Inc.
193
Section 4, User Interface Guide
ATLAS 550 System Manual
PACKET MANAGER > PACKET ENDPNTS > PERFORMANCE > LINK STATS - TBOP AND SDLC
Write security: 3; Read security: 5
Displays layer 2 performance statistics. The statistics fields for TBOP and SDLC reflect the total count
since last cleared. The available statistic information is discussed below.
TX PACKETS
Read security: 5
Total number of HDLC or SDLC packets transmitted through this packet endpoint.
RX PACKETS
Write security: 3; Read security: 5
Total number of HDLC or SDLC packets received through this packet endpoint.
CLEAR COUNTERS
Write security: 3; Read security: 5
Clears all values in this submenu.
PACKET MANAGER > PACKET ENDPNTS > PERFORMANCE > LINK STATS - PPP
Write security: 3; Read security: 5
Displays layer 2 performance statistics. The statistics fields for PPP reflect the total count since last
cleared. The available statistic information is discussed below.
LCP STATE
Read security: 5
Displays the current state of the LCP negotiations.
IPCP
Read security: 5
Displays the UP if PPP IP control has successfully negotiated.
TX PACKETS
Read security: 5
Number of packets transmitted over this link.
RX PACKETS
Read security: 5
Number of packets received over this link.
CLEAR COUNTERS
Write security: 3; Read security: 5
Resets the Tx and Rx packet counters.
194
© 2002 ADTRAN, Inc.
61200305L1-1F
ATLAS 550 System Manual
Section 4, User Interface Guide
PACKET MANAGER > PACKET ENDPNTS > PERFORMANCE > SUBLINK STATS - FRAME RELAY
Write security: 3; Read security: 5
Displays frame relay performance statistics for supported packet endpoint sublinks. These statistic fields
reflect the total count since cleared. These settings are not applicable for PPP or TBOP.
NAME
Write security: 3; Read security: 5
Alphanumeric characters (up to 16 characters) to create a user-defined name for the sublink (PVC).
DLCI
Write security: 3; Read security: 5
Local address for each PVC as assigned by the carrier.
STATE
Write security: 3; Read security: 5
Indicates if this particular sublink (PVC) has been defined as active by a full status poll, and also
indicates if the PVC is in backup mode.
ACTIVE
PVC is active.
INACTIVE
PVC is inactive.
ACTIVE/BU
PVC is active, but in backup mode.
INACTIVE/BU
PVC is inactive and in backup mode.
TX PCKTS
Write security: 3; Read security: 5
Total number of frame relay user data packets transmitted over this PVC.
RX PCKTS
Write security: 3; Read security: 5
Total number of frame relay user data packets received over this PVC.
STATISTICS
Write security: 3; Read security: 5
Provides additional information, as follows, on the individual sublink:
RESET COUNTERS
Write security: 3; Read security: 5
Resets all sublink counters.
FECN COUNT
Write security: 3; Read security: 5
Total number of FECN bits received on this PVC.
61200305L1-1F
© 2002 ADTRAN, Inc.
195
Section 4, User Interface Guide
ATLAS 550 System Manual
BECN COUNT
Write security: 3; Read security: 5
Total number of BECN bits received on this PVC.
DE DISCARD COUNT
Write security: 3; Read security: 5
Total number of Discard Eligible bits that have been received on this PVC.
ACTIVE FLAGS
Write security: ADTRAN USE ONLY
For ADTRAN internal use only.
PACKET MANAGER > PACKET ENDPNTS > CONFIG
Write security: 3; Read security: 5
Creates and configures packet endpoints.
PACKET MANAGER > PACKET ENDPNTS > CONFIG > ENDPNT NAME
Write security: 3; Read security: 5
Alphanumeric string (up to 16 characters in length) to enter a user-definable name (such as the name of the
frame relay provider or the circuit ID).
PACKET MANAGER > PACKET ENDPNTS > CONFIG > PROT
Write security: 3; Read security: 5
Defines the protocol operating on this port. FRAME RELAY configures this packet endpoint for frame relay
signaling. TBOP configures this endpoint as transparent bit oriented protocol. PPP configures this packet
endpoint as point-to-point protocol. SDLC configures this packet endpoint as an SDLC endpoint.
SDLC is only available for use with the Legacy Data Option Module (P/N 1200342L1).
PACKET MANAGER > PACKET ENDPNTS > CONFIG > CONFIG - FRAME RELAY
Write security: 3; Read security: 5
Contains the configuration parameters for this packet endpoint.
196
© 2002 ADTRAN, Inc.
61200305L1-1F
ATLAS 550 System Manual
Section 4, User Interface Guide
SIGNALING ROLE
Write security: 3; Read security: 5
Displays the frame relay signaling role for this packet endpoint. The following options indicate the
signaling role of this packet endpoint.
OFF
The remote device does not support frame relay signaling.
AUTO
Detects the role of the device on the other end of the circuit and
automatically sets this packet endpoint to the appropriate value.
BOTH
Operates in NNI mode.
NETWORK
Acts as the network side of the UNI interface.
USER
Acts as the user side of the UNI interface.
SIGNALING TYPE
Write security: 3; Read security: 5
Displays the frame relay signaling type for this packet endpoint. The following options indicate the
signaling type for this packet endpoint.
AUTO
Detects the signaling type of the device on the other end of the circuit
and automatically sets this packet endpoint to the same signaling type.
ANNEX A
Transmits and responds to ITU-T Q.933-A standards.
ANNEX D
Transmits and responds to ANSI T1.617-D standards.
LMI
Transmits and responds to Group of Four specifications.
USER POLL TIMER (T391)
Write security: 3; Read security: 5
Sets the polling interval to the network in seconds.
USER POLLS PER STATUS (N391)
Write security: 3; Read security: 5
Controls how many link integrity polls occur between full status polls.
USER BAD EVENT THRESHOLD (N392)
Write security: 3; Read security: 5
Sets the number of bad polling events that will cause the link to be declared down in N393 polls.
USER EVENT WINDOW SIZE (N393)
Write security: 3; Read security: 5
Defines the number of poll events in each monitored window.
For most applications, the USER POLL TIMER, USER POLLS PER STATUS, USER BAD EVENT
THRESHOLD, and USER EVENT WINDOW SIZE configuration parameters should be left in the
default state. Use caution when changing these parameters.
61200305L1-1F
© 2002 ADTRAN, Inc.
197
Section 4, User Interface Guide
ATLAS 550 System Manual
NET POLL RESPONSE TIMEOUT (T392)
Write security: 3; Read security: 5
Determines how long this packet endpoint will wait without receiving a poll before declaring the poll
bad.
Ensure that this timer is greater than the T391 on the user side of the UNI; otherwise,
erratic behavior will result.
NET POLLS PER STATUS (N391)
Write security: 3; Read security: 5
Sets the number of link integrity polls before a full status is transmitted.
NET BAD EVENTS THRESHOLD (N392)
Write security: 3; Read security: 5
Sets the number of bad polling events that will cause the link to be declared down in N393 polls.
NET EVENT WINDOW SIZE (N393)
Write security: 3; Read security: 5
Defines the number of poll events in each monitored window.
If the number of bad polls reaches N392 in any N393 period, the link will be declared
down. When N393 good polls are received, the link will be declared active again.
PACKET MANAGER > PACKET ENDPNTS > CONFIG > CONFIG - PPP
Write security: 3; Read security: 5
Displays the configuration for this packet endpoint.
AUTHENTICATION
Write security: 3; Read security: 5
Contains the Authentication parameters for this endpoint.
RX METHOD
Write security: 3; Read security: 5
These are methods the ATLAS 550 uses to authenticate the peer. NONE is selected when you do
not want to authenticate the peer. PAP, CHAP, or EAP is selected when you will allow the peer to
be authenticated with one of the listed authentication protocols. In this case, the most secure
method will be used first (EAP, then CHAP, then PAP). CHAP or EAP is selected when you will
authenticate the peer only using one of the encrypted authentication protocols. EAP is selected
when you will authenticate the peer only using the EAP authentication protocol.
198
© 2002 ADTRAN, Inc.
61200305L1-1F
ATLAS 550 System Manual
Section 4, User Interface Guide
TX METHOD
Write security: 3; Read security: 5
This field displays a list of the methods that we will allow the peer to authenticate us with. This is
of use when a peer wants to do PAP just to get your password. None is selected when you do not
want to be authenticated by the peer. PAP, CHAP, or EAP is selected when you will let the peer
use one or all of the authentication protocols. CHAP or EAP is selected when you will let the
peer use only one of the encrypted authentication protocols. EAP is selected when you will let
the peer use only the EAP authentication protocol.
TX USERNAME
Write security: 3; Read security: 5
The username that the peer will use to authenticate the ATLAS 550.
TX PASSWORD
Write security: 3; Read security: 5
The password that the peer will use to authenticate the ATLAS 550.
DEBUG LOG
Write security: 3; Read security: 5
The following events can be viewed in the event log when PPP events have been turned to INFO.
LCP DEBUGGING
Write security: 3; Read security: 5
This turns on LCP negotiation debugging.
IPCP DEBUGGING
Write security: 3; Read security: 5
This turns on IPCP negotiation debugging.
BCP DEBUGGING
Write security: 3; Read security: 5
This turns on BCP negotiation debugging.
AUTHENTICATION DEBUGGING
Write security: 3; Read security: 5
This turns on authentication debugging.
UNKNOWN PROTOCOL DEBUGGING
Write security: 3; Read security: 5
This turns on debugging for all unknown protocols received on this link.
61200305L1-1F
© 2002 ADTRAN, Inc.
199
Section 4, User Interface Guide
ATLAS 550 System Manual
MAX CONFIG
Write security: 3; Read security: 5
This value is the number of unanswered configuration requests that should be transmitted before
giving up on negotiation. The default value is 10.
MAX TIMER
Write security: 3; Read security: 5
This value is the number of seconds to wait between unanswered configuration requests. The default
value is 2 seconds.
MAX FAILURE
Write security: 3; Read security: 5
Due to the nature of PPP, configuration options may not be agreed upon between two PPP peers. This
value is the number of configuration-NAKs that should occur before an option is
configuration-rejected. This allows a connection to succeed that might otherwise fail. The default
value is 5.
KEEPALIVE
Write security: 3; Read security: 5
Configures the ATLAS 550 to send keepalive frames on PPP connections that are not currently in use
for data.
PACKET MANAGER > PACKET ENDPNTS > CONFIG > CONFIG - SDLC
Write security: 3; Read security: 5
Contains the configuration parameters for the SDLC packet endpoints.
Extreme caution should be used when changing the following parameters from their
default state.
POLL RESPONSE TIMEOUT
Write security: 3; Read security: 5
Sets the number of seconds the ATLAS 550 waits for a poll response before marking the poll as
unanswered.
MINIMUM POLL TIMER
Write security: 3; Read security: 5
Sets the number of seconds the ATLAS 550 waits between polls. The timer is started when the first
poll is sent and will be restarted when the next poll is sent.
200
© 2002 ADTRAN, Inc.
61200305L1-1F
ATLAS 550 System Manual
Section 4, User Interface Guide
SLOW POLL RATIO
Write security: 3; Read security: 5
Configures the ATLAS 550 to send polls to unresponsive remote units at a slower rate than normal.
The number entered sets the ration. When a remote unit is polled repeatedly and no answer is
received, the ATLAS 550 will move the unit from the normal poll interval to the slow poll interval. If
5 is entered here, the remote units on the slow poll will only get polled after the responsive units have
been polled 5 times.
DISCONNECT THRESHOLD
Write security: 3; Read security: 5
Sets the threshold for considering a remote unit inactive. This is determined using unanswered status
polls.
TRANSMIT DELAY
Write security: 3; Read security: 5
Configures the ATLAS 550 to introduce a delay between packets transmitted on this endpoint (in
seconds). The ATLAS 550 will transmit a packet (any traffic - data, poll, etc.) then wait the entered
seconds before transmitting another packet.
CTS OPTION
Write security: 3; Read security: 5
Configures the Clear To Send (CTS) signal on this interface. CTS may be forced on or can be
configured to be asserted only when Request To Send (RTS) is asserted.
DATA FORMAT
Write security: 3; Read security: 5
Configures the data format scheme used on this SLDC endpoint for either NRZ (Non-Return to
Zero) or NRZI (Non-Return to Zero Inverted). Using NRZ configures the Legacy Data Module to
encode using ones and zeroes represented by opposite and alternating high and low voltages. There is
no return to a zero reference voltage between encoded bits. Using NRZI configures the Legacy Data
Module to encode ones with a voltage change and zeroes with no voltage change. NRZI encoding is
also known as transition coding
PACKET MANAGER > PACKET ENDPNTS > CONFIG > SUBLINKS - FRAME RELAY
Write security: 3; Read security: 5
Contains the configuration parameters for individual sublinks, or PVCs. The following parameters are
available.
NAME
Write security: 3; Read security: 5
User-definable name for the DLCI.
61200305L1-1F
© 2002 ADTRAN, Inc.
201
Section 4, User Interface Guide
ATLAS 550 System Manual
DLCI
Write security: 3; Read security: 5
Local address for each PVC as assigned by the carrier.
QOS
Write security: 3; Read security: 5
Quality of service. These values can be used to assign a guaranteed amount of bandwidth available
for this connection. The sum of all QOS values for the sublink should not exceed the Committed
Information Rate (CIR).
BURST
Write security: 3; Read security: 5
Sets the burst rate used by this virtual circuit for data traffic. A value of zero means that the burst rate
is not limited. The value is in kilobits/second. If voice traffic is flowing on ANY sublink on the port
carrying THIS sublink, you should enter a value for this setting. Otherwise, leave this field set to
default (zero). If the service provider has supplied a 'Be' value, enter that value in this field. The burst
rate defines the amount that this virtual circuit is allowed to exceed the CIR. If the service provider
has not supplied an excess burst rate, enter the wire speed in this field.
CONFIG
Write security: 3; Read security: 5
Allows configuration of parameters for each DLCI.
FRAGMENTATION THRESHOLD
Write security: 3; Read security: 5
Max packet size allowed on this PVC. A zero value disables fragmentation. Fragmentation is
used to improve the quality of voice transmission. A good value is R/300, where R is the smallest
of the ATLAS 550 link rates or the far end link rate in bits per second. For example, if a DLCI
comes from an FSU 5622 running on a 56K DDS line and is delivered to the ATLAS 550 on a
full T1, the lower rate is 56000 and the value is 186 or 187. Entered values between 1 and 127 are
adjusted upward.
DLCI STATE
Write security: 3; Read security: 5
Controls how the state of this DLCI is reported to any packet connections within ATLAS 550
attempting to send or receive data on this DLCI.
AUTO
Passes the state as reported by the frame relay switch. Set DLCI
STATE to AUTO for normal operation.
202
FORCE ACTIVE
This DLCI disregards the status as reported from the switch and
reports Active to all packet endpoints within ATLAS 550.
FORCE INACTIVE
Reports status as DOWN to all packet endpoints within ATLAS 550.
© 2002 ADTRAN, Inc.
61200305L1-1F
ATLAS 550 System Manual
Section 4, User Interface Guide
DIAGNOSTIC MODE
Write security: 3; Read security: 5
Controls operation of PVC testing options. To allow the far end to measure delay, select ECHO
FAR-END LOOPBACKS. To continuously measure in-band delay, select IN-BAND DELAY
MEASUREMENT. To turn off continuous diagnostic functions, select PASS-THROUGH DIAGNOSTIC
PACKETS.
ECHO FAR-END
LOOPBACKS
Generates and transmits a response on this DLCI to the remote
equipment if an ADTRAN proprietary diagnostic message is
received on this DLCI.
IN-BAND DELAY
MEASUREMENT
Generates a diagnostic packet to measure delay through the frame
relay network. This process requires that the equipment at the
remote site be ADTRAN IQ compatible.
PASS-THROUGH
DIAGNOSTIC
PACKETS
Used when ATLAS 550 is acting as a frame relay switch. Transmits
a diagnostic packet out the packet endpoint connected to this DLCI,
if a diagnostic packet is received on this packet endpoint.
PRIMARY | BACKUP SELECTION
Write security: 3; Read security: 5
Allows you to define a sublink as a primary or a backup sublink. PRIMARY defines a normal
sublink and includes the menus ENABLE BACKUP SUPPORT, BACKUP PACKET ENDPT, and BACKUP
SUBLINK. BACKUP defines a backup sublink and includes the menus PRIMARY PACKET ENDPT and
PRIMARY SUBLINK.
ENABLE BACKUP SUPPORT
Write security: 3; Read security: 5
(Available for Primary packet endpoints only.) YES displays the backup menus. NO hides the
backup menus.
BACKUP PACKET ENDPT
Write security: 3; Read security: 5
(Visible only if ENABLE BACKUP SUPPORT is set to YES.) Selects BACKUP PACKET ENDPT that
contains the BACKUP SUBLINK to be tied to this sublink.
BACKUP SUBLINK
Write security: 3; Read security: 5
(Visible only if ENABLE BACKUP SUPPORT is set to YES.) Selects the BACKUP SUBLINK to be tied to
this sublink.
61200305L1-1F
© 2002 ADTRAN, Inc.
203
Section 4, User Interface Guide
ATLAS 550 System Manual
PRIMARY PACKET ENDPT
Write security: 3; Read security: 5
(Visible only for Backup packet endpoints.) Selects the PRIMARY PACKET ENDPT that contains the
PRIMARY SUBLINK to be tied to this sublink.
PRIMARY SUBLINK
Write security: 3; Read security: 5
(Visible only for Backup packet endpoints.) Selects the PRIMARY SUBLINK to be tied to this
sublink.
The fields BACKUP MODE, SWITCH ON SUBLINK DOWN, SWITCH ON LMI INACTIVE, SWITCH ON
BACKUP ACTIVE, BACKUP DELAY IN SECONDS, and RESTORE DELAY IN SECONDS display if
PRIMARY (with BACKUP SUPPORT) or BACKUP is enabled.
BACKUP MODE
Write security: 3; Read security: 5
Provides switching options.
AUTO
Provides normal operation.
FORCED
Forces a switch to backup.
DISABLED
Disables backup switching.
SWITCH ON SUBLINK INACTIVE
Write security: 3; Read security: 5
Provides switching options if the sublink goes down. Select YES to switch to backup if the primary
sublink goes down, otherwise select NO.
SWITCH ON LMI DOWN
Write security: 3; Read security: 5
Provides switching options for LMI signaling. Select YES to switch to backup if LMI signaling is
inactive on the primary link, otherwise select NO.
SWITCH ON BACKUP ACTIVE
Write security: 3; Read security: 5
Provides switching options if the backup sublink goes active. Select YES to switch to backup if the
backup sublink goes active, otherwise select NO.
BACKUP DELAY IN SECONDS
Write security: 3; Read security: 5
The amount of time within which any of the enabled switch criteria must be met before service is
switched to the backup circuit.
204
© 2002 ADTRAN, Inc.
61200305L1-1F
ATLAS 550 System Manual
Section 4, User Interface Guide
RESTORE DELAY IN SECONDS
Write security: 3; Read security: 5
The amount of time within which the criteria for switching to backup are reached before service is
returned to the primary circuit.
PACKET MANAGER > PACKET ENDPNTS > CONFIG > USAGE
Read security: 5
This field displays a 7-character summary of the references to this link. Each position is populated with a
dash (-) or a character indicating the resource represented. The characters are as follows:
1
Packet connection in the first dedicated map
2
Packet connection in the second dedicated map
3
Packet connection in the third dedicated map
4
Packet connection in the fourth dedicated map
5
Packet connection in the fifth dedicated map
–
Reserved and currently not is use
S
Used as a Packet Endpoint in the switched dial plan
U
Used by one or more packet switch connections or packet voice entries
PACKET MANAGER > PACKET ENDPNTS > TEST
Write security: 3; Read security: 5
Provides menus for controlling options and setting for packet endpoints.
PACKET MANAGER > PACKET ENDPNTS > TEST > ENDPNT NAME
Write security: 3; Read security: 5
Displays the name of the packet endpoint.
PACKET MANAGER > PACKET ENDPNTS > TEST > PROTOCOL
Write security: 3; Read security: 5
Displays the protocol running on the packet endpoint.
PACKET MANAGER > PACKET ENDPNTS > TEST > SUBLINK - FRAME RELAY
Write security: 3; Read security: 5
Displays test menus for the packet endpoint sublinks. The menus vary depending on the protocol. Testing
is not supported on TBOP or PPP.
NAME
Read security: 5
Displays the user-defined name for the DLCI.
61200305L1-1F
© 2002 ADTRAN, Inc.
205
Section 4, User Interface Guide
ATLAS 550 System Manual
DLCI
Read security: 5
Displays the local address for each PVC as assigned by the carrier.
TEST
Write security: 3; Read security: 5
Displays the test mode for the PVC.
START
Write security: 3; Read security: 5
The fixed duration that Test is not running and the DLCI is not configured for continuous in-band
delay measurement. To change this option, set DIAGNOSTIC MODE to IN-BAND DELAY
MEASUREMENT (also see Packet Manager > Packet Endpnts > Config > Config - SDLC, In-band
Delay Measurement option).
CONTDLY
Write security: 3; Read security: 5
The fixed duration TEST is not running and the DLCI is configured for continuous in-band delay
measurement. The following RESULTS menu accumulates these measurements.
STOP
Write security: 3; Read security: 5
The fixed duration TEST is running. The following DURATION field shows the time remaining in
the current test.
DURATION
Read security: 5
Shows the duration in seconds for the fixed-duration test.
RESULTS [MN/AV/MX DLY]
Read security: 5
Displays the minimum, average, and maximum delay for the delay-measurement test. To display the
additional test results, place the cursor over this field and press <Enter > on the keyboard. The
displayed times are in milliseconds.
ECHO PKT TX
Read security: 5
Displays the total number of test packets that have been transmitted.
ECHO PKT RX
Read security: 5
Displays the total number of test packets that have been received.
206
© 2002 ADTRAN, Inc.
61200305L1-1F
ATLAS 550 System Manual
Section 4, User Interface Guide
ECHO PKT DROPPED
Read security: 5
Displays the total number of packets lost in the receiving direction (traveling from the remote
ADTRAN frame relay device to the ATLAS).
RMT PKT DROPPED
Read security: 5
Displays the total number of packets lost in the transmit direction (traveling from the ATLAS to
the remote ADTRAN frame relay device).
MIN DELAY
Read security: 5
Displays the minimum round trip delay for the current test period.
MAX DELAY
Read security: 5
Displays the maximum round trip delay for the current test period.
AVG DELAY
Read security: 5
Displays the average round trip delay for the current test.
RESET COUNTERS
Write security: 3; Read security: 5
Resets the counters.
PACKET MANAGER > PACKET ENDPNTS > ENDPT COUNT
Read security: 5
Displays the total number of packet endpoints configured.
PACKET MANAGER > PACKET ENDPNTS > ENDPTS SORT
Write security: 3; Read security: 5
Provides sorting options for the packet endpoints. SORTING BY NAME sorts packet endpoints alphabetically
by name. If you do not want to sort packet endpoints, set this option to OFF.
PACKET MANAGER > PACKET CNCTS
Write security: 3; Read security: 5
After packet endpoints are defined, they are connected in the packet connects (PACKET CNCTS) map.
PACKET CNCTS connects upper layer protocols from packet endpoint to packet endpoint. You can think of it
as a dedicated map for virtual ports rather than physical ports.
61200305L1-1F
© 2002 ADTRAN, Inc.
207
Section 4, User Interface Guide
ATLAS 550 System Manual
PACKET MANAGER > PACKET CNCTS > FROM: PEP
Write security: 3; Read security: 5
Selects one packet endpoint for the packet connection. Packet endpoints created in the packet endpoint
configuration are visible on a pull-down menu which includes the ROUTER option. This router is the
internal ATLAS 550 router and can be used multiple times within the PACKET CNCTS menu.
PACKET MANAGER > PACKET CNCTS > SUBLINK
Write security: 3; Read security: 5
If the packet endpoint selected in FROM: PEP supports sublinks, they are available in this menu. In frame
relay, this is the PVC from which you are selecting to groom data.
PACKET MANAGER > PACKET CNCTS > TO: PEP
Write security: 3; Read security: 5
Selects the other packet endpoint for the packet connection. Refer to FROM: PEP above for more detail.
PACKET MANAGER > PACKET CNCTS > SUBLINK
Write security: 3; Read security: 5
If the TO: PEP packet endpoint supports sublinks, the available sublinks are shown within this menu,
which includes the ROUTER option.
PACKET MANAGER > PACKET CNCTS > PROTOCOL
Write security: 3; Read security: 5
Selects the protocols for this packet connection. Selecting the protocols on each individual connection
allows the mixing of data from multiple sources onto a single PVC. Available protocols include the
following: ALL, IP, BRIDGE IP, PACKET VOICE, SNA, SNAP, and TRANSPARENT PROTOCOLS (TBOP,
TASYNC, and SDLC).
1. If ALL is selected, additional connections from that PVC are not allowed.
2. If ROUTER is selected as one packet endpoint, IP is automatically set as the
PROTOCOL.
3. If a TBOP packet endpoint is selected as one packet endpoint, TRANSPARENT is
automatically set as the PROTOCOL.
4. Selecting SDLC signaling on an endpoint requires a Legacy Data Module
(P/N 1200342L1).
PACKET MANAGER > PACKET CNCTS > CONFIG
Write security: 3; Read security: 5
Determines data source and destination. The available options depend on the protocol selected.
208
CONFLICT
Indicates DLCI mismatch.
FROM
Indicates data source.
TO
Indicates data destination.
© 2002 ADTRAN, Inc.
61200305L1-1F
ATLAS 550 System Manual
Section 4, User Interface Guide
PACKET MANAGER > CNCTS SORT
Write security: 3; Read security: 5
Determines the order in which connections are displayed within PACKET CNCTS. Options include FROM
PKT ENDPT/SUBLINK, TO PKT ENDPT/SUBLINK, CONNECTION PROTOCOL, and OFF.
PACKET MANAGER > FRAME RELAY IQ
Write security: 2; Read security: 5
Gathers and stores statistical information in the submenus ENABLE IQ STATS, PORT ENABLES, CONFIG, and
VIEW IQ STATISTICS.
PACKET MANAGER > FRAME RELAY IQ > ENABLE IQ STATS
Write security: 2; Read security: 5
Globally enables and disables IQ statistics gathering. IQ statistics are only gathered when this option is
enabled. This field defaults to the original setting of [15 MIN, 7 DAYS, 96 INTS] when re-enabled.
PACKET MANAGER > FRAME RELAY IQ > PORT ENABLES
Write security: 2; Read security: 5
Enables and disables IQ statistics gathering for each port. Use the submenus NAME, ENABLE, ALL
SUBLINKS, and SUBLINKS to configure the individual ports.
PACKET MANAGER > FRAME RELAY IQ > PORT ENABLES > NAME
Read security: 5
Displays the port number and name.
PACKET MANAGER > FRAME RELAY IQ > PORT ENABLES > ENABLE
Write security: 2; Read security: 5
Enables and disables IQ statistics gathering for the port identified in NAME.
PACKET MANAGER > FRAME RELAY IQ > PORT ENABLES > ALL SUBLINKS
Write security: 2; Read security: 5
Provides an easy way to enable or disable IQ statistics gathering on all sublinks. When this activator reads
DISABLE, pressing <Enter> disables IQ statistics gathering on all sublinks. When it reads ENABLE, pressing
<Enter> enables IQ statistics gathering on all sublinks.
PACKET MANAGER > FRAME RELAY IQ > PORT ENABLE > SUBLINKS
Write security: 2; Read security: 5
Identifies the PVC to be polled. Indicates the number of sublinks that ATLAS 550 will collect IQ data for
61200305L1-1F
© 2002 ADTRAN, Inc.
209
Section 4, User Interface Guide
ATLAS 550 System Manual
within the given link.
NAME
Displays the user-designated name of the sublink (up to 15 characters).
DLCI
Displays the Data Link Connection Identifier (circuit number).
ENABLE
Indicates collection of IQ data for the target DLCI.
PACKET MANAGER > FRAME RELAY IQ > CONFIG
Write security: 2; Read security: 5
Sets the parameters for IQ statistics gathering.
PACKET MANAGER > FRAME RELAY IQ > CONFIG > CURRENT PIVS
Write security: 2; Read security: 5
Identifies resources used by IQ statistics storage. A PIV is a port or PVC per interval. ATLAS can track up
to 10,000 PIVs. Think of it as a resource meter. The PIV number is derived from the MAX DAYS and MAX
INTERVALS selected by the user. Changing one affects the other.
PACKET MANAGER > FRAME RELAY IQ > CONFIG > INTERVAL PERIOD
Write security: 2; Read security: 5
Sets the period for IQ statistics gathering. Options are 5, 10, 15, 20, and 30 MINUTES.
PACKET MANAGER > FRAME RELAY IQ > CONFIG > MAX DAYS
Write security: 2; Read security: 5
Defines the number of history day intervals to keep. Maximum entry is dependent on the MAX INTERVALS
setting.
PACKET MANAGER > FRAME RELAY IQ > CONFIG > MAX INTERVALS
Write security: 2; Read security: 5
Defines the number of history intervals to keep. Maximum entry is dependent on the MAX DAYS setting.
PACKET MANAGER > FRAME RELAY IQ > VIEW IQ STATISTICS
Read security: 5
Displays statistical information gathered for intervals and days on a port and for intervals and days on
sublinks (PVCs or DLCIs).
PACKET MANAGER > FRAME RELAY IQ > VIEW IQ STATISTICS > INTERVAL AND DAY
Read security: 5
Descriptions of the statistics available in the INTERVAL or DAY submenus follow:
210
© 2002 ADTRAN, Inc.
61200305L1-1F
ATLAS 550 System Manual
Section 4, User Interface Guide
RX FRAMES
Read security: 5
The number of frames the port received for the interval or day.
RX BYTES
Read security: 5
The number of bytes the port received for the interval or day.
MAX RX THRU
Read security: 5
The maximum throughput the port received for the interval or day.
AVG RX THRU
Read security: 5
The average throughput the port received for the interval or day.
MAX RX UTIL%
Read security: 5
The maximum utilization the port received for the interval or day.
AVG RX UTIL%
Read security: 5
The average utilization the port received for the interval or day.
TX FRAMES
Read security: 5
The number of frames the port transmitted for the interval or day.
TX BYTES
Read security: 5
The number of bytes the port transmitted for the interval or day.
MAX TX THRU
Read security: 5
The maximum throughput the port transmitted for the interval or day.
AVG TX THRU
Read security: 5
The average throughput the port transmitted for the interval or day.
61200305L1-1F
© 2002 ADTRAN, Inc.
211
Section 4, User Interface Guide
ATLAS 550 System Manual
MAX TX UTIL%
Read security: 5
The maximum utilization the port transmitted for the interval or day.
AVG TX UTIL%
Read security: 5
The average utilization the port transmitted for the interval or day.
PORT UA TIME
Read security: 5
Time, in seconds, the port is unavailable due to physical or frame relay outage.
SIG DOWN TIME
Read security: 5
Time, in seconds, the signaling state has been down.
SIGNAL ERROR
Read security: 5
The number of PVC signaling frames received with protocol violations.
SIGNAL T/O
Read security: 5
The number of PVC signal time-outs. Either T391 seconds elapsed without receiving a response to a
poll or T392 seconds elapsed without receiving a poll.
SIG STATE CHG
Read security: 5
The number of state changes for the PVC signaling protocol. This number includes transitions from
down state to up state and vice-versa.
RX FULL STAT
Read security: 5
The number of PVC-signaling, full-status frames received.
TX FULL STAT
Read security: 5
The number of PVC-signaling, full-status frames transmitted.
RX LI ONLY
Read security: 5
The number of PVC-signaling, link integrity only frames received.
212
© 2002 ADTRAN, Inc.
61200305L1-1F
ATLAS 550 System Manual
Section 4, User Interface Guide
TX LI ONLY
Read security: 5
The number of PVC-signaling, link integrity only frames transmitted.
ASYNC STATUS
Read security: 5
The number of single PVC status frames received.
DISCARD FRAME
Read security: 5
The number of frames discarded by the IQ unit.
ABORTS
Read security: 5
The number of frames received without proper flag termination.
CRC ERROR
Read security: 5
The number of frames received with CRC errors.
OCTET ALIGN
Read security: 5
The number of frames received with a bit count not divisible by eight.
LENGTH ERROR
Read security: 5
The number of frames received that are less than 5 bytes or greater than 4500 bytes.
EA VIOLATION
Read security: 5
The number of frames received with errors in the EA field of the frame relay header.
INACTIVE DLCI
Read security: 5
The number of frames received while the PVC is in the inactive state.
INVALID DLCI
Read security: 5
The number of frames received with a DLCI value less than 16 or greater than 1007, not including
PVC signaling frames.
61200305L1-1F
© 2002 ADTRAN, Inc.
213
Section 4, User Interface Guide
ATLAS 550 System Manual
PACKET MANAGER > FRAME RELAY IQ > VIEW IQ STATISTICS > SUBLINK
Read security: 5
Descriptions of the statistics available in the INTERVAL or DAY submenus follow:
RX FRAMES
Read security: 5
The number of frames the port received for the interval or day.
RX BYTES
Read security: 5
The number of bytes the port received for the interval or day.
MAX RX THRU
Read security: 5
The maximum throughput the port received for the interval or day.
AVG RX THRU
Read security: 5
The average throughput the port received for the interval or day.
MAX RX UTIL%
Read security: 5
The maximum utilization the port received for the interval or day.
AVG RX UTIL%
Read security: 5
The average utilization the port received for the interval or day.
TX FRAMES
Read security: 5
The number of frames the port transmitted for the interval or day.
TX BYTES
Read security: 5
The number of bytes the port transmitted for the interval or day.
MAX TX THRU
Read security: 5
The maximum throughput the port transmitted for the interval or day.
214
© 2002 ADTRAN, Inc.
61200305L1-1F
ATLAS 550 System Manual
Section 4, User Interface Guide
AVG TX THRU
Read security: 5
The average throughput the port transmitted for the interval or day.
MAX TX UTIL%
Read security: 5
The maximum utilization the port transmitted for the interval or day.
AVG TX UTIL%
Read security: 5
The average utilization the port transmitted for the interval or day.
PVC IA TIME
Read security: 5
Time, in seconds, the PVC has been in the inactive state for the interval or day.
RX FECN
Read security: 5
The number of FECNs the PVC has received for the interval or day.
TX FECN
Read security: 5
The number of FECNs the PVC has transmitted for the interval or day.
RX DE
Read security: 5
The number of DEs the PVC has received for the interval or day.
TX DE
Read security: 5
The number of DEs the PVC has transmitted for the interval or day.
RX CR
Read security: 5
The number of CRs the PVC has received for the interval or day.
TX CR
Read security: 5
The number of CRs the PVC has transmitted for the interval or day.
61200305L1-1F
© 2002 ADTRAN, Inc.
215
Section 4, User Interface Guide
ATLAS 550 System Manual
LOST FRAMES
Read security: 5
The number of lost frames on the PVC for the interval or day.
RMT LOST FRMS
Read security: 5
The number of remote lost frames on the PVC for the interval. Applies only if IN-BAND SEQUENCE
NUMBER is ENABLED on the PVC.
RX BURST SEC
Read security: 5
The number of bursty seconds the PVC received for the interval or day.
TX BURST SEC
Read security: 5
The number of bursty seconds the PVC transmitted for the interval or day.
MIN RX FRAME
Read security: 5
The minimum frame size the PVC received for the interval or day.
MAX RX FRAME
Read security: 5
The maximum frame size the PVC received for the interval or day.
AVG RX FRAME
Read security: 5
The average frame size the PVC received for the interval or day.
MIN TX FRAME
Read security: 5
The minimum frame size the PVC transmitted for the interval or day.
MAX TX FRAME
Read security: 5
The maximum frame size the PVC transmitted for the interval or day.
AVG TX FRAME
Read security: 5
The average frame size the PVC transmitted for the interval or day.
216
© 2002 ADTRAN, Inc.
61200305L1-1F
ATLAS 550 System Manual
Section 4, User Interface Guide
MIN FRAME DLY
Read security: 5
The minimum delay in milliseconds on the PVC IN-BAND DELAY MEASUREMENT is ENABLED (see
Packet Manager > Packet Endpnts > Config > Config - SDLC on page 200, the IN-BAND DELAY
MEASUREMENT option) for the PVC or if PVC diagnostics are being performed.
MAX FRAME DLY
Read security: 5
The maximum delay in milliseconds on the PVC for the interval or day. Applies only if IN-BAND
DELAY MEASUREMENT is ENABLED (see Packet Manager > Packet Endpnts > Config > Config SDLC on page 200, the IN-BAND DELAY MEASUREMENT option) for the PVC or if PVC diagnostics are
being performed.
AVG FRAME DLY
Read security: 5
The average delay in milliseconds on the PVC for the interval or day. Applies only if IN-BAND DELAY
MEASUREMENT is ENABLED (see Packet Manager > Packet Endpnts > Config > Config - SDLC on
page 200, the IN-BAND DELAY MEASUREMENT option) for the PVC or if PVC diagnostics are being
performed.
PVC STATE CHANGE
Read security: 5
The number of state changes for this PVC for the interval or day.
61200305L1-1F
© 2002 ADTRAN, Inc.
217
Section 4, User Interface Guide
ATLAS 550 System Manual
ROUTER
The ATLAS 550 router uses the integral 10/100BaseT Ethernet port to transmit local area network (LAN)
traffic over the wide area network (WAN) to a remote LAN. By integrating the router into the network
access device, you benefit from the cost savings of not requiring an external router. To view the menu
options for the Router, see Figure 15. All routing functions within the ATLAS are configured and
monitored from the ROUTER menu.
Figure 15. Router Menu (IP Selected)
ROUTER > IP > STATIC ROUTES
Write security: 2; Read security: 2
The STATIC ROUTES menu manages static IP routes. You can create, modify, and delete routes using this
menu.
ROUTER > IP > STATIC ROUTES > IP ADDRESS
Write security: 2; Read security: 2
Defines the IP address of the host or network device being routed to.
ROUTER > IP > STATIC ROUTES > NETMASK
Write security: 2; Read security: 2
Determines the number of bits used in the above-defined IP address for routing. If a host address is entered
for the IP address, this field must be set to 255.255.255.255.
218
© 2002 ADTRAN, Inc.
61200305L1-1F
ATLAS 550 System Manual
Section 4, User Interface Guide
ROUTER > IP > STATIC ROUTES > GATEWAY
Write security: 2; Read security: 2
Defines the IP address of the router to receive the forwarded IP packet.
ROUTER > IP > STATIC ROUTES > INTERFACE
Write security: 2; Read security: 2
Defines the interface (either Ethernet or frame relay DLCIs) to which IP packets with this address will be
routed.
ROUTER > IP > STATIC ROUTES > HOPS
Write security: 2; Read security: 2
Defines the number of router hops required to get to the network or host. Maximum distance is 15 hops.
ROUTER > IP > STATIC ROUTES > COST
Write security: 2; Read security: 2
Defines the total cost of sending a packet to the selected network. Normally, the cost is based on the
available bandwidth.
ROUTER > IP > STATIC ROUTES > ENABLED
Write security: 2; Read security: 2
Adds a static route to the router.
ROUTER > IP > STATIC ROUTES > ADVERTISE
Write security: 2; Read security: 2
When set to YES, this static route is advertised over all interfaces on which a route advertisement protocol
(e.g., RIP) is enabled. When set to NO, this is a private route.
ROUTER > IP > ARP CACHE
Write security: 2; Read security: 2
The ARP CACHE menu displays the contents of the ATLAS Address Resolution Protocol (ARP) cache. All
resolved cache entries time out after 20 minutes. Unresolved entries time out in 3 minutes.
ROUTER > IP > ARP CACHE > IP ADDRESS
Read security: 2
Displays the IP address used for resolving MAC address.
ROUTER > IP > ARP CACHE > MAC ADDRESS
Read security: 2
Resolves Ethernet address. If set to all zeros, there is no resolution for that address.
61200305L1-1F
© 2002 ADTRAN, Inc.
219
Section 4, User Interface Guide
ATLAS 550 System Manual
ROUTER > IP > ARP CACHE > TIME
Read security: 2
Displays the minutes since the entry was last referenced.
ROUTER > IP > ARP CACHE > TYPE
Read security: 2
Defines this entry as DYNAMIC or STATIC.
ROUTER > IP > ARP CACHE > INTERFACE
Read security: 2
Displays the interface upon which this entry was found.
ROUTER > IP > ARP CACHE > TX PENDING
Read security: 2
Displays the number of transmit packets pending a reply.
ROUTER > IP > ROUTES
Write security: 2; Read security: 2
The ROUTES menu displays the contents of the ATLAS routing table. All static and discovered routes are
displayed from this menu.
ROUTER > IP > ROUTES > IP ADDRESS
Read security: 2
Displays the IP address of the destination host or network.
ROUTER > IP > ROUTES > NETMASK
Read security: 2
Displays the subnet mask applied to the destination address.
ROUTER > IP > ROUTES > GATEWAY
Read security: 2
Displays the IP address of the next-hop router or host receiving the forwarded IP packet.
ROUTER > IP > ROUTES > INTERFACE
Read security: 2
Displays the next-hop router or host interface through which IP packets are routed, as defined here:
220
LOCAL
Forwards the packet directly to the ATLAS router.
EN0 IP
Forwards the packet through the ATLAS Ethernet port.
ENDPOINT NAME
Forwards the packet using the DLCI number.
© 2002 ADTRAN, Inc.
61200305L1-1F
ATLAS 550 System Manual
Section 4, User Interface Guide
ROUTER > IP > ROUTES > USED
Read security: 2
Displays the number of times the router has referenced this route.
ROUTER > IP > ROUTES > CLR
Write security: 2; Read security: 2
Clears the USED menu and resets the value to zero.
ROUTER > IP > ROUTES > FLAGS
Read security: 2
Indicates the properties of this routing table entry, composed of the following letters:
H
- route is a host route
G
- route is a gateway route
DR
- route learned dynamically from RIP
I
- route learned from an ICMP redirect
A
- route learned from IARP
P
- route is private and is not advertised with RIP
T
- route is to a triggered port (updated only when table changes)
ROUTER > IP > ROUTES > HOPS
Read security: 2
Displays the number of router hops required to get to the network or host. Ranges from 0 to 16. If set to 16,
the route is defined as infinite and cannot be used.
ROUTER > IP > ROUTES > COST
Read security: 2
Displays the total cost of sending a packet to the specified network. Normally, the cost is based on the
available bandwidth.
ROUTER > IP > ROUTES > TTL
Read security: 2
Displays the number of seconds until the address is removed from table. A value of 999 means the route is
static.
ROUTER > IP > INTERFACES
Write security: 2; Read security: 2
The INTERFACES menu configures and monitors all interfaces connected to the ATLAS router. These
include the Ethernet and frame relay DLCIs connected in the PACKET MANAGER/ PACKET CNCTS.
61200305L1-1F
© 2002 ADTRAN, Inc.
221
Section 4, User Interface Guide
ATLAS 550 System Manual
ROUTER > IP > INTERFACES > NETWORK NAME
Read security: 2
Displays the name of the interface connected to the ATLAS router, as follows:
EN0 IP
ATLAS Ethernet port
ENDPOINT NAME
DLCI Number
ROUTER > IP > INTERFACES > ADDRESS
Write security: 2; Read security: 2
Defines the individual interface IP address. If this field is left as 0.0.0.0, it is treated as an unnumbered
interface.
ROUTER > IP > INTERFACES > SUBNET MASK
Write security: 2; Read security: 2
Defines the subnet mask applied to the address defined for this link. If the interface IP address is
unnumbered, leave as 0.0.0.0.
ROUTER > IP > INTERFACES > IARP
Write security: 2; Read security: 2
The Inverse ARP (IARP) menu is only present when this interface is a frame-relay network interface.
ATLAS sends Inverse ARP packets to determine the IP address on the other end of the virtual circuit.
ATLAS always responds to Inverse ARP requests with its IP address for the requested DLCI.
ENABLE
Causes ATLAS to dynamically send Inverse ARP packets to determine
the IP address on the other end of the virtual circuit. When an Inverse
ARP packet is not responded to, no route is placed in the IP route table.
If the Inverse ARP packet is responded to, a route is placed in the IP
route table.
DISABLE
Instructs ATLAS not to generate Inverse ARP request packets. In this
case, the FAR-END ADDRESS parameter may be used to statically assign a
route address (see the following, Far-End Address).
ROUTER > IP > INTERFACES > FAR-END ADDRESS
Write security: 2; Read security: 2
This menu is only present for frame-relay network interfaces, and it is only selectable when IARP is
disabled. Use this menu to specify the IP address of the device on the other end of the virtual circuit. If that
IP address is non-zero, a static route to the far-end network will be added using the interface
SUBNET-MASK. If 0.0.0.0 has been specified for the SUBNET-MASK, a default subnet mask is used, based on
the class of the Far-End Address.
ROUTER > IP > INTERFACES > MTU
Write security: 2; Read security: 2
Defines maximum number of bytes in a datagram transmitted over this interface (Maximum Transmit
Unit).
222
© 2002 ADTRAN, Inc.
61200305L1-1F
ATLAS 550 System Manual
Section 4, User Interface Guide
ROUTER > IP > INTERFACES > RIP
Write security: 2; Read security: 2
Configures routing information protocol (RIP) on this interface.
MODE
Write security: 2; Read security: 2
Allows RIP to be enabled or disabled on a per-interface basis.
TX ONLY
RIP advertisements are periodically transmitted, but are not listened to
on this virtual circuit.
RX ONLY
RIP advertisements are not transmitted on this virtual circuit, but they
are listened to.
TX AND RX
RIP advertisements are periodically transmitted and are listened to on
this virtual circuit.
If RIP/MODE is OFF, PROTOCOL, METHOD, and UPDATE will not be visible.
PROTOCOL
Write security: 2; Read security: 2
(Only visible if RIP is enabled.) Sets the version of RIP being used on this interface. The options are
RIP V1 and RIP V2. If RIP V2 is used, a new menu, AUTHENTICATION, opens.
If RIP V2 is used, a user-defined secret may have to be created.
METHOD
Write security: 2; Read security: 2
(Only visible if RIP is enabled.) Defines the method used to send RIP route advertisements. The
options are listed below:
NONE
All routes in the router table are advertised through this interface with
no modification of the routing metric.
SPLIT HORIZON
Only advertises routes not learned through this interface.
POISON REVERSE
All routes are advertised, but the routes learned through this interface
are “poisoned” with an infinite route metric.
61200305L1-1F
© 2002 ADTRAN, Inc.
223
Section 4, User Interface Guide
ATLAS 550 System Manual
UPDATES
Write security: 2; Read security: 2
Defines when RIP advertisements are transmitted.
PERIODIC
RIP advertisements are periodically transmitted.
TRIGGERED
RIP advertisements are transmitted only when new routes are learned,
and learned routes do not age.
AUTHENTICATION
Write security: 2; Read security: 2
Defines the secret used to advertise routes when using RIP V2.
REDISTRIBUTE DEFAULT GATEWAY
Write security: 2; Read security: 2
Enables or disables the transmission of the Default Gateway to be sent with RIP on a per interface
basis.
ROUTER > IP > INTERFACES > PROXY ARP
Write security: 2; Read security: 2
Enables or disables Proxy ARP on this interface. Allows the network portion of a group of addresses to be
shared among several physical network segments. When ENABLED, and an ARP (address resolution
protocol) request is received on the Ethernet port, the address is looked-up in the IP routing table. If the
forwarding port is not on the Ethernet port and the route is not the default route, the router answers the
request with its own hardware address. When DISABLED (default), the router only responds to ARP request
received for its own address.
The ARP protocol itself provides a way for devices to create a mapping between physical (i.e., Ethernet)
addresses and logical IP addresses. PROXY ARP uses the mapping feature by instructing a router to answer
ARP requests as a “proxy” for the IP addresses behind one of its ports. The device which sent the ARP
request then correctly assumes that it can reach the requested IP address by sending packets to the physical
address that was returned. This technique effectively hides the fact that a network has been (further)
subnetted.
ROUTER > IP > GLOBAL
Write security: 2; Read security: 2
Provides a way to configure various settings for the Ethernet port. The following menus are available for
review and editing:
ROUTER > IP > GLOBAL > DEFAULT GATEWAY
Write security: 2; Read security: 2
Defines or changes the default gateway. Enter the default gateway address by entering a decimal number
into the appropriate field and then pressing <Enter> to move to the next field. You will need a default
gateway if the LAN contains multiple segments. This address is composed of four decimal numbers, each
in the range of 0 to 255, separated by periods. This value is set to 0.0.0.0 by default. Contact your LAN
administrator for the appropriate address.
224
© 2002 ADTRAN, Inc.
61200305L1-1F
ATLAS 550 System Manual
Section 4, User Interface Guide
ROUTER > IP > GLOBAL > DEFAULT METRIC
Write security: 2; Read security: 2
Defines the default gateway metric. Enter the default gateway metric by pressing <Enter> and entering a
decimal number.
ROUTER > IP > GLOBAL > DEFAULT GATEWAY COST
Write security: 2; Read security: 2
Defines the default gateway cost. Enter the default gateway metric by pressing <Enter> and entering a
decimal number.
ROUTER > IP > PING
Write security: 2; Read security: 2
Allows you to send pings (ICMP requests) to devices accessible via the network.
Only one ping session can be active at a time.
ROUTER > IP > PING > IP ADDRESS
Write security: 2; Read security: 2
Specifies the IP address to ping.
ROUTER > IP > PING > COUNT
Write security: 2; Read security: 2
Specifies the number of pings to send. The maximum value is 99.
ROUTER > IP > PING > SIZE
Write security: 2; Read security: 2
Specifies the size in bytes of the data portion of the ping request. The default value is 64 bytes, and the
maximum size is 1024 bytes.
ROUTER > IP > PING > TIMEOUT
Write security: 2; Read security: 2
Specifies the time in milliseconds to wait for the ping reply before timing out. The default timeout is three
seconds, and the maximum timeout value is ten seconds.
ROUTER > IP > PING > ROUND TRIP MIN
Read security: 2
Displays the minimum round trip time of the ping request/reply of the current set of pings.
61200305L1-1F
© 2002 ADTRAN, Inc.
225
Section 4, User Interface Guide
ATLAS 550 System Manual
ROUTER > IP > PING > ROUND TRIP AVG
Read security: 2
Displays the average round trip time of the ping request/reply of the cur-rent set of pings.
ROUTER > IP > PING > ROUND TRIP MAX
Read security: 2
Displays the maximum round trip time of the ping request/reply of the cur-rent set of pings.
ROUTER > IP > PING > TX STATS
Read security: 2
Displays the number of ping requests transmitted (n txed), the number of ping replies received (n rxed)
and the number of ping requests that were lost (n lost).
ROUTER > IP > PING > RESET STATS
Write security: 2; Read security: 2
Resets all ping statistics to zero. If the ping client is active, this menu will stop it.
ROUTER > IP > PING > START/STOP
Write security: 2; Read security: 2
If the ping client is currently idle, this menu sends pings to the specified address. If the ping client is active,
the menu stops sending pings.
ROUTER > IP > TELNET CLIENT
Write security: 2; Read security: 2
Allows a user to open a Telnet session to any device listed in the ATLAS 550 route table.
ROUTER > IP > TELNET CLIENT > ADDRESS
Write security: 2; Read security: 2
Defines the IP address assigned to the remote unit you are trying to connect to.
ROUTER > IP > TELNET CLIENT > ESCAPE CHAR
Write security: 2; Read security: 2
Defines the Telnet client escape character. Typing the combination characters will close the active Telnet
session to the remote unit specified in the ADDRESS field.
226
OPTION
KEYSTROKE
^]
<Ctrl > + ]
^\
<Ctrl > + \
^[
<Ctrl > + [
^^
<Ctrl > + <Shift > + 6
^_
<Ctrl > + <Shift > + -
© 2002 ADTRAN, Inc.
61200305L1-1F
ATLAS 550 System Manual
Section 4, User Interface Guide
ROUTER > IP > TELNET CLIENT > PORT
Write security: 2; Read security: 2
Defines the port used in the remote login session. Default (for Telnet) is 23.
ROUTER > IP > TELNET CLIENT > CONNECT
Write security: 2; Read security: 2
Activator used to start a Telnet session to the remote unit configured in the ADDRESS field.
ROUTER > IP > STATISTICS
Write security: 2; Read security: 2
This section describes the following STATISTICS submenus (see the tables below and on the pages
following):
•
•
•
•
•
IP (see Table 6)
ICMP (see Table 7 on page 229)
TCP (see Table 8 on page 230)
UDP (see Table 9 on page 231)
IP Fast Cache (see Table 10 on page 231)
All of these statistics are taken from the MIB-II variables in RFC 1156. To clear the accumulated statistics,
press <Enter> or CLEAR.
Table 6. IP Statistics
Name
Description
FORWARDING
The indication of whether this ATLAS 550 is acting as an IP gateway in respect to
the forwarding of datagrams received by, but not addressed to, this ATLAS 550. IP
gateways forward datagrams; hosts do not (except those Source-Routed via the
host).
DEFAULT TTL
The default value inserted into the Time-To-Live field of the IP header of
datagrams originated at this ATLAS 550, whenever a TTL value is not supplied by
the transport layer protocol.
INRECEIVES
The total number of input datagrams received from interfaces, including those
received in error.
INHDRERRORS
The number of input datagrams discarded due to errors in their IP headers,
including bad checksums, version number mismatch, other format errors,
time-to-live exceeded, errors discovered in processing their IP options, etc.
INADDRERRORS
The number of input datagrams discarded because the IP address in their IP
header's destination field was not a valid address to be received at this ATLAS 550.
This count includes invalid addresses (e.g., 0.0.0.0) and addresses of unsupported
Classes (e.g., Class E). For entities which are not IP Gateways and therefore do not
forward datagrams, this counter includes datagrams discarded because the
destination address was not a local address.
61200305L1-1F
© 2002 ADTRAN, Inc.
227
Section 4, User Interface Guide
ATLAS 550 System Manual
Table 6. IP Statistics (Continued)
Name
Description
FORWDATAGRAMS
The number of input datagrams for which this ATLAS 550 was not their final IP
destination, as a result of which an attempt was made to find a route to forward
them to that final destination. In entities which do not act as IP Gateways, this
counter will include only those packets which were Source-Routed via this ATLAS
550, and the Source-Route option processing was successful.
INUNKNOWNPROTOS
The number of locally-addressed datagrams received successfully but discarded
because of an unknown or unsupported protocol.
INDISCARDS
The number of input IP datagrams for which no problems were encountered to
prevent their continued processing, but which were discarded (e.g., for lack of
buffer space). Note that this counter does not include any datagrams discarded
while awaiting re-assembly.
INDELIVERS
The total number of input datagrams successfully delivered to IP user-protocols
(including ICMP).
OUTREQUESTS
The total number of IP datagrams which local IP user-protocols (including ICMP)
supplied to IP in requests for transmission. Note that this counter does not include
any datagrams counted in FORWDATAGRAMS.
OUTDISCARDS
The number of output IP datagrams for which no problem was encountered to
prevent their transmission to their destination, but which were discarded (e.g., for
lack of buffer space). Note that this counter would include datagrams counted in
FORWDATAGRAMS if any such packets met this (discretionary) discard criterion.
OUTNOROUTES
The number of IP datagrams discarded because no route could be found to transmit
them to their destination. Note that this counter includes any packets counted in
FORWDATAGRAMS which meet this “no-route” criterion. Note also that this includes
any datagrams which a host cannot route because all of its default gateways are
down.
REASMTIMEOUT
The maximum number of seconds which received fragments are held while they
are awaiting reassembly at this ATLAS 550.
REASMREQDS
The number of IP fragments received which needed to be reassembled at this
ATLAS 550.
REASMOKS
The number of IP datagrams successfully reassembled.
REASMFAILS
The number of failures detected by the IP reassembly algorithm (for whatever
reason: timed out, errors, etc.). Note that this is not necessarily a count of discarded
IP fragments since some algorithms (notably RFC 815s) can lose track of the
number of fragments by combining them as they are received.
FRAGOKS
The number of IP datagrams that have been successfully fragmented at this
ATLAS 550.
FRAGFAILS
The number of IP datagrams that have been discarded because they needed to be
fragmented at this ATLAS 550 but could not be, e.g., because their “Don't
Fragment” flag was set.
228
© 2002 ADTRAN, Inc.
61200305L1-1F
ATLAS 550 System Manual
Section 4, User Interface Guide
Table 6. IP Statistics (Continued)
Name
Description
FRAGCREATES
The number of IP datagram fragments that have been generated as a result of
fragmentation at this ATLAS 550.
CLEAR
Clears the accumulated statistics.
Table 7. ICMP Statistics
Name
Description
INMSGS
The total number of ICMP messages which the ATLAS 550 received. Note that
this counter includes all those counted by INERRORS.
INERRORS
The number of ICMP messages which the ATLAS 550 received but determined as
having errors (bad ICMP checksums, bad length, etc.)
INDESTUNREACHS
The number of ICMP Destination Unreachable messages received.
INTIMEEXCDS
The number of ICMP Time Exceeded messages received.
INPARMPROBS
The number of ICMP Parameter Problem messages received.
INSRCQUENCHS
The number of ICMP Source Quench messages received.
INREDIRECTS
The number of ICMP Redirect messages received.
INECHOS
The number of ICMP Echo (request) messages received.
INECHOREPS
The number of ICMP Echo Reply messages received.
INTIMESTAMPS
The number of ICMP Timestamp (request) messages received.
INTIMESTAMPREPS
The number of ICMP Timestamp Reply messages received.
INADDRMASKS
The number of ICMP Address Mask Request messages received.
INADDRMASKREPS
The number of ICMP Address Mask Reply messages received.
OUTMSGS
The total number of ICMP messages which this ATLAS 550 attempted to send.
Note that this counter includes all those counted by ICMPOUTERRORS.
OUTERRORS
The number of ICMP messages which this ATLAS 550 did not send due to
problems discovered within ICMP such as a lack of buffers. This value should not
include errors discovered outside the ICMP layer such as the inability of IP to
route the resultant datagram. In some implementations there may be no types of
error which contribute to this counter's value.
OUTDESTUNREACHS
The number of ICMP Destination Unreachable messages sent.
OUTTIMEEXCDS
The number of ICMP Time Exceeded messages sent.
OUTPARMPROBS
The number of ICMP Parameter Problem messages sent.
OUTSRCQUENCHS
The number of ICMP Source Quench messages sent.
OUTREDIRECTS
The number of ICMP Redirect messages sent.
61200305L1-1F
© 2002 ADTRAN, Inc.
229
Section 4, User Interface Guide
ATLAS 550 System Manual
Table 7. ICMP Statistics (Continued)
Name
Description
OUTECHOS
The number of ICMP Echo (request) messages sent.
OUTECHOREPS
The number of ICMP Echo Reply messages sent.
OUTTIMESTAMPS
The number of ICMP Timestamp (request) messages sent.
OUTTIMESTAMPREPS
The number of ICMP Timestamp Reply messages sent.
OUTADDRMASKS
The number of ICMP Address Mask Request messages sent.
OUTADDRMASKREPS
The number of ICMP Address Mask Reply messages sent.
CLEAR
Clears the accumulated statistics.
Table 8. TCP Statistics
Name
Description
RTOALGORITHM
The algorithm used to determine the timeout value used for retransmitting
unacknowledged octets.
RTOMIN
The minimum value permitted by a TCP implementation for the retransmission
timeout, measured in milliseconds. More refined semantics for objects of this type
depend upon the algorithm used to determine the retransmission timeout. In
particular, when the timeout algorithm is rsre(3), an object of this type has the
semantics of the LBOUND quantity described in RFC 793.
RTOMAX
The maximum value permitted by a TCP implementation for the retransmission
timeout, measured in milliseconds. More refined semantics for objects of this type
depend upon the algorithm used to determine the retransmission timeout. In
particular, when the timeout algorithm is rsre(3), an object of this type has the
semantics of the UBOUND quantity described in RFC 793.
MAXCONN
The limit on the total number of TCP connections the ATLAS 550 can support. In
entities where the maximum number of connections is dynamic, this object should
contain the value -1.
ACTIVEOPENS
The number of times TCP connections have made a direct transition to the
SYN-SENT state from the CLOSED state.
PASSIVEOPENS
The number of times TCP connections have made a direct transition to the
SYN-RCVD state from the LISTEN state.
ATTEMPTFAILS
The number of times TCP connections have made a direct transition to the
CLOSED state from either the SYN-SENT state or the SYN-RCVD state, plus the
number of times TCP connections have made a direct transition to the LISTEN
state from the SYN-RCVD state.
ESTABRESETS
The number of times TCP connections have made a direct transition to the
CLOSED state from either the ESTABLISHED state or the CLOSE-WAIT state.
230
© 2002 ADTRAN, Inc.
61200305L1-1F
ATLAS 550 System Manual
Section 4, User Interface Guide
Table 8. TCP Statistics (Continued)
Name
Description
CURRESTAB
The number of TCP connections for which the current state is either
ESTABLISHED or CLOSE-WAIT.
INSEGS
The total number of segments received, including those received in error. This
count includes segments received on currently established connections.
OUTSEGS
The total number of segments sent, including those on current connections but
excluding those containing only retransmitted octets.
RETRANSSEGS
The total number of segments retransmitted - that is, the number of TCP segments
transmitted containing one or more previously transmitted octets.
CLEAR
Clears the accumulated statistics.
Table 9. UDP Statistics
Name
Description
INDATAGRAMS
The total number of UDP datagrams delivered to UDP users.
NOPORTS
The total number of received UDP datagrams for which there was no application at
the destination port.
INERRORS
The number of received UDP datagrams that could not be delivered for reasons
other than the lack of an application at the destination port.
OUTDATAGRAMS
The total number of UDP datagrams sent from this ATLAS 550.
CLEAR
Clears the accumulated statistics.
Table 10. IP Fast Cache Statistics
Name
Description
HITS
Total number of times the ATLAS 550 went into the Fast Cache and successfully
retrieved an IP address.
MISSES
Total number of times the ATLAS 550 went into the Fast Cache and failed to
retrieve an IP address.
CLEAR
Clears the accumulated statistics.
ROUTER > IP > STATISTICS > CLEAR
Write security: 2; Read security: 2
Clears current statistics in the IP, ICMP, TCP, UDP, and IP Fast Cache statistics tables.
61200305L1-1F
© 2002 ADTRAN, Inc.
231
Section 4, User Interface Guide
ATLAS 550 System Manual
ROUTER > IP > UDP RELAY
Write security: 2; Read security: 2
Allows the router to act as a relay agent for UDP (User Datagram Protocol) broadcast packets. Normally, a
router will not forward UDP broadcast packets. However, many network applications use UDP broadcasts
to configure addresses, host names, and other information. If hosts using these protocols are not on the
same network segment as the servers providing the information, the client programs will not receive a
response without enabling the UDP relay agent.
ROUTER > IP > UDP RELAY > ENABLE
Write security: 2; Read security: 2
Enables/disables the router to act as a relay agent.
ROUTER > IP > UDP RELAY > RELAY TABLE
Write security: 2; Read security: 2
(Available only when UDP Relay is ENABLED.) Lists up to four relay destination servers (RELAY TABLE
0-3). Each server can be configured using the following menus: ENABLE, IP, and UDP.
ENABLE
Write security: 2; Read security: 2
Enables/disables this field. Select either STANDARD or SPECIFIED. (DISABLE is not used.)
STANDARD
(DEFAULT)
Relays any of the following standard UDP protocols: DHCP, TFTP,
DNS, NTP (Network Time Protocol, port 123), NBNS (NetBIOS Name
Server, port 137), NBDG (Net BIOS Datagram, port 138), and BootP.
SPECIFIED
Specifies the UDP port (1 to 65,535) in the UDP Port columns
(maximum of three per server).
IP
Write security: 2; Read security: 2
Defines the IP address of the server that receives the relay packet.
UDP PORTS 1 - 3
Write security: 2; Read security: 2
Specifies the UDP ports to relay. These fields are active only when ENABLE is set to SPECIFIED.
232
© 2002 ADTRAN, Inc.
61200305L1-1F
ATLAS 550 System Manual
Section 4, User Interface Guide
DEDICATED MAPS
The DEDICATED MAPS menu assigns dedicated connections between any two ports in the ATLAS 550. This
section describes the DEDICATED MAPS menu items (see Figure 16). These options are module-dependent;
that is, the menu items available depend on the module selected.
Figure 16. Dedicated Maps Menu
DEDICATED MAPS > ACTIVATE MAP
Write security: 3; Read security: 5
Activates a dedicated map—automatically or manually. You can have up to five different dedicated maps,
each with an optionally specified name. The configuration choices are:
AUTO
MAPS 1 THROUGH 5
Automatically activates a particular dedicated map at the time and day
specified in the ACTIVATE TIME field.
Allows you to manually activate a specific dedicated map. To manually
activate a dedicated map, highlight the ACTIVATE MAP field and press
<Enter>. Choose the desired dedicated map from the popup menu list.
DEDICATED MAPS > CURRENT MAP
Read security: 5
Displays the name of the currently active dedicated map (read-only).
61200305L1-1F
© 2002 ADTRAN, Inc.
233
Section 4, User Interface Guide
ATLAS 550 System Manual
DEDICATED MAPS > CREATE/EDIT MAPS
Write security: 3; Read security: 5
Creates new maps and defines settings, as well as edits existing maps. To add a new map, position the
cursor in the index column and press < I >. ATLAS 550 automatically names the maps in the sequence in
which they are created. You can change the names with MAP NAME.
DEDICATED MAPS > CREATE/EDIT MAPS > #
Write security: 3; Read security: 5
Displays the index number of the available maps.
DEDICATED MAPS > CREATE/EDIT MAPS > MAP NAME
Write security: 3; Read security: 5
Displays the name of the dedicated map. The name can contain up to 57 alpha-numeric characters,
including spaces and special characters. To edit the name, press <Enter> and type in the new name.
DEDICATED MAPS > CREATE/EDIT MAPS > SORT TO/FROM
Write security: 3; Read security: 5
Specifies sort order based on the end points set in CONNECTS/FROM CONFIG and CONNECTS/TO CONFIG. You
can also turn OFF this option. The sort feature is helpful when you are attempting to find a particular
connection in a large connection list.
DEDICATED MAPS > CREATE/EDIT MAPS > CONNECTS
Write security: 3; Read security: 5
Enters the dedicated map connections. Press <Enter> to activate the submenus.
Some of the options available in this submenu change depending on the type of modules
selected in the FROM or TO fields. For more information on these submenus, refer to the
individual module discussions in this section.
You must return to DEDICATED MAPS in the MAIN MENU for changes to take effect.
DEDICATED MAPS > CREATE/EDIT MAPS > CONNECTS > FROM SLT
Write security: 3; Read security: 5
Specifies the slot to use for the FROM connection. When you select this option, a list of all of the slots and
the modules installed in the slots displays. Select the appropriate slot and press <Enter>.
234
© 2002 ADTRAN, Inc.
61200305L1-1F
ATLAS 550 System Manual
Section 4, User Interface Guide
DEDICATED MAPS > CREATE/EDIT MAPS > CONNECTS > PORT
Write security: 3; Read security: 5
Specifies the port to use for the FROM connection. When you select this option, a list of ports and module
types appears. Select the appropriate port and module type, and press <Enter>.
DEDICATED MAPS > CREATE/EDIT MAPS > CONNECTS > TO SLOT/SERVICE
Write security: 3; Read security: 5
Specifies the slot to use for the second end of a connection. Select this option, and a list of all of the slots
and the modules installed in the slots displays. Pick the appropriate slot and press <Enter>. A PKTENDPT or
PKTVOICE endpoint may also be selected as the service for the connection.
DEDICATED MAPS > CREATE/EDIT MAPS > CONNECTS > PORT/PEP
Write security: 3; Read security: 5
Specifies the port to use for the second end of a connection. When you select this option, a list of ports and
module types appears. Select the appropriate port and module type, and press <Enter>. If a PKTENDPT or
PKTVOICE endpoint is selected for the TO SLOT/SERVICE field, the available packet endpoints or packet
voice endpoints will display in the drop down menu after pressing <Enter>.
DEDICATED MAPS > CREATE/EDIT MAPS > CONNECTS > FROM CONFIG
Write security: 3; Read security: 5
Specifies the configuration for the FROM connection. The selections displayed in this field are based on the
type of module selected in the FROM SLT option. For detailed information on submenus for a particular
module type, please refer to the DEDICATED MAPS menu discussion for the appropriate network, option, or
resource module.
DEDICATED MAPS > CREATE/EDIT MAPS > CONNECTS > TO CONFIG
Write security: 3; Read security: 5
Specifies the configuration for the TO connection. The selections displayed in this field are based on the
type of module selected in the TO SLT option. For detailed information on submenus for a particular
module type, please refer to the DEDICATED MAPS menu discussion for the appropriate network, option, or
resource module.
DEDICATED MAPS > CREATE/EDIT MAPS > CONNECTS > SIG
Write security: 3; Read security: 5
Specifies whether the ATLAS 550 uses active Robbed-Bit Signaling (RBS) on the connection. Selecting
ON allows the ATLAS 550 to preserve signaling bits between the two endpoints of the connection.
Selecting OFF ignores the signaling bits of the connection. This selection is automatically set to OFF when
RBS does not apply. For example, a T1-to-Nx connection is set to OFF.
DEDICATED MAPS > CREATE/EDIT MAPS > ACTIVATE TIME
Write security: 3; Read security: 5
Sets the time when the map becomes active if you have selected AUTO in the ACTIVATE MAP field. Enter this
time in hh:mm:ss 24-hour format.
61200305L1-1F
© 2002 ADTRAN, Inc.
235
Section 4, User Interface Guide
ATLAS 550 System Manual
DEDICATED MAPS > CREATE/EDIT MAPS > ENBL DAY
Security level: 3; Read security: 5
Specifies which days of the week the map is active.
DEDICATED MAPS (T1/PRI NETWORK OR DUAL/QUAD T1/PRI MODULES)
DEDICATED MAPS (T1/PRI) > CREATE/EDIT MAPS > CONNECTS
Write security: 3; Read security: 5
Enters the dedicated map connections. Press <Enter> to activate the submenus.
DEDICATED MAPS (T1/PRI) > CREATE/EDIT MAPS > CONNECTS > TO/FROM CONFIG
Write security: 3; Read security: 5
Specifies the configuration for the TO/FROM connection. The following selections may apply to the T1/PRI
Network Interface and Dual/Quad T1/PRI Option Modules, depending on the application:
DS0 SELECTION
Write security: 3; Read security: 5
Defines DS0s for a T1 port. Use this field to define the DS0s for this connection. You can enter the
DS0s in several ways. For example, to enter DS0s one through five, enter 1-5. For DS0s one and
five, enter 1,5.
DS0 AVAILABLE
Write security: 3; Read security: 5
Indicates which DS0s of the T1 are assigned. DS0 assignment is based on the following items.
DIGIT 0-9
*
!
S
S
N
N
This DS0 is available. The digit that displays in this field represents the last
digit of the DS0 number.
This DS0 has been requested for this connection, but the DS0 is not yet
activated for this port.
This DS0 is used by this port in this connection and is currently activated.
This DS0 is used in the switched DIAL PLAN.
This DS0 is used in the switched DIAL PLAN and conflicts with this
connection.
This DS0 is already used in this DEDICATED MAP.
This DS0 is already used in this DEDICATED MAP and conflicts with this
connection.
DS0 RATE
Write security: 3; Read security: 5
Sets the DS0 rate to either 56 or 64 kbps. This field is only valid for T1 ports mapped to a PKT
ENDPNT.
236
© 2002 ADTRAN, Inc.
61200305L1-1F
ATLAS 550 System Manual
Section 4, User Interface Guide
T1 TRUNK CONDITIONING SERVICE
Write security: 3; Read security: 5
Sets known values in the signaling bits and the data field for outgoing DS0s which are
cross-connected to a T1 port experiencing alarms.
The trunk conditioning process consists of a 2.5 second transmission (indicating call termination),
followed by a continuous transmission signaling the final condition as chosen by the user. This
selection is only valid for T1 ports having RBS set to ON.
This option defines to ATLAS 550 the type of signaling being used on the trunk: E&M, LS/GS
NETWORK OR USER, SW56, or CUSTOM.
T1 TRUNK CONDITIONING STATE
Write security: 3; Read security: 5
(Available only when T1 TRUNK CONDITIONING SERVICE is enabled.) Defines the final fault signaling
state.
IDLE
Used for one-way trunks; that is, for outgoing or incoming calls only –
not both.
SEIZED
Used for two-way trunks. Prevents connected equipment from
attempting to use a failed trunk for an outgoing call.
T1 FAULT SIGNALING
Write security: 3; Read security: 5
(Available only when T1 TRUNK CONDITIONING SERVICE is enabled.) Displays the final fault signaling
state of the AB bits. This field is read-only unless CUSTOM is chosen for the T1 TRUNK CONDITIONING
SERVICE option.
T1 TROUBLE CODE VALUE
Write security: 3; Read security: 5
(Available only when T1 TRUNK CONDITIONING SERVICE is enabled.) Displays the Hex value of the 2.5
second pre-alarm transmission.
DEDICATED MAPS (E1/PRA NETWORK INTERFACE)
DEDICATED MAPS (E1/PRA) > CREATE/EDIT MAPS > CONNECTS
Write security: 3; Read security: 5
Enters the dedicated map connections. Press <Enter> to activate the submenus.
DEDICATED MAPS (E1/PRA) > CREATE/EDIT MAPS > CONNECTS > TO/FROM CONFIG
Write security: 3; Read security: 5
Specifies the configuration for the TO/FROM connection. The following selections may apply to the
E1/PRA Network Interface Module, depending on the application:
61200305L1-1F
© 2002 ADTRAN, Inc.
237
Section 4, User Interface Guide
ATLAS 550 System Manual
TS0 SELECTION
Write security: 3; Read security: 5
Defines TS0s for an E1 port. Use this field to define the TS0s for this connection. You can enter the
TS0s in several ways. For example, to enter TS0s one through five, enter 1-5. For TS0s one and five,
enter 1,5.
TS0 AVAILABLE
Write security: 3; Read security: 5
Indicates which TS0s of the E1 are assigned. TS0 assignment is based on the following items:
DIGIT 0-9
This TS0 is available. The digit that displays in this field represents the
last digit of the TS0 number.
*
This TS0 has been requested for this connection, but the TS0 is not yet
activated for this port.
!
This TS0 is used by this port in this connection and is currently
activated.
S
S
N
N
This TS0 is used in the switched DIAL PLAN.
This TS0 is used in the switched DIAL PLANand conflicts with this
connection.
This TS0 is already used in this DEDICATED MAP.
This TS0 is already used in this DEDICATED MAP and conflicts with this
connection.
TS0 RATE
Write security: 3; Read security: 5
Sets the TS0 rate to either 56 or 64 kbps. This field is only valid for E1 ports mapped to a PKT
ENDPNT.
E1 TROUBLE CODE SERVICE
Write security: 3; Read security: 5
Sets known values in the signaling bits and the data field for outgoing TS0s which are
cross-connected to a E1 port experiencing alarms.
The trunk conditioning process consists of a 2.5 second transmission (indicating call termination),
followed by a continuous transmission signaling the final condition as chosen by the user. Set the E1
TROUBLE CODE SERVICE field to OFF or VOICE.
T1 TROUBLE CODE VALUE
Write security: 3; Read security: 5
Displays the Hex value of the 2.5 second pre-alarm transmission.
238
© 2002 ADTRAN, Inc.
61200305L1-1F
ATLAS 550 System Manual
Section 4, User Interface Guide
DEDICATED MAPS (QUAD/OCTAL FXS MODULE)
DEDICATED MAPS (FXS) > CREATE/EDIT MAPS > CONNECTS
Write security: 3; Read security: 5
Enters the dedicated map connections. Press <Enter> to activate the submenus.
DEDICATED MAPS (FXS) > CREATE/EDIT MAPS > CONNECTS > TO/FROM CONFIG
Write security: 3; Read security: 5
Specifies the configuration for the TO/FROM connection. The following selections may apply to the
Quad/Octal FXS Option Modules, depending on the application:
# PORTS
Write security: 3; Read security: 5
Defines ports to be used for this connection.
PORTS AVAILABLE
Write security: 3; Read security: 5
Indicates which ports of the module are assigned. Port assignment is based on the following items:
DIGIT 0-9
This DS0 is available. The digit that displays in this field represents the
last digit of the DS0 number.
*
This DS0 has been requested for this connection, but the DS0 is not yet
activated for this port.
!
This DS0 is used by this port in this connection and is currently
activated.
S
S
N
N
This DS0 is used in the switched DIAL PLAN.
This DS0 is used in the switched DIAL PLAN and conflicts with this
connection.
This DS0 is already used in this DEDICATED MAP.
This DS0 is already used in this DEDICATED MAP and conflicts with this
connection.
SIGNALING METHOD
Write security: 3; Read security: 5
Defines the mode of operation of the selected voice port. The signaling on the T1 mapped to this
voice port must match. The options include LOOPSTART, GROUNDSTART, and PLAR.
61200305L1-1F
© 2002 ADTRAN, Inc.
239
Section 4, User Interface Guide
ATLAS 550 System Manual
ANSWER SUPERVISION
Write security: 3; Read security: 5
Configures answer supervision for the appropriate voice port. Answer supervision (when the far end
answers the call) is indicated by using reverse battery polarity. This is valid for an outbound call
only. On an FXS interface type we respond to LSAS (Line Side Answer Supervision) signaling on
the T1. Our response is to reverse battery polarity on (T-R). Telco must configure their T1 for LSAS
if this is not a point-to-point T1.
E&M CONVERSION
Write security: 3; Read security: 5
Configures the selected voice port for E&M signaling conversion. By enabling this option, other
selections become available that are E&M trunk specific. This option is sometimes referred to as
TANDEM conversion. The following submenu items become visible when E&M CONVERSION is
ENABLED:
E&M SUPERVISION
Write security: 3; Read security: 5
(Available only when E&M CONVERSION is enabled.) Configures the E&M trunk as either Immediate
start or Wink start. This configuration is for the Rx and Tx direction. When DNIS delay is set, this
option only configures the Rx direction.
DIAL TONE
Write security: 3; Read security: 5
(Available only when E&M CONVERSION is enabled.) Configures the ATLAS 550 to generate Dial
Tone out the selected FXS port in response to the 2W going off hook (outgoing call). Generally, dial
tone is provided by the Class 5 switch delivering the T1, but in some instances, the switch cannot
provide dial tone.
RINGBACK
Write security: 3; Read security: 5
(Available only when E&M CONVERSION is enabled.) Configures the ATLAS 550 to generate
ringback tone to the far end while the selected FXS port is ringing. Generally, ringback is provided
by the Class 5 switch delivering the T1, but in some instances, the switch cannot provide ringback
tones.
240
© 2002 ADTRAN, Inc.
61200305L1-1F
ATLAS 550 System Manual
Section 4, User Interface Guide
DNIS DELAY
Write security: 3; Read security: 5
(Available only when E&M CONVERSION is enabled.) Defines the time we delay after transmitting a
wink in response to the 2W going off hook (after ringing) before we send off hook in the RBS
signaling. This field is only valid for E&M conversion. The timing is as follows:
Rx AB
Tx AB
W
DNIS Delay
Off Hook
The following submenu item becomes visible when DNIS DELAY is activated:
61200305L1-1F
© 2002 ADTRAN, Inc.
241
Section 4, User Interface Guide
ATLAS 550 System Manual
DNIS WINK TIMEOUT
Write security: 3; Read security: 5
When DNIS DELAY is ENABLED, a wink will be returned to the originating switch after 5 seconds
if the FXS does not detect an off hook. This option, when DISABLED, allows the FXS port to ring
without winking until the call is answered.
Trunks can be taken out of service by telco if there is No wink. Use caution when disabling
this option.
DEDICATED MAPS (QUAD/OCTAL FXO MODULE)
DEDICATED MAPS (FXO) > CREATE/EDIT MAPS > CONNECTS
Write security: 3; Read security: 5
Enters the dedicated map connections. Press <Enter> to activate the submenus.
DEDICATED MAPS (FXO) > CREATE/EDIT MAPS > CONNECTS > TO/FROM CONFIG
Write security: 3; Read security: 5
Specifies the configuration for the TO/FROM connection. The following selections may apply to the
Quad/Octal FXO Option Module, depending on the application:
# PORTS
Write security: 3; Read security: 5
Defines ports to be used for this connection.
PORTS AVAILABLE
Write security: 3; Read security: 5
Indicates which ports of the module are assigned. Port assignment is based on the following items:
DIGIT 0-9
This DS0 is available. The digit that displays in this field represents the
last digit of the DS0 number.
*
This DS0 has been requested for this connection, but the DS0 is not yet
activated for this port.
!
This DS0 is used by this port in this connection and is currently
activated.
S
S
N
N
242
This DS0 is used in the switched DIAL PLAN.
This DS0 is used in the switched DIAL PLAN and conflicts with this
connection.
This DS0 is already used in this DEDICATED MAP.
This DS0 is already used in this DEDICATED MAP and conflicts with this
connection.
© 2002 ADTRAN, Inc.
61200305L1-1F
ATLAS 550 System Manual
Section 4, User Interface Guide
SIGNALING METHOD
Write security: 3; Read security: 5
Defines the mode of operation of the selected voice port. The signaling on the T1 mapped to this
voice port must match. The options include LOOPSTART, GROUNDSTART, and DPT.
ANSWER SUPERVISION
Write security: 3; Read security: 5
Configures answer supervision for the appropriate voice port. Answer supervision (when the far end
answers the call) is indicated by using reverse battery polarity. This is valid for an outbound call
only. When the FXO originates a call, it looks for reverse polarity on the 2W interface. If reverse
battery is detected, LSAS is transmitted on the T1. This requires Loopstart interfaces to be polarity
dependent.
Keep this option disabled unless you are certain you need LSAS capability.
DEDICATED MAPS (DUAL NX 56/64 MODULE)
DEDICATED MAPS (V35NX) > CREATE/EDIT MAPS > CONNECTS
Write security: 3; Read security: 5
Enters the dedicated map connections. Press <Enter> to activate the submenus.
DEDICATED MAPS (V35NX) > CREATE/EDIT MAPS > CONNECTS > TO/FROM CONFIG
Write security: 3; Read security: 5
Specifies the configuration for the FROM connection. The following selections may apply to the Dual Nx
56/64 Option Module, depending on the application:
DS0 SELECTION
Write security: 3; Read security: 5
Defines DS0s for an Nx port. Use this field to define the DS0s for this connection. This field only
applies to Nx-to-Nx or Nx-to-Pkt Endpt connections.
DS0 RATE
Write security: 3; Read security: 5
Sets the DS0 rate to either 56 or 64 kbps.
61200305L1-1F
© 2002 ADTRAN, Inc.
243
Section 4, User Interface Guide
ATLAS 550 System Manual
DEDICATED MAPS (DUAL USSI MODULE)
DEDICATED MAPS (USSI) > CREATE/EDIT MAPS > CONNECTS
Write security: 3; Read security: 5
Enters the dedicated map connections. Press <Enter> to activate the submenus.
DEDICATED MAPS (USSI) > CREATE/EDIT MAPS > CONNECTS > TO/FROM CONFIG
Write security: 3; Read security: 5
Specifies the configuration for the FROM connection. The following selections may apply to the Dual USSI
Option Module, depending on the application:
DS0 SELECTION
Write security: 3; Read security: 5
Defines DS0s for an USSI port. Use this field to define the DS0s for this connection. This field only
applies to USSI-to-USSI, USSI-to-Nx or USSI-to-Pkt Endpt connections.
DS0 SELECTION
Write security: 3; Read security: 5
Defines DS0s for an USSI port. Use this field to define the DS0s for this connection. This field only
applies to USSI-to-USSI, USSI-to-Nx or USSI-to-Pkt Endpt connections.
DS0 RATE
Write security: 3; Read security: 5
Sets the DS0 rate to either 56 or 64 kbps.
DEDICATED MAPS (OCTAL E&M MODULE)
DEDICATED MAPS (E&M) > CREATE/EDIT MAPS > CONNECTS
Write security: 3; Read security: 5
Enters the dedicated map connections. Press <Enter> to activate the submenus.
DEDICATED MAPS (E&M) > CREATE/EDIT MAPS > CONNECTS > TO/FROM CONFIG
Write security: 3; Read security: 5
Specifies the configuration for the TO/FROM connection. The following selections may apply to the Octal
E&M Option Module, depending on the application:
# PORTS
Write security: 3; Read security: 5
Defines ports to be used for this connection.
244
© 2002 ADTRAN, Inc.
61200305L1-1F
ATLAS 550 System Manual
Section 4, User Interface Guide
PORTS AVAILABLE
Write security: 3; Read security: 5
Indicates which ports of the module are assigned. Port assignment is based on the following items:
DIGIT 0-9
This DS0 is available. The digit that displays in this field represents the
last digit of the DS0 number.
*
This DS0 has been requested for this connection, but the DS0 is not yet
activated for this port.
!
This DS0 is used by this port in this connection and is currently
activated.
This DS0 is used in the switched DIAL PLAN.
S
This DS0 is used in the switched DIAL PLAN and conflicts with this
connection.
S
This DS0 is already used in this DEDICATED MAP.
N
This DS0 is already used in this DEDICATED MAP and conflicts with this
connection.
N
DEDICATED MAPS (NXT1 HSSI AND NXT1 HSSI/V.35 MODULES)
DEDICATED MAPS (NXT1 HSSI) > CREATE/EDIT MAPS > CONNECTS
Write security: 3; Read security: 5
Enters the dedicated map connections. Press <Enter > to activate the submenus.
DEDICATED MAPS (NXT1 HSSI) > CREATE/EDIT MAPS > CONNECTS > TO/FROM CONFIG
Write security: 3; Read security: 5
Specifies the configuration for the TO/FROM connection. The following selection applies to the NxT1 HSSI
and NxT1 HSSI/V.35 Option Modules when connected to a port on a T1 Module. This is the only valid
application for the NxT1 HSSI and NxT1 HSSI/V.35 Option Modules.
DS0 SELECTION
Write security: 3; Read security: 5
Defines DS0s for the T1 port. Use this field to define the DS0s for this connection.
For the NxT1 HSSI and NxT1 HSSI/V.35 Option Modules, any entry in the DS0 selection
field that is less than 24 DS0s is disregarded. The NxT1 HSSI and NxT1 HSSI/V.35 Option
Modules requires the use of all 24 DS0s on a T1 for proper operation.
61200305L1-1F
© 2002 ADTRAN, Inc.
245
Section 4, User Interface Guide
ATLAS 550 System Manual
DS0S AVAILABLE
Write security: 3; Read security: 5
Indicates which DS0s of the T1 are assigned. DS0 assignment is based on the following items:
DIGIT 0-9
This DS0 is available. The digit that displays in this field represents the
last digit of the DS0 number.
*
This DS0 has been requested for this connection, but the DS0 is not yet
activated for this port.
!
This DS0 is used by this port in this connection and is currently
activated.
S
S
N
N
This DS0 is used in the switched DIAL PLAN.
This DS0 is used in the switched DIAL PLAN and conflicts with this
connection.
This DS0 is already used in this DEDICATED MAP.
This DS0 is already used in this DEDICATED MAP and conflicts with this
connection.
T1 TROUBLE CODE SERVICE
Write security: 3; Read security: 5
Sets known values in the signaling bits and the data field for outgoing DS0s which are
cross-connected to a T1 port experiencing alarms.
The trunk conditioning process consists of a 2.5 second transmission (indicating call termination),
followed by a continuous transmission signaling the final condition as chosen by the user. This
selection is only valid for T1 ports having RBS set to ON.
This option defines the type of signaling being used on the trunk: E&M, LS/GS NETWORK OR USER,
SW56, or CUSTOM.
T1 TROUBLE CODE VALUE
Write security: 3; Read security: 5
(Available only when T1 TROUBLE CODE SERVICE is enabled.) Displays the Hex value of the 2.5
second pre-alarm transmission.
DEDICATED MAPS (LEGACY DATA MODULE)
DEDICATED MAPS (LEGACY) > CREATE/EDIT MAPS > CONNECTS
Write security: 3; Read security: 5
Enters the dedicated map connections. Press <Enter> to activate the submenus.
DEDICATED MAPS (LEGACY) > CREATE/EDIT MAPS > CONNECTS > TO/FROM CONFIG
Write security: 3; Read security: 5
Specifies the configuration for the FROM connection. The following selections apply to a connection
between the Legacy Data Option Module and a Packet Endpoint. This is the only valid application for the
246
© 2002 ADTRAN, Inc.
61200305L1-1F
ATLAS 550 System Manual
Section 4, User Interface Guide
Legacy Data Option Module.
SYNC/ASYNC
Write security: 3; Read security: 5
Configures the port for either synchronous or asynchronous data transmission.
The mode of operation depends on the protocol selected in the PACKET MANAGER menus.
INTERFACE TYPE
Write security: 3; Read security: 5
Configures the physical interface of the port as EIA-232 or V.35. Selecting V.35 requires the NxT1
HSSI/V.35 Option Module (P/N 1200346L2) and the purchase of the option V.35 cables (P/N
1200348L1).
BIT RATE
Write security: 3; Read security: 5
Sets the interface bit rate for the port. Selections range from 2400 baud to 128 kbaud.
TD CLOCK SOURCE
Write security: 3; Read security: 5
Configures the interface to provide or recover data clocking.
This clock source is used ONLY on the Legacy Data Option Module and cannot be used as
a source for system timing.
TRANSMIT IDLE CODE
Write security: 3; Read security: 5
Configures the port to use Flags or Ones as the idle code.
DEDICATED MAPS (PKT ENDPT - PACKET ENDPOINT)
DEDICATED MAPS (PKT ENDPT) > CREATE/EDIT MAPS > CONNECTS
Write security: 3; Read security: 5
To assign a packet endpoint to a physical port, select the port in the FROM SLOT/PORT field and configure
the TO SLOT/PORT as follows:
DEDICATED MAPS (PKT ENDPT) > CREATE/EDIT MAPS > CONNECTS > TO SLOT/SERVICE
Write security: 3; Read security: 5
Select PKT ENDPNT to activate a list of available packet endpoints in the TO PORT field.
61200305L1-1F
© 2002 ADTRAN, Inc.
247
Section 4, User Interface Guide
ATLAS 550 System Manual
DEDICATED MAPS (PKT ENDPT) > CREATE/EDIT MAPS > CONNECTS > TO PORT/PEP
Write security: 3; Read security: 5
Press <Enter> and select the appropriate packet endpoint to assign the endpoint to a physical port.
DEDICATED MAPS (PKT ENDPT) > CREATE/EDIT MAPS > CONNECTS > TO/FROM CONFIG
Write security: 3; Read security: 5
Specifies the configuration for the TO/FROM connection. The following selections apply to the packet
endpoint:
TRANSMIT IDLE CODE
Write security: 3; Read security: 5
Configures the ATLAS 550 to send idle code on the packet endpoint with marks or flags.
RECEIVE IDLE CODE
Write security: 3; Read security: 5
Defines the idle code (either marks or flags) the ATLAS 550 should expect on the selected packet
endpoint.
DEDICATED MAPS (PKT VOICE - PACKET VOICE ENDPOINT)
DEDICATED MAPS (PKT VOICE) > CREATE/EDIT MAPS > CONNECTS
Write security: 3; Read security: 5
Enters the dedicated map connections. Press <Enter > to activate the submenus.
DEDICATED MAPS (PKT VOICE) > CREATE/EDIT MAPS > CONNECTS > TO SLOT/SERVICE
Write security: 3; Read security: 5
Select PKT VOICE to activate a list of available packet endpoints in the TO PORT field.
DEDICATED MAPS (PKT VOICE) > CREATE/EDIT MAPS > CONNECTS > TO PORT/PEP
Write security: 3; Read security: 5
Press <Enter> and select the appropriate packet endpoint from the drop-down list.
DEDICATED MAPS (PKT VOICE) > CREATE/EDIT MAPS > CONNECTS > TO/FROM CONFIG
Write security: 3; Read security: 5
Specifies the configuration for the TO/FROM connection. The following selections apply to the PKT VOICE
connections:
DLCI
Write security: 3; Read security: 5
Press <Enter > and select the appropriate DLCI from the drop-down list.
248
© 2002 ADTRAN, Inc.
61200305L1-1F
ATLAS 550 System Manual
Section 4, User Interface Guide
VOICE PORT
Write security: 3; Read security: 5
Identifies the voice port address of the remote unit. Express units support ports 1 and 2. A remote
ATLAS supports ports 1 through 255.
CONFLICT REPORT
Write security: 3; Read security: 5
Describes existing conflicts. Potential problems include DLCI unavailable or Voice port already in
use.
VOICE COMPRESSION
Write security: 3; Read security: 5
Configures the compression algorithm used on the selected packet voice endpoint. The default
compression algorithm in the FSU and Express 52XX series is G.723.1. Valid codecs for the VCOM
Module include G.723.1 and NetCoder. Valid codecs for the ADPCM-32 Module include G.711,
G.726, and Transparent. The ADPCM-32 Module will only operate with another ATLAS containing
an ADPCM-32 Module. Both endpoints must agree on the selected compression algorithm.
The ADPCM-32 Resource Module will not interoperate with the FSU and Express series
products.
SILENCE SUPPRESSION
Write security: 3; Read security: 5
Reduces the total system bandwidth load by preventing ATLAS from sending frames containing a
special silence code during periods of silence. Both endpoints must agree to use silence suppression.
By default, silence suppression is DISABLED. To prohibit silence frames from transmitting and to
decrease the total system bandwidth, ENABLE this feature.
SIGNALING
Write security: 3; Read security: 5
Signaling method on the packet voice endpoint. Both endpoints must agree about the compression
algorithm choice. Options are E&M IMMEDIATE, E&M WINK, and LOOPSTART.
61200305L1-1F
© 2002 ADTRAN, Inc.
249
Section 4, User Interface Guide
ATLAS 550 System Manual
CIRCUIT STATUS
The CIRCUIT STATUS menu allows the user to view the status of all circuits configured for dedicated circuit
backup (see Figure 17).
Figure 17. Circuit Status Menu
CIRCUIT STATUS > FROM
Read security: 5
Indicates the slot, port, and name of the endpoint configured for backup.
CIRCUIT STATUS > MAN (MANUAL BACKUP)
Write security: 3; Read security: 5
This activator forces a link in/out of backup.
250
FB
Force Backup
FR
Force Restore
© 2002 ADTRAN, Inc.
61200305L1-1F
ATLAS 550 System Manual
Section 4, User Interface Guide
CIRCUIT STATUS > BKUP STATUS (BACKUP STATUS)
Read security: 5
The displayed string indicates the current status of the dedicated line. The following messages may display
in the BACKUP STATUS field.
FB
Backup was forced through the interface menu.
FR
Restore was forced through the interface menu.
PRIMARY
The link is active.
DIALING
Attempting to dial the backup link.
BACKUP FAILED
Exceeded MAX NUM REDIALS.
RETRY DIAL [NUM]
Will retry backup dialing in [num] seconds.
PRIMARY DOWN
The link is in error and waiting on backup.
ANSWERING
The link is answering a backup endpoint.
BACKUP
The link is in backup.
CIRCUIT STATUS > LINE STATUS
Read security: 5
Displays the overall status of the connection. The following messages may display in the LINE STATUS
field.
UNKNOWN
Endpoints do not support (or are not configured) for monitoring.
ACTIVE
The connection is up and running.
INACTIVE
The connection is down due to configuration (i.e., DTR is down).
DATA ALARM
The FROM endpoint is in data alarm.
NETWORK ALARM
The TO endpoint is in network alarm.
NET/DATA ALARM
Both the FROM endpoint and the TO endpoint are in alarm.
DATA UNKNOWN
The status of the FROM endpoint is unknown.
CIRCUIT STATUS > DELAY
When present, this indicates that one ATLAS 550 has detected a change in state and is counting down to
delay/restore.
CIRCUIT STATUS > TEST
Write security: 1; Read security: 5
Contains a test activator and test status displays for dedicated dial backup circuits.
61200305L1-1F
© 2002 ADTRAN, Inc.
251
Section 4, User Interface Guide
ATLAS 550 System Manual
CIRCUIT STATUS > TEST > LAST RUN TIME
Read security: 5
(Not visible until a circuit has been tested.) Displays the date and time of the last test call made through
this dedicated dial backup circuit.
CIRCUIT STATUS > TEST > NEXT RUN TIME
Read security: 5
(Not visible unless TEST CALL is configured for non-manual operation in the INTERFACE CONFIG for the
CIRCUIT BACKUP ENDPOINT.) Displays the date and time of the next schedule test call to be made through
this dedicated dial backup circuit.
CIRCUIT STATUS > TEST > LAST TEST STATUS
Read security: 5
Displays the status of the last test call made through this dedicated dial backup circuit. The following status
messages may display:
IDLE
No current test call on this dedicated dial backup circuit
PASSED
Passed last manual or scheduled test
FAILED
Failed last manual or scheduled test
CIRCUIT STATUS > TEST > PASS : FAIL
Read security: 5
Displays the number of successful and unsuccessful test calls made through this dedicated dial backup
circuit.
CIRCUIT STATUS > TEST > TEST NOW
Write security: 5; Read security: 5
Press to initiate a test call on the dedicated dial backup circuit.
252
© 2002 ADTRAN, Inc.
61200305L1-1F
ATLAS 550 System Manual
Section 4, User Interface Guide
DIAL PLAN
The DIAL PLAN submenus set global ATLAS 550 switch parameters as well as individual parameters for
each ATLAS 550 port handling a switched call (see Figure 18). The individual ports are separated into two
port types: network and user. Network ports terminate a connection from the network. User ports terminate
incoming calls and, in turn may be connected to user equipment.
Figure 18. Dial Plan Menu
DIAL PLAN > NETWORK TERM
Write security: 3; Read security: 5
This menu allows the user to define option parameters for ports which terminate a connection from the
network.
In applications where two ATLAS 550 units are used in a point-to-point configuration, a
port in the ATLAS 550 at one end would act as the network (USER TERM), while the ATLAS
550 at the opposite end would be terminating a network connection (NETWORK TERM).
DIAL PLAN > NETWORK TERM > SLOT/SVC
Write security: 3; Read security: 5
Selects the ATLAS 550 slot or service that terminates a network connection.
61200305L1-1F
© 2002 ADTRAN, Inc.
253
Section 4, User Interface Guide
ATLAS 550 System Manual
DIAL PLAN > NETWORK TERM > PORT/PEP
Write security: 3; Read security: 5
Selects the ATLAS 550 port or packet endpoint that terminates a network connection.
There may be more than one “endpoint” associated with a particular port. If a T1 is
connected to the PSTN, some DS0s may be used for long distance, while others are used
for local calls. These would constitute two “endpoints” (trunks) over a single physical
port.
DIAL PLAN > NETWORK TERM > SIG
Write security: 3; Read security: 5
Defines the type of signaling being used for this connection (endpoint). Select RBS for a T1 using Robbed
Bit Signaling or PRI for a Primary Rate ISDN interface. Select NFAS for a non-facility associated
signalling interface or NONE for OSC when bonding DS0s. This selection is only necessary if a T1/PRI is
selected as the SLOT/PORT type.
One HDLC resource is used by each PRI or each Packet Endpoint.
DIAL PLAN > NETWORK TERM > OUT#ACCEPT
Write security: 3; Read security: 5
Defines the parameters for the outgoing calls that ATLAS 550 sends to the network.
DIAL PLAN > NETWORK TERM > OUT#ACCEPT > SRC ID
Write security: 3; Read security: 5
Identifies the call source ID from which this endpoint accepts calls. This field simplifies the creation of a
dial plan in applications where the criterion for switching calls to a certain endpoint is a function of which
endpoint originated the call. SRC ID may be entered with the usual wild card entries (except $).
X
=
Any digit 0 through 9
[1,3,5]
=
Any of these digits
0
=
Default value
The default ID for all source endpoints all accept numbers is 0. This results in all calls being routed based
on the dialed number.
254
© 2002 ADTRAN, Inc.
61200305L1-1F
ATLAS 550 System Manual
Section 4, User Interface Guide
DIAL PLAN > NETWORK TERM > OUT#ACCEPT > ACCEPT NUMBER
Write security: 3; Read security: 5
Designates which numbers this endpoint passes on toward the network. The accept list may consist of
multiple entries. The numbers are defined using the following “wild cards”:
X
=
Any single digit
N
=
Any single digit 2 through 9
$
=
Any number of digits of any value
9
=
This specific number
[1,2,3...]
=
A single digit in this group
Example: 1-800-$ only permits toll-free, long distance calls to 1-800. If this were used, then a second
accept number would need to be specified (NXX-XXXX) permitting local numbers to be dialed.
Any specific entry takes precedence over a wild card. For example, if endpoint A was
designated as $ while endpoint B accepted 963-800X, then an incoming call to 963-800X
would only be accepted by endpoint B.
DIAL PLAN > NETWORK TERM > OUT#ACCEPT > SEARCH
Write security: 3; Read security: 5
Instructs ATLAS 550 in which order to search for an accept number match. Normally, all searches are set
to primary. The secondary search selection forces ATLAS 550 to only accept a call at this endpoint if all
primary endpoints are unavailable.
PRIMARY SEARCH
All long distance calls should go out a PRI directly to an IXC (MCI,
ATT, etc.), and local calls should go out a T1 to the LEC. It may be
desirable to place long distance calls on the local exchange if all of the
IXC trunks are unavailable (busy or in alarm). In this case, the primary
accept number for the local exchange would be N$, and the secondary
accept would be 1$.
SECONDARY SEARCH The same accept rules apply for all secondary number searches as for
primary searches.
DIAL PLAN > NETWORK TERM > OUT#ACCEPT > DATA 64K, DATA 56K, AUDIO, SPEECH
Write security: 3; Read security: 5
Reflects the bearer capability the network has provisioned for this line. If the ISDN lines were purchased
with different services provisioned, then ATLAS 550 would send the call out of the port which supports the
type of service the call requires.
For example, the network termination is on a pair of BRIs (with the same phone number) with one
provisioned for data and the other for voice. By enabling data in one and not the other, ATLAS 550 ensures
that calls bearing data will be sent out the right BRI interface.
61200305L1-1F
© 2002 ADTRAN, Inc.
255
Section 4, User Interface Guide
ATLAS 550 System Manual
DIAL PLAN > NETWORK TERM > OUT#ACCEPT > TREAT CALL AS
Write security: 3; Read security: 5
Allows the incoming call to be treated as the selected call type, regardless of the actual incoming call type.
The default selection, AS RECEIVED, effectively disables the feature by using the actual call type. Other
options include DATA 64K and DATA 56K.
DIAL PLAN > NETWORK TERM > OUT#REJ
Write security: 3; Read security: 5
Defines parameters for outgoing calls that ATLAS 550 will not send to the network.
DIAL PLAN > NETWORK TERM > OUT#REJ > REJECT NUMBER
Write security: 3; Read security: 5
Identifies which numbers this endpoint will not pass on toward the network. The reject list may consist of
multiple entries. The reject list may be used to more easily specify the call filtering desired. The wildcards
are identical as in OUT#ACCEPT (see Dial Plan > Network Term > Out#Accept on page 254).
The reject list takes precedence over the accept list. For example, 1-900-$ rejects all 1-900
long distance calls, and 1-$ rejects all long distance calls.
DIAL PLAN > NETWORK TERM > OUT#REJ > DATA 64K, DATA 56K, AUDIO, SPEECH
Write security: 3; Read security: 5
Rejects outgoing calls based on call type. For example, setting the reject number to $, Digital 56/64 to
ENABLED, and Audio and Speech to DISABLED will reject all digital calls, but accept analog calls.
This list may remain blank if the accept list meets desired filtering.
DIAL PLAN > NETWORK TERM > IFCE CONFIG
Write security: 3; Read security: 5
Specifies the configuration parameters for the endpoint. The selections displayed in this field are based on
the type of module selected in the SLOT/SVC option. For detailed information on submenus for a particular
module type, please refer to the dial plan interface configuration menu discussion for the appropriate
network, option, or resource module.
Some of the options available in this submenu change depending on the type of modules
selected in the SLT/SVC or PRT/PEP fields. For more information on these submenus, refer
to the individual module interface configuration discussions in this section.
DIAL PLAN > NETWORK TERM > SUBST TEMPL
Write security: 3; Read security: 5
The substitution template allows the ATLAS 550 to select calls (based on telephone number) and substitute
256
© 2002 ADTRAN, Inc.
61200305L1-1F
ATLAS 550 System Manual
Section 4, User Interface Guide
a user-defined number for the received digits after the call has been processed by the switchboard.
Substitution templates are created for each entry in the DIAL PLAN.
DIAL PLAN > NETWORK TERM > SUBST TEMPL > ORIGINAL#
Write security: 3; Read security: 5
Designates the number(s) to be the search criteria for the substitution template. The pattern can be a
specific number, or wildcards can be used as part of the number specification.
X
=
Any single digit
N
=
Any single digit 2 through 9
$
=
Any number of digits of any value
9
=
This specific number
[1,2,3...]
=
A single digit in this group
Example: 963-812[012] would be 963-8120 to 963-8122.
DIAL PLAN > NETWORK TERM > SUBST TEMPL > SUBSTITUTED#
Write security: 3; Read security: 5
Designates the number to be substituted for the number(s) defined in the ORIGINAL# field. The pattern can
be a specific number, or wildcards can be used as a part of the number specification.
X
=
Any single digit
N
=
Any single digit 2 through 9
$
=
Any number of digits of any value
9
=
This specific number
[1,2,3...]
=
A single digit in this group
Punctuation characters ( ) - + are ignored and a comma is interpreted as a .5 second pause in the dial string.
Example: The ORIGINAL# field contains $ and the SUBSTITUTED# field contains ,256$. All calls routed out
this connection will be delayed .5 seconds and contain a 256 prefix.
Wildcards used in the SUBSTITUTED# field are only valid when used in the same position
(relative to the end of the digit string) as the ORIGINAL# field.
DIAL PLAN > USER TERM
Write security: 3; Read security: 5
This menu allows you to define option parameters for ports which terminate a connection from user
61200305L1-1F
© 2002 ADTRAN, Inc.
257
Section 4, User Interface Guide
ATLAS 550 System Manual
equipment. In this case, ATLAS 550 is acting as the network.
In applications where two ATLAS 550 units are used in a point-to-point configuration, a
port in the ATLAS 550 at one end would act as the network (user termination), while the
ATLAS 550 at the opposite end would be terminating a network connection (network
termination).
DIAL PLAN > USER TERM > SLOT/SVC
Write security: 3; Read security: 5
Selects the ATLAS 550 slot or service that terminates a user connection.
DIAL PLAN > USER TERM > PORT/PEP
Write security: 3; Read security: 5
Selects the ATLAS 550 port or packet endpoint that terminates a user connection.
There may be more than one “endpoint” associated with a particular port. If a T1 is
connected to the PSTN, some DS0s may be used for long distance, while others are used
for local calls. These would constitute two “endpoints” (trunks) over a single physical
port.
DIAL PLAN > USER TERM > SIG
Write security: 3; Read security: 5
Defines the type of signaling being used for this connection (endpoint). Select RBS for a T1 using robbed
bit signaling or PRI for a Primary Rate ISDN interface. This selection is only necessary if a T1/PRI is
selected as the SLOT/PORT type.
One HDLC resource is used by each PRI or each Packet Endpoint.
DIAL PLAN > USER TERM > IN#ACCEPT
Write security: 3; Read security: 5
Defines the parameters for the incoming calls that ATLAS 550 accepts from the network.
258
© 2002 ADTRAN, Inc.
61200305L1-1F
ATLAS 550 System Manual
Section 4, User Interface Guide
DIAL PLAN > USER TERM > IN#ACCEPT > SRC ID
Write security: 3; Read security: 5
Identifies the call source ID from which this endpoint accepts calls. This field simplifies the creation of a
dial plan in applications where the criterion for switching calls to a certain endpoint is a function of which
endpoint originated the call. SRC ID may be entered with the usual wild card entries (except $).
X
=
Any digit 0 through 9
[1,3,5]
=
Any of these digits
0
=
Default value
The default ID for all source endpoints all accept numbers is 0. This results in all calls being routed based
on the dialed number.
DIAL PLAN > USER TERM > IN#ACCEPT > ACCEPT NUMBER
Write security: 3; Read security: 5
Designates which numbers this endpoint will accept (terminate) from the network. The accept list may
consist of multiple entries. The numbers are defined using the following wildcards:
X
=
Any single digit
N
=
Any single digit 2 through 9
$
=
Any number of digits of any value
9
=
This specific number
[1,2,3...]
=
A single digit in this group
Example: 963-8000 would be a specific incoming number that would be accepted by this endpoint. If this
endpoint consisted of a T1 with multiple DS0s, a “hunt” group for 963-8000 would be formed. The entry $
would accept any call.
Any specific entry will take precedence over a wildcard. For example, if endpoint A was
designated as $ while endpoint B accepted 963-800X, then an incoming call to 963-800X
would only be accepted by endpoint B.
DIAL PLAN > USER TERM > IN#ACCEPT > SEARCH
Write security: 3; Read security: 5
Instructs ATLAS 550 in which order to search for an accept number match. Normally, all searches are set
to primary. The secondary search selection forces ATLAS 550 to only accept a call at this endpoint if all
61200305L1-1F
© 2002 ADTRAN, Inc.
259
Section 4, User Interface Guide
ATLAS 550 System Manual
primary endpoints are unavailable.
PRIMARY SEARCH
All long distance calls should go out a PRI directly to an IXC (MCI,
ATT, etc.), and local calls should go out a T1 to the LEC. It may be
desirable to place long distance calls on the local exchange if all of the
IXC trunks are unavailable (busy or in alarm). In this case, the
primary accept number for the local exchange would be N$, and the
secondary accept would be 1$.
SECONDARY
SEARCH
The same accept rules apply for all secondary number searches as for
primary searches.
DIAL PLAN > USER TERM > IN#ACCEPT > DATA 64K, DATA 56K, AUDIO, SPEECH
Write security: 3; Read security: 5
Reflects the bearer capability of the attached user equipment (typically a TA). If the attached TA can only
handle digital calls, then a voice call sent to this endpoint would be rejected.
DIAL PLAN > USER TERM > IN#ACCEPT > TREAT CALL AS
Write security: 3; Read security: 5
Allows the incoming call to be treated as the selected call type, regardless of the actual incoming call type.
The default selection, AS RECEIVED, effectively disables the feature by using the actual call type. Other
options include DATA 64K and DATA 56K.
DIAL PLAN > USER TERM > OUT#REJ
Write security: 3; Read security: 5
Defines the parameters for the outgoing calls that ATLAS 550 will not send to the network.
DIAL PLAN > USER TERM > OUT#REJ > REJECT NUMBER
Identifies which numbers this endpoint will not pass on toward the network. Use when the outgoing call
filter is different for different users sharing this endpoint. The wildcards are identical as in OUT#ACCEPT
(see Dial Plan > Network Term > Out#Accept on page 254).
[0,1]-$ rejects all long distance calls, but only for this User termination. If permitted in the
Network termination endpoint, this user could not dial long distance numbers while other
users could.
DIAL PLAN > USER TERM > OUT#REJ > DATA 64K, DATA 56K, AUDIO, SPEECH
Rejects outgoing calls based on call type. For example, setting the reject number to $, Digital 56/64 to
ENABLED, and Audio and Speech to DISABLED, rejects all digital calls while not rejecting analog calls.
This list may remain blank if the accept list meets desired filtering.
260
© 2002 ADTRAN, Inc.
61200305L1-1F
ATLAS 550 System Manual
Section 4, User Interface Guide
DIAL PLAN > USER TERM > IFCE CONFIG
Write security: 3; Read security: 5
Specifies the configuration parameters for the endpoint.The selections displayed in this field are based on
the type of module selected in the SLOT/SVC option. For detailed information on submenus for a particular
module type, please refer to the dial plan interface configuration menu discussion for the appropriate
network, option, or resource module.
Some of the options available in this submenu change depending on the type of modules
selected in the SLOT/SVC or PORT/PEP fields. For more information on these submenus,
refer to the individual module interface configuration menu discussions in this section.
61200305L1-1F
© 2002 ADTRAN, Inc.
261
Section 4, User Interface Guide
ATLAS 550 System Manual
DIAL PLAN > USER TERM > SUBST TEMPL
Write security: 3; Read security: 5
The substitution template allows the ATLAS 550 to select calls (based on telephone number) and substitute
a user-defined number for the received digits after the call has been processed by the switchboard.
Substitution templates are created for each entry in the DIAL PLAN.
DIAL PLAN > USER TERM > SUBST TEMPL > ORIGINAL#
Write security: 3; Read security: 5
Designates the number(s) to be the search criteria for the substitution template. The pattern can be a
specific number, or wildcards can be used as part of the number specification.
X
=
Any single digit
N
=
Any single digit 2 through 9
$
=
Any number of digits of any value
9
=
This specific number
[1,2,3...]
=
A single digit in this group
Example: 963-812[012] would be 963-8120 to 963-8122.
DIAL PLAN > USER TERM > SUBST TEMPL > SUBSTITUTED#
Write security: 3; Read security: 5
Designates the number to be substituted for the number(s) defined in the ORIGINAL# field. The pattern can
be a specific number, or wildcards can be used as a part of the number specification.
X
=
Any single digit
N
=
Any single digit 2 through 9
$
=
Any number of digits of any value
9
=
This specific number
[1,2,3...]
=
A single digit in this group
Punctuation characters ( ) - + are ignored and a comma is interpreted as a .5 second pause in the dial string.
Example: The ORIGINAL# field contains $ and the SUBSTITUTED# field contains ,256$. All calls routed out
this connection will be delayed .5 seconds and contain a 256 prefix.
Wildcards used in the SUBSTITUTED# field are only valid when used in the same position
(relative to the end of the digit string) as the ORIGINAL# field.
DIAL PLAN > GLOBAL PARAM
Write security: 2; Read security: 5
Sets ATLAS 550 options which apply to all switched operations, both incoming and outgoing calls.
262
© 2002 ADTRAN, Inc.
61200305L1-1F
ATLAS 550 System Manual
Section 4, User Interface Guide
DIAL PLAN > GLOBAL PARAM > END OF NUMBER TIMEOUT
Write security: 3; Read security: 5
Sets the length of time ATLAS 550 waits before assuming the outgoing dialed number is complete. The
default value is six seconds. This timeout will only be invoked if the dialed number does not match one of
the patterns set in the NUMBER COMPLETE TEMPLATE menu (see Nbr Complete Templates below).
DIAL PLAN > GLOBAL PARAM > COUNTRY CODE
Write security: 3; Read security: 5
The country code. Enter your international country code using only digits. For the United States, enter 1.
DIAL PLAN > GLOBAL PARAM > AREA OR CITY CODE
Write security: 3; Read security: 5
The local area code. Use for sending caller ID to the network.
DIAL PLAN > GLOBAL PARAM > NBR COMPLETE TEMPLATES
Write security: 3; Read security: 5
Sets completed number patterns for outgoing calls so that ATLAS 550 recognizes when the phone number
is complete. Fields include the index number (#) and PATTERN. For example, a local number will be 7
digits long while a long distance (1+ area code + number) will be 11 digits long. The ATLAS 550 defaults
cover almost any installation, and these templates should not require any additional user input – except for
unusual circumstances. The template allows the use of the following wildcard inputs to define numbers:
X
=
Any single digit
N
=
Any single digit 2 through 9
911
=
This specific number
[1,2,3...]
=
A single digit in this group
DIAL PLAN > GLOBAL PARAM > NUMBER TYPE TEMPLATES
Write security: 3; Read security: 5
Sets call type patterns. ISDN interfaces require that a number type be sent over the D channel when a call
is sent or received. A normal RBS trunk does not send a type designator, but uses prefixes instead. For
example, “1 +” prefix is a national long distance call type while a “011 +” prefix is an international long
distance call type. These templates form a table to permit ATLAS 550 to translate the RBS prefix into a
call type for ISDN and vice-versa.
The ATLAS 550 default templates should cover all applications and should not need to be
added to by the user except for very rare circumstances.
DIAL PLAN > GLOBAL PARAM > NUMBER TYPE TEMPLATES > #
Write security: 3; Read security: 5
Denotes an entry number. The maximum number of entries is 50. Press < I > to insert a new entry and
< D > to delete any entry.
61200305L1-1F
© 2002 ADTRAN, Inc.
263
Section 4, User Interface Guide
ATLAS 550 System Manual
DIAL PLAN > GLOBAL PARAM > NUMBER TYPE TEMPLATES > PREFIX
Sets the prefix for the number type. Only digits 0 and 1 are allowed (maximum of six characters).
DIAL PLAN > GLOBAL PARAM > NUMBER TYPE TEMPLATES > PATTERN
Modifies an entry when you press <Enter> (maximum of 40 characters). A pattern for a normal long distance
call, for example, would be 1+(NXX) NXX - XXXX. Note that the symbols ( ), +, -, and space are not required
and are only used to improve the readability of this example.
DIAL PLAN > GLOBAL PARAM > NUMBER TYPE TEMPLATES > NUMBER TYPE
Lists valid selections when you press <Enter>. Selections include LOCAL, NATIONAL, INTERNATIONAL, PRIVATE,
and UNKNOWN.
DIAL PLAN > GLOBAL PARAM > AUTOMATIC ROUTEBACK REJECTION
Write security: 1; Read security: 5
When enabled, AUTOMATIC ROUTEBACK REJECTION prevents calls entering through network termination
interfaces from being forwarded out another network interface. Such an event could happen if an incoming call
specifies a number that has no endpoint configured to accept it and another network interface has a call
acceptance entry which could accept it (such as $). Without automatic rejection, such a call would be forwarded
back to the network. The network would in turn resend the call to the unit until all incoming resources are
consumed.
Use extreme caution when disabling AUTOMATIC ROUTEBACK REJECTION.
DIAL PLAN > GLOBAL PARAM > COLLISION RESPONSE
Write security: 0; Read security: 0
When forced, the COLLISION RESPONSE will enable the ATLAS to perform AUTOMATIC retransmission of
SETUP messages when faced with a collision situation. Forcing this response is not advised.
Use extreme caution when forcing COLLISION RESPONSE.
DIAL PLAN > GLOBAL PARAM > GLOBAL TONE TYPE
Write security: 1; Read security: 5
Specifies the dialing digit tone encoding to be used throughout the entire system. DTMF (dual-tone-multi
frequency) and MF (multi frequency) are the available options.
264
© 2002 ADTRAN, Inc.
61200305L1-1F
ATLAS 550 System Manual
Section 4, User Interface Guide
DIAL PLAN (T1 NETWORK AND DUAL/QUAD T1/PRI MODULES)
All menu items in this section (listed as T1/PRI) apply to T1 Network and Dual/Quad Module interfaces
configured in the DIAL PLAN.
DIAL PLAN (T1/PRI) > NETWORK TERM (PRI)
Write security: 3; Read security: 5
This menu allows the user to define option parameters for ports which terminate a PRI connection from the
network.
DIAL PLAN (T1/PRI) > NETWORK TERM (PRI) > IFCE CONFIG (PRI)
Write security: 3; Read security: 5
Specifies the configuration parameters for the endpoint.
DIAL PLAN (T1/PRI) > NETWORK TERM (PRI) > IFCE CONFIG (PRI) > SWITCH TYPE
Write security: 3; Read security: 5
Defines the type of PRI switch to which the port is connected. If connected to another ATLAS 550, both need to
be set to the same switch type. The following options are available:
•
Lucent 5E
•
National ISDN
•
Northern DMS 100
•
AT&T 4ESS
DIAL PLAN (T1/PRI) > NETWORK TERM (PRI) > IFCE CONFIG (PRI) > FIRST DS0
Write security: 3; Read security: 5
Defines the first DS0 for this endpoint.The ATLAS 550 uses DS0s, starting with this selection, to send and
receive calls to and from the network. The outgoing calls which are allowed or restricted over these DS0s are
set by OUT#ACCEPT (see Dial Plan > Network Term > Out#Accept on page 254) and OUT#REJECT (see Dial
Plan > Network Term > Out#Rej on page 256).
DIAL PLAN (T1/PRI) > NETWORK TERM (PRI) > IFCE CONFIG (PRI) > NUMBER OF DS0S
Write security: 3; Read security: 5
Specifies the number of DS0s ATLAS 550 uses for this endpoint.
61200305L1-1F
© 2002 ADTRAN, Inc.
265
Section 4, User Interface Guide
ATLAS 550 System Manual
DIAL PLAN (T1/PRI) > NETWORK TERM (PRI) > IFCE CONFIG (PRI) > OUTGOING NUMBER
CONVERSION
Write security: 3; Read security: 5
Converts outgoing (towards the network) numbers to the selected numbering plan and type option.
AS DIALED
Sends the digits provided as an unknown number type.
ISDN-NATIONAL
Regardless of what type of number is received, the outgoing number is
substituted with ISDN-National as the number plan and type. Ten digits
are always sent to the network. Leading ones, if present, are stripped out
and the area code (provisioned under DIAL PLAN/GLOBAL PARAMETERS)
is added, if only seven digits are supplied. This action may be required
in areas with ten-digit local dialing.
PREFERRED
ISDN-SUBSCRIBER
PREFERRED
ISDN-NATIONAL
DMS RESERVED
PREFERRED
ISDN-NATIONAL AS
DIALED
Examines the incoming number and if seven digits are received or if a
ten-digit number is received with an area code that matches the area
code provisioned in the global parameters, the number is forwarded to
the network as a seven-digit number defined as ISDN-Subscriber
number plan and type. If the incoming number is ten digits, but with a
different area code, it is forwarded to the network as ISDN-National
preferred.
Ignores the incoming numbering plan and type and substitutes the
ISDN/Telephony numbering plan and National number type. Ten digits
are sent to the network. Leading ones, if present, are stripped out and the
area code set in global parameters is added if only seven digits are
supplied. This action may be required in areas with ten-digit local
dialing.
Sends the digits provided as National number type.
When SWITCH TYPE is set to 4ESS, many installations require the National form where
possible; this may also be the preferred form in 10-digit calling areas.
DIAL PLAN (T1/PRI) > NETWORK TERM (PRI) > IFCE CONFIG (PRI) > STRIP MSD
Write security: 3; Read security: 5
Strips a selected quantity (choose from NONE, 1, 2, AND 3) of the most significant digits (MSD) of a dialed
number prior to being forwarded out of the port.
Example: A network port could be set to accept all calls beginning with 9 (9$), and then with STRIP MSD
set to 1, all digits would be sent toward the network except the leading 9.
STRIP MSD does not affect CALL ACCEPT criteria. All of the digits (including the MSDs that
are subsequently stripped) are used as accept criterion.
266
© 2002 ADTRAN, Inc.
61200305L1-1F
ATLAS 550 System Manual
Section 4, User Interface Guide
DIAL PLAN (T1/PRI) > NETWORK TERM (PRI) > IFCE CONFIG (PRI) >
NETWORK SPECIFIC FACILITY VOICE AND DATA
Write security: 3; Read security: 5
Enables the sending of appropriate information to the PSTN. The default for this option is NORMAL, and in
this case no Network Specific Facility Information Element is sent. Unless one of the services listed below is
subscribed to, the selection should remain set to NORMAL.
The list below indicates services that may be subscribed to from the PSTN. These services require that
specific information (such as a Network Specific Facility Information Element) be sent to the network during
call setup.
•
AT&T Megacom 800
•
AT&T International-800
•
Nortel InWats
•
AT&T Megacom
•
AT&T Dial-It 900/Multiquest •
Nortel OutWats
•
AT&T Accunet
•
National ISDN INWATS
•
Nortel Foreign Exchange
•
AT&T Long Distance
•
Nortel Private Network
•
Nortel Tie Trunk
•
AT&T SDN
(Switched Digital Network)
DIAL PLAN (T1/PRI) > NETWORK TERM (PRI) > IFCE CONFIG (PRI) >
CALLED DIGITS TRANSFERRED
Write security: 3; Read security: 5
Some PRI switches may be provisioned to send only a portion of the called number (like DID). This menu
item allows the ATLAS 550 to know how many digits to expect (choose from NONE, THREE, FOUR, SEVEN,
and ALL). The default is ALL and would almost always be correct. If less than ALL digits are sent, then the
PREFIX is defined as follows:
PREFIX
Write security: 3; Read security: 5
Displays only if CALLED DIGITS TRANSFERRED is not set to ALL. Enter the prefix for the digits
received.
Example: If the number of digits is four and the number called is 963-8615, the telco’s PRI switch
sends only 8615 and the prefix is set to 963. This entire number is then used to determine which
ATLAS 550 user port endpoint should receive the call.
DIAL PLAN (T1/PRI) > NETWORK TERM (PRI) > IFCE CONFIG (PRI) > OUTGOING CALLER ID
Write security: 3; Read security: 5
Defines the number to use to provide Caller ID to the network for outgoing calls sent through this endpoint.
Choose from SEND AS PROVIDED, SUBSTITUTE IF NOT PRESENT, or SUBSTITUTE ALWAYS.
The Caller ID number must be specific (i.e., no wildcards).
61200305L1-1F
© 2002 ADTRAN, Inc.
267
Section 4, User Interface Guide
ATLAS 550 System Manual
DIAL PLAN (T1/PRI) > NETWORK TERM (PRI) > IFCE CONFIG (PRI) > SOURCE ID
Write security: 3; Read security: 5
Simplifies the creation of a dial plan in applications where the criterion for switching calls to a certain
endpoint is a function of which endpoint originated the call.
DEFAULT VALUE = 0. Zero is the default ID for all endpoints and all accept numbers. With default
values, all calls are routed based only on the dialed number.
Multiple endpoints can have the same SOURCE ID.
When creating the CALL ACCEPT list, specify a SOURCE ID(s) as well as a dialed number or range of
dialed numbers to accept.
Example: An application requires that all calls that originate from Port 1 of the ATLAS 830 in Slot 1 be
switched to Port 2 of that same module. Assign a unique SOURCE ID (e.g., 7) to Port 1 of the module, and
then configure Port 2 to only accept calls from that unique SOURCE ID (7).
DIAL PLAN (T1/PRI) > NETWORK TERM (PRI) > IFCE CONFIG (PRI) > SWAP ANI/DNIS
Write security: 3; Read security: 5
Swaps the ANI and DNIS numbers received from the network. ANI (Automatic Number Identification) is
the billing number of the calling party, and DNIS (Dialed Number Identification Service) is the called party
number.
With this swap, the ATLAS 550 switchboard uses ANI to route the call. The accept number
in the dial plan must use the ANI number, not the DNIS number.
DIAL PLAN (T1/PRI) > NETWORK TERM (PRI) > IFCE CONFIG (PRI) > B CHANNEL SELECTION
Write security: 3; Read security: 5
Determines how the ATLAS 550 switchboard uses B channels for call routing. The Circular method can be
used for call load balancing among the available B channels on this interface.
NORMAL
Always start with the last channel configured (i.e., for a full PRI channel
23 would be used if available).
CIRCULAR
Contiguous channels from last to first.
DIAL PLAN (T1/PRI) > NETWORK TERM (PRI) > IFCE CONFIG (PRI) > BUSY OPTION
Write security: 3; Read security: 5
Defines the response propagated to the CPE upon receipt of a DISCONNECT USER-BUSY message from the
network.
NORMAL
Send a progress message to the CPE and map busy tones.
PASS-THRU
Send a DISCONNECT USER-BUSY message to the User Term CPE device.
DIAL PLAN (T1/PRI) > NETWORK TERM (RBS)
Write security: 3; Read security: 5
This menu allows the user to define option parameters for ports which terminate an RBS T1 connection
268
© 2002 ADTRAN, Inc.
61200305L1-1F
ATLAS 550 System Manual
Section 4, User Interface Guide
from the network.
DIAL PLAN (T1/PRI) > NETWORK TERM (RBS) > IFCE CONFIG (RBS)
Write security: 3; Read security: 5
Specifies the configuration parameters for the endpoint.
DIAL PLAN (T1/PRI) > NETWORK TERM (RBS) > IFCE CONFIG (RBS) > FIRST DS0
Write security: 3; Read security: 5
Defines to the ATLAS 550 the first DS0 for this endpoint.The ATLAS 550 uses DS0s, starting with this
selection, to send and receive calls to and from the network. The outgoing calls which are allowed or
restricted over these DS0s are set by OUT#ACCEPT (see Dial Plan > Network Term > Out#Accept on page
254) and OUT#REJECT (see Dial Plan > Network Term > Out#Rej on page 256).
DIAL PLAN (T1/PRI) > NETWORK TERM (RBS) > IFCE CONFIG (RBS) > NUMBER OF DS0S
Write security: 3; Read security: 5
Specifies the number of DS0s ATLAS 550 uses for this endpoint.
DIAL PLAN (T1/PRI) > NETWORK TERM (RBS) > IFCE CONFIG (RBS) > DS0S AVAILABLE
Write security: 3; Read security: 5
Indicates which DS0s of the T1 have been defined in this switched endpoint (indicated by “! “), in another
switched endpoint (indicated by “s”), or in a DEDICATED MAP (indicated by “n”). This field is read-only.
The following characters may display in this field:
0-9
This DS0 is available. The digit that displays in this field represents the
last digit of the DS0 number.
*
This port is requesting this DS0 for this connection, but the DS0 is not
yet activated.
!
This DS0 is used by this endpoint.
S
This DS0 is used elsewhere in the switched DIAL PLAN.
S
This DS0 is in the switched dial plan and conflicts with this endpoint.
N
This DS0 is used in one or more DEDICATED MAPS.
N
This DS0 is in one or more DEDICATED MAPS, and conflicts with this
endpoint.
DIAL PLAN (T1/PRI) > NETWORK TERM (RBS) > IFCE CONFIG (RBS) > SIGNALING METHOD
Write security: 3; Read security: 5
Defines to the ATLAS 550 the type of signaling to be used across this trunk. The signaling selected needs
to match the signaling being provided by the network (PSTN). The following choices are available:
•
E&M Immediate
•
Ground Start
•
E&M Wink
•
Feature Group D
•
Loop Start
61200305L1-1F
© 2002 ADTRAN, Inc.
269
Section 4, User Interface Guide
ATLAS 550 System Manual
The ATLAS 550 converts signaling types between network and user terminations.
DIAL PLAN (T1/PRI) > NETWORK TERM (RBS) > IFCE CONFIG (RBS) > FGD TX SEQUENCE
Write security: 3; Read security: 5
Displayed only if SIGNALING METHOD is configured for FEATURE GROUP D. Defines to the ATLAS 550 the
format in which to present the outgoing digits. Choices: NORMAL if no digits are to be sent; ANI/DNIS to
send both ANI and DNIS; DNIS to send DNIS only; ANI to send ANI only.
DIAL PLAN (T1/PRI) > NETWORK TERM (RBS) > IFCE CONFIG (RBS) > FGD RX SEQUENCE
Write security: 3; Read security: 5
Displayed only if SIGNALING METHOD is configured for FEATURE GROUP D. Defines to the ATLAS 550 the
format in which to receive the incoming digits. Choices: NORMAL if no digits are to be received; ANI/DNIS
to receive both ANI and DNIS; DNIS to receive DNIS only; ANI to receive ANI only.
DIAL PLAN (T1/PRI) > NETWORK TERM (RBS) > IFCE CONFIG (RBS) > WINK AFTER
ANI/DNIS
Write security: 3; Read security: 5
Displayed only if SIGNALING METHOD is configured for FEATURE GROUP D. When enabled, the ATLAS 550
will transmit a wink after ANI/DNIS digits are transmitted.
DIAL PLAN (T1/PRI) > NETWORK TERM (RBS) > IFCE CONFIG (RBS) > DIGIT SUPPRESSION
Write security: 3; Read security: 5
When enabled, no digits will be sent toward the network/PBX after going off-hook on an outgoing call.
DIAL PLAN (T1/PRI) > NETWORK TERM (RBS) > IFCE CONFIG (RBS) > DIRECT INWARD
DIALING
Write security: 3; Read security: 5
Defines to the ATLAS 550 whether Direct Inward Dialing (DID) is being used by the network. If DID is
ENABLED, then the following information must be defined.
DIAL PLAN (T1/PRI) > NETWORK TERM (RBS) > IFCE CONFIG (RBS) > DID DIGITS
TRANSFERRED
Write security: 3; Read security: 5
Defines the number of digits sent to ATLAS 550 from the network if DID is used. This option only displays
if DID is set to ENABLED.
DIAL PLAN (T1/PRI) > NETWORK TERM (RBS) > IFCE CONFIG (RBS) > DID NUMBER PREFIX
Write security: 3; Read security: 5
Defines to the ATLAS 550 the prefix digits which are not received as a part of the DID number. The
ATLAS 550 uses the combination of prefix and DID number to determine the user endpoint that should
receive the incoming call. This option only displays if DID is set to ENABLED. If DID is DISABLED, then you
270
© 2002 ADTRAN, Inc.
61200305L1-1F
ATLAS 550 System Manual
Section 4, User Interface Guide
must define the trunk number.
If Feature Group D is used, DID only refers to DNIS digits.
DIAL PLAN (T1/PRI) > NETWORK TERM (RBS) > IFCE CONFIG (RBS) > TRUNK NUMBER
Write security: 3; Read security: 5
When the network connection does not provide DID digits, the ATLAS 550 must be given a number to use
to determine which user endpoint should receive the incoming call. TRUNK NUMBER displays only when
DID is set to DISABLED.
The trunk number must be specific (i.e., no wildcards).
Example: To connect an incoming DS0 (trunk) to an endpoint with the accept number of 963-8615, set the
trunk number to 963-8615.
DIAL PLAN (T1/PRI) > NETWORK TERM (RBS) > IFCE CONFIG (RBS) > STRIP MSD
Write security: 3; Read security: 5
Strips a selected quantity (choose from NONE, 1, 2, and 3) of the most significant digits (MSD) of a dialed
number prior to being forwarded out of the port.
Example: A network port could be set to accept all calls beginning with 9 (9$), and then with STRIP MSD
set to 1, all digits would be sent toward the network except the leading 9.
STRIP MSD does not affect CALL ACCEPT criteria. All of the digits (including the MSDs that
are subsequently stripped) are used as accept criterion.
DIAL PLAN (T1/PRI) > NETWORK TERM (RBS) > IFCE CONFIG (RBS) > SOURCE ID
Write security: 3; Read security: 5
Simplifies the creation of a DIAL PLAN in applications where the criterion for switching calls to a certain
endpoint is a function of which endpoint originated the call.
DEFAULT VALUE = 0. Zero is the default ID for all endpoints and all accept numbers. With default
values, all calls are routed based only on the dialed number.
Multiple endpoints can have the same SOURCE ID.
When creating the CALL ACCEPT list, specify a SOURCE ID(s) as well as a dialed number or range of
dialed numbers to accept.
Example: An application requires that all calls that originate from Port 1 of the ATLAS 550 in Slot 1 be
switched to Port 2 of that same module. Assign a unique SOURCE ID (e.g., 7) to Port 1 of the module, and
61200305L1-1F
© 2002 ADTRAN, Inc.
271
Section 4, User Interface Guide
ATLAS 550 System Manual
then configure Port 2 to only accept calls from that unique SOURCE ID (7).
272
© 2002 ADTRAN, Inc.
61200305L1-1F
ATLAS 550 System Manual
Section 4, User Interface Guide
DIAL PLAN (T1/PRI) > NETWORK TERM (RBS) > IFCE CONFIG (RBS) > DS0 SELECTION
Write security: 3; Read security: 5
Determines how the ATLAS 550 switchboard uses DS0s for call routing.
Always start with the last channel configured (i.e., for a full PRI channel
NORMAL
23 would be used if available).
CIRCULAR
Contiguous channels from last to first. Use this for call load balancing
among the available DS0s on this interface.
ALIGNED
Provides the ability to maintain alignment between T1s as if they were
in dedicated map mode. This scenario requires DS0 SELECTION set to
ALIGNED on both interfaces (usually on User Term and on Net Term). An
interface that has DS0 SELECTION set to ALIGNED will only process a call
from the switchboard on the same DS0 that the incoming call was
received.
Example: The unit receives an incoming call on DS0 17. The switchboard looks for an interface who has matching
accept criteria to the number it received. A match is found on interface “Z” that has DS0 SELECTION set to ALIGNED.
This causes interface “Z” to only process the call if it has DS0 17 available. If all matching interfaces have DS0
SELECTION set to ALIGNED and none of those interfaces have DS0 17 available, then a busy or fast busy will be
returned to the calling party.
DIAL PLAN (T1/PRI) > USER TERM (PRI)
Write security: 3; Read security: 5
This menu allows the user to define option parameters for ports which emulate a PRI connection.
DIAL PLAN (T1/PRI) > USER TERM (PRI) > IFCE CONFIG (PRI)
Write security: 3; Read security: 5
Specifies the configuration parameters for the endpoint.
DIAL PLAN (T1/PRI) > USER TERM (PRI) > IFCE CONFIG (PRI) > SWITCH TYPE
Write security: 3; Read security: 5
Defines the type of PRI switch that the ATLAS 550 emulates. If connected to another ATLAS 550, both need to be
set to the same switch type. The following options are available:
•
Lucent 5E
•
National ISDN
•
Northern DMS 100
•
AT&T 4ESS
DIAL PLAN (T1/PRI) > USER TERM (PRI) > IFCE CONFIG (PRI) > FIRST DS0
Write security: 3; Read security: 5
Defines to the ATLAS 550 the first DS0 for this endpoint.The ATLAS 550 uses DS0s, starting with this selection, to
send and receive calls to and from the network. The outgoing calls which are allowed or restricted over these DS0s
are set by OUT#ACCEPT (see Dial Plan > Network Term > Out#Accept on page 254) and OUT#REJECT (see Dial
Plan > Network Term > Out#Rej on page 256).
61200305L1-1F
© 2002 ADTRAN, Inc.
273
Section 4, User Interface Guide
ATLAS 550 System Manual
DIAL PLAN (T1/PRI) > USER TERM (PRI) > IFCE CONFIG (PRI) > NUMBER OF DS0S
Write security: 3; Read security: 5
Specifies the number of DS0s ATLAS 550 uses for this endpoint.
DIAL PLAN (T1/PRI) > USER TERM (PRI) > IFCE CONFIG (PRI) > STRIP MSD
Write security: 3; Read security: 5
Strips a selected quantity (choose from NONE, 1, 2, and 3) of the most significant digits (MSD) of a dialed
number prior to being forwarded out of the port.
Example: A network port could be set to accept all calls beginning with 9 (9$), and then with STRIP MSD set
to 1, all digits would be sent toward the network except the leading 9.
STRIP MSD does not affect CALL ACCEPT criteria. All of the digits (including the MSDs that
are subsequently stripped) are used as accept criterion.
DIAL PLAN (T1/PRI) > USER TERM (PRI) > IFCE CONFIG (PRI) > NETWORK SPECIFIC FACILITY
VOICE AND DATA
Write security: 3; Read security: 5
Enables the sending of appropriate information to the PSTN. The default for this option is NORMAL, and in
this case no Network Specific Facility Information Element is sent. Unless one of the services listed below is
subscribed to, the selection should remain set to NORMAL.
The list below indicates services that may be subscribed to from the PSTN. These services require that
specific information (such as a Network Specific Facility Information Element) be sent to the network during
call setup.
•
AT&T SDN
•
AT&T International-800
•
Nortel InWats
•
AT&T Megacom 800
•
AT&T Dial-It 900/Multiquest •
Nortel OutWats
•
AT&T Megacom
•
National ISDN INWATS
•
Nortel Foreign Exchange
•
AT&T Accunet
•
Nortel Private Network
•
Nortel Tie Trunk
•
AT&T Long Distance
DIAL PLAN (T1/PRI) > USER TERM (PRI) > IFCE CONFIG (PRI) > CALLED DIGITS TRANSFERRED
Write security: 3; Read security: 5
Defines the number of digits to forward from the called number. When attached to a PBX, the PBX may be
provisioned to expect to receive fewer than all of the called digits of the incoming call; however, this option
would normally be set to ALL. Choose from NONE, THREE, FOUR, SEVEN, or ALL.
274
© 2002 ADTRAN, Inc.
61200305L1-1F
ATLAS 550 System Manual
Section 4, User Interface Guide
DIAL PLAN (T1/PRI) > USER TERM (PRI) > IFCE CONFIG (PRI) > OUTGOING CALLER ID
Write security: 3; Read security: 5
Defines the number to use to provide Caller ID to the Network for outgoing calls sent through this endpoint.
Choose from SEND AS PROVIDED, SUBSTITUTE IF NOT PRESENT, or SUBSTITUTE ALWAYS.
The Caller ID number must be specific (i.e., no wildcards).
DIAL PLAN (T1/PRI) > USER TERM (PRI) > IFCE CONFIG (PRI) > SOURCE ID
Write security: 3; Read security: 5
Simplifies the creation of a dial plan in applications where the criterion for switching calls to a certain
endpoint is a function of which endpoint originated the call.
DEFAULT VALUE = 0. Zero is the default ID for all endpoints and all accept numbers. With default values,
all calls are routed based only on the dialed number.
Multiple endpoints can have the same SOURCE ID.
When creating the CALL ACCEPT list, specify a SOURCE ID(s) as well as a dialed number or range of
dialed numbers to accept.
Example: An application requires that all calls that originate from Port 1 of the ATLAS 550 in Slot 1 be
switched to Port 2 of that same module. Assign a unique SOURCE ID (e.g., 7) to Port 1 of the module, and
then configure Port 2 to only accept calls from that unique SOURCE ID (7).
DIAL PLAN (T1/PRI) > USER TERM (PRI) > IFCE CONFIG (PRI) > SWAP ANI/DNIS
Write security: 3; Read security: 5
Swaps the ANI and DNIS numbers received from the network. ANI (Automatic Number Identification) is
the billing number of the calling party, and DNIS (Dialed Number Identification Service) is the called party
number.
With this swap, the ATLAS 550 switchboard uses ANI to route the call. The accept number
in the dial plan must use the ANI number, not the DNIS number.
DIAL PLAN (T1/PRI) > USER TERM (PRI) > IFCE CONFIG (PRI) > B CHANNEL SELECTION
Write security: 3; Read security: 5
Determines how the ATLAS 550 switchboard uses B channels for call routing. The Circular method can be
used for call load balancing among the available B channels on this interface.
NORMAL
Always start with the last channel configured (i.e., for a full PRI channel
23 would be used if available).
CIRCULAR
Contiguous channels from last to first.
61200305L1-1F
© 2002 ADTRAN, Inc.
275
Section 4, User Interface Guide
ATLAS 550 System Manual
DIAL PLAN (T1/PRI) > USER TERM (PRI) > IFCE CONFIG (PRI) > BUSY OPTION
Write security: 3; Read security: 5
Defines the response propagated to the CPE upon receipt of a DISCONNECT USER-BUSY message from the
network.
NORMAL
Send a Progress message to the CPE and map busy tones.
PASS-THRU
Send a DISCONNECT USER-BUSY message to the User Term CPE device.
DIAL PLAN (T1/PRI) > USER TERM (RBS)
Write security: 3; Read security: 5
This menu allows the user to define option parameters for ports which emulate an RBS T1 connection from the
network.
DIAL PLAN (T1/PRI) > USER TERM (RBS) > IFCE CONFIG (RBS)
Write security: 3; Read security: 5
Specifies the configuration parameters for the endpoint.
DIAL PLAN (T1/PRI) > USER TERM (RBS) > IFCE CONFIG (RBS) > FIRST DS0
Write security: 3; Read security: 5
Defines the first DS0 for this endpoint.The ATLAS 550 uses DS0s, starting with this selection, to send and
receive calls to and from the network. The outgoing calls which are allowed or restricted over these DS0s are
set by OUT#ACCEPT (see page 181) and OUT#REJECT (see page 183).
DIAL PLAN (T1/PRI) > USER TERM (RBS) > IFCE CONFIG (RBS) > NUMBER OF DS0S
Write security: 3; Read security: 5
Specifies the number of DS0s ATLAS 550 uses for this endpoint.
DIAL PLAN (T1/PRI) > USER TERM (RBS) > IFCE CONFIG (RBS) > DS0S AVAILABLE
Write security: 3; Read security: 5
Indicates which DS0s of the T1 have been defined in this switched endpoint (indicated by “!”), in another
switched endpoint (indicated by “s”), or in a DEDICATED MAP (indicated by “n”). This field is read-only. The
following characters may display in this field:
276
0-9
This DS0 is available. The digit that displays in this field represents the
last digit of the DS0 number.
*
This port is requesting this DS0 for this connection, but the DS0 is not
yet activated.
!
This DS0 is used by this endpoint.
S
This DS0 is used elsewhere in the switched DIAL PLAN.
S
This DS0 is in the switched dial plan and conflicts with this endpoint.
N
This DS0 is used in one or more DEDICATED MAPS.
N
This DS0 is in one or more DEDICATED MAPS, and conflicts with this
endpoint.
© 2002 ADTRAN, Inc.
61200305L1-1F
ATLAS 550 System Manual
Section 4, User Interface Guide
DIAL PLAN (T1/PRI) > USER TERM (RBS) > IFCE CONFIG (RBS) > SIGNALING METHOD
Write security: 3; Read security: 5
Defines the type of signaling to be used across this trunk. The signaling selected needs to match the
signaling being provided by the network. The following choices are available:
•
E&M Immediate
•
Ground Start
•
E&M Wink
•
Feature Group D
•
Loop Start
The ATLAS 550 converts signaling types between network and user terminations.
DIAL PLAN (T1/PRI) > USER TERM (RBS) > IFCE CONFIG (RBS) > FGD TX SEQUENCE
Write security: 3; Read security: 5
Displayed only if SIGNALING METHOD is configured for FEATURE GROUP D. Defines the format in which to
present the outgoing digits. Choices: NORMAL if no digits are to be sent; ANI/DNIS to send both ANI and
DNIS; DNIS to send DNIS only; ANI to send ANI only.
DIAL PLAN (T1/PRI) > USER TERM (RBS) > IFCE CONFIG (RBS) > FGD RX SEQUENCE
Write security: 3; Read security: 5
Displayed only if SIGNALING METHOD is configured for FEATURE GROUP D. Defines the format in which to
receive the incoming digits. Choices: NORMAL if no digits are to be received; ANI/DNIS to receive both
ANI and DNIS; DNIS to receive DNIS only; ANI to receive ANI only.
DIAL PLAN (T1/PRI) > USER TERM (RBS) > IFCE CONFIG (RBS) > WINK AFTER ANI/DNIS
Write security: 3; Read security: 5
Displayed only if SIGNALING METHOD is configured for FEATURE GROUP D. When enabled, the ATLAS 550
will transmit a wink after ANI/DNIS digits are transmitted.
DIAL PLAN (T1/PRI) > USER TERM (RBS) > IFCE CONFIG (RBS) > DIRECT INWARD DIALING
Write security: 3; Read security: 5
Defines whether Direct Inward Dialing (DID) is being used by the network. If DID is ENABLED, then the
following information must be defined.
DIAL PLAN (T1/PRI) > USER TERM (RBS) > IFCE CONFIG (RBS) > CALLER ID NUMBER
Write security: 3; Read security: 5
Defines the number the ATLAS 550 uses to provide caller ID to the network for outgoing calls sent
61200305L1-1F
© 2002 ADTRAN, Inc.
277
Section 4, User Interface Guide
ATLAS 550 System Manual
through this endpoint. This item is optional.
The Caller ID number must be specific (i.e., no wildcards).
DIAL PLAN (T1/PRI) > USER TERM (RBS) > IFCE CONFIG (RBS) > DID DIGITS TRANSFERRED
Write security: 3; Read security: 5
Defines the number of digits sent to ATLAS 550 from the network if DID is used. This option only displays
if DID is set to ENABLED.
If FEATURE GROUP D is used, DID only refers to DNIS digits.
DIAL PLAN (T1/PRI) > USER TERM (RBS) > IFCE CONFIG (RBS) > STRIP MSD
Write security: 3; Read security: 5
Strips a selected quantity (choose from NONE, 1, 2, and 3) of the most significant digits (MSD) of a dialed
number prior to being forwarded out of the port.
Example: A network port could be set to accept all calls beginning with 9 (9$), and then with STRIP MSD
set to 1, all digits would be sent toward the network except the leading 9.
STRIP MSD does not affect CALL ACCEPT criteria. All of the digits (including the MSDs that
are subsequently stripped) are used as accept criterion.
DIAL PLAN (T1/PRI) > USER TERM (RBS) > IFCE CONFIG (RBS) > SOURCE ID
Write security: 3; Read security: 5
Simplifies the creation of a DIAL PLAN in applications where the criterion for switching calls to a certain
endpoint is a function of which endpoint originated the call.
DEFAULT VALUE = 0. Zero is the default ID for all endpoints and all accept numbers. With default
values, all calls are routed based only on the dialed number.
Multiple endpoints can have the same SOURCE ID.
When creating the CALL ACCEPT list, specify a SOURCE ID(s) as well as a dialed number or range of
dialed numbers to accept.
Example: An application requires that all calls that originate from Port 1 of the ATLAS 830 in Slot 1 be
switched to Port 2 of that same module. Assign a unique SOURCE ID (e.g., 7) to Port 1 of the module, and
then configure Port 2 to only accept calls from that unique SOURCE ID (7).
278
© 2002 ADTRAN, Inc.
61200305L1-1F
ATLAS 550 System Manual
Section 4, User Interface Guide
DIAL PLAN (T1/PRI) > USER TERM (RBS) > IFCE CONFIG (RBS) > DIAL ON OFFHOOK
Write security: 3; Read security: 5
Defines a number that is automatically sent to the switchboard when a call on this endpoint is initiated (goes
off hook).
The DIAL ON OFFHOOK number must be specific (i.e., no wildcards).
61200305L1-1F
© 2002 ADTRAN, Inc.
279
Section 4, User Interface Guide
ATLAS 550 System Manual
DIAL PLAN (T1/PRI) > USER TERM (RBS) > IFCE CONFIG (RBS) > DS0 SELECTION
Write security: 3; Read security: 5
Determines how the ATLAS 550 switchboard uses DS0s for call routing.
NORMAL
Always start with the last channel configured (i.e., for a full PRI channel
23 would be used if available).
CIRCULAR
Contiguous channels from last to first. Use for call load balancing
among the available DS0s on this interface.
ALIGNED
Provides the ability to maintain alignment between T1s as if they were
in dedicated map mode. This scenario requires DS0 SELECTION set to
ALIGNED on both interfaces (usually on User Term and on Net Term). An
interface that has DS0 SELECTION set to ALIGNED will only process a call
from the switchboard on the same DS0 that the incoming call was
received.
Example: The unit receives an incoming call on DS0 17. The switchboard looks for an interface who has
matching accept criteria to the number it received. A match is found on interface “Z” that has DS0
SELECTION set to ALIGNED. This causes interface “Z” to only process the call if it has DS0 17 available. If
all matching interfaces have DS0 SELECTION set to ALIGNED and none of those interfaces have DS0 17
available, then a busy or fast busy will be returned to the calling party.
DIAL PLAN (E1/PRA NETWORK MODULE)
E1 TS0s are referred to as DS0s throughout the DIAL PLAN menus.
DIAL PLAN (E1/PRA) > NETWORK TERM (PRA)
Write security: 3; Read security: 5
This menu allows the user to define option parameters for ports which terminate a PRA connection from
the network.
DIAL PLAN (E1/PRA) > NETWORK TERM (PRA) > IFCE CONFIG (PRA)
Write security: 3; Read security: 5
Specifies the configuration parameters for the endpoint.
DIAL PLAN (E1/PRA) > NETWORK TERM (PRA) > IFCE CONFIG (PRA) > SWITCH TYPE
Write security: 3; Read security: 5
Defines the type of PRA switch to which the port is connected. If connected to another ATLAS 550, both
need to be set to the same switch type. The following option is available:
•
280
ETSI/DSS1
© 2002 ADTRAN, Inc.
61200305L1-1F
ATLAS 550 System Manual
Section 4, User Interface Guide
DIAL PLAN (E1/PRA) > NETWORK TERM (PRA) > IFCE CONFIG (PRA) > FIRST DS0
Write security: 3; Read security: 5
Defines the first DS0 for this endpoint.The ATLAS 550 uses DS0s, starting with this selection, to send and
receive calls to and from the network (PSTN). The outgoing calls which are allowed or restricted over
these DS0s are set by OUT#ACCEPT (see Dial Plan > Network Term > Out#Accept on page 254) and
OUT#REJECT (see Dial Plan > Network Term > Out#Rej on page 256).
DIAL PLAN (E1/PRA) > NETWORK TERM (PRA) > IFCE CONFIG (PRA) > NUMBER OF DS0S
Write security: 3; Read security: 5
Specifies the number of DS0s ATLAS 550 uses for this endpoint.
DIAL PLAN (E1/PRA) > NETWORK TERM (PRA) > IFCE CONFIG (PRA) > STRIP MSD
Write security: 3; Read security: 5
Strips a selected quantity (choose from NONE, 1, 2, and 3) of the most significant digits (MSD) of a dialed
number prior to being forwarded out of the port.
Example: A network port could be set to accept all calls beginning with 9 (9$), and then with STRIP MSD
set to 1, all digits would be sent toward the network except the leading 9.
STRIP MSD does not affect CALL ACCEPT criteria. All of the digits (including the MSDs that
are subsequently stripped) are used as accept criterion.
DIAL PLAN (E1/PRA) > NETWORK TERM (PRA) > IFCE CONFIG (PRA) > NETWORK SPECIFIC
FACILITY VOICE AND DATA
Write security: 3; Read security: 5
Enables the sending of appropriate information to the PSTN. Currently not supported for E1/PRA use.
DIAL PLAN (E1/PRA) > NETWORK TERM (PRA) > IFCE CONFIG (PRA) > CALLED DIGITS
TRANSFERRED
Write security: 3; Read security: 5
Some PRI switches may be provisioned to send only a portion of the called number (like DID). This menu
item allows the ATLAS 550 to know how many digits to expect (choose from NONE, THREE, FOUR, SEVEN,
and ALL). The default is ALL and would almost always be correct. If less than ALL digits are sent, then the
PREFIX is defined as follows:
PREFIX
Write security: 3; Read security: 5
Displays only if CALLED DIGITS TRANSFERRED is not set to ALL. Enter the prefix for the digits
received.
Example: If the number of digits is four and the number called is 963-8615, the telco’s PRI switch
sends only 8615 and the prefix is set to 963. This entire number is then used to determine which
ATLAS 550 user port endpoint should receive the call.
61200305L1-1F
© 2002 ADTRAN, Inc.
281
Section 4, User Interface Guide
ATLAS 550 System Manual
DIAL PLAN (E1/PRA) > NETWORK TERM (PRA) > IFCE CONFIG (PRA) > OUTGOING CALLER ID
Write security: 3; Read security: 5
Defines the number to use to provide Caller ID to the network for outgoing calls sent through this
endpoint. Choose from SEND AS PROVIDED, SUBSTITUTE IF NOT PRESENT, or SUBSTITUTE ALWAYS.
The Caller ID number must be specific (i.e., no wildcards).
DIAL PLAN (E1/PRA) > NETWORK TERM (PRA) > IFCE CONFIG (PRA) > SOURCE ID
Write security: 3; Read security: 5
Simplifies the creation of a dial plan in applications where the criterion for switching calls to a certain
endpoint is a function of which endpoint originated the call.
DEFAULT VALUE = 0. Zero is the default ID for all endpoints and all accept numbers. With default
values, all calls are routed based only on the dialed number.
Multiple endpoints can have the same SOURCE ID.
When creating the CALL ACCEPT list, specify a SOURCE ID(s) as well as a dialed number or range of
dialed numbers to accept.
Example: An application requires that all calls that originate from Port 1 of the ATLAS 550 in Slot 1 be
switched to Port 2 of that same module. Assign a unique SOURCE ID (e.g., 7) to Port 1 of the module, and
then configure Port 2 to only accept calls from that unique SOURCE ID (7).
DIAL PLAN (E1/PRA) > NETWORK TERM (PRA) > IFCE CONFIG (PRA) > SWAP ANI/DNIS
Write security: 3; Read security: 5
Swaps the ANI and DNIS numbers received from the network. ANI (Automatic Number Identification) is
the billing number of the calling party, and DNIS (Dialed Number Identification Service) is the called
party number.
With this swap, the ATLAS 550 switchboard uses ANI to route the call. The accept number
in the dial plan must use the ANI number, not the DNIS number.
DIAL PLAN (E1/PRA) > NETWORK TERM (PRA) > IFCE CONFIG (PRA) > B CHANNEL
SELECTION
Write security: 3; Read security: 5
Determines how the ATLAS 550 switchboard uses B channels for call routing. The Circular method can be
used for call load balancing among the available B channels on this interface.
282
NORMAL
Always start with the last channel configured (i.e., for a full PRI channel
23 would be used if available).
CIRCULAR
Contiguous channels from last to first.
© 2002 ADTRAN, Inc.
61200305L1-1F
ATLAS 550 System Manual
Section 4, User Interface Guide
DIAL PLAN (E1/PRA) > USER TERM (PRA)
Write security: 3; Read security: 5
This menu allows the user to define option parameters for ports which emulate a PRA connection.
DIAL PLAN (E1/PRA) > USER TERM (PRA) > IFCE CONFIG (PRA)
Write security: 3; Read security: 5
Specifies the configuration parameters for the endpoint.
DIAL PLAN (E1/PRA) > USER TERM (PRA) > IFCE CONFIG (PRA) > SWITCH TYPE
Write security: 3; Read security: 5
Defines the type of PRA switch that the ATLAS 550 emulates. If connected to another ATLAS 550, both
need to be set to the same switch type. The following option is available:
•
ETSI/DSS1
DIAL PLAN (E1/PRA) > USER TERM (PRA) > IFCE CONFIG (PRA) > FIRST DS0
Write security: 3; Read security: 5
Defines the first DS0 for this endpoint.The ATLAS 550 uses DS0s, starting with this selection, to send and
receive calls to and from the network. The outgoing calls which are allowed or restricted over these DS0s
are set by OUT#ACCEPT (see Dial Plan > Network Term > Out#Accept on page 254) and OUT#REJECT (see
Dial Plan > Network Term > Out#Rej on page 256).
DIAL PLAN (E1/PRA) > USER TERM (PRA) > IFCE CONFIG (PRA) > NUMBER OF DS0S
Write security: 3; Read security: 5
Specifies the number of DS0s ATLAS 550 uses for this endpoint.
DIAL PLAN (E1/PRA) > USER TERM (PRA) > IFCE CONFIG (PRA) > STRIP MSD
Write security: 3; Read security: 5
Strips a selected quantity (choose from NONE, 1, 2, and 3) of the most significant digits (MSD) of a dialed
number prior to being forwarded out of the port.
Example: A network port could be set to accept all calls beginning with 9 (9$), and then with STRIP MSD
set to 1, all digits would be sent toward the network except the leading 9.
STRIP MSD does not affect CALL ACCEPT criteria. All of the digits (including the MSDs that
are subsequently stripped) are used as accept criterion.
DIAL PLAN (E1/PRA) > USER TERM (PRA) > IFCE CONFIG (PRA) > NETWORK SPECIFIC
FACILITY VOICE AND DATA
Write security: 3; Read security: 5
Enables the sending of appropriate information to the PSTN. Currently not supported for E1/PRA use.
61200305L1-1F
© 2002 ADTRAN, Inc.
283
Section 4, User Interface Guide
ATLAS 550 System Manual
DIAL PLAN (E1/PRA) > USER TERM (PRA) > IFCE CONFIG (PRA) > CALLED DIGITS
TRANSFERRED
Write security: 3; Read security: 5
Defines the number of digits to forward from the called number. When attached to a PBX, the PBX may be
provisioned to expect to receive fewer than all of the called digits of the incoming call; however, this
option would normally be set to ALL. Choose from NONE, THREE, FOUR, SEVEN, or ALL.
DIAL PLAN (E1/PRA) > USER TERM (PRA) > IFCE CONFIG (PRA) > OUTGOING CALLER ID
Write security: 3; Read security: 5
Defines the number to use to provide Caller ID to the network for outgoing calls sent through this
endpoint. Choose from SEND AS PROVIDED, SUBSTITUTE IF NOT PRESENT, or SUBSTITUTE ALWAYS.
The Caller ID number must be specific (i.e., no wildcards).
DIAL PLAN (E1/PRA) > USER TERM (PRA) > IFCE CONFIG (PRA) > SOURCE ID
Write security: 3; Read security: 5
Simplifies the creation of a dial plan in applications where the criterion for switching calls to a certain
endpoint is a function of which endpoint originated the call.
DEFAULT VALUE = 0. Zero is the default ID for all endpoints and all accept numbers. With default
values, all calls are routed based only on the dialed number.
Multiple endpoints can have the same SOURCE ID.
When creating the CALL ACCEPT list, specify a SOURCE ID(s) as well as a dialed number or range of
dialed numbers to accept.
Example: An application requires that all calls that originate from Port 1 of the ATLAS 550 in Slot 1 be
switched to Port 2 of that same module. Assign a unique SOURCE ID (e.g., 7) to Port 1 of the module, and
then configure Port 2 to only accept calls from that unique SOURCE ID (7).
DIAL PLAN (E1/PRA) > USER TERM (PRA) > IFCE CONFIG (PRA) > SWAP ANI/DNIS
Write security: 3; Read security: 5
Swaps the ANI and DNIS numbers received from the network. ANI (Automatic Number Identification) is
the billing number of the calling party, and DNIS (Dialed Number Identification Service) is the called
party number.
With this swap, the ATLAS 550 switchboard uses ANI to route the call. The accept number
in the dial plan must use the ANI number, not the DNIS number.
284
© 2002 ADTRAN, Inc.
61200305L1-1F
ATLAS 550 System Manual
Section 4, User Interface Guide
DIAL PLAN (E1/PRA) > USER TERM (PRA) > IFCE CONFIG (PRA) > B CHANNEL SELECTION
Write security: 3; Read security: 5
Determines how the ATLAS 550 switchboard uses B channels for call routing. The Circular method can be
used for call load balancing among the available B channels on this interface.
NORMAL
Always start with the last channel configured (i.e., for a full PRI channel
23 would be used if available).
CIRCULAR
Contiguous channels from last to first.
DIAL PLAN (BRI DBU NETWORK INTERFACE AND QUAD BRI/U MODULES)
All menu items in this section (listed as U-BRI) apply to BRI DBU Network and Quad BRI/U Module
interfaces configured in the DIAL PLAN.
DIAL PLAN (U-BRI) > NETWORK TERM
Write security: 3; Read security: 5
This menu allows the user to define option parameters for ports which terminate a BRI connection from the
network.
DIAL PLAN (U-BRI) > NETWORK TERM > IFCE CONFIG
Write security: 3; Read security: 5
Specifies the configuration parameters for the endpoint.
DIAL PLAN (U-BRI) > NETWORK TERM > IFCE CONFIG > SWITCH TYPE
Write security: 3; Read security: 5
Defines the type of BRI switch to which the port is connected. If connected to another ATLAS 550, both
need to be set to the same switch type. The following options are available:
•
Lucent 5E
•
Northern DMS 100
•
National ISDN
DIAL PLAN (U-BRI) > NETWORK TERM > IFCE CONFIG > SPID LIST
Write security: 3; Read security: 5
To properly operate with a network ISDN switch, the BRI interface must have Service Profile Identifiers
(SPIDs) and phone number(s) that match the SPID(s) and phone number(s) programmed into the ISDN
switch for this line. Each BRI may have one or more phone numbers and SPIDs. The SPID LIST submenu
defines these parameters to ATLAS.
PHONE NUMBER
Write security: 3; Read security: 5
The phone number(s) assigned to this BRI phone line.
61200305L1-1F
© 2002 ADTRAN, Inc.
285
Section 4, User Interface Guide
ATLAS 550 System Manual
SPID NUMBER
Write security: 3; Read security: 5
This entry must match the SPID number(s) which has been set in the network’s ISDN switch (or in
the PBX) for this BRI line. A SPID must be entered for each phone number.
CALLS
Write security: 3; Read security: 5
The number of calls (1 or 2) which can be received or sent on this number/SPID.
D64, D56, AUDIO, SPEECH
Write security: 3; Read security: 5
These options reflect the network provisions for this SPID. If the BRI was purchased with different
services provisioned for the SPIDs, then the call must match the services supported.
DIAL PLAN (U-BRI) > NETWORK TERM > IFCE CONFIG > STRIP MSD
Write security: 3; Read security: 5
Strips a selected quantity (choose from NONE, 1, 2, and 3) of the most significant digits (MSD) of a dialed
number prior to being forwarded out of the port.
Example: A network port could be set to accept all calls beginning with 9 (9$), and then with STRIP MSD
set to 1, all digits would be sent toward the network except the leading 9.
STRIP MSD does not affect CALL ACCEPT criteria. All of the digits (including the MSDs that
are subsequently stripped) are used as accept criterion.
DIAL PLAN (U-BRI) > NETWORK TERM > IFCE CONFIG > SOURCE ID
Write security: 3; Read security: 5
Simplifies the creation of a dial plan in applications where the criterion for switching calls to a certain
endpoint is a function of which endpoint originated the call.
DEFAULT VALUE = 0. Zero is the default ID for all endpoints and all accept numbers. With default
values, all calls are routed based only on the dialed number.
Multiple endpoints can have the same SOURCE ID.
When creating the CALL ACCEPT list, specify a SOURCE ID(s) as well as a dialed number or range of
dialed numbers to accept.
Example: An application requires that all calls that originate from Port 1 of the ATLAS 550 in Slot 1 be
switched to Port 2 of that same module. Assign a unique SOURCE ID (e.g., 7) to Port 1 of the module, and
then configure Port 2 to only accept calls from that unique SOURCE ID (7).
DIAL PLAN (U-BRI) > NETWORK TERM > IFCE CONFIG > SWAP ANI/DNIS
Write security: 3; Read security: 5
Swaps the ANI and DNIS numbers received from the network. ANI (Automatic Number Identification) is
286
© 2002 ADTRAN, Inc.
61200305L1-1F
ATLAS 550 System Manual
Section 4, User Interface Guide
the billing number of the calling party, and DNIS (Dialed Number Identification Service) is the called
party number.
DIAL PLAN (U-BRI) > USER TERM
Write security: 3; Read security: 5
This menu allows the user to define option parameters for ports which emulate a BRI connection.
DIAL PLAN (U-BRI) > USER TERM > IFCE CONFIG
Write security: 3; Read security: 5
Specifies the configuration parameters for the endpoint.
DIAL PLAN (U-BRI) > USER TERM > IFCE CONFIG > SWITCH TYPE
Defines the type of BRI switch the ATLAS 550 emulates. If connected to another ATLAS 550, both need
to be set to the same switch type. The following options are available:
•
Lucent 5E
•
Northern DMS 100
•
National ISDN
DIAL PLAN (U-BRI) > USER TERM > IFCE CONFIG > SPID LIST
The port, acting as the network, must use a Service Profile Identifier (SPID) and phone number(s) in order
to satisfy the ISDN connection protocol expected by the user’s terminal adapter (TA).
PHONE NUMBER
Write security: 3; Read security: 5
The phone number(s) assigned to this BRI phone line.
SPID NUMBER
Write security: 3; Read security: 5
This entry must match the SPID number(s) which has been set in the network’s ISDN switch (or in
the PBX) for this BRI line. A SPID must be entered for each phone number.
The ATLAS 550 does not support autoSPID detection software which some terminal
adapters offer.
CALLS
Write security: 3; Read security: 5
The number of calls (1 or 2) which can be received or sent on this number/SPID.
D64, D56, AUDIO, SPEECH
Write security: 3; Read security: 5
These options reflect the network provisions for this SPID. If the BRI was purchased with different
services provisioned for the SPIDs, then the call must match the services supported.
61200305L1-1F
© 2002 ADTRAN, Inc.
287
Section 4, User Interface Guide
ATLAS 550 System Manual
DIAL PLAN (U-BRI) > USER TERM > IFCE CONFIG > STRIP MSD
Strips a selected quantity (choose from NONE, 1, 2, and 3) of the most significant digits (MSD) of a dialed
number prior to being forwarded out of the port.
Example: A network port could be set to accept all calls beginning with 9 (9$), and then with STRIP MSD
set to 1, all digits would be sent toward the network except the leading 9.
STRIP MSD does not affect CALL ACCEPT criteria. All of the digits (including the MSDs that
are subsequently stripped) are used as accept criterion.
DIAL PLAN (U-BRI) > USER TERM > IFCE CONFIG > SOURCE ID
Simplifies the creation of a dial plan in applications where the criterion for switching calls to a certain
endpoint is a function of which endpoint originated the call.
DEFAULT VALUE = 0. Zero is the default ID for all endpoints and all accept numbers. With default
values, all calls are routed based only on the dialed number.
Multiple endpoints can have the same SOURCE ID.
When creating the CALL ACCEPT list, specify a SOURCE ID(s) as well as a dialed number or range of
dialed numbers to accept.
Example: An application requires that all calls that originate from Port 1 of the ATLAS 550 in Slot 1 be
switched to Port 2 of that same module. Assign a unique SOURCE ID (e.g., 7) to Port 1 of the module, and
then configure Port 2 to only accept calls from that unique SOURCE ID (7).
DIAL PLAN (U-BRI) > USER TERM > IFCE CONFIG > SWAP ANI/DNIS
Swaps the ANI and DNIS numbers received from the network. ANI (Automatic Number Identification) is
the billing number of the calling party, and DNIS (Dialed Number Identification Service) is the called
party number.
DIAL PLAN (U-BRI) > USER TERM > IFCE CONFIG > OUTGOING CALLER ID
Defines the number for the ATLAS 550 to use to provide Caller ID to the Network for outgoing calls sent
through this endpoint. Choose from SEND AS PROVIDED, SUBSTITUTE IF NOT PRESENT, or SUBSTITUTE
ALWAYS.
The Caller ID number must be specific (i.e., no wildcards).
DIAL PLAN (QUAD/OCTAL FXS MODULE)
DIAL PLAN (FXS) > USER TERM
Write security: 3; Read security: 5
This menu allows the user to define option parameters for ports which emulate an analog FXS connection
288
© 2002 ADTRAN, Inc.
61200305L1-1F
ATLAS 550 System Manual
Section 4, User Interface Guide
from the Network (PSTN).
DIAL PLAN (FXS) > USER TERM > IFCE CONFIG
Write security: 3; Read security: 5
Specifies the configuration parameters for the endpoint.
DIAL PLAN (FXS) > USER TERM > IFCE CONFIG > PORTS AVAILABLE
Write security: 3; Read security: 5
Indicates which ports of the Quad/Octal FXS Option Modules have been defined in this switched endpoint
(indicated by “! “), in another switched endpoint (indicated by “s”), or in a DEDICATED MAP (indicated by
“n”). This field is read-only. The following characters may display in this field:
0-9
This port is available.
*
This port is requesting this port for this connection, but the port is not
yet activated.
!
This port is used by this endpoint.
S
This port is used elsewhere in the switched DIAL PLAN.
S
This port is in the switched dial plan and conflicts with this endpoint.
N
This port is used in one or more DEDICATED MAPS.
N
This port is in one or more DEDICATED MAPS, and conflicts with this
endpoint.
•
This port is the wrong kind of port for this endpoint.
DIAL PLAN (FXS) > USER TERM > IFCE CONFIG > NUMBER OF PORTS
Write security: 3; Read security: 5
Specifies the number of ports ATLAS 550 uses for this endpoint.
DIAL PLAN (FXS) > USER TERM > IFCE CONFIG > SIGNALING METHOD
Write security: 3; Read security: 5
Defines to the ATLAS 550 the type of signaling to be used across this trunk. The signaling selected needs
to match the signaling being provided by the network (PSTN). The following choices are available:
•
Loop Start
•
Ground Start
The ATLAS 550 converts signaling types between two endpoints (network or user terms).
DIAL PLAN (FXS) > USER TERM > IFCE CONFIG > FORWARD DISCONNECT
Write security: 3; Read security: 5
In Loop Start applications, FORWARD DISCONNECT configures the length of time loop current will stop
61200305L1-1F
© 2002 ADTRAN, Inc.
289
Section 4, User Interface Guide
ATLAS 550 System Manual
flowing once the far end has terminated the call. Applications requiring Forward Disconnect are Fax
Servers and ACDs.
DIAL PLAN (FXS) > USER TERM > IFCE CONFIG > DIRECT INWARD DIALING
Write security: 3; Read security: 5
Defines to the ATLAS 550 whether Direct Inward Dialing (DID) is being used by the network. If DID is
ENABLED, then the following information must be defined:
DIAL PLAN (FXS) > USER TERM > IFCE CONFIG > DID DIGITS TRANSFERRED
Write security: 3; Read security: 5
Defines the number of digits sent to ATLAS 550 from the network if DID is used. This option only displays
if DID is set to ENABLED.
DIAL PLAN (FXS) > USER TERM > IFCE CONFIG > CALLER ID NUMBER
Write security: 3; Read security: 5
Defines the number the ATLAS 550 uses to provide caller ID to the network for outgoing calls sent
through this endpoint. This item is optional.
The Caller ID number must be specific (i.e., no “wild cards”).
DIAL PLAN (FXS) > USER TERM > IFCE CONFIG > STRIP MSD
Write security: 3; Read security: 5
Strips a selected quantity (choose from NONE, 1, 2, and 3) of the Most Significant Digits (MSD) of a dialed
number prior to being forwarded out of the port.
Example: A network port could be set to accept all calls beginning with 9 (9$), and then with STRIP MSD
set to 1, all digits would be sent toward the network except the leading 9.
STRIP MSD does not affect CALL ACCEPT criteria. All of the digits (including the MSDs that
are subsequently stripped) are used as accept criterion.
290
© 2002 ADTRAN, Inc.
61200305L1-1F
ATLAS 550 System Manual
Section 4, User Interface Guide
DIAL PLAN (FXS) > USER TERM > IFCE CONFIG > SOURCE ID
Write security: 3; Read security: 5
Simplifies the creation of a DIAL PLAN in applications where the criterion for switching calls to a certain
endpoint is a function of which endpoint originated the call.
DEFAULT VALUE = 0. The default ID for all endpoints is 0 and all accept numbers is 0. With default
values, all calls are routed based only on the dialed number.
Multiple endpoints can have the same SOURCE ID.
When creating the CALL ACCEPT list, specify a SOURCE ID(s) as well as a dialed number or range of
dialed numbers to accept.
Example: An application requires that all calls that originate from Port 1 of the ATLAS 550 in Slot 1 be
switched to Port 2 of that same module. Assign a unique SOURCE ID (e.g., 7) to Port 1 of the module, and
then configure Port 2 to only accept calls from that unique SOURCE ID (7).
DIAL PLAN (FXS) > USER TERM > IFCE CONFIG > PORT SELECTION
Write security: 3; Read security: 5
Determines how the ATLAS 550 switchboard uses FXS ports for call routing. The CIRCULAR method can
be used for call load balancing among the available ports on the module.
NORMAL
Always start with the lowest numbered available port (i.e., for a Quad FXS
Module with four configured interfaces, Port 1 would always be used first if
available).
CIRCULAR
Contiguous ports from last to first.
ALIGNED
Provides the ability to maintain alignment between ports as if they were in
dedicated map mode. This scenario requires PORT SELECTION set to
ALIGNED on both interfaces (usually on User Term and on Net Term). An
interface that has PORT SELECTION set to ALIGNED will only process a call
from the switchboard on the same port that the incoming call was received.
Example: The unit receives an incoming call on Port 3. The switchboard looks for an interface who has
matching accept criteria to the number it received. A match is found on interface “Z” that has PORT
SELECTION set to ALIGNED. This causes interface “Z” to only process the call if it has Port 3 available. If all
matching interfaces have PORT SELECTION set to ALIGNED and none of those interfaces have Port 3
available, then a busy or fast busy will be returned to the calling party.
DIAL PLAN (FXS) > USER TERM > IFCE CONFIG > DIAL ON OFFHOOK
Write security: 3; Read security: 5
Defines a number that is automatically sent to the switchboard when a call on this endpoint is initiated
(goes off hook).
The Dial on Offhook number must be specific (i.e., no “wild cards”).
61200305L1-1F
© 2002 ADTRAN, Inc.
291
Section 4, User Interface Guide
ATLAS 550 System Manual
DIAL PLAN (FXS) > USER TERM > IFCE CONFIG > ANI TO CALLER ID
Write security: 3; Read security: 5
Use this option to generate (FSK) Caller ID out the FXS user term port to the subscriber. The ATLAS 550
generates Caller ID from the calling party number (typically when the call is terminated from a PRI). The
calling party number may also come from a Trunk Number on a network term entry, or from the Caller ID
field on a user term entry (if the call comes from one of these sources).
Additional CPE equipment is needed to receiver Caller ID, such as a Caller ID box. To receive Calling
Name information, this equipment must support Multiple Data Message Format (MDMF).
Calling Name will only be delivered (with the number) if a call is received from a PRI that
has been provisioned to provide Calling Name information. Otherwise, only the Calling
Party Number will be generated.
DIAL PLAN (QUAD/OCTAL FXO MODULE)
DIAL PLAN (FXO) > NETWORK TERM
Write security: 3; Read security: 5
This menu allows the user to define option parameters for ports which terminate an analog FXO
connection from the Network (PSTN).
DIAL PLAN (FXO) > NETWORK TERM > IFCE CONFIG
Write security: 3; Read security: 5
Specifies the configuration parameters for the endpoint.
DIAL PLAN (FXO) > NETWORK TERM > IFCE CONFIG > PORTS AVAILABLE
Write security: 3; Read security: 5
Indicates which ports of the Quad/Octal FXO Option Modules have been defined in this switched endpoint
(indicated by “! “), in another switched endpoint (indicated by “s”), or in a DEDICATED MAP (indicated by
“n”). This field is read-only. The following characters may display in this field:
292
0-9
This port is available.
*
This port is requesting this port for this connection, but the port is not
yet activated.
!
This port is used by this endpoint.
S
This port is used elsewhere in the switched DIAL PLAN.
S
This port is in the switched dial plan and conflicts with this endpoint.
N
This port is used in one or more DEDICATED MAPS.
N
This port is in one or more DEDICATED MAPS, and conflicts with this
endpoint.
•
This port is the wrong kind of port for this endpoint.
© 2002 ADTRAN, Inc.
61200305L1-1F
ATLAS 550 System Manual
Section 4, User Interface Guide
DIAL PLAN (FXO) > NETWORK TERM > IFCE CONFIG > NUMBER OF PORTS
Write security: 3; Read security: 5
Specifies the number of ports ATLAS 550 uses for this endpoint.
DIAL PLAN (FXO) > NETWORK TERM > IFCE CONFIG > SIGNALING METHOD
Write security: 3; Read security: 5
Defines to the ATLAS 550 the type of signaling to be used across this trunk. The signaling selected needs
to match the signaling being provided by the network (PSTN). The following choices are available:
•
Loop Start
•
Ground Start
The ATLAS 550 converts signaling types between two endpoints (network or user terms).
DIAL PLAN (FXO) > NETWORK TERM > IFCE CONFIG > DIGIT SUPPRESSION
Write security: 3; Read security: 5
When ENABLED, no digits will be sent toward the network/PBX after going off-hook on an outgoing call.
DIAL PLAN (FXO) > NETWORK TERM > IFCE CONFIG > DIRECT INWARD DIALING
Write security: 3; Read security: 5
Defines to the ATLAS 550 whether Direct Inward Dialing (DID) is being used by the network. If DID is
ENABLED, then the following information must be defined:
DIAL PLAN (FXO) > NETWORK TERM > IFCE CONFIG > DID DIGITS TRANSFERRED
Write security: 3; Read security: 5
Defines the number of digits sent to ATLAS 550 from the network if DID is used. This option only displays
if DID is set to ENABLED.
DIAL PLAN (FXO) > NETWORK TERM > IFCE CONFIG > DID PREFIX
Write security: 3; Read security: 5
(Visible only if DIRECT INWARD DIALING is set to Enabled.) Defines the prefix digits which are not received
as a part of the DID number. The ATLAS 550 uses the combination of prefix and DID number to determine
the user endpoint that should receive the incoming call. If DIRECT INWARD DIALING is DISABLED, a TRUNK
NUMBER must be defined.
DIAL PLAN (FXO) > NETWORK TERM > IFCE CONFIG > TRUNK NUMBER
Write security: 3; Read security: 5
(Visible only if DIRECT INWARD DIALING is set to Disabled.) When the network connection does not provide
DID digits, the ATLAS 550 must be given a number to use to determine which user endpoint should
receive the incoming call.
The TRUNK NUMBER must be specific (i.e., no “wild cards”).
61200305L1-1F
© 2002 ADTRAN, Inc.
293
Section 4, User Interface Guide
ATLAS 550 System Manual
DIAL PLAN (FXO) > NETWORK TERM > IFCE CONFIG > STRIP MSD
Write security: 3; Read security: 5
Strips a selected quantity (choose from NONE, 1, 2, and 3) of the Most Significant Digits (MSD) of a dialed
number prior to being forwarded out of the port.
Example: A network port could be set to accept all calls beginning with 9 (9$), and then with STRIP MSD
set to 1, all digits would be sent toward the network except the leading 9.
STRIP MSD does not affect CALL ACCEPT criteria. All of the digits (including the MSDs that
are subsequently stripped) are used as accept criterion.
DIAL PLAN (FXO) > NETWORK TERM > IFCE CONFIG > SOURCE ID
Write security: 3; Read security: 5
Simplifies the creation of a DIAL PLAN in applications where the criterion for switching calls to a certain
endpoint is a function of which endpoint originated the call.
DEFAULT VALUE = 0. The default ID for all endpoints is 0 and all accept numbers is 0. With default
values, all calls are routed based only on the dialed number.
Multiple endpoints can have the same SOURCE ID.
When creating the CALL ACCEPT list, specify a SOURCE ID(s) as well as a dialed number or range of
dialed numbers to accept.
Example: An application requires that all calls that originate from Port 1 of the ATLAS 550 in Slot 1 be
switched to Port 2 of that same module. Assign a unique SOURCE ID (e.g., 7) to Port 1 of the module, and
then configure Port 2 to only accept calls from that unique SOURCE ID (7).
DIAL PLAN (FXO) > NETWORK TERM > IFCE CONFIG > PORT SELECTION
Write security: 3; Read security: 5
Determines how the ATLAS 550 switchboard uses FXO ports for call routing. The CIRCULAR method can
be used for call load balancing among the available ports on the module.
NORMAL
Always start with the lowest numbered available port (i.e., for a Quad FXO
Module with four configured interfaces, Port 1 would always be used first if
available).
CIRCULAR
Contiguous ports from last to first.
ALIGNED
Provides the ability to maintain alignment between ports as if they were in
dedicated map mode. This scenario requires PORT SELECTION set to
ALIGNED on both interfaces (usually on User Term and on Net Term). An
interface that has PORT SELECTION set to ALIGNED will only process a call
from the switchboard on the same port that the incoming call was received.
Example: The unit receives an incoming call on Port 3. The switchboard looks for an interface who has
matching accept criteria to the number it received. A match is found on interface “Z” that has PORT
SELECTION set to ALIGNED. This causes interface “Z” to only process the call if it has Port 3 available. If all
matching interfaces have PORT SELECTION set to ALIGNED and none of those interfaces have Port 3
available, then a busy or fast busy will be returned to the calling party.
294
© 2002 ADTRAN, Inc.
61200305L1-1F
ATLAS 550 System Manual
Section 4, User Interface Guide
DIAL PLAN (FXO) > USER TERM
Write security: 3; Read security: 5
This menu allows the user to define option parameters for ports which terminate an analog FXO
connection from the Network (PSTN).
DIAL PLAN (FXO) > USER TERM > IFCE CONFIG
Write security: 3; Read security: 5
Specifies the configuration parameters for the endpoint.
DIAL PLAN (FXO) > USER TERM > IFCE CONFIG > PORTS AVAILABLE
Write security: 3; Read security: 5
Indicates which ports of the Quad/Octal FXO Option Modules have been defined in this switched endpoint
(indicated by “! “), in another switched endpoint (indicated by “s”), or in a DEDICATED MAP (indicated by
“n”). This field is read-only. The following characters may display in this field:
0-9
This port is available.
*
This port is requesting this port for this connection, but the port is not
yet activated.
!
This port is used by this endpoint.
S
This port is used elsewhere in the switched DIAL PLAN.
S
This port is in the switched dial plan and conflicts with this endpoint.
N
This port is used in one or more DEDICATED MAPS.
N
This port is in one or more DEDICATED MAPS, and conflicts with this
endpoint.
•
This port is the wrong kind of port for this endpoint.
DIAL PLAN (FXO) > USER TERM > IFCE CONFIG > NUMBER OF PORTS
Write security: 3; Read security: 5
Specifies the number of ports ATLAS 550 uses for this endpoint.
DIAL PLAN (FXO) > USER TERM > IFCE CONFIG > SIGNALING METHOD
Write security: 3; Read security: 5
Defines to the ATLAS 550 the type of signaling to be used across this trunk. The signaling selected needs
to match the signaling being provided by the network (PSTN). The following choices are available:
•
DPT
DPT mode operation configures the ATLAS 550to send DID digits out the USER TERM port toward the user
equipment. DPT mode is one-way operation only. Outbound calls originating from the user equipment will
not be processed.
The ATLAS 550 converts signaling types between two endpoints (network or user terms).
61200305L1-1F
© 2002 ADTRAN, Inc.
295
Section 4, User Interface Guide
ATLAS 550 System Manual
DIAL PLAN (FXO) > USER TERM > IFCE CONFIG > DIRECT INWARD DIALING
Write security: 3; Read security: 5
Defines to the ATLAS 550 whether Direct Inward Dialing (DID) is being used by the network. DID is
ENABLED when configuring the FXO Module for USER TERM operation and the following information must
be defined:
DIAL PLAN (FXO) > USER TERM > IFCE CONFIG > DID DIGITS TRANSFERRED
Write security: 3; Read security: 5
Defines the number of digits sent to ATLAS 550 from the network if DID is used. This option only displays
if DID is set to ENABLED.
DIAL PLAN (FXO) > USER TERM > IFCE CONFIG > STRIP MSD
Write security: 3; Read security: 5
Strips a selected quantity (choose from NONE, 1, 2, and 3) of the Most Significant Digits (MSD) of a dialed
number prior to being forwarded out of the port.
Example: A network port could be set to accept all calls beginning with 9 (9$), and then with STRIP MSD
set to 1, all digits would be sent toward the network except the leading 9.
STRIP MSD does not affect Call Accept criteria. All of the digits (including the MSDs that
are subsequently stripped) are used as accept criterion.
DIAL PLAN (FXO) > USER TERM > IFCE CONFIG > SOURCE ID
Write security: 3; Read security: 5
Simplifies the creation of a DIAL PLAN in applications where the criterion for switching calls to a certain
endpoint is a function of which endpoint originated the call.
DEFAULT VALUE = 0. The default ID for all endpoints is 0 and all accept numbers is 0. With default
values, all calls are routed based only on the dialed number.
Multiple endpoints can have the same SOURCE ID.
When creating the CALL ACCEPT list, specify a SOURCE ID(s) as well as a dialed number or range of
dialed numbers to accept.
Example: An application requires that all calls that originate from Port 1 of the ATLAS 550 in Slot 1 be
switched to Port 2 of that same module. Assign a unique SOURCE ID (e.g., 7) to Port 1 of the module, and
then configure Port 2 to only accept calls from that unique SOURCE ID (7).
DIAL PLAN (FXO) > NETWORK TERM > IFCE CONFIG > PORT SELECTION
Write security: 3; Read security: 5
Determines how the ATLAS 550 switchboard uses FXO ports for call routing. The CIRCULAR method can
be used for call load balancing among the available ports on the module.
NORMAL
296
Always start with the lowest numbered available port (i.e., for a Quad FXO
Module with four configured interfaces, Port 1 would always be used first if
available).
© 2002 ADTRAN, Inc.
61200305L1-1F
ATLAS 550 System Manual
Section 4, User Interface Guide
CIRCULAR
Contiguous ports from last to first.
ALIGNED
Provides the ability to maintain alignment between ports as if they were in
dedicated map mode. This scenario requires PORT SELECTION set to
ALIGNED on both interfaces (usually on User Term and on Net Term). An
interface that has PORT SELECTION set to ALIGNED will only process a call
from the switchboard on the same port that the incoming call was received.
Example: The unit receives an incoming call on Port 3. The switchboard looks for an interface who has
matching accept criteria to the number it received. A match is found on interface “Z” that has PORT
SELECTION set to ALIGNED. This causes interface “Z” to only process the call if it has Port 3 available. If all
matching interfaces have PORT SELECTION set to ALIGNED and none of those interfaces have Port 3
available, then a busy or fast busy will be returned to the calling party.
DIAL PLAN (OCTAL E&M MODULE)
DIAL PLAN (E&M) > USER TERM
Write security: 3; Read security: 5
This menu allows the user to define option parameters for ports which emulate an analog E&M connection
from the Network (PSTN).
DIAL PLAN (E&M) > USER TERM > IFCE CONFIG
Write security: 3; Read security: 5
Specifies the configuration parameters for the endpoint.
DIAL PLAN (E&M) > USER TERM > IFCE CONFIG > PORTS AVAILABLE
Write security: 3; Read security: 5
Indicates which ports of the Quad/Octal E&M Option Modules have been defined in this switched
endpoint (indicated by “! “), in another switched endpoint (indicated by “s”), or in a DEDICATED MAP
(indicated by “n”). This field is read-only. The following characters may display in this field:
0-9
This port is available.
*
This port is requesting this port for this connection, but the port is not yet activated.
!
This port is used by this endpoint.
S
This port is used elsewhere in the switched DIAL PLAN.
S
This port is in the switched dial plan and conflicts with this endpoint.
N
This port is used in one or more DEDICATED MAPS.
N
This port is in one or more DEDICATED MAPS, and conflicts with this endpoint.
•
This port is the wrong kind of port for this endpoint.
DIAL PLAN (E&M) > USER TERM > IFCE CONFIG > NUMBER OF PORTS
Write security: 3; Read security: 5
Specifies the number of ports ATLAS 550 uses for this endpoint.
61200305L1-1F
© 2002 ADTRAN, Inc.
297
Section 4, User Interface Guide
ATLAS 550 System Manual
DIAL PLAN (E&M) > USER TERM > IFCE CONFIG > SIGNALING METHOD
Write security: 3; Read security: 5
Defines to the ATLAS 550 the type of signaling to be used across this trunk. The signaling selected needs
to match the signaling being provided by the network (PSTN). The following choices are available:
•
E&M Wink
•
E&M Immediate
The ATLAS 550 converts signaling types between two endpoints (network or user terms).
DIAL PLAN (E&M) > USER TERM > IFCE CONFIG > DIRECT INWARD DIALING
Write security: 3; Read security: 5
Defines to the ATLAS 550 whether Direct Inward Dialing (DID) is being used by the network. If DID is
ENABLED, then the following information must be defined:
DIAL PLAN (E&M) > USER TERM > IFCE CONFIG > DID DIGITS TRANSFERRED
Write security: 3; Read security: 5
Defines the number of digits sent to ATLAS 550 from the network if DID is used. This option only displays
if DID is set to ENABLED.
DIAL PLAN (E&M) > USER TERM > IFCE CONFIG > CALLER ID NUMBER
Write security: 3; Read security: 5
Defines the number the ATLAS 550 uses to provide caller ID to the network for outgoing calls sent
through this endpoint. This item is optional.
The Caller ID number must be specific (i.e., no “wild cards”).
DIAL PLAN (E&M) > USER TERM > IFCE CONFIG > STRIP MSD
Write security: 3; Read security: 5
Strips a selected quantity (choose from NONE, 1, 2, and 3) of the Most Significant Digits (MSD) of a dialed
number prior to being forwarded out of the port.
Example: A network port could be set to accept all calls beginning with 9 (9$), and then with STRIP MSD
set to 1, all digits would be sent toward the network except the leading 9.
Strip MSD does not affect Call Accept criteria. All of the digits (including the MSDs that
are subsequently stripped) are used as accept criterion.
298
© 2002 ADTRAN, Inc.
61200305L1-1F
ATLAS 550 System Manual
Section 4, User Interface Guide
DIAL PLAN (E&M) > USER TERM > IFCE CONFIG > SOURCE ID
Write security: 3; Read security: 5
Simplifies the creation of a DIAL PLAN in applications where the criterion for switching calls to a certain
endpoint is a function of which endpoint originated the call.
DEFAULT VALUE = 0. The default ID for all endpoints is 0 and all accept numbers is 0. With default
values, all calls are routed based only on the dialed number.
Multiple endpoints can have the same SOURCE ID.
When creating the CALL ACCEPT list, specify a SOURCE ID(s) as well as a dialed number or range of
dialed numbers to accept.
Example: An application requires that all calls that originate from Port 1 of the ATLAS 550 in Slot 1 be
switched to Port 2 of that same module. Assign a unique SOURCE ID (e.g., 7) to Port 1 of the module, and
then configure Port 2 to only accept calls from that unique SOURCE ID (7).
DIAL PLAN (E&M) > USER TERM > IFCE CONFIG > PORT SELECTION
Write security: 3; Read security: 5
Determines how the ATLAS 550 switchboard uses E&M ports for call routing. The CIRCULAR method can
be used for call load balancing among the available ports on the module.
NORMAL
Always start with the lowest numbered available port (i.e., for a Octal E&M
Module with four configured interfaces, Port 1 would always be used first if
available).
CIRCULAR
Contiguous ports from last to first.
ALIGNED
Provides the ability to maintain alignment between ports as if they were in
dedicated map mode. This scenario requires PORT SELECTION set to
ALIGNED on both interfaces (usually on User Term and on Net Term). An
interface that has PORT SELECTION set to ALIGNED will only process a call
from the switchboard on the same port that the incoming call was received.
Example: The unit receives an incoming call on Port 3. The switchboard looks for an interface who has
matching accept criteria to the number it received. A match is found on interface “Z” that has PORT
SELECTION set to ALIGNED. This causes interface “Z” to only process the call if it has Port 3 available. If all
matching interfaces have PORT SELECTION set to ALIGNED and none of those interfaces have Port 3
available, then a busy or fast busy will be returned to the calling party.
DIAL PLAN (E&M) > USER TERM > IFCE CONFIG > DIAL ON OFFHOOK
Write security: 3; Read security: 5
Defines a number that is automatically sent to the switchboard when a call on this endpoint is initiated
(goes off hook).
The Dial on Offhook number must be specific (i.e., no “wild cards”).
61200305L1-1F
© 2002 ADTRAN, Inc.
299
Section 4, User Interface Guide
ATLAS 550 System Manual
DIAL PLAN (DUAL NX56/64 MODULE)
DIAL PLAN (V35NX) > USER TERM
Write security: 3; Read security: 5
This menu allows the user to define option parameters for ports configured for V.35 connections.
DIAL PLAN (V35NX) > USER TERM > IFCE CONFIG
Write security: 3; Read security: 5
Specifies the configuration parameters for the endpoint.
DIAL PLAN (V35NX) > USER TERM > IFCE CONFIG > PORTS AVAILABLE
Write security: 3; Read security: 5
Indicates which ports of the selected Dual Nx 56/64 Option Module have been defined in this switched
endpoint (indicated by “!”), in another switched endpoint (indicated by “s”), or in a DEDICATED MAP
(indicated by “n”). This field is read-only. The following characters may display in this field:
0-4
This port is available.
*
This port is requesting this port for this connection, but the port is not
yet activated.
!
This port is used by this endpoint.
S
This port is used elsewhere in the switched DIAL PLAN.
S
This port is in the switched dial plan and conflicts with this endpoint.
N
This port is used in one or more DEDICATED MAPS.
N
This port is in one or more DEDICATED MAPS, and conflicts with this
endpoint.
DIAL PLAN (V35NX) > USER TERM > IFCE CONFIG > NUMBER OF PORTS
Write security: 3; Read security: 5
Specifies the number of V.35 ports ATLAS 550 uses for this endpoint.
DIAL PLAN (V35NX) > USER TERM > IFCE CONFIG > NUMBER TO DIAL
Write security: 3; Read security: 5
Specifies the number to dial on an outgoing call.
DIAL PLAN (V35NX) > USER TERM > IFCE CONFIG > CALL TYPE
Write security: 3; Read security: 5
Configures the call type (either 56K or 64K) used for outgoing calls from this endpoint.
DIAL PLAN (V35NX) > USER TERM > IFCE CONFIG > DIAL CALL AS
Write security: 3; Read security: 5
Allows the outgoing call to be treated as the selected call type. Options include DIGITAL (for 56K or 64K
300
© 2002 ADTRAN, Inc.
61200305L1-1F
ATLAS 550 System Manual
Section 4, User Interface Guide
data calls), VOICE (for speech calls), and AUDIO (for 3.1kHz audio calls).
DIAL PLAN (V35NX) > USER TERM > IFCE CONFIG > SOURCE ID
Write security: 3; Read security: 5
Simplifies the creation of a dial plan in applications where the criterion for switching calls to a certain
endpoint is a function of which endpoint originated the call.
DEFAULT VALUE = 0. Zero is the default ID for all endpoint and all accept numbers. With default values,
all calls are routed based only on the dialed number.
Multiple endpoints can have the same SOURCE ID.
When creating the CALL ACCEPT list, specify a SOURCE ID(s) as well as a dialed number or range of
dialed numbers to accept.
Example: An application requires that all calls that originate from Port 1 of the ATLAS 550 in Slot 1 be
switched to Port 2 of that same module. Assign a unique SOURCE ID (e.g., 7) to Port 1 of the module, and
then configure Port 2 to only accept calls from that unique SOURCE ID (7).
DIAL PLAN (V35NX) > USER TERM > IFCE CONFIG > MIN DS0’S
Set this to 1 for typical single-call connections. Setting this greater than 1 will restrict connections to
endpoints supporting aggregation (e.g., BONDING) of the specified number of DS0s.
DIAL PLAN (V35NX) > USER TERM > IFCE CONFIG > MAX DS0’S
Set this to 1 for typical single-call connections. Setting this greater than 1 will accommodate connections
to endpoints supporting aggregation (e.g., BONDING) of up to the specified number of DS0s. This also
sets the number of DS0s presented in the negotiation of outgoing aggregate calls.
DIAL PLAN (DUAL USSI MODULE)
DIAL PLAN (USSI) > USER TERM
Write security: 3; Read security: 5
This menu allows the user to define option parameters for ports configured for USSI interface connections.
DIAL PLAN (USSI) > USER TERM > IFCE CONFIG
Write security: 3; Read security: 5
Specifies the configuration parameters for the endpoint.
61200305L1-1F
© 2002 ADTRAN, Inc.
301
Section 4, User Interface Guide
ATLAS 550 System Manual
DIAL PLAN (USSI) > USER TERM > IFCE CONFIG > PORTS AVAILABLE
Write security: 3; Read security: 5
Indicates which ports of the selected Dual USSI Option Module have been defined in this switched
endpoint (indicated by “!”), in another switched endpoint (indicated by “s”), or in a DEDICATED MAP
(indicated by “n”). This field is read-only. The following characters may display in this field:
0-4
This port is available.
*
This port is requesting this port for this connection, but the port is not
yet activated.
!
This port is used by this endpoint.
S
S
N
N
This port is used elsewhere in the switched dial plan.
This port is in the switched dial plan and conflicts with this endpoint.
This port is used in one or more dedicated maps.
This port is in one or more dedicated maps, and conflicts with this
endpoint.
DIAL PLAN (USSI) > USER TERM > IFCE CONFIG > NUMBER OF PORTS
Write security: 3; Read security: 5
Specifies the number of USSI interface ports ATLAS 550 uses for this endpoint.
DIAL PLAN (USSI) > USER TERM > IFCE CONFIG > NUMBER TO DIAL
Write security: 3; Read security: 5
Specifies the number to dial on an outgoing call.
DIAL PLAN (USSI) > USER TERM > IFCE CONFIG > CALL TYPE
Write security: 3; Read security: 5
Configures the call type (either 56K or 64K) used for outgoing calls from this endpoint.
DIAL PLAN (USSI) > USER TERM > IFCE CONFIG > DIAL CALL AS
Write security: 3; Read security: 5
Allows the outgoing call to be treated as the selected call type. Options include DIGITAL (for 56K or 64K
data calls), VOICE (for speech calls), and AUDIO (for 3.1kHz audio calls).
DIAL PLAN (USSI) > USER TERM > IFCE CONFIG > SOURCE ID
Write security: 3; Read security: 5
Simplifies the creation of a dial plan in applications where the criterion for switching calls to a certain
endpoint is a function of which endpoint originated the call.
DEFAULT VALUE = 0. Zero is the default ID for all endpoints and all accept numbers. With default
values, all calls are routed based only on the dialed number.
Multiple endpoints can have the same SOURCE ID.
302
© 2002 ADTRAN, Inc.
61200305L1-1F
ATLAS 550 System Manual
Section 4, User Interface Guide
When creating the CALL ACCEPT list, specify a SOURCE ID(s) as well as a dialed number or range of
dialed numbers to accept.
Example: An application requires that all calls that originate from Port 1 of the ATLAS 550 in Slot 1 be
switched to Port 2 of that same module. Assign a unique SOURCE ID (e.g., 7) to Port 1 of the module, and
then configure Port 2 to only accept calls from that unique SOURCE ID (7).
DIAL PLAN (USSI) > USER TERM > IFCE CONFIG > MIN DS0’S
Write security: 3; Read security: 5
Set this to 1 for typical single-call connections. Setting this greater than 1 will restrict connections to
endpoints supporting aggregation (e.g., BONDING) of the specified number of DS0s.
DIAL PLAN (USSI) > USER TERM > IFCE CONFIG > MAX DS0’S
Write security: 3; Read security: 5
Set this to 1 for typical single-call connections. Setting this greater than 1 will accommodate connections
to endpoints supporting aggregation (e.g., BONDING) of up to the specified number of DS0s. This also
sets the number of DS0s presented in the negotiation of outgoing aggregate calls.
DIAL PLAN (QUAD BRI S/T MODULE)
DIAL PLAN (S/T BRI) > USER TERMINATION
Write security: 2; Read security: 5
The Quad BRI S/T Module acts like the network while interfacing to user equipment (terminal adapters).
When you are working in the network termination section of the DIAL PLAN menu and SLT is defined as a
S/T BRI module, the following interface configuration options are available:
Using the Quad BRI S/T Module on a User Term endpoint requires the use of a
straight-through ISDN S/T cable.
DIAL PLAN (S/T BRI) > USER TERMINATION > IFCE CONFIG > SWITCH TYPE
Write security: 2; Read security: 5
Defines the type of ISDN switch that the port will simulate. If connected to another ATLAS, both need to
be set to the same type. The following options are available:
•
Lucent 5E
•
•
Northern DMS 100 •
National ISDN
Euro ISDN
DIAL PLAN (S/T BRI) > USER TERMINATION > IFCE CONFIG > SPID LIST
Write security: 2; Read security: 5
The port, acting as the network, must use a SPID and a phone number in order to satisfy the ISDN
connection protocol expected by the user’s Terminal Adapter (TA).
PHONE NUMBER
Write security: 3; Read security: 5
The phone number(s) assigned to this BRI phone line.
61200305L1-1F
© 2002 ADTRAN, Inc.
303
Section 4, User Interface Guide
ATLAS 550 System Manual
SPID NUMBER
Write security: 3; Read security: 5
Defines the SPID number(s) used for this BRI line. Although the value of the SPID is not significant,
a SPID must be entered for each phone number. For convenience, the SPID can be set to be the same
as the phone number. The Quad BRI S/T Module does not support autoSPID detection software
which some terminal adapters offer.
No SPID Number is needed for the Euro-ISDN Switch Type.
CALLS
Write security: 3; Read security: 5
For User terminations, the number of calls is fixed at 2.
D64, D56, AUDIO, SPEECH
Write security: 3; Read security: 5
These options reflect the network provisions for this SPID. If the BRI was purchased with different
services provisioned for the SPIDs, then the call must match the services supported.
DIAL PLAN (PKT ENDPT - PACKET ENDPOINTS)
DIAL PLAN (PKT ENDPT) > USER TERM
Write security: 3; Read security: 5
This menu allows the user to define option parameters for ports configured as packet endpoints.
DIAL PLAN (PKT ENDPT) > USER TERM > IFCE CONFIG
Write security: 3; Read security: 5
Specifies the configuration parameters for the endpoint.
DIAL PLAN (PKT ENDPT) > USER TERM > IFCE CONFIG > OUTDIAL NUMBER
Write security: 3; Read security: 5
Defines the number dialed to originate a call.
DIAL PLAN (PKT ENDPT) > USER TERM > IFCE CONFIG > OUTGOING CALL TYPE
Write security: 3; Read security: 5
Selects the terminating resource type, either DIGITAL 64K or DIGITAL 56K.
DIAL PLAN (PKT ENDPT) > USER TERM > IFCE CONFIG > REDIAL TIMER
Write security: 3; Read security: 5
Selects the time delay in seconds between redial attempts.
304
© 2002 ADTRAN, Inc.
61200305L1-1F
ATLAS 550 System Manual
Section 4, User Interface Guide
DIAL PLAN (PKT ENDPT) > USER TERM > IFCE CONFIG > RANDOMIZE TIMER
Write security: 3; Read security: 5
Enables/disables random delay added to the redial timer to avoid glare.
DIAL PLAN (PKT ENDPT) > USER TERM > IFCE CONFIG > RETRY COUNT
Write security: 3; Read security: 5
Defines the number of redials to attempt.
DIAL PLAN (PKT ENDPT) > USER TERM > IFCE CONFIG > OUTGOING CALLER ID
Write security: 3; Read security: 5
Defines the presentation of the calling party number for this endpoint.
DIAL PLAN (PKT ENDPT) > USER TERM > IFCE CONFIG > SOURCE ID
Write security: 3; Read security: 5
Simplifies the creation of a DIAL PLAN in applications where the criterion for switching calls to a certain
endpoint is a function of which endpoint originated the call.
DEFAULT VALUE = 0. Zero is the default value for all endpoints and all accept numbers. With default
values, all calls are routed based only on the dialed number.
Multiple endpoints can have the same SOURCE ID.
When creating the CALL ACCEPT list, specify a SOURCE ID(s) as well as a dialed number or range of
dialed numbers to accept.
Example: An application requires that all calls that originate from Port 1 of the ATLAS 550 in Slot 1 be
switched to Port 2 of that same module. Assign a unique SOURCE ID (e.g., 7) to Port 1 of the module, and
then configure Port 2 to only accept calls from that unique SOURCE ID (7).
DIAL PLAN (PKT ENDPT) > USER TERM > IFCE CONFIG > ROUTE INCOMING CALL
Write security: 3; Read security: 5
Used to define the method which incoming calls are associated to the packet endpoints. This item has three
options:
USING INCOMING
NUM
Endpoint selection based on the incoming number.
USING CALLING
PARTY NUM
Selection based on the Caller ID as presented by the calling party. If this
option is selected, the CALL PARTY NUMBER field is made available to
the interface configuration. This number allows you to configure the
calling part number used to select this packet endpoint.
USING DBU
HANDSHAKE
Selection based on a proprietary protocol. This option is only available
to packet endpoints with backup sublinks. DBU HANDSHAKE is required
to interoperate with ADTRAN IQ and Express family products. It
enables the association of incoming calls with packet endpoints in cases
where there is a single call-in number (hunt group) and no Caller ID
information available.
61200305L1-1F
© 2002 ADTRAN, Inc.
305
Section 4, User Interface Guide
ATLAS 550 System Manual
DBU HANDSHAKE must be disabled for DBU between two ATLAS products.
DIAL PLAN (PKT ENDPT) > USER TERM > IFCE CONFIG > SUPPORT DBU HANDSHAKE
Write security: 3; Read security: 5
DBU HANDSHAKE must be disabled for DBU between two ATLAS products.
This option is only available when the packet endpoint selected in the PORT/PEP field has backup sublinks.
SUPPORT DBU HANDSHAKE enables/disables the generation and acceptance of ADTRAN frame relay
handshake upon connection. If the endpoint is configured to route incoming calls based on the handshake
information, this option is automatically enabled. If another call routing method is in effect, however, this
option can be enabled to support the use of handshake information at the far end of the link.
DIAL PLAN (PKT ENDPT) > USER TERM > IFCE CONFIG > SUPPORT DBU HANDSHAKE
Write security: 3; Read security: 5
Controls contents of the ADTRAN frame-relay handshake upon connection of a backup PVC. Normally
this field should be set to AUTO. The FORCED mode is present for compatibility with older IQ units.
DIAL PLAN (PKT ENDPT) > USER TERM > IFCE CONFIG > CALL PARTY NUMBER
Write security: 3; Read security: 5
(Visible only if GROUP is selected in the PORT/PEP field.) Enter the expected calling part number in this
field. The ATLAS 550 will use the number entered here to compare to the number presented by the
incoming call when configured to route based on Call Party Number.
DIAL PLAN (PKT ENDPT) > USER TERM > IFCE CONFIG > MIN DS0’S
Write security: 3; Read security: 5
Set this to 1 for typical single-call connections. A value greater than 1 will restrict connections to endpoints
supporting aggregation (e.g., BONDING) of the specified number of DS0s.
DIAL PLAN (PKT ENDPT) > USER TERM > IFCE CONFIG > MAX DS0’S
Write security: 3; Read security: 5
Set this to 1 for typical single-call connections. A value greater than 1 will accommodate connections to
endpoints supporting aggregation (e.g., BONDING) of up to the specified number of DS0s. This also sets
the number of DS0s presented in the negotiation of outgoing aggregate calls.
DIAL PLAN (PKT ENDPT) > USER TERM > IFCE CONFIG > CALL ROUTING TABLE
Write security: 3; Read security: 5
This table is only visible if GROUP is selected in the PRT/PEP field. The table format changes, based on the
306
© 2002 ADTRAN, Inc.
61200305L1-1F
ATLAS 550 System Manual
Section 4, User Interface Guide
selected routing option. For each case, CALL PARAMS contain OUTDIAL#, CALLER ID, SOURCE ID, and
MIN/MAX DS0S, as described above.
DIAL PLAN (CKT BACKUP - CIRCUIT BACKUP ENDPOINTS)
DIAL PLAN (CKT BACKUP) > USER TERM
Write security: 3; Read security: 5
This menu allows the user to define option parameters for ports configured as backup endpoints.
DIAL PLAN (CKT BACKUP) > USER TERM > IFCE CONFIG
Write security: 3; Read security: 5
Specifies the configuration parameters for the endpoint.
DIAL PLAN (CKT BACKUP) > USER TERM > IFCE CONFIG > ORIGINATE/ANSWER
Write security: 3; Read security: 5
The following selections are available for the ORIGINATE/ANSWER menu item:
ORIGINATE
The endpoint will originate the backup call.
ANSWER
The endpoint will answer any incoming calls, but will only go into
backup if an error is detected.
ANSWER ANY
The endpoint will answer any incoming calls and go immediately into
backup.
DIAL PLAN (CKT BACKUP) > USER TERM > IFCE CONFIG > OUTGOING CALL TYPE
Write security: 3; Read security: 5
This only applies to originating endpoints.
DIAL PLAN (CKT BACKUP) > USER TERM > IFCE CONFIG > SOURCE ID
Write security: 3; Read security: 5
Simplifies the creation of a dial plan in applications where the criterion for switching calls to a certain
endpoint is a function of which endpoint originated the call.
DEFAULT VALUE = 0. Zero is the default ID for all endpoints and accept numbers. With default values,
all calls are routed based only on the dialed number.
Multiple endpoints can have the same SOURCE ID.
When creating the CALL ACCEPT list, specify a SOURCE ID(s) as well as a dialed number or range of
dialed numbers to accept.
DIAL PLAN (CKT BACKUP) > USER TERM > IFCE CONFIG > OUTDIAL NUMBER
Write security: 3; Read security: 5
This only applies to originating endpoints. This is the number dialed when the endpoint goes into backup.
61200305L1-1F
© 2002 ADTRAN, Inc.
307
Section 4, User Interface Guide
ATLAS 550 System Manual
DIAL PLAN (CKT BACKUP) > USER TERM > IFCE CONFIG > FORCE MODE
Write security: 3; Read security: 5
This forces the backup state of this endpoint. This is a configuration setting, so it will retain its value until
it is changed. To temporarily force an endpoint into backup, or to force a restore, try the Manual activator.
DIAL PLAN (CKT BACKUP) > USER TERM > IFCE CONFIG > BACKUP CRITERIA
Write security: 3; Read security: 5
Criteria for automatic backup. Note that this setting affects the available options for RESTORE CRITERIA.
NET/DATA FAIL
DBU is initiated when either the network fails (possible causes include Red, Yellow,
Blue, or LOS alarms) or when the Nx56/64 module detects a loss of data transitions
on the V.35 interface. If Net/Data Fail is selected, the V.35 Nx INBAND option
must be ON. The remote TSU INBAND option must also be enabled.
When BACKUP CRITERIA is configured for NET/DATA FAIL, the RESTORE CRITERIA must be
MANUAL ONLY.
NET FAIL
DBU is initiated when there is a network failure. Possible causes include LOS,
RED, Yellow, or Blue alarms.
MANUAL
The ATLAS will never initiate DBU until it is manually set to do so.
DIAL PLAN (CKT BACKUP) > USER TERM > IFCE CONFIG > RESTORE CRITERIA
Write security: 3; Read security: 5
This only applies to originating endpoints. These are criteria for automatically coming out of backup. Note
that NETWORK SUCCESS is only available when a backup criterion is not NET/DATA FAIL.
NET SUCCESS
When network is out of alarm
MANUAL ONLY
Only by the Manual activator
DIAL PLAN (CKT BACKUP) > USER TERM > IFCE CONFIG > STARTUP DELAY
Write security: 3; Read security: 5
The amount of time to wait after creating or changing the endpoint before allowing backup.
DIAL PLAN (CKT BACKUP) > USER TERM > IFCE CONFIG > BACKUP DELAY
Write security: 3; Read security: 5
The amount of time to delay after detecting an alarm before going into backup. This only applies to
originating endpoints. If the circuit comes out of alarm before this time has expired, the endpoint will not
go into backup.
308
© 2002 ADTRAN, Inc.
61200305L1-1F
ATLAS 550 System Manual
Section 4, User Interface Guide
DIAL PLAN (CKT BACKUP) > USER TERM > IFCE CONFIG > RESTORE DELAY
Write security: 3; Read security: 5
The amount of time to delay after clearing an alarm before coming out of backup. This only applies to
originating endpoints. If the circuit goes into alarm before this time has expired, the endpoint will remain
in backup.
DIAL PLAN (CKT BACKUP) > USER TERM > IFCE CONFIG > MAX NUM REDIALS
Write security: 3; Read security: 5
The backup endpoint will attempt this many retries before giving up and declaring a backup failure. This
only applies to originating endpoints.
DIAL PLAN (CKT BACKUP) > USER TERM > IFCE CONFIG > REDIAL TIMER
Write security: 3; Read security: 5
The amount of time delayed between a failed backup call and the redial. This only applies to originating
endpoints.
DIAL PLAN (CKT BACKUP) > USER TERM > IFCE CONFIG > ENABLE SCHEDULE
Write security: 3; Read security: 5
Use this menu to schedule the times when backup is enabled. The following selections are available for the
ENABLE SCHEDULE menu item.
ENABLE TIME
Write security: 3; Read security: 5
This is the time of day to enable dial backup.
DISABLE TIME
Write security: 3; Read security: 5
This is the time of day to disable dial backup. If the disable time is earlier than the enable time,
backup monitoring will be active across midnight.
DAYS ENABLED
Write security: 3; Read security: 5
Use this record to enable/disable backup monitoring on particular days of the week.
DIAL PLAN (CKT BACKUP) > USER TERM > IFCE CONFIG > TEST CALL
Write security: 3; Read security: 5
This only applies to originating endpoints. Use this menu to schedule regularly occurring test calls. The
following selections are available for the TEST CALL menu item.
PERIOD
Write security: 3; Read security: 5
How often test calls are to be made
61200305L1-1F
© 2002 ADTRAN, Inc.
309
Section 4, User Interface Guide
ATLAS 550 System Manual
NEXT TEST TIME
Write security: 3; Read security: 5
The date of the next scheduled test call
DIAL PLAN (CKT BACKUP) > USER TERM > IFCE CONFIG > MIN NUM DS0S
Write security: 3; Read security: 5
This option will specify the number of DS0s to use for this switched call. If this number is 1, all calls will
be directed to the endpoint, and not use a BONDING resource. Any number other than 1 will use
BONDING resources to inverse multiplex the multiple switched channels together.
DIAL PLAN (CKT BACKUP) > USER TERM > IFCE CONFIG > MAX NUM DS0S
Write security: 3; Read security: 5
This option will specify the number of DS0s to use for this switched call. If this number is 1, all calls will
be directed to the endpoint, and not use a BONDING resource. Any number other than 1 will use
BONDING resources to inverse multiplex the multiple switched channels together.
DIAL PLAN (PKT VOICE - PACKET VOICE ENDPOINT)
DIAL PLAN (PKT VOICE) > NETWORK TERM
Write security: 3; Read security: 5
This menu allows the user to define option parameters for ports configured as network packet voice
endpoints.
DIAL PLAN (PKT VOICE) > NETWORK TERM > IFCE CONFIG
Write security: 3; Read security: 5
Specifies the configuration parameters for the endpoint.
DIAL PLAN (PKT VOICE) > NETWORK TERM > IFCE CONFIG > DLCI
Write security: 3; Read security: 5
Selects the appropriate DLCI for this dial plan entry.
DIAL PLAN (PKT VOICE) > NETWORK TERM > IFCE CONFIG > VOICE PORT
Write security: 3; Read security: 5
Identifies the voice port address of the remote unit. FSU 5622s support ports 1 and 2. A remote ATLAS
supports ports 1 through 255.
DIAL PLAN (PKT VOICE) > NETWORK TERM > IFCE CONFIG > CONFLICT REPORT
Write security: 3; Read security: 5
Describes existing conflicts. Potential problems include DLCI unavailable or Voice port already in use.
310
© 2002 ADTRAN, Inc.
61200305L1-1F
ATLAS 550 System Manual
Section 4, User Interface Guide
DIAL PLAN (PKT VOICE) > NETWORK TERM > IFCE CONFIG > VOICE COMPRESSION
Write security: 3; Read security: 5
Configures the compression algorithm used on the selected packet voice endpoint. The default
compression algorithm in the FSU and Express 52XX series is G.723.1. Valid codecs for the VCOM
Module include G.723.1 and NETCODER. Valid codecs for the ADPCM-32 Module include G.711, G.726,
and TRANSPARENT. The ADPCM-32 Module will only operate with another ATLAS containing an
ADPCM-32 Module. Both endpoints must agree on the selected compression algorithm.
The ADPCM-32 Resource Module will not interoperate with the FSU and Express series
products.
DIAL PLAN (PKT VOICE) > NETWORK TERM > IFCE CONFIG > SILENCE SUPPRESSION
Write security: 3; Read security: 5
Reduces the total system bandwidth load by preventing ATLAS from sending frames containing a special
silence code during periods of silence. Both endpoints must agree to use silence suppression. By default,
silence suppression is Disabled. To prohibit silence frames from transmitting and to decrease the total
system bandwidth, ENABLE this feature.
DIAL PLAN (PKT VOICE) > NETWORK TERM > IFCE CONFIG > SIGNALING METHOD
Write security: 3; Read security: 5
Selects the type of signaling that the remote port is configured to expect. Available options include E&M
IMMEDIATE, E&M WINK, and LOOP START.
DIAL PLAN (PKT VOICE) > NETWORK TERM > IFCE CONFIG > DIRECT INWARD DIALING
Write security: 3; Read security: 5
Defines whether Direct Inward Dialing (DID) is used by the remote equipment. If DID is enabled, then the
following options must be configured:
DIAL PLAN (PKT VOICE) > NETWORK TERM > IFCE CONFIG > DID DIGITS TRANSFERRED
Write security: 3; Read security: 5
Defines the number of digits sent to ATLAS from the network if DIRECT INWARD DIALING is ENABLED.
DIAL PLAN (PKT VOICE) > NETWORK TERM > IFCE CONFIG > DID PREFIX
Write security: 3; Read security: 5
Defines to ATLAS the prefix digits which are not received as a part of the DID number. ATLAS uses the
combination of prefix and DID number to determine the user endpoint that should receive the incoming
call.
DIAL PLAN (PKT VOICE) > NETWORK TERM > IFCE CONFIG > TRUNK NUMBER
Write security: 3; Read security: 5
Determines which user endpoint should receive the incoming call when the network connection does not
61200305L1-1F
© 2002 ADTRAN, Inc.
311
Section 4, User Interface Guide
ATLAS 550 System Manual
provide DID digits. This field only displays if DIRECT INWARD DIALING is set to DISABLED.
DIAL PLAN (PKT VOICE) > NETWORK TERM > IFCE CONFIG > STRIP MSD
Write security: 3; Read security: 5
Strips a selected quantity (choose from NONE, 1, 2, and 3) of the most significant digits (MSD) of a dialed
number prior to being forwarded out of the port.
Example: A network port could be set to accept all calls beginning with 9 (9$), and then with STRIP MSD
set to 1, all digits would be sent toward the network except the leading 9.
STRIP MSD does not affect CALL ACCEPT criteria. All of the digits (including the MSDs that
are subsequently stripped) are used as accept criterion.
DIAL PLAN (PKT VOICE) > NETWORK TERM > IFCE CONFIG > SOURCE ID
Write security: 3; Read security: 5
Simplifies the creation of a dial plan in applications where the criterion for switching calls to a certain
endpoint is a function of which endpoint originated the call.
DEFAULT VALUE = 0. Zero is the default ID for all endpoints and accept numbers. With default values,
all calls are routed based only on the dialed number.
Multiple endpoints can have the same SOURCE ID.
When creating the CALL ACCEPT list, specify a SOURCE ID(s) as well as a dialed number or range of
dialed numbers to accept.
DIAL PLAN (PKT VOICE) > USER TERM
Write security: 3; Read security: 5
This menu allows the user to define option parameters for ports configured as user packet voice endpoints.
DIAL PLAN (PKT VOICE) > USER TERM > IFCE CONFIG
Write security: 3; Read security: 5
Specifies the configuration parameters for the endpoint.
DIAL PLAN (PKT VOICE) > USER TERM > IFCE CONFIG > DLCI
Write security: 3; Read security: 5
Selects the appropriate DLCI for this dial plan entry.
DIAL PLAN (PKT VOICE) > USER TERM > IFCE CONFIG > VOICE PORT
Write security: 3; Read security: 5
Identifies the voice port address of the remote unit. FSU 5622s support ports 1 and 2. A remote ATLAS
supports ports 1 through 255.
312
© 2002 ADTRAN, Inc.
61200305L1-1F
ATLAS 550 System Manual
Section 4, User Interface Guide
DIAL PLAN (PKT VOICE) > USER TERM > IFCE CONFIG > CONFLICT REPORT
Write security: 3; Read security: 5
Describes existing conflicts. Potential problems include DLCI unavailable or Voice port already in use.
DIAL PLAN (PKT VOICE) > USER TERM > IFCE CONFIG > VOICE COMPRESSION
Write security: 3; Read security: 5
Configures the compression algorithm used on the selected packet voice endpoint. The default
compression algorithm in the FSU and Express 52XX series is G.723.1. Valid codecs for the VCOM
Module include G.723.1 and NETCODER. Valid codecs for the ADPCM-32 Module include G.711, G.726,
and TRANSPARENT. The ADPCM-32 Module will only operate with another ATLAS containing an
ADPCM-32 Module. Both endpoints must agree on the selected compression algorithm.
The ADPCM-32 Resource Module will not interoperate with the FSU and Express series
products.
DIAL PLAN (PKT VOICE) > USER TERM > IFCE CONFIG > SILENCE SUPPRESSION
Write security: 3; Read security: 5
Reduces the total system bandwidth load by preventing ATLAS from sending frames containing a special
silence code during periods of silence. Both endpoints must agree to use silence suppression. By default,
silence suppression is DISABLED. To prohibit silence frames from transmitting and to decrease the total
system bandwidth, ENABLE this feature.
DIAL PLAN (PKT VOICE) > USER TERM > IFCE CONFIG > SIGNALING METHOD
Write security: 3; Read security: 5
Selects the type of signaling that the remote port is configured to expect. Available options include the
following: E&M IMMEDIATE, E&M WINK, and LOOP START.
DIAL PLAN (PKT VOICE) > USER TERM > IFCE CONFIG > DIRECT INWARD DIALING
Write security: 3; Read security: 5
Defines whether or not Direct Inward Dialing (DID) is used by the remote equipment. If DID is enabled,
then the following options must be configured:
DIAL PLAN (PKT VOICE) > USER TERM > IFCE CONFIG > DID DIGITS TRANSFERRED
Write security: 3; Read security: 5
Defines the number of digits ATLAS 550 send to the user equipment.This field only displays if DIRECT
INWARD DIALING is ENABLED.
DIAL PLAN (PKT VOICE) > USER TERM > IFCE CONFIG > CALLER ID NUMBER
Write security: 3; Read security: 5
Defines the number ATLAS uses to provide Caller ID to the network for outgoing calls sent through this
endpoint. This field only displays if DIRECT INWARD DIALING is set to DISABLED, and USER TERM is selected.
Setting this menu item is optional.
61200305L1-1F
© 2002 ADTRAN, Inc.
313
Section 4, User Interface Guide
ATLAS 550 System Manual
DIAL PLAN (PKT VOICE) > USER TERM > IFCE CONFIG > STRIP MSD
Write security: 3; Read security: 5
Strips a selected quantity (choose from NONE, 1, 2, and 3) of the most significant digits (MSD) of a dialed
number prior to being forwarded out of the port.
Example: A network port could be set to accept all calls beginning with 9 (9$), and then with STRIP MSD
set to 1, all digits would be sent toward the network except the leading 9.
STRIP MSD does not affect CALL ACCEPT criteria. All of the digits (including the MSDs that
are subsequently stripped) are used as accept criterion.
DIAL PLAN (PKT VOICE) > USER TERM > IFCE CONFIG > SOURCE ID
Write security: 3; Read security: 5
Simplifies the creation of a dial plan in applications where the criterion for switching calls to a certain
endpoint is a function of which endpoint originated the call.
DEFAULT VALUE = 0. The default ID for all endpoints is 0 and all accept numbers is 0. With default
values, all calls are routed based only on the dialed number.
Multiple endpoints can have the same SOURCE ID.
When creating the CALL ACCEPT list, specify a SOURCE ID(s) as well as a dialed number or range of
dialed numbers to accept.
314
© 2002 ADTRAN, Inc.
61200305L1-1F
DETAIL LEVEL PROCEDURES
DLP-001
Connecting the Terminal or PC to the CONTROL/CRAFT Port ..........................................317
DLP-002
Logging in to the System .....................................................................................................319
DLP-003
Setting IP Parameters for the ATLAS 550 ..........................................................................323
DLP-004
Verifying Communications Over an IP LAN ........................................................................325
DLP-005
Adding/Removing Users and Changing Password Security Levels ....................................329
DLP-006
Updating the Firmware Using TFTP ....................................................................................331
DLP-007
Updating the Firmware Using XMODEM ............................................................................335
DLP-008
Saving the Current Configuration Using TFTP ....................................................................339
DLP-009
Loading a Configuration Using TFTP ..................................................................................341
DLP-010
Saving the Current Configuration Using XMODEM ............................................................343
DLP-011
Loading a Configuration Using XMODEM ...........................................................................345
DLP-012
Connecting the ATLAS 550 to an External Modem ............................................................347
DLP-013
Using the ADTRAN Utility Syslog with the ATLAS 550 .......................................................351
DLP-014
Connecting the Alarm Contacts ..........................................................................................355
DLP-015
Using the Alarm Connections and ACO Button ..................................................................359
61200305L1-1F
© 2002 ADTRAN, Inc.
315
Section 5, DLP-Index
316
ATLAS 550 System Manual
© 2002 ADTRAN, Inc.
61200305L1-1F
CONNECTING THE TERMINAL OR PC TO THE CONTROL/CRAFT PORT
Introduction
ATLAS 550 management and provisioning are facilitated by a series of intuitive menus that are accessible
on a computer screen. Connecting either a VT100 terminal or a PC with terminal emulation software to the
CONTROL IN port on the rear of the unit or the CRAFT interface on the unit faceplate allows access to the
menus and management features of ATLAS 550. This section specifies how to connect the VT100 terminal
or PC to the ATLAS 550.
The front CRAFT interface for the ATLAS 550 is located on the faceplate of the unit and is an RJ-45
connector. Access can also be made to the ATLAS 550 from the back of the unit through the port labeled
CONTROL IN. It is also an RJ-45 connector, and is located on the lower right corner of the back of the unit.
Prerequisite Procedures
The ATLAS 550 must be powered for terminal communication to function.
Tools and Materials Required
•
•
VT100 compatible terminal or computer with terminal emulation software
Appropriate cable to connect terminal to the ATLAS 550 (shipped with unit)
To prevent electrical shock, do not install equipment in a wet location or during a
lightning storm.
Electronic modules can be damaged by static electrical discharge. Before handling
modules, wear an antistatic discharge wrist strap to prevent damage to electronic
components. Place modules in antistatic packing material when transporting or storing.
When working on modules, always place them on an approved antistatic mat that is
electrically grounded.
61200305L1-1F
© 2002 ADTRAN, Inc.
317
Section 5, DLP-001
ATLAS 550 System Manual
DLP-001
Perform Steps Below in the Order Listed
1. Connect a VT100 terminal to ATLAS 550.
•
Set the parameters of the VT100 terminal to:
– 9600 baud rate
– 8 data bits
– No parity
– 1 stop bit
– No flow control
•
If the terminal has a parallel setting, disable it and use serial port.
•
Plug the RJ-45 male end of the data cable into the ATLAS 550. Make the connection to the
VT100 terminal as appropriate for your equipment.
2. Connect a PC emulating a VT100 terminal to ATLAS 550.
Most personal computers or laptops can run communications software that will emulate a VT100
terminal. Windows programs such as Terminal© or Hyperterminal© are two such examples in the
Windows format. However, there are many other adequate, commercially available software packages
which will allow your PC or laptop to emulate a VT100 terminal. Certain configuration items must be
set on a PC or laptop for it to act as a VT100 terminal for the ATLAS 550.
•
Set the parameters of the communications software to:
– 9600 baud rate
– 8 data bits
– No parity
– 1 stop bit
– No flow control
•
Set the PC for direct connect on the appropriate com port (instead of dial up connection).
•
Plug the RJ-45 male end of the data cable into the ATLAS 550. Make connection to the PC
or laptop as appropriate for your equipment.
You are now ready to log in to ATLAS 550, as described in DLP-002, Logging in to the System.
Follow-up Procedures
Once this procedure is complete, return to the procedure which referred you to this DLP and continue with
the tasks indicated there.
318
© 2002 ADTRAN, Inc.
61200305L1-1F
LOGGING IN TO THE SYSTEM
Introduction
Once connected to the ATLAS 550 via either a VT100 terminal or PC configured as a VT100 terminal, it is
necessary to log in to the system to gain access to the management and provisioning functions. This DLP
provides specific steps for logging into the system and accessing the various management and provisioning
functions.
Prerequisite Procedures
Complete DLP-001, Connecting the Terminal or PC to the CONTROL/CRAFT Port before logging in to
ATLAS 550.
Tools and Materials Required
•
•
Data cable to connect to a VT100 terminal or a PC configured as a VT100 terminal (shipped with unit)
VT100 terminal or PC configured as a VT100 terminal
To prevent electrical shock, do not install equipment in a wet location or during a
lightning storm.
Electronic modules can be damaged by static electrical discharge. Before handling
modules, wear an antistatic discharge wrist strap to prevent damage to electronic
components. Place modules in antistatic packing material when transporting or storing.
When working on modules, always place them on an approved antistatic mat that is
electrically grounded.
61200305L1-1F
© 2002 ADTRAN, Inc.
319
Section 5, DLP-002
ATLAS 550 System Manual
DLP-002
Perform Steps Below in the Order Listed
1. After connecting to the system, a blank screen will appear.
Pressing any key will display the login screen shown below.
The cursor will blink at the LOGIN field, waiting for a password to be entered.
2. At the LOGIN field, enter the password for the ATLAS 550.
The manufacturer’s default password for the ATLAS 550 system is “password” in lowercase letters.
The ATLAS 550 has six levels of access granted to a user. The lowest level of access (Level 5) is
read-only, and allows a user to see, but not change, the current configuration of the system. The top
level of access (Level 0) is read-write and allows the user to both see and change system configuration
parameters.
After initial login, the System Administrator is able to define levels of access for various users. (See
DLP-005, Adding/Removing Users and Changing Password Security Levels for more details.)
320
© 2002 ADTRAN, Inc.
61200305L1-1F
ATLAS 550 System Manual
Section 5, DLP-002
3. Upon entering the correct password, the ATLAS 550 MAIN MENU is displayed as shown below.
4. You are now logged in to the ATLAS menu system.
You may also connect to the unit via Telnet if the IP parameters have been provisioned (as
discussed in DLP-003).
Follow-up Procedures
Once this procedure is complete, return to the procedure which referred you to this DLP and continue with
the tasks indicated there.
61200305L1-1F
© 2002 ADTRAN, Inc.
321
Section 5, DLP-002
322
ATLAS 550 System Manual
© 2002 ADTRAN, Inc.
61200305L1-1F
SETTING IP PARAMETERS FOR THE ATLAS 550
Introduction
If the ATLAS 550 is connected to an IP network for Telnet, TFTP, or SNMP management, several IP
parameters must be set for the unit to communicate with the network. These parameters are described in
this DLP along with the procedures for setting them.
Please see your Network Administrator for the proper assignment of the following
parameters: IP ADDRESS, SUBNET MASK, and DEFAULT GATEWAY.
Prerequisite Procedures
This procedure assumes that the ATLAS 550 unit is connected to an IP network and is powered up.
Tools and Materials Required
•
•
Data cable to connect to either a VT100 terminal or a PC configured as a VT100 terminal
VT100 terminal or PC configured as a VT100 terminal
To prevent electrical shock, do not install equipment in a wet location or during a
lightning storm.
Electronic modules can be damaged by static electrical discharge. Before handling
modules, wear an antistatic discharge wrist strap to prevent damage to electronic
components. Place modules in antistatic packing material when transporting or storing.
When working on modules, always place them on an approved antistatic mat that is
electrically grounded.
61200305L1-1F
© 2002 ADTRAN, Inc.
323
Section 5, DLP-003
ATLAS 550 System Manual
DLP-003
Perform Steps Below in the Order Listed
1. Connect the ATLAS 550 unit to your VT100 system (details found in DLP-001).
2. Login to the system with maximum rights (details for logging in are in DLP-002).
3. From the SYSTEM CONFIG menu, select the ETHERNET PORT option and press <Enter>.
The next three steps will require confirmation after each change.
4. From the SYSTEM CONFIG/ETHERNET menu, select the IP ADDRESS option and press <Enter>.
Enter the appropriate IP address.
5. From the SYSTEM CONFIG/ETHERNET menu, select the SUBNET MASK option and press <Enter>.
Enter the appropriate Subnet Mask.
6. From the SYSTEM CONFIG/ETHERNET menu, select the DEFAULT GATEWAY option and press <Enter>.
Enter the appropriate Default Gateway.
7. Left arrow to highlight the ETHERNET submenu to save changes.
8. Escape out to the SYSTEM CONFIG menu and logoff by pressing <Ctrl + L>.
Follow-up Procedures
Once this procedure is complete, return to the procedure which referred you to this DLP and continue with
the tasks indicated there.
324
© 2002 ADTRAN, Inc.
61200305L1-1F
VERIFYING COMMUNICATIONS OVER AN IP LAN
Introduction
When an ETHERNET port is connected to a local area network (LAN), test steps must be performed on the
ATLAS 550 to ensure that the unit is communicating properly over the network. This procedure outlines
those steps.
Prerequisite Procedures
Before beginning this procedure, the unit should be physically connected to the LAN and the provisioning
tasks detailed in DLP-003 should be complete.
Tools and Materials Required
•
Access to a PC or other computer connected to the LAN
To prevent electrical shock, do not install equipment in a wet location or during a
lightning storm.
Electronic modules can be damaged by static electrical discharge. Before handling
modules, wear an antistatic discharge wrist strap to prevent damage to electronic
components. Place modules in antistatic packing material when transporting or storing.
When working on modules, always place them on an approved antistatic mat that is
electrically grounded.
61200305L1-1F
© 2002 ADTRAN, Inc.
325
Section 5, DLP-004
ATLAS 550 System Manual
DLP-004
Perform Steps Below in the Order Listed
1. Ascertain the ATLAS 550 IP address.
If you do not already have the IP Address for the ATLAS 550, either obtain it from the network
administrator or manually check for the address in the SYSTEM CONFIG/ETHERNET PORT/IP
ADDRESS menu of the Network Management interface.
You must login with maximum rights to modify the IP parameters on the ATLAS 550.
2. Ping the ATLAS 550 unit from a remote computer on the network.
Using a remote computer system connected to the LAN, perform an ICMP Ping on the IP Address of
the ATLAS 550. Verify that the unit responds properly.
If the ATLAS 550 fails to respond, try the following:
•
•
•
•
Verify that the proper IP Address, Subnet Mask, and Default Gateway are provisioned in the unit
(see DLP-003 for details).
Verify that the ATLAS 550 is properly cabled into the LAN and that the Ethernet cable is properly
seated in the RJ-45 jack on the rear of the unit.
If the ATLAS 550 is connected to a hub or other network device that provides a carrier sense light
for each port, verify that the carrier sense light for the port to which the ATLAS 550 is connected
is lit. If this light is not lit, check the cabling between the hub and the shelf. The connection may
also be verified using the ETHERNET LED located on the front panel of the ATLAS 550.
Verify the IP Address, Subnet Mask, and Default Gateway on the remote computer system.
If none of these steps are successful, contact the LAN Administrator for assistance.
Refer to the documentation of the computer system if you are unsure how to perform a Ping
command. Most computers running a networked version of Microsoft Windows™ or UNIX
allow a Ping to be performed by typing ping <IP Address> at a command line prompt.
Typically, the Ping program will respond by indicating that the remote IP Address has
responded in a certain amount of time or that no response was received.
Some versions of Ping will continue running until you explicitly tell them to stop. If the
program does not terminate on its own, type <CTRL+C> to get the program to stop.
326
© 2002 ADTRAN, Inc.
61200305L1-1F
ATLAS 550 System Manual
Section 5, DLP-004
3. Telnet to the ATLAS 550.
From the same computer used in the previous step, Telnet to the ATLAS 550 and verify that the Telnet
session is properly opened (see DLP-002 for logging in to a system and establishing a Telnet session).
Once the Telnet session is established, press <CTRL+L> to logout and close the session.
Refer to the documentation of the computer system if you are unsure how to perform a
Telnet. Most computers running a networked version of Microsoft Windows™ or UNIX
allow a Telnet to be performed by typing telnet <IP Address> at a command line prompt.
Telnet is a utility common on many local area networks that allows remote access to
another computer or piece of equipment.
Follow-up Procedures
Once this procedure is complete, return to the procedure which referred you to this DLP and continue with
the tasks indicated there.
61200305L1-1F
© 2002 ADTRAN, Inc.
327
Section 5, DLP-004
328
ATLAS 550 System Manual
© 2002 ADTRAN, Inc.
61200305L1-1F
ADDING/REMOVING USERS AND CHANGING PASSWORD SECURITY
LEVELS
Introduction
All menu items in the ATLAS 550 are protected by passwords of varying security levels. By assigning
different passwords to different security levels, the ATLAS 550 System Administrator can control which
users can view or change various menu items. You can assign multiple passwords at the same access level.
This way, different users with the same access privileges can have different passwords. This procedure
details the steps which must be performed to add or remove user profiles and assign password security
levels in the ATLAS 550.
Tools and Materials Required
•
VT100 terminal or PC with VT100 terminal emulation software
To prevent electrical shock, do not install equipment in a wet location or during a
lightning storm.
Electronic modules can be damaged by static electrical discharge. Before handling
modules, wear an antistatic discharge wrist strap to prevent damage to electronic
components. Place modules in antistatic packing material when transporting or storing.
When working on modules, always place them on an approved antistatic mat that is
electrically grounded.
61200305L1-1F
© 2002 ADTRAN, Inc.
329
Section 5, DLP-005
ATLAS 550 System Manual
DLP-005
Perform Steps Below in the Order Listed
1. Connect to the ATLAS 550 using either the ETHERNET, CONTROL IN, or CRAFT interfaces.
If you are not already connected to the unit’s CONTROL IN or CRAFT interfaces (either with a
VT100 compatible terminal or with a PC running VT100 emulation software), follow the procedure in
DLP-001.
Alternately, if the unit is part of a management cluster connected to the local network, you may use a
PC connected to the network to Telnet into the unit. Use the procedures in DLP-003 and
DLP-004 to connect to the ETHERNET interface.
2. Login to the unit.
Login to the unit using the read-write password (see DLP-002 for details).
3. Go to the SYSTEM CONFIG menu and select the ACCESS PASSWORDS menu and press <Enter>.
4. To add a new user profile and password, select the first column (0) and press I (for insert).
5. Give the new user profile a name by selecting the LABEL field, pressing <Enter> and typing the user
defined name.
6. Personalize the password for the appropriate label by selecting the PASSWORD field, pressing <Enter>,
then typing the desired password.
7. Determine the password level for the corresponding label.
The ATLAS 550 contains six different password levels. The table below gives a brief description of
each level.
Select level... If you want the user to....
5
Have read-only permission for all menu items - minimum rights
4
Have read permission for all menu items and permission to use test commands
3
Have access to all commands except passwords, flash download,
authentication methods, and interface configurations
2
Have access to all commands except passwords, flash download, and
authentication methods
1
Have access to all commands except passwords
0
Have permission to edit every menu item, including creating and editing
passwords -- maximum rights
8. Assign the password level to the appropriate label by selecting the ACCESS RIGHTS field and choosing
the level decided upon in Step 7.
Passwords for the ATLAS 550 system are case sensitive. The default password for a new user profile is
“password”. The current password displays as a series of asterisks (********).
Follow-up Procedures
Once this procedure is complete, return to the procedure which referred you to this DLP and continue with
the tasks indicated there.
330
© 2002 ADTRAN, Inc.
61200305L1-1F
UPDATING THE FIRMWARE USING TFTP
Introduction
The ATLAS 550 supports firmware updates via the 10/100BaseT ETHERNET port using either TFTP from
a network server or the CONTROL IN or CRAFT interfaces using XMODEM. This DLP provides the steps
for a successful firmware upgrade using the 10/100 BaseT ETHERNET port and a TFTP server.
Tools and Materials Required
•
•
A PC with Telnet client software
A TFTP server accessible on the local network (A TFTP server is provided with the unit as part of the
ADTRAN Utilities software.)
To prevent electrical shock, do not install equipment in a wet location or during a
lightning storm.
Electronic modules can be damaged by static electrical discharge. Before handling
modules, wear an antistatic discharge wrist strap to prevent damage to electronic
components. Place modules in antistatic packing material when transporting or storing.
When working on modules, always place them on an approved antistatic mat that is
electrically grounded.
61200305L1-1F
© 2002 ADTRAN, Inc.
331
Section 5, DLP-006
ATLAS 550 System Manual
DLP-006
Perform Steps Below in the Order Listed
1. Connect to the ATLAS 550 using the ETHERNET interface.
If you are not already connected to the unit’s ETHERNET port using Telnet client software, use the
procedure in DLP-003 to connect to the unit.
2. Login to the unit.
Login to the unit using the read-write password (see DLP-002 for details).
3. Go to the SYSTEM UTILITY menu and select the UPDATE FIRMWARE menu; press <Enter>.
4. Select the MODULE SLOT menu and press <Enter>.
Select the appropriate module slot to update. The module slot for the ATLAS 550 system controller
will be module slot 0.
5. Go to the TRANSFER METHOD menu and select TFTP.
6. Enter into TFTP SERVER IP ADDRESS, the IP address of the network TFTP server.
7. Enter into TFTP SERVER FILENAME, the full path name and filename of the update file.
8. From the RESTART SCHEDULE menu, select the time for the module to perform a restart after
completing the update.
RESTART IMMEDIATELY AFTER UPDATE restarts the system immediately after the update is complete.
RESTART AT SPECIFIED DATE AND TIME allows you to select when the updated system will restart. If you
select this option, a new field called RESTART DATE AND TIME displays below the current field. To use
that option, enter the time in 24-hour format (such as 23:00:00 for 11:00 pm). Enter the date in
mm-dd-yyyy format (for example, 09-30-2000).
9. VIEW CURRENT UPDATE STATUS to verify the progress of the current firmware update or to identify any
errors encountered during the download.
Refer to the table on the following page for a detailed description of messages found in this field.
10. Select BEGIN FIRMWARE UPDATE to start the update. Enter Y to confirm the transfer and to set up the
module to receive the TFTP Upload.
332
© 2002 ADTRAN, Inc.
61200305L1-1F
ATLAS 550 System Manual
Section 5, DLP-006
During the TFTP upload, various status messages display in CURRENT UPDATE STATUS to indicate
progress. The following table describes these messages.
Message
Meaning
Contacting
Server
Indicates communication with the TFTP network server is trying to be
established with the specified server address in the TFTP SERVER IP
ADDRESS field.
Beginning
TFTP Transfer
Indicates communication with the TFTP network server has been
established and the update file is being transferred between the
ATLAS 550 and the TFTP network server.
Completed
Indicates the ATLAS 550 successfully received the update file.
Error:
File Not Found
Indicates the TFTP network server was unable to locate the specified file
name or path in the TFTP SERVER FILENAME field.
Error:
Access Violation
Indicates the TFTP network server denied the ATLAS 550 access to the
given update filename and path. Please verify appropriate user rights are
selected for the specified path.
11. When the update has successfully completed, IDLE displays in the CURRENT UPDATE STATUS field and
MODULE UPDATE COMPLETE displays in the PREVIOUS UPDATE STATUS field.
The ATLAS 550 will either restart immediately and resume operation, or will restart at the specified
time and day of the week—depending on your selection.
Follow-up Procedures
Once this procedure is complete, return to the procedure which referred you to this DLP and continue with
the tasks indicated there.
61200305L1-1F
© 2002 ADTRAN, Inc.
333
Section 5, DLP-006
334
ATLAS 550 System Manual
© 2002 ADTRAN, Inc.
61200305L1-1F
UPDATING THE FIRMWARE USING XMODEM
Introduction
The ATLAS 550 supports firmware updates via the ETHERNET port using either TFTP from a network
server or the CONTROL IN or CRAFT interfaces using XMODEM. This procedure outlines the steps for a
successful firmware upgrade using the CONTROL IN or CRAFT interfaces and XMODEM software.
Tools and Materials Required
•
•
VT100 terminal or PC with VT100 terminal emulation software
XMODEM software
To prevent electrical shock, do not install equipment in a wet location or during a
lightning storm
Electronic modules can be damaged by static electrical discharge. Before handling
modules, wear an antistatic discharge wrist strap to prevent damage to electronic
components. Place modules in antistatic packing material when transporting or storing.
When working on modules, always place them on an approved antistatic mat that is
electrically grounded.
61200305L1-1F
© 2002 ADTRAN, Inc.
335
Section 5, DLP-007
ATLAS 550 System Manual
DLP-007
Perform Steps Below in the Order Listed
1. Connect to the ATLAS 550 using the RJ-45 CONTROL IN or CRAFT interface.
If you are not already connected to the shelf’s CONTROL IN or CRAFT interface (either with a VT100
compatible terminal or with a PC running VT100 emulation software), follow the procedure in
DLP-001. Connecting to the CONTROL IN or CRAFT interface limits the upgrade procedure to
XMODEM only.
2. Login to the unit.
Login to the unit using the read-write password (see DLP-002 for details).
3. Go to the SYSTEM UTILITY menu and select the UPDATE FIRMWARE menu; press <Enter>.
4. Select the MODULE SLOT menu and press <Enter>.
Select the appropriate module slot to update. Select SLOT 0 to update the system controller.
Selecting ALL MODULES OF A TYPE and SYS CTRL will force a controller reboot during the
update.
5. Go to the TRANSFER METHOD menu and select XMODEM.
6. From the RESTART SCHEDULE menu, select the time for the module to perform a restart after
completing the update process.
RESTART IMMEDIATELY AFTER UPDATE restarts the system immediately after the update is complete.
RESTART AT SPECIFIED DATE AND TIME allows you to select when the updated system will restart. If
you select this option, a new field called RESTART DATE AND TIME displays below the current field.
To use that option, enter the time in 24-hour format (such as 23:00:00 for 11:00 pm). Enter the date in
mm-dd-yyyy format (for example, 09-30-2000).
7. View CURRENT UPDATE STATUS to verify the progress of the current firmware update or to identify any
errors encountered during the download.
8. Select BEGIN FIRMWARE UPDATE to start the update. Enter Y to confirm the transfer and set up the
module to receive the XMODEM Upload.
When the ATLAS 550 is ready to receive the XMODEM upload, the menu screen will clear and
display Awaiting XMODEM Upload....<Ctrl-X> twice to Cancel. If this does not appear, please
review the steps above for possible configuration errors.
9. From the terminal emulation software, begin the XMODEM upload by using the appropriate command
sequence. This may take several minutes.
If necessary, refer to the terminal emulation software documentation for help. Also, when specifying
the filename, ensure that the file transferred is the one provided by ADTRAN. Otherwise, the update
will not complete successfully.
336
© 2002 ADTRAN, Inc.
61200305L1-1F
ATLAS 550 System Manual
Section 5, DLP-007
Because XMODEM data is being transferred in-band through the menu interface, the VT100 menus of
the ATLAS 550 will be inoperable from the CONTROL IN or CRAFT interfaces. You can cancel the
update at any time within the terminal emulation software. (Please consult the documentation provided
by the terminal emulation software to determine how to do this).
10. When the update has successfully completed, IDLE displays in the CURRENT UPDATE STATUS field and
MODULE UPDATE COMPLETE displays in the PREVIOUS UPDATE STATUS field.
The ATLAS 550 will either restart immediately and resume operation or restart at the specified time
and day of the week, depending on your selection.
Alternately, if the unit is part of a management cluster connected to the local network, you may use a
PC connected to the network to Telnet into the unit. By utilizing the ETHERNET port, the ATLAS 550
may be quickly upgraded using TFTP, provided there is a TFTP server on the local network. The
ATLAS 550 ships with ADTRAN Utilities software, which includes a TFTP server. See DLP-006,
Updating the Firmware Using TFTP for more details.
Follow-up Procedures
Once this procedure is complete, return to the procedure which referred you to this DLP and continue with
the tasks indicated there.
61200305L1-1F
© 2002 ADTRAN, Inc.
337
Section 5, DLP-007
338
ATLAS 550 System Manual
© 2002 ADTRAN, Inc.
61200305L1-1F
SAVING THE CURRENT CONFIGURATION USING TFTP
Introduction
The ATLAS 550 supports configuration transfers from the unit (via the 10/100BaseT ETHERNET port) to
a TFTP server located on the network. This DLP provides the steps for a successful configuration transfer
using the ETHERNET port and a TFTP server.
Tools and Materials Required
•
•
A PC with a Telnet client software
A TFTP server accessible on the local network (A TFTP server is provided with the unit as part of the
ADTRAN Utilities software).
To prevent electrical shock, do not install equipment in a wet location or during a
lightning storm.
Electronic modules can be damaged by static electrical discharge. Before handling
modules, wear an antistatic discharge wrist strap to prevent damage to electronic
components. Place modules in antistatic packing material when transporting or storing.
When working on modules, always place them on an approved antistatic mat that is
electrically grounded.
61200305L1-1F
© 2002 ADTRAN, Inc.
339
Section 5, DLP-008
ATLAS 550 System Manual
DLP-008
Perform Steps Below in the Order Listed
1. Connect to the ATLAS 550 using the ETHERNET interface.
If you are not already connected to the unit’s ETHERNET port using Telnet client software, use the
procedure in DLP-003 to connect to the unit.
2. Login to the unit.
Login to the unit using the read-write password (see DLP-002 for details).
3. Go to the SYSTEM UTILITY menu and select the CONFIGURATION TRANSFER menu; press <Enter>.
4. Set the TFTP SERVER IP ADDRESS to the IP address of the machine running the TFTP Server Program.
If you are using the ADTRAN TFTP server, the IP address displays in the STATUS field. For
other TFTP servers, please refer to the appropriate documentation.
5. Change TFTP server filename to a unique filename. This will be the name of the configuration file
saved to the remote server.
Some TFTP servers constrain the format of the filename depending on the operating system of the
server. For example, a TFTP server running on a PC under Windows 3.1 may only permit 8.3 format
filenames (8 characters, period and three extension characters).
6. Select the SAVE CONFIG REMOTELY menu field and press <Enter>.
Respond with Y to confirm request.
7. View CURRENT TRANSFER STATUS to verify the progress of the current transfer.
8. When the transfer has successfully completed, IDLE displays in the CURRENT TRANSFER STATUS field
and TFTP DOWNLOAD COMPLETE displays in the PREVIOUS TRANSFER STATUS field.
TFTP is not secure. No passwords are required for client access. Anyone can access files
through the IP port on the server machine if they know the target file’s name.
Follow-up Procedures
Once this procedure is complete, return to the procedure which referred you to this DLP and continue with
the tasks indicated there.
340
© 2002 ADTRAN, Inc.
61200305L1-1F
LOADING A CONFIGURATION USING TFTP
Introduction
The ATLAS 550 supports configuration uploads to a unit (via the ETHERNET port) to a TFTP server
located on the network. This DLP provides the steps for a successful configuration upload using the
ETHERNET port and a TFTP server.
Tools and Materials Required
•
•
A PC with a Telnet client software
A TFTP server accessible on the local network (A TFTP server is provided with the unit as part of the
ADTRAN Utilities software).
To prevent electrical shock, do not install equipment in a wet location or during a
lightning storm
Electronic modules can be damaged by static electrical discharge. Before handling
modules, wear an antistatic discharge wrist strap to prevent damage to electronic
components. Place modules in antistatic packing material when transporting or storing.
When working on modules, always place them on an approved antistatic mat that is
electrically grounded.
61200305L1-1F
© 2002 ADTRAN, Inc.
341
Section 5, DLP-009
ATLAS 550 System Manual
DLP-009
Perform Steps Below in the Order Listed
1. Connect to the ATLAS 550 using the ETHERNET interface.
If you are not already connected to the unit’s ETHERNET port using Telnet client software, use the
procedure in DLP-003 to connect to the unit.
2. Login to the unit.
Login to the unit using at least a level 3 password (see DLP-002 for details).
3. Go to the SYSTEM UTILITY menu and select the CONFIGURATION TRANSFER menu; then press <Enter>.
4. Set the TFTP SERVER IP ADDRESS to the IP address of the machine running the TFTP Server
Program.
If you are using the ADTRAN TFTP server, the IP address displays in the STATUS field. For
other TFTP servers, please refer to the appropriate documentation.
5. Change TFTP SERVER FILENAME to a unique filename including path. This will be the name of the
configuration file retrieved from the remote server.
Some TFTP servers constrain the format of the filename depending on the operating system of the
server. For example, a TFTP server running on a PC under Windows 3.1 may only permit 8.3 format
filenames (8 characters, period and three extension characters).
The ATLAS 550 system is rebooted immediately after a configuration is successfully
loaded. No additional confirmation is requested, and any online sessions will be
terminated.
6. Select the LOAD AND USE CONFIG menu field and press <Enter>.
Respond with Y to confirmation request.
7. View CURRENT TRANSFER STATUS to verify the progress of the current upload.
8. When the upload has successfully completed, IDLE displays in the CURRENT TRANSFER STATUS field
and TFTP DOWNLOAD COMPLETE displays in the PREVIOUS TRANSFER STATUS field.
TFTP is not secure. No passwords are required for client access. Anyone can access files
through the IP port on the server machine if they know the target file’s name.
Follow-up Procedures
Once this procedure is complete, return to the procedure which referred you to this DLP and continue with
the tasks indicated there.
342
© 2002 ADTRAN, Inc.
61200305L1-1F
SAVING THE CURRENT CONFIGURATION USING XMODEM
Introduction
The ATLAS 550 supports configuration transfers from the unit using a VT100 terminal or terminal
emulator (with XMODEM) and the CONTROL IN or CRAFT interface. This DLP provides the steps for a
successful configuration transfer using the CONTROL IN or CRAFT port and XMODEM.
Tools and Materials Required
•
•
VT100 terminal or PC with VT100 terminal emulation software
XMODEM software
To prevent electrical shock, do not install equipment in a wet location or during a
lightning storm.
Electronic modules can be damaged by static electrical discharge. Before handling
modules, wear an antistatic discharge wrist strap to prevent damage to electronic
components. Place modules in antistatic packing material when transporting or storing.
When working on modules, always place them on an approved antistatic mat that is
electrically grounded.
61200305L1-1F
© 2002 ADTRAN, Inc.
343
Section 5, DLP-010
ATLAS 550 System Manual
DLP-010
Perform Steps Below in the Order Listed
1. Connect to the ATLAS 550 using the RJ-45 CONTROL IN or CRAFT interface.
If you are not already connected to the unit’s CONTROL IN or CRAFT interface (either with a
VT100 compatible terminal or with a PC running VT100 emulation software), follow the procedure in
DLP-001. Connecting to the CONTROL IN or CRAFT interface limits the config transfer procedure to
XMODEM Only.
2. Login to the unit.
3. Go to the SYSTEM UTILITY menu and select CONFIGURATION TRANSFER menu; press <Enter>.
Login to the unit using the read-write password (see DLP-002 for details).
4. Set the TRANSFER METHOD menu to XMODEM.
5. Select SAVE CONFIG REMOTELY to start the transfers. Enter Y to confirm the transfer and prepare the
ATLAS 550 for the transfer download. The following message is displayed: “This will begin sending a
copy of the current system configuration.”
6. Configure the VT100 terminal or terminal emulation software to Receive (and prompt for a filename).
7. View the CURRENT TRANSFER STATUS to verify the progress of the current transfer.
8. From the terminal emulation software, begin the XMODEM transfer by using the appropriate command
sequence. For Windows HyperTerminal, select Transfer>Receive File. Enter the filename (including
path) and select XMODEM as the transfer method.
If necessary, refer to the terminal emulation software documentation for help. Also, when specifying
the filename, ensure that the file saved has a .cfg extension. Otherwise, the file may not be available
for uploading into other ATLAS 550 units.
Because XMODEM data is being transferred in-band through the menu interface, the VT100 menus of
the ATLAS 550 will be inoperable from the CONTROL IN or CRAFT interfaces. You can cancel the
update at any time within the terminal emulation software. (Please consult the documentation provided
by the terminal emulation software to determine how to do this.)
9. When the transfer has successfully completed, IDLE displays in the CURRENT TRANSFER STATUS field
and XMODEM DOWNLOAD COMPLETE displays in the PREVIOUS TRANSFER STATUS field.
Follow-up Procedures
Once this procedure is complete, return to the procedure which referred you to this DLP and continue with
the tasks indicated there.
344
© 2002 ADTRAN, Inc.
61200305L1-1F
LOADING A CONFIGURATION USING XMODEM
Introduction
The ATLAS 550 supports configuration uploads from a unit using a VT100 terminal or terminal emulator
(with XMODEM) and the CONTROL IN or CRAFT interface. This DLP provides the steps for a successful
configuration upload using the CONTROL IN or CRAFT port and XMODEM.
Tools and Materials Required
•
•
VT100 terminal or PC with VT100 terminal emulation software
XMODEM software
To prevent electrical shock, do not install equipment in a wet location or during a
lightning storm.
Electronic modules can be damaged by static electrical discharge. Before handling
modules, wear an antistatic discharge wrist strap to prevent damage to electronic
components. Place modules in antistatic packing material when transporting or storing.
When working on modules, always place them on an approved antistatic mat that is
electrically grounded.
61200305L1-1F
© 2002 ADTRAN, Inc.
345
Section 5, DLP-011
ATLAS 550 System Manual
DLP-011
Perform Steps Below in the Order Listed
1. Connect to the ATLAS 550 using the RJ-45 CONTROL IN or CRAFT interface.
If you are not already connected to the unit’s CONTROL IN or CRAFT interface (either with a
VT100 compatible terminal or with a PC running VT100 emulation software), follow the procedure in
DLP-001. Connecting to the CONTROL IN or CRAFT interface limits the config transfer procedure to
XMODEM Only.
2. Login to the unit.
Login to the unit using the read-write password (see DLP-002 for details).
3. Go to the SYSTEM UTILITY menu and select CONFIGURATION TRANSFER menu; press <Enter>
4. Set the TRANSFER METHOD menu to XMODEM.
5. Select LOAD AND USE CONFIG to start the transfer. Enter Y to confirm the transfer and prepare the
ATLAS 550 for the transfer download.
The ATLAS 550 system is rebooted immediately after a configuration is successfully
loaded. No additional confirmation is requested, and any online sessions will be
terminated.
When the ATLAS 550 is ready to receive the XMODEM configuration file, the menu screen will clear
and display Awaiting XMODEM Upload....<Ctrl-X> twice to Cancel. If this does not appear, please
review the steps above for possible configuration errors.
6. From the terminal emulation software, begin the XMODEM transfer by using the appropriate command
sequence. For Windows HyperTerminal, select Transfer>Send File. Enter the filename (including path)
and select XMODEM as the transfer method. ATLAS 550 configuration files should have a .cfg
extension.
If necessary, refer to the terminal emulation software documentation for help.
Because XMODEM data is being transferred in-band through the menu interface, the VT100 menus of
the ATLAS 550 will be inoperable from the CONTROL IN or CRAFT interfaces. You can cancel the
update at any time within the terminal emulation software. (Please consult the documentation provided
by the terminal emulation software to determine how to do this.)
7. View CURRENT TRANSFER STATUS to verify the progress of the current upload.
8. When the transfer is complete, the ATLAS 550 will reboot and the login screen will appear. The unit is
now operational.
Follow-up Procedures
Once this procedure is complete, return to the procedure which referred you to this DLP and continue with
the tasks indicated there.
346
© 2002 ADTRAN, Inc.
61200305L1-1F
CONNECTING THE ATLAS 550 TO AN EXTERNAL MODEM
Introduction
The ATLAS 550 can be accessed and managed via a modem, allowing the same capabilities to the user as
if connected to the local CONTROL IN or CRAFT ports. Access is provided either by a female RJ-45
connector, labeled CONTROL IN, located on the lower right corner of the back of the unit or by the CRAFT
port, located on the lower left of the front of the unit.
Prerequisite Procedures
The ATLAS 550 should be mounted in its permanent location before connecting to an external modem.
Tools and Materials Required
•
•
•
Female RJ-45 to Male DB-25 Connector (shipped with unit)
Modem
Modem Cable
To prevent electrical shock, do not install equipment in a wet location or during a
lightning storm.
Electronic modules can be damaged by static electrical discharge. Before handling
modules, wear an antistatic discharge wrist strap to prevent damage to electronic
components. Place modules in antistatic packing material when transporting or storing.
When working on modules, always place them on an approved antistatic mat that is
electrically grounded.
61200305L1-1F
© 2002 ADTRAN, Inc.
347
Section 5, DLP-012
ATLAS 550 System Manual
DLP-012
Perform Steps Below in the Order Listed
1. Mount the modem in its permanent position.
2. Connect power to the modem using manufacturer instructions.
3. Configure the modem as follows:
Speed
9600 bps
Data bits
8
Parity
none
Stop bits
1
Flow control
hardware
Auto answer
on
DTR
ignore
4. Connect the male RJ-45 connector of the data cable to the female RJ-45 connector, labeled
CONTROL IN, located on the lower right corner of the back of the unit or to the CRAFT port, located
on the lower left of the front of the unit.
5. Route the data cable to the modem.
6. Connect the other end of the cable to the RJ-45 end of the connector (RJ-45 to male DB-25). Then,
connect the DB-25 end of the connector to the modem, configured as described above.
7. Connect the modem to the POTS line as required by the manufacturer.
8. Login to the ATLAS 550 system. (Refer to DLP-002 for detailed instructions).
9. From the MAIN MENU, select the SYSTEM CONFIG menu and press the right arrow key to enter the
right-pane menus.
10. From the SYSTEM CONFIG menu, select the CHAIN PORT menu and press <Enter>. Once in the CHAIN
PORT menus, press the right arrow key to enter the right-pane menus.
11. From the CHAIN PORT menus, select the PORT TYPE menu and select DIAL.
If you are connected to the ATLAS 550 using the CRAFT or CONTROL IN interfaces,
changing the PORT TYPE mode to DIAL will terminate your session. You MUST have
Ethernet access to the ATLAS 550 to change the PORT TYPE back to DIRECT and
restore your terminal session.
To complete the connection to the unit, the ATLAS 550 must now be called from a PC
configured to emulate a VT100 terminal, with communication software set as in step 3 and
configured for DIAL mode.
348
© 2002 ADTRAN, Inc.
61200305L1-1F
ATLAS 550 System Manual
Section 5, DLP-012
Follow-Up Procedures
Once this procedure is complete, return to the procedure which referred you to this DLP and continue with
the tasks indicated there.
61200305L1-1F
© 2002 ADTRAN, Inc.
349
Section 5, DLP-012
350
ATLAS 550 System Manual
© 2002 ADTRAN, Inc.
61200305L1-1F
USING THE ADTRAN UTILITY SYSLOG WITH THE ATLAS 550
Introduction
The ATLAS 550 Event Log is used to log various message types at settable threshold levels. The Event
Log is a useful tool for troubleshooting switchboard (or call connection) activities including the viewing of
digits received, digits transferred, and ISDN Messages. The Event Log can maintain the most recent 350
lines of data in a first in/first out buffer. To ensure that important data is not lost, saving the Event Log
messages to an external Syslog server is advised. The ATLAS 550 ships with an ADTRAN provided
Syslog server.
Prerequisite Procedures
This procedure assumes that the ATLAS 550 unit is connected to an IP network and is powered up.
Tools and Materials Required
•
Syslog server (provided on ATLAS 550 System CD in ADTRAN Utilities)
To prevent electrical shock, do not install equipment in a wet location or during a
lightning storm.
Electronic modules can be damaged by static electrical discharge. Before handling
modules, wear an antistatic discharge wrist strap to prevent damage to electronic
components. Place modules in antistatic packing material when transporting or storing.
When working on modules, always place them on an approved antistatic mat that is
electrically grounded.
61200305L1-1F
© 2002 ADTRAN, Inc.
351
Section 5, DLP-013
ATLAS 550 System Manual
DLP-013
Setting Up the ATLAS 550 to use the Syslog
1. Login to the system with maximum rights (details for logging in are in DLP-002). Once you have logged
into the ATLAS 550, go to SYSTEM CONFIG/SYSLOG SETUP. Set the options as follows:
•
•
•
TRANSMISSION: Enabled
HOST IP ADDRESS: Enter the IP address of the PC where the Syslog host resides
HOST FACILITY: Specify the facility destination of log events; Options are LOCAL0 to LOCAL7
Setting Up the Syslog Host
1. On your PC, go to START/PROGRAMS/ADTRAN UTILITIES/SYSLOG. When the Syslog window opens,
you will see LOCAL0 through LOCAL7 listed on the left. This should correspond with the HOST FACILITY
specified in the ATLAS 550. The Syslog program must be open on your PC in order for it to record
ATLAS 550 information. The Syslog files can be viewed through the Syslog window, and they are also
available under the ADTRAN Utilities Folder named LOCALX.TXT, where X can equal 0 through 7. You
can also view the LOCALX.TXT file by clicking on EDIT LOG.
Any event logged in the ATLAS 550 event log (SYSTEM STATUS/EVENT LOG) should also appear in the
Syslog.
352
© 2002 ADTRAN, Inc.
61200305L1-1F
ATLAS 550 System Manual
Section 5, DLP-013
Additional Syslog Features
•
The MONITOR feature allows all Syslog messages to be pre-filtered by SYSTEM NAME, SOURCE, SLOT,
and PORT before displaying these messages to the user and logging the message to the pre-designated
monitor log file. Various filter options may be defined by selecting SOURCE. The figure below shows
the SOURCE FILTER window. When the MONITOR button is selected, the file will be logged to
LOCAL8.TXT. To look at the text file, click on the EDIT LOG button on the left side of the Syslog screen.
Only the Source Options that are selected with an ‘x’ will be displayed in the Syslog file. In this example,
all options will be displayed.
•
Under the LOG FILES menu option, the user may erase log files, define Red events, set prioritiesl, and
clear Red events. The ERASE LOG FILES option erases the specified txt log file. DEFINE RED EVENTS
allows the user to predefine a message priority condition so that if the condition occurs, the file is
highlighted in red. In the first figure on the next page, any CRITICAL or MAJOR condition causes any
LOCAL0 through LOCAL7 facility to become highlighted in red if it receives a critical or major alarm.
61200305L1-1F
© 2002 ADTRAN, Inc.
353
Section 5, DLP-013
ATLAS 550 System Manual
•
The PROPERTIES menu allows the user to specify the types of messages to be logged to an ASCII text
file. Mark the lowest priority Event Log message you want to log to the Syslog server text file. For
example, the figure below shows that all messages will be logged to the text file.
•
The HELP menu also explains these features. Click on HELP/CONTENTS/SYSLOG HOST DAEMON for
further explanation of Syslog features.
Follow-up Procedures
Once this procedure is complete, return to the procedure which referred you to this DLP and continue with
the tasks indicated there.
354
© 2002 ADTRAN, Inc.
61200305L1-1F
CONNECTING THE ALARM CONTACTS
Introduction
This DLP explains how to connect the alarm contacts on the ATLAS 550.
Prerequisite Procedures
Before making alarm connections, the unit should be mounted in its permanent location.
Tools and Materials Required
•
•
•
Wire strippers
Small, straight slot screwdriver
22 or 24 AWG 2-conductor twisted pair cross connect wire
To prevent electrical shock, do not install equipment in a wet location or during a
lightning storm.
Electronic modules can be damaged by static electrical discharge. Before handling
modules, wear an antistatic discharge wrist strap to prevent damage to electronic
components. Place modules in antistatic packing material when transporting or storing.
When working on modules, always place them on an approved antistatic mat that is
electrically grounded.
61200305L1-1F
© 2002 ADTRAN, Inc.
355
Section 5, DLP-014
ATLAS 550 System Manual
DLP-014
Perform Steps Below in the Order Listed
1. For the alarm relay contacts labeled ALARM, determine whether the external alarm reporting device
uses a normally open (NO) or normally closed (NC) circuit for alarm relay. For the external monitor
labeled RELAY MON, the ATLAS 550 uses a NO circuit for alarm relay.
2. Using standard Telco cross-connect wire, determine and cut the length required to reach from the
alarm headers to the alarm-reporting device(s).
3. Using wire strippers, strip 1 inch from both ends of each wire.
4. Remove both terminal blocks.
5. Using the small straight slot screwdriver, loosen the screws in both terminal blocks.
6. For the four-position terminal block, insert one strand into the third slot (counted from the left) for the
COM connection from the ATLAS 550.
7. Insert another strand into either the first slot or the second slot for the NC or NO connections,
respectively.
8. For the two-position terminal block, insert one strand into the first slot (counted from the left) for the
Alarm Out signal. Insert the other strand into the last slot for the Alarm In signal. Complete this step
only if you wish to have the ATLAS 550 monitor for external alarms.
9. Connect the wires to the appropriate terminals on the external device(s) being used.
1
3
O
O I
I
4
2
ALL EMPTY SLOTS MUST BE
COVERED WITH BLANK PANELS
NETWORK 1
NETWORK
NETWORK 2
NETWORK
IN
OUT
CONTROL
OUT
TEST
T1 NETWORK MODULE
FUSE RATING: 2A/250V SLO-BLO
ETHERNET
MON
IN
500 Series
IN
OUT
CAUTION: FOR CONTINUED PROTECTION
AGAINST RISK OF FIRE, REPLACE ONLY
WITH SAME TYPE AND RATING OF FUSE.
90-240VAC, 2A, 50/60Hz
RELAY
ALARM
MON
NC NO COM GND
External Alarm Relay
Monitor Connection
Alarm Relay
Connection
ALARM
1 2 3 4
RELAY
NC NO COM GND
1 2
MON
Table 1. Alarm Relay Connector Pinout
Pin
Name
Description
1
Normally Closed (NC)
Opens when a selected alarm condition is present.
2
Normally Open (NO)
Closes when a selected alarm condition is present.
3
Common (COM)
Common connection between external circuitry and NC or NO terminal.
4
Chassis Ground (GND)
356
© 2002 ADTRAN, Inc.
61200305L1-1F
ATLAS 550 System Manual
Section 5, DLP-014
Table 2. External Relay Monitor Connector Pinout
Pin
Name
Description
1
Alarm Out Outputs EIA-232 level signal for connection to external alarm contacts.
2
Alarm In
Monitors signal coming from external alarm contacts.
Follow-up Procedures
Once this procedure is complete, return to the procedure which referred you to this DLP and continue with
the tasks indicated there.
61200305L1-1F
© 2002 ADTRAN, Inc.
357
Section 5, DLP-014
358
ATLAS 550 System Manual
© 2002 ADTRAN, Inc.
61200305L1-1F
USING THE ALARM CONNECTIONS AND ACO BUTTON
Introduction
The alarm connections alert the user when a selected alarm condition exists. The alarm may be cleared by
pressing the Alarm Cut-Off (ACO) switch on the front panel of the ATLAS 550. This procedure details the
steps which must be performed to use the ATLAS 550 alarm connections and ACO switch.
This procedure should be performed at installation on each ATLAS 550 shelf that is wired out to external
office alarm equipment.
Prerequisite Procedures
Before beginning this procedure, the ATLAS 550 should be mounted in its permanent location and the
alarm contacts should be connected (see DLP-014).
Tools and Materials Required
•
VT100 terminal or PC with VT100 terminal emulation software
To prevent electrical shock, do not install equipment in a wet location or during a
lightning storm.
Electronic modules can be damaged by static electrical discharge. Before handling
modules, wear an antistatic discharge wrist strap to prevent damage to electronic
components. Place modules in antistatic packing material when transporting or storing.
When working on modules, always place them on an approved antistatic mat that is
electrically grounded
61200305L1-1F
© 2002 ADTRAN, Inc.
359
Section 5, DLP-015
ATLAS 550 System Manual
DLP-015
Perform the Steps Below in the Order Listed
To Begin
1. Connect to the ATLAS 550 using either the ETHERNET, CONTROL IN, or CRAFT interfaces.
If you are not already connected to the unit’s CONTROL IN or CRAFT interfaces (either with a
VT100 compatible terminal or with a PC running VT100 emulation software), use the procedure in
DLP-001 to connect to the CONTROL IN or CRAFT interface.
Alternately, if the unit is part of a management cluster connected to the local network, you may use a
PC connected to the network to Telnet into the unit. Use the procedures in DLP-003 and DLP-004 to
connect to the ETHERNET interface.
2. Login to the unit.
Login to the unit using the read-write password (see DLP-002 for details).
Configure the Alarm Relay
1. Go to the SYSTEM CONFIG menu and press the right arrow key to access the right-pane menus. Select
the ALARM RELAY THRESHOLD menu and choose the appropriate threshold level. The ALARM RELAY will
set for this threshold and all other alarms of greater importance. Refer to Section 7, System Event
Logging of this user manual for a listing of all alarms and levels of importance.
Setting the threshold to NORMAL will not set the ALARM RELAY for NORMAL events. No
NORMAL events set the ALARM RELAY.
Configure the Alarm Monitor
Complete the following steps only if you wish to monitor for external alarms.
1. Go to the SYSTEM CONFIG menu and press the right arrow key to access the right-pane menus. Then,
select the EVENT LOGGING menu and press <Enter>. Once in the EVENT LOGGING menu, press the right
arrow key to access the right-pane menus.
2. From the EVENT LOGGING menu, select the EXTERNAL INPUT menu and set it to the same value as the
ALARM RELAY THRESHOLD. Any event on the ALARM MONITOR will now be logged in the EVENT LOG and
set the ALARM RELAY.
360
© 2002 ADTRAN, Inc.
61200305L1-1F
ATLAS 550 System Manual
Section 5, DLP-015
Clearing the Alarm Relay Remotely
1. Go to the SYSTEM CONFIG menu and press the right arrow key to access the right-pane menus. Then,
select the ALARM RELAY RESET field and press <Enter>.
The ALARM RELAY may be cleared locally by pressing the ACO switch.
Follow-up Procedures
Once this procedure is complete, return to the procedure which referred you to this DLP and continue with
the tasks indicated there.
61200305L1-1F
© 2002 ADTRAN, Inc.
361
Section 5, DLP-015
362
ATLAS 550 System Manual
© 2002 ADTRAN, Inc.
61200305L1-1F
CONFIGURATION GUIDES
Dial Backup for Dedicated T1 Circuits............................................................................................. CFG-001
61200305L1-1F
© 2002 ADTRAN, Inc.
Page 363 of 364
Section 6, CFG-6
Page 364 of 364
ATLAS 550 System Manual
© 2002 ADTRAN, Inc.
61200305L1-1F
DIAL BACKUP FOR DEDICATED T1 CIRCUITS
Introduction
Dial backup is an ATLAS 550 capability which allows you to create alternate data connections in the unit
to ensure data integrity in the event of a primary circuit failure. This note will explain what dial backup is
and how to configure an ATLAS 550 to support it. There are three steps to configuring the ATLAS 550 for
dial backup: Configuring the Dedicated T1 Data Link, Configuring the Dial Backup PRI, and Configuring
the Dial Backup Endpoint.
The primary link to be backed up must be a data link to a V.35 port. Dedicated dial
backup for T1 ports is not currently supported.
Before You Begin
This application requires an ATLAS 550 containing firmware B.01 or later, a V.35 Nx Module
(P/N 1200311L1), and a BONDing Module (P/N 1200326L1) if bonding of B channels is required.
Description
The ATLAS 550 will either originate or answer a dial backup call upon detection of a network failure or
data failure on the T1/E1. A network failure is any physical layer T1/E1 failure, such as red alarm or loss
of signal (LOS). A data failure is detected when the ATLAS 550 no longer receives keep-alive responses
over the 8K inband channel. The data criteria for dial backup can only be used when configured to monitor
the inband channel.
61200305L1-1F
© 2002 ADTRAN, Inc.
365
Section 6, CFG-001
ATLAS 550 System Manual
CFG-001
To Configure the Sample Network, Perform the Steps Below in the Order Listed
REMOTE
Router
HOST
T1 0.1
TSU 120
V.35
ISU 128
BRI
2.1
V.35
Router
ATLAS
550
PRI
555-1000
ISDN
0.2
LDN1: 555-2000
LDN2: 555-2001
SPID1: 770-555-2000-0101
SPID2: 770-555-2001-0101
Configuring the DEDICATED T1 Data Link
1. Log into the ATLAS 550 unit with access level 4 or greater.
Please refer to the ATLAS manual for more details on passwords and access levels.
2. From the main menu, select the DEDICATED MAPS menu field. Once the DEDICATED MAPS menu is
selected, press the right arrow key to move to the right-pane menu items, then select the CREATE/EDIT
MAPS field and press <Enter>.
366
© 2002 ADTRAN, Inc.
61200305L1-1F
ATLAS 550 System Manual
Section 6, CFG-001
3. Move to the CONNECTS field and press <Enter>. Once in the CONNECTS menus, press the right arrow
key to enter the right-pane menu items.
4. To enter the slot location of the V.35 module that will connect to the Host side router, select the FROM
SLT column and press <Enter> to display a list of available slots. For the sample network, choose
S2)V35NX-2.
5. To enter the port location of the V.35 port that will connect to the Host side router, select the PORT
column and press <Enter> to display a list of available ports. For the sample network, choose
1)NX56/64 PORT.
61200305L1-1F
© 2002 ADTRAN, Inc.
367
Section 6, CFG-001
ATLAS 550 System Manual
6. To enter the slot location of the T1 Module that will connect to the network T1 circuit, select the TO SLT
column and press <Enter> to display a list of available slots. For the sample network, choose
N1)T1/PRI 1.
7. To enter the port location of the T1 port that will connect to the network T1 circuit, select the PORT
column and press <Enter> to display a list of available ports. For the sample network, choose
1)T1/PRI.
8. Since a Network Module T1/PRI port was selected, the system will automatically populate the FROM
CONFIG field with RATE = 64K. For option module T1/PRI interfaces, you will need to select the
appropriate rate.
368
© 2002 ADTRAN, Inc.
61200305L1-1F
ATLAS 550 System Manual
Section 6, CFG-001
9. To configure the appropriate T1 DSOs, select the TO CONFIG column and press <Enter>. Once in the
TO CONFIG menus, right arrow to the DSO SELECTION field, press <Enter>, and enter 1-18.
Configuring the DIAL BACKUP PRI
1. From the main menu, select the DIAL PLAN menu field. Press the right arrow key to move to the
right-pane menu items, then select the NETWORK TERM field and press <Enter>.
2. To enter the slot location of the network PRI being used for Dial Backup, select the
SLOT/SVC field and press <Enter> to display a list of available slots. For the sample network, choose
S1)T1/PRI - 2.
61200305L1-1F
© 2002 ADTRAN, Inc.
369
Section 6, CFG-001
ATLAS 550 System Manual
3. To enter the port location of the network PRI being used for Dial Backup, select the
PORT/PEP column to display a list of available ports. For the sample network, choose
1)T1/PRI.
4. Select the SIG field and press <Enter> to display a list of available signal methods. For the sample
network, choose the PRI selection.
5. To enter the correct call routing information for this PRI, select the OUT#ACCEPT field and press
<Enter>. Then, press the right arrow key to enter the right-pane menus. Select the ACCEPT NUMBER
field and press <Enter>. To allow ALL calls to route out this PRI to the network, enter a ‘$’.
For a detailed explanation of possible entries, highlight the ACCEPT NUMBER field
and press <Ctrl + A>.
370
© 2002 ADTRAN, Inc.
61200305L1-1F
ATLAS 550 System Manual
Section 6, CFG-001
6. To configure the parameters needed for proper operation of the PRI D channel, select the IFCE CONFIG
field and press <Enter>. Once at the IFCE CONFIG menus, configure the switch type by selecting the
SWITCH TYPE field and choosing the appropriate protocol. Remember, this is the protocol running on
the Central Office switch, not the manufacturer’s name. For the sample network, choose the NATIONAL
ISDN selection.
The remaining configuration parameters are normally left at default values. For more
details on these parameters, please refer to your ATLAS 550 System Manual.
61200305L1-1F
© 2002 ADTRAN, Inc.
371
Section 6, CFG-001
ATLAS 550 System Manual
CONFIGURING THE DIAL BACKUP ENDPOINT
1. From the main menu, select the DIAL PLAN menu field. Press the right arrow key to move to the
right-pane menu items, then select the USER TERM field and press <Enter>.
2. For the slot location of the backup entry, select the SLOT/SVC field and press <Enter> to display a list of
available slots. For the sample network, choose CIRCUIT BACKUP.
372
© 2002 ADTRAN, Inc.
61200305L1-1F
ATLAS 550 System Manual
Section 6, CFG-001
3. For the port location of the backup entry, select the PORT/PEP column and press <Enter> to display a
list of available ports. This is the port that will be backed up if a failure occurs on the network T1. For
the sample network, choose 2.1)NX56/64 PORT.
The PORT/PEP field will only allow you to select V.35 ports that were entered in the FROM
SLT field in the DEDICATED MAP.
4. To enter the correct call routing information for this backup entry, select the IN#ACCEPT field and press
<Enter>. Then, hit the right arrow key to enter the right-pane menus. Select the ACCEPT NUMBER field
and press <Enter>. To accept calls coming from the network PRI, enter ‘555-1000’.
For a detailed explanation of the possible entries, highlight the ACCEPT NUMBER field and
press <Ctrl + A>.
61200305L1-1F
© 2002 ADTRAN, Inc.
373
Section 6, CFG-001
ATLAS 550 System Manual
5. Configure the IFCE CONFIG options for the backup link. These include the Dial Backup parameters.
Navigate to the IFCE CONFIG option and press <Enter>. This will display a list of the Dial Backup
options. The options are described following the figure.
• ORIGINATE/ANSWER
ORIGINATE: The ATLAS 550 will be the originating side in the event of a failure.
ANSWER: The ATLAS 550 will answer any incoming calls, but only go into backup if an error is detect-
ed.
ANSWER ALWAYS: The ATLAS 550 will answer any incoming calls and immediately go into backup.
• OUTGOING CALL TYPE
DIGITAL 56K: Data rate for the backup endpoint is set to 56kbps.
DIGITAL 64K: Data rate for the backup endpoint is set to 64kbps.
• SOURCE ID
The SOURCE ID should remain in the default state unless it has been assigned elsewhere in the configuration. Please refer to the ATLAS 550 System Manual for a detailed discussion of the SOURCE ID field.
• OUTDIAL NUMBER
This field should contain the number you want the ATLAS 550 to dial upon going into backup.
• FORCE MODE:
AUTO: The ATLAS 550 will automatically follow the dial backup configuration parameters to go into
backup.
FORCED: The ATLAS 550 must be manually forced to go into backup upon detection of a failure.
DISABLED: The ATLAS 550 will never go into backup regardless of data integrity.
• BACKUP CRITERIA
NET/DATA FAIL: DBU is initiated when either the network fails (possible causes include Red, Yellow,
Blue, or LOS alarms) or when the Nx56/64 module detects a loss of data transitions on the V.35 interface. If NET/DATA FAIL is selected, the V.35 Nx INBAND option must be ON. The remote TSU inband
must also be enabled.
NET FAIL: DBU is initiated when there is a network failure. Possible causes include LOS, Red, Yellow,
or Blue alarms.
374
© 2002 ADTRAN, Inc.
61200305L1-1F
ATLAS 550 System Manual
Section 6, CFG-001
MANUAL: The ATLAS 550 will never initiate DBU until it is manually initiated.
• RESTORE CRITERIA
MANUAL: The primary link is restored only on manual command. This is the only option when
NET/DATA FAIl is selected for the Backup Criteria parameter.
NET SUCCESS: The primary link is restored when the network alarm clears.
• STARTUP DELAY
Length of time (in seconds) that determines how long to wait before implementing the DBU capabilities
after being configured.
• BACKUP DELAY
Length of time (in seconds) that determines how long the T1 must be in a fail state before dial backup
will take affect.
• RESTORE DELAY
Length of time (in seconds) that determines how long the main circuit must be restored before dial backup will switch off.
• MAX NUMBER OF RETRIES
Options are NONE, 3, 10, and UNLIMITED. This is the number of times the ATLAS 550 will redial if first
DBU connection fails.
• REDIAL TIMER
Length of time (in seconds) that determines how long to wait before retry.
• ENABLE SCHEDULE
This option will take you to a different screen where you can configure times that you will allow or not
allow the ATLAS 550 to go into DBU mode.
• TEST CALL
Options include HOURLY, DAILY, WEEKLY, BI-WEEKLY, or MANUAL ONLY. The ATLAS 550 can be set to
automatically place a DBU test call at any one of these times. If you do not wish for the ATLAS 550 to
use this feature, select MANUAL ONLY.
• MIN DS0S
Specifies the minimum number of DS0s to use for DBU. This option should be set to 1 unless you are
trying to place a bonded call. Bonding requires that the BONDing Module be installed in the ATLAS
550.
• MAX DS0S
Specifies the maximum number of DS0s to use for DBU. The valid range for this field is 1-32.
61200305L1-1F
© 2002 ADTRAN, Inc.
375
Section 6, CFG-001
376
ATLAS 550 System Manual
© 2002 ADTRAN, Inc.
61200305L1-1F
SYSTEM EVENT LOGGING
The ATLAS 550 Event Log is used to log various message types at settable threshold levels. This section
describes the entries that may be logged by the system event log.The Event Log’s CATEGORY is
particularly important – this is the minimum severity level that must be set in order that the event be
logged.
Use caution when changing CATEGORY values from their default levels. If too many
sources have their CATEGORY values set too low, the number of messages being logged in
a given period can be very large. If too many messages are being logged too rapidly,
system performance can be adversely affected.
The Event Log is a useful tool for troubleshooting switchboard (or call connection) activities including the
viewing of digits received, digits transferred, and ISDN Messages. Since most of the events discussed in
the following tables are used primarily during troubleshooting, they should be turned off in normal
operation.
CONTENTS
Setting the Event Log Category . . . . . . . . . . . . . . . . . . . . . . . . . . . . . . . . . . . . . . . . . . . . . . . . . . 370
Viewing the Events . . . . . . . . . . . . . . . . . . . . . . . . . . . . . . . . . . . . . . . . . . . . . . . . . . . . . . . . . . . . . 372
System Events . . . . . . . . . . . . . . . . . . . . . . . . . . . . . . . . . . . . . . . . . . . . . . . . . . . . . . . . . . . . . . . . 373
ISDN Cause Codes . . . . . . . . . . . . . . . . . . . . . . . . . . . . . . . . . . . . . . . . . . . . . . . . . . . . . . . . . . . . . 379
Cause Code Log Entries . . . . . . . . . . . . . . . . . . . . . . . . . . . . . . . . . . . . . . . . . . . . . . . . . . . . . . . . 381
TABLES
Table 1.
Table 2.
Table 3.
Table 4.
Table 5.
Table 6.
Table 7.
Table 8.
Table 9.
Table 10.
Table 11.
Table 12.
Table 13.
Table 14.
System Controller Events . . . . . . . . . . . . . . . . . . . . . . . . . . . . . . . . . . . . . . . . . . . . . . . 373
Switchboard Events . . . . . . . . . . . . . . . . . . . . . . . . . . . . . . . . . . . . . . . . . . . . . . . . . . . 374
Nx 56/64 Events . . . . . . . . . . . . . . . . . . . . . . . . . . . . . . . . . . . . . . . . . . . . . . . . . . . . . . 374
T1 Events . . . . . . . . . . . . . . . . . . . . . . . . . . . . . . . . . . . . . . . . . . . . . . . . . . . . . . . . . . . 375
Ethernet Events . . . . . . . . . . . . . . . . . . . . . . . . . . . . . . . . . . . . . . . . . . . . . . . . . . . . . . . 376
ISDN Events . . . . . . . . . . . . . . . . . . . . . . . . . . . . . . . . . . . . . . . . . . . . . . . . . . . . . . . . . 377
Circuit Backup Events . . . . . . . . . . . . . . . . . . . . . . . . . . . . . . . . . . . . . . . . . . . . . . . . . . 378
DP Outgoing Signaling Events . . . . . . . . . . . . . . . . . . . . . . . . . . . . . . . . . . . . . . . . . . . 379
Modem Management Module Events . . . . . . . . . . . . . . . . . . . . . . . . . . . . . . . . . . . . . . 379
ISDN Cause Code Events . . . . . . . . . . . . . . . . . . . . . . . . . . . . . . . . . . . . . . . . . . . . . . . 379
Cause Code Log Entry Location Designations . . . . . . . . . . . . . . . . . . . . . . . . . . . . . . . 381
ISDN L2 Messages . . . . . . . . . . . . . . . . . . . . . . . . . . . . . . . . . . . . . . . . . . . . . . . . . . . . 381
ISDN Call Control Messages . . . . . . . . . . . . . . . . . . . . . . . . . . . . . . . . . . . . . . . . . . . . 381
Source: ISDN Information Elements . . . . . . . . . . . . . . . . . . . . . . . . . . . . . . . . . . . . . . . 381
61200305L1-1F
© 2002 ADTRAN, Inc.
377
Section 7, System Event Logging
1.
ATLAS 550 System Manual
SETTING THE EVENT LOG CATEGORY
The following steps outline the procedure for setting up the event CATEGORY thresholds for the Event
Log.
1. From the MAIN MENU, go to the SYSTEM CONFIG menu and press the right arrow key to enter the
right-pane menus.
2. Select the EVENT LOGGING field and press <Enter>. Once in the EVENT LOGGING menus,
press the right arrow key to access the right-pane menus.
378
© 2002 ADTRAN, Inc.
61200305L1-1F
ATLAS 550 System Manual
Section 7, System Event Logging
3. Refer to the tables in this section to determine the desired CATEGORY thresholds.
4. To change the CATEGORY, select the appropriate field and press <Enter>. This will provide a list of
available options. Highlight the desired threshold and press <Enter> to select it.Viewing the
Use caution when changing CATEGORY values from their default levels. If too many
sources have their CATEGORY values set too low, the number of messages being logged in
a given period can be very large. If too many messages are being logged too rapidly,
system performance can be adversely affected.
61200305L1-1F
© 2002 ADTRAN, Inc.
379
Section 7, System Event Logging
2.
ATLAS 550 System Manual
VIEWING THE EVENTS
The following steps outline the procedure for viewing EVENT LOG messages.
1. From the MAIN MENU, go to the SYSTEM STATUS menu and press the right arrow key to enter the
right-pane menus.
2. Select the EVENT LOG field and press <Enter>. Once in the EVENT LOG, press the right arrow key
to access the actual messages.
The EVENT LOG messages are stored in a first-in/first-out table. Therefore, the most recent
log entry is found at the top of the log.
380
© 2002 ADTRAN, Inc.
61200305L1-1F
ATLAS 550 System Manual
Section 7, System Event Logging
EVENT LOG messages may be sent to an external Syslog server for storage. Refer to
DLP-013, “Using the ADTRAN Utility Syslog with the ATLAS 550” for more details.
3.
SYSTEM EVENTS
The following tables provide a listing of ATLAS system events. This includes tables of events for each
category, according to the order they appear in the EVENT LOG setup screen.
Table 1. System Controller Events
Console Log String
Category
Event
“-24 V Power Failure Cleared”
CRITICAL
-24 V power supply is functioning normally
again
“-24 V Power Failure”
CRITICAL
-24 V power supply is not operating properly
“-58 V Power Failure Cleared”
CRITICAL
-58 V power supply is functioning normally
again
“-58 V Power Failure”
CRITICAL
-58 V power supply is not operating properly
>70 Internal Temperature Warning Cleared
CRITICAL
Internal system temperature has cooled
below 70o C
>85 Internal Temperature Warning Cleared
CRITICAL
Internal system temperature has cooled
below 85o C
>70C Internal Temperature Warning
CRITICAL
Internal system temperature is greater than
70o C
>85C Internal Temperature Warning
CRITICAL
Internal system temperature is greater than
85o C
Firmware invalid
CRITICAL
Corrupted firmware
Firmware update failed
CRITICAL
Flash download failed
System Configuration Uploaded
CRITICAL
ATLAS configuration file loaded into the
system and activated
Module Not Responding
WARNING
Module removed or not responding
ACO Switch pressed
MINOR
ACO switch pressed
External Alarm Detected
MINOR
Alarm detected on External Alarm Monitor
Login Failure
MINOR
Console login failure1
External Alarm Cleared
MINOR
External alarm cleared
Timing source changed to Internal
MINOR
Neither the primary nor the backup are valid
Timing source changed to Backup
MINOR
The primary source is not Backup valid
Timing source changed to Primary
MINOR
The timing source changed to primary
Not responding to programming
MINOR
Unable to program module
61200305L1-1F
© 2002 ADTRAN, Inc.
381
Section 7, System Event Logging
ATLAS 550 System Manual
Table 1. System Controller Events (Continued)
Console Log String
Category
Cold
Event
NORMAL
System cold start2
Firmware update completed
INFO
Flash download successful
Module Found
INFO
Module found
SNMP Authentication Failure
INFO
SNMP authentication failure3
1
Three consecutive logins were attempted and failed.
2
Generated five seconds after the completion of system initialization.
3
Generated if the ATLAS receives an SNMP request from an SNMP manager defined in the ATLAS SNMP communities
list but with a community name that does not match the community name defined in the SNMP communities list.
Table 2. Switchboard Events
Console Log String
Category
Event
<number> rejected: No such number
WARNING
Call rejected1
<number> rejected: Outgoing reject list
NORMAL
Call rejected2
<number> rejected: Busy
NORMAL
Call rejected3
<number> accepted: <slot> <port>
NORMAL
Call successfully routed
1
No such number in dial plan.
2
Number is on outgoing reject list.
3
All endpoints busy.
Table 3. Nx 56/64 Events
Console Log String
Category
Event
Nx 56/64 511 Test Pattern Active
WARNING
511 Test Pattern Activated
Nx 56/64 511 Test Pattern Cleared
WARNING
511 Test Pattern Deactivated
Nx 56/64 Bilateral Loopback Active
WARNING
Bilateral Loopback Activated
Nx 56/64 Bilateral Loopback Cleared
WARNING
Bilateral Loopback Deactivated
Nx 56/64 Excessive Zeros Alarm
WARNING
Excessive Zeros from DTE
Nx 56/64 Excessive Zeros Alarm Cleared
WARNING
Excessive Zeros condition cleared
Nx 56/64 Clock Slip Alarm Active
MAJOR
Clock Slip Alarm Active
Nx 56/64 Clock Slip Alarm Cleared
MAJOR
Clock Slip Alarm Cleared
Nx 56/64 External Clock Alarm Active
MAJOR
External Clock Alarm
382
© 2002 ADTRAN, Inc.
61200305L1-1F
ATLAS 550 System Manual
Section 7, System Event Logging
Table 3. Nx 56/64 Events (Continued)
Console Log String
Category
Event
Nx 56/64 External Clock Alarm Cleared
MAJOR
External Clock Alarm Cleared
Nx 56/64 PLL Alarm Active
MAJOR
PLL Alarm Active
Nx 56/64 PLL Alarm Cleared
MAJOR
PLL Alarm Cleared
Nx 56/64 CTS Asserted
INFO
CTS Asserted
Nx 56/64 CTS Dropped
INFO
CTS Dropped
Nx 56/64 DCD Asserted
INFO
DCD Asserted
Nx 56/64 DCD Dropped
INFO
DCD Dropped
Nx 56/64 DTR Asserted
INFO
DTR Asserted
Nx 56/64 DTR Dropped
INFO
DTR Dropped
Nx 56/64 RTS Asserted
INFO
RTS Asserted
Nx 56/64 RTS Dropped
INFO
RTS Dropped
Table 4. T1 Events
Console Log String
Category
Event
T1 Curr CSS Thrs Exceeded
WARNING
Current T1 Controlled Slip Seconds
Threshold Exceeded
T1 Curr ES Thrs Exceeded
WARNING
Current T1 Errored Seconds Threshold
Exceeded
T1 Curr LCV Thrs Exceeded
WARNING
Current T1 Line Code Violations
Threshold Exceeded
T1 Curr LES Thrs Exceeded
WARNING
Current T1 Line Errored Seconds
Threshold Exceeded
T1 Curr PCV Thrs Exceeded
WARNING
Current T1 Path Code Violations
Threshold Exceeded
T1 Curr SEFS Thrs Exceeded
WARNING
Current T1 Severely Errored Framing
Seconds Threshold Exceeded
T1 Curr SES Thrs Exceeded
WARNING
Current T1 Severely Errored Seconds
Threshold Exceeded
T1 Curr UAS Thrs Exceeded
WARNING
Current T1 Unavailable Seconds
Threshold Exceeded
T1 Line Loopback Active
WARNING
Line Loopback Active
T1 Loopback Cleared
WARNING
Loopback Cleared
T1 Payload Loopback Active
WARNING
Payload Loopback Active
T1 Total CSS Thrs Exceeded
WARNING
Total T1 Controlled Slip Seconds
Threshold Exceeded
61200305L1-1F
© 2002 ADTRAN, Inc.
383
Section 7, System Event Logging
ATLAS 550 System Manual
Table 4. T1 Events (Continued)
Console Log String
Category
Event
T1 Tot ES Thrs Exceeded
WARNING
Total T1 Errored Seconds Threshold
Exceeded
T1 Total LCV Thrs Exceeded
WARNING
Total T1 Line Code Violations Threshold
Exceeded
T1 Total LES Thrs Exceeded
WARNING
Total T1 Line Errored Seconds Threshold
Exceeded
T1 Total PCV Thrs Exceeded
WARNING
Total T1 Path Code Violations Threshold
Exceeded
T1 Total SEFS Thrs Exceeded
WARNING
Total T1 Severely Errored Framing
Seconds Threshold Exceeded
T1 Total SES Thrs Exceeded
WARNING
Total T1 Severely Errored Seconds
Threshold Exceeded
T1 Total UAS Thrs Exceeded
WARNING
Total T1 Unavailable Seconds Threshold
Exceeded
T1 Blue Alarm Cleared
MAJOR
Blue Alarm Cleared
T1 Blue Alarm Active
MAJOR
Blue Alarm Set
T1 D Channel Alarm Cleared
MAJOR
D Channel Alarm Cleared
T1 D Channel Alarm Active
MAJOR
D Channel Alarm Set
T1 LOS Cleared
MAJOR
LOS Alarm Cleared
T1 LOS Active
MAJOR
LOS Alarm Set
T1 Red Alarm Cleared
MAJOR
Red Alarm Cleared
T1 Red Alarm Active
MAJOR
Red Alarm Set
T1 Tx Blue Alarm Cleared
MAJOR
Tx Blue Alarm Cleared
T1 Tx Blue Alarm Active
MAJOR
Tx Blue Alarm Set
T1 Tx Yellow Alarm Cleared
MAJOR
Tx Yellow Alarm Cleared
T1 Tx Yellow Alarm Active
MAJOR
Tx Yellow Alarm Set
T1 Yellow Alarm Cleared
MAJOR
Yellow Alarm Cleared
T1 Yellow Alarm Active
MAJOR
Yellow Alarm Set
Table 5. Ethernet Events
Console Log String
Out of memory
384
Category
CRITICAL
© 2002 ADTRAN, Inc.
Event
Not enough memory for Ethernet driver
61200305L1-1F
ATLAS 550 System Manual
Section 7, System Event Logging
Table 6. ISDN Events
Console Log String
Category
Event
BRI configuration failed: No ISDN resources
are available
CRITICAL
No BRI resources available
PRI configuration failed: No ISDN resources
are available
CRITICAL
No PRI resources available
No SPID matches the call profile: <called
number> <call type>
WARNING
No Matching SPID found
No SPID with free B channels matches call
type: <call type>
WARNING
No Matching SPID found
LT: Tried to call unregistered SPID <spid>
WARNING
SPID Unregistration attempted
D channel is DOWN
MAJOR
D Channel Down
<message>: Incorrectly formatted cause IE
MAJOR
Incorrectly formatted IE
BRI NT: Spid <spid> was rejected
MAJOR
SPID Failed
BRI NT: SPID Negotiations failed - resetting
the link
MAJOR
SPID Negotiation failed
BRI LT: SPID <spid> received - NOT IN LIST
MAJOR
Unknown SPID received
BRI NT: SPID Negotiations failed - Retrying
MINOR
SPID Retry in progress
Configured BRI as LT
NORMAL
BRI LT configuration successful
Configured BRI as NT
NORMAL
BRI NT configuration successful
Rejected an incoming call for an
unregistered SPID
NORMAL
Call Rejected
D channel is UP
NORMAL
D Channel Up
Released: No longer an ISDN line
NORMAL
ISDN line released
No outgoing B channel available for call to
<number>
NORMAL
No B channels for call
Configured PRI as central office emulator
NORMAL
PRI CO configuration successful
Configured PRI as CPE
NORMAL
PRI CPE configuration successful
BRI NT: Spid <spid> registered
NORMAL
SPID registered
BRI LT: All SPIDs registered
NORMAL
SPID Registration complete
BRI NT: All SPIDs registered
NORMAL
SPID Registration complete
BRI LT: Registering SPID <spid>
NORMAL
SPID Registration in progress
BRI NT Registering SPID <spid>
NORMAL
SPID Registration in progress
Call to <called number> declared busy after
leaving ATLAS
INFO
Call busy
Call to <called number> refused: Busy
INFO
Call busy
61200305L1-1F
© 2002 ADTRAN, Inc.
385
Section 7, System Event Logging
ATLAS 550 System Manual
Table 6. ISDN Events (Continued)
Console Log String
Category
Event
Call to <called number> cleared from ATLAS
end
INFO
Call cleared
Call to <called number> connected
INFO
Call connected
Call to <called number> disconnected by far
end
INFO
Call disconnected
Call not accepted to <called number>: No
channel available
INFO
Call not accepted
Call to ATLAS: <called number> received
INFO
Call received
Call to <called number> ringing
INFO
Call ringing
Dialing <called number>
INFO
Dialing number
Incoming call to <called number> accepted
INFO
Incoming call accepted
Incoming call to <called number> refused
INFO
Incoming call refused
Table 7. Circuit Backup Events
Console Log String
Category
Event
Circuit Backup Attempt Failed
MAJOR
Outgoing backup call was unsuccessful
Circuit Backup Test Call Failed
MAJOR
Outgoing backup test call was
unsuccessful
Attempting Circuit Backup
MINOR
Circuit Backup call attempted to restore
data circuit
Circuit Backup Active
MINOR
Port is currently in backup
Circuit Backup Deactivated, Primary
Restored
MINOR
Port was in backup, but primary data
function was restored
Circuit Backup Data Alarm Active
MINOR
Inband keep alive messages were
disrupted or corrupted
Circuit Backup Data Alarm Cleared
MINOR
Inband keep alive messages are
functioning properly
Circuit Backup Test Call Originated
INFO
Circuit Backup test call was attempted by
the unit
Circuit Backup Test Call Connected
INFO
Circuit Backup test call was successfully
connected to backup site
Circuit Backup Test Call Passed
INFO
Circuit Backup test call was successfully
maintained for test period
386
© 2002 ADTRAN, Inc.
61200305L1-1F
ATLAS 550 System Manual
Section 7, System Event Logging
Table 8. DP Outgoing Signaling Events
Console Log String
Category
Event
TX Set Rx ABCD < > Tx ABCD < >1
INFO
ATLAS changed signal bits on port
RX Change Rx ABCD < > Tx ABCD < >
INFO
Equipment connected to port changed
signal bits
1
The ATLAS 550 uses only AB signaling bits. The CD signaling bits are a copy of the AB values. These values are
shown in hexadecimal notation. For example, if AB signal bits are 01, then the total signal bits would be 01 01. Putting
that in hexadecimal notation results in an event of Tx set Rx ABCD 0x 05.
Table 9. Modem Management Module Events
Console Log String
Category
Event
Modem Management Call Answered
INFO
Incoming call was successfully answered
by the Modem Management Module
Modem Management Call Ended
INFO
Active call to Modem Management
Module was disconnected
4.
ISDN CAUSE CODES
In addition to the above events, certain recognized ISDN cause codes are sent to the event log from the
ISDN message facility during ISDN EVENTS, L2 MESSAGES, and L2 FORMATTED event categories.
Table 10 lists the codes applicable to the ATLAS 550 and the minimum category required for logging the
cause code event.
Table 10. ISDN Cause Code Events
Cause Code Event
Category
Code
WARNING
43
BAD_INFO_ELEM
MAJOR
99
BEAR_CAP_NOT_AVAIL
MINOR
58
INFO
21
CAP_NOT_IMPLEMENTED
MINOR
65
CHAN_NOT_IMPLEMENTED
MINOR
66
CHANNEL_UNACCEPTABLE
INFO
6
DEST_OUT_OF_ORDER
INFO
27
FACILITY_NOT_IMPLEMENTED
MAJOR
69
FACILITY_NOT_SUBSCRIBED
MINOR
50
INFO
29
MINOR
54
ACCESS_INFO_DISCARDED
CALL_REJECTED
FACILITY_REJECTED
INCOMING_CALL_BARRED
61200305L1-1F
© 2002 ADTRAN, Inc.
387
Section 7, System Event Logging
ATLAS 550 System Manual
Table 10. ISDN Cause Code Events (Continued)
Cause Code Event
Category
Code
INCOMPATIBLE_DEST
MAJOR
88
INTERWORKING_UNSPEC
MAJOR
127
INVALID_CALL_REF
MAJOR
81
INVALID_ELEM_CONTENTS
MAJOR
100
INVALID_MSG_UNSPEC
MAJOR
95
INVALID_NUMBER_FORMAT
INFO
28
MANDATORY_IE_LEN_ERR
MAJOR
103
MANDATORY_IE_MISSING
MAJOR
96
NETWORK_CONGESTION
WARNING
42
NETWORK_OUT_OF_ORDER
WARNING
38
NO_CIRCUIT_AVAILABLE
WARNING
34
NO_ROUTE
INFO
2
NO_USER_RESPONDING
INFO
18
NONEXISTENT_MSG
MAJOR
97
NORMAL_CLEARING
INFO
16
NUMBER_CHANGED
INFO
22
MINOR
52
WARNING
45
MAJOR
111
WARNING
44
RESP_TO_STAT_ENQ
INFO
30
SERVICE_NOT_AVAIL
MINOR
63
WARNING
41
MAJOR
102
UNASSIGNED_NUMBER
INFO
1
UNSPECIFIED_CAUSE
INFO
31
USER_BUSY
INFO
17
WRONG_MESSAGE
INFO
98
MAJOR
101
OUTGOING_CALL_BARRED
PRE_EMPTED
PROTOCOL_ERROR
REQ_CHANNEL_NOT_AVAIL
TEMPORARY_FAILURE
TIMER_EXPIRY
WRONG_MSG_FOR_STATE
388
© 2002 ADTRAN, Inc.
61200305L1-1F
ATLAS 550 System Manual
5.
Section 7, System Event Logging
CAUSE CODE LOG ENTRIES
Cause Code IEs that are non-Q.931 (i.e., the Coding Standard field is not 0) are logged with the following
format:
<message>: <coding standard> code <cause code>
The coding standard field is one of the following: Reserved, National, or Local. Each Cause Code IE log
entry ends with a location designation. Table 11 shows these designations. Tables 12 through 14 provide a
listing of system events.
Table 11. Cause Code Log Entry Location Designations
Code
Location
IN0TL
International network
INWK
Network beyond internetworking point
LN
Public network serving the local user
LPN
Private network serving the local user
RLN
Public network serving the remote user
RPN
Private network serving the remote user
TN
U
Transit network
User
Table 12. ISDN L2 Messages
Console Log String
Category
<message contents>
INFO
Event
ISDN Layer 2 (LAPD) Message *
* Provides a hex dump of the entire LAPD frame.
Table 13. ISDN Call Control Messages
Console Log String
Category
Event
Host>>CC <tag><call ID> <message>
INFO
ISDN Call Control Messages
CC>>Host <tag><call ID> <message>
INFO
ISDN Call Control Messages
Table 14. Source: ISDN Information Elements
Console Log String
<message contents>
Category
INFO
Event
ISDN Information Element *
* Provides a hex dump of the ISDN IE sent with a call control message.
61200305L1-1F
© 2002 ADTRAN, Inc.
389
Section 7, System Event Logging
390
ATLAS 550 System Manual
© 2002 ADTRAN, Inc.
61200305L1-1F
ADTRAN UTILITIES
ADTRAN delivers several PC software utilities along with the ATLAS 550. These utilities are located on
the CD-ROM that came with your shipment.
Review the readme file (Readme.txt) for the latest information about the utilities.
The utilities make it easier to interface with the terminal menu and transfer configuration files to and from
TFTP servers. The utilities all run on Microsoft Windows 3.1 or higher. The following sections describe
the Telnet, VT100, and TFTP Server utilities.
CONTENTS
Telnet Utility . . . . . . . . . . . . . . . . . . . . . . . . . . . . . . . . . . . . . . . . . . . . . . . . . . . . . . . . . . . . . . . . . . 384
Session Menu. . . . . . . . . . . . . . . . . . . . . . . . . . . . . . . . . . . . . . . . . . . . . . . . . . . . . . . . . . . 385
Edit Menu . . . . . . . . . . . . . . . . . . . . . . . . . . . . . . . . . . . . . . . . . . . . . . . . . . . . . . . . . . . . . . 386
Options Menu . . . . . . . . . . . . . . . . . . . . . . . . . . . . . . . . . . . . . . . . . . . . . . . . . . . . . . . . . . . 386
Capture Menu. . . . . . . . . . . . . . . . . . . . . . . . . . . . . . . . . . . . . . . . . . . . . . . . . . . . . . . . . . . 386
Help Menu . . . . . . . . . . . . . . . . . . . . . . . . . . . . . . . . . . . . . . . . . . . . . . . . . . . . . . . . . . . . . 387
VT100 Utility . . . . . . . . . . . . . . . . . . . . . . . . . . . . . . . . . . . . . . . . . . . . . . . . . . . . . . . . . . . . . . . . . . 387
Session Menu. . . . . . . . . . . . . . . . . . . . . . . . . . . . . . . . . . . . . . . . . . . . . . . . . . . . . . . . . . . 388
Edit Menu . . . . . . . . . . . . . . . . . . . . . . . . . . . . . . . . . . . . . . . . . . . . . . . . . . . . . . . . . . . . . . 389
Port Menu . . . . . . . . . . . . . . . . . . . . . . . . . . . . . . . . . . . . . . . . . . . . . . . . . . . . . . . . . . . . . . 389
Options Menu . . . . . . . . . . . . . . . . . . . . . . . . . . . . . . . . . . . . . . . . . . . . . . . . . . . . . . . . . . . 389
Capture Menu. . . . . . . . . . . . . . . . . . . . . . . . . . . . . . . . . . . . . . . . . . . . . . . . . . . . . . . . . . . 389
Help Menu . . . . . . . . . . . . . . . . . . . . . . . . . . . . . . . . . . . . . . . . . . . . . . . . . . . . . . . . . . . . . 389
TFTP Server . . . . . . . . . . . . . . . . . . . . . . . . . . . . . . . . . . . . . . . . . . . . . . . . . . . . . . . . . . . . . . . . . . 390
Server Menu . . . . . . . . . . . . . . . . . . . . . . . . . . . . . . . . . . . . . . . . . . . . . . . . . . . . . . . . . . . . 391
Print Log . . . . . . . . . . . . . . . . . . . . . . . . . . . . . . . . . . . . . . . . . . . . . . . . . . . . . . . . . . . . . . . 391
Help . . . . . . . . . . . . . . . . . . . . . . . . . . . . . . . . . . . . . . . . . . . . . . . . . . . . . . . . . . . . . . . . . . 391
Status Field. . . . . . . . . . . . . . . . . . . . . . . . . . . . . . . . . . . . . . . . . . . . . . . . . . . . . . . . . . . . . 391
Meter Field . . . . . . . . . . . . . . . . . . . . . . . . . . . . . . . . . . . . . . . . . . . . . . . . . . . . . . . . . . . . . 392
Log Field . . . . . . . . . . . . . . . . . . . . . . . . . . . . . . . . . . . . . . . . . . . . . . . . . . . . . . . . . . . . . . . 392
FIGURES
Figure 1.
Figure 2.
Figure 3.
Figure 4.
Telnet Menu Tree. . . . . . . . . . . . . . . . . . . . . . . . . . . . . . . . . . . . . . . . . . . . . . . . . . . . .
VT100 Menu Tree . . . . . . . . . . . . . . . . . . . . . . . . . . . . . . . . . . . . . . . . . . . . . . . . . . . .
TFTP Server Interface Menu Tree . . . . . . . . . . . . . . . . . . . . . . . . . . . . . . . . . . . . . . . .
TFTP Server Interface . . . . . . . . . . . . . . . . . . . . . . . . . . . . . . . . . . . . . . . . . . . . . . . . .
61200305L1-1F
© 2002 ADTRAN, Inc.
384
388
390
390
391
Section 7, ADTRAN Utilities
1.
ATLAS 550 System Manual
TELNET UTILITY
The Telnet utility delivered with the ATLAS 550 provides enhancements to standard Telnet programs that
make it easier to work with ATLAS 550 options.
Access the Telnet program remotely through the 10/100BaseT Ethernet port. For a detailed description of
how to work with the Telnet program, refer to Navigating the Terminal Menus in the User Interface Guide
section of this manual. If you need help setting up the ATLAS 550 for a Telnet session, refer to the Detailed
Level Procedures section of this manual.
The Telnet menus include SESSION, EDIT, OPTIONS, CAPTURE, and HELP (see the menu tree in Figure 1).
Session
Telnet
Host Name
Port
Edit Entry
Add New
Delete
Connect
Connect
Disconnect
Transfer Cfg
Exit
Edit
Copy
Paste
Options
Colors
Local Echo
Auto Repeat
Background
Bold
Text
File
Start Cfg Capture
Stop Cfg Capture
Capture
Buffer Size
Save Buffer As
Screen Capture
Help
Contents
IP Status
About
Figure 1. Telnet Menu Tree
392
© 2002 ADTRAN, Inc.
61200305L1-1F
ATLAS 550 System Manual
Section 7, ADTRAN Utilities
Session Menu
Click on SESSION to open the Telnet session.
Connect
Opens dialog box for setting HOST NAME and
PORT parameters for a Telnet session. Also lets
you EDIT ENTRY, ADD NEW entry, and DELETE
stored entries. When the parameters are set, click
CONNECT to make the connection. Click CANCEL
to end the session.
Host Name
Accepts and stores host names. You may either enter a descriptive name, an IP address, or a domain
name directly from this field. Click on the drop-down arrow to display a complete list of previously
stored host names.
PORT
Provides several port options. You may enter port numbers directly into this field to connect to
non-standard ports or select the drop-down combo-box to display the following options:
TELNET
establishes a Telnet session
ECHO
provides a loopback for troubleshooting
DISCARD
bit bucket; discards data
DAYTIME
returns the time
CHARGEN
displays as a unique character stream; used for self-tests
Edit Entry
Changes either the unit name or the IP address of each host.
Press Tab, Return, or a period (.) after each number in the
IP address to move to the next field. If you press Return or
(.) while the cursor is located in each IP field, the next field
is cleared and the cursor advances into it.
Add New
Prompts you for the same information as the EDIT ENTRY
dialog box for new host. When enabled, the USE DNS (Domain Name Server) feature allows users to
request DOMAIN LOOK UP via a DNS server on the network, rather than specifying an IP address. The
name then appears in the HOST NAME field.
Delete
Removes a host name from the list; select the host name to remove, and click DELETE at the prompt.
Connect
Establishes the Telnet session.
61200305L1-1F
© 2002 ADTRAN, Inc.
393
Section 7, ADTRAN Utilities
ATLAS 550 System Manual
Disconnect
Terminates the Telnet session.
To re-establish the session, select CONNECT from SESSION MENU or press ENTER three times. This
action restores the previous connection.
Transfer Cfg
This feature is used with ADTRAN products primarily for sending configuration files to the unit.
Exit
Ends the Telnet session and closes the Telnet screen.
Edit Menu
Provides COPY and PASTE commands.
Options Menu
Provides viewing alternatives for the terminal screen.
Colors
Three options change the color of the background window (BACKGROUND), bold highlights (BOLD),
and text (TEXT).
Local Echo
Echoes each character that you enter.
Auto Repeat
Repeats characters you select from the keyboard, if you hold down the key.
Capture Menu
Provides options for capturing screen images.
File
Sends screen options data to a file in the format options listed below:
Start Cfg Capture
Used with the ADTRAN product line to start sending the scrolling screen capture to a file storage
location.
Stop Cfg Capture
Used with the ADTRAN product line to stop sending the scrolling screen capture to a file storage
location.
Buffer Size
Disables terminal window scroll bars when set to zero. (This is the normal setting for ATLAS 550.)
This number represents the number of lines to capture in the memory buffer.
Save Buffer As
Save screen capture to a file.
394
© 2002 ADTRAN, Inc.
61200305L1-1F
ATLAS 550 System Manual
Section 7, ADTRAN Utilities
Screen Capture
Copies the text on the current Telnet screen to the clipboard. You can open any word processor and
paste the clipboard contents into the program. This option is helpful when debugging.
Help Menu
Provides on-line help for using the ADTRAN Utilities.
Contents
Opens the on-line help.
IP Status
Displays the local port address and the status of the connection.
About
Displays version and owner information.
2.
VT100 UTILITY
Use the VT100 to configure an ATLAS 550 which is directly connected to a PC. The VT100 display is
almost identical to the Telnet display.
For a detailed description of how to work within the terminal menu, refer to Navigating the Terminal
Menus in the User Interface Guide section of this manual. If you need help setting up the ATLAS 550 for a
VT100 session, refer to the Detailed Level Procedures section of this manual.
61200305L1-1F
© 2002 ADTRAN, Inc.
395
Section 7, ADTRAN Utilities
ATLAS 550 System Manual
VT100 menus include SESSION, EDIT, PORT, OPTIONS, CAPTURE, and HELP (see the menu tree in
Figure 2).
Session
VT100
Connect
Disconnect
File Transfer
Exit
XMODEM CRC
ASCII Cfg Files
Edit
Copy
Paste
Port
Settings
Transmit Wakeup
Transmit Refresh
Options
Refresh Screen
Connect
Colors
Local Echo
Auto Repeat
File
Buffer Size
Save Buffer As
Screen Capture
Start Cfg Capture
Stop Cfg Capture
Capture
Help
Send Cfg File
BackGround
Bold
Text
Contents
About
Figure 2. VT100 Menu Tree
Session Menu
Opens VT100 terminal emulation session.
Connect
Opens a specified serial port for a VT100 session.
Disconnect
Closes a specified serial port at the end of a VT100 session.
File Transfer
Uploads and downloads files to and from an ATLAS 550.
XMODEM CRC
Selects the XMODEM file transfer protocol.
ASCII Cfg Files
Selects ASCII transfer mode. Primarily useful for configuration transfers for the ADTRAN products.
396
© 2002 ADTRAN, Inc.
61200305L1-1F
ATLAS 550 System Manual
Section 7, ADTRAN Utilities
Edit Menu
Identical to the Telnet EDIT MENU (see Edit Menu on page 394).
Port Menu
Changes serial COM port SETTINGS. Provides data rate settings from
300—57600 bps.
Options Menu
Provides terminal screen commands.
Refresh Screen
Redraws the screen.
Connect
Provides the options TRANSMIT WAKEUP and TRANSMIT REFRESH.
Transmit Wakeup
Provides a control sequence that puts the ATLAS 550 Control Port online in terminal mode.
Transmit Refresh
Provides a control sequence to refresh the screen automatically when connecting. (This is the default
setting for the ATLAS 550.)
Colors
Identical to Telnet COLORS MENU (see Colors on page 394).
Local Echo
Echoes each character that you enter.
Auto Repeat
Repeats characters you select from the keyboard if you hold down the key.
Capture Menu
Identical to the Telnet CAPTURE MENU (see Capture Menu on page 394).
Help Menu
Provides on-line help and information about the version number.
Contents
Opens on-line help.
About
Displays version and owner information.
61200305L1-1F
© 2002 ADTRAN, Inc.
397
Section 7, ADTRAN Utilities
3.
ATLAS 550 System Manual
TFTP SERVER
The TFTP Server utility transfers ATLAS 550 configuration files to and from a TFTP server. You can
install this program on a PC running any version of Microsoft Windows. The configuration of an
ATLAS 550 can be saved offline as a backup file. The saved file may also be used to send the same
configuration to multiple ATLAS 550 units. Transfer configuration files using the TFTP protocol (a
TCP/IP user protocol) via the 10/100BaseT Ethernet port. The ATLAS 550 must have a valid IP address,
subnet mask, and default gateway (if required), and be connected to an Ethernet network before
proceeding. Figure 4 shows the TFTP server interface. For information on transferring and saving
configurations using TFTP, refer to the Detailed Level Procedures section of this manual.
Files must be placed in the Application directory where you installed the product.
Received files are also placed here.
Server
TFTP Server
Print Log
Help
Enable
Disable
Abort
Exit
...to Clipboard
...to Printer
Clear Log
Contents
About
Figure 3. TFTP Server Interface Menu Tree
Figure 4. TFTP Server Interface
398
© 2002 ADTRAN, Inc.
61200305L1-1F
ATLAS 550 System Manual
Section 7, ADTRAN Utilities
Only one configuration transfer session (upload or download) may be active at a time. The TCP/IP
parameters are not saved or overwritten as part of an ATLAS 550 unit’s transferred configuration to allow
sending identical configurations to multiple units. When you start this program, a port is automatically
opened.
Server Menu
Provides enable, disable, abort, and exit options.
Enable
Enables the TFTP server. The IP address displays in the Status field and Server Ready displays in the
Log field.
Disable
Disables the TFTP server. When you select this option, the message PORT CLOSED displays in the
Status field and Port Closed displays in the Log field.
Abort
Terminates a transfer that is in progress.
Exit
Terminates active transfers and closes the TFTP window.
Print Log
Provides print options.
...to Clipboard
Copies the information in the Log field to the clipboard. You can then open any word processor and
paste the information into the program for review.
...to Printer
Sends the information in the Log field to the default printer.
Clear Log
Deletes the information stored in the Log field.
Help
Provides on-line help and version information.
Contents
Opens on-line help.
About
Displays version and owner information.
Status Field
This field displays general information about port and transfer status. This field is read-only. The unlabeled
field in the center of the screen displays prompts about the status of active transfers, such as bytes
transferred and received.
61200305L1-1F
© 2002 ADTRAN, Inc.
399
Section 7, ADTRAN Utilities
ATLAS 550 System Manual
Meter Field
The XMIT meter provides a visual record of the transfer process.
Log Field
This field displays a record of all of the events that occur during the time the TFTP Server is enabled. Use
the scroll bar to move up and down the list. To clear the information in this field, select CLEAR LOG from
the PRINT LOG menu. Save this information to a file before deleting it with the ...TO CLIPBOARD
command.
400
© 2002 ADTRAN, Inc.
61200305L1-1F
MIB
This section provides a listing of SNMP Management Information Bases (MIBs) supported by the
ATLAS 550. Traps supported for each MIB are also listed.
CONTENTS
MIBs SUPPORTED BY THE ATLAS 550 . . . . . . . . . . . . . . . . . . . . . . . . . . . . . . . . . . . . . . . . . . . . 394
MIB Compilation Order . . . . . . . . . . . . . . . . . . . . . . . . . . . . . . . . . . . . . . . . . . . . . . . . . . . . . . . . . 395
Traps Supported by the ATLAS 550 . . . . . . . . . . . . . . . . . . . . . . . . . . . . . . . . . . . . . . . . . . . . . . . 395
MIB Variables Supported by the ATLAS 550 . . . . . . . . . . . . . . . . . . . . . . . . . . . . . . . . . . . . . . . . 398
61200305L1-1F
© 2002 ADTRAN, Inc.
401
Section 9, MIB
1.
ATLAS 550 System Manual
MIBs SUPPORTED BY THE ATLAS 550
rfc1213.mib
(Standard - MIB-II)
rfc1406.mib
(Standard - DS1 and E1 Interface Types)
rfc1315.mib
(Standard - Frame Relay DTEs)
adtran.mib
(Adtran)
ads1.mib
(Adtran)
fperform.mib
(Adtran)
atproduc.mib
(Atlas)
atunit.mib
(Atlas - Unit)
atmod.mib
(Atlas - Module)
atv35nx.mib
(Atlas - Interface)
atbri.mib
(Atlas - Interface)
att1.mib
(Atlas - Interface)
atvoice.mib
(Atlas - Interface)
athssv35.mib
(Atlas - Interface)
at550.mib
(Atlas - Product Specific - Atlas 550)
atqbriu.mib
(Atlas - Product Specific - Quad BRI-U Option
Module)
*Also need RFC1155-SMI, RFC1158-MIB, RFC-1212, and RFC-1215, which should come standard with
any SNMP Management software package.
402
© 2002 ADTRAN, Inc.
61200305L1-1F
ATLAS 550 System Manual
2.
Section 9, MIB
MIB COMPILATION ORDER
RFC1155-SMI (if necessary)
RFC1158-MIB (if necessary)
RFC-1212 (if necessary)
RFC-1215 (if necessary)
rfc1213.mib
rfc1406.mib
rfc1315.mib
adtran.mib
ads1.mib
fperform.mib
atproduc.mib
atunit.mib
atmod.mib
atv35nx.mib
atbri.mib
att1.mib
atvoice.mib
athssv35.mib
at550.mib
atqbriu.mib
3.
TRAPS SUPPORTED BY THE ATLAS 550
rfc1215.mib
coldStart
warmStart
linkDown
linkUp
authenticationFailure
61200305L1-1F
© 2002 ADTRAN, Inc.
403
Section 9, MIB
ATLAS 550 System Manual
rfc1315.mib
frDLCIStatusChange
atunit.mib
adATLASFrSwToBkup -- 15400500
adATLASFrSwToPrimary -- 15400501
atmod.mib
adATLASModuleOffline -- 15400600
adATLASModuleOnline -- 15400601
adATLASCbuBackupAttempt -- 15400602
adATLASCbuBackupAttemptFailed -- 15400603
adATLASCbuBackupActive -- 15400604
adATLASCbuPrimaryRestored -- 15400605
adATLASCbuTestCallOriginated -- 15400606
adATLASCbuTestCallConnected -- 15400607
adATLASCbuTestCallPassed -- 15400608
adATLASCbuTestCallFailed -- 15400609
atv35nx.mib
adATLASV35NxSlipAlarmActive -- 15400700
adATLASV35NxSlipAlarmInActive -- 15400701
adATLASV35NxPLLAlarmActive -- 15400702
adATLASV35NxPLLAlarmInActive -- 15400703
adATLASV35NxZeroAlarmActive -- 15400704
adATLASV35NxZeroAlarmInActive -- 15400705
adATLASV35NxExtClkAlarmActive -- 15400706
adATLASV35NxExtClkAlarmInActive -- 15400707
adATLASV35NxRTSActive -- 15400708
adATLASV35NxRTSInActive -- 15400709
adATLASV35NxCTSActive -- 15400710
adATLASV35NxCTSInActive -- 15400711
adATLASV35NxDTRActive -- 15400712
adATLASV35NxDTRInActive -- 15400713
adATLASV35NxDSRActive -- 15400714
adATLASV35NxDSRInActive -- 15400715
adATLASV35NxDCDActive -- 15400716
adATLASV35NxDCDInActive -- 15400717
404
© 2002 ADTRAN, Inc.
61200305L1-1F
ATLAS 550 System Manual
atv35nx.mib (cont.)
Section 9, MIB
adATLASV35NxRIActive -- 15400718
adATLASV35NxRIInActive -- 15400719
adATLASV35NxTDActive -- 15400720
adATLASV35NxTDInActive -- 15400721
adATLASV35NxRDActive -- 15400722
adATLASV35NxRDInActive -- 15400723
adATLASV35NxECActive -- 15400724
adATLASV35NxECInActive -- 15400725
att1.mib
adATLAST1RxYellowActive -- 15400900
adATLAST1RxYellowInActive -- 15400901
adATLAST1RxAISActive -- 15400902
adATLAST1RxAISInActive -- 15400903
adATLAST1RedAlarmActive -- 15400904
adATLAST1RedAlarmInActive -- 15400905
adATLAST1LOSActive -- 15400906
adATLAST1LOSInActive -- 15400907
adATLAST1TxAISActive -- 15400908
adATLAST1TxAISInActive -- 15400909
adATLAST1TxYellowActive -- 15400910
adATLAST1TxYellowInActive -- 15400911
adATLAST1CurrentES -- 15400912
adATLAST1CurrentSES -- 15400913
adATLAST1CurrentSEFS -- 15400914
adATLAST1CurrentUAS -- 15400915
adATLAST1CurrentCSS -- 15400916
adATLAST1CurrentPCV -- 15400917
adATLAST1CurrentLES -- 15400918
adATLAST1CurrentLCV -- 15400919
adATLAST1TotalES -- 15400920
adATLAST1TotalSES -- 15400921
adATLAST1TotalSEFS -- 15400922
61200305L1-1F
© 2002 ADTRAN, Inc.
405
Section 9, MIB
ATLAS 550 System Manual
att1.mib (cont.)
adATLAST1TotalUAS -- 15400923
adATLAST1TotalCSS -- 15400924
adATLAST1TotalPCV -- 15400925
adATLAST1TotalLES -- 15400926
adATLAST1TotalLCV -- 15400927
athssv35.mib
adATLASHSSIV35IfceDeact -- 15401100
adATLASHSSIV35IfceReact -- 15401101
at550.mib
adATLAS550ExtAlarmActive -- 21900
adATLAS550ExtAlarmInactive -- 21901
4.
MIB VARIABLES SUPPORTED BY THE ATLAS 550
For the MIBS listed below and on the following pages, an asterisk (*) signifies that Write
Access is not supported.
rfc1213.mib
(1.3.6.1.2.1)
mib-2
system
406
sysDescr
DisplayString
RO
sysObjectID
Object Identifier
RO
sysUpTime
TimeTicks
RO
sysContact
DisplayString
RW
sysName
DisplayString
RW
sysLocation
DisplayString
RW
sysServices
Integer
RO
© 2002 ADTRAN, Inc.
61200305L1-1F
ATLAS 550 System Manual
Section 9, MIB
interfaces
ifNumber
Integer
RO
ifIndex
Integer
RO
ifDescr
DisplayString
RO
ifType
Integer
RO
ifMtu
Integer
RO
ifSpeed
Gauge
RO
ifPhysAddress
PhysAddress
RO
ifAdminStatus
Integer
RW*
ifOperStatus
Integer
RO
ifInOctets
Counter
RO
ifInUcastPkts
Counter
RO
ifInNUcastPkts
Counter
RO
ifInDiscards
Counter
RO
ifInErrors
Counter
RO
ifInUnknownProtos
Counter
RO
ifOutOctets
Counter
RO
ifOutNUcastPkts
Counter
RO
ifOutDiscards
Counter
RO
ifOutErrors
Counter
RO
ifSpecific -- Object
Identifier
RO
ipForwarding
Integer
RW*
ipDefaultTTL
Integer
RW
ipInReceives
Counter
RO
ipInHdrErrors
Counter
RO
ipInAddrErrors
Counter
RO
ifTable
ifEntry
ip
61200305L1-1F
© 2002 ADTRAN, Inc.
407
Section 9, MIB
ATLAS 550 System Manual
ip (continued)
ipForwDatagrams
Counter
RO
ipInUnknownProtos
Counter
RO
ipInDiscards
Counter
RO
ipInDelivers
Counter
RO
ipOutRequests
Counter
RO
ipOutDiscards
Counter
RO
ipOutNoRoutes
Counter
RO
ipReasmTimeout
Integer
RO
ipReasmReqds
Counter
RO
ipReasmOKs
Counter
RO
ipReasmFails
Counter
RO
ipFragOKs
Counter
RO
ipFragFails
Counter
RO
ipFragCreates
Counter
RO
ipAdEntAddr
IpAddress
RO
ipAdEntIfIndex
Intege
RO
ipAdEntNetMask
IpAddress
RO
ipAdEntBcastAddr
Integer
RO
ipAdEntReasmMaxSize
Integer
RO
Counter
RO
icmpInMsgs
Counter
RO
icmpInErrors
Counter
RO
icmpInDestUnreachs
Counter
RO
icmpInTimeExcds
Counter
RO
icmpInParmProbs
Counter
RO
ipAddrTable
ipAddrEntry
ipRoutingDiscards
icmp
408
© 2002 ADTRAN, Inc.
61200305L1-1F
ATLAS 550 System Manual
Section 9, MIB
icmp (continued)
icmpInSrcQuenchs
Counter
RO
icmpInRedirects
Counter
RO
icmpInEchos
Counter
RO
icmpInEchoReps
Counter
RO
icmpInTimestamps
Counter
RO
icmpInTimestampReps
Counter
RO
icmpInAddrMasks
Counter
RO
icmpInAddrMaskReps
Counter
RO
icmpOutMsgs
Counter
RO
icmpOutErrors
Counter
RO
icmpOutDestUnreachs
Counter
RO
icmpOutTimeExcds
Counter
RO
icmpOutParmProbs
Counter
RO
icmpOutSrcQuenchs
Counter
RO
icmpOutRedirects
Counter
RO
icmpOutEchos
Counter
RO
icmpOutEchoReps
Counter
RO
icmpOutTimestamps
Counter
RO
icmpOutTimestampReps
Counter
RO
icmpOutAddrMasks
Counter
RO
icmpOutAddrMaskReps
Counter
RO
tcpRtoAlgorithm
Integer
RO
tcpRtoMin
Integer
RO
tcpRtoMax
Integer
RO
tcpMaxConn
Integer
RO
tcpActiveOpens
Counter
RO
tcpPassiveOpens
Counter
RO
tcp
61200305L1-1F
© 2002 ADTRAN, Inc.
409
Section 9, MIB
ATLAS 550 System Manual
tcp (continued)
tcpAttemptFails
Counter
RO
tcpEstabResets
Counter
RO
tcpCurrEstab
Gauge
RO
tcpInSegs
Counter
RO
tcpOutSegs
Counter
RO
tcpRetransSegs
Counter
RO
tcpConnState
Integer
RW
tcpConnLocalAddress
IpAddress
RO
tcpConnLocalPort
Integer
RO
tcpConnRemAddress
IpAddress
RO
tcpConnRemPort
Integer
RO
tcpInErrs
Counter
RO
tcpOutRsts
Counter
RO
udpInDatagrams
Counter
RO
udpNoPorts
Counter
RO
udpInErrors
Counter
RO
udpOutDatagrams
Counter
RO
udpLocalAddress
IpAddress
RO
udpLocalPort
Integer
RO
snmpInPkts
Counter
RO
snmpOutPkts
Counter
RO
snmpInBadVersions
Counter
RO
tcpConnTable
tcpConnEntry
udp
udpTable
udpEntry
transmission
snmp
410
© 2002 ADTRAN, Inc.
61200305L1-1F
ATLAS 550 System Manual
Section 9, MIB
snmp (continued)
61200305L1-1F
snmpInBadCommunityNames
Counter
RO
snmpInBadCommunityUses
Counter
RO
snmpInASNParseErrs
Counter
RO
snmpInTooBigs
Counter
RO
snmpInNoSuchNames
Counter
RO
snmpInBadValues
Counter
RO
snmpInReadOnlys
Counter
RO
snmpInGenErrs
Counter
RO
snmpInTotalReqVars
Counter
RO
snmpInTotalSetVars
Counter
RO
snmpInGetRequests
Counter
RO
snmpInGetNexts
Counter
RO
snmpInSetRequests
Counter
RO
snmpInSetRequests
Counter
RO
snmpInTraps
Counter
RO
snmpOutTooBigs
Counter
RO
snmpOutNoSuchNames
Counter
RO
snmpOutBadValues
Counter
RO
snmpOutGenErrs
Counter
RO
snmpOutGetRequests
Counter
RO
snmpOutGetNexts
Counter
RO
snmpOutSetRequests
Counter
RO
snmpOutGetResponses
Counter
RO
snmpOutTraps
Counter
RO
snmpEnableAuthenTraps
Counter
RW
© 2002 ADTRAN, Inc.
411
Section 9, MIB
ATLAS 550 System Manual
rfc1406.mib
(1.3.6.1.2.1.10.18)
ds1
dsx1ConfigTable
dsx1ConfigEntry
dsx1LineIndex
Integer
RO
dsx1IfIndex
Integer
RO
dsx1TimeElapsed
Integer
RO
dsx1ValidIntervals
Integer
RO
dsx1LineType
Integer
RW
dsx1LineCoding
Integer
RW
dsx1SendCode
Integer
RW
dsx1CircuitIdentifier
DisplayString
RW
dsx1LoopbackConfig
Integer
RW
dsx1LineStatus
Integer
RO
dsx1SignalMode
Integer
RW*
dsx1TransmitClockSource
Integer
RW
dsx1Fdl
Integer
RW*
dsx1CurrentIndex
Integer
RO
dsx1CurrentESs
Gauge
RO
dsx1CurrentSESs
Gauge
RO
dsx1CurrentSEFSs
Gauge
RO
dsx1CurrentUASs
Gauge
RO
dsx1CurrentCSSs
Gauge
RO
dsx1CurrentPCVs
Gauge
RO
dsx1CurrentLESs
Gauge
RO
dsx1CurrentBESs
Gauge
RO
dsx1CurrentLCVs
Gauge
RO
dsx1CurrentTable
dsx1CurrentEntry
412
© 2002 ADTRAN, Inc.
61200305L1-1F
ATLAS 550 System Manual
Section 9, MIB
dsx1IntervalTable
dsx1IntervalEntry
dsx1IntervalIndex
Integer
RO
dsx1IntervalNumber
Integer
RO
dsx1IntervalESs
Gauge
RO
dsx1IntervalSESs
Gauge
RO
dsx1IntervalSEFSs
Gauge
RO
dsx1IntervalUASs
Gauge
RO
dsx1IntervalCSSs
Gauge
RO
dsx1IntervalPCVs
Gauge
RO
dsx1IntervalLESs
Gauge
RO
dsx1IntervalBESs
Gauge
RO
dsx1IntervalLCVs
Gauge
RO
dsx1TotalIndex
Integer
RO
dsx1TotalESs
Gauge
RO
dsx1TotalSESs
Gauge
RO
dsx1TotalSEFSs
Gauge
RO
dsx1TotalUASs
Gauge
RO
dsx1TotalCSSs
Gauge
RO
dsx1TotalPCVs
Gauge
RO
dsx1TotalLESs
Gauge
RO
dsx1TotalBESs
Gauge
RO
dsx1TotalLCVs
Gauge
RO
dsx1FracIndex
nteger
RO
dsx1FracNumber
Integer
RO
dsx1FracIfIndex
Integer
RW*
dsx1TotalTable
dsx1TotalEntry
dsx1FracTable
dsx1FracEntry
61200305L1-1F
© 2002 ADTRAN, Inc.
413
Section 9, MIB
ATLAS 550 System Manual
rfc1315.mib
(1.3.6.1.2.1.10.32)
frame-relay
frDlcmiTable
frDlcmiEntry
frDlcmiIfIndex
Integer
RO
frDlcmiState
Integer
RW
frDlcmiAddress
Integer
RW*
frDlcmiAddressLen
Integer
RW*
frDlcmiPollingInterval
Integer
RW
frDlcmiFullEnquiryInterval
Integer
RW
frDlcmiErrorThreshold
Integer
RW
frDlcmiMonitoredEvents
Integer
RW
frDlcmiMaxSupportedVCs
Integer
RW*
frDlcmiMulticast
Integer
RW*
frCircuitIfIndex
Integer
RO
frCircuitDlci
Integer
RO
frCircuitState
Integer
RW
frCircuitReceivedFECNs
Counter
RO
frCircuitReceivedBECNs
Counter
RO
frCircuitSentFrames
Counter
RO
frCircuitSentOctets
Counter
RO
frCircuitReceivedFrames
Counter
RO
frCircuitReceivedOctets
Counter
RO
frCircuitCommittedBurst
Integer
RW
frCircuitExcessBurst
Integer
RW
frCircuitThroughput
Integer
RW
frCircuitTable
frCircuitEntry
414
© 2002 ADTRAN, Inc.
61200305L1-1F
ATLAS 550 System Manual
Section 9, MIB
frErrTable
frErrEntry
frErrIfIndex
Integer
RO
frErrType
Integer
RO
Integer
RW*
adProdName
DisplayString
RO
adProdPartNumber
DisplayString
RO
adProdCLEIcode
DisplayString
RO
adProdSerialNumber
DisplayString
RO
adProdRevision
DisplayString
RO
adProdSwVersion
DisplayString
RO
adProdPhysAddress
PhysAddress
RO
frame-relay-globals
frTrapState
adtran.mib
(1.3.6.1.4.1.664)
adtr
an
adProductInfo
adMgmt
adAdmin
adPerform
adShared
adIdentity
adConformance
61200305L1-1F
© 2002 ADTRAN, Inc.
415
Section 9, MIB
ATLAS 550 System Manual
ads1.mib
(1.3.6.1.4.1.664.2.3)
adDS1AlarmTable
adDS1AlarmEntry
adDS1AlarmIndex
Integer
RO
adDS1AlarmEnable
Integer
RW
adDS1LineEvent
Integer
RO
adDS1LineArm
Integer
RW
adDS1AlertIndex
Integer
RO
adDS1AlertEnable
Integer
RW
adDS1CurrentAlert
Integer
RO
adDS1TotalAlert
Integer
RO
adDS1CurrentArm
Integer
RW
adDS1TotalArm
Integer
RW
adDS1CurrentThrsES
Integer
RW
adDS1CurrentThrsSES
Integer
RW
adDS1CurrentThrsSEFS
Integer
RW
adDS1CurrentThrsUAS
Integer
RW
adDS1CurrentThrsCSS
Integer
RW
adDS1CurrentThrsPCVsf
Integer
RW
adDS1CurrentThrsPCVesf
Integer
RW
adDS1CurrentThrsLES
Integer
RW
adDS1CurrentThrsLCV
Integer
RW
adDS1TotalThrsES
Integer
RW
adDS1TotalThrsSES
Integer
RW
adDS1TotalThrsSEFS
Integer
RW
adDS1TotalThrsSEFS
Integer
RW
adDS1AlertTable
adDS1AlertEntry
adDS1CurrentThreshold
adDS1TotalThreshold
416
© 2002 ADTRAN, Inc.
61200305L1-1F
ATLAS 550 System Manual
Section 9, MIB
adDS1TotalThreshold (continued)
adDS1TotalThrsCSS
Integer
RW
adDS1TotalThrsPCVsf
Integer
RW
adDS1TotalThrsPCVesf
Integer
RW
adDS1TotalThrsLES
Integer
RW
adDS1TotalThrsLCV
Integer
RW
Integer
RO
atunit.mib
(1.3.6.1.4.1.664.2.154.1.5)
adATLASUnitmg
adATLASUnitInfo
adATLASUnitIfNumber
adATLASUnitPortInfoTable
adATLASUnitPortInfoEntry
adATLASUnitPortStatus
PortStatus
RO
adATLASUnitPortIfIndex
Integer
RO
adATLASUnitPortDescription
DisplayString
RO
adATLASUnitSlotAddress
Integer
RO
adATLASUnitPortAddress
Integer
RO
Integer
RO
adATLASUnitPortSlotMapTable
adATLASUnitPortSlotMapEntry
adATLASUnitStatus
adATLASUnitFPStatus
61200305L1-1F
© 2002 ADTRAN, Inc.
417
Section 9, MIB
ATLAS 550 System Manual
atmod.mib
(1.3.6.1.4.1.664.2.154.1.6)
adATLASModulemg
adATLASModuleInfoNumber
Integer
RO
adATLASModuleInfoTable
adATLASModuleInfoEntry
adATLASModuleInfoIndex
Integer
RO
adATLASModuleInfoNumIfs
Integer
RO
adATLASModuleInfoNumRsrcs
Integer
RO
adATLASModuleInfoOID
Identifier
RO
adATLASModuleInfoPartNum
DisplayString
RO
adATLASModuleInfoSerialNum
DisplayString
RO
adATLASModuleInfoHardwareRev
DisplayString
RO
adATLASModuleInfoFirmwareRev
DisplayString
RO
adATLASModuleInfoState
Integer
RW
adATLASModuleInfoStatus
Integer
RO
adATLASModuleInfoFPStatus
Integer
RO
Integer
RO
atv35nx.mib
(1.3.6.1.4.1.664.2.154.1.7)
adATLASV35Nxmg
adATLASV35NxIfNumber
adATLASV35NxIfTable
adATLASV35NxIfEntry
418
adATLASV35NxIfIndex
Integer
RO
adATLASV35NxIfSlotNum
Integer
RO
adATLASV35NxIfPortNum
Integer
RO
adATLASV35NxIfAlarmStatus
Integer
RO
adATLASV35NxIfDTEStatus
Integer
RO
adATLASV35NxIfDataRate
Gauge
RO
adATLASV35NxIfPLLFifoStatus
Integer
RO
© 2002 ADTRAN, Inc.
61200305L1-1F
ATLAS 550 System Manual
Section 9, MIB
adATLASV35NxIfInbandStatTable
adATLASV35NxIfInbandStatEntry
adATLASV35NxIfInbandStatIndex
Integer
RO
adATLASV35NxIfInbandStatRxFrames
Counter
RO
adATLASV35NxIfInbandStatTxFrames
Counter
RO
adATLASV35NxIfInbandStatRxBytes
Counter
RO
adATLASV35NxIfInbandStatTxBytes
Counter
RO
adATLASV35NxIfInbandStatReset
Integer
RW
adATLASV35NxTstIndex
Integer
RO
adATLASV35NxTstLoopbk
Integer
RW
adATLASV35NxTstLoopbkStatus
Integer
RO
adATLASV35NxTst511Pattern
Integer
RW
adATLASV35NxTstPatternSync
Integer
RO
adATLASV35NxTstPatternESs
Counter
RO
adATLASV35NxTstInjectErrs
Integer
RW
adATLASV35NxTstClearRslts
Integer
RW
Integer
RO
adATLASBRIIfIndex
Integer
RO
adATLASBRIIfSlotNum
Integer
RO
adATLASBRIIfPortNum
Integer
RO
adATLASBRIIfAlarmStatus
Integer
RO
adATLASV35NxTstTable
adATLASV35NxTstEntry
atbri.mib
(1.3.6.1.4.1.664.2.154.1.8)
adATLASBRImg
adATLASBRIIfNumber
adATLASBRIIfTable
adATLASBRIIfEntry
61200305L1-1F
© 2002 ADTRAN, Inc.
419
Section 9, MIB
ATLAS 550 System Manual
adATLASBRIIfChanStatTable
adATLASBRIIfChanStatEntry
adATLASBRIIfChanStatIndex
Integer
RO
adATLASBRIIfChanStatB1
Integer
RO
adATLASBRIIfChanStatB2
Integer
RO
adATLASBRIIfChanStatD
Integer
RO
adATLASBRITstIndex
Integer
RO
adATLASBRITstLLB
Integer
RW
Integer
RO
adATLAST1IfIndex
Integer
RO
adATLAST1IfSlotNum
Integer
RO
adATLAST1IfPortNum
Integer
RO
adATLAST1IfAlarmStatus
Integer
RO
adATLAST1IfRxLevel
Integer
RO
adATLAST1IfPLLStatus
Integer
RO
adATLAST1IfCurrentLOFC
Gauge
RO
adATLAST1IfTotalLOFC
Gauge
RO
adATLAST1IfResetPRMStats
Integer
RW
adATLAST1IfIntervalIndex
Integer
RO
adATLAST1IfIntervalLOFC
Gauge
RO
adATLASBRITstTable
adATLASBRITstEntry
att1.mib
(1.3.6.1.4.1.664.2.154.1.9)
adATLAST1mg
adATLAST1IfNumber
adATLAST1IfTable
adATLAST1IfEntry
adATLAST1IfIntervalTable
adATLAST1IfIntervalEntry
420
© 2002 ADTRAN, Inc.
61200305L1-1F
ATLAS 550 System Manual
Section 9, MIB
adATLAST1IfDS0Table
adATLAST1IfDS0Entry
adATLAST1IfDS0Index
Integer
RO
adATLAST1IfDS0Status
Octet String
RO
adATLAST1IfDS0Alarm
Octet String
RO
adATLAST1IfDS0RxSignalStatusA
Octet String
RO
adATLAST1IfDS0RxSignalStatusB
Octet String
RO
adATLAST1IfDS0TxSignalStatusA
Octet String
RO
adATLAST1IfDS0TxSignalStatusB
Octet String
RO
adATLAST1TstIndex
Integer
RO
adATLAST1TstLocalLpBk
Integer
RW
adATLAST1TstRemoteLpBk
Integer
RW
adATLAST1TstLpBkStatus
Integer
RO
adATLAST1TstPattern
Integer
RW
adATLAST1TstPatternSync
Integer
RO
adATLAST1TstPatternSyncLost
Integer
RO
adATLAST1TstPatternESs
Integer
RO
adATLAST1TstPatternBESs
Integer
RO
adATLAST1TstPatternSESs
Integer
RO
adATLAST1TstClearResults
Integer
RW
adATLAST1TstInjectError
Integer
RW
adATLAST1TstTable
adATLAST1TstEntry
61200305L1-1F
© 2002 ADTRAN, Inc.
421
Section 9, MIB
ATLAS 550 System Manual
atvoice.mib
(1.3.6.1.4.1.664.2.154.1.10)
adATLASVoicemg
adATLASVoiceIfNumber
Integer
RO
adATLASVoiceIfTable
adATLASVoiceIfEntry
adATLASVoiceIfIndex
Integer
RO
adATLASVoiceIfSlotNum
Integer
RO
adATLASVoiceIfPortNum
Integer
RO
adATLASVoiceIfPortStat
Integer
RO
adATLASVoiceIfTxSignalBits
DisplayString
RO
adATLASVoiceIfRxSignalBits
DisplayString
RO
adATLASVoiceTstIndex
Integer
RO
adATLASVoiceTst2W
Integer
RW
adATLASVoiceTstTxABCD
Integer
RW
adATLASVoiceTst1kHzTone
Integer
RW
adATLASVoiceTstLpBk
Integer
RW
adATLASVoiceTstTable
adATLASVoiceTstEntry
athssv35.mib
(1.3.6.1.4.1.664.2.154.1.11)
adATLASHSSIV35mg
422
© 2002 ADTRAN, Inc.
61200305L1-1F
ATLAS 550 System Manual
Section 9, MIB
at550.mib
(1.3.6.1.4.1.664.2.219)
adATLAS550mg
adATLAS550Fpnl
adATLAS550FpnlSysLeds
adATLAS550FpnlPow
Integer
RO
adATLAS550FpnlSys
Integer
RO
adATLAS550FpnlEth
Integer
RO
adATLAS550FpnlRem
Integer
RO
adATLAS550FpnlNwIndex
Integer
RO
adATLAS550FpnlNwOK
Integer
RO
adATLAS550FpnlNwTest
Integer
RO
adATLAS550FpnlNwError
Integer
RO
adATLAS550FpnlNwAlarm
Integer
RO
Integer
RO
adATLAS550FpnlMLIndex
Integer
RO
adATLAS550FpnlMLStatus
Integer
RO
adATLAS550FpnlMLOnline
Integer
RO
adATLAS550FpnlMLTest
Integer
RO
adATLAS550FpnlNtwkLeds
adATLAS550FpnlNwTable
adATLAS550FpnlNwEntry
adATLAS550FpnlModLeds
adATLAS550FpnlModNumber
adATLAS550FpnlMLTable
adATLAS550FpnlMLEntry
61200305L1-1F
© 2002 ADTRAN, Inc.
423
Section 9, MIB
ATLAS 550 System Manual
atqbriu.mib
(1.3.6.1.4.1.664.2.274)
adATLAS550QuadBRIUmg
adATLAS550QuadBRIUIfTable
adATLAS550QuadBRIUIfEntry
adATLAS550QuadBRIUIfIndex
Integer
RO
adATLAS550QuadBRIUIfNEBE
Counter
RO
adATLAS550QuadBRIUIfFEBE
Counter
RO
adATLAS550QuadBRIUIfResetBECounts
Counts
RW
adFRPerformHistoryIntLength
Integer
RW
adFRPerformCurrentIntTimeRemaining
Integer
RO
adFRPerformCompletedInts
Integer
RO
adFRPerformCompletedDays
Integer
RO
Integer
RO
adFRPerformIntPvcIndex
Integer
RO
adFRPerformIntPvcSlotIndex
Integer
RO
adFRPerformIntPVCStateChange
Counter
RO
adFRPerformIntPVCInactiveTime
Counter
RO
adFRPerformIntPVCFramesRx
Counter
RO
adFRPerformIntPVCFramesTx
Counter
RO
adFRPerformIntPVCBytesRx
Counter
RO
adFRPerformIntPVCBytesTx
Counter
RO
adFRPerformIntPVCAvgThruputTx
Gauge
RO
fperform.mib
(1.3.6.1.4.1.664.4.1)
adFRPerformmg
adFRPerformHistoryControl
adFRPerformCurrentPvcStatus
adFRPerformCurrentPvcStatusTable
adFRPerformCurrentPvcStatusEntry
adFRPerformIntPvcIfIndex
424
© 2002 ADTRAN, Inc.
61200305L1-1F
ATLAS 550 System Manual
61200305L1-1F
Section 9, MIB
adFRPerformIntPVCAvgThruputRx
Gauge
RO
adFRPerformIntPVCMaxThruputTx
Counter
RO
adFRPerformIntPVCMaxThruputRx
Counter
RO
adFRPerformIntPVCAvgUtilizationTx
Gauge
RO
adFRPerformIntPVCAvgUtilizationRx
Gauge
RO
adFRPerformIntPVCMaxUtilizationTx
Counter
RO
adFRPerformIntPVCMaxUtilizationRx
Counter
RO
adFRPerformIntPVCBurstTx
Counter
RO
adFRPerformIntPVCBurstRx
Counter
RO
adFRPerformIntPVCFecnRx
Counter
RO
adFRPerformIntPVCFecnTx
Counter
RO
adFRPerformIntPVCBecnRx
Counter
RO
adFRPerformIntPVCBecnTx
Counter
RO
adFRPerformIntPVCDeRx
Counter
RO
adFRPerformIntPVCDeTx
Counter
RO
adFRPerformIntPVCCrRx
Counter
RO
adFRPerformIntPVCCrTx
Counter
RO
adFRPerformIntPVCMinFrameSizeRx
Counter
RO
adFRPerformIntPVCMinFrameSizeTx
Counter
RO
adFRPerformIntPVCMaxFrameSizeRx
Counter
RO
adFRPerformIntPVCMaxFrameSizeTx
Counter
RO
adFRPerformIntPVCAvgFrameSizeRx
Gauge
RO
adFRPerformIntPVCAvgFrameSizeTx
Gauge
RO
adFRPerformIntPVCLostFrames
Counter
RO
adFRPerformIntPVCRemoteLostFrames
Counter
RO
adFRPerformIntPVCMaxDelay
Gauge
RO
adFRPerformIntPVCMinDelay
Gauge
RO
adFRPerformIntPVCAvgDelay
Gauge
RO
adFRPerformIntPVCTimeInDBU
Counter
RO
© 2002 ADTRAN, Inc.
425
Section 9, MIB
ATLAS 550 System Manual
adFRPerformIntPortStatus
adFRPerformIntPortStatusTable
adFRPerformIntPortStatusEntry
adFRPerformIntIfIndex
Integer
RO
adFRPerformIntPortSlotIndex
Integer
RO
adFRPerformIntPortFramesRx
Counter
RO
adFRPerformIntPortFramesTx
Counter
RO
adFRPerformIntPortBytesRx
Counter
RO
adFRPerformIntPortBytesTx
Counter
RO
adFRPerformIntPortAvgThruputTx
Gauge
RO
adFRPerformIntPortAvgThruputRx
Gauge
RO
adFRPerformIntPortMaxThruputTx
Counter
RO
adFRPerformIntPortMaxThruputRx
Counter
RO
adFRPerformIntPortAvgUtilizationTx
Gauge
RO
adFRPerformIntPortAvgUtilizationRx
Gauge
RO
adFRPerformIntPortMaxUtilizationTx
Counter
RO
adFRPerformIntPortMaxUtilizationRx
Counter
RO
adFRPerformIntPortFullStatusRX
Counter
RO
adFRPerformIntPortFullStatusTx
Counter
RO
adFRPerformIntPortLIOnlyRX
Counter
RO
adFRPerformIntPortLIOnlyTx
Counter
RO
adFRPerformIntPortAsyncStatusFrame
Counter
RO
adFRPerformIntPortIndex
Integer
RO
adFRPerformIntPortErrorSlotIndex
Integer
RO
adFRPerformIntPortUnavailableTime
Counter
RO
adFRPerformIntCrcErrors
Counter
RO
adFRPerformIntAbortFrames
Counter
RO
adFRPerformIntOctectViolations
Counter
RO
adFRPerformIntPortError
adFRPerformIntPortErrorTable
adFRPerformIntPortErrorEntry
426
© 2002 ADTRAN, Inc.
61200305L1-1F
ATLAS 550 System Manual
Section 9, MIB
adFRPerformIntDiscardFrames
Counter
RO
adFRPerformIntLengthErrors
Counter
RO
adFRPerformIntEAViolations
Counter
RO
adFRPerformIntEncapsulationErrors
Counter
RO
adFRPerformIntInactiveDLCI
Counter
RO
adFRPerformIntInvalidDLCI
Counter
RO
adFRPerformIntUnroutable
Counter
RO
adFRPerformIntSignalDownTime
Counter
RO
adFRPerformIntSignalErrors
Counter
RO
adFRPerformIntSignalTimeOut
Counter
RO
adFRPerformIntSignalStateChange
Counter
RO
adFRPerformIntHistoryTimeSlotIndex
Integer
RO
adFRPerformIntHistorySlotTotalTime
Integer
RO
adFRPerformIntHistoryTimeStamp
DisplayString
RO
adFRPerformDayPvcIfIndex
Integer
RO
adFRPerformDayPvcIndex
Integer
RO
adFRPerformDayPvcSlotIndex
Integer
RO
adFRPerformDayPVCStateChange
Counter
RO
adFRPerformDayPVCInactiveTime
Counter
RO
adFRPerformDayPVCFramesRx
Counter
RO
adFRPerformDayPVCFramesTx
Counter
RO
adFRPerformDayPVCBytesRx
Counter
RO
adFRPerformDayPVCBytesTx
Counter
RO
adFRPerformDayPVCAvgThruputTx
Gauge
RO
adFRPerformDayPVCAvgThruputRx
Gauge
RO
adFRPerformIntHistoryTime
adFRPerformIntHistoryTimeTable
adFRPerformIntHistoryTimeEntry
adFRPerformDayPvcStatus
adFRPerformDayPvcStatusTable
adFRPerformDayPvcStatusEntry
61200305L1-1F
© 2002 ADTRAN, Inc.
427
Section 9, MIB
428
ATLAS 550 System Manual
adFRPerformDayPVCMaxThruputTx
Counter
RO
adFRPerformDayPVCMaxThruputRx
Counter
RO
adFRPerformDayPVCAvgUtilizationTx
Gauge
RO
adFRPerformDayPVCAvgUtilizationRx
Gauge
RO
adFRPerformDayPVCMaxUtilizationTx
Counter
RO
adFRPerformDayPVCMaxUtilizationRx
Counter
RO
adFRPerformDayPVCBurstTx
Counter
RO
adFRPerformDayPVCBurstRx
Counter
RO
adFRPerformDayPVCFecnRx
Counter
RO
adFRPerformDayPVCFecnTx
Counter
RO
adFRPerformDayPVCBecnRx
Counter
RO
adFRPerformDayPVCBecnTx
Counter
RO
adFRPerformDayPVCDeRx
Counter
RO
adFRPerformDayPVCDeTx
Counter
RO
adFRPerformDayPVCCrRx
Counter
RO
adFRPerformDayPVCCrTx
Counter
RO
adFRPerformDayPVCMinFrameSizeRx
Counter
RO
adFRPerformDayPVCMinFrameSizeTx
Counter
RO
adFRPerformDayPVCMaxFrameSizeRx
Counter
RO
adFRPerformDayPVCMaxFrameSizeTx
Counter
RO
adFRPerformDayPVCAvgFrameSizeRx
Gauge
RO
adFRPerformDayPVCAvgFrameSizeTx
Gauge
RO
adFRPerformDayPVCLostFrames
Counter
RO
adFRPerformDayPVCRemoteLostFrames
Counter
RO
adFRPerformDayPVCMaxDelay
Gauge
RO
adFRPerformDayPVCMinDelay
Gauge
RO
adFRPerformDayPVCAvgDelay
Gauge
RO
adFRPerformDayPVCTimeInDBU
Counter
RO
© 2002 ADTRAN, Inc.
61200305L1-1F
ATLAS 550 System Manual
Section 9, MIB
adFRPerformDayPortStatus
adFRPerformDayPortStatusTable
adFRPerformDayPortStatusEntry
adFRPerformDayIfIndex
Integer
RO
adFRPerformDayPortSlotIndex
Integer
RO
adFRPerformDayPortFramesRx
Counter
RO
adFRPerformDayPortFramesTx
Counter
RO
adFRPerformDayPortBytesRx
Counter
RO
adFRPerformDayPortBytesTx
Counter
RO
adFRPerformDayPortAvgThruputTx
Gauge
RO
adFRPerformDayPortAvgThruputRx
Gauge
RO
adFRPerformDayPortMaxThruputTx
Counter
RO
adFRPerformDayPortMaxThruputRx
Counter
RO
adFRPerformDayPortAvgUtilizationTx
Gauge
RO
adFRPerformDayPortAvgUtilizationRx
Gauge
RO
adFRPerformDayPortMaxUtilizationTx
Counter
RO
adFRPerformDayPortMaxUtilizationRx
Counter
RO
adFRPerformDayPortFullStatusRX
Counter
RO
adFRPerformDayPortFullStatusTx
Counter
RO
adFRPerformDayPortLIOnlyRX
Counter
RO
adFRPerformDayPortLIOnlyTx
Counter
RO
adFRPerformDayPortAsyncStatusFrame
Counter
RO
adFRPerformDayPortIndex
Integer
RO
adFRPerformDayPortErrorSlotIndex
Integer
RO
adFRPerformDayPortUnavailableTime
Counter
RO
adFRPerformDayCrcErrors
Counter
RO
adFRPerformDayAbortFrames
Counter
RO
adFRPerformDayOctectViolations
Counter
RO
adFRPerformDayPortError
adFRPerformDayPortErrorTable
adFRPerformDayPortErrorEntry
61200305L1-1F
© 2002 ADTRAN, Inc.
429
Section 9, MIB
ATLAS 550 System Manual
adFRPerformDayDiscardFrames
Counter
RO
adFRPerformDayLengthErrors
Counter
RO
adFRPerformDayEAViolations
Counter
RO
adFRPerformDayEncapsulationErrors
Counter
RO
adFRPerformDayInactiveDLCI
Counter
RO
adFRPerformDayInvalidDLCI
Counter
RO
adFRPerformDayUnroutable
Counter
RO
adFRPerformDaySignalDownTime
Counter
RO
adFRPerformDaySignalErrors
Counter
RO
adFRPerformDaySignalTimeOut
Counter
RO
adFRPerformDaySignalStateChange
Counter
RO
adFRPerformDayHistoryTimeSlotIndex
Integer
RO
adFRPerformDayHistorySlotTotalTime
Integer
RO
adFRPerformDayHistoryTimeStamp
DisplayString
RO
adFRPerformDayHistoryTime
adFRPerformDayHistoryTimeTable
adFRPerformDayHistoryTimeEntry
430
© 2002 ADTRAN, Inc.
61200305L1-1F