1
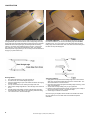
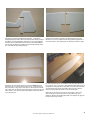
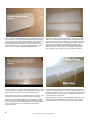
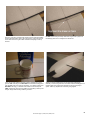
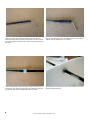
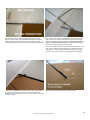
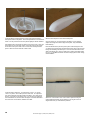
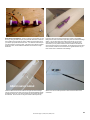
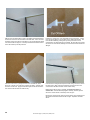
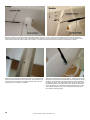
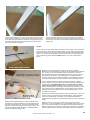
Locate 2 depron gear leg covers. Use a piece of tape “wrap” around the
gear leg and secure the foam. Attach a piece of tape to the front of the
cover, leaving half of the width free. Place the cover against the gear leg,
then wrap the remaining tape around the leg and secure to the cover.
Trim to fit as required for a good fit.
Tack-glue the bottom end of the cover to the wheel pant. Hard landings
may knock the wheel pant off. If that happens, just tack-glue it back on.
You can use a bit of silicone glue to attach the pants, but the silicone takes
a while to dry.
Tail Skid Locate a piece of the scrap carbon strip from the wing. Cut a slot about 1” long at the tail as
shown in the picture. Glue in the carbon strip as shown. Cut the carbon strip so that when
the airplane is resting on the gear, the tail skid is just long enough to keep the rudder off the
ground. You can leave off the landing gear and the tail skid if you plan on flying mostly off
grass. The landing gear and tail skid are VERY helpful if you fly from a hard surface or
indoors
Make sure you mount your speed controller as far forward as possible.
Depending on servo lead length, your receiver may need to be attached aft of the
CG. An easy way to mount the speed controller and receiver is to stick a 2”
piece of masking tape to the back of the ESC and receiver, then use a bit of hot
glue to attach to the airframe. For aesthetic reasons, the ESC and receiver
should be mounted under the horizontal fuselage. For lateral balance, it helps to
mount the speed controller on one side, and the receiver on the opposite side.
Once you have determined the location of the radio components, a balance
check is required. Place your fingers under the wing at the recommended center
of gravity (CG). Initial CG should be at 3 to 3 1/4” aft of where the leading
edge of the wing meets the fuselage. Determine weather the plane is nose
heavy (nose pointing down), or tail heavy (nose pointing up). Most likely, you will
end up tail heavy with no battery attached. Place the battery on the horizontal
fuselage near the CG and slide it forward or aft till the plane balances. This is
your battery cutout location.
Cut a slot in the fuselage just tall enough to slide in the battery pack. You can cut
the slot on the top or the bottom of the horizontal fuselage. Putting the battery
under the wing looks better, but putting it on top creates a better balanced
airplane (However, the battery may interfere with the aileron control rods if placed
on top).
BATTERY PLACEMENT AND INSTALLATION –
Battery placement depends largely on radio component choice.
Heavier servos require the battery to be mounted further forward
than when using lighter servos. The Foamy Factory Mini series
airplanes do not have the battery slot pre cut for this reason. The
best way to determine battery location is to completely build the
airplane and install the radio gear first.
Make sure when you cut the slot, you allow a bit of room for fore and aft
adjustment. As you fly the airplane more, you will probably want to move the CG
aft. You can do this by making the cutout longer toward the tail and sliding the
battery aft. We don’t use any Velcro or strap to secure the battery. We just use a
piece of cellophane tape on both sides of the battery to secure it to the airframe.
All Contents Copyright © Foamy Factory Models, 2005
15