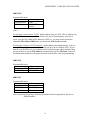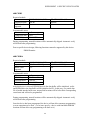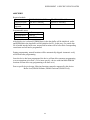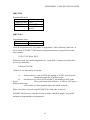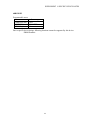
1
PILOT
DEVICE PROGRAMMER
User's Manual
Document Number 210140-1090
(C) Copyright 1996-1999 Advin Systems Inc.
Advin Systems Inc., 1050-L East Duane Ave, Sunnyvale, CA 94086
(408) 243-7000
FAX: (408) 736-2503
www.advin.com
i
Important Notice
The information contained in this manual has been carefully checked and is believed to
be accurate and complete at the time of printing. However, no responsibility is assumed
for errors that might appear. Advin Systems Inc. reserves the right to make any changes
to the product and/or the manual at any time without notice.
Advin Systems Inc. assumes no liability arising out of the use or application of any of its
products.
No part of this document may be copied or reproduced in any form or by any means
without prior written consent of Advin Systems Inc..
Life Support Policy
Advin's products are not authorized for use as critical components or programming of
critical components in life support devices or systems and the use of such implies that
user bears all risk of such use.
Trademarks:
PILOT, PILOT-xxx, PILOT-Uxx,U44-Plus,U84-Plus,U128-Plus
are trademarks of Advin Systems Inc.
IBM, IBM PC are registered trademarks of IBM Corporation
All rights reserved
Printed in U.S.A.
This manual was last revised on: Nov 1, 2000.
ii
PREFACE
Welcome to the world of PILOT programming instruments. PILOT programmers are
designed to be easy to use. Though it is not really necessary to read the manual in order
to use a PILOT programmer, you should read through it before you begin any serious
work. If you don't, you may miss some important information.
One thing that you don't have to do is memorize all of the commands in the manual. The
control software always displays menus to guide you along the way.
This manual applies to the following PILOT programmer models:
Single Socket Programmers:
PILOT-U128+
PILOT-U84+
PILOT-U84
PILOT-U40
PILOT-MVP
PILOT-146
PILOT-1600
PILOT-U44+
PILOT-U32
PILOT-145
PILOT-GCE
Set/Gang Programmers:
PILOT-932D
PILOT-932C
PILOT-840D
PILOT-144
PILOT-143
PILOT-832D
PILOT-832C
PILOT-844C
All these models use the same operator interface. Therefore, when you upgrade later to a
different model, you do not have to learn a new way of doing things. Even more
importantly, the batch/macro files which you may have written to automate your
programming operations can still be used.
iii
NOTES
Important Passages to Read
Engineers usually want to get things done fast. For this reason, we have marked "must read" paragraphs
with double lines, just like the one on the left. Sections so marked contain very useful or important
information. Be sure to read them.
New or revised sections are flagged by a single line.
Shipped Software
All PILOT models come with software needed by the high-end unit. As such, there may
be software which does not apply to your particular model.
"PROM"
The word "PROM" is used throughout the manual as a convenient way to represent
EPROMs because it is easier to read. It does not really mean PROMs per se. It actually
can be interpreted as to stand for "device". (The word PROM was used in our very first
software, in the “PROM Programmer” days, and we have maintained the same word to
retain macro file upward compatibility.)
"PAL"
Similarly, the word "PAL" is used throughout this manual as a convenient way to
represent logic devices in general. It can also be interpreted as to stand for "DEVICE".
For example, the command "/PAL Examine" is used to examine the fuse content of the
logic device currently in the programming socket. (The word PAL was used in our very
first software to represent devices such as MMI PAL16L8. We have maintained the
same word to retain macro file upward compatibility. PAL is a registered trademark of
AMD/MMI.)
Upgradability
Most models can be upgraded from a less powerful to a more powerful machine.
When you are ready to upgrade, please call our sales department and we’ll be happy to
assist you.
TABLE OF CONTENTS
1.0 GENERAL INFORMATION.................................................................................................................... 1
1.1 PRODUCT OVERVIEW............................................................................................................ 1
1.2 SYSTEM REQUIREMENTS..................................................................................................... 1
1.3 PARALLEL PRINTER PORTS................................................................................................. 2
1.4 WARRANTY INFORMATION ................................................................................................ 2
1.5 EXTENDED WARRANTIES: PRIORITY MAINTENANCE PROGRAM ......................... 2
1.6 SOFTWARE UPDATES ............................................................................................................ 2
2.0 INSTALLATION ....................................................................................................................................... 3
2.1 HARDWARE INSTALLATION ............................................................................................... 3
2.2 SOFTWARE INSTALLATION................................................................................................. 4
2.3 POWER UP AND SOFTWARE INVOCATION..................................................................... 4
2.4 QUICK START........................................................................................................................... 5
2.5 NOTES ON LPT PORT NUMBERING.................................................................................... 6
2.6 IN CASE OF PROBLEMS ......................................................................................................... 6
3.0 EXECUTING COMMANDS.................................................................................................................... 9
3.1 EXECUTION OF COMMANDS BY ARROW KEYS ........................................................... 10
3.2 FAST EXECUTION OF COMMANDS ................................................................................... 10
4.0 SCREEN DISPLAY................................................................................................................................... 12
4.1 COMMAND PANEL.................................................................................................................. 12
4.2 MENU PANEL............................................................................................................................ 12
4.3 SELECTION STATUS PANEL ................................................................................................ 13
5.0 COMMAND DESCRIPTIONS................................................................................................................. 15
5.1 CONFIGURE COMMANDS .................................................................................................... 16
5.1.1 CONFIGURE PORT n (/CPn) ............................................................................................... 16
5.1.2 CONFIGURE COLOR ............................................................................................................ 17
5.1.2.1 CONFIGURE COLOR YES (/CCY) .................................................................................. 17
5.1.2.2 CONFIGURE COLOR NO (/CCN).................................................................................... 17
5.1.3 CONFIGURE DEVICE mfr type (/CD mfr type)................................................................. 17
5.1.4 (Not used).................................................................................................................................. 18
5.1.5 CONFIGURE WIDTH ............................................................................................................ 19
5.1.5.1 CONFIGURE WIDTH 1 (/CW1) ....................................................................................... 19
5.1.5.2 CONFIGURE WIDTH 2 (/CW2) ........................................................................................ 19
5.1.5.3 CONFIGURE WIDTH 4 (/CW4) ........................................................................................ 19
5.1.5.4 CONFIGURE WIDTH 8 (/CW8) ........................................................................................ 20
5.1.5.5 CONFIGURE WIDTH INTEL-WAY (/CWI) .................................................................... 20
5.1.5.6 CONFIGURE WIDTH MOTOROLA-WAY (/CWM)...................................................... 20
5.1.5.7 CONFIGURE WIDTH STATUS (/CWS)........................................................................... 20
5.1.6 CONFIGURE SET-SIZE n (/CSn) ........................................................................................ 21
5.1.7 CONFIGURE OTHERS (/CO) .............................................................................................. 21
5.1.8 CONFIGURE saVe FILE (/CVF) .......................................................................................... 23
5.1.9 CONFIGURE RESET (/CR) .................................................................................................. 23
5.1.10 CONFIGURE USER COUNTER (/CU) .............................................................................. 25
5.1.10.1 CONFIGURE USER COUNTER PROGRAM (/CUP)................................................... 25
5.1.10.2 CONFIGURE USER COUNTER VERIFY (/CUV) ........................................................ 25
5.1.10.3 CONFIGURE USER COUNTER ERASE (/CUE) .......................................................... 25
5.1.10.4 CONFIGURE USER COUNTER OTHERS (/CUO) ....................................................... 25
5.1.10.5 CONFIGURE USER COUNTER NONE (/CUN) ........................................................... 25
5.1.10.6 CONFIGURE USER COUNTER, RESET Both (/CUB) ................................................ 25
5.1.10.7 CONFIGURE USER COUNTER, Reset UCF (/CUR).................................................... 25
5.1.11 CONFIGURE MISC COMMANDS..................................................................................... 26
5.1.11.1 CONFIGURE MISC BUFFER-INIT COMMANDS ....................................................... 26
5.1.11.1.1 CONFIGURE MISC BUFFER-INIT VIRGIN (/CMBV)............................................. 26
5.1.11.1.2 CONFIGURE MISC BUFFER-INIT FF (/CMBF) ....................................................... 26
5.1.11.1.3 CONFIGURE MISC BUFFER-INIT 0 (/CMB0).......................................................... 26
5.1.11.1.4 CONFIGURE MISC BUFFER-INIT NO (/CMBN) ..................................................... 26
5.1.11.1.5 CONFIGURE MISC BUFFER-INIT STATUS (/CMBS) ............................................ 26
5.1.11.2 CONFIGURE MISC PACKAGE-TYPE COMMANDS................................................. 27
5.1.11.2.1 CONFIGURE MISC PACKAGE-TYPE DIP (/CMPD) ............................................... 27
5.1.11.2.2 CONFIGURE MISC PACKAGE-TYPE PLCC (/CMPP)............................................ 27
5.2 FILE COMMANDS .................................................................................................................... 28
5.2.1 FILE NAME (/FN <filename>).............................................................................................. 28
5.2.2 FILE DIRECTORY (/FD) ...................................................................................................... 28
5.2.3 FILE ADDRESS n (/FA n) ...................................................................................................... 28
5.2.4 FILE LOAD n (/FLn) .............................................................................................................. 30
5.2.5 FILE SAVE n (/FSn) ............................................................................................................... 30
5.2.6 FILE RANGE (/FR) ................................................................................................................ 31
5.2.7 FILE MAP (/FM) .................................................................................................................... 31
5.2.8 FILE FORMAT x (/FFx) ........................................................................................................ 31
5.3 BUFFER COMMANDS ............................................................................................................. 33
5.3.1 BUFFER FILL n (/BFn) ......................................................................................................... 33
5.3.2 BUFFER LOAD n (/BLn) ...................................................................................................... 33
5.3.3 BUFFER OFFSET n (/BOn) .................................................................................................. 34
5.3.4 BUFFER CHECKSUM n (/BCn)........................................................................................... 34
5.3.5 BUFFER EDIT n (/BEn) ........................................................................................................ 35
5.3.5.1 BUFFER EDIT FUSES (/BEF) ............................................................................................ 35
5.3.5.2 BUFFER EDIT VECTORS (/BEV)..................................................................................... 35
5.3.5.3 BUFFER EDIT UES (/BEU)................................................................................................ 35
5.3.6 BUFFER INVERT (/BV) ........................................................................................................ 35
5.3.7 BUFFER DUPLICATE n (/BDn) .......................................................................................... 35
5.3.8 BUFFER GANG (/BG)........................................................................................................... 36
5.3.8.1 BUFFER GANG SET (/BGS) ............................................................................................. 36
5.3.8.2 BUFFER GANG n (/BGn) .................................................................................................. 36
5.4 RELEASE-CONTROL COMMANDS (/R)............................................................................. 37
5.4.1 RELEASE-CONTROL DISPLAY (/RD) ............................................................................. 37
5.4.2 RELEASE-CONTROL ENTER (/RE) .................................................................................. 37
5.4.3 RELEASE-CONTROL BUFFER n (/RBn) .......................................................................... 37
5.4.4 RELEASE-CONTROL ADDRESS xxxx (/RAxxxx) .......................................................... 38
5.4.5 RELEASE-CONTROL REVISION# n (/RRn)..................................................................... 38
5.4.5.1 RELEASE-CONTROL REVISION# BUFFER (/RRB) ................................................... 38
5.4.5.2 RELEASE-CONTROL REVISION# ENTER (/RRE)...................................................... 38
5.4.6 RELEASE-CONTROL SERIAL# n (/RSn) .......................................................................... 38
5.4.6.1 RELEASE-CONTROL SERIAL# BUFFER (/RSB) ........................................................ 38
5.4.6.2 RELEASE-CONTROL SERIAL# ENTER (/RSE) ........................................................... 38
5.4.6.3 RELEASE-CONTROL SERIAL# INCREMENT (/RSI) ................................................. 38
5.4.7 RELEASE-CONTROL MAP (/RM) ..................................................................................... 39
5.4.8 RELEASE-CONTROL FORMAT COMMANDS................................................................ 39
5.4.8.1 RELEASE-CONTROL FORMAT DEFAULT (/RFD) ..................................................... 39
5.4.8.2 RELEASE-CONTROL FORMAT A (/RFA) ..................................................................... 39
5.4.8.3 RELEASE-CONTROL FORMAT B (/RFB) ...................................................................... 39
5.5 PROM (or PAL) COMMMANDS (/P)..................................................................................... 40
5.5.1 PROM BLANK-CHECK n (/PBn) ........................................................................................ 40
5.5.2 PROM eRASE n (/PRn).......................................................................................................... 40
5.5.3 PROM PROGRAM n (/PPn).................................................................................................. 41
5.5.4 PROM VERIFY n (/PVn) ....................................................................................................... 41
5.5.5 PROM CHECKSUM n (/PCn)................................................................................................ 41
5.5.6 PROM EXAMINE n (/PEn) ................................................................................................... 42
5.6 MACRO COMMANDS.............................................................................................................. 43
5.6.1 MACRO eXecution xxxx (/MX xxxx) .................................................................................. 43
5.6.2 MACRO ERROR (/ME)......................................................................................................... 43
5.6.2.1 MACRO ERROR CONTINUE (/MEC)............................................................................. 43
5.6.2.2 MACRO ERROR PAUSE (/MEP)..................................................................................... 43
5.6.2.3 MACRO ERROR TERMINATE (/MET) ......................................................................... 43
5.6.2.4 MACRO ERROR STATUS (/MES)................................................................................... 44
5.7 EXTENDED COMMANDS...................................................................................................... 45
5.7.1 EXTENDED-COMMAND ACTIVE-RANGE .................................................................... 45
5.7.2 EXTENDED-COMMAND, SPECIFIC-CONFIGURATION (/ES) .................................... 46
5.8 QUIT COMMANDS (/Q) .......................................................................................................... 47
5.8.1 QUIT NO (/QN) ...................................................................................................................... 47
5.8.2 QUIT YES (/QY) .................................................................................................................... 47
5.8.3 QUIT QUERY (/QQ).............................................................................................................. 47
6.0 MACRO FILES.......................................................................................................................................... 48
6.1 RULES FOR CREATING MACRO FILES ............................................................................. 48
6.2 THE BUFFER EDIT COMMAND IN A MACRO FILE ........................................................ 49
6.3 SPECIAL MACRO COMMANDS............................................................................................ 49
6.4 MACRO FILE INVOCATION .................................................................................................. 50
6.5 PARAMETERS FOR MACRO FILES ..................................................................................... 50
7.0 ABORTING ................................................................................................................................................ 52
7.1 ABORTING INDIVIDUAL COMMANDS ............................................................................. 52
7.2 ABORTING MACROS FILES .................................................................................................. 52
8.0 ALLOCATING BUFFER MEMORY...................................................................................................... 53
9.0 DEVICE SELECTION NOTES ................................................................................................................ 55
9.1 SELECTING THE PROPER SOFTWARE MODULE ........................................................... 55
9.2 OTHER NOTES REGARDING DEVICE SELECTION ........................................................ 55
10.0 USING PLCC DEVICES ........................................................................................................................ 57
10.1 STANDARD PLDS, MEMORIES AND MICRO CONTROLLERS................................... 57
10.2 COMPLEX PLDS ..................................................................................................................... 58
10.3 INSTALLING OR REMOVING ADD-ON MODULES....................................................... 58
10.4 ORDERING INFORMATION FOR SOCKET MODULES ................................................. 58
11. SET/GANG PROGRAMMING ................................................................................................................ 59
11.1 EQUIPMENT ............................................................................................................................ 59
11.2 INSTALLATION ...................................................................................................................... 60
11.3 SET AND GANG MODES ...................................................................................................... 60
11.4 GANG PROGRAMMING EXAMPLES ................................................................................ 60
11.5 SET PROGRAMMING EXAMPLES ..................................................................................... 61
APPENDIX A. BRIEF DESCRIPTION OF THE INTEL HEX FORMAT ................................................ 63
SUPPLEMENT 1. SPECIFIC DEVICE NOTES.......................................................................................... 65
1.1 BLANK CHECKS....................................................................................................................... 65
1.2 (RESERVED FOR FUTURE ADDITION) .............................................................................. 65
1.3 ALTERA EPLDS ........................................................................................................................ 66
1.4 ALTERA EPM5000 DEVICES ................................................................................................. 67
1.5 ALTERA EPM7000 DEVICES ................................................................................................. 68
1.6 AMD FLASH WITH SECTOR-PROTECT FEATURES ...................................................... 70
1.7 AMD PALCE 16V8, 20V8 ......................................................................................................... 72
1.8 CYPRESS DEVICES.................................................................................................................. 73
1.9 GAL 16V8, 20V8 ........................................................................................................................ 74
1.10 MICROCHIP PIC MICRO CONTROLLERS....................................................................... 76
1.11 MOTOROLA MICROS........................................................................................................... 78
1.12 PHILIPS/SIGNETICS MICRO CONTROLLERS................................................................. 85
1.13 SERIAL PROMs ....................................................................................................................... 86
1.14 XILINX and AT&T SERIAL PROMS................................................................................... 87
SUPPLEMENT 2: WARRANTY EXTENSION, SOFTWARE PROBLEM REPORT FORMS............. 89
GENERAL INFORMATION
1.0 GENERAL INFORMATION
1.1 PRODUCT OVERVIEW
PILOT programmers are controlled by IBM PCs or compatible computers. They come
with proprietary software which is easy-to-use and yet fast to operate. All commands can
be reached by going through the tree structured command system with only a handful of
cursor control keys. It is not necessary to memorize command keywords. A brief
description of any command keyword can be found on the screen.
Total control of the programmer is available at the PC keyboard, including full screen
editing of buffer data, which is displayed in both hex and ASCII.
Unlike some other programmers on the market, PILOT programmers do not require
memory expansion modules. They use the RAM and disk space inside the PC.
Another significant feature is the macro facility. And the macro commands are exactly
the same as the normal manually input commands, saving you from learning a new set of
commands. A command macro file can be easily created by any text editor. It can be
saved and used later for repetitive operations. Such a facility can be very useful in a
production environment, where non-technical production personnel are assigned to use
the programming instrument.
1.2 SYSTEM REQUIREMENTS
PILOT programmers are designed to operate as peripheral units on an IBM PC. IBM
PCs which are based on 386 or faster computers are supported. At software version
10.89, Pentium machines of up to 200MHZ have been tested to work.
Programming pulse lengths will be within specification limits and is independent of
computer speed. However, faster machines will result in reduced over-head and better
programming speeds and through-puts.
Minimum requirements for the PC are:
RAM:
640K bytes.
Disk drive:
Hard disk with a minimum of 10M bytes is needed for
the complete software libraries.
Printer port:
One parallel printer port for connection to the PILOT
programmer.
LPT1, 2 or 3.
DOS version: 2.1 or higher.
1
GENERAL INFORMATION
Configurations not supported: systems which run multitasking software or background
jobs.
1.3 PARALLEL PRINTER PORTS
Only IBM compatible printer ports will work with a PILOT programmer. Most of the
printer ports on the market are IBM compatible. However, we have seen a few
multifunction graphic cards which do not work. These cards try to save a few gates and
do not implement all of the status lines of a true IBM printer port.
Over 99% of printer ports on IBM or clones will work, and we have never seen any
problem with the simplest half-card type printer ports.
In case your PILOT programmer and PC are not communicating, try using another
parallel printer port or try it on another computer.
1.4 WARRANTY INFORMATION
The product is guaranteed against defects in material or workmanship and guaranteed to
meet specifications in effect at the time of manufacture for a period of one year from
date of delivery. If it should become necessary to return a product for service or repair
within the warranty period, contact the factory first for return authorization. The returned
item will either be repaired or replaced. Except as otherwise indicated, there are no other
warranties, expressed or implied. The liability of Advin Systems Inc. is limited to the
purchase price of the product, and does not cover any lost profits, consequential damages,
or any claim against the purchaser by any party.
1.5 EXTENDED WARRANTIES: PRIORITY MAINTENANCE PROGRAM
After the first year, you can extend the warranty of your machine by subscribing to our
Priority Maintenance Program. If your production line or project schedule depends on
your programming instrument you will want to continue this valuable Priority
Maintenance Program. For your convenience, a warranty extension form is enclosed in
the Supplement section of this manual.
1.6 SOFTWARE UPDATES
Software updates can be downloaded from our web site at www.advin.com.
Semiconductor companies frequently make die revisions in order to make them faster and
cost less. If you have been programming a device fine and suddenly encounter problems
with a new batch of devices, chances are that the old software does not recognize the new
dies. In that case you should update your software by downloading from our web site.
2
INSTALLATION
2.0 INSTALLATION
A PILOT programmer is designed to operate as a slave unit to a PC through a standard
parallel printer port. Parallel ports installed as LPT1, LPT2, or LPT3 will all work.
2.1 HARDWARE INSTALLATION
Each PILOT programmer comes with a 25-pin interface cable. This cable is for
connecting the programmer to a parallel port (not a serial port) on the PC. Install
hardware in the following sequence:
1. Make sure the programmer power switch is off.
2. There is no need to change AC voltage setting in the programmer. It has a built-in
power supply which will automatically sense and adjust to any AC voltages between
110 and 230 volts.
3. Connect the male end of the 25-pin interface cable to a parallel printer port on the PC.
You can use either LPT1, LPT2, or LPT3.
4. Connect the other end of the cable to the 25-pin, male connector on the back of the
programmer.
5. Plug the power cord into the programmer, then into the power source. (with power
switch still in the OFF position)
6. Install add-on modules as follows:
Add-on Modules labeled as AM-xx, PX-xx, GM-xx, UA-xx, USA-xx or UPA-xx
plug onto the programmer via one or two special 50-pin connectors.
PX modules are generic PLCC modules which can be used for most standard logic and
memory devices ranging from 20 to 44 pins. They all have one connector on the
bottom side and should be plugged into the connector right next to the standard ZIF
socket on the programmer. When the module is mounted on the programmer, Silkscreened legend on the module should look right-side up and not upside down.
AM modules are specific PLCC modules for complex or larger devices. These
modules have one or two mounting connectors on the under side. If it has only one
connector, it should be mated to the connector right next to the ZIF socket. Again,
after mounting, legend on the module should look right-side up.
3
INSTALLATION
(All modules except GM modules can be removed and re-installed on the programmer
with the programmer power either in the OFF or the ON position. GM modules do
always need programmer power to be turned off when removing or installing.)
2.2 SOFTWARE INSTALLATION
Software is supplied on DOS formatted diskettes and they can be installed simply by
copying all the files from floppy to a sub-directory on your hard disk.
2.3 POWER UP AND SOFTWARE INVOCATION
Power up the system by pressing the end of the power switch marked "1". The red LED
shall come on within three seconds.
The control software can be invoked under DOS by typing the name
> ADVIN [enter]
For dependability and efficiency of releasing new software, the software is modularized.
You can select the appropriate software module by moving the cursor up or down and
then hit [enter]. Since EPROMs are commonly used, you may select the EPROM devices
and hit [enter]. (Following examples in this chapter are based on EPROMs.)
After a software module is invoked, it scans through the three possible parallel port
addresses, starting from LPT3, then LPT2, then LPT1, until it finds a programmer that is
connected and is powered up. If one is found, a message like this will appear:
Programmer found at LPT2.
LPT port selection good.
Hardware is PILOT-xxx.
Essentially, the software executes a /Configure Port Automatic command on system
initialization. If the programmer is not powered up or if it is not connected properly, you
will see a message like this:
Please check LPT connection .....
In this case, you should make the proper connection or power up the programmer, then
manually issue the /CPA command.
Or, if you have more than one programmer connected to your PC, you can use the /CPn
(n=1,2 or 3) command to switch between them.
4
INSTALLATION
When the /CP (/Configure Port) command is invoked or when software is first started,
the presence of any add-on module is detected and displayed on the bottom of the Status
Display Panel. For example, if the add-on module is a PX-32, the software will display:
"Machine Model: PILOT-U40 with PX-32"
If you do not see the module name being displayed, please double check and make sure
the module is indeed plugged-in properly.
(The module name of a few earlier-designed modules are not displayed, e.g. AM-1800.)
2.4 QUICK START
You can try the following commonly used commands as follows:
1. To select a device, type:
/CD
(/Configure Device)
followed by choice of manufacturer. Then you can scroll up and down the
device list to select your device of choice.
2. To read a device into the RAM data buffer, type:
/BL0
(/Buffer Load socket zero)
Omit "0" if you are use logic devices. 0-7 represents different sockets or
buffers in split or gang/set operations.
3. To display or edit the RAM data buffer, type:
/BE0
(/Buffer Edit socket zero)
4. To blank check a device, type:
/PB0
(/PROM Blankcheck)
5. To program a device, type:
/PP0
(/PROM Program)
6. To specify the name of a data file, type:
/FN FIRM2.HEX
Where FIRM2.HEX is a supplied sample data file.
7. To load the data file into the data buffer, type:
5
INSTALLATION
/FL0 (/File Load socket zero)
8. If you do not know the name of the data file, you can look at the directory as in:
/FD *.HEX
(/File Directory for all file match *.HEX)
2.5 NOTES ON LPT PORT NUMBERING
A parallel printer port that appears as LPT1 to DOS may appear to the PILOT control
software as LPT2, depending on whether or not you have the "Monochrome Display with
Printer Adapter" in your system. This is because DOS uses logical addresses to reference
printers. If the Monochrome Adapter is absent, the physical LPT2 port will be designated
as logical device LPT1 by DOS.
Printer
port address:
3BC
378
278
When referenced
through BIOS:
LPT1
LPT2
LPT3
When referenced
through DOS:
LPT1
LPT2 (LPT1 if 3BC is absent)
LPT3 (LPT2 if 3BC is absent)
PILOT control software has to control the PILOT programmer in real time. Therefore, it
uses the BIOS LPT address instead of going through DOS. It uses the physical address
instead of the logical address. So, don't be puzzled if you have to refer to your PILOT
programmer as LPT2 even though your printer behaves as LPT1. (Similarly for
LPT3/LPT2.)
2.6 IN CASE OF PROBLEMS
Here is a checklist in case of problems:
If the /CPA command cannot recognize the hardware:
1. Make sure the power switch is turned on and the red LED is lit. If the switch is on,
but the LED is off, check the power cord connection and the power supply. If both are
good, check and replace the fuse as follows:
Disconnect power cable from power source and check the fuse which is located in a
HOLDER at the middle of the power entry module (between the IEC plug and the
power switch. There is no need to open up the programmer hardware.). This
HOLDER can be plied out with a flat screw driver. When this holder is plied out, the
fuse will come out with it. In case the fuse is blown, you can find a replacement fuse
in a little tray within the HOLDER. (In case both fuses are blown, you can replace
them with a one-amp, 250 volt, slow blow fuse.)
6
INSTALLATION
2. After you have powered up the programmer, please make sure you wait at least 3
seconds before you issue the /CPn command. The programmer may need 1 or 2
seconds to be initialized before it can talk to the PC.
3. Check the interface cable. Make sure the cable is connected to the proper connector
on the PC and is firmly plugged in. If the cable you're using is not the one supplied, it
could have been made incorrectly or be otherwise defective.
4. Is your PILOT programmer and your printer connected to the same parallel printer
port through an "A/B switch" or "T-switch"? If so, plug the programmer directly into
the parallel port, without going through the switch. Some of the switches on the
market have caused problems.
5. Similarly, "software security keys" must not be used between the PC and the PILOT.
Some of them do cause problems on attached equipment.
If you cannot program a device:
1. Please check device pin 1 orientation:
If it is a DIP:
Make sure device pin 1 is away from you, as indicated by silkscreen on top of
programmer.
If it is a PLCC:
On AM modules or PX modules, make sure pin 1 is away from you, as illustrated on
silk-screen. (32-pin devices: pin 1 should be facing right.) If the module comes with a
clam-shell type socket, the lid of the socket should be opening away from you.
On UPA-44 or UPA-84 modules, make sure pin 1 is facing towards you, as labeled on
silkscreen.
On USA-84 modules, make sure pin 1 is facing towards you, as labeled on templates.
2. Please check device selection. Two seemingly identical devices, may require different
programming voltages. For example, a 2764 is programmed with 21 volts while a
2764A is programmed with 12.5 volts. Using 21 volts to program a 2764A would
damage the device.
3. If you get an error message from the "Buffer Manager", you may be out of buffer
space on disk. Please refer to Chapter 8 "Allocating Buffer Memory".
4. If you think the connection between the ZIF socket and the device (or adapter) is bad
or dirty, you can clean the ZIF socket by slightly closing it and moving an IC side
ways, left to right and right to left, a few times. This will clean the contacts of the ZIF
socket.
7
EXECUTING COMMANDS
3.0 EXECUTING COMMANDS
PILOT commands are organized as a tree structured system. At any one time, a menu is
displayed on the second line (i.e. line 1) of the screen. The menu consists of a list of command keywords. For example, this is the first menu to appear when you invoke the
spEPROM control software:
Config File Buffer Rls-Ctrl PROM Macro Extended Quit
"Config" (Configure) is a command keyword. "Macro" is another one.
The menu displayed on the screen will change as you move around the tree structured
system.
A PILOT command consists of one or more command keywords, such as:
/Quit Yes
/Configure Port 2
/PROM Program 0
All commands can be abbreviated by just using the first character of the keywords. For example, the above
commands can be re-written as:
/QY
/CP2
/PP0
You build up a command by selecting one keyword at a time from each menu.
9
EXECUTING COMMANDS
3.1 EXECUTION OF COMMANDS BY ARROW KEYS
You can get a feel of how commands are structured and executed by trying to execute
some commands using ONLY the following keys:
[right arrow]
[left arrow]
[down arrow] or [enter]
[up arrow] or [ESC]
Moves the cursor to the command on the right.
Moves the cursor to the command on the left
Selects the next branch of the command tree or
executes the command itself.
Moves up the command tree by one level.
3.2 FAST EXECUTION OF COMMANDS
Now, you can get another feel of how commands can be executed easier and faster by using the first
character of the commands instead of using the cursor keys. This is the recommended way after you have
been familiar with the commands, because it is a lot faster typing in one character than hitting the cursor
key several times.
Experience also shows that it will be even easier and faster if you always precede a command with the "/"
key. In that way, you always start at the top of the command tree and you do not have to even think what
level you are currently in.
Try these key strokes:
Key strokes:
/CDI 27C64
/CWW
/CP2
/PE0 125 [ENTER]
Meaning:
Configure Device Intel 27C64
Configure Width Word (16 bit word mode)
Configure Port 2
PROM Examine socket 0 location 125
10
EXECUTING COMMANDS
11
SCREEN DISPLAY
4.0 SCREEN DISPLAY
The PC screen has 25 vertical lines numbered from 0 to 24. They are subdivided by the
PILOT into various zones for information management purposes, each zone having its
own dedicated purpose as described below.
Line 0
/P
(Command Panel)
Lines 1-2
(Menu Panel)
Config File Buffer Rls-Ctrl PROM Macro Extended Quit
Blank, Program, Verify, Checksum, Examine
Line 3
(Message Panel)
Lines 4-16
(General Use Panel)
Lines 18-23
(Selection Status
Panel)
Line 24
Device type: 27C64 8KB, 0-1FFF
Algor:
QuickPulse
Set-size : 8 (#0-#7)
Split: 1 to 2
Filename: FIRM2.HEX
Port: LPT3 Fmt: Hex
Hardware Model: PILOT-U40 with PX32
Version: 10.89
spEPROM.EXE
(c)Advin Systems Inc
(S/W Title Panel)
4.1 COMMAND PANEL
The current command is displayed here. Executable commands appear in high intensity
mode. When a command requires the entry of a parameter, such as a file name, address,
or data, the command disappears to make room for the parame ter field.
4.2 MENU PANEL
Line 1 displays the various command choices/branches at the current level. The current
command choice is highlighted. The cursor can be moved horizontally by the arrow
keys. A [down arrow] or [enter] key will either execute the command or move down the
command tree by one level. An [ESC] or [up arrow] key will move the cursor key up by
one command level.
12
SCREEN DISPLAY
The [/] key always brings the command cursor to the top level menu.
Line 2 is a single line summary of the current command choice. It changes as the
command cursor is moved around.
When a terminal executable command is reached by the [down arrow] or [enter] key, the
command is executed.
4.3 SELECTION STATUS PANEL
The various selections made by you or defaulted to by the software are displayed here.
The software version number can be found at the lower right hand corner. If you call technical support,
you'll need to know the software version you are currently using.
13
COMMAND DESCRIPTIONS
5.0 COMMAND DESCRIPTIONS
COMMAND OVERVIEW
Commands will be easier to learn by first taking a look at the following diagram. It
shows data flow among the four major components of interest: data file, data buffer,
PROM and computer screen.
Shown in bold faces are the most commonly used commands. For example, to read a
master PROM into the data buffer, use /Buffer Load, which translates into keystrokes
"/BL". Then, to program a PROM, use /PROM Program: "/PP".
To program a device, use
/PROM Program
(or /PAL Program)
To read a data file into
the data buffer, use
/File Load
Disk
file
To save data into a
file, use
/File Save
Data
buffer
/Buffer Load
PROM
(or PAL)
/Buffer Edit
allows you to see or
change buffer contents
Computer
Screen
/PROM Examine
(or /PAL Examine)
allows you to see contents
of device.
The most frequently used commands and direction of data flow.
COMMAND GROUPS
The main menu, which can be reached by simply typing [/], consists of nine command
groups:
The CONFIGURE group consists of commands that specify system parameters such as
device type, programming algorithm, set-size, odd/even splitting, etc. These commands
should be executed before other commands.
The FILE group consists of all file related commands such as loading and saving a data
file.
15
COMMAND DESCRIPTIONS
The BUFFER group consists of all commands which manipulate data in the data buffer.
The data buffer is a temporary buffer which holds data to be programmed to a device. It
also holds data that is read from a device.
The RELEASE-CONTROL group is used to automatically set, increment and program
serial numbers into memory devices.
The PROM group consists of blank check, program, verify, and checksum functions.
These are commands which operate on the device (versus BUFFER commands which
operate on the data buffer). When logic devices are used, PAL is used to refer to the
device.
The MACRO group is used for the execution of macro (batch) files.
The EXTENDED commands are those that do not fit into any of the above mentioned
categories, for example, the ACTIVE-RANGE command and certain special commands
that apply only to certain devices.
The QUIT group allows you to exit from the control software.
In the following sections, each command is described in detail. A complete command is
followed by a string of command initials, such as "(/CCY)" for "/Configure Color Yes".
The string inside the parenthesis is all you need to type in for fast command execution.
They are also the exact text for a macro file. (For example, /CC is not a complete
command for a macro file. /CCY is.)
In most cases, pressing [ESC] once will abort the current command being executed.
In you are in the middle of a macro file execution, [ESC] needs to be pressed two times
to terminate the macro file.
5.1 CONFIGURE COMMANDS
The configure group consists of commands that specify system parameters such as the
parallel interface port, device type, programming algorithm, set-size, etc. The configure
commands need to be invoked before other commands.
5.1.1 CONFIGURE PORT n (/CPn)
PILOT programmers interface to the PC through a standard parallel printer port. Any one
of the three available ports - LPT1, LPT2, or LPT3 - can be used in the /CPn command.
If n is between 1 and 3, the software checks to see if a programmer is connected at that
particular port or not.
16
COMMAND DESCRIPTIONS
If n is "A", the software automatically scans all three ports, starting with port 3. If a
programmer is found, then it stops. If none is found at a port, it resets the port and goes
on to the next port.
If a programmer is found at a port, this message is displayed:
LPT port selection good.
Hardware is PILOT-xxx.
If no programmer is found, then an error message is displayed:
Please chk LPT selection, cable connection and power switch.
After the /Configure Port Auto command is invoked, the machine model will be
displayed at the lower right hand corner of the screen. If it is not displayed, then either
the parallel port connection is not good or there is something wrong about the
programmer hardware.
If there is any attached add-on module, it will also be displayed along side the machine
model. (For example: PILOT-U40 with PX44.) If the attached module name is not
displayed, please check and make sure the add-on module is properly plugged into the
special side connector. (Only exceptions where the module name is not displayed: AM1800)
5.1.2 CONFIGURE COLOR
5.1.2.1 CONFIGURE COLOR YES (/CCY)
This command tells the control software that your system has a color monitor. This is the
default setting.
5.1.2.2 CONFIGURE COLOR NO (/CCN)
This command tells the control software that your system does not have a color monitor
or you do not want color on the screen.
5.1.3 CONFIGURE DEVICE mfr type (/CD mfr type)
This command allows you to specify the manufacturer and the device type which you
need to program.
Manufacturer, mfr, is selected by a single character such as "A" for AMD, and "I" for
Intel. If certain characters are in conflict, then another character will be designated. For
17
COMMAND DESCRIPTIONS
example, "B" is used for "ICT". You do not have to memorize these because the
required character code is always displayed.
After manufacturer is specified, the list of supported device types under that
manufacturer is then displayed. You can use the cursor control keys to select the desired
device type, followed by [ENTER].
Alternatively, the desired device type can be entered directly without having to step
through the list with the cursor control keys. For example, "27C512" can be selected by
simply typing "27C512 [ENTER]".
As a confirmation to the selection, the newly selected device type will be displayed on
the lower portion of the screen.
EPROMs
For EPROMs, you can choose a specific manufacturer or choose "Generic".
When you are programming a device using a single-socket programmer, it is always
better to select a specific manufacturer than Generic.
But when you are programming devices in gang mode (using a gang programmer or a
gang module), you may found it necessary to mix manufacturers. In this case the
"Generic" selection comes in handy. The "Generic" screen shows you which
manufacturer's devices can be gang programmed together because they share similar
programming specs.
Generic may also be used if the specific manufacturer for your device type is not listed.
Other Devices
All devices other than EPROMs are configured first by manufacturer and then by device
type. There is no "Generic" choice. In fact, it is very important to choose the right
manufacturer and the right type, otherwise a device can be rendered inoperative.
5.1.4 (Not used)
18
COMMAND DESCRIPTIONS
5.1.5 CONFIGURE WIDTH
(Applies to EPROMs, EEPROMs and FLASH EPROMs. Does not apply to logic
devices, micro controllers and serial memory devices.)
This command allows you to specify the data bus width of the target processor with
which your PROMs are going to be used.
For example, if width is 1, it will be assumed that your data bus width is the same as the
number of data lines in 1 PROM. Therefore, consecutive bytes will reside in the same
PROM.
If width is 2, it will be assumed that your data bus width is twice the data size on a
PROM. That is, consecutive bytes (or words) will reside in alternate PROMs. Therefore,
during a /File Load, data will alternatively go to even and odd buffers. It is equivalent to
a 1-to-2 split.
This is what will happen when width=2: If your PROM is byte-wide, consecutive bytes
will go to alternate PROMs. If your PROM is word-wide, consecutive words will go to
alternative PROMs.
Width affects only /File Load and /File Save commands. All other commands are
executed independent of Width.
5.1.5.1 CONFIGURE WIDTH 1 (/CW1)
Assumes your data bus is as wide as the data bus for 1 PROM. Selects 1-to-1 as the split
option. That is, there will be no splits during file loading. Consecutive bytes from the file
will be loaded into consecutive bytes in the same buffer.
5.1.5.2 CONFIGURE WIDTH 2 (/CW2)
Assumes that your data bus width is twice the data size on a PROM. That is, consecutive
bytes (or words) will reside in alternate PROMs. Therefore, during a File Load, data will
alternatively go to even and odd buffers. This is equivalent to a 1-to-2 split.
This is what will happen when width=2: If your PROM is byte-wide, consecutive bytes
will go to alternate PROMs. If your PROM is word-wide, consecutive words will go to
alternative PROMs.
5.1.5.3 CONFIGURE WIDTH 4 (/CW4)
19
COMMAND DESCRIPTIONS
Assumes that your data bus width is four times the data size on a PROM. During a File
Load, a 1-to-4 split will happen.
If you are using word-wide EPROMs such as 27C210s (40-pin EPROMs) and you are
selecting /Configure Width 4, your EPROMs will be sitting on a 4x16=64-bit wide data
bus.
5.1.5.4 CONFIGURE WIDTH 8 (/CW8)
Assumes that your data bus width is eight times the data size on a PROM. During a File
Load, a 1-to-8 split will result.
If you are using word-wide EPROMs such as 27C210s and you are selecting /Configure
Width 8, your EPROMs will be sitting on a 8x16=128-bit wide data bus.
5.1.5.5 CONFIGURE WIDTH INTEL-WAY (/CWI)
5.1.5.6 CONFIGURE WIDTH MOTOROLA-WAY (/CWM)
In almost all digital control systems, each data byte is addressable. That means each 8bit byte has its own address. In the case of a piece of data that is comprised of a 16-bit
word,
i.e. two bytes, two addresses will then be involved.
Intel's standard way of putting these two bytes is to put the lower order byte first, i.e. at
the lower address. Motorola's way is to put the higher order byte first, i.e., at the higher
address.
Therefore, when programming 16-bit wide PROMs (such as a 27C210) for an Intel data
bus application, the even-addressed bytes in your data file should go to bits 0-7 of the
PROM, and the higher addressed bytes should go to bits 8-15.
Conversely, when programming 16-bit wide PROMs for a Motorola application, the oddaddressed bytes should go to bits 0-7 and the even-addressed bytes should go to bits 815.
You can tell the software which one of the ways should be used with the /CWI and
/CWM commands. /CWI is the default condition.
5.1.5.7 CONFIGURE WIDTH STATUS (/CWS)
This command reports to you whether the Intel-way or the Motorola-way is currently
selected.
(Widths conditions of 1,2,4 or 8 is always displayed at the lower portion of the screen.)
20
COMMAND DESCRIPTIONS
5.1.6 CONFIGURE SET-SIZE n (/CSn)
(Only applies to memory devices.)
When your data file is larger than what one memory device can handle, then the set-size
command can come in handy.
For example, if your data file spans linearly across three EPROMs, then you can specify
/Configure Set-size 3 and use /File Load Set to load the data file. Then data will be
loaded into three data buffers instead of just into buffer 0.
For single-socket programmers: after data is loaded into the different buffers, you can use
"PROM Program 0" to program a device with data in buffer 0, or "PROM Program 1"
to program a device with data in buffer 1, etc.
For multi-socket programmers: you can program all devices of a set by "PROM
Program Set". In this case, data from buffer 0 goes to device at socket 0, those in buffer
1 goes to device at socket 1, etc.
Another example: if your data file needs to be split 1-to-2 and two EPROMs will be big
enough to hold all the data, you can specify /Configure Set-size 2.
Another example: if your data file needs 1-to-2 split, and a total of 3 pairs of EPROMs
are needed, then you can specify /Configure Set-size 6.
5.1.7 CONFIGURE OTHERS (/CO)
This command allows you to change other configuration items which are less frequently
used. This command is the only command that is not executable from a macro file.
You can use the four cursor keys for making selections. When done, simply hit the ESC
key.
Max # of Buffers/Sockets
This value can be set to between 1 to 8.
For single socket programmers, 1 is the normal setting. But if you need to do, say, 1-to-4
split when doing a file load, then you need to set it to 4. Setting this value to a bigger
number than necessary does not hurt, if you have a large disk space and a fast computer.
If you have a slow computer (e.g. 386) , you may incur a slight noticeable increase in
buffer management time if this number is set bigger than necessary.
21
COMMAND DESCRIPTIONS
For gang programmers, or if you are using GM modules, you should set it to the number
of sockets you need to activate. Setting it to a bigger value may cost you a slight increase
in buffer management time if the computer is a slow one.
Package-type
PILOT-146 and all universal programmers such as PILOT-MVP, PILOT-Uxx:
These programmers automatically changes package types because they can detect the presence of plug-in
modules. Therefore, with these programmers, you do not have to set the package types. (e.g. If the PX-32
PLCC module is plugged in, the software will automatically changes the package type to PLCC.)
For PILOT-Gxx, PILOT-142 to PILOT-145, or when USA-84 is used:
The desired package type desired can be changed between PLCC and DIP with the cursor keys.
(If you want to save the setting so that you do not have to do it again the next time you use the programmer,
you can use /Config saVe). Since the /Config Others command uses cursor keys, the /Config Others
command is not executable from a macro file. As an alternative, the /Config Misc command can also be
used to change package types.
If you are using non-Advin PLCC adapters (such as ET adapters):
For PILOT-Gxx and PILOT-14x, you should select DIP, because those adapters are
simply pin routers and the software does not need to know of their presence. For PILOTUxx, since no Advin PLCC modules are present, the software will automatically use DIP.
Disable Continuity (Device Placement) Check
Before any operation is done on a device, the software checks to make sure all pins of the
device are making good contact with the programming socket, i.e. continuity from device
to socket. In case you do not want the software to perform this check (e.g. an IC
manufacturer might want to run operations without a device inserted), you can disable it.
Disable Insertion or Reverse-Device Check
Similarly, the software checks to make sure a device is inserted properly into the
programming socket. If a device is not inserted at all or if it is inserted with pin 1 facing
the opposite direction, the software will issue an error message. This check can be
disabled if you want to.
(A word of CAUTION: reverse-device detection is not guaranteed 100% for all
manufacturer and all devices. The detection is there to save your device, only most of the
time, when it is inserted in reverse.)
Disable Auto-Erase and Auto-Blank-Check
If a device is electrically erasable, it will be erased and blank-checked before
programming. If you need to save extra time (e.g. if you are programming a batch of
brand new devices) by avoiding this operation, you can disable it.
22
COMMAND DESCRIPTIONS
Disable Auto Buffer Clear (Before File Load)
Normally, the data buffer is erased at the beginning of every /File Load operation. This
gives you a pre-defined empty buffer and gives you a predictable checksum if your data
file is not a completely full data file.
However, in some applications, a customer may have to load multiple partial data files. In
those cases, the Auto Buffer Clear feature can be disabled.
Disable Reading of Electronic ID
This command should normally not be used. It is reserved for special privileged users
such as semiconductor manufacturers who are using our equipment for device testing
purposes.
Disable Display of Test Vectors
(For PLDs only) During vector testing, the software displays results of each test vector. If
you are running long vectors and you want to speed up the vector testing process, you can
disable the display of individual steps.
Disable Auto Vector Testing After Programming
(For PLDs only) If the data file contains test vectors, vector testing will be automatically
done after programming, unless it is disabled.
5.1.8 CONFIGURE saVe FILE (/CVF)
This command allows you to save current configuration information so that you do not
have to re-enter them every time you use the software. Examples of configuration
information saved are: file format, file name, device selection, release control
information, and items in the Configure Others screen.
Configuration items are saved into a file called sp.cfg in the default DOS directory.
If the sp.cfg file is not present, a new one will be created. If it is already there, you will
be prompted before the software updates it.
If you are invoking the control software from a floppy disk, you need to make sure that
the disk is not write-protected.
You can change the configuration information and re-save it as often as you like.
5.1.9 CONFIGURE RESET (/CR)
23
COMMAND DESCRIPTIONS
This command resets the PILOT programmer.
This command is normally not necessary because the /Configure Port command already
resets the PILOT programmer. It is left here mainly for upward compatibility with old
existing user macro files.
24
COMMAND DESCRIPTIONS
5.1.10 CONFIGURE USER COUNTER (/CU)
These group of commands allow you the select the use of two User Counters. They are displayed at the
upper right corner of the screen. UCP keeps track of passed operations and UCF keeps track of failed
operations.
5.1.10.1 CONFIGURE USER COUNTER PROGRAM (/CUP)
The command selects UCP and UCF to keep track of programming operations. For example, every /PROM
Program command that results in a “pass” will cause UCP to increment. Another command, such as a
/PROM Verify will not cause the counters to increment.
5.1.10.2 CONFIGURE USER COUNTER VERIFY (/CUV)
The command selects UCP and UCF to keep track of verify operations. For example, every manual /PROM
Verify command that results in a “pass” will cause the UCP to increment. Another command, such as a
/PROM Erase will not cause the counters to increment. These setting is useful when you are verifying a
batch of devices.
5.1.10.3 CONFIGURE USER COUNTER ERASE (/CUE)
The command selects UCP and UCF to keep track of erase operations. For example, every manual /PROM
Erase command that results in a “pass” will cause the UCP to increment. Another command, such as a
/PROM Blank-check will not cause the counters to increment. These setting is useful when you are erasing
a batch of devices.
5.1.10.4 CONFIGURE USER COUNTER OTHERS (/CUO)
The command selects UCP to keep track of operations other than program, verify or erase. For example,
every manual /PROM Blank-check command that results in a “pass” will cause the UCP to increment.
Another command, such as a /PROM Verify will not cause the counters to increment. These setting is
useful when you are doing blank checks with a batch of devices.
5.1.10.5 CONFIGURE USER COUNTER NONE (/CUN)
The command disables the counters to keep track of device operations. This command will be useful in the
future when the two counters are used for other purposes.
5.1.10.6 CONFIGURE USER COUNTER, RESET Both (/CUB)
This command resets both UCP and UCF to zero.
5.1.10.7 CONFIGURE USER COUNTER, Reset UCF (/CUR)
This command resets UCF to zero.
25
COMMAND DESCRIPTIONS
5.1.11 CONFIGURE MISC COMMANDS
These commands are not used as frequently as the other configuration commands and are
therefore grouped together here as MISC commands.
5.1.11.1 CONFIGURE MISC BUFFER-INIT COMMANDS
These commands usually have no effect on logic devices because their data files are always full-length data
files.
For memory devices, however, data files may not be always full-length. And if so, what is the software
going to do with the unused portion of the data buffer? Some programmers would leave it at 0s, some
would leave it at Fs, and some would leave it as whatever was there to start with. This may result in
different checksum values from different programmer manufacturers.
Advin’s position is to use the virgin state as default, since it will result in faster programming through put
(and also allows the engineer to make use of empty portions of a device, in case he needs to add data or
make a “patch” to existing code at a later time). However, some Data I/O programmers initialize the buffers
to 0s and yet other Data I/O programmers initialize the buffers to Fs. In order to provide the customer with
the same checksum if he has used a Data I/O programmer in the past, we provi de alternatives to the user to
select buffer initialization to either 0s or Fs.
5.1.11.1.1 CONFIGURE MISC BUFFER-INIT VIRGIN (/CMBV)
This command tells the software to initialize the buffer (or buffers) to the erased, i.e. virgin, state whenever
a /File Load operation begins. This is a preferred setting, because it will leave unused portions of a device
to be left in the unprogrammed, or virgin, state.
5.1.11.1.2 CONFIGURE MISC BUFFER-INIT FF (/CMBF)
This command tells the software to initialize the buffer (or buffers) to Fs whenever a /File Load operation
begins.
5.1.11.1.3 CONFIGURE MISC BUFFER-INIT 0 (/CMB0)
This command tells the software to initialize the buffer (or buffers) to 0s whenever a /File Load operation
begins.
5.1.11.1.4 CONFIGURE MISC BUFFER-INIT NO (/CMBN)
This command tells the software NOT to initialize the buffer (or buffers) whenever a /File Load operation
begins. This setting is needed if you want to load more than 1 data file before the programming operation.
5.1.11.1.5 CONFIGURE MISC BUFFER-INIT STATUS (/CMBS)
This command display the current setting for buffer initialization.
26
COMMAND DESCRIPTIONS
5.1.11.2 CONFIGURE MISC PACKAGE-TYPE COMMANDS
These commands are needed only by PILOT-Gxx, PILOT-142 to PILOT-145, and when USA-84 is used.
In all other cases, the software is able to automatically decide how to route the signals for different kind of
packages.
5.1.11.2.1 CONFIGURE MISC PACKAGE-TYPE DIP (/CMPD)
This command selects the DIP package.
5.1.11.2.2 CONFIGURE MISC PACKAGE-TYPE PLCC (/CMPP)
This command selects the PLCC package.
27
COMMAND DESCRIPTIONS
5.2 FILE COMMANDS
The file command group consists of all file related commands such as selecting a file
format, loading and saving a file.
5.2.1 FILE NAME (/FN <filename>)
You can enter a filename with this command. The specified filename will be used by the
/File Load and /File Save commands.
A full path name can be entered, even with an optional drive name and file extension
type. In the absence of an explicit extension, a default extension is automatically
appended. The default extension depends on what file format is currently selected. They
are .HEX, .S or .BIN.
Some examples:
SAMPLE
SAMPLE.HEX
A:SAMPLE
A:\DIRX\DIRY\SAMPLE
5.2.2 FILE DIRECTORY (/FD)
You may find it sometimes necessary to look at a DOS directory while you are still in the
PILOT control software. This command is designed just for that purpose. The default
extension is .HEX, .OBJ, .S or .JED (depending on the currently selected format) unless
you specify otherwise. Here are some examples of usage, assuming the current selected
format is HEX:
Entering this:
Will give you:
/FD [ENTER]
T.HEX
JOHN2.HEX
JOHN3.HEX
/FD J* [ENTER]
JOHN2.HEX
JOHN3.HEX
/FD *.* [ENTER]
T.HEX
JOHN2.HEX
JOHN3.HEX
SPX.OBJ
/FD \JIM\*.MAC
27512.MAC
U.MAC
5.2.3 FILE ADDRESS n (/FA n)
28
COMMAND DESCRIPTIONS
(Does not apply to logic devices.)
This command specifies which byte in the file will be loaded into the beginning of the buffer.
In other words, /File Address 20 means data from address 20 in the file will go into the first byte of the
buffer during a file load command.
In the following examples, device type is assumed to be 2732 (address range 00000FFF).
Example 1
After /File Address 0000 has been selected, a file load will cause the following to
happen:
(In this case, the file size is smaller than the buffer size.)
FILE
Address 0000 0001
Contents
12 34
Address 0000 0001
BUFFER Contents 12 34
0020
67
03FF
CD
67
03FF
CD
0FFF
Example 2
When /File Address=0020, a file load will cause the following to happen. That is,
addresses before 0020 in the file are ignored. Data starting at 0020 of the file will be
taken and put into the buffer.
FILE
Address 0000 0001
Contents
12 34
0020
67
Address 0000 0001
BUFFER Contents 67
CD
03FF
CD
03FF
0FFF
Example 3 (for set/gang programmers only)
A data file contains 20000H bytes of data. The addresses begin at 80000 and end at
9FFFF. Assuming it is to be burned into 2764 EPROMs. A total of 16 EPROMs would
then be required.
29
COMMAND DESCRIPTIONS
To program the first set of eight EPROMs, you should use /File Address 80000, then do
a /File Load Set. Since a 2764 can hold 2000 bytes, the buffers will capture data as
follows:
buffer #0 = 80000-81FFF,
buffer #1 = 82000-83FFF,
...
buffer #7 = 8E000-8FFFF.
(In fact, if you invoke the /File Map command, the above information will be revealed.)
To program the second set of eight EPROMs, you should use /File Address 90000. Then
a subsequent /File Load Set will fetch data from the second half of the file (addresses
90000 to 9FFFF).
In the 1-to-2 split mode, consecutive bytes will go to alternate even/odd buffers, but the
concept remains the same.
5.2.4 FILE LOAD n (/FLn)
This command invokes the file loading process and loads data into the specified buffer or
buffers. The name of the file to be loaded should be already specified by a /File Name
earlier.
If /Configure Width is used earlier to specify split, you will see smiling faces going
down the screen in pairs or in quads, otherwise they will go down linearly.
Valid choices of n are: 0, 1, 2, 3, 4, 5, 6, 7, Set.
5.2.5 FILE SAVE n (/FSn)
Data in the selected buffer or buffers will be saved onto the file specified earlier by the
/File Name command.
Before saving your data from the buffers to a file, you can make sure that addresses
assigned to each buffer will be correct by using the /File Map command. If it is not what
you want it to be, you can change it with the /File Address command.
Valid choices of n are: 0, 1, 2, 3, 4, 5, 6, 7, Set.
30
COMMAND DESCRIPTIONS
5.2.6 FILE RANGE (/FR)
(Does not apply to logic devices.)
This command scans through the specified file and finds out the file address range. If
you have a problem loading data from a file into the buffer (during the /File Load
process), you can use this command to make sure that your data file does fall within your
desired address range.
For example, you've been given a hex file, named TEST.HEX, to burn into a pair of
27256s (32K bytes x 2). When you tried /File Load Set the software reported that no
bytes were loaded. Why?
The /File Range command reports that the address range in the file is F0000-FFFFF.
Now, you realize that you should have used the File Address command to set it to
F0000, instead of leaving it at the default value of 00000.
5.2.7 FILE MAP (/FM)
Whereas the /File Range command allows you to see the addresses associated with the file, the /File Map
command allows you to see the addresses associated with the individual buffers.
For example, if /File Address 20 has been specified, and slitting 1-to-2 is used, then a /File Map command
would show (assuming 27C080 is selected):
buf0
buf1
008000 - 107FFE
008001 - 107FFF
meaning that the data from address 8000 in the file will go to the first byte of buffer 0 and data from
address 107FFE will go to the last byte of buffer 0.
If you have problems in loading data from a file, the best thing to do is to use either one or both of these
two commands. Then you'll know why data is not going where they are supposed to go.
5.2.8 FILE FORMAT x (/FFx)
(Does not apply to logic devices, which always use JEDEC format or POF format in case
of MAX devices.)
This command selects the file format to be used for reading from a disk file or for writing
into a disk file.
Valid choices of x are:
H Intel HEX formats (including Extended Hex and 32-bit Hex)
S Motorola S-record file formats (Including S1, S2 and S3 formats)
B Binary file format
A
ASCII file format
31
COMMAND DESCRIPTIONS
This function can also be used as a utility to translate data files from one format to
another. For example, you can set file format to Intel HEX, read a file into the buffers,
set the format to binary, then save the data from the buffers to a file. The data file is now
in binary format.
32
COMMAND DESCRIPTIONS
5.3 BUFFER COMMANDS
5.3.1 BUFFER FILL n (/BFn)
Selected buffers are initialized with a user entered value. If you change your mind in the
middle of entering the fill data, simply press the escape key to abort.
When a device type is selected with the /Configure Device command, a buffer of proper
size will be created and initialized to FFs.
Normally, there is no need for you to initialize the data buffers before you do a /File Load.
However, if you do a SECOND /File Load, you MAY have to use the /Buffer Fill command to initialize
the data buffer.
This is because the /File Load command only loads the appropriate range of data into a
data buffer. If the file address range is small, the /File Load process will not fill the
complete data buffer.
Example: you selected a device, loaded FILE1, programmed a device, then you wanted to
program another device with FILE2. If FILE2 is smaller than the device size, the
remaining area of the data buffer may have data belonging to FILE1. Whereas your
device may still be OK (since it will be programmed with the data from FILE2, plus
some extras), it will not have a "good" checksum --- because next morning you may
program another FILE2 without first doing a FILE1, and then the absence of the "extras"
will give you a different checksum.
Therefore, if you do program consequently different devices with different data file, and
if the data files are smaller than the device size, you may need to use the /Buffer Fill
command before you do a /File Load.
There is no need to issue a /Buffer Fill before a /Buffer Load, because unlike /File
Load, /Buffer Load always loads the complete buffer with data from the device. (Only
exception: if you want to do a partial load, using the /Extended Active-Range
command.)
Valid choices of n are: 0, 1, 2, 3, 4, 5, 6, 7, Set.
5.3.2 BUFFER LOAD n (/BLn)
Selected buffers are loaded with data from PROMs in corresponding sockets. Once in
buffers, the PROM data can be either saved onto a file, or modified and a new PROM
burned.
Valid choices of n are: 0, 1, 2, 3, 4, 5, 6, 7, Set.
33
COMMAND DESCRIPTIONS
5.3.3 BUFFER OFFSET n (/BOn)
(Does not apply to logic devices.)
If you can recall from an earlier section describing the /File Address command: it allows
you to select certain parts of a file when loading it into a buffer, and discarding a certain
beginning part. For example, when File Address = 20, a file load results in:
FILE
Address 0000 0001
Contents
12 34
0020
67
Address 0000 0001
BUFFER Contents 67
CD
03FF
CD
0FFF
03FF
In other words, the data is moved down to a lower address.
If you want to move data up to a higher address, you can use the analogous command
/Buffer Offset.
/File Address allows you to specify how much to ignore at the beginning of the file.
/Buffer Offset allows you to specify how much to skip at the beginning of the buffer.
For example, if File Address is 0000 and Buffer Offset is 20, a file load results in:
Address
FILE
Contents
Address
BUFFER
Contents
0000
12
0000
0020
34
03FF
CD
0020
12
03FF
34
041F
0FFF
CD
5.3.4 BUFFER CHECKSUM n (/BCn)
A checksum is calculated by adding up all the bytes in the buffer. Checksums are 16-bit
values. That is, they are "word-accumulated".
Valid choices of n are: 0, 1, 2, 3, 4, 5, 6, 7, Set.
34
COMMAND DESCRIPTIONS
5.3.5 BUFFER EDIT n (/BEn)
This command allows data in the selected buffer to be viewed and changed. You’ll be
prompted for an offset address between zero to the device size less one, as shown in
parenthesis at the upper left hand corner of the screen. The data to be modified is
indicated by a cursor, which can be moved by the up, down, left, right arrows, plus the
page up and page down keys.
Pressing [TAB] will cause the cursor to go to the ASCII side of the display and allow you
to enter data in ASCII (alpha) mode. Pressing [TAB] again will move it back to the hex
side of the display.
For memory devices, valid choices of n are: 0, 1, 2, 3, 4, 5, 6, 7.
For logic devices, the choices are Fuses, Vectors and User Electronic Signature
5.3.5.1 BUFFER EDIT FUSES (/BEF)
This command allows you to view or edit fuse patterns in the fuse buffer.
5.3.5.2 BUFFER EDIT VECTORS (/BEV)
This command allows you to view or edit test vectors in the test vector buffer.
5.3.5.3 BUFFER EDIT UES (/BEU)
This command allows you to view or edit the User Electronic Signature fuses. Only some logic devices
have UES fuses.
5.3.6 BUFFER INVERT (/BV)
For memory devices, once in a while, an applications calls for inverted data. This command then will come
in handy when you need to do that.
5.3.7 BUFFER DUPLICATE n (/BDn)
These commands apply to set/gang programmers only.
This command duplicates the data in the buffer set to another area. Suppose the set size is
3. Duplicating the buffer set to buffer #4 (/Buffer Duplicate 4) would copy buffer #0 to
#4, #1 to #5, and #2 to #6.
Note that this command is for duplicating the entire set. In the special case where the user
wishes to copy the single buffer #0 to another buffer, the set size must first be changed to
one.
35
COMMAND DESCRIPTIONS
The difference between this command and the /Buffer Gang Set command is that this
command makes only one copy of the buffer set starting at any buffer specified by the
user. The /Buffer Gang Set command always starts duplication from the very next buffer
immediately following the last buffer in the set, and makes as many sets of copies as
possible. If /Buffer Gang Set is used in the above example, buffer #0 gets copied to
buffers #3 and #6, buffer #1 gets copied to buffers #4 and 7, and buffer #2 gets copied
only to buffer #5.
5.3.8 BUFFER GANG (/BG)
Duplicates data from a buffer to all other buffers or repeats the buffer set through all
remaining buffers.
5.3.8.1 BUFFER GANG SET (/BGS)
Copies data in the buffer set to all remaining buffers. If the set size is 3, then ganging the
buffer set (Buffer Gang Set) would copy buffer #0 to #3 and #6, #1 to #4 and #7, #2 to
#5.
5.3.8.2 BUFFER GANG n (/BGn)
Copies data in buffer n to all other buffers.
36
COMMAND DESCRIPTIONS
5.4 RELEASE-CONTROL COMMANDS (/R)
(Does not apply to logic devices.)
The release-control commands allow you to automatically change such things as
firmware revision numbers, serial numbers on the fly just before programming a device.
Automatic date/time stamping and PC-compatible checksum calculations are also done.
When you use the release-control commands, you should assign a block of 16 bytes in
your memory device for holding the release-control information. You can specify the
buffer # and offset address of where this block of information is to be stored. These 16
bytes will be used as follows:
Byte
0-1
2-3
4-7
8-B
C
D-F
Function
revision#
serial#
date
time
checksum
reserved
# of bytes
2
2
4
4
1
3
5.4.1 RELEASE-CONTROL DISPLAY (/RD)
Displays the values in the release control block currently in the buffer.
5.4.2 RELEASE-CONTROL ENTER (/RE)
Puts the new values of release control parameters into the selected buffer. The new values
for revision# and serial# are those as shown in the RELEASE-CONTROL MAP
command. A new date and time are read from the PC. Checksum is generated in such a
way that the overall checksum for the entire set would yield "XX00". This follows the
same convention as used by PC BIOS and allows a quick confidence check to be
performed at a later date by verifying that the checksum value for the set is in fact
"XX00".
5.4.3 RELEASE-CONTROL BUFFER n (/RBn)
Specifies that the release-control block will be in buffer n.
The values of n allowed are: 0, 1, 2, 3, 4, 5, 6, 7
37
COMMAND DESCRIPTIONS
5.4.4 RELEASE-CONTROL ADDRESS xxxx (/RAxxxx)
Specifies the beginning offset address within a buffer for storing the release control block
values.
5.4.5 RELEASE-CONTROL REVISION# n (/RRn)
Allows a new revision# to be entered. The new value will be stored into the buffer at the
next /Release-control Enter command.
5.4.5.1 RELEASE-CONTROL REVISION# BUFFER (/RRB)
Extracts the new revision# from the buffer. Effectively, this makes the new revision# and
current revision# the same.
5.4.5.2 RELEASE-CONTROL REVISION# ENTER (/RRE)
Allows a new revision# to be entered from the keyboard.
5.4.6 RELEASE-CONTROL SERIAL# n (/RSn)
Allows a new serial# to be entered. The new value will be stored into the buffer at the
next /Release-control Enter command.
5.4.6.1 RELEASE-CONTROL SERIAL# BUFFER (/RSB)
Extracts the new serial# from the buffer. Effectively, this makes the new serial# and
current serial# the same.
5.4.6.2 RELEASE-CONTROL SERIAL# ENTER (/RSE)
Allows a new serial# to be entered from the keyboard.
5.4.6.3 RELEASE-CONTROL SERIAL# INCREMENT (/RSI)
Increments the new serial# by one.
38
COMMAND DESCRIPTIONS
5.4.7 RELEASE-CONTROL MAP (/RM)
Displays the new values for the release-control block parameters: buffer#, revision#,
serial#, and their offset locations in the buffer. To look at the current values in the buffer,
use the /Release-control Display command.
5.4.8 RELEASE-CONTROL FORMAT COMMANDS
These are commands which may be implemented in the future.
5.4.8.1 RELEASE-CONTROL FORMAT DEFAULT (/RFD)
5.4.8.2 RELEASE-CONTROL FORMAT A (/RFA)
5.4.8.3 RELEASE-CONTROL FORMAT B (/RFB)
39
COMMAND DESCRIPTIONS
5.5 PROM (or PAL) COMMMANDS (/P)
The word PROM or PAL as used in this manual means "device". This is because our
programmers have evolved from programmers for PROMs and PALs to a whole new
range of other devices such as GALs, PEELs, microcontrollers, etc. PROM and PAL are
still being used here mainly for compatibility between old and new versions of software.
The PROM or PAL command group consists of all commands that either program or
access the PROMs or PALs. (The only exception to this is the command that copies
PROM data into buffers. That command is in the buffer command group).
In the following sub-sections, consider the meaning of PROM to include PAL and all other kinds of
devices. The variable 'n' stands for buffer number or socket number in the case of memory devices which
can be gang-programmed or which can have data split. The value of 'n' does not apply to logic devices.
The meaning of 'n' is summarized as follows:
Logic devices, Serial PROMs and Micros (devices which cannot be gang
programmed):
The value 'n' is not needed.
Memory devices:
Single socket programmers:
0 - 7 Data from buffer n is used.
Multi-socket programmers:
0 - 7 Data from buffer n is used for the device at socket n.
S
(Set) All devices belonging to the set are operated on.
(Set size is defined by the /Configure Set-size command.)
Data for each socket is from a corresponding buffer.
G
(Gang) All devices in all sockets are operated on.
All data comes from buffer 0. That is, it is not necessary to set up
data in other sockets.
5.5.1 PROM BLANK-CHECK n (/PBn)
Checks to see if selected PROMs are blank. As soon as a non-blank byte is detected, the
offset address and value of this byte will be displayed.
The values of n allowed are: 0, 1, 2, 3, 4, 5, 6, 7, S, G
Please also see Supplement 1.1 BLANK CHECKS
5.5.2 PROM eRASE n (/PRn)
Electrically erases a device (when applicable), and then checks to see if it is blank.
The values of n allowed are: 0, 1, 2, 3, 4, 5, 6, 7, S, G
40
COMMAND DESCRIPTIONS
5.5.3 PROM PROGRAM n (/PPn)
Programs a device with data from corresponding buffers.
If the selected device is electrically erasable, it will be automatically erased first before
the programming cycle starts.
The entire device is programmed. Since the buffer size is always the same as the PROM
size, this means the entire buffer is programmed onto the PROM. (If you want only a
certain part of the PROM to be programmed, you can use /Extended-command Activerange as explained later.)
As soon as a byte fails to program, the command is terminated.
At the end of the command, offset locations and values of any defective bytes will be
displayed.
The values of n allowed are: 0, 1, 2, 3, 4, 5, 6, 7, S, G
The meaning of 'n' (logic devices, serial PROMs and micros do not need 'n')
5.5.4 PROM VERIFY n (/PVn)
This command verifies data in a PROM against data in corresponding buffers. A
defective byte terminates the command. The offset address of the error byte will be
reported. The byte values in both the buffer and the problem PROM are also reported.
The values of n allowed are: 0, 1, 2, 3, 4, 5, 6, 7, S, G
5.5.5 PROM CHECKSUM n (/PCn)
Calculates checksums for selected PROMs. The checksum is a 16 bit value calculated by
simply adding up all data bytes.
The values of n allowed are:
For single socket programmers: 0
For gang programmers: 0, 1, 2, 3, 4, 5, 6, 7, S, G
41
COMMAND DESCRIPTIONS
5.5.6 PROM EXAMINE n (/PEn)
Displays data from a PROM on the screen. The data is displayed in both hex and ASCII.
The [up arrow] and [down arrow] keys scroll the screen one line at a time; the [page up]
and [page down] keys scroll the screen one page at a time. The [escape] key terminates
the command.
The values of n allowed are:
For single socket programmers: 0
For gang programmers: 0, 1, 2, 3, 4, 5, 6, 7
42
COMMAND DESCRIPTIONS
5.6 MACRO COMMANDS
Macro files are also called batch files. The format of macro files are described in detail
in the chapter titled MACRO FILES.
5.6.1 MACRO eXecution xxxx (/MX xxxx)
This command allows you to invoke a macro file while you are under the control of
PILOT software. The parameter required is the file name of the macro file. The default
directory is the current directory and the default extension is .MAC. You can specify
other DOS directories or other extensions.
These are examples:
/MX BURNU16
/MX MY.TST
/MX A:\JOHN\NEW\BURN16
5.6.2 MACRO ERROR (/ME)
If an error condition occurs during macro execution, the PILOT control software will
pause so that the user can make note of the error. To continue, press the space bar. To
abort the macro sequence, press [ESC].
You can choose other error handling options using the following /MACRO ERROR xxx
commands. These commands should be located at the beginning of the macro file.
Examples of error conditions are: non-existent file during a file load; device under blank
check is not blank; error detected during programming or verification.
5.6.2.1 MACRO ERROR CONTINUE (/MEC)
This command specifies that macro execution should continue even when errors are
detected.
5.6.2.2 MACRO ERROR PAUSE (/MEP)
This command specifies that the PILOT control software should pause when an error is
detected. This is the default selection.
To continue, press the space bar. To abort, simultaneously press the [CTRL] [SHIFT]
[SHIFT] keys.
5.6.2.3 MACRO ERROR TERMINATE (/MET)
43
COMMAND DESCRIPTIONS
This command specifies that the software should terminate macro execution when an
error is detected. All subsequent commands in the macro file will be ignored, once an
error is detected.
5.6.2.4 MACRO ERROR STATUS (/MES)
This command reports what action is selected as the current error handling option.
44
COMMAND DESCRIPTIONS
5.7 EXTENDED COMMANDS
5.7.1 EXTENDED-COMMAND ACTIVE-RANGE
(Does not apply to logic devices.)
These commands allow you to selectively program a certain part of a device.
Active range is preset to include the complete address range of a device type during
/Configure Device time. If you want to program only a certain part of a device, you can
use the LOW and HIGH commands to select the low and high address boundaries. Then
only bytes from LOW to HIGH, inclusive, will be programmed during a /Prom Program
command.
Example: When Active-range Low= 276, Active-range High=3FF, the following will
happen in a /PROM PROGRAM:
Address
PROM
0000 0001
Contents
0276
03FF
67
CD
0FFF
Only this part
is programmed
Address
BUFFER
Contents
0000 0001
12
34
0276
03FF
67
CD
0FFF
Besides the /Prom Program command, the active range setting is also effective during
/Prom Checksum and /Buffer Load commands. You can get the checksum of a certain
block of data in the device or you can selectively load a certain part of a device into the
buffer using this Active-range facility.
Active-range does not apply to other commands such as /File Load and /File Save. (It
would be very confusing during a file load, if File address, Buffer Offset and Active
Range commands were all in operation.)
There are four commands within this group:
/Active-range Low n:For setting the low boundary to n.
/Active-range High n:
For setting the high boundary to n.
/Active-range Display:
For displaying the current setting.
/Active-range Reset:
For resetting the low and high values to the device limit.
45
COMMAND DESCRIPTIONS
5.7.2 EXTENDED-COMMAND, SPECIFIC-CONFIGURATION (/ES)
Some devices have certain specific configuration bits or fuses that need to be programmed. The /ES
command opens up screens designed specifically for these devices. Description for the /ES command for
some devices can be found the Supplement at the end of this manual.
46
COMMAND DESCRIPTIONS
5.8 QUIT COMMANDS (/Q)
The quit commands allow you to exit the software and return to DOS.
5.8.1 QUIT NO (/QN)
This command prevents an accidental quitting and simply goes back to the main menu.
5.8.2 QUIT YES (/QY)
Selecting this option exits the software and returns to DOS.
5.8.3 QUIT QUERY (/QQ)
When this command is issued, there is a prompt "Do you wish to quit (Y/N)?". The
software quits only if the answer from the operator is "Y".
This command is useful in macro files for burning continuous sets of devices until
enough sets are made by the operator. For example, this macro setup continuously
programs sets of two 2764s as long as the operator responds "Y" to the above question:
/;Filename: mymacro.mac, by Joe.
/MET
/;If Macro Error: Terminate
/CD 2764
/;Configure Device
/FN ISDN.HEX
/;File Name
/CS2
/;Configure Set-size 2
/FLS
/;File Load
/MX doit.mac
/;Macro Execute
/
/;Filename: doit.mac, by Joe.
/:Please put in two blank 2764s and press any key when ready.
/PPS
/;PROM Program Set.
/:Please remove PROMs and label them U71, U72.
/QQ
/;If yes, then quit.
/MX doit
/;Else repeat this macro.
/
47
MACRO FILES
6.0 MACRO FILES
A macro file is an ASCII text file containing a list of PILOT commands. It can be created
with any text editor which can prepare program source files.
The following is an example of a macro file:
/;************************************************************
/:PILOT test. (Please hit any key to continue.)
/;************************************************************
/CDI 27c512
/;Configure Device Intel 27c512
/FN C:\John\FIRM /;File Name = C:\John\FIRM.HEX
/FA F8000
/;File Address = F8000
/FL0
/;Load the file from disk into buffer 0.
/:Insert 27c512, then hit any key to start programming.
/PP0
/;Program PROM at socket 0.
/
6.1 RULES FOR CREATING MACRO FILES
A macro file contains a list of executable commands, each of which begins with a "/"
(slash). For readability, each line should contain only one command and a brief comment.
The last line should have a single "/" which functions as clean return to the top of the
command tree..
Notice that the "/" character has very special meaning in macro files. It indicates the start of a command at
the top of the command tree. Therefore using this character for other purposes, such as the date (11/1/1989)
in a comment line, will cause error messages to be generated. Use "11-1-1989" instead.
A command must begin and end on one line. It cannot overflow to a second line. The
macro file function supports all of the commands used in the interactive mode. The only
exception is the /Configure Others command, which deals only with run-time issues
such as temporary disabling of reverse device insertion check.
Blank lines can be used to make the macro file easier to read.
Like DOS batch files, macro files can be chained but not nested. This means that a
macro file can invoke another macro file, but after the new macro file has been
processed, the software will not return to the previous macro file.
Most of the commands either require just one parameter or none at all. When a parameter
is required, the space before the parameter is optional. The following are some examples:
48
MACRO FILES
/FA 1F000
/FA1F000
/MX macroname
/MXmacroname
6.2 THE BUFFER EDIT COMMAND IN A MACRO FILE
The only command that requires more than one numeric parameter is the /Buffer Edit
command. The command is followed by the first parameter, a buffer address. Following
that is a string of data bytes separated by commas.
These data bytes will be stored into consecutive locations starting at the given address. In
the example below, data byte 12 is stored into buffer #0 address 8900, 34 into address
8901, ... , and F0 into address 8907.
/BE08900,12,34,56,78,9A,BC,DE,F0
Note that there is no space between "BE0" and "8900".
The commas between the data bytes can be omitted if desired, as in:
or
/BE08900,12 34 56 78 9A BC DE F0
/BE08900,123456789ABCDEF0
In the interactive mode, buffer edit can switch between hex input and ascii (alphanumeric) input with the tab key (the tab key is ascii code 09). The same is true if the
buffer edit command comes from a macro file. However, some text editors do not allow
the tab key to be included as the real tab key in a text file. Because of this, the "spade"
key (♠) can also be used instead of the tab key. With most editors, the spade key (ascii
code 06) can be typed in by holding the ALT key and then type "06" on the dedicated
IBM PC numeric key pad.
The following is an example of inputting an ascii string with the buffer edit command in
a macro file:
/BE012,♠This is a test string.
Here the character just before "This" is the spade character.
6.3 SPECIAL MACRO COMMANDS
Any command can be put into a macro file. In addition, three "commands" normally not
used in the interactive mode are supported by macro files, as described in the following
sections.
49
MACRO FILES
COMMENT COMMAND (/;)
A comment command begins with "/;", followed by the comment itself. Comments will
be ignored.
/; This is a comment. Comments are ignored.
MESSAGE COMMAND (/!)
A Message command begins with "/!", followed by the message to be displayed in the
Message Panel on the screen for three seconds by the macro file processor. At the same
time, a beep will sound to call you to its attention. The mode indicator at the upper righthand corner will change to "MSG" for the duration of the three seconds.
/! This message will be displayed on the screen for 3 seconds.
If you enter "/!", while in an interactive session, the software will go into the message command mode.
During this, the keyboard will be temporarily locked as if a message command is being executed. The
keyboard will be unlocked after 3 seconds. Then you may continue using the keyboard.
PAUSE COMMAND (/:)
A Pause command begins with "/:", followed by the message to be displayed in the
Message Panel on the screen. When displayed, a beep will be sounded to call you to its
attention. Unlike the Message command, the message will stay on the screen until you
press a key on the keyboard. The mode indicator will change to a flashing "PAUSE" to
further attract your attention. The Pause command is typically used to provide a break in
the batch processing to request operator action, as in:
/:Please put blank PROMs in the sockets.
6.4 MACRO FILE INVOCATION
A macro file can be invoked in several ways. One way is with the "/MX" (Macro
eXecute) command.
Alternatively, it can be automatically invoked by including the macro file name in the
command line when starting up the PILOT program from DOS, as in the following
example:
C:> spEPROM macroname
6.5 PARAMETERS FOR MACRO FILES
50
MACRO FILES
Macro files take parameters just like DOS batch files. A maximum of nine parameters
can be specified.
For example, suppose your macro file U2start.MAC looks like this:
/CD 27512
....
/RRE %1
/RSE %2
....
/PP0
/;Configure Device 27512
/;Release-control Revision Enter nnnn
/;Release-control Serial# Enter nnnn
You can burn a 27512, of revision 0201 and serial number 1007, by:
> spEPROM myMACRO 0201 1007
(%1) (%2)
If you have another macro file called U2next.mac that looks like this:
....
/RSI
....
/PP0
/;Release-control Serial# Increment
Then you can burn another 27512, with the next serial number, by issuing the command
"/MX U2next".
51
ABORTING
7.0 ABORTING
7.1 ABORTING INDIVIDUAL COMMANDS
To abort a command, simply press [escape].
For example, during a /Configure Device command, pressing [escape] would discard
whatever the current selection is and return to the device type that was previously in
effect before the command was entered.
During the middle of a /PROM Program command, pressing [escape] would abort the
programming cycle.
7.2 ABORTING MACROS FILES
To abort in the midst of a macro file, rapidly pressing [escape] twice is required.
52
ALLOCATING BUFFER MEMORY
8.0 ALLOCATING BUFFER MEMORY
For gang/set programmers, the software creates a set of eight buffers. The size of each
buffer is exactly the same as the size of the selected device type. The buffers are used to
hold interim data to or from devices.
When the software first starts, it calculates how much RAM is available for use in the PC.
If there is enough space for the buffers, then all the buffer data will be resident in RAM.
Otherwise, a temporary file, named "PILOT$$.TMP", is created on disk to hold the
excess data. The temporary file is automatically deleted, when the software returns to
DOS.
53
COMMAND DESCRIPTIONS
9.0 DEVICE SELECTION NOTES
9.1 SELECTING THE PROPER SOFTWARE MODULE
To facilitate quick release of new software, and to increase software reliability and
independence, PILOT software is divided into different modules as follows:
Logic Modules:
spV.EXE
spM.EXE
spAMD.EXE
spGAL.EXE
spPAL.EXE
spEP.EXE
spECL.EXE
spPLS.EXE
Memory Modules:
spPROM.EXE
spEPROM.EXE
spEE.EXE
spEE64.EXE
spSPROM.EXE
spUP.EXE
Used for:
22V10s, advanced and complex PLDs
Altera and Cypress MAX devices
AMD/MMI standard PALs
Lattice, NSC, SGS and AMD 16V8/20V8 devices,
cross-programming from GALs/PALCEs to PALs
PALs from different manufacturers
Altera, Intel and TI EPLDs
ECL PLDs
Sequencers, such as PLSxxx, PLHSxxx and TIFxxx
Used for:
"Bipolar" PROMs, also newer PROMs in CMOS and
erasable PROMs
27xxx series (conventional) EPROMs
EEPROMs and FLASH EPROMs
FLASH EPROMs which are 64Mbit or bigger
Serial PROMs, or serial EE PROMs, e.g. Xilinx 1765,
Microcontrollers
Set/Gang Software: Used on PILOT-8xx & 9xx or GM-8xx & 9xx Set/Gang
modules for:
sgEPROM.EXE
27xxx series (conventional) EPROMs
sgEE.EXE
EEPROMs and FLASH EPROMs
Misc.:
spDIAG.EXE
Used for:
Hardware diagnostics
9.2 OTHER NOTES REGARDING DEVICE SELECTION
AMD and MMI Standard PALs
These are supported by spAMD.EXE. Within the device selection, "AmPALxxx"
denotes devices which were designed by the old AMD and should be used if your device
is marked as AmPALxxx. "PALxxx" denotes devices which were designed by either
MMI or the new AMD. PALxxx should be used if your device does not have the "Am"
marking. These can include devices with the "MMI" logo (for devices which were
55
COMMAND DESCRIPTIONS
designed by MMI) or with the square AMD logo (for devices which were designed by the
new AMD. (AMD combined with MMI in 1987).
56
USING PLCC DEVICES
10.0 USING PLCC DEVICES
10.1 STANDARD PLDS, MEMORIES AND MICRO CONTROLLERS
Standard PLDs, memories, micro controllers and almost all PLCC devices up to 44-pins
can be programmed using one of two types of adapters or modules.
Third-party PLCC Adapters
These are the PLCC adapters which you can purchase from other third party suppliers
such as Emulation Technology. If you are using this type of adapters, you can stay with
the "DIP" package selection. (Package selection is done automatically by S/W on PILOTUxx models and is done manually through the /Configure Others command in PILOT14x and PILOT-Gxx models.) The current selection is always displayed on the lower
portion of the screen.
The draw-back of this type of PLCC adapters is that you might need several different
kinds for the same PLCC pin-count of devices, especially for 28-pin devices, because of
the different location of the four no-connect pins for the 24-pin DIP equivalent of
devices.
One thing to watch out for when using non-Advin PLCC adapters is that they may not
always work, particularly for high speed, CMOS or otherwise sensitive devices, due to
improper layout or extra long lead lengths.
PX Modules From Advin
The PX-series of PLCC modules made by Advin offer several advantages over those
mentioned above. They are more rigidly mounted as they make use of the special side
connector instead of the ZIF socket. They also offer a more reliable connection than
going through the ZIF socket.
Most important of all, this PX modules make use of software mapping instead of
hardware mapping. Therefore, for example, one PX28 supports as many 28-pin PLCCs
as five or more Emulation Technology types.
Using PX Modules on PILOT-Uxx, PILOT-Uxx-Plus, PILOT-MVP, & PILOT-146
These machines automatically sense the presence of the PX modules. The software will
automatically select PLCC if the appropriate PX module is present. Similarly for PGA
modules or QFP modules. If no such modules are present, the software automatically
selects DIP. (Therefore, DIPs cannot be used if PLCC modules are installed.)
57
USING PLCC DEVICES
Using PX Modules on PILOT-14x (excluding PILOT-146) and PILOT-Gxx
These machines cannot sense the presence of PX modules. Therefore you have to tell the
software whether you are programming PLCCs or DIPs. This is done through the
/Configure Others command. Normally, all you have to do is select either DIP or PLCC.
The only exception is when you are using an older PLCC pin-out called NL. For these
devices, they are usually marked clearly as NL on the packaging. (For example,
PAL20L8 from AMD comes in both the FN and NL versions, with the FN version as the
newer and more common version. When using PAL20L8 FN, select "PLCC". When
using PAL20L8 NL, select "PLCC-NL".)
10.2 COMPLEX PLDS
With some exceptions, many complex logic devices are supported by specific PLCC,
QFP or PGA add-on socket modules called AM Modules.
10.3 INSTALLING OR REMOVING ADD-ON MODULES
When using DIP packages, add-on modules such as PX modules or AM modules should
be removed.
Add-on modules can be installed or removed with the programmer power in the OFF or
ON position, as there is no active logic within these modules.
10.4 ORDERING INFORMATION FOR SOCKET MODULES
Advin makes socket modules to support a wide variety of device packages. In almost all
cases, these modules are more flexible, reliable and lower cost than adapters which are
available from third party adapter suppliers. Please check with your local Advin
distributor or the factory for the availability of these modules.
58
SET/GANG PROGRAMMING
11. SET/GANG PROGRAMMING
At the publication time of this manual, the following devices can be set or gang
programmed:
EPROMs, EEPROMs and FLASH EEPROMs.
For more details, please refer to the Supported Devices List at the end of this manual,
which will be kept more up to date as new devices are added.
11.1 EQUIPMENT
Set/gang programming is supported by the PILOT-8xx or PILOT-9xx series multi-site programmers. In
addition, you can do set/gang programming on single-site PILOT programmers with add-on set/gang
modules called GM modules. These GM modules plug on top of the single-site programmers via the 50pin header.
The following table lists what additional GM modules to use when programming different types of memory
or micro controllers.
Set/Gang
E/EPROM
Programmers
28-pin to
32-pin DIPs
40-pin DIPs
32-pin
PLCCs
PILOT-143,
PILOT-144,
PILOT-145,
PILOT-156,
PILOT-MVP,
PILOT-U40,
PILOT-U84,
PILOT-U44+,
PILOT-U84+,
PILOT-U128+
PILOT-832D or
PILOT-932D
PILOT-840D
GM-832D or
GM-932D
GM-840D
GM-832C or GM-844C
GM-932C
(As is)
GM-840D
GM-832D or
GM-932D
GM-832D or
GM-932D
GM-832D or
GM-932D
(As is)
GM-832C or GM-844C
GM-932C
GM-832C or GM-844C
GM-932C
(As is)
GM-844C
PILOT-832C or
PILOT-932C
PILOT-844C
GM-840D
GM-840D
GM-832C or
GM-932C
44-pin
PLCCs
40-pin, 48pin, 56-pin
TSOPs,
PSOPs,
uBGAs
GM-832D or
GM-932D
with AG
modules
AG modules
(As is)
Of special note is that PILOT-832D or PILOT-932D supports both 28 and 32 pin devices, including
EPROMs, EEPROMs and FLASH EEPROMs. PILOT-840D only supports 40-pin EPROMs, EEPROMs
and FLASH EEPROMs. It does not support 32-pin devices.
The 832 models support regular +5v parts and a limited number of low voltage devices. The 932 models
support all low voltage devices as well as +5v devices.
59
SET/GANG PROGRAMMING
All PLCC modules come with the clam-shell type of test sockets made by Yamaichi.
11.2 INSTALLATION
GM modules should be removed or installed with the base programmer in the power
OFF position. Care should be taken when plugging in the GM module. The pins should
align with the 50-pin header. If they do not align well, the red LED on the GM module
will not come on when the power switch is flipped to the ON position.
11.3 SET AND GANG MODES
Set programming means you are programming a set of devices, with different data going
into each device. That is, the device in socket n will be getting data from buffer n.
Gang programming means you are programming a number of devices, all using data from
buffer 0.
PILOT-832 and PILOT-932 models can handle set or gang programming involving all 8
sockets.
PILOT-840D and PILOT-844C can support gang programming on all 8 sockets.
However, if set programming is done, they can only support 4 sockets, using the even
numbered sockets. Therefore, during a /File Load, if there is data for more than one
buffer, the data will be loaded only to the even numbered buffers.
11.4 GANG PROGRAMMING EXAMPLES
Starting from a master device
a. Insert master device into socket 0.
b. Do /BL0 (/Buffer Load 0)
c. Remove master device, insert as many blank devices as you want into the eight
sockets.
d. Do /PPG (/PROM Program Gang)
Data from buffer 0 will then be used to program the devices which are present in the
sockets.
Starting from a data file
a. Select file name using the /File Directory or the /File Name command.
b. Do /FL0 (/File Load 0)
c. Insert as many blank devices as you want into the eight sockets.
60
SET/GANG PROGRAMMING
d. Do /PPG (/PROM Program Gang)
Data from buffer 0 will then be used to program the devices which are present in the
sockets.
11.5 SET PROGRAMMING EXAMPLES
Starting from a master set
PILOT-832 and PILOT-932:
a. Select set-size using /Configure Setsize n.
a. Insert n master devices into socket 0.
b. Do /BLS (/Buffer Load Set)
c. Remove the n master devices, insert n blank devices into the sockets.
d. Do /PPS (/PROM Program Set)
Data from corresponding buffers will then be used to program the devices which are
present in the sockets.
PILOT-840D and PILOT-844C:
a. Select set-size using /Configure Setsize n. n must not be greater than 4.
b Insert n master devices into the even numbered sockets.
c Do /BLS (/Buffer Load Set)
d Remove the n master devices, insert n blank devices into the even numbered sockets.
e Do /PPS (/PROM Program Set)
Data from corresponding buffers will then be used to program the devices which are
present in the sockets.
Starting from a data file
PILOT-832 and PILOT-932:
a. Select set-size using /Configure Setsize n.
b. Do /FLS (/File Load Set).
If you have used /Configure Width 1, data will be loaded into buffer 0, then buffer 1,
then buffer 2, etc. (no split)
If you have used /Configure Width n, where n=2, 4 or 8, data will be split to
different buffers as it is loaded.
c. Insert n blank devices into the sockets.
d. Do /PPS (/PROM Program Set)
61
SET/GANG PROGRAMMING
Data from corresponding buffers will then be used to program the devices which are
present in the sockets.
If your setsize of n is, say, 4, you can program two sets of 4 devices at the same time.
To do this, you can invoke the /Buffer Duplicate Set command after file load is done.
Then increase setsize to 8. Then you can program 8 devices.
For PILOT-840D and PILOT-844C, the operation is similar, except that n must not be
greater than 4 and only even sockets can be used.
62
SET/GANG PROGRAMMING
APPENDIX A. BRIEF DESCRIPTION OF THE INTEL HEX FORMAT
The HEX file format was developed by Intel Corporation for storing absolute data files
and program files on a disk file. It consists of a series of records, each of which contains
either data or address specification for data that follows. The last record in a file is an
end of file record.
The general record format is:
# of characters:
Contents:
1
2
Record
":"
character Length
4
2
Variable
Load
Record Data
Address Type
2
Check
sum
where Record Type is:
00 = Data Record
01 = EOF
02 = Extended Segment Address Record
03 = Start Segment Address Record
04 = Extended Linear Address Record
05 = Start Linear Address Record
Checksum calculation: when all bytes in the record (excluding the ":" record mark, but
including the checksum itself) are added up, the result shall be zero.
Data Record:
# of characters:
Contents:
1
2
Record
":"
character Length
4
2
Load
"00"
Address
Variable
Data
2
Check
sum
This record contains the actual data bytes. The Record Length field specifies the number
of data bytes in the Data field. The absolute address of each data byte is = (Segment
Address) * 16 + Load Address.
End of file Record
# of characters:
Contents:
1
2
"00"
":"
character
4
2
"0000"
This record signifies the end of the HEX file.
63
"01"
2
Check
sum
SET/GANG PROGRAMMING
Extended Segment Address Record:
# of characters:
Contents:
1
2
"02"
":"
character
4
2
"0000"
"02"
4
Segment Address
2
Check
sum
4
CS
Address
2
Check
sum
Segment Address is the upper 16 bits of a 20 bit address.
Start Segment Address Record
# of characters:
Contents:
1
2
"04"
":"
character
4
2
"0000"
"03"
4
IP
Address
This record specifies the execution start address. It could appear anywhere in a HEX file.
It is not always present.
Extended Linear Address Record:
# of characters:
Contents:
1
2
"02"
":"
character
4
2
"0000"
"04"
4
ULBA
2
Check
sum
ULBA stands for Upper Linear Base Address, which is the upper 16 bits of a 32 bit
address.
Start Linear Address Record
# of characters:
Contents:
1
2
"04"
":"
character
4
2
"0000"
"05"
4
EIP
2
Check
sum
This record specifies the execution start address. The value given is the 32-bit linear
address for the EIP register of the 80386.
64
SUPPLEMENT 1: SPECIFIC DEVICE NOTES
PILOT Programmers User's Manual
Supplement
SUPPLEMENT 1. SPECIFIC DEVICE NOTES
1.1 BLANK CHECKS
LOGIC DEVICES
Some logic devices, in particular bipolar devices, have their fuses in a closed or 'X' state
when blank. Some logic devices, especially electrical erasable ones, have blank state as
open or '-'.
In either case, when you do a blank check using the /PB (Prom Blankcheck) command,
software will take care of the differences.
A case where software cannot tell if a device is truly blank or not is when the security device has been
programmed. In this case, some devices will have all 'X's whereas others have all '-'s. Still, some others
will have mixed groups of both.
MEMORY DEVICES
Most memory devices have FFs as the blank state. Some PROMs and microcontrollers
have 00s as the blank state. (Examples of devices which have 00s as the blank state:
bipolar PROMs, 8748 family of micros.)
To be noted is that some devices do not have a specific state as blank. An example is
certain PROMs from Cypress. These devices use "differential" cells. They can still be
blank checked by the /PB command as software will know how to figure out whether
they are indeed blank or not. However, if you use the /PE (PROM Examine) command,
you will see neither all FFs nor all 00s, but rather some patterns of data which could be
different each time you examine them.
1.2 (RESERVED FOR FUTURE ADDITION)
65
SUPPLEMENT 1: SPECIFIC DEVICE NOTES
1.3 ALTERA EPLDS
EP330
To maintain compatibility between EP330 and EP320, the newer EP330 uses the same
number of fuses for the fuse map. However, fuses 2592 to 2879 are actually not used.
Therefore a /PAL Examine after programming will show different fuse patterns for those
fuses, as compared with the /Buffer Edit command.
Also, /PAL Checksum will be different from /Buffer Checksum if an older EP320 fuse
file is used to program an EP330.
EP610-T
The one-time-programmable EP610-T, as it comes from the factory, has its last two fuses
(turbo fuses) already programmed. Therefore, if you are using a fuse file which specifies
non-turbo (last two fuses not to be programmed), you will get a different value between
/Buffer Checksum and /PAL Checksum.
EP1810-T
The same note for EP610-T applies to EP1810-T.
66
SUPPLEMENT 1: SPECIFIC DEVICE NOTES
1.4 ALTERA EPM5000 DEVICES
The following exceptions to normal placement of devices applies only to PILOT-U40 and
PILOT-U84 because of hardware limitations with these models. Newer models (PILOTMVP, PILOT-U44+, PILOT-U84+ and PILOT-U128+ do not need special placement of
devices as stated below.
EPM5016 DIP
This device should be inserted into the ZIF socket with pins offset by 2. That is, pin 1 of
device should be at pin 3 of ZIF.
EPM5016 PLCC
This device is supported by the PX20 PLCC module. However, when inserting it into the
PX20 PLCC module, pin 1 of the device should face the operator. (That is, DO NOT
follow the silk-screen as printed on the PX20 module. The common convention with
other PLCC devices is having pin 1 facing away from the operator.)
EPM5032 PLCC
This device is supported by the PX28 PLCC module. However, when inserting it into the
PX28 PLCC module, pin 1 of the device should face right. (That is, DO NOT follow the
silk-screen as printed on the PX20 module. The common convention with other PLCC
devices is having pin 1 facing away from the operator.)
67
SUPPLEMENT 1: SPECIFIC DEVICE NOTES
1.5 ALTERA EPM7000 DEVICES
Programming an “old” device that contains a new die
If you are using Altera EPM7000 series of devices, it would be a good idea to keep your
Advin software up to date by downloading it from our web site, at least once a year. The
reason is that Altera changes dies every two years or so in order to improve speed and
lower costs. Often, these new dies require different programming algorithms. If you are
using old software, it may not recognize the new dies.
For example, the EPM7128 device has evolved from 7128 to 7128E to 7128S. A device
marked as EPM7128S would contain the newest 7128S die. However, a device marked as
EPM7128E may also use the new 7128S die. Therefore, even if you think you are still
programming an EPM7128E, you may be actually programming an EPM7128S. That is
why if your existing Advin software cannot program a new batch of EPM7000 series of
devices, you may need to download the current software from the Advin web site (at
www.advin.com).
In many cases, the new dies may have different number of fuses than the old dies. When
that happens, the Advin software is smart enough to translate the older data file into the
one needed by the new die. Therefore, when you program a device marked as
EPM7128E but contains an EPM7128S die, you do not need to obtain a new POF file.
You can stay with the original one (still use EPM7128E as the device selection) and the
Advin software will do the forward translation for you, automatically. As far as you are
concerned, nothing seems to have been changed.
The above example between the 7128E-to-7128S conversion applies also to 7128-to7128E conversion and 7128-to-7128S conversion.
Considerations about checksums (programming a new device with an old POF file)
The above article talks about, say, using a 7128E POF file to program a device marked as
7128E (and using 7128E as the device selection).
What about using a 7128E POF file to program a 7128S device (and, of course, using
7128S as the device selection)? (That is, programming a new device with an old POF
file)
If you are using a data file as the source of data, nothing seems to have changed: you can
use your old POF file, Advin software does the translation for you, and you still get the
same checksum as before.
That is, when you load the 7128E POF file, Advin software knows that you are using the
7128S to emulate a 7128E, and displays the 7128E checksum (because that is the
checksum which you’ve got used to all the time.)
68
SUPPLEMENT 1: SPECIFIC DEVICE NOTES
Now, say, if you call up the software the next day, and use /Buffer Load to read from the
device (without doing a /File Load first), you’ll notice a different checksum being
displayed for the device. This checksum is the checksum of a 7128S device. This is
because it is marked as such and you are selecting a 7128S. Without a prior /File Load,
the software would not know that the 7128S is actually emulating an older die (7128E).
.
69
SUPPLEMENT 1: SPECIFIC DEVICE NOTES
1.6 AMD FLASH WITH SECTOR-PROTECT FEATURES
AMD 29F010, 29F040 and other similar devices from AMD
These devices have sector protection features and PILOT software provides you with
convenient ways to make use of them.
The command to use is /Extended Specific-configuration (/ES). When this command
is invoked, you will be prompted with the following:
Enter 0 to 7 to specify a sector to be protected;
[A] to protect all sectors;
[D] to unprotect all sectors;
[Q] to query current device state.
[ESC] when done
Choice:
Since this command will stay in the loop until you hit the [ESC] key, you can, for
example, type "167" to protect sectors 1,6 and 7. The software immediately protects each
sector as the number for that sector is typed, and will always display all the currently
protected sectors. To protect all sectors or unprotect all sectors, use the [A] or [D] key.
[Q] simply reports the current protection state of the device. This /ES command can be
invoked before or after a device is programmed. Of course, if you want a certain sector
to be programmed, then you should protect it after the programming operation and not
before.
PILOT-Uxx models support all the protect/unprotect features in these devices. Other
models may not provide all the protect/unprotect functions. Support details are as
follows:
29F010
Universal
Programmers
Programming
Sector Protect
Sector Unprotect
Yes
Yes
Yes
29F040
Universal
Programmers
Programming
Yes
Universal
programmers
with
Gang Module
Yes
Yes
No
Universal
programmers
with
Gang Module
Yes
70
PILOT-143
to
PILOT-145
Yes
No
No
PILOT-143
to
PILOT-145
Yes
PILOT-8xx,
PILOT-9xx, or
PILOT-14x with
Gang Module
Yes
Yes
No
PILOT-8xx,
PILOT-9xx, or
PILOT-14x with
Gang Module
Yes
SUPPLEMENT 1: SPECIFIC DEVICE NOTES
Sector Protect
Yes
Yes
No
No
Sector Unprotect Yes
Yes (Note1)
No
No
(Note 1: except 29F040s made before March 1995 which are non-FASL devices)
When Gang Modules are used, protect/unprotect applies to all devices in the
programming sockets. For example, hitting '1' protects sector 1 of all devices in the
programming sockets.
[Q], the Query option, reports protection status of all individual devices, which may or
may not be the same. Thus, if you have 8 devices with different sectors protected, the
s/w will reports them properly.
71
SUPPLEMENT 1: SPECIFIC DEVICE NOTES
1.7 AMD PALCE 16V8, 20V8
These devices are like the GALs. They can also be used to emulate standard PALs (i.e.
cross-programmed as PALs)
S/W spGAL, which handles cross-programming, should be used to program these
devices.
Since RAL is a trade mark of Lattice, AMD elects to use "16V8-AS-16R4" as a type
selection instead of "RAL16R4" on the S/W screen. Similarly for other emulated types.
Please refer to section Supplement 1.9. Discussions on GAL 16V8 and 20V8 can be
applied to PALCE 16V8 and 20V8.
JED files can be used interchangeably between the GAL and PALCE devices, as far as
the 16V8 and 20V8 types are concerned.
72
SUPPLEMENT 1: SPECIFIC DEVICE NOTES
1.8 CYPRESS DEVICES
CYPRESS MAX: CY7C344 PLCC
This device is supported by the PX28 PLCC module. However, when inserting it into the
PX28 PLCC module, pin 1 of the device should face right. (That is, DO NOT follow the
silk-screen as printed on the PX20 module. The common convention with other PLCC
devices is having pin 1 facing away from the operator.)
CYPRESS PROMs: 7C245, 7C271, 7C281, 7C291
These and some other Cypress PROMs use differential cells. Please see section
Supplement Section 1.1 on "BLANK CHECKING FOR MEMORY DEVICES".
CYPRESS PROMs: 7C270, 7C276
Bytes 8000H to 8001H in the buffer correspond to word location 4000H of these
devices. This is the control word.
The format of the control word can be found in the Cypress Data Book and is briefly
shown here:
Location 8001H
Location 8000H
Bit 7
Bit 0
Bit 7
XX CS2 CS1 CS0 XX XX XX XX XX XX XX XX 1
Bit 15
Bit 0
of control word
of control word
Bit 0
XX XX OE
Data for the control word can be automatically loaded from the data file (if the data file
does specify its contents), or manually changed by the /Buffer Edit command.
73
SUPPLEMENT 1: SPECIFIC DEVICE NOTES
1.9 GAL 16V8, 20V8
These devices are manufactured by Lattice, National, and SGS. Because these devices
can emulate PALs (or, in other words, cross programmed as PALs), they are supported
on PILOT programmers by a special S/W package spGAL.
BLANK STATES
Unlike PALs, a virgin GAL (or erased GAL) shows all fuses as '-' on the screen. That is,
all fuses are in the open state.
RAL
Lattice uses the term RAL (Re programmable Array Logic) to refer to emulation of
standard PAL devices by GALs. A RAL is not a separately distinct device. It stands for
an emulation type.
For example, if you want to emulate a PAL16R4 by a GAL16V8, select RAL16R4 as the
device type on the PILOT S/W screen instead of GAL16V8.
When a RAL device type is selected, the software automatically configures the
architectural control fuses in the GAL so that the device will look like a standard PAL
after it is programmed.
In the RAL mode, both the architecture control fuses and the user electronic signature are
hidden from the user. That is, commands such as /Buffer Fill Fuse and the /Buffer Edit
Fuse affect only array fuses and not architectural fuses, which will be automatically
configured by the PILOT S/W..
In the GAL mode, however, all fuses, including both the architectural and signature
fuses, can be viewed or edited by the user.
PROGRAMMING EXAMPLES
Starting from a GAL data file
If you compiled your logic equations with GAL selected as the target device, then your data file is a GAL
data file. To program a GAL, simply select the appropriate manufacturer and GAL type, such as Lattice
GAL16V8, then load your file and program.
Starting from a PAL data file
Assuming you have, say, a data file for PAL16R6 and you want to use a Lattice
GAL16V8 to emulate the PAL16R6.
74
SUPPLEMENT 1: SPECIFIC DEVICE NOTES
You simply need to select Lattice RAL16R6, load your data file and program. With the
RAL16R6 selection, the software knows that you have a data file with 16R6 patterns, and
automatically configures the GAL16V8 architectural fuses to emulate a PAL16R6.
Starting from a PAL device
Assuming you have, say, a physical AMD PAL16R6 and you want to duplicate the logic
functions into a Lattice GAL16V8.
You'll need to use spPAL (on a universal programmer such as a PILOT-Uxx, and not on
a dedicated programmer such as a PILOT-Gxx) to read the AMD PAL16R6, save the
fuse data into a PAL data file, then use the previously described procedure to program a
GAL. (i.e. you'll be starting from a PAL data file).
DEVICE TYPE SELECTION
Different device suffix types can be programmed using the standard selection. For
example, GAL16V8A, GAL16V8B, as well as the -7 and -5 versions can be all
programmed or read using the GAL16V8 selection. There is electronic device ID in the
device for the S/W to know what device is being handled, even though they all need
different programming algorithms.
ERASING A GAL DEVICE
When the /PAL Program command is issued, the GAL is automatically erased prior to
programming. Therefore the /PAL eRASE command is not needed before you program
the device. This command is included in case you do want to erase a GAL but do not
want to program it with any data.
75
SUPPLEMENT 1: SPECIFIC DEVICE NOTES
1.10 MICROCHIP PIC MICRO CONTROLLERS
PILOT programmers support the full range of micro controllers made by Microchip.
For DIP packages, no adapters are required on the universal programmers such as
PILOT-MVP, PILOT-U44+, PILOT-U84+ and PILOT-U128+. For other packages or if
the PILOT-14x programmers are used, you can find the required adapters in the
Supported Devices List at the end of this manual.
Gang modules are also available if you need to mass program these devices. At press
time, GM-PIC18D, GM-PIC28D, GM-PIC18S, GM-PIC28S are available for
programming 18-pin and 28-pin PICs in DIP and SOIC. For an updated list of available
gang modules, please call the factory at 408-243-7000 or visit www.advin.com.
DATA FORMAT
1. Since these devices have either 12-bit or 14-bit wide data, each word occupies two
bytes and therefore two address locations in the standard Intel hex format data files.
Likewise, under the /Buffer Edit operation you will see each word as two bytes.
2. In the /Buffer Edit screen, the low order byte of a word is displayed first, following by
the high order byte. That is, an empty buffer looks like:
FF
0F
FF
0F
.....
or FF
3F
FF
3F
.....
MEMORY MAP
Besides the regular data memory area, PIC devices have user id words, configuration words, and unused
areas. The locations of these will be displayed by the software when you hit the F1 key.
CONFIGURATION WORD
Bits in the configuration word will be set appropriately when the data file is loaded with the /FILE Load
command.
But if your data file does not specify how these bits are to be set, you can set it conveniently with the
/Extended-command Specific-configuration (or /ES) command.
If you are reading from a master device and saving to a data file, all the configuration data will be read
from the master by the software and saved appropriately by the software into the data file. Therefore the
next time you need to program a device, you do not have to enter the configuration bits.
76
SUPPLEMENT 1: SPECIFIC DEVICE NOTES
SETTING THE SECURITY BIT IN THE DATA BUFFER
There are three ways to set the security bit in the data buffer:
Method 1: when a data file is loaded using the /File Load command.
Method 2: setting it when the general command /Configure Security Yes.
Method 3: setting the security bit with the /ES command.
The first two commands are generally true for all PIC or non-PIC devices. The third one is there for the PIC
devices because the security bit (or bits) happens to be also part of the configuration bit of a PIC device.
If the security bit is set in the data buffer, you’ll be able to see “Security: YES” displayed at the bottom
part of the screen. Otherwise “Security: No” is displayed.
If the security bit is set in the data buffer, subsequent programming operations as invoked by /PROM
Program will program the device, verify it, then secure it. After the operation is completed, a secured
device will fail any subsequent manually invoked verify operations.
SETTING THE SECURITY BIT IN THE DEVICE (i.e. securing the device)
A /PROM Program command will automatically secure a device (after the programming pass and verify
pass have been successfully completed) if the security bit it set in the data buffer. Or, if you just want to
secure a device which has been programmed before, you can invoke the /PROM Secure command, which
will just do the securing without programming.
77
SUPPLEMENT 1: SPECIFIC DEVICE NOTES
1.11 MOTOROLA MICROS
68HC11A1, 68HC11A8, 68HC11E1
Programmable areas:
Config Byte (EE)
EEPROM bytes
EPROM bytes
Address range
103F
B600-B7FF
None
Due to specific device design, following functions cannot be supported by this device:
PROM Examine
The following are possible error messages which can be encountered when using these
devices:
1.
***** Device Not Responding
This happens when there is no device in the programming socket, or when one or
more signal pins are not making good contact with the porgramming socket.
This error is reported because the programmer cannot communicate properly with
the
device. (Unlike other devices, disabling the continuity check and the reverse
device detection functions would not make the software to ignore the fact the the device
is
not there.)
2.
***** Module Not Responding
back
Something is wrong with the addon module. The addon module should be sent
to the factory for repair after consultation with Technical Support.
78
SUPPLEMENT 1: SPECIFIC DEVICE NOTES
68HC11D3
Programmable areas:
EEPROM bytes
EPROM bytes
Address range
None
F000-FFFF
(note1)
Note 1:
For software versions before 10.78F: buffer address range is 0-FFF. That is, address 0 in
the data buffer corresponds to address F000 of the device. Subsequently, you have to
locate your data file within buffer addresses 0-FFF. (i.e. you may need to invoke the
command /File Address F000 before you invoke the /File Load command.)
For software versions of 10.78F and later: buffer address corresponds directly to device
address. That is, data from buffer address F000 will go to device address F000. If your
data file is in the HEX or S-record format, and if it has the proper address markers, then
you do not have to use the /File Address command when you do /File Load. Data will
be loaded automatically into the proper locations in the buffer, ready for programming.
68HC11E9
Programmable areas:
Config Byte (EE)
EEPROM bytes
Address range
103F
B600-B7FF
68HC11F1
Programmable areas:
Config Byte (EE)
EEPROM bytes
EPROM bytes
Address range
None
FE00-FFFF
None
Due to specific device design, following functions cannot be supported by this device:
PROM Examine
79
SUPPLEMENT 1: SPECIFIC DEVICE NOTES
68HC705B5
Required module:
Required module
/Buffer Load
supported
PILOT-U84,U84+,U128+
AM-B6
Yes
PILOT-U40,U44+,145
AM-B6
No
Programmable areas:
Config Byte (EE)
EEPROM bytes
Address range
103F
B600-B7FF
During programming, unused locations will be automatically skipped. Automatic verify
will be done after programming.
Due to specific device design, following functions cannot be supported by this device:
PROM Examine
68HC705B16
Required module:
Required module
/Buffer Load
supported
PILOT-U84,U84+,U128+
AM-B6 or AM-B6Q
Yes
PILOT-U40,U44+,145
AM-B6 or AM-B6Q
No
Programmable areas:
EPROM bytes
EEPROM bytes
EPROM bytes
Address range
20-4F
100-1FF
0300-3FFF
After this device is selected, EPROM bytes in the data buffer will be initialized to 00s
and EEPROMs in the data buffer will be initialized to FFs. In this way, if a partial data
file is loaded into the buffer area, unspecified locations will be left at their corresponding
erased state and will not be programmed.
During programming, unused locations will be automatically skipped. Automatic verify
will be done after programming.
Once the device has been programmed, the device will not allow anymore programming
or erase operations to be done. (To be more specify, a device with non-blank EPROM
locations will not allow any programming to be done to it.)
80
SUPPLEMENT 1: SPECIFIC DEVICE NOTES
Due to specific device design, following functions cannot be supported by this device:
Buffer Load, PROM Examine, PROM Checksum, PROM Verify
81
SUPPLEMENT 1: SPECIFIC DEVICE NOTES
68HC705B32
Required module:
Required module
/Buffer Load
supported
PILOT-U84,U84+,U128+
AM-B6 or AM-B6Q
Yes
PILOT-U40,U44+,145
AM-B6 or AM-B6Q
No
Programmable areas:
EEPROM bytes
EPROM bytes
Address range
100-1FF
0400-7FFF
After this device is selected, EPROM bytes in the data buffer will be initialized to 00s
and EEPROMs in the data buffer will be initialized to FFs. In this way, if a partial data
file is loaded into the buffer area, unspecified locations will be left at their corresponding
erased state and will not be programmed.
During programming, unused locations will be automatically skipped. Automatic verify
will be done after programming.
Once the device has been programmed, the device will not allow anymore programming
or erase operations to be done. (To be more specify, a device with non-blank EPROM
locations will not allow any programming to be done to it.)
Due to specific device design, following functions cannot be supported by this device:
Buffer Load, PROM Examine, PROM Checksum, PROM Verify
82
SUPPLEMENT 1: SPECIFIC DEVICE NOTES
68HC711E9
Programmable areas:
Config Byte (EE)
EEPROM bytes
EPROM bytes
Address range
103F
B600-B7FF
D000-FFFF
(note1)
68HC711K4
Programmable areas:
EPROM bytes
Address range
A000-FFFF
Since the programmer uses "prog mode" to program the 711K4, following "mask sets" or
die revisions of XC68HC711K4 cannot be programmed because "prog mode" does not
work on them:
C87R, C93W, D26A, D67F
Following "mask sets" can be programmed (i.e. "prog mode" is known to work on these
devices, per Motorola):
D18H, D35T, E53K
"Mask sets" are indicated by two means:
A.
On newer devices, such as E53K, the marking of "E53K" is on the device,
immediately under the XC68 device type.
B.
On older devices, such as C93W and D67F, the marking is NOT on the
device.
They can be found only on the die. A 100X to 300X power
hobbyist microscope
can be used to see these numbers right in the middle of the die.
Please let us know if you are using XC68HC711K4 with other "mask sets".
MC68HC711K4 devices, when they become available, should all support "prog mode"
and thus be programmable on programmers.
83
SUPPLEMENT 1: SPECIFIC DEVICE NOTES
68HC811E2
Programmable areas:
Config Byte (EE)
EEPROM bytes
EPROM bytes
Address range
103F
F800-FFFF
None
Due to specific device design, following functions cannot be supported by this device:
PROM Examine
84
SUPPLEMENT 1: SPECIFIC DEVICE NOTES
1.12 PHILIPS/SIGNETICS MICRO CONTROLLERS
87C751, 87C752
These devices contain both a normal "code" array and an "encryption array".
The default is to program the code array.
To select the encryption array, use the command /Extended_command Cell_type
Encryption (i.e. /ECE). To switch back to the code array, use /Extended_command
Cell_type Encryption (i.e. /ECC).
The /PROM Secure command programs both "security 1" and "security 2" bits. Please
refer to Philips/Signetics Data Books for the meanings of these bits.
85
SUPPLEMENT 1: SPECIFIC DEVICE NOTES
1.13 SERIAL PROMs
8-pin serial PROMs such as those from Xilinx, National and AT&T are supported on all
machines. The software module to be used is spSPROM.
PILOT-U44+, PILOT-U84+, PILOT-U128+, PILOT-MVP
Serial PROMs can be programmed on these machines with no need for special adapters
or placement.
PILOT-Uxx
Instead of top-alignment, the device should be inserted into the 40-pin ZIF socket with
pins 1-4 of the ZIF socket empty. That is, the device should be offset by 4 pins when
placed into the ZIF socket.
For convenience in alignment, you may choose to put another 8-pin device at pins 1 to 4
of the ZIF socket and leave it there until you have finished programming all your 8-pin
serial PROMs. (No signals will go through this dummy 8-pin device during programmer
operations.)
PILOT-14x and PILOT-Gxx
Serial PROMs are supported on these machines with an adapter called AM-1736.
This adapter plugs into the 50-pin header. Serial PROMs can then be inserted into the
ZIF socket on this adapter, top aligned.
86
SUPPLEMENT 1: SPECIFIC DEVICE NOTES
1.14 XILINX and AT&T SERIAL PROMS
RESET POLARITY
There are two methods to specify whether the Reset Polarity fuse is to be programmed or
not. (For devices which do have that fuse. Devices such as 1736A do not has a Reset
Polarity fuse.) Both methods were implemented in S/W versions 10.71 and later. Only
the second method was implemented in older software versions.
METHOD 1: Using the /Extended Specific-config command (/ES)
This command should be used after the data file is loaded into the buffer.
In the buffer, there is an extra byte at the end which specifies whether the Reset Polarity
fuse is to be programmed. (i.e. the buffer has one more byte than the number of bytes
available in the actual device. For example, on a 1765D, the Xilinx compiler generates
data for addresses 0-1FFF. But the Advin buffer has address space of 0-2000.)
When this byte is FF, the Reset Polarity fuse will not be programmed during the
programming operation. (i.e. the reset polarity will be left in its default state.) When this
byte is 0, the fuse will be programmed and the Reset input pin of the device will have
polarity reversed.
The /Extended Specific-config command allows you to change this byte easily without
having to remember the address locations of this byte or the data value that needs to be
put in.
When the /Extended Specific-config command is invoked, the following will be
displayed, with the current selection high lighted:
Current selection:
P
Do pgm Reset Polarity
N
Do NOT pgm Reset Polarity (leave device in default state)
You can use the cursor keys to change the current selection. To exit, hit the ESC key.
The S/W will then put the appropriate data into the appropriate address in the buffer.
If you select to save the contents of the buffer into a data file, the complete Advin buffer
contents will be saved (i.e. Xilinx file plus one more byte). The next time you load this
data file, you will not have to go through the /ES command again, and the Reset Polarity
will be automatically programmed the way you have specified.
87
SUPPLEMENT 1: SPECIFIC DEVICE NOTES
METHOD 2: Changing the last byte in the data buffer.
You can directly change the last byte in the data buffer by using the /Buffer Edit
command. When this byte is FF, the Reset Polarity fuse will not be programmed during
the programming operation. (i.e. the reset polarity will be left in its default state.) When
this byte is 0, the fuse will be programmed and the Reset input of the device will be
reversed.
The address of this last byte is always automatically displayed when the /Buffer Edit
command is invoked. Or, for your convenience, they are:
1718D
1736D
1765D
17128
8DC
11B8
2000
4000
If you select to save the contents of the buffer into a data file, the complete Advin buffer
contents will be saved (i.e. Xilinx file plus one more byte). The next time you load this
data file, you will not have to go through the /ES command again, and the Reset Polarity
will be automatically programmed the way you have specified.
88
SUPPLEMENT 2: SUPPORTED DEVICES
SUPPLEMENT 2: SOFTWARE PROBLEM REPORT FORM
SPR -- Software Problem Report
Please fax to Advin at: (408) 736-2503
To allow us to accurately diagnose a problem and to serve you better, please fill out the first 2 sections and fax to us. If you are calling us,
please have all information available as indicated in those 2 sections. Our technical support staff can be reached by calling (408) 243-7000,
followed by selecting [3].
Tel: (
Name:
)
x
Fax:
Date of report:
Day of the wk: M T W R F
Company:
Product model: U44+, U84+, U128+, U28, U32, U40, U84,
MVP, 145, GCE,
____________
PX28, PX32, PX44, __________
Machine S/N:
832D, 832C, 932D, 932C,
Add-on modules present: UPA, USA, PX20,
Machine is under original 1-year warranty:
[ ]Yes
or: under extended Priority Maintenance Program: [ ]Yes
Module S/N:
[ ]No
[ ]No
IC Manufacturer: AMD, AT&T, Altera, Atmel, Catalyst, Cypress, Dallas, ICT, Intel, ISSI, Lattice, Microchip, Motorola,
Macronix, National, NEC, Philips , SGS, SST, Signetics, WSI, Xicor, Xilinx, Winbond, Zilog, or:
Device type: (27C010, PALCE22V10, etc):
Device is [
] OTP
[
] UV
Device package: DIP, PLCC, TSOP, PSOP, SOIC, QFP, TQFP, PQFP, PGA, uBGA, FBGA, or:
*** Software version # (at lower right hand corner of screen) (very important):
EID (electronic ID, if applicable, at lower part of screen):
Problem is: [ ]consistent [ ]sometimes
Have you tried more than one device: [ ] no
[ ] yes
Description of problem:
*** Exact error message as it appears on screen (eg. Address=xxxx, buffer=xxxx, device=xxxx) (very important):
SPR part of \AD\FORMS\SPR.DOC 981020
89
SUPPLEMENT 2: SUPPORTED DEVICES
90
SCREEN DISPLAY
91