1
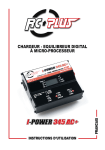
LEKTRON 45W CHARGER USER’S GUIDE
USER’S GUIDE
The Lektron 45W is a compact, high-performance, micro-processor controlled, fast
or slow charger with built-in lithium cell-balance circuitry. It is suitable for charging
Li-Ion, Li-Po, Li-Fe, Ni-MH, Ni-Cd and Lead Acid batteries from an 11 to 15V DC or
110-240V AC power source. With a maximum internal circuit power of 45W (35W
for Ni-Cd and Ni-MH) and a variable charge current of up to 4.5A , the Lektron
45W is a versatile and easy-to-use unit. The clear LCD screen shows all data and
is simple to use for selecting charge parameters.
The Lektron 45W includes a special multi-plug style balance adapter board to suit
most popular brands of Lithium batteries, AC and DC input power cords and a DC
output power cord with male T-connector.
1
LEKTRON 45W CHARGER USER’S GUIDE
table of contents
Service and Support...................................................2
Initial User Parameter Setup..........................10-11
Warnings and Safety Notes....................................3
Lithium Battery Charging..............................112-13
Package Contents........................................................4
Ni-Cd/Ni-MH Battery Charging....................14-15
Overview.......................................................................4-6
Pb (Lead Acid) Battery Charging.................15-16
Battery Charge Current Values..............................6
Process and Error Messages........................17-18
Connections....................................................................7
Blank Charging Data Sheet.................................. 18
Programming Flow Chart.........................................8
Warranty and Liability Information.................... 19
Navigating Charge and Setup Menus...............9
Warranty Service Information............................. 19
Quick-Start Charging Procedures........................9
service and support
If you should have trouble with any of the information listed in this User's Guide,
or if you require additional information or help with this product, please contact
Customer Service at the address below:
Global Services
18480 Bandilier Circle
Fountain Valley, CA 92708
Phone: (714) 963-0329
Fax: (714) 964-6236
Email: [email protected]
WARNING! PLEASE READ BEFORE USE!
Please read this entire User’s Guide prior to operating your new charger. It
contains all the information pertaining to your charger’s correct and safe use.
Using your charger as intended and in a safe manner will ensure your safety
and help prevent possible damage to your charger or batteries. Selecting the
correct parameters for your specific battery is the sole responsibility of the user.
Incorrect parameter selections or incorrect use can result in damage to your
batteries or to your charger.
The Lektron 45W Digital Charger is not intended for use by persons under 14
years of age, unless closely supervised by an adult. Before using your new
charger, read and understand the Warnings and Safety Notes section on the next
page. You should also read and understand any safety, warning and charging
information provided with your batteries.
Keep this User’s Guide in a safe place for future reference.
2
LEKTRON 45W CHARGER USER’S GUIDE
warnings and safety notes
These warnings and safety notes are important and must be followed closely.
Please abide by this information, and follow the instructions in this User’s Guide
closely for maximum safety, otherwise the charger and your battery may be severely
damaged. Failure to follow these instructions can also result in fire, injury to your
person or others, or loss of property.
•Only use the charger with the intended battery types. Do not attempt to charge
any other type of battery.
•Observe any cautions and warnings included with your battery. This is especially
true with Lithium batteries.
• Never leave the charger unsupervised when it’s connected to its power source.
If any malfunction is observed, immediately terminate the charging process.
•Keep the charger away from moisture, dust, dirt, heat, direct sunlight and
vibration. Do not drop it.
•The charger is designed to be powered by an 11 ~ 15V DC or 110 ~ 240V AC
power source only. Do not connect both at the same time!
•Double-check all connections prior to starting the charging process.
•The charger and the battery to be charged should be placed on a heat-resistant,
non-flammable and non-conductive surface. Never place them on a car seat,
carpet or similar. Blocking the vents on the bottom of the charger can cause
the charger to overheat, damaging the charger or even resulting in fire! Keep
flammable and volatile materials well away from the operating area.
•When charging Lithium batteries, we suggest using a charging safety bag,
available from most hobby retailers.
•Be sure to fully understand the information for the battery to be charged. If the
charging values are incorrect, the battery can be severely damaged. Incorrect
charging of Lithium batteries can cause a fire or explosion.
•Never charge a battery than appears damaged, and never charge a Lithium
battery that is swollen in any way.
•To avoid short-circuits between the output power adapter cord connectors,
always connect the adapter cord to the charger first and only then to the battery to
be charged. Reverse the sequence when disconnecting.
•Carefully verify the capacity and voltage of your Lithium battery before
charging it. It may be composed of mixed parallel and series connected cells.
In parallel, the capacity of the battery is multiplied by the number of cells in
parallel (2P means x2), but the voltage remains the same. The voltage imbalance
possible in parallel packs can cause a fire or explosion during the charging
process. We recommend using Lithium batteries in series cell format only.
3
LEKTRON 45W CHARGER USER’S GUIDE
PACKAGE contents
Before using your Lektron 45W Digital Charger, make sure that all the required
accessories are included. This is also a good time to become acquainted with
these various accessories.
•1 PC. Lektron 45W Digital Charger
•1 PC. AC Input Power Cord
•1 PC. DC Input Power Cord w/Two Plug-In Alligator Clips
•1 PC. Output Power Adapter Cord (4mm Banana to Male T-Connector)
•1 PC. Multi-Plug Balance Adapter Board w/Adapter Harness
overview
Use the information in this section to familiarize yourself with your Lektron 45W
Digital Charger.
Features
•AC/DC Power Input In a Compact and Lightweight Design
•Switching AC Power Supply Delivers up to 4.5 Amps of Charge Current
•Built-In XH Balance Port with Multi-Plug Balance Adapter Board
•Charges 1 to 4 Li-Ion, Li-Po or Li-Fe Cells or 1 to 10 Ni-Cd or Ni-MH Cells
•Charges Pb (Lead Acid) Batteries from 2 to 12 Volts
•Easy to Read LCD Screen Displays Voltage, Charge Current, Time & Capacity
•Custom CC/CV Algorithm Safely Charges Li-Ion, Li-Po and Li-Fe Batteries
•Precise Peak-Detection w/Auto-Trickle Charge for Ni-Cd and Ni-MH Batteries
•Push-Button Controls and Audible Tones for Easy Set Up and Control
•Solid State Reverse Polarity and Current Overload Protection
specifications
•AC Input Voltage: 110 ~ 240V
•Charge Safety Timer: 180 Minutes
•DC Input Voltage: 11 ~ 15V
• Ni-Cd/Ni-MH Peak Sensitivity: 8mV/5mV
•Charge Power Output: 45W*
•Lithium Balancing Accuracy: 5mV/Cell
•Charge Current: 0.1 ~ 4.5A
•Battery Capacity Range: 100 ~ 9900mAh
•Lithium Cell Count: 1 ~ 4S (Series)
•Dimensions: 4.3 x 3.2 x 1.5 Inches
•Ni-Cd/Ni-MH Cell Count: 1 ~ 10C
•Weight: 8.1 Ounces
•Pb Battery Voltage: 2 ~ 12V
*Ni-Cd/Ni-MH Charge Power Output = 35W. Higher capacity Ni-Cd and Ni-MH battery packs
will charge at a lower charge current than 4.5 amps. This is normal.
4
LEKTRON 45W CHARGER USER’S GUIDE
overview
inputs, outputs and function buttons
Input Power
110 ~ 240V AC
Power Outputs
LCD Screen
Input Power
11 ~ 15V DC
Balance Port
Type/Stop
Increase/Display
Decrease/Start
Input Power 110 ~ 240V AC:
Used to power the charger from a 110 to 240V AC power source, using the supplied
AC input power cord.
Power Outputs:
Used to charge Lithium, Ni-Cd, Ni-MH and Pb (Lead Acid) batteries, using the
supplied output power adapter cord. The power output sockets accept 4mm
banana connectors. Red is positive and black is negative.
LCD Screen:
Displays programming and process information in an easy to read format.
Input Power 11 ~ 15V DC:
Used to power the charger from an 11 to 15V DC power source, using the supplied
DC Input power cord and plug-in alligator clips.
Balance Port:
Used to plug the included balance adapter board into to balance charge 2 to 4S
Lithium batteries of varying brand and type.
Type/Stop Button:
Press to select the battery type and the charge current rate, and to manually stop
the charging process.
5
LEKTRON 45W CHARGER USER’S GUIDE
overview
inputs, outputs and function buttons, continued....
Increase/Display Button:
Press to select the battery type, increase programming values and select different
data to be viewed on the LCD screen.
Decrease/Start Button:
Press to decrease programming values and start the charging process.
battery charge current values
Recommended safe charge current values
C = X ÷ 1000 Where X = Battery Capacity (eg: 2200mAh, therefore, 1C = 2.20 amps charge current)
Ni-Cd/Ni-MH
Nominal Voltage Level: 1.2V/Cell
Recommended Fast Charge Current: 1C to 2C, depending on the
performance of the cell. Higher discharge batteries can charge at 2C.
Li-Ion
(Lithium Ion)
Nominal Voltage Level: 3.6V/Cell
Maximum Charge Voltage: 4.1V/Cell
Recommended Fast Charge Current: 1C or Less (0.5C recommended).
Li-Po
(Lithium Polymer)
Nominal Voltage Level: 3.7V/Cell
Maximum Charge Voltage: 4.2V/Cell
Recommended Fast Charge Current: 1C or Less. Some Li-Po cells can
be charged at 2C or more, but check with the battery manufacturer first.
If in doubt, charge at 1C.
Nominal Voltage Level: 3.3V/Cell
Maximum Charge Voltage: 3.6V/Cell
Li-Fe
(Lithium Phosphate) Recommended Fast Charge Current: 3C or Less. Check with the battery
manufacturer first.
Nominal Voltage Level: 2.0V/Cell
Maximum Charge Voltage: 2.46V/Cell
Recommended Fast Charge Current: 0.4C or Less
Pb
(Lead Acid)
battery pack nominal voltage values
Number of Cells
Li-Ion
Li-Po
Li-Fe
1 Cell
3.6V
3.7V
3.3V
2 Cells
7.2V
7.4V
6.6V
3 Cells
10.8V
11.1V
9.9V
4 Cells
14.4V
14.8V
13.2V
Ni-Cd/Ni-MH: Number of Cells x 1.20V (e.g. 8 Cells = 9.6V)
6
LEKTRON 45W CHARGER USER’S GUIDE
connections
Use the information in this section to connect your Lektron 45W Digital Charger
and battery. Failure to make these connections correctly can result in damage to
the charger and/or your battery.
connecting the Charger power Input
1) Connect the charger to its power source, using either the AC input power cord
or the DC input power cord and plug-in alligator clips. When connecting to a
DC power source, verify the polarity of the connectors carefully before plugging
the DC input power cord into the charger.
Do not plug both inputs into the charger at the same time! Use either an
AC power source or a DC power source. If using a DC power source from
your vehicle, do not start your vehicle before or during the charging process.
connecting the battery
1) Plug the output power adapter cord into the power outputs of the charger,
making sure to observe correct polarity.
2) Plug your battery into the output power adapter cord. Depending on the
connector type on your battery, you may need to use an adapter (available
separately) or change the connector on the output power adapter cord.
To avoid short-circuits between the output power adapter cord connectors,
always plug the output power adapter cord into the charger first and only
then to the battery to be charged. Reverse the sequence when disconnecting. If
you plug the battery into the output power adapter cord first and the output
power adapter cord connectors touch each other, power from the battery will
cause a short circuit, resulting in possible damage to your battery.
3) If you’re charging a 2 to 4S Lithium battery, plug the balance adapter board into
the balance port, then plug your Lithium battery’s balance connector into the
matching 2S, 3S or 4S balance port on the balance adapter board.
7
LEKTRON 45W CHARGER USER’S GUIDE
programming flow chart
Use this programming flow chart to familiarize yourself with the Lektron 45W Digital
Charger’s setup and charge programming menus.
8
LEKTRON 45W CHARGER USER’S GUIDE
navigating charge and setup menus
When the Lektron 45W Digital Charger is plugged in, the last menu you were in will
be displayed. To navigate through the various screens and make programming
selections, use the three buttons on the charger’s front panel.
name
function
Press and HOLD to move forward through the different Battery Type
menus and the Settings menu. From within a Battery Type menu or
the Settings menu, press to choose the desired charge current or
setup option. Press to stop the current charging process or cancel
an audible alarm.
Press and HOLD to move backward through the different Battery Type
menus and the Settings menu. From within a Battery Type menu
or the Settings menu, press to increase charge current or settings
option values. During Lithium battery charging, press to switch
between process views. After the charging process is complete,
press to scroll though various charging process information screens.
From within a Battery Type menu or the Settings menu, press to
decrease charge current or settings option values. Press and HOLD
to start the charging process. Press to cancel an audible alarm.
Quick-start charging procedures
We’ve provided this information to get you using the charger quickly, but, as always,
so that you completely understand how to use the charger, we suggest first reading
through the detailed charging sections for the battery type you’re charging.
1) Connect the charger to its power source.
2) Plug the output power adapter cord into the power outputs of the charger,
then plug your battery into the output power adapter cord.
3)If you’re charging a 2 to 4S Lithium battery, plug the balance adapter board into
the balance port, then plug your Lithium battery’s balance connector into the
matching 2S, 3S or 4S balance port on the balance adapter board.
4) Press and HOLD the TYPE button to choose the charge menu that matches the
battery type you’re charging
5) Press the TYPE button to view the Charge Current screen, then press the
INCREASE button to select the desired charge current for your battery.
6) Press and HOLD the START button to begin the charging process.
7) After the charging process completes, disconnect your battery from the charger,
then unplug the charger from its power source.
9
LEKTRON 45W CHARGER USER’S GUIDE
initial user parameter setup
Prior to using your charger, you should program and verify the user parameters
described in this section. For example, you might want to change the Key Beep
option or change the Capacity Cutoff or Safety Timer values.
1) Press and HOLD the STOP or DISPLAY buttons for
> 3 seconds to navigate to the SET menu.
1S
2S
3S
4S
set -
V
A
mAh
Time
Ni-cd and ni-mh sensitvity d.peak menu
This menu controls the trigger voltage for automatic charge termination of a Ni-Cd
or Ni-MH battery. The effective value ranges from 9mv to 20mV per cell. If the trigger
voltage is programmed higher, there is a danger of overcharging the battery.
If it is programmed lower, there is a possibility of premature termination. Please
refer to the technical specification for your battery to determine the setting to use.
1) From within the SET menu, press the TYPE button to
scroll to the NP: (SENSITIVITY D.PEAK) menu.
1S
2S
3S
4S
2) Press the INCREASE or DECREASE buttons to select
the desired voltage value, either DE or 10 to 20.
1S
2S
3S
4S
np:de
ca:50
V
A
mAh
Time
V
A
mAh
Time
3) Press and HOLD the STOP button for > 3 seconds return to the top of the SET menu.
•Sensitivity D.Peak values range from DE (Default 9mV) to 10mV to 20mV.
We suggest using the Default 9mV value for both Ni-Cd and Ni-MH batteries.
safety timer menu
This menu controls the charger’s safety timer. When you start the charging process,
the safety timer automatically starts running at the same time. The safety timer is
programmed to prevent overcharging the battery if the battery proves to be faulty, or
if the termination circuit cannot detect the battery as being fully charged. The value
for the safety timer should be generous enough to allow a full charge of the battery.
The value you program will differ based on the capacity of the battery you’re
charging and how many amps you’re charging it at. For example, if you’re
charging a 3000mAh Ni-MH battery at 3.0 amps, it will take approximately 1 hour
to charge, therefore, program the safety timer value to 2 hours.
1) From within the SET menu, press the TYPE button to
scroll to the SA: (SAFETY TIMER) menu.
10
1S
2S
3S
4S
sa:02
V
A
mAh
Time
LEKTRON 45W CHARGER USER’S GUIDE
initial user parameter setup
safety timer menu, continued....
2) Press the INCREASE or DECREASE buttons to select
the desired hour value, either OFF or 01 to 08.
1S
2S
3S
4S
sa:04
V
A
mAh
Time
3) Press and HOLD the STOP button for > 3 seconds return to the top of the SET menu.
•Safety Timer values range from OFF to 01 to 08 in hours. The default value is SA:02.
capacity cut-off menu
This menu controls the charger’s capacity safety cut-off value. This feature sets the
maximum charge capacity that will be supplied to the battery during charge. As
an extra measure of safety, if the delta-peak voltage is not detected or if the safety
timer fails for any reason, this feature will automatically stop the charging process
at the selected capacity value.
1) From within the SET menu, press the TYPE button to
scroll to the CA: (CAPACITY CUT-OFF) menu.
1S
2S
3S
4S
2) Press the INCREASE or DECREASE buttons to select
the desired mAh value x 100, either OFF or 01 to 99.
1S
2S
3S
4S
ca:60
ca:50
V
A
mAh
Time
V
A
mAh
Time
3) Press and HOLD the STOP button for > 3 seconds return to the top of the SET menu.
•Capacity Cut-Off values range from OFF to 01 to 99 in mAh x 100. For example,
a value of 50 = 5000mAh. The default value is CA:60.
We don’t recommend using a value that adds any more than 10% of your
battery pack’s capacity.
key beep menu
This menu controls the charger’s key press audio sound. This key beep audio can
be turned ON or OFF.
1) From within the SET menu, press the TYPE button to
scroll to the BE: (Key Beep) menu.
1S
2S
3S
4S
2) Press the INCREASE or DECREASE buttons to select
the desired key beep value, either ON or OFF.
1S
2S
3S
4S
be:on
be:of
V
A
mAh
Time
V
A
mAh
Time
3) Press and HOLD the STOP button for > 3 seconds return to the top of the SET menu.
•Key Beep values range from OFF to ON. The default value is BE:ON.
11
LEKTRON 45W CHARGER USER’S GUIDE
Lithium battery charging
The Lithium Battery Charging menu is suitable for charging Lithium batteries with
a nominal voltage of 3.3V (Li-Fe), 3.6V (Li-Ion) and 3.7V (Li-Po) per cell.
Lithium batteries are charged using the “Constant Current/Constant Voltage”
method (CC/CV). Constant current is delivered during the first part of the charging
process and once the battery reaches a pre-set voltage, constant voltage is applied
to the battery. As the battery’s voltage becomes equalized to the voltage on the
charger’s output, the charge current will steadily drop. When the current reaches
an approximate value of 1/10C, the charging process will end.
Prior to charging your Lithium battery you MUST first select the correct Lithium
Battery Charging menu for the type of Lithium battery you’re going to be
charging, either Li Po, Li FE or Li Io. This setting is very important, so make sure you
check your battery type carefully and select the correct charge menu.
If you select the incorrect charge menu, the battery can explode during the
charging process!
The procedure descriptions and menu screens shown in this section show charging
a Li-Po battery. The descriptions in this User’s Guide and the actual menu screens
on the charger may vary depending on what type of Lithium battery you’re charging.
Lithium battery balance charging
Balance charging balances the individual voltages of Lithium cells in the battery
to be charged. The charger will monitor the voltage of each cell in the battery and
control the charge current fed to each cell. This will normalize the voltage of all
cells in the battery and it will help to prevent over-charging of one or more cells. It’s
also possible to charge 1S Lithium batteries using only the output power adapter.
It is not recommended to charge a Lithium battery that is not wired for balancing.
Such types of batteries may have no means to protect the equipment or the
user from damage that could result from an overcharged cell in the battery pack.
This warning does not pertain to charging 1S Lithium batteries.
1) Connect the charger to its power source, plug the output power adapter cord
into the power outputs of the charger, then plug your Lithium battery into the
output power adapter cord (1S and 2 to 4S).
2) If you’re charging a 2 to 4S Lithium battery, plug the balance adapter board into
the balance port, then plug your Lithium battery’s balance connector into the
matching 2S, 3S or 4S balance port on the balance adapter board.
3) Press and HOLD the STOP or DISPLAY buttons for > 3
seconds to navigate to the desired Lithium Battery
Charging menu, either Li Po, Li FE or Li Io.
1S
2S
3S
4S
li po
V
A
mAh
Time
The charge menu you choose must match the battery type you’re charging!
12
LEKTRON 45W CHARGER USER’S GUIDE
Lithium battery charging
Lithium battery balance charging, continued....
4) Press the TYPE button to view the Charge Current
screen. The current charge current will be displayed.
1S
2S
3S
4S
V
A
mAh
Time
2.00
5) Press the INCREASE or DECREASE buttons to select the desired charge current.
•Charge Current values range from 0.1 to 4.5 amps.
The charger will automatically determine the correct number of cells in the
Lithium battery, but you must correctly choose the charge current for the
type and capacity of the battery being charged. For more information, refer to
the Battery Charge Current Values section on page 6 or check with your Lithium
battery’s manufacturer.
6) Press and hold the START button until the charging
process begins. An audible double-tone will sound
and CHA - will be displayed, followed by charging
process information.
1S
2S
3S
4S
CHa -
V
A
mAh
Time
Viewing Charging Process Information:
During the charging process, the LCD screen will automatically scroll through
different screens that show various data about the current charging process,
including the current voltage of the battery, the current charge rate, the current
charged capacity in mAh and the current elapsed charge time.
1S
2S
3S
4S
1250
V
A
mAh
Time
1S
2S
3S
4S
4.2
V
A
mAh
Time
If you’re balance charging a 2 to 4S battery, press the DISPLAY button to view
the current voltage of each cell. The LCD screen will automatically scroll through
each cell, showing its current voltage, then show the total voltage. Press the
DISPLAY button a second time to return to the previous screen.
7) When the charging process is complete, a series
of audible tones will sound and the LCD screen will
read FULL.
1S
2S
3S
4S
V
A
mAh
Time
full
After the charging process is complete, press the DISPLAY button to cycle
through the various data about the completed charging process or press
the DECREASE or STOP buttons to return to the main screen.
Pressing the STOP button at any time to terminate the charging process.
END will be displayed on the LCD screen.
13
LEKTRON 45W CHARGER USER’S GUIDE
ni-cd /ni-mh battery charging
The Ni-Cd and Ni-MH Battery Charging menus are suitable for charging Ni-Cd
(Nickel-Cadmium) and Ni-MH (Nickel-Metal Hydride) batteries commonly used
in R/C model applications.
Prior to charging your Ni-Cd or Ni-MH battery you MUST first select the correct
Battery Charging menu for the type of battery you’re going to be charging,
either Ni -H (Ni-MH) or Ni -C (Ni-Cd). This setting is very important, so make sure
you check your battery type carefully and select the correct charge menu.
If you select the incorrect charge menu, damage to your battery may occur
during the charging process or your battery may not charge properly!
The procedure descriptions and menu screens shown in this section show charging
a Ni-MH battery. The descriptions in this User’s Guide and the actual menu screens
on the charger may vary if you’re charging a Ni-Cd battery.
Ni-cd /ni-mh battery charging
For Ni-Cd and Ni-MH batteries, a linear charge current will be delivered to the
battery. The peak detection method will be used to accurately look for the highest
battery voltage during charge. Once this is detected, the charger will automatically
stop fast charging and automatically switch to Trickle Charge mode.
1) Connect the charger to its power source, plug the output power adapter cord
into the power outputs of the charger, then plug your Ni-Cd or Ni-MH battery
into the output power adapter cord.
2) Press and HOLD the STOP or DISPLAY buttons for > 3
seconds to navigate to the desired Battery Charging
menu, either Ni -H or Ni -C.
1S
2S
3S
4S
Ni -h
V
A
mAh
Time
The charge menu you choose must match the battery type you’re charging!
3) Press the TYPE button to view the Charge Current
screen. The current charge current will be displayed.
1S
2S
3S
4S
3.00
V
A
mAh
Time
4) Press the INCREASE or DECREASE buttons to select the desired charge current.
•Charge Current values range from 0.1 to 4.5 amps.
In this charge mode, the charger’s maximum power output is 35W, therefore,
larger capacity battery packs may charge at a lower charge current than
selected. This is normal.
The charger will automatically determine the correct number of cells in the
battery, but you must correctly choose the charge current for the capacity
of the battery being charged. For more information, refer to the Battery Charge
Current Values section on page 6 or check with your battery’s manufacturer.
14
LEKTRON 45W CHARGER USER’S GUIDE
ni-cd /ni-mh battery charging
Ni-cd /ni-mh battery charging, continued....
Make sure that the charge current is safe for your battery to prevent
overheating the cells. ‘AAA’, ‘AA’, ‘A’ and ‘2/3A’ size batteries generate heat
more quickly than ‘Sub-C’ batteries. Most radio control system batteries should not
be charged at currents greater than 1.5A unless suggested by the manufacturer.
Failure to follow these guidelines can result in damage to the battery.
5) Press and hold the START button until the charging
process begins. An audible double-tone will sound
and CHA - will be displayed, followed by charging
process information.
Viewing Charging Process Information:
1S
2S
3S
4S
1S
CHa -
V
A
mAh
Time
3250
V
full
V
During the charging process, the LCD screen will 2S
A
automatically scroll through different screens that 3S
mAh
Time
show various data about the current charging process, 4S
including the current voltage of the battery, the current charge rate, the current
charged capacity in mAh and the current elapsed charge time.
1S
6) When the charging process is complete, a series of 2S
A
audible tones will sound and the LCD screen will read 3S
mAh
Time
FULL and the charger will switch to Trickle Charge 4S
mode. In Trickle charge mode, the charger will continue to deliver a slow charge
at 1/10C until you press the STOP button or unplug the battery from the charger.
After the charging process is complete, press the DISPLAY button to cycle
through the various data about the completed charging process or press
the DECREASE or STOP buttons to return to the main screen.
Pressing the STOP button at any time to terminate the charging process.
END will be displayed on the LCD screen.
PB (Lead acid) battery charging
The Pb (Lead Acid) Battery Charging menu is suitable for charging and discharging
2 to 12V lead acid batteries that are commonly used in the R/C model hobby.
pb battery charging
Pb batteries are totally different from Ni-Cd or Ni-MH batteries. They can only deliver
relatively low current compared to their capacity and similar restrictions apply to
charging them. For this reason, the optimal charge current should be approximately
1/10th of their capacity (1/10C).
Pb batteries must not be charged rapidly. Always follow the guidelines supplied
by the manufacturer of the battery.
15
LEKTRON 45W CHARGER USER’S GUIDE
PB (Lead acid) battery charging
pb battery charging, Continued....
1) Connect the charger to its power source, plug the output power adapter cord
into the power outputs of the charger, then connect your lead acid battery to
the output power adapter cord.
2) Press and HOLD the STOP or DISPLAY buttons for > 3
seconds to navigate to the -PB- Charging menu.
1S
2S
3S
4S
-pb-
V
A
mAh
Time
The charge menu you choose must match the battery type you’re charging!
3) Press the TYPE button to view the Charge Current
screen. The current charge current will be displayed.
1S
2S
3S
4S
3.00
V
A
mAh
Time
4) Press the INCREASE or DECREASE buttons to select the desired charge current.
•Charge current values range from 0.1 to 4.5 amps. We recommend 1/10C.
The charger will automatically determine the correct number of cells in the
battery, but you must correctly choose the charge current for the capacity
of the battery being charged. For more information, refer to the Battery Charge
Current Values section on page 6 or check with your battery’s manufacturer.
5) Press and hold the START button until the charging
process begins. An audible double-tone will sound
and CHA - will be displayed, followed by charging
process information.
Viewing Charging Process Information:
1S
2S
3S
4S
1S
CHa -
V
A
mAh
Time
4500
V
During the charging process, the LCD screen will 2S
A
automatically scroll through different screens that 3S
mAh
Time
show various data about the current charging process, 4S
including the current voltage of the battery, the current charge rate, the current
charged capacity in mAh and the current elapsed charge time.
6) When the charging process is complete, a series of
audible tones will sound and the LCD screen will
read FULL.
1S
2S
3S
4S
full
V
A
mAh
Time
After the charging process is complete, press the DISPLAY button to cycle
through the various data about the completed charging process or press
the DECREASE or STOP buttons to return to the main screen.
16
Pressing the STOP button at any time to terminate the charging process.
END will be displayed on the LCD screen.
LEKTRON 45W CHARGER USER’S GUIDE
process and error messages
The Lektron 45W Digital Charger incorporates various safety features to protect
and monitor the system and verify functions relating to the state of its electronics.
If an error occurs, the cause of the error will be displayed on the LCD screen. In
addition, messages relating to the current charging process may be displayed on
the LCD screen.
process messages
The charging process is complete and the battery is fully
charged. Remove the battery from the charger.
1S
2S
3S
4S
The charging process has been manually aborted by
pressing the STOP button.
1S
2S
3S
4S
The Safety Timer has expired. You can restart the
charging process to continue charging the battery or
disconnect the battery. If necessary, increase the Safety
Timer value.
1S
2S
3S
4S
full
end
stop
V
A
mAh
Time
err.1
err.2
err.3
err.4
err.5
V
A
mAh
Time
V
A
mAh
Time
V
A
mAh
Time
error messages
The DC input voltage is below 11.0 volts or exceeds 15V.
Make sure that the input voltage is within this range.
1S
2S
3S
4S
The battery to be charged is not connected to the output.
Make sure a good connection exists between the battery
and the charger and restart the charging process.
1S
2S
3S
4S
The battery to be charged is connected with reverse
polarity. Reconnect the battery, making sure the polarity
is correct.
1S
2S
3S
4S
The battery to be charged has been disconnected during
the charging process. Reconnect the battery and restart
the charging process.
1S
2S
3S
4S
1S
V
A
mAh
Time
V
A
mAh
Time
V
A
mAh
Time
V
An electronic interruption or internal malfunction with 2S
A
the charger has occurred. If you believe the error is 3S
mAh
Time
something external, attempt to restart the charging 4S
process. If the charging process errors again, there may be an internal problem
with the charger. Contact Customer Service.
17
LEKTRON 45W CHARGER USER’S GUIDE
process and error messages
error messages, Continued....
An internal malfunction with the charger has occurred.
Contact Customer Service.
1S
2S
3S
4S
The charger detects that the voltage of your Lithium battery
is lower or higher than expected. Check the cell count
and voltage of the battery carefully.
1S
2S
3S
4S
The charger detects that the voltage of one cell in your
Lithium battery is too low or too high than the acceptable
voltage for each cell. Check the voltage of the cells
one by one.
1S
2S
3S
4S
err.6
err.7
err.8
V
A
mAh
Time
V
A
mAh
Time
V
A
mAh
Time
blank charging data sheet
Use this blank data sheet to write down information about your batteries, the models
their used in, the charge current you use to charge them and the voltages, mAh
and elapsed time after each charge. This will help you keep track of the different
batteries you used and monitor their performance over time.
Model
18
Battery Type
Charge Current
Voltage, mAh, Time
LEKTRON 45W CHARGER USER’S GUIDE
warranty and liability information
LHS Electronics guarantees this product to be free from defects in both material
and workmanship for a period of 90 days from the date of purchase. During this
90 day warranty period, Global Services will repair or replace at our discretion,
equipment determined to be defective, otherwise, the user is responsible for any
charges for the repair or replacement of the equipment in question. This warranty
does not cover cosmetic damage, nor does it cover damage caused by misuse,
modification, negligence, abuse, improper connections, acts of God or damage
caused by alterations by unauthorized persons. This warranty only applies to the
original purchaser and requires proof of purchase to redeem.
LHS Electronics shall not be liable for any damage resulting from the use of this
product. As LHS Electronics has no control over the use, setup, modification or
misuse of this product, no liability shall be assumed nor accepted for any resulting
damage or injury. By the act of using this product, the user accepts all resulting liability.
In no case shall LHS Electronics’s liability exceed the original cost of the
purchased product.
Some states do not allow the exclusion or limitation of incidental or consequential
damages, or allow limitations on how long an implied warranty lasts, so the above
limitations may not apply to you. This warranty gives you specific legal rights, and
you may have other rights which vary from state to state.
Warranty service information
Before returning your product for warranty consideration, the status of the unit
must be within the terms of the Warranty and Liability Information section above.
When requesting warranty service, please observe the following:
•Include a note detailing the problem or service you are requesting. Include your
daytime phone number, shipping address and your Email address in the event
we need to contact you.
•If your product is out of the warranty period you may request an estimate of
services at the time you return it for service. An omission of this request implies
permission for Global Services to service your product at our discretion.
•If it's determined that your product cannot be warrantied, you will be contacted
with an estimate of repairs.
•Carefully pack the product to prevent any chance of shipping damage, then
send the package to the address below. We recommend using United Parcel
Service, Federal Express or Insured Mail. Postage is nonrefundable.
Global Services
18480 Bandilier Circle
Fountain Valley, CA 92708
Phone: (714) 963-0329
Fax: (714) 964-6236
Email: [email protected]
19
LEKTRON 45W CHARGER USER’S GUIDE
Features and Specifications are Subject to Change Without Notice
All contents © 2013 LHS Electronics
All Rights Reserved
Revision 1 - 12.19.2013
Made in China
P/N 180621
20