1
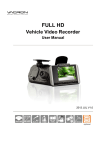
FULL HD Vehicle Video Recorder User Manual 2013 AUG V1.0 Vehicle Video Recorder User Manual Safety Precautions Please Take and review some testing videos initially to make sure the images were recorded correctly. Please note that manufacturer, its subsidiaries and affiliates, or its distributors are not liable for consequential damages arising from any malfunction of main device accessory, including malfunction memory card that results in the failure of recording video or recorded video ca not be read. Before using the product, please ensure that you read the safety precautions described below. Always ensure that the product is used correctly. • • • • • • • • • • • • • • • • Please keep this device away from a children or an infant. Use only recommended power sources. DO NOT apply multi cigarette lighter adapters-Applying such devices will cause unstable power input. As a result, the vehicle video recorder will shut down or cannot record video due to lost power. Please always make sure all power connectors are fully secured. Do not attempt to disassemble, alter or apply heat to the product. Avoid dropping or subjecting the product to severe impacts. To avoid the risk of injury, do not touch the interior of the product if it has been dropped or otherwise damaged. Stop using the product immediately if it emits smoke, a strange smell, or otherwise behaves abnormally. Do not use organic solvents such as alcohol, benzene, or thinner to clean the product. Do not let the product come into contact with water (e.g. sea water) or other liquid. Do not allow liquids or foreign objects to enter the Vehicle Video Recorder. Do not place the Battery near or in direct flame. Do not touch the power cord with a wet hand. Do not use the equipment in a manner that exceeds the rated capacity of the electrical outlet or wiring accessories. Do not use if power cord or outlet is damaged, or power cord does not fully inserted into the power outlet. Do not allow dirt or metal objects (such as pins or keys) to contact the terminals or plug. Avoid using, placing or storing the product in a humid or dusty area. i Vehicle Video Recorder User Manual Index A. Feature Description...................................................................... 1 B. Specification ................................................................................... 2 C. Accessories ...................................................................................... 2 D. Installation Instruction ................................................................ 3 E. Product Dimensions .................................................................... 5 F. SD Card Installation ..................................................................... 6 G. H. I. J. Recording / Stop Recording ..................................................... 7 Remote Controller ........................................................................ 8 OSD Menu function ..................................................................... 9 VACRON Viewer Player ........................................................... 10 1. 2. 3. 4. Operation icon introduction ......................................... 10 Capture.................................................................................. 11 Configuration ..................................................................... 11 Play back ............................................................................... 14 5. 6. 7. 8. File backup ........................................................................... 15 Format ................................................................................... 17 Play BAR ................................................................................ 19 Play speed ............................................................................ 19 9. Volume control................................................................... 19 10. G-SENSOR............................................................................ 20 K. Record Time Estimation .......................................................... 21 ii Vehicle Video Recorder User Manual A. Feature Description Full HD Real-time recorder (H.264 compression technology). 105° Wide-angle CMOS Lens. Record video with sound inside and outside the car. Recorded Video store in Micro SD card. Loop recording / on start recording when memory card is inserted and device is power on. Emergency Manual recording, file save to separate area to prevent overwritten. Built-in G-Sensor, auto recording accident footage. Made in Taiwan with 3 years warranty. 1 Vehicle Video Recorder User Manual B. Specification Item Description Sensor View Angle CMOS Sensor 105° Wide-angle Resolution Full-HD NTSC 30 fps / PAL 25 fps V/A Operating tmp. Storage Recording Recording content DC5V±5% / 1A. Start voltage 4.6V or above is required. -10℃~ +60℃ 4GB SDHC Card or above (Recommend 『SanDisk』Class 10 or above) Auto recording continuously after power on. Stop recording after power off immediately. Date/Time/Image/Sound/G-Sensor data Special format, playing by specific Player Storage Format bundled. Playback by remote control is supported. Audio Input Time setting G-Sensor Built-in microphone Built-in permanent calendar with adjustable function through bundled Player. Built-in 3D G-Sensor C. Accessories Adapter / Remote controller / SD card reader with USB interface / Bracket / cable for converting 4 endpoint, 3.5 inch headphone jack to RCA output / Software CD / Quick user manual 2 Vehicle Video Recorder User Manual D. Installation Instruction 1. To install the device on the windshield by” Sucker-type holder “ or “Stick-Holder” Type Sticker Adhesive Spot, Sucker-type holder Stick-Holder 2. Install the device on the 3. To adjust the recording angle windshield in the best position properly 5. Plug in the Cigarette Lighter 4. Plug in DC5V Power Supply Adaptor 3 Vehicle Video Recorder User Manual 6. VVR installation instruction Caution (1). This device should be installed in the area where the Windshield will be able to be cleaned by windshield wiper. (2). Formatting SD card on the device before beginning to use. (3). Set time zone and timing on OSD. Star the device immediately after you set time zone to make sure the video files will tally with normal time. (4). Setting NTSC or PAL through OSD. 4 Vehicle Video Recorder User Manual E. Product Dimensions Lens Force Record Power Indicator Cable collect slot Remote Control Receiver Recording Indicator MICRO SD Card DC5V Power input Video Out Battery for permanent calendar 5 Vehicle Video Recorder User Manual F. SD Card Installation (1). Format memory card; please refer to the other chapter “Formatting memory card” for more detail. Remark: Memory Card is optional Caution (1). Recommend Memory Card “SanDisk” or “Transcend” Class 10 or above Micro SD Card. (Minimum of 4GB) (2). If the memory card is not formatted by our exclusive player, the device will automatically erase all the data inside of the memory card after inserting it. Then start recording at default setting. (3). Since memory cards have the writing endurance situation, we recommend to inspect the memory card and use pc for playback regularly, to ensure that the memory card can read and write (4). Hot swap is not supported. Please power off device before remove memory card. Removing Memory Card while recording may lose or damage recorded data. 6 Vehicle Video Recorder User Manual G. Recording / Stop Recording 1. Power On/Recording When car power on, the device start up automatically. Please wait for 30 Sec. to start recording. 2. Power Off/Stop recording When the car power off, the device will stop to record video and sound. You can take off the memory card and insert to computer to view the video. 3. Indication Power indicator (1). Recording indicator: Red light Blinking when recording. (Emergency recording blinking fast) (2). Power indicator: Green Recording indicator light is ON when power on. Caution (1). The display of booting screen and live view are subject to change without notice for software upgrade or re-version. (2). Force recording button has highest priority. Push Force recording button will pop up recording window and activate force recording immediately. (3). CR1220 Battery for calendar can be replaced by users. 7 Vehicle Video Recorder User Manual H. Remote Controller Force Recording Button Volume down Volume up Stop Voice Recording Mute Menu Up /Down/ Left/Right Confirm Play Stop Pause / Step How to check if the remote controller is workable? √ Check the mercury cell is installed in correct direction. (Check the pole) √ Check if the cell power is exhaust. √ Check if the sensor is covered. √ Check if it nears by Fluorescent Lamp. 8 Vehicle Video Recorder User Manual I. OSD Menu function Remember: Video output require connecting TV OUT line to the device. In Live view screen press on remote controler will popup OSD operation menu as follows: NTSC / PAL Calendar Firmware Version 1. Select to export NTSC or PAL signals 2. Select to set built-in clock. 3. Select to view the current firmware version 9 Vehicle Video Recorder User Manual J. VACRON Viewer Player ★ DirectX 9.0 or above is required Playback Speed Screen Capture Control BAR Playback Capture Setting Configure Playback Control File 1. Operation icon introduction Back to previous file Previous image Reward Pause Stop Play Next image Next footage 10 Sound G-Sensor Data Vehicle Video Recorder User Manual 2. Capture: Capture the current screen image You can capture the image when playing the video, click button to capture the image. The following window will be show. The image you captured will show on the right side. The default Path for saving files is /Snapshot folder, and the file type is *.bmp. (The Path for saving image files ) SNAPSHOT display area will display image you captured immediately. (SNAPSHOT show) 3. Configuration: configure settings according to your demand Attach your memory card reader to PC and insert the memory card to card reader. Run “Viewer” application on PC, configure record format and display 11 Vehicle Video Recorder User Manual resolution of UI. Then save configuration to memory card. After above processes are completed, the Micro SD card can be insert into the device and start recording according to new setting. 1 2 3 Video Select the video Quality: Quality High/Normal /Low Set recording frame rate for Video front camera. 25(PAL) / Frame Rate 30(NTSC) The resolution of UI can be UI Mode adjusted. 12 Vehicle Video Recorder User Manual This function can encrypt the memory card to prevent illegal retrieving from others, the password is under 15 characters, for example:123456789123456 After setting the password, it is 4 required to enter password to Password access the playback file, setting, formatting memory card features. ★ Note: Upper/lower case character is different. Take a note for the password and keep in save place is very important. Set correct time and save it to 5 memory card, insert memory Time card to device immediately to Setting configure correct time on device. Copy the player to SD 6 Copy the card. So bringing this SD card player to with you, you can play recorded SD card data everywhere, without installing player to PCs. You can set the password. 7 Password When playback recorded data for on the device, the password playback need to be entered to unlock playback feature 13 Vehicle Video Recorder User Manual G-Sensor will detect the abnormal vibrations of the car when Vehicle is running on the road to determine if forced recording should be activated 8 G-sensor to record the event. sensitivity Vehicle type and Gensor’s sensitivity can be adjusted. Vehicle type support: Car, Trunk, Motorcycle, Alarm. Each type have 6 mode: OFF, Light, Low, Normal, High, Heavy 9 4. Audio recording on/off. Open: Audio recording voice / Close: stop recording voice recording. Play back: Open file 14 Vehicle Video Recorder User Manual 5. File backup: Files can be backup and save as *.sd or *.avi format. Step1. Choose the source of the memory card. Step2. Choose the designated footage to backup. 15 Vehicle Video Recorder User Manual Step3. Choose the target file format and start/end record time. File format (1) Our original file format *.sd format (2)AVI File Backup(*.avi) AVI format ★Note: G-sensor data can only be displayed on manufacturer’s player. Step 4. Set the backup folder: default is C:\BlackBox Step 5. Start to backup 16 Vehicle Video Recorder User Manual 6. Format: Format memory card/Langue setting Caution (1). “Format / Restore” will clean all the data saved on Micro SD card, Please back up the data before proceed ”Format /Restore”. (2). Before “Format / Restore” Micro SD memory card, please ensure that Micro SD memory card is unlocked. (3). If the card is unlocked but still cannot be formatted, this might be caused by Windows security restrictions. Please run the program as Administrator to prevent from this problem. 17 Vehicle Video Recorder User Manual a、 “Format” Micro SD card While applying a brand new Micro SD card, or use a Micro SD card that was take out from other devices, a formatting procedure is required. b、 “Restore” Micro SD card When the recorded files were back up in your PC and you want to use the Micro SD card for other purposes, you have to restore original disk format first, so it can be used correctly in other devices. c、 Language setting 12 languages are supported. Please select a designated language you use. * Note: New language setting will take effective after rebooting d、 Current Version Current version information will show here. You can decide if you want to upgrade to a new version base on this information. Please visit VACRON web site http://vvr.vacron.com to get information about available new firmware release. 18 Vehicle Video Recorder User Manual 7. Play BAR: You can use Mouse to drag the car icon to move footage location 8. Play speed: 4X、8X、16X and quick playback, 1/4X、1/8X、 1/16X and slow playback. 9. Volume control: Click +、- to adjust volume. 19 Vehicle Video Recorder User Manual 10. G-SENSOR G-Sensor will detect the impact form the car, and record 1-3 minutes footage automatically. This footage will save to separate area to avoid file from being overwritten. (1) X: Detect vehicle horizontal change. (2) Y: Detect vehicle vertical change. (3) Z: Detect vehicle front/back change. 20 Vehicle Video Recorder User Manual K. Record Time Estimation The chart below is for reference only. The length of time recorded can be varied due to variation in image size may be different. Capacity 8G 16G 32G 120 Min 240 Min 480 Min Video Quality High 21 For More Information Please check VACRON Website http://www.vacron.com Made in Taiwan