Download uSER manual v1.0
Transcript
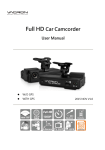
Full HD Car Camcorder User Manual 2015 DEC optional V1.0 Car Camcorder User Manual Safety Precautions Please Take and review some testing videos initially to make sure the images were recorded correctly. Please note that manufacturer, its subsidiaries and affiliates, or its distributors are not liable for consequential damages arising from any malfunction of main device accessory, including malfunction memory card that results in the failure of recording video or recorded video ca not be read. Before using the product, please ensure that you read the safety precautions described below. Always ensure that the product is used correctly. • Please keep this device away from a children or baby. • Use only recommended power sources. • Do not apply multi cigarette lighter adapters-Applying such devices will cause unstable power input. As a result, the vehicle video recorder will shut down or cannot record video due to lost power. • Please always make sure all power connectors are fully secured. • Do not attempt to disassemble, alter or apply heat to the product. • Avoid dropping or subjecting the product to severe impacts. • To avoid the risk of injury, do not touch the interior of the product if it has been dropped or otherwise damaged. i Car Camcorder User Manual • Stop using the product immediately if it emits smoke, a strange smell, or otherwise behaves abnormally. • Do not use organic solvents such as alcohol, benzene, or thinner to clean the product. • Do not let the product come into contact with water (e.g. sea water) or other liquid. • Do not allow liquids or foreign objects to enter the Vehicle Video Recorder. • Do not allow dirt or metal objects (such as pins or keys) to contact the terminals or plug. • Avoid using, placing or storing the product in a humid or dusty area. ii Car Camcorder User Manual Index A. Feature Description .................................................................... 1 B. Specification ............................................................................... 2 C. Accessories ................................................................................. 3 D. Installation Instruction ............................................................... 4 E. Product Dimensions ................................................................... 7 F. SD Card ....................................................................................... 8 G. Remote Controller .................................................................... 10 H. Recording / Stop Recording .................................................... 11 I. OSD Menu Function ................................................................. 13 J. Playback Video Files ................................................................. 15 K. VACRON Viewer ....................................................................... 16 iii Car Camcorder User Manual A. Feature Description Built-in megapixel Sony CMOS sensor. Built-in supercapacitor offers extensional power supply and ensures video is well stored of critical moment and compact. 130° wide angle, six pieces of glass +IR with No Glare large aperture lens. Built-in synchronous single-channel microphone. Recorded Video in SD card, max to 64GB. Auto loop recording when memory card is inserted and device is powered on. Emergency recording button protect data in secured area from being overwritten. Built-in 3 Axis G-Sensor, file auto reserved when it is triggered. GPS logger, auto time calibration Built in foldaway 3 “ LCD monitor (4:3), follow driver’s seat to fix arbitrarily the viewing screen. Built in photo sensors. According to the in car light and adjust indicator brightness automatically that don’t affect drivers in daytime and night Support Full HD record and TV-out to car entertainment cable. 1 Car Camcorder User Manual B. Specification Item Description Sensor Sony 1/2.9”CMOS sensor. Resolution NTSC / 1920x1080 (2M) / 30 fps. PAL / 1920x1080 (2M) / 25 fps. View Angle 130° wide-angle. Display LCD 3 inch 4:3 monitor. Power Supply DC5V±5% / 1A power adaptor. Built-in 1.5F supercapacitor to backup power. Operating Tmp. -10ºC ~ +60ºC. Storage Support 8GB class 10 SD card or above, up to 64GB. Recording Start recording automatically when power up. Prompt recording when power on delay 3 seconds after power shutdown. Recording Data Date/Time/Video/Audio/G-Sensor/GPS data. Storage Format *.ts file is playable on most players, exclusive player available on product disc. Use remote control to playback. Audio Input Built-in microphone. Time Setting Built-in calendar clock to adjust the time. Time adjustment with synchronous GPS and 2 Car Camcorder User Manual time zone. G-Sensor Built-in 3D G-sensor. GPS Function Speed / Coordinate / Calibration Google Map Driving Route NOTE: 1. Version updating will not to be informed, please check the Website Update information 2. SD Card. (optional) C. Accessories Standard 5V cigarette power adapter Remote controller Suction cup bracket Bracket holder Quick user manual Product disc Optional 4 pings, 3.5 inch headphone jack to RCA output cable SD card 3 Car Camcorder User Manual D. Installation Instruction 1. To install the device on the windshield by “Suction Cups” or “Stick-Holder” Type Sticker Adhesive Spot Suction Cups Type Stick-Holder Type 2. The best position to install the device on the windshield 3. To adjust the recording angle properly 4. Plug in DC5V Power Supply 5. Plug in the Cigarette Charger 4 Car Camcorder User Manual 6. VVR installation instruction Best location Cigarette adapter 5 Car Camcorder User Manual Caution (1). This device should be installed in the area where the Windshield will be able to be cleaned by windshield wiper. (2). Formatting SD card on the PC before beginning to use. (3). The GPS positioning speed will be influenced by solar film of the front windshield, weather or other environment factors. (4). If any metal material has contained in the car window films of front window, it could be led to GPS unable for positioning. (5). When install the machine please keep cable away the above of product (GPS Patch). Please fix the cable with bracket and from PC MINI USB left side of machine to ceiling will get better GPS signal. (6). Built in Mini USB to connect with PC. ( For engineering) 6 Car Camcorder User Manual E. Product Dimensions Light Indicator Green light:Power Red light:Recording Blue Light:GPS 3D positioning 1. Lens 6. IR Receiver 2. Reserved for USB PC Link 7. Screen 3. Photo sensors 8. SD card Slot 4. Force recording 9. DC5V 5. Indicator 10. AV OUT 7 Car Camcorder User Manual F. SD Card 1. “Format” SD card While applying a brand new SD card, or use a SD card that was take out from other devices, a formatting procedure is required. Caution (1). “Format” will clean all the data saved in SD card, please backup the data before proceeding “Format”. (2). Before “Format” SD memory card, please ensure that SD memory card is unlocked. (3). If the card is unlocked but still cannot be formatted, this might be caused by Windows security restrictions. Please run the program as Administrator to prevent from this problem. 2. SD Card Installation Remark: Memory Card is optional 8 Car Camcorder User Manual Caution (1). Recommend memory card class 10 or above 8GB SD Card. (2). Since memory cards have the writing endurance situation, we recommend to inspect the memory card and use pc for playback regularly, to ensure that the memory card can read and write (3). Hot swap is not supported. Please power off device before remove memory card. Removing Memory Card while recording may lose or damage recorded data. 3. Record Time Estimation The chart below is for reference only. The length of time recorded can be varied due to variation in image size may be different. Capacity 8GB 16GB 32GB 64GB 90 Min 180 Min 360 Min 720 Min Video Quality High 9 Car Camcorder User Manual G. Remote Controller Playback Screen Switch Emergency REC Stop Voice Recording Menu Navigator Enter Stop √ Check the mercury cell is installed in correct direction. (Check the pole) √ Check if the cell power is exhaust. How to check if the remote controller is workable? √ Check if the sensor is covered. √ Check if it nears by Fluorescent Lamp. 10 Car Camcorder User Manual H. Recording / Stop Recording 1. Power On/Recording When car power on, the device start up automatically. Please wait for 20 Sec. to start recording. 2. Power Off / Stop recording When the car power off, the device will stop to record video and sound. You can take off the memory card and insert to computer to view the video. 3. Indication Power indicator GPS indicator Recording indicator (1). Power indicator: Continuous green light means power on. (2). Recording indicator: Red light Blinking when recording. (Emergency recording blinking fast) (3). GPS indicator: Blue light when GPS located ready. 11 Car Camcorder User Manual Caution (1). The display of booting screen and live view are subject to change without notice for software upgrade or re-version. (2). Setting NTSC or PAL through OSD. (3). Set time zone and timing on OSD. Star the device immediately after you set time zone to make sure the video files will tally with normal time. (4). Force recording button has highest priority. Push Force recording button will pop up recording window and activate force recording immediately. (5). CR1220 Battery for calendar can be replaced by users. (6). Indicator bright separate for Day and Night modes. Default mode is Night mode when power on. (7). Built-in two USB power input. Please don’t input the power at the same time to avoid burning one of the power supplies. 12 Car Camcorder User Manual I. OSD Menu Function In Live view screen press [Menu] will popup OSD operation menu as follows: NTSC / PAL Time Setting Eco-saving monitor Microphone G-Sensor Format Speed Unit Switch Firmware Version 1. Video Type :Click 2. Time setting: Click to choose NTSC /PAL. to adjust clock. 13 Car Camcorder User Manual 3. Monitor setting: click 4. Microphone: Click 5. G-Sensor: Click to set Eco-saving mode. to setup microphone on / off. to set the sensitivity of G-sensor. The higher the sensitivity on behalf of gravity (G) the more sensitive the sensor, the more likely trigger mandatory photography; When emergency record is triggered, it will keep emergency recording and keep the files without being event video overwritten. 6. Format: Click to format SD card. 7. Speed Unit Switch: Click 8. Firmware Version: to switch [ km/h] / [mile/h]. show firmware version. 14 Car Camcorder User Manual J. Playback Video Files Playback the video files on PC via the storage card from the vehicle recorder. Suggest use exclusive player program or via video play software to open .TS files. Such as KM、Baofeng、Windows build in Media player… etc. Please install decoder if can’t play the files. *Please backup important files just in case of overwritten. *Please use exclusive player to read GPS data. 15 Car Camcorder User Manual K. VACRON Viewer ★ Reminder- DirectX 9.0 is required. Allow to move the user interface to left or right. 1. Playback Speed: Fast Forward 2X, 4X, 8X; Slow Forward 1/2X, 1/4X, 1/8X 2. Scroll Bar: playback display can be scrolled to wanted position. Set the start and end point to identify the range, right click to backup the video files. 16 Car Camcorder User Manual 3. Control Panel Pause Reverse Play Stop Previous File Previous Frame Next Frame Next File 4. Volume control: Click +、- to adjust volume. 5. Float Interface Click into video list to play and backup Capture playing screen and recording data Display version information and set up version language Play list, time list G-sensor Show the icon when receiving GPS data, watch the driving track on map 17 Car Camcorder User Manual L. Criteria of TFT LCD Inspection Q: What is bright spot? What is dark spot? A: Bright Spot: At dark background, we found the abnormal bright spots, we called those spot are “Bright Spot” Dark Spot: At multiple color background (excluded dark background), we found the abnormal dark spot, those spots are “Dark Spots” Q:Criteria of bright spot (a) No bright spot in zone A and only one dark spot here. (b) 2 bright spots is OK in zone B same standard to dark spot. (c) Totally 3 Bright spot plus Zone A and Zone B dark spot is OK in zone A+B. Precautions (1). 30 days return policy against Criteria of TFT LCD Inspection. (2). You can get the replacement from your local dealer within 30 days from the receipt date. (3). Only 30 days validity and RMA not included. (4). Light emitting components are weaker time by time. Changes on brightness, color and ghost image are in tolerance range. 18 For More Information Please check VACRON Website http://www.vacron.com Made in Taiwan


