1
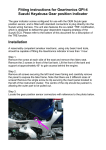
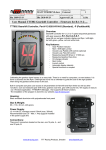
Geartronics paddleshift quick setup guide
The following instructions are intended to help you setup the paddleshift software as quickly and
as easily as possible. More detailed information can be found in the full user manual, which is
located on the setup CD. These instructions assume that the hardware is fully installed and that
the GCU is connected to all the necessary sensors and that the pneumatic system is complete
with all air connections secured.
Important: before powering on the system for the first time ensure that the compressor is
DISCONNECTED or the compressor relay is removed to prevent the compressor from running.
The reverse/neutral interlock mechanism on the gearbox should be removed and blanked off
(except Ricardo 500Nm box) – this function is replaced with the neutral/interlock button on the
steering wheel.
Establishing communication with the GCU.
The most reliable method of communication is via the RS232 serial port connected directly to a
serial port on your laptop computer. The pin-out of the serial lead should be as follows:
9-way D male
9-way D female
2 ----------------------------------------- 2
3 ----------------------------------------- 3
5 ----------------------------------------- 5
If your laptop is not fitted with a serial port, a serial to USB converter may be used. However,
these are often unreliable and it might be a better option to use the built-in USB port on the GCU.
When first connecting the GCU to the laptop using a USB cable, you will be required to install the
Windows drivers, which can be located on the setup CD. When USB installation is complete,
Windows will create a ‘virtual’ COM port and assign it a COM number.
Start the paddleshift software and turn on the ignition. If all is well, the connection status message
at the bottom of the screen should illuminate green to indicate that the GCU is connected. You
should also be presented with a dialogue box asking if you would like to upload the current
settings from the GCU - answer “yes” to this message. If the connection indicator is red then this
indicates a connection problem. To check the COM port number, click on ‘Settings’ and
‘Communications’ at the top of the screen. When using a direct serial connection, the COM port
should match the COM port number of the laptop, usually COM1. For USB connections, the virtual
COM port number will be indicated in the pull-down box if the drivers have been installed correctly.
The GCU is supplied with factory default settings that will give an acceptable shift speed & quality
in most applications. There are more than 80 configurable parameters that govern the shift
strategy. These parameters should be left at their default values unless you fully understand the
consequences of any changes that you make. The exception to this rule is for the essential
configuration changes as described below.
Current GCU settings can be uploaded to the PC at any time by pressing “F5”. Note that
uploading settings will overwrite any changes that have been made on screen. To save changes
that you have made on screen to the GCU, press “F8”.
Initial system checks
At the bottom left of the screen you will see some status indicators. Operate the up & down
paddles, the neutral/interlock button, the clutch/limp-home switch and the auto switch (if fitted). As
the paddles & switches are operated, the corresponding LED should illuminate. When the system
is first powered up (with the compressor disconnected), the pressure indicator should read “000
psi” and the compressor LED should be illuminated.
Setting the ‘Vehicle Profile’ options
When the software is launched, the default page is ‘Vehicle Profile’. In this page we calibrate the
following functions:
Tachometer (engine RPM) settings
Throttle settings
Downshift RPM limit
Clutch settings
Number of gears
Gear ratios
To check the calibration of the tachometer (engine RPM), ensure that the gearbox is in the neutral
position and start the engine. If the tachometer reads incorrectly you will need to change the
number of pulses per engine revolution at the top left of the screen. Note that the default
tachometer range is 0-10,000rpm - this can be increased by selecting “settings” then “rev-counter
range”. When you are satisfied that the tachometer is calibrated correctly, turn off the engine, then
switch the ignition back on.
To calibrate the throttle, click the box entitled ‘Use Throttle Sensor’, then click ‘Calibrate Throttle’.
Follow the on-screen instructions. When complete, download the settings to the GCU by pressing
F8. Check that the throttle indicator moves between 0-100% as the throttle is operated.
The “Downshift inhibit” should normally be set to “Use multiple RPM thresholds”. The “base RPM
threshold” should then be set to the maximum permitted engine speed after a downshift. The
actual RPM limits are then calculated from the programmed gear ratios.
Clutch position monitoring is not normally required unless the car is to be driven by inexperienced
drivers. When the clutch position is not used, the input pin can be re-assigned to function as an
‘emergency’ or ‘limp-home’ switch.
Setting gear positions
The Geartronics paddleshift system relies on accurate gear position sensing. The GCU therefore
needs to ‘learn’ the positions of each gear on the selector barrel.
Select the “gear positions” page. First we must specify the order of the gears – on most gearboxes
this will be N123456 (even if your gearbox has a reverse gear), but some Hewland gearboxes
have the neutral position between 1st & 2nd (1N23456). There are two other gear order options, but
these are only used for two specific gearboxes. We can now programme the gear positions by
selecting ‘Sample Gear Positions’ and following the on-screen instructions. When the software
prompts you to select each gear, you must at this stage select the gears manually. When all the
gears have been sampled, the “barrel rotation” dial will display a series of coloured ‘windows’
which, in most cases, should be equally spaced around the dial. The 0/360º position must be
between the lowest and highest gears, and the sensor must not pass through this position when
any of the gears are selected. If two adjacent gears are spaced either side of the 0/360º position
then please contact Geartronics for advice!
The “Gear position tolerance” should normally be set to 5 or 6 degrees. Once sampling is
complete you should download the settings to the GCU by pressing F8. The numerical gear
indicator on the dashboard and in the software should now correctly indicate the selected gear.
After the gear positions have been programmed and downloaded to the GCU, check that the
indicator dial moves to the centre of each coloured window as you manually select the gears both
up and down the box. Each gear position can be individually adjusted by ±5º by clicking on the
arrows by the side of the gear positions table at the left of the screen. Remember to press F8 after
any changes have been made.
After these initial settings have been completed, you are advised to save the configuration file and
send a copy by email to Geartronics technical. We can then check that the calibration is safe to
test the system and make any changes that are necessary. To save the file, click “file” then “save
as”. By default, the calibration file will be saved to the “program files/geartronics/profiles” folder.
System testing
The system can now be powered on with the compressor connected. On initial power-up, the
compressor should start and you should see the pressure indicator in the software rising. If the
pressure does not increase, switch off immediately and investigate the problem. When the
pressure has risen to 150psi the compressor should turn off. The compressor will initially run for
about 50-60 seconds. When the system is fully pressurised and the compressor turns off, you can
test the actuator & blipper functions form within the ‘Test’ page.
To test the blipper, click the box entitled “throttle blip (250ms)”. The mechanical blipper should be
initially adjusted to give approximately 20-25% throttle opening. The blipper operation can be
verified by looking at the real-time throttle measurement at the bottom right of the screen. Final
throttle blip settings can only be determined by track testing. As a general guide, low inertia, highrevving race engines require less throttle blip than large low-revving production engines.
To verify the correct operation of the gearbox actuator, perform the following test:
Position the wheels so that you can select 2 or 3 gears without the need to turn the wheels further
Click the “data logging” page and select “Delete data log”
Using the shift paddles, select the gears up and down several times without turning the wheels
Click “Load data log”
Examine the “fastest up” and “fastest down” times
The above test should produce shift times of less than 50mS, preferably 20-30mS. Static shift
times longer than 60mS indicate that there is a problem either with the mechanical installation or
an air pressure problem. If the shift times are too slow, please consult Geartronics for advice
before going any further! If everything appears to be working OK and the static shift times are fast
enough, you can then proceed to the next, very important, stage of testing…
Shift cut (torque reduction) test
We now need to test the function of the spark cut or torque reduction. It is extremely important that
the duration of the torque reduction is controlled by the GCU. If you have connected the cut signal
from the GCU to the engine ECU then you must ensure that the ECU is configured to cut the
engine while ever the cut signal remains present. Please consult your ECU supplier or Geartronics
technical for advice. To test the function of the shift cut, perform the following procedure:
Select the “Test” page in the Geartronics software
Set the test spark cut to 50mS
Start the engine and run at approximately 3000rpm.
Click the “spark cut” box and you should hear a slight engine cut
Now set the spark cut to 250mS
Click “spark cut” again and the engine should almost stop
DO NOT under any circumstances operate the system on track until the shift cut test has been
verified. Incorrect shift cut setup can result in serious gearbox damage!
Note: final ECU torque reduction parameters should be determined by track testing. For the
purposes of a workshop test, the torque reduction can be set to 100% (total ignition cut).
Initial shift test
It is strongly recommended that the initial shift test is conducted with the car on stands and the
driven wheels removed.
Assuming that the gearbox is in neutral, start the engine, depress the clutch and select first gear
by pulling the ‘up’ paddle. If a clutch switch is not fitted, you will also need to press the interlock
button to select 1st gear. If 1st gear doesn’t engage immediately, keep the pressure on the paddle
and slip the clutch until the gear engages. Release the clutch and go up the gearbox using the
paddles. Do not press the clutch or reduce the throttle during the shift. When you have selected
top gear, hold the engine at 4000rpm, release the throttle and immediately pull the down paddle.
Each downshift should produce a throttle blip. A static workshop test will usually result in quite
harsh shifts, which will improve once the car is tested on the track, this especially applies to
downshifts. During the shift test, check the barrel position indicator in the software and ensure that
the dial moves to the centre of each coloured window as you select the gears. If not, you will need
to re-sample the gear positions or make individual trim adjustments.
To select neutral from 1st gear you need to press the interlock button and simultaneously pull the
down paddle. There is an option in the software to allow the selection of neutral simply by pressing
the button (from 1st gear only). On gearboxes with a ½ shift to neutral (Sadev & some Hewland) it
is may be necessary to experiment with the “½ click” timer settings on the gear positions page.
Please consult Geartronics technical for advice.
If the shift test in the workshop works OK, then you can conduct further testing on the track.
Before the car is driven on track, please delete the data log. The initial track test should be limited
to a single ‘installation lap’ at reduced speed & load, after which the data logging should be
examined to check for reported mis-shifts etc. The fastest shift times should be in the order of 3040ms. Slowest shift times should generally be less than 150ms. However, these times are only
approximate and can vary considerably depending upon gearbox type and engine response.
The only parameters that you may need to alter in the GCU are the downshift throttle blip settings.
Providing that the spark cut is functioning correctly, the up-shifts should be fast and smooth. When
correctly set, the downshifts should also be fast and very smooth.
Data logging
It is recommended that the data log is saved to disk and then deleted from the GCU after each
session. As a general rule, the fastest shift times should be in the order of 30-40ms (depending
upon gearbox type). On a well-designed (and well maintained!) racing transaxle, the fastest shift
times may come down to as little as 20-30mS! However, the slowest shift times can exceed
150ms in certain circumstances.
The way in which the GCU logs data means that you will probably see some reported miss-shifts.
Do not be alarmed unless there are a significant number or unless the driver is reporting a
problem. The GCU will log a failure if a shift has taken longer than the time allowed. This does not
necessarily mean that the shift has actually failed, and in most cases the driver will be unaware of
any problems. The data logging could be configured in such a way as to not report any problems,
but this would be counter productive as it would not give us any indication of potential problems.
Summary
The Geartronics GCU shift strategies have been developed over a period of several years in many
and varied applications. The default parameters have been found to give acceptable results in
most applications. We would advise that you do not adjust these parameters unless you have a
full understanding of sequential gearbox dynamics and the effects that any parameter changes
might have. There is a detailed software manual on the setup CD that explains the function of
each parameter. If you are unsure about anything then please contact Geartronics technical
before making any changes.