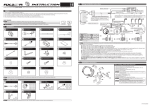
1
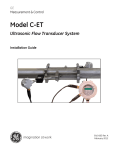
GE
Measurement & Control Solutions
Flow
CModel C-RS
Ultrasonic Flow Transducer
Installation Guide
916-077 Rev. C
July 2010
Model C-RS
Ultrasonic Flow Transducer
Installation Guide
916-077 Rev. C
July 2010
GESensingInspection.com
©2010 General Electric Company. All rights reserved.
Technical content subject to change without notice.
[no content intended for this page]
ii
Contents
1.
2.
3.
4.
5.
6.
Introduction . . . . . . . . . . . . . . . . . . . . . . . . . . . . . . . . . . . . . . . . . . . . . . . . . . . . . . . . . . . . . . . . . . . . . . . . . . . . . . . . . . . . . . . . . . . . 1
Transducer Construction. . . . . . . . . . . . . . . . . . . . . . . . . . . . . . . . . . . . . . . . . . . . . . . . . . . . . . . . . . . . . . . . . . . . . . . . . . . . . . . . 1
Couplants . . . . . . . . . . . . . . . . . . . . . . . . . . . . . . . . . . . . . . . . . . . . . . . . . . . . . . . . . . . . . . . . . . . . . . . . . . . . . . . . . . . . . . . . . . . . . . 2
Preparing for Installation. . . . . . . . . . . . . . . . . . . . . . . . . . . . . . . . . . . . . . . . . . . . . . . . . . . . . . . . . . . . . . . . . . . . . . . . . . . . . . . . 2
4.1 Choosing an Installation Location. . . . . . . . . . . . . . . . . . . . . . . . . . . . . . . . . . . . . . . . . . . . . . . . . . . . . . . . . . . . . . . . . . . . 3
4.2 Preparing the Pipe . . . . . . . . . . . . . . . . . . . . . . . . . . . . . . . . . . . . . . . . . . . . . . . . . . . . . . . . . . . . . . . . . . . . . . . . . . . . . . . . . . 4
4.3 Obtaining the Transducer Spacing . . . . . . . . . . . . . . . . . . . . . . . . . . . . . . . . . . . . . . . . . . . . . . . . . . . . . . . . . . . . . . . . . . . 4
4.4 Determining the Number of Traverses . . . . . . . . . . . . . . . . . . . . . . . . . . . . . . . . . . . . . . . . . . . . . . . . . . . . . . . . . . . . . . . 4
Installing the Universal Clamping Fixture and Transducers - UCF. . . . . . . . . . . . . . . . . . . . . . . . . . . . . . . . . . . . . . . . . . 6
5.1 Verify Fixture Length . . . . . . . . . . . . . . . . . . . . . . . . . . . . . . . . . . . . . . . . . . . . . . . . . . . . . . . . . . . . . . . . . . . . . . . . . . . . . . . . 6
5.2 Identifying the UCF Components. . . . . . . . . . . . . . . . . . . . . . . . . . . . . . . . . . . . . . . . . . . . . . . . . . . . . . . . . . . . . . . . . . . . . 6
5.3 The Double-Traverse Method -UCF. . . . . . . . . . . . . . . . . . . . . . . . . . . . . . . . . . . . . . . . . . . . . . . . . . . . . . . . . . . . . . . . . . . 8
5.4 The Single-Traverse Method - UCF . . . . . . . . . . . . . . . . . . . . . . . . . . . . . . . . . . . . . . . . . . . . . . . . . . . . . . . . . . . . . . . . . .11
5.5 Mounting Transducers into the UCF . . . . . . . . . . . . . . . . . . . . . . . . . . . . . . . . . . . . . . . . . . . . . . . . . . . . . . . . . . . . . . . . .17
Installing the General Clamping Fixture and Transducers - GCF . . . . . . . . . . . . . . . . . . . . . . . . . . . . . . . . . . . . . . . . . .20
6.1 The Double-Traverse Method - GCF . . . . . . . . . . . . . . . . . . . . . . . . . . . . . . . . . . . . . . . . . . . . . . . . . . . . . . . . . . . . . . . . .20
6.2 The Single-Traverse Method - GCF . . . . . . . . . . . . . . . . . . . . . . . . . . . . . . . . . . . . . . . . . . . . . . . . . . . . . . . . . . . . . . . . . .24
6.3 Mounting Transducers into the GCF . . . . . . . . . . . . . . . . . . . . . . . . . . . . . . . . . . . . . . . . . . . . . . . . . . . . . . . . . . . . . . . . .28
6.4 Installing the Magnetic Clamping Fixture and Transducers - MCF . . . . . . . . . . . . . . . . . . . . . . . . . . . . . . . . . . . . .31
6.5 Identifying the MCF Components . . . . . . . . . . . . . . . . . . . . . . . . . . . . . . . . . . . . . . . . . . . . . . . . . . . . . . . . . . . . . . . . . . .31
6.6 The Double-Traverse Method - MCF . . . . . . . . . . . . . . . . . . . . . . . . . . . . . . . . . . . . . . . . . . . . . . . . . . . . . . . . . . . . . . . . .32
6.7 The Double-Traverse Method - MCF . . . . . . . . . . . . . . . . . . . . . . . . . . . . . . . . . . . . . . . . . . . . . . . . . . . . . . . . . . . . . . . . .33
6.8 The Single-Traverse Method - MCF . . . . . . . . . . . . . . . . . . . . . . . . . . . . . . . . . . . . . . . . . . . . . . . . . . . . . . . . . . . . . . . . . .34
6.9 Mounting Transducers into the MCF . . . . . . . . . . . . . . . . . . . . . . . . . . . . . . . . . . . . . . . . . . . . . . . . . . . . . . . . . . . . . . . .38
6.10 Maintaining the C-RS Transducers . . . . . . . . . . . . . . . . . . . . . . . . . . . . . . . . . . . . . . . . . . . . . . . . . . . . . . . . . . . . . . . . .42
6.11 Specifications . . . . . . . . . . . . . . . . . . . . . . . . . . . . . . . . . . . . . . . . . . . . . . . . . . . . . . . . . . . . . . . . . . . . . . . . . . . . . . . . . . . .43
C-RS Ultrasonic Flow Transducer Installation Guide
iii
Contents
[no content intended for this page]
iv
C-RS Ultrasonic Flow Transducer Installation Guide
Preface
Information Paragraphs
•
Note paragraphs provide information that provides a deeper understanding of the situation, but is not essential to
the proper completion of the instructions.
•
Important paragraphs provide information that emphasizes instructions that are essential to proper setup of the
equipment. Failure to follow these instructions carefully may cause unreliable performance.
•
Caution! paragraphs provide information that alerts the operator to a hazardous situation that can cause damage to
property or equipment.
•
Warning! paragraphs provide information that alerts the operator to a hazardous situation that can cause injury to
personnel. Cautionary information is also included, when applicable.
Safety Issues
WARNING! It is the responsibility of the user to make sure all local, county, state and national codes,
regulations, rules and laws related to safety and safe operating conditions are met for each
installation.
Auxiliary Equipment
Local Safety Standards
The user must make sure that he operates all auxiliary equipment in accordance with local codes, standards,
regulations, or laws applicable to safety.
Working Area
WARNING! Auxiliary equipment may have both manual and automatic modes of operation. As equipment
can move suddenly and without warning, do not enter the work cell of this equipment during
automatic operation, and do not enter the work envelope of this equipment during manual
operation. If you do, serious injury can result.
WARNING! Make sure that power to the auxiliary equipment is turned OFF and locked out before you
perform maintenance procedures on the equipment.
Qualification of Personnel
Make sure that all personnel have manufacturer-approved training applicable to the auxiliary equipment.
Personal Safety Equipment
Make sure that operators and maintenance personnel have all safety equipment applicable to the auxiliary equipment.
Examples include safety glasses, protective headgear, safety shoes, etc.
Unauthorized Operation
Make sure that unauthorized personnel cannot gain access to the operation of the equipment.
C-RS Ultrasonic Flow Transducer Installation Guide
v
Preface
Environmental Compliance
Waste Electrical and Electronic Equipment (WEEE) Directive
GE Measurement & Control Solutions is an active participant in Europe’s Waste Electrical and Electronic Equipment
(WEEE) take-back initiative, directive 2002/96/EC.
The equipment that you bought has required the extraction and use of natural resources for its production. It may
contain hazardous substances that could impact health and the environment.
In order to avoid the dissemination of those substances in our environment and to diminish the pressure on the natural
resources, we encourage you to use the appropriate take-back systems. Those systems will reuse or recycle most of the
materials of your end life equipment in a sound way.
The crossed-out wheeled bin symbol invites you to use those systems.
If you need more information on the collection, reuse and recycling systems, please contact your local or regional
waste administration.
Visit http://www.gesensing.com/environment/weee.htm for take-back instructions and more information about
this initiative.
vi
C-RS Ultrasonic Flow Transducer Installation Guide
1. Introduction
The Model C-RS clamp-on ultrasonic flow transducer for liquids is used exclusively with the GE line of ultrasonic
flowmeters. These transducers measure the flow rate of sonically-conductive liquids through pipes having diameters
from 2 in. (5 cm) to over 300 in. (7.6 m). Such measurements are typically independent of the pipe material.
2. Transducer Construction
C-RS transducers may be used at process temperatures from -40 to 302oF (-40 to 150oC). Each C-RS transducer
assembly consists of the following components (see Figure 1):
•
A stainless steel adapter with 3/4” NPT male thread for attaching a junction box
•
A transducer that consists of a peizoelectric element mounted on a wedge and wired to the BNC connector
•
A BNC style connector for use in connecting the transducer to the flowmeter.
Note: The process temperature range specified above is for ATEX certified designs. Consult the factory for higher
temperatures.
BNC Connector
Transducer Body
Adapter
Figure 1: General C-RS Transducer Assembly
C-RS Ultrasonic Flow Transducer Installation Guide
1
3. Couplants
An ultrasonic couplant is supplied for your C-RS installation. The purpose of the couplant is to provide reliable
transmission of ultrasound between two adjacent solid surfaces. Generally speaking, couplants perform this task by
excluding air from between the adjacent surfaces. Accordingly, the C-RS transducers should be pressed tightly against
the pipe, using hand pressure on the set screw to squeeze the couplant to as thin a film as practical for the given pipe
surface.
The most commonly used couplants in ultrasonic testing are ordinarily satisfactory for any short-term clamp-on
flowmeter application. These couplants include, in general order of preference: gels, grease, propylene glycol, oil,
glycerine, and water. Long-term couplants include grease, epoxy adhesive, and solid rubber-like sheet couplant.
The factory provides couplants for both permanent and temporary use as well as for high- and low-temperature
applications. For long-term installations, make sure the couplant does not dry or run out.
Standard couplants supplied by GE are listed in Table 1.
Table 1: Couplants
PART NO.
TYPE
TEMP. RANGE
USE
CPL-1
Standard
-40 to 149oF (-40 to +65oC)
Semi-Permanent
CPL-2
High/Low Temperature
-256 to 500oF (-160 to +260oC)
Semi-Permanent
CPL-3
For Portable
-4 to 140oF (-20 to +60oC)
Temporary
CPL-4
Special
As Required
*Difficult Applications
CPL-7
Epoxy
14 to 122oF (-10 to +50oC)
Permanent
CPL-8
Solid Sheet
-40 to 446oF (-40 to +230oC)
Permanent
* Installations involving hotter or colder temperatures than listed above, may require special
couplants. Consult the factory for such applications.
4. Preparing for Installation
Before the clamping fixture and transducers can be properly installed, you must do the following:
•
Choose an installation location
•
Prepare the pipe
•
Obtain the transducer spacing
•
Determine the number of traverses
CAUTION!
2
A flowmeter’s accuracy and performance depends on the location, spacing, and alignment of
the transducers. The transducer spacing is unique to your installation.
C-RS Ultrasonic Flow Transducer Installation Guide
4.1 Choosing an Installation Location
To select a suitable transducer location, complete the following steps:
1. Locate the transducer measurement point at least 3 ft (1 m) from any butt welds or flanges. Ideally the location
would be in the center of a 20 ft (6 m) section of straight pipe. Make sure there is sufficient clearance on both sides
of the pipe for easy transducer installation:
•
6 in. (15 cm) if you are not using a junction box, or
•
9 in. (22.5 cm) if you are using a junction box.
Note: To guarantee the specified accuracy of the flowmeter, a straight section of pipe and a fully-developed flow
profile are highly recommended. If such conditions are not possible, the transducer location should be such
that the acoustic signal travels through the full distribution of the under-developed flow profile for best
repeatability.
2. Place the transducers as close as possible to the horizontal plane of the pipe (see Figure 2). Locate the transducers
on opposite sides of the pipe 180o apart, ideally at the 3 and 9 o’clock positions.
IMPORTANT: Do not place transducers on the top or bottom of the pipe.
Note: For the best flow profile identification in limited straight section of pipe, place the transducers at 1 and 7
o’clock.
Pipe
Transducer
Signal Path
End View
Figure 2: Transducer Placement
C-RS Ultrasonic Flow Transducer Installation Guide
3
4.2 Preparing the Pipe
To prepare the pipe for transducer installation, complete the following steps:
1. Remove any rust and paint from an area 2 in. (5 cm) wide by 4 in. (10 cm) long on one side of the pipe.
2. Polish the cleaned area, taking care to preserve the original curvature of the pipe.
3. With an ultrasonic thickness gage, measure the pipe thickness at a minimum of six spots on the cleared area. Take
at least three measurements at each spot to ensure accuracy. The thickness readings should not vary by more than
5% at each spot. If you encounter more than a 5% variation at each spot, try a different section of the pipe. Verify
that the wall thickness at both transducer locations has less than the 5% variation.
4. Measure the outside diameter (OD) of the pipe using a tape measure or the supplied pipe wrap.
4.3 Obtaining the Transducer Spacing
Before installing the clamping fixture, you must obtain the calculated transducer spacing from the flowmeter. You will
need to know the transducer spacing to complete this procedure.
To obtain the transducer spacing, you must enter the measured pipe OD and the pipe wall thickness into the Pipe
Parameters menu of the flowmeter User Program The flowmeter will then calculate the correct transducer spacing for
the installation. Refer to your flowmeter User’s Manual for more details.
4.4 Determining the Number of Traverses
The next step in the installation is to determine the number of traverses that you will use. The transducers can be
mounted using one of two methods (see Figure 3 on the next page):
Note: The “number of traverses” refers to the number of times the ultrasonic signal transmitted from one transducer
passes through the fluid from one side of the pipe to the other before it reaches the second transducer.
•
Double-traverse method (“V” method) - transducers are mounted on the same side of the pipe. The ultrasonic
signal is sent from one transducer to the other by bouncing it off the opposite pipe wall.
•
Single-traverse method (“Z” method) - transducers are mounted diagonally across from each other. The ultrasonic
signal is transmitted directly from one transducer to the other by traveling across the pipe.
If the pipe diameter is 4 to 20 in. (10 to 50 cm), you should always try the double-traverse method first, because it
easier to install and provides greater accuracy. The single-traverse method is preferred in the following situations:
•
pipe diameters greater than 20 in. (50 cm)
•
pipes with poor inside surface conditions
•
applications with a highly attenuating fluid
Note: For all installations, it may be useful to try both methods to determine which one yields more accurate results.
Proceed to the appropriate section to properly install your clamping fixture and transducers.
4
C-RS Ultrasonic Flow Transducer Installation Guide
4.4 Determining the Number of Traverses (cont.)
Double Traverse (“V” Method)
Transducers
Ultrasonic Signal Path
TOP VIEW
Single Traverse (“Z” Method)
Transducer
Transducer
TOP VIEW
Figure 3: Double- and Single-Traverse Installations
C-RS Ultrasonic Flow Transducer Installation Guide
5
5. Installing the Universal Clamping Fixture and Transducers - UCF
The Universal Clamping Fixture (UCF) acts as a spacing device and a transducer holder. The UCF is available in two
lengths and includes several components. Before you begin the installation, you should verify that your fixture is the
correct length and familiarize yourself with the fixture components.
IMPORTANT: To maintain ATEX certification the transducer face must be protected against impact. Protection is
provided by properly installing the transducer into the clamping fixture. Care must be taken during
installation to ensure that protection is provided.
5.1 Verify Fixture Length
The UCF is available in 12 in. (30 cm) and 24-in. (60 cm) lengths. Each size fixture can be used for either the single- or
double-traverse method. However, the pipe size ranges listed in Table 2 below must be followed for each method.
Table 2: UCF Pipe Size Ranges
Clamping Fixture
Length
Single-Traverse
Pipe Diameter
Double-Traverse
Pipe Diameter
12-in.
(30 cm)
2 to 24 in.
(5 to 60 cm)
2 to 12 in.
(5 to 30 cm)
24-in.
(60 cm)
2 to 48 in.
(5 to 120 cm)
2 to 24 in.
(5 to 60 cm)
Note: The mounting chain or strap provided by GE with your UCF is the one best suited for your application.
5.2 Identifying the UCF Components
The UCF includes the following components (see Figure 4 on page 7):
•
Two adjustable short blocks for use in the double-traverse method
•
Two slide tracks that connect the two blocks
•
A ruler attached to one of the slide tracks to help set the transducer spacing
•
A long block for use in the single-traverse method
The UCF is chained or strapped to the pipe. Two blocks, which are positioned using the transducer spacing calculated
by the flowmeter, are used to hold the transducers in the proper location on the pipe.
6
C-RS Ultrasonic Flow Transducer Installation Guide
5.2 Identifying the UCF Components (cont.)
Side View
End View
Pressure Bolt
Locking Nut
Thumbscrew
Short Block
1 Screw Hook
(fixed and adjustable)
Chain
Long Block
2 Screw Hooks
Slide Track
Example with Short Blocks
Figure 4: Components of the UCF
C-RS Ultrasonic Flow Transducer Installation Guide
7
5.3 The Double-Traverse Method -UCF
Note: The instructions in this section can also be used for a multiple-traverse method. However, you must use an
EVEN number of traverses. Consult the factory for details.
There are three advantages to using the double-traverse method:
•
Accuracy is improved because the signal is in contact with the fluid longer than with a single-traverse method
•
This configuration can reduce some effect of an underdeveloped flow profile.
•
If there is enough pipe length available, the double-traverse fixture is easier to install.
Note: You will only need the short block assembly for a double-traverse installation. The long block is not used.
To install a double-traverse UCF, complete the following steps:
1. Obtain the transducer spacing dimension, as described in your flowmeter User’s Manual.
2. Be sure the location you have chosen for the installation has a straight pipe and undisturbed flow for at least 10
pipe diameters upstream and 5 pipe diameters downstream from the flow measurement point.
3. Prepare the pipe where you intend to place the clamping fixture by making sure it is clean and free of loose
material. Sanding, though usually not required, may be necessary to remove any high spots on the pipe. When
sanding, be careful to preserve the original curvature of the pipe.
8
C-RS Ultrasonic Flow Transducer Installation Guide
5.3 The Double-Traverse Method -UCF (cont.)
4. Using the attached ruler, move the blocks so they are a distance S from each other. As shown below, use either the
pressure bolts or the ends of the blocks as reference points.
Centerline
Centerline
S = Spacing
S = Spacing
S = Spacing
Select one method to set the spacing
5. Position the clamping fixture along the horizontal plane of the pipe - not on the top or bottom. Make sure the
chains are both on the opposite side of the pipe from the slide track with the ruler.
Side View
C-RS Ultrasonic Flow Transducer Installation Guide
9
5.3 The Double-Traverse Method -UCF (cont.)
6. Wrap the chain around the pipe and fasten the chain on the “J” screw hook on the opposite side of the block. Do
this for both blocks.
Top View
7. Using the screw hook on the blocks, tighten the chains until the fixture is secured snugly to the side of the pipe.
Note: Make sure the chains are perpendicular to the clamping fixture and are not twisted. If the chains are slanted,
the fixture may move and this could change the final transducer spacing.
Figure 5 shows a completed double-traverse installation without transducers.
Side View
Top View
Figure 5: Double-Traverse Clamping Fixture w/o Transducers
10
C-RS Ultrasonic Flow Transducer Installation Guide
5.4 The Single-Traverse Method - UCF
Note: The instructions in this section can also be used for a multiple-traverse method. However, you must use an
ODD number of traverses. Consult the factory for details.
Note: You will need both the short block assembly and the long block for a single-traverse installation. You will also
need a marker or scribe to mark the transducer locations on the pipe
To install a single-traverse UCF, complete the following steps:
1. Obtain the transducer spacing dimension, as described in your flowmeter User’s Manual.
2. Be sure the location you have chosen for the installation has a straight pipe and undisturbed flow for at least 10
pipe diameters upstream and 5 pipe diameters downstream from the flow measurement point.
3. Prepare the pipe where you intend to place the clamping fixture by making sure it is clean and free of loose
material. Sanding, though usually not required, may be necessary to remove any high spots on the pipe. When
sanding, be careful to preserve the original curvature of the pipe.
4. Find the top of the pipe and use a level to draw a line parallel to the center line of the pipe.
Line
Top of Pipe
Side View
C-RS Ultrasonic Flow Transducer Installation Guide
11
5.4 The Single-Traverse Method -UCF (cont.)
5. Make two marks on the line at the top of the pipe. The distance between these two marks must equal the calculated
transducer spacing S.
Spacing
Mark
Mark
Side View
6. From one of the marks, measure around the circumference of the pipe a distance equal to 1/4 of the pipe
circumference. Make a crossmark at this point.
Spacing
Crossmark
Side View
12
C-RS Ultrasonic Flow Transducer Installation Guide
5.4 The Single-Traverse Method - UCF (cont.)
7. From the second mark on the top of the pipe, measure in the opposite direction around the pipe for 1/4 of the
circumference. Make another crossmark at this point.
Spacing
Crossmark
Side View
8. Center the long block over one of the crosssmarks on the pipe. Align the long block so that the pressure bolt is over
the center of the crossmark. Fasten the block by wrapping both chains around the pipe and fastening the chains to
the screw hooks on the opposite side of the block.
Fasten Chains
Top View
C-RS Ultrasonic Flow Transducer Installation Guide
13
5.4 The Single-Traverse Method -UCF (cont.)
9. Use the wing nuts to tighten the chains on the long block until it is secured snugly to the pipe.
Note: Make sure the chains are perpendicular to the clamping fixture and are not twisted. If the chains are slanted,
the fixture may move and this could change the final transducer spacing.
Tighten Screw
Hooks
Top View
10. Position the clamping fixture rails so that one of the short blocks is placed over the remaining crossmark on the
opposite side of the pipe and the pressure bolt is over the center of the crossmark. Make sure the block does not lie
on top of the long block chains.
Short Block
Crossmark
Crossmark
14
(One of two)
Top View
C-RS Ultrasonic Flow Transducer Installation Guide
5.4 The Single-Traverse Method - UCF (cont.)
11. Wrap the chain on one small block around the pipe, and fasten the chain to the screw hook on the opposite side of
the block. Repeat this for the second short block.
Note: Make sure the chains on both blocks are on the same side of the fixture and are on the opposite side from the
ruler.
Top View
12. Tighten the pressure bolt all the way down on the short block that is NOT positioned over a crossmark. This will act
as a reminder that a transducer in NOT installed in that block.
13. Use the screw hooks to tighten the chains on the fixed and adjustable short blocks until the blocks are secured
snugly to the pipe.
Note: Make sure the chains are perpendicular to the clamping fixture and are not twisted. If the chains are slanted,
the fixture may move and this could change the final transducer spacing.
C-RS Ultrasonic Flow Transducer Installation Guide
15
5.4 The Single-Traverse Method - UCF (cont.)
Figure 6 shows a completed single-traverse installation without the transducers.
Side View
S
Top View
Figure 6: Single-Traverse Clamping Fixture w/o Transducers
16
C-RS Ultrasonic Flow Transducer Installation Guide
5.5 Mounting Transducers into the UCF
IMPORTANT: To maintain ATEX certification the transducer face must be protected against impact. Protection is
provided by properly installing the transducer into the clamping fixture. Care must be taken during
installation to ensure that protection is provided.
The last installation step is mounting the transducers into the clamping fixture. To mount the transducers into the UCF,
complete the following steps:
1. Apply a thread sealant to the transducer threads. A sealant is not required for installations in the USA, but a sealant
must be used for installations in EU countries.
2. Before mounting the transducers into the UCF, thread the electrical junction box onto the BNC connector end of the
transducer. Make sure that at least five full threads are engaged. Be sure to orient the cover of the junction box so it
is accessible to make cable connections after the transducer is installed.
3. On one of the transducers, apply a thin bead of couplant down the center of its face approximately the size of a
toothpaste bead.
Note: To prevent the loss of couplant, do not slide the transducer with couplant along the surface of the pipe when
mounting.
Couplant
C-RS Ultrasonic Flow Transducer Installation Guide
17
5.5 Mounting Transducers into the UCF (cont.)
4. Place the two transducers into the blocks. Face the junction box away from the mounting block as shown below.
Note: If the transducer cables are already connected to the flowmeter, you must identify the upstream and
downstream cables and connect them to the appropriate transducers.
Flow
Top View
5. Use the pressure bolt on the block to secure one of the transducers in place. The pressure bolt should fit into the
dimple in the transducer body. Hand-tighten the bolt just enough to hold the transducer in place. Do not overtighten
the bolt, or the clamping fixture may lift off the pipe.
Flow
Top View
6. Tighten the locking nut on the pressure bolt (see Figure 4 on page 7).
IMPORTANT: When using the UCF on a pipe subject to mechanical vibration, the locking nut must be used to secure the
pressure bolt to the transducer. For additional resistance to vibration a thread lock compound or a
stainless steel washer and lock washer may also be used. These items can be ordered from GE by
requesting a "special" clamping fixture and specifying either the thread lock or the washers.
18
C-RS Ultrasonic Flow Transducer Installation Guide
5.5 Mounting Transducers into the UCF (cont.)
7. Repeat Steps 1 to 6 to mount the other transducer into the remaining block.
8. Secure the short block to the rail by tightening the thumbscrew.
See typical completed UCF installations in Figure 7.
Note: If you have mounted the transducers into the UCF properly, the two transducer cable connectors will face away
from each other as shown below.
Double-Traverse Installation (Top View)
Single-Traverse Installation (Top View)
Figure 7: Completed UCF Installations with Transducers
WARNING! Before performing the next step make sure power to the flowmeter electronics has been
disconnected.
9. Make the transducer cable connections as described in the flowmeter User’s Manual.
C-RS Ultrasonic Flow Transducer Installation Guide
19
6. Installing the General Clamping Fixture and Transducers - GCF
The General Clamping Fixture (GCF) acts as a permanent transducer holder. The fixture has two blocks (see Figure 8)
that are used for both double- and single-traverse methods. Steel straps secure the blocks to the pipe for a permanent
installation.
The transducer installation consists of mounting the GCF to the pipe and then mounting the transducers into the blocks.
Refer to the appropriate section for instructions on either the double-traverse method or the single-traverse method
End View
Side View
Figure 8: General Clamping Fixture Block
6.1 The Double-Traverse Method - GCF
Note: The instructions in this section can also be used for a multiple-traverse method. However, you must use an
EVEN number of traverses. Consult the factory for details.
There are three advantages to using the double-traverse method:
•
Accuracy is improved because the signal is in contact with the fluid longer than with a single-traverse method
•
This configuration can reduce some effect of an underdeveloped flow profile.
•
If there is enough pipe length available, the double-traverse fixture is easier to install.
You will need a level and a marker or scribe to locate and mark the transducer locations on the pipe. To install a
double-traverse GCF, complete the following steps:
1. Obtain the transducer spacing dimension, as described in your flowmeter User’s Manual.
2. Be sure the location you have chosen for the installation has a straight pipe and undisturbed flow for at least 10
pipe diameters upstream and 5 pipe diameters downstream from the flow measurement point.
3. Prepare the pipe where you intend to place the clamping fixture by making sure it is clean and free of loose
material. Sanding, though usually not required, may be necessary to remove any high spots on the pipe. When
sanding, be careful to preserve the original curvature of the pipe.
4. Find the top of the pipe and use a level to draw a line parallel to the center line of the pipe.
20
C-RS Ultrasonic Flow Transducer Installation Guide
6.1 The Double-Traverse Method - GCF (cont.)
Top of Pipe
Line
Side View
5. Make two marks on the line at the top of the pipe. The distance between these two marks must equal the calculated
transducer spacing S.
Spacing
Mark
Mark
Side View
6. From each of the marks, measure around the circumference of the pipe in the same direction a distance equal to 1/4
of the pipe circumference. Make a crossmark at each point.
Spacing
Side View
Crossmarks
C-RS Ultrasonic Flow Transducer Installation Guide
21
6.1 The Double-Traverse Method - GCF (cont.)
7. Center one of the blocks over one of the crossmarks on the pipe. Align the block so that the pressure bolt is over the
center of the mark. Secure the block by wrapping the two straps around the block and the pipe and tightening them.
Make sure the turnbuckles are at least 1/2 pipe diameter away from the block.
Turnbuckles
Top View
8. Repeat Step 7 to install the other block over the other crossmark.
Note: Make sure the straps are perpendicular to the bottom of the blocks. If the straps are slanted, the blocks may
move and this could change the final transducer spacing.
Top View
22
C-RS Ultrasonic Flow Transducer Installation Guide
6.1 The Double-Traverse Method - GCF (cont.)
Figure 9 shows a double-traverse installation without the transducers.
Top View
End View
Figure 9: Double-Traverse GCF Installation w/o Transducers
C-RS Ultrasonic Flow Transducer Installation Guide
23
6.2 The Single-Traverse Method - GCF
Note: The instructions in this section can also be used for a multiple-traverse method. However, you must use an
ODD number of traverses. Consult the factory for details.
You will need a level and a marker or scribe to locate and mark the transducer locations on the pipe. To install a
single-traverse GCF, complete the following steps:
1. Obtain the transducer spacing dimension, as described in your flowmeter User’s Manual.
2. Be sure the location you have chosen for the installation has a straight pipe and undisturbed flow for at least 10
pipe diameters upstream and 5 pipe diameters downstream from the flow measurement point.
3. Prepare the pipe where you intend to place the clamping fixture by making sure it is clean and free of loose
material. Sanding, though usually not required, may be necessary to remove any high spots on the pipe. When
sanding, be careful to preserve the original curvature of the pipe.
4. Find the top of the pipe and use a level to draw a line parallel to the center line of the pipe.
Top of Pipe
Line
Side View
5. Make two marks on the line at the top of the pipe. The distance between these two marks must equal the calculated
transducer spacing S.
Spacing
Mark
Mark
Side View
24
C-RS Ultrasonic Flow Transducer Installation Guide
6.2 The Single-Traverse Method -GCF (cont.)
6. From one of the marks, measure around the circumference of the pipe a distance equal to 1/4 of the pipe
circumference. Make a crossmark at this point.
Top View
7. From the second mark on the top of the pipe, measure in the opposite direction around the pipe for 1/4 of the
circumference. Make another crossmark at this point.
Spacing
Crossmark
Side View
C-RS Ultrasonic Flow Transducer Installation Guide
25
6.2 The Single-Traverse Method -GCF (cont.)
8. Center one of the blocks over one of the crossmarks on the pipe. Align the block so that the pressure bolt is over the
center of the crossmark. Secure the block by wrapping two straps around the block and the pipe and tightening
them. Make sure the turnbuckles are at least 1/2 pipe diameter away from the block.
Turnbuckles
Top View
9. Repeat Step 8 to install the other block over the other crossmark.
Note: Make sure the straps are perpendicular to the bottom of the blocks. If the straps are slanted, the blocks may
move and this could change the final transducer spacing.
Top View
26
C-RS Ultrasonic Flow Transducer Installation Guide
6.2 The Single-Traverse Method -GCF (cont.)
Figure 10 shows a single-traverse installation without the transducers.
Top View
End View
Figure 10: Single-Traverse GCF Installation w/o Transducers
C-RS Ultrasonic Flow Transducer Installation Guide
27
6.3 Mounting Transducers into the GCF
IMPORTANT: To maintain ATEX certification the transducer face must be protected against impact. Protection is
provided by properly installing the transducer into the clamping fixture. Care must be taken during
installation to ensure that protection is provided.
The last installation step is mounting the transducers into the clamping fixture. To mount the transducers into the GCF,
complete the following steps:
1. Apply a thread sealant to the transducer threads. A sealant is not required for installations in the USA, but a sealant
must be used for installations in EU countries.
2. Before mounting the transducers into the GCF, thread the electrical junction box onto the BNC connector end of the
transducer. Make sure that at least five full threads are engaged. Be sure to orient the cover of the junction box so it
is accessible to make cable connections after the transducer is installed.
28
C-RS Ultrasonic Flow Transducer Installation Guide
6.3 Mounting Transducers into the GCF (cont.)
3. On one of the transducers, apply a thin bead of couplant down the center of its face approximately the size of a
toothpaste bead.
Note: To prevent the loss of couplant, do not slide the transducer with couplant along the surface of the pipe when
mounting.
Couplant
4. Place the two transducers into the blocks. Make sure the junction box faces away from the mounting block as
shown below.
Note: If the transducer cables are already connected to the flowmeter, you must identify the upstream and
downstream cables and connect them to the appropriate transducers.
Locking Nut
Top View
5. Use the pressure bolt on the block to secure one of the transducers in place. The pressure bolt should fit into the
dimple in the transducer body. Hand-tighten the bolt just enough to hold the transducer in place. Do not overtighten
the bolt, or the clamping fixture may lift off the pipe.
6. Tighten the locking nut on the pressure bolt (see Figure 4 on page 7).
C-RS Ultrasonic Flow Transducer Installation Guide
29
6.3 Mounting Transducers into the GCF (cont.)
IMPORTANT: When using the GCF on a pipe subject to mechanical vibration, the locking nut must be used to secure the
pressure bolt to the transducer. For additional resistance to vibration a thread lock compound or a
stainless steel washer and lock washer may also be used. These items can be ordered from GE by
requesting a "special" clamping fixture and specifying either the thread lock or the washers.
See typical completed GCF installations in Figure 11.
Note: If you have mounted the transducers into the UCF properly, the two transducer cable connectors will face away
from each other as shown below.
Double-Traverse Installation (Top View)
Single-Traverse Installation (Top View)
Figure 11: Completed GCF Installations with Transducers
WARNING! Before performing the next step, make sure power to the flowmeter electronics has been
disconnected.
7. Make the transducer cable connections as described in the flowmeter User’s Manual.
30
C-RS Ultrasonic Flow Transducer Installation Guide
6.4 Installing the Magnetic Clamping Fixture and Transducers - MCF
The Magnetic Clamping Fixture (MCF) is used to fasten transducers to the pipe at the proper spacing without chains or
straps. The MCF can be used only on ferrous pipe materials.
Different fixtures are used for the single- and double-traverse installations. Each type of MCF has magnets at both ends
of the fixtures. When the magnets are turned ON, the fixture magnetically “clamps” to the pipe wall.
6.5 Identifying the MCF Components
Refer to Figure 12 to identify the MCF components. Then proceed to the instructions for either the double-traverse
method or the single-traverse method.
Transducer Block
Magnetic Block
Pressure Bolt
Locking Nut
ON/OFF Switch
Optional
Safety Chain
Thumbscrews
Rails
Figure 12: Transducer Block and Magnetic Block - MCF
C-RS Ultrasonic Flow Transducer Installation Guide
31
6.6 The Double-Traverse Method - MCF
The double-traverse MCF consists of two adjustable blocks which are connected by two parallel rods. One of the rods
acts as a scale or ruler to help you properly space the transducers. Also included in the fixture are two adjustable
transducer blocks.
WARNING! Do not use the MCF at temperatures that exceed 120°F (49°C) or the fixture will fall off the pipe.
Note: The instructions in this section can also be used for a multiple-traverse method. However, you must use an
EVEN number of traverses. Consult the factory for details.
There are three advantages to using the double-traverse method:
•
Accuracy is improved because the signal is in contact with the fluid longer than with a single-traverse method
•
This configuration can reduce some effect of an underdeveloped flow profile.
•
If there is enough pipe length available, the double-traverse fixture is easier to install.
To install a double-traverse MCF, complete the following steps:
1. Obtain the transducer spacing dimension, as described in your flowmeter User’s Manual.
2. Be sure the location you have chosen for the installation has a straight pipe and undisturbed flow for at least 10
pipe diameters upstream and 5 pipe diameters downstream from the flow measurement point.
3. Prepare the pipe where you intend to place the clamping fixture by making sure it is clean and free of loose
material. Sanding, though usually not required, may be necessary to remove any high spots on the pipe. When
sanding, be careful to preserve the original curvature of the pipe.
4. Using the ruler on the rod, move the blocks so they are a distance S from each other. To move the block, loosen the
red thumb screws, slide the block to the desired location and tighten the thumb screws. As shown below, use either
the pressure bolts or the ends of the blocks as reference points.
S
S
S
Select one method to set spacing
32
C-RS Ultrasonic Flow Transducer Installation Guide
6.7 The Double-Traverse Method - MCF
5. Locate the magnetic blocks at least 4 in. (10 cm) away from the transducer blocks. This will ensure that there is
enough clearance to mount the transducers in the blocks. Move the adjustable magnetic blocks in the same manner
as the transducer blocks.
A t le a s t 4 ”
S
S
S
6. Position the clamping fixture along the horizontal plane of the pipe. However, if the pipe is horizontal, do not place
the fixture on either the top or bottom of the pipe.
Top View
7. Turn the switches on each magnet to the ON position.
8. If provided, secure the optional safety chain. The safety chain prevents the fixture from falling off the pipe if the
magnets fail to hold.
C-RS Ultrasonic Flow Transducer Installation Guide
33
6.8 The Single-Traverse Method - MCF
The single-traverse MCF consists of two sections. Each section includes two magnetic blocks which are connected by
two parallel rods. In addition, a sliding transducer block, which is used to hold the transducer in proper alignment, is
mounted on the two rods. The two sections are mounted on opposite sides of the pipe from each other.
Note: In some applications, an MCF with two transducer blocks is used.
WARNING! Do not use the MCF at temperatures that exceed 120°F (49°C) or the fixture will fall off the pipe.
Note: The instructions in this section can also be used for a multiple-traverse method. However, you must use an
ODD number of traverses. Consult the factory for details.
To install a single-traverse MCF, complete the following steps:
1. Obtain the transducer spacing dimension, as described in your flowmeter User’s Manual.
2. Be sure the location you have chosen for the installation has a straight pipe and undisturbed flow for at least 10
pipe diameters upstream and 5 pipe diameters downstream from the flow measurement point.
3. Prepare the pipe where you intend to place the clamping fixture by making sure it is clean and free of loose
material. Sanding, though usually not required, may be necessary to remove any high spots on the pipe. When
sanding, be careful to preserve the original curvature of the pipe.
4. Find the top of the pipe and use a level to draw a line parallel to the center line of the pipe.
Line
Top of Pipe
Side View
34
C-RS Ultrasonic Flow Transducer Installation Guide
6.8 The Single-Traverse Method - MCF (cont.)
5. Make two marks on the line at the top of the pipe. The distance between these two marks must equal the calculated
transducer spacing S.
Spacing
Mark
Mark
Side View
6. From one of the marks, measure around the circumference of the pipe a distance equal to 1/4 of the pipe
circumference. Make a crossmark at this point.
Spacing
Crossmark
Side View
C-RS Ultrasonic Flow Transducer Installation Guide
35
6.8 The Single-Traverse Method - MCF (cont.)
7. From the second mark on the top of the pipe, measure in the opposite direction around the pipe for 1/4 of the
circumference. Make another crossmark at this point.
S
S
S
8. On one of the fixture sections, position the transducer block anywhere along the rods. Be sure to leave enough
room on both sides to easily insert the transducers. To move the block, loosen the red thumbscrews, slide the block
to the desired location and tighten the thumbscrews. Use the pressure bolt as the measuring point for the block.
Repeat for the other fixture section.
Note: If you are using a fixture with two transducer blocks, adjust one block as described above and push the unused
block all the way to one side of the rail. Tighten the pressure bolt all the way down on the unused block. This
will act as a reminder not to install a transducer in that block.
Thumbscrew
9. Center the transducer block over one of the crossmarks on the pipe. Align it so that the pressure bolt on the block is
directly over the center of the crossmark.
Pressure Bolt
Top View
36
C-RS Ultrasonic Flow Transducer Installation Guide
6.8 The Single-Traverse Method - MCF (cont.)
10. Turn the switches on both magnets to the ON position.
11. Repeat steps 9 and 10 to mount the other fixture section on the opposite side of the pipe.
Top View
12. If provided, secure the optional safety chain. The safety chain prevents the fixture from falling off the pipe if the
magnets fail to hold.
C-RS Ultrasonic Flow Transducer Installation Guide
37
6.9 Mounting Transducers into the MCF
IMPORTANT: To maintain ATEX certification the transducer face must be protected against impact. Protection is
provided by properly installing the transducer into the clamping fixture. Care must be taken during
installation to ensure that protection is provided.
The last installation step is mounting the transducers into the clamping fixture. To mount the transducers into the GCF,
complete the following steps:
1. Apply a thread sealant to the transducer threads. A sealant is not required for installations in the USA, but a sealant
must be used for installations in EU countries.
2. Before mounting the transducers into the MCF, thread the electrical junction box onto the BNC connector end of
the transducer. Make sure that at least five full threads are engaged. Be sure to orient the cover of the junction box
so it is accessible to make cable connections after the transducer is installed.
38
C-RS Ultrasonic Flow Transducer Installation Guide
6.9 Mounting Transducers into the MCF (cont.)
3. On one of the transducers, apply a thin bead of couplant down the center of its face approximately the size of a
toothpaste bead.
Note: To prevent the loss of couplant, do not slide the transducer with couplant along the surface of the pipe when
mounting.
Couplant
4. Place the two transducers into the blocks. Make sure the junction box faces away from the mounting block as
shown below.
Note: If the transducer cables are already connected to the flowmeter, you must identify the upstream and
downstream cables and connect them to the appropriate transducers.
Line
Top of Pipe
Side View
C-RS Ultrasonic Flow Transducer Installation Guide
39
6.9 Mounting Transducers into the MCF (cont.)
5. Use the pressure bolt on the block to secure one of the transducers in place. The pressure bolt should fit into the
dimple in the transducer body. Hand-tighten the bolt just enough to hold the transducer in place. Do not overtighten
the bolt, or the clamping fixture may lift off the pipe.
WARNING! Overtightening the pressure bolt will cause the magnet to separate from the pipe.
6. Tighten the locking nut on the pressure bolt, as shown below.
Note: If you have mounted the transducer into the MCF properly, the junction box will face away from the center of
the fixture, as shown below.
Pressure Bolt
Locking Nut
Top View
7. Repeat Steps 1 to 6 to mount the other transducer in the remaining block.
IMPORTANT: When using the MCF on a pipe subject to mechanical vibration, the locking nut must be used to secure the
pressure bolt to the transducer. For additional resistance to vibration a thread lock compound or a
stainless steel washer and lock washer may also be used. These items can be ordered from GE by
requesting a "special" clamping fixture and specifying either the thread lock or the washers.
40
C-RS Ultrasonic Flow Transducer Installation Guide
6.9 Mounting Transducers into the MCF (cont.)
See typical completed MCF installations in Figure 13 below.
WARNING! If your fixture is installed at an elevated location, GE recommends securing the fixture with the
optional safety chain or a tether/leash to prevent injury if the fixture falls off the pipe.
Double-Traverse Installation (Top View)
Single-Traverse Installation (Top View)
Figure 13: Completed MCF Installations with Transducers
WARNING! Before performing the next step make sure power to the flowmeter electronics has been
disconnected.
8. Make the transducer cable connections as described in the flowmeter User’s Manual.
C-RS Ultrasonic Flow Transducer Installation Guide
41
6.10 Maintaining the C-RS Transducers
Transducers, couplant, the clamping fixture and dampening material are provided by the factory. Once you have
completed installation little maintenance is required. Refer to Table 3 for maintenance information.
Table 3: Maintenance Checks
Component
Transducer
Couplant
Dampening
Material
Clamping
Fixture
42
Interval
N/A
Maintenance Check
Comments
No cleaning is
No additional adjustments or maintenance is needed. If
you suspect something is wrong with a transducer or need required.
to replace a transducer, simply loosen the pressure bolt
that secures the transducer in place and remove it. If
necessary, loosen the locking nut with a wrench. Refer to
Installing the Transducers to insert a new transducer.
No cleaning is
Verify every 6 months in Measure the signal strength using the flowmeter
dry areas (e.g. the desert). diagnostics and compare it to the value taken at the time of required.
Verify every 12 months installation. Good and bad limits are listed in the
flowmeter User’s Manual.
in other areas.
N/A
The expected life is 25 years. Consult GE for additional
information if needed.
No cleaning is
required.
Determined by user
Periodic inspection and tightening of the clamping fixture
No cleaning is
nuts is required to ensure the clamping fixture does not
required.
become loose and fall from the pipe, possibly causing injury.
C-RS Ultrasonic Flow Transducer Installation Guide
6.11 Specifications
Table 4: C-RS Transducer Specifications
Transducer #
Parameter
Intended Uses
Installation Type
Material
401
Large pipes
Ductile iron pipes
Lined pipes
Two-phase liquid
High performance
402
Mid-size pipes
High performance
403
Small pipes;
High performance
Clamp-on for liquid applications
316 Stainless Steel or plastic
Pipe Sizes
2” to 300” (5 cm to 7.5 m)
diameter
2” to 300” (5 cm to 7.5 m)
diameter
2” to 6” (5 to 15 cm)
diameter
Operating Frequency
0.5 MHz
1.0 MHz
2.0 MHz
Electrical Rating
200 V peak-to-peak, 5 mA
Ambient Temperature Range -40 to +167°F (-40 to +75°C)
Process Temperature Range -40 to +302°F (-40 to +150°C)
North American Certification Class I, Division 1, Group B, C & D
- Explosion proof
European Certification Flameproof
II 2 GD, EEx md IIC T6 80°C
Tam -40 to 75oC (-40 to 167oF)
KEMA 02ATEX2337 X
North American Certification IP66, TYPE 4X
- Weatherproof
200Vpp, 5mA
European Certification
- Weatherproof
IMPORTANT:
IP 66
The transducer is protected by a suitable fuse located in the flowmeter electronics.
The fuse has a breaking capacity in accordance with the short circuit current of the supply.
C-RS Ultrasonic Flow Transducer Installation Guide
43
[no content intended for this page]
44
C-RS Ultrasonic Flow Transducer Installation Guide
Warranty
Warranty
Each instrument manufactured by GE Sensing is warranted to be free from defects in material and workmanship.
Liability under this warranty is limited to restoring the instrument to normal operation or replacing the instrument, at
the sole discretion of GE Sensing. Fuses and batteries are specifically excluded from any liability. This warranty is
effective from the date of delivery to the original purchaser. If GE Sensing determines that the equipment was
defective, the warranty period is:
•
one year from delivery for electronic or mechanical failures
•
one year from delivery for sensor shelf life
If GE Sensing determines that the equipment was damaged by misuse, improper installation, the use of unauthorized
replacement parts, or operating conditions outside the guidelines specified by GE Sensing, the repairs are not covered
under this warranty.
The warranties set forth herein are exclusive and are in lieu of all other warranties whether
statutory, express or implied (including warranties or merchantability and fitness for a
particular purpose, and warranties arising from course of dealing or usage or trade).
Return Policy
If a GE Sensing instrument malfunctions within the warranty period, the following procedure must be completed:
1. Notify GE Sensing, giving full details of the problem, and provide the model number and serial number of the
instrument. If the nature of the problem indicates the need for factory service, GE Sensing will issue a RETURN
AUTHORIZATION NUMBER (RAN), and shipping instructions for the return of the instrument to a service
center will be provided.
2. If GE Sensing instructs you to send your instrument to a service center, it must be shipped prepaid to the authorized
repair station indicated in the shipping instructions.
3. Upon receipt, GE Sensing will evaluate the instrument to determine the cause of the malfunction.
Then, one of the following courses of action will then be taken:
•
If the damage is covered under the terms of the warranty, the instrument will be repaired at no cost to the owner and
returned.
•
If GE Sensing determines that the damage is not covered under the terms of the warranty, or if the warranty has
expired, an estimate for the cost of the repairs at standard rates will be provided. Upon receipt of the owner’s
approval to proceed, the instrument will be repaired and returned.
C-RS Ultrasonic Flow Transducer Installation Guide
45
Warranty
[no content intended for this page]
46
C-RS Ultrasonic Flow Transducer Installation Guide
GE
Sensing
ATEX
COMPLIANCE
GE Sensing
1100 Technology Park Drive
Billerica, MA 01821
USA
We,
as the manufacturer, declare under our sole responsibility that the
FGA 311 In Situ Flue Gas Oxygen Transmitter
to which this declaration relates, in accordance with the provisions of ATEX Directive 94/9/EC Annex II, meets the following
specifications:
II 2 GD EEx d IIB T2
1180
ISSeP02ATEX028X T95°C IP66 (Housing)
Furthermore, the following additional requirements and specifications apply to the product:
• Having been designed in accordance with EN 50014, EN 50018, and EN 50281, the product meets the fault tolerance
requirements of electrical apparatus for category “d”.
• The product is an electrical apparatus and must be installed in the hazardous area in accordance with the requirements of
the EC Type Examination Certificate. The installation must be carried out in accordance with all appropriate international,
national and local standard codes and practices and site regulations for flameproof apparatus and in accordance with the
instructions contained in the manual. Access to the circuitry must not be made during operation.
• Only trained, competent personnel may install, operate and maintain the equipment.
• The product has been designed so that the protection afforded will not be reduced due to the effects of corrosion of
materials, electrical conductivity, impact strength, aging resistance or the effects of temperature variations.
• The product cannot be repaired by the user; it must be replaced by an equivalent certified product. Repairs should only be
carried out by the manufacturer or by an approved repairer.
• The product must not be subjected to mechanical or thermal stresses in excess of those permitted in the certification
documentation and the instruction manual.
• The product contains no exposed parts which produce surface temperature infrared, electromagnetic ionizing, or
non-electrical dangers.
• The setting of the electronic protective device ensuring that the temperature class indicated in this certificate is fulfilled
shall be affected for each apparatus under the responsibility of the manufacturer. Furthermore, this setting shall not be
modified.
[no content intended for this page]
GE
Sensing
DECLARATION
OF
CONFORMITY
GE Sensing
1100 Technology Park Drive
Billerica, MA 01821
USA
We,
declare under our sole responsibility that the
FGA311 In Situ Flue Gas Oxygen Transmitter
to which this declaration relates, is in conformity with the following standards:
• EN 61326-1:2006, Class A, Table 2, Industrial Locations
• EN 61326-2-3:2006
• EN 61010-1:2001, Over voltage Category II, Pollution Degree 2
following the provisions of Directives 2004/108/EC EMC, 2006/95/EC Low Voltage and 94/9/EC ATEX.
Where products were initially assessed for compliance with the Essential Health and Safety Requirements of the
ATEX Directive 94/9/EC using earlier harmonized standards, a subsequent review has determined that “technical knowledge”
is unaffected by the current harmonized standards listed above.
The units listed above and any ancillary sample handling systems supplied with them do not bear CE marking for the
Pressure Equipment Directive, as they are supplied in accordance with Article 3, Section 3 (sound engineering practices and
codes of good workmanship) of the Pressure Equipment Directive 97/23/EC for DN<25.
2009
Year of Issue
Mr. Gary Kozinski
Senior Certification Engineer
[no content intended for this page]
Customer Support Centers
U.S.A.
The Boston Center
1100 Technology Park Drive
Billerica, MA 01821
U.S.A.
Tel: 800 833 9438 (toll-free)
978 437 1000
E-mail: [email protected]
Ireland
Sensing House
Shannon Free Zone East
Shannon, County Clare
Ireland
Tel: +353 (0)61 470291
E-mail: [email protected]
An ISO 9001:2000 Certified Company
www.gesensinginspection.com/en/about_us/quality.html
www.gesensinginspection.com
©2010 General Electric Company. All rights reserved.
Technical content subject to change without notice.
916-077 Rev. C