1
PROTOCOL SOLUTIONS GROUP
3385 SCOTT BLVD
SANTA CLARA, CA 95054
ST
Automated Test Suite
User Manual
Manual Version 1.00
Software Version 1.00
August 2011
Document Disclaimer
The information contained in this document has been carefully checked and is believed to be
reliable. However, no responsibility can be assumed for inaccuracies that may not have been
detected. LeCroy reserves the right to revise the information presented in this document without
notice or penalty.
Trademarks and Servicemarks
LeCroy and ST Automated Test Suite are trademarks of LeCroy.
Microsoft and Windows are registered trademarks of Microsoft Inc.
All other trademarks are property of their respective companies.
Copyright
Copyright © 2011 LeCroy. All rights reserved.
This document may be printed and reproduced without additional permission, but all copies should
contain this copyright notice.
2
Contents
1.
Introduction ...................................................................................................................... 4
1.1
Test Case Overview ............................................................................................. 4
1.2
Folder Structure .................................................................................................... 4
2.
Automated Test Suite Application Shell ........................................................................... 5
2.2
Main Toolbar ........................................................................................................ 6
2.3
Workspace Area ................................................................................................... 8
2.4
Test Monitoring Console....................................................................................... 9
2.5
Output Window ................................................................................................... 10
2.6
Menus................................................................................................................. 10
3.
Operation of the Automated Test Suite Software ........................................................... 11
4.
Writing ATS VB Scripts .................................................................................................. 12
4.1
Creating the Main Objects .................................................................................. 12
4.2
Specifying Port Configuration ............................................................................. 14
4.3
Running the Analyzer and Capturing a Trace File .............................................. 15
4.4
Running Host Emulator ...................................................................................... 16
4.5
Running Trainer.................................................................................................. 17
4.6
Running InFusion ............................................................................................... 19
4.7
Activating Device Emulator................................................................................. 20
4.8
Running Mixed Configurations/Functionalities.................................................... 21
4.9
VSE Verification ................................................................................................. 23
4.10 Loading Pre Emphasis Signal Settings............................................................... 32
How to Contact LeCroy ............................................................................................................ 33
3
1. Introduction
The ST Automated Test Suite is a turnkey verification system that allows developers to pre-test
devices for SAS/SATA specification conformance. The system generates specific traffic conditions to
the Host or Device under Test (DUT). The Analyzer simultaneously records and analyzes responses.
The ST Automated Test Suite includes a software console that manages the entire compliance
verification process by allowing users to run individual test cases or run the full suite in batch mode
operation.
The ST Automated Test Suite operates on Sierra M6-4, Sierra M6-2, STX A6-4, and
STX M6-1 platforms.
1.1
Test Case Overview
Each individual test case is controlled by a VB script that automates operation of the hardware and
software. The ST Automated Test Suite has Available VB Scripts:
o General, such as PreemphasisLoad and VSE
o Analyzer, such as Multi-Open-Close, Run Analyzer project (Make recording), and Run Analyzer
project (Start-stop recording)
o Target Emulator, such as Activate-Deactivate and Analyzer-Target
o Host Emulator, such as AnalyzerExerciser and HostOnly
o Infusion, such as Analyzer-Infusion and Infusion
o Trainer, such as Analyzer-Trainer, Analyzer-Trainer - 1 Port, Analyzer-Trainer - 2 Ports, Trainer
Only, and TrainerWithExitCode
o Mixture Configurations, such as AnalyzerDeviceInfusion, AnalyzerHostDevice, HostInfusion,
TargetInfusion, TrainerInfusion
See Chapter 4, Writing ATS VB Scripts.
1.2
Folder Structure
The ST Automated Test Suite application has its own folder structure. These folders are at the top
level:
o Examples/Scripts: Contains VB scripts.
o Reports: Contains the generated reports.
o Output: Default folder for saving trace files. You can change the default folder in the
Settings dialog.
4
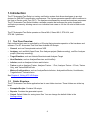
2. Automated Test Suite Application Shell
The ST Automated Test Suite installs an application that initiates the test process and manages the
test output (Figure 2-1).
Figure 2-1
The software contains the following main parts:
o Main Toolbar
o Workspace Area
o Monitoring Console
o Output Window
o Menus
5
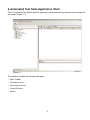
2.1
Main Toolbar
Settings Button
The Settings button, at the left, opens the Settings dialog (Figure 2-2), which provides access to
user-configurable options.
Figure 2-2
VB Scripts root directory: Specifies the folder in which to save VB scripts.
Generated reports path: Specifies the folder in which to save reports.
Trace files path: Specifies the folder in which to save trace file output during test execution.
VB Script Editor: Specifies the application with which to open VB scripts.
Automatically Save Log: To automatically save log files, select the checkbox and enter the
File Path and the Max(imum) Size in kilobytes.
Project files path: Specifies the folder in which to save the project.
Automatically Save Log: To automatically save log files, select the checkbox and enter the
File Path and the Max(imum) Size in kilobytes.
ATS working protocol: Specifies SAS or SATA protocol.
6
Configuration Button
The Configuration button opens the Configuration dialog (Figure 2-3), in which you can enter the
DUT Name and then set the SAS Address and Speed (1.5 Gbps, 3.0 Gbps, 6.0 Gbps, or
AutoSpeed) for each Port number.
Figure 2-3
Click the Find Device button to locate devices.
Help Button
The Help button displays information about the application.
7
2.2
Workspace Area
The Workspace Area provides a nested tree structure that allows you to select individual tests to run
(Figure 2-4).
Figure 2-4
This window lists all available tests. Checkboxes allow selection of the entire suite or individual test
cases.
Buttons
After tests are selected, the Add button adds test(s) to the execution pipe.
After tests are selected, the Show VBS button, or double-clicking the test case name, opens the VB
script file in the Scripts Editor, such as the Notepad application.
The Refresh Test list button refreshes the list of tests, if tests have been added or modified within
the Scripts folder.
8
2.3
Test Monitoring Console
The Test Monitoring Console (Figure 2-5) lists the tests that have been selected for execution, their
results, and their descriptions.
Figure 2-5
After adding a test (using the Add button in the Workspace Area), the test appears in the
Test Monitoring Console.
The Result column displays the test status upon completion. The Result field may display Passed,
Failed, or Done.
• When the test passes, Pass is shown in the Result field on a green background.
• When the test fails, Fail is shown in the Result field on a red background.
• When the test executes and the verification process is unable to confirm the expected behavior,
Done is shown in the Result field on a gray background (rarely occurs).
• When the test is unable to capture a valid trace file, the software displays a message:
“Error during recording; No trace file created”.
If the test fails, the verification software shows an error code in the Description field.
Buttons
The green Run all button, at the left, starts execution in sequential order of all tests in the monitoring
window.
The black Stop button, second from left, allows you to stop execution of the current test run.
The Run Failed Test Case(s) button, third from left, runs the failed test cases again.
The Run Selected Test Case(s) button, fourth from left, runs the selected test cases. You can select
multiple rows using CTRL+Right-Click.
The Remove Selected Test Case(s) button, fifth form left, deletes the selected tests from the list of
potential running tests. You can select multiple rows using CTRL+Right-Click.
9
The Remove All Test Case(s) button, sixth from left, removes all tests from the running queue.
Upon completion of a test run, the View HTML report of latest run button, seventh form left, opens
a summary report. The HTML report summarizes the test results including the result, suspected error
code, and test execution details. If individual test cases generate a fail result, hyperlinks are added to
navigate directly to the error point in the trace file.(Figure 2-7):
Upon completion of a test run, the View XML report of latest run button, eighth from left, opens an
XML version of the summary report.
The Load Project button, second from right, loads saved Projects from a folder. A Project is a
collection of scripts. The scripts are listed in the right pane.
The Save Project button, at the right, saves the current Project to a folder.
2.4
Output Window
The Output Window (Figure 2-6) provides a real time test log in text format. The software generates
a text-based report during execution of the test run and appends the report to the Output Window as
each test completes. The log summarizes the status of the each test and alerts you to possible test
operation problems as they are detected.
Figure 2-6
Buttons
The Save Log button, second from left, saves the Log to a text file.
The Print Log button, second from right, prints the Log.
The Clear button, at the right, clears the window.
2.5
Menus
The Menus are:
o File: Configuration, Settings, Exit
o Run: Run, Stop
o Commands: Add, Remove, Add All, Remove All
o View: Toolbar, Status Bar, Workspace, Output
o Reports: HTML, XML
o Help: Help Topics, About LeCroy STATS
10
3. Operation of the Automated Test Suite Software
When an initial test run starts, the software takes the following steps:
1) The Run all button starts execution in sequential order of all tests in the Test Monitoring Console.
2) Within the Output Window:
Start Recording indicates that the Analyzer begins recording traffic.
Start Generation indicates that the Trainer starts to execute the test script.
Waiting displays while the test is executing.
Stop Generation displays when the test script has finished executing.
Stop Recording displays when the Analyzer has stopped capturing data and automatically
begins uploading the trace file.
Run Verification Script indicates the appropriate verification script has been retrieved and is
automatically analyzing the results of the test.
Passed or Failed displays based on the result of the test.
Finished displays after the test result updates in the Test Monitoring Console.
Retry displays when Fail is logged for a given test and the automatically re-run test option is
enabled in the Settings dialog.
3) Within the Test Monitoring Console:
Pass, Fail, or N/A is added to the Results column.
Error codes are added to the Description column.
11
4. Writing ATS VB Scripts
The most important and significant part of running an automation test is writing their VB Scripts. You
need to write your own VB Scripts for your automation tests and therefore you must understand how
VB Scripts should be prepared.
NOTE: Currently, ATS does support segmented memory and auto run. Auto run is an application
feature which the user can implement in VB script.
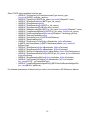
4.1
Creating the Main Objects
You must create two main automation objects at the beginning of any VB Script. The first one is the
STATS object, which sends test results, reports, and possible errors to the STATS environment. The
second one is the SASAnalyzer object, which runs Analyzer, Emulator, Trainer, InFusion, and VSE
projects.
To create automation objects, call the CreateObject function. LECROY is the name of the
namespace that includes all LeCroy automation objects.
To create the STATS automation object, use the following code in your VB Script:
Set MySTATS = WScript.CreateObject("LECROY.STATS")
If Err.Number <> 0 Then
WScript.Echo "STATS Creation Failed"
WScript.Quit
ELSE
MySTATS.ReportText ("My STATS started...")
MySTATS.ReportText ("STATS Automation object is created")
End If
To create the SASAnalyzer automation object, use the following code in your VB Script:
Set MySASAutomation = WScript.CreateObject("LECROY.SASAnalyzer")
If Err.Number <> 0 Then
MySTATS.ReportError Err.number, Err.Description
End If
MySTATS.ReportText ("Analyzer is created successfully")
The STATS Objects has the following reporting functions:
o HRESULT ReportText(BSTR bstrText); Reports the text that will appear on the output
bar in the STATS environment.
o HRESULT ReportError(LONG nErrorCode, BSTR bstrDescription): Reports
possible errors with error codes and descriptions that appear on both the output bar
and the Detail column of the running area in the STATS software.
o HRESULT ReportResult(LONG nResult): Sends the result of the automation test to
display on the Result column of the running area in the STATS environment. Numbers
indicate:
0 =Not Applicable (N/A)
1 = Pass
2 = Fail
12
Other STATS object available functions are:
o HRESULT GetVersion([in] EAnalyzerVersionType version_type,
[out,retval] WORD* analyzer_version);
o HRESULT OpenFile([in] BSTR file_name, [out,retval] IDispatch** trace);
o HRESULT StartGeneration([in] BSTR gen_file_name);
o HRESULT StopGeneration(void);
o HRESULT StartRecording([in] BSTR ro_file_name);
o HRESULT StopRecording([in] BOOL abort_upload);
o HRESULT MakeRecording([in] BSTR ro_file_name, [out,retval] IDispatch** trace);
o HRESULT LoadDisplayOptions([in] BSTR do_file_name, [in] short do_layers);
o HRESULT GetRecordingOptions([out,retval] IDispatch** recording_options);
o HRESULT ResumeGeneration(void);
o HRESULT ActivateDevice( [in] BSTR bstrFileName);
o HRESULT DeactivateDevice();
o HRESULT SetScenarioToPort([in]int nBoardIndex, [in]int nPortIndex,
[in]BSTR bstrLibraryName, [in]BSTR bstrScenarioName, [out, retval] int*
pnErrorCode);
o HRESULT StartScenario([in]int nBoardIndex, [in]int nPortIndex);
o HRESULT StopScenario([in]int nBoardIndex, [in]int nPortIndex);
o HRESULT SetPortConfiguration([in]int nBoardIndex, [in]int nPortConfiguration);
o HRESULT StartGenerationByPort([in] BSTR gen_file_name, [in] int nUnitIndex,
[in]int nPortIndex);
o HRESULT StopGenerationByPort([in] int nUnitIndex, [in]int nPortIndex);
o HRESULT GetTrainerExitCode([in] int nBoardIndex, [in] int nPortIndex,
[out, retval] BYTE* pyTrainerExitCode);
o HRESULT LoadPreEmphasisSignalFile([in]BSTR bstrPreEmphasisSignalFile,
[out, retval]BOOL* pbRetval);
For detailed descriptions of these functions, refer to the Automation API Reference Manual.
13
4.2
Specifying Port Configuration
After creating the SASAnalyzer and STATS automation objects, specify the port configuration by
calling the SetPortConfiguration function. This function specifies the functionality for each port
(Refer to the Automation API Reference Manual for port configuration lists and their values). Use the
following code to set port configuration:
MySASAutomation.SetPortConfiguration 0, 72 ' 72 is the code for DEVICE_CONFIG_AT_0_0_0
If Err.Number <> 0 Then
MySTATS.ReportError Err.number, Err.Description
Else
MySTATS.ReportText ("Set port configuration is done")
End If
14
4.3
Running the Analyzer and Capturing a Trace File
To run an Analyzer project and create a trace file, you have two options. The first one is Start/Stop
Recording, and the second one is MakeRecording.
Using either option, the captured trace file is stored in the Trace File Path specified in the Settings
dialog. The trace file name is the test name and is in a folder with a name similar to the device (DUT)
name specified in the Configuration dialog.
Start/Stop Recording
You can start capturing by calling the StartRecording function, using as input parameter the path of
the Analyzer project.
MySASAutomation.StartRecording("E:\ AnalyzerOnly.sac")
If Err.Number <> 0 Then
MySTATS.ReportError Err.number, Err.Description
Else
MySTATS.ReportText ("Recording is started")
End If
WScript.Sleep(10000) ' Wait 10 seconds for our capturing process.
You stop recording by calling the StopRecording function after waiting enough time for the capturing
process to complete. The parameter specifies whether you want to stop capturing only or you want to
create your trace file also. The FALSE value creates a trace file.
MySASAutomation.StopRecording(FALSE)
If Err.Number <> 0 Then
MySTATS.ReportError Err.number, Err.Description
Else
MySTATS.ReportText ("Recording is stopped")
End If
To get the object of the generated trace file, call the OpenFile function to open the file and return the
reference.
Set SASTracer = MySASAutomation.OpenFile("E:\Output\Device 1\AnalyzerOnly.scs")
If Err.Number <> 0 Then
MySTATS.ReportError Err.number, Err.Description
Else
MySTATS.ReportText ("Trace file is opened")
End If
15
Make Recording
You can call the MakeRecording function, using as input parameter the path of the Analyzer project,
to start capturing, using the current the triggering strategy and specified sample size,. After those
limits are reached, the device stops, and the trace file is generated. With this option, you do not need
to wait for capturing. The function return value is the reference to the generated trace file.
Set SASTracer = MySASAutomation.MakeRecording("E:\Make-Recording.sac")
If Err.Number <> 0 Then
MySTATS.ReportError Err.number, Err.Description
Else
MySTATS.ReportText ("Trace is created")
End If
Closing
After SASTracer is opened and used, close it by calling the Close function. .
SASTracer.Close()
4.4
Running Host Emulator
Running a Host Emulator project is similar to running an Analyzer project. You can use either the
Start Recording or MakeRecording option. Use the Host Emulator project as the parameter, rather
than the Analyzer project. Set your port configuration to the device type that has at least one port of
Host Emulator functionality (for example DEVICE_CONFIG_HE_0_0_0).
16
4.5
Running Trainer
To run a Trainer project, you must specify the SSG file for each port on which you want to start
Trainer. Call the StartGenerationByPort function and specify the Trainer file, board index, and port
index to start generation on the specified port. For example, if you have set port configuration to
DEVICE_CONFIG_AT_AT_0_0, then call StartGenerationByPort for the first and second ports. To
stop generation, call the StopGenerationByPort function for each port on which Trainer has started.
Use the following code to start and stop generation for ports 0 and 1:
'--------- Set port configuration to DEVICE_CONFIG_T_T_A_A --------MySASAutomation.SetPortConfiguration 0, 88
If Err.Number <> 0 Then
MySTATS.ReportError Err.number, Err.Description
Else
MySTATS.ReportText ("Set port configuration is done")
End If
'--------- Start first Generation on Port 0 --------MySASAutomation.StartGenerationByPort "E: \Projects\AnalyzerTrainer-Port one.ssg", 0, 0
If Err.Number <> 0 Then
MySTATS.ReportError Err.number, Err.Description
Else
MySTATS.ReportText ("Generation is started on Port 1")
End If
'--------- Start second Generation on
MySASAutomation.StartGenerationByPort
If Err.Number <> 0 Then
MySTATS.ReportError Err.number,
Else
MySTATS.ReportText ("Generation
End If
Port 1 --------"E:\Projects\AnalyzerTrainer-Port Two.ssg", 0, 1
Err.Description
is started on Port 2")
'-------- Stop Generation on Port 0 -------MySASAutomation.StopGenerationByPort 0, 0
If Err.Number <> 0 Then
MySTATS.ReportError Err.number, Err.Description
Else
MySTATS.ReportText ("Generation is stopped on port 1")
End If
'-------- Stop Generation on Port 1 -------MySASAutomation.StopGenerationByPort 0, 1
If Err.Number <> 0 Then
MySTATS.ReportError Err.number, Err.Description
Else
MySTATS.ReportText ("Generation is stopped on Port 2")
End If
17
If you have only one port for generation, you can use another pair of starting and stopping generation
functions, which require no board or port index, because Trainer can only be started on the single
Trainer port. Specify the Trainer port by the SetPortConfiguration function. Use the following code:
'--------- Set Port Configuration to DEVICE_CONFIG_AT_0_0_0 --------MySASAutomation.SetPortConfiguration 0, 72
If Err.Number <> 0 Then
MySTATS.ReportError Err.number, Err.Description
Else
MySTATS.ReportText ("Set port configuration is done")
End If
'--------- Start an generation file --------MySASAutomation.StartGeneration "E:\Projects\AnalyzerTrainer.ssg"
If Err.Number <> 0 Then
MySTATS.ReportError Err.number, Err.Description
Else
MySTATS.ReportText ("Generation is started")
End If
'--------- Stop Generation --------MySASAutomation.StopGeneration
If Err.Number <> 0 Then
MySTATS.ReportError Err.number, Err.Description
Else
MySTATS.ReportText ("Generation is stopped")
End If
To exit, call the GetTrainerExitCode function. Use the following code to exit generation for port 0 of
board 0.
ExitCode = MySASAutomation.GetTrainerExitCode(0, 0)
If Err.Number <> 0 Then
MySTATS.ReportError Err.number, Err.Description
Else
MySTATS.ReportText ("ExitCode is Received")
End If
18
4.6
Running InFusion
You can use the SASAnalyzer automation object to run InFusion and start scenarios from previously
saved libraries:
1- Set scenario to port: Assigns a scenario from a library to a specific port of the board.
2- Start scenario: Starts scenario on the specified port of the board
3- Stop scenario: Stops scenario on the specified port of the board.
Depending on the port configuration and the number of Jammer ports, you may need to repeat the
steps. For example, if you have 2 ports of Jammer (DEVICE_CONFIG_J_J_0_0) and you want to
start scenario on ports 0 and 1, use the following code:
' --------- set port configuration of board to DEVICE_CONFIG_J_J_0_0 --------MySASAutomation.SetPortConfiguration 0, 68
If Err.Number <> 0 Then
MySTATS.ReportError Err.number, Err.Description
Else
MySTATS.ReportText ("Set port configuration is done")
End If
' --------- Assign “FourthScenario” of VTSE.infdb library to the port 0 of board 0 --------MySASAutomation.SetScenarioToPort 0, 0, "E: \Projects\VTSE.infdb", "FourthScenario"
If Err.Number <> 0 Then
MySTATS.ReportError Err.number, Err.Description
Else
MySTATS.ReportText ("Scenario is set to port 0")
End If
' --------- Assign “ThirdScenario” of VTSE.infdb library to the port 1 of board 0 --------MySASAutomation.SetScenarioToPort 0, 1, "E:\Projects\VTSE.infdb", "ThirdScenario"
If Err.Number <> 0 Then
MySTATS.ReportError Err.number, Err.Description
Else
MySTATS.ReportText ("Scenario is set to port 1")
End If
'--------- Start scenario on port 0 board 0 --------MySASAutomation.StartScenario 0, 0
If Err.Number <> 0 Then
MySTATS.ReportError Err.number, Err.Description
Else
MySTATS.ReportText ("Scenario is started on port 0")
End If
'--------- Start scenario on port 1 board 0 --------MySASAutomation.StartScenario 0, 1
If Err.Number <> 0 Then
MySTATS.ReportError Err.number, Err.Description
Else
MySTATS.ReportText ("Scenario is started on port 1")
End If
'--------- Stop scenario on port 0 board 0 --------MySASAutomation.StopScenario 0, 0
If Err.Number <> 0 Then
MySTATS.ReportError Err.number, Err.Description
19
Else
MySTATS.ReportText ("Scenario is stopped on port 0")
End If
'--------- Stop scenario on port 1 board 0 --------MySASAutomation.StopScenario 0, 1
If Err.Number <> 0 Then
MySTATS.ReportError Err.number, Err.Description
Else
MySTATS.ReportText ("Scenario is stopped on port 1")
End If
4.7
Activating Device Emulator
To activate/deactivate Device Emulator projects, call the ActivateDevice and DeactivateDevice
functions from the SASAnalyer automation object, using as parameter the device emulator project.
Use the following code to activate/deactivate a device emulator:
'--------- Activate a Target Emulator project --------MySASAutomation.ActivateDevice "E:\Projects\DeviceOnly.std"
If Err.Number <> 0 Then
MySTATS.ReportError Err.number, Err.Description
Else
MySTATS.ReportText ("Device is activated")
End If
WScript.Sleep(5000)
'--------- Stop recording and make trace file --------MySASAutomation.DeactivateDevice()
If Err.Number <> 0 Then
MySTATS.ReportError Err.number, Err.Description
Else
MySTATS.ReportText ("Device is deactivated")
End If
20
4.8
Running Mixed Configurations/Functionalities
For several port configurations, you can run Analyzer, Trainer, Host Emulator, Device Emulator, and
Infusion at the same time. For possible port configurations, refer to the Automation API Reference
Manual.
You can run Analyzer with all other functionalities.
Use the following examples of Analyzer-Host-Device and Trainer-Infusion to write your own mixture
configuration automation tests: (Note that error checking parts have been removed from these
examples.)
Analyzer-Host-Device
'--------- set port configuration to DEVICE_CONFIG_AHE_0_ADE_0 --------MySASAutomation.SetPortConfiguration 0, 100
'--------- Run an Analyzer/Exerciser project --------MySASAutomation.StartRecording("E:\AnalyzerHostDevice(AHE-0-ADE-0).sac")
'--------- Activate a Target Emulator project --------MySASAutomation.ActivateDevice "E:\Projects\DeviceOnly.std"
'--------- wait for 5 seconds --------WScript.Sleep(5000)
'--------- Deactivate device --------MySASAutomation.DeactivateDevice()
'--------- Stop recording and make trace file --------MySASAutomation.StopRecording(FALSE)
'--------- Open trace file and have access to its trace file, and later close it -------Set SASTracer = MySASAutomation.OpenFile("E:\AnalyzerHostDevice(AHE-0-ADE-0).scs")
'--------- call a function to see how many packet there are in trace file --------MySTATS.ReportText ("Number of packets in trace file : " &
CSTR(SASTracer.GetPacketsCount()))
'--------- Close trace file --------SASTracer.Close()
21
Trainer-Infusion
'--------- set port configuration to DEVICE_CONFIG_TJ_0_0_0 --------MySASAutomation.SetPortConfiguration 0, 80
'--------- Start a generation file --------MySASAutomation.StartGenerationByPort "E:\Projects\TrainerOnly.ssg", 0, 0
'--------- Assign scenario to port 0 board 0 --------MySASAutomation.SetScenarioToPort 0, 0, "E:\VTSE.infdb", "FirstScenario"
'--------- Start scenario --------MySASAutomation.StartScenario 0, 0
'--------- Stop scenario --------MySASAutomation.StopScenario 0, 0
'--------- Stop Generation --------MySASAutomation.StopGeneration 0, 0
22
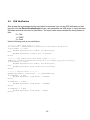
4.9
VSE Verification
After a trace file is generated and its trace object is accessed, you can do VSE verification on that
trace file. Call the RunVerificationScript function, with parameter the VSE script, to verify the trace
file based and return the result of verification. The return value shows whether the result passes or
fails:
0 = FAIL
1 = PASS
2 = Done
Use the following code to run verification:
'--------- Open trace file --------Set SASTracer = MySASAutomation.OpenFile("C:\Cascading-3 Board.scs")
If Err.Number <> 0 Then
MySTATS.ReportError Err.number, Err.Description
Else
MySTATS.ReportText ("Sample file is opened")
End If
'--------- Run Verification with SASVS script --------VSEResult = SASTracer.RunVerificationScript ("C:\sample_ssp_protocol.sasvs")
If Err.Number <> 0 Then
MySTATS.ReportError Err.number, Err.Description
Else
MySTATS.ReportText ("Run Verification finished")
End If
'--------- Report result --------MySTATS.ReportText ("VSE Result - " & CSTR(VSEResult))
If VSEResult = 0 Then
MySTATS.ReportText ("VSE Result - FAILED")
End If
If VSEResult = 1 Then
MySTATS.ReportText ("VSE Result - PASSED")
End If
If VSEResult = 2 Then
MySTATS.ReportText ("VSE Result - DONE")
End If
23
VSTools.inc File of Verification Script Tools
You should include the VSTools.inc include file in all verification scripts. This file contains important script
functions and is a supplement to the Verification Script Engine API provided by the application.It also has
some useful examples.
#########################################################################################
# Copyright (c) 1998 - 2005, LeCroy - All Rights Reserved
#
#
#
# VSTools.inc
#
#
#
# Verification Script Tools
#
# version 1.0
#
#
#
# NOTE: This file contains important script functions and is a supplement to the
#
#
Verification Script Engine API provided by the application.
#
#
#
#
This file SHOULD be included in all verification scripts.
#
#########################################################################################
%include "../IEEE/IEEECompanies.inc"
%include "VS_Primitives.inc"
%include "VS_constants.inc"
#########################################################################################
#
Common Globals
#
#########################################################################################
set State
= 0;
set StartScript = 1;
set str
set val
# Main state machine input.
# This variable may be used for implementation of different kinds of
# state machines.
# indicates that it first run
= ""; # global buffer supposedly for string values
= 0; # global buffer supposedly for integer or other values
########################################################################################
#
FUNCTIONS
#
########################################################################################
####################################################################
#
Common reset actions which should be performed for any
#
#
verification script preparing it for consecutive runs.
#
#
#
# The VSE will call this function for any script after it
#
# has finished running.
#
####################################################################
OnResetScript()
{
State = 0;
StartScript = 1;
ResetScript();
}
########################################################################
24
# This function specifies that the verification is passed and the
#
# script should complete its work.
#
########################################################################
ScriptPassed()
{
out.Result = _VERIFICATION_PASSED;
}
########################################################################
# This function specifies that the verification is failed and the
#
# script should complete its work.
#
########################################################################
ScriptFailed()
{
out.Result = _VERIFICATION_FAILED;
}
########################################################################
# This function specifies that the verification is done and the
#
# script should complete its work.
#
########################################################################
ScriptDone()
{
out.Result = _VERIFICATION_PASSED;
}
########################################################################
# This function returns the name of the level where the current
#
# event occurred.
#
########################################################################
GetLevelName()
{
level = in.Level;
level_name =
select
{
level
level
level
level
level
level
level
level
default
==
==
==
==
==
==
==
==
_IDLE
_LINK
_OOB_SEQ
_TRANSPORT
_ATA
_SCSI
_SMP
_TASK
:
:
:
:
: "Idle";
: "Link";
"OOB_Seq";
"Transp";
"ATA";
: "SCSI";
"SMP";
: "TASK";
: FormatEx("%d", level);
#"Unknown";
};
return level_name;
}
########################################################################
# This function returns the name of the link speed where the current #
# event occurred.
#
########################################################################
GetLinkSpeedName()
{
speed = in.LinkSpeed;
speed_name =
select
{
speed == _LINK_SPEED_1_5
speed == _LINK_SPEED_3_0
: "1.5G";
: "3G";
25
speed == _LINK_SPEED_6_0
: "6G";
default
};
: FormatEx("%d", speed);
return speed_name;
}
########################################################################
# This function returns the name of the channel where the current
#
# event occurred.
#
########################################################################
GetChannelName()
{
channel = in.Channel;
channel_name =
select
{
channel
channel
channel
channel
channel
channel
channel
channel
channel
channel
channel
channel
channel
channel
channel
channel
channel
channel
channel
channel
channel
channel
channel
channel
channel
channel
channel
channel
channel
channel
channel
channel
channel
channel
channel
channel
channel
channel
channel
channel
channel
channel
channel
channel
channel
channel
channel
channel
==
==
==
==
==
==
==
==
==
==
==
==
==
==
==
==
==
==
==
==
==
==
==
==
==
==
==
==
==
==
==
==
==
==
==
==
==
==
==
==
==
==
==
==
==
==
==
==
_I1
_T1
_I2
_T2
_I3
_T3
_I4
_T4
_I5
_T5
_I6
_T6
_I7
_T7
_I8
_T8
_T8
_I9
_T9
_I10
_T10
_I11
_T11
_I12
_T12
_I13
_T13
_I14
_T14
_I15
_T15
_I16
_T16
_I17
_T17
_I18
_T18
_I19
_T19
_I20
_T20
_I21
_T21
_I22
_T22
_I23
_T23
_I24
:
:
:
:
:
:
:
:
:
:
:
:
:
:
:
:
:
"I1";
"T1";
"I2";
"T2";
"I3";
"T3";
"I4";
"T4";
"I5";
"T5";
"I6";
"T6";
"I7";
"T7";
"I8";
"T8";
"T8";
: "I9";
: "T9";
: "I10";
: "T10";
: "I11";
: "T11";
: "I12";
: "T12";
: "I13";
: "T13";
: "I14";
: "T14";
: "I15";
: "T15";
: "I16";
: "T16";
: "I17";
: "T17";
: "I18";
: "T18";
: "I19";
: "T19";
: "I20";
: "T20";
: "I21";
: "T21";
: "I22";
: "T22";
: "I23";
: "T23";
: "I24";
26
#"Unknown";
channel
channel
channel
channel
channel
channel
channel
channel
channel
channel
channel
channel
channel
channel
channel
channel
channel
channel
channel
channel
channel
channel
channel
channel
channel
==
==
==
==
==
==
==
==
==
==
==
==
==
==
==
==
==
==
==
==
==
==
==
==
==
_T24
_I25
_T25
_I26
_T26
_I27
_T27
_I28
_T28
_I29
_T29
_I30
_T30
_I31
_T31
_I32
_T32
_I33
_T33
_I34
_T34
_I35
_T35
_I36
_T36
:
:
:
:
:
:
:
:
:
:
:
:
:
:
:
:
:
:
:
:
:
:
:
:
:
"T24";
"I25";
"T25";
"I26";
"T26";
"I27";
"T27";
"I28";
"T28";
"I29";
"T29";
"I30";
"T30";
"I31";
"T31";
"I32";
"T32";
"I33";
"T33";
"I34";
"T34";
"I35";
"T35";
"I36";
"T36";
#Muxing Channels----------------------channel
channel
channel
channel
channel
channel
channel
channel
channel
channel
channel
channel
channel
channel
channel
channel
channel
channel
channel
channel
channel
channel
channel
channel
channel
channel
channel
channel
channel
channel
channel
channel
channel
channel
channel
channel
channel
channel
channel
channel
==
==
==
==
==
==
==
==
==
==
==
==
==
==
==
==
==
==
==
==
==
==
==
==
==
==
==
==
==
==
==
==
==
==
==
==
==
==
==
==
_I1_1
_T1_1
_I2_1
_T2_1
_I3_1
_T3_1
_I4_1
_T4_1
_I5_1
_T5_1
_I6_1
_T6_1
_I7_1
_T7_1
_I8_1
_T8_1
_T8_1
_I9_1
_T9_1
_I10_1
_T10_1
_I11_1
_T11_1
_I12_1
_T12_1
_I13_1
_T13_1
_I14_1
_T14_1
_I15_1
_T15_1
_I16_1
_T16_1
_I17_1
_T17_1
_I18_1
_T18_1
_I19_1
_T19_1
_I20_1
:
:
:
:
:
:
:
:
:
:
:
:
:
:
:
:
:
"I1_1";
"T1_1";
"I2_1";
"T2_1";
"I3_1";
"T3_1";
"I4_1";
"T4_1";
"I5_1";
"T5_1";
"I6_1";
"T6_1";
"I7_1";
"T7_1";
"I8_1";
"T8_1";
"T8_1";
: "I9_1";
: "T9_1";
: "I10_1";
: "T10_1";
: "I11_1";
: "T11_1";
: "I12_1";
: "T12_1";
: "I13_1";
: "T13_1";
: "I14_1";
: "T14_1";
: "I15_1";
: "T15_1";
: "I16_1";
: "T16_1";
: "I17_1";
: "T17_1";
: "I18_1";
: "T18_1";
: "I19_1";
: "T19_1";
: "I20_1";
27
channel
channel
channel
channel
channel
channel
channel
channel
channel
channel
channel
channel
channel
channel
channel
channel
channel
channel
channel
channel
channel
channel
channel
channel
channel
channel
channel
channel
channel
channel
channel
channel
channel
==
==
==
==
==
==
==
==
==
==
==
==
==
==
==
==
==
==
==
==
==
==
==
==
==
==
==
==
==
==
==
==
==
_T20_1
_I21_1
_T21_1
_I22_1
_T22_1
_I23_1
_T23_1
_I24_1
_T24_1
_I25_1
_T25_1
_I26_1
_T26_1
_I27_1
_T27_1
_I28_1
_T28_1
_I29_1
_T29_1
_I30_1
_T30_1
_I31_1
_T31_1
_I32_1
_T32_1
_I33_1
_T33_1
_I34_1
_T34_1
_I35_1
_T35_1
_I36_1
_T36_1
default
:
:
:
:
:
:
:
:
:
:
:
:
:
:
:
:
:
:
:
:
:
:
:
:
:
:
:
:
:
:
:
:
:
"T20_1";
"I21_1";
"T21_1";
"I22_1";
"T22_1";
"I23_1";
"T23_1";
"I24_1";
"T24_1";
"I25_1";
"T25_1";
"I26_1";
"T26_1";
"I27_1";
"T27_1";
"I28_1";
"T28_1";
"I29_1";
"T29_1";
"I30_1";
"T30_1";
"I31_1";
"T31_1";
"I32_1";
"T32_1";
"I33_1";
"T33_1";
"I34_1";
"T34_1";
"I35_1";
"T35_1";
"I36_1";
"T36_1";
: FormatEx("%d", channel);
#"Unknown";
};
return channel_name;
}
########################################################################
# This function returns the name of the current event.
#
########################################################################
GetEventName()
{
event = in.TraceEvent;
event_name =
select
{
# packet level events...
event
event
event
event
event
event
event
event
==
==
==
==
==
==
==
==
_FRM_PRIMITIVE
_FRM_AF_OPEN
_FRM_AF_IDENTIFY
_FRM_SSP
_FRM_SMP
_FRM_STP
_FRM_OOB_SIGNAL
_FRM_STP_INCOMPELETE
:
:
:
:
:
:
:
:
"_FRM_PRIMITIVE";
"_FRM_AF_OPEN";
"_FRM_AF_IDENTIFY";
"_FRM_SSP";
"_FRM_SMP";
"_FRM_STP";
"_FRM_OOB_SIGNAL";
"_FRM_STP_INCOMPELETE";
default
: FormatEx( "Unknown(%d)", event );
};
return event_name;
}
28
GetFullTimestamp ( time_obj )
{
seconds
= time_obj [0];
total_nanoseconds = time_obj [1];
miliseconds
microseconds
nanoseconds
= total_nanoseconds / 1000000;
= (total_nanoseconds - 1000000*miliseconds) / 1000;
= (total_nanoseconds - 1000000*miliseconds - 1000*microseconds);
timestamp_str
= FormatEx ( "%4d . %03d %03d %03d", seconds,
miliseconds,
microseconds,
nanoseconds );
return timestamp_str;
}
GetCurrTimestamp ()
{
return GetFullTimestamp ( in.Time );
}
########################################################################
# This function returns SAS address value and related company name
#
########################################################################
GetSASAddressString ( address_hi_dword, address_lo_dword )
{
company_name = GetIEEECompanyName ( (address_hi_dword >> 4) & 0x00FFFFFF );
company_name_str = select
{
company_name == "" : "";
default
: Format ( " (%s)", company_name );
return FormatEx ( "0x%08X%08X%s\n", address_hi_dword,
address_lo_dword,
company_name_str );
}
########################################################################
# This function returns SAS address value and related company name
########################################################################
GetSASAddressString2 (SASAddress)
{
address_hi_dword = Revert32BitData(GetSASAddressHi(SASAddress));
address_lo_dword = Revert32BitData(GetSASAddressLo(SASAddress));
#
return GetSASAddressString(address_hi_dword, address_lo_dword);
}
########################################################################
# This function reverts given 32 bit valus.
########################################################################
Revert32BitData(Data)
{
NewData = (Data << 24);
NewData += ((Data & 0xFF00) << 8);
NewData += ((Data & 0xFF0000) >> 8);
NewData += ((Data >> 24) & 0xFF);
#
#
Test = FormatEx ( "Data: 0x%08X
ReportText(Test);
NewData: %08X \n", Data, NewData);
return NewData;
29
#
};
}
RevertRawByteOrder(RawBytes)
{
RawSize
= sizeof(RawBytes);
RevertRaw
= RawBytes;
RevertRaw[RawSize - 1] = GetNBits(RawBytes, 0, 8);
for(index = 1; index < RawSize; index++)
{
RevertRaw[RawSize - index - 1] = NextNBits(8);
}
#
for(index = 0; index < RawSize; index++)
#
{
#
Test = FormatEx ( "Data: 0x%02X RevertedData: %02X \n", RawBytes[index],
RevertRaw[index]);
#
ReportText(Test);
#
}
return RevertRaw;
}
########################################################################
# This function returns high dword of SAS address.
########################################################################
GetSASAddressHi(SASAddress)
{
return GetNBits(SASAddress, 32, 32);
}
########################################################################
# This function returns low dword of SAS address.
########################################################################
GetSASAddressLo(SASAddress)
{
return GetNBits(SASAddress, 0, 32);
}
########################################################################
# This function Format raw bytes to string.
########################################################################
FormatRawBytes(RawBytes)
{
for(index = 0; index < sizeof(RawBytes); index++)
{
if(RawBytes[index] <= 0x0F)
{
ByteFormat
= FormatEx("0%X", RawBytes[index]);
}
else
{
ByteFormat
= FormatEx("%2X", RawBytes[index]);
}
RawFormat = ByteFormat + RawFormat;
# ReportText(RawFormat);
}
return RawFormat;
}
30
#
#
#
#############################################################################
# This function Check the left raw data value is bigger than the right one
#############################################################################
IsRawDataBigger(LeftRaw, RightRaw)
{
LeftRawSize
= sizeof(LeftRaw);
RightRawSize = sizeof(RightRaw);
#
if(LeftRawSize > RightRawSize)
return 1;
if(LeftRawSize < RightRawSize)
return 0;
if(LeftRawSize == RightRawSize)
{
for(index = RightRawSize - 1; index >= 0; index--)
#for(index = 0; index < RightRawSize; index--)
{
if(LeftRaw[index] > RightRaw[index])
return 1;
if(LeftRaw[index] < RightRaw[index])
return 0;
}
}
return 0;
}
########################################################################
# This function outputs the information of the current event.
#
########################################################################
ReportEventInfo()
{
report = FormatEx( "TraceEvent: %6s #%04u, Channel : %s, Speed : %4s ,
Event : %s,
Time : %s,
",
GetLevelName(), in.Index, GetChannelName(), GetLinkSpeedName(), GetEventName(),
TimeToText( in.Time ) );
ReportText( report );
}
ReportPrimEventInfo()
{
if( in.TraceEvent == _FRM_PRIMITIVE )
{
report = FormatEx( "Primitive packet, value : 0x%X, Count : %d\n", in.Primitive,
in.Count );
ReportText( report );
}
}
31
4.10 Loading Pre Emphasis Signal Settings
You can load a previously saved pre emphasis signal-setting file by calling the
LoadPreEmphasisSignalFile function from the SASAnalyzer automation object to retrieve values
from the specified file and load them into the connected board.
'--------- Load Pre Emphasis Signal File --------MySASAutomation.LoadPreEmphasisSignalFile "F:\ForTestATS.sng"
If Err.Number <> 0 Then
MySTATS.ReportError Err.number, Err.Description
Else
MySTATS.ReportText ("Generation is started")
End If
32
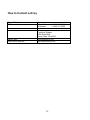
How to Contact LeCroy
Type of Service
Call for technical support…
Fax your questions…
Write a letter …
Send e-mail…
Visit LeCroy web site…
Contract
US and Canada: 1 (800) 909-2282
Worldwide:
1 (408) 727-6600
Worldwide:
1 (408) 727-6622
LeCroy Corporation
Customer Support
3385 Scott Blvd.
Santa Clara, CA 95054
[email protected]
http://www.lecroy.com/
33