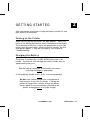
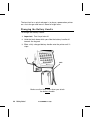
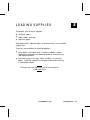
1
MONARCH DOS-based PATHFINDER Ultra System TC6035EZEM Rev. C 10/98 ©1998 Monarch Marking Systems, Inc. All rights reserved. Each product and program carries a respective written warranty, the only warranty on which the customer can rely. Monarch reserves the right to make changes in the product and the programs and their availability at any time and without notice. Although Monarch has made every effort to provide complete and accurate information in this manual, Monarch shall not be liable for any omissions or inaccuracies. Any update will be incorporated in a later edition of this manual. ©1998 Monarch Marking Systems, Inc. All rights reserved. No part of this publication may be reproduced, transmitted, stored in a retrieval system, or translated into any language in any form by any means, without the written permission of Monarch Marking Systems, Inc. Trademarks Monarch, Pathfinder, and Ultra are registered trademarks of Monarch Marking Systems, Inc. 6035, 6076, 6093, and 6094 are trademarks of Monarch Marking Systems, Inc. Datalight is a registered trademark of Datalight, Inc. ROM-DOS is a trademark of Datalight, Inc. Monarch Marking Systems, Inc. P.O. Box 608 Dayton, OH 45401 STATEMENT OF WARRANTY ON MONARCH MACHINES Limited Warranty THIS LIMITED WARRANTY IS IN LIEU OF AND EXCLUDES ALL OTHER WARRANTIES OR REPRESENTATIONS EXPRESSED OR IMPLIED, INCLUDING MERCHANTIBILITY OR FITNESS FOR BUYER’S PURPOSES. THERE IS NO WARRANTY WHICH EXTENDS BEYOND THE LIMITED WARRANTY. The Monarch product covered by this limited warranty is warranted to be free from defects in materials and workmanship for a period of one (1) year from the date of shipment to the original purchaser. This limited warranty does not cover damage by accident, abuse or violence, or use by the original purchaser of other than the standard supplies furnished by or meeting the specification of Monarch, or the Monarch product is operated or maintained contrary to the instructions provided by Monarch. The warranty is void if the machine is altered or repaired by other than Monarch representatives. This warranty does not include the furnishing of ribbons, ink rollers, tags, labels, or other supplies. The Monarch product requiring warranty service may be shipped to the nearest authorized Monarch service facility with the transportation charges PREPAID. Monarch is NOT responsible for damage that occurs during shipment if the product is not shipped in the original Monarch packaging. The Monarch product will be repaired free of charge during the warranty period. This warranty is valid only in the United States. TA B L E O F C O N T E N T S Laser Scanner Safety Information . . . . . . . . . . . . . . . . . . . . . . . . . . . . . . . . . . . . i-1 INTRODUCTION. . . . . . . . . . . . . . . . . . . . . . . . . . . . . . . . . . . . . . . . . . . . . . . . . . . . . . . . 1-1 Printer Types . . . . . . . . . . . . . . . . . . . . . . . . . . . . . . . . . . . . . . . . . . . . . . . . . . . . 1-1 Printer Features . . . . . . . . . . . . . . . . . . . . . . . . . . . . . . . . . . . . . . . . . . . . . . . . . 1-2 Operator’s Checklist . . . . . . . . . . . . . . . . . . . . . . . . . . . . . . . . . . . . . . . . . . . . . . 1-2 GETTING STARTED. . . . . . . . . . . . . . . . . . . . . . . . . . . . . . . . . . . . . . . . . . . . . . . . . . . . . 2-1 Turning on the Printer . . . . . . . . . . . . . . . . . . . . . . . . . . . . . . . . . . . . . . . . . . . . . Charging the Battery. . . . . . . . . . . . . . . . . . . . . . . . . . . . . . . . . . . . . . . . . . . . . . Charging the Backup Battery . . . . . . . . . . . . . . . . . . . . . . . . . . . . . . . . . . . . . . . Changing the Battery Handle . . . . . . . . . . . . . . . . . . . . . . . . . . . . . . . . . . . . . . . 2-1 2-1 2-5 2-6 LOADING SUPPLIES . . . . . . . . . . . . . . . . . . . . . . . . . . . . . . . . . . . . . . . . . . . . . . . . . . . . 3-1 Loading for Peel Mode . . . . . . . . . . . . . . . . . . . . . . . . . . . . . . . . . . . . . . . . . . . . 3-2 Printing in On-Demand Mode . . . . . . . . . . . . . . . . . . . . . . . . . . . . . . . 3-6 Loading for Non-Peel Mode . . . . . . . . . . . . . . . . . . . . . . . . . . . . . . . . . . . . . . . . 3-8 Printing in Continuous Mode . . . . . . . . . . . . . . . . . . . . . . . . . . . . . . . 3-11 Removing Supplies. . . . . . . . . . . . . . . . . . . . . . . . . . . . . . . . . . . . . . . . . . . . . . 3-11 BASIC OPERATIONS . . . . . . . . . . . . . . . . . . . . . . . . . . . . . . . . . . . . . . . . . . . . . . . . . . . . 4-1 About the Display . . . . . . . . . . . . . . . . . . . . . . . . . . . . . . . . . . . . . . . . . . . . . . . . Reading the Printer Status. . . . . . . . . . . . . . . . . . . . . . . . . . . . . . . . . . About the Keypad . . . . . . . . . . . . . . . . . . . . . . . . . . . . . . . . . . . . . . . . . . . . . . . . 4-line/33 Key Printer . . . . . . . . . . . . . . . . . . . . . . . . . . . . . . . . . . . . . . 8-line/48 Key Printer . . . . . . . . . . . . . . . . . . . . . . . . . . . . . . . . . . . . . . About Data Entry Modes . . . . . . . . . . . . . . . . . . . . . . . . . . . . . . . . . . . . . . . . . . 8-line/48 Key Modes . . . . . . . . . . . . . . . . . . . . . . . . . . . . . . . . . . . . . Using Numeric/Normal Mode. . . . . . . . . . . . . . . . . . . . . . . . . . . . . . . . Using Upper-case Alpha Mode . . . . . . . . . . . . . . . . . . . . . . . . . . . . . . TC6035EZEM Rev. C 10/98 4-1 4-1 4-3 4-3 4-5 4-7 4-7 4-8 4-9 Table of Contents i Using Lower-case Alpha Mode . . . . . . . . . . . . . . . . . . . . . . . . . . . . . Special Key Combinations . . . . . . . . . . . . . . . . . . . . . . . . . . . . . . . . Using Function Key Mode . . . . . . . . . . . . . . . . . . . . . . . . . . . . . . . . . Using Delete Mode . . . . . . . . . . . . . . . . . . . . . . . . . . . . . . . . . . . . . . Using the Alt and Ctrl keys . . . . . . . . . . . . . . . . . . . . . . . . . . . . . . . . Restarting the Printer. . . . . . . . . . . . . . . . . . . . . . . . . . . . . . . . . . . . . . . . . . . . 4-10 4-10 4-11 4-13 4-13 4-14 USING THE LASER SCANNER . . . . . . . . . . . . . . . . . . . . . . . . . . . . . . . . . . . . . . . . . . . 5-1 Scanning a Bar Code. . . . . . . . . . . . . . . . . . . . . . . . . . . . . . . . . . . . . . . . . . . . . 5-2 Cleaning the Scanner Window . . . . . . . . . . . . . . . . . . . . . . . . . . . . . . . . . . . . . 5-3 Scanning Tips . . . . . . . . . . . . . . . . . . . . . . . . . . . . . . . . . . . . . . . . . . . . . . . . . . 5-3 CARE AND MAINTENANCE . . . . . . . . . . . . . . . . . . . . . . . . . . . . . . . . . . . . . . . . . . . . . . 6-1 Clearing Supply Jams . . . . . . . . . . . . . . . . . . . . . . . . . . . . . . . . . . . . . . . . . . . . Cleaning the Printhead . . . . . . . . . . . . . . . . . . . . . . . . . . . . . . . . . . . . . . . . . . . Cleaning the Platen Roller . . . . . . . . . . . . . . . . . . . . . . . . . . . . . . . . . . . . . . . . . Cleaning the Sensors . . . . . . . . . . . . . . . . . . . . . . . . . . . . . . . . . . . . . . . . . . . . Storing the Printer . . . . . . . . . . . . . . . . . . . . . . . . . . . . . . . . . . . . . . . . . . . . . . . 6-2 6-4 6-5 6-7 6-9 USING DIAGNOSTICS . . . . . . . . . . . . . . . . . . . . . . . . . . . . . . . . . . . . . . . . . . . . . . . . . . 7-1 Checking Display Characteristics . . . . . . . . . . . . . . . . . . . . . . . . . . . . . . . . . . . 7-3 Checking Keyboard Connections . . . . . . . . . . . . . . . . . . . . . . . . . . . . . . . . . . . 7-4 Testing the Serial Port . . . . . . . . . . . . . . . . . . . . . . . . . . . . . . . . . . . . . . . . . . . . 7-4 Testing the Scanner . . . . . . . . . . . . . . . . . . . . . . . . . . . . . . . . . . . . . . . . . . . . . . 7-5 Checking the Speaker . . . . . . . . . . . . . . . . . . . . . . . . . . . . . . . . . . . . . . . . . . . . 7-6 Checking the Printer . . . . . . . . . . . . . . . . . . . . . . . . . . . . . . . . . . . . . . . . . . . . . 7-7 Displaying Machine Totals. . . . . . . . . . . . . . . . . . . . . . . . . . . . . . . . . . 7-8 Performing Hardware Tests. . . . . . . . . . . . . . . . . . . . . . . . . . . . . . . . . 7-8 Service Diagnostics. . . . . . . . . . . . . . . . . . . . . . . . . . . . . . . . . . . . . . 7-19 Calibrating Labels . . . . . . . . . . . . . . . . . . . . . . . . . . . . . . . . . . . . . . . 7-19 Checking Hardware Version Information . . . . . . . . . . . . . . . . . . . . . 7-20 Checking Software Version Information . . . . . . . . . . . . . . . . . . . . . . 7-21 Exiting the Diagnostics Program. . . . . . . . . . . . . . . . . . . . . . . . . . . . 7-22 ii Table of Contents TC6035EZEM Rev. C 10/98 TROUBLESHOOTING . . . . . . . . . . . . . . . . . . . . . . . . . . . . . . . . . . . . . . . . . . . . . . . . . . . 8-1 Problems and Solutions . . . . . . . . . . . . . . . . . . . . . . . . . . . . . . . . . . . . . . . . . . . 8-1 REFERENCE INFORMATION . . . . . . . . . . . . . . . . . . . . . . . . . . . . . . . . . . . . . . . . . . . . . A-1 Cable Pinouts . . . . . . . . . . . . . . . . . . . . . . . . . . . . . . . . . . . . . . . . . . . . . . . . . . . A-1 SPECIFICATIONS AND ACCESSORIES. . . . . . . . . . . . . . . . . . . . . . . . . . . . . . . . . . . . . B-1 Specifications . . . . . . . . . . . . . . . . . . . . . . . . . . . . . . . . . . . . . . . . . . . . . . . . . . . B-1 Supply Sizes. . . . . . . . . . . . . . . . . . . . . . . . . . . . . . . . . . . . . . . . . . . . . . . . . . . . B-2 Accessories . . . . . . . . . . . . . . . . . . . . . . . . . . . . . . . . . . . . . . . . . . . . . . . . . . . . B-2 GLOSSARY . . . . . . . . . . . . . . . . . . . . . . . . . . . . . . . . . . . . . . . . . . . . . . . . . . . . . . . . . . . A-1 TC6035EZEM Rev. C 10/98 Table of Contents iii 1 INTRODUCTION The Monarch® DOS-based PATHFINDER® Ultra® printer can act as a data collection device, a printer, or both. You can scan bar codes, verify them against data in a database via a radio in your printer (if you have this option), and return new data to print a label. This manual lists the features of your printer, and provides instructions on charging the battery handle and loading supplies. The manual also describes how to care for and maintain of your printer. P r i n t e r Ty p e s The printer comes in two types. The printer on the left has a 4-line display and 33 keys. The printer on the right has an 8-line display and 48 keys. Other than the way things appear on the display or how you use the keys, the two printers are the same. The information in this manual applies to both printers, unless specified otherwise. TC6035EZEM Rev. C 10/98 Introduction 1-1 Printer Features The printer features u alphanumeric keypad u on-demand and continuous printing u adjustable supply width capabilities u clock/calendar u Datalight ROM-DOS 6.22 operating system u RS-232 communications u graphic printing capabilities u display backlight u low-power shutdown to conserve the battery u radio communication (factory-installed option) u laser scanner (factory-installed option) u international keypad (factory-installed option). See Appendix B, "Specifications and Accessories," for a list of available accessories. Operator ’s Checklist Before collecting data or printing, you must 4 charge the battery handle. (See "Charging the Battery Handle" in Chapter 2.) 4 attach a fully charged battery handle. (See "Changing the Battery Handle" in Chapter 2.) 4 load your supplies. (See "Loading for Peel Mode" or "Loading for Non-Peel Mode" in Chapter 3.) 1-2 Introduction TC6035EZEM Rev. C 10/98 2 G E T T I N G S TA R T E D After you unpack your printer, charge the battery handle first and then attach it to the printer. Tu r n i n g o n t h e P r i n t e r When you first turn on the printer, our logo appears. You’ll also notice a line moving horizontally across the bottom of the display. The movement of this line is tied to the progression of tasks the printer must do to get ready. When the printer finishes, the line and logo disappear. If they don’t disappear, see Chapter 8, "Troubleshooting." Charging the Battery The printer is powered by a 12VDC NiCd battery pack in the handle. You can use and recharge the battery handle daily for approximately two years. See the label on the bottom of the handle for battery recycling and disposal information. A stored battery handle loses 2 to 3% of its charge per day. Do Not store a battery handle for a long period of time because it may lose its charge. If storing the printer for longer than a month, charge the battery once a month or leave the battery attached to the printer and plugged in to a trickle charger. TC6035EZEM Rev. C 10/98 Getting Started 2-1 Extremely hot or cold environments will change the discharge rate. Charge the battery handle only when it is drained. If you charge a battery that already contains a charge, you decrease the battery’s charge capacity and life. Always fully discharge and charge the battery handle. The following will decrease battery operating time: u using the laser scanner u communicating via radio frequency u enabling the backlight u printing (especially when printing large amounts of data on the supply, or when printing in on-demand mode). CAUTION Always keep a charged handle attached to the printer. Storing the printer without a handle may erase or alter the memory. To ensure maximum battery charge cycles, charge the battery handle only when the printer indicates that it needs to be charged. Before operating the printer, charge the battery handle and attach it to the printer. You can use one of the following chargers: Charger Approximate Charging Time 6093-07 Fast Charger 1.5 hours 6094-01 Four Station Charger 1.5 hours 2-2 Getting Started TC6035EZEM Rev. C 10/98 Charge time may vary depending on the type of battery and the degree to which the battery was drained. For example, high capacity batteries may take one or two hours longer to charge. When using or storing the charger: u Do Not wrap the cord around the charger. u Do Not pull or put unusual stress on the cord. Before using the charger, inspect the cord for bare wires. Do Not use a charger with bare wires. Use only a manufacturer-approved charger. Refer to the Battery Addendum for more information on battery usage. TC6035EZEM Rev. C 10/98 Getting Started 2-3 To charge the battery handle with the fast charger: 1. Turn the printer off. 2. Remove the battery handle (see "Changing the Battery Handle"). 3. Plug the round connector of the charger into the socket on the battery handle. 4. Plug one end of the power cable into the charger and the other end into a grounded (three prong) electrical outlet of the correct voltage. Refer to the instructions that come with the charger for more information. Battery Handle Charger Connector 2-4 Getting Started TC6035EZEM Rev. C 10/98 Charging the Backup Battery The printer has a rechargeable Nickel Metal Hydride (NiMH) battery that backs up the battery handle. If both batteries are completely drained when you turn on the printer, a CMOS error occurs. You will receive one or two error messages (depending on the type of problem). This message appears if power is lost. WARNING CMOS FAILURE DEFAULTS RESTORED This message appears if data is corrupted. WARNING - CMOS CHECKSUM INVALID DEFAULTS RESTORED If you receive either message: 1. Press any key after each message. The printer attempts to finish booting. 2. Replace the drained battery handle with a fully-charged battery handle and turn the printer on. The length of time it takes for the NiMH battery to recharge varies (up to eight hours), depending on u the options you have on your printer. u if, how, and how long you use the printer while recharging. The battery handle may drain before the NiMH battery is fully charged (probably after four hours, depending on the factors listed above). This drainage affects recharging performance. For example, an hour of printing, scanning, radio communications, or just sitting untouched takes different amounts of power. To avoid this drainage, you may need to switch battery handles or plug the printer into a fast charger while recharging the NiMH battery. TC6035EZEM Rev. C 10/98 Getting Started 2-5 The best bet for a quick recharge is to place a powered-on printer on a fast charger and leave it alone for eight hours. Changing the Battery Handle To change the battery handle: 1. Important. Turn the printer off. 2. Hold the latch down while you slide the battery handle off towards the keypad. 3. Slide a fully charged battery handle onto the printer until it stops. Latch Make sure the latch clicks when you attach the battery handle. 2-6 Getting Started TC6035EZEM Rev. C 10/98 3 LOADING SUPPLIES The printer uses thermal supplies: u synthetic labels u paper labels and tags u specialty paper. See Appendix B, "Specifications and Accessories," for available supply sizes. There are two methods for loading supplies: u Peel mode is for labels only. Load the supplies in peel mode when printing in on-demand mode or when printing and applying labels. u Non-peel mode is for tags, strips of labels, or specialty paper. Load the supplies in non-peel mode when printing in continuous mode. See your System Administrator to find out which mode you need. TC6035EZEM Rev. C 10/98 Loading Supplies 3-1 Loading for Peel Mode Peel mode separates labels from the backing paper, which allows you to print and apply labels immediately. You must load labels in this mode when the on-demand sensor is enabled. Confirm all loading procedures with your System Administrator, because these procedures can vary depending on the application you are running. To load your labels: 1. Turn the printer on. The printer initializes. 2. Start the application and maneuver to the point where it prompts you to load the supplies. 3. Press the latch buttons as shown, and open the supply cover completely. Supply Cover Latch Button 3-2 Loading Supplies TC6035EZEM Rev. C 10/98 4. Pull back the supply lock tab. 5. Squeeze or pull apart the supply holder at its base so it adjusts to the size of your supply roll. You can set it at 1.2", 1.5", and 2.0". Do not move the supply holder without pulling back the supply lock tab first. Supply Holder TC6035EZEM Rev. C 10/98 Loading Supplies 3-3 6. Press the supply lock down to lock the supply holder in place. 7. Remove the seal from the supply roll. Peel and discard the first four inches of labels from the backing paper. Tear evenly across the supply strip. 8. Place the supply roll as shown in the supply holder so that it feeds labels from the bottom. The black marks on the labels should be facing down. 9. Hold the printer upright and gently press down on the label deflector as shown. It may be stiff. Label Deflector 3-4 Loading Supplies TC6035EZEM Rev. C 10/98 10. Feed all four inches of the backing paper over the peel bar and under the applicator roller and the label deflector. Applicator Roller Peel Bar Label Deflector 11. Push the label deflector up until it snaps into place. 12. Partially close the supply cover to the first position (until it clicks once). Do Not close the cover completely at this step or label jams may occur. TC6035EZEM Rev. C 10/98 Loading Supplies 3-5 13. Hold the supply edge between the feed and pinch rollers, and then press the trigger or a key assigned by your System Administrator until all slack is removed. Discard the extra labels that feed. Feed Roller Pinch Roller 14. Close the supply cover completely. Printing in On-Demand Mode In on-demand mode, the printer prints a label each time you remove the previously printed label. Whether you are printing in on-demand mode depends on the application you are running. Ask your System Administrator if you are printing in this mode. Before you begin printing, make sure the handle is fully charged and attach the safety strap of the printer to your wrist. 3-6 Loading Supplies TC6035EZEM Rev. C 10/98 Most likely, the application you are running will have you print labels in on-demand mode as follows: 1. Press the trigger (or other key your System Administrator assigns). 2. Apply the label. Subsequent labels print automatically after you apply each label. As each prints, apply the label. To remove excess backing paper, gently tear down. TC6035EZEM Rev. C 10/98 Loading Supplies 3-7 Loading for Non-Peel Mode Non-peel mode feeds the supply through the printer in one continuous strip. Use non-peel mode to print strips of labels, tags, or specialty paper. To load your supply: 1. Turn the printer on. The printer initializes. 2. Start the application and maneuver to the point where it prompts you to load the supplies. 3. Press the latch buttons as shown and open the supply cover completely. Supply Cover Latch Button 3-8 Loading Supplies TC6035EZEM Rev. C 10/98 4. Pull back the supply lock tab. 5. Squeeze or pull apart the supply holder at its base so it adjusts to the size of your supply roll. You can set it at 1.2", 1.5", and 2.0". Do not move the supply holder without pulling back the supply lock tab first. Supply Holder TC6035EZEM Rev. C 10/98 Loading Supplies 3-9 6. Press the supply lock down to lock the supply holder in place. 7. Remove the seal from the supply roll. 8. Place the supply roll as shown in the supply holder so that it feeds labels from the bottom. The black marks on the labels should be facing down. Specialty paper has no black marks. 9. Feed the supply under the applicator roller and over the label deflector. Applicator Roller Label Deflector 10. Press the trigger or a key assigned by your System Administrator until all slack is removed. Discard extra supplies. 11. Close the supply cover completely. 3-10 Loading Supplies TC6035EZEM Rev. C 10/98 Printing in Continuous Mode In continuous mode, the printer prints one supply or a strip of supplies all at once. Supplies may be thermal labels, tags, or specialty paper. Whether you are printing in continuous mode depends on the application you are running. Ask your System Administrator if you are printing in this mode. Before you begin printing, make sure the handle is fully charged and attach the safety strap of the printer to your wrist. Most likely, the application you are running will have you print labels in continuous mode as follows: 1. Press the trigger (or other key the System Administrator assigns). 2. When printing stops, cut the supply and remove the strip. Removing Supplies To remove supplies: 1. Peel Mode Only. Tear the backing paper just above the pinch roller. 2. Open the supply cover completely. 3. Twist the supply roll or core while pushing down, and then pull forward to remove. TC6035EZEM Rev. C 10/98 Loading Supplies 3-11 3-12 Loading Supplies TC6035EZEM Rev. C 10/98 4 B A S I C O P E R AT I O N S This chapter gives you information about u the display u the keypad u the data entry modes. About the Display Each display line contains 20 characters. Depending on the application running, you may have to use the arrow keys to scroll right, up, or down to see the entire display. An arrow to the bottom right of the display means that there are more functions. Read the following sections to use the arrow keys. Reading the Printer Status 8-line/48 Key Printer Only. The following indicators can appear at the bottom of the display, depending on the data entry mode the printer is in. FCA é X Indicator Description F Function Key Mode C Control Mode A Alt Mode é Upper-case Alpha Mode Caps Lock Mode X Delete Mode (dependent on the application running) TC6035EZEM Rev. C 10/98 Basic Operations 4-1 When none of the indicators are on, the printer is in Normal Mode. This mode is current when you first turn the printer on. See "About Data Entry Modes" for more information. 4-line/33 Key Printer. Indicators appear along the left side of the display to show the mode the printer is in. The indicators are vertical lines, except for the lowest level, which is a q or a r, and the highest, which is a t, or p. p p p p Numbering the positions 1-4 (from top to bottom), following is the meaning of each indicator. Position 1-p Description Function Key Mode t Delete Mode 2 Control Mode 3 Alt Mode 4-q Upper-case Alpha Mode r Lower-case Alpha Mode In the case of positions 1 and 4, you press the key twice to get the second indicator. 4-2 Basic Operations TC6035EZEM Rev. C 10/98 About the Keypad Information about the keypad and the function of the keys is for domestic models only. 4-line/33 Key Printer Your printer may have a keypad as shown. TC6035EZEM Rev. C 10/98 Basic Operations 4-3 b Invokes a code or command designated by the application. f Invokes the function keys as designated by the application. h Invokes a code or command designated by the application. g Moves the cursor to the left while deleting one character at a time. a Invokes a code or command designated by the application. s Enters and exits Upper-case and Lower-case Alpha mode. P Enters a blank character on the display. e Accepts data or a menu selection. < Invokes a code or command designed by the application or moves the cursor one position to the left, and deletes the character. >=* Invokes a code or command designated by the application. Symbol keys /, \, ", $, @, #, %, :, .,+, - Number keys 0-9 Alphabetic keys A-Z Function keys < , > , ’ , ? , INS , | , & , ; , , , DELETE, F7 , F8 , F9 , * , = , F4 , F5 , F6 , [ , ] , F1 , F2 , F3 , HOME , END , F10 , _ 4-4 Basic Operations TC6035EZEM Rev. C 10/98 8-line/48 Key Printer Following is a diagram of the keypad. DEL and the symbols appearing on the face of the number keys do not appear on the keypad. These are hidden symbols/functions that you enter in Upper-case Alpha mode. TC6035EZEM Rev. C 10/98 Basic Operations 4-5 Key Description Fct Toggles Function Key mode on/off. Ctrl Toggles Control mode on/off. Alt Toggles Alt mode on/off. Shift Toggles Upper-case Alpha mode on/off. Bksp Moves the cursor one position to the left, then deletes the character. Enter Accepts a DOS prompt command, application-specific data, or menu selections. ← Moves the cursor one position to the left, then deletes the character or invokes a code or command designated by the application. Esc Tab Del Home End Ins PgUp PgDn ↑ ,↓ ,→ Invokes a code or command designated by the application. To enter Caps Lock Mode, press Fct, then Shift. 4-6 Basic Operations TC6035EZEM Rev. C 10/98 About Data Entry Modes There are six data entry modes: u Numeric/Normal mode (default) u Upper-case Alpha mode u Lower-case Alpha mode u Function Key mode u Delete mode u Alt and Ctrl Key mode. See "Reading the Printer Status" and "About the Keypad" for more information. When the printer is turned on, you are in Numeric/Normal mode. For Upper-case Alpha Press s. Press s twice to return to Numeric/Normal (4-line/33 Key printer). Press s once to return to Numeric/Normal (8-line/48 Key printer). For Lower-case Press s twice. Alpha (4-line/33 Key Press s once to return to Numeric/Normal. Printer only) See "Reading the Printer Status" and "About the Keypad" for more information. 8-line/48 Key Modes The ninth display line indicates which mode the printer is in. See "Reading the Printer Status" for more information. To enter or exit the modes, use the function keys. See "About the Keypad" for more information. When you enter any mode (except Delete), it stays in effect through the next key press. The printer then returns to Normal mode. Delete mode stays in effect until you press a key other than Del. TC6035EZEM Rev. C 10/98 Basic Operations 4-7 The modes are not mutually exclusive. In different cases, you can have more than one in effect. Using Numeric/Normal Mode Numeric/Normal mode is the default mode when the printer is turned on. 4-line/33 Key Printer This mode allows you to use the following keys on the keypad: u Numeric keys u Symbol keys When you are in Numeric/Normal mode, no indicators appear. 8-line/48 Key Printer This mode allows you to use the following keys on the keypad: u Numeric keys u The space key u The alphabetic keys (producing lower-case letters). When you are in Numeric/Normal mode, nothing appears on the status line. 4-8 Basic Operations TC6035EZEM Rev. C 10/98 Using Upper-case Alpha Mode Upper-case Alpha mode works differently on the two printers. 4-line/33 Key Printer This mode allows you to enter upper-case letters or spaces. When you are in Upper-case Alpha mode, the cursor is an underscore and the q indicator appears on the left side of the display. To use Upper-case Alpha mode: 1. When you are in Numeric/Normal mode, press s to enter Upper-case Alpha mode. 2. Enter your data. 3. Press s to return to Numeric/Normal mode. 8-line/48 Key Printer This mode allows you to enter upper-case letters, spaces, or hidden symbols. In Upper-case Alpha mode, the cursor is an underscore and the status line has the symbol on it, or for caps lock. é To use Upper-case Alpha mode: 1. When you are in Numeric/Normal mode, press s to enter Upper-case Alpha mode. Or, you can press f, then s to set caps lock. 2. If caps lock is on, enter your data. Otherwise, press the first character key (from step 1) and repeat steps 1 and 2 as needed until you have entered all the data. 3. If you set caps lock, press f, then s again to turn off caps lock. TC6035EZEM Rev. C 10/98 Basic Operations 4-9 Using Lower-case Alpha Mode 4-line/33 Key Printer Only. This mode allows you to enter lower-case letters. When you are in Lower-case Alpha mode, the cursor is an underscore and the r indicator appears on the left side of the display as shown. To use Lower-case Alpha mode: 1. When you are in Numeric/Normal mode, press s twice to enter Lower-case mode. 2. Enter your data. 3. Press s to return to Numeric/Normal mode. Special Key Combinations You can switch between modes temporarily to enter combination upper-case/lower-case/numeric data. For example, you may need to enter a part number which includes numeric and alpha characters (123AB45). 4-line/33 Key 8-line/48 Key 1. Enter 123. 1. Enter 123. 2. Hold s and enter AB. 2. Press f, s, then enter AB. 3. Release s and enter 45. 3. Press f, s, then enter 45. 4-10 Basic Operations TC6035EZEM Rev. C 10/98 To switch modes temporarily, use the keys shown in this table. Mode you are in You need Press + Hold (4-line/33 Key Printer) Press (8-line/48 Key Printer) Numeric/Normal Upper-case Alpha s s or f then s Lower-case Alpha h The letter as needed Lower-case Alpha h sor f then s Numeric/Normal s The letter as needed Upper-case Alpha s sor f then s Numeric/Normal h The letter as needed Upper-case Alpha Lower-case Alpha Ctrl and Alt also invoke codes or commands designated by the application. Using Function Key Mode This mode allows you to use the numeric keys (0-9) as function keys and to enter the other characters on the upper left corner of the keys (see the next page). On the 8-line/48 Key, you can enter displayed symbols or numeric keys (0-9) as function keys. The function keys are used to perform special functions. Ask your System Administrator if you need to use these keys. On the 4-line/33 Key in function key mode, the cursor is an underscore and a vertical line appears on the left side of the display. On the 8-line/48 Key Printer, an F appears on the status line, and the cursor is an underscore. TC6035EZEM Rev. C 10/98 Basic Operations 4-11 To use the function key: 1. Press f . 2. Press a character or number key. (For example, press f and then 0 to invoke the F10 function.) You must press f for each character you want to enter. On 4-line/33 Key Printer, use the function key to activate the character shown in the upper left corner of each key position in the table below. A b f INS g P F5 U F2 0 L 2 Z ’ H F9 ; F6 V F3 M I * , J . N = O - R [ S W HOME X = < E j + 6 3 ? ? 9 Q D i % 5 1 F10 & 8 4 F1 C $ G F8 7 a > # K F4 s | @ F7 B / F h DELETE < ] T * END Y > _ P Refer to the diagram of the 8-line/48 Key Printer keypad in "About the Keypad" to see the various symbols and characters associated with each key. 4-12 Basic Operations TC6035EZEM Rev. C 10/98 Using Delete Mode To use the Delete mode: 1. Press f. On the 4-line/33 Key Printer, the cursor is an underscore, and a vertical line appears on the left side of the display. On the 8-line/48 Key Printer, the cursor is an underscore and an F appears on the status line. 2. Press g to enter delete mode. On the 4-line/33 Key Printer, the cursor is an underscore, and a t indicator appears on the left side of the display. On the 8-line/48 Key Printer, the cursor is an underscore and an X appears on the status line. Continue deleting by pressing g repeatedly. Return to the original mode by pressing any other key besides g . Use of Delete mode is dependent on the application you are running. You cannot enter delete mode on the DOS Command line. Using the Alt and Ctrl keys The a and h keys invoke codes or commands designated by the application. To use the a or h key: 1. Press the appropriate key(s) to enter this mode: u a u h 2. Press the key you need for your application. TC6035EZEM Rev. C 10/98 Basic Operations 4-13 4-line/33 Key Printer When you press the h key, the cursor is an underscore and a vertical line appears on the left side of the display. 8-line/48 Key Printer When you press the h key, the cursor is an underscore and a C appears on the status line. When you press the a key, the cursor is an underscore and an A appears on the status line. Restarting the Printer To restart the printer, press h + a + g . 4-14 Basic Operations TC6035EZEM Rev. C 10/98 USING THE LASER SCANNER 5 Your printer may have a built-in scanner. This product is certified to be a Class II laser product with the United States DHHS Center for Devices and Radiological Health. The scanner emits less than 1.0 milliwatt beam of laser light from the scanning window. Laser light in excess of Class I limits must be inside a protective cover. No maintenance is required to keep this product in compliance with IEC 825 and DHHS Regulation 21, Subchapter J. No controls are provided for operation or maintenance. CAUTION Laser light - Do Not stare into the beam. TC6035EZEM Rev. C 10/98 Using the Laser Scanner 5-1 Scanning a Bar Code The application you are running controls when you can scan a bar code. When it indicates to scan: 1. Attach the safety strap to your wrist. 2. Point the scanner at a slight angle approximately four to eight inches from the bar code symbol. 3. Press the trigger or other key specified by your System Administrator. The Laser Scan LED lights after a successful scan. This light is at the bottom of the keypad on the 4-line/33 Key Printer and on the right side of the display on the 8-line/48 Key Printer. If the bar code does not scan: u Change the angle of the scanner and press the trigger again. u Make sure the scanner window is clean. See "Cleaning the Scanner Window" later in this chapter. u Try scanning another bar code that you have scanned successfully. If that scan is successful, this means the first bar code cannot be decoded. See Chapter 8, "Troubleshooting." 5-2 Using the Laser Scanner TC6035EZEM Rev. C 10/98 Cleaning the Scanner Window CAUTION Do Not use solvents (e.g., alcohol or acetone) or abrasive cleaners to clean the scanner window. This will damage the finish. Clean the scanner window whenever the window appears to be dirty or smeared. To clean the scanner window: 1. Moisten a soft cloth with water. 2. Wipe the window until it is completely clean. Scanning Tips u Make sure there are no voids in the bar code symbol. u Hold the scanner four to eight inches from the bar code. Move the scanner toward and away from the bar code to find the correct distance for a successful scan. u Aim the scanner at a slight angle to the bar code. u Keep the scanner window clean. u Move to a more dimly lit area if you have several unsuccessful scans. u Direct sunlight may cause unsuccessful scans. TC6035EZEM Rev. C 10/98 Using the Laser Scanner 5-3 5-4 Using the Laser Scanner TC6035EZEM Rev. C 10/98 CARE AND MAINTENANCE 6 This chapter tells you how to u clear supply jams. u clean the printhead. u clean the platen roller. u clean the sensors. u store the printer. TC6035EZEM Rev. C 10/98 Care and Maintenance 6-1 Clearing Supply Jams When clearing a supply jam, check the u label deflector u feed and pinch rollers To clear a supply jam: 1. Press the latch buttons and open the supply cover completely. Label Deflector 2. Gently press down with your fingers on the label deflector. 3. Remove the supply and backing paper. See "Removing Supplies" in Chapter 3. 6-2 Care and Maintenance TC6035EZEM Rev. C 10/98 4. Gently remove any jammed supply and close the deflector. Do Not pull the jammed supply out through the front of the label deflector. Do Not use sharp objects to remove jammed supplies. 5. Check the feed and pinch rollers for jammed supply. Pinch Roller (Feed roller is behind it) 6. Gently remove any jammed supply. TC6035EZEM Rev. C 10/98 Care and Maintenance 6-3 Cleaning the Printhead Clean the printhead u after using 7-10 rolls of supplies. u in extreme temperatures, humid conditions or dirty environment. u when you see voids in the print. u after a supply jam. Use isopropyl alcohol on the interior areas only, never on the exterior. Do Not use silicone to clean or lubricate. Use any of the following items to clean the printhead: u soft cloth moistened with isopropyl alcohol u Monarch Cleaning Pen #114226 u Monarch 6076 T M Cleaning Kit Do Not use sharp objects to remove adhesive or label particles from the printhead area. Do Not touch the printhead with your fingers. These actions may damage the printhead and void your warranty. Always ground yourself by touching something metal before cleaning the printhead. This prevents electrostatic discharge, which may damage your printer. To clean the printhead: 1. Turn the printer off. 2. Open the supply cover and remove the supply roll. 3. Check the supply holder for adhesive buildup, and clean if necessary. 4. Ground yourself by touching something metal other than the printer. 6-4 Care and Maintenance TC6035EZEM Rev. C 10/98 5. Clean the printhead area of all adhesive and label particles using one of the items listed above. Printhead Supply Cover Supply Holder 6. Reload the supply roll and close the supply cover. Cleaning the Platen Roller You can use any of the following items to remove adhesive buildup from the platen: u soft cloth moistened with isopropyl alcohol u Monarch Cleaning Pen #114226 u Monarch 6076 T M Cleaning Kit Do Not use sharp objects to clean the printer. TC6035EZEM Rev. C 10/98 Care and Maintenance 6-5 To clean the platen roller: 1. Turn the printer off and open the supply cover. 2. Remove your supply. See "Removing Supplies" in Chapter 3. 3. Open the label deflector by gently pressing down with two fingers. 4. Clean the platen roller and remove any adhesive buildup. Platen Roller 5. Turn the platen roller with your finger, and then continue cleaning. 6. Reload your supply and close the label deflector and supply cover. 6-6 Care and Maintenance TC6035EZEM Rev. C 10/98 Cleaning the Sensors To clean the on-demand sensor: 1. Turn the printer off and open the supply cover. 2. Open the label deflector by gently pressing down with two fingers. 3. Clean the on-demand sensor with a soft cloth moistened with water. On-Demand Sensor TC6035EZEM Rev. C 10/98 Care and Maintenance 6-7 To clean the black mark sensor: 1. Turn the printer off, open the supply cover and remove the supplies. 2. Clean the black mark sensor with a soft cloth moistened with water. Black Mark Sensor 6-8 Care and Maintenance TC6035EZEM Rev. C 10/98 Storing the Printer Store the printer with a handle attached. Do Not store the printer in or near u magnetic fields u wet or damp areas u dirty or dusty areas u areas of intense vibration or shock. CAUTION Storage in or near these areas can damage the printer and void your warranty. TC6035EZEM Rev. C 10/98 Care and Maintenance 6-9 6-10 Care and Maintenance TC6035EZEM Rev. C 10/98 USING DIAGNOSTICS 7 Only Service or a System Administrator should use diagnostics. You can use diagnostics to u check display characteristics u check keyboard connections u test the serial port u test the scanner u check the speaker u check the printer u check the versions of various parts of the printer. The screens shown in this chapter will differ (more information will appear) if you are using an 8-line/48 Key Printer. TC6035EZEM Rev. C 10/98 Using Diagnostics 7-1 To access these options, you need to use the Diagnostic program. To start the Diagnostic program: 1. 4-line/33 Key Printer Only. From the DOS prompt, press s(if not already in Shift mode). 2. Type DIAG and press e. You will see: DOS Ultra Diagnostic Display Keyboard Serial Port D The currently selected diagnostic function is displayed in inverse mode. An arrow to the right of the display means that there are more functions. 3. 4-line/33 Key Printer Only. Press s to return to normal mode. 4. Scroll with the arrow keys until you highlight the diagnostic function you want to use. Press e. Use the right or down arrow keys to scroll down the list of functions. Use the left or up arrow keys to scroll up the list. To exit any diagnostic function, press b or scroll to Exit in the menu and press e. 7-2 Using Diagnostics TC6035EZEM Rev. C 10/98 Checking Display Characteristics The Display diagnostic menu provides the following selections: Backlight Turns the backlight on and off to ensure it is functioning properly. If the backlight does not turn on and then off, please make a note and call Service. Pixel Tests all the individual pixels on the display. One pixel line toward the bottom of the printer will not have its pixels set. If any other positions are skipped, please make a note and call Service. Character Set Displays all available characters. If any character does not display properly, please make a note and call Service. Character Fills the third line of the display with a single character selected from the keyboard. If any problem is detected, please make a note and call Service. To check display characteristics: 1. At the Main menu, scroll with the arrow keys until you highlight Display. Press e. You will see: Select LCD test Backlight Pixel Character Set D 2. Scroll with the arrow keys to select the LCD test you want. Press e. Each diagnostic function displays directions for starting that test. Press b to exit. TC6035EZEM Rev. C 10/98 Using Diagnostics 7-3 Checking Keyboard Connections The Keyboard diagnostic function displays a keypad replica to test keyboard connections. To check keyboard connections: 1. At the Main menu, scroll with the arrow keys until you highlight Keyboard. Press e. You will see a replica of the printer keypad. 2. Press a key to verify the name of the key and its location on the replica. Press b twice to exit. Te s t i n g t h e S e r i a l P o r t This test is typically performed by Service or your MIS department. To check the serial port, you perform a loopback test, which checks the port for receiving and sending data from a host. The loopback plug referred to in the procedure below is part number 116850, available as an accessory. To test the serial port: 1. At the Main menu, scroll with the arrow keys until you highlight Serial Port. Press e. You will see: Insert loopback plug into serial port connector. Press key to cont 7-4 Using Diagnostics TC6035EZEM Rev. C 10/98 2. Insert the loopback plug and press any key (except b) to start the test. Press b to exit. 3. When the test finishes, you will see Press Esc to cont. Testing speed: XX Testing parity: XX Testing ctrls: XX where XX is OK or err. Press b to exit. If the printer fails to send or receive data, please make a note and call Service. Te s t i n g t h e S c a n n e r The Scanner diagnostic function provides the following selections: Trigger Scanner Displays scanned bar code values for successful scans or no data for scan failures. Configuration Allows the user to enable or disable scanner features for specific bar code types, low power mode, and time-out mode. To test the scanner: 1. At the Main menu, scroll with the arrow keys until you highlight Scanner. Press e. You will see: Select scanner test Trigger scanner Configuration About D 2. Scroll with the arrow keys until you highlight the scanner test you want. Press e. Press b to exit. TC6035EZEM Rev. C 10/98 Using Diagnostics 7-5 Trigger Scanner displays directions for running that test. If you detect a problem scanning, please make a note and call Service. Configuration displays a menu of selections. Refer to the Programmer’s Manual for descriptions of the selections. Scroll with the arrow keys until you highlight the feature you want to enable/disable. Press e, then type a new value. Press b to exit. If you detect a problem with configuration, please make a note and call Service. About displays the type of scanner you have: either a 1222 or a 1223. If you have no scanner, it displays "Scanner Unknown." Press any key to exit. Checking the Speaker The Speaker diagnostic function produces a test series of tones. To check the speaker: 1. At the Main menu, scroll with the arrow keys until you highlight Speaker. Press e. You will see: Speaker Diagnostic 150 Hz tone 2. The speaker emits the test tones (and the display changes) automatically. The test tones are at 150, 300, 600, 1200, 2400, and 4800 Hz. If the speaker does not emit all tones, please make a note and call Service. 7-6 Using Diagnostics TC6035EZEM Rev. C 10/98 Checking the Printer The Printer diagnostic function provides the following selections: Machine Totals Displays the total amount of supplies printed in inches or the number of tags printed. Hardware Test Displays a sub-menu for testing Printing, Sensors, Printhead, Battery, and Motor. Service Diagnostics Reserved for Service use only. Calibration Calibrates the loaded supply. Version Displays versions of print engine board and MCS library. To check the printer: 1. At the Main menu, scroll with the arrow keys until you highlight Printer. Press e. You will see: Select item Machine Totals Hardware Test Service Diag. D 2. Scroll with the arrow keys until you highlight the printer test you want. Press e. Go to the section you selected for more instructions. TC6035EZEM Rev. C 10/98 Using Diagnostics 7-7 D i s p l a y i n g M a c h i n e To t a l s To display machine totals: 1. From the Printer menu, scroll with the arrow keys until you highlight Machine Totals. Press e. You will see: Select item Inches Printed Tags Printed Exit 2. Scroll with the arrow keys to select the number of inches printed or the number of tags printed. Press e. The number of inches or number of tags is automatically displayed. Press e to exit. P e r f o r m i n g H a r d w a r e Te s t s The hardware test sub-menu has the following selections: Printing Prints a test pattern, performs a speed test, prints the gray scale, or adjusts contrast. Sensors Tests on-demand and black mark sensors. Printhead Checks the dot resistance and temperature of the printhead. Battery Checks the battery charge state. Motor Checks the functionality of the motor. Hardware tests are typically performed by an authorized Service representative. However, if you need to run any of these tests, make sure you read the following sections for the acceptable results of each test and when it is necessary to call Service. 7-8 Using Diagnostics TC6035EZEM Rev. C 10/98 When calling Service, be sure to provide the exact results. To perform Hardware Tests: 1. From the Printer menu, scroll with the arrow keys until you highlight Hardware Test. Press e. You will see: Select item Printing Sensors Printhead D 2. Scroll with the arrow keys until you highlight the hardware test you want. Press e. Go to the section you selected for more instructions. Checking the Printing The PRINTING sub-menu provides the following selections: Test Pattern Prints a label to verify that the printhead strobes are working. Print Speed Verifies that the supply is moving through the printer at the correct speed for printing scannable bar codes. Gray Scale Checks the uniformity of the printing. Adjust Contrast Adjusts print contrast. TC6035EZEM Rev. C 10/98 Using Diagnostics 7-9 To check the printing, scroll until you highlight printing on the Hardware Test menu. Press e. You will see: Select item Test Pattern Print Speed Gray Scale D To print the test pattern: 1. Load supplies in non-peel mode. 2. From the Printing sub-menu, scroll with the arrow keys until you highlight Test Pattern. Press e. You will see: Ready to print 3. Press eto print the test sample shown below. Press b to exit. If your printed test sample has fewer lines or no lines, keep the test sample and call Service. 7-10 Using Diagnostics TC6035EZEM Rev. C 10/98 To run the Print Speed test: 1. Load supplies in non-peel mode. 2. From the Printing sub-menu, scroll with the arrow keys until you highlight Print Speed. Press e. You will see: Ready to print 3. Press eto print the test sample. Press b to exit. 4. Use the metric scale shown or a metric ruler to measure your test sample. If your test sample measures more than 101 mm or less than 99 mm, save your test sample and call Service. To run the Gray Scale test: 1. Load supplies in non-peel mode. 2. From the Printing sub-menu, scroll with the arrow keys until you highlight Gray Scale. Press e. You will see: Ready to print TC6035EZEM Rev. C 10/98 Using Diagnostics 7-11 3. Press eto print the test sample. Press b to exit. Test Sample with voids The test sample should be uniformly gray across the supply. If you see voids, especially on the edges as in the example, save your test sample and call Service. To Adjust Contrast: 1. From the Printing sub-menu, scroll with the arrow keys until you highlight Adjust Contrast. Press e. You will see: Stock Type: 2) Paper 7-12 Using Diagnostics TC6035EZEM Rev. C 10/98 2. Scroll with the left arrow until you highlight the stock type you want: synthetic, paper, or fax. Press e. You will see: Barcode Type: 1) Serial 3. Scroll with the left arrow until you highlight the bar code type you want: Serial, Maxicode, Parallel/Serial, or Parallel. Press e. 4. You will see an Adjustment horizontal scroll bar. 5. The default setting for the selected bar code type is indicated by a number and a solid block on the bar. Use the right arrow key to increase the contrast and the left arrow key to decrease the contrast in increments of 1. Press eto save the adjustment. Checking the Sensors The Sensors menu provides the following selections: On-Demand Tests the On-Demand sensor. Black Mark Tests the Black Mark sensor. To check the sensors, scroll until you highlight Sensors on the Hardware Test sub-menu. Press e. You will see: Select item On-Demand Black Mark Exit TC6035EZEM Rev. C 10/98 Using Diagnostics 7-13 To run the On-Demand test: 1. From the Sensors sub-menu, scroll with the arrow keys until you highlight On-Demand. Press e. If the sensor is clear, you will see: On Demand = ### Clear Values must be less than 288. If sensor is blocked, you will see: On Demand = ### Blocked Values must be greater than 480. If the value is invalid, make a note and call Service. 2. Press b to exit. The values displayed may fluctuate on the screen. 7-14 Using Diagnostics TC6035EZEM Rev. C 10/98 To run the Black Mark test: 1. From the Sensors sub-menu, scroll with the arrow keys until you highlight Black Mark. Press e. When the black mark is not positioned over the sensor, you will see: Black Mark = ### White Values must be greater than 480. When the black mark is positioned over the sensor, you will see: Black Mark = ### Black Values must be less than 288. If the value is invalid, make a note and call Service. 2. Press b to exit. The values displayed may fluctuate on the screen. TC6035EZEM Rev. C 10/98 Using Diagnostics 7-15 Checking the Printhead The Printhead menu provides the following selections: Dot Resistance Checks each dot on the printhead (takes approximately four minutes). Temperature Checks the working temperature range of the printhead. To check the printhead, scroll until you highlight Printhead on the Hardware Test sub-menu. Press e. You will see: Select item Dot Resistance Temperature Exit To run the Dot Resistance test: 1. From the Printhead sub-menu, scroll with the arrow keys until you highlight Dot Resistance. Press e. You will see: Running Dot Test... Then you will see: Avg dot = XXX Enter for dot value Esc to leave 7-16 Using Diagnostics TC6035EZEM Rev. C 10/98 2. Press e. You will see: Dot# XX GOOD Value = ### Valid values are 244-308 (inclusive). If the value is not within range, please make a note and call Service. The test continues (with results displayed on the screen) until each dot resistance has been tested and the results displayed. 3. The test concludes by displaying: Avg dot = XXX Enter for dot value Esc to leave. Press b. To run the Temperature test: 1. From the Printhead sub-menu, scroll with the arrow keys until you highlight Temperature. Press e. You will see: Printhead Temp = ### OK The value may fluctuate on the screen. The temperature of the printer depends upon the number of labels printed and the operating environment. TC6035EZEM Rev. C 10/98 Using Diagnostics 7-17 If the printhead value is under 116, do not print anything. Open the cover and let the printer cool. If the printhead value is between 117 and 136 (inclusive), you cannot print strips of labels. Open the cover and let the printer cool. Any printhead value greater than or equal to 137 is normal. The printhead value is not the temperature in degrees. 2. Press b to exit. Checking the Battery The Battery test displays the acceptable recharging capacity of the battery cell. To run the Battery test: 1. From the Hardware Test sub-menu, press e. You will see: Battery = ### XXX If the value (which may fluctuate) is greater than 832, the printer can operate normally. If the value is between 712 and 832 (inclusive), the printer can run but not print. XXX is a description of the meaning of the value (i.e., Fully Charged). 2. Press b to exit. 7-18 Using Diagnostics TC6035EZEM Rev. C 10/98 Checking the Motor The motor test verifies the functionality and speed of the motor by discharging labels. To test the motor: 1. From the Hardware Test sub-menu, press e. The motor will run and dispense labels. 2. Press b to exit. Service Diagnostics This menu selection is password-protected for Service use. Calibrating Labels To run the Calibration Test: 1. From the Printer menu, scroll with the arrow keys until you highlight Calibration. Press e. You will see: Reloading Trigger to feed ESC to Calibrate 2. Load the supply and feed it through the label path. Press the trigger to feed the supply. 3. Press b to perform the calibration test. You will see: Stock Type: 2) Paper_ TC6035EZEM Rev. C 10/98 Using Diagnostics 7-19 4. Scroll with the left arrow until you highlight the stock type you want: synthetic, paper, or fax. Press e. Two or three labels (depending on the supply position) are fed and the motor turns off (unless you choose fax). If you chose fax in step 4, the procedure ends. You will see: Stock Width: 3) 2.0" 5. Scroll with the left arrow until you highlight the stock width you want: 1.2", 1.5", or 2.0". Press e. You will see: Stock Length: X.XX where X.XX is the calibrated stock length. 6. Use the left arrow to backspace and enter a different stock length value (if necessary). Press e. C h e c k i n g H a r d w a r e Ve r s i o n I n f o r m a t i o n To check the version for the print engine board and MCS library: 1. From the Printer menu, scroll with the arrow keys until you highlight Version. Press e. You will see: Select item Print Engine Board MCS Library Exit 7-20 Using Diagnostics TC6035EZEM Rev. C 10/98 2. Scroll with the down arrow until you highlight the option you want. Press e. If you select Print Engine Board, you will see: Print Engine Version X.X If you select MCS Library, you will see: MCS Library Version X.X 3. Press b to exit. C h e c k i n g S o f t w a r e Ve r s i o n I n f o r m a t i o n At the Main menu, scroll with the arrow keys until you highlight About. 1. Press e. You will see: About DOS Ultra Diag Pgm P.X.X BIOS VX.X.X Y DOS VX.X 2. 4-line/33 Key Printer Only. Press e. You will see: About DOS Ultra DOS H/W Rev. X Print Eng VX.X MCS Lib. VX.X 3. Press e to exit. TC6035EZEM Rev. C 10/98 Using Diagnostics 7-21 Exiting the Diagnostics Program 1. At the Main menu, scroll with the arrow keys until you highlight Exit. Press e. You will see: Exit Diag? (Y/N) 2. 4-line/33 Key Printer Only. Press s(unless you are already in Shift mode). 3. Press Y to exit the program or N to return to the Main menu. 7-22 Using Diagnostics TC6035EZEM Rev. C 10/98 8 TROUBLESHOOTING This chapter includes information about printer problems and solutions. Problems and Solutions Some common printer problems and their solutions are listed on the following pages. Problem Solution Printer will not feed. Switch to a fully charged handle. Close the supply cover completely. Load the supply correctly. Check the platen roller for jammed labels. Printer will not print. Switch to a fully charged handle. Load the supply correctly. Clean the printhead. Print has voids or is too light. Load the supply correctly. Close the supply cover completely. Switch to a fully charged handle. Clean the printhead. Check the supply for damage or defects. Switch to a fully charged handle. Printer partially prints on the supply and fails to Load the supply correctly. respond to the keypad or trigger. (A low battery or recharge message does not appear on the display.) TC6035EZEM Rev. C 10/98 Troubleshooting 8-1 When you first turn on the printer, the line moving across the bottom of the screen stops and the logo screen never disappears. Turn off the printer. Then, turn it back on while holding down the f key. When messages appear, release the key. Note the message on the screen when the messages stop scrolling and report the problem to the System Administrator. Problem Solution Switch to a fully charged handle. Printer fails to respond to the keypad during data entry. (A low battery or recharge message does not appear on the display.) Scanner will not scan a bar code. See "Scanning Tips" in Chapter 5. The bar code symbol may have voids. Scan a previously scanned bar code to verify that the scanner is working. If the scanner is not working, ask your System Administrator to run a scanner test. If these solutions do not work, call Service. 8-2 Troubleshooting TC6035EZEM Rev. C 10/98 When calling for support, you may need to tell Service the identification data for the radio and memory cards. Use the information in this table or from the label inside the unit. Option Label Aironet 2.4 U.S. A24US Aironet 2.4 U.K. A24UK Aironet 2.4 France A24FR Aironet 2.4 Germany A24GR Aironet 2.4 Australia A24AU Aironet 3500 A35US Symbol 2.4 U.S. 500mW S24US5 Symbol 2.4 U.S. 100mW S24US1 Symbol 2.4 U.K. S24UK Symbol 2.4 France S24FR Symbol 2.4 Germany S24GR Symbol 902 Mhz S900 Proxim 2.4 U.S. P24US Proxim 2.4 U.K. P24UK Proxim 2.4 France P24FR Proxim 2.4 Germany P24GR 2M Flash 2FLASH 4M Flash 4FLASH 8M Flash 8FLASH 20M Flash 20FLASH 40M Flash 40FLASH TC6035EZEM Rev. C 10/98 Troubleshooting 8-3 8-4 Troubleshooting TC6035EZEM Rev. C 10/98 R E F E R E N C E I N F O R M AT I O N A Cable Pinouts The cable pinouts on the mini-DIN connector on the printer are set as shown. Pin Signal 1 Send RTS 2 Receive CTS 3 Receive RX 4 Ground 5 Send TX 6 DSR 7 Send DTR 8 Send DCD (optional +5 volt) TC6035EZEM Rev. C 10/98 A-1 Reference Information A-2 Reference Information TC6035EZEM Rev. C 10/98 B S P E C I F I C AT I O N S A N D ACCESSORIES Specifications Weight: 2.64 lbs. (1.1 kg) with battery handle, scanner and 1.5" (38 mm) supply roll. Storage Limits: 15°F to 120°F (-9°C to 49°C) Operating Limits: 40°F to 90°F (4°C to 32°C) Power Supply: 115/230 VAC, 50-60 Hz Battery Power: 12 VDC; charging takes approximately 1.5 hours with a 6093-07 Fast Charger. Charge time may vary depending on the type of battery and the degree to which the battery was drained. Printing: Thermal direct Supply Types: Paper and synthetic labels, paper tags, and specialty paper Communications: RS-232C serial port (COM1) or radio frequency port (COM2). The COM2 port is optional Display: 20-character (four-line) alphanumeric liquid crystal with either 4 or 8 lines Memory: Lithium battery maintains memory 2 MB of FLASH 1 MB of Static RAM TC6035EZEM Rev. C 10/98 Specifications & Accessories B-1 Supply Sizes The printer can use supply lengths from .55" (14 mm) to 4.0" (102 mm). The standard label widths are: 1.2 inch (30 mm) 1.5 inch (38 mm) 2.0 inch (51 mm) Accessories RS-232 Cables: 9-pin straight cable #116587-14 25-pin straight cable #116587-15 9-pin PC cable #116587-30 25-pin PC cable #116587-31 Battery Handle: Standard: #115873 High Capacity: #115884 Holster: #PHOL03 #UHOL-01 Battery Chargers: 6093-07 Fast Charger 6094-01 Four-Station Charger Cleaning Supplies: Cleaning Pen #114226 6076 Cleaning Kit For more information about these products, call your Sales Representative. B-2 Specifications & Accessories TC6035EZEM Rev. C 10/98 GLOSSARY Following is a list of terms that you’ll need to know to operate the printer. Application The computer program that runs on the printer and controls how you print, scan, and enter data. Backlight A light that, when on, enables you to see the printer’s display better. Black Mark Sensor A sensor used to position supplies. The printer uses it in conjunction with supplies that have black marks on the back of each tag or label. When it senses a black mark, it knows it has reached the end of the current tag or label. Cable Pinouts The individual signals carried through the printer’s cable. Calibration The printer process that determines the length and width of the supplies. Continuous Mode The printing mode where a strip of tags or labels is printed at once. Dot An individual element on the printhead that, when inked (in conjunction with other inked elements), makes printed characters or symbols. Mini-DIN Connector The end of the cable that fits into the serial port on the printer. Non-Peel Mode The printing mode where labels are not automatically removed from their backing paper. On-Demand Mode The printing mode where, if you are printing multiple tags or labels, one is not printed until you remove the previously printed tag or label. TC6035EZEM7/98 On-Demand Sensor A sensor that determines when a tag or label has just been printed and removed. Peel Mode The printing mode where labels are automatically removed from their backing paper. Pixel An individual element on the display that, when filled (in conjunction with other elements), makes displayed characters or symbols. Serial Port The plug on the side of the printer where you attach the cable. Supplies Tags or labels that the printer prints on. System Administrator The supervisor who sets up and/or explains how to use the printer. Void Streaks in a bar code that contribute to scanning mistakes. TC6035EZEM7/98