1
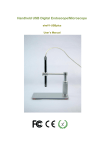
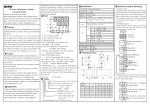
USB PEN MICROSCOPE
eheV1-30USBplus
USER’S GUIDE
INTRODUCTION
FUNCTIONS AND APPLICATIONS
The USB PEN MICROSCOPE is a new electronic product. It is a tubular
imaging system consisting of an optical lens, an image sensor, an
illumination mechanism, and an image transfer control circuit connected to a
computer. You can display the images captured by the USB PEN
MICROSCOPE on the computer screen, store them on the computer, print
them, or send them over the Internet.
As an USB microscope, it can magnify stamps, coins, antiques, insects,
electric circuits, machines, fabrics, food, decorations, etc. and can also help
visually impaired patients magnify small text for reading.
ATTENTION
Before installation and use of this product, please read the instructions in
this manual to ensure its correct use.
SAFETY INSTRUCTIONS
Before using this product, please carefully read the following safety
instructions.
1. The socket that the computer is plugged in must be properly grounded,
as the computer supplies power to this product. If in any doubt, please
have a professional electrician check and verify the grounding to ensure
safety.
2. Never use this product in stormy weather.
3. This product contains delicate and precision components. Be gentle
when using it and avoid harsh handling or excessive force that may
cause damage to the product.
4. The temperature of the handle increases slightly during use and it feels a
little warm. This is normal. If the product is overheated and hot to the
touch, immediately cut off the power and contact us for repair.
5. Never leave the product on unattended. Unplug from the USB port after
use.
6. Do not disassemble this product. Disassembling this product will result in
irreparable damage. The company is not responsible for damage
resulting from disassembly of the product by the user. In case of any
difficulties in using the product, please contact us.
7. This product may only be used by children under supervision of an adult.
Never give this product to a child to use or play by him or herself. Keep
this product out of reach of children.
8. Do not let this product come in direct contact with steam, vapor, water, or
liquids of any kind. Such contact can cause irreparable damage that is
not covered by warranty.
9. When not in use, put the handle in the transparent sleeve and store it in a
tightly sealed box to avoid moisture and decay. Damages resulting from
improper storage are not covered by the warranty.
10.When using this product for eye examination, the illumination should be
as dim and the examination time as short as possible. Never use this
product to examine the eyes of infants or young children.
11.Examination or cleaning of the ear canal, nasal cavity and oral cavity
should only be undertaken by adults who have mastered the depth and
force required for such a task.
12.Never use the mirror or cotton swab for cleaning or treatment of the deep
rear part of the oral cavity. Parts may drop into the throat and cause
serious damage.
13.The cable of this product has been strictly tested. To ensure safe use, do
not replace it.
SYSTEM REQUIREMENTS
For best picture quality, the following specifications are recommended:
1. IBM PC compatible computer
2. Intel Pentium III processor or above
3. 128M RAM or above
4. At least two USB ports (For best effect, USB 2.0 port is recommended).
5. Win XP, Vista or Win 7 home edition or professional edition with CD-ROM
and a 40G or higher hard disc.
TECHNICAL SPECIFICATION
1. DSP: High power Digital Image Monarch Processor.
2. Sensor: high-quality CMOS sensor, 1.3M pixels
3. Resolution: 1280X1024
4. Colors: true color 24bit (RGB)
5. Interface: USB1.1/USB2.0.
6. Frame rate: 30 frames/sec (CIF and VGA).
7. Focal distance: 10mm - ∞
8. Magnification: 200× (at 10mm on 17” screen by 640 x 480 resolution)
PACKING LIST
USB PEN MICROSCOPE
1
Stand
1
Reflector with focusing ring
1
Multi-function tube with focusing ring
1
Ear tip with focusing ring
1
Ear pick with focusing ring
1
Large focusing cap
1
cable with light intensity control dial
1
Software CD (User manual included)
1
SET UP
To avoid mistake in the set up process, please
strictly follow these steps:
Take out of the parts of the stand and
assemble the stand according the photo on
the right. And input pen microscope into the
holding hole on the top of the stand.
Place the included CD into the CD-ROM drive.
Find the icon of ‘ehe.exe’.
Copy the ‘ehe.exe’ to your PC. Just copy but
never try to install it.
Plug the USB PEN MICROSCOPE into the
USB port, and double click on the icon of
‘ehe.exe’ to open the image window.
Rotate the dial on the USB cable to control the brightness of the LED
on the USB PEN MICROSCOPE.
After a short while you should see the image
captured by the USB PEN MICROSCOPE on
the computer monitor. Click on ‘OPTIONS’ and
click on ‘VIDEO CAPTURE PIN’. Click one of
image window size in the drop-down menu
and click on ‘OK’ to confirm. See below
photos:
FOCUSING
The focus distance can be adjustable by turning
the knob of the pen microscope (see right
photo).
And the pen microscope can be move up and
down by turning the pillar (see left photo) for
getting larger photo area or smaller photo area.
TAKE PHOTOS
Click on ‘option’ on the top
of image window.
Then
click
on
‘high
resolution’ in the drop-down
menu to make sure there is
a tick mark here.
Close the drop-down menu.
Push down the button of
the dimmer that located on the USB cable to freeze an image.
Or click ‘snap’ on the top of image window to take a photo.
The photos you have taken will be saved in the computer and display an
icon on the screen.
If your system could not freeze an
image please follow steps to make it
works:
1, click on ‘file’ that is on the top of
image window.
2, click on the ‘set photo folder’
3, designate the folder you want to
save the photos
4, click OK to confirm
MORE WAYS TAKING PHOTOS
Click on ‘option’ on the top of image
window.
Then click on ‘ high resolution’ in the drop-down menu to make sure there is
no tick mark here.
Close the drop-down menu.
Now you get below functions:
IMAGE FREEZ
Please rap the space bar for freezing an image.
If you want to save this image you can rap the return key for saving the
image as a photo.
Rap the space bar again to activate the image window.
TIMING SNAP
Rap the F5 key to arouse a timing snap.
The snap will be delayed 10 seconds after the key was rapped company
with beep per second.
If you could not get a clear photo by push down the snap button the timing
snap may be a help.
RETURN KEY SNAP
Just rap return key to take a photo.
WARNING
The top line of the image window will be blue color while it works properly. It
will be changed into light blue when user operates on background and the
snap function will be lost during this color.
Just click any where inside of the image window to change it back to blue.
LED Light Adjustment
There is a LED light dimmer on the
USB cable. User turn the dimmer
can adjust the light power to a
proper level according the demand
of observation.
MOVIE RECORD
For taking a video:
1, click on ‘video capture’
2, click on ‘Set Time Limit’ and
input how many seconds the video
you want to take and tick the ‘use
time limit’
3, click on the ‘capture’ again
4, click on ‘start capture’
5, click on ‘OK’ to start a record
The video will be taken and
stopped automatically when time
out.
The video is an AVI format.
User may move the AVI file to any folder like other documents.
REFLECTOR
The reflector always comes with
the focusing ring and it adjust
focus same way with the other
function parts. The focusing
distance can be 10mm to infinity.
For use on the teeth checking it
should be focused on any surface
that is at the distance of 10 to 15mm far from the reflector before it be used
for teeth checking.
MULTI-FUNCTION TUBE
The multi-function tube
adjust the focus the same
way as the focusing ring
and are used to focus on
and
inspect
printed
materials on every kind
parts or flat surfaces. The
advantage of using a
multi-function tube is that it saves you from the need to constantly adjust the
focus when you use the pen camera to view parts or flat surface materials
and have to constantly move the camera. By attaching a multi-function tube
to the pen camera, you can press the tube against the surface of the
materials you want to view and thus always maintain a constant distance
between the lens of the pen camera and the materials.
With the multi-function tube, the distance between the lens of the camera
and observed surface is about 25mm.
To use the multi-function tube,
focus on the edges of the opening
at the front end of the lens. This is
done by adjusting the focus until
you see a sharp edged circle on
the screen. The multi-function tube
can now be used to inspect the ear
canal, nasal cavity, hair roots, skin,
etc.
FOCUSING CAPS
The focusing caps adjust the focus
the same way as the focusing ring
and are used to focus on and
inspect printed materials on flat
surfaces. The advantage of using
a focusing cap is that it saves you
from the need to constantly adjust
the focus when you use the pen
camera to view flat surface
materials and have to constantly
move the camera. By attaching a
focusing cap to the pen camera,
you can press the cap against the
surface of the materials you want
to view and thus always maintain a
constant distance between the lens of the pen camera and the materials.
The focusing caps come in large and small sizes.
With the large focusing cap, the distance between the lens of the camera
and observed surface is 20mm.
With the small focusing cap, the distance between the lens of the camera
and observed surface is 10mm.
The large and small focusing caps are sold separately. Please order
according to your need.
EAR TIP
The ear tip should be
connected to the focusing
ring, which is then connected
to the front end of the handle.
The four focusing rods inside
the focusing ring should
match up with and sit in the
four hollows in the focusing
plate on the surface of the
lens. When the focusing ring
is rotated the lens should
rotate, thus adjusting the
focus.
To use the ear tip, focus on
the edges of the opening at
the front end of the lens. This
is done by adjusting the
focus until you see a sharp
edged circle on the screen.
The ear tip can now be used
to inspect the ear canal, nasal cavity, hair roots, skin, etc.
FOCUSING TUBE
Focusing tube is used to touch the
objectives that is watching and get
a higher magnification.
STAND
A stand is come with the pen
microscope and for fixing the pen
cam while you do not use it or use
the pen cam as a microscope.
People
studying
microscopic
morphology can use it to inspect
jewelry, chinaware, decorations,
coins, antiques, fabrics, electric
circuits, etc. Since the focus of the
lens is at the edge of the front-end
opening, you can see virtually
anything you point at. At the same
time you still can adjust the clarity
of the image by rotating the
focusing knob on the top while viewing. And the pen microscope can be move
up and down for focusing or adjust the size of view by turning the pillar (see the
photo) for getting larger photo area or smaller photo area.
POST-SALE SERVICES
LIMITATIONS AND EXCLUSIONS
Please keep all the receipts of your purchase in a safe place. You need to
produce the unaltered and original receipts to receive warranty coverage.
Otherwise, the warranty is voided.
The warranty only covers the product if it is used under normal operation
conditions. However, the following are not covered by the warranty:
Damages resulting from unauthorized disassembly or assembly of the
products by the customer
Damages caused by fitting of improper components to the product
Damages resulting from unauthorized attempts to repair or to alter the
product
Gross distortion, scratches, discoloration, or damage of the covering
Cracks, scratches, and mold spots on the lens.
COMS sensor is burned or apparently scratched
Damages to the PCB board (such as burned PCB board) due to misuse
REPAIR SERVICE CARD
Product model:
Date of repair
Customer’s name
phone number
Description of faults
Place of repair
Results
WARRANTY CARD
Name of customer Address of customer
Purchase date
Customer phone number
Product model
Labeling of Sales Company
Serial number