1
Needle Types and Replacements
Embroidery quality can be greatly effected by your choice of needles. You
will need to find what works best with your applications. The following
information should help.
Replacing a Needle
Sew conditions and material properties will affect the life of a
needle, but eventually, needles will need to be changed.
1. Make sure the safety grabber blade is in the back
position before changing a needle. If it is not, press the
Adjustment and Center keys on the machine keypad to
move the grabber back.
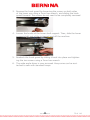
2. Above each needle is a needle clamp set screw that
holds it in place. Using a small flat-blade screwdriver,
turn the needle clamp set screw counterclockwise
about a half of a turn, until the needle can slide down
and out of the needle bar. Do not loosen too much or
remove the set screw. Loosen the screw just enough
for the needle to be removed.
3. Remove the needle by pulling down on the needle.
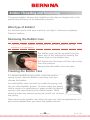
4. Embroidery needles have a front and a back side. The
needle must be installed correctly or the sew quality
may suffer. If you install the needle incorrectly, you my
also get thread breaks. The front of the needle has a
long groove (thread guide), while the back has an indented notch
(scarf) just above the eye of the needle.
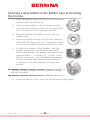
5. With the thread guide facing forward and the scarf facing back,
slide the needle up and into the needle clamp as far as it will go.
The eye of the needle should then be turned 5° to the right. The
acceptable range is 0° - 20° to the right.
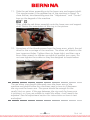
6. A needle orientation magnet may be used to help determine the
angle of the needle eye. This cylindrical magnet can be temporarily
attached to the front of the needle just above the eye. The end
of the magnet will rest on each side of the thread guide and stick
straight out from the needle. This will better indicate the angle of
the eye. For reference, one minute is 6° on a clock face.
Table of Contents
67 of 110