1
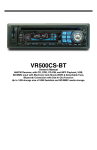
VRVD630 In-Dash AM/FM Stereo with Built-in 3” LCD monitor DVD/CD/VCD/DIVX/MPEG4/MP3/WMA/CD-R/CD-RW Player with USB, SD Card and Video/Audio Auxiliary Input 2 Welcome! Dear Customer, CONGRATULATIONS. The VRVD630 Multi-Media Headunit with AM/FM Stereo Receiver, DVD, VCD, CD, and MP3 Player, Auxiliary Input Jack, SD Card & USB Memory capability and Detachable Faceplate, when used as described, will give you years of dependable service in your car, truck, RV, or mini-van. We have taken numerous measures in quality control to ensure that your product arrives in top condition and will perform to your satisfaction. In the rare event that your VRVD630 Multi-Media Headunit with AM/FM Stereo Receiver, DVD, VCD, CD, and MP3 Player, Auxiliary Input Jack, SD Card & USB Memory capability and Detachable Faceplate contains a damaged or missing item, does not perform as specified, requires warranty service, or you have an installation problem, DO NOT RETURN THIS PRODUCT TO THE STORE. PLEASE CALL OUR TOLL FREE NUMBER FROM THE U.S.A. AND CANADA 1-800-445-1797 and ask to speak with a member of our technical service team; or submit your questions by e-mail to [email protected] and a member of our technical service team will respond by e-mail to your questions. Our in-house technical service team will expedite delivery of your part, advise you on installation, or help troubleshoot a problem with you. If your product needs warranty service, our technical service team representative will help you obtain the fastest remedy possible under the warranty. Contents Precautions ..................................................................................................... 4 Disc & Memory Types ..................................................................................... 5 Care of Discs................................................................................................... 6 Before You Install ............................................................................................ 6 Remove Old Head Unit ................................................................................... 7 Mark Polarity of Speaker Wires ...................................................................... 7 Installation (DIN Front Mount) ......................................................................... 8 Installation (Vehicle’s Brackets) ...................................................................... 9 Wiring Connections........................................................................................10 Location of Controls.......................................................................................11 Remote Control .........................................................................................12-13 Basic Operation ........................................................................................14-15 Radio Operation .............................................................................................15 DVD/VCD Operation..................................................................................16-18 ID3 Tags..........................................................................................................18 USB/SD Card Operations ..............................................................................19 System Setup ........................................................................................... 20-22 Troubleshooting Guide............................................................................. 23-24 :WLJPÄJH[PVUZ........................................................................................... 25-26 Warranty .........................................................................................................27 3 PRECAUTIONS Driving a vehicle while viewing a video on this head unit may violate motor vehicle laws, and may result in serious injury, property damage, or death! • The unit is only designed for use with 4 speakers. Do not combine speaker output wires for use with 2 speakers. Do not ground negative speaker leads to the chassis ground. Please read these important precautions BEFORE attempting to install this unit. • Disconnect the vehicle’s negative battery terminal before starting installation. Consult the vehicle’s owner’s manual for proper instruction. • Do not open the top or bottom cover. Modifying the unit will void the warranty and may damage the unit or cause the unit to malfunction or cause damage the vehicle's electrical system. • The unit is designed for a 12 Volt DC negative ground operation system only. Before installing the unit, make sure your vehicle is a 12Volt DC negative ground system. • Parking in direct sunlight for several hours will cause higher temperatures inside the vehicle. Do not operate in extremely high or low temperatures. The temperature inside the vehicle should be between 32º F (0º C) and 100º F (37º C) before turning on your unit. Cool down the vehicle before operating the unit • Mark the polarity of the existing speaker wires before disconnecting the old head unit. • Be sure to connect the color coded leads according to the wiring diagram. Incorrect connections may damage the unit or cause the unit to malfunction or cause damage the vehicle's electrical system. • The faceplate is a precision piece of equipment that contains sensitive electronic components. Do not subject it to excessive shock. • Make sure all the connections are completely correct before turning on your unit. • When replacing the fuse(s), the replacement must be of the same amperage as shown on the fuse holder. • When extending the ignition, memory backup or the ground cable, use 0.75mm diameter (AWG18) or heavier automotive grade cable to avoid wire deterioration or damage to the wire coating. • Do not block this unit’s vents or heater panels. Blocking them will cause excessive heat to build up inside the unit and may result in fire. • After completing the installation and before operating the unit, reconnect the battery according to the manufacturer’s instructions. Then press the reset (RES) button with a pointed object, such as a ball-point pen to set the unit to its initial status. • To prevent short circuit, never put or leave any metallic object inside the unit. If you smell or see smoke, turn off the power immediately and consult your dealer. • Insert the unit until it is firmly locked into mounting sleeve, otherwise it may fall out. • Do not touch the terminals of the faceplate or of the unit. • Be careful not to drop or shock the unit, it may break or crack because it contains glass parts. • If you have difficulty installing this unit in your vehicle contact customerservice@ vr-3.com or Call 1-800-445-1797 4 Disc & Memory Types The following table contains information on the different functions performed, and the different types of media used by this unit. Disc Type Icon Content Size Playtime DVD Audio/Video 12cm About 2 - 4.5 Hours VCD Audio/Video 12cm About 74 minutes CD Audio 12cm About 74 minutes MP3 Audio 12cm About 600 minutes MPEG4 DIVX Memory Type Audio/Video Icon Content USB Flash Memory Audio/Video SD Card Audio/Video MMC Audio/Video Size Playtime Care of Discs • Handle the disc by its edge to keep the disc clean. Do not touch the disc’s surface. • Do not use CDs with labels or stickers attached. The label may leave a sticky residue when it begins to peel. • Do not use a CD with paste or ink residue on it. • Clean the discs with an optional cleaning cloth. Wipe each disc from the center out. 5 Before You Install Automotive audio equipment installations can be challenging at times, even to the most L_WLYPLUJLK VM PUZ[HSSH[PVU [LJOUPJPHUZ 0M `V\ HYL UV[ JVUÄKLU[ ^VYRPUN ^P[O LSLJ[YPJHS wiring, removing and reinstalling interior panels, carpeting, dashboards or other components of your vehicle, please call our toll-free help line 1-800-445-1797 and our in-house technical service team will answer your installation questions. Contact the vehicle's THU\MHJ[\YLYMVY]LOPJSLZWLJPÄJPUZ[Y\J[PVUZVYJVUZPKLYOH]PUN[OL=9=+WYVMLZsionally installed. IMPORTANT: Remove the two transport screws from the top of the unit before installing. )LMVYLÄUHSPUZ[HSSH[PVUVM[OL\UP[JVUULJ[[OL^PYPUN[LTWVYHYily, making sure the unit and the system work properly. • Use only the parts included with unit to ensure proper installation. The use of unauthorized parts can cause malfunctions. • Consult with your vehicle’s nearest dealership if installation reX\PYLZ[OLKYPSSPUNVMOVSLZVYV[OLYTVKPÄJH[PVUZVM[OL]LOPJSL • Install the unit where it does not get in the driver’s way and cannot injure the passenger if there is a sudden stop, like an emergency stop. • The laser will be damaged if it overheats, so don’t install the unit anywhere hot--for instance, near a heater outlet. • If installation angle exceeds 30 from horizontal, the unit might not give its optimum performance. 6 Installation 1. Remove the Old Unit from the Dashboard A. Remove the outer trim frame. DIN Front Mount B. Insert the keys supplied with the old unit into both sides of the unit as shown in figure below until they click. Pull to remove the old unit from the dashboard. DO NOT DISCONNECT WIRES AT THIS TIME! 2. Mark Polarity of the Speaker Wires Marking the polarity of the speaker wires will make it easier to connect the existing speakers to the VRVD630. Consult the wiring diagram of the existing head unit before disconnecting any wires. If a wiring diagram is not available contact the head unit’s manufacturer. 3. On the masking tape mark the polarity of the speaker wires (+ & - ), as well as left or right, and front or rear. 4. Double check that you marked the first speaker correctly by checking that the speaker wires are the same at the head unit. 1. While the old unit is playing, disconnect the wires from one speaker. 5. Repeat this procedure for all of the speakers. 2. Take a length of masking tape and fold it around the wire so it forms a flag. 6. Mark the power, ground, and any other wires also. 7 Installation DIN FRONT-MOUNT (Method A) IMPORTANT! BEFORE THE FINAL INSTALLATION OF THE HEAD UNIT, CONNECT THE WIRING TEMPORARILY, MAKING SURE THE UNIT AND THE SYSTEM WORK PROPERLY. 0UZLY[ÄUNLYZPU[V[OLNYVV]LPU[OLMYVU[ of frame to remove it. Insert the keys supplied with the old unit into the grooves on both sides of the old unit. The unit can be installed or removed from the dashboard using these keys. (Fig. 1) Fig. 1 After inserting the Mounting Sleeve into the dashboard, select tabs on top, bottom, and sides, then bend them to secure the mounting sleeve in the dash board.(Fig. 2) Fig. 2 1. Dashboard 2. Nut (5mm) 3. Spring washer 4. Screw (5 x 25mm) 5. Screw 6. Strap 7. Plain washer Follow the diagram in Fig. 3 for installing the rear mounting strap to the head unit. The rear mounting strap will help keep the head unit from moving around inside the dashboard. Fig. 3 8 Installation DIN REAR-MOUNT (Method B) Installation using the screw holes on both sides of the unit. 1. Screw holes on the side of the unit. 2. Screws. Use either truss screws (5 x TTVYÅ\ZOZ\YMHJLZJYL^Z_TT depending on the shape of the screw holes in the bracket. 3. Vehicle’s Factory Mounting Bracket 4. Dashboard or Console 5. Hook (Remove this part) Note: The mounting sleeve, outer trim ring, and the mounting strap are not used for this method of installation. PARTS Check All Included Parts Open the VRVD630 box and remove all parts, then check all parts and compare them to the parts list in the user manual. For replacement parts contact VR3 Customer Service at [email protected] or call 1-800-445-1797. 2 Keys 1 Mounting Sleeve 1 Sheet Metal Screw 1 Metal Support Strap 1 Mounting Bolt 1 Faceplate Case 1 1/8" Audio/Video Cable 1 Remote Control 9 Wiring Connections VRVD630 Subwoofer Out Reverse Video In Rear Monitor Out RCA Line Out Rear Front IGNITION MEMORY Right Left Right Left RED (+) YELLOW (+) ORANGE (+) REVERSE LIGHT BROWN (-) PARKING BRAKE Antenn FUSE Connect YELLOW to battery or live + 12 Volts of power BLUE (+) POWER ANTENNA OR AMPLIFIER Negative Ground - BLACK (-) 12 Volt Negative - Front Left Rear Left WHITE + GRAY + WHITE/BLACK - GRAY/BLACK - GREEN + VIOLET + GREEN/BLACK - VIOLET/BLACK - Front Right Rear Right • Before starting the installation, disconnect the negative battery cable from the battery’s negative terminal. )LMVYLÄUHSPUZ[HSSH[PVUVM[OL\UP[JVUULJ[[OL^PYPUN[LTWVYHYPS`THRing sure the unit and the system work properly. 10 Location Of The Controls 1. Power/Back Button 2. Volume Knob 3. Next, Fast Forward/Previous, Fast Reverse 4. Local/Band/Play, Pause 5. Infra Red Window 6. Select/Mode 7. Stereo/AMS/Repeat 8. TFT LCD Display 9. Equalizer Pre-Sets 10. Faceplat Release Button 11. USB Slot 12. AV IN Jack 13. Mute 14. SD Slot 15. Disc Loading Slot 16. Eject Button 17. Reset Button Audio/Video Auxiliary Input The VRVD630 is equipped with an Audio/ Video Auxiliary Input. In order to use the Audio/Video Auxiliary Input you MUST use the supplied Audio/ Video cable. Insert supplied adaptor into the A/V Input Jack on the front panel of the VRVD630. The Adapter has two 3.5 mm jacks (one Yellow for Video and one Black for Stereo Audio). The Yellow jack on the Adpater accepts a 3.5 mm mono Video plug from devices like portable DVD players and Video game controllers. The Black jack on the Adapter accepts a Stereo Audio 3.5 mm plug from any Stereo Audio device (CD player, MP3 player, DVD, etc). 11 Remote Control 1 2 3 4 5 P OWE R MODE DIS P EQ B AC K MUT E S LO W S LO W+ 15 16 17 UP SET ME N T IT L PB 18 U 6 7 8 9 10 11 12 13 E ANG LE G OTO + P LAY 19 C S TOP C LE AR ZOOM P R OG AMS SEEK R PT S E E K+ R DM S UB -T LO C P /N B AND AUDIO ST A V OL 20 21 22 23 24 25 26 27 1. POWER 2. MODE 3. DISP 4. EQ 5. SETUP 6. FAST REVERSE/ FAST FORWARD, PREVIOUS TRACK/ NEXT TRACK, UP/DOWN/LEFT/ RIGHT/ENTER 7. TITLE 8. ANGLE 9. GO TO 10. CLEAR 11. 10+ BUTTON 12. RPT/SEEK- 13. 0-9 NUMBER BUTTONS 14. VOLUME UP/ DOWN 15. BACK 16. MUTE 17. SPEED +/18. MENU 19. PBC 20. STOP 21. PLAY 22. AMS/PROG 23. ZOOM 24. LOC/SUB-T 25. RDM/SEEK+ 26. BAND/ P/N 27. ST/AUDIO See page 8 for a detailed description of the button’s functions. Changing the Battery B Turn the remote over, then slide the battery holder out of the remote. V OL+ 14 Use and Care of the Remote Insert battery into battery holder with positive side of the battery facing up. Point the remote control at the front panel of the unit to operate. Precautions: • Using batteries improperly can cause them to explode. • Keep the battery out of the reach of children. • Should the battery be swallowed, immediately consult a doctor. • Use one CR2025(3V) lithium battery. • Remove the battery if the remote control is not to be used for a month or longer. • Do not short-circuit or disassemble • Dispose of spent batteries properly. • Do not drop the remote control, it may become jammed under the brake or accelerator pedals. Insert battery holder into the remote control until Dispose of All Batteries Properly 12 Remote Control 1. POWER Press to turn the unit ON or OFF. 2. MODE Press the MODE button to change the operating mode of the unit. 3. DISP In DVD mode, press the DISP button to display Title Elapsed, Title Remain, Chapter Elapsed, Chapter Remain, Display Off. In VCD/CD mode, Single Elapsed, Single Remain, Total Elapsed, Total Remain, Display Off. 4. EQ Press to select preset equalizer settings to match the type of music being played. 5. SETUP In playback mode, press to display system setting picture, the user can select some relative constant parameters. 6. [ / ], [ / ], [ / / / ], ENTER Use the [fast reverse/fast forward], [previous track/next track], [up/down/left/right] buttons to select items in the system setting TLU\<ZL[OL,5;,9I\[[VU[VJVUÄYT[OL selected item in the system setting menu. 7. TITLE In DVD mode, repeately press the button to select different titles. Only if DVD Supports. 8. ANGLE Press to change the viewing angle in DVD mode. 9. GO TO Press to set the playback time. 10. CLEAR Press to activate CLEAR function. 11. 10+ Press to select track and chapter. 12. RPT/SEEK In playback mode, press to RPT playing. In radio mode, press to scan stations downwards. 13. (0-9)NUMBER BUTTON - AB Press to select track chapter or preset stations. In DVD/VCD mode, Press once, it sets the “A” position (beginning of the loop); pressed a 2nd time, it sets the “B” position (end of the loop). Pressed again, it exits the loop. 14. VOL-/VOL+ Refer to the head unit about VOLUME. 15. BACK Press to come back last operation. 16. MUTE Press to shut off the sound output. Press it again to resume previous sound level. 17. SLOW-/SLOW+ Press to slow forward or slow reward. 18. MENU Press to return to the root menu of the disc in playback mode. 19. PBC Press to display menus on VCD discs. PBC ON songs palt in order. PBC OFF songs can be played in any order you wish. 20. STOP Press to stop the playback. 21. PLAY/PAUSE Press to play or resume the current playback. 22. AMS/PROG In radio mode, press to scan and automatically store station. In VCD/CD mode, press the AMS button to program the order you wish the chapters to be played. 23. ZOOM Press to increase or decrease the picture in size. 24. LOC/SUB-T In FM of radio mode, press to select local station or distance station. In DVD playback mode, press to change the subtitle language. 25. RDM/SEEK+ In VCD/CD mode, press to play tracks at random order. In radio mode, press to scan stations upwards. 26. BAND/P/N In radio mode, press to select bands. In DVD/VCD mode, press to select PAL MULTI or NTSC system. 27. ST/AUDIO In FM mode,press to select stereo or mono reception. In DVD/VCD mode, press to change the audio language. 13 Basic Operations RESET SWITCH Immediately after installing or connecting power to the unit, it should be initialized. Lower the detachable front panel. Behind the front panel, to the left of the connector, is a small hole with the reset switch in it. With a ball-point pen or other pointed object, press the RESET switch to initialize the unit. 1. PWR/BACK Press the PWR/BACK button to turn the unit ON. The unit automatically remembers its last operation mode and will automatically switch to display that mode. Press and hold the button for 1 second or longer to turn off the unit. 2. MODE 1.Press the MODE button to change the mode. Each time you press the Mode button, the Mode will change. TUNER----DVD----USB----SD----AV * If there is no DVD disc in the unit it will not change to DVD unit. 3. Volume Turning the Volume knob to the right Increases the volume. Turning the volume knob to the left decreases the volume. 4. EQ This unit has 4 pre-set equalizer settings stored in memory. To select the one. * The factory default setting is “OFF”. Each time you rotate the Volume knob, the pre-set equalizer setting changes in the following order: OFF--CLASSIC--POP--ROCK--JAZZ MENUS To access these menus press the volume knob on the faceplate or the MENU button on the remote control 1. Picture Menu In playback and AV mode, press the Volume knob to access the PICTURE menu, there are 4 adjustable video characteristics stored in memory, they’re accessed in the following the order: BRIGHTNESS/CONTRAST/COLOR/HUE. Press and rotate the Volume knob to select the setting you wish to adjust. 2. Audio Menu Press the Volume knob to access the AUDIO menu, then select the item to adjust, each time you press the Volume knob, the item selectedchanges as following order: BASS--TREBLE--EQ--BALANCE--FADER Turn the Volume knob to adjust the sound characteristic selected. 3. Expert Menu Press the Volume knob to access the EXPERT menu, rotate the Volume knob to ghlight the function you wish to adjust. Press the volume knob to select the highlighted function. A. DX/LOC In Radio mode select DX/LOC on the EXPERT menu, then rotate the Volume knob to choose between DX or LOC. Choose DX to listen to a distant, weaker signal, or choose LOC to listen to a stronger local signal. B. ST/MONO In Radio mode select ST/MONO on the EXPERT menu, then rotate the Volume knob to choose between ST or MONO. Choosing ST will enable to the radio to play in stereo mode. MONO will enable the radio to play in mono mode. When the sound quality is poor because the signal strength is weak, 14 Basic Operations use MONO to improve the sound. ST/ MONO is also available on the faceplate. C. WOOFER In any mode choose WOOFER on the EXPERT menu, the rotate the Volume knob to turn the Subwoofer line out ON or OFF. You T\Z[OH]LHUHTWSPÄLYPUZ[HSSLK[VKYP]LH subwoofer. D. BEEP In any mode choose BEEP on the EXPERT menu, then rotate the Volume knob to turn the Beep sound ON or Off. E.LOUD In any mode choose LOUD on the EXPERT menu, then rotate the Volume knob to turn the loudness function ON or OFF. Radio Operations 1. Radio Mode Press the Mode button to select Radio mode. The radio frequency appears in the display. 2. Radio Bands This unit comes with four bands - three FM (FM1, FM2, and FM3) and one AM Band. Each of the four bands can store up to six preset stations, for a total of 24 (18-FM,6AM) pre-set memory stations. Each time the button is pressed, the radio reception band changes in the following order: FM1------FM2------FM3------AM 3. Tuning There are 3 types of Tuning modes; Pre-set, Scan, and Manual. a) Pre-set Tuning ;V \ZL 7YLZL[ [\UPUN `V\ T\Z[ ÄYZ[ ZH]L the radio stations to memory; Press the BND button to select the desired band, FM1, FM2, FM3, or AM, then press and hold the AMS button for 2 seconds. Up to 6 stations will automatically be tuned to. If 6 receivable stations cannot be received, the previously stored station will remain in that memory position. PRE-SET 1 PRE-SET 2 PRE-SET 3 PRE-SET 4 Press the SET button to recall the stored pre-set stations. Each press of the SET button will advance to the next pre-set frequency. b) Seek Tuning Press the button once to seek a lower frequency or the button to seek a higher frequency. When using Seek tuning the radio will seek for the next strongest radio signal to tune to. c) Manual Tuning Press and hold the or button until the word manual appears on the LCD. Then press to tune to a lower frequency or the button to tune to a higher frequency. Leave the unit idle for a few seconds and it will return to scan tuning. 4. Stereo/Mono On the faceplate press the ST button, MONO will be shown on the LCD and the radio will play in mono. Press the ST button again, to listen to the radio in stereo. the default is stereo. When the sound quality is poor because the signal strength is weak, use MONO to improve the sound. 5. Local/Distant Press the LOC button on the faceplate to switch between local and distant modes. 15 DVD Disc Operations Driving a vehicle while viewing a video on this head unit may violate motor vehicle laws, and may result in serious injury, property damage, or death! To play a DVD the vehcle must be stopped and the parking brake must be engaged. 1. Loading a Disc ing, press the Mode button to enter Video mode. Usually a DVD movie has a menu screen for the viewer to choose from. When the DVD’s menu screen appears use the Arrow buttons on the remote control to navigate through the menu choices. Use the Enter I\[[VU VU [OL YLTV[L JVU[YVS [V JVUÄYT your choice on the menu. 4. Pausing Playback on DVD On the faceplate press the BND/ to pause playback of the DVD/CD. Press the button again to resume playback of the DVD/CD. Press the REL button on the top right side of the faceplate to access the disc slot. Insert a disc into the disc slot with the label side facing up. The disc will automatically load. Close the faceplate. 2. Ejecting a Disc Press the REL button on the top right side of the faceplate to access the disc slot. Press the Eject button, then remove the disc. If the disc is not removed within 11 seconds it will automatically reload itself. If you force aEject disc Button into the slot before auto reloading, the disc and/or unit can be damaged. Notes: • Never insert foreign objects into the disc SLOT. • If the disc does not insert easily, there may be another disc in the unit. Press the Eject button to eject the disc, if there isn’t a disc in the unit, and the disc will not load, the unit may require service. • The unit is not compatible with 8 cm CD. 3. Playing a DVD/CD Disc After inserting a disc it will automatically start playing. If the disc does not start play- 5. Selecting a Track on DVD TRACK UP On the faceplate press the button to advance to the beginning of the next track. Each press of the button will advance to the next track. TRACK DOWN On the faceplate press the button ONCE to go to the beginning of the current track. Press the button TWICE to go to the beginning of the previous track. 6. Fast-Forward/Fast-Reverse Fast-Forward Press and hold the button for 1 second or longer. Fast-Reverse Press and hold the button for 1 second or longer. 7. Repeat During DVD playback, you can repeat the whole Title or Chapter of the DVD you are viewing. On the REMOTE or faceplate press the RPT Button to choose Title, Chapter, or OFF. The default is OFF. 8. Slow Motion Playback During DVD playback, press the SLOW + or SLOW - Button for slow motion play. There are 5 speeds. Each time you press the SLOW MOTION Button the playback 16 DVD Disc Operations will change as follows; 1/32, 1/16, 1/8, 1/4 or 1/2 speed. 9. ZOOM During DVD playback, Press the ZOOM Button to increase the picture size. There are 2 size increases, 400% and 1600%. Press the ZOOM button once to increase the picture size 400%, press the ZOOM button twice to increase the picture size 1600%, press the ZOOM Button again to return to normal size. 10. Changing The Viewing Angle With DVDs featuring multi-angle (scenes shot from multiple angles) recordings, you can press ANGLE on the remote control to switch between viewing angles during playback. Selection options switch as follows: ANGLE 1, ANGLE 2, ANGLE 3 NOTES: • This function is only available with the remote control. • This function only operates with DVDs featuring multi-angle recordings. • The mark on a DVD’s package indicates it features multi-angle scenes. • The number in the mark indicates the number of angles from which scenes were shot. If you press ANGLE during fast forward/ fast reverse or pause, fast forward/fast reverse or pause is canceled and normal playback resumes but the viewing angle does not change. 11. “GO TO” PLAYING TIME In DVD mode, press the GO TO button, then, use the buttons to select Title, Chapter, AUDIO, SUBTITLE, Angle, TT Time, CH Time, REPEAT, & Time Disp. from the GO TO menu shown below. Press the ENTER button to choose the item you wish to change. For example; 1. Press GO TO, then use the arrow buttons to highlight Chapter on the menu shown below. MENU Chapter AUDIO SUBTITLE Angle Bi t r at e 75 Bi t r at e 75 TITLE ELAPSED 0: 04: 50 2. Press the ENTER button to select Chapter, then change the chapter of the movie you are watching. 3. Input the chapter number you want to go to. (For example; Enter 08 to go to chapter 8.Enter 10+, then 3 to go to chapter 13.) The DVD player will go to the chapter you have entered. 4. Press GO TO to resume full screen mode. In DVD/VCD mode, press the GO TO button, then, use the buttons to select Title, Chapter, AUDIO, SUBTITLE, Angle, TT Time, CH Time, REPEAT, & Time Disp. from the GO TO menu shown below. MENU Chapter AUDIO SUBTITLE Angle Bi t r at e 75 02 /14 2CH SPANISH OFF 1/1 TITLE ELAPSED 0: 04: 50 Press the ENTER button to choose the item you wish to change. For example; 1. Press GO TO, then use the arrow buttons to highlight Time Disp. on the menu shown below. MENU Disc Time 1:04:43 Track Time 0:04:26 REPEAT OFF Time Disp. TOTAL ELAPSED MENU Chapter AUDIO SUBTITLE Angle _0/14 2CH SPANISH OFF 1/1 02 /14 2CH SPANISH OFF 1/1 Bi t r at e 75 TITLE ELAPSED 0: 04: 50 17 TOTAL ELAPSED 0: 19: 50 DVD/VCD Disc Operations 2. Press the ENTER button to select Time Disp., then the menu below will be shown. MENU TITLE ELAPSED TITLE REMAIN CHAPTER ELAPSED CHAPTER REMAIN Bi t r at e 75 TOTAL ELAPSED 0: 19: 50 3. Highlight the Time Display item on the menu you wish to be displayed. 4. Press the ENTER button to confirm your choice. Your choice will be displayed on the bottom right of the GO TO menu. NOTE: This function is operated by using remote control. 12. Changing The Subtitle Language (multi-subtitle) With DVDs featuring multi-subtitle recordings. Press the LOC SUB-T Button on the remote control to switch between subtitle languages during playback. Selection options switch as follows: Subtitles 1, Subtitles 2, and Subtitles OFF NOTES: • This function is only available with the remote control. • This function only operates with DVDs featuring multi-subtitle recordings. • The number in the mark “ “ on a DVD’s package indicates the number of recorded. 13. AMS Menu A. Press the AMS MENU Button to program the playback of the DVD. main menu, all of the DVD’s chapters will appear on monitor. Use the ARROW buttons to select your desired chapter, press enter to confirm your selection. B. Title Menu: During DVD status, press the TITLE Button to return the title menu, all of the titles will appear on the monitor. Use the UP or DOWN ARROWS buttons to select your desired title. NOTE: • This function is only available with the re- mote control. • These options will be used by the VRVD630 if they are available on the disc. If the disc that is inserted does not have these preferred options, then the discs own preferences will be used. • Some functions will vary depending on the type or format of the disc. 14. Auto Switch to Video When driving the vehicle and inserting a DVD the message “DVD:PARKING BRAKE” will appear on the screen. Park the car and apply the parking brake to view the DVD. 15. Reverse Video In When you put the vehicle in reverse to back up the Reverse Video input will become active. If there is a back up camera attached to the Reverse Camera Video input, the image from the reverse camera will be displayed on the screen. If there isn’t a back up camera attached to the Reverse Camera Video input there will be no image displayed on the screen. MP3/WMA ID3 Tags WOL[OLY WSH`PUN 47>4( ÄSLZ MYVT H Disc, USB Drive, or SD card, the following screen will be displayed. The song titles are displayed on the left, and the ID3 information is displayed on the right. 0+PUMVYTH[PVUPZVUS`\ZLK^P[O47ÄSLZ >4(ÄSLZKVUV[\ZL0+PUMVYTH[PVU(SZV PMHU47ÄSLOHZUV0+PUMVYTH[PVUUV[O- 18 USB/SD Card Operations ing will be displayed on the left side of the screen. MP3/MP4/WMA/DIVX Disc Operations 1. Loading a Disc Press the REL button on the top right side of the faceplate to access the disc slot. Insert a disc into the disc slot with the label side facing up. The disc will automatically load. Close the faceplate. 2. Ejecting a Disc Press the REL button on the top right side of the faceplate to access the disc slot. Press the Eject button, then remove the disc. If the disc is not removed within 11 seconds it will automatically reload itself. If you force a disc into the slot before auto reloading, the disc and/or unit can be damaged. Notes: • Never insert foreign objects into the disc SLOT. • If the disc does not insert easily, there may be another disc in the unit. Press the Eject button to eject the disc, if there isn’t a disc in the unit, and the disc will not load, the unit may require service. • The unit is not compatible with 8 cm CD. USB Drive & SD Card Operations To Load a USB flash drive. 1. Remove the cover from the USB port on the right side of the unit. 0UZLY[[OL<:)ÅHZOKYP]LPU[V[OL<:)port. To Load a SD Card. 1. Lower the faceplate 2. Insert the SD Card into the SD card slot on the left side. MP3/MP4/WMA/DIVX Files From a Disc, USB Drive or SD Card 1. Play / Pause >OLUWSH`PUN47 > 4(ÄSLZZ[VYLKVUH USB drive, press the “BND/ ” Button to start playback. When playing a disc or memory card comIPULK^P[O4747>4(+0=?ÄSLZ [OL\UP[^PSSVUS`YLHK[OLÄSLZ^P[OZHTLMVYmat automatically. For example, if the \UP[YLHK[OL47ÄSLZÄYZ[[OLUP[JHUVUS` WSH`HSS47ÄSLZI\[UVV[OLYMVYTH[Z such as Divx/MP4/WMA although they are in same disc; and after MP3 playback, the unit will stop to play. The same for other formats. During the playback, the key of PREV & NEXT are only available for the ZHTLMVYTH[ÄSLZ 4. Pausing Playback On the faceplate press the BND/ to pause playback. Press the button again to resume playback. 5. Selecting a Track TRACK UP On the faceplate press the button to advance to the beginning of the next track. Each press of the button will advance to the next track. TRACK DOWN On the faceplate press the button ONCE to go to the beginning of the current track. button TWICE to go to the Press the beginning of the previous track. 6. Fast-Forward/Fast-Reverse Fast-Forward Press and hold the button for 1 second or longer. Fast-Reverse Press and hold the button for 1 second or longer. 7. Repeat During playback, you can repeat all of the files or just one track. On the REMOTE or faceplate press the RPT Button to choose Repeat one, Repeat All, or OFF. 19 System Setup System Setup To access the Setup menu, press the Setup button the the remote control. The menu includes; General settings, Audio setup, Video setup, Preferences setup, and Password setup. Use the Arrow ( ) buttons on the remote control to navigate the items available on the menu. Press the Left ( ) arrow button on the remote to return to the previous menu. b) OSD LANGUAGE SETUP Use this menu to select the language displayed on the setup menus and any other on-screen display. 1. General Setup 2. Audio Setup a) SPEAKER SETUP PAGE Use this menu to select to type of sound output. a) TV DISPLAY SETUP The TV Display is for selecting which format (aspect ratio) will be used for the TV screen. • No matter which display format is selected, a picture recorded in standard 4:3 format always displays in the 4:3 aspect ratio. • The display format of DVD titles may vary; please refer to the information that accomWHUPLZ`V\YZWLJPÄJ+=+[P[SL • If the DVD title is recorded in 16:9 wide display format while the TV is a standard 4:3 screen, horizontal compression of the image will result. • Some DVD titles may be recorded in special formats. In such cases, the DVD titles will always appear on the screen in their original format,regardless of which TV display format you select. DOWNMIX MODE: Sets front speakers to LT/RT STEREO, V SURR or 5.1 CH. SPEAKER SETUP PAG E Downmix S TR LT /RT S TE R E O V S UR R S E T D OWNMIX MODE ;OL ÄYZ[ ZL[[PUNZ 3;9; :;,9,6 = SURR) downmix the sound Signal for 2Speakers. This setting allows you to enjoy a surround sound effect with onIy two speakers. For this reason the audio setup for additional speakers (described in the following sections) are disabled when DOWNMlX MODE is set to these settings. In this setting, the DIALOG is active. You have to set the DOWNMlX MODE to 5.1 20 System Setup CH if you have selected the Dolby Digital connection and you would like to enjoy true Dolby Digital surround sound. In this setting, the CENTER, REAR speakers are active. SPDlF OUTPUT MODE: This page is used to set the audio outputs. This DVD player includes three kinds of audio output: 4. Preferences Setup NOTE: The Preferences Setup page is only accessible when there is a disc in the unit, and the disc is stopped. The seting will take effect the next time the unit is powered up. SCREEN TYPE This player supports the following screen output types, MULTI(Auto), NTSC, and PAL systems. PREFERENCE PAGE SCREEN TYPE AUDIO SUBTITLE DISC MENU PARENTAL DEFAULT ENGLISH FRANCH SPANISH CHINESE JAPANESE KOREAN RUSSIAN THAI PREFERRED AUDIO LANGUAGE 1. SPDlF OFF: An analog surround sound format is output through the back-paneI connections for L, R. LS, RS, and Center speakers, and the Subwoofer simulation. 2. SPDlF/RAW or SPDIF/PCM: This surround sound format is output to a Dolby Digital / DTS decoder through the optical and coaxial connectors on the back-panel of the unit. Note: The DVD player simultaneously outputs a Dolby Digital signal and an analog signal, but you have to select the Analog output if you want to take advantage of the Karaoke effects. 3. Video Setup Page Video Quality Setup Page Use the following table to help choose the TV Type for the disc you are viewing. lf your TV only supports NTSC or PAL and you have selected the wrong TV type, the ZJYLLU^PSSÅPJRLYHUKISHJRHUK^OP[L AUDIO Use this page to set the preferred audio language as the default when playing a DVD. (ONLY if the DVD supports these languages) VIDEO SETUP PAGE Component Off PREFERENCE PAGE SCREEN TYPE AUDIO SUBTITLE DISC MENU PARENTAL DEFAULT Off Component ENGLISH FRANCH SPANISH CHINESE JAPANESE KOREAN RUSSIAN THAI PREFERRED AUDIO LANGUAGE 21 System Setup SUBTITLE Sets the preferred subtitle language as the default when playing DVD. (ONLY if DVD supports these languages) PREFERENCE PAGE SCREEN TYPE AUDIO SUBTITLE DISC MENU PARENTAL DEFAULT DEFAULT Resets the unit to its original settings. Press ENTER to reset. PREFERENCE PAGE SCREEN TYPE AUDIO SUBTITLE DISC MENU PARENTAL DEFAULT ENGLISH FRANCH SPANISH CHINESE JAPANESE KOREAN RUSSIAN THAI ENGLISH FRANCH SPANISH CHINESE JAPANESE KOREAN RUSSIAN THAI PREFERRED AUDIO LANGUAGE PREFERRED AUDIO LANGUAGE DISC MENU Sets the preferred disc menu language as the default when playing DVD. (ONLY if the DVD support these languages) PREFERENCE PAGE SCREEN TYPE AUDIO SUBTITLE DISC MENU PARENTAL DEFAULT ENGLISH FRANCH SPANISH CHINESE JAPANESE KOREAN RUSSIAN THAI 5. Password Setup Page Password Mode enables the user to set a password for parental lock function. The initial password is 1389. Changing the Password To change the password, please type 6 numerals as new password. You will be asked for the old password before you can change to a new password. PREFERRED AUDIO LANGUAGE PASSWORD SETUP PAGE Password Mode Password PARENTAL The parental control function works in conjunction with the different censorship ratings assigned to DVDs. These ratings help to control the types of DVDs that the family is able to watch. There are 8 censorship ratings for DVDs. Note: • The PARENTAL preference is changeable when 5.1 PASSWORD MODE set to OFF. • After setting the level of parental control. please set the password to ON to prevent changing of the chosen reting. PREFERENCE PAGE SCREEN TYPE AUDIO SUBTITLE DISC MENU PARENTAL DEFAULT ENGLISH FRANCH SPANISH CHINESE JAPANESE KOREAN RUSSIAN THAI ON PAS S WOR D MODE PASSWORD SETUP PAGE Password Mode Password ON C HANG E CHANGE PASSWORD OLD Password New Password Confirm PWD OK PREFERRED AUDIO LANGUAGE 22 ON OF F System Setup 5. Exit Setup Menu Use the following page to exit the Setup menu. EXIT SETUP MENU 23 System Setup Setting the Screen Size The following table shows multi-aspect ratios for different types of DVDs T V S c reen S ize Picture Format on Disc 16: 9 4: 3 Pan Scan Letter-box Wide S c reen 4: 3 16: 9 Functions Supported by DVD Discs There are many different functions available on DVD discs. The Functions vary by player and Manufacturer. Picture Proportion Modes Regional Code And Signal System Parental Lock Dolby Digital Surround Sound DTS Surround Sound Number of Viewing Angles Number Of Languages Closed Caption for Hearing Impaired Subtitle Languages 24 Troubleshooting DVD Playback Symptom Cause Remedy Power doesn't switch ON . The unit doesn't operate. Leads and connectors are incorrectly connected Confirm once more that all connections are correct A fuse has blown Fix the problem causing the blown fuse and replace the old fuse with a new one of the same capacity Parking Brake Wire is not connected correctly Parking Brake Wire should be connected to the vehicle’s negative parking brake wire The remote control operation mode is incorrect Switch to the correct remote control mode Battery power is low Load new batteries Some operations are prohibited with certain discs Check using another disc The disc is dirty Clean the disc The loaded disc is a type this unit cannot play Check what type the disc is Non compatible video system disc is loaded Change to a disc compatible to your video system Connections are incorrect. Check connections With some discs,96kHz output is prohibited. Switch the output setting to 48 Khz The unit is performing still F.FWD or F.REV pl ayback There is no sound during still F.FWD , F.REV pla yback The operation is prohibited for the disc This operation is not possible The operation is not compatible with the disc's organization This operation is not possible The picture stops (pauses) and the unit cannot be operated Reading of data has become impossible during playback After pressing once more There's no sound Volume level is low The volume level is low Raise the volume level There's audio and video skipping This unit is not firmly secured Secure this unit firmly The picture is stretched the aspect is incorrect The aspect setting is incorrect for the display Select the appropriate setting for your display When the ignition switch is turned ON (or turned to ACC), the motor sounds This unit confirms whether a disc is loaded or not This is a normal operation Operation with the remote control isn't possible Playback is not possible. There's no sound The prohibited mark is displayed and operation is not possible 25 once start playback Troubleshooting DVD Playback Symptom Cause Remedy Playback is not possible The loaded disc has a different region number from this unit Replace the disc with one featuring the same region number as this unit Dialog language (and subtitle language) can not be switched. The DVD playing does not feature multiple language recordings. You cannot switch among multiple languages if they aren't recorded on the disc You can only switch between Switch using the disc menu options indicated in the disc menu No subtitles are displayed The DVD playing does not feature Subtitles are not displayed if they are subtitles not recorded on the disc You can only switch between Switch using the disc menu options indicated in the disc menu Playback is not with the audio language and subtitle language settings selected in SET UP MENU The DVD playing does not feature dialog or subtitles in the language selected in the SET UP MENU Switching to a selected language is not possible if the language selected in the SET UP MENU is not recorded on the disc The picture is extremely unclear/distorted and dark during playback The disc features a signal to prohibit copying (some discs may have this) Since this unit is compatible with the copy guard analog copy protect system. When playing a disc that has a signal prohibiting copying the picture may suffer from horizontal stripes or other imperfections when viewed on some displays. This does not mean this unit is malfunctioning. Symptom Cause Remedy The PBC(playback control) menu display cannot be called up. The video CD playing does not feature PBC This operation is not possible with video Cds not featuring PBC PBC is switched OFF Switch PBC ON Repeat play and track/time search are not possible PBC is switched ON Switch PBC OFF. VCD Playback 26 Specifications GENERAL Power Requirement ........................................................ 12VDC (10.8~16V) Grounding System ................................................................ 12VDC Negative Fuse........................................................................................................ 15 Amps RMS Power Output ................................................................ 4 X 8 Watts Maximum Power Output ................................................................ 4 X 40 Watts 3VHK0TWLKHUJL Dimensions Weight ææ ........................................................ 178mm X 166mm X 50mm ................................................................................................ 1.55 kg DVD PLAYER SN Ratio ........................................................................ More than 70 dB(1KHz) Dynamic Range ........................................................ More than 80 dB(1KHz) Distortion ........................................................................................less than 0.2% Video Output ................................................................ 27 =WW=æ Specifications FM TUNER Frequency Range ........................................................ 87.5~107.9MHz Usable Sensitivity ........................................................................ 10dB SN Ratio ................................................................................ 55dB(mono) Distortion ................................................................................ 0.5%(mono) Stereo Separation ................................................ 30dB(65dBu,1KHz) AM TUNER Frequency Range ........................................................ 530~1710 KHz Usable Sensitivity ........................................................................ 30dB Signal-to-Noise Ratio 50dB ................................................................ 28 Limited Warranty VIRTUAL REALITY VIDEO LABS® products are designed and manufactured to provide a high level of troublefree performance. VIRTUAL REALITY VIDEO LABS® warrants, to the original purchaser, that its products are free from defects in material and workmanship for 30 days from the date of original purchase, as part of our commitment to product excellence. VIRTUAL REALITY VIDEO LABS®HUKVYP[ZHMÄSPH[LZYV\[PULS`PTWYV]LZ the designs, materials or production methods of its existing products. Because it is impractical to publicize all changes in every product, we reserve the right to make such changes without notice. CONDITIONS OF WARRANTY: If during the 30 day warranty period your new product is found to be defective, VIRTUAL REALITY VIDEO LABS® will repair such defect, or replace the product, without charge for parts or labor subject to the following conditions: 1. All repairs must be performed by VIRTUAL REALITY VIDEO LABS®HUKVYP[ZHMÄSPH[LZPU,H[VU[V^U5L^ Jersey. 2. The equipment must not have been altered or been damaged through negligence, accident, or improper operation. 3. The replacement of parts are exempted from this warranty when replacement is necessary due to normal wear and tear. 4. All warranty claims must be accompanied by a copy of the sales receipt or bill of sale. 5. Repair or replacement parts supplied by VIRTUAL REALITY VIDEO LABS® under this warranty are protected only for the unexpired portion of the original warranty. 6. In the case of car stereos, this warranty does not extend to the elimination of car static or motor noise; correction of antenna problems; costs incurred for the removal or reinstallation of the product; damage to tapes, speakers, accessories or car electrical systems. 7. VIRTUAL REALITY VIDEO LABS® will not be responsible for any charge incurred for installation. OWNER’S RESPONSIBILITIES: VIRTUAL REALITY VIDEO LABS® will make every effort to provide warranty service within a reasonable period of time. SHOULD YOU HAVE ANY QUESTIONS ABOUT SERVICE RECEIVED, OR IF YOU WOULD LIKE ASSISTANCE IN OBTAINING SERVICE, PLEASE CALL TOLL FREE 1-800-445-1797, 8:30am - 4:30pm EST. In order to provide you with the proper warranty service, we request that you adhere to the following procedure: 1. Include a copy of your sales receipt or bill of sale with your unit when it is returned for warranty service. 2. If it is necessary to return your product for service, please return it securely packed, preferably in the original shipping carton, and freight and insurance prepaid to the following address: VIRTUAL REALITY VIDEO LABS, Service Department, 41 James Way, Eatontown, New Jersey 07724. 3. Please include a detailed explanation of the problem you are having. 4. If your product is found by VIRTUAL REALITY VIDEO LABS® to have a defect in material or workmanship, within the warranty period, it will be repaired or replaced at no charge and returned to you prepaid. Where permitted by Iaw VIRTUAL REALITY VIDEO LABS® liability shall be limited to that set forth in this warranty. This warranty shall be the exclusive remedy of the purchaser. VIRTUAL REALITY VIDEO LABS® makes no other warranty of any kind, expressed or implied; and all implied warranties, are hereby disclaimed by VIRTUAL REALITY VIDEO LABS® and excluded from this warranty, VIRTUAL REALITY VIDEO LABS®HUKVYP[ZHMÄSPH[LZ[OLTHU\MHJ[\YLYKPZ[YPI\[VYHUKZLSSLYZOHSSUV[ILSPHISLMVY any injury, loss or damage, incidental or consequential, arising out of the use or intended use of the product. ©2007 Virtual Reality Video Labs ® All designs, logos and images are the exclusive property of Virtual Reality Video Labs ®HUKVYP[ZHMÄSPH[LZ<:HUK-VYLPNU7H[LU[Z7LUKPUN(SSYPNO[ZYLZLY]LK Printed in China 00000 29