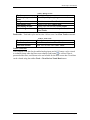
1
FERGUSON BEAUREGARD
iNodeConfig iC
User Manual
iNodeConfig iC User Manual
FERGUSON BEAUREGARD
iNodeConfig iC
User Manual
The Ferguson Beauregard AUTO-CYCLE and iNodeConfig iC program and manuals are
Copyright by Ferguson Beauregard. All rights reserved. This program and manual are the
property of Ferguson Beauregard and are not intended for public distribution.
Ferguson Beauregard
2913 Specialty Drive
Tyler, TX 75707
Phone: (903) 561-4851
Fax: (903) 561-6567
Email: [email protected]
9/15/2008
Version 1.0.0
Page 2
iNodeConfig iC User Manual
Table of Contents
Overview............................................................................................................................. 6
Ferguson Beauregard ACiC............................................................................................ 6
ACiC user interfaces ....................................................................................................... 6
iNodeConfig iC basics. ....................................................................................................... 7
Save and Refresh icons. .................................................................................................. 7
Save icon..................................................................................................................... 7
Refresh icon. ............................................................................................................... 7
Help................................................................................................................................. 7
iNodeConfig iC configuration ............................................................................................ 9
Installing iNodeConfig iC............................................................................................... 9
Connecting to the ACiC and starting iNodeConfig iC ................................................... 9
Connecting with the USB port.................................................................................... 9
ACiC configuration........................................................................................................... 11
Updating firmware ........................................................................................................ 11
Updating firmware with a PC ................................................................................... 11
Updating firmware from an SD card ........................................................................ 11
General configuration ................................................................................................... 11
Setting general parameters........................................................................................ 12
Setting up communications........................................................................................... 12
Cell modem............................................................................................................... 12
Enable/disable cell phone ..................................................................................... 12
Cell modem provisioning...................................................................................... 12
Cell modem activation .......................................................................................... 12
Cell modem reset .................................................................................................. 12
Text messaging security code ............................................................................... 12
Users ......................................................................................................................... 13
Text message services........................................................................................... 13
Adding and Configuring users .............................................................................. 13
Enabling login information ................................................................................... 13
Removing users..................................................................................................... 13
Scheduled data reporting........................................................................................... 13
Adding Scheduled data uplinks ............................................................................ 13
Setting up a well................................................................................................................ 15
Analog inputs ................................................................................................................ 15
General...................................................................................................................... 15
Assigning inputs........................................................................................................ 15
Calibrating inputs...................................................................................................... 16
Digital inputs................................................................................................................. 16
Assigning inputs........................................................................................................ 16
Configuring mode and general settings ........................................................................ 16
Modes........................................................................................................................ 16
Selecting Mode ..................................................................................................... 16
General settings......................................................................................................... 17
Selecting General Settings .................................................................................... 17
Configuring timers, automatic adjustments and counters............................................. 17
9/15/2008
Version 1.0.0
Page 3
iNodeConfig iC User Manual
Timers and automatic adjustments............................................................................ 17
Setting Timers and Automatic Adjustments ......................................................... 18
Timers screen ........................................................................................................ 18
Counters .................................................................................................................... 18
Setting Counters.................................................................................................... 18
Configuring Tank Mode ............................................................................................... 18
Setting Tank Mode Parameters............................................................................. 19
Configuring Sync Mode................................................................................................ 19
Configuring Overrides .................................................................................................. 19
Override categories ................................................................................................... 20
Setting Overrides .................................................................................................. 20
Configuring alarms ....................................................................................................... 20
Alarm categories ....................................................................................................... 20
Setting Alarms ...................................................................................................... 21
Saving and importing configurations............................................................................ 21
Exporting and importing with a PC .......................................................................... 21
Exporting and importing with the SD card. .............................................................. 21
Resetting the ACiC to its default configuration............................................................ 22
Viewing Data ................................................................................................................ 22
Viewing well status and history................................................................................ 22
Clearing well status and history................................................................................ 22
Trend data ................................................................................................................. 22
Tabular .................................................................................................................. 23
Graphical............................................................................................................... 23
Logs............................................................................................................................... 23
Event log ....................................................................................................................... 23
Viewing and clearing the Event log.......................................................................... 23
Trend Data log .............................................................................................................. 23
Saving Trend Data and Event Logs .............................................................................. 24
Update log................................................................................................................. 24
Snapshot log.............................................................................................................. 24
iNodeConfig iC Screen Reference.................................................................................... 25
Connect window ........................................................................................................... 25
Menu bar ................................................................................................................... 25
Tool bar..................................................................................................................... 25
Screens ...................................................................................................................... 26
Devices.................................................................................................................. 26
Tree ....................................................................................................................... 26
Find ....................................................................................................................... 26
ACiC window ............................................................................................................... 26
Menu bar ................................................................................................................... 26
Screen tabs ................................................................................................................ 26
Screens ...................................................................................................................... 27
Data ....................................................................................................................... 27
Config ................................................................................................................... 32
Timers ................................................................................................................... 38
Overrides............................................................................................................... 39
Input Config .......................................................................................................... 43
9/15/2008
Version 1.0.0
Page 4
iNodeConfig iC User Manual
Schedule................................................................................................................ 47
Alarms................................................................................................................... 49
Cell Modem .......................................................................................................... 54
Users ..................................................................................................................... 56
System................................................................................................................... 58
Events.................................................................................................................... 61
Appendix A....................................................................................................................... 63
Installing and starting iNodeConfig iC ......................................................................... 63
Removing a previous version of iNodeConfig iC..................................................... 63
Install iNodeConfig iC.............................................................................................. 63
Installing the USB hardware driver .......................................................................... 65
9/15/2008
Version 1.0.0
Page 5
iNodeConfig iC User Manual
Overview
The iNodeConfig iC User Manual describes in detail the software application
iNodeConfig iC, used to manage the Ferguson Beauregard Auto-Cycle intelligent
Controller (ACiC). For detailed information on ACiC mechanical and electrical
installation, operation and front panel display and keypad use, refer to the Ferguson
Beauregard “Auto-Cycle Operator’s Manual” (ACiC Manual).
Ferguson Beauregard ACiC
The ACiC system is a compact Remote Terminal Unit (RTU) designed for complete
stand-alone operation in the harsh environmental conditions of the oilfield.
The ACiC’s versatile microcomputer-based controller continuously monitors and
optimizes the well-production process. ACiC onboard software includes Ferguson
Beauregard’s patented Auto-Cycle™ electronic well site controller and plunger-lift
control algorithm. The controller records the analytical reservoir information so
production problems can be diagnosed with greater accuracy and efficiency.
The ACiC provides physical connections for analog pressure sensors such as casing and
tubing, as well as a variety of discrete (status) sensors. It can be equipped with virtually
any point-to-point radio or cellular/wire modem to link with a host computer or back
office. Pneumatic signals to control the well's tubing and auxiliary control valves are
supplied from a remote single or dual latching valve assembly
The ACiC controller and the Auto-Cycle™ control algorithm provide proven production
optimization. With automatic self-adjustment of time and pressure settings for well
production cycle control, optimum plunger velocity and well performance are achieved.
This system offers a unique approach to well production management, measurement and
optimization. With an ACiC on duty, the well operator has remote control of motor
valves, and can even monitor tanks and pits for high level alarms. It's like having an
operator on site 24 hours a day.
ACiC user interfaces
The ACiC provides several options for user control and management. When on-site and
performing simple configuration or data viewing, the built-in Keyboard Display Terminal
(KDT) can be used. Instructions for using the KDT are detailed in the ACiC Operator’s
Manual. iNodeConfig iC is intended for detailed configuration and trend data analysis.
iNodeConfig iC can be used locally by connecting a USB cable from a personal computer
to the ACiC, or remotely by connecting through the internet and/or a radio network.
Finally, a cell-modem equipped ACiC supports text messages (SMS), allowing a user to
receive alarms and status information, as well as making configuration changes remotely.
9/15/2008
Version 1.0.0
Page 6
iNodeConfig iC User Manual
iNodeConfig iC basics.
Save and Refresh icons.
The Save and Refresh icons are located at the top left-hand side of every ACiC screen
beneath the screen tabs, visible in Figure 1 below. Since Save and Refresh are used for
nearly every operation described in this manual, these functions are explained first.
Like many RTUs, configuration changes made in iNodeConfig iC are not automatically
sent to the ACiC. Similarly, ACiC data changes are not automatically updated in the
iNodeConfig iC view. The user must either Save changes made to ACiC configuration,
or Refresh iNodeConfig iC to see recent ACiC data changes.
Save icon.
Changes made to iNodeConfig iC configuration settings are sent to the ACiC when the
Save icon
is clicked.
Refresh icon.
iNodeConfig iC will not automatically retrieve and display data and configuration from
the ACiC except during initial connection. Data and configuration will change as the
ACiC adjusts settings and as new data is collected. To see the most recent ACiC data and
configuration, click the Refresh icon
.
Help.
Most items on each screen have a brief description of their purpose. This help text is
displayed at the bottom of the window when an item is highlighted. To highlight an item,
point at it and click the left mouse button.
Figure 1. ACiC help example.
9/15/2008
Version 1.0.0
Page 7
iNodeConfig iC User Manual
In Figure 1, “Enable plunger arrival adjustment” is highlighted. At the bottom of the
screen, the help text for that item is now displayed. If a Hot Key code (in this case, 62)
for the KDT interface is available, it is also shown.
9/15/2008
Version 1.0.0
Page 8
iNodeConfig iC User Manual
iNodeConfig iC configuration
This section describes the initial installation of iNodeConfig iC and the process for
connecting iNodeConfig iC for communication with an ACiC.
Installing iNodeConfig iC
Please see Appendix A.
Connecting to the ACiC and starting iNodeConfig iC
Connecting with the USB port
For local configuration and management iNodeConfig iC can be run on a personal
computer (PC) when it is connected to the ACiC via a USB interface.
1. Open the ACiC outer door, then open the ACiC KDT module door. See Figure 2.
2. Locate the USB port on the KDT module door and the USB port on the PC and
connect a USB cable between the two ports.
Figure 2. ACiC opened with USB cable attached
3. On the PC, start iNodeConfig iC.
4. iNodeConfig iC will automatically recognize the ACiC connected to the PC and
display the Connection Screen, as shown in Figure 3.
5. Double click on the ACiC. iNodeConfig iC will connect and the ACiC opening
screen will be displayed as shown in Figure 4.
9/15/2008
Version 1.0.0
Page 9
iNodeConfig iC User Manual
Figure 3. iNodeConfig iC Connnection Screen
Figure 4. ACiC Opening Screen
9/15/2008
Version 1.0.0
Page 10
iNodeConfig iC User Manual
ACiC configuration
This section describes the process for initial ACiC configuration prior to set up for a
specific well or location, including
• Firmware update
• General configuration
• Communications setup
Updating firmware
ACiC firmware can be updated using iNodeConfig iC, either from a file saved on a
personal computer (PC) or from a file saved on a Secure Digital (SD) card inserted into
the ACiC.
Updating firmware with a PC
1. Save the new firmware file (named similar to “ACiC_L_1_PCB2
1.00.08.00.hex”) into a directory on the PC.
2. From the iNodeConfig iC toolbar, select Tools, then Update Firmware….
3. A File Explorer screen will be displayed. Browse to the directory where the ACiC
firmware is saved, select the firmware file and click Open.
4. iNodeConfig iC will show the loading progess at the bottom of the screen. When
the firmware load is completed, the ACiC will reset, iNodeConfig iC will close,
restart and reopen the data screen.
5. Confirm the new firmware version by checking Firmware Version on the
System screen.
Updating firmware from an SD card
1. Insert the SD card into the ACiC. See Figure 2 for the SD card location.
2. From the iNodeConfig iC toolbar, select File, then Device SD card, then Load
Firmware….
3. On the resulting screen, click on the firmware filename to highlight it (similar to
FIRMWARE.HEX) and click OK.
4. iNodeConfig iC will show the loading progess at the bottom of its screen. When
the firmware load is completed, the ACiC will reset, iNodeConfig iC will close,
automatically restart and reopen the Data screen.
5. Confirm the new firmware version by checking Firmware Version on the
System screen.
General configuration
Set the following parameters during initial ACiC installation.
a. Device Name - Names the ACiC.
b. Battery – The ACiC is available with either a 6V or 12V battery. The Battery
setting must be set to the correct voltage for Energy level and power management
to display and operate correctly.
9/15/2008
Version 1.0.0
Page 11
iNodeConfig iC User Manual
c. KDT password – When a password is used, no changes can be made to the ACiC
using the KDT without entering the correct password. The password must be 4
digits (0-9); 0 disables the password requirement.
d. Serial port usage – Modem enables the cell modem communications, Modbus
enables Modbus communications via the RS-232 port and Disable disables the
port.
e. Tank/Tubing Low battery action – Sets the tank and tubing valves to open,
close or do nothing on a low battery condition.
f. Sync Clock – The ACiC clock must be set. iNodeConfig will synchronize the
ACiC to the PC clock.
Setting general parameters
1. Select the System screen and enter values or select options for the above
parameters.
2. Save the selections by clicking the Save icon.
3. Select Tools, then Sync Clock to set the clock.
Setting up communications
Cell modem
When equipped with a cell modem, the ACiC provides remote access to data, status and
configuration. To utilize the cell modem service, the user must have a cell phone with
text messaging services known as Short Message Service (SMS). The ACiC cell modem
must be provisioned and activated. To protect the ACiC from tampering, access is limited
to either text messages preambled with the ACiC’s unique security code, or the user’s
cell phone information must be entered on the Users screen. For comprehensive
instructions on the use of SMS with an ACiC, see the “ACiC SMS User Manual”.
Enable/disable cell phone
To use the cell modem, the ACiC serial port must be set to Modem for cell phone
communications. If factory-equipped with a cell modem, Modem will already be
selected.
1. Select the System screen.
2. Click on the Serial port usage setting and choose Modem or Disable as
appropriate.
3. Save the selections.
Cell modem provisioning
Call Ferguson Beauregard support.
Cell modem activation
Call Ferguson Beauregard support.
Cell modem reset
Select Tools, then Cell Modem, and then Reset Cell Modem.
Text messaging security code
1. Select the Cell Modem screen.
9/15/2008
Version 1.0.0
Page 12
iNodeConfig iC User Manual
2. For Text messaging security code, enter up to a 6 digit code (upper or lower case
A-Z and 0-9). A blank code will allow any ACiC formatted phone text message
access to this ACiC. The factory default code is ‘654321’.
3. Save the selections.
Users
The ACiC allows multiple users to remotely access the ACiC to receive data updates and
alarms and to make configuration changes. Contact information and privileges for each
user are configured on the Users screen.
Text message services
Each user can have text message services configured individually as follows:
• Scheduled - The user will receive scheduled data updates from the ACiC. (The
schedule is the same for all users.)
• Alarms - The user will receive alarms.
• Can query - The user can remotely query data from the ACiC using KDT hot key
numbers.
• Can modify - The user can remotely modify ACiC configuration using KDT hot
key numbers.
Adding and Configuring users
1.
2.
3.
4.
Select the User screen.
Click the Add button.
Enter the user name in the Full name box.
For text messaging to a cell phone, enter the Phone Number and click to check
the services to be enabled within the Text Message Information area.
5. Save the selections.
Enabling login information
(CURRENTLY UNSUPPORTED).
Removing users
1.
2.
3.
4.
Select the User screen.
Click on the user information to highlight.
Click the Remove button.
Save the selections.
Scheduled data reporting
The ACiC can be configured to regularly uplink data and status to the user. The data can
be uplinked via supported WAN connections (satellite, cellular, etc.). Limited data and
status can also be sent to a user via text messaging.
Adding Scheduled data uplinks
1. Select the Schedule screen.
2. Click the Add button.
3. Enter the time of day in the When box, select the frequency from the Repeats
box drop down menu, and optionally select days of the week from the Repeat on
selections.
9/15/2008
Version 1.0.0
Page 13
iNodeConfig iC User Manual
4. Choose the data type by checking Text Message for status data or Uplink
(CURRENTLY UNSUPPORTED) for user selected data.
5. Save the selections.
9/15/2008
Version 1.0.0
Page 14
iNodeConfig iC User Manual
Setting up a well
This section describes the process for setting up an ACiC for a specific well or location.
The process includes setting up:
• Analog inputs
• Digital inputs
• Mode and general settings
• Timers, automatic adjustments and counters
• Tank mode
• Sync mode
• Overrides
• Alarms
and
• Saving and importing configurations
• Resetting the ACiC
• Viewing data
• Viewing Event logs
• Saving Trend data and Event logs
Analog inputs
The ACiC has four inputs: three configurable signals and the plunger arrival switch (also
known as a Magnetic Shut Off or MSO). The three configurable signals can be used as
analog or digital inputs. This section describes how to configure these as analog signals.
General
The ACiC provides the following options for sampling and storing trend data.
• Analog channel scan rate – The rate the ACiC samples the analog input:
Disabled (for digital or no inputs), 3 second, or 1 minute. Faster sample rates
consume more energy and will deplete the battery more quickly. Choose the
slowest sample rate that meets the need. Use Disabled if there are no analog
inputs configured.
• Trend storage rate – The time span over which the analog inputs are averaged
for each stored trend sample: Disabled or 3 minutes.
• Reference voltage – The reference voltage used for factory calibration of the
analog inputs. Do not change the factory setting.
Assigning inputs
1. Select the Input Config screen. Input signals can be assigned in Analog Setup.
2. For the desired signal, for example Casing pressure, select the desired input
Analog 1 to Analog 3 from the drop down menu to the right of Casing pressure.
(The drop down menu is accessed by clicking on the existing selection.)
3. Assign all of the desired inputs, leaving unused signals as unused.
4. Save the selections.
9/15/2008
Version 1.0.0
Page 15
iNodeConfig iC User Manual
Calibrating inputs
Each assigned input must be calibrated to accurately represent the monitored signal. A
two point calibration procedure is provided. For each point, low or high, the current value
of the signal is entered as the engineering unit. The input is then sampled, low or high,
and is thereby assigned to the current engineering unit. Alternately if the minimum and
maximum input voltage range and the associated engineering units are known, they can
be entered for a rough calibration.
1. Select the Input Config screen.
2. Set the engineering units low to the desired value. For example, if the casing
pressure is 0 PSI, set the engineering units low to 0.
3. Highlight the CP sample low and click on Sample Voltage. The voltage on the
CP input will be read and associated with engineering unit low of 0 PSI.
4. Save the selection.
5. Repeat 1-4 for the high sample.
Digital inputs
The three ACiC inputs can be configured as either analog or digital. This section
describes how to configure these as digital signals. When used as a digital input, the
signal is compared to an internal 2.5 VDC reference voltage. The signal is on if it is
above 2.5 VDC or off if below.
Assigning inputs
1. Select the Input Config screen. Input signals can be assigned in Digital Setup.
2. For the desired signal, for example High LP, select the desired input, Analog 1 to
Analog 3, from the drop down menu to the right of High LP. (The drop down
menu is accessed by clicking on the existing selection.)
3. Assign all of the desired inputs, leaving unused signals as unused.
4. Save the selections.
Configuring mode and general settings
Modes
The ACiC can be operated in one of 5 modes. Each mode has unique capabilities and
associated parameter settings that control these capabilities.
•
•
•
•
•
Manual: The controlled valves are manually set for open or closed.
Plunger: The tubing valve cycles are controlled by the ACiC using the settable
timers and automated adjustments to optimize the plunger cycle.
Tank: The tubing and tank valves cycles are controlled by the ACiC using the
settable timers and automated adjustments to optimize the plunger cycle.
Intermitter: The tubing cycle is preset to fixed values that do not change.
Liquilift Tank: The same as Plunger mode, but adding a tank recovery mode to
modify the off time for no arrival conditions.
Selecting Mode
1. Select the Config screen.
9/15/2008
Version 1.0.0
Page 16
iNodeConfig iC User Manual
2. Under General, select the desired mode from the Control Mode drop down
menu.
3. Save the selection.
General settings
The ACiC provides various operational options which will be defined later within the
detailed screen descriptions. They include:
•
•
•
•
•
•
Afterflow for slow arrival: Allows afterflow during slow arrivals.
Auto restart: Allows restart in previous mode, verses manual mode.
Enable early arrival: Enables early arrival window. If this is disabled, all arrivals
prior to fast time are considered fast arrivals.
Enable plunger arrival adjustment: Allows cycle adjustments based on plunger
arrival time.
Enable proportional adjustment: Allows proportional cycle time adjustments
depending on variance from Good Window.
Plunger catch mode: Allows plunger to be caught on next arrival and well is
shut-in.
Selecting General Settings
1. Select the Config screen.
2. Under General, select the desired condition (True or False) for each option
enable.
3. Save the selection.
Configuring timers, automatic adjustments and counters
Timers and automatic adjustments
The ACiC optimizes plunger lift system control by developing a performance history of
plunger arrival times and adjusting operating parameters to improve efficiency. The
adjustment process compares the plunger arrival times to defined time windows of the
tubing cycle. The operating windows are created by setting the Tubing On Time, Fast
Time and Slow Time. The example below indicates a typical set of windows for an
8,000’ tubing depth.
START TIME
0 Min
Fast Window
FAST TIME
10 Min
Good Window
SLOW TIME
15 Min
Slow Window
ON TIME
30 Min
No Arrival
A plunger arriving at the surface in less than 10 minutes would fall in the Fast Window,
arrival between 10 and 15 minutes would fall in the Good Window, arrival between 15
9/15/2008
Version 1.0.0
Page 17
iNodeConfig iC User Manual
minutes and 30 minutes would fall in the Slow Window and any not arriving within 30
minutes are No Arrivals.
The ACiC provides the ability to control the plunger cycle by adjusting the Afterflow
Time (flow allowed after arrival) and Off Time (flow disabled) by user defined times.
Adjustments are made for arrivals within the windows as follows:
FAST WINDOW
GOOD WINDOW
SLOW WINDOW
NO ARRIVAL
Increase Afterflow Time and decrease Off Time
No changes
Decrease Afterflow Time and increase Off Time
Decrease Afterflow Time and increase Off Time
Setting Timers and Automatic Adjustments
1. Select the Config screen.
2. Enter the desired times for each parameter within the Tubing Off Cycle, Tubing
On Cycle, Tubing Afterflow, Tubing Fast Arrival Adjustments, Tubing No
Arrival Adjustments and Tubing Slow Arrival Adjustments.
3. Save the selections.
Timers screen
The timer values can be viewed and adjusted using a graphical interface provided on the
Timers screen. The control mode can be changed and On or Off cycles can be started.
•
•
•
Cycle windows - The graphical interface allows the user to drag the window bars
to increase or decrease the times, or enter numerical values into the window
boxes.
Control mode - The mode may be changed by selecting the desired mode from
the Control Mode drop down window.
Start On/Off cycle – Either On or Off cycles can be started by clicking the Start
On Cycle or Start Off cycle.
Counters
The ACiC provides plunger arrival history counters which act as triggers to force shut-in
or allow afterflow when plunger arrival is consistently within a timer window. For
example, the well will shut in when the plunger has not arrived during the number of
cycles set in the Initial no arrival counter.
Setting Counters
1. Select the Config screen.
2. Enter the desired initial counts for each initial counter within the Plunger Arrival
Counters. The current counts will reset to the initial counts when an On or Off
cycle is forced to start; otherwise the current counters will continue to decrement.
You may set the current counters if desired.
3. Save the selections.
Configuring Tank Mode
When Tank Mode is selected the following parameters may be set.
9/15/2008
Version 1.0.0
Page 18
iNodeConfig iC User Manual
•
•
•
•
•
•
Current recovery counter: Number of consecutive no arrivals until recovery
mode. Resets to initial recovery counter on plunger arrival or 0. (Liquilift tank
mode only.)
Initial recover counter: Initial number of consecutive no arrivals before recovery
mode. (Liquilift tank mode only.)
Reset afterflow to minimum on recovery
Tank delay mode: Time delay to tank valve opening from start of On cycle.
Tank on time: Tank valve on time provided plunger has not arrived.
Tank recovery time: Used instead of Off time when Current recovery counter
reaches 0. (Liquilift tank mode only.)
Setting Tank Mode Parameters
1. Select the Config screen.
2. Under Tank Mode, set the desired values.
3. Save the values.
Configuring Sync Mode
TBD
Configuring Overrides
The ACiC allows for setting safety valve overrides. These overrides are based on the
limits within which the production pressures are allowed to operate. If pressures exceed
the limits, valves are opened or closed as defined. The user sets these initial limits. The
ACiC also provides the ability to automatically adjust these limits based on the plunger
arrival history and the application of settable increments to the initial limits.
Example: The following parameters are set as shown. The initial range is 400 to
500 PSI (in the examples below, this range is written as “400-500”)
Casing Pressure Overrides
Open if CP is greater than
Close if CP is less than
Fast arrival, high CP decrease
Slow arrival, high CP increase
No arrival, high CP increase
Fast arrival, low CP decrease
Slow arrival, low CP increase
No arrival, low CP increase
Max CP shut in
•
•
9/15/2008
500
400
5
10
15
5
10
15
700
If the initial pressure is greater than 500, the valve opens; if less than 400,
the valve closes. Regardless of the range, the well will shut in if the
pressure exceeds 700 PSI.
If a fast arrival follows, the range is decreased by 5: from 400-500 to 395495.
Version 1.0.0
Page 19
iNodeConfig iC User Manual
•
•
If a slow arrival follows, the range is increased by 10: from 400-500 to
410-510.
If a no arrival follows, the range is increased by 15: from 400-500 to 415515.
Override categories
• Casing Pressure
• Differential Pressure
• Line Pressure
• Tubing Pressure
• Misc
o Open if TP-LP is greater than - Allows user to enter a differential set point
of tubing pressure minus line pressure. Provided minimum off-time has been
satisfied, the algorithm will override the remaining offtime period and open
the plunger valve, if the differential condition occurs.
o Open if fluid slug is less than - Attempts to calculate fluid slug size. Opens
the plunger valve and overrides the remaining off-time period (provided the
minimum off-time period has been completed). The slug is calculated
continuously with the following: (Casing pressure minus tubing pressure
divided by casing pressure minus line pressure), i.e. (CP-TP)/(CPLP)=FSLUG.
Setting Overrides
1. Select the Overrides screen.
2. Under the desired category set the desired values.
3. Some values can either be “Disabled” or set to a specific value. To set a specific
value, the alarm must first be enabled to change the value. Click the value and
open the drop down menu that appears. Check or uncheck the Enable as desired.
If enabled, change the value as desired.
4. Save the values.
Configuring alarms
The ACiC can be configured to send alarms to one or more users by various methods (for
example to a cell phone). The alarm values or conditions are disabled, or set to specific
trigger values. When the alarm trigger value is met, an alarm is generated. Alarms can be
delayed such that the alarm condition must persist for a set time before an alarm will be
generated. An “all clear” message (the alarm condition no longer exits) can be selected to
be sent or not sent. For a user to receive alarms, contact information and an enable must
be set up on the Users page.
Alarm categories
• Battery
• Casing Pressure
• Differential Pressure
• General
• Level
• Line Pressure
9/15/2008
Version 1.0.0
Page 20
iNodeConfig iC User Manual
•
•
Line Temperature
Tubing Pressure
Setting Alarms
1. Select the Alarms screen.
2. Each alarm value can be either “Disabled” or set to a specific trigger value. The
alarm must first be enabled to change the value. Click the value and open the drop
down menu that appears. Check or uncheck the Enable as desired.
3. If enabled, change the value as desired.
4. Save the values.
Saving and importing configurations
iNodeConfig iC provides the ability to export (save) or import (load) a configuration. An
exported configuration is a file that contains the complete configuration of the ACiC at
the time the configuration is saved. The exported configuration may be imported into any
ACiC. The configuration file may be exported to or imported from a PC, or an SD card
inserted into the ACiC.
Exporting and importing with a PC
1. Export the configuration
a. Select File, then Export Configuration, from the iNodeConfig iC toolbar.
The PC’s File Explorer will open.
b. Using File Explorer, find or create a directory into which to save the
configuration.
c. Name the file in File Name and click Save. The file is saved.
2. Import a configuration
a. Select File, then Import Configuration, from the iNodeConfig iC
toolbar. The PC’s File Explorer will open.
b. Using File Explorer, find the directory where the configuration file is
saved.
c. Click on the desired file. The file name will be entered into the File name
box. Click Open. The configuration will be loaded into the ACiC.
Exporting and importing with the SD card.
1. Export the configuration
a. Select File, then Device SD card, then Save Configuration As…, from
the iNodeConfig iC toolbar. The Save As window will open.
b. Using Save As, name the file in File Name and click OK. The file is
saved. Note the file name is limited to 8 characters using A-Z and 0-9
only.
2. Import a configuration
a. Select File, then Import Configuration, from the iNodeConfig iC
toolbar. The Load File From SD Card window will open.
b. Click on the desired file and click OK. The configuration will be loaded
into the ACiC
9/15/2008
Version 1.0.0
Page 21
iNodeConfig iC User Manual
Resetting the ACiC to its default configuration
The ACiC may be returned to its default factory configuration.
1. Select Tools, then Reset ACiC to defaults.
Viewing Data
Well status, history and trend data can be easily viewed using iNodeConfig iC.
Viewing well status and history
Status and history items are displayed on either the Data or the Config screen depending
on the parameter.
1. Select the Data screen and click the data list button.
2. The following data categories are displayed. To see the most recent instantaneous
data, click the Refresh icon.
a. Analog inputs – Analog input level for the enabled inputs
b. Arrival history – Plunger arrival history (fast, good, slow, no)
c. Digital inputs – Digital input level for selected inputs
d. Plunger run times – Last 15 run arrival times, and average arrival time.
e. Plunger totals – Total cycles, on and off time, and arrival counts.
f. Tank totals – Total tank cycles and on time.
3. Select the Config screen.
4. The following data categories are displayed.
a. General – Current mode, settings and enables.
b. Plunger Arrival Counters – Initial and current arrival counts for each
window.
c. Sync mode – Displays the sync modem enable and the allowed flow time.
d. Tank Mode – Tank settings and times.
e. Tubing – Current On/Off/Afterflow times and arrival adjustments.
Clearing well status and history
Various status and history items can be cleared (set to ‘0’) with iNodeConfig iC. Click on
Tools, then click:
a. Clear Totals – Clears the following counts:
• Arrival History
• Plunger Run Times
• Plunger arrival counts
• Total tubing cycles
• Tubing off/on time
• Tank cycles
• Tank on time
b. Reset Plunger – clears the Lifetime plunger arrival count.
Trend data
Time stamped trend data for the enabled analog inputs and ACiC battery are saved to
volatile memory. Trend data can be viewed in either a tabular or graphical representation.
9/15/2008
Version 1.0.0
Page 22
iNodeConfig iC User Manual
Tabular
1. Select the Data screen and click the tabular trend button.
2. Data will be shown in a tabular form for the enabled analog inputs and battery
voltage level. Data is presented oldest first - scroll down to the end of table for the
most recent data.
Graphical
1. Select the Data screen and click the graphical trend button.
2. Data will be shown in a graphical format for the enabled analog inputs and the
battery voltage level. The data is presented with the values on the Y axis and the
associated time stamp on the X axis.
3. To zoom in on data, hold the left mouse button down and draw a square around
the data of interest. The data will expand to fill the screen.
4. While the cursor is inside the graph, click the right mouse button to display
Options for the graphical screen. The following options are displayed.
• Copy – Copies the graphical image for pasting.
• Save Image As… - Opens a window to save the image in a desired
format, jpeg for instance.
• Page Setup – Opens a window to adjust the page settings for printing.
• Print – Opens a window to print the graph.
• Show Point Values – Enables the viewer to see the values for individual
points on the graph by passing the cursor over the point.
• Un-Zoom • Undo All Zoom/Pan
• Set Scale to Default
• Individual Y Axes
Logs
Event log
The ACiC records an Event log to volatile memory (the log will be erased if power is
removed from the ACiC). The log contains the time, source, type, reason and description
of the event in tabular form. The log can be cleared to start a fresh log.
Viewing and clearing the Event log
1. Select the Events screen. The Event log will be loaded and displayed with the
lastest event at the top of the screen.
2. To refresh the Event log, click Refresh.
3. To clear the Event log, click on Clear Events.
Trend Data log
If trend storage is enabled and an SD card is installed, trend data will be automatically
saved once an hour by the ACiC in a Trend Data log on the SD card.
9/15/2008
Version 1.0.0
Page 23
iNodeConfig iC User Manual
Saving Trend Data and Event Logs
Trend Data and Event logs provide a permanent history which is automatically updated to
the SD card once an hour by the ACiC.Trend Data and Event logs can be saved in two
ways on the SD card:
Method 1 manually updates the automatically updated log on the SD card, saving the
history immediately without waiting for the next automatic update.
Method 2 allows the user to save the history for later viewing.
Update log
1. Select File, then Device SD Card, and Save Trend to Restorable Memory, the
trend log is updated. Save Configuration To Restorable Memory and Save
Event Log To Restorable Memory are also available, but are redundant as they
are automatically updated following changes.
Snapshot log
1. Select File, then Device SD Card, and Save Trend Snapshot As… or Save
Event Log Snapshot As…. The Save As window will open.
2. Using Save As, name the file in File Name and click OK. The file is saved. Note
the file name is limited to 8 characters using A-Z and 0-9 only.
9/15/2008
Version 1.0.0
Page 24
iNodeConfig iC User Manual
iNodeConfig iC Screen Reference
The iNodeConfig iC graphical user interface has two windows. The Connect window,
which opens when iNodeConfig iC is started, provides general setup for iNodeConfig
and the means to select and connect to ACiC s. Once an ACiC is selected and the
connection is made, a second window is opened. The ACiC window provides access to
the ACiC for management and data viewing. This section describes each window and
screen and the items and parameters on each screen.
Connect window
The Connect window utilizes a menu bar, toolbar and screen selection tabs for
management and viewing.
Figure 5 Connect Window
Menu bar
The menu bar, located at the top of the window, has the following dropdown menu
selections:
• File – User levels (Pumper, Installer and Administrator) and Exit
• View – An alternate way to select the screen to be viewed.
• Tools – Various tools such as Connect to Device, Cancel Connection, Clear
Found Devices, Connection Properties and Options.
• Help – Help screens and version information.
Note: Some items in the menu bar selections are non-operational at this time.
Tool bar
The tool bar is located underneath the menu bar. It will allow the user to choose the
connection path (iNRM, TCP/IP or USB), the properties for each path, and a means to
9/15/2008
Version 1.0.0
Page 25
iNodeConfig iC User Manual
enter the ACiC’s ESN to connect. From the user standpoint, it is presently nonoperational.
Screens
Devices
The Devices screen displays the device to which iNodeConfig iC is currently connected.
Tree
Non-operational.
Find
Non-operational.
ACiC window
The ACiC window utilizes a menu bar, toolbar and screen selection tabs for management
and viewing of the ACiC.
Menu bar
The menu bar, located at the top of the screen, consists of:
• File – File related tasks; importing/exporting configuration, SD memory card
access.
• Edit - Non-operational
• View – Opens a separate window to view internal ACiC status messages.
• Tools – Various tools such as clock sync, counter resets, firmware updates.
• Help – Help screens and version information.
Screen tabs
The screen selection tabs, located under the toolbar near the top of the window, allow the
user to switch between the various screens. Each screen provides an interface to the
ACiC for viewing data and status, and configuring ACiC parameters and settings. There
are eleven screen tabs:
• Data – Current values for inputs, plunger and cycle history, and trend data.
• Config – Setup configuration and status for various modes, cycle times and
automatic adjustments.
• Timers – Graphical representation of the cycle windows and manual mode and
timing adjustments.
• Overrides – Configuration and status of control overrides and automatic
adjustments.
• Input Config – Configuration and calibration of analog and digital inputs.
• Schedule – Configuration of data and text message uplink schedules.
• Alarms – Configuration of alarm settings.
• Cell Modem – Configuration and status of cell modem and security.
• Users – Configuration of users allowed to access ACiC.
• System –View ACiC system status.
• Events – View log of ACiC events.
9/15/2008
Version 1.0.0
Page 26
iNodeConfig iC User Manual
Screens
Data
The Data screen shows current values for inputs, plunger and cycle history, and trend
data. The Data screen provides three different data viewing options:
1. Tabular data and totals.
2. Tabular trend data.
3. Graphical trend data.
Tabular data and totals
The following describes the items on the Data screen by section when the Data screen
list button
is selected.
Figure 6 Tabular Data Screen
Analog inputs – Analog channel input level for enabled inputs, otherwise shows
“Disabled”. Channel assignments are made on Input Config screen.
9/15/2008
Version 1.0.0
Page 27
iNodeConfig iC User Manual
Table 1. Analog Inputs
Input
Tank level
Casing pressure
Line pressure
Line temperature
Tubing pressure
Description
Tank level in inches.
Casing pressure in PSI.
Line pressure in PSI.
Line temperature in degrees F.
Tubing pressure in PSI.
Arrival history – Plunger arrival count history (fast, good, slow, no). Reset to 0 on
Clear Totals command.
Table 2. Arrival History
Count
Fast arrival count
Good arrival count
No arrival count
Slow arrival count
Description
Count of plunger arrivals within the Fast window.
Count of plunger arrivals within the Good window.
Count of no plunger arrivals within Tubing on time.
Count of plunger arrivals within the Slow window.
Digital inputs – Digital input status of “Active” (on) or “Inactive” (off) for enabled
inputs, otherwise shows “Disabled”. Channel assignments are made on Input Config
screen.
Table 3. Digital Inputs
Input
Alarm input
High line pressure input
Description
Status of digital input assigned to Alarm input
Status of digital input assigned to HL pressure
input
Status of digital input assigned to Off input
Status of digital input assigned to On input
Status of digital input assigned to Plunger input
Status of digital input assigned to Shut-in input
Off input
On input
Plunger input
Shut-in input
Plunger run times – last 15 run arrival times, and average arrival time.
Table 4. Plunger Run Times
Run Time
Average plunger run time
Plunger run time 1 - 15
Description
Average or last 15 plunger run times.
Plunger run time from On cycle to arrival.
Plunger totals – Total cycles, on and off time, and arrival counts. All are set to 0 on
Clear Totals command, except for Lifetime plunger arrival count.
9/15/2008
Version 1.0.0
Page 28
iNodeConfig iC User Manual
Table 5. Plunger Totals
Totals
Lifetime plunger arrival
count
Plunger arrival count
Total tubing cycles
Total tubing off time
Total tubing on time
Description
Reset only on Replace plunger command.
Arrival count since Clear Totals.
Tubing cycles since Clear Totals.
Tubing valve off time since Clear Totals.
Tubing valve on time, including afterflow, since
Clear Totals.
Tank totals – Total tank cycles and on time. All are set to 0 on Clear Totals command.
Table 6. Tank Totals
Totals
Total tank cycles
Total tank on time
Description
Tank valve cycles since Clear Totals.
Tank valve on time since Clear Totals.
Tabular Trend Data
Time stamped trend data for the enabled analog inputs and ACiC battery can be viewed
in a tabular format when the Data screen tabular trend button
is selected. Data is
presented oldest first; scroll down to the end of table for the most recent data. Trend data
can be cleared using the toolbar Tools – Clear Devices Trend Data button.
9/15/2008
Version 1.0.0
Page 29
iNodeConfig iC User Manual
Figure 7. Tabular Trend Screen
Graphical Trend Data
Time stamped trend data for all enabled analog inputs and ACiC battery voltage can be
viewed in a graphical format when the Data screen graphical trend button
is selected.
The data is presented with the values on the Y axis and the associated time stamp on the
X axis. To zoom in on an area, hold the left mouse button down, draw a square around
the data of interest and release the mouse button. The data will expand.
9/15/2008
Version 1.0.0
Page 30
iNodeConfig iC User Manual
Figure 8. Graphical Trend Screen
To display graphical screen options, click the right mouse button on the graph. The
options menu contains the following options.
• Copy – Copies the graphical image for pasting.
• Save Image As… - Opens a window to save the image in a desired format, jpeg
for instance.
• Page Setup – Opens a window to adjust the page settings for printing.
• Print – Opens a window to print the graph.
• Show Point Values – Enables the viewer to show the values for individual points
on the graph by passing the cursor over the point.
• Un-Zoom - Displays all data.
• Undo All Zoom/Pan • Set Scale to Default • Individual Y Axes -
9/15/2008
Version 1.0.0
Page 31
iNodeConfig iC User Manual
Config
The Config screen provides setup configuration and status for various modes, cycle times
and automatic adjustments. Remember to save any modifications that are made.
The following describes the items on the Config screen by section.
Figure 9. Config Screen
9/15/2008
Version 1.0.0
Page 32
iNodeConfig iC User Manual
General – General configuration settings.
Table 7. Config General
Item
Control Mode
Afterflow for
slow arrival
Auto restart
Enable early
arrival
Enable plunger
arrival
adjustment
Enable
proportional
adjustment
Plunger catch
mode
9/15/2008
Description
Sets the operation mode of the controller: Manual, Plunger,
Tank, Intermitter, Liquilift
When True, the ACiC will allow the well to afterflow even
when the plunger arrives in the SLOW WINDOW. When
False, on a slow plunger arrival the well will be shut in and
will not afterflow.
Controls how the ACiC will respond when restarting after a
power loss or reset. When False, the ACiC will resume in
Manual mode with the well shut in. When True, the ACiC
will resume the control mode it was in before it restarted.
When True, the early arrival window is enabled. When
False, the early arrival window is ignored, and all arrivals
before the fast time are considered to be within the fast
arrival window.
When True, this allows adjustments to be made based on
the plunger arrival time. When False, no adjustments will
be made.
When True, this allows larger time adjustments to be made
when the plunger arrives farther outside the GOOD
WINDOW. When False, fixed adjustments are made
according to the settings in the Adjustments sections,
explained in the Adjustments tables below.
When enabled, the plunger will be caught and held the next
time it arrives. This will stop any cycles that are being run.
Version 1.0.0
Page 33
iNodeConfig iC User Manual
Plunger Arrival Counters – Plunger arrival initial count setting and current counts.
Table 8. Plunger Arrival Counters
Item
Initial early
counter
Current early
counter
Initial fast
counter
Current fast
counter
Initial good
counter
Current good
counter
Initial slow
counter
Current slow
counter
Initial no
arrival counter
Current no
arrival counter
Description
Number of early arrivals that must occur before the well is
shut-in and an error is raised.
Number of early arrivals remaining before the well is shut-in
and an error is raised. This is decreased by one each time a
plunger arrives in the EARLY WINDOW. Any arrival that is
not in the EARLY WINDOW will reset this count to the
initial early counter value.
Number of fast arrivals that must occur before allowing
afterflow to commence.
Number of fast arrivals remaining before allowing afterflow
to commence. This is decreased by one each time a plunger
arrives in the FAST WINDOW. Any SLOW or NO
ARRIVALS will reset this count to the initial fast counter
value.
Number of good arrivals that must occur before allowing
afterflow to commence.
Number of good arrivals remaining before allowing
afterflow to commence. This is decreased by one each time a
plunger arrives in the GOOD WINDOW. Any SLOW or NO
ARRIVALS will reset this count to the initial good counter
value.
Number of slow arrivals that must occur before the well is
shut-in.
Number of slow arrivals remaining before the well is shut-in.
This is decreased by one each time a plunger arrives in the
SLOW WINDOW. Any FAST or GOOD ARRIVALS will
reset this count to the initial slow counter value.
Number of no arrivals that must occur before the well is
shut-in.
Number of no arrivals remaining before the well is shut-in.
This is decreased by one each time a plunger does not arrive.
Any FAST or GOOD ARRIVALS will reset this count to the
initial no arrival counter value.
Sync Mode – Allows wells to have syncronized flow times for use on a common gather
system.
Table 9. Sync Mode
Item
Enable
constant cycles
Flow time
9/15/2008
Description
When True, allows the user to enter a flow time so that each
on/off cycle takes a constant amount of time. This makes it
possible to syncronize wells in the same gathering system.
The total time that the sales valve can be on. This setting is
only applicable if Enable constant cycles is True.
Version 1.0.0
Page 34
iNodeConfig iC User Manual
Tank Mode – General Tank mode settings.
Table 10. Tank Mode
Item
Current
recovery
counter
Initial recovery
counter
Restart
afterflow to
minimum on
recovery
Tank delay
time
Tank on time
Tank recovery
time
Description
The current number of no arrivals remaining before the
recovery off time will be used in place of the off time.
Initial counter setting for the Liquilift tank mode recovery
counter. It sets how many consecutive no arrivals are
allowed before the ACiC uses the tank recovery time instead
of the off time.
When True, the afterflow time will be reset to the minimum
afterflow time when the ACiC starts the recovery time.
Time from the start of the tubing cycle before the ACiC has
to open the tank valve to reduce the pressure and surface the
plunger. This is bypassed if the plunger arrives before the
Tank delay time has elapsed.
Time that the tank valve will be open, provided the plunger
has not arrived.
Special off time used in Liquilift tank mode. When the
recovery counter runs out due to consecutive no arrivals, this
time will be substituted for the off time.
Tubing: Off Cycle – Tubing Off Cycle configuration.
Table 11. Tubing Off Cycle
Item
Tubing off
time
Minimum
tubing off time
Maximum
tubing off time
9/15/2008
Description
Amount of time that the well will stay off or shut in. The
ACiC can adjust this value based on cycle performance.
Minimum value to which the tubing off time can be adjusted.
Maximum value to which the tubing off time can be
adjusted.
Version 1.0.0
Page 35
iNodeConfig iC User Manual
Tubing: On Cycle – Tubing On Cycle configuration.
Table 12. Tubing On Cycle
Item
Early time
Description
Time from the start of the tubing cycle to the boundary
between the early window and the fast window.
Time from the start of the tubing cycle to the boundary
Fast time
between the fast arrival window and the good window.
Time from the start of the tubing cycle to the boundary
Slow time
between the good window and the slow arrival window.
Tubing on time Maximum amount of time the ACiC will wait for the plunger
to arrive at the surface. When this time is reached, the
plunger is considered a no arrival.
Tubing: Afterflow – Tubing Afterflow configuration.
Table 13. Afterflow
Item
Afterflow time
Minimum
afterflow time
Maximum
afterflow time
Description
The amount of time that the well will be allowed to flow
after the plunger has surfaced. The controller can adjust this
value based on cycle performance.
Minimum value to which the afterflow time can be adjusted.
Maximum value to which the afterflow time can be adjusted.
Tubing: Fast Arrival Adjustments – Tubing Fast Arrival Adjustment configuration.
Table 14. Fast Arrival Adjustments
Item
Afterflow time
increase
Tubing off
time decrease
Description
If the plunger arrives within the fast arrival window, the
afterflow time will be increased by this value. Typical range
is 1 to 5 minutes.
If the plunger arrives within the fast arrival window, the
tubing off time will be decreased by this value. Typical range
is 1 to 5 minutes.
Tubing: No Arrival Adjustments – Tubing No Arrival Adjustments configuration.
Table 15. No Arrival Adjustments
Item
Off time
increase
9/15/2008
Description
If the plunger does not arrive, the tubing off time will be
increased by this value. Typical range is 30 to 60 minutes.
Version 1.0.0
Page 36
iNodeConfig iC User Manual
Tubing: Slow Arrival Adjustments – Tubing Slow Arrival Adjustments configuration.
Table 16. Slow Arrival Adjustments
Item
Afterflow time
decrease
Tubing off
time increase
9/15/2008
Description
If the plunger arrives within the slow arrival window, the
afterflow time will be decreased by this value. Typical range
is 1 to 5 minutes.
If the plunger arrives within the slow arrival window, the
tubing off time will be increased by this value. Typical range
is 1 to 5 minutes.
Version 1.0.0
Page 37
iNodeConfig iC User Manual
Timers
The Timers screen is a graphical representation of the plunger cycle windows. It allows
the user to view and modify the Control Mode and associated cycle windows, and start
the On and Off cycles. Remember to save any changes made on this screen.
Changing modes - The mode may be changed by selecting the Control Mode drop down
menu and selecting the desired mode.
Starting cycles – The On and Off cycle may be forced to start by clicking the appropriate
Start On Cycle or Start Off Cycle button.
Changing window settings – The window sizes may be changed either by entering a
new value in the time setting, or by using the cursor to drag the boundary between the
windows. To change the boundary, place the cursor on the boundary, left click and then
drag the boundary to the desired location. The time displayed in the associated box will
change accordingly.
Figure 10 Timers Screen
9/15/2008
Version 1.0.0
Page 38
iNodeConfig iC User Manual
Overrides
The Overrides screen displays the configuration and status of control overrides and
automatic adjustments. Save any modifications.
The following describes the items on the Overrides screen by section.
Figure 11. Overrides Screen
9/15/2008
Version 1.0.0
Page 39
iNodeConfig iC User Manual
Casing Pressure Overrides – Casing Pressure Overrides configuration.
Table 17. CP Overrides
Item
Open if CP is
greater than
Close if CP is less
than
Fast arrival, high
CP decrease
Slow arrival,
high CP increase
No arrival, high
CP increase
Fast arrival, low
CP decrease
Slow arrival, low
CP increase
No arrival, low
CP increase
Max CP shut in
Only honor CP
overrides in
afterflow
Description
Opens the tubing valve if the Casing Pressure is greater
than or equal to the PSIG setting. Will only override if
Minimum Off Time has expired.
Closes the tubing valve if the Casing Pressure is less than
or equal to the PSIG setting.
Amount the “Open if CP is greater than” value will be
decreased by for each fast cycle.
Amount the “Open if CP is greater than” value will be
increased by for each slow cycle.
Amount the “Open if CP is greater than” value will be
increased by for each no arrival.
Amount the “Close if CP is less than” value will be
decreased by for each fast cycle.
Amount the “Close if CP is less than” value will be
increased by for each slow cycle.
Amount the “Close if CP is less than” value will be
increased by for each no arrival.
Maximum casing pressure at which the ACiC will be put
into manual mode and the well will be shut in.
When True, the ACiC will only honor casing pressure
overrides for closing valves during the afterflow cycle.
Differential Pressure Overrides - Differential Pressure Overrides configuration.
Table 18. DP Overrides
Item
Close if DP is less
than
Low DP delay
Fast arrival, low
DP decrease
Slow arrival, low
DP increase
No arrival, low
DP increase
Only honor DP
overrides in
afterflow
9/15/2008
Description
Closes the tubing valve if the Differential Pressure is less
than or equal to the PSIG setting.
Time the Differential pressure must remain below the set
point before the tubing valve is closed.
Amount the “Close if DP is less than” value will be
decreased by for each fast cycle.
Amount the “Close if DP is less than” value will be
increased by for each slow cycle.
Amount the “Close if DP is less than” value will be
increased by for each no arrival.
When True, the ACiC will only honor differential pressure
overrides for closing valves during the afterflow cycle.
Version 1.0.0
Page 40
iNodeConfig iC User Manual
Line Pressure Overrides – Line Pressure Overrides configuration.
Table 19. Line Pressure Overrides
Item
Close if LP is less
than
High LP delay
Only honor LP
overrides in
afterflow
Description
Close the tubing valve if the Line Pressure is less than or
equal to the PSIG setting.
A delay feature for use with a line pressure switch gauge.
This delay time allows the normal cycle to make and
break contact with the switch during the early part of the
on cycle and continue to operate. If the line pressure is
high after the delay expires, the well will shut in. Once the
line pressure drops, the off cycle will be started.
Configures the ACiC to only honor the line pressure
overrides for closing valves during the afterflow cycle.
Misc - Miscellaneous Overrides configuration.
Table 20. Miscellaneous Overrides
Item
Open if TP-LP
is greater than
Description
Open the tubing valve if the (Tubing Pressure - Line
Pressure) is equal to or greater than the PSIG setting. Will
only override time if Minimum Off Time has expired.
Open the tubing valve if the fluid slug calculation is greater
Open if fluid
slug is less than than or equal to the PSIG setting.
9/15/2008
Version 1.0.0
Page 41
iNodeConfig iC User Manual
Tubing Pressure Overrides – Tubing Pressure Overrides configuration.
Table 21. TP Overrides
Item
Open if TP is
greater than
Close if TP is
less than
Fast arrival,
high TP
decrease
Slow arrival,
high TP
increase
No arrival, high
TP increase
Fast arrival, low
TP decrease
Slow arrival,
low TP increase
No arrival, low
TP increase
Min TP shut in
Max TP shut in
Only honor TP
overrides in
afterflow
9/15/2008
Description
Opens the tubing valve if the Tubing Pressure is greater
than or equal to the PSIG setting. Will only override time if
Minimum Off Time has expired.
Closes the tubing valve if the Tubing Pressure is less than
or equal to the PSIG setting.
Amount the “Open if TP is greater than” value will be
decreased by for each fast cycle.
Amount the “Open if TP is greater than” value will be
increased by for each slow cycle.
Amount the “Open if TP is greater than” value will be
increased by for each no arrival.
Amount the “Close if TP is less than” value will be
decreased by for each fast cycle.
Amount to increase the “Close if TP is less than” value will
be increased by for each slow cycle.
Amount to increase the “Close if TP is less than” value will
be increased by for each no arrival.
Minimum tubing pressure at which the controller will be
put into manual mode and the tubing valve will be closed.
Maximum tubing pressure at which the controller will be
put into manual mode and the tubing valve will be closed.
When True, the ACiC will only honor tubing pressure
overrides for closing valves during the afterflow cycle.
Version 1.0.0
Page 42
iNodeConfig iC User Manual
Input Config
The Input Config screen allows configuration and calibration of analog and digital
inputs. Save any modifications made on this screen.
The following describes the items on the Input Config screen by section.
Figure 12. Input Config Screen
9/15/2008
Version 1.0.0
Page 43
iNodeConfig iC User Manual
Analog setup – Analog input channel configuration assigns analog input channels to a
selected process data type.
Table 22. Analog Setup
Item
Casing pressure
analog channel
Differential
pressure analog
channel
Line pressure
analog channel
Line temperature
analog channel
Tank level analog
channel
Tubing pressure
analog channel
Description
Analog channel to use as a source for casing pressure.
Analog channel to use as a source for differential
pressure.
Analog channel to use as a source for line pressure.
Analog channel to use as a source for temperature.
Analog channel to use as a source for tank level.
Analog channel to use as a source for tubing pressure.
Casing pressure - These settings are used to calibrate analog input channels assigned as
casing pressure signals.
Table 23. Casing Pressure
Item
CP sample low
CP sample high
CP engineering
units low
CP engineering
units high
Description
Low sample point of the casing pressure calibration in
millivolts.
High sample point of the casing pressure calibration in
millivolts.
Low sample point of the casing pressure calibration in
psig.
High sample point of the casing pressure calibration in
psig.
Differential pressure – These settings are used to calibrate analog input channels
assigned as differential pressure signals.
Table 24. Differential Pressure
Item
DP sample low
DP sample high
DP engineering
units low
DP engineering
units high
9/15/2008
Description
Low sample point of the differential pressure calibration
in millivolts.
High sample point of the differential pressure calibration
in millivolts.
Low sample point of the differential pressure calibration
in psig.
High sample point of the differential pressure calibration
in psig.
Version 1.0.0
Page 44
iNodeConfig iC User Manual
Digital setup - Digital channels are used for signals that have only one of two states, high
or low. The high or low states are recognized as high or low, or ON or OFF states that are
used to trigger an alarm or action.
Table 25. Digital Setup
Item
High LP digital
input channel
OFF digital input
channel
On digital input
channel
Shut-in digital
input channel
Soft alarm digital
input channel
Description
Digital channel to use as a source for high line pressure.
Digital channel to use as a source for OFF action.
Digital channel to use as a source for ON action.
Digital channel to use as a source for shut-in action.
Digital channel to use as a source for a soft alarm. This is
used to send an SMS alarm to warn of an approaching
alarm condition.
General – General analog input configuration.
Table 26. Input Configuration General
Item
Analog channel
scan rate
Trend storage rate
Reference voltage
Description
Rate at which the analog channels are scanned: Once per
second, once per minute, or disabled.
Rate at which analog channel scans are averaged and
stored to the trend log: Three minutes or disabled.
Reference voltage for the analog signals. FACTORY
SETTING - DO NOT CHANGE.
Line pressure - These settings are used to calibrate analog input channel signals to be
assigned as line pressure signals.
Table 27. Line Pressure
Item
LP sample low
LP sample high
LP engineering
units low
LP engineering
units high
9/15/2008
Description
Low sample point of the line pressure calibration in
millivolts.
High sample point of the line pressure calibration in
millivolts.
Low sample point of the line pressure calibration in psig.
High sample point of the line pressure calibration in psig.
Version 1.0.0
Page 45
iNodeConfig iC User Manual
Line temperature - These settings are used to calibrate analog input channel signals to
be assigned as line temperature signals.
Table 28. Line Temperature
Item
LT sample low
LT sample high
LT engineering
units low
LT engineering
units high
Description
Low sample point of the line temperature calibration in
millivolts.
High sample point of the line temperature calibration in
millivolts.
Low sample point of the line temperature calibration in
degrees Fahrenheit.
High sample point of the line temperature calibration in
degrees Fahrenheit.
Tank level - These settings are used to calibrate analog input channel signals to be
assigned as tank level signals.
Table 29. Tank Level
Item
Tank level sample
low
Tank level sample
high
Tank level
engineering units
low
Tank level
engineering units
high
Description
Low sample point of the tank level calibration in
millivolts.
High sample point of the tank level calibration in
millivolts.
Low sample point of the tank level calibration in inches.
High sample point of the tank level calibration in inches.
Tubing Pressure – These settings are used to calibrate analog input channel signals to be
assigned as tubing pressure signals.
Table 30. Tubing Pressure
Item
TP sample low
TP sample high
TP engineering
units low
TP engineering
units high
9/15/2008
Description
Low sample point of the tubing pressure calibration in
millivolts.
High sample point of the tubing pressure calibration in
millivolts.
Low sample point of the tubing pressure calibration in
psig.
High sample point of the tubing pressure calibration in
psig.
Version 1.0.0
Page 46
iNodeConfig iC User Manual
Schedule
The Schedule screen allows configuration of scheduled ACiC status messages sent to
users designated on the Users screen. Schedule times can be added, defined and deleted.
The screen is divided into two sections. The upper screen lists the existing schedules and
provides the means to add or remove a scheduled item. The lower screen, Schedule
Details, provides the specific configuration items for a new scheduled item. Save any
modifications made on this screen.
The following describes the configuration items on the Schedule screen.
Figure 13 Schedule Screen
Upper screen - The upper screen shows an entry for each scheduled item. Each
scheduled item has the following characteristics:
Table 31. Schedule Upper Screen
Item
When
Frequency
Action
Add
Remove
9/15/2008
Description
The time of day when the scheduled item will be sent.
The frequency the scheduled item will be sent. For
example: hourly, daily, weekly.
The type of data item that will be sent. For example:
Uplink or text message.
Adds a new item to the schedule list when clicked.
Removes the highlighted schedule item when clicked.
Version 1.0.0
Page 47
iNodeConfig iC User Manual
Schedule Details - The schedule details screen provides the following configuration
items for each scheduled item. The scheduled item is configured by first highlighting the
item and then selecting the desired configuration items. The following describes the
configuration items.
Table 32. Schedule Details
Item
When
Frequency –
Repeats
Frequency –
Repeat every
Frequency –
Repeat on
Actions – Uplink
Actions – Text
message
9/15/2008
Description
The time of day when the scheduled item will be sent.
The frequency the scheduled item will be sent. For
example: hourly, daily, weekly.
Currently unsupported.
Day of the week on which to uplink when weekly is
selected. Multiple days can be selected.
Configures the ACiC to uplink the scheduled item via
TCP/IP (internet). Currently unsupported.
Configures the ACiC to uplink the scheduled item as a
text message via cell phone SMS. Currently the
scheduled item will only a uplink a status message
containing the current tubing cycles and plunger counts,
average run times, battery voltage and solar charge
current.
Version 1.0.0
Page 48
iNodeConfig iC User Manual
Alarms
The Alarms screen provides configuration for setting alarm conditions that will result in
an alarm being sent to designated users. Save any modifications made on this screen.
The following describes the items on the Alarms screen by section.
Figure 14 Alarms Screen
9/15/2008
Version 1.0.0
Page 49
iNodeConfig iC User Manual
Battery alarms – These are alarm settings for the ACiC battery voltage. High and low
battery charge levels can be set to trigger a soft alarm (ACiC alarms only) or shut in
(ACiC alarms and shuts in enabled valves).
Table 33. Battery Alarms
Item
Battery voltage
high alarm
Battery voltage
high shut in
Battery voltage
low alarm
Battery voltage
low shut in
Description
High setpoint for the battery voltage at which the ACiC
will enter the alarm state.
High setpoint for the battery voltage at which the ACiC
will shut in and enter the alarm state.
Low setpoint for the battery voltage at which the ACiC
will enter the alarm state.
Low setpoint for the battery voltage at which the ACiC
will shut in and enter the alarm state.
CP alarms – These are alarm settings for the casing pressure. High and low levels can be
set to trigger a soft alarm (ACiC alarms only) or shut in (ACiC alarms and shuts in
enabled valves).
Table 34. CP Alarms
Item
Casing pressure
high alarm
Casing pressure
high shut in
Casing pressure
low alarm
Casing pressure
low shut in
9/15/2008
Description
High setpoint for the casing pressure at which the ACiC
will enter the alarm state.
High setpoint for the casing pressure at which the ACiC
will shut in and enter the alarm state.
Low setpoint for the casing pressure at which the ACiC
will enter the alarm state.
Low setpoint for the casing pressure at which the ACiC
will shut in and enter the alarm state.
Version 1.0.0
Page 50
iNodeConfig iC User Manual
DP alarms – These are alarm settings for the differential pressure. High and low levels
can be set to trigger a soft alarm (ACiC alarms only) or shut in (ACiC alarms and shuts in
enabled valves).
Table 35. DP Alarms
Item
Differential
pressure high
alarm
Differential
pressure high shut
in
Differential
pressure low
alarm
Differential
pressure low shut
in
Description
High setpoint for the differential pressure at which the
ACiC will enter the alarm state.
High setpoint for the differential pressure at which the
ACiC will shut in and enter the alarm state.
Low setpoint for the differential pressure at which the
ACiC will enter the alarm state.
Low setpoint for the differential pressure at which the
ACiC will shut in and enter the alarm state.
General – These are general alarm settings typically not directly associated with a
process parameter.
Table 36. Alarms General
Item
Alarm delay
Alarm on early
arrival error
Alarm on highline error
Alarm on
maintenance
timeout
Alarm on mode
change
Alarm on no
arrival
Alarm on plunger
count
Alarm on plunger
error
Send all-clear
messages
9/15/2008
Description
Amount of time that a setpoint must be exceeded before
the ACiC will enter the alarm state or shut in.
Indicates whether the ACiC will enter an alarm state
when an early arrival error occurs. True or false.
Indicates whether the ACiC will enter an alarm state
when a high-line error occurs. True or false.
Indicates whether the ACiC will enter an alarm state
when a maintenance timeout occurs. True or false.
Indicates whether the ACiC will enter an alarm state
when a control mode change occurs. True or false.
Indicates whether the ACiC will enter an alarm state
when the plunger does not arrive. True or false.
High setpoint for the plunger count at which the ACiC
will enter the alarm state.
Indicates whether the ACiC will enter an alarm state
when a plunger error occurs. True or false.
When enabled, the ACiC will send all-clear messages
when the ACiC leaves an alarm state and resumes normal
operation. True or false.
Version 1.0.0
Page 51
iNodeConfig iC User Manual
Level alarms – These are alarm settings for the tank levels. High and low levels can be
set to trigger a soft alarm (ACiC alarms only) or shut in (ACiC alarms and shuts in
enabled valves).
Table 37. Level Alarms
Item
Tank level high
alarm
Tank level high
shut in
Tank level low
alarm
Tank level low
shut in
Description
High setpoint for the tank level at which the ACiC will
enter the alarm state.
High setpoint for the tank level at which the ACiC will
shut in and enter the alarm state.
Low setpoint for the tank level at which the ACiC will
enter the alarm state.
Low setpoint for the tank level at which the ACiC will
shut in and enter the alarm state.
LP alarms - These are alarm settings for the line pressure. High and low levels can be set
to trigger a soft alarm (ACiC alarms only) or shut in (ACiC alarms and shuts in enabled
valves).
Table 38. LP Alarms
Item
Line pressure high
alarm
Line pressure high
shut in
Line pressure low
alarm
Line pressure low
shut in
Description
High setpoint for the line pressure at which the ACiC
will enter the alarm state.
High setpoint for the line pressure at which the ACiC
will shut in and enter the alarm state.
Low setpoint for the line pressure at which the ACiC will
enter the alarm state.
Low setpoint for the line pressure at which the ACiC will
shut in and enter the alarm state.
LT alarms - These are alarm settings for the line temperature. High and low levels can
be set to trigger a soft alarm (ACiC alarms only) or shut in (ACiC alarms and shuts in
enabled valves).
Table 39. LT Alarms
Item
Line temperature
high alarm
Line temperature
high shut in
Line temperature
low alarm
Line temperature
low shut in
9/15/2008
Description
High setpoint for the line temperature at which the ACiC
will enter the alarm state.
High setpoint for the line temperature at which the ACiC
will shut in and enter the alarm state.
Low setpoint for the line temperature at which the ACiC
will enter the alarm state.
Low setpoint for the line temperature at which the ACiC
will shut in and enter the alarm state.
Version 1.0.0
Page 52
iNodeConfig iC User Manual
TP alarms - These are alarm settings for the tubing pressure. High and low levels can be
set to trigger a soft alarm (ACiC alarms only) or shut in (ACiC alarms and shuts in
enabled valves).
Table 40. TP Alarms
Item
Tubing pressure
high alarm
Tubing pressure
high shut in
Tubing pressure
low alarm
Tubing pressure
low shut in
9/15/2008
Description
High setpoint for the tubing pressure at which the ACiC
will enter the alarm state.
High setpoint for the tubing pressure at which the ACiC
will shut in and enter the alarm state.
Low setpoint for the tubing pressure at which the ACiC
will enter the alarm state.
Low setpoint for the tubing pressure at which the ACiC
will shut in and enter the alarm state.
Version 1.0.0
Page 53
iNodeConfig iC User Manual
Cell Modem
The Cell Modem screen provides configuration for the ACiC internal cell modem. Save
any modifications made on this screen.
The following describes the items on the Cell Modem screen by section.
Figure 15. Cell Modem Screen
General – These are general cell modem configuration items.
Table 41. Cell Modem General
Item
Last modem error
string
Modem phone
number
Modem power off
cycle
Modem power on
cycle
Modem signal
strength
Modem type
9/15/2008
Description
Error string used for debugging modem operation.
Represents the last error encountered, thus may show an
error even if the condition no longer exists.
The phone number of the ACiC modem. This is number
dialed to send a text message to the ACiC.
Amount of time that the cell modem will be powered off
in its on/off cycle. Set to zero to have the modem always
on. Used to create a cell modem on/off cycle to minimize
power consumption at the ACiC. The cell modem is
inaccessible during the off cycle.
Amount of time that the cell modem will be powered on
in its on/off cycle. Used to create a cell modem on/off
cycle to minimize power consumption at the ACiC.
Signal strength that the modem is getting from the cell
network.
Type of the cell mode. (CDMA or GSM)
Version 1.0.0
Page 54
iNodeConfig iC User Manual
Text messaging – These are text messaging specific parameters.
Table 42. Cell Modem Text Messaging
Item
Text message
security code
9/15/2008
Description
Global password to allow access to the text message
system of the ACiC. Users that are not specifically
approved through the users list on the Users screen must
enter this code in the message to use access the ACiC
with text messaging.
Version 1.0.0
Page 55
iNodeConfig iC User Manual
Users
The Users screen provides the management of users who have the ability to received data
and manage the ACiC via remote access (for example, cell phones using SMS). The user
settings can be configured to allow the user to receive data and alarms, view data, and
modify the ACiC configuration. The screen is divided into two sections. The upper
screen lists the existing users and their authorizations, and provides the means to add or
remove a user. The lower screen, User Details, provides the specific configuration items
for a new user. Save any modifications made on this screen.
The following describes the configuration items on the Users screen.
Figure 16. Users Screen
Upper screen - The upper screen shows an entry for each user. Each user has the
following characteristics:
Table 43. User Upper Screen
Item
Full Name
Login Information
Text Messaging
Add
Remove
9/15/2008
Description
User’s name.
Not supported
Users phone number and authorizations.
Adds a new user when clicked.
Removes the highlighted user when clicked.
Version 1.0.0
Page 56
iNodeConfig iC User Manual
User Details - The User details screen provides the following configuration items for
each user. The user is configured by first highlighting the user and then selecting the
desired configuration items. The following describes the configuration items.
Table 44. User Details
Item
Full name
Login information
– User name
Login information
– Can modify
Text Message
Information –
Phone number
Text Message
Information –
Scheduled
Text Message
Information –
Alarms
Text Message
Information – Can
query
Text Message
Information – Can
modify
9/15/2008
Description
Name to identify user.
Name used for remote login. Not supported.
Allows remote user to modify ACiC settings. Not
supported.
Users cell phone number which will receive alarms and
scheduled data.
Enables this user to receive scheduled text data at the
above cell phone number.
Enables this user to receive text alarms at the above cell
phone number.
Authorizes this user to request and view ACiC data with
text messages.
Authorizes this user to modify ACiC parameters and
settings with text messages.
Version 1.0.0
Page 57
iNodeConfig iC User Manual
System
The System screen provides management and status of items specific to the ACiC. The
following describes the items on the System screen by section. Some items are user
settable (shown in normal black on the screen), and others are status that can only be
viewed (shown in gray on the screen). Save any modifications made on this screen.
Figure 17. System Screen
General – General ACiC system configuration items.
9/15/2008
Version 1.0.0
Page 58
iNodeConfig iC User Manual
Table 45 System General
Item
Device ESN
Device Name
Device Type
Hardware Version
Firmware Version
Energy Level
Charge Current
Device Clock
Battery
KDT password
Description
Electronic serial number is used to identify the ACiC.
User-defineable name for the ACiC.
Numeric type of the ACiC.
Hardware version of the ACiC 's main board.
Firmware version of the ACiC 's main board.
Energy level, in volts, of the ACiC’s battery.
Current, in milliamps, that the solar panel is putting out
to charge the battery.
Current real time clock value.
This must be set to match the type of battery that the
ACiC is using. The ACiC may be supplied with either a
6V or 12V battery. For the ACiC to correctly monitor the
battery voltage (energy level), this setting must agree
with installed battery.
A four digit password used to access the ACiC using the
KDT. If a password is set, the user must enter that
password to change any item with the KDT. The default
is “0000” which allows KDT use without a password.
Misc – Miscellaneous ACiC configuration items.
Table 46. System Miscellaneous
Item
Serial port usage
Tank valve low
battery action
Tubing valve low
battery action
9/15/2008
Description
Selects which type of device connected to the internal
serial port of the ACiC. Options are Disabled, Modem
and Modbus, which must match the desired connection,
Modem for cell phone modem, or Modbus for Modbus.
Only one option can be chosen, i.e. a Modbus enabled
ACiC cannot utilize the cell phone.
Specifies action to take with the tank valve when a low
battery condition is detected. Options are No Action,
Close and Open. The low battery condition occurs at
4.8V for a 6V battery and 9.6V for a 12V battery.
Specifies action to take with the tubing valve when a low
battery condition is detected. Options are No Action,
Close and Open. The low battery condition occurs at
4.8V for a 6V battery and 9.6V for a 12V battery.
Version 1.0.0
Page 59
iNodeConfig iC User Manual
Self-Test – Self-test status and results from the automated self-test run after power-up or
reset.
Table 47. System Self-Test
Item
FLASH self-test
Modem self-test
NRM status
Reset source
RTC self-test
SD card self-test
SRAM self-test
9/15/2008
Description
Self-test results on the FLASH memory. Status can be:
FLASH OK, FLASH not recognized, FLASH has too
many bad blocks, FLASH not initialized and FLASH
not supported.
Self-test results for the cell modem. Status can be:
Modem OK, Modem did not respond, Unsupported
modem type, Poor signal quality, Could not
configure, No network, No GPRS, Modem not
supported and Not checked.
Self-test results for the radio module (NRM). Status can
be: NRM OK, NRM not detected, NRM not
initialized,
NRM initialization error and NRM not supported.
Source of the last system reset. Status can be: Power up
reset, Watchdog reset, Software reset, User/NRST
reset and Brownout reset.
Self-test results for the real-time clock (RTC). Status can
be: RTC OK, RTC XSTP fault (a hardware failure),
RTC Reset invalid time.
Self-test results for the SD card (removable memory
card). Status can be: Not checked, SD card OK, Lowlevel failure (SD send op cond failed), Low-level
failure (MMC send op cond failed), Read OCR failed,
Set block length failed, MMC not supported and SD
Card not supported.
Self-test results on the SRAM (internal memory). Status
can be: SRAM OK and SRAM failed.
Version 1.0.0
Page 60
iNodeConfig iC User Manual
Events
The Events screen provides a log of ACiC events. The events are initially displayed with
the latest event first. The events may be sorted as desired, by clicking the header (time,
source, type, reason or description). The event log may contain up to 962 events. Scroll
down the list using the slider on the right side of the screen. The oldest events will be lost
once the log is full and new events occur. The log may be cleared using Clear Events on
the toolbar above the events listing. Each event has information, if applicable, for the
following items.
Figure 18, Events Screen
9/15/2008
Version 1.0.0
Page 61
iNodeConfig iC User Manual
Table 48. Events
Item
Time
Source
Type
Reason
Description
9/15/2008
Description
Time stamp of the event
The source that triggered the event. Sources include:
Internal, Keypad, Local operator interface (iNodeConfig
via USB), Modbus master, Plunger controller, Plunger
controller application and Text message.
Each event gives a type description that includes: Alarm
shut-in, Alarm text message sent, Analog alarm, Digital
alarm, Digital input event, Error (SMS to email) sent,
Error text message sent, Firmware upgrade, Low battery
fault, Modem reset, Operation mode change, Response
text message sent, Restart, RTU configured, Safety shutin, Scheduled text message sent, Software reset, Text
message log-in, Text message received, Time change and
Valve change.
Each event gives a reason description that includes:
Analog shut-in, Battery voltage high, Battery voltage
low, Casing pressure high, Casing pressure low, Code
from host, Code from SDCard, Configuration initialized,
Differential pressure high, Differential pressure low,
Digital override shut-in, Early arrival error, High casing
pressure, High injection pressure, High line error, High
tubing pressure, Injection pressure high, Injection
pressure low, Invalid security code, Keypad reset, Line
pressure high, Line pressure low, Line temperature high,
Line temperature low, Logged in via email, LOI reset,
Low tubing pressure, Missing security code, n/a, New
operation mode: LL tank, New operation mode: manual,
New operation mode: other, New operation mode:
plunger, New operation mode: tank, New operation
mode: timer, No error, OFF Button, ON Button, Plunger
arrival, Plunger error, SMS security not enabled,
Successful SMS log in, Tank level high, Tank level low,
Tubing pressure high, Tubing pressure low, Valve closed
and Valve opened.
The description adds additional information for the event
if applicable.
Version 1.0.0
Page 62
iNodeConfig iC User Manual
Appendix A
Installing and starting iNodeConfig iC
The following is a description of the installation of iNodeConfig iC. The installation
varies depending if the PC has a previous version of iNodeConfig iC installed. If
there is a previous version installed it must first be removed. If there was no previous
version, the USB hardware driver must be installed.
Removing a previous version of iNodeConfig iC
If there is a previous version of iNodeConfig iC on the PC, perform the following
before proceeding, else proceed to “Install iNodeConfig iC”:
1. Open Add or Remove Programs by clicking Start, Settings, Control Panel,
Add or Remove Programs. Wait for the screen to populate with the installed
software.
2. Scroll down to and click iNodeConfig iC.
3. Click the Remove button and then Yes to the question to remove or not.
iNodeConfig iC will be removed.
Install iNodeConfig iC
1. Create a folder and load the new iNodeConfig iC software or insert the disk
containing the software into your PC. The software files will typically be the
following:
2. Open the folder or disk and run “Setup.exe”
3. On the “Welcome to the iNodeConfig iC Setup Wizard” screen click Next.
9/15/2008
Version 1.0.0
Page 63
iNodeConfig iC User Manual
4. On the “Select Installation Folder” screen click Next.
5. On the “Confirm Installation” screen click Next.
9/15/2008
Version 1.0.0
Page 64
iNodeConfig iC User Manual
6. An installation screen for iNodeConfig will follow. When complete the
“Installation Complete” screen will be shown. Click Close and the installation of
iNodeConfig iC will be complete. A new “iNodeConfig iC” icon will appear on
your PC’s desktop. NOTE: If the USB hardware driver has not been installed and
this is a new installation, proceed to “Installing the USB hardware driver” before
starting iNodeConfig iC.
Installing the USB hardware driver
If this is a new installation of iNodeConfig iC on the PC, the installation is not complete.
Continue on to the following steps. If iNodeConfig iC had been previously installed and
9/15/2008
Version 1.0.0
Page 65
iNodeConfig iC User Manual
then removed for this update, the installation is complete and you can run iNodeConfig
iC.
1. Connect the ACiC USB port to the PC USB connector with a USB cable.
2. In the lower right of the PC screen a series of “found new hardware” icons will
display and disappear.
3. The “Found New Hardware Wizard” screen will be displayed. Click on the “No,
not this time” selection and click Next.
4. On the next screen click “Install from a list or specific location (Advanced)” and
then click Next.
5. On the next screen choose “Include this location in the search:” and choose one of
the following options to define the location that contains the driver:
9/15/2008
Version 1.0.0
Page 66
iNodeConfig iC User Manual
a. Enter “C:\Program Files\Ferguson Beauregard\ iNodeConfig iC” into the
box to the left of the Browse button and click Next, or
b. Click the Browse button. Using the “Browse for folders” screen find the
directory my computer, local disk, program files, Ferguson Beauregard,
iNodeConfig iC. Click on the “iNodeConfig iC” so that the folder icon is
pictured as open. Click OK. Click Next on the resulting screen as above.
6. If the PC has had a previous installation of iNodeConfig and the USB driver has
been changed you may get a screen similar to the following. Choose “C:\Program
Files\Ferguson Beauregard\iNodeConfig iC\fbimon_install.inf” and click Next.
9/15/2008
Version 1.0.0
Page 67
iNodeConfig iC User Manual
7. A warning screen will appear concerning “compatibility testing”, click Continue
Anyway and the installation process will continue.
8. After the file installation process is complete, click Finish on the resulting screen.
9/15/2008
Version 1.0.0
Page 68
iNodeConfig iC User Manual
9. Open iNodeConfig iC by clicking the icon. iNodeConfig iC will open with the
following screen.
10. Double click on the ACiC entry displayed on the screen. iNodeConfig iC will
connect and the ACiC opening screen will be displayed as shown below.
9/15/2008
Version 1.0.0
Page 69
iNodeConfig iC User Manual
Figure 19. iNodeConfig iC Opening Screen
9/15/2008
Version 1.0.0
Page 70