1
BOX INCLUDES
Please check the contents of the box. Notify us within 14 days of
purchase if your flat bed scanner is not complete. Your flat bed
scanner includes:
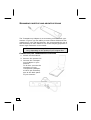
USB flat bed scanner unit
Transparency Adapter
USB cable
AC Adapter (DSA-0151A-12UP or HDAD15W101-124)
Installation and application software on CD
This user manual
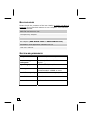
SYSTEM REQUIREMENTS
6
Computer
PC/AT compatible computer
Processor type
and speed
Pentium® III class 500MHz or
higher
Operating system
Windows® ME/2000/XP
Memory
64MB,
recommended: 128MB or more
Hard disc capacity
Min. 800MB free storage capacity
Installation
CD-ROM drive
Connections
USB interface