1
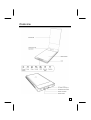
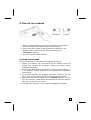
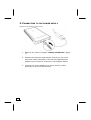
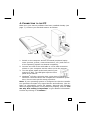
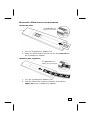
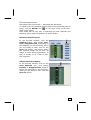
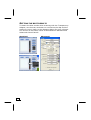
4. CONNECTING TO THE PC
Make sure your scanner software has been installed already (see
page 7). Connect your flat bed scanner as follows:
Power on/off
1. Switch on the computer and all connected peripheral equipment (monitor, printer, external hard drive, etc.) and wait until the operating system has booted completely.
2. Connect one end of the USB cable to a free USB connection
socket on your computer and the other end to the scanner.
3. Turn the power switch at the back panel of your
scanner to “ON”. The LED lights up at the front
panel of the scanner.
4. Windows® will then recognize that a new piece of hardware
has been connected and it will complete the installation procedure. Do not interrupt this setup procedure.
Note: If your operating system is configured so that the installation procedure accepts only signed drivers and software, (the default) an information screen will appear. Although the software
lacks the digital signature it may still work properly. Click on “Tell
me why this testing is important” to get detailed information.
Confirm by clicking on “Continue.”
11