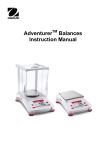
1
®
Explorer Balances
Instruction Manual
EXPLORER BALANCES
EN-1
TABLE OF CONTENTS
1. INTRODUCTION ....................................................................................................................5
1.1
1.2
1.3
Description ................................................................................................................................................... 5
Features ....................................................................................................................................................... 5
Safety Precautions ....................................................................................................................................... 5
2. INSTALLATION .....................................................................................................................6
2.1 Unpacking .................................................................................................................................................... 6
2.2 Installing Components.................................................................................................................................. 7
2.2.1 Terminal Setup ......................................................................................................................................... 7
2.2.2 Installing the Wind Ring, Weighing Platform on Models EX124, EX224, and EX324 ............................. 7
2.2.4 Installing the Draft Shield Glass and Doors on Draft Shield Models........................................................ 8
2.2.5 Installing the Weighing Pan & Wind Shield – Non-Draft Shield Models .................................................. 9
2.3 Selecting the Location.................................................................................................................................. 9
2.4 Leveling the Equipment................................................................................................................................ 9
2.5 Connecting Power...................................................................................................................................... 10
2.5.1 AC Adapter............................................................................................................................................. 10
2.6 Connecting the Interface ............................................................................................................................ 10
2.7 Adjusting the View Angle of the Terminal .................................................................................................. 10
2.8
Remote Terminal Operation................................................................................................................... 11
2.8.1 Separating the Terminal from the Weighing Base ................................................................................. 11
2.8.2 Terminal Mounting.................................................................................................................................. 11
2.9 Initial Calibration......................................................................................................................................... 11
3. OPERATION ........................................................................................................................12
3.1 Overview of Display, Home Screen ........................................................................................................... 12
3.2 Principal Functions and Main Menu.......................................................................................................... 12
3.3 Overview of Parts and Features –Draft Shield Models.............................................................................. 13
3.4 Overview of Parts and Features – Non-Draft Shield Models ..................................................................... 14
3.5 Overview of Parts and Features – Terminal .............................................................................................. 15
3.6 Functions and Their Icons.......................................................................................................................... 16
3.6.1 Standby .................................................................................................................................................. 16
3.6.2 Printing Data........................................................................................................................................... 16
3.6.3 Applications ............................................................................................................................................ 16
3.6.4 TouchLess Sensor Status ...................................................................................................................... 16
3.6.5 AutoCal™................................................................................................................................................ 16
3.6.6 Menu ...................................................................................................................................................... 16
3.6.7 More….................................................................................................................................................... 16
3.6.8 Level Assist ............................................................................................................................................ 16
3.6.9 Zero Operation ....................................................................................................................................... 16
3.6.10 Taring a Container.................................................................................................................................. 16
3.6.11 Weighing Units ....................................................................................................................................... 17
3.6.12 Preset Tare............................................................................................................................................. 17
3.6.13 Calibration Test ...................................................................................................................................... 17
3.6.14 Calculator ............................................................................................................................................... 17
3.6.15 Stopwatch............................................................................................................................................... 17
3.6.16 Logout .................................................................................................................................................... 17
4. APPLICATIONS ...................................................................................................................18
4.1 Weighing .................................................................................................................................................... 19
4.1.1 Edit Settings ........................................................................................................................................... 19
4.1.2 Application Setup ................................................................................................................................... 20
4.1.3 Statistics for Weighing............................................................................................................................ 21
4.2 Parts Counting ........................................................................................................................................... 22
4.2.1 Standard Parts Counting (default).......................................................................................................... 22
4.2.2 Application Setup ................................................................................................................................... 25
4.2.3 Parts Counting – Check ......................................................................................................................... 26
4.2.4 Parts Counting – Fill ............................................................................................................................... 27
4.2.5 Statistics for Parts Counting................................................................................................................... 28
4.3 Percent Weighing....................................................................................................................................... 30
4.3.1 Edit Settings ........................................................................................................................................... 30
4.3.2 Application Setup ................................................................................................................................... 33
4.4 Check Weighing ......................................................................................................................................... 34
EN-2
EXPLORER BALANCES
4.4.1 Standard Check Weighing (default) ....................................................................................................... 34
4.4.2 Edit Settings ........................................................................................................................................... 34
4.4.3 Application Setup ................................................................................................................................... 35
4.4.4 Check Weighing – Nominal/Weight Mode ............................................................................................. 36
4.4.5 Check Weighing – Nominal/Percent Tolerance Mode ........................................................................... 37
4.4.6 Display Settings...................................................................................................................................... 38
4.4.7 Statistics for Check Weighing ................................................................................................................ 39
4.5 Dynamic/Animal Weighing ......................................................................................................................... 40
4.5.1 Edit Settings ........................................................................................................................................... 41
4.5.2 Application Setup ................................................................................................................................... 41
4.5.3 Dynamic Weighing – Semi-Auto ............................................................................................................ 42
4.5.4 Dynamic Weighing – Automatic ............................................................................................................. 43
4.5.5 Statistics for Dynamic Weighing............................................................................................................. 44
4.6 Filling .......................................................................................................................................................... 45
4.6.1 Edit Settings ........................................................................................................................................... 45
4.6.2 Application Setup ................................................................................................................................... 46
4.6.3 Statistics for Filling ................................................................................................................................. 47
4.7 Totalization ................................................................................................................................................. 49
4.7.1 Totalization – Manual (Default) .............................................................................................................. 49
4.7.2 Application Setup ................................................................................................................................... 50
4.7.3 Totalization – Automatic ......................................................................................................................... 51
4.8 Formulation ................................................................................................................................................ 52
4.8.1 Free Formulation (default)...................................................................................................................... 52
4.8.2 Application Setup ................................................................................................................................... 53
4.8.3 Recipe Formulation ................................................................................................................................ 54
4.9 Differential Weighing .................................................................................................................................. 57
4.9.1 Item Settings .......................................................................................................................................... 57
4.9.2 Application Setup ................................................................................................................................... 59
4.9.3 Differential Weighing with Auto-Process On .......................................................................................... 60
4.10 Density Determination................................................................................................................................ 61
4.10.1 Measuring the Density of a Solid Using Water (default) ........................................................................ 61
4.10.2 Application Setup ................................................................................................................................... 63
4.10.3 Measuring the Density of a Buoyant Material Using Water ................................................................... 64
4.10.4 Measuring the Density of a Solid Using an Auxiliary Liquid................................................................... 64
4.10.5 Measuring the Density of a liquid using a Calibrated Sinker (not supplied)........................................... 65
4.10.6 Measuring the Density of Porous Material Using Oil ............................................................................. 67
4.11 Peak Hold................................................................................................................................................... 69
4.11.1 Peak Hold – Semi-Automatic (default) ................................................................................................... 69
4.11.2 Application Setup ................................................................................................................................... 70
4.11.3 Peak Hold – Manual ............................................................................................................................... 71
4.11.4 Peak Hold – Automatic........................................................................................................................... 72
4.12 Ingredient Costing ...................................................................................................................................... 73
4.12.1 Item Settings .......................................................................................................................................... 73
4.12.2 Application Setup ................................................................................................................................... 76
4.13 Pipette Adjustment ..................................................................................................................................... 77
4.13.1 Pipette Adjustment – Manual (default) ................................................................................................... 77
4.13.2 Begin Pipette Adjustment Process......................................................................................................... 79
4.13.3 Application Setup ................................................................................................................................... 80
4.14 Statistical Quality Control (SQC)................................................................................................................ 81
4.14.1 Edit Settings ........................................................................................................................................... 81
4.14.2 Begin the SQC Process ......................................................................................................................... 82
4.14.3 Application Setup ................................................................................................................................... 84
4.15 Statistics ..................................................................................................................................................... 85
4.16 Library ........................................................................................................................................................ 85
4.16.1 Creating a Library Record ...................................................................................................................... 85
4.16.2 Retrieving a Library Record ................................................................................................................... 86
4.16.3 Deleting a Stored Library Record........................................................................................................... 86
4.17 Additional Features .................................................................................................................................... 87
4.17.1 Weigh Below .......................................................................................................................................... 87
5. MENU SETTINGS ................................................................................................................88
5.1 Menu Navigation ........................................................................................................................................ 88
5.1.1 Changing Settings .................................................................................................................................. 88
5.2 Main Menu.................................................................................................................................................. 89
EXPLORER BALANCES
EN-3
5.3 Calibration .................................................................................................................................................. 89
5.3.1 Calibration sub-menu ............................................................................................................................. 89
5.3.2 Internal Calibration (AutoCal™) ............................................................................................................. 89
5.3.3 Automatic Calibration ............................................................................................................................. 89
5.3.4 AutoCal™ Adjustment............................................................................................................................ 90
5.3.5 Span Calibration..................................................................................................................................... 90
5.3.6 User Calibration...................................................................................................................................... 91
5.3.7 Calibration Test ...................................................................................................................................... 91
5.4 User Settings.............................................................................................................................................. 92
5.4.1 User Settings Sub-menu ........................................................................................................................ 92
5.4.2 Language ............................................................................................................................................... 92
5.4.3 Volume ................................................................................................................................................... 92
5.4.4 Display Settings...................................................................................................................................... 92
5.4.5 User Manager......................................................................................................................................... 92
5.4.6 Functions Configuration ......................................................................................................................... 93
5.4.7 TouchLess Sensor Setup....................................................................................................................... 93
5.4.8 Draft Shield light ..................................................................................................................................... 93
5.5 Balance Setup ............................................................................................................................................ 94
5.5.1 Balance Set-up sub-menu...................................................................................................................... 94
5.5.2 Stable Range.......................................................................................................................................... 94
5.5.3 Filter level ............................................................................................................................................... 94
5.5.4 Auto Zero Tracking................................................................................................................................. 94
5.5.5 Auto Tare................................................................................................................................................ 95
5.5.6 Gross Indicator ....................................................................................................................................... 95
5.5.7 Legal For Trade...................................................................................................................................... 95
5.5.8 Graduations............................................................................................................................................ 95
5.5.9 Date & Time ........................................................................................................................................... 95
5.6 Applications ................................................................................................................................................ 96
5.6.1 Turning an Application ON/OFF............................................................................................................. 96
5.7 Weighing Units ........................................................................................................................................... 96
5.7.1 Units Sub-menu...................................................................................................................................... 96
5.7.2 Turning a Unit ON/OFF .......................................................................................................................... 97
5.7.3 Custom Units.......................................................................................................................................... 97
5.8 GLP and GMP Data ................................................................................................................................... 98
5.8.1 GLP Data Sub-menu .............................................................................................................................. 98
5.8.2 Header.................................................................................................................................................... 98
5.8.3 Balance Name........................................................................................................................................ 98
5.8.4 User Name ............................................................................................................................................. 98
5.8.5 Project Name.......................................................................................................................................... 98
5.9 Communication .......................................................................................................................................... 99
5.9.1 Communication Sub-menu..................................................................................................................... 99
5.9.2 Baud Rate .............................................................................................................................................. 99
5.9.3 Transmission .......................................................................................................................................... 99
5.9.4 Handshake ........................................................................................................................................... 100
5.9.5 Alternate Command ............................................................................................................................. 100
5.9.6 Print Output .......................................................................................................................................... 100
5.9.7 Auto Print.............................................................................................................................................. 101
5.9.8 Print Calibration Data ........................................................................................................................... 101
5.9.9 Print Content ........................................................................................................................................ 101
5.9.10 Print Layout .......................................................................................................................................... 103
5.9.11 Data Transfer Function ........................................................................................................................ 103
Double click “Accessibility Options” in control panel......................................................................................... 104
5.10 Library ...................................................................................................................................................... 105
5.11 I/O Settings............................................................................................................................................... 105
5.12 Diagnostics............................................................................................................................................... 105
5.12.1 Level Bubble Light................................................................................................................................ 105
5.12.2 Draft Shield Light (Analytical models) .................................................................................................. 105
5.12.3 Sensors ................................................................................................................................................ 105
5.12.4 Service Menu ....................................................................................................................................... 105
5.13 Factory Reset ........................................................................................................................................... 106
5.13.1 Factory Reset Sub-menu ..................................................................................................................... 106
5.13.2 Reset Calibration.................................................................................................................................. 106
5.13.3 Reset User Settings ............................................................................................................................. 106
EN-4
EXPLORER BALANCES
5.13.4 Reset Balance Setup............................................................................................................................ 106
5.13.5 Reset Application Modes ..................................................................................................................... 106
5.13.6 Reset Weighing Units........................................................................................................................... 106
5.13.7 Reset GLP and GMP Data................................................................................................................... 106
5.13.8 Reset Communication .......................................................................................................................... 106
5.13.9 Reset I/O Settings ................................................................................................................................ 106
5.13.10 Reset All (Global Reset)....................................................................................................................... 106
5.14 Lockout..................................................................................................................................................... 107
5.14.1 Lockout Sub-menu ............................................................................................................................... 107
5.14.2 Lock Calibration.................................................................................................................................... 107
5.14.3 Lock User Settings ............................................................................................................................... 107
5.14.4 Lock Balance Setup ............................................................................................................................. 107
5.14.5 Lock Application Modes ....................................................................................................................... 107
5.14.6 Lock Weighing Units............................................................................................................................. 107
5.14.7 Lock GLP and GMP Data..................................................................................................................... 107
5.14.8 Lock Communication............................................................................................................................ 108
5.14.9 Lock Library.......................................................................................................................................... 108
5.14.10 Lock I/O Settings .................................................................................................................................. 108
5.14.11 Factory Reset ....................................................................................................................................... 108
5.15 Securing the Menu and Key Lock menu settings..................................................................................... 108
5.16 Information ............................................................................................................................................... 109
5.16.1 Using Information ................................................................................................................................. 109
6. LEGAL FOR TRADE..........................................................................................................110
6.1
6.2
6.3
Settings .................................................................................................................................................... 110
Verification................................................................................................................................................ 110
Sealing ..................................................................................................................................................... 110
7. PRINTING ..........................................................................................................................111
7.1
7.2
7.3
Connecting, Configuring and Testing the Printer/Computer Interface ..................................................... 111
Printout Examples .................................................................................................................................... 112
Output Format .......................................................................................................................................... 120
8. MAINTENANCE .................................................................................................................121
8.1
8.2
8.3
8.4
Calibration ................................................................................................................................................ 121
Cleaning ................................................................................................................................................... 121
Troubleshooting ....................................................................................................................................... 121
Service Information .................................................................................................................................. 121
9. TECHNICAL DATA ............................................................................................................122
9.1 Specifications ........................................................................................................................................... 122
9.2 Drawings and Dimensions ....................................................................................................................... 129
9.3 Parts and Accessories ............................................................................................................................. 130
9.4 Icons List .................................................................................................................................................. 131
9.5 Communication ........................................................................................................................................ 137
9.5.1 Interface Commands ............................................................................................................................ 137
9.5.2 RS232 (DB9) Pin Connections............................................................................................................. 140
9.6 The USB Interface.................................................................................................................................... 140
10. SOFTWARE UPDATES .....................................................................................................144
11. COMPLIANCE....................................................................................................................145
EXPLORER BALANCES
1.
INTRODUCTION
1.1
Description
EN-5
The Explorer balance is a precision weighing instrument that will provide you with years of service if properly cared
for. The Ohaus Explorer balances are available in capacities from 120 grams to 10,200 grams.
1.2
Features
Modular Design: Ohaus Explorer balances are composed of two interconnected modules: a Terminal and a Base.
Depending on the user’s needs, the unit can be operated with the Terminal either attached to, or remote from, the
Base, with a single interconnect cord 1 meter long.
Touch Controls: Quick, graphical access to all control
functions, over a dozen applications and many features.
Touchless Sensors: can be assigned functions when
activated: Zero, Print, Tare, etc.
Statistics: available in Weighing, Counting, Percent
Weighing, Check Weighing, Dynamic Weighing, Filling,
Density Determination, Pipette Adjustment and
Statistical Quality Control applications.
1.3
Safety Precautions
Caution: Read all safety warnings before installing, making connections, or servicing this
equipment. Failure to comply with these warnings could result in personal injury and/or
property damage. Retain all instructions for future reference.
•
•
•
•
•
•
•
•
•
Verify that the input voltage range printed on the data label and the plug type matches the local AC power
to be used.
Make sure that the power cord does not pose a potential obstacle or tripping hazard.
Use the balance only in dry locations.
Do not drop loads on the pan.
Use only approved accessories and peripherals.
Operate the equipment only under ambient conditions specified in these instructions.
Disconnect the equipment from the power supply when cleaning.
Do not operate the equipment in hazardous or unstable environments.
Service should only be performed by authorized personnel.
EN-6
2.
2.1
EXPLORER BALANCES
INSTALLATION
Unpacking
Carefully remove your Explorer balance and each of its components from the package. The included components
vary depending on the balance model (see table below). Save the packaging to ensure safe storage and transport.
Included Component
Terminal
Weighing Base
Weighing Platform
90 mm Diameter
Photo
EX124
EX224
EX324
EX223
EX423
EX623
EX1103
EX2202
EX4202
EX6201
EX6202
EX10201
EX10202
X
X
X
X
X
X
X
130 mm Diameter
X
180 x 210 mm
Sub-Platform
X
X
130mm Diameter
Support Caps
(4 Pcs)
X
Wind Ring
X
Wind Shield
Draft Shield
Assembly
Power Adapter
Power Cord
Use Cover
Compact Disk:
Instruction Manual
Quick Start Guide
Warranty Card
X
(Country specific)
Terminal
USB Software
X
X
X
X
X
X
X
X
X
X
X
X
X
X
X
X
X
X
X
X
X
X
X
EXPLORER BALANCES
2.2
EN-7
Installing Components
Refer to the illustrations and instructions below to identify and assemble your Explorer balance with its
components. All components must be assembled before using the balance.
2.2.1 Terminal Setup
When the Explorer is delivered, the Terminal is already attached (docked) to the Base. No additional setup is
necessary. However, for Draft Shield models, the Terminal needs to be detached temporarily in order to assemble
parts of the Draft Shield. Refer to the illustrations and instructions below to identify and assemble your Explorer
Balance.
Note: The Terminal is identical for all Explorer Balance models.
2.2.2
Installing the Wind Ring, Weighing Platform on Models EX124, EX224, and EX324
Note: Assembly instructions also apply to models with the suffix M or N.
1. Place the Wind Ring in position.
2. Insert the Platform Assembly
onto the Mounting Cone located
in the center of the Balance.
2.2.3
Installing the Sub-Platform and Weighing Pan on Models EX223, EX423, EX623 and EX1103
1. Place the Sub-platform in
position.
2. Position the Platform on the
Sub-platform.
EN-8
2.2.4
EXPLORER BALANCES
Installing the Draft Shield Glass and Doors on Draft Shield Models
1. Carefully remove each of the four glass Draft Shield sections from the packaging.
NOTE: Before installing side doors, be sure to set the lock tabs in the proper position, as shown here.
UNLOCK:
LOCK:
2. Follow the steps below to install side, front and top doors of the Draft Shield.
Side Door Installation
1. Unlock
2. Align
3. Clear
4. Lock
Position glass door to slide. Open lock tab (top); insert in top groove and slide inside bottom groove. Close lock tab.
Front Panel Installation
1. Release
terminal
2. Align
3. Push to
rear
4. Reconnect
terminal
Press button to separate Terminal from Base. Seat panel’s hooked ends in base. Swing panel to vertical position.
Top Door Installation
1.
Align
2. Press Down
Insert Top Door’s hooked ends in grooved pegs. Press gently to seat. Check for smooth movement. Close door.
EXPLORER BALANCES
2.2.5
EN-9
Installing the Weighing Pan & Wind Shield – Non-Draft Shield Models
Note: Assembly instructions also apply to models with the suffix M or N.
1. Place the four Support Caps onto the Balance as shown.
2. Place the Weighing Pan on the Support Caps
3. Place the Wind Shield onto the Balance as shown.
Note: The balance can be operated without the Wind Shield. However, depending on ambient conditions the
displayed results may be slightly less stable.
2.3
Selecting the Location
Avoid excessive vibrations, heat sources, air current, or rapid temperature changes. Allow sufficient space.
Note: Interface cables connect to the terminal. The terminal can be detached and mounted on a wall or
positioned on a table separate from the balance.
2.4
Leveling the Equipment
The Explorer has an illuminated level indicator as a reminder that the balance should
be leveled for accurate weighing. There is a level bubble in a small round window on
the front of the Base. To level the balance, adjust the Leveling Thumbwheels at each
corner until the bubble is centered in the circle.
Be sure the equipment is level each time its location is changed.
Note: The feet cannot rotate. The Thumbwheels must be used for leveling.
See the Level Assist screen in the Information Menu.
To see the Level Assist menu, touch
More on the bottom-right corner of the
main screen. Then touch Level Assist.
The Level Assist screen shows which
direction to turn the thumbwheels to
center the level bubble.
EN-10
2.5
EXPLORER BALANCES
Connecting Power
2.5.1 AC Adapter
Connect the power cord of the AC Adapter (supplied) to the power receptacle on the rear of the Base.
Then connect the AC adapter plug to a suitable electrical outlet.
Caution: For use with CSA certified (or equivalent approved) power source,
which must have a limited current output.
Note: Allow equipment to warm up for 60 minutes for optimal weighing performance.
Standby: When unit is plugged in, it starts in Standby mode. Press the Standby icon to start.
2.6
Connecting the Interface
Use the built-in RS-232 (10101) Port to connect either to a
computer or a printer with a standard (straight-through) serial
cable. Or connect using the scale’s USB port.
Note: For configuration and interface commands, see the
Communication Menu Settings section.
For Connecting, Configuring and Testing the Printer/Computer
Interface, and for sample Print Output Formats, see the Printing
section.
Interface connections on back of Terminal.
Thread printer cable along cable coils on bottom of balance. Or pass cable through groove near release button.
2.7
Adjusting the View Angle of the Terminal
To adjust the Terminal display’s viewing angle, press in the Terminal Adjust buttons on both sides of the Terminal.
EXPLORER BALANCES
2.8
EN-11
Remote Terminal Operation
The Terminal communicates with the weighing base via the Terminal cable. This cable must be plugged into the
Terminal for the Explorer to display properly. If desired, the Explorer balance may be operated either with the
Terminal attached (as-shipped), or remotely (up to 1 meter away).
2.8.1
1.
2.
Separating the Terminal from the Weighing Base
To detach, press both the Release buttons inward (both at the same time) and gently pull the Terminal
towards you (outward) until the Terminal is detached. These Release buttons disengage the two hooks
holding the Terminal to the Base. A cable is attached to the Terminal. Take care to not damage or
disconnect this cable.
To reattach the Terminal, press in the two Release buttons and slide the Terminal into the Base until the
Terminal hooks click and engage to hold the Terminal in place.
Release Button
Base and Terminal
Terminal Cable
Note: If a longer operation distance is required, a Terminal Extension cable is available as an accessory.
2.8.2 Terminal Mounting
If desired, the Terminal may be mounted to a wall or table using fasteners (not supplied) that are appropriate for the
type of mounting surface The Terminal bracket will accommodate 4mm (#8) screws. Locate the mounting holes as
shown in Figure 2-1.
56.5 mm
2.2 in
48.5 mm
1.9 in
112 mm / 4.4 in
Figure 2-1. Terminal Mounting Dimensions.
2.9
Initial Calibration
When the Balance is first installed, and when it is moved to another location, it must be calibrated to ensure
accurate weighing results. The Explorer Balances have built in AutoCal which can calibrate the balance
automatically and does not require calibration masses. If preferred, the balance can be manually calibrated with
external masses. Have the appropriate calibration masses available before beginning calibration. Refer to the
Calibration Section for masses and calibration procedure.
EN-12
3.
3.1
EXPLORER BALANCES
OPERATION
Overview of Display, Home Screen
This equipment utilizes a touch-sensitive display. Touch areas and Buttons to control the equipment’s functions.
CONTROLS
Touch to access application setup menu
Touch to change
Touch to access
applications
available libraries
Touch for information menu
Instructional Messages
Stability (*), Net (NET),
Gross (G) and/or center
of zero (>0<) indicators
Touch unit indicator to
change weighing unit
Capacity or Status Guides:
Vary by application
Result Fields:
Information varies by
application
Application Buttons:
Functions vary by
application
Touch icons to perform
specific functions or
access other functions
3.2
Principal Functions and Main Menu
Weighing:
Taring:
Press Tare to set the display to zero. Place an item on the pan. Display indicates gross weight.
With no load on the pan, press Tare to set the display to zero. Place an empty container on the pan
and press Tare. Add material to the container and its net weight is displayed. Remove container and
container’s weight appears as a negative number. Press Tare to clear.
MENU & SCREEN NAVIGATION
Touch Menu to open the menu list.
Touch and drag the Scroll bar to view additional items.
Calibration:
Touch to view calibration options.
User Settings:
Touch to view user preferences.
Balance Setup:
Touch to view balance settings.
Application Modes:
Touch to view application modes.
Weighing Units:
Touch to view weighing units.
GLP and GMP Data:
Insert user data for traceability.
Diagnostics:
Touch to view Diagnostics items.
Communication:
Touch to view COM Device Settings and Print
Settings.
Factory Reset:
Touch to do a Factory reset.
Library:
Touch to delete all Library records.
Lockout:
Touch to access the Lockout menu list.
I/O Settings:
Touch to view remote I/O Settings.
Information:
Touch to view list of topics.
EXPLORER BALANCES
3.3
EN-13
Overview of Parts and Features –Draft Shield Models
Terminal cable
storage clips
Data label
Weigh
Below
Access
Lock switch
Illuminated
Level
Indicator
(hidden)
Touchless
Sensors
Top View
Foot; NonAdjustable
Bottom View
Draft Shield
Light
Power
Connection
Touchless
Sensors with
Indicator Lights
Leveling
Thumbwheels
Type label
(M, N models only)
Rear View
Side View
Figure 3-1. Explorer Balance (models EX124, EX224, EX324, EX223, EX423, EX623, EX1103)
EN-14
EXPLORER BALANCES
3.4 Overview of Parts and Features – Non-Draft Shield Models
Terminal cable
storage clips
Data label
Weigh
Below
Access
Lock switch
Illuminated
Level
Indicator
Foot; NonAdjustable
Touchless
Sensors
Top View
Power
Connection
Leveling
Thumbwheels
Rear View
Type label
(M, N models only)
Bottom View
Touchless
Sensors with
Indicator Lights
Side View
Figure 3-2. Explorer Base (models EX2202, EX4202, EX6202, EX10202, EX6201, EX10201)
EXPLORER BALANCES
3.5
EN-15
Overview of Parts and Features – Terminal
Hooks
(to attach
to base)
Terminal
Release
Buttons
Capacity sticker
(Approved models
only)
Terminal
Bracket
Angular
Adjust
Buttons
Touchless
Sensors with
Indicator Lights
Foot
Top View
Side View
USB Device
Connection
Option
Port
Terminal
Cable
(from Base)
Terminal
Cable Clamp
RS232
Connection
Back View
Figure 3-3. Explorer Terminal
EN-16
3.6
EXPLORER BALANCES
Functions and Their Icons
Seven Icons are initially available to operate the Balance and access the Menu. These Icons can be customized
based on user preference. For setup information, see User Settings.
3.6.1 Standby
Touch Standby to shut down the display.
Note: After initial start-up (Section 2), in Standby your balance needs no warm-up time and is
immediately available for weighing by touching the Start-up icon.
3.6.2 Printing Data
Touch Print to send the displayed value to a printer or computer via the active COM port.
Note: Ensure proper setup of connections, printing and interface parameters.
Note: Data may also be printed using the Touchless Sensors by configuring these for Printing.
Data may also be printed using the P command from a computer connected to the COM port.
3.6.3 Applications
The balance can be configured to operate in various Application modes.
Touch Applications to choose – or the top button in the Application area.
3.6.4 TouchLess Sensor Status
Explorer balances have four TouchLess sensors that can be assigned a unique function when
activated (e.g., zero, print, tare, etc).
To assign a task for each TouchLess sensor, press Sensors.
Note: To activate a sensor, move an object over it (from a distance of 1-2 inches or 3 cm). The sensor
shows a green light and beeps when activated. If the sensor cannot be activated (sensor is disabled
during certain instances, like when the Menu is displayed) the sensor shows a red light.
3.6.5 AutoCal™
When AutoCal is ON, the balance performs a self calibration. AutoCal will automatically calibrate the
Balance (using the internal mass) each time a change in temperature significant enough to affect
accuracy, or after every 11 hours.
Touch AutoCal™ to initiate. (Default status is ON.)
3.6.6 Menu
Touch Menu to enter the balance’s menu list.
3.6.7 More…
Touch More to access Level Assist, Zero, Tare, Units, Pretare, Cal Test, Calculator, and Stopwatch.
3.6.8 Level Assist
For assistance with Leveling the Balance; the Level Assist screen shows which direction to turn the
thumbwheels to center the level bubble.
3.6.9 Zero Operation
Remove the load from the pan and touch Zero to set the display to zero. When weighing pan is
empty, the >0< indicator turns on when the measurement is within + ¼ division (d) of the zero setting.
Note: The balance also features Auto Zero Tracking (AZT) that automatically maintains a Center of
Zero within the tolerances set in the AZT menu (see Balance Settings).
or
3.6.10 Taring a Container
Taring sets the weight of a container as zero, so only the weight of objects held in the container
(net weight) is displayed.
Manual Tare – Place the empty container on the pan and touch Tare when stable.
Add material to the container. The net weight of the material is displayed.
To clear the Tare value, remove the container from the pan and touch Tare.
EXPLORER BALANCES
EN-17
3.6.11 Weighing Units
The balance can be configured to measure in a variety of weighing units, including three (3) custom
units. Touch Units to choose from the displayed list. (Scroll down to see all options.)
Note: The active weighing Unit can also be accessed by touching the unit area of the Main Display
line; If a unit is not displayed in the list, it must first be turned on via the User Menu.
3.6.12 Preset Tare
To enter a Preset Tare, press the Icon and then enter a value;
enter 0 to clear the Preset Tare. The display will show the PT symbol and the tare value as a negative
number.
3.6.13 Calibration Test
is used to compare a known calibration weight against the last stored span calibration data.
3.6.14 Calculator
To use the built-in calculator application, touch Calculator. A four function calculator with addition,
subtraction, multiplication and division mathematical operations is available
•
Perform a numeric operation using the keypad.
•
Press = to view the result.
•
To Clear the display: Press CE to clear the entry, C to clear
all
•
Touch x to close and return to the current Application.
3.6.15 Stopwatch
To use the built-in stopwatch application, touch Stopwatch. A countdown timer with interval (lap)
timer is available.
•
Press Start to begin using the Stopwatch timer.
•
Press Reset to reset the timer to Zero.
•
Touch Close to close and return to the current Application.
3.6.16 Logout
Used for User logout and return to User Login screen. This feature is only active if a user profile has
been created and a User has logged in.
EN-18
4.
EXPLORER BALANCES
APPLICATIONS
The balance can be configured to operate in various Application modes.
Touch Applications to choose – or the top button in the Application area:
Note: If an application mode does not appear in the list of available Applications it must be enabled in the User
Menu: touch Menu, then select Application Modes. The full list of modes appears. Touch the one you want to
enable. Then touch Enabled in the setup menu for that application mode – Percent Weighing in the example
below. Each enabled mode appears in the Applications menu.
The Explorer Balance incorporates the following Applications.
Weighing
Parts Counting
Percent
Weighing
Check
Weighing
Dynamic
(Animal)
Weighing
Filling
Totalization
Formulation
Differential
Weighing
Density
Determination
Peak Hold
(High Point)
Ingredient
Costing
Pipette
Adjustment
Statistical
Quality Control
(SQC)
Library
(complements most Applications)
EXPLORER BALANCES
4.1
EN-19
Weighing
Note: Before using any application, be sure the balance has been leveled and calibrated.
Use this application to determine the weight of items in the selected unit of measure.
Note: The Explorer is shipped with all units enabled.
Weighing
1. In the upper left portion of the home screen, select Weighing (this application is the default).
2. Press Tare or Zero if necessary to begin.
3. Place objects on the pan to display the weight. When stable, the * appears.
4. The resulting value is displayed in the main Weighing Line in the active unit of measure.
The WEIGHING Home screen
Main Display Line
Second Display Line (not shown)
Reference Fields
Application Buttons
Functions
4.1.1
Edit Settings
To view or adjust the current settings
Touch the Edit Settings button. The Settings screen appears.
Minimum Weight: establish a minimum weight value to
be used to verify a reading. If an actual weight is below
the established Minimum Weight value, it is flagged by a
color change: yellow.
To adjust the Minimum Weight value, touch the
Minimum Weight button.
A numeric input window appears.
Use the keys to enter the desired Minimum Weight,
then press 9.
The display reverts to the previous screen with the
new Minimum Weight value highlighted: orange.
To return to the Weighing home screen, touch
Return to Application at bottom-right of that screen.
Application Icon
EN-20
4.1.2
EXPLORER BALANCES
Application Setup
The Application can be customized for various user preferences.
Touch the Setup Icon (wrench) to enter Application Setup.
The Application Setup Menu is now displayed.
Select the list item to view or change the setting as
desired.
To return to the Application home screen, touch Done.
The Weighing Application Setups are below (defaults in Bold)
Item
Enabled
Secondary Unit
Minimum Weight
Statistics
Lock Settings
Reference fields
Min Weight
Gross
Net
Tare
Print Options
Min Weight
Available Settings
On, Off
On, Off
On, Off
Off, Manual, Auto
On, Off
Comments
Turns Application on/off
To show the Second Display line
To enable Min Weight
On, Off
On, Off
On, Off
On, Off
Min Weight is displayed
Gross weight is displayed
Net weight is displayed
Tare weight is displayed
See Printing Section.
On, Off
Press to lock the current setting(s)
so they cannot be changed.
EXPLORER BALANCES
4.1.3
EN-21
Statistics for Weighing
The Statistics function allows you to compare a number of samples and examine the relative deviation of each
sample from the mean, along with other statistical data. A minimum of three samples is required.
Statistics can be determined manually (requires key press after each step) or automatically (weights are
automatically recorded when stable). To use the Statistics function, enable it in the Application Setup menu.
This feature is available in Weighing, Counting, Check Weighing, Dynamic/Animal Weighing and Filling
applications.
Application Setup: First, enable Statistics
Touch the Setup Icon (wrench) to
enter Setup menu to enable
Statistics.
The Statistics options screen
appears.
Enable the desired mode (Manual, Auto)
Press Close to return to the Setup menu.
To return to the Application home screen, press Done.
Accumulating displayed values & viewing data – Manual
Once Statistics-Manual is enabled, two buttons appear on
the Application screen; Statistics and Accumulate.
Application – Auto
Statistics Auto mode is similar to Manual mode, except the
first stable weight is automatically captured, so the
Accumulate button is not shown.
To add the sample to the data set, place the item on the pan
and press Accumulate.
When stable, the Statistics button lights briefly to show the
item is added to the set, and the data set quantity increments
by one.
Continue to add items and press Accumulate to build the data
set.
Press the Statistics button to view the results, as shown here.
Press Print to send results to the enabled COM port.
Press Close to return to the Application home screen without
clearing the current statistics set.
Press Clear Data to clear results and return to the home screen.
EN-22
4.2
EXPLORER BALANCES
Parts Counting
Use this application to count samples of uniform weight. Three different modes can be selected:
Standard Counting, Check Counting, or Fill Counting.
4.2.1
Standard Parts Counting (default)
In the upper left portion of the home screen, select Counting.
The default (or last) Average Piece Weight (APW) is displayed.
Place objects on the pan to display the number of pieces.
The PARTS COUNTINGStandard Home screen
Main Display Line
Second Display Line
Reference Fields
Application Buttons
Application Icon
Functions
The Auto Optimization feature improves counting accuracy:
it automatically re-calculates the piece weight as parts are
added. By default APW Optimization is Off.
When a new APW is established, APW Optimization occurs
when the number of pieces added to the pan is between one
and three times the number already on the pan. The screen
momentarily indicates Auto Optimization in the information
line.
4.2.1.1 Edit Settings: To view or adjust the current settings, touch the Edit Settings button:
The Settings screen is now displayed.
Settings available: APW, Sample Size,
Functions available: Recalculate APW,
Return to Application
Establish an Average Piece Weight (APW)
Each time a new type of part is counted, the nominal weight of
one piece (Average Piece Weight or APW) must be established
using a small quantity of pieces. This APW is stored until
replaced by another APW.
There are two methods to establish the APW value:
1. The actual APW is known; or
2. The APW must be derived by weight. For this case the
current sample size will be used
To choose a different value, establish it beforehand, using the Sample Size button. (See below.)
EXPLORER BALANCES
EN-23
Set a known Average Piece Weight (APW)
To adjust the APW value directly, touch the APW button.
A numeric input window appears.
Key in the desired APW Weight, then press 9.
The display returns to the previous screen with the
new APW value highlighted.
To return to the Counting home screen,
touch Return to Application.
Set a new Average Piece Weight (APW) – Derived
To establish a new APW, touch the Recalculate APW button
The APW Screen is displayed.
NOTE: The sample size that is displayed will be used.
To use a different sample size, change that first. (See below.)
Follow the screen instructions to establish a new APW
Actions available: Tare, Cancel, or Accept
Press Accept to capture the value and return to the Settings
screen.
The Settings screen returns with the new APW value
highlighted.
To return to the Counting home screen,
touch Return to Application.
The home screen shows 10 pieces at the new APW
EN-24
4.2.1.2
EXPLORER BALANCES
Sample Size
The sample size can be 1 to 100 pieces. The default sample
size is 10. Once a sample size is changed, the balance will
immediately open the Recalculate APW screen, expecting to
establish a new APW.
The current sample size is shown on the Settings screen.
To adjust the sample size, touch the Samples button.
A numeric input window appears.
Key in the desired Sample Size, then press 9.
The next screen appears, with the message to place the number
of pieces entered in the numeric input window.
Place the indicated number of pieces on the platform.
Then touch either Tare, Cancel, or Accept.
Press Accept to capture the value and return to
the Settings screen.
The Settings screen appears with the new APW value
highlighted.
To begin counting pieces, touch Return to Application.
EXPLORER BALANCES
EN-25
4.2.2 Application Setup
The Application can be customized for various user preferences.
Touch the Setup Icon (wrench) to enter Application Setup.
The Application Setup Menu appears.
Select the list item to view or change the setting as
desired.
To return to the Application home screen, touch Done.
The Counting Application Setups are below (defaults in Bold).
Item
Enabled
Auto Optimization
Counting Mode
Secondary Unit
Statistics
Lock Settings
Reference fields
APW
Gross
Net
Tare
Target
Difference
Over Limit
Under Limit
Print Options
APW
Sample Size
Target
Difference
Over Limit
Under Limit
Available Settings
On, Off
On, Off
Standard Counting,
Check Counting,
Fill Counting
On, Off
Off, Manual, Auto
On, Off
Comments
Turns Application on/off
On, Off
On, Off
On, Off
On, Off
On, Off
On, Off
On, Off
On, Off
The APW is displayed
Gross weight is displayed
Net weight is displayed
Tare weight is displayed
Used for Check-Fill only
Used for Check-Fill only
Used for Check-Counting only
Used for Check-Counting only
See Printing Section.
On, Off
On, Off
On, Off
On, Off
On, Off
On, Off
Select the Mode
To show the Second Display line
Press to lock the current setting(s)
so they cannot be changed.
Used for Check-Fill only
Used for Check-Fill only
Used for Check-Counting only
Used for Check-Counting only
EN-26
4.2.3
EXPLORER BALANCES
Parts Counting – Check
This feature permits establishing a set quantity of pieces as criteria for similar items that can be quickly checked
against a sample.
Press the
Setup
(wrench)
button to enter
the Counting
Setup menu.
Change
Counting
Mode to
Check
Counting.
The PARTS COUNTING – Check Home screen
Main Display Line
Second Display Line
Reference Fields
Application Buttons
Functions
The default (or last) Average Piece Weight (APW) is
displayed. Place objects on the pan to display the
Check Status (number of pieces).
4.2.2.1 Edit Settings: To use the Parts Counting-Check mode,
the Over Limit and Under Limit values must be set.
The Average Piece Weight and standard sample size can also
be set. Follow these steps:
Touch the Edit Settings button. The Settings screen appears.
The buttons for APW, Samples, Over Limit and Under Limit
show default (or previously set) values. To change any value,
touch the button. A keyboard screen appears.
(See keyboard screens, next page.)
To set a new average piece weight, press the
Recalculate APW button.
A new screen appears with the message:
Place 30 pieces. Press Accept
(Default is 10 pieces, but message matches
number of pieces in Samples button.)
After following these instructions, press Return to Application
on the main Edit Settings screen.
EXPLORER BALANCES
4.2.4
EN-27
Parts Counting – Fill
This feature permits establishing a set quantity of pieces as a reference, so when pieces are added, their
percentage of the reference amount appears. A Progress bar indicates the percentage.
In the upper left portion of the home screen, select Parts Counting.
(The option will appear if it has been enabled in the Application Modes menu.)
Press the Setup
(wrench) button
to enter the
Counting Setup
menu.
Change
Counting Mode
to Fill
Counting.
The PARTS COUNTING – Fill Home screen
Main Display Line
Second Display Line
Reference Fields
Application Buttons
Functions
The default (or last) Average Piece Weight (APW) is displayed.
Place objects on the pan to display the Fill Status.
4.2.3.1 Edit Settings: To use the Parts Counting-Fill mode, the Target (in pieces) and Difference values (in
percent) must be set up in the Settings Menu.
Touch the Edit Settings button. The Settings screen appears.
EN-28
EXPLORER BALANCES
The buttons for APW, Samples and Target show default
(or previously set) values. To change values, touch the button.
A keyboard screen appears.
Key in the new value, and press Done.
To set a new average piece weight, press Recalculate APW.
A new screen appears saying:
Place 10 pieces. Press Accept
After following these instructions, and setting all values as
desired, press Return to Application.
4.2.5
Statistics for Parts Counting
Use the Statistics function to compare a number of samples and examine the relative deviation of the samples
along with other statistical data. A minimum of three samples is required.
Statistics can be determined manually (Manual mode, with key press after each step) or automatically (Auto
Mode: weights are automatically recorded when stable). To use the statistics function, enable it first in the
Application Setup menu.
Application Setup
First, Enable Statistics
Touch the Setup
Icon wrench (as
above) to enter
Setup menu.
Press Statistics and choose either Manual or Automatic, then press Close.
Press Done on the main options menu to return to the home screen.
EXPLORER BALANCES
Accumulating displayed values & Viewing data – Manual
Once Statistics is enabled, two buttons appear on the Application screen; Statistics and Accumulate.
To add the sample to the data set, place the item on the pan and
press Accumulate.
When stable, the Statistics button lights briefly to show the item
is added to the set and the data set quantity increments by one.
Continue to add items and press Accumulate to build the
statistical data set
At any time, press the Statistics button to view the results.
The Statistics Results screen
Press Print to send to the enabled COM port
Press Close to return to the Application home screen
with the current statistics set or
Press Clear Data to clear the results and return to the
Application home screen.
Statistics – Automatic
Statistics Automatic mode is similar to manual mode (above) except the first stable weight is automatically
captured. Thus the Accumulate button is not used.
EN-29
EN-30
4.3
EXPLORER BALANCES
Percent Weighing
Use Percent Weighing to measure the weight of a sample displayed as a percentage of a pre-established
Reference Weight.
The default (or last) Reference Weight is displayed.
Place an object on the pan. The difference between the sample and the Reference Weight is displayed as both a
weight and a percentage.
To Access Percent Weighing:
Press the upper left portion of the home screen,
so the available Application Modes are visible.
Select Percent Weighing.
The Percent Weighing Home Screen appears.
The PERCENT WEIGHING Home screen
Main Display Line
Second Display Line
Reference Fields
Application Buttons
Functions
4.3.1 Edit Settings
To view or adjust the current settings
To adjust the Application settings, touch the Edit Settings
button. (See above.)
The Settings screen is now displayed.
Settings available: Reference, Reference Adjust
Functions Available: Recalculate Reference,
Return to Application
Application Icon
EXPLORER BALANCES
EN-31
Establishing a Reference Weight
There are two methods to establish the Reference Weight value:
1. Direct: If the actual Reference Weight is known, it can be entered directly;
2. Derived: The sample’s weight can be used to establish the reference weight.
Establishing a Known Reference Weight
The current
Reference
weight value is
shown on the
Settings screen.
To adjust the
Reference
weight directly,
touch the
Reference
button.
A numeric input
window appears.
Key in the desired Reference Weight, then press 9.
The display returns to the previous screen with the new value highlighted.
To return to the Percent Weighing home screen, touch Return to Application.
Using a Sample to Establish a Derived Reference Weight
To establish a
new Reference
weight value,
touch the
Recalculate
Reference
button.
The New
Reference
screen appears.
Follow the
screen
instructions to
establish a new
Reference
Weight.
Actions available: Tare, Cancel, or Accept.
Press Accept to capture the value and return to the Settings screen.
The display returns to the Settings screen with the new Reference weight value highlighted momentarily.
To return to the Percent weighing home screen, touch Return to Application.
EN-32
EXPLORER BALANCES
Reference Weight Adjustment (Reference Adjust)
The Reference Weight adjustment can be 1 to 1000 percent.
Examples: 100% means the sample is displayed as compared to 100% of the Reference Weight.
25% means the sample is displayed as compared to 400% of the Reference Weight.
The Edit Settings screen shows current Reference Adjust value. To change it, touch Reference Adjust button.
A numeric input
window appears.
Key in the
desired
Reference
Weight
Adjustment, then
press Done.
The display returns to the previous screen with the new value highlighted momentarily.
To return to the Percent weighing home screen, touch Return to Application.
EXPLORER BALANCES
4.3.2
EN-33
Application Setup
The Application can be customized for various user preferences. Press Setup (wrench) from the home screen.
The Setup
Menu appears.
Select the item
to view or
change.
To return to the
Application
home screen,
press Done.
Percent Weighing Application Setups (defaults in Bold)
Item
Enabled
Secondary Unit
Lock Settings
Available Settings
On, Off
On, Off
On, Off
Comments
Turns Application on/off
To show the Second Display line
Press to lock the current setting(s)
so they cannot be changed.
Reference fields
Reference Weight
Difference (weight)
On, Off
On, Off
The Reference is displayed
Displays the Difference to the
reference weight.
Displays the Difference to the
reference weight as percentage.
Gross weight is displayed
Net weight is displayed
Tare weight is displayed
See Printing Section.
Difference (percent)
On, Off
Gross
Net
Tare
Print Options
Reference Weight
Reference Adjust
Difference (weight)
Difference (percent)
On, Off
On, Off
On, Off
On, Off
On, Off
On, Off
On, Off
EN-34
4.4
EXPLORER BALANCES
Check Weighing
Check Weighing is used to compare the weight of a sample against target limits. Three different modes can be
selected: Over and Under, Nominal Weight Tolerance, or Nominal Percent Tolerance.
4.4.1
Standard Check Weighing (default)
In the upper left portion of the home screen, select Check Weighing.
The default (or last) Check weigh limits are displayed. Place objects on the pan. The Under/Accept/Over status
is shown in the progress bar area while the actual weight of the item is shown on the main Display Line.
The CHECK WEIGHING Home screen
Main Display Line
Second Display Line
Reference Fields
Application Buttons
Application Icon
Functions
4.4.2
Edit Settings
To view or adjust the current settings
Touch the Edit Settings button. The Settings screen appears.
The Application Settings Screen.
Settings available: Over Limit, Under Limit
Functions Available: Return to Application
The check limit values are displayed in the settings screen.
To set the Over Limit value, touch the Over Limit button
To set the Under Limit value, touch the Under Limit button
A numeric input window appears.
Enter the desired Limit Weight, then press OK.
The display returns to the previous screen with the new value
highlighted momentarily.
To return to the CHECK WEIGHING home screen,
touch Return to Application.
EXPLORER BALANCES
4.4.3
EN-35
Application Setup
The Application can be customized for various user preferences.
Touch the Setup Icon (wrench) to enter the Application Setup
from the home screen:
The Setup Menu is now displayed.
Select the list item to view or change the setting as
desired.
To return to the Application home screen, touch Done.
Check Weighing Application Setups (defaults in Bold)
Item
Enabled
Limits Setting Mode
Secondary Unit
Audible Signal
Statistics
Display Setting
Lock Settings
Reference fields
Over Limit
Under Limit
Gross
Net
Tare
Target
Positive Tolerance
Negative Tolerance
Print Options
Over Limit
Under Limit
Target
Positive Tolerance
Negative Tolerance
Available Settings
On, Off
Over and Under,
Nominal/Weight Tol,
Nominal/Percent Tol.
On, Off
On, Off
Off, Manual, Auto
Weight,
Check Status
On, Off
Comments
Turns Application on/off
To select the Mode
On, Off
On, Off
On, Off
On, Off
On, Off
On, Off
On, Off
On, Off
Over weight limit
Over weight limit
Gross weight is displayed
Net weight is displayed
Tare weight is displayed
Used for Nominal Checkweigh
Used for Nominal Checkweigh
Used for Nominal Checkweigh
See Printing Section.
On, Off
On, Off
On, Off
On, Off
On, Off
To show the Second Display line
Beeps if reading is under or over.
To show Weight or Check Status
on Main Display Line
Press to lock the current setting(s)
so they cannot be changed.
Used for Nominal Checkweigh
Used for Nominal Checkweigh
Used for Nominal Checkweigh
EN-36
4.4.4
EXPLORER BALANCES
Check Weighing – Nominal/Weight Mode
With this feature you can establish a Target or Nominal weight
value and pre-set tolerance in weight.
To enable this feature, enter the Setup menu.
Change the mode to Nominal/Wt Tolerance.
The Check Weighing options screen returns.
Press Done to begin Check Weighing.
CHECK WEIGHING – Nominal/Wt Tolerance home screen
Main Display Line
Second Display Line (not shown)
Reference Fields
Application Buttons
Functions
To use this mode, touch Edit Settings to set the Nominal, and
Upper and Lower Tolerance values (in weight).
(See keyboards below.)
Press Return to Application when settings are complete.
Application Icon
EXPLORER BALANCES
4.4.5
EN-37
Check Weighing – Nominal/Percent Tolerance Mode
With this feature you can establish a Target or Nominal weight value and pre-set tolerance in percent.
To enable this feature, enter the Setup menu.
Change the mode to Nominal, % Tolerance. The Check Weighing options screen returns.
Press Done to begin Check Weighing.
The CHECK WEIGHING – Nominal/Percent Tolerance
home screen
Main Display Line
Second Display Line (not shown)
Reference Fields
Application Buttons
Application Icon
Functions
To use this mode, touch Edit Settings to set the Target
Weight, and Upper and Lower Tolerance values (in percent).
(See keyboards below.)
Press Return to Application when settings are complete.
EN-38
4.4.6
EXPLORER BALANCES
Display Settings
The results can be displayed with the check status (Under, Accept, or Over) either in the Progress bar
(Weighing) or in the main Weighing Line (Check Status).
To display the results in the main Weighing Line, set the Display Setting to
Check Status, using the Application Setup screen.
(The default value is Weight.)
The CHECK WEIGHING home screen with
Display set to Check Status
Main Display Line
Second Display Line
Reference Fields
Application Buttons
Application Icon
Functions
To enable audible signals for Under, Accept, and Over,
Touch Audible Signal-On in the Application Setup screen.
EXPLORER BALANCES
4.4.7
EN-39
Statistics for Check Weighing
Use the Statistics function to compare a number of samples and examine the relative deviation of the samples
along with other statistical data. A minimum of three samples is required.
Statistics can be determined manually (with key press after each step) or automatically (weights recorded
automatically when stable). To use the statistics function, enable it first in the Application Setup menu.
Application Setup
First, Enable Statistics.
Touch the Setup
Icon wrench to
enter Setup
menu.
Touch
Statistics.
Choose either
Manual or
Automatic, then
press Done.
Accumulating Displayed Values & Viewing Data – Manual
Once Statistics is enabled, two buttons appear on the Application screen: Statistics and Accumulate.
To add the sample to the data set, place the item on the pan and
press Accumulate.
When stable, the Statistics button momentarily lights to show
the item is added to the set and the data set quantity increments
by one.
Continue adding items and pressing Accumulate to build the
statistical data set
At any time, press the Statistics button to view the results.
The Statistics Results screen
Press Print to send to the enabled COM port
Press Close to return to the Application home screen
with the current statistics set.
Press Clear Data to clear the results and return to
the Application home screen.
Statistics – Automatic
Statistics Automatic mode is similar to manual mode (above) except the first stable weight is automatically
captured. Thus the Accumulate button is not used.
EN-40
4.5
EXPLORER BALANCES
Dynamic/Animal Weighing
Use this application to weigh an unstable load, such as a moving animal. Three different start/reset modes can be
selected: Manual (start and stop via key press), Semi-Automatic (auto-start with manual reset), and Automatic
(start and stop automatically).
Dynamic Weighing – Manual (default)
To set the mode, touch the Setup wrench:
When you make a selection, the Setup options
screen re-appears.
Press Done.
On the Dynamic Weighing home screen, the
default (or last) Averaging Time is displayed.
Follow the screen instructions.
The DYNAMIC WEIGHING Home screen
Main Display Line
Second Display Line
Reference Fields
Application Buttons
Functions
Place objects on the pan.
Press the Begin Dynamic button.
The balance begins a countdown (averaging process).
During the countdown, the information line displays the time
remaining.
If necessary, press Cancel to quit and return to the Home
screen.
When the countdown ends, the result is displayed and held.
Press Reset to clear the held weight and return to the Initial
screen.
Note: Clear the pan before beginning a new Dynamic Weighing
cycle.
Application Icon
EXPLORER BALANCES
4.5.1
Edit Settings
To view or adjust the current settings:
Press the Edit Settings button.
(See Home Screen, previous page.)
The Settings screen appears.
The Application Settings Screen.
Settings available: Averaging Time
Functions Available: Return to Application
The Averaging Time can be set from 1 to 99 seconds.
The default value is 10. To change it, press the button.
A numeric input window is displayed.
Key in the desired Averaging Time, then press Done.
The display returns to the previous screen with the new value
highlighted.
To return to the Dynamic Weighing home screen,
touch Return to Application.
4.5.2
Application Setup
The Application can be customized for various user
preferences.
Touch the Setup wrench to enter the Application Setup
from the home screen.
The Setup Menu appears.
Select the list item to view or change the setting as desired.
To return to the Application home screen, press Done.
EN-41
EN-42
EXPLORER BALANCES
Dynamic Weighing Application Setups (defaults in Bold)
Item
Enabled
Auto Sample Mode
Statistics
Lock Settings
Reference fields
Averaging Time
Gross
Net
Tare
Print Options
Averaging Time
4.5.3
Available Settings
On, Off
Manual,
Semi Automatic
Automatic
Off, Manual, Auto
On, Off
Comments
Turns Application on/off
To select the Mode
On, Off
On, Off
On, Off
On, Off
Time in Seconds
Gross weight is displayed
Net weight is displayed
Tare weight is displayed
See Printing Section.
Press to lock the current setting(s)
so they cannot be changed.
On, Off
Dynamic Weighing – Semi-Auto
The cycle begins when an object (animal) is placed on the pan, but the held value must be reset manually.
To enable this feature, touch the Setup Icon (wrench) in the
top-center of the main screen to enter the
Dynamic Weighing Setup menu.
Change the mode to Semi Automatic.
The Dynamic – Semi-Automatic screen appears with the
default (or last) Averaging Time displayed.
Place specimen
on the Pan. The
cycle starts
automatically.
After the cycle
ends, the weight
reading is held.
Press the Reset
button to clear the
reading and return
to zero.
EXPLORER BALANCES
4.5.4
Dynamic Weighing – Automatic
The cycle begins when an object (animal) is placed on the pan, and the held value is automatically reset
when the object is removed from the pan (10-second delay).
To enable this feature, enter the Dynamic Weighing Setup menu.
Press Auto Sample, and change the mode to Automatic.
The Dynamic – Automatic screen appears with the default
(or last) Averaging Time displayed.
Place objects on the pan to begin.
The cycle starts automatically.
After the cycle ends, remove the specimen and the balance returns
to the Home screen automatically (after a 10-second delay).
EN-43
EN-44
4.5.5
EXPLORER BALANCES
Statistics for Dynamic Weighing
Use the Statistics function to compare a number of samples and examine the relative deviation of the samples
along with other statistical data. A minimum of three samples is required.
Statistics can be determined manually (Manual mode, with key press after each step) or automatically
(Automatic Mode: weights are automatically recorded when stable). To use the statistics function, enable it first
in the Application Setup menu.
Application Setup
First, Enable Statistics
Touch the Setup
Icon wrench to
enter Setup
menu.
Press Statistics.
Choose either
Manual or
Automatic
mode, then
press Done.
Accumulating Displayed Values & Viewing Data – Manual
Once Statistics is enabled, two buttons appear on the Application screen: Statistics and Accumulate.
To add the sample to the data set, place the item on the pan
and press Accumulate.
When stable, the Statistics button momentarily lights to show
the item is added to the set and the data set quantity increments
by one.
Continue adding items and pressing Accumulate to build the
statistical data set
At any time, press the Statistics button to view the results.
The Statistics Results screen
Press Print to send to the enabled COM port
Press Close to return to the Application home screen
with the current statistics.
Press Clear Data to clear the results and return to the
Application home screen.
Statistics – Automatic
Statistics Automatic mode is similar to manual mode (above) except the first stable weight is automatically
captured. Thus the Accumulate button is not used.
EXPLORER BALANCES
4.6
EN-45
Filling
This application allows the user to slowly fill a container to a pre-determined target weight. The progress bar
displays the filling status, and within 10 percent of the target value the progress bar converts to fine resolution
(+/– 10%) for accurate results.
In the upper left portion of the home screen, select Filling.
The default (or last) Target weight is displayed. Place objects on the pan to begin.
The FILLING Home screen
Main Display Line
Second Display Line
Reference Fields
Application Buttons
Functions
Application Icon
The progress bar displays the filling status, and within 10 percent of the target value, the progress bar converts
to fine resolution display.
4.6.1
Edit Settings
To view or adjust the current settings:
Touch the Edit Settings button.
The Settings screen appears:
Settings available: Target Weight
Functions Available: Recalculate Target Weight,
Return to Application
Establish a Target Weight
Each time a new item is used for filling, the Target Weight
(fill-to weight) must be established.
There are two (2) methods to establish the Target Weight:
1. The actual Target Weight is known; or
2. The Target Weight can be derived from a sample.
Establish using a Known Target Weight
The current Target Weight appears on the Settings screen, on
the Target Weight button. (See above.)
To adjust the Target weight value directly,
touch the Target Weight button.
A numeric input window appears.
Enter the desired Target Weight, then press Done.
The display returns to the previous screen with the new value
highlighted.
Press Return to Application to go to the Filling home screen.
EN-46
EXPLORER BALANCES
Using a Sample to establish new Target Weight - Derived
To establish a new Target Weight value,
press the Recalculate Target Weight button.
The New Target Screen appears, with a message:
Place the target weight on the pan. Press Accept to
continue.
Place the weight on the pan (or in a tared container).
Press Accept to return to the Settings screen.
The display returns to the Settings screen with the new
Target Weight value highlighted momentarily.
To return to the Filling home screen,
touch Return to Application.
4.6.2
Application Setup
The Application can be customized for various user
preferences.
Touch the Setup Icon (wrench) to enter the Application Setup
menu from the home screen.
The Setup Menu appears.
Select the list item to view or change the setting as
desired.
To return to the Application home screen, touch Done.
EXPLORER BALANCES
EN-47
The Filling Application Setups (defaults in Bold)
Item
Enabled
Secondary Unit
Statistics
Lock Settings
Reference fields
Target Weight
Difference (Weight)
Difference (Percent)
Gross
Net
Tare
Print Options
Target Weight
Difference (Weight)
Difference (Percent)
4.6.3
Available Settings
On, Off
On, Off
Off, Manual, Auto
On, Off
Comments
Turns Application on/off
To show the Second Display line
On, Off
On, Off
On, Off
On, Off
On, Off
On, Off
The Target weight is displayed
Displays the Difference to the Target weight
Displays the Difference to the Target weight
Gross weight is displayed
Net weight is displayed
Tare weight is displayed
See Printing Section.
Press to lock the current setting(s) so they
cannot be changed.
On, Off
On, Off
On, Off
Statistics for Filling
Use the Statistics function to compare a number of samples and examine the relative deviation of the samples
along with other statistical data. A minimum of three samples is required.
Statistics can be determined manually (Manual mode, with key press after each step) or automatically
(Automatic Mode: weights are automatically recorded when stable). To use the statistics function, enable it first
in the Application Setup menu.
Application Setup
First, Enable Statistics
Touch the Setup
Icon wrench (see
below) to enter
Setup menu.
Touch
Statistics.
Choose either
Manual or
Automatic
mode, then
press Done.
EN-48
EXPLORER BALANCES
Accumulating Displayed Values & Viewing Data – Manual
Once Statistics is enabled, two buttons appear on the Application screen: Statistics and Accumulate.
To add the sample to the data set, place the item on the pan
and press Accumulate.
When stable, the Statistics button momentarily lights to show
the item is added to the set and the data set quantity increments
by one.
Continue adding items and pressing Accumulate to build the
statistical data set
At any time, press the Statistics button to view the results.
The Statistics Results screen
Press Print to send to the enabled COM port
Press Close to return to the Application home screen
with the current statistics set.
Press Clear Data to clear the results and return to the
Application home screen.
Statistics – Automatic
Statistics Automatic mode is similar to manual mode (above) except the first stable weight is automatically
captured. Thus the Accumulate button is not used.
EXPLORER BALANCES
4.7
EN-49
Totalization
Totalization measures the cumulative weight of a sequence of items. Two different Totalization accumulation
modes can be selected: Manual accumulation (requires key press) and Automatic accumulation.
The cumulative total may exceed the capacity of the Balance.
4.7.1
Totalization – Manual (Default)
Touch the upper left portion of the home screen.
A drop-down menu appears. Select Totalization if it is present.
(If not, touch the Menu icon in the bottom-left corner, then
choose Application Modes, scroll down to find Totalization,
press it, then press Enabled to turn it On. It will now appear in
the Application Modes menu on the home screen.
Place objects on the pan to begin.
The TOTALIZATION Home screen
Main Display Line
Second Display Line
Reference Fields
Application Buttons
Functions
The sample weight is shown on the Main Display Line.
Press Accumulate to add the weight of the item to the total.
When stable, the new total is shown on the secondary Display Line.
Remove the item from the weighing pan, then add the next item
and continue as above.
When finished, press the Clear Total button to reset the
Second Display Line to zero.
Application Icon
EN-50
4.7.2
EXPLORER BALANCES
Application Setup
The Application can be customized for various user preferences.
Touch the Setup Icon (wrench) to enter the Application Setup
from the home screen.
The Setup Menu appears.
Select the list item to view or change the setting as
desired.
To return to the Application home screen, touch Done.
The Totalization Application Setups (defaults in Bold)
Item
Enabled
Auto Sample Mode
Reference fields
Samples
Available Settings
On, Off
On, Off
Comments
Turns Application on/off
To select the mode
On, Off
Average (weight)
Standard deviation
Minimum (weight)
Maximum (weight)
Range
Gross
Net
Tare
Print Options
Samples
Average (weight)
Standard Deviation
Minimum (weight)
Maximum (weight)
Range
On, Off
On, Off
On, Off
On, Off
On, Off
On, Off
On, Off
On, Off
To display the number of
samples weighed
Displays the Average
Displays the standard deviation
Displays the Minimum value
Displays the Maximum value
Displays the Range
Gross weight is displayed
Net weight is displayed
Tare weight is displayed
See Printing Section.
On, Off
On, Off
On, Off
On, Off
On, Off
On, Off
EXPLORER BALANCES
4.7.3
Totalization – Automatic
The weight of the item is added automatically (when stable).
To enable this feature:
1. Touch the Setup Icon (wrench) to enter Application Setup.
2. Press Auto Sample to turn this feature On.
Clear the pan (if necessary). Add a new sample.
The item weight is shown on the Main Display Line.
The weight of the item is automatically added (when stable) to the
total. The new total is shown on the Second Display Line.
Remove the item from the weighing pan, then add the next item
and continue the same as in manual mode.
When finished, press the Clear Total button to reset the
Second Display line to zero.
EN-51
EN-52
4.8
EXPLORER BALANCES
Formulation
Use this application for compounding and recipe making. The number of components can be 2 to 99.
Formulation has two available modes of operation: Free Formulation and Recipe Formulation.
4.8.1
Free Formulation (default)
This mode of Formulation allows the user to freely add components. A filler material is asked for at the end.
In the upper left portion of the home screen, select Formulation.
The FREE FORMULATION Home screen
Main Display Line
Second Display Line
Reference Fields
Application Buttons
Functions
To start the compounding process, press Begin Formulation.
A prompt says Place component 1 then press Accept.
The item weight is displayed on the main display Line.
Place the first ingredient on the pan (or in a tared container).
Press Accept to store the first component.
A prompt says Place item 2. Press Accept.
Continue adding components and pressing Accept to store the
weight of the individual components until the formula is
complete.
The Total line shows the total weight of all the components.
Press Print at any time in the process to print the recipe.
Then press End Formula.
The display may prompt for a Filler material.
If the formula calls for a filler material, press OK.
A popup message window appears, prompting for the
Filler Material to be added.
Add the filler if needed, then press Accept.
(If no filler is needed, press Accept without adding filler.)
The results are then displayed in a pop-up window.
Free - Formulation Results
Press Print to send data to the enabled COM port
Press Close to close the Results window and return to the
Application home screen
Application Icon
EXPLORER BALANCES
4.8.2
EN-53
Application Setup
The Application can be customized for various user preferences.
Touch the Setup icon (wrench) to enter Application Setup
from the home screen.
The Setup Menu appears.
Select the list item to view or change the setting as
desired.
To return to the Application home screen, touch Done.
The Formulation Application Setups (defaults in Bold)
Item
Enabled
Mode
Filler
Secondary Unit
Reference fields
Total
Gross
Net
Tare
Target
Difference (weight)
Difference (percent)
Print Options
Total
Target
Difference (weight)
Difference (percent)
Available Settings
On, Off
Free Formulate,
Recipe Based
On, Off
On, Off
Comments
Turns Application on/off
To select the mode
On, Off
On, Off
On, Off
On, Off
On, Off
On, Off
On, Off
Total is displayed
Gross weight is displayed
Net weight is displayed
Tare weight is displayed
For Recipe Based mode
For Recipe Based mode
For Recipe Based mode
See Printing Section.
On, Off
On, Off
On, Off
On, Off
To prompt for a filler material
To show the Second Display line
For Recipe Based mode
For Recipe Based mode
For Recipe Based mode
EN-54
4.8.3
EXPLORER BALANCES
Recipe Formulation
Recipe Formulation requires the formula to be entered first,
followed component by component.
To enable this feature, press the Setup icon (wrench) to
enter the Formulation Setup menu.
Change the mode to Recipe Based.
Press Done in the main setup options screen.
The RECIPE FORMULATION Home screen
Main Display Line
Second Display Line
Reference Fields
Application Buttons
Functions
Press Begin Formulation.
If no items have been previously set up, the Settings screen
appears.
If items already exist in memory, Formulation begins.
Press the Add New button.
A new default component is added to the end of the Formula
(default Name, Weight).
To change the default component Name, Press Edit Name.
The alpha-numeric entry screen appears.
Application Icon
EXPLORER BALANCES
EN-55
Enter the new name, then press 9.
The display returns to the previous screen with the new value
highlighted momentarily.
To change the
default
component
weight, press
Edit Weight.
The numeric
entry screen
appears.
Enter the new
weight, then
press 9.
The display returns to the previous screen with the new value highlighted momentarily.
Continue adding components as required for your formula.
To change the order of a component in the formula, touch the
item to highlight it, then press Move Up or Move Down.
To delete a component, touch the item to highlight it, and
press Delete Item.
To clear all components, press Clear All.
A confirmation is required.
When finished, press Return to Application.
Press Begin Formulation. Follow the screen instructions:
Add the required component in the formula.
The component weight is shown on the Main Display Line.
The progress bar displays the fill status. Within 10 percent of the
target value the progress bar converts to fine resolution display.
Press Accept to add the weight of the component to the total.
The new total appears on the Second Display Line.
The Difference to the target is displayed for each component
(in weight and percent).
Follow the screen instructions to continue adding components
and pressing Accept to complete the Formula.
When finished, the Formulation Results screen is displayed.
EN-56
Formulation Results
Press Print to send the results to the enabled COM port.
To close the Results window and return to the Application home
screen, press Close.
EXPLORER BALANCES
EXPLORER BALANCES
4.9
EN-57
Differential Weighing
Differential weighing stores weight values so samples can be dried or processed and the difference in weight
calculated. Up to 99 samples can be stored.
Differential weighing has two operating modes:
•
Auto-Process On, where the initial and final weights are
sequentially gathered for a one item; and
•
Auto-Process Off, where initial weights are gathered for
a set of items, then all the final weights for each item are
gathered afterwards.
Touch the Setup icon (wrench) to enter Application Setup from
the home screen.
The DIFFERENTIAL WEIGHING Home screen
Main Display Line
Second Display Line
Reference Fields
Application Buttons
Functions
4.9.1
Item Settings
Press Item Settings to set up items in memory.
To set up the item, Press Add New.
Application Icon
EN-58
New items are added with default name and weight
information
(no initial or final weights).
To change the default Item Name, press Edit Name.
The alpha-numeric entry screen appears.
Enter the new name, then press 9.
The display returns to the previous screen with the new value
highlighted momentarily.
Continue adding items as required using Add New.
New items can be added at any time.
To delete an item, touch the item to highlight it,
then press Delete Item.
To Clear the item initial weight press Clear Initial Weight.
(This feature is disabled if no initial weight is stored.)
To Clear the item’s final weight, press Clear Final Weight.
(This feature is disabled if no final weight is stored.)
To clear all items, press Clear All, then confirm.
When finished, press Return to Application.
On the main Application screen, follow the screen instructions:
Add the first item, then press Accept to store the value.
The initial weights of the defined item are recorded first, then
the final weights of the items are collected next.
Once the items initial weight and a final weight are stored, the
values are displayed along with the Difference in weight and
percent.
The items are stored in memory. To begin a new Differential
weighing session, delete the initial and/or final weights.
EXPLORER BALANCES
EXPLORER BALANCES
4.9.2
EN-59
Application Setup
The Application can be customized for various user preferences.
Touch the Setup icon (wrench) to enter Application Setup from
the home screen.
The Setup Menu appears.
Select the list item to view or change the setting as desired.
To return to the Application home screen, touch Done.
The Differential Weighing Application Setups (defaults in Bold)
Item
Available Settings
Comments
Enabled
On, Off
Turns Application on/off
Auto-Process Mode
On, Off
To select the mode
Initial Weight
On, Off
The initial weight is displayed
Final Weight
On, Off
The final weight is displayed
Difference (Weight)
On, Off
Displays the Difference to initial
in weight
Difference (Percent)
On, Off
Displays the Difference to initial
in percent
Gross
On, Off
Gross weight is displayed
Net
On, Off
Net weight is displayed
Tare
On, Off
Tare weight is displayed
Reference fields
See Printing Section.
Print Options
Initial Weight
On, Off
Final Weight
On, Off
Difference (Weight)
On, Off
Difference (Percent)
On, Off
EN-60
4.9.3
EXPLORER BALANCES
Differential Weighing with Auto-Process On
Differential weighing with Auto Process On requires the initial and final weights to be sequentially gathered for a
single item.
To enable this feature, touch the Setup icon (wrench) from the
home screen to enter Application Setup.
Press Auto Process to turn it On.
Follow the screen instructions to begin.
The DIFFERENTIAL WEIGHING – Auto Home screen
Main Display Line
Second Display Line (not shown)
Reference Fields
Application Buttons
Functions
Follow the screen instructions:
Press Item Settings to set up items in memory if necessary.
Use the buttons as necessary.
Follow the same steps as shown on page 57.
Press Return to Application when ready.
A message prompts for Item 1 to be placed on the pan again,
then to press Accept to establish Final Weight.
After Accept is
pressed, the difference between initial and
final weights
appears in the
Reference
Fields.
A message
prompts to start
the process
again, if
desired.
Application Icon
EXPLORER BALANCES
4.10
EN-61
Density Determination
The Explorer can be used to determine an object’s density. Four types of density determination can be made:
1. Solids more dense than water
2. Solids less dense than water
3. Liquid density
4. Porous material (impregnated with oil)
A density determination kit is designed to be used with Ohaus Explorer balances. Illustrations in this procedure
refer to the density kit. However, you may use whatever lab apparatus that suits the requirements for density
measurements. The balance software includes a built-in reference density table for water at temperatures
between 10°C and 30°C. Review this entire section before attempting density measurements.
When making density measurements the material should weigh at least 10 mg on an analytical balance and 100
mg on a precision balance.
Density can be determined manually (with a key press after each step) or automatically (weights are
automatically recorded). Before making density measurements, establish the Application Settings.
The DENSITY DETERMINATION Home screen
Main Display Line
Second Display Line (not shown)
Reference Fields
Application Buttons
Functions
4.10.1 Measuring the Density of a Solid Using Water (default)
Press the Setup button (the wrench) to open the Density
Determination Settings screen.
Confirm the following Setups are selected:
9 Density Type: Solid
9 Liquid Type: Water
9 Porous Material: Off
Press Done to return to the Density Determination home screen.
The Edit Settings Screen.
Settings available: Water Temp
Functions Available: Return to Application
To adjust the water temperature value,
touch the Water Temp button.
The balance calculates water density based on the water
temperature value entered (internal lookup table).
Measure the actual water temperature using a precision
thermometer.
Application Icon
EN-62
EXPLORER BALANCES
A numeric input window appears.
Enter the actual water temperature, then press Done.
The display returns to the previous screen with the new value
highlighted.
To return to the Density Determination home screen,
touch Return to Application.
To begin the Density Determination process,
press Begin Density Determination.
(See below.)
Step 1 of 2 –
Weigh the
Sample in Air.
Press Begin
Density
Calculation.
Follow screen
instructions,
then press
Accept
to store the dry
sample weight
(“in air”).
Step 2 of 2 –
Weigh the
Sample
Submerged in
the Liquid.
Follow the
screen
instructions,
then press
Accept
to store the
sample weight
(submerged in
liquid).
Once the necessary weights have been determined, the density of the sample is displayed in g/cc
(along with the weight in air, weight in water) on the Application screen.
Press Begin Density Determination to reset all the weight values and restart the process.
EXPLORER BALANCES
EN-63
4.10.2 Application Setup
The Application can be customized for various user preferences.
Touch the Setup
Icon (wrench) to
enter Application
Setup from the
home screen.
The Setup Menu appears.
Select the list item to view or change the setting as
desired.
To return to the Application home screen, touch Done.
The Density Application Setups (defaults in Bold)
Item
Enabled
Density Type
Liquid Type
Porous Material
Auto Print Result
Auto Sample Mode
Reference fields
Liquid Density
Water Temperature
Oil density
Weight in Air
Oiled Weight
Weight in Liquid
Sinker volume
Print Options
Porous Material
Liquid Type
Liquid Density
Water Temperature
Weight in Air
Weight in Liquid
Available Settings
On, Off
Solid, Liquid
Water, Other
On, Off
On, Off
On, Off
Comments
Turns Application on/off
To select either solid or liquid
Liquid used during measurements
To select Porous material
To automatically print results
To select the mode
On, Off
On, Off
On, Off
On, Off
On, Off
On, Off
On, Off
Test liquid’s density is displayed
The water temp is displayed
The test oil’s density is displayed
The sample weight is displayed
The sample weight is displayed
The sample weight is displayed
Displays volume of the Sinker
See Printing Section.
On, Off
On, Off
On, Off
On, Off
On, Off
On, Off
EN-64
EXPLORER BALANCES
4.10.3 Measuring the Density of a Buoyant Material Using Water
Press the Setup button (the wrench) to open Settings screen.
Confirm the following Setups are selected:
9 Density Type: Solid
9 Liquid Type: Water
9 Porous Material: Off
Press Done to return to the Density Determination home screen.
Follow the same procedure as Solid Material above, except in
Density Determination step 2, push the sample down into the
liquid until it is fully submerged.
4.10.4 Measuring the Density of a Solid Using an Auxiliary Liquid
To enable this feature, enter the Density Setup menu and select the following:
Density Type: Solid; Liquid Type: Other; Porous Material: Off. See Application Setup.
The DENSITY DETERMINATION – SOLID Home screen
Main Display Line
Second Display Line
Reference Fields
Application Buttons
Functions
Confirm the default values displayed (Liquid Density, etc) are
correct.
To edit the default values, touch Edit Settings and the
application Settings screen appears.
Settings available: Liquid Density
Functions Available: Return to Application
To adjust the Liquid Density value, touch the Liquid Density
button.
Measure the actual liquid density of the Density setup and enter
it.
A numeric input window appears.
Key in the density in g/cc, then press Done.
The display returns to the previous screen with the
new value highlighted.
Application Icon
EXPLORER BALANCES
EN-65
To return to the Density Determination home screen,
touch Return to Application.
Begin the Density determination process as per above.
4.10.5 Measuring the Density of a liquid using a Calibrated Sinker (not supplied)
Enable this feature, enter the Density Setup menu and select the following; Density Type: Liquid.
(See Application Setup.)
Note: when the Density Type is set to Liquid, the Liquid type and Porous material selections are disabled.
The DENSITY DETERMINATION – LIQUID Home screen
Main Display Line
Second Display Line
Reference Fields
Application Buttons
Functions
Confirm that the default value displayed (sinker volume) is
correct. To edit the default values, touch Edit Settings and the
Settings screen is now displayed:
Settings available: Sinker Volume
Functions Available: Return to Application
To adjust the Sinker volume value, touch the Sinker Volume
button.
Application Icon
EN-66
A numeric input window is displayed.
Key in the desired value, then press 9.
The display returns to the previous screen with the new value
highlighted.
To return to the Density Determination home screen,
touch Return to Application.
Press Begin Density Determination to start the process.
Step 1 of 2 – Weigh the Sinker in Air.
Follow the screen instructions, then press Accept
to store the sinker weight (“in air”).
Step 2 of 2 – Weigh the Sinker Submerged in the Test
Liquid.
Follow the screen instructions, then press Accept
to store the sinker weight (submerged in liquid).
Once the necessary weights have been determined,
the density of the Liquid sample is displayed in g/cc
(along with the weight in air, weight in water)
on the Application screen.
Press Begin Density Determination to reset all the weight
values and restart the process.
EXPLORER BALANCES
EXPLORER BALANCES
EN-67
4.10.6 Measuring the Density of Porous Material Using Oil
To enable this feature, enter the Density Determination
Setup menu, and set the following:
9
9
9
Density Type: Solid
Liquid Type: Water
Porous Material: On
The DENSITY DETERMINATION – POROUS Home screen
Main Display Line
Second Display Line
Reference Fields
Application Buttons
Functions
Confirm the default values displayed (Water Temp) are correct.
To edit the default values, touch Edit settings.
The Settings screen appears.
Settings available: Water Temp, Oil Density
Functions Available: Return to Application
The balance calculates water density based on the water
temperature value entered (look-up table).
Measure the actual water temperature using a precision
thermometer.
To adjust the Water Temperature or Oil Density values,
touch the Water Temp or Oil Density button.
Numeric input windows appear.
Key in the desired value,
then press 9.
The display returns to the previous
screen with the new value highlighted.
To return to the Density Determination
home screen, touch
Return to Application.
Application Icon
EN-68
Press Begin Density Calculation.
Step 1 of 3 – Weigh the Un-Oiled Sample in Air.
Follow the screen instructions then press Accept to store the
dry sample weight (in air).
Step 2 of 3 – Weigh the Oiled Sample in Air.
Follow the screen instructions then press Accept
to store the sample weight (oiled).
Step 3 of 3 – Weigh the Oiled Sample Submerged in Liquid.
Follow the screen instructions then press Accept
to store the oiled sample weight (submerged in liquid).
Once the necessary weights have been determined, the density
of the sample is displayed in g/cc (along with the weight in air,
un-oiled and oiled, and weight in water) on the Application
screen
The value stays on the display until Begin Density
Determination is touched.
Press Begin Density Determination to reset all the weight
values and restart the process.
EXPLORER BALANCES
EXPLORER BALANCES
4.11
EN-69
Peak Hold
The Peak Hold application allows the user to capture and store the highest stable weight in a series of weight
measurements.
Three different start/reset modes can be selected:
9 Manual (start and stop the capture via key press),
9 Semi-Automatic (start automatically/reset manually); and
9 Automatic (start and stop the capture automatically).
This application allows both stable and unstable weights to be captured.
4.11.1 Peak Hold – Semi-Automatic (default)
In the upper left portion of the home screen, select Peak Hold.
Follow the screen instructions to begin.
The PEAK HOLD Home screen
Main Display Line
Second Display Line
Reference Fields
Application Buttons
Functions
Place item on the pan. The capture process starts automatically.
The highest reading is held on the display.
To release the reading, press End Peak Hold.
The following screen appears.
Clear the pan or press Tare to reset the display and re-start the
process.
Application Icon
EN-70
EXPLORER BALANCES
4.11.2 Application Setup
The Application can be customized for various user preferences.
Touch the Setup icon (wrench) to enter Application Setup from
the home screen.
The Setup Menu appears.
Select the list item to view or change the setting as
desired.
To return to the Application home screen, touch Done.
The Peak Hold Application Setups (defaults in Bold).
Item
Enabled
Auto Sample Mode
Stable Weight Only
Secondary Unit
Reference fields
Gross
Net
Tare
Print Options
Stable Weight Only
Available Settings
On, Off
Manual,
Semi Automatic
Automatic
On, Off
On, Off
Comments
Turns Application on/off
To select the mode of operation
On, Off
On, Off
On, Off
Gross weight is displayed
Net weight is displayed
Tare weight is displayed
See Printing Section.
On, Off
To capture Stable values only
To show the Second Display line
EXPLORER BALANCES
EN-71
4.11.3 Peak Hold – Manual
For manual start and reset, choose Manual mode.
To enable this feature, enter the Peak Hold Setup menu:
Change the mode to Manual.
The PEAK HOLD – Manual Home screen
Main Display Line
Second Display Line
Reference Fields
Application Buttons
Functions
Follow the screen instructions: Place item on the pan.
Press Begin Peak Hold to begin the capture process.
The following screen appears:
The highest stable weight reading is held indefinitely.
Press End Peak Hold then clear the pan to reset the display
and re-start the process.
Application Icon
EN-72
EXPLORER BALANCES
4.11.4 Peak Hold – Automatic
For automatic start and reset, choose Automatic mode.
To enable this feature, enter the Peak Hold Setup menu.
Change the mode to Automatic.
The HIGH POINT – Auto Home screen
Main Display Line
Second Display Line
Reference Fields
Application Buttons
Functions
Place item on the pan. The capture process starts automatically.
The highest stable weight reading is held until the weight is
removed.
The process starts automatically once the weight is removed
from the pan (after 10 sec delay).
Application Icon
EXPLORER BALANCES
4.12
EN-73
Ingredient Costing
This application allows the user to determine the cost of a formula or recipe based on the known cost and quantity
of the components or ingredients. Up to 99 components are allowed.
In the upper left portion of the home screen, select Ingredient Costing.
Follow the screen instructions to begin.
The INGREDIENT COSTING Home screen
Main Display Line
Second Display Line
Reference Fields
Application Buttons
Functions
4.12.1 Item Settings
Press Item Settings to set up items in memory.
The Edit Settings Screen.
Settings available: Add New, Edit name, Edit Cost,
Edit Unit, Delete Item, Clear All
Functions Available: Return to Application
To set up the item(s) in memory, Press Add New.
A new item is added (default Name) with default info
(cost per weight and weight unit).
Application Icon
EN-74
To change the default item name, Press Edit Name.
The alpha-numeric entry screen appears.
Enter the new name, then press 9.
The display returns to the previous screen with the new value
highlighted momentarily.
To change the default component cost per unit,
Press Edit Cost.
The numeric entry screen appears.
Enter the new weight, then press Done.
The display returns to the previous screen with the new value
highlighted momentarily.
To change the default component Unit, press Edit Unit.
The Weighing Units screen appears.
EXPLORER BALANCES
EXPLORER BALANCES
Continue adding items as required, using Add New.
New items can be added at any time.
To delete an item, touch the item to highlight it,
then press Delete Item.
To clear all items, press Clear All. A confirmation is required.
When finished, press Return to Application.
Once setup is complete and the application screen is displayed,
follow the screen instructions:
Add the first item then press Accept to store the value in
memory.
The weight of the item is recorded,
then the screen prompts for the next component.
Unit Cost, Total Weight and Total Cost are also displayed.
Continue follow the screen instructions to add the items to the
pan and touch the Accept button until each item has been
weighed.
Press the View Data button at any time to show the current
results: (Item, Item Cost and Item Weight).
After the last item has been weighed, press View Data to see
the results.
(Cancel the current data set by pressing Clear Data.)
Ingredient Costing Results.
Press Print to send the data to the enabled COM port.
Press Close to close the results window and return to the
Application home screen.
EN-75
EN-76
EXPLORER BALANCES
4.12.2 Application Setup
The Application can be customized for various user preferences.
Touch the Setup Icon (wrench) to enter Application Setup from
the home screen.
The Setup Menu is now displayed.
Select the list item to view or change the setting as
desired.
To return to the Application home screen, touch Done.
The Ingredient Costing Application Setups (defaults in Bold)
Item
Enabled
Currency label
Reference fields
Unit Cost
Total Weight
Total Cost
Gross
Net
Tare
Print Options
Total Weight
Total Cost
Available Settings
On, Off
None, various
Comments
Turns Application on/off
To select the Currency label
On, Off
On, Off
On, Off
On, Off
On, Off
On, Off
To display the Item cost
To display the Total weight
To display the Total cost
Gross weight is displayed
Net weight is displayed
Tare weight is displayed
See Printing Section.
On, Off
On, Off
EXPLORER BALANCES
4.13
EN-77
Pipette Adjustment
Pipette adjustment checks the accuracy and precision values of pipettes by weight analysis. The balance has a
built-in density reference table for water at temperatures between 10°C and 30°C. If other liquids are used for
pipette calibration, enter the liquid’s density at current room temperature in g/cc. Since all calculations are made
within the balance, the atmospheric pressure is also required.
Pipette adjustment can be accomplished manually (with a key press after each step) or automatically (weights
are automatically recorded when stable). Calculations made within the balance provide results of inaccuracy and
imprecision. Up to 30 samples can be used.
The PIPETTE ADJUSTMENT Home screen
Main Display Line
Second Display Line
Reference Fields
Application Buttons
Functions
4.13.1 Pipette Adjustment – Manual (default)
Confirm the default values displayed are correct:
Nominal, Inaccuracy, Imprecision, Density, Atmospheric
Pressure, Water Temperature, etc.
To edit the default values, touch the Edit Settings button.
The Edit Settings Screen.
Settings available: Nominal Capacity, Water Temp,
Inaccuracy, Atmospheric Press,
Imprecision, Pipette Name,
Pipette Number
Functions Available: Return to Application
To adjust the pipette Nominal Capacity value,
touch the Nominal button.
Enter the Nominal Capacity in the keyboard screen that
appears, and press 9.
The display returns to the previous screen with the new value
highlighted.
Note: Capacity can be measured in mL or uL, depending on the
Application Setup.
Application Icon
EN-78
To adjust the water temperature, touch the Water Temp button.
The balance calculates water density based on the water
temperature value entered. Measure the actual water
temperature using a precision thermometer.
A numeric input window is displayed.
Key in the desired temperature, then press Done.
The display returns to the previous screen with the new value
highlighted.
Continue to enter the required information
following the above procedure:
Pipette Inaccuracy, via the Inaccuracy button
Barometric Pressure, via the Barometric Pressure button
Pipette Imprecision, via the Imprecision button
Pipette Name, via the Pipette Name button
Pipette Number, via the Pipette number button
When finished, press Return to Application.
The Application home screen appears, and you can begin the
Pipette Adjustment process.
EXPLORER BALANCES
EXPLORER BALANCES
EN-79
4.13.2 Begin Pipette Adjustment Process
Touch
Begin Pipette
Adjustment.
Follow the
screen
instructions, to
Place
container on
the pan. Then
Press Tare.
Step 1 – Dispense the First Sample
Follow the screen instructions, then press Accept to store the
first sample weight (liquid).
Continue to follow the screen instructions by dispensing
samples and pressing Accept to store each sample weight
(liquid).
The default number of samples is 10.
It can be changed in Setup, from 2 to 30 samples.
Once all the sample
weights have been
dispensed,
the Results screen is
automatically
displayed.
Press Graph to see
results plotted. Press
Result to return to the
result screen. Press
Close to return to the
Pipette Adjustment
home screen.
Note: To view either the results or graph screens again from the home screen, press the View Result button.
To start a new Pipette Adjustment process, press Begin Pipette Adjustment.
EN-80
EXPLORER BALANCES
4.13.3 Application Setup
The Application can be customized for various user preferences.
Touch the Setup Icon (wrench) to enter the Application Setup
from the home screen.
The Setup Menu appears.
Select the list item to view or change the setting as
desired.
To return to the Application home screen, touch Done.
The Pipette Adjustment Application Setups (defaults in Bold)
Item
Enabled
Auto Sample Mode
Number of Samples
Liquid Type
Unit of Pressure
Volume Unit (Pipette
capacity unit)
Secondary Unit
Lock Settings
Reference fields
Nominal Volume
Inaccuracy
Imprecision
Liquid Density
Barometric Unit
Water Temperature
Print Options
Nominal Volume
Inaccuracy
Imprecision
Liquid Density
Barometric Unit
Water Temperature
Available Settings
On, Off
On, Off o
2 – 30 (default 10)
Water, Other
ATM, inHg, KPa,
mbar, mmHg, PSIA
mL, uL
Comments
Turns Application on/off
To select the mode of operation
To select the number of samples
Liquid used during measurements
To select Atmospheric Pressure unit
On, Off
On, Off
To show the Second Display line
Press to lock the current setting(s) so
they cannot be changed.
On, Off
On, Off
On, Off
On, Off
On, Off
On, Off
Nominal capacity displayed
Inaccuracy value displayed
Imprecision value displayed
Liquid density value displayed
Barometric Pressure value displayed
Water temperature is displayed
See Printing Section.
On, Off
On, Off
On, Off
On, Off
On, Off
On, Off
Nominal capacity unit
EXPLORER BALANCES
4.14
EN-81
Statistical Quality Control (SQC)
The Statistical Quality control (SQC) feature is useful during various types of process filling operations, to monitor
and/or control the process to eliminate under- and over-filling.
As samples are weighed and stored in the balance, a Trend Analysis is developed and can be displayed.
Up to 10 batches with up to 80 samples in a batch are visible for quality control purposes. Each batch of samples
is shown, with the maximum, minimum, standard deviation and mean values for each batch. An on-going
examination of the relative deviation of the samples along with other statistical data can be viewed.
The filling process operation can be effectively monitored by observing the results on the View Trace screen.
SQC collection can be done manually (Manual mode, requires key press after each step) or
automatically (Auto Mode, the weights are automatically recorded when stable).
In the upper left portion of the home screen, select SQC.
The SQC Home screen
Main Display Line
Second Display Line
Reference Fields
Application Buttons
Functions
4.14.1 Edit Settings
Confirm the default values (Nominal, Inaccuracy, Imprecision,
Density, Atmospheric Pressure, Water Temperature, etc.)
are correct.
To view/edit the default values, touch the Edit Settings button.
The Settings screen appears.
Settings available: Nominal Target weight,
+Tolerance 1, –Tolerance 1,
+Tolerance 2, –Tolerance 2
Functions Available: Return to Application
To adjust the Nominal Target weight value,
touch the Nominal button.
A numeric input window appears.
Key in the desired Nominal Weight, then press 9.
The display returns to the previous screen with the new value
highlighted.
Application Icon
EN-82
EXPLORER BALANCES
Continue to enter the required information following the above
procedure:
Positive Tolerance 1, via the +Tolerance 1 button.
Negative Tolerance 1, via the –Tolerance 1 button.
Positive Tolerance 2, via the +Tolerance 2 button.
Negative Tolerance 2, via the –Tolerance 2 button.
Tolerances can be in either weight (default) or percent –
See Application Setup, Section 4.14.3.
When finished, press Return to Application and the SQC home
screen appears.
4.14.2 Begin the SQC Process
Touch the Begin
New Batch
button.
First Batch: the
screen prompts
for the Batch
name.
Enter the Batch
name, then
press 9.
The Process screen is then displayed.
Follow the screen instructions, then press Accept
to store the sample weight.
The current number of Samples, along with the Average, Sum,
Minimum value, Maximum value, and Range are displayed.
Continue to follow the screen instructions by weighing samples
and pressing Accept to store each sample’s weight.
The sample size is 10 (default).
It can be changed in Setup from 2 to 80 pieces.
At any time, press End Batch to see the Individual results
screen, showing results for the current Batch.
Once all the samples have been weighed,
the Results screen appears automatically.
If the COM interface is enabled, press Print to send the results
either to a computer or a printer.
Press Close to return to the current Batch process.
A message offers the chance to save the batch, if desired.
EXPLORER BALANCES
EN-83
To view the process results of this batch (and any other saved
batch), press the View Batch History button.
The Batch History screen shows the basic information –
Maximum, Minimum, Average (mean), and Standard
Deviation – for all currently saved batches.
Press Select to see (and print) the Batch Information screen for
any saved batch.
Press Clear Batches to reset SQC results and
return to the SQC home screen
Press Close to return to the SQC home screen to
begin another batch or to view process results.
To view the
Process results
graphically
(batch
comparison),
press the View
Trace button.
Press Print or
Close as
above.
EN-84
EXPLORER BALANCES
4.14.3 Application Setup
The Application can be customized for various user preferences.
Touch the Setup Icon (wrench) to enter Application Setup from
the home screen.
The Setup Menu is now displayed.
Select the list item to view or change the setting as
desired.
To return to the Application home screen, touch Done.
The SQC Application Setups (defaults in Bold)
Item
Enabled
Number of Samples
Tolerance Mode
Auto Sample Mode
Lock Settings
Reference fields
Number of Batches
Number of Samples
Average
Total
Maximum
Minimum
Range
Print Options
Number of Batches
Number of Samples
Average
Total
Maximum
Minimum
Range
Available Settings
On, Off
2 – 80 (default 10)
Weight,
Percent
Manual,
Semi Automatic,
Automatic
On, Off
Comments
Turns Application on/off
To select the number of samples in a Batch
Tolerance used during measurements
On, Off
On, Off
On, Off
On, Off
On, Off
On, Off
On, Off
The total batches
The total samples
The Average value is displayed
The Sum value is displayed
The Maximum value is displayed
The Minimum value is displayed
The Range is displayed
See Printing Section.
On, Off
On, Off
On, Off
On, Off
On, Off
On, Off
On, Off
To select the mode of operation
Press to lock the current setting(s) so they
cannot be changed.
EXPLORER BALANCES
4.15
EN-85
Statistics
Statistics are used to compare a number of samples and examine the relative deviation of the samples along with
other statistical data. A minimum of three samples is required.
Statistics can operate manually (key press after each step) or automatically (weights automatically recorded
when stable). To use the statistics feature, enable it in the Application Setup menu.
This feature is available in Weighing, Counting, Check Weighing, Dynamic Weighing and Filling applications.
4.16
Library
When an item is processed on a regular basis, the item’s data may be stored in memory for future use. This
memory is referred to as the Balance’s Library.
The following data is stored for the Application used:
Application
Weighing
Counting
Percent Weighing
Check Weighing
Dynamic Weighing
Filling
Totalization
Formulation
Differential Weighing
Density Determination
Peak Hold
Ingredient Costing
Pipette Adjustment
SQC
Parameters
and setups
x
x
x
x
x
N/A
N/A
N/A
x
N/A
N/A
x
x
Name
x
x
x
x
x
x
N/A
N/A
N/A
x
N/A
N/A
x
x
Preset
Tare
x
x
x
x
x
x
N/A
N/A
N/A
x
N/A
N/A
x
x
APW
Ref Wt.
or Target
x
Sample
size
Under
Limit
Over
Limit
x
x
x
x
x
x
x
x
x
Level
Mode
x
N/A
N/A
N/A
x
N/A
N/A
N/A
N/A
N/A
N/A
N/A
N/A
N/A
N/A
N/A
N/A
N/A
N/A
N/A
N/A
N/A
N/A
N/A
N/A
N/A
N/A
N/A
N/A
N/A
N/A
N/A
N/A
N/A
N/A
N/A
N/A
4.16.1 Creating a Library Record
To create a Library record, the Settings screen is used. From the home screen, touch the Edit Settings button.
The Settings screen is now displayed.
Touch the Edit
Settings button.
The Settings
screen appears.
Confirm the
application settings;
then touch Save
(the diskette,
top-right).
An alphanumeric
entry screen
appears, to enter
the Library Record
name.
EN-86
EXPLORER BALANCES
Enter the Record name,
then press 9.
Note: Library Record names
can be 8 characters or less.
A Record is saved message
appears. Press OK, then…
Press Return to Application.
4.16.2 Retrieving a Library Record
Load a Library record from the home screen.
Press the Library bar in the upper right area of the screen.
(It shows the name of the most recently used library file.)
The Library manager popup is now displayed.
Touch the Library Record to highlight it, then touch Recall
to load the record’s settings into the Application.
Then press Close to return to the home screen with the Library
name displayed and the stored parameters active.
4.16.3 Deleting a Stored Library Record
To delete a stored record, follow “Retrieving a Library Record” above, but press Delete instead of Recall.
EXPLORER BALANCES
4.17
EN-87
Additional Features
4.17.1 Weigh Below
The Explorer Balance is equipped with a weigh below hook for weighing below the balance.
Note: before turning the balance over, remove the Pan, Pan Support, Wind Ring/Shield and Draft Shield
elements (if present) to prevent damage.
CAUTION: Do not place the balance on the pan support cone or Load cell Pins
To use this feature, remove power from the balance, then remove the protective cover for the weigh below
opening (2 screws). The protective cover is reversible for easy storage.
The balance can be supported using lab jacks or any other convenient method. Ensure the balance is level and
secure. Power on the Balance, then use a string or wire to attach items to be weighed.
EN-88
5.
5.1
EXPLORER BALANCES
MENU SETTINGS
Menu Navigation
All menu navigation is performed by touching the display. To enter the Menu, touch Menu from any Application
Home screen. The Main menu appears, with buttons for Main, Back and Done. Continue touching the
appropriate list item to navigate to the Menu items or touch a button to change location.
5.1.1 Changing Settings
To change a menu setting, navigate to that setting using the following steps:
Enter the Menu
From any Application screen, Touch Menu.
The Main Menu List appears on the display.
Select the Sub-Menu
Scroll down to the selected item of the Main Menu List
and touch it. The Sub-Menu appears.
Select the Menu Item
Continue until the desired setting is chosen in the
Menu list. Touch the setting to change it.
The changed setting will be displayed as highlighted
for 2 seconds to confirm the changed value.
Exit the Menu and Return to the Current Application
After the setting is confirmed, touch Done to return to the Application.
Note: at any time the Main, Back & Done buttons can be touched to navigate to the desired area of the menu or
return to the current Application.
EXPLORER BALANCES
5.2
EN-89
Main Menu
The Explorer balance Main menu structure is illustrated below.
Calibration
Library
5.3
User
Settings
Balance
Setup
Application
Modes
Weighing
Units
GLP and
GMP Data
I/O
Settings
Diagnostics
Factory
Reset
Lockout
Information
Communication
Calibration
Explorer Balances offer a choice of six calibration methods: Internal Calibration, AutoCal Calibration,
Calibration Adjust, Span Calibration, linearity Calibration, and User Calibration.
Note: Do not disturb the balance during any calibration.
5.3.1
Calibration sub-menu
AutoCal™
Internal
Calibration
Automatic
Calibration
AutoCal™
Adjustment
Span
Calibration
User
Calibration
Calibration
Test
5.3.2 Internal Calibration (AutoCal™)
Calibration is accomplished with the internal calibration mass. Internal calibration can be performed at
any time, provided the balance has warmed up to operating temperature and is level.
With the Balance turned ON and no load on the pan, touch AutoCal™ Internal Calibration.
The Balance begins to calibrate.
Alternately, touch the shortcut Calibration Icon from any Application home screen
to initiate an Internal Calibration.
The display shows the status, then returns to the current application.
To cancel at any time, press Cancel.
5.3.3 Automatic Calibration
When Automatic Calibration is set ON, the balance performs a self calibration when a measured
predefined change occurs (in temperature or time). AutoCal will automatically calibrate the Balance (using
the internal mass) each time a change in temperature significant enough to affect accuracy, or after every
11 hours.
EN-90
EXPLORER BALANCES
5.3.4 AutoCal™ Adjustment
Use this calibration method to adjust the zero calibration point, without affecting the span or linearity
calibration.
Calibration Adjust may be used to adjust the result of the Internal calibration by +100 divisions.
Note: Before making a calibration adjustment, perform an Internal Calibration. To verify whether an
adjustment is needed, place a test mass equal to the span calibration value* on the pan and note the
difference (in divisions) between the nominal mass value and the actual Balance reading. If the difference
is within +1 division, calibration adjustment is not required. If the difference exceeds +1 division,
calibration adjustment is recommended. (*See Table 5-1, below.)
Example:
Actual weight reading:
Expected weight reading:
Difference Weight (d):
Difference weight in digits:
200.014
200.000 (Test mass value)
0.014
–14 (Adjust value)
To perform a Calibration Adjustment, touch AutoCal Adjustment from the Calibration Menu; Enter the
value (positive or negative divisions) to match the difference noted earlier in the procedure and press 9.
Recalibrate using Internal Calibration. After calibration, place the test mass on the pan and verify that the
mass value now matches the displayed value. If not, repeat the procedure until Internal Calibration
reading agrees with the test mass.
Once completed, the balance stores the Adjustment value and the display returns to the current
application.
5.3.5 Span Calibration
Span calibration uses two calibration points, one at zero load and the other at specified full load (span).
Refer to Table 5.1 for Span values.
Note: Factory default settings are shown in bold.
TABLE 5-1 Calibration Masses
Model
EX124
EX224
EX324, M, N
EX223
EX423
EX623
EX1103, M, N
EX2202
EX4202
EX6202
EX10202, M, N
EX6201
EX10201
Span Calibration Points
50g, 100g
100g, 150g, 200g
150g, 200g, 300g
100g, 150g, 200g
200g, 300g, 400g
300g, 400g, 500g, 600g
500g, 1000g
1000g, 2000g
2000g, 3000g, 4000g
3000g, 4000g, 5000g, 6000g
5000g, 10,000g
3000g, 4000g, 5000g, 6000g
5000g, 10,000g
Weight Class
ASTM Class 1
OIML E2
ASTM Class 1
OIML E2
ASTM Class 1
OIML E2
ASTM Class 1
OIML E2
ASTM Class 1
OIML E2
ASTM Class 1
OIML E2
ASTM Class 1
OIML E2
ASTM Class 1
OIML E2
ASTM Class 1
OIML E2
ASTM Class 1
OIML E2
ASTM Class 1
OIML E2
ASTM Class 2
OIML F1
ASTM Class 1
OIML E2
With the balance turned ON and no load on the pan, touch Span Calibration to initiate the procedure.
Additional calibration values to be used are shown on the display. The best accuracy is achieved using
the mass closest to the full span value.
Note: To change the span calibration point, touch the alternate weight shown on the display.
Follow the screen instructions and place the specified calibration weight on the scale when prompted to
do so. When complete, the display shows the Span calibration status and returns to the current
application.
EXPLORER BALANCES
5.3.6 User Calibration
User Calibration is used to calibrate the balance using a user defined mass.
With no load on the scale, press User Calibration from the calibration sub-menu.
The display shows the current full load (span) calibration point and calibration unit of measure.
To change the value to a user-defined weight, touch ENTER VALUE.
Enter the weight via the popup screen. The balance then prompts for the User-defined weight.
Place the specified calibration weight on the balance and the calibration process completes.
The display shows status, then returns to the current application.
5.3.7 Calibration Test
Use Calibration Test to compare a known calibration weight against the stored span calibration data.
With no load on the scale, press Cal Test to begin the process.
The balance captures the zero point, then prompts for the span value.
The display shows status, followed by the difference between the current calibration weight and the
stored calibration data.
After 3 seconds, the display returns to the current application.
EN-91
EN-92
5.4
EXPLORER BALANCES
User Settings
When using the Balance for the first time, enter this sub-menu to set User-defined values like Language,
Display Settings, Volume, Functions Configuration and the Touchless Sensor setup.
5.4.1
User Settings Sub-menu
Language
Volume
Display
Settings
User
Manager
Functions
Configuration
Factory default settings are shown below in bold.
5.4.2 Language
Set the language displayed for menus and displayed messages.
English (default)
German
French
Spanish
Italian
5.4.3 Volume
Controls the built-in Speaker loudness.
Default value= 5 (mid-level)
0= disabled (Off)
Range is 0 to 10
5.4.4 Display Settings
Use this sub-menu to change the setting for:
Screen Brightness: Default value= 50 (mid-level)
Range is 20 to 100
Touch Calibrate
“Touch the screen at the center of the ring. O Press here.”
(First top-left, then bottom-right.)
Auto Dim (Dims the display if no Screen Activity for x minutes)
Default value = OFF (disabled). Range is 1 to 240 minutes
5.4.5 User Manager
Enter this sub-menu to create user profiles if desired.
User Level: Default is Standard User; Administrator is available.
Change PIN: Set password if desired.
Lockout: Can be used by Administrator to lockout the Menu items of a
named User.
Sensor
Setup
Draft Shield
Light
(Analytical
models)
EXPLORER BALANCES
5.4.6
Functions Configuration
Touch Functions Configuration to see a table of Selected and
Available functions. Press > to move a function from Available to
Selected, and press < to move them back.
To move all functions to the right, Press >> and press <<
to move them back.
5.4.7
TouchLess Sensor Setup
If desired, assign Print, Zero, Tare, or Calibrate
to the Touchless Sensors Terminal Right, Terminal Left,
Base Right, and Base Left.
5.4.8
Draft Shield light
Set the status of the lighted Draft Shield feature.
OFF = disabled.
ON = enabled.
EN-93
EN-94
5.5
EXPLORER BALANCES
Balance Setup
Enter this sub-menu to customize Balance display functionality.
5.5.1
Balance Set-up sub-menu
Stability
Indicator Range
Filter Level
Auto Zero
Tracking
Auto Tare
Gross Indicator
Legal For Trade
Graduations
Date & Time
Factory default settings are shown below in bold.
5.5.2 Stable Range
Set the amount the reading can vary while the stability symbol remains on.
0.5 D
1D
2D
3D
5D
= 0.5 graduations
= 1 graduation
= 2 graduations
= 3 graduations
= 5 graduations
Note: When LEGAL FOR TRADE (below) is set to ON, the setting is forced to 1 D.
The setting is locked when the Security Switch is set to the ON position.
5.5.3 Filter level
Set the amount of signal filtering.
LOW
MEDIUM
HIGH
= faster stabilization time with less stability.
= normal stabilization time with normal stability.
= slower stabilization time with more stability.
5.5.4 Auto Zero Tracking
Set the automatic zero tracking functionality.
OFF
0.5 D
1D
3D
= disabled.
= display maintains zero up to a drift of 0.5 graduation
per second
= display maintains zero up to a drift of 1 graduation per
second.
= display maintains zero up to a drift of 3 graduations per
second.
Note: When Legal for Trade is set to ON, the AZT setting is forced to 0.5 D.
The OFF setting is still available. The setting is locked at the current setting when the
security switch is set to the ON position
EXPLORER BALANCES
EN-95
5.5.5 Auto Tare
Set the automatic Tare.
OFF = disabled.
ON = enabled.
5.5.6 Gross Indicator
Set the symbol displayed for gross weights.
OFF = no symbol is displayed.
GROSS = the G symbol is displayed.
BRUTTO = the B symbol is displayed.
5.5.7 Legal For Trade
Use this menu to set the Legal for Trade status.
OFF = standard operation.
ON = operation complies with Weights and Measures regulations.
Note: When Legal for Trade is set to ON, the menu settings are affected as follows:
Calibration Menu:
AutoCal internal Calibration is forced to ON and hidden. Automatic Calibration, and
Calibration Test functions are available. All other functions are hidden.
Balance Setup Menu:
Stability Indicator Range is locked at 1 Division.
Auto Zero Tracking is limited to 0.5 Division and OFF.
Auto Tare and Gross Indicator are locked at their current setting.
Graduations is forced to 1 Division and the menu item is hidden.
Weighing Units menu: all units are locked at their current settings.
Communication Menu:
Stable Weight Only is locked ON.
Numeric Value Only is locked OFF.
Auto print mode selections are limited to OFF, On Stability, and Interval.
Continuous is not available.
Note: The security switch under the Base must be in the locked position to set Legal
for Trade to ON. The security switch must be in the unlocked position to set Legal for
Trade to OFF. See Section 6.
5.5.8 Graduations
Set the displayed readability of the balance.
1 Division = standard readability.
10 Divisions = readability is increased by a factor of 10.
For example, if the standard readability is 0.01g, selecting 10 Divisions will result in a
displayed reading of 0.1g.
5.5.9 Date & Time
Set the current Date and Time.
Change the format (if desired),
then enter the current value.
Select 9 to return to the sub-menu.
EN-96
5.6
EXPLORER BALANCES
Applications
Enter this sub-menu to activate the desired Balance Applications. Only one application can be running at
a time.
(The use of each Application is described in detail in Section 4.)
5.6.1
Turning an Application ON/OFF
Touch line of the desired
application. In the Item
option screen, touch the
Enabled line to toggle it
on or off.
Once an Application is
enabled (turned on) it
may be chosen from the
Applications shortcut
(top-left of all home
screens).
The current menu item status is shown: OFF = disabled, ON = enabled
5.7 Weighing Units
Enter this sub-menu to activate the desired units of measure.
Note: Due to national laws, the indicator may not include some of the units of measure listed.
5.7.1
Units Sub-menu
milligram
gram
kilogram
carat
ounce
ounce troy
pound
pennyweight
grain
Newton
momme
mesgal
Tael (HK)
Tael (SG)
Tael (TW)
tical
tola
baht
Custom Unit 1
Custom Unit 2
Custom Unit 3
Note: If LEGAL FOR TRADE is set to ON, the Unit menu is locked.
EXPLORER BALANCES
EN-97
5.7.2 Turning a Unit ON/OFF
Select the desired unit, then touch the item to
toggle it either on or off.
The current menu item status is shown.
OFF
= disabled
ON
= enabled
5.7.3 Custom Units
Use each Custom Unit to display weight in an alternative unit of measure. The custom unit is defined using a
conversion factor, where the conversion factor is the number of custom units per kilogram expressed in scientific
notation (Factor x 10^Exponent).
For example: To display weight in troy ounces (32.15075 troy ounces per kilogram)
enter a Factor of 0.321508 and an Exponent of 2.
Set the status.
OFF
ON
= disabled
= enabled
When Custom Unit is set to ON, the Factor, Exponent and Least Significant Digit must be set.
Factor
Set the conversion factor using the numeric keypad.
Settings of 0.00001 to 1.9999999 are available. The default setting is 1.000000
Exponent
Set the factor multiplier.
0
1
2
3
–3
–2
–1
0
= multiply the Factor by 1 (1x10 )
= multiply the Factor by 10 (1x101)
= multiply the Factor by 100 (1x10²)
= multiply the Factor by 1000 (1x10³)
= divide the Factor by 1000 (1x10⁻³)
= divide the Factor by 100 (1x10⁻²)
= divide the Factor by 10 (1x10⁻¹)
Least Significant Digit
Set the graduation.
Settings of 0.00001, 0.00002, 0.00005, 0.0001, 0.0002, 0.0005, 0.001, 0.002,
0.005, 0.01, 0.02, 0.05, 0.1, 0.2, 0.5, 1, 2, 5, 10, 20, 50, 100, 200, 500 and 1000
are available.
Note: Least Significant Digit setting selections are dependent on the Factor and Exponent settings.
Selections are limited.
EN-98
EXPLORER BALANCES
5.8 GLP and GMP Data
Enter this menu to set the Good laboratory Practices (GLP) data.
5.8.1
GLP Data Sub-menu
5.8.2 Header
Enables the printing of GLP headings. There are up to 5 headings available.
Alphanumeric settings up to 25 characters are available for
each Header setting. .
5.8.3 Balance Name
Set the balance identification.
Alphanumeric settings up to 25 characters are available. The default setting is
blank.
5.8.4 User Name
Set the user identification.
Alphanumeric settings up to 25 characters are available. The default setting is
blank.
5.8.5 Project Name
Enter this menu to set the Project identification.
Alphanumeric settings up to 25 characters are available. The default setting is blank.
EXPLORER BALANCES
EN-99
5.9 Communication
Enter this menu to define external communication methods and to set printing
parameters.
Data may be output to either a printer or PC (See Section 5.9.8 for output samples.)
Factory default settings are shown in bold.
Note: The COM3 menu is only available if the optional Interface is installed.
5.9.1
Communication Sub-menu
RS232
Standard
USB
Choosing an item brings up another menu level (RS232 shown):
Device Settings
Print Settings
Choosing a Settings item brings up yet another menu level; the device settings are dependent on the
COM chosen (RS232 shown)
Device Settings Menu: (RS232 shown)
5.9.2 Baud Rate
Set the baud rate (bits per second).
2400
4800
9600
19200
38400
= 2400 bps
= 4800 bps
= 9600 bps
= 19200 bps
= 38400 bps
5.9.3 Transmission
Set the data bits, stop bit, and parity.
7 EVEN 1
7 ODD 1
7 NONE 1
8 NONE 1
7 EVEN 2
7 ODD 2
7 NONE 2
8 NONE 2
= 7 data bits, even parity
= 7 data bits, odd parity
= 7 data bits, no parity
= 8 data bits, no parity
= 7 data bits, even parity
= 7 data bits, odd parity
= 7 data bits, no parity
= 8 data bits, no parity
EN-100
EXPLORER BALANCES
5.9.4 Handshake
Set the flow control method.
NONE
XON-XOFF
HARDWARE
= no handshaking
= XON/XOFF handshaking
= hardware handshaking (COM1 menu only)
5.9.5 Alternate Command
Enter this sub-menu to set a different command character for the P (Print), T (Tare) or Z (Zero)
commands.
Note: The selected character can only be used for one command.
Alternate Print Command
Set the alternate command character for Print.
Settings of A to Z are available. The default setting is P.
Alternate Tare Command
Set the alternate command character for Tare.
Settings of A to Z are available. The default setting is T.
Alternate Zero Command
Set the alternate command character for Zero.
Settings of A to Z are available. The default setting is Z.
Print Settings Menu:
Note: If LEGAL FOR TRADE is set to ON, the print Output-Stable setting is not reset.
5.9.6
Print Output
Print Stable Weight Only
Set the printing criteria.
OFF
ON
= values are printed immediately, regardless of stability.
= values are printed only when the stability criteria are met.
Print Numeric Value Only
Set the printing criteria.
OFF
ON
= All data values are printed
= Only numeric data values are printed
EXPLORER BALANCES
EN-101
5.9.7 Auto Print
Set the automatic printing functionality.
OFF
ON STABLE
INTERVAL
CONTINUOUS
= disabled
= printing occurs each time the stability criteria are met.
= printing occurs at the defined time interval.
= printing occurs continuously.
When ON STABLE is selected, set the conditions for printing.
LOAD
LOAD ZERO
= Prints when the displayed load is stable.
= Prints when the displayed load or zero reading is stable.
When INTERVAL is selected, set the time interval using the numeric keypad.
Settings of 1 to 3600 seconds are available.
5.9.8 Print Calibration Data
Set the automatic Calibration Data printing functionality.
OFF
ON
= disabled
= enabled
5.9.9 Print Content
Enter this sub-menu to define the content of the printed data.
See details below:
EN-102
EXPLORER BALANCES
Header
Set the status.
Application Name
Set the status.
OFF
ON
USER
USER
USER
USER
USER
= the user defined header is not printed.
= the user defined header is printed.
DEFINED
DEFINED
DEFINED
DEFINED
DEFINED
TEXT
TEXT
TEXT
TEXT
TEXT
NOTE: The header information must be defined
using the H x “text” interface command.
(See Section 5.1.)
Date and Time
Set the status.
OFF
ON
= the time and date are not printed.
= the time and date are printed.
01/31/10
OFF
ON
= the Application Name is not printed.
= the Application Name is printed.
Application Name: XXXXXXXXXXXX
Result
Set the status.
OFF
ON
= the displayed reading is not printed.
= the displayed reading is printed.
NUMERIC ONLY = only the numeric portion of
the displayed reading is printed.
Gross
Set the status.
OFF
ON
= the gross weight is not printed.
= the gross weight is printed.
12:30 PM
12.000 kg
Balance ID
Set the status.
OFF
ON
= the Balance ID value is not printed.
= the Balance ID value is printed.
Balance Id:
XXXXXXXXXXXX
= the Balance Name is not printed.
= the Balance Name is printed.
User Name
Set the status.
= the User Name is not printed.
= the User Name is printed.
User Name:
XXXXXXXXXXXX
OFF
ON
= the Project Name is not printed.
= the Project Name is printed.
Project Name: XXXXXXXXXXXX
= the tare weight is not printed.
= the tare weight is printed.
Information
Set the status.
OFF
ON
= the reference info is not printed.
= the reference info is printed.
Note: See below for more clarification
Signature Line
Set the status.
OFF
ON
Project Name
Set the status.
OFF
ON
= the net weight is not printed.
= the net weight is printed.
Tare
Set the status.
Balance Name:
XXXXXXXXXXXXXX
OFF
ON
OFF
ON
10.000 kg NET
Balance Name
Set the status.
OFF
ON
Net
Set the status.
= the Signature Line is not printed.
= the Signature Line is printed.
Signature:__________________
EXPLORER BALANCES
EN-103
NOTE: The Information is dependent on the application and the ACCUMULATE setting.
Examples are shown below.
Mode
Accumulate set OFF
Accumulate set ON
Weighing
None
Counting
APW: 0.100 kg
APW: 0.100 kg
N: 10
Total: 1000 Pcs
Avg: 100 Pcs
Std: 1 Pcs
Min: 99 Pcs
Max: 101 Pcs
Diff: 2 Pcs
Percent
Ref Wt: 1.23 kg
Ref Wt: 1.23 kg
Check
Weighing
Under: 0.995 kg
Over: 1.005 kg
Under: 0.995 kg
Over: 1.005 kg
N: 10
Total: 10.000 kg
Avg: 1.000 kg
Std: 0.001 kg
Min: 0.999 kg
Max: 1.001 kg
Diff: 0.002 kg
Dynamic
Level: 0
Level: 0
N: 10
Total: 10.000 kg
Avg: 1.000 kg
Std: 0.001 kg
Min: 0.999 kg
Max: 1.001 kg
Diff: 0.002 kg
N: 10
Total: 10.000 kg
Avg: 1.000 kg
Std: 0.001 kg
Min: 0.999 kg
Max: 1.001 kg
Diff: 0.002 kg
5.9.10 Print Layout
This sub-menu is used to define the format of the data output to a printer or computer.
Format
Set the printing format.
MULTI
= a multiple line printout is generated. A CRLF is added after each data
output.
SINGLE
= a single line printout is generated. A TAB delimiter is added between
each data output.
Feed
Set the paper feed.
NONE
= the paper remains in its current position after printing.
LINE
= move the paper up one line after printing.
4 LINE
= move the paper up four lines after printing.
FORM
= a form feed is appended to the output.
5.9.11 Data Transfer Function
Output weighing results directly to a PC application. Setup is easy and
no additional software is required.
OFF
ON
= do not print.
= print the specified settings.
EN-104
EXPLORER BALANCES
Click the Start Menu in Windows XP system
and click “Settings” –>open Control Panel.
Double click Accessibility Options in
Control Panel.
Select the General tab in
Accessibility Options.
Check Use Serial Keys, and click the Settings button.
Select the Serial Port, and set the Baud rate to 9600.
After selecting, click OK to close setting for serial keys.
Close the Control Panel.
Run Excel to open one blank sheet. Focus the cursor on one item.
At this time, if scale sends data to the PC through the RS232 port, the data
will be put into the cell, and the cursor will automatically move to the next
vertical cell.
Note: If the weighing value is a negative number, set the target cell in
TEXT format. Otherwise, Excel will not distinguish it as a negative number.
EXPLORER BALANCES
EN-105
5.10 Library
When an item is processed on a regular basis, the item’s data may be stored in memory for future use. This
memory is referred to as the Balance’s Library.
Refer to Section 4 for details.
5.11 I/O Settings
Enter this menu to set the optional input and output device parameters.
Set the function to be controlled by an optional external input device, such as a
footswitch. There are four possible settings for each.
OFF
ZERO
TARE
PRINT
= disabled
= equivalent to pressing the ZERO button.
= equivalent to pressing the TARE button.
= equivalent to pressing the PRINT button.
5.12 Diagnostics
Use this menu to enable the Diagnostics (troubleshooting) functions, and to enter the Service menu;
5.12.1 Level Bubble Light
To verify proper operation of the illuminated Level Bubble.
When selected, this light should blink.
5.12.2 Draft Shield Light (Analytical models)
To verify proper operation of the Draft Shield Light.
When selected, this light should blink.
5.12.3 Sensors
To verify proper operation of each Touchless Sensor.
When operated, each sensor should light and make a sound.
5.12.4 Service Menu
Used to enter the Ohaus Service menu (Service personnel only). A password is required
to access this menu;
EN-106
EXPLORER BALANCES
5.13 Factory Reset
Use this sub-menu to reset the menus to their Factory default settings.
5.13.1 Factory Reset Sub-menu
Calibration
Reset
User Settings
Reset
Balance Setup
Reset
Application
Modes Reset
GLP and GMP
Data Reset
Communication
Reset
I-O Settings
Reset
Reset All
5.13.2 Reset Calibration
Select YES to return all Calibration menu items to their factory settings.
5.13.3 Reset User Settings
Select YES to return all User Settings menu items to their factory settings.
5.13.4 Reset Balance Setup
Select YES to return all Balance Setup menu items to their factory settings.
5.13.5 Reset Application Modes
Select YES to return all Application Modes menu items to their factory settings.
5.13.6 Reset Weighing Units
Select YES to return all Weighing Units menu items to their factory settings.
5.13.7 Reset GLP and GMP Data
Select YES to return all GLP and GMP Data menu items to their factory settings.
5.13.8 Reset Communication
Select YES to return all Communication menu items to their factory settings.
5.13.9 Reset I/O Settings
Select YES to return all I/O Settings menu items to their factory settings.
5.13.10 Reset All (Global Reset)
Select YES to return all the menu items to their factory settings.
Weighing Units
Reset
EXPLORER BALANCES
EN-107
5.14 Lockout
Use this menu to prevent unauthorized changes to menu settings. When the menu is locked and the
security switch is set to ON, the locked menus can be viewed but not changed. Factory default settings
are shown in bold.
5.14.1 Lockout Sub-menu
Calibration
Lockout
GLP and GMP
Data Lockout
User Settings
Lockout
Balance Setup
Lockout
Application
Modes Lockout
Communication
Lockout
Library
Lockout
I/O Settings
Lockout
5.14.2 Lock Calibration
Set the status.
OFF
ON
= the Calibration menu is not locked.
= the Calibration menu is locked.
5.14.3 Lock User Settings
Set the status.
OFF
ON
= the User Settings menu is not locked.
= the User Settings menu is locked.
5.14.4 Lock Balance Setup
Set the status.
OFF
ON
= the Balance Setup menu is not locked.
= the Balance Setup menu is locked.
5.14.5 Lock Application Modes
Set the status.
OFF
ON
= the Applications menu is not locked.
= the Applications menu is locked.
5.14.6 Lock Weighing Units
Set the status.
OFF
ON
= the Units menu is not locked.
= the Units menu is locked.
5.14.7 Lock GLP and GMP Data
Set the status.
OFF
ON
= the GLP and GMP Data menu is not locked.
= the GLP and GMP Data menu is locked.
Weighing Units
Lockout
Factory Reset
Lockout
EN-108
EXPLORER BALANCES
5.14.8 Lock Communication
Set the status.
OFF
ON
= the Communication menu is not locked.
= the Communication menu is locked.
5.14.9 Lock Library
Set the status.
OFF
ON
= the Library menu is not locked.
= the Library menu is locked.
5.14.10 Lock I/O Settings
Set the status.
OFF
ON
= the I/O Settings menu is not locked.
= the I/O Settings menu is locked.
5.14.11 Factory Reset
Set the status.
OFF
ON
= the Factory Reset menu is not locked.
= the Factory Reset menu is locked.
5.15 Securing the Menu and Key Lock menu settings
A slide switch is used to secure the Lock menu settings. When the switch is set to the ON position, the Lock menu
settings may be viewed but not changed. This switch is located under the Base.
Set the position of the switch to ON by sliding the external Lock Switch to LOCKED as shown in Section 6.
When the switch is in the ON position, the start up display includes the LOCK ON message.
Note: This switch is also used in conjunction with the Legal for Trade menu item. When the Legal for Trade menu
is set to ON, the switch must be set to the ON position to prevent calibration and changes to metrologically
significant settings. Refer to Section 6 for more information.
EXPLORER BALANCES
EN-109
5.16 Information
Information is available from any application as well as from the Main Menu. A brief descrtiption of the
item selected is displayed.
This feature is menu based.
5.16.1 Using Information
• Touch the Info Icon to bring up
the menu (UPPER RIGHT)
• Information topics, beginning with
Level Assist
• Touch the word or the “+” in front
of it, to open a topic.
• Touch x to close the Information
topic.
EN-110
6.
EXPLORER BALANCES
LEGAL FOR TRADE
When the balance is used in trade or a legally controlled application it must be set up, verified and sealed in
accordance with local weights and measures regulations. It is the responsibility of the purchaser to ensure that all
pertinent legal requirements are met.
6.1
Settings
Before verification and sealing, perform the following steps in Order:
1. Verify that the menu settings meet the local weights and measures regulations.
2. Units menu should be reviewed. Verify the units turned On meet the local weights and measures
regulations.
3. Perform a calibration as explained in Section 5.
3. Set the position of the Security Switch to the locked position.
4. Set Legal for Trade to ON in the Balance Setup menu.
6.2
Verification
A weights and measures official or authorized service agent must perform the verification procedure.
6.3
Sealing
After the Balance has been verified, it must be sealed to prevent undetected access to the legally controlled
settings. Before sealing the device, ensure that the security switch is in the Locked position and the Legal for Trade
setting in the Balance Setup menu has been set to ON.
If using a wire seal, pass the sealing wire through the holes in the security switch and Bottom Housing as shown.
If using a paper seal, place the seal over the security switch and Bottom Housing as shown.
Un-Locked
Locked with Wire Seal
Locked with Paper Seal
EXPLORER BALANCES
7.
7.1
PRINTING
Connecting, Configuring and Testing the Printer/Computer Interface
Use the built-in RS-232 Port to connect either to a computer or a printer.
If connecting to a computer, use HyperTerminal or similar software.
(Find HyperTerminal under Accessories/Communications in Windows XP.)
Connect to the computer with a standard (straight-through) serial cable.
Choose New Connection, “connect using” COM1 (or available COM port).
Select Baud=9600; Parity=8 None; Stop=1; Handshaking=None. Click OK.
Choose Properties/Settings, then ASCII Setup. Check boxes as illustrated:
(Send line ends…; Echo typed characters…; Wrap lines…)
Use RS232 Interface Commands (Section 9.6.1) to control the balance from a PC.
Note: When the HyperTerminal configuration is complete, it will automatically
print the results of a Cal Test operation, and echo print commands sent to the scale.
Printer Connection
Two printers compatible with Explorer Balances are available from Ohaus.
(See Section 9.) Connect a straight-through serial cable to the scale’s RS232 port,
or connect using the scale’s USB port.
See sample Print Output Formats below.
EN-111
EN-112
7.2
EXPLORER BALANCES
Printout Examples
Examples for each Application are shown with all items turned ON in the Print Content menu. The default values
for Header lines 1-5 are also shown.
Weighing
Company Name
Address 1
Address 2
Address 3
Address 4
12/7/2010 3:00 PM
Balance ID:
Balance Name: EXPLORER
User Name:
Project Name:
Application: Weighing
Result:
2.771 g Net
Gross:
4.148 g
Net:
2.771 g Net
Tare:
1.377 g T
Minimum Weight: 0.000 g
Signature:____________
Weighing->Statistics
Company Name
Address 1
Address 2
Address 3
Address 4
12/7/2010 3:04 PM
Balance ID:
Balance Name: EXPLORER
User Name:
Project Name:
Statistics
Number of Samples: 3
Total: 2.737 g
Average: 0.912 g
Standard Deviation: 0.372 g
Minimum: 0.457 g
Maximum: 1.369 g
Difference: 0.912 g
Signature:____________
Parts Counting->Standard
Company Name
Address 1
Address 2
Address 3
Address 4
12/7/2010 3:20 PM
Balance ID:
Balance Name: EXPLORER
User Name:
Project Name:
Application: Parts Counting
Quantity:
3 PCS Net
Gross:
2.325 g
Net:
1.379 g Net
Tare:
0.946 g T
APW: 0.4551 g
Samples: 1 PCS
Signature:____________
Parts Counting->Check
Company Name
Address 1
Address 2
Address 3
Address 4
12/7/2010 3:21 PM
Balance ID:
Balance Name: EXPLORER
User Name:
Project Name:
Application: Check Counting
Quantity:
3 PCS Net
Status: Under
Gross:
2.323 g
Net:
1.377 g Net
Tare:
0.946 g T
APW: 0.4551 g
Samples: 1 PCS
Over Limit: 30 PCS
Under Limit: 10 PCS
Signature:____________
EXPLORER BALANCES
Parts Counting->Fill
Company Name
Address 1
Address 2
Address 3
Address 4
12/7/2010 3:23 PM
Balance ID:
Balance Name: EXPLORER
User Name:
Project Name:
Application: Fill Counting
Quantity:
3 PCS Net
Gross:
2.324 g
Net:
1.378 g Net
Tare:
0.946 g T
APW: 0.4551 g
Samples: 1 PCS
Target: 4 PCS
Difference: -1 PCS
Signature:____________
Percent Weighing
Company Name
Address 1
Address 2
Address 3
Address 4
12/7/2010 3:27 PM
Balance ID:
Balance Name: EXPLORER
User Name:
Project Name:
Application: Percent Weigh
Percentage:
91 % Net
Gross:
1.401 g
Net:
0.455 g Net
Tare:
0.946 g T
Reference: 0.500 g
Reference Adjust: 100 %
Difference: -0.045 g
Difference: -9.00 %
Signature:____________
EN-113
Parts Counting->Statistics
Company Name
Address 1
Address 2
Address 3
Address 4
12/7/2010 3:11 PM
Balance ID:
Balance Name: EXPLORER
User Name:
Project Name:
Statistics
Number of Samples: 3
Total: 6 PCS
Average: 2 PCS
Standard Deviation: 1 PCS
Minimum: 1 PCS
Maximum: 3 PCS
Difference: 2 PCS
Signature:____________
EN-114
EXPLORER BALANCES
Check Weigh->Over Under
Company Name
Address 1
Address 2
Address 3
Address 4
12/7/2010 3:32 PM
Balance ID:
Balance Name: EXPLORER
User Name:
Project Name:
Application: Check Weighing
Result: Accept
Gross:
1.401 g
Net:
0.455 g Net
Tare:
0.946 g T
Over Limit: 619.999 g
Under Limit: 0.010 g
Signature:____________
Check Weigh-> Nom, Wt Tol
Company Name
Address 1
Address 2
Address 3
Address 4
12/7/2010 3:34 PM
Balance ID:
Balance Name: EXPLORER
User Name:
Project Name:
Application: Check Weighing
Result: Under
Gross:
1.401 g
Net:
0.455 g Net
Tare:
0.946 g T
Target: 310.000 g
+ Tolerance (wt.): 155.000 g
- Tolerance (wt.): 155.000 g
Signature:____________
Check Weigh-> Nom, % Tol
Company Name
Address 1
Address 2
Address 3
Address 4
12/7/2010 3:35 PM
Balance ID:
Balance Name: EXPLORER
User Name:
Project Name:
Application: Check Weighing
Result: Under
Gross:
1.399 g
Net:
0.453 g Net
Tare:
0.946 g T
Target: 310.000 g
+ Tolerance (%): 50.00 %
- Tolerance (%): 50.00 %
Signature:____________
Check Weighing ->Statistics
Company Name
Address 1
Address 2
Address 3
Address 4
12/7/2010 3:37 PM
Balance ID:
Balance Name: EXPLORER
User Name:
Project Name:
Statistics
Number of Samples: 3
Total: 2.725 g
Average: 0.908 g
Standard Deviation: 0.372 g
Minimum: 0.453 g
Maximum: 1.364 g
Difference: 0.911 g
Signature:____________
EXPLORER BALANCES
EN-115
Dynamic Weighing
Company Name
Address 1
Address 2
Address 3
Address 4
12/7/2010 3:38 PM
Balance ID:
Balance Name: EXPLORER
User Name:
Project Name:
Application: Dynamic Weigh
Averaging Time: 10 seconds
Gross:
2.310 g
Net:
1.364 g Net
Tare:
0.946 g T
Final weight: 12.643 g
Signature:____________
Dynamic ->Statistics
Company Name
Address 1
Address 2
Address 3
Address 4
12/7/2010 3:41 PM
Balance ID:
Balance Name: EXPLORER
User Name:
Project Name:
Statistics
Number of Samples: 3
Total: 181.092 g
Average: 60.364 g
Standard Deviation: 40.027 g
Minimum: 31.404 g
Maximum: 116.966 g
Difference: 85.563 g
Signature:____________
Filling
Company Name
Address 1
Address 2
Address 3
Address 4
12/7/2010 3:42 PM
Balance ID:
Balance Name: EXPLORER
User Name:
Project Name:
Application: Filling
Result:
1.825 g Net
Gross:
2.771 g
Net:
1.825 g Net
Tare:
0.946 g T
Target: 10.000 g
Diff Weight g: -8.175 g
Diff Percent %: -81.8 %
Signature:____________
Filling->Statistics
Company Name
Address 1
Address 2
Address 3
Address 4
12/7/2010 3:44 PM
Balance ID:
Balance Name: EXPLORER
User Name:
Project Name:
Statistics
Number of Samples: 3
Total: 5.021 g
Average: 1.674 g
Standard Deviation: 0.435 g
Minimum: 1.366 g
Maximum: 2.289 g
Difference: 0.923 g
Signature:____________
EN-116
EXPLORER BALANCES
Totalization
Company Name
Address 1
Address 2
Address 3
Address 4
12/7/2010 3:46 PM
Balance ID:
Balance Name: EXPLORER
User Name:
Project Name:
Application: Totalization
Total:
5.939 g NET
Gross:
2.778 g
Net:
1.832 g Net
Tare:
0.946 g T
Samples: 4
Average: 1.485 g
Standard Deviation: 0.382 g
Minimum: 0.911 g
Maximum: 1.832 g
Range: 0.921 g
Signature:____________
Formulation->Free Formulat
Company Name
Address 1
Address 2
Address 3
Address 4
12/7/2010 3:50 PM
Balance ID:
Balance Name: EXPLORER
User Name: xiao
Project Name: AURORA
Application: Formulation
Result:
1.345 g Net
Gross:
2.291 g
Net:
1.345 g Net
Tare:
0.946 g T
Item 1: 1.833 g
Item 2: 0.888 g
Item 3: 1.344 g
Total: 4.065 g
Signature:____________
Formulation->Recipe
Company Name
Address 1
Address 2
Address 3
Address 4
12/7/2010 3:54 PM
Balance ID:
Balance Name: EXPLORER
User Name:
Project Name: AURORA
Application: Formulation
Total Target: 3.000 g
Total Actual: 5.401 g
Total Diff(%): 80.0 %
Item 3
Target: 1.000 g
Actual: 1.345 g
Diff(%): 34.5 %
Item 2
Target: 1.000 g
Actual: 1.800 g
Diff(%): 80.0 %
Item 1
Target: 1.000 g
Actual: 2.256 g
Diff(%): 125.6 %
Signature:____________
EXPLORER BALANCES
Differential
Company Name
Address 1
Address 2
Address 3
Address 4
12/7/2010 3:57 PM
Balance ID:
Balance Name: EXPLORER
User Name:
Project Name:
Application: Differential
Result:
1.341 g Net
Gross:
2.287 g
Net:
1.341 g Net
Tare:
0.946 g T
Item Name: Item 3
Initial wt.: 1.338 g
Final wt.: 1.343 g
Difference: -0.005 g
Difference: -0.4 %
Signature:____________
Density Determination
Company Name
Address 1
Address 2
Address 3
Address 4
12/7/2010 4:01 PM
Balance ID:
Balance Name: EXPLORER
User Name:
Project Name:
Application: Density (Solid)
Density Determ: 1.9668 g/cc
Gross:
1.832 g
Net:
0.886 g Net
Tare:
0.946 g T
Weight in air: 1.799 g
Weight in liquid: 0.886 g
Auxiliary liquid: Water
Water Temp.: 20.0 C
Porous Material: Off
Signature:____________
EN-117
Peak Hold
Company Name
Address 1
Address 2
Address 3
Address 4
12/7/2010 4:00 PM
Balance ID:
Balance Name: EXPLORER
User Name:
Project Name:
Application: Peak Hold
Peak weight: 115.722 g
Gross:
0.921 g
Net:
-0.025 g Net
Tare:
0.946 g T
On Stability: No
Signature:____________
EN-118
EXPLORER BALANCES
Pipette Adjustment
Company Name
Address 1
Address 2
Address 3
Address 4
12/7/2010 4:04 PM
Balance ID:
Balance Name: EXPLORER
User Name:
Project Name:
Application: Pipette Adjust
Result: Fail
Nominal Volume: 2 ml
Inaccuracy: 77.12 %
Imprecision: 0.68 %
Water Temp.: 20.0 C
Barometric Unit: 1.0 ATM
Pipette Name:
Pipette Number:
Number of Samples: 4
> +2S: 0.00 %, 0
> +1S: 25.00 %, 1
+1S > Mean > -1S: 75.0 %, 3
< -1S: 0.00 %, 0
< -2S: 0.00 %, 0
Signature:____________
Ingredient Costing
Company Name
Address 1
Address 2
Address 3
Address 4
12/7/2010 4:09 PM
Balance ID:
Balance Name: EXPLORER
User Name:
Project Name:
Application: Ingredient Cost
Total Items: 4
Total Weight: 4.570 g
Total Cost: 13.73 $
Item 1
Item Weight: 0.454 g
Unit Cost: 1.00 $/g
Item's Total Cost: 0.45 $
Item 2
Item Weight: 0.910 g
Unit Cost: 2.00 $/g
Item's Total Cost: 1.82 $
Signature:____________
EXPLORER BALANCES
SQC
Company Name
Address 1
Address 2
Address 3
Address 4
12/7/2010 4:14 PM
Balance ID:
Balance Name: EXPLORER
User Name:
Project Name:
Application: SQC
Batch Name: x
Samples: 4
Unit : g
Nominal Weight: 310.000 g
Average: 1.141 g
Maximum: 1.834 g
Minimum: 0.454 g
Standard Deviation: 0.514 g
Relative Deviation: 0.451 g
Range: 1.380 g
> +T2: 0.00 %, 0
> +T1: 0.00 %, 0
+T1 > N > -T1: 0.00 %, 0
< -T1: 0.00 %, 0
< -T2: 100.00 %, 4
Signature:____________
EN-119
EN-120
EXPLORER BALANCES
Span Calibration and User Calibration:
Span Calibration
Company Name
Address 1
Address 2
Address 3
Address 4
12/6/2010 4:33 AM
---Span Calibration--Balance ID:
Balance Name: EXPLORER
User Name:
Project Name:
New Calibration: 1999.99 g
Old Calibration: 2000.00 g
Difference: 0.01 g
Weight ID__________
Signature:____________
--------------End---------------
Content
HEADER 1
HEADER 2
HEADER 3
HEADER 4
HEADER 5
TIME
RESULT
RESULT
RESULT
RESULT
RESULT
User Calibration
Company Name
Address 1
Address 2
Address 3
Address 4
12/6/2010 4:36 AM
---User Calibration--Balance ID:
Balance Name: EXPLORER
User Name:
Project Name:
New Calibration: 1999.99 g
Old Calibration: 2000.00 g
Difference: 0.01 g
Weight ID__________
Signature:____________
--------------End--------------
The CAL TEST printout is automatically printed when a Calibration Test is performed.
Calibration Test
Company Name
Address 1
Address 2
Address 3
Address 4
12/6/2010 4:33 AM
---Calibration test--New Calibration: 3999.97 g
Old Calibration: 4000.00 g
Difference: 0.03 g
Weight ID__________
--------------End--------------
Content
HEADER 1
HEADER 2
HEADER 3
HEADER 4
HEADER 5
TIME
RESULT
RESULT
RESULT
RESULT
RESULT
7.3
Output Format
The Result Data, and G/N/T data, is output in the following format.
Field:
Length:
Label 1 Space 2 Weight 3 Space2 Unit 4
1
11
1
Space Stability 5 Space G/N 6 Space
1
≤1
≤1
≤3
0
Term.
Characters 7
≤8
1. In certain cases, a Label field of up to 11 characters is included.
2. Each field is followed by a single delimiting space (ASCII 32).
3. The Weight field is 9 right justified characters. If the value is negative, the “–“ character is located at the
immediate left of the most significant digit.
4. The Unit field contains the unit of measure abbreviation up to 5 characters.
5. The Stability field contains the “?” character if the weight reading is not stable. The Stability field and the
following Space field are omitted if the weight reading is stable.
6. The G/N field contains the net or gross indication. For net weights, the field contains “NET”. For gross
weights, the field contains nothing, “G” or “B”, depending on the GROSS INDICATOR menu setting.
7. The Termination Characters field contains CRLF, Four CRLF or Form Feed (ASCII 12), depending on
the LINE FEED menu setting.
EXPLORER BALANCES
8.
MAINTENANCE
8.1
Calibration
EN-121
Periodically verify calibration by placing an accurate weight on the balance and viewing the result. If calibration is
required, perform a Balance internal calibration.
8.2
Cleaning
Disconnect the Explorer Balance from the power supply before cleaning.
Make sure that no liquid enters the interior of the Terminal or Base.
Clean the Balance at regular intervals.
Housing surfaces may be cleaned with a lint-free cloth slightly dampened with water or a mild
cleaning agent.
Glass surfaces may be cleaned with a commercial glass cleaner.
Do not use solvents, harsh chemicals, ammonia or abrasive cleaning agents.
8.3
Troubleshooting
TABLE 8-1. TROUBLESHOOTING
Symptom / Display
8.4
Possible Cause
Remedy
Balance will not turn on No power to Balance
Verify connection and voltage
Poor accuracy
Improper calibration
Unstable environment
Perform calibration
Move balance to suitable location
Cannot calibrate
Calibration Menu locked
LFT set to on
Unstable environment
Incorrect calibration masses
Turn Calibration menu lock off
Turn LFT off
Move balance to suitable location
Use correct calibration masses
Cannot change menu
settings
Sub-menu locked
LFT set to on
Unlock sub-menu
Turn LFT off
Low Reference weight
Reference weight too small
The weight on the pan is too small to
define a valid reference weight.
Increase sample size
Invalid Piece Weight
Average piece weight is too small
Increase average piece weight
Operation Timeout
Weight reading is not stable
Move balance to suitable location
------
Busy (tare, zero, printing)
Wait until completion
Service Information
If the troubleshooting section does not resolve your problem, contact an Authorized Ohaus Service Agent. For
service assistance in the United States, call toll-free 1-800-526-0659 between 8:00 AM and 5:00 PM Eastern
Standard Time. An Ohaus Product Service Specialist will be available to assist you. Outside the USA, pleas visit
our website www.ohaus.com to locate the Ohaus office nearest you.
EN-122
9.
TECHNICAL DATA
9.1
Specifications
Ambient conditions
• Indoor use only
• Altitude: Up to 2000 m
• Specified Temperature range: 10°C to 30°C
• Humidity: maximum relative humidity 80 % for temperatures up to 31°C
decreasing linearly to 50% relative humidity at 40°C
• Mains supply voltage fluctuations: up to ±10% of the nominal voltage
• Installation category II
• Pollution degree: 2
• Operability is assured at ambient temperatures between 5°C and 40°C
Materials
• Base Housing; die-cast Aluminum, Painted
• Top Housing, Base, Terminal: plastic (ABS)
• Weighing Platforms: 18/10 stainless steel
• In-use Cover, Terminal: plastic (PET)
• Draft Shield; Glass, plastic (ABS)
EXPLORER BALANCES
EXPLORER BALANCES
EN-123
TABLE 9-1. SPECIFICATIONS
MODEL
Capacity
Readability d
Repeatability (std. dev.) (g)
Linearity (g)
Span Calibration Points (g)
Weighing units
Applications
Stabilization time (typical)
Display
Display size
Backlight
Controls
Communication
Balance power input
Power supply
Platform size (diameter)
Terminal Housing dimensions
(W x D x H)
Base Housing dimensions
(W x D x H)
Assembled dimensions
(W x D x H)
Net weight
Shipping weight
EX224
EX324
220 g
320 g
0.1 mg
0.0001 g
+ 0.0002 g
50g, 100g
100g, 150g, 200g
150g, 200g, 300g
Baht, carat, grain, gram, milligram, mesgal, momme, Newton, ounce,
pennyweight, Tael (Hong Kong), Tael, (Singapore), Tael (Taiwan), tical,
tola, troy ounce, custom (3)
Weighing, Parts Counting, Percent Weighing, Check Weighing, Dynamic
Weighing, Filling, Totalization, Formulation, Differential Weighing, Peak
Hold, Density Determination, Pipette Adjustment, Ingredient Costing,
Statistical Quality Control
Within 2 seconds
Within 3 seconds
Full-Color VGA Graphic LCD
5.7 in / 14.5 cm (diagonal)
White LED
4-wire resistive touch screen
RS-232, USB
12 VDC, 0.5A
AC Adapter Input: 100-240 VAC 0.6A 50-60 Hz
AC Adapter Output: 12 VDC 1.5A
90 mm
3.5 in
195 x 155 x 68 mm
7.7 x 6.1 x 2.7 inch
230 x 260 x 350 mm
9.1 x 10.2 x 13.8 inch
230 x 393 x 350 mm
9.1 x 15.5 x 13.8 inch
6.9 kg
15.2 lb
9.7 kg
21.3 lb
Note: Default Calibration weights shown in Bold
EX124
120 g
EN-124
EXPLORER BALANCES
TABLE 9-2. SPECIFICATIONS (Cont.)
MODEL
Capacity
Readability d
Repeatability (std. dev.)
Linearity
Span Calibration Points
Weighing units
Applications
Stabilization time (typical)
Display
Display size
Backlight
Controls
Communication
Balance power input
Power supply
Platform size (diameter)
Terminal Housing dimensions
(W x D x H)
Base Housing dimensions
(W x D x H)
Assembled dimensions
(W x D x H)
Net weight
Shipping weight
EX223
220 g
EX423
420 g
EX623
620 g
EX1103
1100 g
0.001 g
0.001 g
+ 0.002 g
100g, 150g,
200g, 300g,
300g, 400g,
500g, 1000g
500g, 600g
400g
200g
Baht, carat, grain, gram, milligram, mesgal, momme, Newton, ounce,
pennyweight, pound, Tael (Hong Kong), Tael, (Singapore), Tael (Taiwan),
tical, tola, troy ounce, custom (3)
Weighing, Parts Counting, Percent Weighing, Check Weighing, Dynamic
Weighing, Filling, Totalization, Formulation, Differential Weighing, Peak
Hold, Density Determination, Pipette Adjustment, Ingredient Costing,
Statistical Quality Control
Within 1.5 seconds
Full-Color VGA Graphic LCD
5.7 in / 14.5 cm (diagonal)
White LED
4-wire resistive touch screen
RS-232, USB
12 VDC, 0.5A
AC Adapter Input: 100-240 VAC 0.6A 50-60 Hz
AC Adapter Output: 12 VDC 1.5A
130 mm
5.1 in
195 x 155 x 68 mm
7.7 x 6.1 x 2.7 inch
230 x 260 x 350 mm
9.1 x 10.2 x 13.8 inch
230 x 393 x 350 mm
9.1 x 15.5 x 13.8 inch
6.9 kg
7.5 kg
15.2 lb
16.5 lb
9.7 kg
10.3 kg
21.3 lb
22.7 lb
Note: Default Calibration weights shown in Bold
EXPLORER BALANCES
EN-125
TABLE 9-3. SPECIFICATIONS (Cont.)
MODEL
Capacity
Readability d
Repeatability (std. dev.)
Linearity
Span Calibration Points
Weighing units
Applications
Stabilization time (typical)
Display
Display size
Backlight
Controls
Communication
Balance power input
Power supply
Platform size
Terminal Housing dimensions
(W x D x H)
Base Housing dimensions
(W x D x H)
Assembled dimensions
(W x D x H)
Net weight
Shipping weight
EX2202
2200 g
EX4202
4200 g
EX6202
6200 g
EX10202
10200 g
0.01 g
0.01 g
+ 0.02 g
2000g, 3000g,
3000g, 4000g,
2500g, 5000g,
1000g, 2000g
5000g, 6000g
7500g, 10,000g
4000g
Baht, carat, grain, gram, kilogram, mesgal, momme, Newton, ounce,
pennyweight, pound, Tael (Hong Kong), Tael, (Singapore), Tael
(Taiwan), tical, tola, troy ounce, custom (3)
Weighing, Parts Counting, Percent Weighing, Check Weighing,
Dynamic Weighing, Filling, Totalization, Formulation, Differential
Weighing, Peak Hold, Density Determination, Pipette Adjustment,
Ingredient Costing, Statistical Quality Control
Within 1 second
Full-Color VGA Graphic LCD
5.7 in / 14.5 cm (diagonal)
White LED
4-wire resistive touch screen
RS-232, USB
12 VDC, 0.5A
AC Adapter Input: 100-240 VAC 0.6A 50-60 Hz
AC Adapter Output: 12 VDC 1.5A
190 x 200 mm
7.5 x 8.0 in
195 x 155 x 68 mm
7.7 x 6.1 x 2.7 inch
230 x 260 x 98 mm
9.1 x 10.2 x 3.9 inch
230 x 393 x 98 mm
9.1 x 15.5 x 3.9 inch
4.3 kg / 9.5 lb
5.0 kg / 11.0 lb
6.8 kg / 15.0 lb
7.5 kg / 16.5 lb
Note: Default Calibration weights shown in Bold
EN-126
EXPLORER BALANCES
TABLE 9-4. SPECIFICATIONS (Cont.)
MODEL
Capacity
Readability d
Repeatability (std. dev.)
Linearity
Span Calibration Points
Weighing units
Applications
Stabilization time (typical)
Display
Display size
Backlight
Controls
Communication
Balance power input
Power supply
Platform size
Terminal Housing dimensions
(W x D x H)
Base Housing dimensions
(W x D x H)
Assembled dimensions
(W x D x H)
Net weight
Shipping weight
EX6201
6200 g
EX10201
10200 g
0.1 g
0.1 g
+ 0.2 g
3000g, 4000g,
2500g, 5000g,
5000g, 6000g
7500g, 10,000g
Baht, carat, grain, gram, kilogram, mesgal, momme, Newton, ounce,
pennyweight, pound, Tael (Hong Kong), Tael, (Singapore), Tael
(Taiwan), tical, tola, troy ounce, custom (3)
Weighing, Parts Counting, Percent Weighing, Check Weighing,
Dynamic Weighing, Filling, Totalization, Formulation, Differential
Weighing, Peak Hold, Density Determination, Pipette Adjustment,
Ingredient Costing, Statistical Quality Control
Within 1 second
Full-Color VGA Graphic LCD
5.7 in / 14.5 cm (diagonal)
White LED
4-wire resistive touch screen
RS-232, USB
12 VDC, 0.5A
AC Adapter Input: 100-240 VAC 0.6A 50-60 Hz
AC Adapter Output: 12 VDC 1.5A
190 x 200 mm
7.5 x 8.0 in
195 x 155 x 68 mm
7.7 x 6.1 x 2.7 inch
230 x 260 x 98 mm
9.1 x 10.2 x 3.9 inch
230 x 393 x 98 mm
9.1 x 15.5 x 3.9 inch
5.0 kg
11.0 lb
7.5 kg
16.5 lb
Note: Default Calibration weights shown in Bold
EXPLORER BALANCES
EN-127
TABLE 9-5. SPECIFICATIONS (Cont.)
MODEL
Max
Min
d=
e=
Approval Class
Repeatability (std. dev.)
Linearity
Span Calibration Points
Weighing units
Applications
Stabilization time (typical)
Display
Display size
Backlight
Controls
Communication
Balance power input
Power supply
Platform size
Terminal Housing dimensions
(W x D x H)
Base Housing dimensions
(W x D x H)
Assembled dimensions
(W x D x H)
Net weight
Shipping weight
EX224x1
220 g
0.01 g
0.0001 g
0.001 g
I
EX324x1
320 g
0.01 g
0.0001 g
0.001 g
I
EX423x1
420 g
0.02 g
0.001 g
0.01 g
II
EX1103x1
1100 g
0.1 g
0.001 g
0.01 g
I
0.0001 g
0.001 g
+ 0.0002 g
+ 0.002 g
100g, 150g,
150g, 200g,
200g, 300g,
500g, 1000g
200g
300g
400g
M-Models: milligram, gram, carat
N-Models: gram, milligram, carat, pennyweight,
grain, ounce, troy ounce
Weighing, Parts Counting, Percent Weighing,
Dynamic Weighing, Totalization, Formulation
Within 2 seconds
Within 3 seconds
Within 1.5 seconds
Full-Color VGA Graphic LCD
5.7 in / 14.5 cm (diagonal)
White LED
4-wire resistive touch screen
RS-232, USB
12 VDC, 0.5A
AC Adapter Input: 100-240 VAC 0.6A 50-60 Hz
AC Adapter Output: 12 VDC 1.5A
90 mm
130 mm
3.5 in
5.1 in
195 x 155 x 68 mm
7.7 x 6.1 x 2.7 inch
230 x 260 x 350 mm
9.1 x 10.2 x 13.8 inch
230 x 393 x 350 mm
9.1 x 15.5 x 13.8 inch
6.9 kg
7.5 kg
15.2 lb
16.5 lb
9.7 kg
10.3 kg
21.3 lb
22.7 lb
Note 1: M = EC Type approved
N = NTEP certified and Measurement Canada approved
Note 2: Default Calibration weights shown in Bold
EN-128
EXPLORER BALANCES
TABLE 9-6. SPECIFICATIONS (Cont.)
EX4202x1
4200 g
0.5 g
0.01 g
0.1 g
II
MODEL
Max
Min
d=
e=
Approval Class
Repeatability (std. dev.)
Linearity
Span Calibration Points
EX10202x1
10200 g
1g
0.01 g
0.1 g
I
+0.01 g
+0.02 g
2500g, 5000g,
7500g, 10,000g
M-Models:kilogram, gram, carat
N-Models: gram, kilogram, carat, pennyweight,
grain, pound, ounce, troy ounce
Weighing, Parts Counting, Percent Weighing,
Dynamic Weighing, Totalization, Formulation
Within 1 second
Full-Color VGA Graphic LCD
5.7 in / 14.5 cm (diagonal)
White LED
4-wire resistive touch screen
RS-232, USB
12 VDC, 0.5A
AC Adapter Input: 100-240 VAC 0.6A 50-60 Hz
AC Adapter Output: 12 VDC 1.5A
190 x 200 mm
7.5 x 8.0 in
195 x 155 x 68 mm
7.7 x 6.1 x 2.7 inch
230 x 260 x 98 mm
9.1 x 10.2 x 3.9 inch
230 x 393 x 98 mm
9.1 x 15.5 x 3.9 inch
4.3 kg / 9.5 lb
5.0 kg / 11.0 lb
6.8 kg / 15.0 lb
7.5 kg / 16.5 lb
2000g, 3000g, 4000g
Weighing units
Applications
Stabilization time (typical)
Display
Display size
Backlight
Controls
Communication
Balance power input
Power supply
Platform size
Terminal Housing dimensions
(W x D x H)
Base Housing dimensions
(W x D x H)
Assembled dimensions
(W x D x H)
Net weight
Shipping weight
Note 1: M = EC Type approved
N = NTEP certified and Measurement Canada approved
Note 2: Default Calibration weights shown in Bold
EX10201x1
10200 g
10 g
0.1 g
0.1 g
I
+0.1 g
+0.2 g
2500g, 5000g,
7500g, 10,000g
EXPLORER BALANCES
9.2
EN-129
Drawings and Dimensions
Fully assembled dimensions
13.8 in.
350 mm
9.1 in.
230 mm
15.5 in.
393 mm
Figure 9-1. Draft Shield models
3.9 in.
98 mm
9.1 in.
230 mm
15.5 in.
393 mm
Figure 9-2. Non-Draft Shield models
EN-130
9.3
EXPLORER BALANCES
Parts and Accessories
TABLE 9-7. PARTS
DESCRIPTION
Terminal in-use Cover
Universal AC Adapter (without power Cord)
Power Cord US
Power Cord EU
Power Cord UK
Power Cord AU
Power Cord JP
90 mm Pan Assembly
130 mm Pan
190 x 200 mm Pan
Front Door kit
Left Glass Door kit
Right Glass Door kit
Top Glass Door kit
PART NUMBER
83033633
46001884
83033672
83033673
83033674
83033675
83033676
83033640
83033641
83033643
83033677
83033678
83033679
83033680
TABLE 9-8. ACCESSORIES
DESCRIPTION
Foot Switch kit
Terminal Extension Cable kit
Density Determination kit
Tower Mount for Terminal
Draft Shield kit
Security Device
Printer
Interface Cable, Printer
Interface Cable, PC 25 pin
Interface Cable, PC 9 pin
Interface Cable, USB (Type A to B)
Second RS232 Option kit
Ethernet Option Kit
PART NUMBER
83021086
83021083
80253384
83021102
83021084
80850043
Contact Ohaus
Contact Ohaus
Contact Ohaus
Contact Ohaus
83021085
83021081
83021082
EXPLORER BALANCES
9.4
EN-131
Icons List
TABLE 9-9. EXPLORER BALANCE ICONS
ICON
FUNCTION
ICON
FUNCTION
Standby
Calibration Menu
Print
User Settings
Menu
Applications
Balance Setup
Menu
Sensors
Application Modes
Menu
AutoCal™
Weighing Units
Menu
Main Menu
GLP and GMP
Data Menu
More Functions…
Communication
Menu
Level Assist
Library
Zero
I/O Settings
menu
Tare
Diagnostics
Menu
Units
Factory Reset
Menu
Pre-Tare
lockout
Menu
Cal Test
Information Menu
Calculator
Stopwatch
Logout
EN-132
EXPLORER BALANCES
TABLE 9-9. EXPLORER BALANCE ICONS (Continued)
ICON
FUNCTION
ICON
FUNCTION
AutoCal™ Internal
Calibration
Stability Indicator
Range
Automatic
Calibration
Filter Level
AutoCal™
Adjustment
Auto Zero Tracking
Span Calibration
Auto Tare
User Calibration
Gross Indicator
Calibration Test
Legal For Trade
Language
Graduations
Volume
Date and Time
Display Settings
User Manager
Functions
Configuration
Sensors
Draft Shield Light
EXPLORER BALANCES
EN-133
TABLE 9-9. EXPLORER BALANCE ICONS (Continued)
ICON
FUNCTION
ICON
FUNCTION
Weighing
Differential
Parts Counting
Density
Determination
Percent Weighing
Peak Hold
Check Weighing
Ingredient Costing
Dynamic Weighing
Pipette Adjustment
Filling
Statistical Quality
Control
Totalization
Formulation
EN-134
EXPLORER BALANCES
TABLE 9-9. EXPLORER BALANCE ICONS (Continued)
ICON
FUNCTION
ICON
FUNCTION
Milligram unit
Momme unit
Gram unit
Mesghal unit
Kilogram unit
Hong Kong Tael
unit
Carat
unit
Singapore Tael
unit
Ounce unit
Taiwan Tael unit
Ounce Troy unit
Tical unit
Pound unit
Tola unit
Pennyweight unit
Baht unit
Grain unit
Custom unit 1
Newton unit
Custom unit 2
Custom unit 3
EXPLORER BALANCES
EN-135
TABLE 9-9. EXPLORER BALANCE ICONS (Continued)
ICON
FUNCTION
ICON
FUNCTION
Header
Calibration Reset
Balance Name
User Settings
Reset
User Name
Balance Setup
Reset
Project Name
Application Modes
Reset
RS 232 Standard
Weighing Units
Reset
USB Standard
GLP and GMP
Data Reset
External Input 1
Communication
Reset
External Input 2
I/O Settings Reset
External Input 3
Reset All
External Input 4
Level Bubble Light
Draft Shield Light
Sensors
Service Menu
EN-136
EXPLORER BALANCES
TABLE 9-9. EXPLORER BALANCE ICONS (Continued)
ICON
FUNCTION
Calibration Lockout
User Settings
Lockout
Balance Setup
Lockout
Application Modes
Lockout
Weighing Units
Lockout
GLP and GMP
Data Lockout
Communication
Lockout
Library Lockout
I/O Settings
Lockout
Factory Reset
Lockout
ICON
FUNCTION
EXPLORER BALANCES
9.5
EN-137
Communication
9.5.1 Interface Commands
Commands listed in the following table will be acknowledged by the balance.
The balance will return “ES” for invalid commands.
TABLE 9-10. EXPLORER INTERFACE COMMAND LIST
Command
Characters1)
IP
P1)
CP
SP1)
SLP
SLZP
xP
0P
H
Z
T
xT
PT
PM
xM
M
PU
xU
U
ON
OFF
C
IC
UC
AC
xUC
Function
Immediate Print of displayed weight (stable or unstable). Attention: when LFT ON, IP could
only print stable displayed weight.
Print displayed weight according to “Stable only” setting in the communication menu. Attention:
when LFT ON, P could only print stable displayed weight.
Continuous Print. Attention: when LFT ON, CP could not work.
Print on Stability.
Auto Print stable non-zero displayed weight. Attention: the corresponding settings in the
communication menu are modified too.
Auto Print stable non-zero weight and stable zero reading. Attention: the corresponding
settings in the communication menu are modified too.
Interval Print x = Print Interval (1-3600 sec) 0P ends interval Print. Attention: the corresponding
settings in the communication menu are modified too.
See above.
Enter or get Print Header Lines. Attention: header text length is up to 25 characters, the setting
format is “H x “header line text””; and “H x” could get the corresponding header line in the
balance.
Same as pressing Zero Key
Same as pressing Tare Key.
Establish a preset Tare value in displayed unit. X = preset tare value. Sending 0T clears tare (if
allowed).
Prints Tare weight stored in memory.
Print current application mode (weighing mode).
Set current application mode to x. x depends on application, use application list2).
Scroll to the next enabled mode.
Print Current weighing unit: g, Kg, lb, oz, etc….
Set balance to unit x: g, Kg etc. x depends on unit list3).
Scroll to the next enabled unit.
Brings out of Standby
Goes to Standby.
Begin Span Calibration, same as trigger from calibration menu. Attention: when LFT ON, the
operation is not allowed.
Begin internal Calibration, same as trigger from calibration menu.
User Calibration (uses default weight), same as trigger from calibration menu. Attention: when
LFT ON, the operation is not allowed.
Abort Calibration. Attention: when LFT ON, the operation is not allowed.
Set user defined weight and trigger one user calibration. Attention: the user defined weight is
only used for this command.
EN-138
EXPLORER BALANCES
TABLE 9-10. EXPLORER INTERFACE COMMAND LIST (continued)
Command
Characters1)
PSN
PV
x#
P#
x%
P%
xAW
xAW
PAW
BAW
CW
xCO
xCU
PCO
PCU
xCM
xCT%
PCT%
xCTW
PCTW
xC%
PC%
xCW
PCW
xDH
xD
xFL
xAL
Esc R
PID
xID
xTL
PTIME
PDATE
xTIME
xDATE
CA
SA
xA
0A
SC
xAM
?
xS
xRL
Function
Print Serial Number.
Print base software version, terminal software version and LFT ON (if LFT is set ON).
Set Counting APW (x) in grams. (must have APW stored)
Print Counting application APW.
Set Percent application reference weight (x) in grams. (must have reference weight stored)
Print Percent application reference weight.
Set Dynamic Weigh Level to x. (x = 1 - 99 seconds)
Set Dynamic Weigh Mode. x = A (Automatic), S (Semi-Automatic), M (Manual)
Print Dynamic Weigh Level.
Start Dynamic Weigh cycle. (Manual Mode)
Clear locked weight (weight < threshold) in Dynamic Weigh (same as button “Reset”) & Display
Hold (same as button “End Peak Hold”).
Set Checkweighing Over Limit in grams x.
Set Checkweighing Under Limit in grams x.
Print Checkweighing Over Limit.
Print Checkweighing Under Limit.
Set Checkweigh mode (1=over/under, 2=target/% tolerance, 3=Target/weight tolerance
Set Checkweighing target in grams x for percent tolerance mode.
Print Checkweighing Target for percent tolerance mode.
Set Checkweighing target in grams x for weight tolerance mode.
Print Checkweighing Target for weight tolerance mode.
Set Checkweighing % tolerance x. Attention: when x is a positive value, it is used to set the
+tolerance value; vice versa.
Print Checkweighing % tolerance.
Set Checkweighing weight tolerance x. Attention: when x is a positive value, it is used to set
the +tolerance value; vice versa.
Print Checkweighing weight tolerance.
Set Display Hold mode (Peak Hold). x = A (Automatic), S (Semi-Automatic), M (Manual)
Set 1 second print delay (set x = 0 for OFF, or x = 1 for ON).
Set filter level to x (1 = low, 2 = med, 3 = high).
Set Auto-zero to x (x = 1 for 0d, x = 2 for 0.5d, x = 3 for 1d, x = 4 for 3d).
Resets all Balance menus to factory defaults. Attention: The binary code of this commands is
“1B 20 52 0D 0A” or “1B 52 0D 0A”.
Print current user Name.
Program user Name. Attention: only allowed numeric input.
Set Totalize Mode. x = A (Automatic), M (Manual).
Print current time.
Print current date.
Set Time, x format: hh:mm:ss.
Set Date, x format: mm/dd/yyyy.
Continuous weight, same as CP.
Stable load, same as SLP.
Interval Print x = interval in sec (1-3600) 0 = off, same as xP.
Set AutoPrint off, same as 0P.
Begin Span Cal, same as C.
Set Animal Mode to Auto, Semi-Auto, Manual. Same as xAW(A/S/M)
Prints current mode, same as PM.
0 = print unstable data, same as IP; 1 = print stable only1), same as SP.
0 = disable response; 1 = enable response. This command only controls the “OK!” response.
EXPLORER BALANCES
EN-139
General Notes:
Commands sent to the indicator must be terminated by a carriage return-line feed (CRLF).
Alternate command characters may be defined by the user.
Data output is always terminated with a carriage return-line feed (CRLF).
Note 1) There is 40-second timeout control for print under stable requirement. If the unstable condition continues
over 40 seconds, balance will respond “ES”.
Note 2) Application list:
Index
Application
Index
Application
0
Weighing
11
Pipette Adjustment
1
Parts Counting
12
Ingredient Adjustment
2
Percent Weighing
13
SQC
3
Check Weighing
4
Dynamic Weighing
5
Filling
6
Totalization
7
Formulation
8
Differential
9
Peak Hold
Density
Determination
10
Note 3) Unit list:
Index
Unit
Index
Unit
0
Milligram
11
Mesghal
1
Gram
12
Hong Kong Tael
2
Kilogram
13
Singapore Tael
3
Carat
14
Taiwan Tael
4
Ounce
15
Tical
5
Ounce Troy
16
Tola
6
Pound
17
Baht
7
Pennyweight
18
Custom Unit 1
8
Grain
19
Custom Unit 2
9
Newton
20
Custom Unit 3
10
Momme
EN-140
9.5.2
EXPLORER BALANCES
RS232 (DB9) Pin Connections
Pin 2: Balance transmit line (TxD)
Pin 3: Balance receive line (RxD)
Pin 5: Ground signal (GND)
Pin 7: Clear to send (hardware handshake) (CTS)
Pin 8: Request to send (hardware handshake) (RTS)
GND
RxD
TxD
5
1
6
9
CTS
RTS
9.6
The USB Interface
The Ohaus USB Interface is a unique solution to the problem of connecting a balance to a computer using a
Universal Serial Bus (USB). USB devices are categorized into classes such as disk drives, digital cameras,
printers, etc. Balances do not have a commonly used class so the Ohaus USB interface uses a generic interface
based on the RS232 serial standard.
Data sent from the balance to a computer is in USB format. The USB data is directed to a virtual port. This port
then appears as an RS232 port to the application program.
When sending a command from a computer to the balance, the application program sends a command to the
virtual port as if it were an RS232 port. The computer then directs the command from the virtual port to the
computers USB connector where the balance is connected. The port receives the USB signal and reacts to the
command.
The USB Interface includes a CD with the software drivers to create the required virtual port on the computer.
System Requirements
• PC running Windows 98®, Windows 98SE®, Windows ME®, Windows 2000®, Windows XP® or Windows 7®
• Available USB port (Type A, 4-pin, female)
USB Connection
The balance’s USB port terminates with a 4-pin, female, USB Type B connector.
A USB Cable (type B/male to type A/male) is required (not supplied).
1. Ensure that the balance is powered on and working properly.
2. Power on the computer and verify that its USB port is enabled and working properly.
3. Plug the cable’s USB connectors into the computer’s USB port and the balance’s USB port. Windows®
should detect a USB device and the New Hardware Wizard will be initialized.
Virtual Port Software Installation
1.Insert the supplied CD into the computer’s CD
drive.
Different versions of Windows® have slightly
different steps to load the driver that is on the
CD. In all versions the New Hardware Wizard
guides you through the required steps to select
the driver that is located on the CD.
2.After clicking Finish, the virtual port should be
ready for use.
Windows® typically adds the virtual port in
sequence after the highest number COM port.
For example, on PC’s equipped with up to 4
COM ports, the virtual port will be COM5.
When using the USB interface with programs
that limit the number of COM port designations
(e.g. Ohaus MassTracker allows only COM1, 2,
3, & 4), it may be necessary to assign one of
these port numbers to the new virtual port.
Example of Windows XP Hardware Wizard
This can be done in the Port Settings of the Device Manager utility, found in the Windows Control Panel.
EXPLORER BALANCES
EN-141
Balance Setup FOR USB INTERFACE
A) The Ohaus Interface is preset to communicate using the following settings:
2400 baud, 7 bit, no parity, no handshake.
To use different settings, it will be necessary to change either the balance settings, or the computer settings.
B) Configure the balance to the desired USB and printing parameters.
PRINT
Stable
On, Off
A-Print
Cont, On.Stbl, On.Acc*, 5sec, 15sec, 30sec,
60sec, off
End
Yes, No
*Note: Print and USB menu selections may
vary between the different balance series.
SETUP DEFINITIONS
PRINT / Stable – On
PRINT / Auto Print – Continuous
PRINT / Auto Print – On Stable
PRINT / Auto Print – (xx) sec
PRINT / Auto Print – Off
USB / USB – Off
USB / Baud, Parity, Handshake
USB
USB
On / Off
Baud
600, 1200, 2400, 4800, 9600, 19200
Parity
7-even, 7-odd, 7-none, 8-none
Handshake
None, Xon-Xoff, RTS-CTS
END
Yes, No
Balance transmits stable data only.
Balance repeatedly sends data as fast as possible.
Balance automatically outputs data upon stability.
Balance sends data every (xx) seconds.
Only sends data when PRINT is pressed.
Turns Interface off, saving battery power.
Set parameters to match printer or computer.
Operation
USB OUTPUT
With the Adapter installed the balance will operate in one of the following three ways:
• USB = On, Auto Print = Off, Stable = On or Off
Press PRINT to send the display data based on the settings in the Menu.
If Stable is set to On, the balance will wait for a stable reading before sending data.
• USB = On, Auto Print = On, Stable = On or Off
The balance will automatically send data.
If Stable is set to On, only stable values will be sent.
• USB = Off
The interface is turned off.
EN-142
EXPLORER BALANCES
Data sent from the Interface is in standard ASCII format terminated with a [CRLF] (carriage return-line feed).
The output format is as follows:
[weight]
10 characters (right justified)
[space]
1 character
[unit]
5 characters max (left justified)
[space]
1 character
[stability indicator] 1 character
“?” when unstable, blank when stable
[space]
1 character
[legend]
10 character TOTAL, hh:mm:ss(time interval), etc.
[CR]
1 character
[LF]
1 character
Output examples: (Note: * and _ indicate spaces)
*****192.21_g
*******0.01_g_?
– Manual, Continuous or On-Stable printing
unstable reading
*******0.01_g___ 00:00:00
*****176.30_g_?_00:00:15
*****192.08_g___00:00:30
– Interval Printing (example:15sec interval)
unstable reading
*****192.21_g
*****207.80_g_TOTAL
– Accumulate Mode (Manual printing only)
EXPLORER BALANCES
USB INPUT
The balance will respond to various commands sent via the interface adapter.
Terminate the following commands when with a [CR] or [CRLF].
Explorer Commands
?
print current mode
0A
turn Auto-print off
SA
Auto-print on, prints on stability
CA
Continuous Auto-print
(n)A
Auto-print on 1 to 3600 second intervals (n = 1 to 3600)
C
perform span calibration
L
perform linearity calibration
0M
gram mode
1M
ounce mode
2M
troy ounce mode
3M
pennyweight mode
4M
parts counting mode
5M
pound mode
T
tare balance, same as pressing ON-ZERO
V
print software version
(Esc)R reset balance to factory defaults
P
same as pressing PRINT
LE
print last error code, i.e. [Err 0]
0S
print unstable data
1S
print stable data only
P
same as pressing Print
SP
print stable weight only
IP
immediate print of displayed weight (stable or unstable)
CP
Continuous print of weights
SLP Auto-print stable non-zero weight only
SLZP Auto-print stable non-zero weight and zero reading
xP
Auto-print on 1 to 3600 second intervals (x = 1 to 3600)
0P
turns auto-print off
PM
print current mode
M
advance to the next enabled mode
PU
print current unit
U
advance to the next enabled unit
T
same as pressing Tare
Z
same as pressing Zero
PV
print software version
Auto-Print Operation
Once Auto-Print is activated in the menu, the balance will send data as required.
To temporarily stop Auto-Printing, press PRINT.
If there is data in the print buffer the printer will finish printing this data.
A second press will resume Auto-Printing.
EN-143
EN-144
10.
EXPLORER BALANCES
SOFTWARE UPDATES
Ohaus is continuously improving its balance software. To obtain the latest release, please contact your Authorized Ohaus
Dealer or Ohaus Corporation.
EXPLORER BALANCES
11.
EN-145
COMPLIANCE
Compliance to the following standards is indicated by the corresponding mark on the product.
Mark
Standard
This product conforms to the EMC Directive 2004/108/EC, the Low Voltage Directive 2006/95/EC
and the Non-automatic Weighing Instruments Directive 2009/23/EC. The complete Declaration of
Conformity is available online at www.ohaus.com.
AS/NZS CISPR 11, AS/NZS 61000.4.3
CAN/CSA-C22.2 No. 61010-1-04
UL Std. No. 61010-1
Important notice for verified weighing instruments
Weighing instruments verified at the place of manufacture bear one of the preceding marks on the
packing label and the green ‘M’ (metrology) sticker on the descriptive plate. They may be put into
service immediately.
Weighing instruments to be verified in two stages have no green ‘M’ (metrology) on the descriptive
plate and bear one of the preceding identification marks on the packing label.
The second stage of the initial verification must be carried out by the approved service
organization of the authorized representative within the EC or by the national weights and
measures (W+M) authorities.
The first stage of the initial verification has been carried out at the manufacturer’s work.
It comprises all tests according to the adopted European standard EN45501:1992, paragraph
8.2.2.
If national regulations limit the validity period of the verification, the user of the weighing instrument
must strictly observe the re-verification period and inform the respective W+M authorities.
FCC Note
This equipment has been tested and found to comply with the limits for a Class A digital device, pursuant to Part 15
of the FCC Rules. These limits are designed to provide reasonable protection against harmful interference when
the equipment is operated in a commercial environment. This equipment generates, uses, and can radiate radio
frequency energy and, if not installed and used in accordance with the instruction manual, may cause harmful
interference to radio communications. Operation of this equipment in a residential area is likely to cause harmful
interference in which case the user will be required to correct the interference at his own expense.
Industry Canada Note
This Class A digital apparatus complies with Canadian ICES-003.
EN-146
EXPLORER BALANCES
ISO 9001 Registration
In 1994, OHAUS Corporation, USA, was awarded a certificate of registration to ISO 9001 by Bureau Veritus Quality
International (BVQI), confirming that the OHAUS quality management system is compliant with the ISO 9001
standard’s requirements. On May 21, 2009, OHAUS Corporation, USA, was re-registered to the ISO 9001:2008
standard.
Disposal
In conformance with the European Directive 2002/96/EC on Waste Electrical and Electronic
Equipment (WEEE) this device may not be disposed of in domestic waste. This also applies to
countries outside the EU, per their specific requirements.
The Batteries Directive 2006/66/EC introduces new requirements from September 2008 on
removability of batteries from waste equipment in EU Member States. To comply with this
Directive, this device has been designed for safe removal of the batteries at end-of-life by a
waste treatment facility.
Please dispose of this product in accordance with local regulations at the collecting point
specified for electrical and electronic equipment.
If you have any questions, please contact the responsible authority or the distributor from which
you purchased this device.
Should this device be passed on to other parties (for private or professional use), the content of
this regulation must also be related.
For disposal instructions in Europe, refer to www.ohaus.com , choose your country then search
for WEEE.
Thank you for your contribution to environmental protection.
LIMITED WARRANTY
Ohaus products are warranted against defects in materials and workmanship from the date of delivery through the
duration of the warranty period. During the warranty period Ohaus will repair, or, at its option, replace any
component(s) that proves to be defective at no charge, provided that the product is returned, freight prepaid, to
Ohaus.
This warranty does not apply if the product has been damaged by accident or misuse, exposed to radioactive or
corrosive materials, has foreign material penetrating to the inside of the product, or as a result of service or
modification by other than Ohaus. In lieu of a properly returned warranty registration card, the warranty period shall
begin on the date of shipment to the authorized dealer. No other express or implied warranty is given by Ohaus
Corporation. Ohaus Corporation shall not be liable for any consequential damages.
As warranty legislation differs from state to state and country to country, please contact Ohaus or your local Ohaus
dealer for further details.
Ohaus Corporation
7 Campus Drive
Suite 310
Parsippany, NJ 07054 USA
Tel: (973) 377-9000
Fax: (973) 944-7177
With offices worldwide.
www.ohaus.com
*83021171*
P/N 83021171
© 2011 Ohaus Corporation, all rights reserved.