1
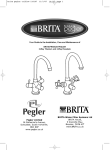
brita pegler fixed a5 8pp 110107
11/1/07
12:22
Page 1
BRITA/FRANCIS PEGLER
Solo Nebula
brita pegler fixed a5 8pp 110107
11/1/07
12:22
Page 2
Water regulations requirements
It is important to ensure that the water supplies to your taps and mixers are connected in accordance with
the water regulations (WRAS) requirements and good plumbing practice.
Please note: The production of all component parts on both tap and cartridge have been manufactured
using appropriate materials and as such all appropriate parts in contact with “potable water” have been
given full WRAS approval. Contact either PEGLER or BRITA for the official WRAS approval number.
It is both PEGLER and BRITA’s recommendation and good plumbing practice that a service valve should
also be installed in the inlet supply line upstream of the product (cold water supply line only for the Solo
Nebula) for ease of any future maintenance. To satisfy this requirements please order PEGLER Prestex 808
servicing valve: order reference code 523007 (15mm)
The installation of all parts of the tap has to be done according country specific directives for installation of
drinking water devices.
The tap used in combination with the water filter tap must be free of limescale build up. It is not permitted
to use a water softener before the filter.
The Solo Nebula filter tap has been designed to function under the following conditions.
Transport/Ambient temperature operation/storage/transport: 1-60°C
Minimum supply pressure on cold side: 1.0 bar (cartridge optimum pressure 1.5bar)
Maximum supply pressure on cold side 6.0 bar
To gain best performance from the BRITA filter cartridge, please ensure that the cartridge is not
exposed to temperatures below 4 C or in excess of 30 C
Average filter capacity is based on 500 litres or 3 months average usage.
o
o
A design-tested non-return valve pursuant to DIN 3269-1/DIN 3269—2 DVGW and SVGW has been
factory-fitted at the water inlet of the connecting fitting.
The BRITA Filter must only be connected to a potable cold water supply. Do not use a BRITA Filter where
water is microbiologically unsafe, or with waters of unknown quality without appropriate sterilisation.
If an instruction is received from the authorities that mains water must be boiled, the BRITA filtered water
must also be boiled. When the instruction to boil water is no longer in force, a new filter cartridge must be
inserted and the connections must be cleaned.
For certain groups of people (e.g. those with impaired immunity and for babies), it is generally
recommended that tap water should be boiled; this also applies to filtered water. Irrespective of the water
used, you should use utensils with stainless steel, such as kettles and saucepans, to boil the water. In
particular, people who are sensitive to nickel should use appliances made of stainless steel or kettles with
concealed elements.
For reasons of hygiene, the filter is given a special treatment with silver. A small amount of silver, which
poses no known threat to health, may be transferred to the water. This transference would be within the
World Health Organisation (WHO) guidelines for drinking-water quality.
IMPORTANT NOTE: For people with kidney disease or dialysis patients: During the filtering process,
there may be a slight increase in potassium content. If you have kidney disease and/or have to live
according to a potassium regulated diet, we recommend that you discuss the use of the filter with
your doctor. If you have kidney disease and/or have to live according to a potassium regulated diet,
we recommend that you call Brita Care Customer Services on 0044 (0) 870 487 1000 for further
information, which you may wish to discuss with your doctor.
brita pegler fixed a5 8pp 110107
11/1/07
12:22
Page 3
If your BRITA System is not in use for several days (1-2 days), we recommend that you flush the filter
system with at least 1.2 litres. BRITA recommends that the filter system not be taken out of use for longer
periods. After stagnation times of over 4 weeks the filter should be flushed with 6.0 litres or alternatively
replaced. In this connection, please also remember the maximum useful life of the filter cartridge of 3
months.
Explanation of the BRITA filter cartridge Serial No:
Example of the batch code: 5154
First digit:
Second and third digit:
Fourth digit:
5 = year of production (2005)
15 = calendar week No. (15)
4 = 4th day of the week (4 = Thursday)
The BRITA filter must be thoroughly flushed until water runs completely clear.
The filter cartridge should be changed after 500 litres, but latest 3 months after commissioning, regardless
of the level of exhaustion. To ensure optimum filter performance, the electronic exchange indicator
integrated in your tap tells you when to change the cartridge.
Filter head of the filter system is designed for a service life of 5 years and bear a production date.
Exchange must be carried out after 5 years by an expert.
Please store cartridge always in original sealed foil at a cool and dry place.
Although every effort is made to ensure good tasting, reliable odour free water, BRITA cannot offer
guaranteed improvement on water quality if the intake of water is microbiologically unsafe or of unknown
quality without adequate disinfection before entering the cartridge unit.
An independent institute has also certified the food grade quality of BRITA water and filter products. A
copy of this is available upon request.
Should excessive flow be experienced, then it may be necessary to install a Pressure reducing valve
upstream from the product. Please order PEGLER Prestex PRV-2 : order reference code 5A2011 (15mm which will reduce inlet pressure to 1.5bar minimum)
Please note: The Solo Nebula Tap will for a short period after use drip, this is to allow water pressure
within the spout to reduce to atmospheric conditions, and remove any pressure from the filter and filter
head. It has been deemed that the amount of “dripping” after use is acceptable at the 1.5 bar optimum
operating pressure. Installations made above this recommendation operating pressure may incur dripping
for longer periods of time.
Pre-installation Checks:
1. Ensure that there is sufficient space to install the product without it hampering its operation. When fitting
in a corner position make sure there is sufficient clearance for the use of the handle and the alignment
of the spout.
2. Ensure that the outlet will protrude sufficiently into the sink and will clear any obstructions.
brita pegler fixed a5 8pp 110107
11/1/07
12:22
Page 4
INSTALLATION
For Solo Nebula Kitchen Filter Tap
1. Decide the location of the tap.
Please note: This tap is regarded as an additional product to your existing hot and cold water supply tap,
offering the convenience of BRITA Filtered Water. Therefore it is suggested that mounting either within the
corner of your existing sink or with in close proximity. Due to the location of the installation drilling into the
worktop will be required.
2. The tap is capable of being mounted both on the right or left side and the spout is adjustable before
installation to suit and as such the spout can be rotated by unscrewing the setscrew in rear of base,
then twist to align as required. Re-tighten the setscrew when in position.
3. Decide location of the cartridge, this should be situated within a suitable distance from the tap hole.
BRITA and PEGLER recommend no more than 0.75meters. At this point do not assemble the cartridge
to the cartridge head!
Please note: It may be noted that surplus tube may be noticeable depending on the cartridge location.
Neither PEGLER nor BRITA advise that this tube is cut due to exacting requirements of the cut finish. Any
surplus tube can be fixed around the internal wall of the cupboard if required to ensure free space within.
4. Once you have decided its location use the cutting template on the rear of the instructions as guidance
to size of hole. This can be cut from the instructions and laid down at the point of location. Please note
there is a distance limitation from your cold supply due to length of tube supplied, so a simple check is
required noting the distance and the location of the cartridge.
5. Once positioned using two drills (sizes 30mm diameter (for rear of base) and 22mm diameter for front of
base) drill out two holes ensuring a clean cut is made. At this point both BRITA and PEGLER take no
ownership of incorrect cutting of any worktops or sinks other than a BRITA or PEGLER approved
installation engineer. (A cutting template is available at the back of these instructions)
6. Turn off the water supply! And drain down system.
7. Push in lifetime indicator cable into base of tap body ensuring ‘O’ ring is located firmly in place. Use
diagram below to confirm hole location.
8. Locate and screw the clamping stud until stop is achieved, being careful not to damage the lifetime
indicator cable
Please note: at this point you will see that the pre assembled hose is labelled with a tag and will later be
fitted to the outlet of the filter cartridge. The remaining two hoses are not tagged and at this stage it should
be noted which connections these are made with. PEGLER recommended the following connections
(see diagram below)
IMPORTANT NOTE: In any event of installing a plastic hose into the
incorrect push-fit connection - to remove press the release collar
around the push-fit and pull out hose.
brita pegler fixed a5 8pp 110107
11/1/07
12:22
Page 5
9. The product comes with ease of installation push fit connectors! Take both of loosely supplied hoses
and simply push into the tap body. Push into base of the tap body until stop is achieved.
10. Position the fixed tap in desired position. Ensure all parts are located through the drilled holes
including the threaded clamping stud, wire and the three plastic hoses.
11. Once loosely in-place, check again that handle and spout movement is not obstructed.
Please note: The operation of the valves and the handles is such that they are precise and easy to
operate. Total movement from fully on to fully off is only 90° or quarter of a turn. Excessive force once
opened or closed may force the valve to malfunction.
12. To tighten the mixer to the ware, firstly, place “horse shoe shaped” clamping plate onto the threaded
clamping stud, ensure larger diameter is positioned under sink/worktop. Then secure by screwing tight
the clamping nut, taking care of indicator light cable as this is now hanging down from tap.
13. Decide the position of the 15mm “T” off from the cold supply. This will usually be below your existing
sink tap. Either the “T” can be located between any connections from your current sink tap and
domestic supply or into the standard copper pipe from the domestic supply.
14. Once decided, locate the “T” piece in the domestic supply ensuring the 15mm capnuts and 15mm
olives used make a water tight seal.
15. In addition to the standard “T” supplied, a reducing kit is also enclosed to allow connection to your
existing kitchen tap that may be fitted with 10mm diameter copper pipe.
Please note: If your existing kitchen tap is fitted with flexible hoses, then they can be screwed straight
onto the “T” by removing the reducing kit as well as the 15mm capnut and 15mm olive from the outward
flow end of the “T”. The threading connections are standard for connections of this type at 1/2” BSP and
can be screwed straight onto the “T”.
brita pegler fixed a5 8pp 110107
11/1/07
12:22
Page 6
Please note: It is a water regulation requirement to fit double check valves on the inlets of your current
kitchen tap, especially if the water is single flow and therefore mixes within the spout or body of the tap. If
this is the case and due to back siphon-age possibilities both PEGLER and BRITA recommend that double
check valves are fitted between the “T” and the connection point to your existing tap. To achieve this
please order Pegler Prestex 802 check valve: order reference code 551001 (15mm)
Connection to existing tap
Outlet to Solo Nebula
16. The cartridge head has already been semi-assembled with brass check valve elbow in place on the
inlet of the cartridge head and a plastic connection piece on the outlet of the cartridge head. These
have both been assembled to a defined torque and therefore should not be removed by anyone other
than a BRITA or PEGLER approved installation engineer.
17. Screw the head bracket and the cartridge head (screws are provided for the bracket assembly) then
screw the cartridge to the cartridge head after removing the yellow plastic protection cap. This simply
pulls away.
18. Once assembled offer under the sink (usually in a kitchen cupboards) the cartridge to find its best
location, ensuring allowance is made for the pre assembled electronic box. Likewise be aware that to
replace the cartridge you have to unscrew, so sufficient room below the cartridge is required to remove
the cartridge. Note the cartridge can be located in a vertical or horizontal manner.
19. Once its location is identified remove the cartridge and mark the location of the holes from the bracket
on the internal wall of the cupboard. This will help with the assembly of the bracket onto the wall.
20. Screw the bracket in place.
21. Re assemble the cartridge back into the cartridge head.
22. Take the hose (identified with the tag) and simply push into the outlet end of the cartridge head until
stop is achieved.
brita pegler fixed a5 8pp 110107
11/1/07
12:22
Page 7
Identification Tag
23. Next take the middle hose out of the tap base (not identified with tag) and push into the brass check
valve elbow until the stop is achieved.
24. The last connection is from the front of the tap base. Take the final hose (not identified with tag) and
make the last connection into the 15mm “T” piece.
25. Once completed push in the connecting plug on the end of the lifetime indicator cable into the socket
on the side of the electronic box. Remove the battery clip and insert the battery (supplied loose ref:
CR2032) using the indication on the battery carrier for confirmation of the correct installation of the
battery.
Please note: Please ensure that filter water is always connected via the cold supply line. In normal
installation types hot is on the left and cold is on the right (when viewed from the front).
26. Turn on water supply and check for leaks before the handles are turned on.
27. Next turn on the tap handle and check for further any addition leaks.
Please note: Only filter water is dispensed from this handle.
28. Press the reset button and hold for 2 seconds and with immediate effect the indicator light in the
flange tap should be seen solid red and then green.
YOU HAVE NOW STARTED THE LIFETIME INDICATOR FOR IMMEDIATE USE.
29. For immediate use of the filtered water simply run for a minute/approx 3 litres (or until water runs
clear). This is purely to activate the filter material within each cartridge for perfect BRITA filter water.
Please note: This simply running on for a minute/approx 3 litres (or until water runs clear) needs to be
done at the point of use for each new cartridge.
brita pegler fixed a5 8pp 110107
11/1/07
12:22
Page 8
Special Guidelines for lifetime indicator:
The lifetime indicator is to function only when the tap is delivering BRITA filtered water
When the filter and battery are OK there will be a solid green light.
When the filter condition is considered to be at 90% of its life then the light will turn amber.
When the life of the filter has been exhausted then it will turn red.
When the battery voltage has dropped to a low level it is indicated by a red flash.
Solid Green = filter OK
Solid Amber = filter past 90% of usable life
Sold Red = filter needs changing
Red flashes = battery need replacing.
It is recommended that the batteries should be changed every twelve months to reduce the risk of battery
leakage.
When a new filter is fitted pressing the reset button restarts the lifetime indicator.
Changing the battery will not affect the filter state counters.
CARE AND MAINTENANCE
To maintain the surface finishes, simply wipe occasionally with a mild detergent on soft damp cloth Dry
using soft cloth, never use abrasive cleaners or chemical household cleaners, avoid contact with concentrated bleach. PEGLER products are manufactured to the highest standards and should require little or no
maintenance. In the unlikely event of any spare part requirements, please contact your nearest stockist or
contact
Pegler Technical Helpline,
Telephone: 0870 1200 285
Fax: 01302 560537
Cartridge Exchange Instructions
Water filter tap cartridge
The filter cartridge should be exchanged after 500 litres or after 3 months (whichever occurs first) to ensure
optimum filter performance.
1. When cartridge exchange indicator gives signal, filter cartridge needs to be exchanged. Please see
sequence of indicator within user manual supplied with the initial tap.
Red light to indicate filter
exchange.
brita pegler fixed a5 8pp 110107
11/1/07
12:22
Page 9
2. Remove exhausted cartridge by unscrewing clockwise from the filter head.
Clockwise to unscrew
3. Remove plug from the top of the new filter cartridge.
4. Insert new filter cartridge into filter head and turn anti-clockwise until in place. Do not over tighten.
Anti-clockwise to tighten
5. Restart the cartridge exchange indicator by pressing the “Reset” button located on the battery housing.
Press reset button
6. Turn on the filtered water and flush water through the cartridge for approximately 1 minute/3 litres (or
until water runs completely clear).
brita pegler fixed a5 8pp 110107
11/1/07
12:22
Page 10
Turn handle to
operate BRITA filter
water
7. Check the tap to see that the cartridge exchange indicator has turned to solid green. (Please see
Special Guidelines for lifetime indicator.) If not, please repeat step 5.
8. Please note date of exchange into your “booklet of maintenance” below
Cartridge Exchange Date:
…………………………...
…………………………...
……………………………
……………………………
……………………………
……………………………
……………………………
Note: Exhausted filter cartridges can be disposed of in accordance with the local laws and regulations (in
principle normal domestic waste).
In addition please note that all BRITA components have been manufactured from recyclable materials. Any
cartridges returned to BRITA will be recycled. Please send to:
FREEPOST RLZS-YGLS-ZLGL,
BRITA,
COALVILLE,
LE67 1TE
Cartridge Distributor:
Brita Water-Filter-Systems Ltd.
Brita House, 9 Granville Way
Chaucer Industrial Estate
Bicester, Oxfordshire, OX26 4JT
United Kingdom
For information on BRITA and cartridge queries please contact BRITA customer care:
Telephone: 0845 0770 035
brita pegler fixed a5 8pp 110107
11/1/07
12:22
Page 11
Template to cut out and locate Drawing to scale.
brita pegler fixed a5 8pp 110107
Version 2 Nov 2006
11/1/07
12:22
Page 12