1
ASSEMBLY INSTRUCTIONS
0048-0838
REVISION A
3/29/12
PAGE 1
AVENGER BRAKE LEVER INSTALLATION
AVENGER LEVERS
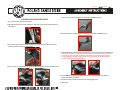
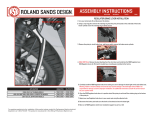
1. Turn your motorcycle off and disconnect the battery.
2. Using a snap ring pliers remove the retaining ring from the pivot pin located on the underside of the brake
master cylinder. Save the retaining ring, it will be reused.
3. Remove the pivot pin, stock brake lever, and loosen and/or remove the brake master cylinder.
4. 0062-2064 & 0062-2071 Only: Remove the pivot bushing from the stock lever and install into the RSD Avenger lever.
RSD Avenger levers for FLH and XL models have a bushing pre-installed at the factory.
0062-2064 & 0062-2071 ONLY
7. Reconnect the battery and make sure the brake is functional and test the brake light.
8. Move on to RSD Avenger clutch lever installation (page 2) or go for a ride!
%
&
%
#
$
"
!
6. Once the RSD Avenger brake lever is in position install the pivot pin and install the retaining ring on the bottom
of the pivot pin.
0062-2061
0062-2063
0062-2065
0062-2068
0062-2070
0062-2072
0062-2062
0062-2064
0062-2066
0062-2069
0062-2071
0062-2073
CLUTCH P/N
AVENGER INLAY: 2008-2012 FLH TOURING MODELS
AVENGER INLAY: 1996-2012 BIG TWIN, 1996-2003 XL SPORTSTER MODELS
AVENGER INLAY: 2004-2012 XL SPORTSTER MODELS
AVENGER: 2008-2012 FLH TOURING MODELS
AVENGER: 1996-2012 BIG TWIN, 1996-2003 XL SPORTSTER MODELS
AVENGER: 2004-2012 XL SPORTSTER MODELS
BRAKE P/N
PRODUCT DESCRIPTION & APPLICATION
5. Carefully install the RSD Avenger brake lever making sure not to damage the brake light switch and rubber boot.
Warning: Failure to install carefully and correctly may result in damage to the brake light switch. RSD is not
responsible for damage caused by improper installation. For additional instructions consult the service manual
for your specific model.
0048-0838
A 3/29/12
5. Remove the pivot bushing from the stock lever and install into the RSD Avenger lever.
AVENGER CLUTCH LEVER INSTALLATION
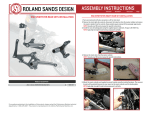
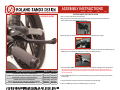
1. Turn your motorcycle off and disconnect the battery.
2. Slide rubber boot away from the clutch cable adjuster. Using a 9/16” and 1/2” wrench completely collapse the
clutch adjuster.
6. Remove the plastic anti-rattle tab from the stock clutch lever and install onto the RSD Avenger lever.
3. Using a snap ring pliers remove the retaining ring from the pivot pin located on the underside of the clutch
pivot housing. Save the retaining ring, it will be reused.
7. Install the RSD Avenger clutch lever, plastic clutch cable pivot pin, clutch cable, main pivot pin, and retaining clip.
Warning: 2007-up models are equipped with a clutch interrupt switch. Care must be taken during installation
to not damage the switch and rubber boot. Failure to install carefully and correctly may result in damage to
the switch. RSD is not responsible for damage caused by improper installation. For additional instructions
consult the service manual for your specific model.
4. Remove the pivot pin, stock clutch lever, and the plastic clutch cable pin. Save these parts, they will be reused.
8. Once the RSD Avenger clutch lever is in position adjust the clutch cable. Consult the service manual for
specific clutch adjustment procedures.
9. Reconnect the battery and make sure the clutch lever is disengaging the clutch.
%
&
%
#
$
"
!
10. Go for a ride!