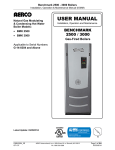
1
Model 1005
Automotive Scope / GMM
User’s Manual
a world leader in test & measurement
FINE INSTRUMENTS CORPORATION
341-5, SONGNAE-DONG, SOSA-GU, BUCHON-SHI, KYUNGGI-DO KOREA
-TEL: (82-32) 668-6042 -FAX: (82-32) 656-5844
-E-mail: [email protected]
© Copyright 2004 Fine Instruments Corp. All right reserved.
Specifications subject to change without notice.
Litho in Korea.
FINE INSTRUMENTS CORPORATION
Menu Overview
DANGER
W hen ha ndling a ny si gnals higher
than 1 50 V peak , don t e lectrica lly
a c t i v ate B OTH C H A an d/o r CH B
terminal(s) AND USB terminal together
a t a tim e . I f they a r e e le c tri ca lly
activated simultaneously, a death or a
s e ri ous pe rs o na l inj ur y c ou ld be
resulted in.
CAUTION
When handing any extremely high
voltage signals, e.g. the signals
generated from the spark plugs,
NEVER PUT ANY TEST LEADS (Either
the Red or Yellow test leads Or the
Secondary ignition probe lead Or
Power Cable from Cigarette Lighter)
CONNECTED TO THE SCOPE IN THE
AREAS NEAR THOSE STRONG
SIGNALS. If so, the scope can be
damaged or worked improperly.
COMPONENT TESTS MENU
SENSORS
ACTUATORS
ELECTRICAL
IGNITION
(or DIESEL)
MAIN MENU
COMPONENT TESTS
SCOPE
GRAPHING MULTIMETER
VEHICLE DATA
INSTRUMENT SETUP
GRAPHING MULTIMETER MENU
VOLT DC, AC
OHM/DIODE/CONTINUITY
RPM
FREQUENCY
DUTY CYCLE
PULSE WIDTH
DWELL
IGNITION PEAK VOLTS
IGNITION BURN VOLTS
IGNITION BURN TIME
INJECTOR PEAK VOLTS
INJECTOR ON TIME
AMP DC, AC
TEMPERATURE C F
LIVE
FILTER MENU
INPUT A : OFF
INPUT B : OFF
VEHICLE DATA MENU
CYLINDERS : 4
CYCLES
:4
BATTERY
: 12 V
IGNITION
: CONV
IGNITION MENU
CONV (default)
DIS
DIESEL
INSTRUMENT SETUP MENU
DISPLAY OPTIONS
FILTER
AUTO POWER OFF
LANGUAGE
VERSION INFORMATION
SCOPE CALIBRATION
LANGUAGE MENU
LANGUAGE : ENGLISH
DISPLAY OPTIONS MENU
USER LAST SETUP : OFF
CONTRAST : 4
GRATICULE : ON
HORIZ TRIG POS : 10 %
ACQUIRE MODE : PEAK DETECT
SENSOR TESTS MENU
ABS Sensor (Mag)
O 2S Sensor (Zirc)
Dual O2 Sensor
ECT Sensor
Fuel Temp Sensor
IAT Sensor
Knock Sensor
TPS Sensor
CKP Magnetic
CKP Hall
CKP Optical
CMP Magnetic
CMP Hall
CMP Optical
VSS Magnetic
VSS Optical
MAP Analog
MAP Digital
MAF Analog
MAF Digi Slow
MAF Digi Fast
MAF Karman-Vrtx
EGR (DPFE)
ACTUATOR TESTS MENU
Injector PFI/MFI
Injector TBI
Injector PNP
Injector Bosch
Mixture Cntl Sol
EGR Cntl Sol
IAC Motor
IAC Solenoid
Trans Shift Sol
Turbo Boost Sol
Diesel Glow Plug
ELECTRICAL TESTS MENU
Power Circuit
V Ref Circuit
Ground Circuit
Alternator Output
Alternator Field VR
Alternator Diode
Audio System
DC Switch Circuits
AUTO POWER OFF MENU
AUTO POWER OFF : ON
AUTO POWER OFF TIME : 30 min
DIESEL MENU
DIESEL INJECTOR
ADVANCE
IGNITION TESTS MENU
PIP/ SPOUT
DI Primary
DI Secondary
DIS Primary
DIS Secondary
Contents
1. INTRODUCTION
Menu Overview
1. Introduction
1.1 Comparing Scan Tools, DSOs and DMMs
1.2 Vehicle Service Manuals
1- 1
1- 2
2. Safety Information
3. Automotive Electronic Signals
3.1 Primary Signal Types Found in Modern Vehicles
3.2 Critical Characteristics of Automotive Electronic Signals
3.3 The Golden Rule of Electronic System Diagnosis
3.4 Signal Probing with an Oscilloscope
3333-
4. Getting Started
4.1 Product Description
4.2 Quick Tour
4.3 Front Panel Controls
4.4 Measurement Connections
4.5 Grounding Guidelines
4.6 Display
4.7 SCOPE Mode
4.8 GMM (GRAPHING MULTIMETER) Mode
4- 1
4- 2
4- 6
4- 7
4- 8
4- 9
4-15
4-16
5. Instrument Operation
5.1 Instrument Test Modes
5.2 SCOPE Displays
5.3 GMM Displays
5.4 Dual Input Scope Operation
5.5 Changing the Vehicle Data and Instrument Setup
5.6 Freezing, Saving, and Recalling Screens
5.7 Glitch Snare Operation
5.8 Tips for Noise Management
5- 1
5- 1
5- 7
5-13
5-13
5-17
5-18
5-19
6. Automotive Diagnostics & Applications
6.1 Component Tests
6.2 Sensor Tests
6.3 Actuator Tests
6.4 Electrical Tests
6.5 Ignition Tests
6.6 Diesel Tests
6- 1
6- 1
6-32
6-48
6-57
6-68
1
2
2
2
Vehicle manufacturers have helped you locate a driveability problem by designing Electronic Control Units with
trouble-code generating capabilities. But, the ECUs aren’t perfect because they don’t cover everything (most glitches
and intermittents). On-board diagnostic systems are engineered with fairly wide set limits for sensors, actuators,
connectors and terminals. When a component exceeds its limit consistently, a trouble code is generated. But to keep
warranty costs in line, tolerances aren’t set to catch all transients, even though they can cause some of your worst
driveability problems.
Therefore, repair technicians are finding more and more uses for a Digital Storage Oscilloscope (DSO) and a Digital
Multimeter (DMM) thesedays. A DSO can capture a live “signature” of a circuit and store it for later analysis or
comparison against Known-good waveforms - an invaluable resource for detecting marginal components. A GMM
(Graphing Multimeter) gives you advanced multimeter capabilities coupled with the visual power of trend graphing
and waveform display.
This Meter – a combination DSO and GMM – represents the most powerful and versatile tool available for
troubleshooting automotive electronics since we can track down elusive no-code driveability problems.
1.1 COMPARING SCAN TOOLS, DSOs AND DMMs
All of these tools have unique capabilities, and today’s vehicles demand that automotive technicians are able to use
all three tools to correctly diagnose various driveability problems. DSOs alone cannot replace DMMs or scan tools.
By the same token, DMMs or scan tools cannot replace DSOs.
For example, when anti-lock brakes on your car are sometimes erratic, you might firstly try a road test to notice that
the ABS light does not come on. When you get back to the shop, you plug in your scan tool and find no trouble
codes.
Because you still have your DMM, you follow the manufacturer’s instructions and you look at the output voltage from
each of the wheel speed sensors. They all appear to be in tolerance, and the manufacturer’s fault tree recommends
you to replace the ABS computer. Unfortunately, the ABS computer on this vehicle is embedded in the master
cylinder, so you must replace everything. The worst thing is the problem still exists even after you complete all of the
work.
Normal ABS Signal
Most of the signal shown above is visible to scan tools, DSOs and DMMs.
7. Maintenance
8. Specifications
Glossary
Menu Overview
Faulty ABS Signal
However, the faults shown above are not visible to scan tools and DMMs. They are only visible to DSOs.
1-1
If you had a DSO, you could look at the output signal from each of the wheel speed sensors. From this you would
have discovered that the left rear wheel speed sensor had some very fast aberrations that caused the ABS computer
to act strange. You replace the left rear wheel speed sensor to cure the problem. The scan tools missed this problem
because no trouble codes were set and the computer communication bus was too slow to pick up the spikes. The
DMMs missed this problem because it averaged the sensor signals and could not see the fast abberations.
2. SAFETY INFORMATION
WARNING
Scan tools and DMMs sample very slow when compared to DSOs. DSOs are typically more than a few hundred
thousand times faster than scan tools and more than 1,000 times faster than DMMs.
There are many examples of vehicle signals that DMMs and scan tools are unable to see. There are many vehicle
problems that can occur that really require a DSO or combination DSO and DMM to diagnose accurately.
1.2 VEHICLE SERVICE MANUALS
This instrument tells how to hook up it to the selected vehicle components to be tested. However, it is strongly
recommended that you consult the manufacturer’s service manual for your vehicle before any test or repair
procedures are performed in order to get the color of the wire or the PCM’s pin number from a wiring diagram.
For availability of these service manuals, contact your local car dealership, auto parts store, or bookstore, The
following companies publish valuable repair manuals:
• Mitchell International
14145 Danielson Street
Poway, CA 92064
Tel : 888-724-6742
• Haynes Publications
861 Lawrence Drive
Newbury Park, CA 91320
Tel : 1-800-442-9637
• Motor Publications
5600 Crooks Road, Suite 200
Troy, MI 48098
Tel : 1-800-426-6867
• Helm Inc.
14310 Hamilton Avenue
Highland Park, MI 48203
Tel : 1-800-782-4356
READ “SAFETY INFORMATION” BEFORE USING THIS MANUAL.
This instrument is designed to be used only qualified personnel who are (properly trained) skilled professional
automotive technicians.
It is assumed that the user has a thorough understanding of vehicle systems before using this instrument.
To use this instrument safely, it is essential that operating and servicing personnel follow both generally accepted
safety procedures and the safety precautions specified in this manual.
A DANGER identifies an imminently hazardous situation which, if not avoided, will result in death or serious injury to
the user or the bystanders.
A WARNING identifies conditions and actions that pose hazard(s) to the user or the bystanders.
A CAUTION identifies conditions and actions that may damage the instrument or the vehicle.
The term “Isolated (or Electrically floating)” is used in this manual to indicate a measurement in which the COM
terminal of this instrument is connected to a voltage different from earth ground. The term “Grounded” is used when
the COM terminal is connected to an earth ground potential. The COM terminal of this instrument is rated up to 300
V rms above earth ground for the safety of isolated measurements.
Using Your Instrument Safely
Follow safe servicing practices as described in your vehicle service manual. To use this instrument safely, follow the
safety guidelines below :
DANGER
• Use the instrument in service area WELL VENTILATED providing at least four change of air per hour. Engines
produce carbon monoxide, an odorless, colorless, and poisonous gas that causes slower action time and can
result in death or serious injury. Route exhaust outside while testing with engine running.
• Set the parking brake and block the wheels, especially the wheels on front-wheel drive vehicles, before testing or
repairing the vehicle because the parking brake does not hold the drive wheels.
• Be sure there is adequate clearance between any moving components when testing. Moving components and
belts can CATCH loose clothing, parts of your body or the instrument and cause serious damage or personal
injury.
• Always wear approved safety eye protection when testing or repairing vehicles. Objects can be propelled by
whirling engine components can cause serious injury.
1-2
• When handling any signals higher than 150 V peak, don t electrically activate BOTH CH A and/or CH B
terminal(s) AND USB terminal together at a time. If they are electrically activated simultaneously, a death or a
serious personal injury could be resulted in.
2-1
Avoid Fires:
• Disconnect the live test lead before disconnecting the common test lead.
• Do not position head directly over carburetor or throttle body. Do not pour gasoline down carburetor or throttle
body when cranking or running engine. Engine backfire can occur when air cleaner is out of normal position.
• Do not perform internal service or adjustment of this instrument unless you are qualified to do so.
• Do not use fuel injector cleaning solvents or carburetor sprays when performing diagnostic testing.
• The instrument has internal arcing or sparking parts. Do not expose the instrument to flammable vapors.
• Do not smoke, strike a match, place metal tools on battery, or cause a spark in the vicinity of the battery. Battery
gases can ignite.
• Keep a fire extinguisher rated for gasoline, chemical, and electrical fires in work area. Fires can lead to serious
injury or death.
Avoid Burns:
• Do not touch hot exhaust systems, manifolds, engines, radiators, sample probe, etc.
• Do not remove radiator cap unless engine is cold. Pressurized engine coolant may be hot.
• Wear gloves when handling hot engine components.
• Use a suitable battery carrier when transporting batteries.
CAUTION
WARNING
Avoid Electrical Shock:
• Make sure that the vehicle to be tested is at a safe potential before making any measurement connections.
• Connect the COM input of the instrument to vehicle ground before clamping the standard SECONDARY PICKUP
(supplied) on the ignition wires. This ground connection is required IN ADDITION TO the normal measurement
ground connections.
• Disconnect circuit power and discharge all high voltage capacitors before connecting the instrument to make
resistance, continuity, or diodes measurements.
• Do not rely on questionable, erratic, or obviously erroneous test informations or results. Make sure that all
connections and data entry information are correct and that the test procedure was taken correctly. Do not use
suspicious test information or results for diagnostics.
• Do not touch ignition coils, coil terminals, and spark plugs while operating. They emit high voltages.
• Do not puncture an ignition wire to connect the instrument, unless specifically instructed by vehicle manufacturer.
• Be sure the ignition is in the OFF position, headlights and other accessories are off, and doors are closed before
disconnecting the battery cables. This also prevents damage to on-board computer systems.
IF the ground of the instrument is connected to a voltage higher than 42 V peak (30 V rms);
• Use only the standard test leads set supplied with the instrument.
• Do not use conventional exposed metal BNC or BANANA PLUG connectors.
• Use only one ground connection to the instrument (GROUND LEAD of the CH A’s shielded test lead).
• Remove all probes and test leads that are not in use.
• Connect the power adapter to the AC outlet before connecting it to the instrument.
Follow the general safety guidelines below;
• Avoid working alone.
• Inspect the test leads for damaged insulation or exposed metal. Check test lead continuity. Replace damaged
leads before use.
• Do not use the instrument if it looks damaged.
• Select the proper function and range for your measurement.
• When using the probes, keep your fingers away from probe contacts.
Keep your fingers behind the finger guards on the probes.
2-2
2-3
3. AUTOMOTIVE ELECTRONIC SIGNALS
3.1 PRIMARY SIGNAL TYPES FOUND IN MODERN VEHICLES
DECLARATION OF CONFORMITY
for
FINEST 1005 Automotive Scope / GMM
Once you become familiar with basic vehicle waveforms it will not matter how new or old the vehicle is, or even who
manufactured the vehicle. You will be able to recognize signals that do not look right.
Direct Current (DC) Signals
Manufacturer
Fine Instruments Corporation
341-5, Songnae-Dong, Sosa-Gu
Bucheon, Kyunggi-Do
Republic of Korea
Statement of Conformity
Based on test results using appropriate standards, the product is in conformity
with
Electromagnetic Compatibility Directive 89/336/EEC
Low Voltage Directive 73/23/EEC
The types of sensors or devices in a vehicle that produce DC signals are:
• Power Supplies - Battery voltage or sensor reference voltages created by the PCM.
• Analog sensor signals - engine coolant temperature, fuel temperature, intake air temperature, throttle position,
EGR pressure and valve position, oxygen, vane and hot wire mass airflow sensors, vacuum and throttle switches
and GM, Chrysler and Asian manifold absolute pressure (MAP) sensors.
Alternating Current (AC) Signals
The types of sensors or devices in a vehicle that produce AC signals are:
• Vehicle speed sensors (VSS)
• Antilock brake system wheel speed sensors (ABS wheel speed sensors)
• Magnetic camshaft (CMP) and crankshaft (CKP) position sensors
• Engine vacuum balance viewed from an analog MAP sensor signal
• Knock sensors (KS)
Frequency Modulated Signals
Sample tests
Standards used:
EN 61010-1/A2 (1995) & EN 61010-2-031 (1994)
Safety Requirements for Electrical Equipment
for Measurement, Control, and Laboratory Use
EN 61326 : 1997+A 1+A2 (1998)
Electromagnetic Compatibility Generic Emission & Immunity Standard
The tests have been performed by TÜV PRODUCT SERVICE GMBH.
This Conformity is indicated by the symbol CE, i.e.
“Conformité Européenne”
2-4
The types of sensors or devices in a vehicle that produce Frequency Modulated signals are:
• Digital mass airflow (MAF) sensors
• Ford’s digital MAP sensors
• Optical vehicle speed sensors (VSS)
• Hall Effect vehicle speed sensors (VSS)
• Optical camshaft (CMP) and crankshaft (CKP) position sensors
• Hall Effect camshaft (CMP) and crankshaft (CKP) position sensors
Pulse Width Modulated Signals
The types of circuits of devices in a vehicle that produce Pulse Width Modulated signals are:
• Ignition coil primary
• Electronic spark timing circuits
• EGR, purge, turbo boost, and other control solenoids
• Fuel injectors
• Idle air control motors and solenoids
Serial Data (Multiplexed) Signals
The types of circuits or devices in a vehicle that produce Serial Data signals are:
• Powertrain control modules (PCM)
• Body control modules (BCM)
• ABS control modules
• Other control modules with self diagnostics or other serial data / communications capability
3-1
3.2 CRITICAL CHARACTERISTICS OF AUTOMOTIVE ELECTRONIC SIGNALS
To minimize this possible interference with the oscilloscope, keep these tips and suggestions in mind:
Most interference will be picked up by the oscilloscope test leads.
Only 5 critical characteristics (or information types) given from the Automotive electronic signals are important
because the vehicle’s PCM considers them important.
• Amplitude - The voltage of the electronic signal at a certain point in time.
• Frequency - The time between events, or cycles, of the electronic signal, usually given in cycles per second
(Hertz).
• Shape - The signature of the electronic signal, with its unique curves, contours, and corners.
• Duty Cycle - The on-time, or relative pulse width of the electronic signal.
• Pattern - The repeated patterns within the signal that make up specific messages, like synchronous pulses that
tell the PCM that cylinder #1 is at TDC (Top Dead Center), or a repeated pattern in the serial data
stream that tells the scan tool the coolant temperature is 212 F (or 100 C), etc.
3.3 THE GOLDEN RULE OF ELECTRONIC SYSTEM DIAGNOSIS
For the vehic le’s computer sy stem to function properly, it mus t send and receiv e s ignals wi th the critical
characteristics it was designed to communicate with.
• Route the test leads away from all ignition wires and components whenever possible.
• Use the shortest test leads possible, since other test leads may act as an antenna and increase the potential for
interference, especially at higher frequency levels that are found when probing near the vehicle¡¯s on-board
computer.
• With the potential for RF interference in the engine compartment, if possible, use the vehicle chassis as ground
when connecting the oscilloscope test leads. In some cases the engine block can actually act as an antenna for
the RF signals.
• The test leads are a very important part of any oscilloscope. Substituting other leads in both length and
capability may alter the signals on your display.
The oscilloscope can also pick up interference like the test leads.
• Because the oscilloscope circuits are so sensitive, and therefore powerful, do not place the oscilloscope directly
on ignition wires or near high energy ignition components, like coil packs.
• If you are using the AC or DC charger/adaptor to power the oscilloscope, keep the external power leads far
away from the engine and ignition if possible.
Each of the primary types of electronic signals use the critical characteristics to establish electronic communication.
They each use different combinations of the critical characteristics to communicate. Here’s a list of which critical
characteristics each of the primary signal types uses to communicate:
• Direct Current signals use Amplitude only.
• Alternating Current signals use Amplitude, Frequency, and Shape.
• Frequency Modulated signals use Amplitude, Frequency, and Shape.
• Pulse Width Modulated signals use Amplitude, Frequency, Shape, and Duty Cycle.
• Serial Data signals use Amplitude, Frequency, Shape, Duty Cycle, and Pattern.
The list will help to give you a better understanding of which signal types use which critical characteristics to do their
electronic communication. The above rules work very well and hold up in most cases, but there are exceptions to its
rules. Not many, but a few.
It may come as no surprise to some that serial data signals are the most complex signals in the vehicle. They use all
5 critical characteristics to communicate with. Thus, they take a special analyzer to decode them - one very familiar
to most technicians - the scan tool.
3.4 SIGNAL PROBING WITH AN OSCILLOSCOPE
The engine compartment of a running vehicle is a very unfriendly environment for automotive signals to live.
Temperature extremes, dirt and corrosion, and electrical leaks, or noises from the high voltage pulses generated
from a typical ignition system can produce interference that can contribute significantly to the cause of many
driveability problems.
When you are probing components, sensors and circuits, be aware that the electrical noises from today’s high output
ignition systems can produce an RF energy that is similar to a radio station. Since oscilloscopes are so sensitive,
this interference can actually override the signals you are trying to capture and give you a false reading on the
display.
3-2
3-3
4. GETTING STARTED
4.1 PRODUCT DESCRIPTION
This instrument is a battery-operated 2-channel lab scope, advanced true rms graphing multimeter (GMM) designed
expressly for use in the automotive service market. The main purpose of this instrument is to provide advanced
troubleshooting capabilities for automotive service technicians in an easy-to-operate format.
This instrument offers the following features:
•
•
•
•
•
•
•
•
•
•
A 25 Mega-sample/Second (one channel minimum) sample rate for rapid data updates.
Lab scope signal patterns.
True RMS Graphing Multimeter (GMM) measurements and graphs.
A unique “Glitch Snare” mode which captures, displays and optionally saves abnormal signal patterns in the
Scope mode of the COMPONENT TESTS only when they occur.
Preset tests that enable the user to check the majority of automotive sensors, actuators and systems easily and
quickly.
Powerful built-in reference information for each preset test which includes a test procedure showing how to
connect to the circuit, a normal reference signal pattern, theory of operation and troubleshooting tips.
Menu-driven interface has automatic configurations for most of non-preset tes ts, s o you will find that the
instrument is easy-to-use.
The Secondary Ignition Single function displays the waveform along with the spark voltage, RPM, burn time and
burn voltage.
The Diesel function allows you to set injection pump timing and RPM using the optional Diesel accessories.
USB interface supports updates for code and data.
Even though this instrument is designed to configure itself to almost any test, it is very important that you continue
through this manual and carefully read and understand the capabilities of this instrument before attempting actual
measurements.
4-1
The fastest way to set up the instrument to test most automotive devices(sensors, actuators...) and circuits is
to choose from one of the built in COMPONENT TESTS. Each test places the instrument in a configuration best
suited to display signals for the chosen device or circuit.
4.2 QUICK TOUR
Powering the Instrument
Press a Four Way arrow key to position the HIGHLIGHT BAR over the COMPONENT TESTS menu choice and
press
to select.
Press the POWER key to turn the instrument on. The instrument beeps once and turns on.
At power on, the instrument displays the VEHICLE DATA menu as shown in Figure 1.
MAIN MENU
VEHICLE DATA MENU
COMPONENT TESTS
CYLINDERS : 4
Press the F1 key to
accept the displayed
settings.
CYCLES
:4
BATTERY
: 12 V
IGNITION
: CONV
OK
SCOPE
Default settings:
You can change the
settings to match with
the vehicle under test.
GRAPHING MULTIMETER
VEHICLE DATA
INSTRUMENT SETUP
SELECT
Press the F5 key to
change the highlighted
selection.
BACK
SELECT
Figure 2. Main Menu
Figure 1. Vehicle Data Menu at Power-On
From the resulting COMPONENT TESTS menu, select IGNITION from the test group. Then, press
Changing the Power-On Display
Use “Instrument Setup” menu option to change the Power-On display from VEHICLE DATA MENU(default) to the
user’s last display.
to select.
COMPONENT TESTS MENU
SENSORS
Resetting the Instrument
ACTUATORS
If you want to restore the instrument settings as delivered from the factory, do the following:
1. Turn the instrument off by pressing the POWER key.
2. Keep
depressed while you turn the instrument on by pressing the POWER key. Release
hear a double beep to indicate that the Master Reset has been executed.
ELECTRICAL
. You will
NOTE
The Master Reset clears all memory data.
Performing a Navigation Exercise
IGNITION
BACK
SELECT
Figure 2. Selecting IGNITION Menu
To display the MAIN MENU while a measurement display is active, press the MENU key to display the MAIN MENU
as shown in Figure 2. This menu lists all of the tests, displays and setups available:
•
•
•
•
•
4-2
COMPONENT TESTS
SCOPE
GRAPHING MULTIMETER
VEHICLE DATA
INSTRUMENT SETUP
4-3
Next, press the Four Way arrow keys to highlight PIP/SPOUT. Press
to test the input signal(s).
to select. Now, the instrument is ready
• Press the SAVE key to save the present screen in the next memory location.
• Press the RECALL key to recall the screen last saved in memory.
• Press the CLEAR key to clear all the memory locations.
• Press the BACK key to resume measuring or to return to the previous display.
Power Sources and Charging the Battery
The instrument can be powered from any of the following sources:
• Internal Battery Pack
This is a rechargeable Ni-MH Battery Pack already installed.
Figure 3. Example of Result Display
Press
to remove the Reference Waveform(s).
• Power Adapter
The Power Adapter / Battery Charger powers the instrument from a standard AC outlet and charges the installed
Ni-MH Battery Pack.
The instrument can be used during battery charging. Verify that your local line voltage is appropriate before using
the Power Adapter to power the instrument.
• Charging Adapter (Optional)
This adapter charges the instrument’s Ni-MH Battery Pack from a standard 12 V DC cigarette lighter outlet
Press
to enter the scope into the test mode and continue to display the Reference Waveform(s) for
comparison to a live waveform(s).
WARNING
TO AVOID ELECTRICAL SHOCK, USE A BATTERY CHARGER THAT IS
AUTHORIZED FOR USE WITH THE AUTOMOTIVE SCOPE.
For this demonstration, view the following reference information specific to the test selected. Reference information
is available at any time by pressing the HELP key. Press
when finished viewing each area under the HELP
menu.
Test Procedure - Tells how to hook up the scope, and what accessories to use. Describes how to stimulate the
sensor or operate the circuit to obtain a diagnostic waveform.
Reference Waveform (REF WFM) - Shows a typical good or normal signal pattern. Describes significant waveform
features or variations.
Theory of Operation - Explains what the sensor or circuit does and the important signals involved.
Troubleshooting Tips - Tells the symptoms caused by the defective component and how to fix up the problems.
Function Information - Explains about the particular function keys that can be used for the selected test for certain
COMPONENTS.
Pressing
moves back through the previous displays to return to active tests or to test selected menus.
After you choose a preset test, you may change most instrument settings to get a better look at the signal. You can
even change to different display modes, moving between Scope mode and GMM mode as needed, by pressing the
GMM MODE function key in the Scope display or the SCOPE MODE function key in the GMM display.
You can hold the information in memory at any time by pressing the HOLD key to freeze the display. Notice that
SAVE, RECALL, and CLEAR function key label is displayed above the Function key on the bottom display after
is pressed.
USE the following procedure to charge the battery pack and to power the instrument:
1. Connect the Power Adapter / Battery Charger to line voltage.
2. Insert the Power Adapter’s low voltage plug into the Power Adapter connector of the instrument. You can now use
the instrument while the Ni-MH batteries are being charged slowly. If the instrument is turned off, the batteries are
charged more quickly.
During operation, when the batteries are low, a battery symbol
appears on the top right of the display. When
this occurs, replace or recharge the internal battery pack immediately.
3. The Power Adapter uses a trickle charging method for the batteries, so no damage can occur even if you leave it
charging for long periods.
Typically a 8 hour recharge during instrument working and a 4 hour recharge during instrument off provides the
instrument with the maximum use of 4 hours.
Auto-Power-Off
When operated on batteries (no adapter connec ted), the instrument c onserves power by turning itself off
automatically, if you have not pressed a key for 30 minutes or if the battery level is too low. The instrument turns back
on if the POWER key is pressed.
The Auto-Power-Off will be disabled automatically when enters the GMM mode.
You can adjust the Auto-Power-Off time between 5 minutes and 120 minutes to use “Instrument Setup” menu option.
4-4
4-5
ITEM
4.3 FRONT PANEL CONTROLS
KEYS
DESCRIPTION
Sets automatic ranging on and off (toggle).
When on, t he top right display shows A UTO. When t his f unction is set on, it
searches for the best range and time base settings and once f ound it t racks the
signal. When this function is off, you should manually control ranging.
Key Control Overview
Display area for the
Function Key Labels
Turns the LCD Backlight on and off.
Turns the power on and off (toggle). When you turn the power on, previous settings
are activated.
Allows you to use cursors for measurements on waveforms. A cursor is a vertical
line or a horizontal line that you can move over the waveform like a ruler to measure
values at specific points.
Freezes the display (HOLD is displayed at the top right). Also displays a menu to
save or recall screens or to clear the memory.
Takes you back to the main navigation menu.
¨ì
4.4 MEASUREMENT CONNECTIONS
Figure 4. Key Control Overview
Key Descriptions
ITEM
KEYS
to
DESCRIPTION
These are the Function keys.
The function assigned to each key is indicated by the Function Key Label displayed
above the key on the bottom display.
Displays information about the highlighted menu choice during menu selection.
Displays information about the function keys when a selected test is running.
Figure 5. Measurement Connections
Performs one of the following actions:
• Moves up and down through menu choices.
• Moves a waveform up and down.
• Moves a voltage cursor up and down.
• Adjusts the trigger level when you are in the SCOPE mode.
Performs one of the following actions:
• Moves a waveform right and left.
• Moves a time cursor left and right.
Ranges amplitude up and down for both channels (CH A & CH B).
Ranges Time Bass up and down for both channels (CH A & CH B).
4-6
INPUT A (Red)
INPUT A is used for all single channel measurements, sometimes combined with use of the other inputs, Various
test leads and adapters are required depending on the type of measurement selected.
INPUT B (Yellow)
INPUT B is used in conjunction with INPUT A.
• In COMPONENT TEST mode,
for DUAL O2 SENSOR measurements.
for PIP/SPOUT measurements.
for ADVANCE measurements.
• In SCOPE mode you can use the instrument as a dual trace oscilloscope with INPUT A and INPUT B connected.
4-7
COM, TRIGGER
Used as external trigger for probes with dual banana plugs, such as the RPM Inductive Pickup.
3. Measurement faults or short circuit with the DUAL INPUT SCOPE mode. This occurs when you perform floating
measurements with grounding at different points.
INPUT A
INPUT A
TRIGGER (as single input)
Used in SCOPE mode to trigger (or start) acquisitions from an external source.
INPUT B
INPUT B
COM (as single input)
Used for safety grounding when the Capacitive Secondary Pickup is connected to the ignition system.
(Incorrect Grounding)
S hort Circuit by Grounding on Dif ferent
Potentials
WARNING
T O AVO ID ELECTRICAL SHO CK, CO NNECT THE COM INPUT OF THE
INSTRUMENT TO VEHICLE GROUND BEFORE CLAMPING THE CAPACITIVE
SECONDARY PICKUP(SUPPLIED) ON THE IGNITION WIRES.
THIS GROUND CONNECTION IS REQUIRED IN ADDITION TO THE NORMAL
MEASUREMENT GROUND CONNECTIONS.
For other tests, the COM input should not be connected to engine ground when the probes have their own ground
connection at the probe end. See the GROUNDING GUIDELINES.
(Correct Grounding)
Grounding at One Point
Instrument Grounding for Measurements on the Ignition System
For the instrument safety, connect the COM input to engine ground before you perform measurements on the
ignition system with the Capacitive Secondary Pickup.
To prevent ground loops, connect all ground leads to the SAME engine ground.
4.6 DISPLAY
4.5 GROUNDING GUIDELINES
The instrument presents “live” measurement data in the form of Scope and GMM displays. Temporary displays are
used to display frozen and saved measurement data.
Incorrect grounding can cause various problems:
1. A ground loop can be created when you use two ground leads connected to different ground potentials. This can
cause excessive current through the grounding leads.
INPUT A
INPUT A
COM
(Incorrect Grounding)
Ground Loop by Double Grounding on
Different Grounds
(Correct Grounding)
Shield of Test Lead Connected to Ground
Menus are provided as a means of choosing instrument’s measurement configuration. To display the MAIN MENU
while a measurement display is active, press the MENU key at any time.
Menu Display
When you press MENU key, the instrument displays the MAIN MENU. To select a menu option, use the Four Way
arrow keys to move the highlight bar to the desired item. Then press
. To exit the MAIN MENU and return to
the previous setup, press
. During menu selection, the bottom part of the screen is used to display the function
key menu.
MAIN MENU
COMPONENT TESTS
SCOPE
2. Excessive noise shown on the measured signal.
VEHICLE DATA
COM
INSTRUMENT SETUP
(Incorrect Grounding)
Noise Pickup on Unshielded Ground Lead
4-8
GRAPHING MULTIMETER
INPUT A
BACK
SELECT
4-9
COMPONENT TESTS
COMPONENT TESTS MENU
SENSORS
ACTUATORS
ELECTRICAL
IGNITION
(or DIESEL)
Leads to a series of predefined setups to test most common sensors and circuits.
SCOPE
Use Single Input Scope mode if you want to measure a single signal, INPUT B is turned off. Use Dual Input Scope
mode if you want to simultaneously measure two waveforms - one on INPUT A and the other on INPUT B.
GRAPHING MULTIMETER
INPUT A is used for all GMM(Graphing Multimeter) tests. The probes and test leads to be used depend upon the
type of test performed.
VEHICLE DATA
Set the vehicle data to match the vehicle under test. If they do not match, you could get incorrect test results and
may not be able to select all available tests for this vehicle. This menu appears at power-on as the start-up display
due to its importance.
INSTRUMENT SETUP
Use this menu option to set the following:
• Optimal settings for display.
• Filter function enabled and disabled.
• Auto-Power-Off enabled and disabled and adjusting the Auto-Power-Off time.
• Language for menus and HELP text.
• Version Information of current software.
• Scope Calibration when using the scope in abnormal operating environments.
Menu Overview
Figure 6. shows an overview of available test functions, displays and setups from the MENU key. The MAIN MENU
choices represent categories of applications that are listed in sub-menus as shown in the following figure.
MAIN MENU
COMPONENT TESTS
SCOPE
GRAPHING MULTIMETER
VEHICLE DATA
INSTRUMENT SETUP
GRAPHING MULTIMETER MENU
VOLT DC, AC
OHM/DIODE/CONTINUITY
RPM
FREQUENCY
DUTY CYCLE
PULSE WIDTH
DWELL
IGNITION PEAK VOLTS
IGNITION BURN VOLTS
IGNITION BURN TIME
INJECTOR PEAK VOLTS
INJECTOR ON TIME
AMP DC, AC
TEMPERATURE C F
LIVE
FILTER MENU
INPUT A : OFF
INPUT B : OFF
VEHICLE DATA MENU
CYLINDERS : 4
CYCLES
:4
BATTERY
: 12 V
IGNITION
: CONV
IGNITION MENU
CONV (default)
DIS
DIESEL
INSTRUMENT SETUP MENU
DISPLAY OPTIONS
FILTER
AUTO POWER OFF
LANGUAGE
VERSION INFORMATION
SCOPE CALIBRATION
LANGUAGE MENU
LANGUAGE : ENGLISH
DISPLAY OPTIONS MENU
USER LAST SETUP : OFF
CONTRAST : 4
GRATICULE : ON
HORIZ TRIG POS : 10 %
ACQUIRE MODE : PEAK DETECT
AUTO POWER OFF MENU
AUTO POWER OFF : ON
AUTO POWER OFF TIME : 30 min
DIESEL MENU
DIESEL INJECTOR
ADVANCE
SENSOR TESTS MENU
ABS Sensor (Mag)
O 2S Sensor (Zirc)
Dual O2 Sensor
ECT Sensor
Fuel Temp Sensor
IAT Sensor
Knock Sensor
TPS Sensor
CKP Magnetic
CKP Hall
CKP Optical
CMP Magnetic
CMP Hall
CMP Optical
VSS Magnetic
VSS Optical
MAP Analog
MAP Digital
MAF Analog
MAF Digi Slow
MAF Digi Fast
MAF Karman-Vrtx
EGR (DPFE)
ACTUATOR TESTS MENU
Injector PFI/MFI
Injector TBI
Injector PNP
Injector Bosch
Mixture Cntl Sol
EGR Cntl Sol
IAC Motor
IAC Solenoid
Trans Shift Sol
Turbo Boost Sol
Diesel Glow Plug
ELECTRICAL TESTS MENU
Power Circuit
V Ref Circuit
Ground Circuit
Alternator Output
Alternator Field VR
Alternator Diode
Audio System
DC Switch Circuits
IGNITION TESTS MENU
PIP/ SPOUT
DI Primary
DI Secondary
DIS Primary
DIS Secondary
Figure 6. Automotive Test Functions & Setups Overview
4-10
4-11
Getting Reference Information for the Selected Test
Screen Displays
Reference information is available at any time by pressing the HELP key.
Press
when finished viewing each area under the HELP menu.
HELP MENU
TEST PROCEDURE
REFERENCE WAVEFORM
THEORY OF OPERATION
TROUBLESHOOTING TIPS
Figure 8. Single and Dual Input scope in COMPONENT TESTS
FUNCTION INFORMATION
BACK
Use Dual Input Scope mode if you want to simultaneously measure two waveforms - one on INPUT A and the other
on INPUT B.
SELECT
Use SINGLE INPUT SCOPE mode if you want to measure a single signal, INPUT B is turned off.
Use DUAL INPUT SCOPE mode if you want to simultaneously measure two signals.
Getting Information About the Function Keys During a Running Test
Using the Function keys
When you press this key during a running test, you get information about the function keys that can be used
for the test.
For each test, one or more Function Key Labels are displayed, depending on the sub-selections possible. The
Labels indicate what the keys do when you press them. (See the following example.)
IGNITION DI SECONDARY
For example,
BACK
Page 1 of 2
FAST
KEYS
UPDATE TRIG LVL
VEHICLE Giv es a list of options to define
DATA
the type of vehicle under test.
CYLINDER S IN GLE -displays the ignition
SINGLE pattern of one single cylinder.
PARADE
BACK
P AR AD E-displays the ignition
pattern of all cylinders in firing
order.
PAGE
DOWN
VEHICLE
DATA
CYLINDER
SINGLE
FAST
KEYS
UPDATE TRIG LVL
FAST
Turns all readings off to make the
UPDATE measur em ent faster and m ore
reliable.
KEYS You can adjust trigger level for a
TRIG LVL stable display by using the four
way arrow keys.
BACK
Figure 7. Information About the Function keys
4-12
CYLINDER
PARADE
Function Key Labels
RUN
Function keys
Page 2 of 2
Function Info
Function Info
CYLINDER
SINGLE
WFM
ERASE
DI Primary
DI Primary
VEHICLE
DATA
VEHICLE
DATA
Figure 8. Function Key Labels for SECONDARY IGNITION
Pressing a function key that has no label has no effect.
The same Function Key Label can appear in several tests and it performs a similar function.
Examples of Function Key Labels
CYLINDER
PARADE
SINGLE
Two separate functions can be allowed to the same function key.
You can use the function key to toggle between the functions.
When you press
, you can select between PARADE and SINGLE cylinder test.
PAGE
UP
OHM
CONTINUTY
OPEN
CLOSE
When you press
, OHM becomes the active function. When
you press
, Diode (
) becomes the active function. When
you pres s
, OPEN CO NTINUITY becomes the active
function. Pressing
, CLOSE CONTINUITY becomes the
active function.
4-13
KEYS
RANGE A
MOVE A
TRIG LVL
The
KEYS icon indicates that you can use the Four Way arrow keys to change Volt & Time
ranges, to move the waveform position, and to adjust the trigger level for either INPUT A or INPUT B.
And also you can use the Four Way arrow keys to adjust the sensitivity level in the COMPONENT
TEST (IGNITION mode).
Press
to toggle among RANGE A , MOVE A , and TRIG LVL for INPUT A, or among
RANGE B , MOVE B , and TRIG LVL for INPUT B.
KEYS
CURSOR 1
CURSOR 2
The
icon indicates that you can use the Four Way arrow keys to move CURSOR 1 (if CURSOR 1
is highlighted) or move CURSOR 2 (if CURSOR 2 is highlighted). Press the function key to toggle
between CURSOR 1 and CURSOR 2.
REPEAT
TEST
This Label is displayed for SINGLE DISPLAY tests, for example the knock sensor test. To repeat the
test, press the function key, then perform the required action. The knock sensor test is a single shot
measurement, which means that the signal from the knock sensor is displayed only once. To get a new
test result, you have to press the
key and then tap the engine block or the sensor again. You
may have to readjust the vertical RANGE to get an optimal waveform.
INVERT
OFF
ON
To change to the opposite polarity. Puts the waveform display upside down.
GMM
MODE
This Label is displayed in the Scope test mode of the COMPONENT TESTS only.
To change from Scope test mode to GMM test mode, press the function key.
SCOPE
MODE
This Label is displayed in the GMM test mode of the COMPONENT TESTS only.
To change from GMM test mode to Scope test mode, press the function key.
GLITCH
SNARE
This Label is displayed in the Scope test of the COMPONENT TESTS only.
To capture, display, and optionally save abnormal signal patterns when they occur, press the function
key.
4-14
4.7 SCOPE MODE
SCOPE mode provides a display of signal patterns from
either CH A or CH B over times ranging from 1 µs to 50
seconds per division, and for voltage ranges from 50 mV
to 300 V full scale.
The display may be triggered at all time settings, and
trigger slope and level may be adjusted as needed. The
scope display is defaulted in Glitch Detect mode to display
even the narrowest glitches.
The SINGLE INPUT SCOPE mode (Component Tests
onl y) provi des for the di splay of up to four meter
measurements above the waveform viewing area.
Figure 9. Scope Mode Indicators
Indicate meter measurement function.
Indicate HOLD function enabled.
Backlit indicator.
Low battery indicator.
Indicate SCOPE mode.
Indicate AUTORANGING mode.
Indicate FILTER function enabled.
Indicate time base per division.
Indicate trigger level voltage.
Blank if DC, ~ if AC.
Indicate trigger slope (rising or falling).
Indicate AUTO triggered.
Indicate voltage per division and coupling.
Blank if DC, ~ if AC,
if GND.
Indicate signal source channel.
Indicate INPUT A zero level.
Indicate trigger location.
4-15
5. INSTRUMENT OPERATION
4.8 GMM (GRAPHING MULTIMETER) MODE
GMM mode plots the results of signal measurements such
as frequency as the values change with time. The time
range in GMM mode may be set manually from 5 seconds
to 24 hours per display.
From the MAIN MENU, you can choose 3 independent instrument test modes:
Ranges for the vertical scale may also be set manually,
and the available range depends upon the measurement
being displayed.
• COMPONENT TESTS
• SCOPE
• GRAPHING MULTIMETER
Where possible, measurements plotted in GMM mode are
performed on a cycle-by-cycle basis, resulting in extremely
fast response.
The fastest way to set up the instrument to test most devices and circuits is to choose from one of the built in
CO MPO NENT TESTS. These tests preset the instrument to either Single or Dual Input Scope mode. Most
instrument settings may be adjusted manually once you have chosen a Component Test, enabling you to fine tune
settings to get a better look at the signal. Changes you make to settings specific to a Component Test are
temporary, and are restored to their preset values each time another test is chosen. When configured for a specific
Component Test, the instrument displays the reference waveform and data as well as the name of the test on the
bottom display along with the Function Key Labels specific to the test chosen.
This mode is very suitable to find faults in slowly changing
processes.
5.1 INSTRUMENT TEST MODES
Figure 10. GMM Mode Indicators
Indicate meter measurement functions.
NOW: Most recent meter reading.
MAX: Maximum value since last reset.
MIN: Minimum value since last reset.
Indicate HOLD function enabled.
Low battery indicator.
Indicate GMM mode.
Indicate AUTORANGING mode. Pressing
sets automatic ranging on. Using the Four Way arrow keys for
ranging turns automatic ranging off and extinguishes AUTO.
Indicate voltage per division.
Indicate time per display.
Indicate signal source channel.
If you prefer total control over your instrument configuration, choose SCOPE test mode from the MAIN MENU.
Settings for SCOPE are separately preserved and restored each time you choose SCOPE from the MAIN MENU.
Thes e settings are not affected when you choose a Component Test. This is also true for the GRAPHING
MULTIMETER test mode, so in effect they are “custom” setups.
5.2 SCOPE DISPLAYS
Using Single and Dual Input Scope Mode
The instrument can be configured to show scope displays for either CH A or CH B signals: In DUAL INPUT SCOPE
mode, both CH A and CH B may be displayed at the same time.
Use SINGLE INPUT SCOPE mode if you want to measure a single signal, INPUT B is turned off.
Use DUAL INPUT SCOPE mode if you want to simultaneously measure two signals.
SCOPE
4-16
5-1
Function keys and Result Screen
SCOPE displays are defaulted in “Glitch Detection” mode. This means that all signals are sampled at the full sample
rate of the instrument and the minimum and maximum excursions are always shown on the display, even if the
horizontal time setting is too slow to show each individual sample interval. In this mode, every noise spike of 40 ns
and wider will be displayed.
INPUT A Control Functions
When you are in SCOPE, you can control the INPUT A functions as follows:
SCOPE
INPUT
A
INPUT
B
SINGLE
SHOT
TRIGGER
KEYS
MOVE A
COUPLING
DC
INVERT
OFF
KEYS
MOVE A
SCOPE INPUT A
Figure 12. Scope Display
Automatic ranging and signal tracking is on.
Pressing
sets automatic ranging and signal tracking on and off.
If on, AUTO is displayed, if off, AUTO is disappeared.
Trigger level voltage of INPUT A.
Time base range.
Trigger icon. Indicates trigger slope ( indicated negative slope).
Auto triggered.
INPUT A range setting.
INPUT B range setting.
Indicates signal source channel A.
INPUT A zero level.
Indicates trigger location.
Indicates signal source channel B.
INPUT B zero level.
Making an Easy Setup
When you enter the scope mode, the instrument automatically optimizes vertical range, time base, and trigger
settings to create a stable display. (Autoranging is default)
• When you press one of the Voltage and Time control keys, the instrument switches to manual control of range
and trigger settings.
• Press
to toggle between automatic and manual control of range and trigger settings. Use this key if you
cannot get a stable display using manual control.
5-2
BACK
Press t o return to the
previous menu.
Press to invert the INPUT A
signal waveform.
Press to select DC, AC or GROUND coupling.
DC Coupling allows you to measure and display both the DC and AC components of a signal. AC Coupling blocks
the DC component and passes the AC component only. GND grounds the input of the instrument internally.
INPUT B Control Functions
When you are in SCOPE, you can control the INPUT B functions as follows:
SCOPE
INPUT
A
INPUT
B
SINGLE
SHOT
TRIGGER
KEYS
MOVE A
COUPLING
DC
INVERT
OFF
KEYS
MOVE B
SCOPE INPUT B
BACK
DISPLAY
OFF
Press to turn INPUT B on or off.
Press to invert the INPUT B
signal waveform.
Press to select DC, AC, or GROUND coupling.
When you entered SINGLE DISPLAY, INPUT B is turned off by default, but you can turn it on by pressing F2.
5-3
Single-Shot Function
AUTO versus NORMAL acquisitions
Normally the scope mode automatically repeats the measurements to acquire waveforms by the recurrent
acquisition mode.
SINGLE-SHOT allows you to perform single acquisition to snap events that occur only once. REPEAT TEST (
)
is used to start a next single acquisition.
If you select AUTO, the instrument always performs acquisitions, i.e., it always displays the signals on the input. If
NORMAL is selected, a trigger is always needed to start an acquisition.
If you select
If you select
SCOPE
INPUT
A
INPUT
B
SINGLE
SHOT
TRIGGER
TRIGGER SLOPE
KEYS
MOVE A
, trigger occurs at a rising(positive) edge of the signal.
, trigger occurs at a falling(negative) edge of the signal.
TRIGGER SOURCE
If you select TRIGGER SOURCE A (default), acquisitions start when the signal on INPUT A fulfills the selected
trigger conditions.
If you select TRIGGER SOURCE TRIG, the previous rule is valid for the signal on the TRIGGER input.
SCOPE SINGLE SHOT
SINGLE
OFF
BACK
REPEAT
TEST
KEYS
MOVE A
TRIGGER LEVEL
Press to repeat a single-shot acquisition.
This function allows you to set the level that the signal must cross to trigger acquisitions.
Normally, after you enter SINGLE or DUAL INPUT SCOPE mode, the AUTO RANGE function automatically sets
and maintains an optimal trigger level as the signal changes.
Move the
trigger level icon (or
icon) to the desired level by using
and
keys.
Trigger Control Functions
TRIGGER is a set of conditions that determine whether and when acquisitions start. The following will determine the
trigger conditions:
•
•
•
•
Select INPUT A or TRIGGER as the TRIGGER SOURCE input.
Use AUTO or NORMAL acquisitions.
Select trigger to occur on a positive or negative SLOPE of the signal.
SET the trigger LEVEL.
You can use the INSTRUMENT SETUP menu to set the Horizontal Trigger Position (Horiz Trig Pos) to three
different horizontal locations on the display, depending on whether you want to see conditions that led up to the
trigger event, or those following it.
• 10 % Trigger located close to left edge of display.
• 50 % Trigger located at center display.
• 90 % Trigger located close to right edge of display.
If you change the trigger level, the AUTO RANGE function is turned off.
Use 10 % Trigger to show events which happen after the trigger.
Use 90 % Trigger to show events leading up to the trigger.
When you are in SCOPE, you can control the trigger functions as follows:
Noise Filter Function
SCOPE
INPUT
A
HORIZONTAL TRIGGER POSITION (HORIZ TRIG POS)
INPUT
B
SINGLE
SHOT
TRIGGER
KEYS
TRIG LVL
Press to select the trigger level adjustment.
There are cases where you may want to filter out noises in order to see a better signal. This can be especially true
when ignition noise is present. The instrument provides a noise filter for each input channel which reduces the
bandwidth from its normal 5 MHz to 2 KHz. You can enable or disable CH A Filter or CH B Filter using the
INSTRUMENT SETUP menu. When enabled, the FILTER indicator appears on the screen.
SCOPE TRIGGER
BACK
MODE
AUTO
SLOPE
SOURCE COUPLING
A
DC
Press to select DC or AC.
Press to select AUTO or
NORMAL acquisitions.
Press to select the trigger source.
Press to select the trigger slope.
5-4
5-5
Cursor Key Function
For VOLTS CURSORS,
Volts dif feren ce b etw een C URSO R 1 a nd
CURSOR 2 positions on the INPUT A waveform.
A cursor is a vertical line or a horizontal line placed over the displayed waveform to measure values at certain points.
The instrument can measure signal details by using Cursors. This function is not possible for all tests.
Press
to display the Function key Menu for cursor operation.
If cursor operation is not possible for the actual measurement, the instrument beeps to alert you.
Two cursors (vertical lines) appear on the display.
2.4 V
The left cursor is named CURSOR 1, the right CURSOR 2.
Sa mple valu e at
VOLTS CURSOR 1
p osition on t he
waveform.
CURSORS
BACK
VOLTS 1 DELTA VOLTS 2
CURSOR
TIME
KEYS
CURSOR 1
7.2 V
Samp le va lue at
CURSOR 1 position
on th e I NPUT A
waveform.
9.8 V
Sample value a t
VO LTS CURSO R
2 posit io n o n t he
waveform.
Volts difference between CURSOR 1
and CURSOR 2 positions.
VOLTS 1
A: 130 mV
B: 24.0 mV
Sa mple value at
CURSOR 1 position
o n t he I NPUT B
waveform.
DELTA
520 mV
74 mV
Samp le va lue at
CURSOR 2 position
on th e I NPUT A
waveform.
VOLTS 2
650 mV
98.0 mV
Samp le va lue at
CURSOR 2 position
on th e I NPUT B
waveform.
Volts difference between CURSOR 1
an d CUR SOR 2 posit ion on t he
INPUT B waveform.
• Press
to set TIME cursor or VOLTS cursor or cursor OFF.
• Press
to select the cursor you want to move (1 or 2).
• Use the Four Way arrow keys to move the cursors.
Reading Test Results on the SCOPE (Component Tests only) Display
The top display shows readings related to values at the cursor positions.
For example, during a O2S SENSOR (Zirc) test, MAXIMUM and MINIMUM values are displayed as readings and
during a DUAL O2 SENSOR test MAXIMUM and MINIMUM values of the signals from the oxygen sensor before and
after the catalytic converter are displayed as readings. During a DI SECONDARY test, SPARK VOLTAGE, RPM,
BURN TIME, and BURN VOLTAGE are displayed as readings.
Measurement results can be displayed as numeric values (referred to as readings) and waveform. The types of
readings depend on the test taking place.
For TIME cursors,
TIME 1
20.4 ms
Sample value at TIME CURSOR
1 position on the waveform(s).
DELTA
48.1 ms
TIME 2
68.5 ms
Sample value at TIME CURSOR 2
position on the waveform(s).
Time difference between TIME CURSOR 1
and TIME CURSOR 2 positions.
The values you see on the display most often depend on the vehicle under test. Refer to the Service Manual of the
vehicle manufacturer.
In Chapter 6 “Automotive Diagnostics & Applications” you can find typical results of certain applications.
5.3 GMM DISPLAYS
The instrument performs cycle by cycle measurements of a variety of signal characteristics in Real Time and plots
them as they change with time as a graph. The instrument also performs certain other measurements on a
continuous basis, delivering the results for graphing 20 times per second. You can also plot the input signal directly
(as in SCOPE mode) by choosing LIVE.
The GMM display includes a meter reading showing the current value of the graphed parameter. This reading is an
average over many result values. In some cases, measurements are the maximum or minimum of a series of signal
values over the most recent 1 second interval.
The following table shows measurements which can be plotted in GMM displays and the type of graphing and
readout.
5-6
5-7
Code
Measurement
Graphing Type
DC VOLT
AC VOLT
AC+DC VOLT
OHM
DIODE
CONTINUITY
RPM
FREQUENCY
DUTY CYCLE
PULSE WIDTH
DWELL
IGNITION PEAK VOLTS
IGNITION BURN VOLTS
IGNITION BURN TIME
INJECTOR PEAK VOLTS
INJECTOR ON TIME
TEMPERATURE
LIVE
DC Average
AC Average
AC+DC Average
Ohms
Diode drop
Continuity
RPM
Frequency
Duty Cycle
Pulse Width
Dwell
Ignition Peak Volts
Ignition Burn Volts
Ignition Burn Time
Injector Peak Volts
Injector On Time
Temperature °C, °F
Live
Continuous
Continuous
Continuous
Continuous
Continuous
Continuous
Cycle by Cycle
Cycle by Cycle
Cycle by Cycle
Cycle by Cycle
Cycle by Cycle
Cycle by Cycle
Cycle by Cycle
Cycle by Cycle
Cycle by Cycle
Cycle by Cycle
Continuous
Direct input samples
Vertical and Horizontal Scaling
Using Graphing Multimeter (GMM)
MAIN MENU
COMPONENT TESTS
SCOPE
GRAPHING MULTIMETER
VEHICLE DATA
INSTRUMENT SETUP
GRAPHING MULTIMETER MENU
VOLT DC, AC
OHM / DIODE / CONTINUITY
RPM
FREQUENCY
DUTY CYCLE
PULSE WIDTH
DWELL
IGNITION PEAK VOLTS
IGNITION BURN VOLTS
IGNITION BURN TIME
INJECTOR PEAK VOLTS
INJECTOR ON TIME
AMP DC, AC
TEMPERATURE °C, °F
LIVE
Making Connections
INPUT A is used for all GMM tests just except the RPM measurement. The probes and test leads to be used depend
on the type of test performed. When you select certain GMM tests, a connection help screen will guide you by
pressing
. This tells you which probe or test lead to use and where to connect it.
Function Key Labels for Each Test
Testing Volt DC, AC
GMM VOLT
Press to measure DC
voltage.
DC
AC
AC+DC
MAX/MIN
RESET
Press to measure AC
true rms voltage.
Press to start plotting a new
graph as new samples are
acquired.
REPEAT
TEST
Press to reset maximum
and minimum.
Press to measure AC+DC true rms voltage.
Figure 13. Changing Vertical and Horizontal Ranges
The vertical and horizontal ranges in GMM displays are manually adjustable by using the Four Way arrow keys.
You can stop graphing by pressing HOLD key on the instrument.
The vertical ranges available in GMM displays vary with the measurement being graphed, and generally cover the
possible output range of the measurement.
The time ranges available for GMM displays range from 5 sec. to 24 hrs. per display.
Auto-Power-Off will not occur during the GMM mode, but to graph for periods of 5 min and longer, operate the
instrument from external power because operating endurance on internal power is limited to about 4 hours with fresh
batteries.
5-8
5-9
Testing Resistance, Diode, and Continuity
Testing Frequency, Duty Cycle, or Pulse Width
Use this menu option to test resistance, diode forward voltage, and the continuity of wiring and connections. Connect
the test lead tip and test lead ground across the object to be tested.
GRAPHING MULTIMETER
GMM OHM
FREQUENCY
CONTINUTY
OPEN
CLOSE
OHM
Press to measure
resistance.
DUTY CYCLE
PULSE WIDTH
Press to test diodes.
Press to test continuity of wiring and
connections.
If you select OPEN, the instrument beeps
when the tested connection is open.
If you select CLOSE, it beeps when the
tested connection is closed.
OFL is displayed when the resistance is outside the instrument’s maximum range. This occurs when the resistance
of the sensor is too high or the connection to the sensor is interrupted or open.
GMM FREQUENCY
GMM DUTY CYCLE
%
ms
Hz
GMM PULSE WIDTH
%
ms
Hz
Press to test the signal
frequency in Hz.
P ress t o test the dut y cycle of the
signal.
If you select , the duty cycle of the
negative-going pulse is displayed.
If you select , the duty cycle of the
positive-going pulse is displayed.
To test a diode, the instrument sends a small current through the diode to test the voltage across it. Depending on
the type of diode, this voltage should be in the range from 300 to 600 mV. A diode that has an internal short will
display about 0 V. OFL is displayed when the diode is defective or when it is connected in reverse. If you are not
certain about the polarity of the diode, try the reverse connection. If this also displays OFL, the diode is defective. A
good diode must display OFL when connected in reverse.
%
ms
Hz
Press to test the pulse width of the
signal.
If you select , the width of the
negative-going pulse is displayed.
If you select , the width of the
positive-going pulse is displayed.
Testing Secondary Ignition Peak Volts, Burn Volts, and Burn Time
Measuring RPM
The instrument automatically scales and displays the waveform on the screen. Connect the Inductive Pickup to the
COM/TRIGGER input terminals and clamp the pickup probe on the spark plug wire close to the spark plug.
GRAPHING MULTIMETER
GMM RPM
Press to adjust the built-in
4 step trigger levels.
Default is Level 2.
Press to decrease.
RPM TRIG
2
IGNITION PEAK VOLTS
n
1 720
DEFAULT
SETUP
REPEAT
TEST
IGNITION BURN VOLTS
Press to start plotting a new graph
as new samples are acquired.
IGNITION BURN TIME
Press to restore the default value
settings stored in VEHICLE DATA.
Press to increase.
GMM IGNITION PEAK VOLTS
INVERT
OFF
REPEAT
TEST
MAX/MIN
RESET
GMM IGNITION BURN VOLTS
INVERT
OFF
REPEAT
TEST
MAX/MIN
RESET
GMM IGNITION BURN TIME
INVERT
OFF
REPEAT
TEST
MAX/MIN
RESET
and
keys are used to set the number of Spark Signal Pulses to the instrument per 720 (two crank shaft
revolutions). n = 1, 2, 3, 4, 5, 6, 8, 10, or 12
Press to invert the displayed ignition
waveform.
5-10
5-11
SINGLE cylinder waveform
Testing Current
Use this menu option to test current with a current probe. (optional accessory)
SPARK VOLTAGE
GMM AMPERES
DC
AC
AC+DC
RANGE
10 mV/A
REPEAT
TEST
Press to measure DC current.
BURN VOLTAGE
P ress to measure
AC true rms current.
BURN TIME
Press to select between
10 mV/A, and 100 mV/A.
Press to measure AC+DC
true rms current.
Don’t forget to set the Current Probe to zero before using it for measurements.
Testing Injector Peak Volts and On Time
Testing Temperature
Use this menu option to test temperature with a temperature probe. (optional accessory)
GRAPHING MULTIMETER
INJECTOR PEAK VOLTS
P ress to selec t bet ween
measuring degrees Celsius
and degrees Fahrenheit.
INJECTOR ON TIME
GMM INJECTOR PEAK VOLTS
REPEAT
TEST
GMM TEMPERATURE
C
F
REPEAT
TEST
GMM INJECTOR ON TIME
MAX/MIN
RESET
REPEAT
TEST
MAX/MIN
RESET
5.4 DUAL INPUT SCOPE OPERATION
Dual Input Scope
PEAK VOLTS
Use the scope function if you want to simultaneously measure two waveforms - one on INPUT A and the other on
INPUT B.
Using Single and Dual Input Scope
INJECTION PULSE WIDTH (ON TIME)
Testing Dwell
Use SINGLE INPUT SCOPE if you want to use a single signal, INPUT B is turned off.
Use DUAL INPUT SCOPE if you want to simultaneously measure two signals.
5.5 CHANGING THE VEHICLE DATA & INSTRUMENT SETUP
The test is done with the shielded test lead on INPUT A connected to the primary side of the ignition coil.
There are two groups of setups in the Main Menu.
GMM DWELL
VEHICLE
DATA
DWELL
%
MAX/MIN
RESET
VEHICLE DATA : Use this menu option to enter the correct vehicle data, such as the number of cylinders or cycles
on the vehicle under test.
Press to select between readings in %,
degrees ( ) crankshaft rotation, or in ms.
5-12
5-13
INSTRUMENT SETUP : Use this menu option to set the following:
• Optimal settings for display.
• Optimal settings for noise filter to each INPUT.
• Auto-Power-Off ON and OFF and adjusting Auto-Power-Off Time.
• Language for menus and help text.
• Scope Calibration
DISPLAY OPTIONS MENU
USER LAST SETUP: You can change the Power-On display from VEHICLE DATA MENU (default) to the last
display having been displayed just before the instrument was turned off.
CONTRAST:
This setting, expressed as a percentage, determines the contrast ratio between display text or
graphics and the LCD background.
0 % is all white. 100 % is all black.
In practice, the percentage will be somewhere between 30 % and 80 %, to have a good
readable display.
GRATICULE:
Can be set On or Off (default is On).
A dot type graticule assists in making visual voltage and timing measurements. The distance
between adjacent dots is one division. The graticule also allows you to easily compare wave
forms between CH A and CH B and stored waveforms for timing and voltage differences.
HORIZ TRIG POS:
Horizontal Trigger Position can be set to three different horizontal locations (10 %, 50 %, or
90 %) on the display, depending on whether you want to see conditions that led up to the
trigger event, or those following it.
ACQUIRE MODE:
Can be set to Peak Detect mode (default) or Normal mode.
• Peak Detect - This is the default mode to detect glitches and reduces the possibility of
aliasing.
• Normal - Use to acquire 480 points and display them at the SEC/DIV setting.
Changing Vehicle Data
If the vehicle data do not match with the vehicle under test, you could get incorrect test results and may not be able
to select all available tests for this vehicle.
Because this menu is very important for the proper use of the instrument, it also appears at power-on as the start-up
display.
VEHICLE DATA
VEHICLE DATA MENU
CYLINDERS : 4
CYCLES
:4
BATTERY : 12 V
IGNITION : CONV
CYLINDERS: 1, 2, 3, 4(default), 5, 6, 8, 10, or 12. Specifies the number of cylinders on the vehicle under test.
CYCLES:
2 or 4(default). Specifies a two-or four-stroke engine.
BATTERY:
12 V (default) or 24 V. Specifies battery voltage.
IGNITION:
CONV (default), DIS, or DIESEL.
Specifies the type of ignition system.
CONV (conventional) indicates systems using a distributor.
DIS (or EI) indicates Distributorless Ignition Systems.
DIESEL indicates ignition systems of Diesel engine.
< Key Points >
If you probe a noisy square wave signal that contains intermittent and narrow glitches, the
waveform displayed will vary depending on the acquisition mode you choose.
Normal
Changing Instrument Setup
Peak Detect
The next two topics describe each of the types of acquisition modes and their differences.
INSTRUMENT SETUP
INSTRUMENT SETUP MENU
DISPLAY OPTIONS
FILTER
AUTO POWER OFF
LANGUAGE
VERSION INFORMATION
SCOPE CALIBRATION
Peak Detect. Use Peak Detect acquisition mode to detect glitches as narrow as 1 µs and to
limit the possibility of aliasing. This mode is effective when at 10 µs/div or slower.
• Sample points displayed
Peak Detect mode displays highest and lowest acquired voltage in each interval.
5-14
5-15
Normal. Use Normal acquisition mode to acquire 480 points and display them at the SEC/DIV
setting.
5.6 FREEZING, SAVING, AND RECALLING SCREENS
Hold Mode
The HOLD key enables you to freeze the current display. This makes it possible to examine occasional waveform
anomalies and to stop the GMM mode at the end of a manual sweep test.
The instrument provides four memory locations to which you can save the current screen along with its setup in the
Scope, GMM, Component Test, and Glitch Snare modes.
Press HOLD (
) to freeze the current display and show the Function Key Menu to save, recall, or to clear the
memory. HOLD indicator appears in the top right of the display when the HOLD key is pressed.
• Sample points
Normal mode acquires a single sample point in each interval.
In each (Scope, GMM, Component Test, or Glitch Snare) mode, the operation sequency of the SAVE, RECALL, and
CLEAR function is as follows:
The maximum sample rate is 25 MS/s. At 10 µs and faster settings, this sample rate does not
acquire 480 points. In this case, a Digital Signal Processor interpolates points between the
sampled points to make a full 480 point waveform record.
SAVE RECALL
FILTER MENU:
Can be set On or Off (default is Off) for each INPUT.
• Off - Passes all signal components up to 5 MHz.
• On - Passes signal components up to 2 KHz.
Turn on this option to reduce noises in scope displays and measurements.
BACK
SAVE
RECALL
MEMORY GLIT SN
CLEAR
Previous
State
AUTO POWER OFF MENU
AUTO POWER OFF: You can adjust the Auto-Power-Off time between 5 minutes and 120 minutes.
LANGUAGE MENU
LANGUAGE:
This setting is used to select the local language or English for the information text display.
This option is not available if only one language is implemented.
MEMORY SAVE
BACK
MEMORY ERASE
Empty
SEARCH
1
SAVE
BACK
SEARCH
1
Scope
ERASE
VERSION INFORMATION MENU
VERSION INFORMATION: You can see the version number of current software.
Search
SCOPE CALIBRATION MENU
Save memory
Search
Clear memory
SCOPE CALIBRATION: This setting is used to minutel y calibrate the s cope under the fol lowing operating
environments.
• When measuring in extremely hot or cold places.
• When the inner temperature of the scope was increased very greatly due to its long
operation.
MEMORY RECALL
BACK
Press
5-16
when SCOPE CALIBRATION is highlighted to activate this setting.
Scope
SEARCH
1
WFM
ON
Search
Waveform
On/Off
RUN
Run
State
5-17
5.7 GLITCH SNARE OPERATION
ACTUATOR INJECTOR PFI/MFI
BACK
Glitch Snare is a powerful combination of capabilities which enables you to reliable capture and display Actual Signal
Waveforms associated with elusive and unusual signals.
Glitch Snare combines real-time measurements with s pecially designed scope trigger facilities, monitoring
measurement results on an event by event basis and triggering on any result which deviates above or below the
norm by more than a present limit. The input signal is captured at the moment when a trigger event occurs.
Imagine the frequency graph from an ABS sensor with an occasional dropout due to an intermittent short in the
cable. As the wheel spins, the frequency output is stable until it briefly drops out due to the short. A graph of the
frequency shows a stable value until the short occurs. At that instant the graph show a sharp spike downward
indicating that the frequency went to zero. Now imagine being able to set “trigger thresholds” above and below the
stable frequency value shown on the graph so that when the downward spike on the graph occurs, a trigger event is
generated. This is the essence of Glitch Snare operation.
When ordinary scopes try to detect dropouts and other sudden changes in continuous AC signals, the majority of the
signal is ignored because these instruments only display new waveforms at the rate of a few per second. Therefore,
it is not easy for them to capture and display the occasional glitch or dropout. And if an interesting event does
happen to be captured, it is soon overwritten with the next normal event, making detailed examination impossible.
The Glitch Snare operation triggers only on abnormal signal conditions, which virtually guarantees you’ll catch the
first event to come along. The captured signal waveform remains displayed in the Glitch Snare display for you to
examine until it is overwritten by the next unusual event.
What’s more, by enabling the Auto Save option, each new event to be detected is automatically saved to Memory 1
to Memory 4. By setting the Auto Save option, you can automatically fill up all four memories with the four most
recent unusual events.
Best of all, Glitch Snare operation is completely automatic. Trigger thresholds are calculated automatically based on
recent signal history. The measurement used as a basis for Glitch Snare operation is Period by default. Certain
COMPONENT TESTS use other measurements, and some tests disable Glitch Snare when it is inappropriate.
Glitch Snare is most useful with continuous AC or digital signals where the information is embedded in the signalís
frequency, pulse width or duty factor.
To enable Glitch Snare operation, press the Glitch Snare function key in the Scope mode of the COMPONENT
TESTS. If Glitch Snare is available for the current test, the instrument will display the Glitch Snare display in a line
along with a conventional scope display in a solid line for comparison. Vertical and horizontal settings for both
displays are matched.
For example,
REF WFM
OFF
GLITCH
SNARE
KEYS
MOVE A
ACTUATOR INJECTOR PFI/MFI
BACK
AUTO SAVE
OFF
KEYS
MOVE A
5.8 TIPS FOR NOISE MANAGEMENT
The instrument is very sensitive to spikes and other noise pulses which may be present on automotive signals. While
this capability can be valuable when tracking down glitch related problems, it can also obscure the signal you really
want to see in DC circuits such as power distribution.
If noise is obscuring the signals you want to see, try the following tips:
Using the Internal Battery Power
In general, noise pickup is minimized when you use this instrument on its internal battery power. Using the standard
Shielded Test Leads supplied will help in noise rejection
Noise Filter
Turn on the Filter (INSTRUMENT SETUP menu) for the input channel you are using. This blocks frequencies above
2 kHz and should reduce ignition impulse noises and other noises of the short spike variety.
Ground Connections
Many sensors output signals are “single ended” meaning that a single output pin delivers the signal with being
referred to a ground pin also on the sensor. In order for the signal to be accurately delivered to the PCM, however,
both the signal and ground parts of the circuit should be sound. If a sensor output signal at the PCM appears to be
erratic or its level appears incorrect, check the signal at the output pins of the sensor (both signal and ground
connections). If the signal is correct, suspect the wire harness of either the signal or the ground side. Check for
voltage drops in both the signal and the ground paths between the sensor and the PCM.
Never trust that a chassis ground connection is the same as the PCM or the sensor ground. The ground continuity
can be disrupted by a missing strap or loose fastener easily.
COMPONENT TESTS
ACTUATORS
INJECTOR PFI/MFI
5-18
5-19
6. AUTOMOTIVE DIAGNOSTICS & APPLICATIONS
6.1 COMPONENT TESTS
Preset Operation
The instrument provides predefined setups for a variety of vehicle sensors and circuits. To choose a preset test,
select COMPONENT TESTS from the MAIN MENU. From the resulting menu, select a test group:
•
•
•
•
SENSORS
ACTUATORS
ELECTRICAL
IGNITION
Then select a specific test from those listed. Each test places the instrument in a configuration best suited to display
signals for the chosen device or circuit. Once a test has been selected, you can obtain some useful reference
informations specific to that test at any time by pressing the HELP key as previously described.
In some cases there are more than one test for a particular device. If you are not sure which test to use, the
descriptions to the tests in the following sections would help you decide.
When you want to test a device for which no test is provided, choose a test for a similar device. For example, to test
a temperature sensor not listed, try the Fuel Temp Sensor test. Or choose SCOPE from the MAIN MENU and
configure the instrument manually as needed.
After you chose a preset test, you may change most instrument settings as needed to get a better look at the signal.
You can even change the display type between SCOPE mode and GMM mode.
6.2 SENSOR TESTS
COMPONENT TESTS
SENSORS
SENSOR TESTS MENU
ABS Sensor (Mag)
O2S Sensor (Zirc)
Dual O 2 Sensor
ECT Sensor
Fuel Temp Sensor
IAT Sensor
Knock Sensor
TPS Sensor
CKP Magnetic
CKP Hall
CKP Optical
CMP Magnetic
SENSOR TESTS MENU
CMP Hall
CMP Optical
VSS Magnetic
VSS Optical
MAP Analog
MAP Digital
MAF Analog
MAF Digi Slow
MAF Digi Fast
MAF Karman-Vrtx
EGR (DPFE)
6-1
• Troubleshooting Tips
ABS Sensor-Magnetic
If the amplitude is low, look for an excessive air gap between the trigger wheel and the pickup.
• Theory of Operation
ABS (Anti-lock Brake System) wheel speed sensors generate AC signals with frequency proportional to wheel
speed. The amplitude (peak to peak voltage) increases as the wheel speed increases and is greatly affected by air
gap between the magnetic tip and the reluctor wheel. The ABS computer compares the frequencies and uses this
information to maintain wheel speeds while braking.
This test shows the sensor’s raw output signal or the frequency proportional to wheel speed. The sensor’s output
signal should be continuous as long as the wheel rotates. Spikes or distortion of individual output pulses may
indicate occasional contact between the sensor and the reluctor wheel.
If the amplitude wavers, look for a bent axle.
If one of the oscillations looks distorted, look for a bent or damaged tooth on the trigger wheel.
O2S Normal - Zirconia
• Theory of Operation
An O2 sensor provides an output voltage that represents the amount of oxygen in the exhaust stream. The output
voltage is used by the PCM to adjust the air/fuel ratio of the fuel mixture between a slightly Rich condition and a
slightly Lean condition.
• Symptoms
ABS light on, no ABS signal generation
A zirconia-type O2 sensor provides high output voltage (a Rich condition) and low output voltage (a Lean condition).
• Test Procedure
1. Connect the shielded test lead to the CH A input and connect the ground lead of the test lead to the sensor
output LO or GND and the test lead probe to the sensor output or HI. (Use a wiring diagram for the vehicle being
serviced to get the ABS control unit pin number, or color of the wire for this circuit.)
2. Drive vehicle or spin the wheel by hand to generate signal.
When driving vehicle, back probe the connector leading to the sensor. Place the transmission in drive, and slowly
accelerate the drive wheels.
If the sensor to be tested is on a drive wheel, raise the wheels off the ground to simulate driving conditions. Key
OFF, Engine OFF (KOEO).
A titania-type O2 sensor changes resistance as the oxygen content of the fuel mixture changes. This results in a low
output voltage (from a Rich condition) and a high output voltage (from a Lean condition). Most Titania O2 sensors
are found on MFI (Multiport Fuel Injection) systems.
A voltage swing between 100 mV and 900 mV indicates that the O2 sensor is properly signalling PCM to control the
fuel mixture.
• Symptoms [OBD II DTC’s : P0130 ~ P0147, P0150 ~ P0167]
Feedback Fuel Control System’s (FFCS’s) no entering Closed Loop operation, high emissions, poor fuel economy.
3. Use the Glitch Snare mode to detect spikes and dropouts.
• Test Procedure
4. Compare ABS sensors on all wheels for similarities.
1. Connect the shielded test lead to the CH A input and connect the ground lead of the test lead to the sensor
output LO or GND and the test lead probe to the sensor output or HI. (Get the color of the O2 signal wire or PCM
pin number from a wiring diagram.)
• Reference Waveform
FREQ = 416 Hz
P-P = 3.00 V
ABS wheel speed sensor
logged while driving 20 MPH
VEHICLE INFORMATION
YEAR
: 1989
MAKE
: Acura
MODEL : Legend
ENGINE : 2.7 L
FUELSYS : Multiport Fuel Injection
PCM_PIN : Pos Grn Blu pin 13
Neg Brn pin 18
STATUS : KOBD (Key On Driven)
RPM
: 1200
ENG_TMP : Operating Temperature
VACUUM : 18 In. Hg
MILEAGE : 69050
2. Warm the engine and O2 sensor for 2-3 minutes at 2500 RPM, and let the engine idle for 20 seconds.
3. Rev the engine rapidly five or six times in 2 second intervals from idle to Wide Open Throttle (WOT). Be careful
not to overrev the engine. Engine RPM over about 4000 is not necessary. Just get good snap throttle accels and
full decels.
4. Use the HOLD key to freeze the waveform on the display to check the maximum O2 voltage, minimum O2 voltage
and response time from Rich to Lean.
Amplitude and Frequency increase with wheel speed. Output signal should be stable
and repeatable without distorted pulses.
6-2
6-3
• Reference Waveform
• Symptoms [OBD II DTC’s : P0420 ~ P0424, P0430 ~ P0434]
Example of good O2 waveform from property
operating TBI system at idle. Hash is normal.
Avg. O 2 voltage = 526 mV
“Moderate Hash”
This is normal
VEHICLE INFORMATION
YEAR
: 1995
MAKE
: Plymouth
MODEL : Acclaim
ENGINE : 2.5 L
FUELSYS : Throttle Body Fuel Injection
PCM_PIN : 41 BkGrn Wire
STATUS : KOER (Key On Running)
RPM
: Idle
ENG_TMP : Operating Temperature
VACUUM : 20 In. Hg
MILEAGE : 4350
Emissions test failure, poor fuel economy.
• Test Procedure
1. Connect one shielded test lead to the CH A and the other test lead to the CH B. Connect the ground leads of
both test leads to the engine GND’s and one lead probe to the sensor 1 (upstream sensor) output or HI and the
other lead probe to the sensor 2 (downstream sensor) output or HI.
2. Run the engine until the O2 sensors are warmed to at least 600 °F (315 °C) in closed loop operation.
3. Run the engine at idle while increasing engine speed.
4. Use this test to check the efficiency of the catalytic converter.
• Reference Waveform
The maximum voltage when forced Rich should be greater than 800 mV. The minimum
voltage when forced Lean should be less than 200 mV. The maximum allowable
response time from Rich to Lean should be less than 100 ms.
NOTE
For a Titania-type O2 sensor, change the vertical range to 1 V/div.
• Troubleshooting Tips
The response time increases by aging and poisoning of the O2 sensor.
Peak to peak voltages should be at least 600 mV or greater with an average of 450 mV.
If the waveform is severely hashy, look for a misfire caused by Rich mixture, Lean mixture, ignition problem, vacuum
leak to an individual cylinder, injector imbalance, or carboned intake valves.
IMPORTANT: Don’t use a scan tool at the same time you are analyzing the O2 waveform on the instrument. The
PCM may go into a different operating strategy when diagnostics are activated by the scan tool.
Waveform logged about
40 seconds after startup.
Downstream O 2 sensor voltage
rises as converter heats up and
begins to use excess oxygen to
burn HC and CO.
VEHICLE INFORMATION
YEAR
: 1990
MAKE
: Lexus
MODEL : LS400
ENGINE : 4.0 L
FUELSYS : Multiport Fuel Injection
PCM_PIN : 6 OXL1 BIK wire OXL2 24 Grn wire
STATUS : KOER (Key On Running)
RPM
: 2500
ENG_TMP : Warming UP
VACUUM : 21 In. Hg
MILEAGE : 79369
Good O2 sensor's output swing between 100 mV and 900 mV indicates that the O2
sensor is properly signalling PCM to control the fuel mixture.
The fluctuations in the downstream sensor’s signal are much smaller than that of the
the upstream sensor. As the catalytic converter “lights off” (or reaches operating
temperature) the signal goes higher due to less and less oxygen being present in the
exhaust stream as the catalyst begins to store and use oxygen for catalytic conversion.
Dual O2 Sensor
• Theory of Operation
Many vehicles utilize dual O2 sensors within the Feedback Fuel Control System. Both O 2 sensors provide an output
voltage that represent the amount of oxygen in the exhaust stream respectively before and after the catalytic
converter. The leading sensor signal is used as feedback for controlling the fuel mixture. The trailing sensor signal is
used by PCM to test efficiency of the catalytic converter. The signal amplitude from the trailing sensor will increase
when the efficiency of the catalytic converter declines over years. A good O2 sensor located downstream from the
catalyst should see much less fluctuations than its upstream counterpart during steady state operation. This is due to
the properly operating catalyst’s ability to consume oxygen when it is converting HC and CO, thus dampening the
fluctuations in the downstream sensor’s signal. That is, the difference in voltage amplitude from the sensors is a
measure for the ability of the catalyst to store oxygen for the conversion of harmful exhaust constituents.
6-4
6-5
• Troubleshooting Tips
4. Press the HOLD key to freeze the waveform on the display for closer inspection.
When a catalytic converter is totally deteriorated, the catalytic conversion efficiency as well as the oxygen storage
capability of the catalytic converter are essentially lost. Therefore, the upstream and downstream O2 sensor signals
closely resemble one another on an inactive converter.
5. To measure resistance, disconnect the sensor before changing to the GMM mode and then connect the Ground
and CH A leads to the terminals on the sensor.
• Reference Waveform
V
V
B
B
A
A
t
upstream sensor
ECT Test from stone
cold to operating temp.
Stone
cold
here
63.5 Dg.F
Thermostat opens
here
t
downstream sensor
A
B
A
B
¡é
¡é
¡é
¡é
Catalytic Converter OK
MAX = 3.26 V
MIN = 1.86 V
PCM resistor
switched in
here
Engine at
operating
temp. here
Catalytic Converter Efficiency
poor
VEHICLE INFORMATION
YEAR
: 1986
MAKE
: Oldsmobile
MODEL : Toronado
ENGINE : 3.8 L
FUELSYS : Multiport Fuel Injection
PCM_PIN : C10 Yel wire
STATUS : KOER (Key On Running)
RPM
: 1500
ENG_TMP : Warming Up
VACUUM : 18 In. Hg
MILEAGE : 123686
• Troubleshooting Tips
ECT (Engine Coolant Temperature) Sensor
Check the manufacturer’s specifications for exact voltage range specifications, but generally the sensor’s voltage
should range from 3 V to just under 5 V when stone cold, dropping to around 1 V at operating temperature. The
good sensor must generate a signal with a certain amplitude at any given temperature.
• Theory of Operation
Opens in the ECT sensor circuit will appear as upward spikes to V Ref.
Most ECT sensors are Negative Temperature Coefficient (NTC) type thermistors. This means they are primarily two
wire analog sensors whose resistance decreases when their temperature increases. They are supplied with a 5 V V
Ref power signal and return a voltage signal proportional to the engine coolant temperature to the PCM. When this
instrument is connected to the signal from an ECT sensor, what is being read is the voltage drop across the sensor’s
NTC resistor.
Shorts to ground in the ECT sensor circuit will appear as downward spikes to ground level.
Typically, ECT sensor’s resistance ranges from about 100,000 ohms at -40 °F (-40 °C) to about 50 ohms at +266 °F
(+130 °C).
The ECT sensor signal is used by the PCM to control closed-loop operation, shift points, torque converter clutch
operation, and cooling fan operation.
• Symptoms [OBD II DTC’s: P0115 ~ P0116, P0117 ~ P0119]
No or hard start, high fuel consumption, emissions failure, driveability problems.
Fuel Temp Sensor
• Theory of Operation
Most Fuel Temperature (FT) sensors are Negative Temperature Coefficient (NTC) type thermistors. They are
primarily two wire analog sensors whose resistance decreases when their temperature increases. Some sensors
use their own case as a ground, so they have only one wire, the signal wire. They are supplied with a 5 V V Ref
power signal and return a voltage signal proportional to the temperature to the PCM. FT sensors usually sense the
engine’s fuel temperature in the fuel rail. When this instrument is connected to the signal from a FT sensor, what is
being read is the voltage drop across the sensor’s NTC resistor.
• Test Procedure
Typically, FT sensor’s resistance ranges from about 100,000 ohms at -40 °F (-40 °C) to about 50 ohms at +266 °F
(+130 °C).
1. Backprobe the terminals on the ECT sensor with the CH A lead and its ground lead.
• Symptoms [OBD II DTC’s: P0180 ~ P0184, P0185 ~ P0189]
2. Run the engine at idle and monitor the sensor voltage decrease as the engine warms. (Start the engine and hold
the throttle at 2500 RPM until the trace goes across the screen.)
Hard start, poor fuel economy, driveability problems
3. Set the time base to 50 sec/div to see the sensor’s entire operating range, from stone cold to operating
temperature.
6-6
6-7
• Test Procedure
• Symptoms [OBD II DTC’s: P0110 ~ P0114]
1. Backprobe the terminals on the FT sensor with the CH A lead and its ground lead.
Poor fuel economy, hard start, high emissions, tip-in hesitation
2. Start the engine and hold the throttle at 2500 RPM until the trace goes across the screen.
• Test Procedure
3. Set the time base to 50 sec/div to see the sensor’s entire operating range, from stone cold to operating
temperature.
1. Backprobe the terminals on the IAT sensor with the CH A lead and its ground lead.
4. Press the HOLD key to freeze the waveform on the display for closer inspection.
2. When the IAT sensors are at engine operating temperature, spray the sensors with a cooling spray, a water
spray, or evaporative solvent spray and monitor the sensor voltage. Perform this test with the Key ON, Engine
Off. The waveform should increase in amplitude as the sensor tip cools.
5. To measure resistance, disconnect the sensor before changing to the GMM mode and then connect the Ground
and CH A leads to the terminals on the sensor.
• Reference Waveform
MAX = 3.13 V
MIN = 2.66 V
3. Press the HOLD key to freeze the waveform on the display for closer inspection.
4. To measure resistance, disconnect the sensor before changing to the GMM mode and then connect the Ground
and CH A leads to the terminals on the sensor.
Engine warmed
up for 8 minutes
here
Engine stone
cold here
VEHICLE INFORMATION
YEAR
: 1988
MAKE
: Nissan/Datsun
MODEL : 300 ZX non-turbo
ENGINE : 3.0 L
FUELSYS : Multiport Fuel Injection
PCM_PIN : 15 Yel wire
STATUS : KOER (Key On Running)
RPM
: 2000
ENG_TMP : Warming Up
VACUUM : 21 In. Hg
MILEAGE : 57782
• Reference Waveform
MAX = 3.26
MIN = 1.86
Key On
Engine Off
here
Key On Engine Off
“Spray” test Intake
Air Temp. Sensor
Intake Air Temp sensor sprayed
with brake cleaner here. As
sensor tip cools, voltage
increases.
• Troubleshooting Tips
Check the manufacturer’s specifications for exact voltage range specifications, but generally the sensor’s voltage
should range from 3 V to just under 5 V when stone cold, dropping to around 1 to 2 V at operating temperature. The
good sensor must generate a signal with a certain amplitude at any given temperature.
Opens in the FT sensor circuit will appear as upward spikes to V Ref.
Shorts to ground in the FT sensor circuit will appear as downward spikes to ground level.
VEHICLE INFORMATION
YEAR
: 1986
MAKE
: Oldsmobile
MODEL : Toronado
ENGINE : 3.8 L
FUELSYS : Multiport Fuel Injection
PCM_PIN : C11 Tan wire
STATUS : KOEO (Key On Engine Off)
RPM
:0
ENG_TMP : Ambient Temp.
VACUUM : 0 In. Hg
MILEAGE : 123686
• Troubleshooting Tips
Check the manufacturer’s specifications for exact voltage range specifications, but generally the sensor’s voltage
should range from 3 V to just under 5 V when stone cold, dropping to around 1 to 2 V at operating temperature. The
good sensor must generate a signal with a certain amplitude at any given temperature.
Opens in the IAT sensor circuit will appear as upward spikes to V Ref.
INTAKE AIR TEMP (IAT) Sensor
• Theory of Operation
Most Intake Air Temperature (IAT) sensors are Negative Temperature Coefficient (NTC) type thermistors. They are
primarily two wire analog sensors whose resistance decreases when their temperature increases. They are supplied
with a 5 V V Ref power signal and return a voltage signal proportional to the intake air temperature to the PCM.
Some sensors use their own case as a ground, so they have only one wire, the signal wire. When this instrument is
connected to the signal from an IAT sensor, what is being read is the voltage drop across the sensor’s NTC resistor.
Typically, IAT sensor’s resistance ranges from about 100,000 ohms at -40 ˚F (-40 ˚C) to about 50 ohms at +266 ˚F
(+130 ˚C).
6-8
Shorts in the IAT sensor circuit will appear as downward spikes to ground level.
Knock Sensor
• Theory of Operation
AC signal generating Knock Sensors are piezoelectric devices that sense vibration or mechanical stress (knock)
from engine detonation. They are quite different from most other AC signal generating automotive sensors that
sense the speed or position of a rotating shaft.
Engine detonation resulting from overadvanced ignition timing can cause severe engine damage. Knock sensors
supply the PCM (sometimes via a spark control module) with Knock detection so the PCM can retard ignition timing
to prevent further Knocking.
6-9
Knock sensors generate a small AC voltage spike when vibration or a knock from detonation occurs. The bigger the
Knock or vibration, the bigger the spike. Knock sensors are usually designed to be very sensitive to the Knocking
frequencies (in 5 to 15 kHz range) of the engine block.
Throttle Position Sensor (TPS)
• Theory of Operation
A TPS is a variable resistor that tells the PCM the position of the throttle, that is, how far the throttle is open, whether
it is opening or closing and how fast. Most throttle position sensors consist of a contact connected to the throttle
shaft which slides over a section of resistance material around the pivot axis for the movable contact.
• Symptoms [OBD II DTC’s: P0324 ~ P0334]
No AC signal generation at all from Knock Sensors.
1. Connect the CH A lead to the sensor output or HI and its ground lead to the engine block or the sensor wire
labeled LO (if internally grounded).
The TPS is a three wire sensor. One of the wires is connected to an end of the sensor’s resistance material and
provides 5 V via the PCM’s V Ref circuit, another wire is connected to the other end of the resistance material and
provides the sensor ground (GND). The third wire is connected to the movable contact and provides the signal
output to the PCM. The voltage at any point in the resistance material is proportional to the throttle angle as sensed
through the movable contact.
2. Test 1: With the Key On, Engine Running, put a load on the engine and watch the Scope display. The peak
voltage and frequency of the waveform will increase with engine load and RPM increment. If the engine is
detonating or pinging from too much advanced ignition timing, the amplitude and frequency will also increase.
The voltage signal returning to the PCM is used to calculate engine load, ignition timing, EGR control, idle control
and other PCM controlled parameters such as transmission shift points. A bad TPS can cause hesitation, idle
problems, high emissions, and Inspection/ Maintenance (I/M) test failures.
Test 2: With the Key On, Engine Off, tap the engine block lightly near the sensor with a small hammer or a
ratchet extension. Oscillations will be displayed immediately following a tap on the engine block. The harder the
tap, the larger the amplitude of the oscillations.
Generally, throttle position sensors produce just under 1 V with the throttle closed and produce just under 5 V with
the throttle wide open (WOT). The PCM determines the sensor’s performance by comparing the sensor output to a
calculated value based on MAP and RPM signals.
• Test Procedure
• Reference Waveform
Typical Knock Sensor test.
Note signal goes above and below zero volts(AC).
Logged during slight acceleration.
• Symptoms [OBD II DTC’s: P0120 ~ P0124, P0220 ~ P0229]
VEHICLE INFORMATION
YEAR
: 1993
MAKE
: Ford
MODEL : F150 4WD Pickup
ENGINE : 5.0 L
FUELSYS : Multiport Fuel Injection
PCM_PIN : Neg-GND
Pos-Pin23 Yel Red wire
STATUS : KOER (Key On Running)
RPM
: Slightly Accelerate
ENG_TMP : Operating Temperature
VACUUM : 19 In. Hg
MILEAGE : 66748
Hesitation, stall at stops, high emissions, I/M test failures, transmission shifting problems.
• Test Procedure
1. Connect the CH A lead to the output or signal circuit of TPS and its ground lead to the TPS’s GND.
2. With KOEO, slowly sweep the throttle from closed to the wide open position (WOT) and then the closed position
again. Repeat this process several times.
• Reference Waveform
MAX = 4.36 V
MIN = 880 mV
Wide Open Throttle
• Troubleshooting Tips
Knock sensors are extremely durable and usually fail from physical damage to the sensor itself. The most common
type of Knock Sensor failure is not to generate a signal at all due to its physical damage, when the waveform stays
flat even if you rev the engine or tap on the sensor. In this case, check the sensor and the instrument connections;
make sure the circuit is not grounded, then condemn the sensor.
6-10
Closed Throttle
Closed Throttle
VEHICLE INFORMATION
YEAR
: 1989
MAKE
: Chevrolet
MODEL : 1500 Series Truck
ENGINE : 5.0 L
FUELSYS : Throttle Body Fuel Injection
PCM_PIN : C13 DkBlu wire
STATUS : KOEO (Key On Engine Off)
RPM
: 0
ENG_TMP : Operating Temperature
VACUUM : 0 In. Hg
MILEAGE : 108706
6-11
• Troubleshooting Tips
• Reference Waveform
Check the manufacturer’s specifications for exact voltage range. Generally, the sensor output should range from just
under 1 V at idle to just under 5 V at wide open throttle (WOT). There should be no breaks, spikes to ground or
dropouts in the waveform.
P - P = 13.7 V
FREQ = 89.2 Hz
Peak voltage indicates
WOT
Voltage decrease
identifies enleanment
(throttle plate closing)
Voltage increase
identifies
enrichment.
DC offset indicates voltage
at key on, throttle closed.
Minimum voltage indicates
closed throttle plate.
Dropouts on the slopes of the waveform indicate a
short to ground or an intermittent open in the sensor’s
carbon track (resistance materials).
The firs t 1/8 to 1/3 of the sensor’s carbon trac k
usually wears out most because this portion is most
used while driving. Thus, pay particular attention to
the waveform as it begins to rise.
(Defective TPS Pattern)
VEHICLE INFORMATION
YEAR
: 1987
MAKE
: Chrysler
MODEL : Fifth Avenue
ENGINE : 5.2 L
FUELSYS : Feedback Carburetor
PCM_PIN : 5 #1 Org wire + 9 #1 Blk wire
STATUS : KOER (Key On Running)
RPM
: 1400
ENG_TMP : Operating Temperature
VACUUM : 19 In. Hg
MILEAGE : 140241
The amplitude and frequency increase with engine speed (RPM).
The amplitude, frequency and shape should be all consistent for the conditions (RPM,
etc.), repeatable (except for “sync” pulses), and predictable.
Generally, the oscillations may not be perfect mirror images of each other above and
below the zero level mark, but they should be relatively close on most sensors.
Magnetic Crankshaft Position (CKP) Sensor
• Theory of Operation
• Troubleshooting Tips
The magnetic CKP sensors are AC signal generating analog sensors. They generally consist of a wire wrapped, soft
bar magnet with two connections. These two winding, or coil, connections are the sensor’s output terminals. When a
ring gear (a reluctor wheel) rotates past this sensor, it induces a voltage in the winding. A uniform tooth pattern on
the reluctor wheel produces a sinusoidal series of pulses having a consistent shape. The amplitude is proportional to
the rotating speed of the reluctor wheel (that is, the crankshaft or camshaft). The frequency is based on the
rotational speed of the reluctor. The air gap between the sensor’s magnetic tip and the reluctor wheel greatly affects
the sensor’s signal amplitude.
Make sure the frequency of the waveform is keeping pace with engine RPM, and that the time between pulses only
changes when a “sync” pulse is displayed. This time changes only when a missing or extra tooth on the reluctor
wheel passes the sensor. That is, any other changes in time between the pulses can mean trouble.
They are used to determine where TDC (Top Dead Center) position is located by creating a “synchronous” pulse
which is generated by either omitting teeth on the reluctor wheel or moving them closer together.
The PCM uses the CKP sensors to detect misfire. When a misfire occurs, the amount of time it takes for a waveform
to complete its cycle increases. If the PCM detects an excessive number of misfires within 200 to 1000 crankshaft
revolutions, a misfire code (OBD II DTC) is set.
• Symptoms [OBD II DTC’s: P0340 ~ P0349, P0365 ~ P0369, P0390 ~ P0394]
No or hard start, intermittent misfire, driveability problems
• Test Procedure
1. Connect the CH A lead to the sensor output or HI and its ground lead to the sensor output LO or GND.
2. With KO ER (Key On, Engine Running), let the engine idle, or use the throttle to accelerate or decelerate the
engine or drive the vehicle as needed to make the driveability, or emissions, problem occur.
3. Use the Glitch Snare mode to catch dropouts or stabilize waveforms when a “sync” pulse is created.
6-12
Look for abnormalities observed in the waveform to coincide with an engine sputter or driveability problem.
Before assuring the sensor’s failure, when waveform abnormalities are observed, make sure that a chafed wire or
bad wiring harness connector is not the cause, the circuit isn’t grounded, and the proper parts are spinning.
Hall Effect CranKshaft Position (CKP) Sensor
• Theory of Operation
These CKP sensors are classified as “CKP Sensors-Low Resolution” in industry.
The Hall CKP sensors are low resolution digital sensors which generate the CKP signal, that is a low frequency
(hundreds of Hz) square wave switching between zero and V Ref, from a Hall sensor.
The Hall CKP sensor, or switch, consists of an almost completely closed magnetic circuit containing a permanent
magnet and pole pieces. A soft magnetic vane rotor travels through the remaining air gap between the magnet and
the pole piece. The opening and closing of the vane rotor’s windows interrupt the magnetic field, causing the Hall
sensor to turn on and off like a switch - so some vehicle manufacturers call this sensor a Hall switch.
These sensors operate at different voltage levels depending on the vehicle manufacturers and deliver a series of
pulses as the shaft rotates.
They are used to switch the ignition and/or fuel injection triggering circuits on and off.
The PCM uses the Hall CKP sensors to detect misfire.
6-13
• Symptoms [OBD II DTC’s: P0340 ~ P0349, P0365 ~ P0369, P0390 ~ P0394]
Long cranking, poor fuel economy, emissions problem
Optical CranKshaft Position (CKP) Sensor
• Theory of Operation
• Test Procedure
These CKP sensors are classified as “CKP Sensors - High Resolution” in industry.
1. Connect the CH A lead to the sensor output or HI and its ground lead to the sensor output LO or GND.
The optical CKP sensors can sense position of a rotating component even without the engine running and their
pulse amplitude remains constant with variations in speed. They are not affected by electromagnetic interference
(EMI). They are used to switch the ignition and/or fuel injection triggering circuits on and off.
2. With KOEC (Key On, Engine Cranking), or with KOER, use the throttle to accelerate or decelerate the engine or
drive the vehicle as needed to make the driveability, or emissions, problem occur.
3. Use the Glitch Snare mode to catch dropouts or stabilize waveforms when a “sync” pulse is created.
• Reference Waveform
The optical sensor consists of a rotating disk with slots in it, two fiber optic light pipes, an LED, and a phototransistor
as the light sensor. An amplifier is coupled to the phototransistor to create a strong enough signal for use by other
electronic devices, such as PCM or ignition module.
The phototransistor and amplifier create a digital output signal (on/off pulse).
FREQ = 11.3 Hz
MAX = 8.33 V
MIN = 0.00 V
Cranking test of Hall type (in dist.)
crankshaft position (CKP) sensor
VEHICLE INFORMATION
YEAR
: 1985
MAKE
: Volkswagen
MODEL : Jetta
ENGINE : 1.8 L
FUELSYS : CIS Fuel Injection
PCM_PIN : 9 GryWht wire
STATUS : KOEC (Key On Cranking)
RPM
: Cranking
ENG_TMP : Operating Temperature
VACUUM : 5 In. Hg
MILEAGE : 105522
The amplitude, frequency, and shape should be all consistent in the waveform from
pulse to pulse. The amplitude should be sufficient (usually equal to sensor supply
voltage), the time between pulses repeatable (except for “sync” pulses), and the
shapes repeatable and predictable. Consistency is the key.
• Troubleshooting Tips
The duty cycle of the waveform changes only when a “sync” pulse is displayed. Any other changes in duty cycle can
mean troubles.
The top and bottom corners of the waveform should be sharp and voltage transitions of the edge should be straight
and vertical.
Make sure the waveform isn’t riding too high off the ground level. This could indicate a high resistance or bad ground
supply to the sensor.
Although the Hall CKP sensors are generally designed to operate in temperatures up to 318 °F (150 °C), they can
fail at certain temperatures (cold or hot).
6-14
• Symptoms [OBD II DTC’s: P0340 ~ P0349, P0365 ~ P0369, P0390 ~ P0394]
No or hard starts, stall at stops, misfires, poor fuel economy, emissions failure
• Test Procedure
1. Connect the CH A lead to the sensor output or HI and its ground lead to the sensor output LO or GND.
2. With KOER (Key On, Engine Running), let the engine idle, or use the throttle to accelerate or decelerate the
engine or drive the vehicle as needed to make the driveability, or emissions, problem occur.
3. Use the Glitch Snare mode to catch dropouts or stabilize waveforms when a “sync” pulse is created.
• Reference Waveform
FREQ = 2.27 kHz
MAX = 5.06 V
MIN = -133 mV
Frequency Modulated signal.
Frequency increases with
increasing engine RPM. Duty
cycle stays constant.
VEHICLE INFORMATION
YEAR
: 1989
MAKE
: Mitsubishi
MODEL : Montero
ENGINE : 3.0 L
FUELSYS : Multiport Fuel Injection
PCM_PIN : 22 Blk wire at PCM
STATUS : KOER (Key On Running)
RPM
: Idle
ENG_TMP : Operating Temperature
VACUUM : 20 In. Hg
MILEAGE : 184066
The amplitude, frequency, and shape should be all consistent in the waveform from
pulse to pulse. The amplitude should be sufficient, the time between pulses repeatable
(except for “sync” pulses), and the shapes repeatable and predictable. Consistency is
the key.
6-15
• Troubleshooting Tips
The duty cycle of the waveform changes only when a “sync” pulse is displayed. Any other changes in duty cycle can
mean troubles.
• Reference Waveform
PK - PK = 9.93 V
FREQ = 33.1 Hz
The top and bottom corners of the waveform should be sharp. However, the left upper corner may appear rounded
on some of the higher frequency (high data rate) optical distributors. This is normal.
Optical CKP sensors are very susceptible to malfunction from dirt or oil interfering with the light transmission through
the rotating disk. When dirt or oil enters into the sensitive areas of the sensors, no starts, stalls, or misfires can
occur.
Magnetic Camshaft Position (CMP) Sensor
VEHICLE INFORMATION
YEAR
: 1989
MAKE
: Acura
MODEL : Legend
ENGINE : 2.7 L
FUELSYS : Multiport Fuel Injection
PCM_PIN : C3 OrgBlu
STATUS : KOER (Key On Running)
RPM
: Idle
ENG_TMP : Operating Temperature
VACUUM : 20 In. Hg
MILEAGE : 69050
• Theory of Operation
The magnetic CMP sensors are AC signal generating analog sensors. The generally consist of a wire wrapped, soft
bar magnet with two connections. These two winding, or coil, connections are the sensor’s output terminals. When a
ring gear (a reluctor wheel) rotates past this sensor, it induces a voltage in the winding. A uniform tooth pattern on
the reluctor wheel produces a sinusoidal series of pulses having a consistent shape. The amplitude is proportional to
the rotating speed of the reluctor wheel (that is, the crankshaft or camshaft). The frequency is based on the
rotational speed of the reluctor. The air gap between the sensor’s magnetic tip and the reluctor wheel greatly affects
the sensor’s signal amplitude.
They are used to determine where TDC (Top Dead Center) position is located by creating a “synchronous” pulse
which is generated by either omitting teeth on the reluctor wheel or moving them closer together.
The PCM or ignition module uses the CMP sensors to trigger ignition or fuel injector events. The magnetic CMP and
CKP sensors are susceptible to Electromagnetic Interference (EMI or RF) from high voltage spark plug wires, car
phones or other electronic devices on the vehicle. This can cause a driveability problem or set a Diagnostic Trouble
Code (DTC).
• Symptoms [OBD II DTC’s: P0340 ~ P0349, P0365 ~ P0369, P0390 ~ P0394]
Long cranking time, poor fuel economy, emissions failure
• Test Procedure
1. Connect the CH A lead to the sensor output or HI and its ground lead to the sensor output LO or GND.
2. With KOER (Key On, Engine Running), let the engine idle, or use the throttle to accelerate or decelerate the
engine or drive the vehicle as needed to make the driveability, or emissions, problem occur.
3. Use the Glitch Snare mode to catch dropouts or stabilize waveforms when a “sync” pulse is created.
The amplitude and frequency increase with engine speed (RPM).
The amplitude, frequency and shape should be all consistent for the conditions (RPM,
etc.), the time between pulses repeatable (except for “sync” pulses), and the shapes
repeatable and predictable.
• Troubleshooting Tips
Make sure the frequency of the waveform is keeping pace with engine RPM, and that the time between pulses only
changes when a “sync” pulse is displayed. This time changes only when a missing or extra tooth on the reluctor
wheel passes the sensor. That is, any other changes in time between the pulses can mean trouble.
Look for abnormalities observed in the waveform to coincide with an engine sputter or driveability problem.
Hall Effect Camshaft Position (CMP) Sensor
• Theory of Operation
These CMP sensors are classified as “CMP Sensors - Low Resolution” in industry.
The Hall CMP sensors are low resolution (accuracy) digital sensors which generate the CMP signal, that is a low
frequency (tens of Hz) square wave switching between zero and V Ref, from a Hall sensor.
The Hall CMP sensor, or switch, consists of an almost completely closed magnetic circuit containing a permanent
magnet and pole pieces. A soft magnetic vane rotor travels through the remaining air gap between the magnet and
the pole piece. The opening and closing of the vane rotor’s window interrupts the magnetic field, causing the Hall
sensor to turn on the off like a switch - so some vehicle manufacturers call this sensor a Hall switch.
These sensors operate at different voltage levels depending on the vehicle manufacturers and deliver a series of
pulses as the shaft rotates.
They are used to switch the ignition and/or fuel injection triggering circuits on and off.
The PCM uses the Hall CMP sensors to detect misfire.
6-16
6-17
• Symptoms [OBD II DTC’s: P0340 ~ P0349, P0365 ~ P0369, P0390 ~ P0394]
• Theory of Operation
Long cranking time, poor fuel economy, emissions failure
These CMP sensors are classified as “CMP Sensors - High Resolution” in industry.
The optical CMP sensors are high resolution (accuracy) digital sensors which generate the CMP signal, that is a
high frequency (hundreds of Hz to several kHz) square wave switching between zero and V Ref.
The optical CMP sensors can sense position of a rotating component even without the engine running and their
pulse amplitude remains constant with variations in speed. They are not affected by electromagnetic interference
(EMI). They are used to switch the ignition and/or fuel injection triggering circuits on and off.
• Test Procedure
1. Connect the CH A lead to the sensor output or HI and its ground lead to the sensor output LO or GND.
2. With KOER (Key On, Engine Running), let the engine idle, or use the throttle to accelerate or decelerate the
engine or drive the vehicle as needed to make the driveability, or emissions, problem occur.
3. Use the Glitch Snare mode to catch dropouts or stabilize waveforms when a “sync” pulse is created.
• Reference Waveform
FREQ = 22.3 Hz
MAX = 7.33 V
MIN = -333 mV
Fixed Pulse Width signal.
Frequency increases with
increasing engine RPM.
Camshaft makes one
rotation in between pulses.
VEHICLE INFORMATION
YEAR
: 1986
MAKE
: Oldsmobile
MODEL : Toronado
ENGINE : 3.8 L
FUELSYS : Multiport Fuel Injection
PCM_PIN : K BrnWht wire at ignition module
STATUS : KOER (Key On Running)
RPM
: 2500
ENG_TMP : Operating Temperature
VACUUM : 20 In. Hg
MILEAGE : 123686
The amplitude, frequency, and shape should be all consistent in the waveform from
pulse to pulse. The amplitude should be sufficient (usually equal to sensor supply
voltage), the time between pulses repeatable (except for “sync” pulses), and the shape
repeatable and predictable. Consistency is the key.
• Troubleshooting Tips
The duty cycle of the waveform changes only when a “sync” pulse is displayed. Any other changes in duty cycle can
mean troubles.
The top and bottom corners of the waveform should be sharp and voltage transitions of the edge should be straight
and vertical.
Make sure the waveform isn’t riding too high off the ground level. This could indicate a high resistance or bad ground
supply to the sensor.
Although the Hall CMP sensors are generally designed to operate in temperatures up to 318 °F (150 °C), they can
fail at certain temperatures (cold or hot).
The optical sensor consis ts of a rotating disk with s lots in it, two fiber optic light pipes, and LED, and a
phototransistor as the light sensor. An amplifier is coupled to the phototransistor to create a strong enough signal for
use by other electronic devices, such as PCM or ignition module.
The phototransistor and amplifier create a digital output signal (on/off pulse)
• Symptoms [OBD II DTC’s: P0340 ~ P0349, P0365 ~ P0369, P0390 ~ P0394]
No or hard starts, stall at stops, misfires, poor fuel economy, emissions failure
• Test Procedure
1. Connect the CH A lead to the sensor output or HI and its ground lead to the sensor output LO or GND.
2. With KOER (Key On, Engine Running), let the engine idle, or use the throttle to accelerate or decelerate the
engine or drive the vehicle as needed to make the driveability, or emissions, problem occur.
3. Use the Glitch Snare mode to catch dropouts or stabilize waveforms when a “sync” pulse is created.
• Reference Waveform
FREQ = 35.7 Hz
MAX = 4.93 V
MIN = 133 mV
Fixed Pulse Width signal.
Frequency increases with
increasing engine RPM.
VEHICLE INFORMATION
YEAR
: 1989
MAKE
: Mitsubishi
MODEL : Montero
ENGINE : 3.0 L
FUELSYS : Multiport Fuel Injection
PCM_PIN : 23 Red wire at PCM
STATUS : KOER (Key On Running)
RPM
: Idle
ENG_TMP : Operating Temperature
VACUUM : 20 In. Hg
MILEAGE : 184066
The amplitude, frequency, and shape should be all consistent in the waveform from
pulse to pulse. The amplitude should be sufficient, the time between pulses repeatable
(except for “sync” pulses), and the shapes repeatable and predictable. Consistency is
the key.
Optical Camshaft Position (CMP) Sensor
6-18
6-19
• Troubleshooting Tips
The duty cycle of the waveform changes only when a “sync” pulse is displayed. Any other changes in duty cycle can
mean troubles.
• Reference Waveform
P - P = 6.93 V
FREQ = 131 Hz
The top and bottom corners of the waveform should be sharp. However, the left upper corner may appear rounded
on some of the higher frequency (high data rate) optical distributors. This is normal.
Optical CMP sensors are very susceptible to malfunction from dirt or oil interfering with the light transmission through
the rotating disk.
When dirt or oil enters into the sensitive areas of the sensors, no starts, stalls, or misfires can occur.
AC signal - Amplitude & Frequency
increase with vehicle speed.
Magnetic Vehicle Speed Sensor (VSS)
VEHICLE INFORMATION
YEAR
: 1988
MAKE
: Nissan/Datsun
MODEL : 300 zx non-turbo
ENGINE : 3.0 L
FUELSYS : Multiport Fuel Injection
PCM_PIN : 12 Wht wire at the instrument cluster
STATUS : KOBD (Key On Being Driven)
RPM
: 1500
ENG_TMP : Operating Temperature
VACUUM : 20 In. Hg
MILEAGE : 57782
• Theory of Operation
The vehicle speed sensors provides vehicle speed information to the PCM, the cruise control, and the speedometer.
The PCM uses the data to decide when to engage the transmission torque converter clutch lockup and to control
electronic transmission shift levels, cruise control, idle air bypass, engine cooling fan, and other functions.
The magnetic vehicle speed sensors are usually mounted directly on the transmissions or transaxles. They are two
wire sensors and AC signal generating analog sensors. They are very susceptible to Electromagnetic Interference
(EMI or RF) from other electronic devices on the vehicle.
They generally consist of a wire wrapped, soft bar magnet with two connections. These two winding, or coil,
connections are the sensor’s output terminals. When a ring gear (a reluctor wheel) rotates past this sensor, it
induces a voltage in the winding.
A uniform tooth pattern on the reluctor wheel produces a sinusoidal series of pulses having a consistent shape. The
amplitude is proportional to the rotating speed of the reluctor wheel. The signal frequency is based on the rotational
speed of the reluctor. The air gap between the sensor’s magnetic tip and the reluctor wheel greatly affects the
sensor’s signal amplitude.
• Symptoms [OBD II DTC’s: P0500 ~ P0503]
The amplitude and frequency increase with vehicle speed. Vehicle Speed Sensors
make waveforms whose shapes all look and behave v ery similar. Generally , the
oscillations (the ups and downs in the waveform) are very symmetrical at constant
speed.
• Troubleshooting Tips
If the amplitude is low, look for an excessive air gap between the trigger wheel and the pickup.
If the amplitude wavers, look for a bent trigger wheel or shaft.
If one of the oscillations look distorted, look for a bent or damaged tooth on the trigger wheel.
IMPORTANT: When troubleshooting a missing VSS signal, check the fuse first. If there is no power to the buffer,
there will be no square wave output. If the fuse is good, check the sensor first than a buffer mounted
under the dash. If you have a sine wave coming from the sensor, but no square wave from the buffer,
don’t assume the problem is in the buffer; it may not be there because of a loose connector between
the sensor and the buffer.
Inaccurate speedometer, improper transmission shifting, problems affecting ABS and cruise control
• Test Procedure
Optical Vehicle Speed Sensor (VSS)
1. Raise the drive wheels off the ground and place the transmission in drive.
• Theory of Operation
2. Connect the CH A lead to the sensor output or HI and its ground lead to the sensor output LO or GND.
The optical vehicle speed sensors are usually driven by a conventional cable and are found under the dash. They
are digital sensors and are not affected by electromagnetic interference (EMI).
3. With KOBD (Key On, Being Driven), monitor the VSS output signal at low speed while gradually increasing the
speed of the drive wheels.
4. Use the Glitch Snare mode to detect spikes and dropouts.
They generally consist of a rotating disk with slots in it, two fiber optic light pipes, a light emitting diode, and a
phototransistor as the light sensor. An amplifier is coupled to the phototransistor to create a strong enough signal for
use by other electronic devices, such as the PCM or ignition module. The phototransistor and amplifier create a
digital output signal (on/off pulse).
Optical sensors are very susceptible to malfunction from dirt or oil interfering with the light transmission through the
rotating disk. When dirt or oil enters into the sensitive areas of the sensors, driveability problems can occur and
DTC’s can be set.
6-20
6-21
• Symptoms [OBD II DTC’s: P0500 ~ P0503]
Analog Manifold Absolute Pressure (MAP) Sensor
Improper transmission shifting, inaccurate speedometer, problems affecting ABS and cruise control
• Test Procedure
1. Raise the drive wheels off the ground and place the transmission in drive.
2. Connect the CH A lead to the sensor output or HI and its ground lead to the sensor output LO or GND.
• Theory of Operation
Almost all domestic and import MAP sensors are analog types in design except Ford’s MAP sensor. Analog MAP
sensors generate a variable voltage output signal that is directly proportional to the intake manifold vacuum, which is
used by the PCM to determine the engine load. They are primarily three wire sensors and are supplied with 5V V
Ref power, a ground circuit, and the signal output to the PCM.
4. Use the Glitch Snare mode the detect spikes and dropouts.
High pressure occurs when the engine is under a heavy load, and low pressure (high intake vacuum) occurs when
there is very little load. A bad MAP sensor can affect the air-fuel ratio when the engine accelerates and decelerates.
It may also have some effect on ignition timing and other PCM outputs. A bad MAP sensor or its hose can trigger
DTC’s for MAF, TP, or EGR sensors.
• Reference Waveform
• Symptoms [OBD II DTC’s: P0105 ~ P0109]
3. With KOBD (Key On, Being Driven), monitor the VSS output signal at low speed (about 30 MPH) while gradually
increasing the speed of the drive wheels.
FREQ = 19.2 Hz
MAX = 12.0 V
MIN = 0.00 V
Frequency Modulated Signal.
Frequency increases with
vehicle speed.
VEHICLE INFORMATIONS
YEAR
: 1984
MAKE
: Oldsmobile
MODEL : Toronado
ENGINE : 5.0 L
FUELSYS : Feedback Carburetor
PCM_PIN : 16 Brn wire
STATUS : KOBD (Key On Being Driven)
RPM
: 1350
ENG_TMP : Operating Temperature
VACUUM : 15 In. Hg
MILEAGE : 52624
Low power, stall, hesitation, excessive fuel consumption, emissions failure
• Test Procedure
1. Connect the CH A lead to the sensor output or HI and its ground lead to the sensor output LO or GND.
2. Shut off all accessories, start the engine and let it idle in park or neutral. After the idle has stabilized, check the
idle voltage.
3. Rev the engine from idle to Wide Open Throttle (WOT) with a moderate input speed (this should only take about
2 seconds - don’t overrev the engine.)
4. Let engine speed drop back down to idle for about two seconds.
5. Rev the engine again to WOT (very quickly) and let it drop back to idle again.
The signal frequency should increase with increasing vehicle speed, but the duty cycle
should stay consistent at any speed. The amplitude, frequency, and shape should be
all consistent in the waveform from pulse to pulse. The amplitude should be sufficient
(usually equal to sensor supply voltage), the time between pulses repeatable and the
shapes repeatable and predictable.
• Troubleshooting Tips
The top and bottom corners of the waveform should be sharp and voltage transitions of the edge should be straight
and vertical.
6. Press the HOLD key to freeze the waveform on the display for closer inspection.
NOTE
It may be advantageous to put the sensor through its paces by using a handheld
vacuum pump to see that it generates the correct voltage at a specific vacuum.
• Reference Waveform
MAX = 4.86 V
MIN = -133 mV
slow
accel.
Snap
accel.
All of the waveforms should be equal in height due to the constant supply voltage to the sensor.
Make sure the waveform isn’t riding too high off the ground level. This could indicate a high resistance or bad ground
supply to the sensor. (Voltage drop to ground should not exceed 400 mV.)
Idle
Look for abnormalities observed in the waveform to coincide with a driveability problem or a DTC.
Full
decel.
6-22
VEHICLE INFORMATIONS
YEAR
: 1993
MAKE
: Chevrolet
MODEL : Suburban 1500
ENGINE : 5.7 L
FUELSYS : Throttle Body Fuel Injection
PCM_PIN : B13 LtGrn wire at MAP sensor
STATUS : KOER (Key On Running)
RPM
: Acceleration & Deceleration
ENG_TMP : Operating Temperature
0VACUUM : 3-24 In. Hg
MILEAGE : 55011
6-23
Check the manufacturer’s specifications for exact voltage range versus vacuum levels,
and compare them to the readings on the display. Generally the sensor voltage should
range about 1.25 V at idle to just under 5 V at WOT and close to 0 V on full
deceleration. High vacuum (around 24 In. Hg on full decel) produces low voltage
(close to 0 V), and low vacuum (around 3 In. Hg at full load) produces high voltage
(close to 5 V).
IMPORTANT: There are a few MAP sensors designed to do the opposite (high vacuum = high voltage).
Some Chrysler MAP sensors just stay at a fixed voltage when they fail, regardless of changes in
vacuum level. Generally 4 cylinder engines make nosier waveforms because their vacuum fluctuates
more between intake strokes.
3. Make sure that the amplitude, frequency and shape are all present, repeatable, and consistent. Amplitude should
be close to 5 V.
Frequency should vary with vacuum. Shape should stay constant (square wave).
4. Make sure the sensor produces the correc t frequency for a given amount of vacuum, according to the
specification chart for the vehicle you are working on.
5. Use the Glitch Snare mode to detect dropouts or unstable output frequency.
• Reference Waveform
FREQ = 159 Hz
MAX = 5.06 V
MIN = -133 mV
Ford digital MAP sensor
Key On Engine Off (KOEO)
• Troubleshooting Tips
HIGH ENGINE LOAD
A high voltage level indicates
high intake manifold pressure
(low vacuum).
LOW ENGINE LOAD
As the throttle plate opens,
manifold pressure rises
(manifold vacuum lowers).
A low voltage level indicates
low intake manifold pressure
(high vacuum).
VEHICLE INFORMATIONS
YEAR
: 1993
MAKE
: Ford
MODEL : F150 4WD Pickup
ENGINE : 5.0 L
FUELSYS : Multiport Fuel Injection
PCM_PIN : 45 LtGrn Blk wire
STATUS : KOEO (Key On Engine Off)
RPM
: 0
ENG_TMP : Operating Temperature
VACUUM : 0 In. Hg
MILEAGE : 66748
Frequency decreases as vacuum increases. Look for pulses that are a full 5 V in
amplitude. Voltage transitions should be straight and vertical. Voltage drop to ground
should not exceed 400 mV. If the voltage drop is greater than 400 mV, look for a bad
ground at the sensor or the PCM.
Digital Manifold Absolute Pressure (MAP) Sensor
• Troubleshooting Tips
• Theory of Operation
A bad digital MAP sensor can produce incorrect frequencies, runted (shortened) pulses, unwanted spikes and
rounded off corners that could all have the effect of garbling “electronic communication”, thus causing a driveability
or emissions problem.
Ford’s digital MAP sensor is found on many Ford and Lincoln Mercury vehicles from the early 1980’s to well into the
1990’s. This sensor produces a frequency modulated square wave whose frequency varies with the amount of
intake vacuum sensed. It generates about 160 Hz with no vacuum applied, and it generates about 105 Hz when it is
sensing around 19 In.Hg at idle. Check the manufacturer’s specs for the year, make and model for exact vacuum
versus frequency reference numbers. This is a three wire sensor, supplied with 5 V V Ref power, a ground circuit,
and the digital signal output pulses based on the amount of vacuum it senses.
• Symptoms [OBD II DTC’s: P0105 ~ P0109]
Low power, stall, hesitation, excessive fuel consumption, emissions failure
• Test Procedure
1. Connect the CH A lead to the sensor output or HI and its ground lead to the sensor output LO or GND.
Analog Mass Air Flow (MAF) Sensor
• Theory of Operation
There are two main varieties of analog MAF sensors; Hot Wire type and Vane type. Hot wire type MAF sensors use
heated-metal-foil sensing element to measure air flow entering the intake manifold. The sensing element is heated to
about 170 ˚F (77 ˚C), above the temperature of incoming air. As air flows over the sensing element, it cools the
element, causing resistance to drop. This causes a corresponding increase in current flow, which causes supply
voltage to decrease. This signal is seen by the PCM as a change in voltage drop (high air flow = high voltage) and is
used as an indication of air flow. The PCM uses this signal to calculate engine load, to determine the right amount of
fuel to be mixed with the air, and ignition timing, EGR control, idle control, transmission shift points, etc.
2. With the Key On, Engine Off (KOEO), apply different amounts of vacuum to the sensor using a handheld vacuum
pump.
6-24
6-25
Vane type MAF sensors, mainly, consist of a variable resistor (potentiometer) that tells the PCM the position of the
vane air flow door. As the engine is accelerated and more air passes through the vane air flow sensor, the vane air
door is pushed open by the incoming air. The angle of the vane air flow door is proportional to the volume of air
passing by it. A vane type MAF sensor consists of a contact connected to the vane door which slides over a section
of resistance material that is places around the pivot axis for the movable contact. The voltage at any point in the
resistance material, as sensed through the movable contact, is proportional to the angle of the vane air door.
Overswing of the door caused by snap accelerations provides information to the PCM for acceleration enrichment.
[Many Toyotas are equipped with vane type MAF sensors operating opposite the above – their voltage is high when
airflow is low.]
• Troubleshooting Tips
If overall voltage is low, be sure to check for cracked, broken, loose, or otherwise leaking intake air ducts.
IMPORTANT: 0.25 V can make the difference between a good sensor and a bad one, or an engine that is blowing
black smoke and one that is in perfect control of fuel mixture.
However, because the sensor output voltages will vary substantially depending on vehicle engine
families, in some cases, this sensor can be difficult to diagnose definitively.
• Symptoms [OBD II DTC’s: P0100 ~ P0104]
Digital Slow MAF (Mass Air Flow) Sensor
Hesitation, stall, low power, idle problems, excessive fuel consumption, emissions failure
• Theory of Operation
• Test Procedure
There are three main varieties of digital MAF sensors; Digital Slow type (output signals in the 30 to 500 Hz range),
Digital Fast type (output signals in the kHz range), and Karman Vortex type (which changes pulse width as well as
frequency). A digital MAF sensor receives a 5 V reference signal from the PCM and sends back a variable frequency
signal that is proportional to the mass of air entering the engine. The output signal is a square wave, in most cases,
with a full 5 V in amplitude. As the airflow increases, the frequency of the signal generated increases. The PCM uses
these signals to calculate fuel injector ON time and ignition timing and also determines MAF sensor deterioration by
comparing the MAF signal to a calculated value based on MAP, TP, IAT, and RPM signals.
1. Connect the CH A lead to the sensor output or HI and its ground lead to the sensor output LO or GND.
2. Shut off all accessories, start the engine and let it idle in park or neutral. After the idle has stabilized, check the
idle voltage.
3. Rev the engine from idle to Wide Open Throttle (WOT) with a moderate input speed (this should only take about
2 seconds – don’t overrev the engine).
4. Let engine speed drop back down to idle for about two seconds.
Digital Slow MAF sensors can be found on early to mid 1980’s G M vehicles, and many other engine systems.
Generally, the older the MAF sensor, the slower the frequency it produces.
5. Rev the engine again to WOT (very quickly) and let it drop back to idle again.
• Symptoms [OBD II DTC’s: P0100 ~ P0104]
6. Press the HOLD key to freeze the waveform on the display for closer inspection.
Hesitation, stall, low power, idle problems, excessive fuel consumption, emissions failure
• Reference Waveform
• Test Procedure
MAX = 4.12 V
MIN = 680 mV
slow
accel.
Snap
accel.
Idle
Full
decel.
6-26
VEHICLE INFORMATIONS
YEAR
: 1993
MAKE
: Ford
MODEL : Explorer
ENGINE : 4.0 L
FUELSYS : Multiport Fuel Injection
PCM_PIN : 14 LtBlu Red wire
STATUS : KOER (Key On Running)
RPM
: Acceleration and Deceleration
ENG_TMP : Operating Temperature
VACUUM : 2-24 In. Hg
MILEAGE : 54567
Hot wire type MAF sensor voltage should range from just over 2 V at idle to just over 4
V at WOT, and should dip slightly lower than idle voltage on full deceleration.
Vane type MAF sensor voltage should range from about 1 V at idle to just over 4 V at
WOT and not quite back to idle voltage on full deceleration.
Generally, on non-Toyota varieties, high airflow makes high voltage and low airflow
makes low voltage. When the sensor voltage output doesn’t follow airflow closely, the
waveform will show it and the engine operation will be noticeably affected.
1. Connect the CH A lead to the sensor output or HI and its ground lead to the sensor output LO or GND.
2. With the Key On, Engine Running (KOER), use the throttle to accelerate and decelerate the engine. Try different
RPM ranges while spending more time in the RPM ranges that correspond to the driveability problem.
3. Make sure that the amplitude, frequency and shape are all correct, consistent, and repeatable.
4. Make sure that the sensor generates the correct frequency for a given RPM or airflow rate.
5. Use the Glitch Snare mode to detect dropouts or unstable output frequency.
6-27
• Reference Waveform
FREQ = 64.1 Hz
MAX = 4.93 V
MIN = 0.00 V
Frequency increases due to air
flow increase from snap accel.
Idle air flow here
before snap accel.
4. Make sure that the sensor generates the correct frequency for a given RPM or airflow rate.
VEHICLE INFORMATIONS
YEAR
: 1986
MAKE
: Oldsmobile
MODEL : Toronado
ENGINE : 3.8 L
FUELSYS : Multiport Fuel Injection
PCM_PIN : B6 Yel wire
STATUS : KOER (Key On Running)
RPM
: Snap Acceleration
ENG_TMP : Operating Temperature
VACUUM : 0-24 In. Hg
MILEAGE : 123686
Frequency stays constant when airflow is constant. Frequency increases as airflow
increases from snap acceleration.
Look for pulses that are a full 5 V in amplitude. Voltage transitions should be straight
and vertical. Voltage drop to ground should not exceed 400 mV. If greater than 400
mV, look for a bad ground at the sensor or the PCM.
• Troubleshooting Tips
Possible defects to watch for are runted (shortened) pulses, unwanted spikes, and rounded off corners that could all
have the effect of garbling an electronic communication, causing a driveability or emissions problem. The sensor
should be replaced if it has intermittent faults.
Digital Fast MAF (Mass Air Flow) Sensor
5. Use the Glitch Snare mode to detect dropouts or unstable output frequency.
• Reference Waveform
VEHICLE INFORMATIONS
YEAR
: 1990
MAKE
: Buick
MODEL : Le Sabre
ENGINE : 3.8 L
FUELSYS : Multiport Fuel Injection
PCM_PIN : Yel wire
STATUS : KOER (Key On Running)
RPM
: 2500
ENG_TMP : Operating Temperature
VACUUM : 20 In. Hg
MILEAGE : 103128
FREQ = 6.57 kHz
MAX = 5.06 V
MIN = 0.00 V
Frequency stays constant when airflow is constant. Frequency increases as airflow
increases from snap acceleration. Look for pulses that are a full 5 V in amplitude.
Voltage transitions should be straight and vertical. Voltage drop to ground should not
exceed 400 mV. If greater than 400 mV, look for a bad ground at the sensor or the
PCM.
NOTE
On some Digital Fast MAF sensors, such as the GM Hitachi sensor found on 3800
Buick V-6s, the upper left corner of the pulse is rounded off slightly. This is normal
and doesn’t indicate a bad sensor.
• Theory of Operation
Digital Fast type MAF sensors can be found on GM’s 3800 V-6 engine with the Hitachi sensor, Lexus models, and
many others. The Hitachi sensor has a square wave output in the 10 kHz range.
Voltage level of square waves should be consistent and frequency should change smoothly with engine load and
speed.
• Troubleshooting Tips
Possible defects to watch for are runted (shortened) pulses, unwanted spikes, and rounded off corners that could all
have the effect of garbling an electronic communication, causing a driveability or emissions problem. The sensor
should be replaced if it has intermittent faults.
• Symptoms [OBD II DTC’s: P0100 ~ P0104]
Hesitation, stall, low power, idle problems, excessive fuel consumption, emissions failure
• Test Procedure
1. Connect the CH A lead to the sensor output or HI and its ground lead to the sensor output LO or GND.
2. With the Key On, Engine Running (KOER), use the throttle to accelerate and decelerate the engine. Try different
RPM ranges while spending more time in the RPM ranges that correspond to the driveability problem.
3. Make sure that the amplitude, frequency and shape are all consistent, repeatable, and accurate.
6-28
Digital Karman-Vortex MAF (Mass Air Flow) Sensor
• Theory of Operation
Karman-Vortex type MAF sensors are usually manufactured as part of the air cleaner assembly. They are commonly
found on Mitsubishi engine systems. While most digital MAF sensors vary only their frequency with changes in
airflow rate, the Karman-Vortex type’s signal varies Pulse Width as well as Frequency with changes in airflow rate.
As the airflow increases, the frequency of the signal generated increases.
Karman-Vortex sensors differ from other digital MAF sensors during acceleration modes. During acceleration, not
only does the sensor’s frequency output increases, but also its pulse width changes.
6-29
• Symptoms [OBD II DTC’s: P0100 ~ P0104]
Differential Pressure Feedback EGR (DPFE) Sensor
Hesitation, stall, low power, idle problems, excessive fuel consumption, emissions failure
• Test Procedure
1. Connect the CH A lead to the sensor output HI and its ground lead to the sensor output LO or GND.
2. With the Key On, Engine Running (KOER), use the throttle to accelerate and decelerate the engine. Try different
RPM ranges while spending more time in the RPM ranges that correspond to the driveability problem.
3. Make sure that the amplitude, frequency, shape, and pulse width are all consistent, repeatable and accurate for
any given operating mode.
4. Make sure that the sensor generates the correct and steady frequency for a given RPM or airflow rate.
5. Use the Glitch Snare mode to detect dropouts or unstable output frequency.
• Reference Waveform
FREQ = 69.4 Hz avg.
MAX = 5.06 V
MIN = 933 mV
Karman Vortex MAF sensor
during snap acceleration.
VEHICLE INFORMATIONS
YEAR
: 1992
MAKE
: Mitsubishi
MODEL : Eclipse
ENGINE : 1.8 L
FUELSYS : Multiport Fuel Injection
PCM_PIN : 10 GrnBlu wire
STATUS : KOER (Key On Running)
RPM
: Snap Acceleration
ENG_TMP : Operating Temperature
VACUUM : 3-24 In. Hg
MILEAGE : 49604
Frequency increases as airflow rate increases. Pulse width (duty cycle) is modulated in
acceleration modes.
Look for pulses that are a full 5 V in amplitude. Look for the proper shape of the
waveform in terms of consistent, square corners, and consistent vertical legs.
• Troubleshooting Tips
Possible defects to watch for are runted (shortened) pulses, unwanted spikes, and rounded off corners that could all
have the effect of garbling an electronic communication, causing a driveability or emissions problem. The sensor
should be replaced if it has intermittent faults.
• Theory of Operation
An EGR (Exhaust Gas Recirculation) pressure sensor is a pressure transducer that tells the PCM the relative
pressures in the exhaust stream passages and, sometimes, intake manifold. It is found on some Ford EEC IV and
EEC V engine systems.
Ford calls it a PFE (Pressure Feedback EGR) sensor when the sensor outputs a signal that is proportional to the
exhaust backpressure.
Ford calls it a DPFE (Differential Pressure Feedback EGR) sensor when the sensor outputs the relative difference in
pressure between intake vacuum and exhaust.
These are important sensors because their signal input to the PCM is used to calculate EGR flow. A bad EGR
pressure sensor can cause hesitation, engine pinging, and idle problems, among other driveability problems, and I/M
emission test failures.
The EGR pressure sensor is usually a three wire sensor. One wire supplies the sensor with 5 V via the PCM’s V Ref
circuit, another wire provides the sensor ground, and the third wire is the sensor’s signal output to the PCM.
Generally, Ford’s DPFE sensors are found on late model 4.0 L Explorers and other vehicles and produce just under
1 V with no exhaust gas pressure and close to 5 V with maximum exhaust gas pressure.
NOTE
Ford’s PFE sensors produce 3.25 V with no exhaust back pressure increasing to
about 4.75 V with 1.8 PSI of exhaust back pressure. O n properly operating
vehicles the voltage won’t ever get to 5 V. PFE sensors can be found on many
Taurus and Sable models.
• Symptoms [OBD II DTC’s: P0400 ~ P0408]
Hesitation, engine pinging, idle problems, I/M emission test failure
• Test Procedure
1. Connect the CH A lead to the sensor output HI and its ground lead to the sensor output LO or GND.
2. Start the engine and hold throttle at 2500 RPM for 2–3 minutes until the engine is fully warmed up and the
Feedback Fuel System is able to enter closed loop. (Verify this by viewing the O2 sensor signal, if necessary.)
3. Shut off A/C and all other accessories. Drive the vehicle under normal driving modes; start from dead stop, light
acceleration, heavy acceleration, cruise, and deceleration.
4. Make sure that the amplitude is correct, repeatable, and present during EGR conditions. The sensor signal
should be proportional to exhaust gas versus manifold vacuum pressures.
5. Make sure that all the hoses and lines to and from the intake manifold, EGR valve, and vacuum solenoid valve
are intact, and routed properly, with no leaks. Make sure the EGR valve diaphragm can hold the proper amount
of vacuum (check manufacturer’s specs.). Make sure that the EGR passageways in and around the engine are
clear and unrestricted from internal carbon buildup.
6. Press the HOLD key to freeze the waveform on the display for closer inspection.
6-30
6-31
• Reference Waveform
Saturated Switch Type (MFI/PFI/SFI) Injector
VEHICLE INFORMATIONS
YEAR
: 1994
MAKE
: Ford
MODEL : Explorer
ENGINE : 4.0 L
FUELSYS : Multiport Fuel Injection
PCM_PIN : 27 BrnLtGrn wire
STATUS : KOER (Key On Running)
RPM
: Snap Acceleration
ENG_TMP : Operating Temperature
VACUUM : 3-24 In. Hg
MILEAGE : 40045
MAX = 1.86 V
MIN = 400 mV
Ford EGR Differential Pressure
Sensor logged during snap
acceleration
Engine accelerated
here
As soon as the engine reaches the predetermined EGR requirement conditions, the
PCM will begin opening the EGR valve. The waveform should rise when the engine is
accelerated. The waveform should fall when the EGR valve closes and the engine
decelerates. EGR demands are especially high during accelerations. During idle and
deceleration, the valve is closed.
• Theory of Operation
The fuel injector itself determines the height of the release spike. The injector driver (switching transistor) determines
most of the waveform features. Generally an injector driver is located in the PCM that turns the injector on and off.
Different Kinds (Saturated Switch type, Peak-and-Hold type, Bosch type Peak-and-Hold, and PNP type) of injector
drivers create different waveforms. Knowing how to interpret injector waveforms (determining on-time, referencing
peak height, recognizing bad drivers, etc.) can be a very valuable diagnostic talent for driveability and emission
repair.
Saturated switch injector drivers are used primarily on multiport fuel injection (MFI, PFI, SFI) systems where the
injectors are fired in groups or sequentially. Determining the injector on-time is fairly easy. The injector on-time
begins where the PCM grounds the circuit to turn it on and ends where the PCM opens the control circuit. Since the
injector is a coil, when its electric field collapses from the PCM turning it off, it creates a spike. Saturated Switch type
injectors have a single rising edge. The injector on-time can be used to see if the Feedback Fuel Control System is
doing its job.
• Symptoms
Hesitation, rough idle, intermittent stall at idle, poor fuel mileage, emissions test failure, low power on acceleration
• Test Procedure
• Troubleshooting Tips
1. Connect the CH A lead to the injector control signal from the PCM and its ground lead to the injector GND.
There should be no breaks, spikes to ground, or dropouts in the waveform.
6.3 ACTUATOR TESTS
COMPONENT TESTS
ACTUATORS
6-32
ACTUATOR TESTS MENU
Injector PFI/MFI
Injector TBI
Injector PNP
Injector Bosch
Mixture Cntl Sol
EGR Cntl Sol
IAC Motor
IAC Solenoid
Trans Shift Sol
Turbo Boost Sol
Diesel Glow Plug
2. Start the engine and hold throttle at 2500 RPM for 2-3 minutes until the engine is fully warmed up and the
Feedback Fuel System enters closed loop. (Verify this by viewing the O2 sensor signal, if necessary.)
3. Shut off A/C and all other accessories. Put vehicle in park or neutral. Rev the engine slightly and watch for the
corresponding injector on-time increase on acceleration.
1) Induce propane into the intake and drive the mixture rich. If the system is working properly, the injector ontime will decrease.
2) Create a vacuum leak and drive the mixture lean. The injector on-time will increase.
3) Raise the engine to 2500 RPM and hold it steady. The injector on-time will modulate from slightly larger to
slightly smaller as the system controls the mixture. Generally, the injector on-time only has to change from
0.25 ms to 0.5 ms to drive the system through its normal full rich to full lean range.
IMPORTANT: If the injector on-time is not changing, either the system may be operating in an “open loop” idle
mode or the O2 sensor may be bad.
4. Use the Glitch Snare mode to check for sudden changes in the injector on-time.
6-33
• Reference Waveform
• Test Procedure
MAX = 35.3 V
MIN = -2.00 V
DUR = 3.92 ms
PCM turns
circuit on here
PCM turns
circuit off here
VEHICLE INFORMATIONS
YEAR
: 1993
MAKE
: Ford
MODEL : F150 4WD Pickup
ENGINE : 5.0 L
FUELSYS : Multiport Fuel Injection
PCM_PIN : 58 Tan wire
STATUS : KOER (Key On Running)
RPM
: Idle
ENG_TMP : Operating Temperature
VACUUM : 19 In. Hg
MILEAGE : 66748
1. Connect the CH A lead to the injector control signal from the PCM and its ground lead to the injector GND.
2. Start the engine and hold throttle at 2500 RPM for 2-3 minutes until the engine is fully warmed up and the
Feedback Fuel System enters closed loop. (Verify this by viewing the O2 sensor signal, if necessary.)
3. Shut off A/C and all other accessories. Put vehicle in park or neutral. Rev the engine slightly and watch for the
corresponding injector on-time increase on acceleration.
1) Induce propane into the intake and drive the mixture rich. If the system is working properly, the injector ontime will decrease.
2) Create a vacuum leak and drive the mixture lean. The injector on-time will increase.
3) Raise the engine to 2500 RPM and hold it steady. The injector on-time will modulate from slightly larger to
slightly smaller as the system controls the mixture. Generally, the injector on-time only has to change from
0.25 ms to 0.5 ms to drive the system through its normal full rich to full lean range.
4. Use the Glitch Snare mode to check for sudden changes in the injector on-time.
When the Feedback Fuel Control System controls fuel mixture properly, the injector
on-time will modulate from about 1-6 ms at idle to about 6-35 ms under cold cranking
or Wide Open Throttle (WOT) operation.
The injector coil release spike(s) ranges are from 30 V to 100 V normally.
• Reference Waveform
MAX = 83.5 V
MIN = 0.00 V
DUR = 5.51 ms
• Troubleshooting Tips
Spikes during on-time or unusual high turn off spikes indicate the injector driver’s malfunction.
Peak and Hold Type (TBI) Injector
Straight line here (just below
battery voltage) indicates
good injector driver.
• Theory of Operation
Peak and Hold fuel injector drivers are used almost exclusively on Throttle Body Injection (TBI) systems. These
drivers are only used on a few selected MFI systems like GM’s 2.3 L Quad-4 engine family, Saturn 1.9 L, and Isuzu
1.6 L. The driver is designed to allow approximately 4 A to flow through the injector coil and then reduce the current
flow to a maximum of about 1 A. Generally, far more current is required to open the pintle valve than to hold it open.
The PCM continues to ground the circuit (hold it at 0 V) until it detects about 4 A flowing through the injector coil.
When the 4 A “Peak” is reached. the PCM cuts back the current to a maximum of 1 A, by switching in a current
limiting resistor. This reduction in current causes the magnetic field to collapse partially, creating a voltage spike
similar to an ignition coil spike, The PCM continues the “Hold” operation for the desired injector on-time, then it shuts
the driver off by opening the ground circuit completely. This creates the second spike. Under acceleration the
second spike move to the right, while the first remains stationary. If the engine is running extremely rich, both spikes
are nearly on top of one another because the PCM is attempting to lean out the mixture by shortening injector ontime as much as possible.
• Symptoms
Hesitation on throttle tip in, rough idle, intermittent stall at idle, poor fuel mileage, emissions test failure, low power on
acceleration.
6-34
VEHICLE INFORMATIONS
YEAR
: 1993
MAKE
: Chevrolet
MODEL : Suburban 1500
ENGINE : 5.7 L
FUELSYS : Throttle Body Fuel Injection
PCM_PIN : A16 DkBlu
STATUS : KOER (Key On Running)
RPM
: Snap Acceleration
ENG_TMP : Operating Temperature
VACUUM : 3-24 In. Hg
MILEAGE : 55011
When the Feedback Fuel Control System controls fuel mixture properly, the injector
on-time will modulate from about 1-6 ms at idle to about 6-35 ms under cold cranking
or Wide Open Throttle (WOT) operation.
The injector coil release spike(s) ranges are from 30 V to 100 V normally. The turn off
spikes less than 30 V may indicate shorted injector coil.
Initial drive voltage should go close to 0 V. If not, injector driver may be weak.
• Troubleshooting Tips
Spikes during on-time or unusual high turn off spikes indicate the injector driver’s malfunction. On GM and some
ISUZU dual TBI systems lots of extra oscillations or “hash” in between the peaks indicates a faulty injector driver in
the PCM.
6-35
PNP Type Injector
• Theory of Operation
A PNP type injector driver within the PCM has two positive legs and one negative leg. PNP drivers pulse power to an
already grounded injector to turn it on. Almost all other injector drivers (NPN type) are opposite. They pulse ground
to an injector that already has voltage applied. This is why the release spike is upside-down. Current flow is in the
opposite direction. PNP type drivers can be found on several MFI systems; Jeep 4.0 L engine families, some pre1988 Chrysler engine families, a few Asian vehicles, and some Bosch vehicles in the early 1970s like the Volvo 264
and Mercedes V-8s.
The injector on-time begins where the PCM switches power to the circuit to turn it on. The injector on-time ends
where the PCM opens the control circuit completely.
• Reference Waveform
PCM turns
injector off
MAX = 15.9 V
MIN = 27.9 V
DUR = 6.07 ms
PCM turns
injector on
by switching
power on
• Symptoms
Hesitation on throttle tip in, rough idle, intermittent stall at idle, poor fuel mileage, emissions test failure, low power on
acceleration
• Test Procedure
VEHICLE INFORMATIONS
YEAR
: 1990
MAKE
: Jeep
MODEL : Cherokee
ENGINE : 4.0 L
FUELSYS : Multiport Fuel Injection
PCM_PIN : 4 Yel wire at #4 injector
STATUS : KOER (Key On Running)
RPM
: Idle
ENG_TMP : Operating Temperature
VACUUM : 16.5 In. Hg
MILEAGE : 85716
When the Feedback Fuel Control System controls fuel mixture properly, the injector
on-time will modulate from about 1-6 ms at idle to about 6-35 ms under cold cranking
or Wide Open Throttle (WOT) operation.
The injector coil release spike(s) ranges are from -30 V to -100 V normally.
1. Connect the CH A lead to the injector control signal from the PCM and its ground lead to the injector GND.
2. Start the engine and hold throttle at 2500 RPM for 2-3 minutes until the engine is fully warmed up and the
Feedback Fuel System enters closed loop. (Verify this by reviewing the O2 sensor signal, if necessary.)
3. Shut off A/C and all other accessories. Put vehicle in park or neutral. Rev the engine slightly and watch for the
corresponding injector on-time increase on acceleration.
1) Induce propane into the intake and drive the mixture rich. If the system is working properly, the injector ontime will decrease.
2) Create a Vacuum leak and drive the mixture lean. The injector on-time will increase.
3) Raise the engine to 2500 RPM and hold it steady. The injector on-time will modulate from slightly larger to
slightly smaller as the system control the mixture. Generally, the injector on-time only has to change from 0.25
ms to 0.5 ms to drive the system through its normal full rich to full lean range.
IMPORTANT: If the injector on-time is not changing, either the system may be operating in an “open loop” idle
mode or the O2 sensor may be bad.
NOTE
Some injector spike heights are “chopped” to between -30 V to -60 V by clamping
diodes. There are usually identified by the flat top on their spike(s) instead of a
sharper point. In those cases, a shorted injector may not reduce the spike height
unless it is severely shorted.
• Troubleshooting Tips
Spikes during on-time or unusual large turn off spikes indicate the injector driver’s malfunction.
4. Use the Glitch Snare mode to check for sudden changes in the injector on-time.
6-36
6-37
• Reference Waveform
Bosch-Type Peak and Hold Injector
• Theory of Operation
Bosch type Peak and Hold injector drivers (within the PCM) are designed to allow about 4 A to flow through the
injector coil, then reduce the flow to a maximum of 1 A by pulsing the circuit on and off at a high frequency. The
other type injector drivers reduce the current by using a “switch-in” resistor, but this type drivers reduce the current
by pulsing the circuit on and off.
Current flow
pulsed on and
off enough to
keep hold in
winding activated
Battery voltage
(or source voltage)
supplied to the
injector
Driver transistor
turns on, pulling
the injector pintle
away from its
seat, starting fuel
flow
Peak voltage caused
by the collapse of the
injector coil. when
current is reduced.
MAX = 50.6 V
MIN = -3.33 V
DUR = 2.23 ms
PCM turns
circuit on
Bos ch ty pe Peak and Hold i njector
drivers are found on a few European
models with MFI s ystems and s ome
early to mid-1980s Asian vehicles with
MFI systems.
PCM turns
circuit off
VEHICLE INFORMATIONS
YEAR
: 1986
MAKE
: Nissan/Datsun
MODEL : Stanza Wagon
ENGINE : 2.0 L
FUELSYS : Multiport Fuel Injection
PCM_PIN : B WhtBlk wire
STATUS : KOER (Key On Running)
RPM
: Idle
ENG_TMP : Operating Temperature
VACUUM : 21 In. Hg
MILEAGE : 183513
When the Feedback Fuel Control System controls fuel mixture properly, the injector
on-time will modulate from about 1-6 ms at idle to about 6-35 ms under cold cranking
or Wide Open Throttle (WOT) operation.
The injector coil release spike(s) ranges are from 30 V to 100 V normally.
Return to battery
(or source) voltage
IMPORTANT :On some European vehicles like Jaguar, there may be only one release spike because the first
release spike does not appear due to a spike suppression diode.
Injector On-Time
• Troubleshooting Tips
Spikes during on-time or unusual high turn off spikes indicate the injector driver’s malfunction.
• Symptoms
Hesitation on throttle tip in, rough idle, intermittent stall at idle, poor fuel mileage, emissions test failure, low power on
acceleration
• Test Procedure
1. Connect the CH A lead to the injector control signal from the PCM and its ground lead to the injector GND.
2. Start the engine and hold throttle at 2500 RPM for 2-3 minutes until the engine is fully warmed up and the
Feedback Fuel System enters closed loop. (Verify this by reviewing the O2 sensor signal, if necessary.)
3. Shut off A/C and all other accessories. Put vehicle in park or neutral. Rev the engine slightly and watch for the
corresponding injector on-time increase on acceleration.
1) Induce propane into the intake and drive the mixture rich. If the system is working properly, the injector ontime will decrease.
2) Create a vacuum leak and drive the mixture lean. The injector on-time will increase.
3) Raise the engine to 2500 RPM and hold it steady. The injector on-time will modulate from slightly larger to
slightly smaller as the system control the mixture. Generally, the injector on-time only has to change from 0.25
ms to 0.5 ms to drive the system through its normal full rich to full lean range.
IMPORTANT: If the injector on-time is not changing, either the system may be operating in an “open loop” idle
mode or the O2 sensor may be bad.
4. Use the Glitch Snare mode to check for sudden changes in the injector on-time.
6-38
Mixture Control Solenoid
• Theory of Operation
The mixture control signal is the most important output signal in a carbureted Feedback Fuel Control system. On a
GM vehicle, this circuit pulses about 10 times per second, with each individual pulse (pulse width or on-time) varing,
depending upon the fuel mixture needed at that moment.
In a GM vehicle, this circuit controls how long (per pulse) the main jet metering rods in the carburetor stay down
(lean position). Most feedback carburetor systems operate in the same way – more mixture control on-time means
lean mixture command. Generally, mixture control commands (from the PCM) that oscillate around duty cycles
greater than 50 % mean the system is commanding a lean mixture in an effort to compensate for a long term rich
condition.
• Symptoms
Hesitation on throttle tip in, poor fuel economy, erratic idle, rich or lean emissions
• Test Procedure
IMPORTANT :Before performing the test procedure, the O2 sensor must be tested and confirmed good.
1. Connect the CH A lead to the mixture solenoid control signal from the PCM and its ground lead to GND.
6-39
2. Start the engine and hold throttle at 2500 RPM for 2-3 minutes until the engine is fully warmed up and the
Feedback Fuel System enters closed loop. (Verify this by viewing the O2 sensor signal.)
3. Shut off A/C and all other accessories. Put vehicle in park or neutral. Adjust lean stop, air bleed, and idle mixture
as per recommended service procedures for the carburetor being serviced.
4. Use the Glitch Snare mode the check for signal dropouts.
How much and when EGR flow occurs is very important to emissions and driveability. To precisely control EGR flow,
the PCM sends Pulse Width Modulated signals to a vacuum solenoid valve to control vacuum flow to the EGR valve.
When applying vacuum, the EGR valve opens, allowing EGR flow. When blocking vacuum, EGR flow stops.
Most engine control systems do not enable EGR operation during cranking, engine warm up, deceleration, and
idling. EGR is precisely controlled during acceleration modes to optimize engine torque.
• Symptoms
• Reference Waveform
Hesitation, loose power, stall, emissions with excessive NOx, engine detonation (pinging)
FREQ = 10.0 Hz
DUTY = 48.8 %
MAX = 31.6 V
NOTE: O 2 sensor
must be good to
test this circuit
PCM turns
circuit on
PCM turns
circuit off
VEHICLE INFORMATIONS
YEAR
: 1984
MAKE
: Oldsmobile
MODEL : Delta 88
ENGINE : 5.0 L
FUELSYS : Feedback Carburetor
PCM_PIN : 18 Blu wire (at test connector)
STATUS : KOER (Key On Running)
RPM
: Idle
ENG_TMP : Operating Temperature
VACUUM : 19.5 In. Hg
MILEAGE : 104402
When the main venturi metering circuits are adjusted properly (lean stop, air bleed,
etc.), the mixture control signal should oscillate around 50 % duty cycle normally.
When the main metering and idle mixture adjustments are set correctly, the tall spike
will oscillate slightly from right to left and back again, but remain very close to the
middle of the two vertical drops in the waveform. The PCM is oscillating the signal right
to left, based on input from the O2 sensor.
• Test Procedure
1. Connect the CH A lead to the EGR control signal from the PCM and its ground lead to GND.
2. Start the engine and hold throttle at 2500 RPM for 2-3 minutes until the engine is fully warmed up and the
Feedback Fuel System enters closed loop. (Verify this this by viewing the O2 sensor signal.)
3. Shut off A/C and all other accessories. Drive the vehicle under normal driving modes; start from dead stop, light
acceleration, heavy acceleration, cruise, and deceleration.
4. Make sure that the amplitude, frequency, shape, and pulse width are all correct, repeatable, and present during
EGR flow conditions.
5. Make sure that all the hoses and lines to and from the intake manifold, EGR valve, and vacuum solenoid valve
are all intact, and routed properly, with no leaks. Make sure the EGR valve diaphragm can hold the proper
amount of vacuum. Make sure that the EGR passageways in and around the engine are clear and unrestricted
from internal carbon buildup.
6. Use the Glitch Snare mode to check for signal dropouts.
• Reference Waveform
• Troubleshooting Tips
If the duty cycle does not remain around 50 %, check for vacuum leaks or a poor mixture adjustment.
MAX = 29.0 V
MIN = -1.33 V
If the waveform oscillates around 50 % duty cycle during one operating mode (for instance, idle) but not another,
then check for vacuum leaks, misadjusted idle mixture, main metering mixture, or other non-feedback system
problems that affect mixture at different engine speeds.
EGR (Exhaust Gas Recirculation) Control Solenoid
• Theory of Operation
EGR systems are designed to dilute the air-fuel mixture and limit NOx formation when combustion temperatures
generally exceed 2500 °F (1371 °C) and air-fuel ratios are lean. The effect of mixing exhaust gas (a relatively inert
gas) with the incoming air-fuel mixture is a sort of chemical buffering or cooling of the air and fuel molecules in the
combustion chamber. This prevents excessively rapid burning of the air-fuel charge, or even detonation, both of
which can raise combustion temperatures above 2500 °F. The initial formation of NOx is limited by EGR flow and
then the catalytic converter acts to chemically reduce the amounts of produced NOx entering the atmosphere.
6-40
PCM turns
circuit on
PCM pulses
circuit here
PCM turns
circuit off
VEHICLE INFORMATIONS
YEAR
: 1990
MAKE
: Chevrolet
MODEL : Suburban
ENGINE : 5.7 L
FUELSYS : Throttle Body Fuel Injection
PCM_PIN : A4 Gry wire
STATUS : KOER (Key On Running)
RPM
: Light Acceleration
ENG_TMP : Operating Temperature
VACUUM : 12-23 In. Hg
MILEAGE : 59726
As soon as the engine reaches the predetermined EGR requirement conditions, the
PCM should begin pulsing the EGR solenoid with a pulse width modulated signal to
open the EGR solenoid valve. EGR demands are especially high during accelerations.
6-41
• Troubleshooting Tips
If the waveform has runted (shortened) spike heights, it indicates a shorted EGR vacuum solenoid.
If the waveform has a flat line (no signal at all), it indicates a PCM failure, PCM’s EGR conditions not met, or wiring
or connector problem.
Too much EGR flow can make the vehicle hesitate, loose power, or even stall. Not enough EGR flow can result in
emissions with excessive NOx and engine detonation (pinging).
The idle control output command from the PCM should change when accessories are
switched on and off or the transmission is switched in and out of gear.
The pulse width modulated signals from the PCM should control the speed of the
motor, and in turn the amount of air bypassing the throttle plate.
The turn off spikes may not be present in all IAC drive circuits.
IMPORTANT :Before diagnosing IAC motor, several things must be checked and verified; the throttle plate should
be free of carbon buildup and should open and close freely, the minimum air rate (minimum throttle
opening) should be set according to manufacturer’s specifications, and check for vacuum leaks or
false air leaks.
IAC (Idle Air Control) Motor
• Theory of Operation
Idle air control valves keep the engine idling as low as possible, without stalling, and as smoothly as possible when
accessories such as air conditioning compressors, alternators, and power steering load the engine.
Some IAC valves are solenoids (most Fords), some are rotating motors (European Bosch), and some are gear
reduction DC stepper motors (most GM, Chrysler). In all cases, however, the PCM varies the amplitude or pulse
width of the signal to control its operation and ultimately, idle speed.
Rotating IAC motors receive a continuous pulse train. The duty cycle of the signal controls the speed of the motor,
and in turn the amount of air bypassing the throttle plate.
• Symptoms
Erratic high or low idle, stalling, high activity but no change in idle
• Test Procedure
1. Connect the CH A lead to the IAC control signal from the PCM and its ground lead to GND.
• Troubleshooting Tips
If the engine idle speed doesn’t change corresponding with the change of the PCM’s command signal, suspect a
bad IAC motor or clogged bypass passage.
IAC (Idle Air Control) Solenoid
• Theory of Operation
Idle air control solenoids keep the engine idling as low as possible, without stalling, and as smoothly as possible
when accessories such as air conditioning compressors, alternators, and power steering load the engine.
Ford’s IAC solenoids are driven by a DC signal with some AC superimposed on top. The solenoid opens the throttle
plate in proportion to the DC drive it receives from the PCM. The DC drive is applied by holding one end of the
solenoid coil at battery positive while pulling the other end toward GND. The DC voltage at the driven pin decreases
as the solenoid drive current is increased.
2. Run the engine at idle while turning accessories (A/C, blowers, wipers, etc.) on and off. If the vehicle has an
automatic transmission, put it in and out of drive and park. This will change the load on the engine and cause the
PCM to change the output command signal to the IAC motor.
• Symptoms
3. Make sure that idle speed responds to the changes in duty cycle.
• Test Procedure
4. Use the Glitch Snare mode to check for signal dropouts.
1. Connect the CH A lead to the IAC control signal from the PCM and its ground lead to the chassis GND.
• Reference Waveform
FREQ = 100 Hz
DUTY = 52.5 %
PCM turns
circuit on
6-42
PCM turns
circuit off
VEHICLE INFORMATIONS
YEAR
: 1989
MAKE
: BMW
MODEL : 525 I
ENGINE : 2.5 L
FUELSYS : Multiport Fuel Injection
PCM_PIN : 22 WhtGrn wire
STATUS : KOER (Key On Running)
RPM
: Idle
ENG_TMP : Operating Temperature
VACUUM : 15 In. Hg
MILEAGE : 72822
Erratic high or low idle, stalling, high activity but no change in idle
2. Run the engine at idle while turning accessories (A/C, blowers, wipers, etc.) on and off. If the vehicle has an
automatic transmission, put it in and out of drive and park. This will change the load on the engine and cause the
PCM to change the output command signal to the IAC solenoid.
3. Make sure that the amplitude, frequency, and shape are all correct, repeatable, and consistent for the various idle
compensation modes.
4. Make sure that idle speed responds to the changes in the IAC drive.
6-43
• Reference Waveform
• Symptoms
VEHICLE INFORMATIONS
YEAR
:
1993
MAKE
:
Ford
MODEL :
Explorer
ENGINE :
4.0 L
FUELSYS :
Multiport Fuel Injection
PCM_PIN :
21 Wht-LtBlu wire
STATUS :
KOER (Key On Running)
RPM
:
Idle
ENG_TMP :
Operating Temperature
VACUUM :
19 In. Hg
MILEAGE :
54567
FREQ = 158 Hz
MAX = 12.2 V
MIN = 6.40 V
The idle control output command from the PCM should change when accessories are
switched on and off or the transmission is switched in and out of gear.
DC level should decrease as the IAC solenoid drive current is increased.
IMPORTANT :Before diagnosing IAC solenoid, several things must be checked and verified; the throttle plate
should be free of carbon buildup and should open and close freely, the minimum air rate (minimum
throttle opening) should be set according to manufacturer’s specifications, and check for vacuum
leaks or false air leaks.
Slow and improper shifting, engine stops running when vehicle comes to a stop
• Test Procedure
1. Connect the CH A lead to the transmission shift solenoid control signal from the PCM and its ground lead to the
chassis GND.
2. Drive the vehicle as needed to make the driveability problem occur or to exercise the suspected shift solenoid circuit.
3. Make sure that the amplitude is correct for the suspected transmission operation.
4. Use the proper transmission fluid pressure gauges to make sure the transmission fluid pressure and flow being
controlled by the solenoid is being effected properly by solenoid operation. This will help discriminate between an
electronic problem and a mechanical problem (such as a sticking solenoid valve, clogged fluid passages, or
leaking internal seals, etc.) in the transmission.
• Reference Waveform
Vehicle speed reached
35 MPH here and PCM
turned shift solenoid on
• Troubleshooting Tips
If the engine idle speed doesn’t change corresponding with the change of the PCM’s command signal, suspect a
bad IAC solenoid or clogged bypass passage.
Transmission Shift Solenoid
• Theory of Operation
The PCM controls an automatic transmission’s electronic shift solenoid or torque converter clutch (TCC) lockup
solenoid.
The PCM opens and closes the solenoid valves using a DC switched signal. These solenoid valves, in effect, control
transmission fluid flow to clutch pack, servos, torque converter lockup clutches, and other functional components of
the transmission under the PCM’s control.
Some electronic shift solenoid systems use ground feed controlled solenoids that are always powered up and some
systems use power feed controlled solenoids that are always grounded. A ground feed controlled solenoid on a DC
switched circuit appears as a straight line at the system voltage, and drops to ground when the PCM activates the
solenoid. A power feed controlled solenoid on a DC switched circuit appears as a straight line at 0 V until the PCM
activates the solenoid.
Many vehicle PCM’s are programmed not to enable TCC operation until the engine reaches a certain temperature as
well as a certain speed.
6-44
VEHICLE INFORMATIONS
YEAR
: 1993
MAKE
: Ford
MODEL : Explorer
ENGINE : 4.0 L
FUELSYS : Multiport Fuel Injection
PCM_PIN : 52 Org Yel wire
STATUS : KOBD (Key On Driven)
RPM
: 1500
ENG_TMP : Operating Temperature
VACUUM : 19 In. Hg
MILEAGE : 54567
The drive signal should be consistent and repeatable.
• Troubleshooting Tips
If the waveform appears as a flat line (no signal at all), it can indicate a PCM failure, PCM conditions not met (shift
points, TCC lockup, etc.), or wiring or connector problems.
Turbo Boost Control Solenoid
• Theory of Operation
Turbochargers increase horsepower considerably without increasing engine piston displacement. Turbochargers
also improve torques over the useful RPM range and fuel economy, and reduces exhaust gas emissions.
Turbocharger’s boost pressure must be regulated to obtain optimum acceleration, throttle response, and engine
durability. Regulating the boost pressure is accomplished by varying the amount of exhaust gas that bypasses the
exhaust side turbine. As more exhaust gas is routed around the turbine, the less boost pressure is increased.
6-45
A door (called the wastegate) is opened and closed to regulate the amount of bypass. The wastegate is controlled
by a vacuum servo motor, which can be controlled by a vacuum solenoid valve that receives a control signal from
the PCM. When the PCM receives a signal from the MAP sensor indicating that certain boost pressure is reached,
the PCM commands the vacuum solenoid valve to open in order to decrease boost pressure. The PCM opens the
solenoid valve via a pulse width modulated signal.
• Symptoms
Poor driveability, engine damage (blown head gasket), hard stall under acceleration
• Test Procedure
1. Connect the CH A lead to the solenoid control signal from the PCM and its ground lead to the chassis GND.
2. Start the engine and hold throttle at 2500 RPM for 2-3 minutes until the engine is fully warmed up and the
Feedback Fuel system enters closed loop. (Verify this by viewing the O2 sensor signal, if necessary.)
Diesel Glow Plug
• Theory of Operation
Starting cold diesel engines are not easy because Blowby past the piston rings and thermal losses reduce the
amount of c ompression possible. Cold starting can be improved by a sheathed element glow plug in the
precombustion chamber (in case of Direct-injection (DI) engines, in the main combustian chamber).
When current flows through the heating coil of the glow plug, a portion of the fuel around the glow plug’s hot tip is
vaporized to assist in igniting the air-fuel mixture. Newer glow plug systems, which continue to operate after engine
startup for up to 3 minutes, improve initial engine performance, reduce smokes, emissions, and combustian noises.
Usually, a glow plug control unit supplies power to the glow plug during appropriate conditions. Some newer glow
plugs are designed with a heater element that changes resistance with temperature. The glow plug’s resistance
increases as the heating element gets hotter by the combustian temperature’s increment after startup.
3. Drive the vehicle as needed to make the suspected problem occur.
Usually, glow plug systems are power feed controlled so the waveform of the current going through its heating
element appears as a straight line at 0 V until the ignition key is switched on.
4. Make sure that the drive signal comes on as the boost pressure is regulated and the wastegate actually responds
to the solenoid control signal.
• Symptoms
No or hard start, emissions with excessive smokes, excessive combustian noises (knocks)
• Reference Waveform
• Test Procedure
FREQ = 19.5 Hz
DUTY = 39.2 %
MAX = 28.0 V
PCM turns
circuit off
PCM turns
circuit on
VEHICLE INFORMATIONS
YEAR
: 1988
MAKE
: Chrysler
MODEL : LeBaron Convertible
ENGINE : 2.2 L Turbo
FUELSYS : Multiport Fuel Injection
PCM_PIN : 39 LtGrn Blk wire
STATUS : KOBD (Key On Driven)
RPM
: Moderate Acceleration (35 MPH)
ENG_TMP : Operating Temperature
VACUUM : 5 In. Hg
MILEAGE : 77008
As soon as the turbo engine reaches a predetermined boost pressure under
acceleration, the PCM should begin pulsing the turbo boost solenoid with a varying
pulse width modulated signal to open the wastegate. On deceleration, the signal is
stopped and the valve is closed.
1. Set the instrument up with the current probe. (Connect the probe to the CH A.)
2. Adjust the probe to read DC Zero.
3. Clamp the current probe around the glow plug feed wire.
4. With the diesel engine stone cold, turn on the ignition key and watch for the readings.
5. Make sure that the amplitude of the current is correct and consistent for the glow plug systems under test.
• Reference Waveform
MAX = 56 A
MIN = 1 A
Ignition key
on
Ignition key
off
• Troubleshooting Tips
If the turn off spikes are not present, the solenoid coil may be shorted.
If the drive signal never appears under the high boost conditions, the driver within the PCM may have failed.
Ignition key
switched on.
Current begins
to flow through
glow plugs.
VEHICLE INFORMATIONS
YEAR
: 1977
MAKE
: Mercedes-Benz
MODEL : 240 D
ENGINE : 2.4 L
FUELSYS : Multiport Fuel Injection
PCM_PIN : Power supply to glow plugs
STATUS : KOEO (Key On Engine Off)
RPM
: 0
ENG_TMP : Ambient Temperature
VACUUM : 0 In. Hg
MILEAGE : 151417
If the turn off spikes are runted (shortened), the vacuum solenoid valve may be shorted.
6-46
6-47
Look for the current going through the glow plug to be at its maximum when the
ignition key is switched on. Maximum current and operating current specifications may
be available from the manufacturer’s service manual.
All glow plugs should draw about the same current under cold or hot conditions.
3. Exercise the sensor, device, or circuit while watching for the amplitude of the signal. The amplitude should stay in
a predetermined voltage range for a given condition.
4. In most cases, the amplitude of the waveform should stay at the battery voltage when the circuit is on, and go to
0 V when the circuit is off.
• Reference Waveform
• Troubleshooting Tips
If the waveform stays flat (at 0 V), suspect a faulty glow plug. If the waveform has drop outs, suspect an open circuit
in the glow plug’s heating element. An open circuit may be caused by overheat from a faulty controller, vibration, or
fatigue related malfunctions.
MAX = 20.3 V
MIN = 8.00 V
transient spikes are normal
with engine running
6.4 ELECTRICAL TESTS
scope connected to
PCM power and ground
COMPONENT TESTS
ELECTRICAL
ELECTRICAL TESTS MENU
Power Circuit
V Ref Circuit
Ground Circuit
Alternator Output
Alternator Field VR
Alternator Diode
Audio System
DC Switch Circuits
Power Supply Circuit
• Theory of Operation
wiggle or shake wiring harness or
wires to suspect component while
looking for drop outs in the waveform
VEHICLE INFORMATIONS
YEAR
: 1986
MAKE
: Oldsmobile
MODEL : Toronado
ENGINE : 3.8 L
FUELSYS : Multiport Fuel Injection
PCM_PIN : C16 Org and D1 BlkWht wires
STATUS : KOER (Key On Running)
RPM
: Idle
ENG_TMP : Operating Temperature
VACUUM : 20 In. Hg
MILEAGE : 123686
The voltage should stay in a predetermined voltage range for a given condition (during
normal operation). Transient spikes above average voltage level are normal with
engine running.
• Troubleshooting Tips
If the amplitude is changing when it is not supposed to (for example, when the switch in the circuit is not being
operated), there may be a failure in the circuit.
If the waveform has some spikes to ground, there may be an open circuit in the power side or there may be a
voltage short to ground.
This test procedure tests the integrity of the battery power supply to vehicle as well as to subsystems or switches
that rely on battery power to operate. This test procedure can be used to assure components and devices are
getting the quality and quantity of power supply necessary for proper operation. This procedure can be applied to a
lot of different automotive circuits that use battery voltage as their power source, such as power supply circuits (to
PCM and other control modules), temperature switches, throttle switches, vacuum switches, light switches, brake
switches, cruise control switches, etc.
If the waveform has some upward spikes, there may be an open circuit in the ground side.
• Symptoms
The PCM provides a stable regulated voltage, normally 5 V DC (8 V or 9 V DC on some older vehicles), to sensors
and components controlled by it for operation. The V Ref circuit should stay at their specified voltage during normal
operation. (The voltage level should not vary more than 200 mV under normal operation.)
No start, loss of power
• Test Procedure
1. Connect the CH A lead to the power supply circuit of the device to be tested and its ground lead to the device’s
GND.
2. Make sure power is switched on in the circuit so that the sensor, device or circuit is operational and current is
flowing through the circuit.
6-48
Voltage Reference (V Ref) Circuit
• Theory of Operation
• Symptoms
Low power, sensor output values out of range
• Test Procedure
1. Connect the CH A lead to the V Ref signal from the PCM and its ground lead to the sensor or chassis GND.
6-49
2. Make sure power is switched on to the PCM and monitor the voltage level of the V Ref signal from the PCM.
Compare it with the manufacturer’s recommended limits.
3. If the voltage level is unstable or the waveform shows spikes to ground, check the wiring harness for shorts or
intermittent connections.
• Reference Waveform
• Test Procedure
1. Connect the CH A lead to the GND pin of the grounded device or the one side of the suspect junction and its
ground lead to the chassis GND or the other side of the suspect junction.
2. Make sure power is switched on in the circuit so that the sensor, device, or circuit is operational and current is
flowing through the circuit.
3. The average voltage drop across the junction should be less than 100 mV to 300 mV.
MAX = 5.33 V
MIN = 4.66 V
Sensor Reference Voltage sent out by PCM. Supplies
voltage to various sensors.
Waveform’s amplitude should
not vary more than 200 mV
under normal operating modes
wiggle the sensor harness/wiring
while watching the waveform’s
amplitude to check for bad
connections or chafed wires
VEHICLE INFORMATIONS
YEAR
: 1986
MAKE
: Oldsmobile
MODEL : Toronado
ENGINE : 3.8 L
FUELSYS : Multiport Fuel Injection
PCM_PIN : C14 Gry wire at TPS
STATUS : KOER (Key On Running)
RPM
: Idle
ENG_TMP : Operating Temperature
VACUUM : 18 In. Hg
MILEAGE : 123686
• Reference Waveform
MAX = 40 mV
MIN = -40 mV
Tests voltage drop across ground circuit
CH A probe connected to engine block
COM probe connected to battery negative.
Test conducted w/engine running.
The voltage should stay in a predetermined voltage range for a given condition.
Normal V Ref voltage ranges are from 4.50 V to 5.50 V.
• Troubleshooting Tips
If the voltage level is unstable or the waveform shows spikes to ground, check the wiring harness for shorts or bad
connections.
Waveform’s amplitude should not vary more than 200 mV under normal operation.
Ground Circuit
• Theory of Operation
A ground circuit controls the feedback on any controlled circuit by grounding that circuit to a common conductor
(ground).
This test procedure tests the integrity of ground circuits by performing a voltage drop test across the suspected
resistance in a ground circuit or the suspect junction.
This test procedure can be used to assure components and devices are getting the quality of ground supply necessary
for proper operation. This procedure can be applied to a lot of different automotive circuits that are grounded to the
vehicle’s electrical systems either through the engine block, chassis, or through a wire connected to the negative
side of the battery.
• Symptoms
Poor performance, inaccurate sensor outputs
6-50
VEHICLE INFORMATIONS
YEAR
: 1986
MAKE
: Oldsmobile
MODEL : Toronado
ENGINE : 3.8 L
FUELSYS : Multiport Fuel Injection
PCM_PIN : CH A on Engine Block
COM on Battery Negative
STATUS : KOER (Key On Running)
RPM
: Idle
ENG_TMP : Operating Temperature
VACUUM : 18 In. Hg
MILEAGE : 123686
Average voltage drop should not exceed 100 - 300 mV. If there is too much resistance
in the ground circuit, the waveform’s amplitude will be too high.
• Troubleshooting Tips
If average voltage drop is excessive, clean or replace the connections and cables.
Alternator Output
• Theory of Operation
Alternators replaced generators due to their higher output at low engine speed, and their more compact and
lightweight design. An alternator is an AC generator with diode rectification, which converts the AC signal to a
pulsating DC signal. The DC signal charges the vehicle’s battery and supplies power to run the vehicle’s electrical
and electronic systems. Field current is supplied to the rotor in the alternator to vary its output. Alternator output
voltage increases as engine RPM increases.
The alternator’s output voltage is controlled by a solid state regulator within the PCM, in some cases. The regulator
limits the charging voltage to a preset upper limit and varies the amount of the excitation current supplied to the field
winding. The field winding excitation is varied according to the battery’s need for charge and ambient temperature.
Check the manufacturer’s specs regarding the upper and lower limits of charging voltage permitted for the vehicle
being checked.
The alternator’s output voltage should be roughly 0.8 V to 2.0 V above the static battery voltage with the KOEO (Key
Off Engine Off).
6-51
• Symptoms
Alternator Field/ VR (Voltage Reference)
No start, low battery, slow cranking
• Theory of Operation
• Test Procedure
Before performing the alternator output voltage test, the battery’s state of charge should be checked and a battery
load test should be performed.
1. Connect the CH A lead to the battery positive post and its ground lead to the battery negative post.
2. Turn off all electrical loads and start the engine.
3. Hold the engine at 2500 RPM for about 3 minutes and check the alternator’s output voltage.
A voltage regulator (in the PCM) controls alternator output by adjusting the amount of current flowing through the
rotor field windings. To increase alternator output, the voltage regulator allows more current to flow through the rotor
field windings. The field control current is varied according to the battery’s need for charge and ambient temperature.
If the battery is discharged, the regulator may cycle the field current on 90 % of the time to increase the alternator
output. If the electrical load is low, the regulator may cycle the field current off 90 % of the time to decrease the
alternator output. That is the signal is usually pulse width modulated.
If the field control circuit is malfunctioning, the charging system can overcharge or undercharge, either creating
problems.
• Reference Waveform
• Symptoms
AVG = 13.2 V
Test conducted with engine
running and A/C off.
Normal voltage ranges
are from 0.8 volts to 2.0
volts above engine off
(static) battery voltage.
VEHICLE INFORMATIONS
YEAR
: 1986
MAKE
: Oldsmobile
MODEL : Toronado
ENGINE : 3.8 L
FUELSYS : Multiport Fuel Injection
PCM_PIN : CH A to Positive side of Battery
COM to GND
STATUS : KOER (Key On Running)
RPM
: 2500
ENG_TMP : Operating Temperature
VACUUM : 20 In. Hg
MILEAGE : 123686
Normal voltage ranges are about 0.8 V to 2.0 V above the static battery voltage with
the Key Off Engine Off. Over 2.0 V may indicate an overcharge condition and less than
0.8 V may indicate an undercharge solution. Different vehicles have different charging
system specifications. Consult the manufacturer’s specs.
General rules of thumb; GM 14.5 to 15.4 V, Ford 14.4 to 14.8 V, and Chrysler 13.3 to
13.9 V
IMPORTANT :The test results can be different in a big way according to the ambient temperature, what electrical
loads are on the battery during testing, the age of battery, the battery’s charging state, the level and
quality of the battery’s electrolyte, or the battery design.
Undercharging, overcharging, or no charging output
• Test Procedure
1. Connect the CH A lead to the field control circuit, and its ground lead to the chassis GND.
2. Start the engine and run at 2500 RPM. Operate the heater fan on high with the headlight on high beam, or use
battery load tester to vary the amount of load on the vehicle’s electrical system.
3. Make sure that the voltage regulator is properly controlling the duty cycle of the alternator field drive signal as the
load changes.
• Reference Waveform
FREQ = 390 Hz
DUTY = 21.8 %
NOTE: A/C on high blow and headlights on
highbeam.
VEHICLE INFORMATIONS
YEAR
: 1986
MAKE
: Oldsmobile
MODEL : Toronado
ENGINE : 3.8 L
FUELSYS : Multiport Fuel Injection
PCM_PIN : 3D11 at BCM Grey wire at alternator pin F
RPM
: 2500
ENG_TMP : Operating Temperature
VACUUM : 18 In. Hg
MILEAGE : 123686
• Troubleshooting Tips
If the output voltage is excessively high, or the battery is leaking, wet, smells like acid, or is boiling, the alternator
may be defective. Check the regulator for its proper operation. Also perform a voltage drop test on both sides of the
alternator housing and at the battery. If the voltage is different, the alternator may be grounded improperly.
6-52
The charging system’s voltage regulator should vary the on-time of the alternator’s
field control driv e signal depending on the electrical system requirements. The
regulator should pulse the field drive signal with the overall duty cycle average meeting
the electrical system demands. When electrical load is put on the battery, the field
control circuit should go high to compensate for it. Frequency may increase during
conditions of increased charging demand.
6-53
• Troubleshooting Tips
If the voltage is high, there is no command to turn the alternator on or the regulator does not have the ability to
decrease the voltage.
• Reference Waveform
P-P = 373 mV
If the voltage is low, the alternator will be on all the time and cause an overcharging state.
If the voltage can not be pulled to ground sufficiently, there may be bad regulator within the PCM.
Alternator Diode
Tested at idle with high beam and wipers
on, and A/C blower on high speed.
• Theory of Operation
An alternator generates current and voltage by the principles of electromagnetic induction. Accessories connected to
the vehicle’s charging system require a steady supply of direct current (DC) at a relatively steady voltage level. A set
of diodes, part of the alternator’s rectifier bridge, modifies the AC voltage (produced in the alternator) to the DC
voltage. When analyzing a vehicle’s charging system, both AC and DC level should be analyzed because the AC
level (called “ripple voltage”) is a clear indication of diode condition. Too high a level of AC voltage can indicate a
defective diode and discharge the battery.
VEHICLE INFORMATIONS
YEAR
: 1986
MAKE
: Oldsmobile
MODEL : Toronado
ENGINE : 3.8 L
FUELSYS : Multiport Fuel Injection
PCM_PIN : B+ post at alternator
STATUS : KOER (Key On Running)
RPM
: Idle
ENG_TMP : Operating Temperature
VACUUM : 18 In. Hg
MILEAGE : 123686
A bad alternator diode produces Peak to Peak voltages exceeding 2 V usually and its
waveform will have “humps” that drop out and go much lower than the normal ones
shown above.
A shorted diode splits the pulses into pairs.
Usually, a bad alternator diode produces Peak to Peak voltages of more than 2 V.
• Troubleshooting Tips
• Symptoms
Overnight battery draining, excessive AC current from alternator output, flickering lights, poor driveability
• Test Procedure
NOTE
This test is made at the rear case half of the alternator and not battery.
The battery can act as a capacitor and absorb the AC voltage.
1. Connect the CH A lead to the B+ output terminal on the back of the alternator and its ground lead to the
alternator case.
2. With the Key On, Engine Off, turn on the high beam headlights, put the A/C or heater blower motor on high
speed, turn on the windshield wipers, and rear defrost (if equipped) for 3 minutes.
3. Start the engine and let it idle.
4. Make sure that pulses in ripple waveform are all about the same size and that pulses are not grouped into pairs.
If the waveform has very noticeable dropouts with two or three times the peak to peak amplitude of a normal ripple,
the diodes are defective. Dropouts from bad diodes usually have a peak to peak voltages of around 1.5 V to 2.0 V.
If the humps in the waveform are grouped into pairs, the alternator has one or more bad diodes.
Audio System Speaker
• Theory of Operation
Automotive speakers are electromechanical devices that convert electrical signal from a vehicle’s radio (or
monitoring system) into mechanical vibrations. The mechanical vibrations produced by automotive speakers are in
the audible frequency range from 16 to 20,000 Hz.
Audio signals to the speaker usually range between 0.5 and 10 V Peak to Peak. DC resistance of the speaker voice
coils is normally less then 10 ohms.
• Symptoms
A blown speaker with an open circuit
• Test Procedure
1. Connect the CH A lead to the positive speaker circuit and its ground lead to the negative speaker circuit.
2. Turn on the radio at normal listening level and make sure that the speaker drive signal is present.
3. To measure the resistance of the speaker voice coils, set the instrument to the GMM mode. Measure the
resistance with the drive signal disconnected.
6-54
6-55
• Reference Waveform
MAX = +473 mV
MIN = -509 mV
music starts new
note here
VEHICLE INFORMATIONS
YEAR
: 1989
MAKE
: Buick
MODEL : Le Sabre
ENGINE : 3.8 L
FUELSYS : Multiport Fuel Injection
PCM_PIN : CH A to speaker (+)
COM to speaker (–)
STATUS : KOEO (Key On Engine Off)
RPM
: 0
ENG_TMP : Ambient Temperature
VACUUM : 0 In. Hg
MILEAGE : 93640
A few notes from Willie Nelson’s
“On The Road Again”
Automotive speaker drive signals normally range between 0.5 V and 10 V Peak to
Peak.
Resistance of the speaker voice coils is normally less than 10 ohms.
3. Exercise the switch while paying attention to the amplitude of the signal. It should stay in a predetermined voltage
range for a given condition. In most cases, the amplitude of the waveform should stay at B+ or battery voltage
when the circuit is on, and go to 0 V when the switch is activated.
• Reference Waveform
MAX = 13.8 V
MIN = -1.0 V
Brake pedal
released
here
Brake pedal
depressed here
VEHICLE INFORMATIONS
YEAR
: 1993
MAKE
: Ford
MODEL : Explorer
ENGINE : 4.0 L
FUELSYS : Multiport Fuel Injection
PCM_PIN : 2 Lt Grn wire
STATUS : KOER (Key On Running)
RPM
: Idle
ENG_TMP : Operating Temperature
VACUUM : 19 In. Hg
MILEAGE : 54567
If there is a failure in the circuit, the waveform’s amplitude will change when it is not
supposed to.
• Troubleshooting Tips
• Troubleshooting Tips
If the waveform has spikes to ground, there may be an open circuit in the power side or a voltage short to ground.
If the speaker is blown, suspect an open circuit.
If the waveform has upward spikes, there may be an open in the ground side.
DC Switch Circuits
6.5 IGNITION TESTS
• Theory of Operation
This test procedure can be applied to a lot of different automotive circuits that use B+ as their power source, such as
power supply circuits (to the PCM and other control modules), temperature switches, throttle switches, vacuum
switches, light switches, brake switches, cruise control switches, etc.
This test can be used to test the integrity of the battery power supply to the switches that rely on the battery power to
operate.
• Symptoms
No start, lose of power, no working of switches
COMPONENT TEST
IGNITION
IGNITION TESTS MENU
PIP/SPOUT
DI Primary
DI Secondary
DIS (EI) Primary
DIS (EI) Secondary
• Test Procedure
1. Connect the CH A lead to the power supply circuit of the switch to be tested and its ground lead to the switch
GND circuit.
2. Make sure power is switched on in the circuit so that the switch is operational.
6-56
6-57
PIP (Profile Ignition Pickup)/SPOUT (Spark Output)
Reference Waveform
• Theory of Operation
The most common electronic ignition system found on Ford vehicles (primarily on Ford/Lincoln/Mercury) has been
dubbed TFI for Thick Film Ignition. This system uses a Hall Switch in the TFI module, mounted on the distributor, to
produce a basic spark timing signal, PIP (Profile Ignition Pickup). This signal is sent to the PCM and the PCM uses
this signal to monitor results and accurately time the fuel injector and electronic spark timing output (SPO UT)
signals. The PCM sends the SPOUT back to the TFI module, which then fires the ignition coil primary circuit. The
PIP signal is primarily a frequency modulated signal that increases and decreases its frequency with engine RPM,
but it has also a pulse width modulated component bec ause it is acted upon by the TFI module, based on
information previously received via the SPOUT signal.
The SPOUT signal is a pulse width modulated signal because the PCM continually alters the SPOUT signal’s pulse
width, which has the primary ignition dwell and ignition timing advance information encoded in it. The frequency of
the SPOUT signal also increases and decreases with engine RPM because it simply mimics the frequency of the
PIP signal.
Many GM/European/Asian vehicles use a similar overall ignition circuit design.
The rising and falling edges of the SPOUT move in relation to PIP. The rising edge controls spark timing and the
falling edge controls coil saturation (dwell).
Watching both simultaneously using this instrument will tell you whether the PCM can compute timing based on
sensor inputs. For example, if the MAP sensor fails, the rising edge of SPOUT will not move relative to the rising
edges of PIP when Manifold Absolute Pressure changes.
Ford EEC-IV PIP and SPOUT
signals logged at 3000 RPM
“sync”
pulse
“sync”
pulse
VEHICLE INFORMATIONS
YEAR
: 1993
MAKE
: Ford
MODEL : F150 4WD Pickup
ENGINE : 5.0 L
FUELSYS : Multiport Fuel Injection
PCM_PIN : CH A 56 GryOrg wire
CH B 36 Pnk wire
STATUS : KOER (Key On Running)
RPM
: 3000
ENG_TMP : Operating Temperature
VACUUM : 21 In. Hg
MILEAGE : 66748
The edges must be sharp. Anything that affects ignition timing should change the
position of SPOUT (upper trace) with respect to PIP (lower trace). The notches out of the
top and bottom corner of PIP go away when the SPOUT connector is removed because
this cuts off the TFI’s ability to encode the PIP signal with the SPOUT information.
Troubleshooting Tips
If changing manifold vacuum has no effect on the rising edges of SPOUT, check for a faulty BP/MAP sensor.
If PIP is absent, the engine will not start; check for a bad TFI module or other distributor problem.
• Symptoms
Engine stall out, misfire, slow advance timing, hesitations, no start, poor fuel economy, low power, high emissions
• Test Procedure
1. Connect the ground leads of both channel test leads to the chassis GND’s. Connect the CH A to the PIP signal
and the CH B to the SPOUT signal. Use a wiring diagram for the vehicle being serviced to get the PCM pin
number, or color of the wire for each circuit.
2. Crank or start the engine.
3. With the Key On, Engine Running (KOER), let the engine idle, or use the throttle to accelerate and decelerate the
engine, or drive the vehicle as needed to make the driveability problem occur.
4. Look closely to see that the frequency of both signals is keeping pace with engine RPM and that the pulse width
on the pulse width modulated notches of the signal changes when timing changes are required.
5. Look for abnormalities observed in the waveforms to coincide with an engine sputter or driveability problem.
If SPOUT is absent, the system may be in LOS (Limited Operation Strategy) or limp-home mode. Check for
problems in the PCM or bad wiring harness connectors.
If the rising edges of PIP or SPOUT are rounded, timing will be inaccurate, although the system may not set an error
code. Check for problems in the module producing each signal.
DI (Distributor Ignition) Primary
Theory of Operation
The ignition coil primary signal is one of the top three most important diagnostic signals in powertrain management
systems. This signal can be used for diagnosing the driveability problems such as no starts, stalls at idle or while
driving, misfires, hesitation, cuts out while driving, etc.
The waveform displayed from the ignition primary circuit is very useful because occurrencies in the ignition
secondary burn are induced back into the primary through mutual induction of the primary and secondary windings.
This test can provide valuable information about the quality of combustion in each individual cylinder. The waveform
is primarily used to :
1. analyze individual cylinder’s dwell (coil charging time),
2. analyze the relationship between ignition coil and secondary circuit performance (from the firing line or ignition
voltage line),
6-58
3. locate incorrect air-fuel ratio in individual cylinder (from the burn line), and
6-59
4. locate fouled or damaged spark plugs that cause a cylinder misfire (from the burn line).
It’s sometimes advantageous to test the ignition primary when the ignition secondary is not easily accessible.
Symptoms
No or hard starts, stalls, misfires, hesitation, poor fuel economy
Look for the burn line to be fairly clean without a lot of hash (“noise”). A lot of hash can indicate an ignition misfire in
the cylinder due to over-advanced ignition timing, bad injector, fouled spark plug, or other causes. Longer burn lines
(over 2 ms) can indicate an abnormally rich mix ture and shorter burn line (under 0.75 ms) can indicate an
abnormally lean mixture.
Look for at least 2, preferably more than 3 oscillations after the burn line.
This indicates a good ignition coil (and a good condenser on point-type ignitions).
Test Procedure
1. Connect the CH A lead to the ignition coil primary signal (driven side) and its ground lead to the chassis GND.
DI (Distributor Ignition) Secondary (Conventional Single and Parade)
2. With the Key On, Engine Running (KOER), use the throttle to accelerate and decelerate the engine or drive the
vehicle as needed to make the driveability problem or misfire occur.
Secondary ignition patterns are very useful when diagnosing ignition related malfunctions. The secondary scope
pattern is divided into three sections:
Firing Line (spark initiated)
3. For cranking test, set the Trigger mode to Normal.
4. Make sure that the amplitude, frequency, shape and pulse width are all consistent from cylinder to cylinder. Look
for abnormalities in the section of the waveform that corresponds to specific components.
arc-over or
ignition
voltage
burn
line
spark or burn
voltage
Ignition coil begins
charging here
Spark Line (or Burn Line)
Points open or
transistor turns OFF
Reference Waveform
MAX = 170 V
DUR = 2.07 ms
DWELL = 12.4 °
OF CYL 1
Points close or
transistor turns ON
coil oscillations
VEHICLE INFORMATIONS
YEAR
: 1987
MAKE
: Chrysler
MODEL : Fifth Avenue
ENGINE : 5.2 L
FUELSYS : Feedback Carburetor
PCM_PIN : CH A to Negative side of ignition coil
STATUS : KOER (Key On Running)
RPM
: Idle
ENG_TMP : Operating Temperature
VACUUM : 20 In. Hg
MILEAGE : 140241
The Ignition Peak voltage and Burn voltage measurements are available in this test,
but they should be corrected to account for the turns ratio of the coil windings.
Look closely to see that the pulse width (dwell) changes when engine load and RPM
changes.
Spark is extinguished
Coil oscillations
Dwell Section
Firing
Section
Intermediate Section
SECONDARY FIRING SECTION
The firing section consists of a firing line and a spark (or burn) line. The firing line is a vertical line that represents the
voltage required to overcome the gap of the spark plug. The spark line is a semi-horizontal line that represents the
voltage required to maintain current flow across the spark gap.
SECONDARY INTERMEDIATE SECTION
The intermediate section displays the remaining coil energy as it dissipates itself by oscillating between the primary
and secondary side of the coil (with the points open or transistor off).
SECONDARY DWELL SECTION
Troubleshooting Tips
Look for the drop in the waveform where the ignition coil begins charging to stay relatively consistent, which
indicates consistent dwell and timing accuracy of individual cylinder.
Look for a relatively consistent height on the “arc-over” voltage or firing line. A line that is too high indicates high
resistance in the ignition secondary due to an open or bad spark plug wire or a large spark gap. A line that is too
short indicates lower (than normal) resistance in the ignition secondary due to fouled, cracked, or arcing spark plug
wire, etc.
Look for the spark or burn voltage to remain fairly consistent. This can be an indicator of air-fuel ratio in the cylinder.
If the mixture is too lean, the burn voltage may be higher, and if too rich, the voltage may be lower than normal.
6-60
The dwell section represents coil saturation, which is the period of time the points are closed or the transistor is on.
The ignition (or distributor) dwell angle is the number of degrees of distributor rotation during which the points or
transistor are closed (or magnetic saturation time in degrees).
Normally, it takes about 10 to 15 ms for an ignition coil to develop complete magnetic saturation from primary current.
The secondary ignition test has been an effective driveability check for over three decades along with the primary
ignition test. The ignition secondary waveform can be useful in detection of problems in mechanical components of
engine and fuel system, as well as the ignition system components.
When the PARADE mode is selected, this instrument will present a parade of all the cylinders, starting at the left with
the spark line of the number 1 cylinder. The instrument will display the pattern for each cylinder’s ignition cycle in the
engine’s firing order. For example, if the firing order for a given engine is 1,4,3,2, the instrument will display the
ignition cycles for each cylinder as shown starting with cylinder number 1, then 4, then 3, and then 2.
6-61
Firing lines should be equal. A short line
indicates low resistance in the wire. A high
line indicates high resistance in the wire
Firing lines clearly displayed
for easy comparison
1. Connect the capacitive type ignition secondary probe to the CH A input terminal and its ground lead to chassis
GND.
2. Connect the Inductive Pickup to the COM/TRIGGER input terminals.
NOTE
The Inductive Pickup must be used to synchronize triggering between the spark
plug wire signal and the coil secondary signal clamped by the capacitive secondary
probe.
Available voltage
should be about 10 kV
on a conventional ignition
system and even greater
with an electronic system
Spark lines can be viewed side-by-side
for ease of comparison
Cylinders are displayed in firing order
3. Clip the secondary probe to the coil secondary lead wire and clamp the pickup probe on the spark plug wire close
to the spark plug.
IMPORTANT :Signals from individual spark plug wires are useful only for triggering. Ignition Peak Voltage, Burn
Voltage, and Burn Time measurements may not be accurate, if the signal is taken on the spark
plug side of the distributor, due to the rotor spark gap. For accurate measurements, use the coil
secondary signal before the distributor.
NOTE
If you want to test SECONDARY IGNITION SINGLE, press
SINGLE and SECO NDARY IGNITION PARADE, press
PARADE.
• Symptoms
No or hard starts, stalls, misfires, hesitation, poor fuel economy
to highlight
to highlight
• Test Procedure
NOTE
A Capacitive type ignition secondary probe must be used to test the ignition
secondary circuit.
Connecting the CH A or CH B leads directly to an ignition secondary circuit can
cause severe damage to the instrument or even personal injury.
4. With the Key On, Engine Running (KOER), use the throttle to accelerate and decelerate the engine or drive the
vehicle as needed to make the driveability problem or misfire occur.
5. Make sure that the amplitude, frequency, shape and pulse width are all consistent from cylinder to cylinder. Look
for abnormalities in the section of the waveform that corresponds to specific components.
• Reference Waveform
Connect the test leads as displayed by the test tool’s HELP (Test Procedure) and shown in Figure below.
FIRE = 9.20 kV
BURN = 7.42 V
DUR =2.39 ms
OF CYL 1
arc-over or
ignition voltage
spark or burn
voltage
Burn line
ign. coil begins
charging here
VEHICLE INFORMATIONS
YEAR
: 1984
MAKE
: Mercedes-Benz
MODEL : 380 SE
ENGINE : 3.8 L
FUELSYS : CIS Fuel Injection
PCM_PIN : CH A to the Coil wire
STATUS : KOER (Key On Running)
RPM
: Idle
ENG_TMP : Operating Temperature
VACUUM : 19.5 In. Hg
MILEAGE : 18575
Look closely to see that the pulse width (dwell) changes when engine load and RPM
changes.
6-62
6-63
• Troubleshooting Tips
Look for the drop in the waveform where the ignition coil begins charging to stay relatively consistent, which
indicates consistent dwell and timing accuracy of individual cylinder.
Look for a relatively consistent height on the “arc-over” voltage or firing line. A line that is too high indicates high
resistance in the ignition secondary due to an open or bad spark plug wire or a large spark gap. A line that is too
short indicates lower (than normal) resistance in the ignition secondary due to fouled, cracked, or arcing spark plug
wire, etc.
Look for the spark or burn voltage to remain fairly consistent. This can be an indicator of air-fuel ratio in the cylinder.
If the mixture is too lean, the burn voltage may be higher, and if too rich, the voltage may be lower than normal.
Look for the burn line to be fairly clean without a lot of hash. A lot of hash can indicate an ignition misfire in the
cylinder due to over-advanced ignition timing, bad injector, fouled spark plug or other causes. Longer burn lines
(over 2 ms) can indicate an abnormally rich mixture and shorter burn lines (under 0.75 ms) can indicate an
abnormally lean mixture.
Look for at least 2, preferably more than 3 oscillations after the burn line. This indicate a good ignition coil (a good
condenser on point-type ignitions).
DIS (Distributorless Ignition System) Primary
• Theory of Operation
The DIS (or EI) primary ignition test is an effective test for locating ignition problems that relate to EI ignition coils.
The waveform is very useful because occurrences in the ignition secondary burn are induced back into the primary
through mutual induction of the primary and secondary windings. The waveform is primarily used to :
1. analyze individual cylinder dwell (coil charging time),
2. analyze ignition coil and secondary circuit performance (from the firing line),
3. locate incorrect air-fuel ratio in individual cylinders (from the burn line), and
4. locate fouled or damaged spark plugs that cause a cylinder misfire (from the burn line).
This test can be useful in detection of problems in mechanical engine and fuel system components, as well as
ignition system components.
• Symptoms
No or hard starts, stalls, misfires, hesitation, poor fuel economy
• Reference Waveform
MAX = 170 V
DUR = 1.59 ms
DWELL = 6.00 %
arc-over or
ignition
voltage
burn
line
spark or burn
voltage
ignition coil begins
charging here
coil
fires
coil
oscillations
VEHICLE INFORMATIONS
YEAR
: 1994
MAKE
: Ford
MODEL : Explorer
ENGINE : 4.0 L
FUELSYS : Multiport Fuel Injection
PCM_PIN : 10 Coil A YelBlk at ignition
STATUS : KOER (Key On Running)
RPM
: Idle
ENG_TMP : Operating Temperature
VACUUM : 19.5 In. Hg
MILEAGE : 40045
The Ignition Peak voltage and Burn voltage measurements are available in this test,
but they should be corrected to account for the turns ratio of the coil windings.
• Troubleshooting Tips
Look for the drop in the waveform where the ignition coil begins charging to stay relatively consistent, which
indicates consistent dwell and timing accuracy of individual cylinder.
Look for a relatively consistent height on the “arc-over” voltage or firing line. A line that is too high indicates high
resistance in the ignition secondary due to an open or bad spark plug wire or a large spark gap. A line that is too
short indicates lower (than normal) resistance in the ignition secondary due to fouled, cracked, or arcing spark plug
wire, etc.
Look for the spark or burn voltage to remain fairly consistent. This can be an indicator of air-fuel ratio in the cylinder.
If the mixture is too lean, the burn voltage may be higher, and if too rich, the voltage may be lower than normal.
Look for the burn line to be fairly clean without a lot of hash, which can indicate an ignition misfire in the cylinder due
to over-advanced ignition timing, bad injector, fouled spark plug or other causes. Longer burn lines (over 2 ms) can
indicate an abnormally rich mixture and shorter burn lines (under 0.75 ms) can indicate an abnormally lean mixture.
Look for at least 2, preferably more than 3 oscillations after the burn line. This indicate a good ignition coil (a good
condenser on point-type ignitions).
DIS (Distributorless Ignition System) Secondary
• Test Procedure
1. Connect the CH A lead to the ignition coil primary signal (driven side) and its ground lead to the chassis GND.
2. With the key on, engine running, let the engine idle, or use the throttle to accelerate and decelerate the engine or
drive the vehicle as needed to make the driveability problem or misfire occur.
3. Make sure that the amplitude, frequency, shape and pulse width are all consistent from cylinder to cylinder. Look
for the abnormalities in the section of the waveform that corresponds to specific components.
4. If necessary, adjust the trigger level for a stable display.
6-64
• Theory of Operation
Most Distributorless Ignition systems use a waste spark method of spark distribution. Each cylinder is paired with the
cylinder opposite to it (1-4, or 3-6, or 2-5). The spark occurs simultaneously i n the cylinder coming up on the
compression stroke and in the cylinder coming up on the exhaust stroke. The cylinder on the exhaust stroke requires
very little of the available energy to fire the spark plug.
The remaining energy is used as required by the cylinder on the compression stroke. The same process is repeated
when the cylinders reverse roles.
6-65
The secondary POWER/WASTE spark display waveform can be used to test several aspects of EI (or DIS) system
operation. This test can be used to :
1. Connect the capacitive type ignition secondary probe to the CH A input terminal and its ground lead to chassis
GND.
1. analyze individual cylinder dwell (coil charging time),
2. Clip the secondary probe to the coil secondary lead wire before the distributor.
2. analyze ignition coil and secondary circuit performance (from the firing line),
3. With the Key On, Engine Running (KOER), use the throttle to accelerate and decelerate the engine or drive the
vehicle as needed to make the driveability problem or misfire occur.
3. locate incorrect air-fuel ratio in individual cylinders (from the burn line), and
4. locate fouled or damaged spark plugs that cause a cylinder misfire (from the burn line).
Generally on modern high energy ignition (HEI) systems, firing voltages should be around 15 kV to beyond 30 kV.
Firing voltages vary based on spark plug gap, engine compression ratio, and air-fuel mixture. On dual spark EI
systems, the WASTE spark is usually much lower in peak voltage than the POWER spark. Close to 5 kV can be
normal.
• Symptoms
No or hard starts, stalls, misfires, hesitation, poor fuel economy
4. If the firing line is negative, press
5. Make sure that the amplitude, frequency, shape and pulse width are all consistent from cylinder to cylinder. Look
for abnormalities in the section of the waveform that corresponds to specific components.
• Reference Waveform
FIRE = 8.53 kV
BURN = 1.30 kV
DUR = 1.36 ms
RPM = 780
arc-over
or ignition
voltage
• Test Procedure
NOTE
A Capacitive type ignition secondary probe must be used to test the ignition
secondary circuit. Connecting the CH A or CH B leads directly to an ignition
secondary circuit can cause severe damage to the instrument or even personal
injury.
Connect the test leads as displayed by the test tool’s HELP (Test Procedure) and shown in Figure below.
to invert the pattern.
spark or burn
voltage
Ignition coil begins
charging here
Burn
line
VEHICLE INFORMATIONS
YEAR
: 1994
MAKE
: Ford
MODEL : Explorer
ENGINE : 4.0 L
FUELSYS : Multiport Fuel Injection
PCM_PIN : Cyl #1 Spark Plug wire
STATUS : KOER (Key On Running)
RPM
: Idle
ENG_TMP : Operating Temperature
VACUUM : 19.5 In. Hg
MILEAGE : 40045
Look closely to see that the pulse width (dwell) changes when engine load and RPM
changes.
• Troubleshooting Tips
Look for the drop in the waveform where the ignition coil begins charging to stay relatively consistent, which
indicates consistent dwell and timing accuracy of individual cylinder.
Look for a relatively consistent height on the “arc-over” voltage or firing line. A line that is too high indicates high
resistance in the ignition secondary due to an open or bad spark plug wire or a large spark gap. A line that is too
short indicates lower (than normal) resistance in the ignition secondary due to fouled, cracked, or arcing spark plug
wire, etc.
Look for the spark or burn voltage to remain fairly consistent. This can be an indicator of air-fuel ratio in the cylinder.
If the mixture is too lean, the burn voltage may be higher, and if too rich, the voltage may be lower than normal.
Look for the burn line to be fairly clean without a lot of hash, which can indicate an ignition misfire in the cylinder due
to over-advanced ignition timing, bad injector, fouled spark plug or other causes. Longer burn lines (over 2 ms) can
indicate an abnormally rich mixture and shorter burn lines (under 0.75 ms) can indicate an abnormally lear mixture.
Look for at least 2, preferably more than 3 oscillations after the burn line. This indicate a good ignition coil (a good
condenser on point-type ignitions).
6-66
6-67
Some tips to keep in mind :
• Always position the piezo pickup on the fuel line at about the same distance from the injector.
• Place the pickup on a straight part of the fuel line. Don’t place it on a bent part of the line.
• Always compare results with a reference waveform from a good diesel engine to get acquainted with the signal
shape.
• Always compare signals at the same engine speed (RPM).
• Pump timing is critical and should occur within 1 degree of crankshaft rotation.
6.6 DIESEL TESTS
VEHICLE DATA
IGNITION
DIESEL
The diesel test functions are selected if “IGNITION: DIESEL” has been set in the VEHICLE DATA menu. To choose
a preset DIESEL test menu, select COMPONENT TESTS from the MAIN MENU. From the resulting menu, select
DIESEL TESTS menu.
Diesel Injector
(Diesel RPM Measurement and Diesel Injection Pattern Display)
Use the optional Diesel Probe Set consisting of a Piezo Pickup, which is clamped on the diesel fuel pipe, and a
Diesel Adaptor to be connected to the CH A input of the instrument.
• Reference Waveform
COMPONENT TESTS
DIESEL
DIESEL TEST MENU
DIESEL INJECTOR
ADVANCE
RPM = 903
DUR = 0.6 ms
DUR = Duration of the injection pulse
Introduction
During the compression stroke of a diesel engine, the intake air is compressed to about 735 psi (50 Bar). The
temperature hereby increases up to 1,292 ° to 1,652 °F (700 ° to 900 °C). This temperature is sufficient to cause
automatic ignition of the Diesel fuel which is injected into the cylinder, shortly before the end of the compression
stroke and very near to the TDC (Top Dead Center).
Diesel fuel is delivered to the individual cylinders at a pressure of between 5145 psi and 17,640 psi (350 Bar and
1200 Bar). The start of the injection cycle should be timed within 1 ° Crankshaft to achieve the optimum trade-off
between engine fuel consumption and combustion noise (knock). A timing device controls the start of the injection
and will also compensate for the propagation times in the fuel delivery lines.
Diesel RPM measurements are necessary for adjusting idle speed, checking maximum RPM, and performing smoke
tests at fixed RPM values.
Measurement Conditions
• Analysis of Injection Pattern at Idle Speed
The delivery valve opens
and a pressure wave
proceeds toward the
injector.
Cleaning : The fuel lines (to be measured on) should be cleaned in order to assure a good contact of the fuel line
itself to the Piezo Pickup and ground clip. Use sandpaper (preferably a de-greaser) to clean the lines.
Positioning and Pr obe Connection : The Piezo Adapter should be placed as close as possible to the Diesel
injector on a straight part of the fuel line. Clamp the ground clip close to the Piezo Pickup. Make sure that the ground
clip does not make contact to the piezo itself or to adjacent fuel lines. Connect the adapter to the instrument. Notice
that the ground wire is shorter than the signal wire in order to have the weight of probe and cable loaded on the
ground wire, not on the signal wire. The piezo element may not bounce or rattle on the fuel line, or make contact to
other fuel lines or any other material close by.
6-68
The injection pumps plunger
moves in the supply direction
and thus generating a high
pressure in the pressure
gallery.
When the injector opening
pressure is reached to more than
1,470 psi (100 Bar), the needle
valve overcomes its needle spring
force and lifts.
The injection process ends, the
delivery valve closes and the
pressure in the fuel line drops.
This quick drop causes the
nozzle to close instantly,
preventing the nozzle from
opening again, and preventing
backflow of combustion gases.
6-69
Diesel Advance
7. Maintenance
Diesel pump testers are used to calibrate pumps exactly to the engine’s requirements. The testers monitor the
signals from the reference on the engine’s flywheel. The start of the delivery is monitored and timing adjustments
can be made at different speeds.
We can reveal problems in the timing of the start of fuel delivery compared to the TDC signal of the flywheel sensor
through this advance measurement, which cannot be an absolute and accurate diesel pump adjustment test.
• Test Procedure
1. Clamp the piezo pickup and its ground clip on the fuel line of the first cylinder close to the injector and connect
the adapter to the CH A.
2. Connect the CH B to the TDC sensor signal output or HI. Don’t use the ground lead of the CH B test lead, since
the instrument is already grounded through the pickup adapter to the fuel line (double grounding).
WARNING
Avoid Electrical Shock or Fire:
• Use only insulated probes, test lead, and connectors specified in this manual when making measurements > 42 V
Peak (30 Vrms) above earth ground or on circuits > 4800 VA.
• Use probes and test leads within ratings and inspect them before use. Remove probes and test leads before
opening case or battery cover.
• The instrument must be disconnected from all voltage sources before it is opened for any adjus tment,
replacement, maintenance, or repair.
• Capacitors inside may still be charged even if the instrument has been disconnected from all voltage sources.
Discharge all high voltage capacitors before making resistance, continuity, or diodes measurements.
3. Use the cursors to read the advance in degrees of the flywheel rotation.
Cleaning
• Reference Waveform
RPM = 898
ADV = 15 °
RPM = 1689
ADV = 12.9 °
Clean the instrument with a damp cloth and a mild detergent.
Do not use abrasives, solvents, or alcohol.
Do not use any type of paper to clean the display screen. This will cause scratches and diminish the transparency of
the screen. Use only a soft cloth with a mild detergent.
Keeping Batteries in Optimal Condition
Always operate the instrument on batteries until a battery symbol
appears in the top right of the display. This
indicates that the battery level is too low and the batteries need to be recharged.
CAUTION
Frequent charging of the batteries when they are not completely empty can cause a “memory effect”. This means
that the capacity of the Ni-MH batteries decreases, which can reduce the operating time of the instrument.
(Advance at idle)
(Advance at 1689 RPM)
Replacing and Disposing of Batteries
WARNING
To avoid electrical shock, remove the test leads, probes, and battery charger before replacing the batteries.
1. Disconnect the test leads, probes, and battery charger from both the source and the instrument.
2. Remove the battery cover by using a screwdriver.
3. Replace the Ni-MH battery pack with a new Ni-MH battery pack ONLY specified in this manual.
4. Reinstall the battery cover by using a screwdriver.
NOTE
Do not dispose of the replaced battery with other solid waste. Used batteries
should be disposed of by a qualified recycler or hazardous materials handler.
Fuses Not Required
Since the instrument uses electronically protected inputs, no fuses are required.
6-70
7-1
8. Specifications
General Specifications
Operation temperature
: 32 °F to 104 °F (0 °C to 40 °C)
Storage temperature
: -4 °F to 140 °F (-20 °C to 60 °C)
Relative Humidity
: 0 % to 80 % at 32 °F to 95 °F (0 °C to 35 °C),
0 % to 70 % at 32 °F to 131 °F (0 °C to 55 °C)
Temperature Coefficient
: Nominal 0.1 x (Specified Accuracy) / °C (< 18 °C or > 28 °C ; < 64 °F or > 82 °F)
Max Voltage between
any input and Ground
: 300 V
Max Input Voltage
: 300 V
GMM Basic DC Accuracy
: 0.3 %
Bandwidth
: DC to 5 MHz (-3dB)
Max Sample rate
: 25 Mega sample/second
Graphing Multimeter
Display Counter
: 5,000 count
Display
: 280 x 240 pixels (active area) with backlit (EL)
Reference Waveform
: 51 Waveform
PC interface
: USB version 1.1
Power requirements
: Rechargeable Battery
(External AC to DC Power Adaptor)
Battery Life
: 4 Hours with backlit off
Size (H x W x D)
: 9.06 x 4.72 x 1.97” (230 x 120 x 50 mm)
Safety & design
: CAT II 300 V per IEC 1010-1, UL 3111-1 and C22.2 No. 1010-1
Accessory
User Manual
: 1 ea
AC to DC Power Adaptor
/Battery Charger
: 1 ea
Shielded Test Leads
: 2 ea (red and yellow)
Ground Leads
for Shielded Test Leads
: 2 ea (black)
Alligator Clips
: 3 ea (red, yellow and black)
8-1
Back Probe Pins
: 3 ea (red, yellow and black)
Trigger
Secondary Pick-up
: 1 ea
Trigger Source
: CH A, CH B, TRIGGER (External trigger)
Inductive Pick-up
: 1 ea
Sensitivity (CH A)
: < 1.0 div to 5 MHz
Soft Carrying Case
: 1 ea
Sensitivity (Trigger)
: 0.2 V p-p
Modes
: Single shot, Normal, Auto
Coupling
: AC, DC
Slope
: Rising and falling edge
USB Interface
Cable and Software (Optional) : 1 ea
Current Probe - CA113 OS/AT (Optional) : 1 ea
Diesel Probe Set (Optional)
: 1 ea
Temperature Probe (Optional)
: 1 ea
Others
Isolated 12V Charging Adaptor (Optional) : 1 ea
Glitch Snare
: SCOPE Mode (Component test only)
Isolated 24V Charging Adaptor (Optional) : 1 ea
Acquire Mode
: SCOPE Mode
Setup memory
: 8 Waveform & Setup
Reference waveform
: 51 Waveform and Setup
Cursor
: Time and Volt
Instrument Setup
: Language, Contrast, Graticule
Scope Specifications
Horizontal
Sample rate
: 25 Mega sample/second
Record length
: 1000 Points
Update rate
: Real time, Roll
Accuracy
: ± (0.1 % + 1 pixel)
Sweep rate
: 1 µs to 50 sec in a 1, 2, 5 sequence (Scope mode)
5 s to 24 Hours in a 1, 2, 5 sequence (GMM mode)
Vertical
Graphing Multimeter (GMM) Specifications
DC Voltage Measurement
Range
Resolution
500 mV
5V
0.1 mV
0.001 V
50 V
0.01 V
600 V
0.1 V
Band width
: DC to 5 MHz ; -3 dB
Resolution
: 8 bit
Channel
: 2 Channel
Coupling
: AC, DC, GND
Input Impedance
: 1 Mohm / 70 pF
Range
Resolution
Maximum Input Voltage
: 300 V
500 mV
0.1 mV
Volt/Division
: 50 mV to 100 V in a 1, 2, 5 sequence
5V
0.001 V
: ±3%
50 V
0.01 V
600 V
0.1 V
Accuracy
Accuracy
± (0.3 % + 5 d)
> Input Impedance : 10 M
AC Voltage Measurement
Accuracy
40 Hz ~ 400 Hz
400 Hz ~ 10 kHz
± (0.5 % + 5 d)
± (2.5 % + 5 d)
> Input Impedance : 10 M
8-2
8-3
(AC+DC) Voltage Measurement
Continuity Test
Range
Resolution
DC 500 mV
DC 5 V
0.1 mV
0.001 V
DC 50 V
0.01 V
DC 600 V
0.1 V
Accuracy
40 Hz ~ 400 Hz
400 Hz ~ 10 kHz
± (0.8 % + 5 d)
± (3.0 % + 5 d)
Range
4 cylinder
120 - 20000 RPM
60 - 10000 RPM
Open Circuit Voltage
3.0 V
Accuracy
Range
2.0 V
± (2.0 %5 d)
Range
-50 °C to 1300 °C
Resolution
0.1 °C
Accuracy
2 RPM
-58 °F to 2372 °F
0.1 °F
± 5.4 °F
± 3 °C
DC Ampere Measurement (Current Probe Output)
Range
10 Hz
100 Hz
% Duty
Dwell
1 ms
Accuracy
Frequency Measurement
Frequency
Response time
Approx. 70 W
Temperature Measurement
Mode
Function
Threshold
1.2 V
Diode Test
RPM Measurement
2 cylinder
Test Voltage
Resolution
0.001 Hz
0.01 Hz
1 kHz
10 kHz
0.1 Hz
100 kHz
1 MHz
10 Hz
100 Hz
5 MHz
1 kHz
2.0 % ~ 98 %
3.6 ° ~ 356.4 °
Pulse Width
Accuracy
1 Hz
Resolution
Accuracy
30 mA ~ 20 A
1 mV/10 mA
± (1.5 % + 20 mA)
100 mA ~ 40 A
40 A ~ 60 A
1 mV/100 mA
1 mV/100 mA
± (2.0 % + 20 mA)
Range
± (4.0 % + 0.3 A)
± (0.1 % + 3 d)
AC Ampere Measurement (Current Probe Output)
Range
Resolution
Accuracy
40 Hz ~ 1 kHz
1 kHz ~ 5 kHz
± (4.0 % + 30 mA)
0.1 %
Pulse Width > 2 µs
30 mA ~ 10 A
1 mV/10 mA
± (2.0 % + 20 mA)
0.1 °
1.2 °/krpm + 2 d
100 mA ~ 40 A
40 A ~ 60 A
1 mV/100 mA
1 mV/100 mA
± (2.0 % + 20 mA)
± (6.0 % + 30 mA)
± (8.0 % + 0.3 A)
2 µs ~ 450 ms (Pulse Width > 2 µs)
Ohm Measurement
8-4
Range
Resolution
500 W
0.1 W
5 kW
0.001 kW
50 kW
500 kW
0.01 kW
0.1 kW
5 MW
0.001 MW
30 MW
0.01 MW
Accuracy
± (0.5 % + 5 d)
± (0.75 % + 5 d)
± (0.75 % + 10 d)
8-5
GLOSSARY
Terminology
Description
ABS
Antilock Brake System
AC
Alternating Current
AC Coupling
A mode of signal transmission that passes the dynamic (AC) signal component to the
input (INPUT A or INPUT B), but blocks the DC component. Useful to observe an AC
signal that is normally riding on a DC signal, e.g. charging ripple.
Acquisition
The process of gathering measurement data into the instrument’s memory.
Acquisition Rate
The number of acquisitions performed per second
Actuator
A mechanism for moving or controlling something indirectly instead of by hand.
Alternating Current
An electrical signal in which current and voltage vary in a repeating pattern over time.
Alternator
An AC generator with diode rectification.
Amplitude
The difference between the highest and the lowest level of a waveform.
Attenuation
The decrease in amplitude of a signal
Auto Range
Activates an automatic adaptation of the instrument to the input signal in amplitude,
timebase, and triggering.
Bandwidth
A frequency range.
Baud Rate
Communication parameter that indicates the data transfer rate in bits per second.
Blower
A device designed to supply a current of air at a moderate pressure. The blower case is
usually designed as part of a ventilation system.
BNC
Coaxial type input connector used for INPUT A and INPUT B.
Bottom Display
The lower part of the display, where the function key menu is listed.
Bypass
Providing a secondary path to relieve pressure in the primary passage.
Carburetor
A mechanism which automatically mixes fuel with air in the proper proportions to
provide a desired power output from a spark ignition internal combustion engine.
Catalytic Converter
An in-line exhaust system device used to reduce the level of engine exhaust emissions.
Closed Loop (Engine)
An operating condition or mode which enables modification of programmed instructions
based on a feedback system.
Continuity
Instrument setup to check wiring, circuits, connectors, or switches for breaks (open
circuit) or closed circuits.
Contrast
This setting (expressed in a percentage) determines the contrast ratio between display
text or graphics and the LCD background. (0 % is all white. 100 % is all black.)
Conventional
Ignition System
Ignition system that uses a distributor.
G-1
Terminology
Description
Terminology
Description
Cursor
A vertical or horizontal line (kind of ruler) that you can place on the screen and move
horizontally or vertically to measure values at certain points of the waveform.
Function Key Labels
Labels shown on the bottom display that indicate the function of the function keys
to
.
DC
Direct Current
Function Key Menu
The function key labels listed on the bottom display.
DC Coupling
A mode of signal transmission that passes both AC and DC signal components to the
input (INPUT A or INPUT B) of the instrument.
Glitch
A momentary spike in a waveform. This can be caused by a momentary disruption in
the circuit under test.
Default Setup
The setup that exists as long as there are no changes made to the settings.
Glow plug
A combustion chamber heat generating device to aid starting diesel engines.
Diesel Probe
A test probe that has a pickup element to measure the pressure pulse in the diesel fuel
pipe. It converts fuel pipe expansion into voltage.
Governor
A device designed to automatically limit engine speed.
Ground
Differential
Measurement(Delta)
Measurement of the difference between the waveform sample values at the positions of
the two cursors.
An electrical conductor used as a common return for an electric circuit(s) and with a
relative zero potential.
An electrical device that allows current to flow in one direction only.
Ground Controlled
Circuit
A circuit that is energized by applying ground; voltage has been already supplied.
Diode
Direct Current
A signal with constant voltage and current
DIS
Distributorless Ignition System
Hall-Effect Sensor
(or Hall Sensor)
A semiconductor moving relative to a magnetic field, generating a variable voltage
output. Used to determine position in the automotive industry.
Division
A specific segment of a waveform, as defined by the grid on the display.
Idle
Rotational speed of an engine with vehicle at rest and accelerator pedal not depressed.
Drive
A device which provides a fixed increase or decrease ratio of relative rotation between
its input and output shafts.
Ignition
System used to provide high voltage spark for internal combustion engines.
Inductance
The signal caused by a sudden change of a magnetic field.
For example, when you turn off the current through a solenoid, a voltage spike is
generated across the solenoid.
Intake Air
Air drawn through a cleaner and distributed to each cylinder for use in combustion.
Intermittent
Irregular, a condition that happens with no apparant or predictable pattern.
Invert
To change to the opposite polarity. Puts the waveform display upside down.
Knock (Engine)
The sharp, metallic sound produced when two pressure fronts collide in the combustion
chamber of an engine.
Lamda Sensor
Oxygen (or O2) sensor.
LCD
Liquid Crystal Display
Link
(Electrical/Electronic)
General term used to indicate the existence of communication facilities between two points.
Manifold
A device designed to collect or distribute fluid, air or the like.
Master Reset
Resets the instrument to the factory “Default Setup”.
You can do this by turning power on while pressing the F5 function key (
Driver
A switched electronic device that controls output state.
Duty Cycle
On-time or off-time to period time ratio expressed in a percentage.
Earth Ground
A conductor that will dissipate large electrical currents into the Earth.
ECM
Electronic Control Module on a vehicle.
ECU
Electronic Control Unit on a vehicle.
EIA-232-D/RS-232C
International standard for serial data communication to which the optical interface of the
instrument conforms.
Electromagnetic
Interference
Mutual disturbance of signals, mostly caused by signals from adjacent wiring.
EMI
Electromagnetic Interference
Feed Controlled Circuit A circuit that is energized by applying voltage; it has already been grounded.
Filter
Electrical circuits or device that only passes or blocks certain signal frequencies. An
application can be to remove noises from a signal.
Freeze Frame
A block of memory containing the vehicle operating conditions for a specific time.
Frequency
The number of times a waveform repeats per second, measure in Hz. 1 Hz equals one
cycle per second.
Fuel Trim
A set of positive and negative values that represent adding or subtracting fuel from
engine. A fuel correction term.
G-2
).
Menu
A list of choices for selecting a test, a function, or a setting.
Malfunction Indicator
Lamp (MIL)
A required on-board indicator to alert the driver of an emission related malfunction.
Noise
Extraneous electrical signal that can interfere with other electrical signals. The noise can
disturb the function of the signal when it exceeds a certain electrical level.
G-3
Terminology
Description
NTC
A resistor that has a Negative Temperature Coeffic ient; resistance decreases as
temperature increases.
O2 Sensor
Oxygen sensor
Off-time
Terminology
Description
Scan Tool
A device that interfaces with and communicates information on a data link.
Sample
A reading taken from an electrical signal. A waveform is created from a successive
number of samples.
The part of an electrical signal during which an electrical device is de-energized.
Sampling Rate
The number of readings taken from an electrical signal every second.
On-time
The part of an electrical signal during which an electrical device is energized.
Saturated Driver
Fuel injection circuit that maintains the same voltage level throughout its on-time.
OBD II
On-Board Diagnostics Second Generation (or Generation Two)
Secondary Pickup
OBD II Systems
Provide comprehensive diagnostics and monitoring of emission controlling systems.
An accessory that can be clamped on the high voltage coil wire used to measure
secondary ignition patterns.
Open Loop
An operating condition or mode based on programmed instructions and not modified by
a feedback system.
Shielded Test Lead
A test lead that is surrounded by a conductive screen to protect the measurement signal
against environmental influences, such as electrical noise or radiation.
Peak Value
The highest or lowest value of a waveform.
Shift Solenoid
A device that controls shifting in an automatic transmission.
Peak-and-Hold
A method for regulating the current flow through electronic fuel injectors. Supplies
higher current necessary to energize the injector, then drops to a lower level just
enough to keep the injector energized.
Single Shot
A signal measured by an oscilloscope that only occurs once (also called a transient
event).
Spark Advance
The relationship between the ignition timing and top dead center (DTC).
Pixel
The smallest graphic detail possible for the liquid crystal display (LCD)
Spike
A (high) voltage pulse during a short period of time (sharp pulse).
Powertrain
The elements of a vehicle by which motive power is generated and transmitted to the
driven axles.
Throttle
A valve for regulating the supply of a fluid, usually air or a fuel/air mixture, to an engine.
Time Base
The time defined per horizontal division on the display.
Pressure (Absolute)
The Pressure referenced to a perfect vacuum.
Trace
Pressure (Differential)
The pressure difference between two regions, such as between the intake manifold and
the atmospheric pressures.
The displayed waveform that shows the variations of the input signal as a function of
time.
Trigger
Determines the beginning point of a waveform.
PTC
A res istor that has a Positive Temperature Coefficient; resistance increas es as
temperature increases.
Trigger Level
The voltage level that a waveform must reach to start display.
Pulse
A voltage signal that increases or decreases from a constant value, then returns to the
original value.
Trigger Slope
The voltage direction that a waveform must have to start display. A positive Slope
requires the voltage to be increasing as it crosses the Trigger Level, a negative Slope
requires the voltage to be decreasing.
Pulse Modulated
A circuit that maintains average voltage levels by pulsing the voltage on and off.
Trigger Source
The instrument input that supplies the signal to provide the trigger.
Rail
A manifold for fuel injection fuel.
Transducer
Range
Specified limits in which measurements are done.
Reference Voltage
An unaltered voltage applied to a circuit. Battery plus (B+) and ground (GND) are
examples of reference voltages.
A device that receives energy from one system and retransmits (transfers) it, often in a
different form, to another system.
For example, the cruise control transducer converts a vehicle speed s ignal to a
modulated vacuum output to control a servo.
Regulator (Voltage)
A device that automatically controls the functional output of another device by adjusting
the voltage to meet a specified value.
Turbocharger
A centrifugal device driven by exhaust gases that pressurize the intake air, thereby
increasing the density of charge air and the consequent power output from a given
engine displacement.
Relay
A generally electromechanical device in which connections in one circuit are opened or
closed by changes in another circuit.
USB
Universal Serial Bus (visit www.usb.org for details.)
Root Mean Square
(RMS)
Conversion of AC voltages to the effective DC value.
User’s Last Display
The last display having been displayed just before the instrument was turned off.
Vertical Scale
RPM
Engine speed expressed in Rotations Per Minute of the crankshaft.
The scale used for vertical display (vertical sensitivity) expressed in certain units per
division.
G-4
G-5
Terminology
Voltage Drop
Description
Menu Overview
Voltage lose across a wire, connector, or any other conductor.
Voltage drop equals resistance in ohms times current in amperes (ohm’s Law).
Wastegate
A valve used to limit charge air pressure by allowing exhaust gases to bypass the
turbocharger.
Waveform
The pattern defined by an electrical signal.
WOT
Wide Open Throttle.
COMPONENT TESTS MENU
SENSORS
ACTUATORS
ELECTRICAL
IGNITION
(or DIESEL)
MAIN MENU
COMPONENT TESTS
SCOPE
GRAPHING MULTIMETER
VEHICLE DATA
INSTRUMENT SETUP
GRAPHING MULTIMETER MENU
VOLT DC, AC
OHM/DIODE/CONTINUITY
RPM
FREQUENCY
DUTY CYCLE
PULSE WIDTH
DWELL
IGNITION PEAK VOLTS
IGNITION BURN VOLTS
IGNITION BURN TIME
INJECTOR PEAK VOLTS
INJECTOR ON TIME
AMP DC, AC
TEMPERATURE C F
LIVE
FILTER MENU
INPUT A : OFF
INPUT B : OFF
VEHICLE DATA MENU
CYLINDERS : 4
CYCLES
:4
BATTERY
: 12 V
IGNITION
: CONV
IGNITION MENU
CONV (default)
DIS
DIESEL
INSTRUMENT SETUP MENU
DISPLAY OPTIONS
FILTER
AUTO POWER OFF
LANGUAGE
VERSION INFORMATION
SCOPE CALIBRATION
LANGUAGE MENU
LANGUAGE : ENGLISH
DISPLAY OPTIONS MENU
USER LAST SETUP : OFF
CONTRAST : 4
GRATICULE : ON
HORIZ TRIG POS : 10 %
ACQUIRE MODE : PEAK DETECT
ACTUATOR TESTS MENU
Injector PFI/MFI
Injector TBI
Injector PNP
Injector Bosch
Mixture Cntl Sol
EGR Cntl Sol
IAC Motor
IAC Solenoid
Trans Shift Sol
Turbo Boost Sol
Diesel Glow Plug
ELECTRICAL TESTS MENU
Power Circuit
V Ref Circuit
Ground Circuit
Alternator Output
Alternator Field VR
Alternator Diode
Audio System
DC Switch Circuits
AUTO POWER OFF MENU
AUTO POWER OFF : ON
AUTO POWER OFF TIME : 30 min
DIESEL MENU
DIESEL INJECTOR
ADVANCE
G-6
SENSOR TESTS MENU
ABS Sensor (Mag)
O 2S Sensor (Zirc)
Dual O2 Sensor
ECT Sensor
Fuel Temp Sensor
IAT Sensor
Knock Sensor
TPS Sensor
CKP Magnetic
CKP Hall
CKP Optical
CMP Magnetic
CMP Hall
CMP Optical
VSS Magnetic
VSS Optical
MAP Analog
MAP Digital
MAF Analog
MAF Digi Slow
MAF Digi Fast
MAF Karman-Vrtx
EGR (DPFE)
IGNITION TESTS MENU
PIP/ SPOUT
DI Primary
DI Secondary
DIS Primary
DIS Secondary