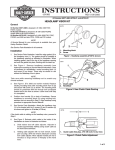
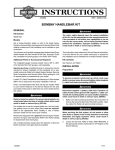
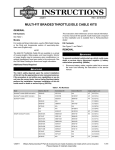
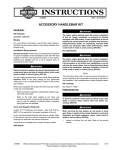
1
-J04390
REV. 2007-11-13
FRONT TURN SIGNAL RELOCATION KIT
4.
Remove the front and rear fuel tank mounting hardware
following the instructions in the appropriate Service
Manual. Move the fuel tank back on the frame to gain
access to the tabs on the steering head harness shield.
Models
5.
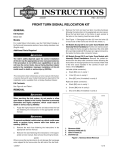
See Figure 1. Disengage the tabs (2) from the holes (3)
on each side of the frame and remove the shield (1).
For model fitment information, please see the P&A Retail Catalog or the Parts and Accessories section of www.harleydavidson.com (English only).
6.
Pull the wire harness down from inside the frame enough
to disconnect the white (left) [31L] and black (right) [31R]
3-place turn signal connectors. Set aside the frame-side
connector halves.
7.
Remove the socket terminals from the lamp-side connector
halves following the instructions in the appropriate Service
Manual. Make note of the wire colors installed in the cavities of each connector, which should be:
GENERAL
Kit Number
69433-08
Additional Parts Required
The rider's safety depends upon the correct installation
of this kit. Use the appropriate service manual procedures.
If the procedure is not within your capabilities or you do
not have the correct tools, have a Harley-Davidson dealer
perform the installation. Improper installation of this kit
could result in death or serious injury. (00333a)
NOTE
This instruction sheet references Service Manual information.
A Service Manual for your model motorcycle is required for
this installation and is available from a Harley-Davidson Dealer.
Kit Contents
Left side (white connector):
a.
Black [BK] wire in cavity 1
b.
Violet [V] wire in cavity 2
c.
Blue [BE] wire (if installed) in cavity 3
Right side (black connector):
a.
Black [BK] wire in cavity 1
b.
Brown [BN] wire in cavity 2
c.
Blue wire [BE] (if installed) in cavity 3
See Figure 6 and Table 1.
REMOVAL
is00692
3
4
When servicing the fuel system, do not smoke or allow
open flame or sparks in the vicinity. Gasoline is extremely
flammable and highly explosive, which could result in
death or serious injury. (00330a)
1.
2
Purge the high-pressure fuel line and disconnect the fuel
line following the instructions in the appropriate Service
Manual.
2
1
To prevent accidental vehicle start-up, which could cause
death or serious injury, remove main fuse before proceeding. (00251b)
2.
Remove the main fuse following the instructions in the
appropriate Service Manual.
3.
Remove the seat following the instructions in the appropriate Service Manual. Save all seat mounting hardware.
1.
2.
3.
4.
Harness shield
Harness shield tab (2)
Hole in frame (2)
Grommet (2)
Figure 1. Harness Shield Removal
NOTE
When moving the fuel tank back, do not damage the fuel gauge
wires clipped to the frame under the left side of the fuel tank.
-J04390
1 of 5
is00693
is00694a
7
7
9
9
5
6
4
5
4
3
6
3
8
2
2
8
1
1
1.
2.
3.
4.
5.
6.
7.
8.
9.
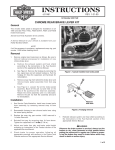
Right side turn signal
Jam nut
Ball stud
Ball stud clamp
Retainer
Lockwasher
Rear-view mirror stalk
Acorn nut
Brake master cylinder housing
Figure 2. Right Side Turn Signal Removal
8.
See Figure 2. Using 5/8 in. and 1/2 in. wrenches, hold the
right side ball stud clamp (4) and loosen the jam nut (2).
9.
Hold the retainer (5) with the 5/8 in. wrench, and remove
the ball stud clamp from the retainer. Discard the ball stud
clamp.
10. Remove and discard the ball stud (3) and jam nut from
the right side turn signal (1). Remove the turn signal lamp
and allow it to hang down, taking care not to damage any
surfaces.
11. Remove the retainer (5) and lockwasher (6) from the rearview mirror stalk (7). Discard the lockwasher and retainer.
12. See Figure 3. Hold the left side ball stud clamp (4) and
loosen the jam nut (2).
13. Remove the ball stud clamp from the ball receptacle (5).
Discard the ball stud clamp. Unscrew and discard the ball
stud (3) and jam nut from the left-side turn signal (1).
Remove the turn signal lamp and allow it to hang down,
taking care not to damage any surfaces.
-J04390
1.
2.
3.
4.
5.
6.
7.
8.
9.
Left side turn signal
Jam nut
Ball stud
Ball stud clamp
Ball receptacle
Lockwasher
Rear-view mirror stalk
Acorn nut
Clutch hand lever bracket
Figure 3. Left Side Turn Signal Removal
14. Remove the acorn nut (8), ball receptacle and lockwasher
(6) from the rear-view mirror stalk (7). Discard the ball
receptacle, lockwasher and acorn nut.
NOTES
FXD, FXDC and FXDL models: The turn signal wires are
routed alongside the hand control wires through retainers fastened to the outside of the handlebar.
FXDB models: The turn signal wires are routed through
grommets on the underside of the handlebar switch housings,
then inside a sleeve along with the hand control wires through
retainers fastened to the outside of the handlebar.
FXDWG models: The turn signal wires are routed through
grommets on the underside of the handlebar switch housings,
then inside the handlebars.
ALL models: To make removal easier, a smooth tape (such
as electrical tape) can be used to cover the socket terminals
at the ends of the turn signal wires.
15. Completely remove the turn signals and wires from the
handlebar.
2 of 5
Models with turn signal wires OUTSIDE the handlebar
switch housings (FXD, FXDC and FXDL models): While
supporting the turn signal lamp, pull the turn signal wires
upward and outward through the wire retainers.
lamp is attached. Insert the harness into the slot in that orientation to avoid a half-twist in the wire harness at the lamp.
is04978
Models with turn signal wires INSIDE the handlebar
switch housings (FXDB and FXDWG models):
a.
b.
7
8
d.
Remove the tape used to cover the socket terminals
at the ends of the turn signal wires. Pull the wire harness through the hole in the switch housing with the
grommet.
e.
Remove the grommet from the turn signal wire harness, and install it back in the hole in the switch
housing. Set the signal lamp and wires aside for
installation.
f.
Assemble the wire bundle to the metal bracket at the
bottom of the housing using a new cable strap from
the kit. It may be necessary to use a T-15 TORX ®
drive head to loosen the bracket to install the wire tie.
Assemble the upper and lower switch housings following the instructions in the appropriate Service
Manual. Install the switch housing to the handlebar.
11
1
1.
2.
3.
4.
5.
6.
7.
8.
9.
10.
11.
2.
Both left side and right side turn signal lamps are identical.
The wire harness exiting the turn signal lamp has a flat crosssection, similar to the wire slot (3) near the lamp end of the
stalk.
For best appearance, align the harness along its full length to
determine the flat side that will lie against the stalk when the
-J04390
Left side turn signal
Right side turn signal
Wire slot (2)
Cap screw (2)
Lockwasher (2)
Triple clamp (partial view shown)
Pinch bolt (2)
Cap screw and washer
P-clamp
Right side (black) connector
Left side (white) connector
Carefully feed the length of wire from the turn signal lamp
into the stalk through the wire slot (3).
4.
Install the screw (4) and lockwasher (5) into the stalk and
through the hole. Position the turn signal lamp against the
end of the stalk and thread the screw into the lamp
housing. Do not fully tighten at this time.
5.
Place the mounting bracket in position on the lower fork
below the triple clamp (6). Align the lamp to face forward,
and parallel to the ground. While holding the alignment,
remove the assembly and tighten the lamp mounting screw
(4) to 70-80 in-lbs (8-9 Nm).
6.
Install the mounting bracket assembly to the lower fork
with a pinch bolt (7), ensuring:
See Figure 3. Fasten the mirror stalk to the clutch hand
lever bracket (9) with the acorn nut (8) and lockwasher (6)
from the kit, but do not fully tighten at this time.
NOTES
See Figure 4. The mounting brackets are stamped with either
LH (left side) or RH (right side). Be sure to install the correct
bracket on the correct side.
10
3.
Repeat for the opposite side switch housing.
ALL models: See Figure 2. Fasten the mirror stalk to the
front brake master cylinder housing (9) with the acorn nut
(8) and lockwasher (6) from the kit, but do not fully tighten
at this time.
3
Figure 4. Installation of Mounting Bracket and Wire
Harness
INSTALLATION
1.
9
6
Separate the upper and lower switch housings following the instructions in the appropriate Service
Manual. Carefully cut and remove the cable strap
inside the switch housing, and identify the wires
coming from the turn signal lamp (not the turn signal
switch on the handlebar control pod).
Support the turn signal lamp and pull the turn signal
wires upward and outward through the handlebar wire
harness bundle until the turn signal wires are free of
the others up to the switch housing grommet.
h.
2
Remove one of the handlebar switch housings from
the handlebar, following the instructions in the
appropriate Service Manual. Support the hand lever
to prevent damage.
c.
g.
5
4
Set the signal lamps and wires aside for installation.
a.
That the lamp is facing forward and parallel to the
ground.
b.
Verify that the exiting wire is centered in the wirenotch (3) at the stalk base and is not being pinched
by the stalk against the fork bracket.
7.
Tighten the pinch bolt (7) to 70-80 in-lbs (8-9 Nm).
8.
Repeat Steps 1-7 for the opposite side.
9.
Remove the cap screw and washer (8) that mount the
front brake line(s) to the underside of the lower fork
bracket, and set aside.
10. Loosely install the P-clamp (9) and the brake line with the
cap screw and washer (8).
NOTE
P-clamp orientation should be opposite of the brake-line
mounting.
3 of 5
11. See Figure 5. Route the wires behind the fork tubes. Feed
both signal wires through the P-clamp in the direction
opposite that from which they originated, so the wire is
heading back toward its own turn signal lamp.
NOTE
Ensure the wires are not pulled tight when the handlebars are
turned full to the left or right fork stops.
12. Pull the wires through the P-clamp so they are just pulled
taut and tighten the cap screw to 8.3-10.0 ft-lbs (11.3-13.6
Nm).
The wires from the right-side turn signal should now be
toward the right side of the vehicle, and the left-side wires
toward the left.
17. Test the turn signals to ensure they function correctly.
To prevent accidental vehicle start-up, which could cause
death or serious injury, remove main fuse before proceeding. (00251b)
18. Remove the main fuse.
Be sure that steering is smooth and free without interference. Interference with steering could result in loss of
vehicle control and death or serious injury. (00371a)
•
is04980
Be sure wires do not pull tight when handlebars are
turned fully to left or right fork stops.
19. Use cable straps from the kit as needed to secure the
harnesses so they do not interfere with steering function,
or become entangled or pinched. Secure any excess
harness length with a cable strap so it can be stowed
inside the steering head.
Figure 5. Routing the Wires
13. See Figure 4. Install the socket terminals from the the turn
signal harnesses into the correct lamp side connector
halves following the instructions in the appropriate Service
Manual. Unless noted differently on removal,
Left side (white connector) (11):
a.
Black [BK] wire in cavity 1
b.
Violet [V] wire in cavity 2
c.
Blue [BE] wire (if installed) in cavity 3
20. Push the wire harness back up inside the frame, behind
the steering head. Position the harness shield (1) to the
underside of the top bar with the tabs (2) inside, and push
upward until the tabs engage the holes (3) on each side
of the frame.
When servicing the fuel system, do not smoke or allow
open flame or sparks in the vicinity. Gasoline is extremely
flammable and highly explosive, which could result in
death or serious injury. (00330a)
21. Install the fuel tank and connect the fuel line following the
instructions in the appropriate Service Manual.
Right side (black connector) (10):
22. Install the main fuse.
a.
Black [BK] wire in cavity 1
b.
Brown [BN] wire in cavity 2
23. Install the seat following the instructions in the appropriate
Service Manual.
c.
Blue wire [BE] (if installed) in cavity 3
14. See Figure 1. Feed the assembled right side turn signal
connector, from the outside, through the grommet (4) in
the right side of the frame, behind the steering head. Feed
the assembled left side connector through the grommet
in the left side of the frame.
15. Connect the left and right connector halves to the samecolor mating connector halves coming from the frame.
After installing seat, pull upward on seat to be sure it is
locked in position. While riding, a loose seat can shift
causing loss of control, which could result in death or
serious injury. (00070b)
24. Adjust the mirrors for proper field of vision and tighten the
acorn nuts to 12 ft-lbs (16 Nm). Check mirror adjustment
and reposition if necessary.
16. Temporarily install the main fuse following the instructions
in the appropriate Service Manual.
-J04390
4 of 5
SERVICE PARTS
is04977
3
2
4
9
7
1
5
6
8
Figure 6. Service Parts: Front Turn Signal Relocation Kit
Table 1. Service Parts Table
Item
Description (Quantity)
Part Number
1
Stalk, front turn-signal relocation (right)
68565-08
2
Stalk, front turn-signal relocation (left)
68567-08
3
Socket head cap screw, 5-16-24 x 5/8 in., Grade 8 (2)
2698A
4
Lock washer, split, 5/16 in. (2)
7042
5
Screw, button head (2)
926
6
Nut, acorn 5/16-24 chrome (2)
7720
7
Washer, star lock, 5/16 inch
7127
8
P-clamp, 0.31 nominal diameter
10059A
9
Cable strap (8)
10065
-J04390
5 of 5