1
VEHICLE PREPARATION & SWAY BAR REMOVAL
NOTE:
For vehicles equipped with Autoride
(Electronic Suspension Control), separate brake hose
from sensor link bracket.
1)
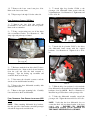
Park the vehicle on a level surface. Set the
parking brake and chock rear wheels. Measure and
record the distance from the center of each wheel to
the top of the fender opening. See illustration #1.
2)
Remove the brake caliper anchor bolts.
Remove the brake caliper and its mounting bracket as
an assembly. Hang the caliper assembly with wire or a
tie wrap.
FRONT SUSPENSION
CAUTION: Do not allow the caliper to hang by the
brake hose.
3)
Label the brake rotor left or right. Remove the
brake rotor. Remove the half shaft axle nut.
4)
Loosen jam nut and remove the nut from the
outer tie rod stud. Lightly tap the steering knuckle and
disconnect the tie rod end from the knuckle.
5)
Loosen the nuts at the upper and lower ball
joints. Lightly tap the steering knuckle to disconnect
the ball joints.
Illus. 1
2)
Raise the front of the vehicle and support the
frame with jackstands. Remove the front wheels and
set them aside.
6)
Remove the upper and lower ball joint nuts.
Carefully remove the steering knuckle.
7)
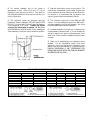
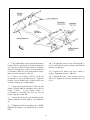
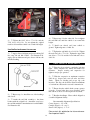
Index mark the half shaft and front differential
flange for installation reference. See illustration 3.
3)
Disconnect the sway bar from the lower
control arms. Save end links for reuse.
4)
Remove the sway bar frame bracket bolts.
Remove the sway bar.
STEERING KNUCKLE, SHOCK ABSORBER, HALF SHAFT (4WD
ONLY), & LOWER CONTROL ARM REMOVAL
1)
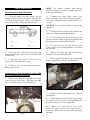
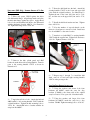
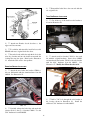
Remove the brake hose and ABS sensor wire
from the upper control arm. Disconnect the ABS
sensor wire at the frame rail. See illustration 2.
Illus. 3
8)
Remove the half shaft flange bolts. Remove
the half shaft.
9)
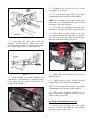
Index-mark the shock absorber upper mount,
coil spring, and lower mount. Disconnect Electronic
Suspension Control connector if applicable.
10)
Remove the shock absorber lower bolts.
Remove the three shock absorber upper mount to
frame nuts. Remove the shock absorber and spring
assembly.
Illus. 2
6