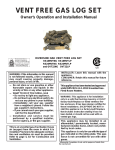
1
International Chassis - 3200 Series Congratulations, and thank you for purchasing a Krystal Enterprises Vehicle You have taken ownership of a true luxury vehicle which is in a class all its own. We are providing this manual to familiarize you with your new Krystal Enterprises Professional Bus. This manual shall serve as a reference document for the operations and maintenance procedures that shall be required throughout the life of your vehicle. This edition covers all our International Chassis models, and is designed to be used in conjunction with the original chassis manufacturer’s owner’s literature, as well as all other component manufacturers literature. IMPORTANT: PLEASE READ CAREFULLY For your safety and the safety of others, we ask that you completely familiarize yourself with this manual, and all other operators manuals before you operate this vehicle for the first time. KRYSTAL ENTERPRISES 2701 East Imperial Highway Brea, California 92821 (800) KRYSTAL (579-7825) (714) 986-1200 TA B L E O F C O N T E N T S SAFETY Pre-Trip Inspection (suggested minimum) General Vehicle Safety Warnings Vapor Door Operational Safety Check List Air Door Emergency Release Valve Electric Door Emergency Release Lever Wheelchair Securement and Occupant Restraint Systems Air Door Lock Pin Assembly Dual Overhead Parcel Racks Emergency Egress Window Operation Emergency Roof Hatch Exit OPERATION In-Dash Control Panels Controls and Accessory Functions Audio/Video PA Control Blank Page Video Entertainment Center Load Shed & High Idle Charge Protection Operating Procedures CLICK ON THE DESCRIPTION TO GO TO THAT PAGE 4 8 10 11 12 13 14 16 17 18 19 20 21 22 23 24 26 TA B L E O F C O N T E N T S High Idle Charge Protection Operating Controls Battery Location - Primary and Secondary Window, Door, Mirror and Light Control Switches Back-Up Camera Controls and Operation Rear Step Operation Rear Cargo Door Micro Switch Foldaway Seating Bus Passenger Seating Stainless Steel Wheel Liners Air Conditioning Assembly Floor Heaters Movable Wall - Standard Movable Wall - EZ Move Air Operated - Single Plug Door Air Operated - Single Plug Door Air Operated - Double Plug Door with Lower Air Step Electric Swing Doors Braun Rear Door Wheelchair Lift Ricon Rear Door Wheelchair Lift 27 28 29 30 31 32 33 34 35 36 38 39 41 44 46 48 50 52 54 CLICK ON THE DESCRIPTION TO GO TO THAT PAGE 5 TA B L E O F C O N T E N T S SPECIFICATION Standard Chassis Specification for 31’ & 35’ Standard Equipment for 31’ & 35’ Standard Chassis Specification for 38’ Standard Equipment on 38’ General Vehicle Dimensional Specifications-Body & Chassis by Model General Body Material and Construction Measurements Vehicle Manufacturers Identification Label PREVENTATIVE CARE & MAINTENANCE Preventative Maintenance Schedule TROUBLE SHOOTING Basic Troubleshooting Guide ASSEMBLIES & SCHEMATICS - AIR & ELECTRIC INTERNATIONAL Diamond Logic Electrical System Legend for Standard Fuse & Circuit Breaker Panel CLICK ON THE DESCRIPTION TO GO TO THAT PAGE 6 56 58 59 61 62 64 65 66 85 90 92 TA B L E O F C O N T E N T S Legend for Optional Fuse & Circuit Breaker Panel Carrier Rooftop Air Conditioning System Diagrams Model 35 & 38 Accessory Harness-Front Portion Model 35 & 38 Accessory Harness-Rear Portion Model 35 & 38 Accessory Harness-Legend Model 35 & 38 Accessory Harness-Body Wiring Diagram Part 1 & 2 Front/Rear A/C Module Wiring Diagram Circuit Board Assembly Phase 1 Circuit Board Assembly Phase 2 93 106 108 PARTS - SERVICE - WARRANTY 110 VENDOR REFERENCE LIST 114 INDEX 116 KRYSTAL ENTERPRISES VEHICLE WARRANTY 120 94 100 101 102 103 105 CLICK ON THE DESCRIPTION TO GO TO THAT PAGE 7 Pre-Trip Inspection (suggested minimum) Any item not passing inspection, must be reported immediately, before operating vehicle FAILURE OF HIGHLIGHTED ITEM(S) TO PASS INSPECTION WILL CAUSE VEHICLE TO BE GROUNDED Item 8 Inspection Procedure 1 Check preventative maintenance schedule: for services due at present mileage 2 Check operation of: drivers seat and seat belt 3 Check operation of: steering wheel and shift levers 4 Check operation of: turn indicators 5 Check operation of: foot pedals and parking brake 6 Check operation of: all gauges, for normal readings with engine running 7 Check operation of: dash indicator lights with key on, engine not started, then again with engine started 8 Check operation of ventilation system: heating, defrosters, fans and air conditioning 9 Check: horn, wipers, washers, and mirrors for cleanliness, adjustment, operation and damage 10 Check condition of: fire extinguisher, warning reflectors and first aid kit 11 Check: all doors, glass and windows: for operation, cleanliness, and damage. 12 Check: all emergency exits for operation, warning devices, markings, to be free and clear 13 Check interior lighting: for operation and damage 14 Check Side Passenger Entry Door - Emergency Exit Operation (see page 11,12,13) RETURN TO MENU Pass Fail Pre-Trip Inspection (suggested minimum) Any item not passing inspection, must be reported immediately, before operating vehicle FAILURE OF HIGHLIGHTED ITEM(S) TO PASS INSPECTION WILL CAUSE VEHICLE TO BE GROUNDED Item Inspection Procedure 15 Check Side Passenger Entry Door: for damage and proper closing operation 16 Check exterior lighting: for operation and damage 17 Check exterior: for cleanliness, markings and damage 18 Check fuel cap: in place and secure 19 Check all tires and wheels: for tread depth, cracks & bulges, missing lug nuts, and air pressure 100 psi Frt/Rr for KK35, and 120 psi Frt & 100 psi Rr for KK38 20 Check: oil level 21 Check: transmission fluid level 22 Check: engine coolant level 23 Check: power steering fluid level 24 Check: brake fluid level 25 Check: belts for tension and wear 26 Check operation of: cameras, if applicable 27 Check operation of: PA system, if applicable 28 Check operation of: audio and video system, if applicable 29 Check wheelchair lift: for proper function or damage and securement station equipment RETURN TO MENU Pass Fail 9 GENERAL VEHICLE SAFETY WARNINGS CAUTION - VERY IMPORTANT NO STANDEES ARE ALLOWED, AT ANY TIME WHILE THE VEHICLE IS IN MOTION. DISCONTINUE OPERATION OF THE VEHICLE, WHEN THE LOW AIR WARNING LIGHT OR BUZZER ON INSTRUMENT CLUSTER ACTIVATE, OR UNTIL THE PROBLEM WITH THE SYSTEM CAN BE RESOLVED. DISCONTINUE OPERATION OF THE VEHICLE, IF ANY CRITICAL ITEM ON THE PRE-TRIP INSPECTION LIST FAILS TO PASS, OR UNTIL ALL PROBLEMS ARE RESOLVED. AIR DOOR EMERGENCY RELEASE VALVE, MUST BE OPERATED DAILY, PRIOR TO VEHICLE OPERATION Caution! UNDER EMERGENCY SITUATIONS, (IF EQUIPPED) THE BOTTOM AIR STEP WILL NOT DEPLOY. 10 RETURN TO MENU Vapor Air & Electric Door Operational Safety Check List ATTENTION WHEN OPERATING A VEHICLE WITH A VAPOR DOUBLE PANEL AIR OR ELECTRIC ACTUATED PASSENGER ENTRANCE DOORS, THE FOLLOWING PRECAUTIONS SHOULD BE TAKEN. AIR DOORS - SINGLE or DOUBLE The Emergency Release Valve System - (must be checked on a daily basis) Once the emergency release valve has been actuated (by turning the red handle counter clockwise), it should be possible to open the doors by pushing outward with your hand after about 5 seconds. Caution! UNDER EMERGENCY SITUATIONS, (IF EQUIPPED) THE BOTTOM AIR STEP WILL NOT DEPLOY. The Obstruction Sensing System (Sensitive Edge) - (must be checked on a daily basis) Only when the door is closing, can reversing be actuated. The reversing motion should be shut off at about 10 to 30 mm before the final closing position. If the reversing process actuates too late, the sensiELECTRIC DOORS The Emergency Release Lever System - (must be checked on a daily basis) Once the emergency release lever has been actuated (by pushing the red handle from right to left as indicated on the sticker), it should then be possible to open the doors by pushing the panels outward with your hand. RETURN TO MENU 11 Air Door Emergency Release Valve CO UN E CAUTION! TE W R CLO CK IS UNDER EMERGENCY SITUATIONS, (IF EQUIPPED) THE BOTTOM AIR STEP WILL NOT DEPLOY. ACTION: VALVE MUST BE OPERATED DAILY, PRIOR TO VEHICLE OPERATION EMERGENCY OPERATION EMERGENCY USE ONLY 12 For Emergency Door Opening, turn the red valve counter clockwise, this will release the door after about 5 seconds, then the door can be pushed open. RETURN TO MENU Electric Door Emergency Release Lever Electric Door Motor Cover EMERGENCY EXIT PUSH HANDLE LEFT PUSH DOORS OUT EMERGENCY EXIT PUSH HANDLE LEFT PUSH DOORS OUT Emergency Exit Lever Decal ACTION: EMERGENCY EXIT PUSH HANDLE LEFT LEVER MUST BE CHECKED DAILY, PRIOR TO VEHICLE OPERATION PUSH DOORS OUT EMERGENCY USE ONLY Emergency Exit Lever RETURN TO MENU 13 Wheelchair Securement and Occupant Restraint Systems Pre-Trip Inspection Is each securement station properly equipped with four securement straps, a lap belt, and a shoulder belt? Are all straps and belts in good working condition? Any defects such as cut, frayed, contaminated or damaged webbing, improperly functioning buckles or hardware, or broken or worn parts, require replacement of the entire strap or belt assembly. Are all floor anchorages, (i.e., tracks or plates), clear of dirt or debris to allow for proper system fitting attachment? Is there a clean, dry container in the vehicle to allow for storage of the system when not in use? Is the vehicle equipped with a web belt cutter for use in the event of an emergency evacuation? Are complete system operational instructions, in either printed or decal form, located within the vehicle compartment to serve as a reference? CAUTION! Never utilize the Occupant Restraint System unless you are fully trained, if you’re not sure what to do, always call your Kinedyne Representative for Assistance! 14 RETURN TO MENU Typical Wheelchair Securement Methods Front Strap Attachment With the wheelchair and occupant facing toward the front of the vehicle, center the wheelchair between the floor tracks or plates. As you position the wheelchair, remember that the securement straps need to have approximately a 45° angle from the floor tracks or plates to where they attach to the frame. Also, keep in mind the proper extension and placement of the occupant restraint shoulder belt. Apply the wheel locks or turn off the power if motorized. Rear Strap Attachment Typical 4-Point Restraint with Lap & Shoulder Belt For Specific Operating Instructions and System Care and Maintenance, refer to your Kinedyne Literature Lap Belt Attachment RETURN TO MENU 15 Air Door Lock Pin Assembly CAUTION! UNDER EMERGENCY SITUATIONS, (IF EQUIPPED) THE BOTTOM AIR STEP WILL NOT DEPLOY. CAUTION! Security Pin must be removed during bus operation. Pin is only to be used for security, if bus is not in operation. 16 RETURN TO MENU Dual Overhead Parcel Racks Overhead Parcel Rack for models 31 & 35 only (curb side shown) Overhead Parcel Rack for models 35 & 38 only with Roof Top Ducted A/C (street side shown) CAUTION! Do not overload Parcel Racks. Do not fasten parcels to retainer bars. RETURN TO MENU 17 Emergency Egress Window Operation Lift up on lever to disengage latch Pull down on lever to disengage latch GL20 Touring Window Panoramic Frameless Window Windows with Emergency Exit stickers are designated emergency exits. Follow the directions on the sticker. Disengage latches and push windows out 18 RETURN TO MENU Emergency Roof Hatch Exit This is a Dual Purpose hatch used for Emergency Egress and Ventilation purposes. SUGGESTED MAINTENANCE Periodically inspect attaching fasteners for evidence of loosening due to tampering, and regularly clean surface with a mild soap and water. CAUTION: When removing graffiti, it is the customers responsibility to ensure cleaning solutions are compatible with the materials used on Safety Vents. Solutions containing, acetone, ether, lacquer thinner, or other solvents can destroy the high strength properties of many engineering plastics - AVOID these cleaners For Emergency Exit Turn Red Handle Clockwise, Then Push Knob to Open SEE MANUFACTURERS LITERATURE FOR ADDITIONAL INFORMATION RETURN TO MENU 19 In Dash Control Panel H J K Switches 7 - 12 Switches 13 - 18 G Component Legend F Switches 1 - 6 20 A B C D E RETURN TO MENU A Air Park Brake ** B Front Fan Switch Hi-Low-Off C Rear Fan Switch Hi-Low-Off D Climate Control Cool-Heat-Off E Auxiliary F AM/FM - CD G Audio/Video PA H Fan Control Speed J Temp Control K Front A/C Control ** Air Brake is Standard with LCT Transmission and Optional with WTEC Transmission In Dash Control Panel Switches and Components Dash Panel Switch Legend L M N Carrier Sutrak Controls for Roof Mounted A/C Component Legend (cont) L Fan Switch - Carrier Sutrak M Temp Control - Carrier Sutrak N 12 Volt Access O P 1 2 3 4 5 6 7 8 9 10 11 12 13 14 15 16 17 18 Air Suspension Dump - DUMP/SUSP Heated Mirror - ON/OFF BLANK BLANK Luggage Door Ajar Warning Light Passenger Door Ajar Warning Light Cabin Light - ON/OFF Map Light - ON/OFF Bath Pump - ON/OFF Floor Heater - ON/OFF Floor Heater - HI/LO Load Shed - ON/OFF BLANK BLANK BLANK BLANK BLANK BLANK Q R RETURN TO MENU 21 Audio/Video PA Control 2 4 6 7 8 5 9 10 11 3 1 13 12 FRONT VIEW REAR VIEW 1 On/Off Volume Control - controls power and volume 8 VCP Play - starts the tape playing 2 Bass Control - increases or decreases bass 9 VCP Fast Forward - fast forwards tape 3 Treble Control - increases or decreases treble 10 VCP Stop - stops tape 4 Radio Mode - enables radio, indicator light will be on 11 VCP Replay - rewinds and replays from start of tape 5 PA Mode - enables PA, indicator light will be on 12 VCP Rewind - rewinds tape 6 VCP Mode - enables VCP, indicator light will be on 13 Paging Mode - (Internal or External) press button once to engage system, press again to toggle between internal/external 7 VCP Power SEE MANUFACTURERS LITERATURE FOR ADDITIONAL INFORMATION 22 RETURN TO MENU THIS PAGE IS INTENTIONALLY BLANK RETURN TO MENU 23 Video Entertainment Center Ceiling Mounted CRT Monitor Basic Operating Instruction LCD Monitor [The TV cannot be viewed without first truning on the DVD] For specific Operating Instructions, Check Your Component information.Manual Bulkhead Mounted LCD Monitor 24 Under Loft LCD Monitor 1. After truning on the DVD, turn on the TV using the power on the TV or the button on the TV remote. (Note: TV must be set to Video #1 for DVD to work) 2. To view TV, push the TV/Video button to switch between TV and DVD(Video). 3. To view movies select DVD, from the on screen menu. 4. The DVD buttons on the remote will now operate all the functions of the DVD. RETURN TO MENU Dash Mounted DVD Player Components shown here may vary from what you have installed in your vehicle. See manufacturers literature for operating instructions on your specific component To view the TV, the DVD Player must be turned on. Next set the DVD to TV by using the remote control. RETURN TO MENU 25 Load Shed & High Idle Charge Protection Operating Procedures Load Shed System Reference Guide The Load Shed portion of your vehicles Charge Protection System, is engaged by pressing the switch marked “Load Shed” on the dash. Once engaged, this system monitors system voltage and automatically shuts down vehicle functions as necessary, to maintain the proper specified voltage levels. This system is automatic and not adjustable. It is recommended that the Load Shed system be enabled at all times. NOTE: The light on this switch will only be illuminated if the system is actively monitoring and turning off systems to conserve voltage. See your INTERNATIONAL manual for specific details. Manual High Idle System Reference Guide SPSC (Stationary Pre-Set Speed Controls) THIS SYSTEM OFFERS PRE-PROGRAMED SETTINGS FOR MANUAL HIGH IDLE CHARGE PROTECTION Note: This means, if all vehicle enabling conditions are met, Manual High Idle Charge Protection mode can be engage. ENABLING CONDITIONS: Parking brake set Gear shift lever in PARK Foot off service brake Foot off accelerator Brake lights connected and functional TO ACTIVATE HIGH IDLE CHARGE PROTECTION Do the following: Press the “ON” position on the left side CRUISE/THROTTLE - ON/OFF switch. This feature provides two different predetermined speeds which are selected with the SET/CRUISE or RESUME/ACCEL positions. You need to know which position to use for your specific need. Press the right side SET/CRUISE or RESUME/ACCEL switch for the desired pre-set speed Press the switch that selects the desired speed. To select the other speed, press the other switch. The engine will immediately return to idle. You must press the switch a second time to go to the second speed. This is done to protect equipment from being inadvertently operated at the wrong speed. TO DEACTIVATE HIGH IDLE CHARGE PROTECTION, Do the following: Press the “OFF” position on the left side CRUISE/THROTTLE - ON/OFF switch. (CONTINUES ON NEXT PAGE) 26 RETURN TO MENU High Idle Charge Protection Operating Controls See Section D of your INTERNATIONAL Operators Manual for specific information on the basic functions of your engine speed control system. All speed control functions are activated by using the switches on the steering wheel as shown below. The switches on the steering wheel control five (5) possible options; 1. Cruise Control. 2. Throttle. 3. Stationary Variable Speed. 4. Stationary Pre-Set Speed. 5 Mobile Variable Speed. The Stationary Pre-Set Speed function is used to provide High Idle Charge Protection Refer to your INTERNATIONAL Operators Manual - Chassis, for complete Speed Control System instructions RETURN TO MENU 27 Battery Compartment and Under Vehicle Storage Battery Compartment Access This tray contains three (3) in-line INTERNATIONAL batteries See your INTERNATIONAL manual for specific details and specifications. 28 RETURN TO MENU Under Vehicle Storage Bin Standard on model 38 Optional on model 31 & 35 Window, Door, Mirror and Light Control Switches Door Lock and Window Control Switch If equipped, these switches allow the driver to lock/unlock doors and windows, and raise and lower windows. The passenger side may also be comparably equipped. Mirror Control Switch This rocker switch allows the operator to switch from right to left mirror. When either the right or left mirror is engaged, pressing the 4 arrow control, allows the mirror to move in 4 different directions for precise adjustment. Leaving the heated mirror switch on in hot weather may cause the mirror to crack. Door Switch This switch opens and closes the passenger door. Panel Dimmer Switch This momentary rocker switch controls and adjusts the dash cluster lights up and down eight levels of brightness. Park Light Switch This three position switch activates dash lights and exterior running lights and headlights. These 3 switches are located to the left of the steering wheel, below the dash cluster RETURN TO MENU 29 Back-Up Camera Controls and Operation 1 NOTE: To reverse image on monitor, push button on back of camera 2 3 4 5 LCD Monitor Location of the monitor may vary according to vehicle configuration System Operation Monitor Controls 1. Power Button, glows dimly when system is connected fully manual, becoming bright upon activation 2. A/B input Select Button, toggles active display between AV1 and AV2 inputs 3. Day/Night Mode Button, toggles intensity of LCD screen for day or night operation, (day=maximum intensity, night=less intensity) 4. Picture Adjustment Menu Button, accesses on-screen-display, to adjust (brightness, contrast, color, tint). Use the Volume control to adjust each up or down, as indicate by a bar graph at bottom on screen. 5. Volume Button, controls +- output volume of built-in speaker, when feature is connected. Also used in Picture Adjustment Mode. 30 Back-Up Camera (located on rear of vehicle) RETURN TO MENU This system consists of two major components: 1. The Back-Up Camera 2. LCD Monitor The system may be connected two ways: 1. Fully manual, requiring the power button on the LCD Monitor to be pushed to energize the system and activate the monitor. 2. Automatic, which activates the monitor whenever the ignition is turned to accessory or the engine is started. SEE MANUFACTURERS LITERATURE FOR ADDITIONAL INFORMATION Rear Step Operation Rear Step Switch Guard SEE MANUFACTURERS LITERATURE FOR ADDITIONAL INFORMATION Rear Step Operational Schematic For the double rear step (shown above) and the single rear step, operation is the same. The schematic (this page) explains the electrical operation of both steps. The power switch allows you to enable or disable step operation. When the step is enabled, opening the rear door automatically extends the step. Note: See Manufacturers literature regarding periodic lubrication requirements. RETURN TO MENU 31 Rear Cargo Door Micro Switch Cargo Door Micro Switch The switch is located at the rear cargo door upper hinge, shown at left and above. It operates the rear interior lights and also activates the door-ajar light on the front overhead control panel. Rear Door and Hinge Assy 32 This switch works in conjunction with the rear step, allowing the power switch (shown on previous page) to enable or disable step operation. RETURN TO MENU Foldaway Seating Fold Forward Lift Rearward Lever “A” Push/Release Lever “B” Lift Pull Towards Aisle Until Down Lock Engages Push in Lever “D” Rotate Clockwise To Lock, Counter-Clockwise to Unlock Truss Lock “C” Front To Lower 1. Rotate the Truss Lock “C” to unlock the assembly, then push Lever “D” and pull the top of the seat toward the aisle until it is locked in the down position. 2. Push lever “A” forward, and lift the back cushion until the lever “A” has snapped back into the locked position. To Raise 1. Push lever “A” forward, and fold the back cushion down against the seat cushion until lever has snapped back into locked position. 2. Push lever “B” upward, and lift the seat into the fold away position, and rotate the Truss Lock “C” to lock the assembly in place. RETURN TO MENU 33 Bus Passenger Seating Bus seating is mounted into the floor of the vehicle as shown in the photos to the left and right To move seating: 1. Remove the black plastic track cover, so the track is exposed. 2. Next remove the nut from the base. NOTE: Nut must be horizontal with the track when the seat is re-attached to the seat track. CAUTION: Bolts must be torqued to 35 ft... Lbs. Standard seating installation, 31’ & 35’ models only AMAYA seating installation, 38’ model only Caution: When Adding Seating, Do Not Exceed Weight Distribution/Payload Limitations 34 RETURN TO MENU Optional Stainless Steel Wheel Liners CAUTION! Wheel liners should only be removed using the Wheel Liner Tool provided with your vehicle. Damage could occur if the supplied tool is not used. Lug Jam Nut Cover Assy Pop Out Center Wheel Liner Tool Front Wheel Hub Center Emblem Turn Installation Tool INSTALLATION - REMOVAL INSTRUCTIONS NOTE: When removing or installing, never remove the original equipment lug nuts. 1. TO REMOVE, simply place the Wheel Liner Tool over the Jam Nut Covers. 2. Remove Jam Nut Covers from each wheel and remove Liners 1. TO INSTALL, determine the correct placement of liners for proper hand hole alignment. 2. Install Liner over studs, then install Jam Nut Covers w/built-in jam nuts onto the studs. Using the Wheel Liner Tool, tighten all Jam Nuts SEE MANUFACTURERS LITERATURE FOR ADDITIONAL INFORMATION RETURN TO MENU Front Wheel Liner Lug Jam Nut Cover Assy Hub Center Emblem Rear Wheel Turn Installation Tool Rear Wheel Liner 35 Air Conditioning Assemblies for Models 31 & 35 ONLY ACC Front Air Conditioning This unit also provides heat when A/C is not required, by toggling switch on the dash panel Both units are operated by the driver, using the controls on the Dash Panel, see page 20 & 21. Optional ACC Rear Air Conditioning A/C only - No Heat MODEL BY BTU’S 36 FREON CHARGE 68,000 BTU Front with 40,000 BTU Rear using (Single Aux Compressor) 11.75 lbs. Model 38 Roof Top Carrier A/C (Single Aux Compressor) 11.75 lbs 68,000 BTU (Dual Aux Compressors) 5.50 lbs 40,000 BTU (Dual Aux Compressors) 6.0 lbs Model 38 Roof Top Carrier A/C (Dual Aux Compressors) 7.0 lbs. per compressor RETURN TO MENU Air Conditioning System - Roof Mounted for Model 35 & 38 Only Removing intake grille for access to filter and electrical panel . Intake grille fasteners are twist out to disengage and push in to engage. Intake Filter should be cleaned often to insure proper filtration. Fuses and relays for the A/C system are located for easy access as shown on the right. Intake grille for roof mounted A/C For schematics of wiring diagrams and fuse locations see pages 96-101 RETURN TO MENU Roof mounted A/C electrical panel located behind forward intake grille 37 Floor Heater Assembly - Optional Rear 30,000 BTU Model 65,000 BTU Model Both units are turned on when the heat mode is selected on the In Dash Control Panel (see page 20) 38 RETURN TO MENU Movable Wall, Standard - Front View (models 31 & 35 only) Caution: When Adding Seating, Do Not Exceed Weight Distribution/Payload Limitations Movable Wall shown above in the forward position RETURN TO MENU 39 Movable Wall, Standard - Rear View (models 31 & 35 only) The standard movable wall can be moved by doing the following: 1. Remove the seats from in front of the wall 2. From the baggage compartment side, remove the plastic track cover on both the side wall and floor to expose the track. 3. Disengage the top latches at the outside corners of the wall. 4. From the front side of the wall, loosen the bolts. 40 5. With assistance on both sides of the wall, push evenly on both sides and slowly move the wall to the desired position. 6. When securing wall, make sure to re torque all bolts to 35 ft.. lbs. Note: if seats are installed, seat bolts must also be torqued to 35 ft.. lbs. 7. Replace all plastic track covers and engage top latches. RETURN TO MENU Movable Wall (E-Z Move) - Open Front Caution: When Adding Seating, Do Not Exceed Weight Distribution/Payload Limitations E-Z M o v e Wa l l O p e r a t i n g I n s t r u c t io n s Movable Wall to the open position (with luggage compartment) 1) Release the top two clamps located on the ceiling. 2) Enter bus through the rear door and release bottom clamp 3) Push the movable wall at the upper most centrally located handle to the stop 4) Release the divider clamp and slide out each divider half. Rotate the clamp assembly into the seat track and engage clamps. SAFETY ALERT 5) Engage the top two clamps into the locked position SAFETY ALERT SAFETY ALERT Clamps must be locked down before operating vehicle Movable Wall to the closed position (no luggage compartment) 1) Release the top two clamps located on the ceiling. 2) Enter bus through the rear door. 3) Release and rotate the clamp assembly (divider) out of the seat track. Slide the divider to the stop and engage the divider clamp to lock down the dividers. 4) Pull the movable wall at the upper most centrally located handle to the stop. 5) Engage the bottom clamp into the receiver located in the floor. SAFETY ALERT 6) Close the rear door. Enter the bus, walk to the rear and engage the top two clamps into the locked position. SAFETY ALERT SAFETY ALERT Clamps must be locked down before operating vehicle. RETURN TO MENU 41 Movable Wall (E-Z Move) - Open Rear To Open and Close E-Z Move Wall Instructions for Opening and Closing the E-Z Move Wall shown on the previous page, may also be found mounted on the back of the Movable Wall. Follow the instructions for Open Position - (with luggage compartment) or Close Position - (no luggage compartment) SAFETY ALERT: ALL CLAMPS MUST BE LOCKED DOWN BEFORE OPERATING VEHICLE 42 RETURN TO MENU Movable Wall (E-Z Move) - Clamp Assemblies LH & RH Lower Clamp Assembly ( LH shown) Center Lower Clamp Assembly LH & RH Ceiling Clamp Assembly (RH shown) SAFETY ALERT: ALL CLAMPS MUST BE LOCKED DOWN BEFORE OPERATING VEHICLE RETURN TO MENU 43 Single Plug Door - Air Operated 4-Way Valve Closing Cushioning Valve Closing Speed Valve Opening Speed Valve Opening Cushioning Valve CAUTION! Never attempt adjustment of the Boomerang Arm, call KRYSTAL SERVICE Air Door Speed Adjustment Procedure Single Plug Door System (door shown partially open) Secondary Entry Door Switch - used on air operated door systems, located on passenger door post 1. Remove the air motor cover located in the stepwell. 2. Using the photo on this page, identify the speed control valves. Using a 3/8” wrench, loosen the locknuts on both valves. 3. Operate the door and adjust both valves until the opening and closing speeds are equal and acceptable. Then tighten both locknuts. 4. Using a flat blade screwdriver, adjust the opening and closing cushioning valves on the air motor, then replace cover. 44 RETURN TO MENU Compressed Air Schematic - Single Plug Door DETAIL FOR 2005 & NEWER MODELS 4 WAY SOLENOID VALVE DOOR SWITCH ELECTRONIC PANEL AIR PILOT LOCATED AT STEPS CLOSE VALVE (CUSHIONING) YELLOW BLUE RED TEE DETAIL FOR 2004 & OLDER MODELS CLOSE DOOR MOTOR 4 WAY SOLENOID VALVE DOOR SWITCH ELECTRONIC PANEL LOCATED AT STEPS OPEN YELLOW CLOSE VALVE (CUSHIONING) RED SPEED CONTROL VALVES OPEN VALVE (CUSHIONING) CLOSE EMERGENCY RELEASE IN OUT BLUE DOOR MOTOR OPEN SPEED CONTROL VALVES OPEN VALVE (CUSHIONING) FROM INTERNATIONAL AIR TANK RETURN TO MENU 45 Single Plug Door with Air Operated Lower Step CAUTION! Never attempt adjustment of the Boomerang Arm, call KRYSTAL SERVICE DOOR 4-Way Valve STEP Air Pressure Regulator STEP 4-Way Valve DOOR Closing Speed Valve DOOR Closing Cushioning Valve DOOR Opening Speed Valve DOOR Opening Cushioning Valve Air Door Speed Adjustment Procedure Single Plug Door System With Extended Lower Step Note! Emergency override prevents door from opening if Lower Step Fails To Deploy Secondary Entry Door Switch - used on air operated door systems, located on passenger door post 1. Remove the air motor cover located in the stepwell. 2. Using the photo on this page, identify the speed control valves. Using a 3/8” wrench, loosen the locknuts on both valves. 3. Operate the door and adjust both valves until the opening and closing speeds are equal and acceptable. Then tighten both locknuts. 4. Using a flat blade screwdriver, adjust the opening and closing cushioning valves on the air motor, then replace cover. 46 RETURN TO MENU Lower Step Adjustment Procedure and Door/Step Air Schematic Air Operated Step Adjustment Procedure 1. Remove the air motor cover located in the stepwell, and remove air step cover from the underside of air step. 2. Locate the speed control valves on the cylinder located on the underside of the air step. Using a 3/8” wrench, loosen the locknuts on both valves. 3. Check air pressure on guage to verify operating pressure is between 60 psi minimum and 80 psi maximum. 4. Operate the door and adjust both speed control valves until the extension and retraction speeds are equal and acceptable. Then tighten both locknuts, and replace both covers. SINGLE PLUG DOOR AND LOWER STEP AIR SCHEMATIC RETURN TO MENU 47 Double Plug Door - Air Operated ATTN: Double Plug Air Door Speed Is Factory Set CAUTION! If adjustments become necessary, do not attempt adjustments. Contact the Krystal Service Dept., at 1-800-Krystal (579-7825) The Emergency Release Valve System - (must be checked on a daily basis) Once the emergency release valve has been actuated (by turning counter clockwise), it should be possible to open the doors by pushing outward with your hand after about 5 seconds. Caution! UNDER EMERGENCY SITUATIONS, (IF EQUIPPED) THE BOTTOM AIR STEP WILL NOT DEPLOY. The Obstruction Sensing System (Sensitive Edge) - (must be checked on a daily basis) Only when the door is closing, can reversing be actuated. The reversing motion should be shut off about 10 to 30 mm before the final closing position. If the reversing process actuates too late, the sensitivity of the differential pressure switch would require re-adjustment. Do not attempt adjustment, call the KRYSTAL SERVICE DEPT. 48 RETURN TO MENU Double Plug Door - Air Operated Secondary Entry Door Switch, used on air operated double plug door systems, is located on the indash control panel as shown on page 20-21 Double Plug Door System (doors shown partially open) RETURN TO MENU 49 Electric Swing Door System Electric door motor Cover For removal of door motor cover 1. Remove black rubber strip from molding channel 2. Remove exposed screws in aluminum channel 3. Remove screws from 3 corners of cover EMERGENCY EXIT PUSH HANDLE LEFT PUSH DOORS OUT EMERGENCY EXIT PUSH HANDLE LEFT PUSH DOORS OUT Emergency Exit Lever Decal Electric door motor with control arm NOTE: LEVER MUST BE CHECKED DAILY, PRIOR TO VEHICLE OPERATION Electric Door Adjustment Procedure Door Speed Is Factory Set If adjustments become necessary, do not attempt adjustments. Contact the Krystal Service Dept., at 1-800-Krystal (579-7825) 50 RETURN TO MENU Electric Swing Door System Any concerns regarding door operation, such as opening or closing speed, or nonoperation, should be directed to the Krystal Service Department. Never attempt any adjustments on any portion of this door assembly. RETURN TO MENU 51 Wheelchair Lift - Rear Door, BRAUN Lift Motor Assy User Instructions Passenger Loading and Unloading Do not exceed the 800 pound load capacity of the lift. Prior to lift operation, the lift should be inspected for proper function. If any problems exist, DO NOT USE LIFT. Contact Braun Corp. at 1-800-THE LIFT for repair. Passengers loading from the ground level, should back onto the platform. All passengers loading onto the platform, should be positioned fully within the yellow boundaries, facing outward from the vehicle, with the wheelchair locks locked, gripping handrails if able. Electric wheelchairs should be turned off. UNFOLD The UNFOLD function deploys the lift from the upright position, with the platform extended flat at floor level, with the roll stop vertical. FOLD The FOLD function raises the lift from the horizontal floor level position, bringing the platform back to a full upright position DOWN The DOWN function lowers the platform to the ground level, and extends the roll stop to a flat position, for wheelchair egress. UP The UP function raises the roll stop to full vertical position, before raising the platform from ground level to the floor level position for unloading. CAUTION! Back-up Pump Lift Control Pump Handle Never raise or lower lift if roll stop is malfunctioning CAUTION! YOU MUST READ AND UNDERSTAND THE MANUFACTURERS OPERATORS MANUAL BEFORE EVER OPERATING THIS LIFT Release Valve 52 RETURN TO MENU Wheelchair Lift - Rear Door, BRAUN Lift Closed Lift Extended Lift Lowered Emergency Back-Up Operation In the event of an electrical system failure, this lift system provides for full manual operation. Locate the back-up pump release valve, and the hand pump handle on the motor housing. To Unfold the Platform 1. Place the slotted end of the pump handle onto the back-up pump release valve, and turn counterclockwise until the platform reaches floor level. 2. Turn the release valve clockwise to stop the platform (make sure valve is tight but not over tight) To Lower Platform and Roll Stop 1. Repeat step 1 in the previous procedure to lower the lift to the ground level. To Fold Roll Stop and Raise Platform 1. Place the slotted end of the pump handle onto the back-up pump release valve, and turn clockwise to close valve. 2. Insert handle into back-up pump, and pump until platform reaches floor level. To Fold Platform Up 1. Repeat step 2 above until fully upright. Note: Refer to Operator’s Manual for Detailed Operating & Maintenance Procedures RETURN TO MENU 53 Wheelchair Lift - Rear Door, RICON Lift Motor Assy ATTENTION! Lift needs service, when green light is continuously lit, Basic User Instructions Passenger Loading and Unloading Do not exceed the 800 pound load capacity of the lift. Prior to lift operation, the lift should be inspected for proper function. If any problems exist, DO NOT USE LIFT. Contact Ricon Corp. at 1-818-322-2884 for repair. Passengers loading from the ground level, should back onto the platform. All passengers loading onto the platform, should be positioned centrally on the platform, facing outward from the vehicle, with the wheelchair locks locked, and restraint belt fastened. Electric wheelchairs should be turned off. UNFOLD The UNFOLD function deploys the lift from the upright position, with the platform extended flat at floor level, with the roll stop vertical. FOLD The FOLD function raises the lift from the horizontal floor level position, bringing the platform back to a full upright position DOWN The DOWN function lowers the platform to the ground level, and extends the roll stop to a flat position, for wheelchair egress. UP The UP function raises the roll stop to full vertical position, before raising the platform from ground level to the floor level position for unloading. CAUTION! Back-up Pump Pump Handle (not shown) 54 Lift Control Release Valve Never raise or lower lift if roll stop is malfunctioning CAUTION! YOU MUST READ AND UNDERSTAND THE MANUFACTURERS OPERATORS MANUAL BEFORE EVER OPERATING THIS LIFT RETURN TO MENU Wheelchair Lift - Rear Door, RICON Lift Closed Lift Extended Lift Lowered Emergency Back-Up Operation In the event of an electrical system failure, this lift system provides for full manual operation. Locate the back-up pump release valve, and the hand pump handle on the motor housing. To Deploy the Platform 1. Place the slotted end of the pump handle onto the back-up pump release valve, and turn counterclockwise ¼ turn until the platform reaches floor level. 2. Turn the release valve clockwise to stop the platform (make sure valve is tight but not over tight) To Lower Platform and Roll Stop 1. Repeat step 1 in the previous procedure to lower the lift to ground level. To Fold Roll Stop and Raise Platform 1. Place the slotted end of the pump handle onto the back-up pump release valve, and turn clockwise to close valve. 2. Insert handle into back-up pump, and pump until platform reaches floor level. To Stow Platform Up 1. Repeat step 2 above until fully upright. Note: Refer to Operator’s Manual for Detailed Operating & Maintenance Procedures RETURN TO MENU 55 Chassis Specification - Standard 3200 for Model 31 & 35 56 Chassis International 3200 GVWR - Total 23,880 lbs Front Axle Capacity 8,000 lbs Front Springs Capacity 8,000 lbs Rear Suspension INTERNATIONAL AIR RIDE - 20,000 lbs Rear Axle Capacity 17,500 lbs Rear Axle Ratio 4.63 Shock Absorbers Gas Filled Engines DT466 Turbo Diesel - 210HP Fast Idle Controller Standard INTERNATIONAL Transmission Allison 2200 PTS Series Electronic 5-Speed Automatic Alternator 270 Amp Leece-Neville Batteries - Chassis 3 - 12 Volt, 1950 CCA Steering Power Assisted Steering Column Locking, Energy Absorbing, Tilt w/ Cruise Control Brakes 4 Wheel ABS Power Disc Brakes w/Air Actuated Parking Brake Fuel Tank 65 Gallon RETURN TO MENU Chassis Specification - Standard 3200 for Model 31 & 35 Cab Paint 9219 White Glass Tinted All Windows Doors Power Door Locks - Power Windows Lights Halogen Sealed Beam Headlights Air Conditioner Cab 23,000 BTU INTERNATIONAL with R-134a Heater/Defroster 4-Speed Fan Safety 3-Point Shoulder/ Lap Belts Air Bags Driver Safety Restraint System Windshield Wipers Intermittent Gauges/Instrumentation Voltmeter, Oil Pressure, Temperature, Fuel Gauge, Speedometer, Tachometer, Air Pressure Gauges Mirrors Power Remote with Heated Element Tires 245/70R19.5F 12Ply All-Season Radial Wheels 19.5” x 7.5”, 8 - Hole, Stamped Steel Wheelbase 31= 218” RETURN TO MENU 35= 254” 57 Standard Equipment on 3200 Model 31 & 35 • • • • • • • • • • • • • • • • • • • • 58 DT466 Turbo Diesel Engine 210HP Power Steering 4-Wheel ABS Power Disc Brakes Heavy Duty Dual Batteries Allison 5-Speed Auto Transmission International Air Ride Rear Suspension 245/70R19.5F All Season Radial Tires 50 States Emissions 65 Gallon Fuel Tank Adjustable Tilt Steering Wheel Cruise Control Engine Oil Cooler Transmission Oil Cooler Automatic High Idle Controller Drive Shaft Guards .063 Aluminum Exterior Side Walls Welded Steel Cage Frame Cab Running Boards Air Ride Drivers Seat Captains Chairs - Co-Pilot • • • • • • • • • • • • • • • • • • • 3/4” Resin Laminated Floor 2” Fiberglass Insulation Commercial Grade Carpet Ribbed Rubber Center Aisle Mid-High Seats with Level 3 Fabric 68,000 BTU A/C System w/Dual Compressors AM/FM Stereo Cassette - In Dash Power Cab Door Locks Power Cab Windows Back-up Alarm Valance Lighting Single Plug Air Actuated Sedan Entry Door Full Body Undercoating Base White Body Color Power Remote/Heated Mirrors GL20 80% Tinted Windows w/UV Protection 270 Amp Leece-Neville Alternator Movable Luggage Partition Rear Luggage Door w/Electric Step RETURN TO MENU Chassis Specification - Standard 3200 for Model 38 GVWR - Total 27,500 lbs Front Axle Capacity 10,000 lbs Front Springs Capacity 10,000 lbs Rear Suspension INTERNATIONAL AIR RIDE - 20,000 lbs Rear Axle Capacity 17,500 lbs Rear Axle Ratio 4.11 with DT466 Engine Shock Absorbers Gas Filled Engines DT466 In-Line 6 cylinder Turbo Diesel - 245HP Fast Idle Controller Standard INTERNATIONAL Transmission Allison 3000 PTS Series Electronic 5-Speed Automatic Alternator 270 Amp Leece-Neville Batteries - Chassis 3 - 12 Volt, 1950 CCA Steering Power Assisted Steering Column Locking, Energy Absorbing, Tilt w/ Cruise Control Brakes S-Cam Air Brake System with ABS Fuel Tank 65 Gallon MODEL 38 SPECICICATIONS CONTINUED ON PAGE 58 RETURN TO MENU 59 Chassis Specification - Standard 3200 for Model 38 60 Cab Paint 9219 White Glass Tinted All Windows, Power Assisted Door Lights Halogen Sealed Beam Headlights Doors Power Door Locks - Power Windows Air Conditioner Cab - 23,000 BTU INTERNATIONAL Heater/Defroster 4-Speed Fan Safety 3-Point Shoulder/ Lap Belts Air Bags Driver Safety Restraint System Windshield Wipers Intermittent Gauges/Instrumentation Voltmeter, Oil Pressure, Temperature, Fuel Gauge, Speedometer, Tachometer, Air Pressure Gauges Mirrors Power Remote with Heated Element Tires 245/70R19.5F 16 PLY All Season Radial Wheels 19.5” 8 - Hole, 8-Lug Steel Wheelbase K38 - 291” RETURN TO MENU Standard Equipment on 3200 Model 38 • • • • • • • • • • • • • • • • • • • • • DT466 6cyl. Turbo Diesel Engine 245HP Power Steering Full Air Brake System w/ABS 3 Heavy Duty INTERNATIONAL Batteries Allison 5-Speed Auto Transmission International Air Ride Rear Suspension 245/70R19.5F All Season Radial Tires 50 States Emissions 65 Gallon Fuel Tank Adjustable Tilt Steering Wheel Cruise Control Engine Oil Cooler Transmission Oil Cooler Automatic High Idle Controller Drive Shaft Guards .063 Aluminum Exterior Side Walls Welded Steel Cage Frame Cab Running Boards Air Ride Drivers Seat Captains Chairs - Co-Pilot 3/4” Resin Laminated Floor • • • • • • • • • • • • • • • • • • • • • 2” Fiberglass Insulation Dual Overhead Racks w/Reading Lamps Smooth Rubber Flooring w/Ribbed Center Aisle Amaya Coach Seating 165,000 BTU Ducted Roof A/C System AM/FM Stereo w/CD Player - In Dash TV VCP Package Power Cab Door Locks Power Cab Windows Back-up Alarm Paging System Single Plug Air Actuated Sedan Entry Door Full Body Undercoating Base White Body Color Power Remote/Heated Mirrors Frameless Panoramic View Windows 270 Amp Leece-Neville Alternator S/S Wheel Inserts Rear Luggage Partition-Permanent Rear Luggage Door w/Electric Step Under Vehicle Storage Bins RETURN TO MENU 61 General Vehicle Dimensional Specifications-Body & Chassis by Model Features Models GVWR 31W 35 35W 38 25,500 lbs 25,500 lbs 25,500 lbs 25,500 lbs 27,500 lbs 218” 218” 254” 254” 291” Overall Length 30’ 10” 30’ 10” 34’ 4” 34’ 4” 38’ Turning Radius 29’ 1” 29’ 1” 33’ 2” 33’ 2” 37’ 6” Interior Height 76.5” 76.5” 76.5” 76.5” 75” Interior Body Length (without Luggage) 262” 262” 302” 302” 330” Interior Body Length (with Luggage) 224” 224” 258” 258” 286” Depth of Luggage Compartment 38” 38” 44” 44” 44” 30½” x 64½” 30½” x 64½” 30½” x 64½” 30½” x 64½” 30½” x 64½” Clear Door Opening - Single Plug 32½” x 81” 32½” x 81” 32½” x 81” 32½” x 81” 32½” x 81” Clear Door Opening - Double Plug 40½” 40½” 40½” 40½” 40½” Clear Door Opening - Swing Doors 42” 42” 42” 42” 42” Clear Door Opening - Wheelchair Lift Door N/A 42” x 73¾” N/A 42” x 73¾” N/A Exterior Height 124” 124” 124” 124” 124” Exterior Width (excluding Mirrors) 102” 102” 102” 102” 102” Exterior Width (including Mirrors) 120” 120” 120” 120” 120” Wheelbase Clear Door Opening - Luggage Door 62 31 RETURN TO MENU General Vehicle Dimensional Specifications-Body & Chassis by Model (cont) Features Models 31 31W 35 35W 38 Interior Width - at Floor 89½” 89½” 89½” 89½” 89½” Interior Width - at Shoulder 94½” 94½” 94½” 94½” 96” 18” 18” 18” 18” 18” 26½ ” 36½” 26½” 26½: 27½” 18” 18” 18” 18” 18” Front of Seat Cushion to Seat Back 27½” 27½” 27½” 27½” 27½” Floor Height from Ground at Rear Aisle Width Hip to Knee Seat Cushion Length 37½” 37½” 37½” 37½” 37½” 1st Step from Ground 14” 14” 14” 14” 14” Riser Height 11” 11” 11” 11” 11” Step Height 11½” 11½” 11½” 11½” 11½” RETURN TO MENU 63 General Body Materials and Construction Measurements Size of Steel Tubing used in Body Sidewall & Roof Structure Center line Spacing of Tubing used in Body Sidewall & Roof Structure Wall Thickness of Steel Tubing used in Body Sidewall & Roof Structure Thickness of Aluminum Sidewall & One Piece Aluminum Roof Size of Steel Tubing used in Main Floor Structure Center line Spacing of Tubing used in Floor Structure Wall Thickness of Steel Tubing used in Floor Structure Thickness of Double Backed Insulated Fiberglass Batting Insulation Window Size - KK31 & KK35 Window Size - KK38 64 RETURN TO MENU 1” x 1½” 30” .095 .063 2” x 4” 24” .120 2” 32” x 40” 45” x 41” Vehicle Manufacturers Identification Label Model 31 & 35 K 19.5x7.5 INTERNATIONAL 25500 11567 8000 3629 245/70R19.5F 100 17500 245/70R19.5F 19.5x7.5 LABEL EXPLANATION 690 7938 DUAL 690 100 Model 38 K INTERNATIONAL 27500 12474 10000 4536 245/70R19.5 F 120 19.5x7.5 175000 245/70R19.5F 19.5X7.5 830 7938 100 DUAL 690 K # - This is your permanent Krystal Vehicle Identification number. VIN # - This is your DMV Vehicle Identification Number. GVWR -This is the gross rated capacity of your vehicle GAWR Front -This is the rated capacity of the front axle GAWR Rear -This is the rated capacity of the rear axle Date Incomplete Vehicle Manufactured This is the date the chassis was produced by INTERNATIONAL Date Of Manufacture by Krystal - This is the date the vehicle was completed by KRYSTAL. Paint Code - This is the master number for the paint specification and color used on your vehicle. Tires, Rims - This indicates the required tire and rim sizes, and air capacities for your specific vehicle. RETURN TO MENU 65 GENERAL PREVENTATIVE MAINTENANCE INFORMATION Please familiarize yourself with all INTERNATIONAL Manuals that have been provided with your new vehicle. They detail specific components, and specify how they are to be properly maintained. Both INTERNATIONAL and Krystal recommend that you study your manuals carefully before ever attempting to operate this vehicle for the first time. IMPORTANT The information contained in this section of your Krystal Owners Manual does not supersede any information that relates to a specific component of the INTERNATIONAL portion of your vehicle. REGARDING THE INTERNATIONAL PORTION OF YOUR VEHICLE: ANY PROCEDURE REFERENCED IN THE FOLLOWING PREVENTATIVE MAINTENANCE SECTION OF THIS MANUAL, SHOULD ALWAYS BE REFERENCED TO THAT SPECIFIC PORTION OF YOUR INTERNATIONAL CHASSIS OPERATORS MANUALS, SEE MAINTENANCE & SPECIFICATIONS - SECTION “E” OF YOUR INTERNATIONAL CHASSIS MANUAL. LUBRICATION AND MAINTENANCE INTERVALS After a vehicle is placed in operation, Regular Lubrication and Maintenance Intervals should be established, based upon the type of service and road conditions that the vehicle will be subjected to, such as; ON HIGHWAY, CITY, OR SEVERE SERVICE. 66 RETURN TO MENU PREVENTATIVE MAINTENANCE SCHEDULE The following Maintenance Schedules are provided as a convenient reference for the specified systems and components which require periodic service. These schedules are not intended to be a complete list of all possible services to be performed on a regular basis, nor is it suggested that more frequent services not be considered. Because of the different types of operations coaches are subjected to, the severity of service must be considered when establishing maintenance intervals. Therefore, any such intervals given in the following schedule must be adjusted according to the specific type of operation in which your particular vehicle will be used. The intervals given include those recommended by Krystal Enterprises, Inc., and those recommended by INTERNATIONAL Truck and Engine Corporation. The recommendations should be considered as maximum intervals. It should be noted that maintenance inspection and service operations of shorter intervals are always preferable to longer intervals. Check your INTERNATIONAL Engine and Chassis Operation and Maintenance Manual for additional specific information not covered in this section of your Krystal Operators Manual. RETURN TO MENU 67 MAINTENANCE OPERATIONS FOR THE DT466 ENGINES Inspection Intervals (whichever Miles, Kilometers, Hours, Months occurs First) OP NO. Maintenance Operation D a i l y 1 check oil level 1 ■ 2 check coolant level 1 ■ 3 drain water separator(fuel system) 1,2 ■ 4 inspect air to air cooler 1 ■ 5 inspect for external leakage1 ■ 6 inspect air restriction indicator 3 ■ 7 inspect belt 1 ■ 8 change engine oil & filter 4 Refer to Op 8 page 81 9 check coolant SCA concentration (conventional coolant only) 1 ■ 10 inspect air intake piping and clamps 1 ■ Every 21.100 km(15,000 miles), 550 hours, 6 months Every 43,000 km, 30,000 miles, 1100 hours, 12 months Every 24 months Every 193,100 km, 120,000 miles, or 5000 hours Every 290,000 km, 180-200,000 miles, or 6700 - 7500 hours Annually See page 68 for specific explanation of Notes 68 RETURN TO MENU Every 322,000 km, 200,000 miles, or 3800 hours or 2 years Every 241,000 km, 150,000 miles, or 6000 hours, or 2 ½ years Every 500,000 km, 300,000 miles, or 12,000 hours, or 5 years MAINTENANCE OPERATIONS FOR THE DT466 ENGINES Inspection Intervals (whichever Miles, Kilometers, Hours, Months occurs First) OP NO. Maintenance Operation 11 measure air intake restriction 1,3,5 ■ 12 change fuel filters 6 ■ 13 change coolant filter (if equipped) 7,9 ■ 14 pressurize induction system 1,5 15 inspect vibration damper 1,8 ■ 16 adjust valve lash 5,8 ■ 17 measure crankcase pressure 5 ■ 18 inspect turbo 1 ■ 19 inspect electrical system 1 20 service cooling system 7 21 extended life coolant 9 D a i l y Every 21.100 km(15,000 miles), 550 hours, 6 months Every 43,000 km, 30,000 miles, 1100 hours, 12 months Every 24 months Every 193,100 km, 120,000 miles, or 5000 hours Every 290,000 km, 180-200,000 miles, or 6700 - 7500 hours Annually Every 322,000 km, 200,000 miles, or 3800 hours or 2 years Every 241,000 km, 150,000 miles, or 6000 hours, or 2 ½ years Every 500,000 km, 300,000 miles, or 12,000 hours, or 5 years ■ ■ ■ ■ ■ (green) ■ (red) ■ See page 68 for specific explanation of Notes RETURN TO MENU 69 DETAILED MAINTENANCE NOTES FOR THE DT466 ENGINES PLEASE REFER AS NECESSARY OR AS REQUIRED TO YOUR INTERNATIONAL Engine Operation and Maintenance Manual for detailed explanations 1. 2. 3. 4. 5. 6. 7. 8. 9. 70 Correct if necessary If equipped Service Air Cleaner elements as required If fuel contains more than 0.05% sulfur, reduce oil change intervals, see page 81 of your INTERNATIONAL Engine Operation and Maintenance Manual Refer to current Engine Diagnostic Manual sections in your INTERNATIONAL Engine Operation and Maintenance Manual Change according to transfer pump minimum specifications Refer to appropriate manual charts in Section 6 of your INTERNATIONAL Engine Operation and Maintenance Manual for cooling system maintenance schedules Refer to EGES-210, DT466 and DT530 Diesel Engine Service Manual - Latest Revision Extended life coolant does not require a filter. If a filter is installed, only a blank filter containing no supplemental coolant should be used. RETURN TO MENU THIS PAGE IS INTENTIONALLY BLANK RETURN TO MENU 71 PREVENTIVE MAINTENANCE SCHEDULE SPECIAL INSTRUCTIONS/SUGGESTIONS It is strongly suggested that the following items always be observed or acted upon at every established maintenance interval or as otherwise specified by INTERNATIONAL and/or Krystal Enterprises. Air Conditioning - serviced each spring Front Axle - complete inspection, lubrication and adjustments Rear Axle - complete inspection, re-torquing, replace worn parts Air Brakes System - inspect, clean, lubricate and adjust all components Desiccant Air Dryer - replace every 12 months Hydraulic Brakes - inspect, clean, lubricate, replace fluid, shoes, linings Catalytic Converter - check for proper function Air Induction System - inspect complete system every 12 months Chassis Mounted Charge Air Cooler - inspect daily Cooling System - inspect coolant level daily, Note special instructions for Extended Life Coolant Fan Clutch - inspect every spring Fuel System - inspect accelerator and system components frequently Propeller Shaft - at regular lubrication intervals, all components should be inspected 72 RETURN TO MENU KRYSTAL RECOMMENDED PREVENTIVE MAINTENANCE SCHEDULE THE FOLLOWING PAGES SPECIFY THE MINIMUM REQUIREMENTS NECESSARY TO PROPERLY MAINTAIN YOUR VEHICLES SYSTEMS AND COMPONENTS CHECK EVERY DAY: all items on Pre-Trip inspection (see page 8 & 9) side passenger door emergency release valve operation side passenger entry door, operation, locking, damage, and adjustment emergency roof hatch emergency egress window latches function of all interior and exterior lights check all seat belts for proper operation tire pressure, Model 31 & 35 - 100 psi Frt/Rr, Model 38 - 120 psi Frt & 100 psi Rr fluid leaks from, transmission, engine, power steering, engine coolant, gear oil, fuel drain fuel filter/water separator CHECK EVERY MONTH: windshield washer fluid level door linkage and pivot arm lubrication lube rear Kwikee step, (if equipped) clean air intake filter for A/C system tires for wear, and tread depth RETURN TO MENU 73 KRYSTAL RECOMMENDED PREVENTIVE MAINTENANCE SCHEDULE AT 5,000 MILES/600 HOURS DO THE FOLLOWING: inspect tires for wear and inspect tread depth rotate tires re-inspect torque settings on International Air Ride Suspension System lube door seals with silicon spray, check for proper sealing lube Vapor door rotary drive mechanism check the torque of all door hardware on Vapor door systems AT 10,000 MILES/1200 HOURS DO THE FOLLOWING: inspect tires for wear and inspect tread depth rotate tires clean battery terminals check the torque of all door hardware on Vapor door systems AT 15,000 MILES/1800 HOURS DO THE FOLLOWING: inspect tires for wear and inspect tread depth rotate tires inspect steering linkage, suspension, ball joints, drive shafts, and drive shaft guards inspect engine cooling system and hoses inspect brake system inspect exhaust system and heat shields inspect automatic transmission fluid and external filter element check wheels for end play and noise 74 RETURN TO MENU KRYSTAL RECOMMENDED PREVENTIVE MAINTENANCE SCHEDULE inspect and lubricate steering idler arms replace cabin air filter, if equipped inspect half shaft boots, if equipped re-inspect torque settings on International Air Ride Suspension System clean air compressor intake filter lube door seals with silicon spray, check for proper sealing check air system for leaks, and electrical connections lube Vapor door rotary drive mechanism check the torque of all door hardware on Vapor door systems AT 20,000 MILES/2400 HOURS DO THE FOLLOWING: inspect tires for wear and inspect tread depth rotate tires clean battery terminals check the torque of all door hardware on Vapor door systems AT 25,000 MILES/3000 HOURS DO THE FOLLOWING: inspect tires for wear and inspect tread depth rotate tires check the torque of all door hardware on Vapor door systems clean condenser coils RETURN TO MENU 75 KRYSTAL RECOMMENDED PREVENTIVE MAINTENANCE SCHEDULE AT 30,000 MILES/3600 HOURS DO THE FOLLOWING: inspect tires for wear and inspect tread depth rotate tires inspect steering linkage, suspension, ball joints, drive shafts, and drive shaft guards inspect engine cooling system and hoses inspect brake system inspect exhaust system and heat shields change automatic transmission fluid and external filter element check wheels for end play and noise inspect and lubricate 4 x 2 ball joints inspect and lubricate steering idler arms replace cabin air filter, if equipped inspect half shaft boots, if equipped clean air compressor intake filter clean battery terminals lube door seals with silicon spray, check for proper sealing re-inspect torque specifications on INTERNATIONAL Suspension System check air system for leaks, and electrical connections lube Vapor door rotary drive mechanism check the torque of all door hardware on Vapor door systems inspect drive belts and replace if necessary 76 RETURN TO MENU KRYSTAL RECOMMENDED PREVENTIVE MAINTENANCE SCHEDULE AT 35,000 MILES/4200 HOURS DO THE FOLLOWING: inspect tires for wear and inspect tread depth rotate tires check the torque of all door hardware on Vapor door systems AT 40,000 MILES/4800 HOURS DO THE FOLLOWING: inspect tires for wear and inspect tread depth rotate tires clean battery terminals check the torque of all door hardware on Vapor door systems AT 45,000 MILES/5400 HOURS DO THE FOLLOWING: inspect tires for wear and inspect tread depth rotate tires inspect steering linkage, suspension, ball joints, drive shafts, and drive shaft guards inspect engine cooling system and hoses inspect brake system inspect exhaust system and heat shields check wheels for end play and noise inspect and lubricate steering idler arms replace cabin air filter, if equipped inspect half shaft boots, if equipped RETURN TO MENU 77 KRYSTAL RECOMMENDED PREVENTIVE MAINTENANCE SCHEDULE clean air compressor intake filter lube door seals with silicon spray, check for proper sealing re-inspect torque specifications on INTERNATIONAL Suspension System check air system for leaks, and electrical connections lube Vapor door rotary drive mechanism check the torque of all door hardware on Vapor door systems AT 50,000 MILES/6000 HOURS DO THE FOLLOWING: inspect tires for wear and inspect tread depth rotate tires clean battery terminals check the torque of all door hardware on Vapor door systems clean condenser coils AT 55,000 MILES/6600 HOURS DO THE FOLLOWING: inspect tires for wear and inspect tread depth rotate tires check the torque of all door hardware on Vapor door systems AT 60,000 MILES/7200 HOURS DO THE FOLLOWING: inspect tires for wear and inspect tread depth rotate tires inspect steering linkage, suspension, ball joints, drive shafts, and drive shaft guards 78 RETURN TO MENU KRYSTAL RECOMMENDED PREVENTIVE MAINTENANCE SCHEDULE inspect engine cooling system and hoses inspect brake system inspect exhaust system and heat shields change automatic transmission fluid and external filter element check wheels for end play and noise replace wheel bearing grease seal inspect and lubricate steering idler arms replace cabin air filter, if equipped inspect half shaft boots, if equipped clean air compressor intake filter clean battery terminals lube door seals with silicon spray, check for proper sealing re-inspect torque specifications on INTERNATIONAL Suspension System check air system for leaks, and electrical connections lube Vapor door rotary drive mechanism check the torque of all door hardware on Vapor door systems inspect drive belts and replace if necessary AT 65,000 MILES/7800 HOURS DO THE FOLLOWING: inspect tires for wear and inspect tread depth rotate tires check the torque of all door hardware on Vapor door systems RETURN TO MENU 79 KRYSTAL RECOMMENDED PREVENTIVE MAINTENANCE SCHEDULE AT 70,000 MILES/8400 HOURS DO THE FOLLOWING: inspect tires for wear and inspect tread depth rotate tires clean battery terminals check the torque of all door hardware on Vapor door systems AT 75,000 MILES/9000 HOURS DO THE FOLLOWING: inspect tires for wear and inspect tread depth rotate tires inspect steering linkage, suspension, ball joints, drive shafts, and drive shaft guards inspect engine cooling system and hoses inspect brake system inspect exhaust system and heat shields check wheels for end play and noise inspect and lubricate steering idler arms replace cabin air filter, if equipped inspect half shaft boots, if equipped clean air compressor intake filter lube door seals with silicon spray, check for proper sealing re-inspect torque specifications on INTERNATIONAL Suspension System lube Vapor door rotary drive mechanism check the torque of all door hardware on Vapor door systems clean condenser coils 80 RETURN TO MENU KRYSTAL RECOMMENDED PREVENTIVE MAINTENANCE SCHEDULE AT 80,000 MILES/9600 HOURS DO THE FOLLOWING: inspect tires for wear and inspect tread depth rotate tires clean battery terminals check air system for leaks, and electrical connections check the torque of all door hardware on Vapor door systems AT 85,000 MILES/10200 HOURS DO THE FOLLOWING: inspect tires for wear and inspect tread depth rotate tires check the torque of all door hardware on Vapor door systems AT 90,000 MILES/10800 HOURS DO THE FOLLOWING: inspect tires for wear and inspect tread depth rotate tires replace engine and frame mounted fuel filters inspect steering linkage, suspension, ball joints, drive shafts, and drive shaft guards inspect engine cooling system and hoses inspect brake system inspect exhaust system and heat shields check wheels for end play and noise inspect and lubricate 4 x 2 ball joints RETURN TO MENU 81 KRYSTAL RECOMMENDED PREVENTIVE MAINTENANCE SCHEDULE inspect and lubricate steering idler arms replace cabin air filter, if equipped inspect half shaft boots, if equipped clean air compressor intake filter clean battery terminals lube door seals with silicon spray, check for proper sealing re-inspect torque specifications on INTERNATIONAL Suspension System check air system for leaks, and electrical connections lube Vapor door rotary drive mechanism check the torque of all door hardware on Vapor door systems inspect drive belts and replace if necessary AT 95,000 MILES/11400 HOURS DO THE FOLLOWING: inspect tires for wear and inspect tread depth rotate tires check the torque of all door hardware on Vapor door systems AT100,000 MILES/12000 HOURS DO THE FOLLOWING: inspect tires for wear and inspect tread depth rotate tires clean condenser coils clean battery terminals check the torque of all door hardware on Vapor door systems 82 RETURN TO MENU SUPPLEMENTARY PREVENTIVE MAINTENANCE INFORMATION In addition to the required Preventative Maintenance information included in the previous schedule, the following specific exceptions should be noted. Extended Life Coolant Extended Life Coolant must have ELC extender added at 150,000 miles in order to extend the life of the coolant to 300,000 miles, 5 years, or 12,000 hours of operation. Rear Axle Lubricant: Must be changed every 18 months or 90,000 miles. Change Rear Axle Lubricant: On Dana axles using synthetic fluid, fluid must be changed every 3 years or 250,000 miles. Check your INTERNATIONAL Engine Operation and Maintenance Manual, for special operating condition maintenance requirements, that may be applicable due to your specific vehicle operating profile. RETURN TO MENU 83 User Notes - Preventive Maintenance Additional User Notes 84 Additional User Notes RETURN TO MENU Basic Troubleshooting Guide The following section details basic troubleshooting techniques that will help you to understand and determine the best course of action regarding some commonly encountered problems. PROBLEM POSSIBLE SOLUTIONS VIBRATION: Noises or Vibration at high speeds only, or in a certain range of speeds: A certain range of speeds indicates a damaged or otherwise out-of-balance drive line, Contact your nearest INTERNATIONAL DEALER. The Krystal Service Dept. can recommend one near you. REAR A/C BLOWER INOPERATIVE Check to make sure the INTERNATIONAL front A/C unit is on. Check fuses on the A/C control relay board in ceiling. If the rear A/C is still not working, call the Krystal Service Dept. MOVING CARGO PARTITION TO ADD ADDITIONAL SEATING Remove seats in front of the Partition Wall and loosen all four bolts securing the wall. Then go behind the wall and remove the channel nut on the floor, this will allow the wall to be move back and then additional seating can be installed. Note: torque Seat Bolts to 35 ft. lbs. EXTERIOR LIGHTING One or all exterior clearance lights inoperative, please refer to the INTERNATIONAL wiring schematic in the Krystal Electrical Schematic Manual. Exterior running lights work off of the Krystal relay board. SLIDER WINDOWS HARD TO OPEN AND CLOSED If any of the windows start to stick during opening or closing, simply spray both side tracks with silicone spray and work the windows a few times to lubricate the tracks. This should be done approximately every three months. RETURN TO MENU 85 Basic Troubleshooting Guide PROBLEM POSSIBLE SOLUTIONS PAGING SYSTEM INOPERATIVE Check the 15 amp fuse, on the fuse panel behind the dash cover, on the passenger side. See page 92-93 for fuse legend & location. See instructions for the paging system located on page 22. NO TELEVISION RECEPTION If the TV has power, but you cannot pickup any stations, make sure VCP mode button on the P.A. System is engaged and the VCP power button is engaged. REAR VCP & TV INOPERATIVE Check to make sure all connections on the back of both units are tight. Check the fuse located at the front face of the TV, and on the backside of the VCP. EXTERIOR SEALANTS CRACKING If the exterior seams of the bus ever crack or start lifting, simply clean OR LIFTING the area with rubbing alcohol or mineral spirits completely. After this has been done you can remove the old silicone by using a sharp knife or razor cutter. Clean the area again with the above cleaners and apply a thin bead of white exterior silicone and smooth the bead with your finger for a smooth appearance. 86 REAR ELECTRIC STEP INOPERATIVE Check to make sure the step switch is turned on. This switch is located inside the cargo area on the right hand sidewall. If this will not power up the step, call the Krystal Service Dept. The rear step should be lubricated every 30 days to ensure proper operation of the step. REAR STEREO/CD INOPERATIVE Check to make sure all connections are tight. Also remove the stereo and check the fuse located on the backside of the stereo. RETURN TO MENU Basic Troubleshooting Guide PROBLEM POSSIBLE SOLUTIONS CANNOT REMOVE WATER FROM LAVATORY Make sure fresh water tank has water in it and the water pump switch is in the on position. NOTE: Always be sure to turn the water pump switch off when not in use. Failure to do so could cause a steady drain on the auxiliary battery or could cause damage to the water pump. The fresh water fill is located under the bus at the rear of the vehicle. PASSENGER LIGHTS INOPERATIVE Check to make sure the switch on the overhead control panel is turned on. Check the fuse located on the INTERNATIONAL fuse panels behind the dash cover. (Ref. diagram on pages 92-93) BACK-UP ALARM INOPERATIVE Check to make sure reverse lights are coming on, if not, check the fuse located on the INTERNATIONAL fuse panels behind the dash cover. (Ref. diagram on pages 92-93) RETURN TO MENU 87 Troubleshooting Notes PROBLEM 88 POSSIBLE SOLUTIONS RETURN TO MENU Troubleshooting Notes PROBLEM POSSIBLE SOLUTIONS RETURN TO MENU 89 INTERNATIONAL’S Diamond Logic Electrical System This vehicle is equipped with the Diamond Logic Electrical System. This system is self diagnosing, and self monitoring, making troubleshooting and repairs quicker and faster than conventional systems. This system should only be diagnosed and repaired by authorized service centers. Any attempt by unauthorized personnel may damage your system and/or jeopardize your warranty. Your new Diamond Logic Electrical System and all component interfaces are covered by INTERNATIONAL and Krystal to provide you with seamless coverage for your electrical system. When problems arise, simply follow the procedures as outlined in the Parts-Service-Warranty section in this manual. The following pages will provide you with schematics and diagrams that can help you understand the general concept of your buses electrical components and how they are connected. These schematics and diagrams will prove helpful when trying to determine which connection is faulty and where it is located. The following pages will also provide some basic general information about your buses possible configuration, including some information which is provided in greater detail in your INTERNATIONAL product manuals. 90 RETURN TO MENU INTERNATIONAL’S Diamond Logic Electrical System STANDARD PANEL OPTIONAL PANEL Fuses and Circuit Breakers are located behind the dash cover on the passenger side, See page 92-93 for diagrams & legends. RETURN TO MENU 91 Legend for Standard Fuse & Circuit Breaker Panel F8 10A F12 30A F16 15A F3 15A 15A F7 5A F11 5A 30A F15 20A F2 F6 10A F1 5A F5 F10 5A F14 10A F9 F13 F1 ACC F2 BAT STD INST CLUSTER CB/RADIO F3 BAT STD OWNER/OPERATOR F4 BAT STD HEATER - A/C BLOWER F5 ACC STD SYS CONTROLLER / 6 SWITCH PACK F6 BAT STD KEY SWITCH / DIAG CONN F7 BAT OPT CIGAR LIGHTER F8 5A F20 10A F17 5A F19 F18 OPT OPT PANEL LIGHT BAT STD HEATER - A /C CONTROL BAT STD DOME LIGHTS / MAP LIGHT / RADIO F11 F12 10A F18 IGN NOT AVAIL F13 * OPT RIGHT MIRROR HEAT F14 BAT OPT AUX POWER SOURCE F15 BAT OPT PWR WINDOW / LOCKS DRIVER DOOR F16 BAT OPT PWR WINDOW / LOCKS PASS DOOR AUTO SHIFT RELAY IGN RELAY ACC RELAY F17 NOT AVAIL F9 F10 92 30A F4 OPT 5A F22 5A 5A F24 5A F21 F23 ALLISON - LCT/EATON AUTOSHIFT - AUTOCLUTCH OPT LEFT MIRROR HEAT F19 IGN STD INST CLUSTER / HTR -A/C CONTROLS F20 IGN STD SYSTEM CONTROLLER / NTR - A/C BLOW F21 IGN STD OWNER / OPERATOR F22 IGN OPT DRIVERS INFO CENTER F23 IGN OPT COMPASS / TEMP F24 IGN ** ACCELERATOR CLUTCH SW PLEASE NOTE: The legend shown on this page reflects all available standard configurations and may include items not ordered with your vehicle. RETURN TO MENU Legend for Optional Fuse & Circuit Breaker Panel IGN RELAY F36 7.5A F46 F45 F28 F30 F32 7.5A F35 15A F34 15A F27 F29 F31 F33 F27 F38 F40 F42 20A F44 10A F37 F39 F41 F43 F37 BAT OPT F28 IGN STD F38 BAT OPT F29 IGN STD F39 BAT OPT F30 IGN STD F40 BAT OPT F31 IGN STD F41 BAT OPT F32 IGN STD F42 BAT OPT F33 IGN OPT P.A. / DVD F43 BAT OPT F34 IGN OPT A/C IGNITION TRIGGER F44 BAT OPT F35 ACC OPT IGNITION / RADIO F45 F36 ACC STD REAR CAMERA F46 REAR STEP RADIO MEMORY OPT ACC OPT PLEASE NOTE: The legend shown above reflects all available options and may include options not ordered with your vehicle. RETURN TO MENU 93 Carrier Rooftop Air Conditioning System Diagram Evaporator Condenser Control Panel Shielded Cable Fan High Pressure Switch Temp In Dash Control Panel Low Pressure Switch High Pressure Switch + - 12V Battery 94 Alternator Waterpump Heating Heating Valve Low Pressure Switch RETURN TO MENU Compressor Clutch Compressor Clutch Carrier Control Panel-Thermostat Schematic B+ RD 6mm2 B+ U4 BKYE F1A U2 15A 1 BKBU 8 10 11 REL 1 Thermostat Sensor OGRD Poti 7 1 9 6 Heating 2 4 Cooling 3 5 WHRD U3 REL 2 85 K1A 30 87a 87 87 87 87 86 87a 87 K4A BKGY WHYE X3 11 pol. 1 3 2 WH WH V3 B1N BN V2 WHOG BKRD RDWH V1 9 10 11 5 Vent 2 Vent 1 V5 Inside Sensor V4 X20 1 2 7 1 Climate S1A S2A R1N Temperature Setting D+61 Alternator UH UK WHBU 4 WH All wires 1.5mm2 WH OGRD Control Panel Y1A Y2A Liquid Line Valve Control Panel RETURN TO MENU 95 RD 6mm2 B+ RD 6mm2 Compressor - Heatpump Schematic F3A 2 B11F 2 BU 4 1 B11F Y7M P> 85 87a 87 2 Compressor Clutch 4 1 Y8M Y7M 2 BK 2.5mm2 1 2.5mm2 4 Y31A 2 Heating Valve Compressor Clutch RETURN TO MENU P> 2 B21F Y8M 4 1 4 2 Compressor Clutch DETAIL OF COMPRESSOR CLUTCH SECTION 8 1 4 2.5mm2 1 B20F P< 4 Compressor Clutch 7 2 B21F 30 10A B20F P< P< 4 86 BU 2.5mm2 1 P> K3A F4A 6 B10F P> P< WH 10A BLUE 96 15A 85 87a 87 BKGY OGRD 30 RD 6mm2 UH UK 86 RD 6mm2 K2A F2A 2.5mm2 1 B10F M M31M Waterpump Heating Condenser Blowers Schematic B+ RD 6mm2 RD 6mm2 B+ BKBU BKYE OGRD GY 2.5mm2 F13M F14M 15A 87 87 87 F15M 15A U4 U3 K15M GN 2.5mm2 85 30 GN 2.5mm2 87 K14M GY 2.5mm2 30 86 U2 F16M 15A 15A X1 M M M21M M22M Condenser Blowers GNYE GNBU GNWH GNOG white M M M23M M24M RETURN TO MENU 97 Evaporator Blowers Schematic 85 F15M 30 F16M 87 Battery 12V 98 BN 30 86 87 87 86 30 K4M 2 4 3 M M M1M M2M Evaporator Blowers RETURN TO MENU U2 U4 BKGN 85 86 BN GN BKYE BKOG 85 87 30 K6M WHOG 180A WHRD F01M 30 WHYE 1 86 F3M BKBU X2 85 5 6 WHGN 30 87 BKWH 86 85 BN 87 F1M black 15A BKBU 85 BN GN BKRD BKBU 86 F4M GN 15A RD 6mm2 F3M 15A RD 6mm2 F2M 15A BK F1M RD 6mm2 RD 6mm2 B+ M M M3M M4M Evaporator Blowers Schematic B+ 30 85 30 86 87 86 30 13 M M M5M M6M Evaporator Blowers RETURN TO MENU 85 30 86 WHGN 87a 87 86 K13M U4 87 30 K12M WHBK 12 85 BN 87 GNRD 11 U2 14 15 BKGN WHYE GN 85 K10M BKYE BN BKRD 30 K9M WHBU 10 86 87 BN 30 RD 6mm2 15A BKBU 86 85 BN GN 87 WHOG BKBU WHRD 85 K7M X2 F8M K11M 87 86 U4 15A BU 85 K8M F7M 15A RD 6mm2 F6M 15A RD 6mm2 F5M GY U2 RD 6mm2 B+ M M M7M M8M 99 Model 35 & 38 Accessory Harness-Front Portion SEE ACCESSORY HARNESS LEGEND ON PAGE 102 FRONT OF VEHICLE (D) DOOR AJAR LED 160"-LEG 16AWG BLACK/YELLOW (F) GROUND 32"-LEG 16AWG WHITE #5 16AWG WHITE #2 16AWG WHITE #3 16AWG WHITE #4 16AWG WHITE #1 (LOOP) (C) SPEAKERS 17"-LEG 16AWG WHITE/BLACK 16AWG PINK 16AWG RED/YELLOW (LOOP) 16AWG BLACK/WHITE (LOOP) (A) RF SPEAKER 150"-LEG 16AWG RED/YELLOW 16AWG BLACK/WHITE INTERIOR LIGHT 14AWG ORANGE (MAP) 16AWG YELLOW (CABIN) 16AWG WHITE #2 (B) 67 59 ENTRY DOOR LIGHT 127"-LEG 16AWG BLUE/WHITE 16AWG WHITE #3 RELAY BOARD 34"-LEG 14AWG PINK 16AWG RED 16AWG BLUE/WHITE 16AWG PURPLE 16AWG YELLOW (LOOP) 14AWG ORANGE (LOOP) 15 7 (I) EXTERIOR LIGHTS 16"-LEG 16AWG BROWN (LOOP) 16AWG WHITE #1 (LOOP) (E) 100 (M) EXTERIOR LIGHTS 11"-LEG 16AWG BROWN (LOOP) 16AWG WHITE #1 (LOOP) 4 RETURN TO MENU 155 (J) EXTERIOR LIGHTS 10"-LEG 16AWG BROWN (LOOP) 16AWG WHITE #1 (LOOP) (L) (H) EXTERIOR LIGHTS 166"-LEG 16AWG BROWN 16AWG WHITE #1 LR SPEAKER 48"-LEG 16AWG PINK 16AWG WHITE/BLACK (K) INTERIOR LIGHTS 12"-LEG 16AWG YELLOW (CABIN) 14AWG ORANGE (MAP) 16AWG WHITE #4 (G) LF SPEAKER 44"-LEG 16AWG PINK (LOOP) 16AWG WHITE/BLACK (LOOP) 10 (N) EXTERIOR LIGHTS 14"-LEG 16AWG BROWN (LOOP) 16AWG WHITE #1 (LOOP) 168 (P) EXTERIOR LIGHTS 45"-LEG 16AWG BROWN (LOOP) 16AWG WHITE #1 (LOOP) (Q) EXTERIOR LIGHTS 66"-LEG 14AWG PINK 16AWG PURPLE 16AWG BROWN/WHITE 6 5 Model 35 & 38 Accessory Harness-Rear Portion SEE ACCESSORY HARNESS LEGEND ON PAGE 102 (U) REAR OF VEHICLE EXTERIOR LIGHTS 13"-LEG 16AWG BROWN (LOOP) 16AWG WHITE #1 (LOOP) (O) EXTERIOR LIGHTS 15"-LEG 16AWG BROWN (LOOP) 16AWG WHITE #1 (LOOP) (V) EXTERIOR LIGHTS 13"-LEG 16AWG BROWN (LOOP) 16AWG WHITE #1 (LOOP) (T) MICRO SWITCH 60"-LEG 16AWG BLACK/YELLOW (LOOP) 16AWG WHITE #5 14 16 (AA) RR SPEAKER 48"-LEG 16AWG RED/YELLOW 16AWG BLACK/WHITE (CC) EXTERIOR LIGHTS 18"-LEG 16AWG BROWN (LOOP) 16AWG WHITE #1 (LOOP) (Z) EXTERIOR LIGHTS 84"-LEG 16AWG BROWN (LOOP) 16AWG WHITE #1 (LOOP) 17 6 7 15 15 17 6 168 (EE) EXTERIOR LIGHTS 174"-LEG 16AWG BROWN 16AWG WHITE #1 74 5 (S) LUGGAGE LIGHTS 62"-LEG 16AWG RED (LOOP) 16AWG BLACK/YELLOW (LOOP) (R) EXTERIOR LIGHTS 24"-LEG 16AWG BROWN (LOOP) 16AWG WHITE #1 (LOOP) (DD) EXTERIOR LIGHTS 24"-LEG 16AWG BROWN (LOOP) 16AWG WHITE #1 (LOOP) (W) EXTERIOR LIGHTS 13"-LEG 16AWG BROWN (LOOP) 16AWG WHITE #1 (LOOP) (X) REAR STEP SWITCH 57"-LEG 16AWG BLACK/YELLOW (LOOP) 16AWG BROWN/WHITE (BB) EXTERIOR LIGHTS 18"-LEG 16AWG BROWN (LOOP) 16AWG WHITE #1 (LOOP) (Y) LUGGAGE LIGHTS 84"-LEG 16AWG RED 16AWG BLACK/YELLOW RETURN TO MENU 101 Model 35 & 38 Accessory Harness Legend AWG 16 COLOR BROWN/WHITE FROM LOCATION Q TO DESTINATION X 16 WHITE #1 H LOOP @ I, J, L, M, O, P, R, U, V, W, EXTERIOR LIGHTS GROUND Z, BB, CC, DD, ending @ EE EXTERIOR LIGHTS GROUND 16 BROWN H LOOP @ I, J, L, M, O, P, R, U, V, W, EXTERIOR LIGHTS POWER Z, BB, CC, DD, ending @ EE EXTERIOR LIGHTS POWER INTERIOR LIGHT GROUND 16 WHITE #4 F K 16 WHITE #5 F T MICRO SWITCH GROUND 16 PURPLE E Q RELAY BOARD TO REAR STEP 16 RED E LOOP @ S, ending @ Y RELAY BOARD TO LUG. LIGHTS 14 PINK E Q RELAY BOARD TO REAR STEP 16 BLACK/YELLOW D LOOP @ S, T, X, ending @ Y DOOR AJAR LED 16 PINK C LOOP @ G, ending @ N SPEAKERS 16 WHITE/BLACK C LOOP @ G, ending @ N SPEAKERS 16 WHITE #3 B F ENTRY DOOR LIGHT GROUND 16 BLUE/WHITE B E ENTRY DOOR LIGHT 14 ORANGE A LOOP @ E, ending @ K INTERIOR (MAP) LIGHTS 16 WHITE #2 A F INTERIOR LIGHTS GROUND 16 YELLOW A LOOP @ E ending @ K INTERIOR (CABIN) LIGHTS 16 BLACK/WHITE A LOOP @ C ending @ AA SPEAKER 16 RED/YELLOW A LOOP @ C ending @ AA SPEAKER AWG COLOR FROM LOCATION TO DESTINATION DESCRIPTION WIRE LIST 102 DESCRIPTION RETURN TO MENU NOTES REAR STEP SWITCH NOTES Model 35 & 38 Accessory Harness Wiring Diagram- Part 1 RETURN TO MENU 103 Model 35 & 38 Accessory Harness Wiring Diagram- Part 2 TURN SIGNAL HARNESS (ROUTED ALONG FLOOR) LEFT MID TURN SIGNAL GREEN/YELLOW RIGHT MID TURN SIGNAL GREEN 104 RETURN TO MENU TURN SIGNALS GREEN/YELLOW GREEN A/C Module Wiring Diagram - Front/Rear REF: RELAYS REF: FUSES Details of A/C Modules as shown in Diagrams on pg. 107 &109 RETURN TO MENU 105 Circuit Board Assembly Phase 1 Circuit board located in compartment above driver 106 RETURN TO MENU Circuit Board Phase 1 - Electrical Diagram 1 Front A/C Module This board configuration was last used through Feb. ‘04 3 4 5 6 7 8 Rear A/C Module 2 RETURN TO MENU 9 107 Circuit Board Assembly Phase 2 Circuit Board Assembly located on divider panel behind driver’s seat. 108 RETURN TO MENU Circuit Board Phase 2 - Electrical Diagram 4 Front A/C Module Rear A/C Module 3 1 RETURN TO MENU 2 109 PARTS - SERVICE - WARRANTY OBTAINING PARTS When parts are required for a warranty repair, all parts will be handled by the KRYSTAL Service Department. All other Non-Warranty parts needs can be handled by contacting the KRYSTAL PARTS DEPARTMENT, directly at 1-800-845-4883. You may purchase parts directly over the counter, or have them shipped to you, usually within 24 hours. In order to expedite your parts order, please have your KRYSTAL ENTERPRISES serial number, which starts with K-######, and is located on the drivers door jamb of all our vehicles. UNDERSTANDING WARRANTY POLICY (read the following sections carefully) Should your bus require service related to the converted areas of the vehicle, read this section first, before taking any action. By doing so, you will clearly understand the KRYSTAL SERVICE PROCESS, and avoid possible delays. NEVER initiate a warranty repair without prior approval of the KRYSTAL SERVICE DEPARTMENT. Not following this procedure could void your warranty reimbursement for that particular repair. 110 RETURN TO MENU PARTS - SERVICE - WARRANTY WHO SHOULD PERFORM WARRANTY SERVICE ON YOUR VEHICLE If there is any doubt as to whether or not a repair is related to the KRYSTAL WARRANTY, call the KRYSTAL SERVICE DEPARTMENT at 1-800-845-4883, this may save you time wasted at a chassis dealer or another shop, for a problem appropriately solved by contacting KRYSTAL SERVICE DEPARTMENT. If the problem is conversion related, then it can either be repaired at our Brea, California facility, or by a shop that we recommend in your area, or by a shop of your choice. This procedure is true of both warranty and non-warranty repairs. Depending on the nature of the problem, it may be necessary to have the warranty repair done at our Brea, California facility. CAUTION ABOUT TOWING! If it becomes necessary to tow your bus, a flat bed rig is preferred. UNDER NO CIRCUMSTANCES, should the bus be towed by lifting the rear end, serious frame damage can occur. RETURN TO MENU 111 PARTS - SERVICE - WARRANTY WARRANTY VERSUS NON-WARRANTY Whether a particular problem is covered under the KRYSTAL WARRANTY depends, in some cases, on several factors. The KRYSTAL SERVICE DEPARTMENT, determines coverages ahead of time on a case-by-case basis, either over the phone or at our Brea, California facility. HAVING NON-WARRANTY REPAIRS PERFORMED If the service manager has determined that the repair is not covered, or you are sure that it is not covered, we would be happy to recommend a shop in your area, or schedule an appointment with the KRYSTAL SERVICE DEPARTMENT, whichever is more convenient. HAVING WARRANTY REPAIRS PERFORMED There are three (3) methods: 1. Repair is done at the KRYSTAL SERVICE DEPARTMENT, in Brea, California 2. Repair is done at a KRYSTAL authorized service facility near you. 3. Repair is done at a shop of your choice, with prior approval of the KRYSTAL SERVICE DEPARTMENT 112 RETURN TO MENU PARTS - SERVICE - WARRANTY HAVING WARRANTY REPAIRS PERFORMED (con’t) If either method 2 or 3 as described on the previous page are to be used, you must obtain pre-authorization and a KRYSTAL ENTERPRISES SERVICE DEPARTMENT repair authorization number (R.A.N), in advance of performing any repairs. Both requirements my be accomplished from a single phone call to the KRYSTAL SERVICE DEPARTMENT, at 1-800845-4883. If method 3 is used, simply pay for the work and mail a copy of the invoice with the repair authorization number, and your KRYSTAL vehicle ID number, which is found on the vehicle ID tag on the drivers door jamb) on the invoice, so your claim(s) can be processed without any problems. You will be reimbursed within 30 days. Send all invoices to the service manager at: KRYSTAL ENTERPRISES Attn: Service Department Manager 2701 East Imperial Highway Brea, California 92821 RETURN TO MENU 113 Vendor Reference Listing Vendor 114 Warranty Period ALLISON TRANSMISSION 1-800-252-5283 3 Years, Unlimited Miles AUTOMOTIVE CLIMATE CONTROL A/C 1-800-462-6322 2 Years, Unlimited Miles AUDIOVOX TV & VCP 1-800-274-1886 1 Year, Unlimited Miles CARRIER A/C 1-800-673-2431 2 Years, Unlimited Miles FREEDMAN SEATING 1-713-929-6100 2 Years or 20,000 Miles, Whichever Comes First GOODYEAR TIRES 1-800-466-3982 Free Replacement 1st year or up to 3/32” tread ware, then pro-rated thereafter PHOENIX USA 1-931-561-6128 3 Years INTERNATIONAL ROAD SERVICE 1-800-448-7825 1 Year Towing KRYSTAL SERVICE DEPT 1-800-845-4883 See Copy of Krystal Warranty KWIKEE ELECTRIC STEPS 1-800-736-7366 1 Year or 12,000 Miles, Whichever Comes First ROSEN 1-866-467-6736 1 Year, Unlimited Miles PANASONIC 1-949-251-1851 1 Year, Unlimited Miles SHURFLOW WATER PUMPS 1-800-854-3218 2 Years, Unlimited Miles SONY STEREO 1-800-282-2848 1 Year, Unlimited Miles TRANSPEC WORLDWIDE 1-810-274-9400 1 Year, Unlimited Miles VOYAGER PA SYSTEM 1-800-274-1886 1 Year, Unlimited Miles RETURN TO MENU Vendor Reference Listing Vendor Warranty Period RETURN TO MENU 115 INDEX A Air and Electrical Diagrams & Schematics 105 Air Conditioning 36, 37 Air Door Lock Pin 16 Air Schematic, Single & Double Plug Doors 45 Audio/Video. PA Control 22 B Back-Up Camera 30 Battery Location 28 Body Materials & Construction Measurements 64 Braun Rear Door Wheelchair Lift 50, 51, 52, 53 C Cargo Door Micro Switch 32 Caution!, Safety Alerts 14, 16, 17, 44 Charge Protection 26 Circuit Board Assembly, F-550 Ver 1 & 2 106, 108 Compressed Air Supply & Schematic, single 45 Construction Materials & Measurements 64 D Dimensional Specifications, Boby & Chassis 62 116 RETURN TO MENU INDEX Double Plug Door System 47 E Electrical Diagrams & Schematics, misc, enlargements 105 Emergency Egress Window 18 Emergency Release Lever 11, 13 Emergency Release Valve 8, 11, 12, 48 Emergency Roof Hatch 19 F Foldaway Seating 33 H Heated Mirror Switch 29 I Identification Label, Vehicle Manufacturers 65 Idle Controller, Ford & Penntex 26, 27 L LCD Monitor, ref back-up camera 30 M Micro Switch 32 Mirror Control Switch 29 RETURN TO MENU 117 INDEX Movable Wall 39, 40, 41 O Obstruction Sensing System, Sensative Edge 11 Occupant Restraint Systems, ADA 14 Overhead Parcel Rack 17 P PARTS 110, 111, 112, 113 Passenger Seating 34 PA Control, Audio/Video 22 Pre-Trip Inspection 8 PREVENTATIVE MAINTENANCE SCHEDULE 66 Processing Warranty Claims 112, 113 R Rear Step 31 Ricon Rear Door Wheelchair Lift 54 S Safety Check List, Vapor Air & Elect Door 11 Seating, Std. Passenger & Foldaway 33, 34 SERVICE, Warranty 110, 111, 112, 113, 114 Single Plug Door System 44, 46 118 RETURN TO MENU INDEX Swing Door System 50 Switches, mirror, micro, pressure, door, step 32, 46, 49 T TOWING 111 Troubleshooting Guide 85 V Vapor Air & Electric Door Safety Alerts 11 VEHICLE SAFETY WARNINGS 10 Vendor Reference Listing 114 Video Entertainment Center 24 W WARRANTY 110, 111, 112, 113 WARRANTY POLICY 110 WARRANTY REPAIRS 112, 113 WARRANTY SERVICE 111 Wheelchair Lift, Braun & Ricon 52, 54 Wheelchair Securement, ADA 14, 15 Wheel Liners, Stainless Steel 35 Wiring Diagrams, 100 - 105 RETURN TO MENU 119 KRYSTAL ENTERPRISES LIMITED WARRANTY Krystal Enterprises (hereinafter referred to as Krystal Enterprises and Krystal) is the final stage manufacturer of an incomplete vehicle, which is manufactured and separately warranted by the incomplete vehicle manufacturer. This limited Warranty thus does not extend to any part or portion of the incomplete vehicle except as specifically required by any applicable Federal law or regulation. Krystal Enterprises warrants to the original purchaser of each new Krystal Enterprises bus, that all parts (except electronic parts which are warranted by their original manufacturer) installed by Krystal will be free from defects in material and workmanship under normal use and service for one (1) year, with unlimited mileage, from the date of purchase by the original retail customer. Krystal Enterprises further warrants to the original purchaser of each new Krystal Enterprises bus, the body structure which is defined as the cage, skin, front and rear caps, and floor structure to be free from defects, in material and workmanship under normal use and service for five (5) years or 100,000 miles, whichever comes first, from the date of purchase by the original retail customer. In the event of a Warranty claim, Krystal reserves the right to replace or repair the defective part. The original retail customer must return the bus to the original selling Authorized Dealer for the necessary authorization and parts. THE DEALER MUST OBTAIN, PRIOR TO PERFORMING ANY WORK, A REPAIR AUTHORIZATION NUMBER (R.A.N) ON ANY KRYSTAL ENTERPRISES BUS. If the selling Dealer is unable to remedy the situation, the original retail customer should contact the Warranty Department of Krystal Enterprises. If the selling 120 RETURN TO MENU dealer does not perform repair work on premise, the Dealer must call the Krystal Warranty Department for instructions on proceeding with the repair via an authorized repair facility. If the bus was not purchased from a Krystal Authorized Dealer, the original retail customer must contact the Krystal Warranty Department to receive information and prior authorization for any needed repair work. Provided that prior authorization was obtained from the Warranty Department of Krystal Enterprises, all labor costs associated with the repair or replacement of defective parts will be paid by Krystal. Krystal reserves the right to make a physical inspection of the bus by authorized factory personnel following any complaint prior to any repair. Krystal shall have no liability for any defect or damage caused by the original owner’s use of parts or services which are not authorized by Krystal or for any parts or paint which have been subject to misuse, neglect or accident, or have been subject to external mechanical or chemical influences, especially stone chips, airborne rust or industrial fall-out. This Limited Warranty DOES NOT cover loss to time. Inconvenience, loss of use of any vehicle, cost of rented replacement vehicle, or lodging or mileage expense in connection with any warranty repairs. NO PERSON IS AUTHORIZED TO ALTER OR CHANGE IN ANY WAY THE TERMS AND CONDITIONS OF THE ABOVE STATED LIMITED WARRANTY RETURN TO MENU 121 It is the policy of KRYSTAL ENTERPRISES, Inc. , to incorporate product improvements to our products whenever possible or practical to do so. We reserve the right to make changes and or improvements at any time without incurring any obligation to make such changes on previously sold products. Additionally, the information and specifications contained within this manual are current at time of printing. Subsequently all information contained in this manual is subject to change at any time, without notice. Please note that this manual applies to all INTERNATIONAL models and explains standard equipment as well as many options, and may include equipment not presently installed on your vehicle. KRYSTAL ENTERPRISES Copyright © 2005 Ver-2 122 RETURN TO MENU