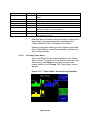
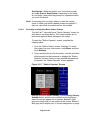
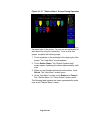
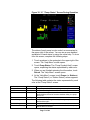
1
$3000
VacTrac™ Series
Conveying Systems
4-Pump 32-Station Controllers
Operation, Installation, and Service Manual
AEC, Inc.
1100 E. Woodfield Road
Schaumburg, IL 60173
Tel. (847) 273-7700
Fax (847) 273-7804
www.aecinternet.com
Part No. A0565547
Bulletin No. WH2-610.2
6/28/2007
Write down your unit serial number(s)
here for future reference
Model #
Serial #
________________
________________
________________
________________
________________
________________
________________
________________
Performance figures stated in this manual are based on a standard atmosphere of 59°F
(15°C) at 29.92” Hg (1,014 millibars) at sea level, using 60 Hz power. Altitude is an
important consideration when specifying vacuum conveying components. AEC can
advise you on proper selection and sizing of systems for your operating environment.
AEC is committed to a continuing program of product improvement. Specifications,
appearance, and dimensions described in this manualare subject to change without
notice.
© Copyright AEC and AEC, Inc. 2008
All rights reserved.
A0565547
Effective 4/1/2008 Part No.
Bulletin No. WH2-610.2
Page ii of 98
Table of Contents
1
General Information.......................................................................... 9
1-1
1-2
1-3
1-4
1-5
2
Safety ............................................................................................... 12
2-1
2-2
2-3
2-4
2-5
2-6
2-7
3
Unpacking and Inspection ......................................................................... 17
In the Event of Shipping Damages............................................................ 17
Parcel Post Shipment................................................................................ 17
United Parcel Service Shipment................................................................ 18
If the Shipment is Not Complete................................................................ 18
If the Shipment is Not Correct ................................................................... 18
Returns ..................................................................................................... 18
Installation ....................................................................................... 19
4-1
4-2
4-3
4-4
4-5
5
Work Rules................................................................................................ 12
Tools and Equipment Needed................................................................... 12
Safety Considerations ............................................................................... 12
2-3-1 Reporting a Safety Defect ............................................................. 13
General Responsibility .............................................................................. 13
Operator Responsibility ............................................................................. 14
Maintenance Responsibility....................................................................... 14
Safety Devices .......................................................................................... 15
2-7-1 Safety Circuit Standards ............................................................... 15
2-7-2 Fail Safe Operation ....................................................................... 15
2-7-3 Safety Device Lock-Outs............................................................... 16
Shipping Information...................................................................... 17
3-1
3-2
3-3
3-4
3-5
3-6
3-7
4
Equipment Function .................................................................................... 9
Necessary Documents ................................................................................ 9
System Capabilities..................................................................................... 9
Equipment Cycle ....................................................................................... 10
Models Covered by this Manual ................................................................ 10
Installing the VacTrac Control Panel ......................................................... 19
Making Electrical Connections .................................................................. 19
Making VacTrac Control Panel Power Drop Wiring Connections.............. 19
Connecting the Control Panel to Vacuum Hoppers................................... 19
Connecting the Control Panel to the Pump Package ................................ 20
Using the Standard 6” Touch Screen ........................................... 21
5-1
5-2
Introduction ............................................................................................... 21
Setup......................................................................................................... 21
5-2-1 Setting Up the System .................................................................. 21
5-2-1-1
5-2-1-2
5-2-1-3
5-2-1-4
Setting the Number of Stations and the Number of Pumps ...... 22
Setting Up Alarm Silences ........................................................ 23
Setting Up Pump Staging.......................................................... 24
Setting Up Touch Switch Delay ................................................ 25
Page iii of 98
5-2-2 Setting Up Stations ....................................................................... 26
5-2-2-1 Setting Up a Single Station ....................................................... 26
5-2-2-2 Copying Settings from One Station to Others ........................... 28
5-2-3 Setting Up Pumps ......................................................................... 30
5-2-3-1 Setting Up a Single Pump......................................................... 30
5-2-3-2 Copying Settings from One Pump to Others............................. 32
5-2-4 Finishing Setup: Setting Up Passwords ........................................ 34
5-2-4-1 Setup Password........................................................................ 34
5-2-4-2 Operator Password ................................................................... 34
5-3
5-2-5 Starting the System for the First Time........................................... 36
General Operation..................................................................................... 36
5-3-1 Overview ....................................................................................... 36
5-3-2 Basic Tasks................................................................................... 37
5-3-2-1
5-3-2-2
5-3-2-3
5-3-2-4
5-3-2-5
5-3-2-6
5-3-2-7
5-3-2-8
5-3-2-9
Reviewing Station Status .......................................................... 37
Reviewing Pump Status............................................................ 39
Logging On and Logging Off..................................................... 40
Enabling and Disabling Stations and Pumps ............................ 42
Starting and Stopping the System ............................................ 42
Reviewing and Adjusting Basic Station Settings....................... 43
Navigating among the “Station Operator” Screens ................... 44
Adjusting Convey Time and Dump Delay ................................. 44
Activating and Stopping Priority Convey for a Station .............. 45
5-3-3 Advanced Tasks............................................................................ 46
5-3-3-1 Reviewing and Resetting a Pump Hour Meter.......................... 46
5-3-3-2 Transferring Stations to a Standby Pump ................................. 47
5-3-4 Alarms........................................................................................... 50
5-3-4-1 Reviewing Alarms ..................................................................... 50
5-3-4-2 Clearing the Alarm Log ............................................................. 50
5-3-4-3 Silencing Alarms ....................................................................... 51
6
Using the Optional 10” Interface ................................................... 52
6-1
6-2
Introduction ............................................................................................... 52
Setup......................................................................................................... 53
6-2-1 Setting Up the System .................................................................. 53
6-2-1-1
6-2-1-2
6-2-1-3
6-2-1-4
Setting the Number of Stations and the Number of Pumps ...... 53
Setting Up Alarm Silences ........................................................ 54
Setting Up Pump Staging.......................................................... 55
Setting Up Touch Switch Delay ................................................ 56
6-2-2 Setting Up Stations ....................................................................... 57
6-2-2-1 Setting Up a Single Station ....................................................... 57
6-2-2-2 Copying Settings from One Station to Others ........................... 59
6-2-3 Setting Up Pumps ......................................................................... 61
6-2-3-1 Setting Up a Single Pump......................................................... 61
6-2-3-2 Copying Settings from One Pump to Others............................. 63
6-3
6-2-4 Finishing Setup: Setting Up Passwords ........................................ 65
6-2-5 Starting the System for the First Time........................................... 67
General Operation..................................................................................... 68
6-3-1 Overview ....................................................................................... 68
6-3-2 Basic Tasks................................................................................... 68
Page iv of 98
6-3-2-1
6-3-2-2
6-3-2-3
6-3-2-4
6-3-2-5
6-3-2-6
6-3-2-7
6-3-2-8
6-3-2-9
Reviewing Station Status .......................................................... 68
Reviewing Pump Status............................................................ 70
Logging On and Logging Off..................................................... 72
Enabling and Disabling Stations and Pumps ............................ 73
Starting and Stopping the System ............................................ 74
Reviewing and Adjusting Basic Station Settings....................... 74
Navigating among the Station Operator Screens ..................... 75
Adjusting Convey Time and Dump Delay ................................. 76
Activating and Stopping Priority Convey for a Station .............. 76
6-3-3 Advanced Tasks............................................................................ 77
6-3-3-1 Reviewing and Resetting a Pump Hour Meter.......................... 77
6-3-3-2 Transferring Stations to a Standby Pump ................................. 78
6-3-4 Alarms........................................................................................... 81
6-3-4-1 Reviewing Alarms ..................................................................... 81
6-3-4-2 Clearing the Alarm Log ............................................................. 82
6-3-4-3 Silencing Alarms ....................................................................... 83
7
8
Maintenance .................................................................................... 84
Configurable Settings..................................................................... 85
8-1
8-2
9
Troubleshooting.............................................................................. 89
9-1
9-2
10
11
Options for Station Setup .......................................................................... 85
Options for Pump Setup ............................................................................ 87
General Troubleshooting........................................................................... 89
Alarms ....................................................................................................... 90
9-2-1 Station Alarms............................................................................... 90
9-2-2 Pump Alarms ................................................................................ 90
9-2-3 System Alarms .............................................................................. 90
Options ............................................................................................ 91
Spare Parts List .............................................................................. 92
11-1 Recommended Spare Parts List ............................................................... 92
12
Technical Assistance ..................................................................... 93
12-1 Contact Information for Technical Assistance ........................................... 93
12-2 Returned Material Policy ........................................................................... 94
12-2-1 Credit Returns ............................................................................... 94
12-2-2 Warranty Returns .......................................................................... 94
13
Safety Tag Information ................................................................... 96
13-1 Controller Safety Tags .............................................................................. 96
13-2 Controller Identification (Serial Number) Tag ............................................ 96
14
Appendix ......................................................................................... 97
Page v of 98
Charts and Figures
1 VTC4/32 Controller with 6" Display.................................................................... 11
2 VTC4/32 Controller with Optional 10” Display .................................................. 11
3 Basic Menu Flow for Setup of 6” Controller...................................................... 21
4 6” Default “Station Status” Screen Before Setup............................................. 22
5 6” “Menu” Screen ................................................................................................ 22
6 6” “System Setup” Screen Before Setup .......................................................... 23
7 6” System Setup Screen ..................................................................................... 24
8 6” “Station Status” Screen ................................................................................. 26
9 6” “Station Operator” Screen Before Setup...................................................... 27
10 6” “Station Setup” Screen .................................................................................. 27
11 6” “Station Copy” Screen ................................................................................... 29
12 6” “Pump Status” Screen.................................................................................... 31
13 6” Pump Setup Screen Before Setup................................................................. 31
14 6” “Pump Copy” Screen...................................................................................... 32
15 6” “Station Status” Screen During Operation................................................... 38
16 6” “Pump Status” Screen During Operation..................................................... 39
17 6” “Password Entry” Screen .............................................................................. 41
18 6” “Station Operator” Screen ............................................................................. 43
19 6” Pump Setup Screen ........................................................................................ 46
20 6” “Transfer To Standby Pump” Screen............................................................ 48
Page vi of 98
21 6” Transfer To Standby Pump Button................................................................ 48
22 6” Alarm Log Screen ........................................................................................... 50
23 Basic Menu Flow for Setup of 10” Controller.................................................... 52
24 10” Default “Station Status” Screen Before Setup........................................... 53
25 10” “System Setup” Screen Before Setup ........................................................ 54
26 10” “System Setup” Screen................................................................................ 55
27 10” “Station Status” Screen ............................................................................... 57
28 10” “Station Operator” Screen Before Setup.................................................... 58
29 10” “Station Setup” Screen ................................................................................ 58
30 10” “Station Copy” Screen ................................................................................. 60
31 10” “Pump Status” Screen.................................................................................. 62
32 10” “Pump Setup” Screen Before Setup ........................................................... 62
33 10” “Pump Copy” Screen.................................................................................... 64
34 10” “Station Status” Screen During Operation................................................. 69
35 10” “Pump Status” Screen During Operation................................................... 71
36 10” “Password Entry” Screen ............................................................................ 72
37 10” Station Operator Screen............................................................................... 75
38 10” “Pump Setup” Screen................................................................................... 78
39 10” “Transfer to Standby Pump” Screen........................................................... 79
40 10” Transfer to Standby Pump button ............................................................... 80
41 10” “Alarm Log” Screen...................................................................................... 82
42 10” “System Setup” Screen................................................................................ 83
Page vii of 98
Safety Considerations
AEC VacTrac™ conveying systems are designed to provide
safe and reliable operation when installed and operated
within design specifications, following national and local
safety codes.
To avoid possible personnel injury or equipment damage
when installing or operating this equipment, always use good
judgment and follow these safe practices:
; Follow all SAFETY CODES.
; Wear SAFETY GLASSES and WORK GLOVES.
; Use care when LOADING, UNLOADING, RIGGING, or
MOVING this equipment.
; OPEN, TAG, and LOCK ALL DISCONNECTS before
working on equipment. It is a good idea to remove the
fuses and carry them with you.
; GROUND your VacTrac™ system properly before
applying power.
; Use extreme caution when working with your AEC
VacTrac™ system. HIGH VACUUM can be dangerous.
Keep body parts, tools, clothing, and debris away from
vacuum inlets.
; Do not jump or bypass any electrical safety control.
; Do not restore power until you remove all tools, test
equipment, etc.
; Only PROPERLY TRAINED personnel familiar with the
information in this manual should work on this equipment.
1
General Information
1-1
Equipment Function
AEC VacTrac™ systems create vacuum for conveying
pelletized or granular material in a central material handling
system.
A typical use is an in-plant distribution system for plastic
processing plants.
1-2
Necessary Documents
The documents below are necessary for proper installation,
operation and maintenance of VacTrac™ conveying
systems. You can obtain additional copies from the AEC
Service Department at AEC, Inc. Make sure that the
appropriate personnel are familiar with these documents:
• This product manual.
• The VacTrac™ Mechanical Components product manual.
• Electrical schematic and connection diagrams.
• Blower and electric motor information sheets.
• Operation and Installation manuals for all electrical
components.
1-3
System Capabilities
VacTrac™ central vacuum systems are as varied as the
applications they service. The tubing and equipment
furnished in an AEC system are designed to convey the
material(s) specified at the time of purchase at specific rates
and distances.
AEC can advise you on your system capabilities based on
system makeup, distance, material, and conveying rates you
want.
System capacity is directly affected by the pressure
drop in the overall system, such as number of material
line bends, pipe length, Y-tubes, T-tubes, etc.
Page 9 of 98
Use the minimum effective amount of vinyl flex hose to
maximize material line efficiency. Keep material lines as
straight as possible. Refer to the VacTrac™ Mechanical
Components Product Manual (AEC Part No. A0536580) for
installation recommendations.
Important! Vacuum leaks occurring anywhere in your system reduce capacity.
L
1-4
Equipment Cycle
VacTrac™ material conveying systems are used for
automatic pneumatic handling of most free-flowing, dry,
pelletized, or granular materials. Material characteristics
determine the type of equipment needed to convey the
material.
1-5
Models Covered by this Manual
VacTrac™ Series 32-Station Controller
• Programmable Logic Controller.
• 24 VDC or 115 VAC control circuits available.
• Easy-to-use touch screen operator interface terminal.
• Optional audible/visual alarm.
Page 10 of 98
Figure 1: VTC4/32 Controller with 6" Display
24”
6”
30”
* Depth dimension is 12”
Figure 2: VTC4/32 Controller with Optional 10” Display
24”
10”
30”
* Depth dimension is 12”
Page 11 of 98
2
Safety
2-1
Work Rules
The installation, operation, and maintenance of this
equipment must be conducted in accordance with all applicable work and safety codes for the installation location. This
may include, but is not limited to OSHA, NEC, CSA, SPI,
and any other local, national, and international regulations.
; Read and follow these operating instructions when
installing, operating, and maintaining this equipment. If
the instructions become damaged or unreadable,
additional copies are available from AEC, Inc.
; Only qualified personnel familiar with this equipment
should work with this system.
; Work only with approved tools and devices.
; Disconnect and lock out power while working on this
equipment.
2-2
Tools and Equipment Needed
These tools and equipment are necessary for installation:
; Hand tools.
; Wire, conduit, and fittings for wiring runs.
; Anchor bolts with nuts and washers or red head-type
anchors.
2-3
Safety Considerations
The terms NOTIC, CAUTION, WARNING, and DANGER
have specific meanings in this manual.
NOTICE is used to indicate a statement of company policy
directly or indirectly related to the safety of personnel or
protection of property.
CATION indicates a potentially hazardous situation which, if
not avoided, may result in minor injury.
WARNING indicates a potentially hazardous situation which,
if not avoided, could result in death or serious injury.
Page 12 of 98
DANGER indicates an imminently hazardous situation
which, if not avoided, will result in death or serious injury.
This word will be limited to the most serious situations.
L
2-3-1
The term IMPORTANT emphasizes areas where equipment
damage could result, or provides additional information to
make a step or procedure easier to understand. Disregarding
information marked IMPORTANT would not be likely to
cause personal injury.
Reporting a Safety Defect
If you believe that your equipment has a defect that could
cause injury, you should immediately discontinue its use and
inform AEC, Inc.
The principle factors that can result in injury are failure to
follow proper operating procedures (i.e. lockout/tagout), or
failure to maintain a clean and safe working environment.
2-4
General Responsibility
No mater who you are, safety is important. Owners,
operators and maintenance personnel must realize that
every day, safety is a vital part of their jobs.
If your main concern is loss of productivity, remember that
production is always affected in a negative way following an
accident. The following are some of the ways that accidents
can affect your production:
• Loss of a skilled operator (temporarily or permanently)
• Breakdown of shop morale
• Costly damage to equipment
• Downtime
An effective safety program is responsible and economically
sound.
Organize a safety committee or group, and hold regular
meetings. Promote this group from the management level.
Through this group, the safety program can be continually
reviewed, maintained, and improved. Keep minutes or a
record of the meetings.
Page 13 of 98
Hold daily equipment inspections in addition to regular
maintenance checks. You will keep your equipment safe for
production and exhibit your commitment to safety.
Please read and use this manual as a guide to equipment
safety. This manual contains safety warnings throughout,
specific to each function and point of operation.
2-5
Operator Responsibility
The operator’s responsibility does not end with efficient
production. The operator usually has the most daily contact
with the equipment and intimately knows its capabilities and
limitations.
Plant and personnel safety is sometimes forgotten in the
desire to meet incentive rates, or through a casual attitude
toward machinery formed over a period of months or years.
Your employer probably has established a set of safety rules
in your workplace. Those rules, this manual, or any other
safety information will not keep you from being injured while
operating your equipment.
Learn and always use safe operation. Cooperate with coworkers to promote safe practices. Immediately report any
potentially dangerous situation to your supervisor or
appropriate person.
2-6
Maintenance Responsibility
Proper maintenance is essential to safety. If you are a
maintenance worker, you must make safety a priority to
effectively repair and maintain equipment.
Before removing, adjusting, or replacing parts on a machine,
remember to turn off all electric supplies and all accessory
equipment at the machine, and disconnect and lockout
electrical power. Attach warning tags to the disconnect
switch.
Be sure that all non-current carrying parts are correctly
connected to earth ground with an electrical conductor that
complies with current codes. Install in accordance with
national and local codes.
When you have completed the repair or maintenance
procedure, check your work, remove your tools. Rigging, and
handling equipment.
Page 14 of 98
2-7
Safety Devices
This section includes information on safety devices and
procedures that are inherent to the VTC4/32 Controller. This
manual is not intended to supersede or alter safety
standards established by the user of this equipment. Instead,
the material contained in this section is recommended to
supplement these procedures in order to proved a safer
working environment.
At the completion of this section, the operator and
maintenance personnel will be able to do the following:
• Identify and locate specific safety devices.
• Understand the proper use of the safety devices provided.
• Describe the function of the safety device.
2-7-1
Safety Circuit Standards
Safety circuits used in industrial systems protect the operator
and maintenance personnel from dangerous energy. They
also provide a means of locking out or isolating the energy
for servicing equipment.
Various agencies have contributed to the establishment of
safety standards that apply to the design and manufacture of
automated equipment. The Occupational Safety and Health
Administration (OSHA) and the Joint Industrial council (JIC)
are just a few of the organizations that have joined with the
plastics industry to develop safety standards.
Every effort has been made to incorporate these standards
into the design of the VacTrac system; however, it is the
responsibility of the personnel operating and maintaining the
equipment to familiarize themselves with the safety
procedures and the proper use of any safety devices.
2-7-2
Fail Safe Operation
If a safety device or circuit should fail, the design must be
such that the failure causes a “Safe” condition. As an
example, a safety switch must be a normally open switch.
The switch must be held closed with the device it is to
protect. If the switch fails, it will go to the open condition,
tripping out the safety circuit.
At no time should the safety device fail and allow the
operation to continue for example, if a safety switch is
Page 15 of 98
guarding a motor, and the safety switch fails, the motor
should not be able to run.
2-7-3
Safety Device Lock-Outs
Some safety devices disconnect electrical energy from a
circuit. The safety devices that are used in the VTC4/32
Controller are primarily concerned with electrical power
disconnection.
WARNING! Always disconnect and lockout all electrical power and pneumatic
(i.e. compressed air) sources prior to servicing the VTC4/32
Controller. Failure to do so may result in serious injury. No one but
the person who installed the lockout may remove it.
Page 16 of 98
3
Shipping Information
3-1
Unpacking and Inspection
You should inspect your AEC VacTrac™ 32-station
controller for any possible shipping damage. If the container
and packing materials are in re-usable condition, save them
for reshipment if necessary.
Thoroughly check the equipment for any damage that might
have occurred in transit, such as broken or loose wiring and
components, loose hardware and mounting screws, etc. In
case of breakage, damage, shortage, or incorrect shipment,
refer to the following sections.
3-2
In the Event of Shipping Damages
Important! According to the contract terms and conditions of the Carrier, the
L
responsibility of the Shipper ends at the time and place of
shipment.
; Notify the transportation company’s local agent if you
discover damage.
; Hold the damaged goods and packing material for the
examining agent’s inspection. Do not return any goods to
AEC, Inc. before the transportation company inspection
and authorization.
; File a claim against the transportation company.
Substantiate the claim by referring to the agent’s report.
A certified copy of our invoice is available upon request.
The original Bill of Lading is attached to our original
invoice. If the shipment was prepaid, write us for a
receipted transportation bill.
; Advise AEC, Inc. regarding your wish for assistance and
to obtain an RMA (return material authorization) number.
3-3
Parcel Post Shipment
Notify AEC, Inc. at once in writing, giving details of the loss
or damage. This information is required for filing a claim with
our insurance company.
Page 17 of 98
Hold the damaged goods with the container and packing
materials for possible inspection by postal authorities.
3-4
United Parcel Service Shipment
; Contact your local UPS office regarding damage and
insurance claims.
3-5
; Retain the container and packing.
; Notify AEC, Inc. at once.
If the Shipment is Not Complete
Check the packing list. The apparent shortage may be intentional. Back-ordered items are noted on the packing list. You
should have:
; AEC VacTrac™ Series 32-station controller
; Bill of Lading
; Packing list
; Operating and Installation packet
; Electrical schematic and panel layout drawings
; Component instruction manuals
Re-inspect the container and packing material to see if you
missed any smaller items during unpacking. Determine that
the item was not inadvertently taken from the area before
you checked in the shipment. Notify AEC, Inc. immediately
of the shortage.
3-6
If the Shipment is Not Correct
If the shipment is not what you ordered, contact AEC, Inc.
immediately. For shipments in the United States and
Canada, call 1 (630) 475-7143; for all other countries, call
001 (630) 475-7143. Include the order number and item.
Hold the items until you receive shipping instructions.
3-7
Returns
Important! Do not return any damaged or incorrect items until you receive
L
shipping instructions from AEC, Inc.
Page 18 of 98
4
Installation
4-1
Installing the VacTrac Control Panel
Note: Before you mount the panel, consider how you run wiring to
the vacuum hoppers, the filter chamber atmospheric valve (if
so equipped) and the pump motor starter(s), vacuum
switch(es), and vent valve(s).
Mount the panel on a flat, vertical area. It should be a visible
area that gives your operator access to the control. The
panel requires a low voltage power drop as listed on the
serial tag.
4-2
Making Electrical Connections
Refer to local electrical codes, the schematic and connection
diagrams supplied with this unit and the serial tag for wiring
considerations. Run all wiring in conduit if codes require it.
4-3
Making VacTrac Control Panel Power Drop Wiring
Connections
Hardwire the input power at 110/1/50-60 VAC or 230V/1/5060 VAC, depending on the specifications, which are located
on the VacTracTM Control Panel Serial Tag. The main power
switch is located on the right side of the enclosure.
Important! AEC recommends that you protect PLC memory by providing the
L
4-4
control panel with a dedicated circuit, a true earth ground, and a
spike/surge protector.
Connecting the Control Panel to Vacuum Hoppers
1. On 115 VAC control voltage systems, run a common hot
(115 VAC) wire and a common neutral wire from the
controller to each vacuum hopper in the VacTracTM
system.
On 24 VDC control voltage systems, run a common +24
VDC wire and a common 0 (zero) VDC wire from teh
controller to each vacuum hopper in the VacTracTM
system.
Page 19 of 98
2. On all systems, run two wires to each vacuum hopper:
one each from the controller to the Bin-Full switch (LS)
and to the Atmospheric/Sequence-T solenoid (SOL)
valve.
3. Make sure that the solenoid and the proximity switch (if
supplied) on vacuum hoppers are the same voltage (24
VDC) as the VacTracTM control panel voltage. Consult
the control panel serial tag and the solenoid valve
nameplates.
4. Wire size depends on control voltage, distance, number
of vacuum hoppers, and the number of wires in each
raceway. Consult a qualified electrician.
5. Properly ground each hopper to reduce static build up
generated by material conveying.
4-5
Connecting the Control Panel to the Pump Package
1. Wire the pump package motor starter coil (M) to the
terminal provided in the VacTrac™ control panel
enclosure.
2. Wire the pump package vacuum relief valve solenoid
(SOL A) to the terminal provided in the VacTrac™ control
panel enclosure.
3. Wire the pump package vacuum switch (VS) to the
terminal located in the VacTrac™ control panel
enclosure.
4. On VTPB pumps, wire the pump package blowback
solenoid (SOL B) to the terminal located in the
VacTrac™ control panel enclosure.
5. On 115 VAC control voltage systems, run a common hot
(115 VAC) wire and a common neutral wire from the
controller to each pump package in the VacTracTM
system.
On 24 VDC control voltage systems, run a common +24
VDC wire and a common 0 (zero) VDC wire from the
controller to each pump package in the VacTracTM
system.
Page 20 of 98
5
Using the Standard 6” Touch Screen
5-1
Introduction
This chapter gives the procedures for configuring your VTC
4/32 controller. This chapter applies only to the standard 6”
touch screen controller. If you have purchased the optional
10” touch screen controller, skip to Chapter 6: “Using the
Optional 10” Interface”.
Configuration of your VTC4/32 controller includes setting the
number of stations and pumps, setting variables such as
convey time and blow-back interval, and setting up
passwords. AEC recommends that you carry out these
procedures in the order given here.
5-2
Setup
Important! Before carrying out these procedures, install all equipment as
L
5-2-1
described in Chapter 4: “Installation”, and in the manual VacTrac™
Series Conveying Systems: Mechanical Components.
Setting Up the System
Figure 3 below gives an overview of the basic flow between
the menus used in setting up the system.
Figure 3: Basic Menu Flow for Setup of 6” Controller
Pumps
Station
Status
Touch and Hold Station Icon
Station
Operator
Station Setup
Station
Setup
Pump
Status
Stations
Menu
Menu
Menu
Touch and Hold Pump Icon
Menu
Menu
System Setup
System
Setup
Page 21 of 98
Alarms
Alarms
Pump
Setup
5-2-1-1
Setting the Number of Stations and the Number of Pumps
Figure 4: 6” Default “Station Status” Screen Before
Setup
1. At the “Station Status” screen (Figure 4) or at the “Pump
Status” screen, touch the Menu button. The “Menu”
screen opens.
Figure 5: 6” “Menu” Screen
2. At the “Menu” screen (Figure 5), touch the System
Setup button. The “System Setup” screen opens.
Page 22 of 98
Figure 6: 6” “System Setup” Screen Before Setup
3. At the “System Setup” screen, (Figure 6), touch Stations
Present. A keypad pops up.
4. Enter the total number of stations (1-32) to be controlled
by the system. Use ← to erase any mistakes. Use ↵ to
enter the value. The keypad disappears, and the new
setting appears under Stations Present.
5. Touch Pumps Present. A keypad pops up.
6. Enter the total number of pumps (1-4) to be controlled by
the system. Use ← to erase any mistakes. Use ↵ to
enter the value. The keypad disappears, and the new
setting appears under Pumps Present.
5-2-1-2
Setting Up Alarm Silences
When an alarm occurs, a horn sounds and a strobe light
flashes at each installed central alarm. An alarm banner
appears in the center of the screen. An alarm message and
Alarm Silence button are on the banner. Touching this
button silences the horn and turns off the lights for
configurable periods of time and causes the alarm banner to
disappear. You can set different lengths of time for keeping
the horn silent and keeping the light turned off. If a new
alarm occurs, the horn sounds and the light turns on again.
To set the lengths of time for suppressing the alarm strobe
and horn, complete the following steps:
1. Go to the “System Setup” screen by touching the Menu
button on any screen. Then touch System Setup. The
“System Setup” screen will pop up.
Page 23 of 98
2. On the “System Setup” screen (Figure 7), touch the
Strobe Suppress button. A keypad pops up with an
entry of 0.
Figure 7: 6” System Setup Screen
3. Enter the number of minutes (between 0 and 99) that you
want the strobe lights to stay off. If you want the lights to
stay on as long as the alarm persists, leave the setting at
0. If you want the lights to stay off until a new alarm
occurs, enter 99 in the keypad. Use ← to erase any
mistakes. Use ↵ to enter the value. The keypad
disappears and the new setting appears under Strobe
Suppress.
4. On the “System Setup” screen ( Figure 7), touch the
Horn Silence button. A keypad pops up with an entry of
0.
5. Enter the number of minutes (between 0 and 99) that you
want the horn to stay off. If you want the horn to stay on
as long as the alarm persists, leave the setting at 0. If
you want the horn to stay off until a new alarm occurs,
enter 99 in the keypad. Use ← to erase any mistakes.
Use ↵ to enter the value. The keypad disappears and
the new setting appears under Horn Silence.
5-2-1-3
Setting Up Pump Staging
To avoid an excessive power demand at your facility when
the conveying system starts up, you can stagger the times at
which pumps start. Whenever a demand would cause two
pumps to start simultaneously, your choice for pump staging
sets the delay between the start of one pump and the start of
the next. The factory default is a delay of three seconds. You
Page 24 of 98
need to change this setting only if this delay is too long or
too short for your facility.
To set the delay between the start of one pump and the next,
complete the following steps:
1. Go to the “System Setup” screen by touching the Menu
button on any screen. Then touch System Setup. The
“System Setup” screen will pop up.
2. Touch the Pump Staging button. A keypad pops up with
an entry of 0.
3. Enter the number of seconds (between 0 and 99) for the
length of the delay between the start of one pump and
the next. Use ← to erase any mistakes. Use ↵ to enter
the value. The keypad disappears, and the new setting
appears under Pump Staging.
5-2-1-4
Setting Up Touch Switch Delay
During operation, the controller normally displays the
“Station Status” screen or the “Pump Status” screen,
showing the current status of all stations or pumps. Briefly
touching the icon for a station or pump toggles between
taking it offline (disabling it) and putting it online (enabling it).
Touching the icon and holding it takes the user into the
controller’s menu system. The setting for button delay
determines how long the user must keep an icon touched
before a menu appears. The factory default is 1.5 seconds.
You need to change this setting only if you find that users
are having difficulty with the current setting.
To change the touch switch delay, complete the following
steps:
1. Go to the “System Setup” screen by touching the Menu
button on any screen. Then touch System Setup. The
“System Setup” screen will pop up.
2. On the System Setup screen ( Figure 7), touch the
Button Delay button. A keypad pops up, with an entry of
0.
3. Enter the number of seconds (between 0 and 99) for the
button delay. Use ← to erase any mistakes. Use ↵ to
enter the value. The keypad disappears, and the new
setting appears under Button Delay.
Page 25 of 98
5-2-2
5-2-2-1
Setting Up Stations
Before starting the system, you must define several settings
for each station, such as which pump conveys material to it.
This section first discusses how to use the controller’s menu
system to configure stations. The table on pages 85–86
discusses the individual choices.
Setting Up a Single Station
1. Go to the “Station Status” screen if needed. To reach this
screen from any other screen, touch Menu on the righthand side of the screen, and then touch Stations. The
“Station Status” screen appears:
Figure 8: 6” “Station Status” Screen
2. On the “Station Status” screen (Figure 8), touch the icon
for the station you want to setup, and hold it for several
seconds. The “Station Operator” screen opens.
Page 26 of 98
Figure 9: 6” “Station Operator” Screen Before Setup
3. On the “Station Operator” screen (Figure 9), touch the
Station Setup button. The “Station Setup” screen
opens.
Figure 10: 6” “Station Setup” Screen
4. On the “Station Setup” screen (Figure 10), adjust settings
as required. Touching any box that appears in red (for
“disabled”) toggles it to green (for “enabled”), and vice
versa. Touching any light gray box gives you a keypad to
enter a new value.
Keypad entry works as with many ATM machines⎯the
first digit you enter initially appears to the right of the
decimal point and moves to the left as you enter more
digits. You do not need to use the decimal point. Use ←
to erase any mistakes. Use ↵ to enter the value. The
keypad disappears, and the “Station Setup” screen
shows the new value in the selected gray box.
Page 27 of 98
Touching Reset to Defaults in the lower right of the
screen changes all the settings for this station back to
their factory defaults.
See pp. 84–87 for details on the options and their default
settings.
5. As appropriate, setup the rest of the stations using either
of the following methods:
• Copy this station’s settings to one or more other
stations, as described below.
• Use the Back or Next buttons to navigate to other
stations. Touch Back to go to the previous “Station
Setup” screen, or touch Next to go to the next
“Station Setup” screen.
• Touch Goto and enter a station number to go to that
station’s setup screen.
5-2-2-2
Copying Settings from One Station to Others
If other stations at your facility will use the same settings as
a station you have already set up, you can copy the settings
from this station to the others. To copy settings from one
station to others, complete the following steps.
At the “Station Setup” screen (Figure 10) for the station you
want to copy from, touch Copy in the upper right corner. The
“Station Copy” screen appears, showing the station number
for the station you are copying from.
Page 28 of 98
Figure 11: 6” “Station Copy” Screen
Follow the directions below to copy settings to one other
station, a range of stations, or all stations:
• Copying to One Other Station:
1. On the “Station Copy” screen (Figure 11), touch the
gray Copy to Station button. The keypad pops up.
2. Enter the station number for the station you are
copying to. Use ← to erase any mistakes. Use ↵ to
enter the value. The keypad disappears, and the
“Station Copy” screen shows the station number you
entered.
3. Touch the green Copy to Single Station button.
Complete briefly appears on the screen.
4. As appropriate, either continue copying to other
stations, or touch Return to go back to the “Station
Setup” screen.
• Copying to a Range of Other Stations:
1. On the “Station Copy” screen (Figure 11), touch the
gray First Station button. The keypad pops up.
2. Enter the station number for the lower end of the
range you are copying to. Use ← to erase any
mistakes. Use ↵ to enter the value. The keypad
disappears, and the “Station Copy” screen shows the
station number you entered under First Station.
Page 29 of 98
3. On the “Station Copy” screen (Figure 11), touch the
gray Last Station button. The keypad pops up.
4. Enter the station number for the upper end of the
range you are copying to. Use ← to erase any
mistakes. Use ↵ to enter the value. The keypad
disappears, and the “Station Copy” screen shows the
station number you entered under Last Station.
5. Touch the green Copy to Range of Stations button.
Complete briefly appears on the screen.
6. As appropriate, either continue copying to other
stations, or touch Return to go back to the “Station
Setup” screen.
• Copying to All Other Stations:
1. On the “Station Copy” screen (Figure 11), touch the
green Copy to All Stations button. Complete briefly
appears on the screen.
2. Touch Return to go back to the “Station Setup”
screen.
5-2-3
5-2-3-1
Setting Up Pumps
Before starting the system, you must define several settings
for each pump, such as how quickly to shut it down when it
is not in use. This section first discusses how to use the
controller’s menu system to configure pumps. The table on
page 87 discusses the individual choices.
Setting Up a Single Pump
1. Go to the “Pump Status“ screen if needed. To reach this
screen from any other screen, touch Menu on the righthand side of the screen, and then touch Pumps. The
“Pump Status” screen appears:
Page 30 of 98
Figure 12: 6” “Pump Status” Screen
2. Touch the icon for the pump you want to set up, and hold
it for several seconds. The “Pump Setup” screen opens.
Figure 13: 6” Pump Setup Screen Before Setup
3. Adjust settings as required. Touching any box that
appears in red (for “disabled”) toggles it to green (for
“enabled”), and vice versa. Touching any box that
appears in light gray gives you a keypad to enter a new
value.
Keypad entry works as with many ATM machines: the
first digit you enter initially appears in the rightmost
column and moves to the left as you enter more digits.
You do not need to use the decimal point. Use ← to
erase any mistakes. Use ↵ to enter the value. The
keypad disappears and the “Pump Setup” screen shows
the new value in the selected gray box.
Page 31 of 98
See page 87 for details on the options and their default
settings.
4. As appropriate, setup the rest of the pumps using either
of the following methods:
• Copy this pump’s settings to one or more other
pumps, as described below
• Use the Back or Next buttons to navigate to other
pumps. Touch Back to go to the previous “Pump
Setup” screen, or touch Next to go to the next
“Pump Setup” screen.
• Touch Goto and enter a pump number to go to that
pump’s setup screen .
5-2-3-2
Copying Settings from One Pump to Others
If other pumps at your facility will use the same settings as a
pump you have already set up, you can copy the settings
from this pump to the others. To do so:
At the “Pump Setup” screen (Figure 13) for the pump you
want to copy from, touch Copy in the upper right corner. The
“Pump Copy” screen appears, showing the pump number for
the pump you are copying from.
Figure 14: 6” “Pump Copy” Screen
Page 32 of 98
Follow the directions below to copy settings to one other
station, a range of stations, or all stations:
• Copying to One Other Pump:
1. On the “Pump Copy” screen (Figure 14), touch the
gray Copy to Pump button. The keypad pops up.
2. Enter the pump number for the station you are
copying to. Use ← to erase any mistakes. Use ↵ to
enter the value. The keypad disappears, and the
“Pump Copy” screen shows the pump number you
entered.
3. Touch the green Copy to Single Pump button.
Complete briefly appears on the screen.
4. As appropriate, either continue copying to other
pumps, or touch Return to go back to the “Pump
Setup” screen.
• Copying to a Range of Other Pumps:
1. On the “Pump Copy” screen (Figure 14), touch the
gray First Pump button. The keypad pops up.
2. Enter the pump number for the lower end of the range
you are copying to. Use ← to erase any mistakes.
Use ↵ to enter the value. The keypad disappears,
and the “Pump Copy” screen shows the pump
number you entered under First Pump.
3. On the “Pump Copy” screen (Figure 14), touch the
gray Last Pump button. The keypad pops up.
4. Enter the pump number for the upper end of the
range you are copying to. Use ← to erase any
mistakes. Use ↵ to enter the value. The keypad
disappears, and the “Pump Copy” screen shows the
pump number you entered under Pump Station.
5. Touch the green Copy to Range of Pumps button.
Complete briefly appears on the screen.
6. As appropriate, either continue copying to other
pumps, or touch Return to go back to the “Pump
Setup” screen.
• Copying to All Other Pumps:
1. On the “Pump Copy” screen (Figure 14), touch the
green Copy to All Pumps button. Complete briefly
appears on the screen.
Page 33 of 98
2. Touch Return to go back to the “Pump Setup” screen.
5-2-4
5-2-4-1
Finishing Setup: Setting Up Passwords
You can set up passwords for two levels of security: for
operators and for setup personnel. The controller comes
from the factory with neither password set. This allows every
user access to all functions.
Setup Password
If you define a password for setup personnel, then most
settings can be changed only after entering the password.
The password will be required to display the following
screens:
• System Setup (to review and change system-wide
settings, clear the alarm log, and go to the network status
screens).
• Station Setup (to review and change settings for all station
options).
• Pump Setup (to review and change settings for all pump
options).
5-2-4-2
Operator Password
If you define a password for operators, then a password will
be required to carry out any function (other than reviewing
station and pump status, silencing alarms, reviewing the
alarm log, and looking at help screens). Entering the
operator’s password will give the user access to the
functions at the following screens:
• Station Status (to enable or disable a station, and start or
stop system)
• Pump Status (to enable or disable a pump, and start or
stop system)
• Station Operator (to adjust a station’s convey time and
dump delay, activate priority convey, and review the
station’s last convey time and pump assignment;
depending on the options installed, the screen may also
enable the operator to adjust the mixture percentage for a
remote proportioning valve, review the last purge time and
purge valve, and set the intended material line for material
proofing)
Entering the setup password will give the user access to all
functions.
Page 34 of 98
Note: If you want to protect the operator’s functions with a
password, you must also define a setup password. If you
leave the setup password undefined, then all users will have
access to all functions.
If you want two different levels of password protection, you
must make the passwords different from each other. If the
two passwords are the same as each other, then any user
who enters the password will have access to all functions.
To set (or remove) password protections, complete the
following steps:
1. Go to the “System Setup” screen by touching the Menu
button on any screen. Then touch System Setup. The
“System Setup” screen will open.
2. On the “System Setup” screen ( Figure 7), touch the
Operator Password button or the Setup Password
button, depending on which password you want to set up.
A keypad pops up, with an entry of 0.
3. Enter up to four digits. If you want to remove password
protection, enter 0 as the password. Use ← to erase any
mistakes. Use ↵ to enter the value. The keypad
disappears, and the “System Setup” screen shows the
password you entered.
Note: When entering a password, all four digits must be supplied.
For example, if you enter a password of 2 here, you will
need to enter 0002 when the controller prompts for the
password.
If desired, you can also change the duration for which a
password remains effective. During operation, the passwordprotected screens are available either until the user logs off
or until this time elapses, whichever comes first. This feature
prevents the password from remaining active if a user
forgets to log off.
Note: The password timer starts when the user logs on. It expires
even if the user is actively using the screens when the
chosen time is up. If the timer expires, the system goes to
the “Station Status” screen. Your password duration should
be long enough to allow authorized users to complete their
tasks but short enough to provide adequate protection
against tampering.
Page 35 of 98
To change the duration of the password, complete the
following steps:
1. On the “System Setup” screen ( Figure 7), touch the
Operator Password Duration button or the Setup
Password Duration button, depending on which
password duration you want to change. A keypad pops
up, with an entry of 0.
2. Enter the number of minutes (between 1 and 99) that you
want to set as the password duration. Use ← to erase
any mistakes. Use ↵ to enter the value. The keypad
disappears, and the “System Setup” screen shows the
new setting.
5-2-5
Starting the System for the First Time
Once you have finished all the setup described above, you
are ready to start the system. To start your system, complete
the following steps.
1. At any screen, touch Menu on the right side of the
screen. The “Menu” screen appears (Figure 5).
2. Touch Stations. The “Station Status” screen appears
(Figure 8).
3. For each station that you want to use, briefly touch its
icon. The icon turns blue, indicating that the station is
ready, or the icon turns yellow, indicating that the station
needs material.
4. Touch Pumps. The “Pump Status “screen opens (Figure
12)
5. For each pump that you want to use, briefly touch its
icon. The icon turns blue, indicating that the pump is
ready.
6. Touch Push to Start System in the lower right-hand
corner of the screen.
7. The system starts. If any alarm messages appear on the
top of the screen, see p. 89.
5-3
5-3-1
General Operation
Overview
Your VTC 4/32 controller electrically controls valves and
solenoids to convey material from a central location to
individual stations as needed. The controller senses
Page 36 of 98
demands for material at the stations and responds to the
demands in a timely fashion.
This section gives the procedures for using your controller,
and it covers tasks that can be carried out with no password
or with an operator’s password. The section is divided into
three sub-sections:
• Basic tasks: tasks normally carried out by a station
operator
• Advanced tasks: tasks normally carried out by setup
personnel
• Alarms: silencing and clearing alarms
Important! Before you carry out any of the procedures in this chapter, the
L
system must be set up as described earlier in this chapter.
5-3-2
5-3-2-1
Basic Tasks
Reviewing Station Status
The starting point for all operations is the “Station Status”
screen. To reach this screen from any other screen, touch
Menu on the right-hand side of the screen, and then touch
Stations. The “Station Status” screen appears.
Page 37 of 98
Figure 15: 6” “Station Status” Screen During Operation
The status of each station is color-coded. You can see an
explanation of each status by using the online help. To do so
from this screen, complete the following steps:
1. Touch Menu. The “Menu” screen opens.
2. Touch Help Menu. The “Help Menu” screen opens.
3. Touch Station States. The “Station Symbols Help”
screen opens, explaining the status represented by each
color.
4. When you are finished reviewing the information, touch
Return. The “Help Menu” screen opens.
5. Touch Menu to return to the “Menu” screen.
The following table explains the status represented by each
color at the “Station Status” screen.
Page 38 of 98
Color
Gray outline
Label
Offline
Blue
Yellow
Green
Light Blue
Green, blinking
Ready
Demand
Loading
Dumping
Priority
Red, blinking
Red outline, blinking
Alarm
Critical
Description
Station is not enabled. The controller ignores any demands or
alarms.
Station is enabled and idle (full).
Station requires material.
Station is being loaded with material.
Station is dumping material into its receiver.
Station is in priority convey mode. Its pump will be temporarily
dedicated to filling it as soon as possible.
Station is in alarm.
Station is in critical alarm. The controller has disabled the station
until the alarm is cleared.
Additional basic information about each station (convey time,
dump delay, and pump assignment) is available at the
“Station Operator” screen. See page 43 for details.
Detailed configuration settings for each station are available
at the “Station Setup” screen. See page 85 for details about
each of these settings.
5-3-2-2
Reviewing Pump Status
The “Pump Status” screen is the counterpart of the “Station
Status” screen. To reach the “Pump Status” screen from any
other screen, touch Menu on the right-hand side of the
screen, and then touch Pumps. The “Pump Status” screen
appears.
Figure 16: 6” “Pump Status” Screen During Operation
Page 39 of 98
The status of each pump is color-coded. You can see an
explanation of each status by using the online help. To do so
from this screen, complete the following steps:
1. Touch Menu. The “Menu” screen appears.
2. Touch Help Menu. The “Help Menu” screen appears.
3. Touch Pump States. The “Pump Symbols Help” screen
appears, explaining the status represented by each color.
4. When you are finished reviewing the information, touch
Return. The “Help Menu” appears.
5. Touch Menu to return to the “Menu” screen.
The following table explains the status represented by each
color at the Station Status screen.
Color
Gray outline
Yellow
Blue
Label
Offline
Ready
Idle
Green
Blue, blinking
Loading
Blow Back
Red, blinking
Red outline, blinking
Alarm
Critical
Description
Pump is not enabled. The controller ignores any alarms.
Pump is off, waiting for demand from a station.
Pump is on, waiting for demand from a station. If there is no
demand before the end of the auto shutdown delay, the pump
will turn off.
Pump is conveying material to a station.
Pump’s air filter is being cleaned by blowing compressed air
backward through it.
Pump is in alarm.
Pump is in critical alarm. The controller has disabled the pump
until the alarm is cleared.
Additional basic information about each pump, including
configuration settings and the number of hours the pump has
been running, is available at the “Pump Setup” screen. For
details on configuration settings, see page 87. For details on
the hour meter, see page 46.
5-3-2-3
Logging On and Logging Off
Your controller may be set up to require a password for any
operation (other than reviewing station and pump status,
silencing alarms, reviewing the alarm log, and looking at help
screens). If so, touching a button will open the “Password
Entry” keypad screen.
Page 40 of 98
Figure 17: 6” “Password Entry” Screen
Enter the four-digit password (including any leading zeros).
For example, if the password is 1, enter 0001.
Each digit appears as an “X” as you touch it. When you
touch the fourth digit, the controller carries out your request.
For example, it enables or disables the requested pump or
station, or it goes to the “Station Operator” screen. If you did
not enter the correct password, the controller erases the
entry. You can then try again. To give up, touch Return.
Note: If you have lost the password(s), contact AEC for assistance.
Once you have logged on, the password remains active until
you log off or the password expires. (Setup personnel at
your facility control the number of minutes before the
password expires.) While the password is active, you can
continue to carry out password-protected tasks without
reentering the password. If the timer expires, the controller
goes to the “Station Status” screen and you must reenter the
password to continue working.
When you have finished any tasks that require the
password, you should log off. (If you forget to do this, the
controller will log you off when the password expires.) To log
off, complete the following steps:
1. Go to the “Menu” screen by touching Menu from any
other screen.
2. Touch Log Off Password. The “Station Status“ screen
opens.
Page 41 of 98
5-3-2-4
Enabling and Disabling Stations and Pumps
When a station or pump is disabled, the controller makes no
attempt to use it and ignores any alarms that occur for it.
Disabling a station or pump at the controller’s screen is
similar to bypassing a station with its bypass switch.
Enabling a station or pump makes it available for use.
Note: For a station to be available for the system, it must be
enabled at the controller’s screen and its bypass switch must
be in the “0” position.
To enable or disable a station (or pump), complete the
following steps:
1. Go to the “Station Status” (or “Pump Status”) screen, if
needed. To reach this screen from any other screen,
touch Menu, and then Stations (or Pumps).
Each disabled station (or pump) has an icon with a status
of “offline” (black with a gray outline). All other statuses
are enabled statuses.
2. Touch the icon for the station (or pump) briefly. The
station (or pump) switches to the new state, as indicated
by the color of its icon.
Note: If the “Station Operator” (or “Pump Setup”) screen appears
when you touch the icon, then you have kept your finger on
the screen too long. Touch Stations (or Pumps) to return to
the “Status” screen and try again. If you find it difficult to
touch the icon briefly enough, ask the setup personnel at
your facility to lengthen the touch switch delay.
5-3-2-5
Starting and Stopping the System
Important! In an emergency, you can use the power switch on the side of the
L
controller cabinet if a password is required to stop the system and
you do not know the password.
Note: Normally, all the stations and pumps you want to use should
be enabled before you start the system. When the system is
stopped, icons for enabled stations are blue and icons for
enabled pumps are yellow. Enabling stations and pumps is
described on p. 42.
A button to start and stop the system is located in the lower
right of the “Station Status” and “Pump Status” screens.
When the system is off, the button is red and reads Push to
Page 42 of 98
Start System. When the system is on, the button is green
and reads Push to Stop System. Depending on the setup
at your facility, the system may prompt for a password when
you touch this button.
Note: If conveying does not begin when you start the system,
check to make sure that all needed pumps are enabled. If
they are, check that all needed stations are enabled.
5-3-2-6
Reviewing and Adjusting Basic Station Settings
The VacTrac™ controller has a “Station Operator” screen for
each station, as shown below. This screen enables you to
review and adjust all basic settings for the station.
To reach the “Station Operator” screen, complete the
following steps:
1. Go to the “Station Status” screen, if needed. To reach
this screen from any other screen, touch Menu, and then
touch Stations.
2. Touch and hold the icon for the station, until the controller
either prompts for the password or displays the “Station
Operator” screen. Once you have entered the password
(if needed), the “Station Operator” screen appears.
Figure 18: 6” “Station Operator” Screen
Settings in the box labeled Convey, the red Priority Convey
Activate button, and the menu controls on the right-hand
side of the screen appear for all stations. Buttons in light
gray are settings that you can adjust at this screen. Boxes in
dark gray are for display only. If a pump assignment or purge
Page 43 of 98
setting needs to be changed, this must be done at the
“Station Setup” screen.
5-3-2-7
Navigating among the “Station Operator” Screens
The controls in the upper right-hand corner of the screen
enable you to move among the “Station Operator” screens:
• To display the screen for the next lower-numbered station
(for example, to move from the screen for Station 15 to the
screen for Station 14), touch Back.
• To display the screen for the next higher-numbered station
(for example, to move from the screen for Station 15 to the
screen for Station 16), touch Next.
• To display the screen for a specific station, touch Goto. A
keypad pops up. Enter the number for the desired station.
Use ← to erase any mistakes. Use ↵ to enter the value.
• To exit to the “Station Status” (or “Pump Status”) screen,
touch Stations (or Pumps).
5-3-2-8
Adjusting Convey Time and Dump Delay
Convey time is the length of time the station’s vacuum valve
remains open to allow material to be drawn in. (For a
volume-fill station, the valve closes when material covers the
station’s volume-fill proximity sensor or this time elapses,
whichever comes first.)
Dump delay is the length of time allowed for material to drain
from the station into its receiver. During this time, the
controller does not attempt to deliver any more material to
the station.
The settings for convey time and dump delay should match
the times actually required to fill and empty the station. The
following problems may occur if these settings are incorrect:
• Material is backing up and causing “high vacuum” alarms
(for time-fill stations only): Convey time is too long.
• System is not keeping up with the demand for material:
Convey time is too short, or dump delay is too long.
For your reference, the “Station Operator” screen shows the
length of time the controller actually spent conveying
material during the most recent delivery under Last Convey
Time.
Page 44 of 98
To adjust a station’s convey time (or the dump delay),
complete the following steps:
1. Go to the “Station Operator” screen by touching and
holding a station icon, or go to the “Station Setup”
screen.
2. Touch Convey Time (or Dump Delay). A keypad pops
up.
3. Enter the number of seconds desired for convey time or
dump delay. Use ← to erase any mistakes. Use ↵ to
enter the value. The new setting appears under Convey
Time (or Dump Delay).
5-3-2-9
Activating and Stopping Priority Convey for a Station
Important! Before activating priority convey, make sure that all other stations
L
using the same pump have adequate material in reserve to continue
operation. No material will be conveyed to these stations during
priority convey.
If you want the controller to fill a specific station with material
immediately, you can activate “priority convey” for that
station. When you do so, the controller temporarily dedicates
the station’s pump to it, ignoring demands from other
stations assigned to that pump. Once the chosen station is
full, normal operation resumes.
You can also use this feature to give one station a “head
start” by conveying a few loads to it and then stopping the
priority convey.
No more than one station for a given pump can be in “priority
convey” at once. To activate priority convey, complete the
following steps:
1. Go to the “Station Operator” by touching and holding a
station icon, or go to the “Station Setup” screen.
2. Touch Priority Convey Activate. The button changes to
Priority Convey Active and blinks until the station’s
demand has been satisfied (or you stop the priority
convey). The controller begins filling the chosen station
only (after finishing any convey already in progress).
3. To stop a priority convey before the station is completely
full, Touch the blinking Priority Convey Active. The
button changes to Priority Convey Activate and stops
Page 45 of 98
blinking. The controller finishes the current convey, if any,
and resumes normal operation.
5-3-3
5-3-3-1
Advanced Tasks
This section describes the procedures carried out during
operation that are normally reserved for setup personnel.
These procedures require use of the setup password (if your
facility has defined one). The procedure for logging on and
off with the setup password is the same as for logging on
with the operator password; see p. 40 for step-by-step
instructions for logging on and off.
Reviewing and Resetting a Pump Hour Meter
The controller keeps two meters for the length of time a
pump has run. One, like a car’s odometer, keeps a running
total and cannot be reset. The other, like a car’s trip
odometer, counts the running time since the last reset.
To review and reset the hour meter, complete the following
steps:
1. At any screen, touch Menu, and then touch Pumps. The
“Pump Status” screen opens.
2. Touch and hold the icon for the pump. The “Pump Setup”
screen opens.
Figure 19: 6” Pump Setup Screen
The box labeled x Hours Resettable shows the running
time since the last reset. The box labeled x Hours shows
total running time.
Page 46 of 98
To reset the resettable meter, touch Hour Meter Reset. The
time above Hours Resettable changes to 0.
5-3-3-2
Transferring Stations to a Standby Pump
If a pump fails, you can transfer all of the controller’s station
assignments for that pump to a standby pump. To do this,
you must disable (take offline) both the source pump and the
standby pump, and the standby pump must have no stations
already assigned to it.
The transfer operation at the controller’s touch screen
merely changes the pump assignment for every station on
the failed pump. It does not transfer any pump settings for
auto shutdown delay, alarms, or blow-back to the standby
pump. Mechanical connections must be changed manually.
To transfer stations from a pump to a standby pump,
complete the following steps:
1. At any screen, touch Menu, and then touch Pumps. The
“Pump Status” screen appears.
2. Both the source pump and the standby pump must be
offline. If either pump is any other state, disable it by
touching its icon briefly. The icon becomes black with a
gray outline.
3. Move the vacuum hose from the failed pump to the
standby pump, and carry out any other mechanical
procedures needed to use the standby pump.
4. At the “Pump Status” screen, touch and hold the icon for
any pump until the “Pump Setup” screen appears.
5. At the “Pump Setup” screen, touch Transfer Stations To
Standby Pump. The “Transfer to Standby Pump” screen
opens:
Page 47 of 98
Figure 20: 6” “Transfer To Standby Pump” Screen
6. Touch Source Pump. The keypad pops up.
7. Enter the number of the failed pump. Use ← to erase any
mistakes. Use ↵ to enter the value. The number appears
under Source Pump.
8. Touch Standby Pump. The keypad pops up.
9. Enter the number of the standby pump. Use ← to erase
any mistakes. Use ↵ to enter the value. The number
appears under Standby Pump, and a button labeled
Transfer to Standby Pump appears on the screen.
Figure 21: 6” Transfer To Standby Pump Button
Note: When you enter the second pump number, the controller
checks to make sure that both pumps are offline and that the
standby pump has no stations assigned to it. If these
conditions are not all met, error messages appear on the
screen instead of a Transfer to Standby Pump button. If
you get an error message, first check to make sure that you
Page 48 of 98
have entered the correct numbers and reenter if necessary.
If another error occurs, see the Standby Pump Errors section
on page 49.
10. Touch Transfer To Standby Pump. “Transfer in
Progress” appears briefly on the screen, followed by
“Transfer Complete,” in place of the Transfer To
Standby Pump button. The controller switches the
setting for Source Pump to the new pump and switches
the setting for Standby Pump to 0 (unassigned).
11. Touch Return, and then Pumps to return to the “Pump
Status” screen.
12. Put the standby pump online by briefly touching its icon.
The icon changes color to show the new status, and the
system begins using the pump. In addition, all “Station
Operator” and “Station Setup” screens show the new
pump assignment.
When the failed pump is operational again, you can repeat
this process, this time using the standby pump’s number as
the setting for Source Pump the repaired pump’s number as
the setting for Standby Pump.
Standby Pump Errors
If the error message tells you to disable the source pump
and/or the standby pump, touch Return at this screen, then
Pumps at the “Pump Setup” screen. Take the pumps offline
and then return to the “Transfer to Standby Pump” screen.
If the error message tells you that the standby pump has
stations assigned, you must either use a different standby
pump or you must remove the pump assignment for all
stations assigned to the standby pump. To remove the
assignments, complete the following steps:
1. Touch Return at the “Standby Pump” screen, and then
touch Menu.
2. From the “Menu” screen, touch Stations.
3. Touch and hold a station icon to get to the “Station
Operator” screen.
4. Then touch Setup to go to the “Station Setup” screen.
5. Use Back and Next to review all pump assignments.
Page 49 of 98
6. Where necessary, choose Assigned to Pump #n to set
station assignments to 0 (unassigned). Then return to the
“Transfer to Standby Pump” screen.
5-3-4
5-3-4-1
Alarms
Reviewing Alarms
To review your system’s alarms, touch Alarms on “Menu”
screen. The “Alarm Log” screen appears, with the newest
alarm listed first.
Figure 22: 6” Alarm Log Screen
To scroll up and down through the list, touch and at the
bottom of the list.
5-3-4-2
Clearing the Alarm Log
The controller saves all alarm messages, together with the
date and time the alarm occurred. When you no longer need
the history, or when the list becomes too long to manage,
you can erase the log. To do so:
1. At the “Menu” screen, touch System Setup. The “System
Setup” screen appears.
2. Touch Clear Alarm Log. A warning message pops up,
asking for confirmation.
3. Touch Continue. The “System Setup” screen reappears. To confirm that the log has been erased, you
can return to the “Menu” screen and touch Alarms.
Page 50 of 98
5-3-4-3
Silencing Alarms
Whenever a new alarm occurs, your controller sounds the
horn and turns on the strobe light at each central alarm.
Touch Alarm Silence on the alarm message banner that
appears when a new alarm occurs or press the physical
push button included in the central alarm option.
The horns and lights at the central alarms turn off. Your
controller has separate, configurable settings for how long
the horns should remain silent and how long the lights
should remain off. If the alarm condition still exists when
either of these times elapses, the corresponding device
(horns or lights) turn on again and the alarm message
banner appears with a “Suppression/Silence Time Expired”
message. If a new alarm occurs, both horns and lights turn
on. See page 89 for a list of alarms and their possible
causes.
Page 51 of 98
6
Using the Optional 10” Interface
6-1
Introduction
This chapter gives the procedures for configuring your VTC
4/32 controller. This chapter applies only to the optional 10”
touch screen controller. If you have purchased the standard
6” touch screen controller, refer to Chapter 5: “Using the
Standard 6” Touch Screen.“
Configuration of your VTC4/32 controller includes setting the
number of stations and pumps, setting variables such as
convey time and blow-back interval, and setting up
passwords. AEC recommends that you carry out these
procedures in the order given here.
Important! Before carrying out these procedures, install all equipment as
L
described in Chapter 4, “Installation” and in the manual VacTrac™
Series Conveying Systems: Mechanical Components.
Figure 23 below gives an overview of the basic flow between
the menus used in setting up the system.
Figure 23: Basic Menu Flow for Setup of 10” Controller
Pumps
Station
Status
Touch and Hold Station Icon
Station
Operator
Pump
Status
Stations
System Setup
Alarms
System
Setup
Station Setup
System Setup
Station
Setup
Touch and Hold Pump Icon
Alarms
Alarms
Pump
Setup
Page 52 of 98
6-2
Setup
6-2-1
6-2-1-1
Setting Up the System
Setting the Number of Stations and the Number of Pumps
Figure 24: 10” Default “Station Status” Screen Before
Setup
1. At the “Station Status” screen (Figure 24), or at the
“Pump Status” screen, touch System Setup. The
“System Setup” screen appears.
Page 53 of 98
Figure 25: 10” “System Setup” Screen Before Setup
2. Touch Stations Present in the upper left of the “System
Setup” screen. A keypad pops up.
3. Enter the total number of stations (1–32) to be controlled
by this controller. Use ← to erase any mistakes. Use ↵ to
enter the value. The keypad disappears and the new
setting appears under Stations Present.
4. Touch Pumps Present in the upper part of the “System
Setup” screen. A keypad pops up.
5. Enter the total number of pumps (1–4) to be controlled by
this controller. Use ← to erase any mistakes. Use ↵ to
enter the value. The keypad disappears and the new
setting appears under Pumps Present.
6-2-1-2
Setting Up Alarm Silences
When an alarm occurs, a horn sounds and a strobe light
flashes at each installed central alarm. The lower right
corner of the controller’s screen turns into a button labeled
Alarm Silence. Touching this button silences the horn(s)
and turns off the light(s) for configurable periods of time. You
can set different lengths of time for keeping the horn silent
and keeping the light turned off. If a new alarm occurs, the
horn sounds and the light turns on again.
To set the lengths of time for suppressing the alarm strobe
and horn complete the following steps:
1. Go to the “System Setup” screen. To reach this screen
from the “Station Status” or “Pump Status” screen, touch
Page 54 of 98
and hold the icon for any station or pump, until the
“Station Operator” or “Pump Setup” screen appears.
Then touch System Setup. The “System Setup” screen
appears.
Figure 26: 10” “System Setup” Screen
2. Touch Alarm Strobe Suppression or Alarm Horn
Silence, as appropriate. A keypad pops up, with an entry
of 0.
3. Enter the number of minutes (range: 0–99). If you want
the light (or the horn) to stay on as long as the alarm
persists, simply leave its entry at 0. If you want the horn
(or the light) to stay off until a new alarm occurs, use 99
for its entry. Use ← to erase any mistakes. Use ↵ to enter
the value. The keypad disappears and the new setting
appears under Alarm Strobe Suppression or Alarm
Horn Silence.
4. Repeat for the other device (strobe or horn) as
appropriate.
6-2-1-3
Setting Up Pump Staging
To avoid an excessive power demand at your facility when
the conveying system starts up, you can stagger the times at
which pumps start. Whenever a demand would cause two
pumps to start simultaneously, your choice for pump staging
sets the delay between the start of one pump and the start of
the next. The factory default is a delay of three seconds. You
need to change this setting only if this delay is too long or
too short for your facility.
Page 55 of 98
To set the delay between the start of one pump and the next,
complete the following steps:
1. Go to the “System Setup” screen if needed by touching
System Setup from any other screen. The current delay
is displayed under Pump Staging.
2. Touch Pump Staging. A keypad pops up, with an entry
of 0.
3. Enter the number of seconds (range: 1–99). Use ← to
erase any mistakes. Use ↵ to enter the value. The
keypad disappears and the new setting appears under
Pump Staging.
6-2-1-4
Setting Up Touch Switch Delay
During operation, the controller normally displays the
“Station Status” screen or the “Pump Status” screen,
showing the current status of all stations or pumps. Briefly
touching the icon for a station or pump toggles between
taking it offline (disabling it) and putting it online (enabling it).
Touching the icon and holding it takes the user into the
controller’s menu system. The setting for touch switch delay
determines how long the user must keep an icon touched
before a menu appears. The factory default is 1.5 seconds.
You need to change this setting only if you find that users
are having difficulty with the current setting.
To change the touch switch delay, complete the following
steps:
1. Go to the “System Setup” screen if needed by touching
System Setup from any other screen. The current delay
is displayed under Touch Switch Delay.
2. Touch Touch Switch Delay. A keypad pops up, with an
entry of 0.
3. Enter the number of seconds (range: 0.0–99.0). As with
many ATM machines, the first digit you enter initially
appears to the right of the decimal point and moves to
the left as you enter more digits. You do not need to use
the decimal point. Use ← to erase any mistakes. Use ↵
to enter the value. The keypad disappears and the new
setting appears under Touch Switch Delay.
Page 56 of 98
6-2-2
6-2-2-1
Setting Up Stations
Before starting the system, you must define several settings
for each station, such as which pump conveys material to it.
This section first discusses how to use the controller’s menu
system to configure stations. The table on pages 85-87
discusses the individual choices.
Setting Up a Single Station
1. Go to the “Station Status” screen if needed by touching
Stations from any other screen.
Figure 27: 10” “Station Status” Screen
2. On the “Station Status” screen (Figure 27), touch the icon
for the station you want to set up, and hold it for several
seconds. The “Station Operator” screen for the selected
station appears.
Page 57 of 98
Figure 28: 10” “Station Operator” Screen Before Setup
3. At the “Station Operator” screen (Figure 28), touch
Station Setup. The “Station Setup” screen appears.
Figure 29: 10” “Station Setup” Screen
4. Adjust settings as required. Touching any box that
appears in red (for “disabled”) toggles it to green (for
“enabled”), and vice versa. Touching any box that
appears in light gray gives you a keypad to enter a new
value.
Keypad entry works as with many ATM machines: the
first digit you enter initially appears in the rightmost
column and moves to the left as you enter more digits.
You do not need to use the decimal point. Use ← to
Page 58 of 98
erase any mistakes. Use ↵ to enter the value. The
keypad disappears and the “Station Setup” screen shows
the new value in the selected gray box.
Touching Reset to Defaults in the lower right of the
screen changes all settings for this station back to their
factory defaults. See page 85 for details on the options
and their default settings.
As appropriate, set up the other stations using one of the
following methods:
• Copy this station’s settings to one or more other stations,
as described below.
• Touch Back to go to the “Station Setup” screen, and
repeat the steps in this section.
• Touch Next to go to the “Station Setup” screen, and
repeat the steps in this section.
• Touch Goto and enter a station number to go to that
station’s setup screen, and repeat the steps in this section.
6-2-2-2
Copying Settings from One Station to Others
If other stations at your facility will use the same settings as
a station you have already set up, you can copy the settings
from this station to the others. To copy settings from one
station to another, complete the following steps.
At the “Station Setup” screen (for the station you want to
copy from), touch Copy in the screen’s upper right. The
“Station Copy” screen appears, showing the station number
for the station you are copying from:
Page 59 of 98
Figure 30: 10” “Station Copy” Screen
Follow the directions below to copy settings to one other
station, a range of stations, or all stations.
• Copying settings to one other station:
1. Touch the gray Copy to Station button. The keypad
pops up.
2. Enter the station number for the station you are
copying to. Use ← to erase any mistakes. Use ↵ to
enter the value. The keypad disappears and the
“Station Copy” screen shows the station number you
entered under Copy to Station.
3. Touch the green Copy to Single Station button.
“Complete” briefly appears on the screen.
4. As appropriate, either continue copying to other
stations, or touch Return to go back to the “Station
Setup” screen.
• Copying settings to a range of other stations:
1. Touch the gray First Station button. The keypad
pops up.
2. Enter the station number for the station at the lower
end of the range you are copying to. Use ← to erase
any mistakes. Use ↵ to enter the value. The keypad
disappears and the “Station Copy” screen shows the
station number you entered under First Station.
Page 60 of 98
3. Touch the gray Last Station button. The keypad pops
up.
4. Enter the station number for the station at the upper
end of the range you are copying to. Use ← to erase
any mistakes. Use ↵ to enter the value. The keypad
disappears and the “Station Copy” screen shows the
station number you entered under Last Station.
5. Touch the green Copy to Range of Stations button.
“Complete” briefly appears on the screen.
6. As appropriate, either continue copying to other
stations, or touch Return to go back to the “Station
Setup” screen.
• Copying settings to all other stations:
1. Touch the green Copy To All Stations button.
“Complete” briefly appears on the screen.
2. Touch Return to go back to the “Station Setup”
screen.
6-2-3
6-2-3-1
Setting Up Pumps
Before starting the system, you must define several settings
for each pump, such as how quickly to shut it down when it
is not in use. This section first discusses how to use the
controller’s menu system to configure pumps. The table on
page 87 discusses the individual choices.
Setting Up a Single Pump
1. Go to the “Pump Status” screen by touching Pumps from
any other screen. The “Pump Status” screen appears.
Page 61 of 98
Figure 31: 10” “Pump Status” Screen
2. From the “Pump Status“ screen (Figure 31), touch the
icon for the pump you want to set up, and hold it for
several seconds. The “Pump Setup” screen appears.
Figure 32: 10” “Pump Setup” Screen Before Setup
3. Adjust settings as required. Touching any box that
appears in red (for “disabled”) toggles it to green (for
“enabled”), and vice versa. Touching any box that
appears in light gray gives you a keypad to enter a new
value.
Keypad entry works as with many ATM machines: the
first digit you enter initially appears in the rightmost
column and moves to the left as you enter more digits.
Page 62 of 98
You do not need to use the decimal point. Use ← to
erase any mistakes. Use ↵ to enter the value. The
keypad disappears and the “Pump Setup” screen shows
the new value in the selected gray box. See page 87 for
details on the options and their default settings.
As appropriate, set up the other pumps using one of the
following methods:
• Copy this pump’s settings to one or more other pumps, as
described below.
• Touch Back to go to the “Pump Setup” screen, and repeat
the steps in this section.
• Touch Next to go to the “Pump Setup” screen, and repeat
the steps in this section.
• Touch Goto and enter a pump number to go to that
pump’s setup screen, and repeat the steps in this section.
6-2-3-2
Copying Settings from One Pump to Others
If other pumps at your facility will use the same settings as a
pump you have already set up, you can copy the settings
from this pump to the others. To copy settings from one
pump to another, complete the following steps:
At the “Pump Setup” screen (for the pump you want to copy
from), touch Copy in the screen’s upper right. The “Pump
Copy” screen appears, showing the pump number for the
pump you are copying from.
Page 63 of 98
Figure 33: 10” “Pump Copy” Screen
Follow the directions below to copy settings to one other
pump, a range of pumps, or all pumps.
• Copying settings to one other pump:
1. Touch the gray Copy to Pump button. The keypad
pops up.
2. Enter the pump number for the pump you are copying
to. Use ← to erase any mistakes. Use ↵ to enter the
value. The keypad disappears and the “Pump Copy”
screen shows the pump number you entered under
Copy to Pump.
3. Touch the green Copy To Single Pump. “Complete”
briefly appears on the screen.
4. As appropriate, either continue copying to other
pumps, or touch Return to go back to the “Pump
Setup” screen.
• Copying settings to a range of other pumps
1. Touch the gray First Pump button. The keypad pops
up.
2. Enter the number for the pump at the lower end of the
range you are copying to. Use ← to erase any
mistakes. Use ↵ to enter the value. The keypad
disappears and the “Pump Copy” screen shows the
pump number you entered under First Pump.
Page 64 of 98
3. Touch the gray Last Pump button. The keypad pops
up.
4. Enter the number for the pump at the upper end of the
range you are copying to. Use ← to erase any
mistakes. Use ↵ to enter the value. The keypad
disappears and the “Pump Copy” screen shows the
pump number you entered under Last Pump.
5. Touch the green Copy To Range of Pumps button.
“Complete” briefly appears on the screen.
6. As appropriate, either continue copying to other
pumps, or touch Return to go back to the “Pump
Setup” screen.
• Copying settings to all other pumps
1. Touch the green Copy To All Pumps button.
“Complete” briefly appears on the screen.
2. Touch Return to go back to the “Pump Setup” screen.
6-2-4
Finishing Setup: Setting Up Passwords
You can set up passwords for two levels of security: for
operators and for setup personnel. The controller comes
from the factory with neither password set. This allows every
user access to all functions.
Setup Password
If you define a password for setup personnel, then most
settings can be changed only after entering the password.
The password will be required to display the following
screens:
• System Setup (to review and change system-wide
settings, clear the alarm log, and go to the network status
screens)
• Station Setup (to review and change settings for all station
options)
• Pump Setup (to review and change settings for all pump
options)
Operator Password
If you define a password for operators, then a password will
be required to carry out any function (other than reviewing
station and pump status, silencing alarms, reviewing the
Page 65 of 98
alarm log, and looking at help screens). Entering the
operator’s password will give the user access to the
functions at the following screens:
• Station Status (to enable or disable a station, and start or
stop system)
• Pump Status (to enable or disable a pump, and start or
stop system)
• Station Operator (to adjust a station’s convey time and
dump delay, activate priority convey, and review the
station’s last convey time and pump assignment)
Entering the setup password will give the user access to all
functions.
Note: If you want to protect the operator’s functions with a
password, you must also define a setup password. If you
leave the setup password undefined, then all users will have
access to all functions.
If you want two different levels of password protection, you
must make the passwords different from each other. If the
two passwords are the same as each other, then any user
who enters the password will have access to all functions.
To set (or remove) password protections, complete the
following steps:
1. Go to the “System Setup” screen if needed by touching
System Setup from any screen. The “System Setup”
screen opens.
2. Touch Operator Password or Setup Password, as
appropriate. A keypad pops up, with an entry of 0.
3. Enter up to four digits. If you want to remove the
password protection, simply leave the entry at 0. Use ←
to erase any mistakes. Use ↵ to enter the value. The
keypad disappears and the new setting appears under
Operator (or Setup) Password. In addition, if you have
added a password, a new button appears on the screen,
labeled Log Off Password.
Note: When entering a password, all four digits must be supplied.
For example, if you enter a password of 2 here, you will
need to enter 0002 when the controller prompts for the
password.
Page 66 of 98
If desired, you can also change the duration for which a
password remains effective. During operation, the passwordprotected screens are available either until the user logs off
or until this time elapses, whichever comes first. This feature
prevents the password from remaining active if a user
forgets to log off.
Note: The password timer starts when the user logs on. It expires
even if the user is actively using the screens when the
chosen time is up. If the timer expires, the system goes to
the “Station Status” screen. Your password duration should
be long enough to allow authorized users to complete their
tasks but short enough to provide adequate protection
against tampering.
To change the duration of a password, complete the
following steps:
1. At the “System Setup” screen, touch Operator
Password Duration or Setup Password Duration, as
appropriate. A keypad pops up, with an entry of 0.
2. Enter the number of minutes (between 1 and 99). Use ←
to erase any mistakes. Use ↵ to enter the value. The
keypad disappears and the new setting appears under
Operator (or Setup) Password Duration.
6-2-5
Starting the System for the First Time
Once you have finished all the setup described above, you
are ready to start the system. To start your system, complete
the following steps:
1. At any screen, touch Stations on the right-hand side of
the screen. The “Station Status“ screen appears.
2. For each station that you want to use, briefly touch its
icon. The icon turns blue, indicating that the station is
ready or yellow, indicating that the station needs material.
3. Touch Pumps. The “Pump” Status screen appears.
4. For each pump that you want to use, briefly touch its
icon. The icon turns blue, indicating that the pump is
ready.
5. Touch Push to Start System in the lower right-hand
corner of the screen. The system starts. If any alarm
messages appear on the top of the screen, see page 83.
Page 67 of 98
6-3
General Operation
6-3-1
Overview
Your VTC 4/32 controller electrically controls valves and
solenoids to convey material from a central location to
individual stations as needed. The controller senses
demands for material at the stations and responds to the
demands in a timely fashion.
This section gives the procedures for using your controller,
and it covers tasks that can be carried out with no password
or with an operator’s password. The section is divided into
three sub-sections:
• Basic tasks: tasks normally carried out by a station
operator
• Advanced tasks: tasks normally carried out by setup
personnel
• Alarms: silencing and clearing alarms
6-3-2
6-3-2-1
Basic Tasks
Reviewing Station Status
The starting point for all operations is the “Station Status”
screen. To reach this screen from any other screen, touch
Stations. The “Station Status” screen opens.
Page 68 of 98
Figure 34: 10” “Station Status” Screen During Operation
The status of each station is color-coded, as summarized in
the upper right of the screen. You can see an explanation of
each status by using the online help. To do so from this
screen, complete the following steps.
1. Touch anywhere in the rectangle in the upper right of the
screen. The “Help Menu” screen appears.
2. Touch Station States. The “Station Symbols Help”
screen opens, explaining the status represented by each
color.
3. When you are finished reviewing the information, touch
Return. The “Help Menu” screen opens.
4. At the “Help Menu” screen, touch Stations (or Pumps).
The “Station Status” (or “Pump Status”) screen opens.
The following table explains the status represented by each
color at the “Station Status” screen.
Page 69 of 98
Color
Gray outline
Label
Offline
Blue
Yellow
Green
Light Blue
Green, blinking
Ready
Demand
Loading
Dumping
Priority
Red, blinking
Red outline, blinking
Alarm
Critical
Description
Station is not enabled. The controller ignores any demands or
alarms.
Station is enabled and idle (full).
Station requires material.
Station is being loaded with material.
Station is dumping material into its receiver.
Station is in priority convey mode. Its pump will be temporarily
dedicated to filling it as soon as possible.
Station is in alarm.
Station is in critical alarm. The controller has disabled the station
until the alarm is cleared.
Additional basic information about each station (convey time,
dump delay, and pump assignment) is available at the
“Station Operator” screen. See page 74 for details.
Detailed configuration settings for each station are available
at the “Station Setup” screen. See page 84 for details about
specific settings.
6-3-2-2
Reviewing Pump Status
The “Pump Status” screen is the counterpart of the “Station
Status” screen. Touch Pumps to reach the “Pump Status”
screen from any other screen. The “Pump Status” screen
appears:
Page 70 of 98
Figure 35: 10” “Pump Status” Screen During Operation
The status of each pump is color-coded, as summarized in
the upper right of the screen. You can see a more detailed
explanation of each status by using the online help. To do so
from this screen, complete the following steps:
1. Touch anywhere in the rectangle in the upper right of the
screen. The “Help Menu” screen opens.
2. Touch Pump States. The “Pump Symbols Help” screen
opens, explaining the status represented by each color.
3. When you are finished reviewing the information, touch
Return. The “Help Menu” screen opens.
4. At the “Help Menu” screen, touch Pumps (or Stations).
The “Pump Status” (or “Station Status”) screen appears.
The following table explains the status represented by each
color at the “Pump Status” screen.
Color
Gray outline
Yellow
Blue
Label
Offline
Ready
Idle
Green
Blue, blinking
Loading
Blow Back
Red, blinking
Red outline, blinking
Alarm
Critical
Description
Pump is not enabled. The controller ignores any alarms.
Pump is off, waiting for demand from a station.
Pump is on, waiting for demand from a station. If there is no
demand before the end of the auto shutdown delay, the pump
will turn off.
Pump is conveying material to a station.
Pump’s air filter is being cleaned by blowing compressed air
backward through it.
Pump is in alarm.
Pump is in critical alarm. The controller has disabled the pump
until the alarm is cleared.
Page 71 of 98
Additional information about each pump, including
configuration settings and the number of hours the pump has
been running, is available at the “Pump Setup” screen. For
details on configuration settings, see page 87. For details on
the hour meter, see page 77.
6-3-2-3
Logging On and Logging Off
Your controller may be set up to require a password for any
operation (other than reviewing station and pump status,
silencing alarms, reviewing the alarm log, and looking at help
screens). If so, touching a button will open the “Password
Entry” keypad screen.
Figure 36: 10” “Password Entry” Screen
Enter the four-digit password (including any leading zeros).
For example, if the password is 1, enter 0001.
Each digit appears as an “X” as you touch it. When you
touch the fourth digit, the controller carries out your request.
For example, it enables or disables the requested pump or
station, or it goes to the “Station Operator” screen. If you did
not enter the correct password, the controller erases the
entry. You can then try again. To give up, touch Return.
Note: If you have lost the password(s), contact AEC for assistance.
Once you have logged on, the password remains active until
you log off or the password expires. (Setup personnel at
your facility control the number of minutes before the
password expires.) While the password is active, you can
Page 72 of 98
continue to carry out password-protected tasks without
reentering the password. If the timer expires, the controller
goes to the “Station Status” screen and you must reenter the
password to continue working.
When you have finished any tasks that require the
password, you should log off. (If you forget to do this, the
controller will log you off when the password expires.) To log
off, complete the following steps:
1. Go to a “Station Operator” screen by touching and
holding a station icon.
2. Touch Log Off Operator near the lower right of the
screen. The “Station Status” screen appears.
6-3-2-4
Enabling and Disabling Stations and Pumps
When a station or pump is disabled, the controller makes no
attempt to use it and ignores any alarms that occur for it.
Disabling a station or pump at the controller’s screen is
similar to bypassing a station with its bypass switch.
Enabling a station or pump makes it available for use.
Note: For a station to be available for the system, it must be
enabled at the controller’s screen and its bypass switch must
be in the “0” position.
To enable or disable a station (or pump), complete the
following steps:
1. Go to the “Station Status” (or “Pump Status”) screen, if
needed. To reach this screen from any other screen,
touch Stations (or Pumps) on the right-hand side of the
screen. Each disabled station (or pump) has an icon with
a status of “offline” (black with a gray outline). All other
statuses are enabled statuses.
2. Touch the icon for the station (or pump) briefly. The
station (or pump) switches to the new state, as indicated
by the color of its icon.
Note: If the “Station Operator” (or “Pump Setup”) screen appears
when you touch the icon, then you have kept your finger on
the screen too long. Touch Stations (or Pumps) to return to
the “Status” screen and try again. If you find it difficult to
touch the icon briefly enough, ask the setup personnel at
your facility to lengthen the touch switch delay.
Page 73 of 98
6-3-2-5
Starting and Stopping the System
Important! In an emergency, you can use the power switch on the side of the
L
controller cabinet if a password is required to stop the system and
you do not know the password.
Note: Normally, all the stations and pumps you want to use should
be enabled before you start the system. When the system is
stopped, icons for enabled stations are blue and icons for
enabled pumps are yellow. Enabling stations and pumps is
described on page 73.
A button to start and stop the system is located in the lower
right of the “Station Status”, “Pump Status”, and “Alarm Log”
screens. When the system is off, the button is red and reads
Push to Start System. When the system is on, the button is
green and reads Push to Stop System. Depending on the
setup at your facility, the system may prompt for a password
when you touch this button.
Note: If conveying does not begin when you start the system,
check to make sure that all needed pumps are enabled. If
they are, check that all needed stations are enabled.
6-3-2-6
Reviewing and Adjusting Basic Station Settings
The VacTrac™ controller has a “Station Operator” screen for
each station, as shown below. This screen enables you to
review and adjust all basic settings for the station.
To reach the “Station Operator” screen, complete the
following steps:
1. Go to the “Station Status” screen, if needed by touching
Stations from any other screen.
2. Touch and hold the icon for the station, until the controller
either prompts for the password or displays the Station n
Operator screen. Once you have entered the password
(if needed), the Station n Operator screen appears.
Page 74 of 98
Figure 37: 10” Station Operator Screen
Settings in the box labeled Convey, the red Priority Convey
Activate button, and the menu controls on the right-hand
side of the screen appear for all stations. Buttons in light
gray are settings that you can adjust at this screen. Boxes in
dark gray are for display only. If a pump assignment or purge
setting needs to be changed, this must be done at the
“Station Setup” screen.
6-3-2-7
Navigating among the Station Operator Screens
The controls in the upper right-hand corner of the screen
enable you to move among the “Station Operator” screens:
• To display the screen for the next lower-numbered station
(for example, to move from the screen for Station 15 to the
screen for Station 14), touch Back.
• To display the screen for the next higher-numbered station
(for example, to move from the screen for Station 15 to the
screen for Station 16), touch Next.
• To display the screen for a specific station, touch Goto. A
keypad pops up. Enter the number for the desired station.
Use ← to erase any mistakes. Use ↵ to enter the value.
• To exit to the “Station Status” (or “Pump Status”) screen,
touch Stations (or Pumps).
Page 75 of 98
6-3-2-8
Adjusting Convey Time and Dump Delay
Convey time is the length of time the station’s vacuum valve
remains open to allow material to be drawn in. (For a
volume-fill station, the valve closes when material covers the
station’s volume-fill proximity sensor or this time elapses,
whichever comes first.)
Dump delay is the length of time allowed for material to drain
from the station into its receiver. During this time, the
controller does not attempt to deliver any more material to
the station.
The settings for convey time and dump delay should match
the times actually require to fill and empty the station. The
following problems may occur if these settings are incorrect:
• Material is backing up and causing “high vacuum” alarms
(for time-fill stations only): Convey time is too long.
• System is not keeping up with the demand for material:
Convey time is too short, or dump delay is too long.
For your reference, the “Station Operator” screen shows the
length of time the controller actually spent conveying
material during the most recent delivery under Last Convey
Time.
To adjust a station’s convey time (or the dump delay),
complete the following steps:
1. Go to the “Station Operator” screen (as described on
page 74), or go to the “Station Setup” screen.
2. Touch Convey Time (or Dump Delay). A keypad pops
up.
3. Enter the number of seconds desired. Use ← to erase
any mistakes. Use ↵ to enter the value. The new setting
appears under Convey Time (or Dump Delay).
6-3-2-9
Activating and Stopping Priority Convey for a Station
Important! Before activating priority convey, make sure that all other stations
L
using the same pump have adequate material in reserve to continue
operation. No material will be conveyed to these stations during
priority convey.
Page 76 of 98
If you want the controller to fill a specific station with material
immediately, you can activate “priority convey” for that
station. When you do so, the controller temporarily dedicates
the station’s pump to it, ignoring demands from other
stations assigned to that pump. Once the chosen station is
full, normal operation resumes.
You can also use this feature to give one station a “head
start” by conveying a few loads to it and then stopping the
priority convey.
No more than one station for a given pump can be in “priority
convey” at once.
To activate priority convey, complete the following steps:
1. Go to the “Station Operator” screen (as described on
page 74), or go to the “Station Setup” screen.
2. Touch Priority Convey Activate. The button changes to
Priority Convey Active and blinks until the station’s
demand has been satisfied (or you stop the priority
convey). The controller begins filling the chosen station
only (after finishing any convey already in progress).
3. To stop a priority convey before the station is completely
full, touch the blinking Priority Convey Active. The
button changes to Priority Convey Activate and stops
blinking. The controller finishes the current convey, if any,
and resumes normal operation.
6-3-3
6-3-3-1
Advanced Tasks
This section describes the procedures carried out during
operation that are normally reserved for setup personnel.
These procedures require use of the setup password (if your
facility has defined one). The procedure for logging on and
off with the setup password is the same as for logging on
with the operator password; see page 72.
Reviewing and Resetting a Pump Hour Meter
The controller keeps two meters for the length of time a
pump has run. One, like a car’s odometer, keeps a running
total and cannot be reset. The other, like a car’s trip
odometer, counts the running time since the last reset.
To review and reset the hour meter, complete the following
tasks:
Page 77 of 98
1. At any screen, touch Pumps. The “Pump Status” screen
appears.
2. Touch and hold the icon for the pump. The “Pump Setup”
screen appears.
Figure 38: 10” “Pump Setup” Screen
The box labeled x Hours Resettable shows the running
time since the last reset. The box labeled x Hours shows
total running time.
To reset the resettable meter, touch Hour Meter Reset. The
time above Hours Resettable changes to 0.
6-3-3-2
Transferring Stations to a Standby Pump
If a pump fails, you can transfer all of the controller’s station
assignments for that pump to a standby pump. To do this,
you must disable (take offline) both the source pump and the
standby pump, and the standby pump must have no stations
already assigned to it.
The transfer operation at the controller’s touch screen
merely changes the pump assignment for every station on
the failed pump. It does not transfer any pumps settings for
auto shutdown delay, alarms, or blow-back to the standby
pump. Mechanical connections must be changed manually.
To transfer stations from a pump to a standby pump:
1. At any screen, touch Pumps. The “Pump Status” screen
opens.
Page 78 of 98
2. Both the source pump and the standby pump must be
offline. If either pump is any other state, disable it by
touching its icon briefly. The icon becomes black with a
gray outline.
3. Move the vacuum hose from the failed pump to the
standby pump, and carry out any other mechanical
procedures needed to use the standby pump.
4. At the “Pump Status” screen, touch and hold the icon for
any pump until the “Pump Setup” screen appears.
5. At the “Pump Setup” screen, touch Transfer Stations To
Standby Pump. The “Transfer to Standby Pump” screen
appears.
Figure 39: 10” “Transfer to Standby Pump” Screen
6. Touch Source Pump. The keypad pops up.
7. Enter the number of the failed pump. Use ← to erase any
mistakes. Use ↵ to enter the value. The number appears
under Source Pump.
8. Touch Standby Pump. The keypad pops up.
9. Enter the number of the standby pump. Use ← to erase
any mistakes. Use ↵ to enter the value. The number
appears under Standby Pump, and a button labeled
Transfer to Standby Pump appears on the screen.
Page 79 of 98
Figure 40: 10” Transfer to Standby Pump button
Note: When you enter the second pump number, the controller
checks to make sure that both pumps are offline and that the
standby pump has no stations assigned to it. If these
conditions are not all met, error messages appear on the
screen instead of a Transfer to Standby Pump button. If
you get an error message, first check to make sure that you
have entered the correct numbers and reenter if necessary.
If another error occurs, see the Standby Pump Errors section
on page 81.
10. Touch Transfer To Standby Pump. “Transfer in
Progress” appears briefly on the screen, followed by
“Transfer Complete,” in place of the Transfer To
Standby Pump button. The controller switches the
setting for Source Pump to the new pump and switches
the setting for Standby Pump to 0 (unassigned).
11. Touch Return. The “Pump Setup” screen appears.
12. Touch Pumps. The “Pump Status” screen appears.
13. Put the standby pump online by briefly touching its icon.
The icon changes color to show the new status, and the
system begins using the pump. In addition, all “Station
Operator” and “Station Setup” screens show the new
pump assignment.
When the failed pump is operational again, you can repeat
this process, this time using the standby pump’s number as
the setting for Source Pump the repaired pump’s number as
the setting for Standby Pump.
Page 80 of 98
Standby Pump Errors
If the error message tells you to disable the source pump
and/or the standby pump, touch Return at this screen, then
Pumps at the “Pump Setup” screen. Take the pumps offline
and then return to the “Transfer to Standby Pump” screen.
If the error message tells you that the standby pump has
stations assigned, you must either use a different standby
pump or you must remove the pump assignment for all
stations assigned to the standby pump. To remove the
assignments, complete the following steps:
1. Touch Return at the “Standby Pump” screen, and then
touch Stations.
2. Touch and hold a station icon to get to the “Station
Operator” screen.
3. Then touch Setup to go to the “Station Setup” screen.
4. Use Back and Next to review all pump assignments.
5. Where necessary, choose Assigned to Pump x to set
station assignments to 0 (unassigned). Then return to the
“Transfer to Standby Pump” screen.
6-3-4
6-3-4-1
Alarms
Reviewing Alarms
To review alarms, touch Alarms at the “Station Status” or
“Pump Status” screen. The “Alarm Log” screen appears, with
the newest alarm listed first.
Page 81 of 98
Figure 41: 10” “Alarm Log” Screen
To scroll up and down through the list, touch and at the
bottom of the list.
6-3-4-2
Clearing the Alarm Log
The controller saves all alarm messages, together with the
date and time the alarm occurred. When you no longer need
the history, or when the list becomes too long to manage,
you can erase the log. To clear the alarm log, complete the
following steps:
1. At the “Station Status” or “Pump Status” screen, touch
Alarms. The Alarm Log screen opens.
2. Touch System Setup on the right-hand side of the
screen. The “System Setup” screen opens.
Page 82 of 98
Figure 42: 10” “System Setup” Screen
3. Touch Clear Alarm Log. A warning message pops up,
asking for confirmation.
4. Touch Continue. The “System Setup” screen opens. To
confirm that the log has been erased, you can return to
the “Station Status” or “Pump Status” screen and touch
Alarms.
6-3-4-3
Silencing Alarms
Whenever a new alarm occurs, your controller sounds the
horn and turns on the strobe light at each central alarm. In
addition, the AEC logo on the controller’s screen changes to
an Alarm Silence button.
To silence the alarm, touch Alarm Silence in the lower righthand corner of the screen.
The horns and lights at the central alarms turn off. The
button changes back to the AEC logo. Your controller has
separate, configurable settings for how long the horns
should remain silent and how long the lights should remain
off. If the alarm condition still exists when either of these
times elapses, the corresponding devices (horns or lights)
turn on again. If a new alarm occurs, both the horns and the
lights turn on.
Page 83 of 98
7
Maintenance
No Periodic maintenance is required on this unit.
Page 84 of 98
8
Configurable Settings
This section describes the proper setup of the VTC4/32
control system parameters. These parameters are operator
changeable; however, these items should require setup only
during the initial installation. Only authorized personnel
should change them.
Many of the variables and setup parameters have been
preset at the factory and do not need to be changed.
However, this section of the manual will address all of the
setup parameters that were available at the time of printing.
The purpose of this is to familiarize the reader with all the
setup parameters and their usage.
8-1
Options for Station Setup
Name
Conveying Options
Convey time
(Last convey time)
Dump delay
Description
Options
Default
Length of time the station’s vacuum
valve remains open to allow material to
be drawn in. (For a volume-fill station,
the valve closes when material covers
the station’s volume-fill proximity sensor
or this time elapses, whichever comes
first.)
1–999 sec.
30 sec.
Adjust this value to match the actual time
needed to fill the station.
Display only. Length of time the station’s
vacuum valve was open for receiving material
during the most recent convey. This information
is displayed for your reference when adjusting
convey time and dump delay.
Length of time allowed for material to drain from
the station into the receiver. The controller will
not attempt to deliver more material to the
station until this time has elapsed.
Adjust this value to match the actual time
needed to drain the station. If it is set too short,
the controller may attempt to refill the station
before it is empty, causing material to back up
and/or underusing the station’s capacity. If it is
set too long, the system may be unable to keep
up with your equipment’s demand for material.
Page 85 of 98
—
1–99 sec.
—
10 sec.
Name
Assigned to pump n
Special convey
Name
Alarm Options
No convey
# attempts before alarm
Description
Number (address) of the pump to which this station’s
vacuum line is connected.
No more than 20 stations can be assigned to
one pump.
When this option is enabled, the station’s vacuum
valve remains open for the convey time, even if the
station is not demanding material and is indicating
that it is full. When disabled, the station’s vacuum
valve opens when there is demand from the station,
and it remains open until the convey time has elapsed
or material trips the volume-fill proximity switch.
Enable this option if and only if the station has
no flapper.
Options
0–4 (0 = not
assigned)
Default
0
disabled,
enabled
disabled
Description
Options
Default
When this option is enabled, the controller issues a
“no convey” alarm if it has repeatedly attempted to
convey material to the station but the flapper never
opened during the dump delay. (The number of
attempts is controlled by the next setting.)
Usually this option should be enabled. At times, you
may wish to disable it during operation as a stopgap
measure for dealing with an alarm.
Number of attempts before alarm: the number of
times the controller will attempt to convey material
to a station before it issues a “no convey” alarm.
The setting for this option depends on (a) how much
material your injection mold uses to make each part
compared with the capacity of the receiver and
(b) how important it is to keep your injection mold
from running out of material and shutting down. A
higher setting will give you fewer alarms, at the risk
of emptying the receiver without warning. A lower
setting will give more frequent alarms, at the risk of
disrupting operations unnecessarily.
disabled,
enabled
disabled
1–99
3
Page 86 of 98
8-2
Options for Pump Setup
Several of the items in this screen are not setup options but
are instead intended for use during operation. These items
(hour meter and transferring stations to a standby pump) are
described in Chapters 5 and 6, which cover operation
procedures.
Name
Idle Time Options
Auto shutdown delay
Alarm Options
Pump fault
Blow Back Options
Blow back
Every n loads
# pulses
On time
Description
Options
Default
Length of time the pump continues to run unloaded
without demand from any station. After this time has
elapsed, the pump shuts down to save power and to
prevent wear on the pump.
Adjust this setting to fit the needs of your facility
in trading off the savings against the costs
associated with waiting for a pump to start up
when there is a demand for material.
0–999 sec.
45 sec.
The control has one input/pump that you can wire to
generate alarms for situations of your choosing. For
example, you may have a sensor that turns on when
material reaches the top of a filter-chamber waste
bin. When this option is enabled, the controller
issues an alarm if the sensor wired to the input for
Pump Fault turns on.
Enable this option if and only if your facility has
installed a miscellaneous alarm on the input for
Pump Fault for this pump.
disabled,
enabled
disabled
When this option is enabled, the controller
periodically sends compressed air backward through
the pump’s air filter to dislodge accumulated dust
and debris.
Enable this option if and only if the pump has
the equipment for compressed-air filter cleaning.
Number of conveying cycles to stations between
filter cleanings.
Adjust this setting based on experience. The
more dust and debris in your material line, the
smaller this number needs to be.
Number of pulses of compressed air sent through the
pump’s filter during cleaning.
If blow-back is not working as desired, the AEC
service may ask you to change this setting.
Number of seconds that the air compressor remains
on for each pulse during filter cleaning.
If blow-back is not working as desired, the AEC
service may ask you to change this setting.
disabled,
enabled
disabled
1–99
5
1–99
5
0.1–99.0 sec.
1.0 sec.
Page 87 of 98
Name
Off time
Description
Options
0.5–99.0 sec.
Number of seconds between air pulses during filter
cleaning.
If blow-back is not working as desired, the AEC
service may ask you to change this setting.
Page 88 of 98
Default
1.0 sec.
9
Troubleshooting
9-1
General Troubleshooting
Problem
The control panel doesn’t light up
at all
The touch screen display doesn’t
come on when the control panel
is powered up.
A pump package doesn’t run,
even though it is on-line and its
indicator is lit.
A vacuum receiver is being bypassed in the loading cycle.
Vacuum receivers are overfilling.
Possible Cause
The control panel is not turned
on.
Solution
Turn on the control panel.
The external disconnect
(recommended) in the dedicated
circuit is open (off).
Fuse/circuit breaker in the power
drop is blown/tripped.
Control power switch is broken.
Fuse in display is blown.
Loose wiring to display.
Close the switch (on).
Display is faulty.
The motor overload has tripped.
Main fuse in power drop or
optional fused disconnect has
blown.
Motor contact is faulty.
The vacuum receiver is off-line.
The convey time for the vacuum
receiver is set to zero.
The field-installed station bypass
switch is simulating a Bin Full
condition.
The field-installed station bypass
switch is bad or mis-wired.
The vacuum receiver was
assigned to the wrong pump
during setup.
Conveying times are too long
(Time Fill Mode only).
Maximum conveying times are
too long, and the PLC does not
recognize the Vacuum Receiver
Full Proximity Switch(es).
Page 89 of 98
Replace/reset.
Replace.
Replace.
Repair.
Replace.
Reset the overload and check
the motor for the proper amp
draw on tag.
Replace the fuse.
Repair or replace as required.
Use the controller to put the
vacuum receiver on-line.
Use the controller to enter a
longer convey time.
Normal operation. Set the switch
so the vacuum receiver is back in
the loading sequence.
Repair, replace, or re-wire.
Repeat the setup procedure.
Time the vacuum receiver (s)
during loading, and set the
conveying times to a few
seconds less.
Check proximity sensors for
proper operation and proper
wiring to the PLC. Repair as
needed. Reset the conveying
times to a reasonable value, and
adjust as needed.
9-2
Alarms
The format for all station alarms is “Station n [alarm text],” for
example, “Station 12 receiver low level.” The format for all
pump alarms is “Pump n [alarm text].” Any alarm that does
not start with “Station” or “Pump” is a system alarm.
The following tables list all alarms alphabetically, together
with possible causes. A “critical” alarm is one that causes the
affected device to stop.
Note: You can also see a list of alarms and their causes in the
controller’s online help. To display this information, touch the
color key of statuses in the upper right-hand corner of either
the “Station Status” or the “Pump Status” screen, or touch
Help at any other screen. When you are finished reviewing
the help, touch Return.
9-2-1
Station Alarms
Alarm message
High vacuum
No convey
Not assigned (Critical)
9-2-2
Pump Alarms
Alarm message
Pump failure
(Critical)
Pump fault
Too many stations assigned to
pump
(Critical)
9-2-3
Possible cause
Circuit breaker or overload protector has tripped.
Contactor has malfunctioned.
(Function determined by your facility.)
More than 20 stations are assigned to this pump.
System Alarms
Alarm message
Low battery
Possible cause
Material line is blocked.
Vacuum line is blocked.
Convey time is too long (time-fill station only).
Sequence valve has malfunctioned.
Vacuum switch has malfunctioned.
Note: After you have corrected the cause of this alarm, the alarm will be
cleared when the controller has conveyed a full load to this station.
Material container is empty.
Material line is disconnected from material source.
Vacuum line is disconnected from station.
Take-off compartment is not adjusted properly.
Convey time is too short.
Note: As a stopgap measure, you can disable the “no convey” alarm for
this station until the problem can be remedied. See pp. 57 and 86.
Station has not been assigned to a pump
Possible cause
Battery for the controller is defective.
Battery for the controller is old and drained.
Page 90 of 98
10
Options
The following is a list of options that your controller may be
equipped with:
230/1/60 Operation
Required to operate with a 230/1/60 supply voltage.
CE Package for 220/1/50 Operation
Required in Europe and other areas that need 220/1/50
supply voltage
Audible/visual alarm
Alarm light and horn assembly that can be remote mounted
and wired into the controller to indicate an alarm condition.
10” Color Touch Screen in Lieu of Standard 6” Touch Screen
Improved legibility of operating parameters.
Page 91 of 98
11
Spare Parts List
11-1
Recommended Spare Parts List
Quantity
1
1
1
AEC Part Number
A0555116
A0563568
A0563932
Vendor Part Number
1746-P2
1746-OW16
1
A0555121
1746-IA16
1
A0555120
1746-IV16
5
5
5
5
1
A0565513 GMD1
A0542200 MDL1.5
A0542207 MDL3.0
A0544791 MDA10
A0563933
Page 92 of 98
Description
Power Supply
16 pt. Relay Output
Power Supply (6” Display
Only)
16 pt AC Input (115V Control
Only)
16 pt DC Input (24VDC Control
Only)
Fuse
Fuse
Fuse
Fuse (24VDC Control Only)
Power supply (24VDC Control
Only)
12
12-1
Technical Assistance
Contact Information for Technical Assistance
Parts Department
Call toll-free 7am–5pm CST [800] 423-3183 or call [847] 273-7700
The AEC Parts Department at AEC, Inc. is ready to provide the parts to keep your systems up and running.
Application Engineering replacement parts ensure operation at design specifications. Please have the model and
serial number of your equipment when you call. Consult the Customer Parts List included in your information packet
for replacement part numbers.
Service Department
Call toll-free 8am–5pm CST [800] 423-3183 or call [847] 273-7700
Emergencies after 5pm CST, call [847] 439-5655
AEC has a qualified service department ready to help. Service contracts are available for most AEC products.
Sales Department
Call [847] 273-7700 Monday–Friday, 8am–5pm CST
AEC products are sold by a world-wide network of independent sales representatives. Contact our Sales Department
for the name of the sales representative nearest you.
Contract Department
Call [847] 273-7700 Monday–Friday, 8am–5pm CST
Let AEC install your system. The Contract Department offers any or all of these services: project planning; system
packages including drawings; equipment, labor, and construction materials; and union or non-union installations.
AEC, Inc.
1100 E. Woodfield Road, Suite 588
Schaumburg, IL 60173
[847] 273-7700 • Fax [847] 273-7804
Page 93 of 98
12-2
12-2-1
Returned Material Policy
Credit Returns
1. Prior to the return of any material, authorization must be
given by AEC, INC. A RMS number will be assigned for
the equipment to be returned.
2. Reason for requesting the return must be given.
3. All returned material purchased from AEC, INC. returned
is subject to 15% ($75.00 minimum) restocking charge.
4. All returns are to be shipped prepaid.
5. The invoice number and date or purchase order number
and date must be supplied.
6. No credit will be issued for material that is not within the
manufacturer’s warranty period and/or in new and
unused condition, suitable for resale.
12-2-2
Warranty Returns
1. Prior to the return of any material, authorization must be
given by AEC, INC. A RMS number will be assigned for
the equipment to be returned.
2. Reason for requesting the return must be given.
3. All returns are to be shipped prepaid.
4. The invoice number and date or purchase order number
and date must be supplied.
5. After inspecting the material, a replacement or credit will
be given, at AEC’s discretion, if the item is found to be
defective in materials or workmanship, and it was
manufactured by AEC, INC. Purchased components are
covered under their specific warranty terms.
Page 94 of 98
Page 95 of 98
13
13-1
Safety Tag Information
Controller Safety Tags
High Voltage
Inside Enclosure
13-2
Read Operation and
Installation Manual
Controller Identification (Serial Number) Tag
(Located on the side of the controller box)
1100 E. Woodfield Road
Tel. (847) 273-7700
Fax (847) 273-7804
VTC CONTROL PANEL
Model No. VTC4/P32
115
Volt
60
Serial No. 31K0182
Hz
Control Voltage 24VDC
Page 96 of 98
1
Ph
14
Appendix
Review electrical drawings supplied in the packet with the
manual.
Page 97 of 98
1100 E. Woodfield Road • Schaumburg, IL 6073 USA
(847) 273-7700 • Fax (847) 273-7804
www.aecinternet.com