1
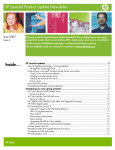
HP LaserJet Product Update Newsletter
March 2007
Issue 3
Inside…
Welcome to the 3rd edition of the HP LaserJet Product Update Newsletter! This newsletter provides
“hot off the press” technical information about the HP LaserJet printers you use and support.
Our focus this quarter is on the HP Universal Print Driver (UPD). We know that you have questions
about the UPD, and we have the answers! Look inside for information on the latest UPD version 3.1
along with the most popular Frequently Asked Questions from customers like you.
HP Universal Print Driver ........................................................................................ 3
IPG News flash—HP Universal Print Driver for Windows version 3.1 now available...................... 3
Issues resolved .................................................................................................................. 3
Enhancements ................................................................................................................... 3
Current issues for UPD 3.1.................................................................................................. 4
HP Universal Print Driver FAQs................................................................................................ 4
What is the HP Universal Print Driver (UPD)? ........................................................................ 4
What are the different setup options? .................................................................................. 4
How does the HP Universal Print Driver work? ...................................................................... 5
HP Universal Print Driver technical details............................................................................. 7
Other legacy, specialty, and non-Windows environments....................................................... 9
Managed Print Administration technical details ................................................................... 10
Customer-specific questions and answers ........................................................................... 11
Other resources............................................................................................................... 12
HP LaserJet news and updates .............................................................................. 12
HP LaserJet printer support in Microsoft Windows Cluster Server environment ............................. 12
Tips for troubleshooting .................................................................................................... 12
HP LaserJet Multi-Function Finisher C8088A/B ........................................................................ 12
13.12.21 Jam in Left Accessory ........................................................................................ 12
13.12.22 Jam in Left Accessory ........................................................................................ 14
HP Monochrome LaserJet printer updates .............................................................. 15
HP LaserJet P3005 Printer series—Blank display/No boot on base and duplex units ................... 15
HP Color LaserJet printer updates.......................................................................... 16
HP Color LaserJet 4700/CP4005 Printer series—Troubleshooting poor print quality.................... 16
HP Color LaserJet 9500 Printer series and 9500mfp series ....................................................... 17
Unclearable “Replace Transfer Kit” message ...................................................................... 17
10.90.XX error ............................................................................................................... 19
HP LaserJet MFP updates ...................................................................................... 20
MFP hangs when sending or receiving faxes........................................................................... 20
HP Public
Inside,
cont’d…
HP Confidential
HP Confidential
HP Restricted
“M” series MFPs—Copy job sends to previous user’s sending destination................................... 21
HP Color LaserJet CM1015/1017 MFP ................................................................................. 22
Cable connection messages.............................................................................................. 22
HP LaserJet M3027/M3035 MFP series................................................................................. 23
Repositioning the stapler’s actuator rod.............................................................................. 23
HP LaserJet M3027/M3035/M4345/M5025/M5035 MFP series—Control panel calibration ... 24
HP LaserJet 4345/M4345 MFP series and HP Color LaserJet 4730 MFP series .......................... 24
“Corrupt Firmware in External Accessory” error message ..................................................... 24
HP Color LaserJet 9500mfp series ......................................................................................... 25
Solutions provided with firmware roll 08.061.9 .................................................................. 25
Intermittent 10.00.YY errors.............................................................................................. 27
HP Universal Print Driver
IPG News flash—HP Universal Print Driver for Windows
version 3.1 now available
Hewlett-Packard IPG is pleased to announce
the release of the Universal Print Driver (UPD)
for Windows® version 3.1, available for
download at the following link:
http://www.hp.com/go/upd
The UPD 3.1 addresses some issues with
earlier versions of the UPD, and adds some
functional improvements as well.
Issues resolved
Microsoft Cluster issue
A bug was recently discovered in UPD version
3.0 that caused the UPD to fail when installed
in a Microsoft® Cluster environment. The issue
is now resolved.
Note
Even with this new version of the UPD, it is still
necessary to install the UPD driver on each of
the nodes that will make up the Cluster virtual
server environment prior to installing it on the
Virtual (Active) Server. Install the UPD via the
Add Printer Wizard, or use the Install.exe
utility to add the UPD to each node prior to
installing the UPD on the virtual server. The
UPD only needs to be installed one time on
each of the nodes making up the Cluster.
Windows Vista
Version 3.1 of the UPD is compatible with
Microsoft® Windows Vista™ operating
systems.
PCL5 line printing to mono single function and
multifunction printers
A bug was discovered in UPD 3.0 PCL5
drivers—when printing lines and boxes from
within a .pdf document to a monochrome
single function or multi function laser printer,
the lines or boxes would not appear. A
workaround to this problem has been created
for UPD 3.1, and a permanent solution is
planned for a subsequent release of the UPD.
HP Universal Print Driver 3.1
Workaround instructions for printing lines or
boxes
1. Install UPD PCL5 version 3.1
2. Go to Printers->Printing Preferences>[Mono device w/problem]->Advanced
3. Set Graphics Mode: Send graphics as
raster.
4. Set Device Render Type: Color.
Anyone who needs these boxes drawn will
need to make these settings individually.
Double-Byte character support for the Status
Notification Pop-up (SNP)
Correct characters now appear within the SNP
window in countries that support Double-Byte
character sets.
Active Directory Administrative Template
UPD 3.1 is the minimum version of driver that
will be supported with the HP UPD AD Admin
Template file. The AD Admin Template is
available through your HP field support
personnel, and will be available for download
from hp.com in mid-April 2007.
Enhancements
Citrix Presentation Server and Windows
Terminal Services
Enhancements to the UPD allow for
configuration of auto-created or redirected
printers that are using the UPD when the client
printers are connected by network ports.
The UPD can retrieve device specific
information from the client printer and
configure the auto-created printer within the
Citrix ICA session or the redirected printer
within the Remote Desktop Session.
3
Current issues for UPD 3.1
Windows Vista 32 Add Printer Wizard fails PS
install
This defect only occurs if User Account Control
is enabled and Add Printer is chosen from the
Printers and Faxes window toolbar, or from the
“standard” right-click menu. If the Add Printer
Wizard is installed using “Run as
administrator,” everything works fine.
Main features of the HP UPD
Advanced features discovered through
bidirectional communication with the
printer/MFP include:
•
Automatic two-sided (duplex) printing
•
Job storage (e.g. private print, stored jobs,
proof-and-hold, etc.)
•
Driver watermarks
•
Input trays
Job accounting
It appears that the UPD is not sending any of
the PJL commands that get used for color logs
on compatible devices. As a result, the
information returned is incomplete.
•
Output bins
•
Stapling
Windows Vista and SNP—For similar reasons
as stated above, there will only be limited job
status information returned in the Status
Notification Pop-up screen when the UPD is
used in Windows Vista.
While organizations may employ several types
of print architectures, HP foresees the following
uses for UPD:
What are the different setup
options?
1. Deploy as a single driver for mobile users.
HP Universal Print Driver
FAQs
2. Deploy for driver simplification on
Windows® print servers.
What is the HP Universal Print
Driver (UPD)?
UPD for mobile users
Administrators can silently install the PCL5,
PCL6, or the HP postscript version of the UPD
to the clients directly (e.g., through the SMS
server). Clients can then discover locally
connected devices through mDNS (the same
protocol used by Apple Computer for
“Bonjour”, formerly “Rendezvous”).
The HP Universal Print Driver is a single driver
that supports HP PCL5, HP PCL6, and
HP postscript level 2 and 3 emulation. This
includes all compatible HP LaserJets and
HP Color LaserJets developed after 1997.
History of the UPD
The HP Universal Print Driver has evolved from
the HP Mobile Print Driver for Windows. The
mobile version of the driver was created so
that users on the road could easily print to
locally connected devices in temporary
environments.
Gradually, some customers started to use the
mobile driver in standard office environments
as a way to simplify the number of drivers on
the client. Other customers chose to take
advantage of managed printer lists in standard
office environments as a self-service tool.
3. Deploy as a self-service tool for end-users.
Optionally (and easily) display the IP (or host
name) at the device’s front panel through tools
like HP Web Jetadmin so that users can walk
up to a device and type in addresses manually
(useful for locations where printers are on
different subnets or multicasting is disabled).
HP expanded upon this functionality by adding
additional features and tools. Now, most users
can’t tell the difference between the UPD and
standard in-box drivers.
HP Universal Print Driver 3.1
4
UPD for driver simplification on Windows print
servers
Administrators can install the PCL5, PCL 6, or
Postscript version of the UPD in Static Mode
(recommended) on the print servers. Once
installed and bound to printers, the UPD can
be deployed to the Client device via Point and
Print.
2000/XP Client
2000/2003/XP
Print Server
How does the HP Universal Print
Driver work?
A virtual print queue is created in the Printers
and Faxes folder for the PCL5, PCL6, or the
Postscript version of the driver. Basically, the
driver queries the printer for its existence (for
network printers, its capabilities) then either
sends the job or presents a driver interface
depending on what the user has chosen to do.
What happens when a user selects File ->
Print?
If you print a document directly to the virtual
driver (“HP Universal Printing PCL 5 / PCL6” or
“HP Universal Printing PS”), you will see a popup window of the driver querying the printer.
Printer/MFP
In this setup, the UPD is installed on the print
server in Static Mode and bound to printers.
Static Mode is the default operating mode
when using the Add Printer Wizard. In this
mode the UPD behaves just like the HP productspecific print drivers.
The UPD as a self-service tool
Administrators can silently install the PCL5,
PCL6, or Postscript version of the UPD to the
clients directly (e.g., through the SMS server).
Managed Printer Lists (MPLs) and Managed
Printer Policies (MPPs) are pulled from the
“managed-print” host. These lists can point to
direct-IP printers or Windows print server
printers, making this method of deployment
attractive for these hybrid environments. See
“Managed Print Administration Technical
Details” on page 10 for more information on
Managed Printer Lists, Managed Print Policies,
and Access Control Lists.
1. Click File, then Print. Enter your printing
specifications, and click OK.
Print window
2. The driver will query the printer.
Q
2000/XP Client
Any Windows
Print Server
The driver will query the printer
Managed Printer Lists
Windows IIS Server
“managed-print”
Printer/MFP
HP Universal Print Driver 3.1
Printer/MFP
3. Once the query is complete, the print job is
sent to the device and is viewed and
managed like any other job in the virtual
driver.
(Continued on the next page.)
5
If you go into the Properties window of the
virtual print driver after the interrogation
process you will get a driver interface to
choose additional settings. See the examples
below.
1. Click File, Print, then Properties.
Properties window
Print window
2. The driver will query the printer.
What happens when I visit a virtual queue’s
properties?
You can visit a virtual queue’s properties
(“HP Universal Printing PCL 5” or
“HP Universal Printing PS”) in the Printers and
Faxes window. Click Start, Control Panel,
Printers and Faxes.
The driver queries the printer
3. Choose additional settings. For supported
network printers, the driver would present a
list of the device’s capabilities (e.g.,
duplexing, stapling, trays, etc.). For locally
connected printers (LPT, USB, etc) a basic
interface is presented (e.g., no duplexing,
no stapling, no trays, etc.).
HP Universal Print Driver 3.1
Printers and Faxes window
You will see a pop-up window where you will
be able to choose a printer from a printer list
or search for a device. Once a device is
selected, the driver will query the printer for its
capabilities (the same process as used when
printing a document) then present the queue’s
properties.
(Continued on the next page.)
6
If you chose to “Make a permanent instance of
the printer in the Printers folder” you would still
be presented with the virtual queue’s
properties. However, a new printer queue
would be established in the Printers and Faxes
window. See the example below.
A new printer queue is established
Virtual queue’s properties
Important: do not be tempted to immediately
configure the virtual queue or printing
preferences if creating a permanent instance of
the driver. This is because you would be
looking at the virtual queue’s properties (as
opposed to the permanent instance’s
properties). Exit the queue after creating the
permanent instance then go into the properties
of the permanent queue that was created in
order to manage it further (share it out, define
printing defaults, etc.).
Request for device properties window
Properties window of the permanent queue
Validating the printer window
HP Universal Print Driver
technical details
This section will cover details regarding the
UPD components and behavior.
Can permanent instances be shared out?
Yes. This is discussed in this column, beginning
at the top of the page.
Properties window
HP Universal Print Driver 3.1
Is the device queried every time it is printed to?
No; in general, settings are cached. For cases
where a user has chosen to create a
permanent instance of a printer, settings are
permanently saved to the local registry (like
any other printer driver) and the user would
7
continue to print to that permanently created
instance.
For cases where a user has not chosen to
create a permanent instance of a driver,
registry entries are saved in a .CREG (cached
registry) file. Initially the driver will attempt to
save the CREG files to the “C:\Program
Files\Hewlett-Packard\HP Universal Printing”
directory. See the example below.
What port monitor is used with the UPD?
Hewlett-Packard has its own version of the
TCP/IP port monitor for communicating with
network devices. It is not part of the installer
package of the HP Universal Print Driver.
However, if the port is present, the UPD will
attempt to create a port using the
“HP Standard TCP/IP” port. If not present, it
will use the Microsoft “Standard TCP/IP” port
instead.
For cases where the UPD is pointed to an
existing print queue shared out from a print
server instead of to a printer itself, the
“HP UNC Port” monitor is used.
For cases where locally installed devices are
selected, the LPTx or USB00x port is used.
HP Universal Printing directory window
If that directory is not available or is locked,
the driver will attempt to cache settings in the
%TEMP% then %TMP% directories. If neither of
these directories is available then the UPD will
query the printer every time for non-permanent
instances.
Are permanent instances updated with new
drivers too?
Yes. Since the HP Universal Print Driver uses
the same driver (with different registry entries)
for permanent instances, all queues with that
driver will be updated.
Why is the queue reporting 8 ppm and color
capabilities?
This is expected behavior for both the virtual
queues and permanent instance queues. Even
though we query a machine on the network for
its capabilities, there are certain limitations
within the Windows 2000, 2003 , and
Windows XP® operating systems that force
drivers to report their capabilities (independent
of this network discovery).
This is a cosmetic concern for most customers
as the concern is largely around what the
queue properties look like. See the example
below.
How can I have permanent instances re-query
a device?
As with other HP drivers, there is the ability to
select an Update Now button or Update: Yes
menu.
Can options and capabilities be manually
specified?
No. The universal driver talks to so many
different devices that the list of options could
become quite long and perhaps confuse some
users. Some limited functionality is being
considered for a future release (e.g. duplexing,
stapling, etc. for locally connected devices).
HP Universal Print Driver 3.1
Properties window
The driver Properties (what the user sees when
they select File, then Print) are different for
8
color devices versus monochrome devices. In
the example below, the HP Color LaserJet
3800 driver Properties show a Color tab, while
the HP LaserJet 4345mfp driver Properties
does not.
Location and Comment fields
HP Color LaserJet 3800 Printing Preferences
window has a Color tab
Other legacy, specialty, and nonWindows environments
What about usage in Microsoft clustered
environments?
Yes. The UPD version 3.1 (released in
February 2007) supports Microsoft Clustered
environments.
Note
The UPD must be installed on each of the
Nodes that will make up the Cluster server
prior to installing the UPD in the Virtual Server.
HP LaserJet 4345mfp Printing Preferences
window has no Color tab
There may be cases where customers will care
about what the queue reports—for example,
customers using the UPD for driver
simplification on print servers in cases where
users locate printers (by capabilities) through
Active Directory. The only workaround here is
to specify actual queue properties in the
Location and Comment fields providing users
with the capabilities for a given device. See
the example in the next column.
HP Universal Print Driver 3.1
What about usage in a Citrix or WTS
environment?
Please review the “HP Printers Supported in
Citrix Presentation Server Environments” white
paper at the following URLs.
PDF version:
http://activeanswers.compaq.com/ActiveAns
wers/Render/1,1027,6464-6-100-2251,00.htm
HTML version:
http://h20000.www2.hp.com/bizsupport/Te
chSupport/Document.jsp?objectID=c0021345
5&locale=en_US
What about usage in an Apple Macintosh
environment?
There are no plans for a Macintosh version of
the driver at this time. HP Drivers can be used,
however, with the Apple Bonjour (formerly
9
Rendezvous) discovery mechanism. This
mechanism behaves the same way the UPD
does when looking for devices on the local
subnet (using mDNS).
What about usage in Windows 98, ME, and
NT environments?
There are no plans for Windows 98, ME, or
Windows NT® versions of the driver at this
time. However, there are 98, ME, and NT
versions of the HP Mobile Print Driver for
Windows (the predecessor to the HP Universal
Print Driver) at
http://www.hp.com/go/mp4n_software. The
Mobile Print Driver does not discover as many
options (e.g. duplex only) and can only
participate in the Default UPD View.
What about usage in a Windows 64-bit
environment?
Yes, both 32-bit and 64-bit versions of the UPD
are available for download.
What about a Designjet version of the driver?
While not officially on the plan-of-record,
testing of the PostScript version of the driver is
being considered for Designjets with PostScript
capabilities. However, given the level of
complexity customers look for in wide-format
printing (roll feeds, ink modes, non-standard
paper sizes, etc.) we would recommend
customers continue to use their supported
Designjet printer drivers from
http://www.designjet.hp.com/.
Does the UPD work with non-HP printers?
The UPD has been tested and is supported on
HP printers starting with the HP LaserJet 4000
and newer. Please refer to the Service
Administrator Guide for a complete list of
printers supported with the UPD.
Managed Print Administration
technical details
What are managed printer lists and policies?
Managed Printer Lists (MPLs), Managed Print
Policies (MPPs), and Access Control Lists are
created, managed. and distributed from the
HP Managed Print Administration control
panel.
HP Managed Printing Administration window
What is required to run the MPA control panel?
• Windows Server 2000 or Windows Server
2003 with the host name “managed-print.”
•
Internet Information Services (IIS) version 5
or 6.
What do printer lists look like on the clients?
Printer lists can be simple lists (“Default UPD
View”—like those that were available to the
Mobile Print Drivers for Windows), or HTML
based for tabular; printer graphics, or map
views below. The more complex the view, the
more time an administrator would need to
spend setting up the list.
Default UPD view
Tabular HTML view
List with printer graphics
HP Universal Print Driver 3.1
10
If my device can be discovered by the UPD via
mDNS but cannot communicate via SNMP,
what is the issue?
It’s possible that the JD card is configured so
that SNMP is locked down to some degree.
Clickable image map
Each created printer list can have a different
type of view. For example, in corporate towers
it may make sense to invest the time to create a
clickable map view. For the smaller sites it may
make more sense to create printer graphics or
a tabular view for less administration.
How are MPLs and MPPs distributed to the
clients?
The HP Universal Print Driver running on the
client desktops make a network call for the
host-name “managed-print” (where the lists and
policies are generated). If there, lists can be
pulled down dynamically to the client. This
“pull” style architecture means that concerns
with mobile users, unavailable PC’s, and
scheduling are mitigated.
What are some of the managed print policies
that can be enforced?
Does a user have access to color devices? Are
users allowed to discover locally connected or
network devices? Are users allowed to create
permanent instances of printers? What printer
lists do they have access to? All these policies
and more can be managed with MPPs.
Customer-specific questions and
answers
Can I configure the UPD using HP Web
Jetadmin and the driver configuration plug-in?
Yes! The UPD supports driver pre-configuration
utility.
How does the UPD communicate with a
network printer? Is this SNMP protocol?
When a device is discovered via mDNS, the
UPD then resolves the device’s hostname. That
hostname is then used to verify that the device
is able to communicate over SNMP and that
the UPD can get a few key PML objects: Model
name, supported PDLs, PDL versions, whether
there is a duplex unit installed, etc.
HP Universal Print Driver 3.1
Is it possible to suppress the UPD status
notification pop-up messages on the client
machine installed from a print server?
A white paper is available that explains how
to manage the SNP pop-ups for the UPD. Go
to http://www.hp.com/go/upd, click the
Technical Support link, then click Manuals.
Download the white paper called “HP UPD
Series for Windows, Managing the Status
Notification Pop-ups.”
How do I set defaults for the driver on the
server so all installs have the same defaults?
The UPD supports the HP Driver pre-configured
utility available at the following link:
http://h20000.www2.hp.com/bizsupport/Te
chSupport/SoftwareDescription.jsp?lang=en&c
c=us&swItem=bi-108084&jumpid=reg_R1002_USEN
This will allow the driver to be configured once
and deployed to all clients with the same
configuration options.
Will the user need to uninstall the current 3.0
version from the PC to upgrade?
No. There is no need to uninstall the current
version of the UPD to upgrade to the newest
version.
How does the static mode install command line
switch work?
In version 3.0, the static mode install command
line switch works by using the port name
specified by the /sm switch, if that port exists.
If that port does not exist, the UPD install will
create a new port and give it the HST_ prefix.
The HST_ prefix helps identify the ports that
were created by the UPD, and it also helps the
UPD quickly identify the port type.
In normal operation UPD printing operation,
once the printer is bound to a port, the job will
be delivered to that port (and associated port
monitor) no matter what it is named.
11
In addition to removing the driver using the
“Server Properties” menu, is there another way
to remove the UPD?
The UPD can also be removed by cleaning out
the cached UPD registry settings. These are
stored under
HKEY_CURRENT_USER\Software\HewlettPackard\HP Print Settings. Simply delete the
entire HP Print Settings registry key.
Support for the HP Universal Print Driver is
covered with the warranty for your HP
hardware. For equipment covered by your
existing warranty or extended service
(including HP Care Packs), no support costs
are incurred. For HP equipment which is out of
warranty and not covered by an extended HP
service offering, a per-incident charge for
support will be billed to a major credit card.
For more information
www.hp.com/go/upd
Other resources
Support statement
Call: 1-800-HP-INVENT
Un-moderated public forums are available at
the HP IT Resource Center at the following URL:
http://forums.itrc.hp.com/
HP LaserJet news and updates
HP LaserJet printer support
in Microsoft Windows
Cluster Server environment
HP LaserJet Multi-Function
Finisher C8088A/B
Microsoft currently provides no Cluster
certification for any print driver—including the
Microsoft Unidrv.dll inbox driver provided with
the operating system, or the HP LaserJet printer
drivers provided by Hewlett-Packard.
A control panel message of “13.12.21 Jam in
Left Accessory” is usually due to contaminated
sensors. The flipper assembly’s optical sensors
are being blocked or contaminated by
environmental dirt/dust or media dust.
Cleaning the optical sensors usually resolves
this error condition. To clean the optical
sensors, follow the steps below.
HP LaserJet printer drivers, with the exception
of host-based printer drivers, include clusteraware components that are Microsoft-signed
for use in a Microsoft Windows Cluster Server
environment. The cluster-aware driver
components are intended to provide cluster
server compatibility for full printer functionality.
HP driver deployment includes testing within a
Microsoft Windows Cluster Server
environment.
13.12.21 Jam in Left Accessory
1. Move the multi-function finisher away from
the printer.
Tips for troubleshooting
•
Verify that you have downloaded the latest
driver from hp.com to ensure that you have
the latest component versions.
•
If you experience continued difficulties,
contact HP’s technical support and escalate
through normal support processes.
The flipper assembly is located on the side
of the multi-function finisher
HP Universal Print Driver 3.1
12
2. Remove the jammed paper from the multifunction finisher, along with any other
media in the paper path.
5. Lift the flapper as shown below.
3. Identify the upper sensor (transmitter)
location. See the photos below.
Lift the flapper
6. Identify the lower sensor (receiver) location.
Location of the optical sensors
Lower optical sensor (receiver)
7. Clean the lower optical sensor with a lintfree cloth.
The transmitter optical sensor is located in
the upper middle part of the flipper
assembly
4. Clean the upper optical sensor with a dry,
lint-free cloth.
Clean with a dry, lint-free cloth
Clean with a dry, lint-free cloth
8. Re-attach the multi-function finisher to the
side of the printer. The printer may continue
to flush any media left in the paper path.
9. If the printer does not come to a READY
status, turn the power OFF then back ON.
10. If the “13.12.21 Jam in Left Accessory”
error continues after cleaning the optical
sensors, contact HP or an HP Authorized
Service Provider.
HP LaserJet news and updates
13
13.12.22 Jam in Left Accessory
New flipper assemblies have been returned to
HP as defective or as a DOA part because of
a “13.12.22 Jam in Left Accessory” message
appearing on the control panel after a new
flipper assembly installation.
HP has evaluated field service returned flipper
assemblies (part number 4G1-5219-030CN)
and determined that the shipping locks and
orange packaging tape was not removed prior
to installation in the multi-function finisher. The
flipper assemblies were re-tested, and found to
work properly when the packaging material
was removed.
Location of shipping locks and packaging tape
Solution
Ensure that the shipping locks and orange
packaging tape have been removed. See the
photo below for identification and location of
the shipping locks and packaging tape.
The flipper assembly
HP LaserJet news and updates
The flipper assembly is located on the side of
the multi-function finisher
14
HP Monochrome LaserJet printer updates
HP LaserJet P3005 Printer series—Blank display/No boot on
base and duplex units
In some instances the HP LaserJet P3005
printer base and duplex models will start up
with a blank display, or will not start up at all.
This may be caused by wrong timing values set
in firmware version 20060807 02.034.0 in
combination with Infineon-B memory chips on
the formatter board.
The affected memory chip markings
Before using the solution described below,
please verify the following:
•
•
•
The printer is an HP LaserJet P3005 base
model (Q7812A) or duplex (d) model
(Q7813A).
The printer has Infineon-B memory chips on
the formatter as shown in the photos below.
This memory chip (U11) is located just below
the DIMM slot.
If the memory chip does not say Infineon B,
the blank display is not caused by the issue
described above.
HP LaserJet P3005 printer
The affected serial number ranges for product
numbers Q7812A and Q7813A are:
•
CNB1B00078 – CNB1B03155
•
CNB1C00001 – CNB1C03138
•
CNB1D00007 – CNB1D02297
•
CNB1F00002 – CNB1F02325
•
CND1D02824 – CND1D08564
•
CND1F03106 – CND1F08813
Upgrade the firmware to version 02.034.1 or
later. Since the printer will not start up, it is not
possible to just upgrade the firmware. To get
the printer to start up correctly, you will need to
install a 32 MB DDR-2 DIMM (part number
CB420A). After this, the printer should boot up
correctly, and then you can upgrade the
firmware to version 02.034.1 or later.
Location of the chip on the formatter board
HP Monochrome LaserJet printer updates
Background information
This issue is caused by incorrect timing values
in firmware version 02.034.0 that cause the
printer to fail start-up under certain conditions
(such as low or high temperatures) without
additional memory. Firmware version
02.034.1 or later corrects these timing values.
Only several hundred units were built with
firmware version 02.034.0, and very few of
these will fail because of incorrect timing
values.
15
HP Color LaserJet printer updates
HP Color LaserJet 4700/CP4005 Printer series—
Troubleshooting poor print quality
You may experience poor print quality which
looks like VERY poor transfer or smudged print.
The defect will most likely occur on all media,
but print quality is especially poor on heavy
glossy media (when the media sensor
determines media type). The print quality defect
may look like the example below:
Look for zeros (00) in row 22, columns A and B
Example of poor print quality
We have identified one possibility for this issue.
Sometime after the Paper Input Unit (also called
Paper Feed Assembly) has been replaced (and
only if it has been replaced) if you perform a
“Cold Reset” or “Restore Factory Defaults,” the
media sensor value from the new Paper Input
Unit is erased. To determine if this is the cause,
print a Diagnostics Page through the control
panel and check to see if the values in row 22,
columns A and B are zeros.
HP Color LaserJet printer updates
If the values are zeros, the media sensor
calibration values have been lost and need to
be re-entered through the control panel service
menu. If the values are not zeros, then the
media sensor values have not been lost and this
is not the cause of the failure.
16
HP Color LaserJet 9500 Printer series and 9500mfp series
Unclearable “Replace Transfer
Kit” message
An unclearable “Replace Transfer Kit” message
on the HP Color LaserJet 9500/9500mfp
control panel could be caused by two different
things:
•
The HP Color LaserJet 9500 Printer series or
the HP Color LaserJet 9500mfp series have
displayed the “Replace Transfer Kit” message
on the control panel before the 200,000
page point (200,000 is the transfer kit’s
recommended life) and the customer is
unable to clear the message.
•
The “Replace Transfer Kit” message occurs as
expected at the proper page count (200,000
pages); however, the customer is unable to
clear the message after replacing the transfer
kit.
The error creates a hard stop to the printer until
the message is cleared, but the customer cannot
clear the message via the front panel Reset
menu. Technicians have unsuccessfully tried to
clear the message by clearing the Transfer Kit
count in SERVICE mode.
Background
There are two scenarios that can cause the
control panel to post a “Replace Transfer Kit.”
The first and primary instance is at 200,000
pages when the transfer belt has reached the
recommended end of life. In this instance,
replacing the transfer kit should clear the
message. If it does not, see the workaround
listed in the next column.
HP Color LaserJet 9500hdn printer with optional
multifunction finisher
Workaround
When a “Replace Transfer Kit” message
appears on the control panel follow these steps:
1. Print out a Supplies Status Page and check
the Image Transfer Kit page count. If it is at
200,000 pages; replace the transfer kit with
a new kit (part number C8555A).
2. If the page count is not at 200,000 pages
or within 20% of that range (160,000 or
higher), check the alignment of the ITB
sensor flag, sensor 44.
How to check the alignment of the ITB sensor
flag (SR44)
1. Pulling the ITB out of the drawer, identify the
flag as shown below:
The second instance where the “Replace
Transfer Kit” message may appear is when the
device is not recognizing the presence of the
Intermediate Transfer Belt (ITB) for some reason
or is sensing that the belt has shifted and is not
aligned. In this instance further troubleshooting
should be performed. See the workaround in
the next column.
ITB flag
2. Take the ITB out of the drawer, and look
inside, to the left. You will see the sensor
itself. See the photo on the next page.
HP Color LaserJet printer updates
17
Correct alignment
3. In the picture below, the tab on the ITB has
the hole aligned so the sensor has light
passing through. This creates the error
message.
Correct alignment
If the alignment is correct
Check to see if the sensor is working properly.
Tape the flag on the ITB so the hole is covered,
making sure it’s opaque so light can’t get
through (see the photo below). Re-insert the ITB.
Tape the flag on the ITB
If the error is still present, replace Sensor 44
(part number WG8-5624-000CN). See pages
262 and 313 in the Service Manual.
Incorrect alignment—gap between sensor
and flag
If this is a new ITB, the hole should be to the
right of the sensor (as in the photo at the top of
this column) thus blocking the path of the light.
This will remove the error message.
If the alignment is off
Check the seating of the sensor housing, and
the sensor itself. If the seating is correct, but the
alignment is still off, replace the ITB.
HP Color LaserJet printer updates
If the error goes away, the sensor is working
properly. Check that the cable connections are
secure by reseating the connections. See page
262 in the Service Manual for cable connection
locations.
If the error does not go away, use the following
workaround:
1. Turn the printer off and pull the power cable
from the engine.
2. Remove all toner, image drums, the toner
bottle and cleaning blade, the transfer roller,
and the ITB.
(Continued on the next page)
18
3. Close the doors, plug the power cable into
the engine and power on the unit.
4. The unit will begin the boot cycle and then
request the consumables.
5. Install the consumables as requested on the
front control panel by the engine, closing the
doors between each installation, the only
exception being the toner and image drums.
When the first toner or image drum is
requested, install all four toner or image
drum cartridges.
At this point, the error should be cleared. If the
above steps do not clear the message, contact
HP with the following information (you can find
this information on the HP Embedded Web
Server):
1. If the error was cleared with the
workarounds provided, which workaround
cleared the message?
2. Serial number and model of engine
3. The current page count of the engine
4. Firmware revision
5. When the message appeared. (Was the
transfer kit to be replaced as expected or
was the message prematurely posted?)
6. What was occurring when the message
posted? A print job? Clearing a jam?
Coming out of power save?
HP Color LaserJet 9500mfp with 8-bin mailbox
10.90.XX error
A 10.90.XX error occurs when the toner is
packed tightly enough in the toner cartridge
(due to shipping) that it won't flow into the
printer cartridge. The printer cartridge is starved
for toner and triggers the error.
Shaking the toner cartridge may help the
situation if the toner is packed too tightly. If this
doesn’t work, please follow the instructions from
the service manual:
1. Power cycle the printer.
2. Replace the indicated supply.
3. Check the print cartridge or image drum
e-label indicator for damage. Replace the
print cartridge or the image drum if
necessary.
4. For image drums, check:
a) Connectors J112, J13, J14 and J15 on
the antenna Printed Circuit Assembly
(PCA).
b) Connectors J1001, J1002, J1003,
J1004 and J1005 on the memory
controller PCA.
c) Connector J802 on the toner cartridge
driver PCA.
5. Replace the antenna PCA for the indicated
cartridge or drum.
6. Replace the toner cartridge driver PCA.
7. Replace the DC Controller PCA.
8. Make sure that the toner delivery system and
shutters are functioning correctly.
HP Color LaserJet printer updates
19
HP LaserJet MFP updates
MFP hangs when sending or receiving faxes
Several issues regarding the fax module have
been discovered for the following products:
HP LaserJet 4345/9040/9050/M3027/
M3035/M4345 MFPs and HP Color LaserJet
9500/4730 MFPs.
1. When sending a fax, the control panel
hangs with the message SENDING FAX
PAGE X OF X (TO: XXX-XXX-XXXX) but the
fax is never sent.
2. When receiving a fax, the control panel
hangs with the message RECEIVING FAX
PAGE X OF X (FROM: XXX-XXX-XXXX) but
the fax is never received.
3. If the fax is cancelled, an error 49.6A1C
may appear on the control panel screen,
requiring you to reboot the MFP.
We have identified an issue regarding a small
number of Analog Fax Accessories (Fax 300)
used in several MFP models. The issue is
isolated to Fax 300 cards using a particular
SRAM chip. To ascertain if the Fax 300
contains this SRAM, use these instructions:
Large chip
Small chip
Check the large chip
4. Check the white text on the large chip. It
may be necessary to use a flashlight to see
clearly between the two PCAs. The chip will
have two, three, or four lines of white text.
It is not necessary to read the text, just
identify the number of lines.
Two lines of text
1. Remove the Analog Fax Accessory card
from the MFP’s formatter. As these
instructions vary, see your particular
model’s service manual for instructions on
removing the formatter and fax card.
2. The Fax 300 consists of two stacked PCA
subassemblies, one large and one small.
Look for the smaller PCA, as circled below.
Look for the smaller PCA
3. Orient the Fax 300 so that the larger PCA
is on top in order to view the underside of
the smaller PCA. You will see two chips—
one large (10 mm by 18 mm) and one
small (4 mm by 8 mm). You will need to
check the large chip.
HP LaserJet MFP updates
Three lines visible from this view
Four lines of text
5. If the chip has only two lines of text it falls
within the isolated Fax 300 cards that are
known to have this defect.
Solution
If the chip contains only two lines of text,
replace the Fax 300 card with part number
Q3701-60010.
20
“M” series MFPs—Copy job
sends to previous user’s
sending destination
Changes to the digital sending/fax user
interface in the M-series MFPs (with firmware
version 20061210 48.015.9 and older) make
it easier for users to inadvertently send their
copy job to the previous user’s destination.
MFPs prior to the M-series (e.g., HP LaserJet
4345/9050mfp, HP Color LaserJet
9500/4730mfp) display a Save Current
Settings? screen after a fax or digital send job.
The user must select YES or NO. This screen
will timeout, based on Auto Settings Reset, and
go back to the home screen. Auto Settings
Reset can be set to Immediate or a delay of 10
to 300 seconds in the HP Embedded Web
Server (EWS) or HP Web Jetadmin. The default
value is 20 seconds.
The M-series products eliminate the Save
Current Settings? screen. There is also a defect
in the Auto Settings Reset function: it is only
active if authentication is enabled. With any
type of authentication enabled, the Auto
Settings Reset timeout selection works, but
Immediate does not. The result is that the fax or
digital send screen stays active for the number
of seconds set in the Inactivity Timeout. The
default value for Inactivity Timeout is 60
seconds.
The user scenario with the M-series products is
as follows:
•
User 1 sends a fax or digital send job and
immediately walks away
•
User 2 puts a job in the Automatic Document
Feeder and presses the Start button,
intending to make a copy. The display still
has the fax screen, but the user doesn’t
notice.
•
HP LaserJet MFP updates
User 2’s job is sent to the same destination
as User 1’s.
HP LaserJet M5025 MFP
Solution for the present time
Any type of authentication will cause a screen
to appear after a sending job. The screen
says: “Do you want to remain logged in?”
Your choices are YES and NO.
This screen will stay active for the time set by
the Auto Settings Reset. Please note that
Immediate does not function, even though it
can be selected.
1. The simplest type of authentication is to set
the Group 1 PIN to a single digit, such as
0. You can then set all sending functions to
require the Group 1 PIN. Whenever a user
selects a sending function, the single-digit
PIN will be required.
2. A second workaround is to reduce the
value of the Inactivity Timeout. It can be set
as low as 10 seconds.
Solution for the future
The next firmware CPE release reactivates the
Auto Settings Reset function. This release will
be available the week of February 19, 2007.
The default time a sending screen stays active
after a job will change from 60 seconds
(Inactivity Timeout) to 20 seconds (Auto
Settings Reset). Auto Settings Reset can be
changed to Immediate, or any value from 10
to 300 seconds via the HP Embedded Web
Server or HP Web Jetadmin.
21
HP Color LaserJet CM1015/1017 MFP
Cable connection messages
Errors can occur with the CM1015/1017 MFP
if cable connections to the formatter board are
loose, damaged, or not connected. The
numbers in the photograph below correspond
to the reference numbers in the table below.
This table will assist in diagnosing the display
messages that are related to cable connection
issues.
Cable reference numbers
Reference
number
Possible loose connections
Display message or condition
with xx firmware
Copy output
1
CB394-60104 Assembly photo
memory card cable (1017 only)
“49 Service Error, Turn off
then on”
No response
2
CB394-60103 ASSY-CABLE-SCAN
MODULE/MOTOR
“Scanner Error 12, Turn off
then on”
When button is pushed, the screen
momentarily reads “copying 1/1.”
The engine runs for approximately 15
seconds, but there is no copy output.
The 1015 responds the
same as the 1017
3
CB394-60102 ASSY-CNTRL PNL
CABLE LCD
Blank screen, no lights
No response
The 1015 responds the
same as the 1017
4
CB395-60105 ASSY-CNTRL PNL
CABLE CGD (1017 only)
Vertical colored lines appear
on screen; Ready and Cancel
lights flash
Color and black-and-white copy work
normally
The 1015 operates
normally
5
Power cable
Blank screen, no lights
No response
The 1015 responds the
same as the 1017
6
DCC to Formatter FFC
The ready screen appears
normal for the first 15
seconds, then reads “Engine
communication error”
No output. On the 1017 the screen
goes blank with small HP logo across
the top. On the 1015, you receive a
“49 Error.”
The 1015 responds the
same as the 1017 except
with a “49 Error” when the
copy button is pressed
HP LaserJet MFP updates
Comments
22
HP LaserJet M3027/M3035 MFP series
Repositioning the stapler’s
actuator rod
The stapler’s actuator rod is coming off during
transportation. The stapler will not work and
appears to be broken. See the example photo
below.
HP LaserJet M3035 MFP
The actuator rod is out of place
1. Open the stapler’s door and grab the
stapler’s actuator rod using needle nose
pliers (or by hand) and insert the stapler’s
actuator rod back into place.
2. Verify proper installation of the stapler’s
actuator rod. This picture shows the correct
installation.
The actuator rod in its correct place
3. Push on the stapler’s actuator rod. It has to
move freely—you should feel a spring
action when pushing the rod inwards.
Reposition the actuator rod
The actuator rod should move freely
4. Staple five sheets together to test the
stapler’s functionality.
HP LaserJet MFP updates
23
HP LaserJet M3027/M3035/M4345/M5025/M5035 MFP
series—Control panel calibration
The steps for calibrating the control panel on
the M3027, M3035, M4345, M5025, and
M5035 MFPs are a little different than
calibrating the control panel on other MFPs.
We have provided the procedure below.
5. As soon as the square in the upper left
corner is touched, another square will
appear at the lower right corner of the
touch-screen.
Note
6. With a pen, touch the small square at the
lower right corner.
For accurate calibration, use a pen. Do not use
your finger.
7. At this point, calibration is complete and
the device will continue booting up.
1. Power off the device.
2. Hold down the # and C keys while
powering ON the device.
3. Release the keys when a small square
appears at the upper left corner of the
control panel’s touch-screen.
4. With a pen, touch the small square.
This photo shows the two squares on the
M3035 MFP’s touch-screen
Note
Touch the small square in the upper left corner
only ONCE. The square will not disappear
when touched.
HP LaserJet 4345/M4345 MFP series and HP Color LaserJet
4730 MFP series
“Corrupt Firmware in External
Accessory” error message
If the error message “Corrupt Firmware in
External Accessory” appears after updating the
firmware, you will need to resend the firmware
RFU file.
Background
This error often occurs when a firmware RFU
file is sent to the MFP and the MFP reboots to
an error (for example, a 49.xxxx error)
afterwards. In most cases, this error message
indicates the output accessory does not have
the necessary firmware loaded on it.
Resending the RFU file will reload the
firmware.
HP LaserJet MFP updates
HP LaserJet M4345 MFP
24
HP Color LaserJet 9500mfp series
Solutions provided with firmware
roll 08.061.9
The following enhancements and fixes have
been provided with the 08.061.9 revision
firmware roll—now available at the following
URL:
http://www.hp.com/go/lj9500mfp_firmware
Enhancements to base
Control panel TONER LOW messages are
suppressed.
•
•
Firmware upgrades are now logged to the
Event Log.
•
Firmware version is now included in all Event
Log entries.
•
When Fax Confirmation is enabled, the
original number is completely obscured
while entering the confirmation number.
•
Fax number is removed when confirmation
fails with Fax Number Confirmation
enabled.
•
And HP separator page is implemented in
the driver properties.
•
More complete user information is included
in the log file for send to email jobs sent
through SMTP gateways.
HP Color LaserJet 9500mfp with 8-bin mailbox
Fixes for the following issues:
Some ADF jams may hang third party
SCAPE solutions.
•
•
Corrupt firmware on your input or output
device may cause one of the following
messages on the front control panel:
“49.2169” error message, “Resend
Upgrade” message, or “Corrupt Firmware
on Output Device” message.
•
SLEEP DELAY is not resetting to default after
Restoring Factory Settings.
•
Time is not being reported correctly in Job
Accounting Data.
•
Some PDF files may print with inverse colors.
•
49.5001 may appear when storing and
retrieving large numbers of copy jobs.
•
A security page has been added to the
HP Embedded Web Server.
•
49.FF81 errors are logged to the Event Log.
•
Implemented an Intermediate control panel
lock feature.
•
•
Added additional metadata keys to support
third party accounting software.
Secure Storage Erase operations may not
consistently show up in the event log.
•
Kerberos Authentication may not work when
the LDAP Server Bind Method is anything but
Kerberos.
•
Fax Modem failure when the number dialed
contains 80 digits or more (Prefix and
Recipient combined).
•
49.4C02 error may occur after performing
restore factory setting following a Disk
INIT/NVRAM INIT.
•
49.6A08 or 49.6A18 Compression Error
when a modem failure occurs while
receiving a corrupted fax.
•
The Cancel button on Restrict Color Page
may not work properly.
•
Enhancements to Embedded Analog Fax
• Backup and Export capabilities for Fax
Address Book and Speed Dial lists have
been added.
HP LaserJet MFP updates
•
Fax reports can be printed from the default
fax tray specified on the printer.
•
The name of any speed dial chosen is
displayed next to the number when using the
quick dial feature.
25
•
E-mail Fax Notification does not include
thumbnail image (include thumbnail option is
not selectable in the HP Embedded Web
Server).
•
Digital Sending Software (DSS) Send to
Folder file size is always the same no matter
what is selected - Small, Standard or Large
file size.
•
When pressing the Reset key during a scan
initiated by a third party application running
on the MFP, the device may become
unresponsive.
•
The analog fax card is not disabled during
secure disk erase
•
Implemented new telecom features for
Belarus fax compatibility.
•
The HP Embedded Web Server is reporting
the NFS file system access incorrectly.
•
When setting up Embedded Send to
Network Folder with MFP User Credentials,
the user is prompted to enter Public
Credential Information before leaving the
HP Embedded Web Server.
Not all fax numbers are listed in the e-mail
notification when the list contains 1,500 to
2,000 characters.
•
PC Fax e-mail notification’s “TO” field
displays name garbled.
•
The MFP will not print legal size faxes from
trays 2 or 3 when certain paper size settings
are used.
•
The MFP is missing the capability to add up
to eight (8) additional Kerberos domain
entries.
•
A 49.4C02 error may occur when power
cycling the MFP with LDAP Authentication set
to Log In At Walk Up.
•
The MFP loses contact with the Network
Time Protocol (NTP) server if the IP address
changes.
Current firmware revisions included in the
20060914 08.061.9 firmware bundle:
Accessory
Revision No
2000 sheet input tray (Q1891A)
0113
Stacker/Stapler (C8085A)
050317
When Toner Low Alerts are turned on you
may receive an Email Alert every 10
seconds.
Stacker (C8084A)
060602
8-Bin Mailbox (Q5693A)
050316
Multifunction finisher (C8088B)
041022
Printing all Private Jobs may not print
requested number of copies for each job.
Copy Processor Board
0.206 (2.1)
Scanner Control Board
MFP301 11
•
SMTP Authentication may fail when used
with Microsoft IIS Virtual SMTP Server.
Analog Fax
2.35i
•
While “LDAP server not available” message
is displayed, menu items may disappear or
pressing Reset & Start initiates a copy job.
•
49.4C02 or 49.4C06 error may occur when
pressing the Reset key with some third party
Digital Send enabler applications.
•
•
HP LaserJet MFP updates
•
Current firmware updates included in the
08.061.9 firmware bundle:
HP Multifunction finisher revision 041022
• No update
Stapler/Stacker revision 050317
No update
•
Stacker revision 060602
• 13.12.13 error may occur when a sensor
does not properly detect a large stack of
media in the output bin
•
FAX ACTIVITY LOG may show negative job
duration if no end time is logged when the
fax is terminated unexpectedly.
•
Ability to use simple or simple over SSL for
LDAP addressing when using Kerberos
authentication.
8-Bin Mailbox revision 050316
• No update
•
Scan “Scaling Error” message is cropped in
all languages except English.
•
•
HP MFP Digital Sending Software (DSS) is
limited to 32 log entries.
2000 sheet input tray revision 0113
No update
26
Intermittent 10.00.YY errors
We have discovered an issue that may cause
supply e-label memory errors to occur on the
HP Color LaserJet 9500mfp (indicated by
10.00.YY errors). These errors are usually
caused by the supply. However, in this
situation the 10.00.YY errors are intermittent,
with the YY portion of the error changing to a
different supply each time the error posts.
Solution
This issue can be resolved with the latest DC
Controller firmware update. To obtain this
update, contact HP support.
This firmware version is indicated by the value
“6A” listed as the “DC Controller” on the
Configuration Page. HP Color LaserJet
9500mfps which have been manufactured with
this firmware version have a “T” in the third
digit of their serial number.
Workaround
1. Check the event log for recurring errors. If
the error is persistent and always indicates
the same supply (the last two digits of the
error are always the same), replace the
supply indicated by the error message
(print cartridge or image drum). The error is
probably not the issue being investigated.
2. If the event log indicates a different supply
(the last two digits of the error are different)
each time it occurs, turn sleep delay off.
The e-label is read each time the printer
comes out of sleep delay, so this will limit
the number of times the error may appear.
The steps to turn sleep delay off are:
MENU -> CONFIGURE DEVICE -> RESETS ->
SLEEP DELAY = OFF .
3. The e-labels are read when the printer is
powered on and when the front doors are
opened and closed. To limit the occurrence
of the error, do not power off the printer.
4. If the error does occur, opening and closing
the front doors will usually clear the error.
HP LaserJet MFP updates
27
Microsoft, Windows, Windows NT, and Windows XP are U.S. registered trademarks of Microsoft
Corporation. Windows Vista is either a registered trademark or trademark of Microsoft Corporation in
the United States and/or other countries. PostScript is a trademark of Adobe Systems Incorporated.
© Copyright 2007 Hewlett-Packard Development Company, L.P. The information contained herein is
subject to change without notice. The only warranties for HP products and services are set forth in the
express warranty statements accompanying such products and services. Nothing herein should be
construed as constituting an additional warranty. HP shall not be liable for technical or editorial errors
or omissions contained herein.