1
AV-FL-SOL-RF
Radio Controlled Solar Helipad Floodlight
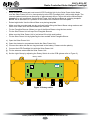
i) Determine, to which group, each individual light belongs. E.g., taxiway edge lights = 0, runway
edge lights = 1, obstruction lights = 2, threshold lights = 3, etc... Adjust Rotary Switch A to the
appropriate light group. E.g. 0, 1, or 2
j) Test the operation of the light by using the Radio Controller (see “Using the Radio Control to
activate the HLS System” section of manual for information).
k) Close electronic enclosure and lid of the solar Power Unit. Secure lid with provided bolt
l) Bolt the light into its final location
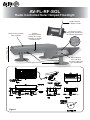
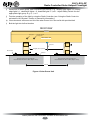
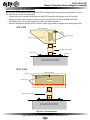
FRONT VIEW
Solar Panel
Charge port
Connector for LED
Floodlight Unit
Solar Power Unit
Antenna
Frangible Sleeve (98mm)
Mount Base
Ground
Concrete block and in-ground bolds
Recommended size: 40cm x 40cm, depth ~25cm)
Concrete block and in-ground bolds
Recommended size: 40cm x 40cm, depth ~25cm)
400mm
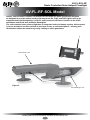
Figure 4. Solar Power Unit
Latest products and information available at www.avlite.com
10