1
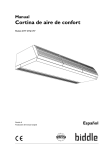
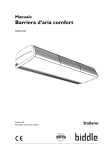
Manual
Comfort Air Curtain
for Direct Expansion
Model CA V
R
Version: 5.2
a
a
Copyright and trademarks
All the information and drawings in this manual are the property of Biddle and may not be used (other than for the
actual operation of the device), photocopied, duplicated, translated and/or be brought to the attention of third
parties without Biddle’s prior written permission.
The name Biddle is a registered trademark.
Warranty and Liability
Please refer to Biddle’s Terms of Sales and Delivery for warranty and liability conditions.
Biddle excludes liability for consequential loss at all times and under all circumstances.
Liability for the contents of this manual
However much care might have been taken in ensuring the correctness and, where necessary, completeness of the
description of the relevant parts, Biddle disclaims all liability for damage resulting from any inaccuracies and/or
deficiencies in this manual.
Should you detect any errors or ambiguities in this manual then we would be pleased to hear from you: it helps us
to improve our documentation even further.
Biddle retains the right to change the specifications stated in this manual.
For more information
If you have any comments or questions about specific topics relating to this product, please do not hesitate to
contact Biddle.
Address for the UK:
Address for other countries:
Biddle Air Systems Ltd.
St. Mary’s Road
Nuneaton
Warwickshire CV11 5AU
United Kingdom
Biddle bv
P.O. Box 15
NL-9288 ZG Kootstertille
The Netherlands
tel:
fax:
tel:
fax:
024 7638 4233
024 7637 3621
e-mail:
[email protected]
internet: www.biddle-air.com
2
+31 512 33 55 24
+31 512 33 55 54
e-mail:
[email protected]
internet: www.biddle.info
MANUAL
. . . Table of contents
1
Introduction
5
1.1
1.2
5
5
5
5
6
6
6
6
7
7
7
8
8
9
9
9
1.3
1.4
2
Installation
2.1
2.2
2.3
2.4
2.5
2.6
2.7
3
About this manual
How to use this manual
1.2.1
General
1.2.2
Marginal symbols
1.2.3
Pictograms on the device and in the guide
1.2.4
Related documentation
About the unit
1.3.1
System operation
1.3.2
Outside air temperature sensor (accessory)
1.3.3
Limitations
1.3.4
Models and type references
1.3.5
Type plate
1.3.6
Components and accessories
Safety instructions
1.4.1
Operation
1.4.2
Installation, maintenance and service
General instructions
Delivery check
Installation procedure
Connecting the unit to the power supply
Connecting the unit to the Daikin system
2.5.1
Connecting the control system
2.5.2
Connecting the refrigerant
Installing the outside air temperature sensor (accessory)
Switching on and testing operation
2.7.1
Switching the system on
2.7.2
Testing operation
Operation
3.1
3.2
3.3
3.4
General
Switching On and Off
3.2.1
Switching the system On and Off
3.2.2
Selecting the operation mode
3.2.3
Defrosting
Air curtain settings
3.3.1
Adjusting settings
3.3.2
Adjusting heating
Messages on the Biddle control panel
3.4.1
Dirty-filter indicator
3.4.2
Outside air temperature sensor indication
3.4.3
Faults
Version: 5.2 (08-12-2010)
11
11
11
11
12
12
12
13
14
14
14
15
16
16
16
16
16
17
17
17
17
18
18
18
18
3
COMFORT AIR CURTAIN FOR DIRECT EXPANSION
4
Settings
4.1
4.2
5
Maintenance
5.1
5.2
5.3
6
7.3
7.4
4
Safety instructions
Testing for faults
Non-fault-related symptoms
Faults with specific symptoms
Service
7.1
7.2
8
Replacing or cleaning the filter
Cleaning the unit
Scheduled maintenance
Faults
6.1
6.2
6.3
6.4
7
Setting on the Daikin operation panel
4.1.1
General
4.1.2
Additional field settings
Settings on the Biddle control panel
4.2.1
General
4.2.2
Additional functions at the Installer’s level
4.2.3
Non-operational functions
Safety instructions
Access to the interior of the unit
7.2.1
Opening the unit
7.2.2
Accessing electronics in the unit
Fuses
Other service works
Dismantling
19
19
19
19
19
19
20
20
21
21
21
21
22
22
22
23
24
25
25
25
25
25
26
26
27
MANUAL
INTRODUCTION
1 . . Introduction
1.1
About this manual
This manual relates to the comfort air curtain, models CA V,
which are intended specifically for application within Daikin
direct expansion systems.
This manual contains information and instructions for installation, operation and maintenance, which are specific to these
particular unit models.
1.2
How to use this manual
1.2.1 General
This manual is a leading. It should be read in the written order.
From this manual, references are made to:
•
the manual of the Biddle CA model Comfort Air Curtain
•
the manuals of the Daikin system components (outdoor
unit, indoor unit, operation panel, etc.)
Before carrying out any work on this appliance, read this manual, and all referred sections in other manuals, completely
through in the presented order.
1.2.2 Marginal symbols
In this manual the following marginal symbols are used:
n
c
Version: 5.2 (08-12-2010)
Note:
Draws your attention to an important part of the text.
Read this part of the text carefully.
Caution:
If you do not perform this procedure or action correctly
you can damage the device.
So follow the instructions carefully.
5
INTRODUCTION
COMFORT AIR CURTAIN FOR DIRECT EXPANSION
w
Warning:
d
Danger:
If you do not perform this procedure or action correctly you can cause bodily injury and/or damage.
So follow the instructions carefully.
This indicates actions which are not permitted.
Ignoring this warning can lead to serious damage
or accidents which may involve bodily injury.
The action concerned may only be performed by
qualified technical staff when carrying out maintenance or repair.
1.2.3 Pictograms on the device and in the guide
The pictograms in table1-1 refer to possible risks and/or
dangers. You will find these pictograms in the text when risky
actions are being discussed. The same pictograms will also be
found on the device.
Table 1-1 Pictograms
PICTOGRAM
ê
ç
DESCRIPTION
Warning: You are entering an area which contains ‘live’ components.
Accessible to qualified maintenance staff only.
Caution is urged.
Warning: This surface or part can be hot. There is a risk of burns on
contact.
1.2.4 Related documentation
Besides this manual, the following documents are supplied with
this unit:
1.3
•
Biddle CA model Comfort Air Curtain Manual;
•
wiring diagram for installation and service.
About the unit
1.3.1 System operation
The air curtain is connected within a Daikin direct expansion
system. Air discharged by the appliance is heated by the refrigerant.
6
MANUAL
INTRODUCTION
The air curtain is controlled and operated partially by the
Daikin system, and partially by the Biddle system.
1.3.2 Outside air temperature sensor (accessory)
The sensor controls the air curtain in response to outside air
temperatures. At lower temperatures, the unit is set one or
two settings higher.
1.3.3 Limitations
•
The unit can only be applied within Daikin direct expansion systems.
•
The unit is not suitable for cooling.
•
No external controls may be connected to the unit.
1.3.4 Models and type references
Table 1-2 provides an overview of the models, that are
described in this manual, and their corresponding type references. Combined, the type references constitute the type
code, for instance: CAVM150DKFBC. Several combinations
are available.
Table 1-2 Type code explained
TYPE CODE
REFERENCE
MEANING
Biddle product series
CA
air curtain, CA model
Daikin system
V
for connection within Daikin VRV system (‘multi’)
capacity
S, M, L or XL
small, medium, large or extra large range
discharge width
100, 150, 200 or 250
discharge width in cm
heating
DK
heating within Daikin direct expansion system
mounting method
F
free-hanging model
R
recessed model
C
cassette model
B
White
S
Aluminium
X
non-standard colour
C
Biddle control panel included
N
not included
ELEMENT
colour
control panel
Version: 5.2 (08-12-2010)
7
INTRODUCTION
COMFORT AIR CURTAIN FOR DIRECT EXPANSION
1.3.5 Type plate
Type CAVM150DKFBC
Biddle bv
Markowei 4
NL-9288 HA Kootstertille
Code 1550
Nº 5426/1-1 00-01
DaikinC.
M 60 kg
Medium R410A
pmax
Capacity Index 80
Example of a type plate
U 230 V 1N~ 50 Hz
Imax L1 2.4 A
Imax L2 -
The type plate can be found at the left side, on the inlet side
(under the inlet cover).
It lists the following data:
Imax L3 Pmotor 0.56 kW
Pheating -
•
Type: full type code of the unit;
•
Code: unit code of the Biddle electronic controller;
•
M: weight of the unit;
•
Medium: refrigerant
•
Capacity Index: Daikin capacity index
•
U, Imax, Pmotor : maximum load on the electrical system by
the unit.
1.3.6 Components and accessories
Daikin components
The following components are required with an installation:
•
outdoor unit
•
optional: one or several indoor units
•
Daikin operation panel
•
materials necessary for connection, e.g. refrigerant pipes,
cables, etc.: see the outdoor unit’s Installation Manual.
n
Note:
The outdoor unit’s control system and capacity index must
match with those of the air curtain unit.
Biddle components
The following components are delivered separately but always
required:
•
Biddle control panel (able to control a maximum of 10
units);
•
Biddle control cable, available in various lengths;
•
only with free-hanging models: set of end panels.
Accessories
The following accessories are available as options:
•
8
outdoor air temperature sensor;
MANUAL
1.4
INTRODUCTION
•
wall bracket set, ‘Standard’ or ‘Design’;
•
threaded rod lining;
Safety instructions
1.4.1 Operation
w
w
çw
c
Warning:
Do not put any objects in the inlets and outlets.
Warning:
Do not block the inlets and outlets.
Warning:
The upper surface of the unit becomes hot during
operation.
Caution:
Water may leak from the unit in exceptional situations. Do
not place anything under the unit that may suffer damage as
a result of any leakage.
1.4.2 Installation, maintenance and service
d
Danger:
w
Warning:
ê
The unit may be opened by qualified technical staff
only.
Perform the following actions before opening the
unit:
1. Switch the system Off using the Daikin operation panel.
2. Wait until the fans of the air curtain unit have stopped.
3. Allow the unit to cool down.
ç
The heat exchanger can get very hot. Moreover, the fans
may keep on running for a while.
4. Disconnect power supply to the Daikin outdoor unit
5. Disconnect power supply to the air curtain unit.
c
Version: 5.2 (08-12-2010)
Caution:
If the unit is working, or just has worked in defrost mode,
there may be water in the inspection panel.
9
INTRODUCTION
COMFORT AIR CURTAIN FOR DIRECT EXPANSION
w
10
Warning:
The fins of the heat exchanger are sharp.
MANUAL
INSTALLATION
2 . . Installation
2.1
General instructions
w
Warning:
w
c
Warning:
c
Caution:
Installation may only be carried out by technically
qualified staff.
Follow the safety instructions in Section 1.4.
Caution:
The unit should be connected in compliance with all local
statutory regulations, instructions and standards.
Taking in building dust, grit, cement powder etc. may damage the unit. While such substances are present in the
room:
-
do not start to use the device,
cover air intake and discharge openings.
You may cover the unit with the packaging material.
2.2
2.3
Delivery check
•
Check the unit and its packaging for correct delivery.
Immediately report to the supplier any damage caused in
transit.
•
Check whether all parts are included.
Installation procedure
Install the system in the following predefined order:
1. Install Daikin components as described in the relevant
manuals:
-
Version: 5.2 (08-12-2010)
outdoor unit
if applicable to your system: indoor unit(s)
operation panel
11
INSTALLATION
COMFORT AIR CURTAIN FOR DIRECT EXPANSION
2. Install the air curtain unit as described in the ‘Installation’
chapter in the CA model Air Curtain Manual:
1. Mount the unit.
2. Install the control panel.
3. Finish the unit.
4. Connect the air curtain unit to the power supply (see Section 2.4)
5. Connect the air curtain unit to the Daikin system (see Section 2.5).
6. Install the outside air temperature sensor (optional, see
Section 2.6)
7. Turn the system on and check that it functions properly
(see Section 2.7)
2.4
Connecting the unit to the power supply
1. Ensure that an (earthed/grounded) power point is available
at a maximum of 1.5 m from the left side of the unit.
2.5
w
w
Warning:
w
Warning:
The unit must be earthed (grounded).
Warning:
The wall socket must remain accessible after the
installation of the unit to be able to disconnect the
unit from the mains when maintenance work is to
be performed.
Do not switch the unit on/off in normal use via the
mains, use the control pad.
Connecting the unit to the Daikin system
2.5.1 Connecting the control system
All models
c
12
Caution:
Use a cable with a minimum cross-sectional area of
0.75 mm².
MANUAL
INSTALLATION
Models with discharge widths 150, 200, or 250
X84
1. Connect the system controller to the X84 connector
located on the top of the air curtain:
-
Connect the controller cable from the outdoor unit to
F1/F2.
If applied to your unit: Connect the Daikin operation panel to P1/P2.
2. Attach the cable housing (supplied) to the connector.
Models with discharge width 100
1. Remove the cover 1 from the box on the side of the unit.
2
2. Optional: Detach the box from the unit:
-
1
c
Remove the bracket 2 from the unit and from the box.
Mount the box to the wall at a place of your choice.
Caution:
Do not detach the cables between the unit and the box.
3. Lead the control cable(s) into the box through the free
cable gland(s) 3.
4. Connect the system controller to the terminal block 4:
3
-
4
-
Connect the controller cable from the outdoor unit to
F1/F2.
If applied to your unit: Connect the Daikin operation panel to P1/P2.
5. Screw down the cable gland(s).
6. Put the cover 1 back onto the box.
2.5.2 Connecting the refrigerant
Version: 5.2 (08-12-2010)
•
Attach the pipes as described in the Daikin outdoor unit
Installation Manual.
•
Attach the pipelines to the protruding pipe ends on the
top surface of the unit by means of a soldered joint.
13
INSTALLATION
2.6
COMFORT AIR CURTAIN FOR DIRECT EXPANSION
Installing the outside air temperature sensor (accessory)
X82
1. Attach the outside air temperature sensor to the outside
of the building.
n
Note:
Do not place the sensor in direct sunlight.
2. Connect the sensor to the X82 connector on top of the
air curtain.
3. Attach the cable housing (supplied) to the connector.
2.7
Switching on and testing operation
2.7.1 Switching the system on
1. Check all air curtain connectors:
-
display for operational air curtain
power supply
control cable(s) connecting Biddle control panel and
unit(s)
control cable(s) connecting Daikin outdoor unit and
unit(s)
control cable(s) connecting Daikin operation panel and
unit(s)
2. Turn on the power supply and/or put the air curtain plug in
the socket.
If the unit is working correctly, then the Biddle control
panel will display symbols.
If multiple air curtain units have been attached:
1. Turn on the power supply to all air curtain units.
2. Reset the Biddle control panel: Please refer to the CA
model Air Curtain Manual.
3. If applicable to your system: Turn on the Daikin indoor
unit(s) as described in their Installation Manual.
4. Turn on the Daikin outdoor unit as described in its Installation Manual.
display for non-operational air curtain
14
MANUAL
INSTALLATION
2.7.2 Testing operation
5. Test the system according to the outdoor unit’s Installation Manual.
6. Operate the unit with the Daikin operation panel (see
Chapter 3) and verify its operation:
1. Switch the system On. The unit should start to discharge air.
2. Set the operation mode to Heating, and set the temperature setpoint to maximum. After some time, the unit
should discharge heated air.
3. Set the operation mode to Fan only. After some time,
the unit should discharge unheated air.
4. Switch the system Off. After some time, the unit
should turn itself off.
5. If you have installed the outdoor air temperature
sensor: Verify the operation of the sensor with function
no. 87 in the Installer’s Level (see Section 4.2.2).
Version: 5.2 (08-12-2010)
15
OPERATION
3. .
3.1
COMFORT AIR CURTAIN FOR DIRECT EXPANSION
Operation
General
The air curtain is operated partially from the Daikin operation
panel, partially from the Biddle control panel.
Most features on the Daikin operation panel work as
described its Operation Manual. However, several features do
not work or operate differently.
Biddle control
panel
3.2
Daikin operation
panel
The features on the Biddle control panel work as described
below.
Switching On and Off
3.2.1 Switching the system On and Off
•
To switch the system On or Off, press the
the Daikin operation panel.
button on
When the LED next to this button is lit, the system is On. If
the LED is flashing, there is a fault.
The = button on the Biddle control panel has no function.
When the LED on this panel is lit, the system has turned off
the air curtain.
3.2.2 Selecting the operation mode
•
Select the operation mode with the
Daikin operation panel:
-
Fan only: the air curtain always discharges unheated air.
-
Heating: the air curtain’s heating is automatically controlled.
Other modes are not available.
16
button on the
MANUAL
OPERATION
3.2.3 Defrosting
When the Daikin operation panel displays the
symbol, the system is working in defrost mode. Then, the air curtain will either discharge unheated air, or be turned off
(depending on the settings, see Section 4.1.2).
Defrosting is activated automatically by the system when necessary. When the defrosting is done, the unit will operate normally again.
3.3
Air curtain settings
actual room temperature
3.3.1 Adjusting settings
•
strength
Adjust the strength of the air curtain using the + and buttons on the Biddle control panel.
The
and
have no function.
n
buttons on the Daikin operation panel
Note:
To achieve maximum climate separation with minimum
energy consumption, Biddle recommends to select the
lowest strength at which no draught occurs.
Display on Biddle control panel
(example)
3.3.2 Adjusting heating
Adjust the temperature setpoint with the
buttons on the
Daikin operation panel. The display on this panel shows the
setpoint.
temperature setpoint
Display on Daikin operation panel
(example)
The system controls the air curtain’s heating automatically.
The heating is stopped when the setpoint is reached. Then,
the air curtain will either discharge unheated air, or be turned
off (depending on the settings, see Section 4.1.2).
n
Note:
To prevent draught problems, Biddle recommends to
adjust the temperature setpoint to maximum.
The } button om the Biddle control panel has no function.
The display on this panel always shows the actual room temperature.
Version: 5.2 (08-12-2010)
17
OPERATION
3.4
COMFORT AIR CURTAIN FOR DIRECT EXPANSION
Messages on the Biddle control panel
3.4.1 Dirty-filter indicator
The number of ‘full’ triangles indicates the filter’s service life:
the more triangles, the longer the service life.
When the message
appears, the filter’s maximum life
has lapsed: you should then clean or replace it.
For details on the filter indication, see the CA model Air Curtain Manual.
3.4.2 Outside air temperature sensor indication
If the % symbol is displayed on the Biddle control panel, then
the air curtain setting is turned up by the outside air temperature sensor.
3.4.3 Faults
fault code
The message
indicates that there is a fault. Next to
it, the fault code is displayed.
n
Note:
The fault code will disappear when you press any key.
The message
will however remain visible as long
as the fault is not corrected.
If an fault code is displayed without the message
, the
fault occurred in your absence, and has been resolved in the
meantime.
For details on the fault messages, see the CA model Air Curtain Manual.
18
MANUAL
SETTINGS
4 . . Settings
4.1
Setting on the Daikin operation panel
4.1.1 General
On the Daikin operation panel, field settings can be performed as detailed in its Installation Manual.
The unit models described in this manual have some additional settings.
4.1.2 Additional field settings
SECOND CODE NO.
FIRST
DESCRIPTION
CODE NO.
OF SETTING
01
02
03
04
(22)
3
Air curtain’s
operation
when not heating
unheated
(default)
unheated
halted
(when 238 is set to
01)
--
(23)
8
Air curtain’s
operation in
defrost mode
halted
unheated
(default)
unheated
--
MODE NO.
4.2
Settings on the Biddle control panel
4.2.1 General
On the Biddle control panel, settings can be performed at the
Manager’s level and at the Installer’s level as detailed in the CA
model Air Curtain Manual.
The unit models described in this manual have some additional settings. Conversely, certain functions do not work with
these models.
Version: 5.2 (08-12-2010)
19
SETTINGS
COMFORT AIR CURTAIN FOR DIRECT EXPANSION
4.2.2 Additional functions at the Installer’s level
NO.
FUNCTION
OPTIONS
85
Outside air temperature setpoint 1
Pre-settable between -9.5 and +31 °C
(default value = 0 °C)
If the outside air temperature falls
below this point, then the air volume
setting is increased by one level.
86
__ (below -9.5 °C): outdoor air
temperature sensor regulation deactivated
Outside air temperature setpoint 2
Pre-settable between -9.5 and +31 °C
(default value = -9.5 °C)
If the outside air temperature falls
below this point, then the air volume
setting is increased by two levels.
87
YOUR
SETTING
__ (below -9.5 °C): outdoor air
temperature sensor regulation deactivated
Current outside air temperature and
sensor function test
The outside air temperature is displayed.
flashing -9.5 °C: sensor not connected
4.2.3 Non-operational functions
20
•
The outside air temperature reading (function no. 69) cannot be disabled.
•
All functions relating to external controls (functions nos.
60, 61 & 76) cannot be set.
•
All functions relating to discharge air temperature (functions nos. 1, 5, 51, 72 & 74) an be set, but have no effect.
MANUAL
MAINTENANCE
5 . . Maintenance
5.1
Replacing or cleaning the filter
See the ‘Maintenance’ Section in the CA model Air Curtain
Manual.
5.2
Cleaning the unit
You may clean the exterior of the unit with a damp cloth and a
domestic cleaner. Do not use any solvents.
w
w
5.3
Warning:
Ensure that no water runs into the unit.
Warning:
Ensure that the connectors on the top surface are
kept dry.
Scheduled maintenance
Version: 5.2 (08-12-2010)
•
Maintain the air curtain unit according to the ‘Maintenance’ Section in the CA model Air Curtain Manual.
•
Maintain the Daikin components according to their Service Manuals from Daikin.
21
FAULTS
COMFORT AIR CURTAIN FOR DIRECT EXPANSION
6. .
6.1
6.2
Faults
Safety instructions
d
Danger:
w
Warning:
Work on the unit’s interior shall be performed by
qualified technical staff only.
Before opening the unit, follow the safety instructions in section 1.4.
Testing for faults
n
Note:
No specialist skills are required to perform the tests
described below.
If you suspect a fault, then perform the following steps to
determine whether there is indeed a fault:
1. Determine whether the symptoms are part of normal
operations as described in Section 6.3.
2. Determine whether the symptoms are caused by a fault as
described in Section 6.4.
3. Set the system to heating mode using the Daikin operation panel and set the temperature setpoint to maximum.
-
If the appliance discharges no air at all, or no hot air,
after 15 minutes, then there is a fault.
4. Set the temperature setpoint to minimum.
-
If the appliance still discharges hot air, after 15 minutes,
then there is a fault.
5. If you have detected a fault, and Section 6.4 does not provide a solution, then contact the supplier.
22
MANUAL
6.3
FAULTS
Non-fault-related symptoms
SYMPTOM
EXPLANATION
ACTION
The displays of one or both control panels display is blank.
The unit connected to the control panel has no power supply.
Check the plug and the power
supply.
The ?, = en } buttons on
the Biddle control panel do not
work.
These buttons have no function.
Switch the air curtain on with the
Daikin operation panel. (See Section 3.2.)
The
and
buttons on
the Daikin operation panel do
not work.
These buttons have no function.
Control the strength of the air
curtain with the Biddle control
panel. (See Section 3.3.)
The air curtain does not work,
and the LED on the Biddle control panel is lit.
Either the system is switched off,
or it turned off the air curtain
automatically.
Verify the settings on the Daikin
operation panel. (See Sections
3.2, 3.3 en 4.1.)
The air curtain is discharging
unheated air.
The system turned off the heating automatically.
Verify the settings on the Daikin
operation panel. (See Sections
3.2, 3.3 en 4.1.)
The air curtain is discharging
unheated or cold air, or does not
work, and the Daikin operation
panel displays
.
The system is working in defrost
mode. This will take 5 to 10 minutes.
Wait until defrosting is done.
Version: 5.2 (08-12-2010)
23
FAULTS
6.4
24
COMFORT AIR CURTAIN FOR DIRECT EXPANSION
Faults with specific symptoms
SYMPTOM
EXPLANATION
ACTION
The Biddle control panel display
is blank.
• Connected unit has no power
supply,
• Faulty connection to control
panel.
• Fault in Biddle electronics in
the unit.
• Check power supply.
• Consult the 'Faults' section in
CA model Air Curtain Manual.
The Daikin operation panel display is blank.
• Connected unit has no power
supply,
• Faulty connection to control
panel.
• Fault in Daikin electronics in
the unit.
• Check power supply.
• Consult Installation Manual of
control panel.
• Contact the supplier.
Biddle control panel displays a
fault message (S and/or
E or F plus a digit).
• Biddle electronics signals a
fault.
• Consult the 'Faults' section in
CA model Air Curtain Manual.
Daikin operation panel displays
an fault message (flashing LED
and/or fault code)
• Daikin electronics in unit or
outdoor unit signals a fault.
• Consult the Service Manual of
the outdoor unit.
• Contact the supplier.
Air curtain does not work while
Biddle control panel indicates
that it is working (LED unlit, symbols on display, no S
symbol).
• Fault in Biddle electronics,
transformer, fuse, or fans in
unit.
• Consult the 'Faults' section in
CA model Air Curtain Manual.
Appliance discharges cooled air
for a prolonged time and/or condensate is forming in the unit.
• Fault in unit.
• Turn the whole system off
immediately.
• Contact the supplier.
Warning: This situation can
be hazardous and/or cause
damage.
MANUAL
SERVICE
7 . . Service
7.1
7.2
Safety instructions
d
Danger:
w
Warning:
Service on the unit may be performed by qualified
technical staff only.
Before opening the unit, follow the safety instructions in section 1.4.
Access to the interior of the unit
7.2.1 Opening the unit
See the ‘Service’ Chapter in the CA model Air Curtain Manual.
7.2.2 Accessing electronics in the unit
w
Warning:
Before opening the unit:
Follow the safety instructions in Section 1.4.
All models
2
3
1
Version: 5.2 (08-12-2010)
1. Remove the inspection panel 1 (see CA Model Air Curtain Manual).
2. Biddle electronics are located at 2.
25
SERVICE
COMFORT AIR CURTAIN FOR DIRECT EXPANSION
Models with discharge widths 150, 200, or 250
3. Remove cover 3. Daikin electronics are located behind
this cover.
2
3
Models with discharge width 100
4. Remove the cover 4 from the box on the side of the unit.
Daikin electronics are located behind this cover..
4
7.3
Fuses
There are 4 fuses in the unit. Their values are indicated near
the fuse holders.
Table 7-1 Locations of fuses
7.4
LABEL
LOCATION
F100
on PCB of Biddle
electronics
F110
on PCB of Biddle
electronics
transformer fuse
(unlabelled)
near transformer with
Biddle electronics
F1U
on PCB of Daikin
electronics
Other service works
See the ‘Service’ Chapter in the CA model Air Curtain Manual.
26
MANUAL
DISMANTLING
8 . . Dismantling
Dismantling the system, handling coolant, oil and other components should be performed by a qualified engineer in compliance with relevant local and national regulations.
Any used electrical/electronic devices must be handed in for
processing in compliance with EU regulations. By ensuring that
this product is disposed of in the correct manner, you prevent
any damage to human health and/or the environment. For
more information about this subject, please contact your supplier or local government agency.
Version: 5.2 (08-12-2010)
27
Declaration of Conformity
manufacturer:
address:
Biddle BV
Markowei 4
9288 HA Kootstertille
The Netherlands
We declare that the following product:
product description:
brand:
model:
type:
Remark:
Comfort Air Curtain
Biddle
CA with integrated Daikin print suitable for Daikin VRV or CVP
R410A system.
CA V-S-100/150/200/250 ; CA V-M-100/150/200/250
CA V-L-100/150/200/250 ; CA V-XL-100/150/200/250
The installer is responsible for making the whole
heating system comply with the PED directive.
In accordance with the following Directives:
2006/95/EC
2004/108/EC
the Low Voltage Directive
the Electromagnetic Compatibility Directive
Has been designed and manufactured to the following specifications:
EMC:
EN 61000-6-2
EN 61000-6-3
LVD:
EN 60335-1
EN 60335-2-40: 2002
Electromagnetic Compatibility (EMC) -- Part 6-1: Generic
standards – Immunity for industrial environments
Electromagnetic Compatibility (EMC) -- Part 6-3: Generic
standards – Emission standard for residential, commercial and
light-industrial environments
Safety of household and similar electrical appliances
Part 1: General requirements
Safety of household and similar electrical appliances
Part 2-40: Particular requirements for electrical heat pumps, air
conditioners and dehumidifiers
I hereby declare that the equipment named above has been designed to comply with the relevant sections
of the above referenced specifications. The unit complies with all essentials requirements of the directives.
signed by:
P. Stoelwinder, Managing Director, 27-10-2010