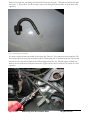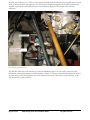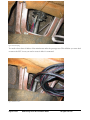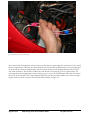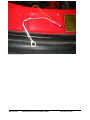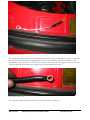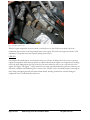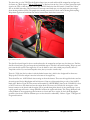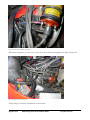
1
BITZ RACING CIS to EFI conversion kit for the Porsche® 911 Installation Guide Rev 1.7 Copyright 2012 BITZ Racing http://www.bitzracing.com Reproduction or redistribution without written consent is prohibited Table of Contents TABLE OF CONTENTS ................................................................................................................................................................................................................1 DISCLAIMER ..................................................................................................................................................................................................................................2 PLAYING SAFE ..............................................................................................................................................................................................................................3 MECHANICAL REPAIR /MODIFICATION ..........................................................................................................................................................................................3 ELECTRICAL REPAIR/MODIFICATION ............................................................................................................................................................................................4 FUEL SYSTEM REPAIR /MODIFICATION..........................................................................................................................................................................................5 KIT CONTENTS..............................................................................................................................................................................................................................7 REQUIRED TOOLS .......................................................................................................................................................................................................................9 CHANGES REQUIRED TO INSTALL THE KIT ..................................................................................................................................................................10 A/C COMPATIBILITY ................................................................................................................................................................................................................10 IGNITION SYSTEM COMPATIBILITY .................................................................................................................................................................................12 JACKING UP THE CAR..............................................................................................................................................................................................................14 MODIFYING FEED AND RETURN FUEL FITTINGS ........................................................................................................................................................15 REMOVING CIS INJECTION SYSTEM .................................................................................................................................................................................20 PREPARING THE INTAKE MANIFOLDS.............................................................................................................................................................................27 PREPARING THE FUEL RAILS...............................................................................................................................................................................................30 MOUNTING THE FUEL RAILS................................................................................................................................................................................................33 CONNECTING THE FUEL LINES ...........................................................................................................................................................................................40 VACUUM HOSE PICKUP...........................................................................................................................................................................................................47 ROUTING THE WIRING............................................................................................................................................................................................................48 CONNECTING THE WIRES......................................................................................................................................................................................................58 MOUNTING THE AIR TEMPERATURE SENSOR..............................................................................................................................................................84 MOUNTING THE OXYGEN SENSOR.....................................................................................................................................................................................88 MOUNTING THE ECU................................................................................................................................................................................................................89 CHECKING THE THROTTLE BUTTERFLY .......................................................................................................................................................................92 FUEL INJECTORS AND FUEL PRESSURE ..........................................................................................................................................................................92 PREPARING TO START THE ENGINE .................................................................................................................................................................................93 SUPPORT........................................................................................................................................................................................................................................94 WHY NO TPS SENSOR? .............................................................................................................................................................................................................96 MEGASQUIRT PHYSICAL INTERFACES ............................................................................................................................................................................97 Page 1 of 99 BITZ Racing CIS to EFI Installation Guide All rights reserved Disclaimer By installing the BITZ Racing CIS to EFI kit you agree to the following terms and conditions: You agree to be fully responsible for any personal injury or property damaged caused directly or indirectly of this kit. It is your responsibility for meeting any laws with regards to purchasing and installing such a kit on your vehicle. If you were not made aware of these conditions prior to purchasing the kit, and do not agree with these conditions, you can return the kit for a refund. Page 2 of 99 BITZ Racing CIS to EFI Installation Guide All rights reserved Playing Safe Installation of this kit should be a fun project, but can turn ugly if working in an unsafe environment. With permission, the following section has been copied from the “Safety Precautions” section of the MegaManual and should be followed. This section is “© Bowling & Grippo”. “In the shop, you need to: • Ensure children and animals are kept well away from the working area for the entire duration of the work, including periods where the vehicle is unattended. • Allow the presence only of persons who are trained, professional mechanics, or those who have read, understood, and agreed to follow all of the safety precautions applicable to your vehicle, tools and equipment, and any and all applicable fire regulations. • Wear eye protection whenever you operate power tools. • When using any tool or equipment that requires household current, make sure the device is correctly connected to its plug, and that it is correctly grounded (where necessary - see the operator's manual for each tool or piece of equipment). • Before each use, check the power cord for any device operating on household current for cuts, breaks, or other defects. Replace or repair any damage components before using. • Do not operate any power tool or equipment in damp conditions. • Wear ear protection whenever you operate loud power tools. • Do not wear loose clothing, ties, or long hair, which can get caught in moving parts and cause serious injury or death. • Do not where a ring while working on a vehicle. It is a conductor and can cause an injurious short circuit. • Cover as many areas of your body as possible with appropriate fire-retardent, abrasion resistant clothing. • Get someone to check on you regularly while you are working on your vehicle. • Keep all chemicals, cleaner products, automotive fliuds and other such products tightly capped and out of the reach of children and animals. • Do not siphon toxic liquids such as gasoline, anti-freeze, or brake fluid by mouth, or allow them to remain on your skin. • Get help lifting heavy components. Do not attempt to lift heavy items, or you may injure yourself. Mechanical Repair/Modification • Disconnect the battery before beginning any repair work. Disconnect the negative terminal first before working on the vehicle, and install the negative terminal last when the repairs are done. • Always ensure the park brake is applied, the vehicle is in park (automatic trans) or neutral (manual trans), and the wheels are chocked with approved devices. Page 3 of 99 BITZ Racing CIS to EFI Installation Guide All rights reserved • Always consult your owner's manual for proper jacking procedures. DO NOT WORK UNDER THE VEHICLE unless you have properly located 4 suitable automotive jack stands under the frame at the approved locations. Don't rely on a jack when working under a vehicle. • Always pull a wrench towards you when loosening fasteners; never push away from your body. • Always use the proper tool for the job you are doing. Where this is specified in the shop manual, use that exact tool. Otherwise, use the appropriate tool of the proper size, specification, and strength for the job you are doing. • Don't attempt to loosen extremely tight fasteners, or you could hurt yourself or damage your car or property. Take the vehicle to a licensed repair shop to have the fastener removed. • Never use a pipe over a wrench as an extension. The pipe or wrench could fail and cause injury or damage. • Any fastener that is removed and subsequently re-installed must be correctly torqued to the manufacturer’s specification using an appropriate torque wrench. • Any fastener that is replaced with another must be of the same dimensions, thread size and pitch, and strength and ductility as the original. • Take great care when installing fasteners to guard against cross threading. • Don’t try to start the engine without checking that the transmission is in neutral (or park for automatics) and the parking brake is set. • Don't remove the radiator cap from the radiator until the engine has completely cooled. • Don't drain the oil from the oil pan until the engine has completely cooled. • Do not touch, or allow your clothing to touch, any part of the exhaust system until is has cooled enough to avoid burns. • Do not allow spilled liquids to remain on the floor. You could slip and injure yourself. Electrical Repair/Modification • Always place an appropriately rated fuse in the power supply line to any electrical component you add to your vehicle. See the equipment's manual for appropriate amperage rating for the fuse. • Use appropriate wire sizes (gauge) for the current and length of your wires. When in doubt, use larger wires. • Splices can be made using solder and electrical tape (or heat shrink tubing), or crimp connector. If you solder, make sure to have a proper, cleaned join before overlapping the splice with elctrical tape (or heat shrink tubing). Be careful not to burn yourself when soldering or shrinking the heat shrink tubing. If you use crimp connectors, be sure to use the proper tools and procedures recommended by the crimp/tool manufacturer. • Keep all wires away from moving parts (including, but not limited to: belt, pulleys, throttle linkage, transission cables, etc.) and away from hot parts (exhaust, cylinder heads, etc.). Use a retentive device (such as nylon tie-straps) to keep wires in place. • Wherever possible, use a protective covering (such a convoluted tubing) over bundles of wires. • If a fuse blows, do NOT bypass it. Find the problem and fix it before operating your vehicle. Page 4 of 99 BITZ Racing CIS to EFI Installation Guide All rights reserved • Never expose a battery to open flame or electric spark - batteries generate a gas which is flammable and explosive. • DO NOT allow battery fluid to contact eyes, skin, fabrics, or painted surfaces. This fluid is highly corrosive. Flush any contacted areas with water immediately and thoroughly. • Be careful that metal tools or jumper cables do not contact the positive battery terminal (or metal in contact with this terminal) and any other metal on the vehicle, because a short circuit could occur and cause injury or damage. • Always wear eye protection when cleaning the battery. • Batteries should always be kept out of the reach of children. Fuel System Repair/Modification Elimination of fuel spills or leakage from vehicles, in combination with adequate ventilation and control of ignition sources, is the most effective way of preventing flammable liquid fires in the shop environment. Safety measures in any work area used for automotive maintenance, repair, or modifications should also include the following: • Keep two (2) fully charged fire extinguishers suitable for extinguishing gasoline fires readily at hand at all times when working on your vehicle. Carry one in your car at all times. • Do not use gasoline for cleaning parts under any circumstances. • DO NOT ATTEMPT ANY REPAIR ON THE FUEL TANK OR FUEL FILLER NECK WHERE HEAT OR FLAME IS REQUIRED. This includes grinding, soldering, welding, drilling, hammering, chiseling, filing, or any other operation that might create a spark or heat. • A small amount of fuel will be released when fuel lines are disconnected, so be sure to wear appropriate fuel proof gloves, and have a shop cloth ready to catch any spillage, then place the cloth in an approved container. • Use care in removing fuel injectors to prevent damage to the electrical connections, the injector fuel filter, or the injector nozzle. Do not use pliers to remove injectors since their use could damage the injectors. Injectors are electrical components and should NOT be immersed in any type of cleaner. • Keep all fuel lines away from moving parts (including, but not limited to: belt, pulleys, throttle linkage, transmission cables, etc.) and away from hot parts (exhaust, cylinder heads, etc.). Use nylon straps and convoluted tubing to keep wires in place. • DO NOT disassemble your fuel pressure regulator. It contains a spring under heavy compression, and this could cause injury if it is accidentally released. • Fuel hoses are specially manufactured. If replacement becomes necessary, it is important to use only hoses meeting GM specification 6163-M. Hoses not meeting 6163-M could fail and cause injury, death and/or property damage. • An approved flammable and combustible liquids spill control procedure, in conformance with your local Fire Code, should be implemented in automotive repair areas. This may include the use of barriers of non-combustible construction to contain a spill, sloping the floor to divert a spill to a proper drainage system or use of non-combustible absorbent materials conforming to ULC/ORD-C410A. Page 5 of 99 BITZ Racing CIS to EFI Installation Guide All rights reserved • Properly designed ventilation should be provided in automotive repair areas to ensure that explosive flammable vapor concentrations do not accumulate. • Ignition sources, such as smoking or cutting/welding operations that create open flames or sparks, should be controlled in automotive repair areas if vehicles are fuelled or flammable liquids are being handled. • Electrical equipment in automotive repair areas should conform to your applicable Electrical Safety Code and should be maintained in good repair. • Incandescent trouble lights should be replaced with fluorescent trouble lights. Tests have shown that incandescent trouble lights can ignite gasoline vapours if the bulb is broken from thermal or mechanical shock and the hot filament is exposed to the vapours. Thermal breakage of the bulb may occur if a liquid at room temperature is spilled or sprayed onto an incandescent bulb at its normal operating temperature (350ºF to 400ºF). Use incandescent trouble lights with Teflon coated bulbs or fluorescent trouble lights to reduce this potential ignition source. • Repair or maintenance work on propane (or natural gas) fuelled vehicles should not be done unless fuel shut-off valves located at the fuel tank are closed. • Repair work on fuel systems in operational gasoline or propane/natural gas powered vehicles (i.e. fuel tank, associated piping and fuel injection systems) should not be done in at home. Take your vehicle to a licensed automotive repair shop for this work. • If you replace the gas tank cap, it must have the same features and design as the original. Failure to use the correct cap can result in injury, death, and property damage. NOTE: Despite special precautions being taken to first drain fuel-filled components, spillage/leakage can still occur. If work on these components is required, it should not be done without first draining fuel in an area specifically designed for this purpose (i.e. no ignition sources in immediate area, proper trouble lights, proper ventilation, readily accessible fire extinguishers, etc.), and should only be done under the constant supervision of a trained professional mechanic. Drained fuel should be stored in listed safety containers that are kept closed when not in use.” Page 6 of 99 BITZ Racing CIS to EFI Installation Guide All rights reserved Kit Contents The CIS to EFI kit includes the following parts. Please take the time to go through the kit and make sure everything is there before you start. Great care is taken to make sure nothing is accidentally left out. Please note the Partial CIS to EFI kit does not include the following items: six fuel injectors, fuel pressure regulator, fuel pressure gauge, & fuel pressure gauge adaptor. These items are needed to complete the kit. Refer to the website for part numbers and where you can purchase these items. If you purchased the fuel pressure regulator, then it needs to be calibrated in order to function properly. This requires installing a fuel pressure gauge which is not included in the kit. Refer to the Fuel Pressure Installation Guide in the documents sections for details and part numbers required to do this. Table 1: CIS to EFI kit contents Quantity Description 1 MegaSquirt ECU (custom software load for Porsche 911) 1 MegaSquirt tachometer adaptor for BOSCH CDI ignition 1 Main wiring harness (from MegaSquirt to engine bay) 1 Fuel injector wiring harness with mating connector 1 ¼” plastic loom for engine bay wiring dress up (15’) 6 CIS to EFI injector bung 6 High impedance fuel injectors 1 Fuel pressure regulator 1 Fuel pressure regulator mounting bracket (L-shaped) 1 M6x16 Hex bolt, washer, lock washer for fuel pressure regulator mounting 1 M12x1.5 nut for fuel pressure regulator mounting 2 Aluminum Fuel rail 6 Fuel rail mounting bracket 6 M6x40 Hex bolt (for mounting fuel rails) 12 Fuel rail bracket spacers (two per bracket) 6 M6 Nut, flat washer, lock washer 2 Fitting: -6AN male flare to –6AN O-ring 2 Fitting: -6AN male flare to –6AN swivel O-ring, 90 degree elbow 4 Fitting: -6AN swivel female flare to ¼” barbed 1 Cover for Mixture Control Unit with three M5 bolts, flat & lock washers 1 Vacuum hose (7/64” ID) 12’ length 1 1/8” plastic Tee for vacuum hose Page 7 of 99 BITZ Racing CIS to EFI Installation Guide All rights reserved 8 Fuel injection hose clamps for ¼” hose 1 Fuel injection fuel hose (¼” ID) 6’ long 1 3 wire heated oxygen sensor with mating connector 1 Weld on oxygen sensor bung 1 Air temperature sensor with mating connector 1 11/16 x18TPI plastic nut for air temperature sensor 1 Engine temperature sensor mounted on 5/16” terminal ring 1 ATO fuse holder with 20Amp fuse 1 ATO fuse holder with 5 Amp fuse 1 ATO fuse holder with 3 Amp fuse 15 Red butt connectors 3 Blue 5/16” stud terminal ring 2 Red T-TAP connector with mating blade 1 Tool: butt crimper, wire cutter 1 ½” black Snap bushing 1 3/8” black Snap bushing 15 Tie Wraps 1 Roll of electrical black tape 1 Velcro pad 1 Straight through serial cable Page 8 of 99 BITZ Racing CIS to EFI Installation Guide All rights reserved Required Tools Here are some of the tools that will be needed to install the kit. Exacto knife Hand drill 11/16” drill bit 5/8” drill bit 3/8” drill bit Metric wrench set SAE wrench set To interface to the MegaSquirt fuel management ECU you will need a computer. Although one could use a full desktop, it is much more practical to use a laptop that you can carry in the car. The computer must have a serial port in order to interface with the MegaSquirt ECU. The proper serial cable is provided with the kit. Note that some of the newer laptops today don’t come standard with a serial port. If your laptop only has a USB port you can purchase a USB to serial port converted. Talk to your local computer shop about this converter and what software drivers are required. The laptop must be at least a Pentium® 1 or better running at least Windows 95 or better. The serial to USB adaptor model number C250-1162 from http://www.tigerdirect.ca has been tried and tested by a number of folks and works. Some people seem to have issues with other serial to USB adaptors. If you don't already have one, buy this one to avoid headaches. If this unit is not available, post on the BitzRacing Yahoo forum to see which adaptors people are using. Page 9 of 99 BITZ Racing CIS to EFI Installation Guide All rights reserved Changes required to install the kit Heating ducts: In a stock Porsche 911 configuration the left EFI fuel rail would interfere with the plastic heating duct. So, in order to install the CIS to EFI kit you need to backdate your heating system with the parts used before the electric blower was introduced. This is fairly easy and most people have done this modification already to clean up the engine bay. The parts needed to make this modification are listed below. Used versions from a ‘parted’ car are good enough and can be obtained cheap from ebay, Pelican classifieds, Rennlist classifieds, etc…. Left hot air duct, 930.106.321.02 4 plastic nuts, 999.591.592.40 2 rubber plugs, 999.703.044.50 Right hot air duct, 911.106.327.00 Right engine cover plate, 911.106.036.00 Right engine cover, 911.106.827.00 Right air duct support, 911.106.331.00 Once you have the parts, it is fairly easy to do. Whatever you do, don’t leave the ducts going to the heat exchangers open as any carbon monoxide from the engine exhaust will make it’s way to the cabin. Do it right like that shown in Figure 1. Your engine bay will be nice and clean and the heating will be functional. Figure 1: backdating heating A/C Compatibility A port has been added to the right fuel rail between injectors #4 and #5 to allow alternate fuel routing for cars with A/C units. The reason is that the fuel fitting at the end of the right fuel rail interferes with the A/C compressor. Some modifying is required to the mounting bracket for cylinder #4 in order to make this work. Refer to the Mounting the Fuel Rails chapter for details. Note that some of the newer rotary A/C compressors are just too long and cannot be made to work with the standard fuel rail. One person who really wanted to keep his Rotary A/C unit reduced the length of the right side fuel rail by cutting it down and having a welding shop weld the end shut. The bottom fitting was used for the fuel line. If you do this make sure you cut the right fuel rail and the side closest to the bottom fuel fitting. Page 10 of 99 BITZ Racing CIS to EFI Installation Guide All rights reserved Below are some pictures of the modification. Page 11 of 99 BITZ Racing CIS to EFI Installation Guide All rights reserved Ignition system compatibility The kit works well with the stock Bosch CDI ignition and MSD ignition system. One ignition system that has shown problems is the Permatune CDI box, therefore the Permatune box is not supported with the BITZ Racing EFI kit. A couple of folks have tried to make it work, but no solution is available. If you are using a Permatune box you will have to change to something else like stock Bosch CDI or MSD. Page 12 of 99 BITZ Racing CIS to EFI Installation Guide All rights reserved Installation Procedure You need to first decide whether you are going to keep the stock CIS airbox and air filter as is. The fuel distributor and mixture control unit attached to the airbox are no longer need for fuel management and the engine bay can be cleaned up a bit by removing it. In order to do this, you’ll need to cut up your airbox to remove the part that holds the mixture control unit and air filter. If you decide to go this route you will need to hackup the airbox. Below are pictures of what a “CIS Look”, and “Clean Look” installations are like. Figure 2: CIS Look conversion Page 13 of 99 BITZ Racing CIS to EFI Installation Guide All rights reserved Figure 3: Clean Look installation If you go with the “Clean look”, you’ll need things that are not included in the kit (alternate air filter, rubber boot that goes from throttle body to new air filter, air filter for auxiliary air regulator, and plugging some CIS hoses. Cone air filters can be obtained from local speed shops. The rubber “Cobra boot” can be obtained from http://www.airflo.com and the part number is 90CB30. Here is a direct link: http://store.airflo.com/90cb30.html If you keep the CIS look you won’t need any other parts to complete the conversion. The drawback is the engine bay will not be as clutter free. If your going to keep the CIS airbox as is, you maybe able to do the conversion without having to remove the whole intake system. I say maybe, because I haven’t tried it but I can’t see why it would be impossible. Let’s get started. Jacking Up the Car First disconnect the battery from the vehicle because you will be doing some electrical work. You need to jack up the car to get the wiring harness to the engine bay. You might as well do it now. With the car jacked up it is much easier to work in the engine bay as you don’t have to be bent over. Use proper jack stands under each of the rear torsion bar covers to get the car up to the right height. It has to be high enough to be able to stick your head all the way in front of the transmission. Refer to the service manual on how to do this safely. Under NO circumstance should you use a hydraulic jack as the main support for the vehicle. Make sure it is well supported, you LIFE depends on it! Page 14 of 99 BITZ Racing CIS to EFI Installation Guide All rights reserved Modifying Feed and Return Fuel Fittings Before removing any fuel lines, you need to be ready for the fuel that will spill. You need to have a rag ready to catch the fuel. For obvious reasons, no smoking and keep hot shop lights away from the engine bay. Figure 4 below is a diagram of how the fuel flows in the vehicle. Figure 4 : Fuel Diagram The feed and return fuel lines need to be cut. The reason to cut the lines is because you’ll be reusing the stock fittings with the barb ends to connect the new fuel injection hose. I can just hear what your thinking. Cut the fuel lines? This is irreversible. Yes cut the fuel lines and don’t look back. Both ends of the old fuel line have barbed Page 15 of 99 BITZ Racing CIS to EFI Installation Guide All rights reserved fittings, so if you ever hit your head somewhere and get the crazy idea of putting back the CIS, you can always just use the new hose on both barbed ends. Hopefully this has put your mind at easy. Now CUT THE HOSE! First cut the feed line that exits the fuel filter. There is a metal hose on the top of the fuel filter that makes a 180 degree bend. At the end of this metal hose is a black fuel line that is attached. You need to cut the black hose just after the end of the metal hose. Be ready to catch the fuel that will spill. Refer to Figure 5 Figure 5: fuel feed line With the line cut, remove the remaining fuel line on the barbed end with an exacto knife. Refer to Figure 6. Figure 6: Feed line fitting Page 16 of 99 BITZ Racing CIS to EFI Installation Guide All rights reserved With the hose removed, your fitting should look like that shown in Figure 7. The barb end must be the right size for the ¼” ID fuel hose. You don’t need to remove the fitting from the fuel filter. It can be done in the engine bay. Figure 7: feed line fitting ready for installation You need to repeat the same procedure for the return line. There is a Tee connection on the return line. The Tee connects the hoses from the accumulator and the CIS metering unit to the main return line. The fuel line that must be cut is the fuel line between the CIS metering unit and the Tee. This will expose a barbed end which is used to attach the fuel injection return hose. Figure 8 shows this Tee with the CIS system out of the engine bay. Page 17 of 99 BITZ Racing CIS to EFI Installation Guide All rights reserved Figure 8: Return line Tee Figure 9 shows the return line Tee with the barb end completely exposed. You don’t need to remove the Tee from the engine bay to do this. It should be possible to expose the barb end without removing the Tee. Figure 9: Return line Tee ready for install Figure 10 shows the return line Tee complete. The picture shows the fuel injection hose connected, but this won’t be done until later on. For now you should see the Tee with the barb end exposed. The barb end must be the right size for a ¼” ID hose. Note that some vehicle years had a extra fitting on the TEE. If this is the case you will have to plug these extra ports. Note that this plug needs to be very well sealed. Do not use glues or epoxy that can crack or dissolve with fuel over time. Leaking fuel in the engine bay is extremely dangerous. Page 18 of 99 BITZ Racing CIS to EFI Installation Guide All rights reserved Figure 10: Return line Tee complete Page 19 of 99 BITZ Racing CIS to EFI Installation Guide All rights reserved Removing CIS injection system With the fuel lines cut you can now remove the whole intake, airbox and fuel distribution system. If you are going to try and do the conversion without removing the intake then you can skip this step. With the fuel lines disconnected you can now removed the whole intake system. Remove whatever is in the way of doing this (ie: blower fan, heater hoses, etc.). Remove the 12 nuts holding the intake runners down to the engine. There is also a nut that holds the airbox to the engine in the rear. Remove the linkage to the throttle body and the throttle linkage return spring. It is out of sight between the base of the throttle linkage and connects to the middle intake runner on a small, drilled flange. Remove the connector to the AAR (Auxiliary Air Regulator) and mark it with a piece of tape, because the same type of connector is used elsewhere. Remove the connector on the Mixture Control Unit and mark this connector with a piece of tape. Remove the connector to the cold start injector and mark it as such. Remove the connector to the frequency valve (19801983) and mark it as such. Remove the breather hose. Now remove the whole intake with airbox. It should all come out of the engine bay as one unit. You may have to remove the boot, if you can’t get it out. You now need to remove the CIS components that are not needed. Refer to Figure 11 for location. First start with the injectors. After 20-30 years the CIS injectors are most probably stuck really well in the intake manifold. This procedure will require some force and cursing. Using a generous squirt of “Kroil” on the old injectors and letting sit for an hour or so may avoid the forcing and cursing. If they are really hard to get out, you can unscrew the fuel line and screw a nut on top of the CIS injector. Then you can use the nut as a point to pry the injectors off. If you are doing this in the engine bay, you should place a paper cloth in the open holes. You don’t want a small metal washer falling inside. Figure 11: Location of CIS components Remove the control pressure regulator (or warm-up regulator) mounted on intake runner #2. Unscrew the banjo fitting on the cold start valve. With no power to the cold start valve, there will be no vacuum leak, so don’t connect the cold start connector back into the cold start valve when you re-install everything. Note that Page 20 of 99 BITZ Racing CIS to EFI Installation Guide All rights reserved the cold start connector has +12Volts on the contacts and when left unconnected can potentially short out with some of the metal parts in the engine bay. For this reason it should be wrapped with the black insulation tape supplied to prevent any shorts with the open contacts. Refer to Figure 12 for location of the cold start connector. Figure 12: Cold Start Valve and connector The fuel lines from each of the injectors go to the fuel distribution unit. You now need to remove the fuel distribution unit from the mixture control unit. Refer to Figure 13. There are three flat head screws that need to be removed to get the fuel distributor unit off the mixture control unit. One screw is under a fuel line, so the fuel line needs to be removed first. Page 21 of 99 BITZ Racing CIS to EFI Installation Guide All rights reserved Figure 13: Fuel distributor and mixture control unit Figure 14 shows the fuel distributor with the three screws removed. You can now pull the fuel distributor unit off the mixture control unit. There is a 30mm rubber O-ring that seals the two together. You must be careful not to tear or lose it. It will most likely be stuck under the fuel distributor unit once you remove it. Slowly pry it off as to not tear it. This will be re-used later on. Page 22 of 99 BITZ Racing CIS to EFI Installation Guide All rights reserved Figure 14: Fuel distributor screws removed Figure 15 shows the mixture control unit with the fuel distributor removed (note the O-ring). Page 23 of 99 BITZ Racing CIS to EFI Installation Guide All rights reserved Figure 15: Fuel distributor removed Install the O-ring in the grove as shown in Figure 16 Page 24 of 99 BITZ Racing CIS to EFI Installation Guide All rights reserved Figure 16: Mixture control unit O-ring Finally install the cover supplied with the kit over the hole on the mixture control unit. Insert the M5x20 bolts with lock washers and flat washers into the cover and tighten down. Note that the length of the M5x20 bolts is perfect length so that the left bolt (refer to Figure 16) will make contact with the mixture control arm pinning it in place. If you see that the bolt is making contact with the mixture control arm well before it has seated then add another flat washer to bring it a little higher. With the mixture control arm pinned down it will not bounce up and down when you hit a bump driving down the road. Finally the round disk in the mixture control unit is no longer needed and is only obstructing the air path. So it should be removed. The nut that holds down this disk has a lot of friction, so make sure you use the right socket to remove it. Once complete it should look like that in Figure 17. The keen observer will notice there is still a small (1/8”) hole exposed to unfiltered air. This hole was used to access the mixture adjustment screw in the CIS system. The system was designed to work this way, but it is not perfect. If you like perfection you can take a piece of the vacuum hose supplied with the kit and stuff it into this hole. You will need to fit a screw with a head larger than the hole to prevent it from getting sucked into the engine. Make sure it is nice and tight because the vacuum of the engine will be pulling on it. Page 25 of 99 BITZ Racing CIS to EFI Installation Guide All rights reserved Figure 17: Completed mixture control unit Page 26 of 99 BITZ Racing CIS to EFI Installation Guide All rights reserved Preparing the Intake Manifolds With all the fuel lines and CIS injectors out you can now start preparing the intake runners for the new injectors. With the CIS injectors out your intake runner should look like Figure 18. The CIS injector bung now needs to be removed. If you look closely, you can see that it is staked in. These stakes need to be filed away before the CIS injector bung can be pulled up and out. A good way to do this is to use a Dremel tool with an abrasive disk. If you are doing this with the runners installed in the vehicle you need to make sure the holes are plugged well, because little bits of ground metal will be going everywhere and you don’t want them to make their way into the engine. Plug the holes and after the stakes are ground away use a vacuum to suck up any small ground metal. With the stakes ground away, you should be able to remove the CIS injector bungs. Plug the hole once the injector bung has been removed. There seems to be a strong gravitational force pulling small metal objects into the open ports. Move on to the next intake port and repeat until all the CIS injector bungs are removed. Note, it is advised to replace the intake runner gaskets once the old ones are disturbed. An air leak on one intake runner will cause problems during tuning. Figure 18: Intake runner with CIS injector bung Page 27 of 99 BITZ Racing CIS to EFI Installation Guide All rights reserved With the CIS injector bungs removed your intake port should look like that pictured in Figure 19. Figure 19: CIS injector bung removed You can now insert the new EFI injector bungs in the intake runners. There should be an O-ring on each of the EFI injector bungs. Add a bit of oil to the o-ring before inserting it in the hole. Then insert the EFI injector bung in the runner. You will most likely need to push it hard to get it to seat properly. When seated properly it should look like that in Figure 20. Repeat for the other intake ports. Remember to plug the open holes as you work on the other intake runners. Page 28 of 99 BITZ Racing CIS to EFI Installation Guide All rights reserved Figure 20: Intake runner with EFI injector bung Page 29 of 99 BITZ Racing CIS to EFI Installation Guide All rights reserved Preparing the fuel rails First inspect the fuel rails for any dirt, plastic from packing, or a small piece of metal from the machining process. The fuel rails must be free of any particles. The fuel injector nozzles are very small and any piece of dirt is sure to block an injector and cause no end of grief later on. If they aren’t perfectly clean, use soap and hot water to clean them. You need to now attach the fittings to the fuel rails. Before you begin refer to Figure 23. Note the direction of the 90 degrees fittings and where the mounting holes are relative to them. If you don’t place the fittings on the proper side you’ll end up with two right or two left fuel rails. The fuel rails require a –6AN O-ring male fitting. Secure the fuel rail to a vise with rubber jaws. Insert the straight –6AN O-ring to –6AN flare on one side. Make sure there is an O-ring on the fitting. Tighten the fitting. Figure 21: Fuel rail fitting (straight) The 90degree fittings are swivel type, which means you, will be able to orient the fitting in the proper direction. To do this, turn the nut with the O-ring facing you completely clockwise. Insert the O-ring side of the fitting into the fuel rail and rotate it until it is completely seated. At this point it won’t be facing the proper direction. Back out the fitting until it is 90 degrees with the vertical (refer to Figure 22). Now hold the fitting so it does not rotate. While doing this tighten the nut until the O-ring is properly seated. Page 30 of 99 BITZ Racing CIS to EFI Installation Guide All rights reserved Figure 22: Fuel rail fitting (90 degree) Figure 23 shows what the fuel rails should look like once they are complete. Note that the picture only shows two mounting holes, but there should be a third one in the middle. Figure 23: Fuel rails with fittings Page 31 of 99 BITZ Racing CIS to EFI Installation Guide All rights reserved Note if you vehicle has A/C and you intend to keep the A/C the right fuel rail must use the port underneath the fuel rail instead of the port on the end of the rail. Refer to Figure 30 for details. This will work only with the stock A/C unit. The newer rotary A/C units will not work as they are even longer and will interfere with the right fuel rail. Page 32 of 99 BITZ Racing CIS to EFI Installation Guide All rights reserved Mounting the Fuel Rails Each of the fuel rails is held to the intake manifolds with three L-shaped brackets. Start with the left rail. First for each of left intake runners remove the left most nut holding it down. Also remove the flat washer. Make sure your intake ports are plugged, because that washer will get sucked into an open port in no time. Make sure there are no washers left because the bracket must seat on the intake manifold directly, otherwise it will be too high. Place one L-shaped bracket on each of the intake manifold studs and then put the flat washer and then lightly tighten the nut. With all three brackets in place now you can insert the fuel rails. First apply a small amount of oil on the two O-rings of the fuel injectors and insert them into the left fuel rail. Now insert the fuel injectors with the fuel rail into the EFI injector bungs. You will probably need to line things up and slowly push one injector a little bit at a time. Now rotate the bracket so it is parallel to the fuel rail. Once parallel tighten the bracket nut. There should be about a 1/8” (3mm) gap between the bracket and the fuel rail. You can pull the bracket accordingly to get the desired gap. Refer to Figure 24. Figure 24: Fuel rail bracket gap You must now use a mirror to make sure the hole in the bracket lines up with the hole in the fuel rails. With the fuel rails pushed all the way down the hole in the bracket should be a little higher than the hole in the fuel rail. The difference should be about 1/16” (1.5mm). You now need to pull the fuel rail up a little so the two holes line up perfectly. If the difference in height is too much then there is something wrong. There is a limit as to how much the fuel rail can be pulled up. If you pull it too high the fuel injector O-ring will come too close to the edge of the fuel rail risking a fuel leak. You shouldn’t have to pull up the fuel rail more than 1/16” (1.5mm) when it is fully pushed down. If the hole is not aligned front to back you can pull the bracket in the direction required. Do this in small increments checking each time. You don’t want to be overshooting and then have push back in the other Page 33 of 99 BITZ Racing CIS to EFI Installation Guide All rights reserved direction. If you bend the bracket back and forth too many times you run the risk of fatiguing the metal which may result in a crack in the future. Figure 25 shows how the holes should like when they are aligned. Figure 25: Fuel rail hole alignment You should now be able to install the M6x40 bolts through the bracket and fuel rails without anything binding. They should be in the following order: Bolt, flat washer, mounting bracket, ¾” washer, ¾” washer, fuel rail, flat washer, lock nut. Refer to Figure 26 for details. Page 34 of 99 BITZ Racing CIS to EFI Installation Guide All rights reserved Figure 26: Left fuel rail completed You now need to repeat this for the right fuel rail. There is one problem though. The Auxiliary Air Regulator (AAR) is in the way of one of the mounting brackets and needs to be shifted to the right by about 1/8” (3mm). The AAR is used in the EFI for idle up so you will need it. You have a couple of options here depending what tools are available to you. If you have access to a jig saw you could remove the AAR and cut slots where the holes are allowing you to adjust the position of the AAR. Refer to Figure 27 and Figure 28. Page 35 of 99 BITZ Racing CIS to EFI Installation Guide All rights reserved Figure 27: AAR slot cutting Figure 28: AAR modification complete The other option is use a drill press to make the hole oval, allowing enough movement to the right that is required. If you don’t have access to a jigsaw or drill press or you do, but are not adventurous, or you have that silly thought again that someday you will be going back to CIS and don’t want to make any non-reversible modifications, you can do the following. Just remove the bolt closest to the front and loosen the bolt closes to the rear end of the car. Now turn the AAR clockwise so it no longer is in the way of the bracket. You will only Page 36 of 99 BITZ Racing CIS to EFI Installation Guide All rights reserved have one bolt holding the AAR, but that should be OK. You’ll probably have to bend the aluminum pipe that goes into the AAR to get things lined up. Now follow the same procedure as the left side to mount the fuel rail on the right. Refer to Figure 29 for details. Note the picture shows a black box mounted on the left side of the AAR. This is an air filter which is required if you cut up the air box to remove snorkel and air filter. If you leave the airbox as is, then use the existing hose that goes from the AAR back to the airbox. Figure 29: Right side fuel rail complete If your car has A/C then 90 degree fitting on the right fuel rail will interfere with the A/C compressor. The right fuel rail has a port on the bottom side. Remove the plug from the bottom and place it on the end of the fuel rail. Then place the 90 degree fitting on the bottom of the fuel rail. Refer to Figure 30 for details. Page 37 of 99 BITZ Racing CIS to EFI Installation Guide All rights reserved Figure 30: Fuel rail with A/C compresor The A/C supporting bracket will need some modifying to clear the fuel rail bracket. Figure below shows the mods done by one installer. You don’t need to remove as much material as shown below, about ¼” from the fuel rail mounting bracket is enough. Modifications to the brackets can be done with a hacksaw, bandsaw, grinder, or metal file. Be patient and work slowly. Page 38 of 99 BITZ Racing CIS to EFI Installation Guide All rights reserved Figure 31: A/C compressor bracket modification Page 39 of 99 BITZ Racing CIS to EFI Installation Guide All rights reserved Connecting the fuel lines Just like the fuel rails, first inspect the hose to be free of any dirt, packing plastic or foam inside. Any small particle is sure to get into the fuel rail and block a fuel injector causing all kinds of problems later on. The kit comes with a minimum of 6 feet (1.52m) of ¼” ID fuel hose rated for fuel injection systems. Don’t cut more than what you need because you’ll end up short. Below are the recommended lengths of fuel line if you fit the kit as shown. If you change the routing of the fuel lines, then you may need more fuel line. If you do have to get more fuel line, for whatever reason, it must be stamped “Fuel Injection Hose”. The guy at the local parts store may try and sell you regular fuel hose (rated 30R7) and tell you it is OK, but it is not. Ideally it should be stamped with SAE 30R9 on the hose or say “Fuel Injection Hose”: From fuel filter to left fuel rail = 16 inches (40.6cm) From left fuel rail to right fuel rail = 24 inches (61cm) From right fuel rail to input of fuel pressure regulator = 13.5 inches (34.3cm) From output of fuel pressure regulator to return line Tee = 18.5 inches (47cm) First, start with the hose going from the fuel filter to the left rail. Cut the hose to the required length. Now take one of the –6AN to ¼” barb fittings and insert it all the way into the hose. You’ll need some force to do this. Place the fitting on a wall and push the hose into the fitting. Place the clamp around the hose at the fitting location and tighten. Don’t over tighten the clamp because you’ll tear the hose. Now slip in another clamp in the hose, insert it in the barb fitting coming out of the fuel filter. Insert the brass fitting into the left fuel rail and tighten. You need to have one wrench one the brass fitting and one on the steel fitting that is already in the fuel rail. Don’t over tighten the fitting. Once complete it should look like that in Figure 32. Page 40 of 99 BITZ Racing CIS to EFI Installation Guide All rights reserved Figure 32: Fuel hose from filter to left rail Now cut the required length for the fuel line going from the left fuel rail to the right fuel rail. Insert the fittings in the hose. Make sure you put the clamps in before you insert the fittings. Tighten the hose clamps. Tighten the fittings to the rails using two wrenches. Refer to Figure 33. Page 41 of 99 BITZ Racing CIS to EFI Installation Guide All rights reserved Figure 33: tightening fuel rail fittings Figure 34 shows the hose going from the left rail to the right rail complete. Page 42 of 99 BITZ Racing CIS to EFI Installation Guide All rights reserved Figure 34: Fuel hose left to right rail Next cut the required length of hose to go from the right fuel rail to the fuel pressure regulator. Insert the brass fitting in the hose and clamp it with the hose clamp. Insert the open end in the fuel pressure regulator and then tighten the hose clamp. Refer to Figure 35. Page 43 of 99 BITZ Racing CIS to EFI Installation Guide All rights reserved Figure 35: Fuel Hose attached to fuel pressure regulator Install the L-shaped fuel pressure regulator bracket to the front wall of the engine bay. There should be a hole with a M6 thread there. If your engine bay still has the sound proof mat, it will be under there. Install the bracket with the M6x16 bolt, washer, and lock washer. Refer to Figure 36. Note the direction the bracket is installed. Some folks have installed the fuel pressure regulator on top of right intake runner. Page 44 of 99 BITZ Racing CIS to EFI Installation Guide All rights reserved Figure 36: Fuel pressure regulator mounting bracket Install the fuel pressure regulator to the mounting bracket. Tighten the hose from the fuel pressure regulator to the right fuel rail again with two wrenches (don’t over tighten the fitting). Then you can tighten the M12x1.5 nut used to secure the fuel pressure regulator to the mounting bracket. Refer to Figure 37. Page 45 of 99 BITZ Racing CIS to EFI Installation Guide All rights reserved Figure 37: Fuel pressure regulator mounted Next cut the required length of fuel hose to go from the fuel pressure regulator output to the barb fitting on the return Tee. Insert the hose into the fuel pressure regulator barb fitting. Install the clamp and tighten. Next install the clamp in the hose and fit the hose on the barb fitting in the return Tee. Tighten the hose clamp (refer to Figure 10). You can now attach the 1/8” ID vacuum hose to the fuel pressure regulator vacuum port. Install the 1/8” plastic Tee in the path because you will need a vacuum pickup from the airbox. Figure 38 shows the completed fuel pressure regulator install. Page 46 of 99 BITZ Racing CIS to EFI Installation Guide All rights reserved Figure 38: Completed fuel pressure regulator install Vacuum hose pickup It is very important to hook up the vacuum pickup to the correct place. MegaSquirt uses vacuum signal via the supplied vacuum hose to determine engine load. The vacuum hose runs from the MegaSquirt ECU to the fuel pressure regulator. From the fuel pressure regulator a “Tee” is used split the hose and run it to the vacuum source. The vacuum hose must be placed on a nipple on the throttle body that is BELOW the butterfly. Placing it above the throttle butterfly will make the car not run at all. It is also imperative that this pickup is NOT shared with anything else, like a vacuum advance hose for the distributor. A dedicated vacuum is a MUST for proper operation. If your throttle body doesn’t have a nipple below the butterfly a hole can be drilled directly in the airbox and a 1/8” barb fitting installed. If you do this make sure barb fitting has no leaks and will not fall off the airbox. Page 47 of 99 BITZ Racing CIS to EFI Installation Guide All rights reserved Routing the Wiring The ECU needs to be mounted inside the vehicle. Although it is tempting to mount it in the engine bay to avoid the hassles of routing the main harness, it will cause problems in the future as the engine bay gets very hot and the ECU will fail someday when you’re stuck in traffic on a very hot day. To start the wiring you need to remove the passenger seat as the ECU will be mounted under. There are four bolts holding down the passenger seat (refer to Figure 39). Remove all four to get it out. If you have power seats there will most likely be other things to remove. Study the area and remove what is necessary. Figure 39: Passenger seat rear bolts With the passenger seat out you will now need to drill two holes in the tunnel that runs down the middle of the cabin. The hole for the main harness has to be 5/8” in diameter and the hole for the vacuum hose needs to be 3/8” in diameter. You need to be very careful drilling these holes because there are all kinds of stuff running through this tunnel including ***FUEL LINES***. You need to open up the hatch located at the feet between the two rear seats (Figure 43). Using a mirror and a light you need to look inside and see if anything of any danger is in the vicinity of where you will be drilling. Start with a small drill (1/16”) and slowly work up to the required diameter. Let the drill just penetrate through the metal. If it goes too far who knows what you may hit. Every time you drill look though and make sure you are clear of any fuel lines or anything else and that nothing got damaged. Figure 40 shows the approximate height that is needed for the holes. Both holes need to be centered about 7/8” from the bottom. Once drilled insert the two snap-in bushings supplied in each hole. The photo in Figure 40 does not show a snap in bushing for the vacuum hose, but one is included in the kit and should be installed. These will keep the sharp edges of the metal from tearing the harness and vacuum hose. Page 48 of 99 BITZ Racing CIS to EFI Installation Guide All rights reserved Figure 40: Routing holes in tunnel With the holes drilled it is time to route the main harness. It is easiest to do this using a fishing wire. A 1/16” diameter hard wire works well. Run it through the harness hole first and pick it up out from the hatch beneath the rear seats. Make a hook in the wire and hook it to the main harness. Refer to Figure 41. Some feedback from installers of the kit indicate that it is easier to not install the large grommet into the hole until the harness has been pulled through to the rear cover. It is much more efficient to feed the large grommet down the length of the harness (the hose doesn’t matter since it can be fed on from the other end), but the large one should only be inserted once the harness is at the 18” length position. Otherwise, there is no wiggle room in trying to snake the harness through the hole. If you do this be careful not to tear the hose or harness on the sharp edge of the metal. Page 49 of 99 BITZ Racing CIS to EFI Installation Guide All rights reserved Figure 41: fishing the main harness Figure 42: Pulling the harness Slowly pull the harness through the 5/8” hole until you get it out the rear hatch. Refer to Figure 43. Once you see it in the rear hatch pull all the harness through. Run it under any necessary cables, tubes, and wires so it is ready to be inserted in the hole on the right side (looking from rear to front). Page 50 of 99 BITZ Racing CIS to EFI Installation Guide All rights reserved Figure 43: Tunnel opening You need to leave about 16 inches of the main harness under the passenger seat. This will allow you some slack to remove the ECU in case you need to access it while it is connected. Figure 44: Harness routed Page 51 of 99 BITZ Racing CIS to EFI Installation Guide All rights reserved Figure 45: 16" slack in main harness Now route the vacuum hose through the 3/8 snap-in bushing until you get access to it in the rear hatch. Pictures don’t show the snap in bushing, but there is one and it needs to be installed. You need to be careful not to kink the vacuum hose by trying to make a sharp bend. A good idea is to take the hose with both ends open and blow through it too see how much force is required to get the air through. Once you route it try blowing through it again to see if the hose has been pinched. You have to make sure it doesn’t get pinched anywhere because it will cause problem later on which will be difficult to figure why things are not working. Take your time; you are in no rush. Next you need to route the harness through the hole shown in the Figure 46. The harness will ultimately end up on the left side of the engine bay. The picture in Figure 46 shows the harness going through the right hole. If the left hole is available and has lot’s of space you can choose it instead. This way you don’t have to go over the transmission. Page 52 of 99 BITZ Racing CIS to EFI Installation Guide All rights reserved Figure 46: exit hole for harness Push the harness so it goes through the hole. You’ll now need to get under the car and pull it though. A helper feeding the harness from the cabin makes the process easier. Once you get it out you need to feed it over and around the transmission and start heading for the left side of the car (When you under the car looking up it is your right side). Page 53 of 99 BITZ Racing CIS to EFI Installation Guide All rights reserved Figure 47: Harness exit hole Figure 47 shows the harness being routed over the transmission shifter shaft. You need to make sure in its final position it is not touching any moving parts. Now pull the harness following the fuel lines towards the left side of the engine bay. Use tie wraps or the existing clips to hold the harness in place. Refer to the following pictures to get the harness all the way to its final destination. It must come up in front of the left shock tower, just like the fuel lines do. Feedback from some installers, indicate that there may be no holes available. If this is the case, then drill two new ones carefully, route the harness and hose, then RTV around them to protect them from abrasion. Page 54 of 99 BITZ Racing CIS to EFI Installation Guide All rights reserved Figure 48: harness following fuel lines Figure 49: harness routing Page 55 of 99 BITZ Racing CIS to EFI Installation Guide All rights reserved Figure 50: Wire harness comes up behind the left shock tower Figure 51: Harness in engine bay Page 56 of 99 BITZ Racing CIS to EFI Installation Guide All rights reserved Figure 52: Harness in engine bay Page 57 of 99 BITZ Racing CIS to EFI Installation Guide All rights reserved Connecting the Wires To connect the wires from the harness to the appropriate locations you’ll need the crimper tool, red butt connectors, and the terminal rings that are supplied with the kit. Connection are going to be made by stripping the two wires to be connected, inserting them into the red butt connector and then crimping each end of the butt connector using the crimping tool. Crimping should be more than adequate means of connecting wires, however if one wishes, one can also solder the wires together and then apply a heat shrink covering. If you are going to solder the wires, you will need a soldering iron, solder (don’t use plumbers’ solder), and heat shrink tubing. Have a copy of the wiring diagram (Figure 53) handy when starting this task. With the harness and vacuum hose routed through it maybe a good time to re-check that the vacuum hose is not kinked, by performing the blow test. Page 58 of 99 BITZ Racing CIS to EFI Installation Guide All rights reserved Figure 53: Wiring diagram The crimper tool is also a wire stripper. The harness has two different gauges of wire (20AWG and 16AWG). Note that 16AWG is a BIGGER wire than the 20AWG. One would think a larger number means larger wire, but it is the opposite. Use the appropriate slot in the stripper for the wire gauge you are stripping. The idea is to remove the insulation without damaging the copper strands in the wire. When stripping the wire to be butt Page 59 of 99 BITZ Racing CIS to EFI Installation Guide All rights reserved connected, you need to expose about ¼” (6mm) of copper. If you expose too little, then you run the risk of not crimping the copper in the butt connector. If you expose too much then some of the copper will be out of the butt connector insulation risking a possible short. When crimping insert the exposed copper into the red butt connector, and use the nose of the crimper with the red dot (22-18) to squeeze the butt connector at the location of the copper. Figure 54 shows an example of a crimped butt connection. Note the location of the crimping. Another option is soldering the wires and using heat shrink tubing to insulate. Figure 54: Wire crimping example With the harness routed to the left rear corner of the engine bay, tear back the black mesh cover to expose the wires inside. Be careful not to cut any wires doing this. Once cut back, place some black tape over the black sleeve. Refer to Figure 55. Page 60 of 99 BITZ Racing CIS to EFI Installation Guide All rights reserved Figure 55: cutting wire mesh sleeve Figure 56: tape wire mesh sleeve With the sleeve cut back, you are ready to start making connections. Make sure the battery is disconnected from the car to prevent any electrical shorts. First thing to do is to connect the three fuses to a source of power. The location must have power when the key is in both “Start” and “Run” positions. Also there must be no power when the key is out or not in one of these two positions. You must make sure this is the case. You need to consult the wiring diagram of the specific year of vehicle you are working with. Use a voltmeter or 12v test lamp to verify this. On a 1978-83 911SC such a power source is shown in Figure 57. This is the power source for the heater blower relay fuse. Note that the heater blower relay is also removed. Since most people doing this Page 61 of 99 BITZ Racing CIS to EFI Installation Guide All rights reserved conversion, will most likely dump the heater blower motor to clean up the engine bay, this is an ideal spot to pickup the power. Some folks have decided to install a fuse block instead of the inline fuses supplied with the kit. If you want details, please post on the BitzRacing Yahoo forum for details on how people are doing this. Run all three ATO fuse wires to the location shown. Note that this side is the “un-fused” side of the power line. There should be three fuses attached to the fuse holders. One 3Amp fuse to power the MegaSquirt controller, one 5Amp fuse to power the heater in the O2 sensor, and one 20Amp fuse to power the fuel injectors Note the “Porsche 911 SC Bentley manual” (page 971-4) has the wrong description for the 1978-1980 picture. The arrow #5 pointing to the lowest fuse is the heater blower relay fuse and not the rear window defogger. Figure 57: power source Connect the red wire from the harness to the 3Amp fuse wire as shown in Figure 58. Page 62 of 99 BITZ Racing CIS to EFI Installation Guide All rights reserved Figure 58: MegaSquirt power connection Now get the black four contact connector for the fuel injectors. Splice the wires so they are staggered. This is required, because if the lengths are equal all the butt connectors will line up and they won’t fit in the corrugated wire loom. Attach a red butt connector to the red, and two white wires. Refer to Figure 59. Now connect the wires to the appropriate places. Follow the wiring diagram. The red wire from the fuel injector connector goes to the black 20Amp fuse wire. The two white wires connect to the two white wires from the harness. You will have to shorten the white wires to get things to line up. Once wired up, mate the fuel injector connector together. Page 63 of 99 BITZ Racing CIS to EFI Installation Guide All rights reserved Figure 59: Fuel injector connector Page 64 of 99 BITZ Racing CIS to EFI Installation Guide All rights reserved Figure 60: Fuel injector connector to 20Amp fuse Next connect the air temperature sensor connector to the harness. Again stagger the connections so they can fit in the corrugated loom after they have been crimped. One wire from the air temperature sensor connector goes to the brown wire from the wiring harness. Do not confuse the brown wire from the harness with the TAN wire from the harness. The brown is a darker chocolate brown color where the TAN is a lighter shade. The other wire from the air temperature sensor connector goes to one of the 20AWG black wires from the harness. Do NOT use the 16AWG wire (Larger diameter black wire) for this connection. Make sure you leave enough length of wire to run the connector to its final destination. Refer to Figure 61. Page 65 of 99 BITZ Racing CIS to EFI Installation Guide All rights reserved Figure 61: Air temperature connector It’s up to you whether you want to put the corrugated loom over the wires as you splice them, or wait till the end and do the all at once. Figure 62 shows the completed air temperature sensor wire. Figure 62: Air temperature sensor connector complete Next is the pink fuel pump disable wire. This connection is very important from a safety point of view. This wire is used by the MegaSquirt to disable the fuel pump if the engine ever stops running. In the event of a bad accident and a fuel line breaks the engine will stop and the MegaSquirt ECU will then issue the signal to cut the fuel pump from pouring fuel all over the accident scene. Make sure this is done correct, your life may depend on it in the future. Connect a red blade to the pink wire as shown. This requires a lot of crimping force to make a good connection. A spare blade is provided in case you damage the first one. Page 66 of 99 BITZ Racing CIS to EFI Installation Guide All rights reserved Figure 63: Fuel Pump Relay Wiring Page 67 of 99 BITZ Racing CIS to EFI Installation Guide All rights reserved The Figure 63 shows how the fuel pump and relay is wired on the Porsche 911. The logic is such that when the pink wire is GROUNDED the fuel pump stops. When the pink wire is un-connected (or HIGH IMPEDANCE), the fuel pump runs. The standard MegaSquirt software expects the fuel pump to operate opposite to this. No worry, the ECU software supplied from BitzRacing has been modified to operate with Porsche fuel pump wiring. If you are installing your own relay for the fuel pump on a very early 911 which did not have a relay, please ensure it is connected as shown in Figure 63. Figure 64: Fuel pump disable wire You need to locate the wire that is connected to the rear of the fuel metering plate. It uses the same kind of connectors that are used on the fuel injectors. Be careful because there are two behind there. One goes to the old CIS cold start injector and the other goes the fuel metering plate switch. The way it works, in the CIS system, is once air stops flowing through to the engine (ie: engine stopped), the metering plate falls down, engaging a switch which turns off the fuel pump. We need to tap into this wire. There are two brown wires on this connector. On the 1978-1983 911SC the desired wire has a pink stripe on it. For other vehicle years, the color maybe different. For example one installer of the kit indicated that in his 1976 Carrera the wire color was brown with a black line. If you have an Ohmmeter you can check the resistance to ground of each of the two wires. The WRONG wire should show zero Ohms (short to ground). Once you have the correct wire you’ll have to pull back the rubber around the connector to expose the wires. Refer to Figure 65. Use the burgundy T-TAP provided to tap into this wire. Flip the T-TAP over and Squeeze to make the connection. Now you can push the pink wire with the red blade into this T-TAP making the connection to the MegaSquirt. Before trying to find this pink wire refer to the alternate method shown in Figure 67 on page 70. Page 68 of 99 BITZ Racing CIS to EFI Installation Guide All rights reserved Figure 65: Fuel pump disable T-Tap Figure 66: Tapped connection made to existing wiring (fuel pump disable) I was later informed that a better place exists to tap into this fuel pump relay wire. A white plastic connector exists near the fuse box in the left hand side of the engine bay. It is at this location that the brown with pink stripe also exists. The later year vehicles have two spade connectors. In earlier years it was only a single spade connector. Refer to Figure 67. Page 69 of 99 BITZ Racing CIS to EFI Installation Guide All rights reserved Figure 67: Alternate fuel pump wire tap It is now time to wire the flat three contact connector that goes to the Oxygen sensor. Connect the wires as shown in the wiring diagram. Stagger the splices again so they fit in the corrugated wire loom. Green wire from the O2 sensor connector goes to the green wire from the wiring harness. Yellow wire from the O2 sensor connector goes to the 5Amp fuse wire. Brown wire connects to a blue terminal ring, which is then bolted to the chassis (ground). Find a clean 8mm stud to bolt this ground terminal ring to. If you installing a wide band O2 sensor instead of the narrow band O2 sensor, refer to the “Wide Band O2 Installation Guide” in the document section of the www.BitzRacing.com site for details. Figure 68: Oxygen sensor connector Page 70 of 99 BITZ Racing CIS to EFI Installation Guide All rights reserved Figure 69: Oxygen sensor ground terminal Page 71 of 99 BITZ Racing CIS to EFI Installation Guide All rights reserved The engine temperature sensor is next. In the kit there is a terminal ring with a wire pre-attached to it. This is the engine temperature sensor. It isn’t really a CHT (Cylinder Head Temperature) sensor, because we won’t be mounting it directly to a cylinder head. The only purpose this serves is for cold enrichment. Megasquirt needs to know when the engine is cold to allow for cold enrichment. My experience is that mounting this sensor on the left valve cover gives a good indication of how cold the engine is. The percent enrichment can be dialed in via the laptop for each given temperature. Connect the orange wire from the wiring harness to this engine temperature sensor as shown in Figure 70. Note the wire from the engine temperature sensor is too thin to connect them butting each other. You must twist the two wires together, and then put both into one side of the butt connector and squeeze. Put some black tape around the connection feeding the wires from each end as shown in Figure 72. Figure 70: Engine temperature sensor Page 72 of 99 BITZ Racing CIS to EFI Installation Guide All rights reserved Figure 71: Engine temperature sensor Page 73 of 99 BITZ Racing CIS to EFI Installation Guide All rights reserved Figure 72: Engine temperature sensor The engine temperature sensor needs some strain relief because the wire connecting to the sensor is very thin and can easily be broken. Run the corrugated loom over the wires and then tape the loom directly to the terminal ring as shown in Figure 73. This way if you pull on the loom, it does not apply any strain on the wire. Tape the other end of the loom to the orange wire so the loom takes all the strain. Figure 73: Engine temperature sensor Now mount the terminal ring to the left valve cover bolt as shown in Figure 74. Page 74 of 99 BITZ Racing CIS to EFI Installation Guide All rights reserved Figure 74: Engine temperature sensor With the engine temperature sensor mounted on the chain cover, some folks have noticed a lag in the temperature response due to the large thermal mass of the engine. This means the engine runs under “cold enrichment” longer than necessary especially during winter season. UPDATE: One installer did careful analysis and found that using one of banjo oil fittings allows the sensor to monitor engine oil temperature which is much quicker to respond rather than the engine case temperature. The fitting used is the banjo fitting where the oil goes into the cam tower below the valve cover on the left side of the engine. The Figure 75 & Figure 77 shows where this is located. A detailed instruction guide was written up on this and is available in the BitzRacing Yahoo forum in the “FILES” section. It basically requires removing the banjo fitting and tapping the bolt head with an 8mm thread, inserting an 8mm bolt, and then fitting the temperature sensor on the 8mm bolt with a nut. Page 75 of 99 BITZ Racing CIS to EFI Installation Guide All rights reserved Figure 75: Alternate engine temperature sensor location Figure 76: Modified fitting Page 76 of 99 BITZ Racing CIS to EFI Installation Guide All rights reserved Figure 77: Alternate engine temperature sensor location Page 77 of 99 BITZ Racing CIS to EFI Installation Guide All rights reserved The wires that go to the TPS (Throttle Position Sensor) are not used and should be wrapped up and put away for future use. (Read chapter “Why no TPS sensor?” to find out how & why). Note you must ground the input signal to the TPS, so find the purple, yellow, and 20AWG black wire from the harness. Connect the Yellow wire to the black wire using a butt connector. Then wrap some black tape over the purple wire preventing it from shorting with the chassis. The purple wire contains power and you don’t want it shorting with anything. Wrap them together and tuck them into the left corner where the harness comes out. Figure 78: TPS sensor wires The fast idle solenoid signal is also not used and needs to be wrapped up and put away for future use. Find the fast idle solenoid wire (grey) and wrap the end with black tape so it doesn’t short with anything. Wrap it up and put it near the left corner of the engine bay. If you do decide to use it with a third party solenoid, there is a 1amp limit on this. If your solenoid requires more, then you need to install a relay. There is a TAN wire (don’t confuse it with the darker brown wire), which is also designated for future use. Wrap up the TAN wire and put it near the left corner of the engine bay. There should be two 16AWG black wires coming out from the harness. These are the large black wires and are the main ground for the MegaSquirt and fuel injectors. Crimp on a blue terminal ring to each of the 16AWG black wires. Refer to Figure 69. Then mount each terminal to a DIFFERENT place on the CHASSIS. It is best to NOT hook one to the chassis and one the engine block. The reason is a Porsche 911 the negative of the battery connects to the chassis and the engine gets its ground through the chassis via the ground strap. A poor engine ground strap will cause a voltage difference between the engine and chassis. This voltage difference will cause problems if one megasquirt ground connects to chassis and one to engine. So hook both MegaSquirt grounds to the chassis. Find two different spots on the chassis for redundancy. Refer to Figure 79 & Figure 80 for ground locations. Page 78 of 99 BITZ Racing CIS to EFI Installation Guide All rights reserved Figure 79: Porsche ground locations Page 79 of 99 BITZ Racing CIS to EFI Installation Guide All rights reserved Figure 80: Ground location near CDI Finally there should be a blue wire left. This is the TACH pickup for the Megasquirt. This needs to be hooked up to the high voltage coil via the Tach adaptor. The Porsche 911 uses a Capacitive Discharge Ignition (CDI) system for spark. This system generates a high voltage (about 400volts) on the primary side of the coil. This ignition event needs to be sent to the ECU. A special adaptor is supplied with the kit and must be used to interface the ECU to the coil. Care must be taken, not to bend this adaptor thus breaking the internal components. Figure 81 shows the ignition tach adaptor. Some vehicles have spade connectors instead of a terminal ring. You can cut off the terminal ring and install a spade connector for your ignition coil. Note that the tach adaptor is polarized, which means it CANNOT be reversed. Make sure the terminal ring side is connected to the ignition coil. The tach adaptor needs to be tie-wrapped down so it doesn’t flop around as it will eventually break. Page 80 of 99 BITZ Racing CIS to EFI Installation Guide All rights reserved Figure 81: Ignition adaptor If you are running a stock BOSCH CDI you need to connect this ignition adaptor to the POSITIVE side of the coil. Refer to Figure 83. You will also need to cut a blue jumper wire that is located in the MegaSquirt unit itself. Refer to Figure 82. Note if the case has a label indicating the blue wire has been cut then this step is not required. Use a #1 Philips screwdriver to remove the four top screws holding the MegaSquirt case cover. Then cut the blue wire. Be careful not to touch any other components. Also make sure the exposed ends of the cut wire do not short with anything inside the MegaSquirt unit. Page 81 of 99 BITZ Racing CIS to EFI Installation Guide All rights reserved Figure 82: MegaSquirt Blue Wire If you are running another ignition that uses multiple sparks (like MSD) then you must hook the blue wire from the harness to the TACH output of this modern ignition controller. Hooking it up to the coil will NOT work due to the multiple sparks. In this case DO NOT install the Tach Adaptor. The Tach Adaptor should only be used when connecting the blue wire from the harness directly to the CDI coil. Getting a good TACH signal is key to making this system work. Page 82 of 99 BITZ Racing CIS to EFI Installation Guide All rights reserved Figure 83: TACH pickup for BOSCH CDI ignition With all the wiring done, you can now cover up loose wires with the corrugated loom. Refer to Figure 84. Figure 84: Adding the corrugated wire loom Add tie wraps to secure the wire harness on the fuel rails. Page 83 of 99 BITZ Racing CIS to EFI Installation Guide All rights reserved Mounting the Air Temperature Sensor The air temperature sensor needs to be mounted in a location where it is subjected to the intake air. It has to be away from any hot objects that would radiate heat. A good spot for the sensor is on the left or right side of the air box after the air filter. Refer to Figure 85. Note that if you cut up the airbox for the “Clean Look” the air temperature sensor must be mounted in the rubber intake boot Figure 85: MAT location on airbox Use a drill an 11/16” diameter drill to make the hole for the air temperature sensor. Page 84 of 99 BITZ Racing CIS to EFI Installation Guide All rights reserved Figure 86: MAT location on airbox Install the MAT sensor and use the nut to secure it in place. Once complete connect the wires from the harness to the MAT sensor. Figure 87: MAT location on airbox Page 85 of 99 BITZ Racing CIS to EFI Installation Guide All rights reserved Figure 88: MAT location on airbox UPDATE May 2013: One installer found that the above location of the MAT sensor causes problems during heat soak. When a hot engine is shut down for a few minutes, the sensor becomes heat soaked. During the restart, the sensor is not exposed to enough airflow resulting in an air temperature that is higher than what the engine is actually getting. This results in a lean condition. This can be fixed by moving the MAT to the intake of the snorkel. This allows for the sensor to quickly reach the actual air temperature after a heat soak. See photos below for location: Page 86 of 99 BITZ Racing CIS to EFI Installation Guide All rights reserved Figure 89 : Better MAT sensor location Page 87 of 99 BITZ Racing CIS to EFI Installation Guide All rights reserved Mounting the Oxygen sensor The kit includes a heated oxygen sensor that needs to be mounted on the exhaust. The 1980 to 1983 vehicles already have a mounting hole for the oxygen sensor so all that is required is to unscrew the old sensor and mount the new one. The pre- 1980 years require welding an oxygen sensor bung (included in kit) to the exhaust. It must be welded just before the catalytic converter. If you have backdated your exhaust then there is no catalytic converter so the sensor can be mounted on the left manifold after the three pipes merge into one. Figure 90 shows the location on the 80-83 years. If you don’t have the tools to do this, a local muffler shop can do this installation. They will need to drill a 7/8” hole in the exhaust pipe and weld the bung in place. The bung must be welded so the sensor has at least a 15degree angle vertically. The sensor should not be horizontal or pointing downwards. This is required because any water in the sensor will leak out before it freezes inside the sensor and causes damage during the winter months. Use the included anti-seize compound on the threads of the oxygen sensor. Do not get any anti-seize compound on the sensor tip. Install the sensor and torque to required specs. The wires need to be routed to the engine bay so that they are kept away from any hot exhaust parts. Use the tie-wraps to do this. Insert the mating connector from the harness to the oxygen sensor connector. If you installing a wide band O2 sensor instead of the narrow band O2 sensor, refer to the “Wide Band O2 Installation Guide” in the document section of the www.BitzRacing.com site for details. Figure 90: Oxygen sensor location Page 88 of 99 BITZ Racing CIS to EFI Installation Guide All rights reserved Mounting the ECU The ECU is mounted under the passenger seat. The case of the ECU is not sealed and the ECU will not tolerate any water. If you have damp carpets then chances are water is making its way to the passenger floor. These leaks must be address now. Find the source of any exposed holes to the outside and fix them. The kit comes with a Velcro pad with adhesive that will be used to mount the ECU under the passenger seat. The Velcro method is simple and works. It also allows you to easily remove the ECU if needed. First step is to thoroughly clean the passenger floor before applying the Velcro pad. It must be free of dust and oil for the Velcro to stick properly. Use a good house hold cleaning product to for the job. Figure 91 shows where the Velcro pads should be applied. Figure 91: Mounting the ECU An alternative method of mounting the ECU is to use a clamp with a diameter of 4.5” (114mm). This is not provided in the kit. You will need a rivet gun if you choose this route. You’ll need to drill holes in the clamp and then drill two holes with the same spacing in the passenger floor. Then you can rivet the clamp down. The clamp needs to be bent into a rectangle that is the same shape as the ECU. Refer to Figure 92 for details. If the clamp is designed as shown, you will be able to unscrew it with the passenger seat still installed. Page 89 of 99 BITZ Racing CIS to EFI Installation Guide All rights reserved Figure 92: Mounting the ECU Finally you can also use the bracket on the ECU with four screws to mount the ECU directly to the floor. Note this method will require removing the passenger seat to remove the ECU and is not recommended. Also this will make holes in the floor which will be a source for water to enter. When complete mount the ECU as shown in Figure 93. Note the loop of wire harness and vacuum hose. Leave enough slack to allow you to pull the ECU from under the passenger seat while still connected to the harness. First insert the vacuum hose into the barb fitting. Then insert the harness connector into the DB-37 connector on the MegaSquirt ECU. Tighten the two screws to secure the DB-37 connector to the MegaSquirt unit. Page 90 of 99 BITZ Racing CIS to EFI Installation Guide All rights reserved Figure 93: Mounting the ECU Note that later vehicles have the O2 and acceleration enrichment control box under the passenger seat. These units are no longer needed and can be removed to make room for the ECU. Cover the old connectors with a plastic bag and elastic to prevent them from rusting. Page 91 of 99 BITZ Racing CIS to EFI Installation Guide All rights reserved Checking the throttle butterfly It’s a good idea to check proper movement of the throttle butterfly especially if you removed the intake out of the car. Check to see that the gas pedal moves freely and that the throttle butterfly turns a full 90 degrees so the butterfly is pointing straight up. There are a few people that have improperly adjusted the linkages resulting in the throttle butterfly not opening up all the way. Have a helper press the gas pedal all the way down and check with a mirror to make sure the butterfly opens all the way. Fuel Injectors and fuel pressure The MegaSquirt comes pre-programmed assuming it will drive six 30lbs/hr fuel injectors. Note that the fuel injectors are specified to flow 30lbs/hr when the fuel pressure is 3bar (43.5psi). This is good for about 280Hp. Since the 3.0L normally aspirated engine does not produce that much horsepower, the fuel pressure is dropped to 2.5bar to keep the pulse widths at idle from being too small. At a fuel pressure of 2.5bar the 30lbs/hr injectors only flow 27.4lbs/hr. This is good for 254Hp. The fuel pressure regulator you purchased will NOT be calibrated, and so you must do this. Refer to the Fuel Pressure Installation Guide in the documents sections for details and part numbers required to do this. You must keep this in mind if you make any changes to the “Required Fuel” value in the “constants” screen of the tuning software (MegaTune). If your fuel pressure regulator has been calibrated for 2.5bar fuel pressure then your 30lbs/hr injector only flow 27.4lbs/hr. The MegaSquirt ECU will come pre-programmed with the correct value based on 30lbs/hr injectors and 2.5bar fuel pressure. If you decide to change either one you will need to adjust the “Required Fuel” value accordingly. Note, some folks have installed the kit on a 2.4L engine. It’s not recommended to use 30lbs/hr injectors for the 2.4L engine. Something like 24lb/hr is better. This requires changing the “Required Fuel” value. Please mention this when you purchase your kit, and the default MegaSquirt configuration file will be re-scaled accordingly. Page 92 of 99 BITZ Racing CIS to EFI Installation Guide All rights reserved Preparing to start the engine Before you start the engine you need to make sure there are no fuel leaks whatsoever. The fuel rails are pressurized and a small hole would create a nice mist of gasoline making it perfect for ignition in a hot engine bay. Have a fire extinguisher close by and make sure it is rated for gasoline. Make sure all the fuel lines are connected and clamped. Next disconnect the MegaSquirt from the wiring harness. Have a helper turn the key to the run position while you look closely in the engine bay. The pump should come on and you should hear the fuel running through the fuel lines. Let it run while you inspect every connection for fuel leaks. If this passes the test, then turn off the key. Connect the harness to the MegaSquirt ECU and the vacuum hose. Now turn the key to the RUN position. Don’t crank yet. Listen for the pump. The fuel pump should come on and then turn off after a couple of seconds. This is an indication that the ECU is working properly. If it never goes off, there is a good chance you did not hook up the “fuel pump disable” (pink wire from harness) to the correct location. Go back and check your work. If the pump comes on and then goes off after a couple of seconds, you can crank the engine to start it. The engine should start within a few crank cycles. The ECU comes pre-programmed with a base configuration, which should get the engine started and make the car drive able. Page 93 of 99 BITZ Racing CIS to EFI Installation Guide All rights reserved Support Join the BITZ Racing Yahoo group to discuss your EFI conversion. There are lot’s of helpful people in the forum that have gone through the same procedure as you and are more than happy to share ideas. The link to join is here: http://autos.groups.yahoo.com/group/bitzracing/ You can also email [email protected] for any questions. Page 94 of 99 BITZ Racing CIS to EFI Installation Guide All rights reserved Tuning the engine In order to tune the engine you need to obtain the tuning software. Tuner Studio from EFI Analytics is a popular program with great features. There is a free version with the basic functions needed that can be downloaded for Mac OS, Windows, and Linux. A paid version has some nice features for automated tuning. Details can be found here: http://tunerstudio.com/ The MegaManual which can be found below has a lot of good information about MegaSquirt and how it works. http://www.megamanual.com/mtabcon.htm For more links to informative web pages visit the links section of BITZ Racing: http://www.bitzracing.com/links/index.html Page 95 of 99 BITZ Racing CIS to EFI Installation Guide All rights reserved Why no TPS sensor? You’re probably asking how can the kit work without a TPS (throttle position sensor)? Most vehicles have one, how can this kit get away without one? The throttle position sensor is mainly used for acceleration enrichment. The way this normally works is that the ECU monitors the throttle position and when it sees a fast change in throttle position it adds an extra squirt of fuel (acceleration enrichment) just like a carburetor would. How much enrichment and for how long, is fully configurable via the tuning software. Throttle position data and manifold pressure was logged at a high rate from a 1978 911SC. The data showed that when the throttle position was moved an immediate change in manifold pressure was measured. So it was determined that the manifold pressure could be used as a trigger instead of throttle position, since there is a direct correlation and virtually no delay. This technique of using the MAP sensor instead of the TPS sensor greatly simplifies the CIS to EFI kit and reduces cost. Note that the tuning software uses the label “TPS”, however the internal software in the ECU has been modified to use the MAP instead of the TPS for acceleration enrichment. Page 96 of 99 BITZ Racing CIS to EFI Installation Guide All rights reserved MegaSquirt physical interfaces Figure 94: MegaSquirt Front Page 97 of 99 BITZ Racing CIS to EFI Installation Guide All rights reserved Figure 95: MegaSquirt Back Page 98 of 99 BITZ Racing CIS to EFI Installation Guide All rights reserved