1
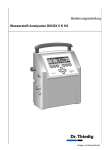
Operating Manual Oxygen Analyser Dr. Thiedig + Co Prinzenallee 78-79 D-13357 Berlin Phone: +49 30 49 77 69-0 Fax: +49 30 49 77 69-25 E mail: [email protected] www.thiedig.com Service hotline: (+49) 30 49 77 69-42 File: O2-EC6-E-060301.doc Edition O2-EC-D-01/03/06 Subject to changes 2 Table of contents 1 2 3 4 Introduction ........................................................................................................8 1.1 Conventional use 8 1.2 Unit description 8 1.3 Measuring principle 8 1.4 Processing measuring data 8 1.5 Connections 10 1.6 Operating elements 12 Menu overview................................................................................................. 13 2.1 The "Measuring" screen 14 2.2 Calibration menu 14 2.3 Main menu 15 2.4 Menu level 2 15 Taking the unit into service............................................................................ 16 3.1 Filling the reference electrode with KCl solution 16 3.2 Connections 17 3.3 Taking the unit into service 17 Calibration of the Digox 6............................................................................... 18 4.1 Introduction 18 4.2 Variables influencing calibration 20 4.2.1 Flow 20 4.2.2 Pressure 20 4.2.3 Temperature 20 4.3 Calibrating of the flowmeter 20 4.3.1 Preparation 20 4.3.2 Carrying out the calibration 21 4.3.3 Check Kf factor 21 4.4 Thiedig active calibration 22 4.4.1 Preparation 22 4.4.2 Carrying out the Thiedig active calibration 22 4.4.3 Check Ks factor 24 4.5 Short calibration 24 4.6 Reference calibration 26 4.6.1 Ref min calibration 26 4.6.2 Ref max calibration 27 3 5 6 Measuring ........................................................................................................ 28 5.1 Conditions of the sample and practical hints 28 5.2 The Digox 6 data logger 29 5.2.1 How to operate the continuous Data logger 29 5.2.1.1 Selection of the interval 29 5.2.1.2 Recording and saving measuring values 30 5.2.2 How to operate the measuring point data logger (optional) 30 5.2.3 Output of measuring values 30 5.2.4 Deleting measure values 31 5.3 How to operate DigoxWin 32 5.3.1 Introduction 32 5.3.2 Installing DigoxWin 32 5.3.2.1 Windows operating system 32 5.3.2.2 Checking the data transmission settings 32 5.3.3 Starting DigoxWin 33 5.3.4 Processing measuring data on the PC 34 5.3.4.1 The online data logger 34 5.3.4.2 Reading out the data storage in the Digox 6 35 5.3.4.3 Evaluate measuring data 36 5.3.5 Further DigoxWin functions 37 Maintenance..................................................................................................... 38 6.1 Cleaning the electrodes 38 6.1.1 General hints 38 6.1.2 Steps to be performed 38 6.2 Exchanging diaphragm and sealing rings 39 6.2.1 General hints 39 6.2.2 Means required 39 6.2.3 Works to be carried out 40 6.3 Hints regarding the moisture indicator 41 6.4 Hints regarding the battery operation 41 7 Fault messages and troubleshooting .......................................................... 42 8 Special functions............................................................................................. 46 8.1 Status display 46 8.2 Selecting recorder measuring ranges and output currents 46 8.3 Menu level 2 functions 47 8.3.1 Make system settings 48 8.3.2 Setting the interface 48 8.3.3 Setting the clock 49 8.3.4 Polling the identification number 49 8.3.5 Enabling options 49 4 8.3.6 System check 50 8.3.7 Generating a code 50 8.3.8 Flowmeter 50 9 Technical data Digox 6 ................................................................................... 51 10 Appendix .......................................................................................................... 52 11 10.1 Definition of terms 52 10.2 Scope of supply with accessories kit 53 10.3 Spare parts 54 10.3.1 Analyser block Digox 6 54 10.3.2 Further spare parts 56 10.4 Digox 6 EC unit extension and accessories 56 10.5 Terminal assignment 57 Index ................................................................................................................. 59 5 The instructions at hand are intended to make you familiar with the functions of the Digox 6 analyser and to properly operate the device. The unit should be operated by trained personnel only. The operating manual contains the following additional information: WARNING! This indicates a warning note to avoid improper operating states of the unit. NOTE: Here you get further information and details. You should always place this operating manual within reach of the location of the Digox. Due to technical improvements, some descriptions and figures in this operating manual may slightly differ from the functions of your Digox unit. Therefore, no claims can be made on the grounds of data, figures and descriptions included in this manual. Copyright All rights for this operating manual are reserved by Dr. Thiedig + Co. No part of this operating manual may be reproduced or distributed or used for competitive purposes or disclosed to third parties. In case of questions regarding the Digox 6 analyser, please contact: Dr. Thiedig + Co. Service phone: (+49) 30 49 77 69-42 email: [email protected] 6 7 1 Introduction 1.1 Conventional use The principle is based on an electrochemical reduction of dissolved oxygen at the measuring electrode. For this, the measuring electrode is polarized. The oxygen analyser Digox 6 measures reliably, precisely and quickly the oxygen content in beer, soft drinks and water in the trace range between 0.001 and 20 mg/l. The precise measuring principle, the built-in calibration device, the solid assembly and the easy handling of the Digox 6 are ideal conditions for an analyser for quality control in breweries and filling machines. 1.2 The measurement takes place directly in the medium. The sample is the electrolyte for the electrochemical reaction. This enables the measurement without using membranes. The membrane-free sensor measures quickly, drift-free and reliably in the temperature range between -5 and +50 °C. Unit description The Digox 6 consists of the analyser block and the splash-proof display and user field. The analyser block contains the calibration device, the measuring cell system as well as the sensors for temperature and flow measurement. It is mounted on the back of the housing and is protected by a cover. The Digox 6 has connections for power supply, recorder outputs and PC interface. The reduction of oxygen causes a measuring current between both electrodes. This measuring current is a direct measure for the oxygen concentration in the sample. The Thiedig sensor uses this measuring principle in a potentiostatic regulated grouping of 3 electrodes. The measuring current depends on the temperature and flow of the sample. The built-in flow and temperature sensors measure these variables. The Digox 6 software corrects the measuring values. Corrections are carried out automatically via the medium. The unit has a built-in battery charger for approximately 8 hours operation independent of the mains. The unit can also be operated via the power supply, however, for a steady state we recommend using the stationary measuring unit Digox 5S. The Digox 6 has a data logger and in connection with the Touch-Memory-System (optional) has an additional data memory. The data communication is carried out via the PC interface. 1.3 To calibrate the oxygen analyser, different procedures can be used. Some operate fully automatically. Here the calibration is carried out without interrupting the measuring process. 1.4 Processing measuring data The supplied software DigoxWin runs under the operating system Windows 98/ 2000/ XP. The measuring data can be displayed, saved as well as evaluated in tables or graphically online on the PC. The measured data can be processed with Microsoft Excel ™. Measuring principle The Thiedig measuring principle for the analysis of oxygen traces operates according to the potentiostatic 3 electrodes measuring system developed by Prof. Tödt and Dr. Teske. 8 The optional Touch-Memory-System can be combined with the data storage. Touch-Memories are individually programmed data storage (TouchKeys), which are attached to measuring points. They automatically enable a safe allocation of measurement and measuring points. In addition, when using the special user TouchKeys, a clear allocation of user and measurement is ensured. In the created data file, the measuring values, the measuring point and the user are filed. If you have further questions regarding the use and the advantages of this system, please do not hesitate to contact us. 9 1.5 Connections 1 2 3 4 5 6 Regulating valve sample flow Moisture indicator for housing interior Socket for RS-232 interface or Touch-Memory Stick (optional) Sample out flow Out Socket for recorder output/ measuring range identification Socket for plug-in power supply unit Figure: 1.2 Figure: 1.1 1 2 3 4 5 6 10 1 Figure: 1.4 1.6 Figure: 1.3 1 2 Display Sample supply In 2 11 Operating elements Figure:1.5 6 1 Display, "Measuring" is displayed, the measuring mode is active 2 7 To switch the Digox 6 on – shortly press this key To switch the Digox 6 off – press and hold the key for 5 seconds 3 to switch the measuring mode on 4 to open the calibration menu 5 to confirm your input 8 12 Press this key once – to switch the display lighting on, after the set lighting period has passed, the light goes out independently To open the main menu Cursor keys To make your selection and to enter numbers. Notes: 13 2 Menu overview 2.1 The "Measuring" screen 2.2 The "Measuring" screen appears automatically after switching the Digox 6 on or after pressing Calibration menu To enter press . . Figure: 2.2 Figure: 2.1 1 2 3 4 5 Selection of the calibration mode: • Thiedig active calibration, section 4.4 Faulty parameter Measuring value Sample temperature in [°C] Flow in [l/h] Date and time • Short calibration, section 4.6 • Reference calibration, section 4.7 • Calibration of the flowmeter, section 4.3 Use 14 scroll down. 2.3 2.4 Main menu To enter the main menu press Menu level 2 Confirm the last entry in the main menu with . Figure: 2.4 Figure: 2.3 Mark the desired function with or . Select numbers with and digit with confirm with . • select the medium • data logger, see section 5.2 • poll status (e.g. Ks factor), see section 8.1 • set measuring range, see section 8.2 • battery status, see section ??? • Code for entering menu level 2, see section 8.3 Press or , mark the next . to confirm the code. Menu level 2 is opened. Here the following functions are available: • • • • NOTE: A four-digit code can be used to protect menu level 2 functions against unauthorised use. The default setting is 9999. • • • • System settings, see section 8.3.1 Select interface, see section 8.3.4 Set clock, see section 8.3.5 Identification, see section 8.3.6 Enable options, see section 8.3.7 System check, see section 8.3.8 Flowmeter, see section 8.3.9 Generate code, see section 8.3.10 NOTE: Please also take into account the menu overview in the appendix and the enclosed quick reference. 15 3 Taking the unit into service Before you can use the Digox 6 to do measurements, you must carry out some preliminary steps. Filling 1. Unscrew the reference electrode (1) from the analyser block (Figure3.1). 3.1 2. Fill the KCl solution into the hollow place as far as to the tip of the V. Filling the reference electrode with KCl solution The measuring system is equipped with a reference electrode for a precise setting of the measuring potential. During operation, this electrode immerses into a 15% KCl solution. 3. If required, remove air bubbles from the diaphragm bridge (2) by slightly tilting the analyser block (Figure3.2). 4. Screw in the reference electrode and re-attach the analyser block. NOTE: This solution is included in the service pack. Before taking the unit into service, you have to fill the analyser block with the solution. WARNING! Before the analyser block is filled with sample, the reference block must have been filled with the KCl solution. In order to fill the reference cell, the analyser block has to be dismantled. Removal of analyser block 1. Lie the analyser flat on a table with the reverse side showing upwards. 2. Loosen the knurled screws on the cover of the analyser block and remove the sealing plug. Figure:3.1 3. Loosen the knurled nuts and remove the plug connector from the electrodes. 4. Now you can take off the analyser block from the holders and in order to fill, place vertically. 16 3.2 Connections A flexible hose and two hose clips are included in the scope of supply to connect the Digox 6. NOTE: Keep the feed line from the samplings point to the analyser as short as possible. If reductions, clutches or other hose adapters are used, air bubbles could settle on it. Because of this, the running-in time of the analyser is prolonged in order to reach low concentrations. WARNING! Only use oxygen-proof hoses. Silicon hoses will lead to higher oxygen values. 3.3 Taking the unit into service Shortly press to switch the Digox 6 on. The starting screen is displayed. The Digox 6 will at first perform a system check. Then the message "The current user of this unit is" ************ Version X.X“. Then the "Measuring" screen appears (see section 2.1). Figure:3.2 NOTE: The message "Version X.X“ indicates the current firmware version of the Digox 6. NOTE: When screwing in the reference electrode, excess KCl solution will leave the bore (3) (Figure 3.2). Please collect the liquid with absorbent paper. To switch the Digox 6 off, press at least 5 seconds. WARNING! The analyser block should now rest for about 15 minutes so that the diaphragm can take up the KCl solution. 17 and hold it for 4 Calibration of the Digox 6 4.1 Introduction During measurement in the liquid samples, the electrochemically active surface of the electrode system may change. By this, the sensitivity of the measuring electrode will change as well. Therefore, the electrode system needs to be calibrated from time to time. The Digox 6 has a built-in process regulated calibration system, which can carry out a calibration without interrupting the measuring series. For the Thiedig active calibration and the short calibration, a defined increase of the oxygen concentration is produced. This is done by electrolysis of the sample. The resulting increase of the measuring current is used to determine the calibration function. With the essential requirement "no oxygen – no measuring current“ the processor places this function through the zero point (Figure: 4.1.) The Thiedig active calibration lasts about 120 seconds. During the actual calibration, the measuring conditions are also being monitored. Figure: 4.1 The short calibration operates similar to the Thiedig active calibration, however, it does not compare the values of measuring current, flow and temperature with those of the beginning. It lasts about 60 seconds. Cross-sensibilities can be eliminated with the reference calibration. For this, two defined oxygen concentrations Ref min and Ref max must be set. The calibration line is crossing those two points. The reference calibration takes into account all conditions deviating from the ideal case (the function crosses the zero point) (Figure: 4.1). 18 Individual cases and recommended calibration Measurement in beer • For the measurement in beer, we recommend using the Thiedig active calibration for most cases. Trimming of an offset (cross-sensibility) • If an offset occurs during the measurement, which means the indicated measuring value is increased by the same value in the total measuring range, this offset can be corrected. • For this, the Ref min calibration determines a zero current Izero. A combination with the other calibrations is possible. Measurement in wort • If the oxygen concentrations are above 1mg/l (e.g. in wort), it is no longer possible to carry out a Thiedig active calibration. NOTE: Should implausible results occur during the Thiedig active calibration, please check the zero current (section 8.1, Status display). It should be 0µA in most cases. In order to delete the zero current, please refer to section 4.6.1, Ref min calibration. • For this, we recommend carrying out a Ref max calibration. In the course of this, the Digox 6 is trimmed with an externally determined reference value. NOTE: Due to a frequently occurring content of suspended particles, blockages in the analyser block can happen during the measurement in wort. Therefore, we recommend the following practical steps: - Secure the hose, which is connected at the sample return, with a hose clamp. - On this hose, put a hose clip after the regulating valve and open the regulating valve as far as it will go. - Regulate the flow via the hose clip after the analyser block. Measurements with the sampling device. • The short calibration is especially suitable for cases in which constant measuring conditions for a calibration are only available for a short time. For further uses, please do not hesitate to contact us. 19 4.2 4.3 Variables influencing calibration 4.2.1 Flow Calibrating of the flowmeter The calibration of the flowmeter is done in the works with water. When taking the unit into service, the Digox 6 should be calibrated with the measuring medium. When calibrating the flowmeter, the Kf factor is determined. Usual values are between 0.9 and 1.2. Measurements done at open electrodes are influenced by the flow volume. Flow volumes between 3 and 18 litres per hour affect the measuring value of the medium water and of the medium beer, which is then compensated by the Digox 6. Calibration does not have to be repeated in regular intervals. We recommend one-year intervals. NOTE: If a flow volume outside this range is found, the value indicating the flow will flash in the "Measuring" screen, and an indicating symbol will appear. 4.3.1 Preparation Required means • Measuring cylinder, 250 ml (included in the supply) • PVC hose (included in the supply) The accuracy of the flow measurement depends on the viscosity of the medium. 4.2.2 Pressure 1. Connect the sample supply (marker In) to the sampling point. The pressure of the sample does not influence the measured value. The measuring system of the Digox 6 has been designed for operating pressures of up to 8 bar, allowing for short pressure peaks of up to 16 bar. 2. Connect the PVC hose to the sample return (marker Out). 3. Switch the Digox 6 on and wait until the "Measuring“ screen appears. 4.2.3 Temperature 4. Set the flow at the regulating valve to 10 litres per hour, check the measured value in the display. The measured value is influenced by the temperature with a gradient of 3% per °C. The Digox 6 has got a temperature compensation in the range between 0 and +50 °C. 5. Press . The calibration menu is opened. Use the cursor keys to mark the menu item FLOWMETER. 6. Press . The following display appears. Figure 4.2 20 4.3.2 Carrying out the calibration 4.3.3 Check Kf factor 1. Press the key. The calibration starts after 10 seconds and takes 60 seconds. 1. Press to open the main menu. 2. Press to mark the menu item STATUS. 2. When the 60-second countdown starts, lead the hose from the sample return line into the measuring cylinder and collect the sample. 3. Press . The submenu STATUS displays the Kf factor. 3. Calibration is completed after 60 seconds. Remove the hose from the measuring cylinder. Then press the message. key to confirm the Figure: 4.4 4. Read and enter the volume of the liquid collected. Press or Press 5. Use to select a number. to mark the next digit. to confirm your input. Figure4.3 WARNING! The value to be entered should be between 150ml and 180ml. If a wrong value is entered, for example 500ml, the Kf factor will be re-adjusted. This can only be rectified by the Dr. Thiedig+Co maintenance service. 6. The Kf factor is displayed for 3 seconds. Then the display returns to the calibration menu. 7. Press to return to the "Measuring" screen. 21 4.4 Thiedig active calibration 4.4.2 Carrying out the Thiedig active calibration During the Thiedig active calibration the Ks factor is determined. The Ks factor is the measure for the measuring electrode’s sensitivity. The active calibration lasts approximately 120 seconds. 1. Press . The calibration menu is opened. Select THIEDIG ACTIVE CALIBRATION. NOTE: A low Ks factor indicates a low measuring sensitivity. If the value is smaller than 0.4, we recommend cleaning the measuring electrode. If the Ks factor is below 0.2, a calibration is no longer possible. Figure: 4.5 2. Press . The calibration starts. Then a countdown appears, beginning with 60 seconds. 4.4.1 Preparation NOTE: Each calibration must be carried out with a flow between 9.1 and 10.9 l/h. Figure:4.6 Calibration procedure: After connecting the unit to the sampling point, let "run down“ the oxygen value first. Only Start the calibration, if the values of the temperature and of the oxygen concentration are stable. Figure:4.7 60s - 56s Measuring current, flow and temperature are determined (basic values) Figure: 4.7 55s - 41s Tolerances are checked Measuring current: max. 0.5 % Flow max. ± 0.5 l/h Temperature : max. ± 0.5 °C 22 Figure: 4.8 Figure: 4.12 A comparison shows a deviation – please refer to fault messages (section 7). Although a deviation has been established, the calibration can be accepted by the user. In the course of this, the error code will be displayed in the calibration history. If aborted, the calibration would not accepted. After this, the Digox 6 changes again into the measuring mode and displays the current oxygen value in the sample. 40s - 0s The measuring current produces a defined amount of oxygen in the sample. The formed oxygen quantity depends on the current flow. 3. Current (real) measuring values and desired (ideal) measuring values are displayed. NOTE: If an error message is displayed after completing the calibration, we recommend carrying out the calibration once more, bearing in mind the error source listed below. Figure: 4.9 4. After oxygen has been generated, the device automatically opens the "Measuring" screen. Figure:4.10 5. Sixty seconds after oxygen has been generated, a comparison with the start values is carried out. In the course of this, undesired variables (drift of the oxygen value, temperature and flow) are examined during calibration. Figure: 4.11 A comparison shows no deviation – the newly calculated Ks factor is displayed (Figure: 4.12). 23 4.4.3 Check Ks factor 4.5 The Ks factor of the measuring electrode should be checked after each active calibration. By doing this, the required calibration interval can be determined. During the short calibration, possible changes in oxygen concentration, flow and temperature are not examined during the calibration. The short calibration takes 45 seconds. 1. Press . The main menu is opened. NOTE: The calibration must be carried out with a flow between 9.1 and 10.9 l/h. twice to highlight the menu item Press STATUS. Short calibration After connecting the unit to the sampling point, let "run down“ the oxygen value first. Only Start the calibration, if the values of the temperature and of the oxygen concentration are stable. 2. Press . The submenu STATUS displays the Ks factor. 1. Press . The calibration menu is opened. 2. Select the menu item SHORT CALIBRATION and confirm with . The calibration starts. A countdown is displayed, beginning with 45 seconds. Figure: 4.13 3. Press again: The last three active calibrations are displayed, including date, time and, if applicable error code (please refer to section 7). NOTE: If the current flow is outside the required measuring range, a fault message will be displayed. Figure: 4.14 24 Calibration procedure: 45s - 44s Measuring current, flow and temperature are determined (start values). 43s - 0s The calibration current produces a defined amount of oxygen in the sample. 3. After successful calibration, the calculated Ks factor is displayed for 3 seconds. Figure: 4.15 4. Then the Digox 6 automatically shifts to the "Measuring" screen. NOTE: Short calibrations are not saved in the menu STATUS. 25 4.6 Reference calibration 4.6.1 Ref min calibration During the reference calibration, the two points Ref min and Ref max are determined, with the help of which the calibration function is determined. 1. Press . The calibration menu is opened. and hold until the menu item REF 2. Press MIN CALIBRATION is highlighted. Confirm with . NOTE: The Ref min value is also called zero current because a correction of the zero point can be carried out with the Ref min calibration (please also refer to section 4.1). The zero current is displayed in MENU \ STATUS (please also refer to section 8.1). Figure: 4.16 3. A selection menu appears. Highlight the menu item REF MIN CALIBRATION and confirm with . Figure: 4.17 NOTE: The menu item DELETE REF MIN sets the value for Refmin to 0µA = 0µg/l or deletes the zero current. 4. In the following window press the calibration. and start Figure: 4.18 5. A countdown appears, beginning with 50 seconds. After the calibration, a reference concentration is polled. Use the cursor keys to enter it and confirm with 26 . 4.6.2 Ref max calibration 1. Press Figure: 4.19 . The calibration menu is opened. to select the menu item 2. Press REF MAX CALIBRATION and confirm with 6. After successful calibration, the calculated Ks factor is displayed for three seconds. Then the Digox 6 automatically shifts to the "Measuring" screen. . 3. In the following window press the calibration. and start Figure: 4.20 4. The calibration starts. A countdown appears, beginning with 50 seconds. After the calibration, a reference concentration is polled. Use the cursor keys to enter it and confirm with . 5. After successful calibration, the calculated Ks factor is displayed for three seconds. Then the Digox 6 automatically shifts to the "Measuring" screen. NOTE: If the calibration curve is determined again, the most recent point determined, the Ref min value is used as a basis. With Ref min = 0, the calibration curve crosses the zero point. 27 5 Measuring 5.1 Conditions of the sample and practical hints The sample must meet certain conditions in order to ensure error-free measurements: Parameter Conductivity Flow Pressure Temperature Value Hints Minimum: 20 µS This value will always be fulfilled when used in the beverage industry . Permissible 3-18 l/h The flow is compensated electronically within the limits stated. During the calibration, the flow must be between 9.1 and 10.9 l/h. Only Standard: 9-11 l/h in this range, the calibration can be carried out correctly. This is Ideal: 10 l/h monitored. Minimum: 0.1 bar Pressure peaks of up to 16 bar are permitted for short intervals. Maximum: 8 bar Minimum: 0 °C The temperature is compensated electronically within the limits stated. Maximum: 50 °C Threshold value: 70 °C If this temperature is exceeded, it will lead to damages of the measuring block. Threshold value: 110 °C This maximum temperature constancy can be achieved with a brown measuring block (as a special edition). (Special edition) Using cleaning and disinfection agents with the Digox 6: - Using chlorine disinfection agents: depending on the existing concentration and reaction time, the measurement of the Digox 6 is influenced by the contact of free chlorine (Cl2) with the measuring electrode. In this case, please get in touch with our customer service. - In order to internally clean the analyser block, the Digox 6 can be rinsed through in the course of an acid tank cleaning (cold) at the sampling tab. We recommend a monthly interval and using nitric acid-free products. 28 5.2 The Digox 6 data logger 5.2.1 How to operate the continuous Data logger The Digox 6 has got 2 separate data storage: the continuous data logger and the measuring point data logger. The data logger allows to save measuring values and marginal conditions in the unit and to retrieve them later via the data interface. 5.2.1.1 Selection of the interval 1. Mark the menu item DATA LOGGER in the main menu and confirm with . 2. In the menu DATA LOGGER, confirm the menu item CONTINUOUS LOGGER with The continuous data logger allows to continuously save the measuring values of a measuring point in intervals that can be set. Three series of measurements can be started in a sequence. A total of 1,000 values can be saved. . The following menu opens. NOTE: The memory can be extended to accommodate up to 3,000 measuring values. This function can be enabled ex works or by our maintenance service. Figure 5.1 3. Press to confirm the menu item CONFIGURATION. The window for the logger configuration opens. When using the continuous data logger, the following conditions must be taken into account: • Independent of the amount of recorded values, the data logger can be started three times. • If the total amount of recorded measuring values is attained, the measurement will be stopped and a message will be displayed (please refer to section 7). If you would like to continue the measurement, this message must be acknowledged. Figure: 5.2 4. Use the cursor keys to set the calibration interval. to select a number and or Use mark the next digit. The measuring point data logger is a part of the TouchMemory system and is optional. Confirm the selected interval with to . NOTE: The shortest interval to be selected is 5 seconds. 29 5.2.1.2 Recording and saving measuring values 5.2.2 How to operate the measuring point data logger (optional) Starting the data logger: 1. Connect the TouchMemory stick with the Digox 6 (see figure 1.2) and work in the "Measuring“ screen. 1. Mark the menu item START/STOP in the menu DATA LOGGER//CONTINUOUS and press 2. If you want to record the current value, touch the stick on the measuring point Touchkey. The name of the measuring point and the current measuring value is displayed and then saved. to confirm. The message DATA LOGGER RUNNING will appear. 2. After starting the data logger, the menu automatically returns to the measuring mode. 3. If the user of the device changes, the new user touches the stick on his/her User Touchkey. The current user is displayed briefly and then saved. NOTE: Recording of data is possible only when the data logger is in the measuring mode. When a menu is opened with or no data are recorded. 5.2.3 Output of measuring values Stopping the data logger: There are two possibilities of reading out the measuring values saved in the Digox 6: 1. Mark the menu item START/STOP in the menu DATA LOGGER//CONTINUOUS and confirm • The supplied DigoxWin program can be used to read out the measuring values. with . The message DATA LOGGER STOPPED will appear. • The measuring values of the measuring point data logger can be displayed. 2. After stopping the data logger, the menu automatically returns to the measuring mode. Other possible messages: • "The data logger is running. Do you want to stop it? (Touchkey / ENTER)“ To stop the data logger press • to confirm. "The data logger has already recorded three series of measurement.“ A new start of the logger is possible only after deleting the data (please see hint section 5.2). 30 5.2.4 Deleting measure values Reading out the measuring values through DigoxWin 1. Mark the menu item DELETE in the menu DATA LOGGER//CONTINUOUS and confirm 1. Install the DigoxWin program on the PC, see section 5.4. with . 2. Use the supplied interface cable to connect the Digox 6 with a free serial PC interface (e.g. COM1). NOTE: The transfer rates [9600 Baud] of the Digox 6 and DigoxWin program must be identical: Figure 5.4 2. Quit the menu by pressing 3. Start DigoxWin and open the menu item COMMUNICATION to select the entry READ OUT DATA LOGGER. Now the measuring values will be read out from the data logger of the Digox 6. NOTE: After confirming the deletion, the display will remain unchanged for about 30 seconds and then return to the menu. NOTE: For using DigoxWin, please read section 5.4. Displaying measuring values (only measuring point data logger) 1. Mark the menu item DISPLAY MEASURING VALUES in the menu DATA LOGGER//MEASURING POINT. 2. Press . to confirm. Figure: 5.3 31 5.3 How to operate DigoxWin 5.3.2.2 Checking the data transmission settings 5.3.1 Introduction Setting the PC interface Please check the interface setting in DigoxWin: open the SETTINGS/INTERFACE menu. The DigoxWin program allows you to: • Display, save and evaluate measuring data of the Digox 6. • Make selections, e.g. choosing the medium • Poll the status of the Digox 6, e.g. Ks and Kf factor. Hardware requirements - 586 PC processor or higher - a free serial interface - CD-ROM drive or network for installation Figure: 5.6 The interfaces available on the PC are highlighted. Software requirements - MS Windows™ 98/2000/XP - MS Excel™ 2000 or higher NOTE: If a serial mouse is connected to the COM1 port of your PC, you can connect the interface cable to COM 2. In this case, the settings must be adapted in DigoxWin. The transfer of the measured data from the Digox 6 to a PC takes place via a serial interface using the interface cable included in the scope of supply. The measured data can be processed with Microsoft Excel™. Setting the 9,600 Baud transfer rate 1. Please check the setting of the transfer rate at the Digox 6 (also refer to section 8.3.4) 2. To check the transfer rate setting in DigoxWin: please open the SETTINGS/INTERFACE menu. 5.3.2 Installing DigoxWin 5.3.2.1 Windows operating system 1. Insert the installation CD in the drive. 2. Copy the directory \software.english with all subdirectories onto your hard disk. 3. Change into the copied directory and delete the read-only from the file Digoxwin.ini. For this, proceed as follows: a. Use your right mouse key to click on the file, b. Select "Properties". c. Delete the tick "read-only". 4. Use your right mouse button to click on the file Digoxwin.exe and establish a short-cut on the desktop. NOTE: The transfer rate of the PC interface must be the same as the transfer rate of the Digox 6. The adaptation is only carried out at Digox 6 and in DigoxWin, a change in the system control of the PC is not required. 32 5.3.3 Starting DigoxWin Double-click the DigoxWin icon. The program surface opens. Figure 5.7 1 2 3 4 5 6 7 8 Open data logger file Save data logger file Convert data logger file into Microsoft Excel Print data logger file Activate online mode Start Thiedig active calibration Set limits and Alarms Poll calibration logs Menu overview Main menu File Communication Entries Open Save To Excel Close Print Exit Online Read out data logger Read out measuring points Settings Status Window Info Active calibration Menu code Limits & alarms Medium Recorder output Interface Language Ks factor Kf factor Calibration log Battery status Meaning Open data logger files Save data logger file Convert data logger file to Microsoft Excel Close data logger file Print data logger file Exit DigoxWin Start online measuring window Read out the continuous data logger of the Digox 6 Read out the measuring point logger of the Digox 6 Start active calibration in DigoxWin Change the menu code for the 2nd menu level in the Digox 6 Change limits and alarm settings in the Digox 6 Change medium settings in the Digox 6 Change recorder output settings in the Digox 6 Change the interface in DigoxWin Set the menu language in DigoxWin Read out the Ks factor in the Digox 6 Read out the Kf factor in the Digox 6 Read out the calibration log in the Digox 6 This function is not supported by the stationary Digox 6 Menu for the arrangement of the windows opened in DigoxWin Display the DigoxWin program version 33 5.3.4 Processing measuring data on the PC 3 4 The Digox 6 offers several ways of processing measuring data on the PC and to save them as a file: • Online logging • Reading out the continuous logger and the measuring point logger (optional) • Reading out the measuring data via MS Excel 5 6 Sampling interval for online measurement 5, 10, 15, 20, 25, 30 seconds Current data record number A maximum of 4,000 is possible, if there are more than 4,000, DigoxWin will automatically create a new logger file with the file number 02. Button for starting/stopping the recording Close the online mode window. NOTE: A new file will be automatically created with every new starting of the online mode. Preparation Connect the PC to the Digox 6 and start DigoxWin. Online logger files are saved automatically by the DigoxWin program. The files are saved on the PC in the subdirectory named \Logger and can be opened through the icon (1) (figure 5.6) or the menu item FILEI\ OPEN. In order to save, you must have enough free memory on your hard disk. 5.3.4.1 The online data logger Data currently measured at the Digox 6 are represented on the PC in the online mode. The online data logger can be used to save the data. 1. Activate the online mode. Click the icon (5) (figure 5.7) or select menu item COMMUNICATION/ ONLINE. 2. The online logger is displayed. WARNING! The hardware was not designed for simultaneous operation of the continuous data logger in the Digox 6 and of the online mode and should therefore be avoided. If this is not observed, the fault message "EEPROM-Error at ...“ may appear on the Digox 6 display (also refer to section 7). Figure: 5.8 1 2 File name of the logger file 120406 Date (dd.mm.yy) L identification for online logger 02 current file No. Measuring data according to the display "Measuring“ at the Digox 6 34 5.3.4.2 Reading out the data storage in the Digox 6 1. To read out the measuring data of the logger in the Digox 6, open in DigoxWin the menu item COMMUNICATION/ READ OUT DATA LOGGER. 2. The measuring data are transferred to the PC. A corresponding message is faded in the DigoxWin program window. 3. Then the transferred measuring data are displayed in DigoxWin as a table. NOTE: In order to read out data, the Digox 6 must be switched on. 4. To save measuring data select icon (2) (figure 5.6) or the menu item FILE/ SAVE. 5. Enter the file name and click OK. The data are saved in a file with the following extensions: • KON – continuous logger • MES – measuring point logger 35 5.3.4.3 Evaluate measuring data The measuring data read out from the Digox 6 can be evaluated in Microsoft Excel. For this purpose, a function for the conversion of data into Microsoft Excel format has been integrated into DigoxWin. • Select icon (3) (figure 5.7) or menu item FILEI\ TO EXCEL. • Enter a name for the new file, using the extension "xls“ and click the Save button to confirm the file name. • MS Excel will be opened and the measuring data will be transferred. Figure: 5.9 NOTE: With some computer configurations, fault messages may appear when converting measuring values from DigoxWin to Excel. Therefore, we recommend importing the DigoxWin file in Excel via the Excel "Import" function. In case of questions or problems, please contact our maintenance hotline. In Excel, the measuring data can be displayed in tables or graphically and be saved and printed. 36 5.3.5 Further DigoxWin functions Click the "Close" button to exit the current menu. Make settings The following functions can be read out from the Digox 6 (click the "Read out" button), be changed in DigoxWin and be saved again in the Digox 6 (click the "Write" button): • Poll status messages The following values or states can be read out from the Digox 6 and displayed in DigoxWin. • Calibration factors Select menu item STATUS\ KS FACTOR: Ks value of the oxygen calibration Select menu item STATUS\ KF FACTOR: Kf value of the flowmeter calibration • Select calibration log Menu item STATUS\ CALIBRATION LOG. nd Code for the 2 menu level Select the menu item SETTINGS\ MENU CODE. Figure: 5.10 • Read out and change recorder outputs Select the menu item SETTINGS\ RECORDER OUTPUTS. Figure: 5.12 Click the N, N-1 or N-2 button to display the calibration log: N last calibration log N-1, N-2 logs recorded earlier Figure: 5.11 NOTE: Only recorder output 1 is available at the Digox 6. • Select medium • Select interface and transfer rate, see section 5.3.2 Change limits and alarms not available with the Digox 6 • 37 6 Maintenance WARNING! Only use original parts from Dr. Thiedig when carrying out maintenance work. Only these parts have been checked and fulfil all requirements. WARNING! Do not use any detergents which contain chlorine or powerful rubbing-off substances. This can damage the electrodes. If foreign parts are used, no claims can be made regarding the proper operation of the Digox 6. 6.1.2 Steps to be performed 6.1 Dismantling of the analyser block: 1. Lie the analyser flat on a table with the reverse side showing upwards. Cleaning the electrodes 6.1.1 General hints NOTE: Clean the measuring electrode when the Ks factor is smaller than 0.2. You can poll the Ks factor in the menu STATUS. 2. Loosen the knurled screws on the cover of the analyser block and remove the sealing plug. 3. Loosen the knurled nuts and withdraw the plug from the electrodes. After cleaning the electrodes, always carry out a Thiedig active calibration. The measuring sensibility of the measuring electrode can change greatly within the first hours after cleaning. We recommend a second calibration after some time. 4. Now you can take off the analyser block from the holders. Loosen the connecting plug for the temperature and flow measurement and remove the block. Cleaning the measuring and calibration electrode: 1. Unscrew the upper pressure pieces and pull out the respective electrodes. WARNING! Do not clean the reference electrode, this will render them useless. 2. Clean both electrodes with a detergent (cleaning powder) and filter paper or a soft tissue. After this, flush the electrodes carefully with water. You need the following for cleaning: - A detergent (chlorine-free, e.g. AJAX powder lemon fresh), cleaning powder (included in the supply) - A soft tissue, filter paper or the like - water - a brush for cleaning the counter-electrodes (included in the supply) - a tooth brush or the like (recommended for cleaning the contact piece) - compressed-air pistol (if available) NOTE: Do not touch the measuring electrode with your fingers after cleaning. 38 6.2 Cleaning counter-electrodes and contact pieces: 1. Unscrew the lower pressure pieces and remove the respective contact pieces (if required, use pliers). Exchanging diaphragm and sealing rings Dr. Thiedig+Co recommends to annually change the diaphragm and all sealing rings at the analyser block. 2. Use the brush included in the supply to clean the counter-electrodes with the same detergent. After cleaning, flush the counterelectrodes with water. 6.2.1 General hints To exchange the diaphragm and the sealing rings, the analyser block must be dismantled. 3. After cleaning the counter-electrodes, the contact pieces must also be cleaned. For this, use the tooth brush. NOTE: Carry out all works in a clean, dry place. Blow all the parts dry and re-install the analyser block in the reverse order. 6.2.2 Means required To dismantle the analyser block, you need: a SW 7 socket spanner a cross-tipped screwdriver a special screwdriver for the diaphragm (special tool) an electrode removing tool (special tool) a test tube brush (accessory kit) Vaseline 15% KCl solution a clean cloth as base a mild cleaning solution (e.g. using dishwashing agent) a set of sealing rings DG 50.35.00 diaphragm DG 50.09.00 NOTE: The inclined surface at the shaft of the measuring and calibration electrode must not block the aperture to the flowmeter or to the mixing spiral. The surface where the electrodes and contact pieces are connected must be dry. NOTE: In order to maintain the analyser block, we offer the service set DG 50.91.00. It contains all required tools and auxiliary substances as well as a service manual. 39 6.2.3 Works to be carried out 7. Loosen the screws (29) at the flowmeter block (16) and unscrew the adapters (18) from the flowmeter (27). Dismantling the analyser block: see section 6.1.2 8. Withdraw the counter-electrode (9). NOTE: Place the analyser block on a clean cloth. Please observe figure 10.1. when dismantling the unit. NOTE: Always use the special electrode removing tool (DG 94.05.90) to remove the counter-electrode. Other tools may damage the analyser block. Dismantling the analyser block: 1. Unscrew the temperature sensor (24) by loosening the black knurled nut. Take care not to turn the connection cable. Otherwise, this can damage the contact pin. 9. Remove all old sealing rings from the block parts. 10. Clean the block parts in the cleaning solution. Finally, flush the parts with clear water. 2. Unscrew the pressure pieces (23). 3. Withdraw the measuring electrode (13) and the contact pieces (4+14). NOTE: In order to remove coarse coatings on the counter-electrodes, the cleaning brush can be combined with a mild abrasive. Afterwards, the counter-electrodes must be rinsed thoroughly. WARNING! When dismantling the measuring electrode (13), keep it straight, carefully removing it from the block without the metal touching the aperture. 11. Carefully dry the block parts. 12. Now insert the new diaphragm and the new sealing rings. 4. Unscrew the reference electrode (10). Pour the KCl solution into a beaker glass and discharge it in the drain. NOTE: We recommend replacing the diaphragm and the sealing rings together, as damaged sealing rings may corrupt the measuring result. When exchanging the sealing rings, please observe figure:10.1. and figure:10.2. WARNING! Do not clean the reference electrode (10). The coating must be dark grey. If the colour is light grey, the reference electrode must be replaced. When sliding back the grey conduit, make sure that the inclined surface at the shaft of the electrodes does not block the aperture (air vent). 13. When reassembling the unit, proceed in the reverse order. Then refill the analyser block with KCl solution, also refer to section 3.3. 5. Use the (SW 7 mm) socket spanner to loosen the 4 hex nuts (21). Withdraw the connection rods (19). The 5 single blocks are now separated from each other. 6. Use the special screwdriver to remove the diaphragm (7). 40 6.4 WARNING! Very carefully tighten the tension rod. If it is tightened too firmly, this may tear the block parts. An important element for measuring with the Digox 6 is the state of the battery. The Digox 6 is equipped with an improved nickel-metal-hydrid battery. No claims can be made from the resulting damages. NOTE: The battery is a part liable to wear. This already occurs when leaving the manufacturer. As a device manufacturer, we guarantee that batterys supplied by us have only been stored at our premises for a short time and that they are then directly delivered to our customers. NOTE: Applying a thin fatty film on the surface of the sealing rings makes it easier to insert the counterelectrodes into the block. In addition because of this, damages of the sealing rings will be avoided when inserting at the block’s transverse bores. Damaged sealing rings are often the cause for a liquid inlet occurring later between the counterelectrode and the block and the resulting corrosion of the counter-electrode. 6.3 Hints regarding the handling of rechargeable battery Hints regarding the handling of the battery In order to optimize the service life of the battery and thereby the measurement stand-by of the Digox 6, we recommend considering the following hints: • Avoid extreme ambient temperatures – do not store the device in a cold storage room or in full sun. • Only reload the battery if its capacity is under 50%. • Take care of the battery – unload and load the battery at least once a month overnight: o Fully unload the battery until the device switches itself off o Afterwards load the battery with the charging unit o Observe the indicator regarding the loading state Indicator reading after unloading at 0% and during loading increasing to 100% o Normal loading time is 3-4 hours • Do not always connect the device to the charging unit when it is not being used. By doing this, the available capacity of the battery will be reduced. Hints regarding the moisture indicator The housing of the Digox 6 is equipped with a moisture indicator for the housing interior (please refer to figure 1.2). Possible residual moisture is taken up by the moisture indicator. The viewing window displays the residual moisture in the housing. - blue colouring: humidity < 40%, state is completely harmless - white colouring: humidity > 40%, exchange moisture indicator NOTE: We recommend regularly checking the viewing window and annually replacing the indicator. 41 7 Fault messages and troubleshooting Cause Remedy The flow is flashing in the right top of the display and warning triangle appears. Flow < 3.0 l/h or > than 20 l/h Set the flow a the regulating valve to about 10l/h. Check the value in the right top of the display. Incorrect Kf factor, 0.9 > Kf >1.2 Re-calibrate the flowmeter The throughput displayed is lower than expected: the flowmeter is dirty or faulty Clean the flowmeter - Rinse the analyser block - Open and clean the flowmeter - If this does not work, please contact our maintenance hotline The temperature is flashing in the left top of the display, for example, the display reads 49.9°C The feed line to the temperature sensor has been interrupted Check the proper seat of the sensor connector. The temperature sensor is faulty Replace the temperature sensor. Display message: Yes will stop the recording by the data logger. If No is selected, the logger continues running, and the whole memory is overwritten. The previously saved measuring values get lost. After pressing a key, the "Measuring" screen will be displayed. 42 Cause Remedy The unit was switched off with a running continuous logger. Decide with the cursor keys whether the data logger should continue. After switching on the unit, the following message is displayed No connection can be established between the Digox Check the following points: 6 and DigoxWin. - Interface cable OK - Correct interface at the PC and in DigoxWin - Same baud rate Digox 6 and DigoxWin - Correct DigoxWin version with regard to the Digox 6 firmware NOTE: Always use the supplied software version with the respective analyser. Display message: "EEPROM-Error at ......“ or switch the unit off and on again (if this is Press not successful, please call our maintenance hotline). Simultaneous operation of the continuous logger in the Digox 6 and of the online mode in DigoxWin. The hardware was not designed for simultaneous operation of the continuous data logger in the Digox 6 and of the online mode or of the diagram in Dkonfig, respectively. Please contact our maintenance hotline. EEPROM-Error at the processor board 43 Cause Remedy Calibration error A: At the start of the active calibration (sec.0), the flow was between 5 l/h and 15 l/h, but was not between the ideal value 9 l/h and 11 l/h). Calibration error A: Set the correct flow of 10.0 l/h (tolerance: ± 0.5 l/h is permissible). Calibration error B: The O2 concentration, which was determined in sec.0 to sec.5, was bigger than 1.000 mg/l. Calibration error B: Reduce the oxygen concentration which is in the sample to a value below 0.500 mg/l and start the calibration again. Calibration error C: ZERO VALUE INSTABLE. The current measured between sec.15 and sec.20 deviates more than 5% with regard to the current measured between sec.0 and sec.5. Calibration error C: Wait until the displayed measuring value is constant and start the calibration again. Calibration error D: Wait until the sample temperature is stabilized and then start the calibration. Calibration error D: The temperature measured in sec.20 deviates more than 5% with regard to the temperature measured in sec.0. Calibration error E: Wait until the displayed flow is constant and then repeat the calibration. Calibration error E: The flow measured in sec.20 deviates more than 5% with regard to the flow measured in sec.0. NOTE: In case of any questions or problems, please call our maintenance hotline. Please also consider the information provided on our homepage. There you find FAQs and answers. (coming soon). 44 Notes: 45 8 Special functions 8.2 The special functions of the Digox 6 allow to poll device states or to make settings. 8.1 Selecting recorder measuring ranges and output currents 1. In the main menu, press until the menu item MEASURING RANGES is highlighted. Status display Press to open the menu MEASURING RANGES. Figure 8.1 Figure 8.2 Use and the menu item STATUS for the status display. Here, the following information is provided: 2. Select the recorder output and confirm with . The current measuring range is • • • • • Ks factor refer to section 4.4 Kf factor refer to section 4.3 zero current refer to section 4.7 Medium here, the medium setting is displayed, the default setting for the Digox 6 is Pilsner measuring range here the setting of the recorder output is displayed. highlighted in the menu opened. Use and to set the desired measuring range and to confirm. To save the setting, highlight the menu RETURN and press . Figure 8.3 The following measuring ranges can be selected for the recorder outputs: • concentration 1,000mg/l, 20,000mg/l, automatic identification of the measuring range NOTE: The display of the measuring range does not refer to the measuring range used by the Digox 6. Here the current setting for the measuring range of the recorder output is displayed. NOTE: The concentration ranges are set in the works, if required by the customer, they can be adapted by Dr. Thiedig+Co service personnel. and in the 3. After saving, use subsequent menu to set the output current and save the value with 46 . 8.3 NOTE: The functions of menu level 2 and their settings can be protected from unauthorised users with a four-digit code. The default setting is 9999. It can be modified using the menu item GENERATE THE CODE. Take care to remember the code. It can also be changed in DigoxWin, please refer to section 5.3.5. Figure 8.4 4. After saving, the menu MEASURING RANGES will open. Use Menu level 2 functions to return to the "Measuring" screen. 1. Select the menu item CODE in the main menu and confirm with . 2. Enter the code, using the number and Press and and to change to change digits. to confirm your entry. Figure 8.5 3. The main menu of menu level 2 opens. Figure 8.6 47 8.3.1 Make system settings Checksum The checksum serves to check the device components before switching off. Highlight the In the main menu of menu level 2, highlight the menu item SYSTEM ADJUSTMENTS and confirm with menu item and press . The SYSTEM menu opens. . Use and change between YES and NO and to to confirm. Figure: 8.7 Figure: 8.10 Set language Highlight the menu item and press . To change the language, highlight the language desired and confirm with 8.3.2 Setting the interface This function serves to select the interface and the related transfer rate (baud rate). 1. In the main menu of menu level 2, highlight . To save, highlight the menu field RETURN using and press . the menu item INTERFACES and press The INTERFACES menu opens. . Figure: 8.8 Set illumination time Highlight the menu item and press Figure: 8.18 . Use and to set the illumination time and confirm with . 2. Select interface 1. Press . The INTERFACES menu opens.. Set LCD contrast Highlight the menu item and press and . Use to adjust the contrast (in steps between 0 and 100%). Press to confirm your selection. Figure: 8.19 3. Select the transfer rate: Press confirm with or and . To return to the main menu, select the RETURN entry and confirm with Figure: 8.9 , or use screen. 48 to return to the "Measuring" 8.3.4 Polling the identification number NOTE: The function INTERFACE 2 is an option and not supported by the Digox 6. In the menu of menu level 2, use to highlight the menu item IDENTIFICATION and press . The transfer rates of the PC interface must be the same as the transfer rate of the Digox 6. The transfer rate of the PC is set using the DigoxWin program (refer to section 5.3.2.2). Figure: 8.21 8.3.3 Setting the clock The 12-digit IDENT number of your unit is In the menu of menu level 2, press and highlight the menu item SET CLOCK. Press displayed. Use level 2. . to return to the menu of menu 8.3.5 Enabling options In the menu of menu level 2, use to highlight the menu item ACTIVE OPTIONS and press Figure: 8.20 . Mode of operation Press to activate the setting mode, 24 is to set the 12 h display and highlighted. Press to confirm your selection. Figure: 8.22 Change time and date This menu item allows you to use a code to extend the memory of the data logger from 1,000 to 3,000 values. Highlight the menu item and confirm with . The setting mode is active. Changes are made using the cursor keys. Use to confirm. NOTE Enabling the extended data logger is done by our maintenance service. After setting, highlight the menu item RETURN and confirm with . 49 8.3.6 System check 8.3.7 Generating a code This menu provides test programs for the keyboard function and the display. You can use this menu item to generate a new access code for menu level 2. and In the menu of menu level 2, press highlight the menu item SYSTEM CHECK. Press NOTE If you have changed the access code and forgotten it, it can be read out and changed again in DigoxWin. . 1. Highlight the menu item GENERATE CODE and press . Figure: 8.23 Keyboard check Select the entry in the menu and press . You are prompted to press specific keys within 3 seconds. Figure: 8.24 LCD check Highlight the menu item and press program is run automatically. 2. Set the new code: Use . A check the numbers and or next/previous digit. Press or to change to select the to save. After the completion of the system check, highlight the menu item RETURN and confirm with . IMPORTANT NOTE! Take care to remember the new code for the later activation of menu level 2. 3. Highlight the menu item RETURN and confirm with . The main menu opens, the menu item code is highlighted. 8.3.8 Flowmeter Under this entry, the calibration of the flowmeter is supported, as described in section 4.3. 50 9 Technical data Digox 6 Type: Measuring range: Measuring method: Measuring electrode: Counter-electrode: Reference electrode: Sample conductivity: Display: Accuracy: Digox 6 EC 0.001 ... 20.00 mg/l O2 Potentiostatic 3-electrode measuring system Silver Stainless steel (material no. 1.4571) Silver/Silver-chloride electrode in 15% potassium chloride (KCl-) solution > 20 µS/cm (always fulfilled in beverages) Graphic display ±1% based on the measuring range end value in the lower range 0...1.000mg/l Temporary deviations of 10% of the measuring value can be caused by high frequency irradiation. Data logger: continuous data logger, adjustable interval for 1,000 measuring values (3,000 measuring values as an option Measuring point data logger for 200 measuring values (TouchMemory system) Data interface: RS 232 Recorder output: One output 0(4) ... 20mA for concentration: 0…1.000 mg/l 0... 20.00 mg/l to be set to a fixed value or automatic changeover and detection of the measuring range IMPORTANT NOTE! Connection of a recorder with a grounding potential at the measuring reference point (GND) constitutes an illegal operating status, where signal corruption is possible due to potential and hum loops. The recorder cable must not be longer than 3 metres. Time constant t90: <10sec Ambient temperature: -5...40°C Sample temperature: 0...60°C (up to 50°C compensated) as an option suitable for CIP up to 110°C (brown analyser block) with nitric acid and chlorine-free cleaning and disinfection agents Sample pressure: 8 bar maximum Sample flow: 3-18 l/h (compensated) Calibration: Fully automatic Thiedig active calibration, reference calibration Power supply: 12 V NiMH battery for approximately 8 hour operation 100-240V AC, 50/60 Hz 13VA (plug-in charging unit ) Protection class: IP65 Weight: 3.8 kg Dimensions: 270 x 330 x 140 mm 51 10 Appendix 10.1 Definition of terms Measuring range The measuring range includes the concentration range in which the unit can safely detect dissolved oxygen. Time constant t90 This is the time the unit needs to respond with a 90% rise of the level to a sudden concentration change. Ambient temperature This is the temperature permitted in the environment where the unit is operated. Sample temperature This is the temperature of the sample where safe dissolved oxygen can be guaranteed. Drift The drift is the systematic change (decrease or increase) of the sensitivity of the measuring electrode. Compensation Within this range, the measuring value is compensated for the parameter. 52 10.2 Scope of supply with accessories kit No. Designation Item No. 1 Digox 6 EC analyser (portable) DG 65.00.00 1 Digox 6 EC accessories kit (portable) DG 65.30.00 1 Bottle with 100ml KCl solution DG 09.41.00 1 Replacement diaphragm DG 50.09.00 1 Sealing ring set Digox 5/6 DG 50.35.00 1 Test tube brush ZZ 19.00.40 1 Measuring cylinder 250ml ZZ 13.00.62 1 DigoxWin software TN 68.50.00 1 Interface cable DG 50.80.09 1 2m hose 5x1.5 mm WW 60.00.90 2 Hose fitting ZZ 55.16.03 1 Charging unit DG 50.31.00 1 Reducing spout ZZ 06.00.16 1 Cleaning powder for electrodes 1 Digox 6 operating manual 1 Test certificate 53 10.3 Spare parts 10.3.1 Analyser block Digox 6 Figure: 10.1 Block parts Digox 6 Figure: 10.2 Sealing rings Digox 6 54 Block parts Digox 6 Figure 10.2 Item Item No. No. Digox 6 sealing rings (O-rings) Figure 10.2 Name Pos. Item No. No. Name. Dimensions 1 DG 94.05.01 1 Calibration block a ZZ 20.00.33 3 O-ring, Viton OR 3,68-1,78 2 DG 94.05.02 1 Counter-electrode F b ZZ 20.00.43 6 O-ring, Viton OR 4,3-2,4 3 DG 94.06.00 1 Calibration electrode K c ZZ 20.00.62 1 O-ring, Viton OR 6,07-1,78 4 DG 94.11.00 1 Contact piece with d ZZ 20.00.63 2 O-ring, Viton OR 6,75-1,78 5 DG 94.05.04 2 Tube coil block e ZZ 20.00.70 2 O-ring, Viton OR 7,52-3,53 6 DG 94.23.11 1 Nozzle f ZZ 20.00.81 1 O-ring, Viton OR 8-2 7 DG 94.05.05 1 Tube coil g ZZ 20.01.01 2 O-ring, Viton OR 10-2 8 DG 94.05.06 2 Plate h ZZ 20.01.21 6 O-ring, Viton OR 12-2 9 DG 50.05.07 1 Reference block i ZZ 20.01.25 5 O-ring, Viton OR 12,42-1,78 10 DG 94.07.00 1 Reference electrode V k ZZ 20.01.52 1 O-ring, Viton OR 15,6-1,78 11 DG 50.25.08 1 Measuring block m TN 21.01.99 4 Sheet gasket 12 DG 94.05.09 1 Counter-electrode G n ZZ 20.00.71 2 O-ring, Viton OR 7,65-1,78 13 DG 94.08.00 1 Measuring electrode o ZZ 20.00.64 2 O-ring, Viton OR 6-1 14 DG 94.10.00 1 Contact piece p XX 04.71.02 1 Safety ring 15 DG 50.09.00 1 Diaphragm DG 5 16 DG 50.25.02 1 Flowmeter block 17 DG 94.25.03 1 Attachment tongue 18 DG 94.25.04 2 Adapter 19 DG 50.05.17 2 Clamping bolt, bottom 20 DG 50.05.18 2 Clamping bolt, top 21 XX 09.34.05 4 Hex nut 22 XX 01.25.06 4 Ring washer 23 DG 94.05.18 4 Pressure piece 24 DG 50.19.00 1 Temperature sensor 25 DG 50.25.40 1 Spindle with flange 26 DG 50.25.30 1 Output 27 DG 50.26.00 1 Flowmeter 28 XX 00.85.06 2 Pan head screws 29 XX 79.85.13 2 Oval head screw borehole 55 10.3.2 Further spare parts Designation Item No. Rechargeable battery DG 65.17.00 Moisture indicator DG 02.00.02 Cable harness DG 50.15.00 If you require further spare parts, please contact our service hotline: +49 30 49 77 69 - 42 10.4 Digox 6 EC unit extension and accessories Designation Item No. Service kit Digox 5/6 EC/K contains all necessary tools and supplies for maintaining the analyser block Electrode removing tool DG 50.91.00 DG 94.05.90 also included in the service kit Digox 5/6 EC/K 25 x 8 screwdriver 05.13.78 also included in the service kit Digox 5/6 EC/ K Euro adapter for charging unit ZZ 58.00.94 UK adapter for charging unit ZZ 58.00.95 US adapter for charging unit ZZ 58.00.96 Australian adapter for charging unit ZZ 58.00.97 Cable for recorder output connection DG 50.80.10 User TouchKey (programmed according to customer) DG 50.80.12 System accessories Touch Memory Set Touch Memory Stick and Measuring point Touch Key (programmed according to customer) Automatic sampling device DG 50.80.14 DG 04.62.00 to take the sample from bottles and cans Bottle-turning device DG 94.48.00 to adjust the phase equilibrium in bottles and cans Total oxygen determination system DG 94.47.10 to calculate the total oxygen in bottles and cans 56 10.5 Menu overview 57 10.6 Terminal assignment Table 10.1: Terminal assignment Circular connector/ socket Sub-D-Socket Function Socket 1 RS 232 / Touch Memory Pin 1 Pin 3 RDO Pin 2 Pin 2 TDO Pin 3 Pin 5 GND Pin 4 Touch Memory System Pin 5 Socket 2 Analog Out / Measuring range Pin 1 Pin 2 Measuring range identification Pin 3 GND Pin 4 0(4)…20mA Pin 1 18VDC Pin 2 GND Pin 3 n.c. Pin 4 n.c. Socket 3 Charger 58 Notes: 59 11 Index A L Accessories .........................................................56 Accessories kit.....................................................53 Ambient temperature .....................................51, 52 Analog output................ quod vide Recorder output Analyser block .....................................................54 Language ............................................................ 48 LCD contrast ....................................................... 48 M Main menu .......................................................... 15 Maintenance ....................................................... 38 Make system settings ......................................... 48 Measurement in beer .......................................... 19 Measurement in wort .......................................... 19 Measuring ........................................................... 14 Measuring electrode ........................................... 38 Measuring point data logger ......................... 29, 30 Measuring principle............................................... 8 Measuring range ........................................... 51, 52 Menu level 2........................................................ 15 Menu level 2 functions ........................................ 47 Menu overview.................................................... 57 Moisture indicator.......................................... 10, 41 B Block parts ...........................................................55 C Calibrating of the flowmeter.................................20 Calibration menu..................................................14 Check Kf factor ....................................................21 Check Ks factor ...................................................24 Checksum............................................................48 Cleaning and disinfection agents.........................28 Clock ....................................................................49 Code ....................................................................50 Code for the 2nd menu level.................................37 Compensation......................................................52 Conditions of the sample .....................................28 Connections...................................................10, 17 Continuous data logger........................................29 Cross-sensibility...................................................19 O Offset .................................................................. 19 Online data logger............................................... 34 Operating elements............................................. 12 P D Practical hints...................................................... 28 Data logger ..........................................................29 Data transmission settings ..................................32 Diaphragm ...........................................................39 DigoxWin .................................................31, 32, 33 Drift ......................................................................52 R Enabling options ..................................................49 Evaluate measuring data.....................................36 Rechargeable battery.......................................... 41 Recorder measuring ranges ............................... 46 Recorder outputs ................................................ 37 Ref max calibration ............................................. 27 Ref min calibration .............................................. 26 Reference calibration .................................... 18, 26 Reference electrode...................................... 38, 40 F S Fault messages ...................................................42 Filling the reference electrode .............................16 Flowmeter ......................................................50, 55 Identification number ...........................................49 Illumination time...................................................48 Interface...............................................................48 Sample temperature ........................................... 52 Scope of supply .................................................. 53 Sealing rings ................................................. 39, 55 Short calibration ............................................ 18, 24 Spare parts ......................................................... 54 Special functions................................................. 46 Status display...................................................... 46 System check...................................................... 50 K T KCl solution..........................................................16 Kf factor ...............................................................21 Ks factor.........................................................22, 38 Taking the unit into service ................................. 16 Technical data..................................................... 51 Temperature sensor............................................ 55 Terminal assignment........................................... 58 Thiedig active calibration .............................. 18, 22 Time constant t90 ........................................... 51, 52 E I 60 Touch-Memory-System .........................................9 Troubleshooting ...................................................42 Unit extensions ................................................... 56 Z U Zero current .................................................. 19, 26 Unit description ......................................................8 61 Dr. Thiedig + Co Prinzenallee 78-79 D-13357 Berlin Phone: +49 30 49 77 69-0 Fax: +49 30 49 77 69-25 Email: [email protected] www.thiedig.com Service-Hotline: (+49) 30 49 77 69-42 62