1
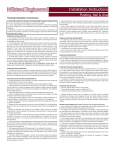
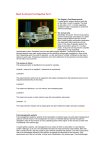
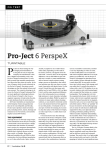
TECHNICAL
Restoration
Tips
Andrew
Atwood
How Deep Do You
Want to Go?
Part Two of an ongoing series
L
ast installment, I discussed preparing your workspace to undertake an extensive restoration. Okay, so now let’s say that
you’ve found your dream car to restore, you have the perfect
place to carry out your project, and all the tools and equipment
you think you’ll need to complete this task. However, you should
not touch the car until you’ve answered the following questions.
Answer these questions first
First, what kind of restoration are you attempting to accomplish? Are you looking for just a clean driver or a 100-point
concours-quality restoration to earn medals? This is a critically
important question because one will cost as much if not more
than the car’s value and potentially take your car off the road for
up to 10 years.
Second, the timeframe in which you have or plan to complete
this project in is also a very important factor in deciding how in
depth the restoration will be. Setting ambitious goals within a very
short timeframe is a recipe for unnecessary stress or frustration.
Third, if this car is to be more of a driver than a show car, are
there any modifications or updates you plan to perform during
the restoration? The answer to this question will determine what
other departures you will take from maintaining originality.
These questions will help you decide how much of the car you
take apart at the outset, and also what will be carefully preserved
and rebuilt and what will be tossed and replaced. I can’t stress
enough the importance of the answers to these questions. Too
many times I have seen vehicles torn down to their bare frames
only to wind up lying in pieces in the back of the garage or yard,
never again to grace the road, and eventually ending up being
sold off as scrap or spare parts. How may times do you see
partially restored cars for sale with tens of thousands of dollars
invested in them only to be offered for sale for a fraction of the
original investment?
You don’t need to be one of those examples if you plan
carefully and responsibly. What I mean by that is know your
limits in what you can do personally and also how much money
you plan to spend on the car. With everything I’ve talked about
and warned about, I’m not trying to scare any one away from
restoring a car. On the other hand, I’m hoping more people will
do their own restorations correctly with this advice. As G.I. Joe
said, “Knowing is half the battle.”
We recently retrieved this 1949 170 cabriolet from the storage container in which it had
been stored for more than 20 years. We’ve decided to do as little restoration as possible.
careful amateur with enough time and space can handle these
projects. This level of restoration can also include minor cleanup
and detailing of the engine bay and interior, which will require
some additional sweat and elbow grease.
Unless you are well versed in this area, I would leave the
bodywork and paint to the professionals for several reasons. First,
it’s hard to hide bad bodywork; even with the best paint job, the
car can look like a piece of corrugated steel if not done correctly.
Second, a good paint job requires a very sterile environment to
prevent bugs and other debris from permanently embalming
themselves into the fresh paint. Third, automotive painting can no
longer be performed without meeting significant environmental
regulations in many locales.
Check around with a few shops before you start to get some
ideas of pricing and ask them to show you completed examples
of what your finished car will look like. Based on my experience,
here’s how I’d break the costs down to refresh an average 1960s
or ’70s Mercedes-Benz sedan or roadster. Assuming the car owner does all the disassembly labor – with exception of the body
and paint work – you can expect to pay somewhere in the area
of $2,000 to $3,000 for a Maaco-quality paint job and between
$9,000 and $10,000 or more at a premium paint shop that specializes in restorations. For the rest of the refresh job, rubber kits will
cost anywhere from $900 to $1,500 and chrome repair can go for
$900 to $3,000, depending on how much chrome and bright work
needs repairing. If the interior needs to be cosmetically refreshed
as well, this can add another $2,000 to $3,000. As you can see, it
adds up quickly; but planning ahead will help prevent disasters
and perhaps even save your marriage.
Levels of restoration and costs
With your answers to these questions in mind, I believe there
are three basic types of restorations.
The first and easiest restoration project is the refresh, which
is primarily cosmetic and does not require any major surgery or
heavy mechanical work. It consists of removing all the chrome
and bright work for paint and bodywork, having damaged
chrome or bright work repaired, and then replacing all the rubber
weather stripping. Aside from the paint and metal work, any
68
The Star ®
MARCH-APRIL 2014
Aside from the upholstery, the rest of the 170 (above) can be brought back to life
without extensive work. The wood’s in good shape as are the gauges and controls.
TECHNICAL
This blue W180 220S is an example of what can be done at a level-two restoration without taking the car to pieces. We’re just starting on the red W112 300SE example above.
Note that each of these cars is driven two or three times a week while we’re continuing to improve their condition, a strategy I always recommend to owners when appropriate.
The second, more in-depth restoration project includes everything above with the addition of removing the engine and transmission assemblies and overhauling or refreshing them, as well as
making some suspension repairs. Again, even with the car owner
doing the labor and only parts costs are added in, the additional
work can push a restoration project far beyond typical recreational budgets unless carried out over three to five years or more.
Engine and transmission rebuilds can easily cost $10,000 –
even more in the case of an M189 or M100 engine – and if the
fuel system needs a rebuild, you can add $1,000 to $2,000 more.
With these additions, you can be looking at $20,000 to $35,000 in
costs. Nevertheless, this might be a feasible option if the project
is budgeted and carried out over several years.
The third option is the complete restoration, often referred
to as a “frame-up,” “bare metal,” or “complete nut-and-bolt”
restoration. As these project terms imply, everything is stripped
from the body down to the last nut and bolt and shard of paint
and either replaced or completely restored. A project like this can
easily be as high as $40,000 to $60,000, and there are actually
few practical limits on the cost. I recently saw a restored Pagoda
on which the owner spent nearly $200,000. Let me stress again –
these costs are just guesstimates and they don’t include outside
labor costs if you have to pay someone to do the teardown and
assembly. The more effort you put into planning, the better your
chances of being successful.
What am I going to do with my restoration?
To answer these questions regarding my Heckflosse project
that I described in the last installment, I started with my love of
the marque and model. I have no problem spending more on
the car than it’s worth because I don’t plan to sell it for a profit.
Therefore, what I would do to the car and how far I would tear
it down for restoration was only limited by my imagination – my
wallet limited only the rate at which I could complete the project.
In addition to wanting a car that was perfect in my eyes – one
that I could take to shows for a year and display my mechanical
prowess – I wanted a reliable driver that my wife and I could enjoy
on cross-country trips for many years to come. This required some
creative thinking on my part. First, the W112s aren’t known for their
outstanding reliability and spare parts are difficult to find if they
break down on a road trip. This gave my restoration a different
direction and set of engineering goals than a 100-point concours
restoration to original specifications would have done, so I had to
plan accordingly.
My end goal was to have a very presentable car to take to
events, but not to enter in concours judging, that was as reliable
to drive as a W126 from the mid-1980s. I knew the air suspensions
on the W112s are notoriously problematic and very expensive to
restore, repair and maintain, so looking for a reliable option has led
me to a couple of after-market solutions. Second, the wonderful
but also temperamental and expensive M189 engine and K4
transmission were to be replaced with a workhorse of an enginetrans assembly in the way of a M117 and a 722.3 combination.
I’ll explain my strategies to achieve both goals in depth
in later issues, so stay tuned. Now that I had my overall plans
defined, I could lay out my tasks accordingly, starting with a
complete teardown. In the next article, I will start explaining how
I accomplished my objectives.
On the left, this was the “before” shot of the 180 engine compartment. By removing the ancillary components, cleaning everything, then replacing wires and hoses, we can
take the engine to the condition shown in the center. In contrast, the engine at right is from a W111 280SE, which has been removed and rebuilt in a level-two restoration.
The Star ®
MARCH-APRIL 2014
69
TECHNIC AL
Restoration
Project
Andrew
Atwood
Paint & Body Work
Part Five of an ongoing series
A
t the end of part four, my Heckflosse project car once again
had solid quarter panels and rockers; however, the rest
of the car still needed some serious massaging to get it
back to Mercedes-Benz standards – and mine – before we
started back up the reassembly hill.
I did farm out the next step – body-panel work and paint – to
another professional shop. I have done this work many times over
the past 30 years and I’m proud of the work I can do – and accomplished – on my last creation, a 1966 Chevy Pro Street pickup truck.
But after painting the 22-foot-long monster three times to get the
paint to lay correctly and fix my screw-ups, my OCD finally got the
better of me and I conceded that next time I would pay someone to
do this part.
With all the new paint materials and local environmental
restrictions these days, there are other good reasons to subcontract
paint and bodywork to a good professional shop. I’m not trying to
discourage anyone from attempting these tasks, but it’s important
to know your limitations and where your energies are best spent.
Deciding who should do the work and how much to spend
is entirely up to your budget and the desired end product, but
the fact is that there are no good bargain paint jobs that will last,
period. This is because 90 percent of the quality and longevity of a
paint job is in the bodywork and prep work. The best paint job in
the world will look like crap if the prep work is not done correctly.
Conversely, a bad paint job can usually be fixed if the bodywork was
done correctly.
There are several successful ways to select a good body shop.
First, when you are given a quote for body and paint, make sure
the shop shows you an actual example of its work on another car
before you give the go-ahead. That way they can’t say you got what
you paid for because they showed you an example. Secondly, ask
how specific repairs will be performed and drop in frequently to see
the different stages of work to ensure, for example, that damaged
panels were actually repaired rather than simply covered with body
filler and paint.
With all said, the more prep work you put into the car before you
take it to a professional, the less expensive the paint job will be. For
instance, if you remove chrome and trim as well as rubber seals and
mechanicals where you can before delivering the car, you’ll save
money and practically guarantee that critical parts aren’t lost during
the work. Moreover, you’ll have the satisfaction of being able to say,
“I did that” instead of “I paid someone to do that” when you start
showing the car. I was very fortunate that the body shop I chose
let me help with sanding, cleaning and prep work, not so much to
reduce cost – I was told they charge more when the owner helps –
but because I wanted to be part of every process of the restoration.
I chose Scott’s Coach Works to massage the body back into
shape. These guys do all of the paintwork for Scottsdale MercedesBenz and Barrett-Jackson Auction, so they know what they’re doing.
COUNTERCLOCKWISE FROM TOP LEFT: My pride and joy is painted, reassembled
and (finally) back at my shop. For paint color, I chose DB 162 Blue-Grey – a
classic hue which changes from grey to blue, depending on the lighting. I removed
chrome trim, rubber and mechanical components before delivering the car to the
body shop. Doors removed from the vehicle with prepaint preparation underway.
The tedious part: While off the car, all panels were sprayed with filler primer,
dusted with guide coating to identify high spots, then block sanded. This process
was repeated many times over many hours until the surface was flawless. Good
as the day it was made: front quarter panel after repair and filler primer.
66
The Star ®
SEPTEMBER–OCTOBER 2014
TECHNIC AL
... 90 percent of
the quality and
longevity of a
paint job is in
the bodywork
and prep work.
The Star ®
SEPTEMBER–OCTOBER 2014
67
TECHNIC AL
CLOCKWISE FROM TOP LEFT: Front quarter panels, hood and trunk in the spray booth. The painted rolling chassis. Painted and baked quarter panels before being reunited
with the chassis. The trunk needed some work! Repaired, masked and sprayed trunk interior. Heckflosse comes home, and now it’s time for the next step in the restoration.
First, the body guy spent two months hand-beating the
panels with them off the car, heating them with a torch and then
shrinking the metal back into the desired shape by quenching it
with cold water. This is a lot harder than the typical approach of a
collision repair, where the metal is pulled out, roughly smoothed,
then covered with a thick layer of body filler that is smoothed into
correct contours. It represents 90 percent of the finishing work.
Next, a very thin layer (1/16 inch to 3/32 inch) of skim coat body
filler was spread evenly over the entire body panel and then block
sanded down until bare metal was again exposed. Then came the
tedious part: While off the car, all panels were sprayed with filler
primer, dusted with guide coating to identify high spots, then
block sanded. This process was repeated many times over many
hours until the surface was flawless.
Finally, the last block-sanding step was performed with the
panels on the car to make sure that all panels matched and lined
up. This last step is critical because it ensures that adjacent panels
have the same curvature and smooth seamless flow from the front
to rear of the car. This also allowed us to correct any inconsistency
in the panel gaps by filing and sanding them even and straight.
With panel sanding and filling completed, all the panels were
removed again, followed by … yes, more sanding. This time it
was in the doorjambs and all the other little nooks and crannies
in which dirt and crud like to hide. But we still weren’t ready for
paint. Nope, now each individual panel was scrutinized for even
68
The Star ®
SEPTEMBER–OCTOBER 2014
the smallest pinhole – these will show up 10 times worse after
the paint is laid down. A product called spot filler was applied
with a razor blade to touch up these little imperfections. Now
it was time to paint. I know spending all this time (and money)
sounds extreme – particularly because the painting itself usually
only takes one or two days. But the process not only guarantees a
perfectly straight and flawless body, but also a paint job that will
surpass even Mercedes-Benz for smoothness and longevity.
Choosing the paint color is a very personal decision that needs
to be researched and considered carefully – the wrong choice
is painful and expensive to correct. For a prospective concours
entrant, it’s easy – just consult the build records for the paint
shade with which the car was originally painted.
However, I had decided I wanted my car to be similar to, if not
exactly like, my original grey car from Australia, which wasn’t easy
because Mercedes has more than 30 different shades of grey to
choose from. I also wanted to keep with my theme of a car that
would look original at first glance, so I selected from the 1963
Mercedes-Benz color chart. My eyes kept returning to one color
every time – DB 162 Blue-Grey – a color that I think has a classic
and elegant look, as well as the property of changing from grey to
blue, depending on the lighting.
If you are selecting a color from paint charts, consider this
important tip: Have the shop paint a sample sheet-metal piece at
least 12 inches square so that you can see the paint color in the
TBUYERS
E C H N IGUIDE
CAL
Restoration
Project
Andrew
Atwood
Suspension Restoration
Part Six of an ongoing series
W
hile my Heckflosse (or Finback, if you will) was at the
paint and body shop as discussed in parts four and
five of this series, I used that time to decide how I was
going to restore the suspension. I was able to do this
by salvaging the front subframe assembly and the rear differential from my donor W110 – already having relinquished one of
its doors and front-left fender to the cause – and installed them
under my W112 restoration project. This got the body and chassis
back up off the ground, making it easier to roll around during
body and paintwork and allowed me to completely restore the
original suspension from the W112.
Suspension restoration
Disassembling and overhauling the front suspension on an
older Mercedes can be accomplished by anyone with general
mechanical knowledge, but working on the rear suspension is
different because of the swing-axle differential. Removing and
tearing down the suspension requires special tools and specific
disassembly and reassembly procedures. If these directions are
not followed, you can and will destroy the differential, so make
sure that you have a service manual and some mechanical confidence before attempting the task – or find someone who does.
Manuals are available online and some of them can be obtained
on DVDs. Having worked on these vehicles for more than 28 years,
I have accumulated a lot of knowledge and literature – even some
manuals on microfiche – but that’s a topic for a different day.
Carefully following the workshop procedures, I disassembled
all components down to the bare parts and sent them out for
powder coating.
I chose to have the suspension parts powder coated rather
than painting them by hand for many good reasons. In particular,
the powder coating company would sandblast all individual parts,
which meant I didn’t have to clean them. More importantly, the
powder-coating process creates a very hard and durable finish
that is resistant to almost all liquids, flying rocks and debris. This
process is relatively inexpensive and also hides most of the imperfections that would be visible had I painted them with a rattle can.
Finally, taking into account my time and the cost of materials, it
was simply more cost-effective.
I told the shop to use semi-gloss black, which would be
as close to the factory finish as possible – and a preference of
concours judges. I have seen some restorations with glossy or
flat-black colored suspensions, which also look good, but you can
choose what you like. There are several precautions to take when
having automotive parts powder coated. In particular, make sure
all machined surfaces and threaded holes are covered and taped
to prevent them from being painted. Also, ensure that stamped
and cast-identification information on the parts isn’t obliterated
when applying a coating that’s too thick. If that happens, you’ll
spend hours scraping and grinding to remove the paint – at which
point you’ll discover just how durable the powder coating is.
Because I have rebuilt many front suspensions and differentials, I did not take pictures during the disassembly process, but
RIGHT: My finished front suspension assembled on the bench, including airbags
and cans. I chose to have suspension components powder-coated for durability.
62
The Star ®
NOVEMBER–DECEMBER 2014
TECHNIC AL
I wanted to make the
car more reliable so it
could be driven more
frequently and with
less maintenance.
.
The Star ®
NOVEMBER–DECEMBER 2014
63
TECHNIC AL
CLOCKWISE FROM TOP LEFT: After researching and pricing the parts needed to get the factory suspension working, I decided instead to install a modern four-corner
suspension system, which uses electronic ride-control sensors at each corner of the car similar to the yaw and height sensors used on 2014 Mercedes models. This
modern system helps keep the car perfectly level, improving ride and handling over the original system. As a first step, I had to fabricate new air bag cans so that none
of the original Mercedes parts were altered. A completed airbag/airbag can assembly. Detail of the completed front suspension with airbag system installed.
I highly recommend that you do if this is your first time. It is very
easy to forget which way a certain adjuster bolt goes or on which
side a washer or seal is supposed to be. This can lead to a big
headache when you’re reassembling the system.
Replacement parts
As you tear the suspension systems down to their individual
components, you will usually find that the kingpin bushings and
upper and lower outer control-arm bushings have play in them,
which will require replacement. Replacement bushings are readily
available in the aftermarket or your local Mercedes-Benz parts
department, and they are reasonably priced; don’t hesitate to
replace them. You will appreciate the like-new tight feeling in a
suspension that does not rattle or run away with every rut and
crack in the road.
As you disassemble the front suspension, a good rule of thumb
is to measure and note the configuration of any adjustable component so that it can be reassembled in the same configuration as
the original, if possible. If not, center the adjuster when installing
so that if you drive the car to an alignment shop, it won’t wander
all over the road. Moreover, the alignment shop will have a good
base from which to start the adjustments.
For differential and rear suspension, I followed the same
process for disassembly and powder coating as for the front,
except for the differential assembly. This required meticulous
attention because it’s a very rare-optioned 3.91 limited-slip differential. Following the workshop manual, I disassembled the third
64
The Star ®
NOVEMBER–DECEMBER 2014
member, as it’s called, and measured the limited-slip clutch packs.
Fortunately they were still well within spec, which was good as
these are very expensive to replace.
When it came to the differential bearings, I decided to replace
them to prevent any kind of differential whine after reassembly,
but finding replacements was a bit tough. Mercedes-Benz does
offer new ones, but the cost was creeping into the $2,500 range
just for bearings alone. I researched the original FAG bearing
numbers and found that at least bearings for the axle and side
differential bearing were available with the same specifications
through a bearing supply house. Sourcing parts from outside
generic suppliers is sometimes a viable option, but care must be
taken when using non-factory parts. For example, the original
bearings must be measured down to the last .01mm to ensure
not only correct fit, but correct operation. This may sound a bit
extreme, but it can make the difference between your rebuild
lasting 50 years or failing in 50 days. I will always be the first to use
a factory part over an aftermarket part unless the aftermarket supplier also offers factory parts as well, and recommend you take the
same care in your restoration.
Considering air suspension
With the suspension components powder coated and
assembled, I turned my attention to the spring portion of the
suspension – I absolutely love the way the W112 and W109 chassis
cars ride and handle – but the air suspension’s reliability leaves a
lot to be desired. After pricing all parts needed to get the factory
TECHNIC AL
CLOCKWISE FROM TOP LEFT: My rebuilt W112 swing-axle differential. Removing and tearing down one of these requires great care, with special tools and specific disassembly and reassembly procedures. A rear airbag/air can assembly installed. View of a rear suspension stabilizer. The completed rear suspension. The vertical yellow
elements are the rear anti-sway bar links. I am very pleased with my aftermarket air suspension system. The only modification I had to make to the Heckflosse was to drill
two one-eighth-inch mounting holes in the body and subframe for each sensor. I have all original parts and can return the suspension to factory specification at any time.
suspension working, I was looking at $1,200 just in airbags, not to
mention $2,500 in rebuilt valves – and I would still be limited to
the operating quirks of that era’s system.
As noted at the outset of this project, I wanted to make the
car more reliable so it could be driven more frequently with less
maintenance. Researching aftermarket air systems, I found one
called AccuAir that intrigued me. Not only would it eliminate all
mechanical ride-control valves, but it would give me a modern
four-corner controlled air-suspension system as opposed to the
original, whereby the front was corner-to-corner control but both
rear corners were controlled as one. A four-corner suspension
system helps keep the car perfectly level, which improves ride and
handling. This system uses electronic ride-control sensors on each
corner of the car, similar to the yaw and height sensors used on the
2014 Mercedes models. These sensors read each corner’s height
and relay that information to the electronic ride-control valve,
which will then add or remove air from each air bag individually.
This translates to better handling, maintaining the car’s level while
cornering. It also allows me to preprogram in three different ride
heights that are accessed by the touch of a button – just like the
new cars. All this with almost no maintenance – for me it was a nobrainer. Now again, there are purists out there who will call what
I’m doing sacrilegious, so let me stress that this is my solution for
my car – don’t send me hate mail!
To install the AccuAir kit into my car, I had to fabricate new
airbag cans so that none of the original Mercedes parts were
harmed in this procedure; this means I can return my car’s
suspension back to stock at any time – if I want. After fabricating
the airbag cans, I replaced the air lines utilizing the same material as those installed in semi-trailer trucks. This guaranteed good
airflow and, more importantly, longevity and durability. As for
mounting the ride-height sensors, this was the only part of the
air-suspension system that required me to modify the body; I had
to drill two one-eighth-inch holes for each sensor to mount them
to the body and subframe. I then ran the wiring for these along the
factory body-wiring harness under the inner door sills.
The next item to consider was where to place the air tank,
control valve and compressors. I could have used the original tank,
but that would mean drilling into and modifying it, which I didn’t
want to do. Instead, I installed the new components as a package
assembly under the parcel shelf in the trunk, which didn’t take up
any trunk-floor space and kept it out of the way of luggage. The
system also stays clean and is easily serviceable, should the need
arise. All these installations took approximately 18 to 20 hours of
work – not bad for a complete suspension modification. The cost
to install one of these kits is about par with completely restoring
the stock system, but without any of the drawbacks. There are
cheaper systems on the market, but none are as good as the one I
installed; nor would they have given me the four-corner control of
the AccuAir system.
And, nearly 12 months after installation, the system works
exactly as I had hoped and has not dropped once. So, how’s that
for reliable?
Andrew Atwood owns Atwood European in Phoenix, Arizona
The Star ®
NOVEMBER–DECEMBER 2014
65