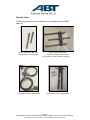
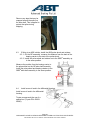
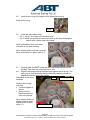
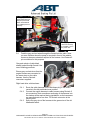
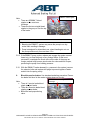
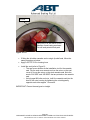
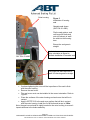
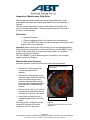
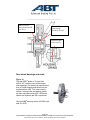
1
MAN-006 INSTALLATION & SERVICE MANUAL FOR FITMENT OF SIBS® ONTO TOYOTA HILUX VEHICLES Change Revision Issue Revision Issue Date Comments Author Approved 0 16-11-07 Initial Release SM AM Page 1 MAN-006 REV-0 INSTALLATION & SERVICING OF SIBS® ON TOYOTA HILUX VEHICLES UNCONTROLLED COPY IF PRINTED. CHECK WEBSITE FOR LATEST VERSION About This Manual Vehicle Applications, Web Page, Terminology, Contact Information .................4 Important Information Installation of SIBS®, Safety Labels, Storage ....................................................5 Introduction Introduction to SIBS® ..........................................................................................6 Special Tools Special Tools Required During Installation.........................................................8 Inspection and Pre-Installation Check Suggestions and Preparation ...........................................................................10 SIBS® Front Brake Assembly : Drawing, Exploded View ...............................11 Parts List........................................................12 ® SIBS Rear Brake Assembly : Drawing, Exploded View................................14 Parts List........................................................15 SIBS® Key Hydraulic and Electrical Components ............................................17 Installation Procedures Installation Sequence .......................................................................................18 Installation of SIBS® Brakes - Front..................................................................19 Rear ..................................................................23 TM Installation of EMMA System ........................................................................29 EMMATM System Electrical Schematic .............................................................30 Check EMMATM System Operation ..................................................................36 Bleed EMMATM System ....................................................................................37 Bleed Service Brakes........................................................................................37 Adjustment Of EMMATM Relief Valve ...............................................................38 Adjustment Of Load Proportioning Valve .........................................................38 Servicing Procedures Service Intervals ..............................................................................................39 Recommended Parts Holding ..........................................................................40 Torque of Critical Bolts and Nuts .....................................................................41 Fluids Used .......................................................................................................42 Handling and Disposal of SIBS® Fluid .............................................................43 Replacing SIBS® Fluid, Fluid Volumes ............................................................43 Changing Grease Felt Seal ..............................................................................44 Changing Housing Seal ....................................................................................45 Page 2 MAN-006 REV-0 INSTALLATION & SERVICING OF SIBS® ON TOYOTA HILUX VEHICLES UNCONTROLLED COPY IF PRINTED. CHECK WEBSITE FOR LATEST VERSION Inspection / Maintenance Strip Down Procedure .........................................................................................................48 Detailed Parts Inspection Brake Housings.................................................................................................50 Brake Pads and Rotor, Rotor Carrier ...............................................................51 Wheel Bearings and Seals ...............................................................................52 EMMATM Park Brake .........................................................................................57 EMMATM Filter...................................................................................................59 SIBS® / EMMATM Troubleshooting Guide ..........................................................................................................................61 Material Safety Data Sheet ..........................................................................................................................64 Service History Record Sheet ..........................................................................................................................68 Notes ..........................................................................................................................69 Appendix ..........................................................................................................................70 Page 3 MAN-006 REV-0 INSTALLATION & SERVICING OF SIBS® ON TOYOTA HILUX VEHICLES UNCONTROLLED COPY IF PRINTED. CHECK WEBSITE FOR LATEST VERSION About this Manual This manual applies to the Sealed Integrated Braking System (SIBS®) for TOYOTA HILUX vehicles. It details how to fit the SIBS® correctly. While every effort has been made to address all the issues involved, please advise Advanced Braking Technology of any errors or omissions, and suggestions to improve the manual. Vehicle Applications: KUN1* Series – 3L Diesel (Rear brakes only) KUN2* Series – 3L Diesel (Full SIBS® system) KUN3* Series – 3L Diesel (Full SIBS® system) GGN2* Series – 4L Petrol (Full SIBS® system) All variants must be fitted with 16” rims (Rim 6.00JJ x 16 Steel, Toyota P/N 42611-OK250) Web page: The most up to date version of the Manual can be downloaded from the web page: www.advancedbraking.com On the right hand side, click on Installation Manual. You may be asked for a username and password: Username: SIBS Password: resellers (note: case-sensitive). Technical Bulletins relevant to the system are also posted in this area. Terminology: SIBS® EMMA™ SIBS® Fluid Service Brake Park Brake Emergency Brake PECB Sealed Integrated Braking System Electronically Modulated Mechanically Applied Specially formulated cooling fluid used in SIBS® brakes Brakes applied when driving Brakes applied when vehicle is parked Brakes applied in an emergency Park/Emergency Control Box Contact information: Advanced Braking Pty Ltd Unit 1, 3 McDonald Street West Osborne Park W.A. 6017 AUSTRALIA Postal address: PO BOX 1177, Osborne Park, WA 6916 Email: [email protected] Web: www.advancedbraking.com Phone: +61 (0)8 9273 4800 Fax: +61 (0)8 9201 9986 Page 4 MAN-006 REV-0 INSTALLATION & SERVICING OF SIBS® ON TOYOTA HILUX VEHICLES UNCONTROLLED COPY IF PRINTED. CHECK WEBSITE FOR LATEST VERSION Important Information Ownership of SIBS® The SIBS® Patent and Trademarks are owned by Advanced Braking Technology Ltd. Manual Information This manual has been prepared to assist customers, maintenance personnel and operators of SIBS®. It should be read thoroughly and understood to ensure that the product is installed, utilised and maintained properly. This manual provides instructions for the retrofitting, installation, service and maintenance for a SIBS® system in a Toyota HILUX (vehicle application as detailed above). All information contained in this manual is based on the latest SIBS® product information available at the time of publication. Advanced Braking Technology Ltd reserves the right to change the manual at any time without prior notice. This manual should be read in conjunction with the appropriate Toyota chassis manual for further information on removal of any standard Toyota components. Advanced Braking Technology welcomes any queries or feedback on the contents of this manual. Installation of SIBS® SIBS® must be installed by a qualified tradesperson who has undergone the required training by ABT and has been licensed by ABT to do so. The silica gel sachets must be removed from the brake assemblies prior to installation. Safety Labels Advanced Braking Technology provides customers with Safety Labels that are required to be placed prominently in any vehicle fitted with SIBS®. Storage of SIBS® All SIBS® units are protected against corrosion and may be stored for up to 3 months before installation. Plugs are fitted in the brake fluid inlet ports of housings – these should be kept in place during storage or shipping to prevent corrosion. Any SIBS® that remains unfitted for a period longer than 3 months must be inspected thoroughly before use. Page 5 MAN-006 REV-0 INSTALLATION & SERVICING OF SIBS® ON TOYOTA HILUX VEHICLES UNCONTROLLED COPY IF PRINTED. CHECK WEBSITE FOR LATEST VERSION Introduction Figure 1 Exploded assembly diagram of a typical rear SIBS® brake. Your Sealed Integrated Braking System (SIBS®) shown above as exploded view in figure 1, is a unique new product leading the way in motion control technology. SIBS® is an enclosed single rotor high-speed disc brake. It provides greater reliability in a compact enclosed package. SIBS® design and development is primarily concerned with: • Safety • Advanced Technology • Simplicity A SIBS® is simple to install, simple to operate and increases reliability significantly. It utilizes conventional actuation and can be applied to any rotary equipment, large or small, industrial or automotive, on and off road. A SIBS® incorporates a service brake, a park brake and an emergency brake into a single brake. It is an Australian invention that is patented worldwide. It is the only brake in the world that is able to perform consistently every time, regardless of its environment, while requiring minimal maintenance throughout its life under the most demanding braking applications. A SIBS® set comprises four individual brakes. Each fully sealed brake consists of a sliding rotor, brake pads and a small quantity of specially formulated SIBS® fluid. Because it is fully sealed, there is no ingress of foreign substances, and brake debris is not released into the atmosphere. Page 6 MAN-006 REV-0 INSTALLATION & SERVICING OF SIBS® ON TOYOTA HILUX VEHICLES UNCONTROLLED COPY IF PRINTED. CHECK WEBSITE FOR LATEST VERSION Both front assemblies provide service braking only. The rear assemblies provide service brake, EMMA™ park brake and emergency brake. All the service pistons are actuated by a brake master cylinder; the EMMA™ pistons are applied by disc springs and released by hydraulic pressure from a standalone pump unit. This system is referred to as an Electronically Modulated, Mechanically Applied (EMMA™ fail safe braking mechanism) system. Page 7 MAN-006 REV-0 INSTALLATION & SERVICING OF SIBS® ON TOYOTA HILUX VEHICLES UNCONTROLLED COPY IF PRINTED. CHECK WEBSITE FOR LATEST VERSION Special Tools The following items shown are required for the installation of a full SIBS® brake set. Dowel / Guide Pins –M10 x 1.5 (Manufacture From Long Bolts) Master Cylinder Setup Tool (Toyota Part Number: 09737-00013) (Only required if master cylinder is replaced) LSPV Gauge Set (Toyota Part Number: 09709-29018) Nutserts & Insertion Tool (Textron Part Number: 39006-28035) Page 8 MAN-006 REV-0 INSTALLATION & SERVICING OF SIBS® ON TOYOTA HILUX VEHICLES UNCONTROLLED COPY IF PRINTED. CHECK WEBSITE FOR LATEST VERSION Vacuum Pressure Gauge Other tools may be required during assembly and disassembly of the brake units. Note: it may also be necessary to manufacture other spacers for pressing bearings, seals and locking collars. Toyota rear axle shaft special tool. Bearing puller Toyota P/N: 09521-25011 Toyota P/N: 09710-30021 Page 9 MAN-006 REV-0 INSTALLATION & SERVICING OF SIBS® ON TOYOTA HILUX VEHICLES UNCONTROLLED COPY IF PRINTED. CHECK WEBSITE FOR LATEST VERSION Inspection and Pre-Installation Check Remove the parts from their packaging and carefully check that the kit contains all the parts listed on the delivery document. Familiarize yourself with each part and learn where it goes. Keep the parts clean at all times. WARNING A SIBS® unit must not be contaminated with any external matter that may adversely affect its operation and reliability Suggestions: • Inspect each brake and supplied items against the packing list included in the shipment. • Ensure all items are included as described. • Ensure all components remain in their original packaging until required for assembly. • Thoroughly read the Service Manual. Familiarize yourself with the tools required and prepare them for use; familiarize yourself with the parts of the brake and the process required for fitting each brake and control system. • Ensure complete cleanliness of all brake components and the working environment around the vehicle. • Ensure no contamination of the brake assemblies occurs during installation. • Follow the points in the manual as described; if you are not sure – check the Manual. • Place each brake close to the vehicle adjacent to the axle where the brake is to be fitted, ensuring that they cannot by contaminated by any foreign material. Preparation Make sure all the tools, equipment and brake components are readily available. Before starting installation, check that: 1. the battery is disconnected 2. the vehicle is standing safely on a hoist 3. the original Toyota brakes have been removed (refer to Toyota manual): a. remove rear axle shaft assemblies b. if fitting fronts, remove the front steering knuckle assemblies 4. the handbrake cable and lever have been removed 5. the required amount of SIBS® fluid is available 6. an empty drain pan is available Page 10 MAN-006 REV-0 INSTALLATION & SERVICING OF SIBS® ON TOYOTA HILUX VEHICLES UNCONTROLLED COPY IF PRINTED. CHECK WEBSITE FOR LATEST VERSION GREASE NIPPLE 15-1560 DUST CAP 42-9017 V-SEAL SUPPORT 42-2020 BOLT 01-3078 BOLT 01-3302 WASHER 01-3158 FELT SEAL 42-2045 SPRING WASHER 01-3303 HOUSING SEAL 01-4083 SEAL COVER 42-2004 HOUSING BOLT 01-3220 BRAKE PAD - CW 24-2850 ROTOR 42-2002 ROTOR CARRIER 42-2011 BRAKE PAD - ACW 24-2860 (42-9031 FRONT HUB KUN3*) FRONT HUB KUN2* 42-9009 FRONT OUTER HOUSING LH 42-2023 (42-2022 FRONT OUTER HOUSING RH) SIBS FOR HILUX BRAKE ASSY FRONT DISC BOLT 01-3206 DOWEL PIN 15-3050 BOLT 01-3200 O-RING 01-2102 INNER HOUSING LH 42-2009 (42-2010 INNER HOUSING RH) MOUNTING BOLT (MACHINED) 42-2021 DATE 08/11/2007 DRG. NO. ADAPTED FROM PART No 42-0004 THIS DOCUMENT REMAINS THE PROPERTY OF ADVANCED BRAKING TECHNOLOGY Pty Ltd AND MAY NOT BE COPIED OR REPRODUCED IN WHOLE OR PART, OR COMMUNICATED TO OTHER PARTIES WITHOUT THE PERMISSION OF ADVANCED BRAKING TECHNOLOGY Pty Ltd @ 2007 PROPRIETARY DOCUMENT PR-42-0004-0 SPACER KUN2* 42-9036 (42-9028 HUB ADJUSTING NUT KUN3*) DRAIN PLUG 15-1341 BREATHER BARB 15-3021 SPACER 42-9004 (42-9020 ABS SENSOR FRONT) HUB DUST SEAL 42-9037 FILL PLUG 15-1330 NOTE: FRONT LEFT HAND ASSEMBLY SHOWN RIGHT HAND ASSEMBLY IS MIRROR IMAGE SERVICE PISTON 42-2013 O-RING (HOUSING) 15-1080 O-RING (PRIMARY) 01-2099 SEAL CARRIER 42-2012 WHEEL STUD 42-2014 SHAFT SEAL 01-4073 O-RING (WIPER) 01-2085 BACKUP WASHER 01-4076 BLEED NIPPLE 15-1151 BEARING ASSEMBLY 42-9012 (42-9032 KNUCKLE RH) KNUCKLE LH 42-9033 Parts list – SIBS® front brake assembly To suit Hilux vehicles with and without ABS. Part number 42-9036 42-9028 42-9037 42-9032 42-9033 42-9008 42-9018 42-9017 42-9012 Description Spacer KUN2* Hub adjusting nut KUN3* Hub dust seal Knuckle RH Knuckle LH Knuckle RH – ABS Knuckle LH - ABS Dust cap Bearing assembly 42-9009 42-9031 42-9004 42-9020 42-2045 42-2023 42-2022 42-2021 42-2020 42-2014 42-2013 42-2012 42-2011 42-2009 42-2010 42-2004 42-2002 24-2860 24-2850 15-3050 15-3021 15-1560 15-1341 15-1331 15-1151 15-1080 01-4083 01-4076 01-4073 01-3303 01-3302 Hub front – KUN2* Hub front – KUN3* Spacer ABS sensor front Felt seal Front outer housing LH Front outer housing RH Mounting bolt (machined) V-seal support Wheel stud Service piston Seal carrier Rotor carrier Inner housing LH Inner housing RH Seal cover Rotor Brake pad – ACW Brake pad – CW Dowel pin Breather barb Grease nipple Drain plug Fill plug Bleed nipple O-ring (Housing) Housing seal Back up washer Shaft seal Spring washer Bolt Qty 1 Comment OE part 1 OE part Manufactured from OE part 1 1 1 1 OE part Manufactured from OE part Manufactured from OE part OE part 1 1 Manufactured Manufactured 4 1 6 4 1 1 1 Manufactured Manufactured Manufactured Manufactured Manufactured Manufactured Manufactured 1 1 2 2 2 1 1 1 1 1 1 1 4 1 3 3 Manufactured Manufactured Manufactured Manufactured Inner housing 1 Service piston Felt seal cover Felt seal cover Page 12 MAN-006 REV-0 INSTALLATION & SERVICING OF SIBS® ON TOYOTA HILUX VEHICLES UNCONTROLLED COPY IF PRINTED. CHECK WEBSITE FOR LATEST VERSION 01-3220 01-3206 01-3200 01-3158 01-3078 01-2102 Housing bolt Bolt Bolt Washer Bolt O-ring 12 2 2 8 8 1 01-2099 01-2085 O-ring (primary) O-ring (wiper) 4 4 Rotor carrier Seal carrier Seal cover Seal cover Inner housing mounting Service piston Service piston Page 13 MAN-006 REV-0 INSTALLATION & SERVICING OF SIBS® ON TOYOTA HILUX VEHICLES UNCONTROLLED COPY IF PRINTED. CHECK WEBSITE FOR LATEST VERSION BOLT 01-3206 GREASE CUP 42-9017 GREASE NIPPLE 15-1560 BOLT 01-3302 V-SEAL SUPPORT 42-2020 SPRING WASHER 01-3303 FELT SEAL 42-2045 SEAL COVER 42-2004 BOLT 01-3078 WASHER 01-3158 ROTOR CARRIER 42-2011 DOWEL PIN 15-3050 O-RING (WIPER) 01-2027 O-RING (PRIMARY) 01-2092 SERVICE PISTON 42-2008 COPPER WASHER 15-1890 EMMA FEED 24-3186 HOUSING O-RING 15-1080 CIRCLIP 42-9027 EMMA PISTON 24-2010 WASHER 01-3211 NUT 42-9039 NOTE: FOR ABS VEHICLES FIT ALSO: 42-9026 ABS SENSOR REAR 42-9025 BEARING RETAINER BACKUP WASHER (EMMA MINOR) 01-4051 O-RING (EMMA MINOR) 24-4030 THIS DOCUMENT REMAINS THE PROPERTY OF ADVANCED BRAKING TECHNOLOGY Pty Ltd AND MAY NOT BE COPIED OR REPRODUCED IN WHOLE OR PART, OR COMMUNICATED TO OTHER PARTIES WITHOUT THE PERMISSION OF ADVANCED BRAKING TECHNOLOGY Pty Ltd @ 2007 PROPRIETARY DOCUMENT DRAIN PLUG 15-1341 LINK PIPE 24-2815 DATE 08/11/2007 DRG. NO. PR-42-0038-0 RETRACTOR BOLT 15-2530 FILL PLUG 15-1330 SPRING COVER GASKET 15-2080 DISC SPRING 15-3750 BACKUP WASHER (EMMA MAJOR) 15-4060 SPRING COVER 15-2781 EMMA COVER PLUG 70-3006 NOTE: REAR RIGHT HAND ASSEMBLY SHOWN LEFT HAND ASSEMBLY IS MIRROR IMAGE BEARING RETAINER 42-2053 O-RING (EMMA MAJOR) 15-4050 INNER HOUSING RH 42-2000 (42-2001 INNER HOUSING LH) BEARING CARRIER 42-2050 SHAFT SEAL 01-4075 REAR MOUNTING STUD 42-9038 BRAKE PAD - CW 24-2850 ROTOR 42-2002 BLEED NIPPLE 15-1151 BREATHER BARB 15-3021 REAR OUTER HOUSING RH 42-2018 (42-2019 REAR OUTER HOUSING LH) HOUSING BOLT 01-3220 BRAKE PAD - ACW 24-2860 HILUX REAR AXLE SHAFT 42-9030 (42-9000 REAR AXLE SHAFT WITH ABS) HOUSING SEAL 01-4083 WHEEL STUD 42-2014 SIBS FOR HILUX BRAKE ASSY REAR DISC MACHINED UNIT BEARING 42-2057 BEARING COLLAR 42-2052 SPRING COVER BOLT 15-1840 Parts list – SIBS® rear brake assembly To suit Hilux vehicles with and without ABS. Part number 70-3006 Description EMMA cover plug Qty 4 42-9039 42-9038 42-9030 42-9000 4 4 1 42-9027 42-9017 42-2057 Nut Rear mounting stud Hilux rear axle shaft Hilux rear axle shaft – with ABS Circlip Dust cap Machined unit bearing 42-2053 42-2052 42-2050 42-2045 42-2018 42-2019 42-2020 42-2014 42-2011 42-2008 42-2004 42-2002 42-2000 42-2001 24-4030 24-3186 24-2010 24-2860 24-2850 24-2815 15-4060 15-4050 15-3750 15-3050 15-3021 15-2781 15-2530 15-2080 15-1890 Bearing retainer Bearing collar Bearing carrier Felt seal Rear outer housing RH Rear outer housing LH V-seal support Wheel stud Rotor carrier Service piston Seal cover Rotor Inner housing RH Inner housing LH O-ring (EMMA minor) EMMA feed EMMA piston Brake pad – ACW Brake pad – CW Link pipe O-ring (EMMA major) O-ring (EMMA major) Disc spring Dowel pin Breather barb Spring cover Retractor bolt Spring cover gasket Copper washer 1 1 1 Comment Supplied separately with kit. Fitted on installation OE part OE part Manufactured from OE part 1 1 1 1 1 OE part OE part Manufactured from standard bearing Manufactured Manufactured Manufactured Manufactured Manufactured 1 6 1 2 1 1 1 Manufactured Manufactured Manufactured Manufactured Manufactured Manufactured Manufactured 4 1 4 2 2 1 4 4 32 2 1 1 4 1 1 Manufactured Manufactured Manufactured Manufactured Inner housing Manufactured Manufactured Page 15 MAN-006 REV-0 INSTALLATION & SERVICING OF SIBS® ON TOYOTA HILUX VEHICLES UNCONTROLLED COPY IF PRINTED. CHECK WEBSITE FOR LATEST VERSION 15-1840 15-1560 15-1341 15-1331 15-1151 15-1080 01-4083 01-4075 01-4051 01-3303 01-3302 01-3211 01-3220 01-3206 01-3158 01-3078 01-2092 01-2027 Spring cover bolt Grease nipple Drain plug Fill plug Bleed nipple O-ring (Housing) Housing seal Shaft seal Backup washer (EMMA minor) Spring washer Bolt Washer Housing bolt Bolt Washer Bolt O-ring (primary) O-ring (wiper) 10 1 1 1 4 1 1 1 4 3 3 4 12 2 8 8 2 2 Felt seal cover Felt seal cover Mounting Rotor carrier Seal cover Seal cover Service piston Service piston Page 16 MAN-006 REV-0 INSTALLATION & SERVICING OF SIBS® ON TOYOTA HILUX VEHICLES UNCONTROLLED COPY IF PRINTED. CHECK WEBSITE FOR LATEST VERSION A B C D 7 16 15 14 6 6 1 5 5 5 4 4 6 13 17 12 8 3 3 02-1002 02-6004 02-6008 02-6012 02-6014 02-6020 02-7005 02-7010 02-7016 02-7026 24-3188 24-3189 7 8 9 10 11 12 13 14 15 16 17 18 Item P/N 1 01-2072 2 01-4045 3 01-5032 4 01-5033 5 01-5071 6 01-5072 3 2 9 18 2 11 4 10 Manifold Assembly Relief valve Pressure switch Circuit breaker 40Amp Relay Harness engine bay - Hilux Connector male 7/16 UNO - 7/16 JIC Plug blanking 7/16 UNO Hydraulic pump Solenoid valve Elbow 7/16 JIC M-F Screen Description O-ring Dowty washer Banjo bolt Dowty washer Filter cartridge Orifice plug 2 1 1 1 1 1 1 1 1 1 1 1 1 Preset to 700psi falling Part of engine bay harness Part of engine bay harness Part of engine bay harness Includes solenoid valve, relief valve, banjo bolts & seals Fits to solenoid valve Horizontal mount with plastic reservoir shown QTY Comment 2 2 2 1 1 30 micron 1 Diameter 0.018" 1 A B C D Installation Procedures Installation Sequence SIBS® brakes for Toyota Hilux are supplied assembled onto the front steering knuckle and rear axle shaft. The installation sequence is as detailed below. • • • • • • • Install front SIBS® knuckle assemblies left & right Install rear SIBS® axle shaft assemblies left & right EMMA™ Engine Bay Pump Assembly (under the bonnet) EMMA™ PECB and Cabin Harness (inside cabin) Bleeding of the EMMA™ system Bleeding the service brake system Test drive – followed by a second bleed of the service brakes Page 18 MAN-006 REV-0 INSTALLATION & SERVICING OF SIBS® ON TOYOTA HILUX VEHICLES UNCONTROLLED COPY IF PRINTED. CHECK WEBSITE FOR LATEST VERSION Installation of SIBS® brakes - front 1. 1.1. 1.2. 1.3. 1.4. Remove the OE steering knuckle assembly. Note: procedure below is a truncated version of that found in the Toyota manual, if in doubt: refer to Toyota manual. Remove front wheel Remove front speed sensors (if ABS vehicle) Remove brake line Disconnect tie-rod end sub-assembly 1.4.1. Remove cotter pin & nut Toyota manual showing special tool to disconnect tie rod end from steering knuckle 1.5. Remove the 2 bolts and disconnect the suspension arm from the steering knuckle 1.6. Remove the clip and nut from the upper arm assembly Toyota manual showing special tool to disconnect the steering knuckle from the suspension upper arm 1.7. Remove the front steering knuckle assembly. Page 19 MAN-006 REV-0 INSTALLATION & SERVICING OF SIBS® ON TOYOTA HILUX VEHICLES UNCONTROLLED COPY IF PRINTED. CHECK WEBSITE FOR LATEST VERSION 2. 2.1. Install SIBS® front knuckle assembly. Installation is reverse of removal and is the same for LH and RH steering knuckle assemblies. Install the upper arm with the nut. Torque nut to 110Nm Install the clip. Note: if holes in cotter pin are not aligned, tighten the nut a further 60° 2.2. Install the lower suspension arm onto the steering knuckle via the two bolts. Torque bolts to 160Nm 2.3. Install tie rod end sub-assembly. Install the tie rod end nut. Torque nut to 49Nm. Install a new cotter pin. Note: if holes in cotter pin are not aligned, tighten the nut a further 60° 2.4. 2.5. Install front stabilizer link assembly. Torque nut to 70Nm. Install front ABS speed sensor. 2.5.1. Torque on speed sensor bolt 8.0Nm. 2.5.2. Install 3 x clamps. Torque on bolts 13Nm. 2.6. Install front brake hose into the clip and new brake pipe (A) into the inner housing. Install front brake hose into the clip. Install the new brake pipes into the inner housings. 42-2027 (Brake pipe front LH LCV5) 42-2028 (Brake pipe front RH LCV5) (A) Brake pipe Page 20 MAN-006 REV-0 INSTALLATION & SERVICING OF SIBS® ON TOYOTA HILUX VEHICLES UNCONTROLLED COPY IF PRINTED. CHECK WEBSITE FOR LATEST VERSION 2.7. Install red breather hose. This prevents build up of pressure within the brake under severe driving conditions. 2.7.1. Measure 1.5m of red breather hose (1/4” ID) and cut. 2.7.2. Install red breather hose onto the hose connector on the inner housing. 2.7.3. Restrain the hose to the hose connector with jubilee type hoseclamp (B). 2.7.4. Feed the hose up the inner guard and into the engine bay 2.7.5. Restrain the hose to the service brake hose clip with a cable tie. 2.7.6. Restrain the hose to the inner guard with a p-clamp (C). Restrain red breather hose. Ensure the hose will not rub on any suspension components at full lock. Cable tie hose to service brake hose clip. (B) Hose clamp Restrain red breather hose at the top of the inner guard. Use a p-clamp fitted to the chassis. (C) P-clamp 2.8. Install expansion chambers. Expansion chambers allow the brake to vent without allowing ingress of dirt. The expansion chambers are diesel water traps used in reversethe inlet from the brake is at the bottom, and the outlet to the paper type filter is at either position 1 or 3 at the top. Page 21 MAN-006 REV-0 INSTALLATION & SERVICING OF SIBS® ON TOYOTA HILUX VEHICLES UNCONTROLLED COPY IF PRINTED. CHECK WEBSITE FOR LATEST VERSION 2.8.1. Locate a suitable position against the inner guard in the engine bay. 2.8.2. Use existing M8 captive nuts, or install new ones using the M8 Nutserts provided. 2.8.3. Bolt the expansion chambers using M8 bolts provided. Use washers behind the chamber if the guard is not flat at this point. 2.8.4. Fit a short length of black 5/16” ID fuel hose to either position 1 or 3 at the top of the chamber. Run this hose to a paper type fuel filter. 2.8.5. Restrain the fuel filter as high as possible under the bonnet. Use the 50mm half-saddles provided. Use existing captive nuts or install new ones using the M8 Nutserts. Expansion chamber and paper type fuel filter mounted under the bonnet. Note: positions may vary depending on availability of space. Expansion chamber bolts to the EMMA™ bracket on right hand drive model vehicles (e.g KUN26R). On left hand drive vehicles, locate a suitable position and mount the chamber as per the instructions above. Page 22 MAN-006 REV-0 INSTALLATION & SERVICING OF SIBS® ON TOYOTA HILUX VEHICLES UNCONTROLLED COPY IF PRINTED. CHECK WEBSITE FOR LATEST VERSION Installation of SIBS® brakes – rear 3. Remove rear axle shaft assemblies 3.1. 3.2. 3.3. 3.4. 3.5. Remove the rear wheel Remove the speed sensors (if ABS is fitted) Disconnect the service brake line Disconnect the park brake cable. Remove the axle shaft with backing plate. 3.5.1. Remove the 4 backing plate mounting nuts Remove the 4 nuts. Pull out the axle shaft. Take care not to damage the oil seal in the differential housing Oil seal in differential housing. ABS rear axle shown – oil seal in differential housing is mounted further inboard on ABS models. Oil seal 3.6. 3.7. 3.8. Remove the OE brake pipes from the tee piece to the brake. Remove the clamps from the brake pipes as these will be re-used. Remove the park brake cable by undoing the restraining bolts down the chassis. Disconnect the switch and remove the park brake lever in the cabin. Page 23 MAN-006 REV-0 INSTALLATION & SERVICING OF SIBS® ON TOYOTA HILUX VEHICLES UNCONTROLLED COPY IF PRINTED. CHECK WEBSITE FOR LATEST VERSION 4. Install SIBS® brakes rear axle shaft assemblies. Installation is reverse of removal. 4.1. The rear brake assemblies are supplied with M14 retractor bolts fitted to the spring cover. These retract the EMMA™ piston and keep the springs compressed during shipment and assembly. Do not remove the retractor bolts until after the EMMA™ system is connected and fully functional. The vehicle should not be driven until the retractor bolts have been removed. Rear brake assembly showing 4 x retractor bolts. Do not remove retractor bolts until AFTER EMMA™ pump has been installed and is functioning correctly. 4.2. Remove the 4 nuts and washers fitted to the studs on the bearing carrier assembly. Remove 4 x nuts and washers fitted to the mounting studs on the bearing carrier assembly. These are left on during shipping to ensure the inner housing and bearing carrier remains sealed. Page 24 MAN-006 REV-0 INSTALLATION & SERVICING OF SIBS® ON TOYOTA HILUX VEHICLES UNCONTROLLED COPY IF PRINTED. CHECK WEBSITE FOR LATEST VERSION Remove any tape that may be wrapped around the spline on the axle shaft. This is applied to protect the spline during shipping. 4.3. If fitting to an ABS vehicle, install the ABS pulse wheel and retainer. 4.3.1. On the OE assembly, measure the distance from the back of the bearing carrier to the start of the pulse wheel. 4.3.2. Install the pulse wheel and retainer on to the SIBS® assembly up to the same position. Measure the position from the bearing carrier to the pulse wheel on the OE axle shaft assembly. Install the pulse wheel and bearing retainer to the SIBS® axle shaft assembly to the same position. 4.4. Install a new oil seal in the differential housing. Install a new oil seal in the differential housing. Toyota recommends the use of a special tool (Toyota P/N: 0995060020). Page 25 MAN-006 REV-0 INSTALLATION & SERVICING OF SIBS® ON TOYOTA HILUX VEHICLES UNCONTROLLED COPY IF PRINTED. CHECK WEBSITE FOR LATEST VERSION 4.5. Install a new o-ring to the spigot of the differential housing. Install a new o-ring O-ring 4.6. Install the red breather hose. 4.6.1. Cut a 1.5m length of the breather hose. 4.6.2. Install one end into the hose connector on the inner housing and restrain with a jubilee type hose clamp. Install red breather hose to the hose connector on the inner housing. Note: retractor bolts not shown, however these should still be in place, (refer 4.1). Carefully slide the SIBS® brake and axle shaft assembly into the diff housing. Take care not to damage the oil seal 4.8. Align the housing such that the three bleed nipples are at the top. The spring cover (that houses the stack of Belleville washers) should be biased towards the front of the vehicle. Orientation of rear inner 3 x bleed nipples Top housings. 4.7. Position the housing such that: • 3 x bleed nipples at the top. • Spring cover is biased towards the front of the vehicle Note: retractor bolts not shown, however these should still be in place, (refer 4.1). Front of vehicle Page 26 MAN-006 REV-0 INSTALLATION & SERVICING OF SIBS® ON TOYOTA HILUX VEHICLES UNCONTROLLED COPY IF PRINTED. CHECK WEBSITE FOR LATEST VERSION 4.9. Install the washers and locknuts to the mounting studs. Tighten the M12 locknuts to 69Nm Tighten locknuts to 69Nm 4.10. Install the expansion chambers. Expansion chambers allow the brake to vent without allowing ingress of dirt. The expansion chambers are diesel water traps used in reversethe inlet from the brake is at the bottom, and the outlet to the paper type filter is at either position 1 or 3 at the top. 4.10.1. Locate a suitable position to install the expansion chambers. Drill holes as required. Use the M8 nuts and bolts provided. Ensure that the expansion chambers will not be impacted by the axle even during extreme axle movements. Note: breather pipes cross over: LH breather is connected to RH brake, as shown. 4.10.2. Drill holes in the under-tray and use the M8 nuts and bolts to provided to mount the expansion chambers 4.10.3. Fit the red hose to the bottom of the chambers. Note the LH breather hose feeds into the bottom of the RH expansion chamber. Ensure there is sufficient length of hose – when the vehicle is on the hoist the axle will be at its lowest position. 4.10.4. Fit a length of 5/16” ID black fuel hose to the top barbs of both rear expansion chambers at ports no. 2 or 3 and join with a tee piece (see figure below). Page 27 MAN-006 REV-0 INSTALLATION & SERVICING OF SIBS® ON TOYOTA HILUX VEHICLES UNCONTROLLED COPY IF PRINTED. CHECK WEBSITE FOR LATEST VERSION Barbs at position no. 2 Tee piece hose connector to suit 5/16” hose 4.10.5. Run the outlet from the tee piece to a paper type in-line fuel filter, mount filter as high on the vehicle as possible. Use the 50mm half saddle to mount the paper type fuel filter. This will ensure the brake will not breath dirt or water which is detrimental to the operation of the brake. Paper type in-line fuel filter mounted at the top of the tray behind the driver. Page 28 MAN-006 REV-0 INSTALLATION & SERVICING OF SIBS® ON TOYOTA HILUX VEHICLES UNCONTROLLED COPY IF PRINTED. CHECK WEBSITE FOR LATEST VERSION 5. Installation of the EMMA™ system. Note, when fitting optional Manual Release system in addition to pump, refer to TBN-032, which is included in the Appendix at the back of this document. Relay Fitment of EMMA™ unit. KUN26R shown, fitment in LH vehicles may differ. 5.1. The EMMA™ pump, manifold and bracket assembly is shipped complete with wiring harness. Check that the relay is fully encased with Plasti-dip, as this prevents corrosion of this part. 5.2. Mount the EMMA™ pump, manifold & bracket assembly using the components provided. 5.3. Study the wiring diagram (overleaf). Note the following: 5.3.1. The heavy gauge red wire from the relay must be connected to constant +12V in the power box. 5.3.2. Earth the heavy gauge green/white wire from the motor. 5.3.3. Earth the two small gauge black wires from the solenoid & pressure switch Page 29 MAN-006 REV-0 INSTALLATION & SERVICING OF SIBS® ON TOYOTA HILUX VEHICLES UNCONTROLLED COPY IF PRINTED. CHECK WEBSITE FOR LATEST VERSION Heavy gauge green/white wire from the pump and small black wires earthed to a suitable point on the body. Heavy gauge red wire from the relay to constant +12V in the power box 5.4. Feed the grey and red wires through the firewall into the cabin. Note: on some vehicles where the pump is mounted in front of the radiator, there may be some extension required of the harness. Use Deutsch 2 pin connectors for this purpose. Grey and red wire (inside black sheath) poked through firewall. Use one of existing grommets. Ensure grey and red wires from the engine harness are connected to the same wires on the cabin harness. Use the Deutsch connectors supplied. Right hand drive vehicle shown. 5.4.1. 5.4.2. 5.4.3. Route the cabin harness to the Hirschman plug in the centre console in the old park brake lever position. Connect the engine harness to cabin harness using Deutsch 2 pin connectors. Note: sometimes sectioning of the harness into two halves will be required during installation, as the harnesses are manufactured as one item. Fit Deutsch connector at the section point. Splice the grey wire of the harness to the green wire of the old handbrake switch. Page 31 MAN-006 REV-0 INSTALLATION & SERVICING OF SIBS® ON TOYOTA HILUX VEHICLES UNCONTROLLED COPY IF PRINTED. CHECK WEBSITE FOR LATEST VERSION Route the cabin harness to the black Hirschman plug in the centre console in the old park brake lever position. Note the brown wire (to be spliced into the drivers’ door open switch) and the grey wire (to be spliced into the green wire of the old handbrake switch). 5.4.4. Earth the black wire from the Hirschman plug end of the harness in a suitable location. Earth the black wire in a suitable location on the body. Position shown here is in the passenger foot well below the dashboard. Note the red and white wires of the harness running to the centre console. 5.4.5. 5.4.6. Earthing point Black wire Run the green and blue wires from the Hirschman plug end of the harness up to the steering wheel console. Remove shroud at base of steering wheel Splice green wire (with sealed fuse holder) into the red/white wire out of the ignition barrel assy. This wire picks up constant +12V to operate the EMMA™ system. Page 32 MAN-006 REV-0 INSTALLATION & SERVICING OF SIBS® ON TOYOTA HILUX VEHICLES UNCONTROLLED COPY IF PRINTED. CHECK WEBSITE FOR LATEST VERSION Blue and green wires routed to steering column. Note sealed fuse holders – check these are fitted with 7.5Amp mini blade type fuses. 5.4.7. Green wire spliced into red/white wire out of ignition barrel assembly. Splice the blue wire (with sealed fuse holder) into the thick black/yellow wire coming out of the ignition barrel assembly. This wire picks up ignition live to operate the EMMA™ system. Image showing blue wire (with sealed fuse holder) spliced to thick black/yellow wire from ignition barrel assembly. Black/yellow wire Blue wire from harness already spliced to black/yellow 5.4.8. Splice the brown wire into the drivers’ door open switch. Ensure the wire will not be impacted by the drivers feet. Page 33 MAN-006 REV-0 INSTALLATION & SERVICING OF SIBS® ON TOYOTA HILUX VEHICLES UNCONTROLLED COPY IF PRINTED. CHECK WEBSITE FOR LATEST VERSION Splice the brown wire into the drivers’ door open switch. Run the wire under the drivers seat and floor matt away from any possible damage by the drivers feet. 5.5. Control box 5.5.1. Find a suitable location to fix the control box firmly to the centre console. Depending on centre console type, this may require some modification of the plastic centre console. Mounting of control box on dual cab Hilux. Some modification of the centre console is required. Firmly fasten the control box to the floor using the fasteners and bracket provided Mounting of control box in single cab Hilux. Mounts in place of park brake lever. Note: the park brake lever is still shown in this photo. It should be removed, refer to 2.16. 5.5.2. Fit black Hirschman plug from cabin harness into control box. Page 34 MAN-006 REV-0 INSTALLATION & SERVICING OF SIBS® ON TOYOTA HILUX VEHICLES UNCONTROLLED COPY IF PRINTED. CHECK WEBSITE FOR LATEST VERSION 5.6. Hydraulics 5.6.1. Run the long hydraulic hose down the left hand chassis rail. Secure along the way with p-clamps. Hydraulic hose running down LH chassis rail, secured with p-clamps. 5.6.2. Bolt hydraulic tee piece to rear differential housing. 7/16” JIC tee piece fitted to rear differential housing, viewed from the rear. Use existing M8 captive nut for the purpose. 5.6.3. 5.6.4. Run the two hydraulic hoses to the left hand and right hand brake. Connect the hose to the EMMA™ pump Page 35 MAN-006 REV-0 INSTALLATION & SERVICING OF SIBS® ON TOYOTA HILUX VEHICLES UNCONTROLLED COPY IF PRINTED. CHECK WEBSITE FOR LATEST VERSION 5.7. Check EMMA™ system operation 5.7.1. Reconnect the battery 5.7.2. Shut the door. Description of operation: The Red Operator Button is wired into the ignition so that the vehicle key is needed to release the brakes. However, the yellow or black Momentary Release Button allows the brakes to be released in a situation where the key is not available – but only as long as the button remains depressed. This prevents the brakes being left off. The Red/Green LED in the centre of the control provides a visual indication of the circuit operation. To Release the EMMA™ Brakes: • • • With the ignition ON, check the LED display is RED. If it is not, push the Red Operator Button in. This indicates the system is reset. Now gently twist the Red Operator Button clockwise (~15°) and pull. The LED display should change to GREEN – indicating brake release is in operation. Full brake release is indicated when the Brake Warning Light in the dashboard goes out. However, the vehicle should be able to be moved very soon (~1-2seconds) after the pump starts to run. 5.8. Engage the pump using the control box. If it does not work, ensure the door is open & check the connections using the wiring diagram. 5.9. Bleed the EMMA™ system: 5.9.1. Run the pump. 5.9.2. Bleed the EMMA™ system of each rear inner housing assembly using the 2 bleed nipples on each rear housing. Page 36 MAN-006 REV-0 INSTALLATION & SERVICING OF SIBS® ON TOYOTA HILUX VEHICLES UNCONTROLLED COPY IF PRINTED. CHECK WEBSITE FOR LATEST VERSION Note: • There are 2 EMMA™ bleed nipples on the rear inner housings. • These are the two outside bleed nipples in the group of 3 at the top of the brake. EMMA™ bleed nipples WARNING Note: 1. Bleeding the EMMA™ system may cause the pump to run dry under load, resulting in damage. 2. Pump is designed for intermittent use, when bleeding do not run the pump continuously for more than ~10 s. 5.9.3. If the EMMA™ pump cycles, release and engage the system several times to try to clear the pump of any foreign matter. If this is not successful, investigate the check valve on the side of the pump as foreign material may become stuck under the valve and hold it open, preventing the pump from building pressure. 5.10. With the EMMA™ brake released (i.e. pressure in the system) remove the retractor bolts and replace with plugs to prevent ingress of water and dirt into the spring cavity. 6. Bleed the service brakes. Use standard workshop procedure. Ensure the brake fluid level in the master cylinder does not run dry. Note: • There is 1 service brake bleed nipple per front brake. • There are 2 service brake bleed nipples per rear brake. • Bleed the load proportioning valve. Service brake bleed nipples on rear housings Page 37 MAN-006 REV-0 INSTALLATION & SERVICING OF SIBS® ON TOYOTA HILUX VEHICLES UNCONTROLLED COPY IF PRINTED. CHECK WEBSITE FOR LATEST VERSION 7. Adjustment of the EMMATM Relief Valve. The relief valve can be adjusted if required to change the delay in application of the EMMATM Brake. The procedure for this adjustment is detailed in Technical Bulletin TBN-019, which can be found in the Appendix at the back of this document. 8. 8.1. Adjust the load proportioning valve Correct operation of SIBS® requires a functioning and correctly set Load Sensing Proportioning Valve (LSPV). For the adjustment procedure, follow that set out in the standard Toyota Manual. Use the Toyota LSPV Gauge (Toyota P/N: 09709-209017). Install LSPV Gauge – into front and rear bleed ports. Raise the front brake pressure to 80 kg/cm2 (1138psi) Rear brake pressure on SIBS® should read: 8.2. 8.3. 8.4. HEAVY DUTY: 70 ± 6 kg/cm2 STANDARD DUTY 65 ± 6 kg/cm2 (996 ± 85 psi) (925 ± 85 psi) 8.5. Test drive the vehicle – the front brakes should ALWAYS lock before the rear brakes. Adjust again if necessary. 9. Fit warning labels. SIBS® brakes are supplied with two OPERATOR CAUTION labels. Fit the SIBS® warning labels in prominent positions, easily visible by the operator and any mechanic working on the vehicle 10. Check for any leaks. Test drive the vehicle. 11. Bleed the service brakes for a second time Page 38 MAN-006 REV-0 INSTALLATION & SERVICING OF SIBS® ON TOYOTA HILUX VEHICLES UNCONTROLLED COPY IF PRINTED. CHECK WEBSITE FOR LATEST VERSION Servicing Procedures. Service Intervals: Two weekly service: • Check brake fluid level in master cylinder and top up as required. • Check ATF fluid level in EMMA™ pump and top up as required. • Put vehicle on hoist and remove wheels • Inspect brakes for leaks • Grease felt seal via grease nipple, approx 3 pumps whilst rotating hub / axle shaft. • Re-fit wheels and test drive. Check for correct operation of EMMA™ brake and service brakes. o Ensure EMMA™ brake release and engagement times are not excessive. If EMMA brake engagement time is excessive, adjust relief valve. If no change, consider changing EMMA™ filter. o Ensure service brakes are functioning correctly and the vehicle is not pulling to one side. Change oil and perform TBN-018 (Optimum performance procedure) to rectify vehicle pulling. Minor service: 5,000 – 7,500 km (depending on conditions) • Complete two weekly service • Put vehicle on hoist and remove wheels. • Inspect felt seals - replace as required. • Inspect for leaking housing seals – replace as required. • Drain SIBS® oil from all four brakes. • Perform Optimum performance procedure (TBN-018), try to get even temperature on all four brakes to ensure all friction surfaces are restored. Allow brakes to cool. • Replace SIBS® oil with 800ml of fluid per housing. Refer to Figures 1 & 2 for location of fill & drain plugs. • Inspect for leaking housing seals – replace as required. • Test drive. o EMMA™ brakes: refer above o Service brakes: refer above. Any issues that are not rectified by above procedure may require removal of outer housing for further investigation. Major service: 20,000 – 50,000km (12 months) • Put vehicle on hoist and remove wheels. Page 39 MAN-006 REV-0 INSTALLATION & SERVICING OF SIBS® ON TOYOTA HILUX VEHICLES UNCONTROLLED COPY IF PRINTED. CHECK WEBSITE FOR LATEST VERSION • Remove outer housing using recommended practice. • Measure pad wear. Replace pads if below specified limits. o Original thickness = 14mm o Front: replace if thickness < 11mm o Rear: replace if thickness < 12.5mm o Note: when replacing pads it is desirable to replace all pads across an axle to ensure consistent performance. • Check components and replace seals: o Replace service piston o-rings o Inspect service pistons and service piston bores for corrosion or pitting. Replace if necessary o Inspect EMMA™ pistons for leakage and change o-rings if necessary. Replace EMMA™ piston o-rings every second Major service. • Replace housing bolts • Inspect rotor carrier and rotor spline. Replace if spline teeth of either component are visibly stepped or there is excessive play in the fit of the two components. o Note: the splines of the rotor and rotor carrier should engage smoothly and slide under load. There should be minimal ‘wobble’ between components. • Replace wheel bearings and wheel bearing seals. • Inspect seal surface axle shaft and hubs, restore with speedi-sleeves if corroded or pitted. • Flush EMMA™ hydraulic system with ATF. • Change EMMA™ filter. Recommended parts holding (per 10 vehicles): P/N Description Qty Comment 42-4000 O-ring kit for one front brake LCV5 2 Required for Major service. Includes housing o-ring, service piston o-rings. Does not include main housing seal or felt seal. 42-4001 O-ring kit for one rear brake LCV5 2 Required for Major service. Includes housing o-ring, service and EMMA™ piston o-rings. Does not include main housing seal or felt seal. 01-4083 Cassette seal 4 Main housing seal 42-2045 Felt seal 4 Felt grease seal. Page 40 MAN-006 REV-0 INSTALLATION & SERVICING OF SIBS® ON TOYOTA HILUX VEHICLES UNCONTROLLED COPY IF PRINTED. CHECK WEBSITE FOR LATEST VERSION ® 2 00-3321 SIBS Cooling Fluid – 20L 02-7005 Pressure switch 1 EMMA™ hydraulic system 01-5071 Filter element 1 EMMA™ hydraulic system 15-1151 Bleed nipple 8 15-1330 Fill plug 2 15-1341 Drain plug (with magnet) 2 15-4361 Hose breather 6m Housing bolt 48 01-3220 (12 required per brake assy) 15-1840 Spring cover bolt 20 (10 required per rear brake assy) 15-2530 Retractor bolt 8 42-2002 Rotor LCV5 2 42-2011 Rotor carrier LCV5 2 70-3006 Plug EMMA™ 8 01-7016 Relay 60Amp (dioded) 1 42-2014 Stud wheel M12 LCV5 12 24-4962 Kit brake pads for two front or rear brakes 1 24-2815 Brake pipe service link 2 42-2026 Hose 1 hydraulic EMMA™ supply LCV5 1 42-2024 Brake pipe rear LH LCV5 1 42-2025 Brake pipe rear RH LCV5 1 24-2826 Brake pipe rear RH TLC100 1 42-2027 Brake pipe front LH LCV5 1 42-2028 Brake pipe front RH LCV5 1 EMMA™ electrical system Torque of critical bolts & nuts: 01-3220 M10 Housing bolts: 42-9039 M12 Locknuts: 01-3078 M6 Seal cover bolts: xx-xxxx Wheel nuts 61Nm 75Nm 15Nm 90Nm 15-1330, 15-1341 15-1151 01-5080 01-3302 Hand tight Hand tight Hand tight Hand tight Fill / drain plugs: apply PTFE tape. Bleed nipples Tube nuts M5 Seal support bolts Page 41 MAN-006 REV-0 INSTALLATION & SERVICING OF SIBS® ON TOYOTA HILUX VEHICLES UNCONTROLLED COPY IF PRINTED. CHECK WEBSITE FOR LATEST VERSION Use only automatic Transmission Fluid (ATF, DEXRON II or III) in the Pump Reservoir. Pump Reservoir Pump Reservoir Use only DOT 3 Brake Fluid in the Master Cylinder. Master Cylinder Master Cylinder Use only SIBS® Fluid in the Brake Housings. Fill plug Brake housings Page 42 MAN-006 REV-0 INSTALLATION & SERVICING OF SIBS® ON TOYOTA HILUX VEHICLES UNCONTROLLED COPY IF PRINTED. CHECK WEBSITE FOR LATEST VERSION ® Handling and disposal of SIBS Fluid to SIBS® Fluid Material Safety Data Sheet (Appendix) for handling instructions. • Refer • SIBS ® Fluid must be disposed of in accordance with all Regulatory and Environmental regulations. Replacing SIBS® Fluid Draining SIBS® Fluid Remove the drain plug (see Figures 1 & 2) from a brake assembly and drain SIBS® Fluid into a drain pan, ready for disposal. WARNING The use of any fluid other than SIBS® Fluid will void the warranty and may cause brake failure resulting in injury or death. The brakes must be drained and filled with new SIBS® Fluid if they remain totally immersed in water for lengthy periods. Before refilling with SIBS® Fluid, ensure that the drain plug has been cleaned and fitted with new thread sealant tape. Remove the fill plug and fill the system with fresh SIBS® Fluid through this port using only SIBS® Fluid. Fill each brake assembly with 800ml of SIBS® fluid. Fill plug Drain plug FIGURE 2 FIGURE 1 Front brake drain and filler plug locations Rear brake drain and filler plug locations SIBS® Fluid Volume in Brake Assemblies: • Each Front Assembly 0.8 litre • Each Rear Assembly 0.8 litre Page 43 MAN-006 REV-0 INSTALLATION & SERVICING OF SIBS® ON TOYOTA HILUX VEHICLES UNCONTROLLED COPY IF PRINTED. CHECK WEBSITE FOR LATEST VERSION Grease felt seal Grease nipple Figure 3 Rotor carrier grease nipple. o Remove wheels. o Apply grease and rotate hub / axle shaft slowly. Minimum 5 pumps every two weeks. o Note: check state of felt seal and replace if necessary. Changing the felt seal 8 x M6 Seal cover bolts 3 x M5 felt seal support bolts. Apply Caterpillar Contact Cement (P/N: 5H2471) or equivalent. Brake to be fully assembled to axle (or knuckle) prior to installing Apply clean, good quality machine oil to seal surface after adhesive has cured Figure 4 Changing the felt seal • Loosen and remove the 3 x M5 felt seal support bolts. • Remove the used seal. • Clean the bore. Check for signs of leaking of the main housing seal. If the housing seal requires changing, follow the procedure set out below. • Apply contact cement to the surface of the felt seal that will be incontact with the housing (Caterpillar contact cement P/N: 5H2471 or equivalent) • Install felt seal and allow cement to cure. • Apply some machine oil to the felt seal to lubricate the sliding surfaces. Page 44 MAN-006 REV-0 INSTALLATION & SERVICING OF SIBS® ON TOYOTA HILUX VEHICLES UNCONTROLLED COPY IF PRINTED. CHECK WEBSITE FOR LATEST VERSION Changing the housing seal Important: When changing the housing seal on the rear brake assemblies, there should be no spring force on the outer housing. Use the EMMA™ pump to hold off the spring force and install the retractor bolts. The hydraulic pressure can then be released. Hint: if the EMMA™ pump is disconnected or not working, use a manual hydraulic pump e.g. Enerpac. The outer housing does not need to be removed to change the housing seal. There are several different housing seals that may be used. The procedure for installation is similar. • • • • • • Remove felt seal o Undo 3 x M5 bolts that locate the felt seal support and remove o Undo 8 x M6 bolts that locate seal cover and remove. Felt seal should be glued to seal cover. Remove the housing seal. Hint: use TEK screws to lever out if required. Clean outer housing bore and seal cover using Brakeclean. Ensure the seal surface is free of corrosion. If necessary place in a lathe and buff with fine wet and dry emery paper (~2400 grit or finer). This is important to provide a smooth seal surface and is especially important when installing a single lip shaft seal (non-cassette type). Ensure there are no sharp edges on the lead in for the rotor carrier. This is especially important when fitting a single lip shaft seal If fitting seal framed cassette seal (SAF P/N: 01-4083) do the following: o Place cassette seal air side down. o Run some LOCTITE 290 (wik-in) around the edge of the seal, at the join of the two steel components, as this is a potential leak path. o Allow LOCTITE to go off. o This process will prevent SIBS® fluid from by-passing the seal lip by weeping through the join of the two steel components. Apply ‘wik-in’ Loctite 290 to full diameter of seal casing. Allow to cure. Figure 4 Preparing cassette seal (SAF P/N: 01-4083) for installation. Oil side Air side Page 45 MAN-006 REV-0 INSTALLATION & SERVICING OF SIBS® ON TOYOTA HILUX VEHICLES UNCONTROLLED COPY IF PRINTED. CHECK WEBSITE FOR LATEST VERSION Oil side Apply LOCTITE 290 ‘wik-in’ to full diameter of seal casing as shown. This will seal potential leak path Figure 4 Cont • • • If fitting the all rubber cassette seal or single lip shaft seal, follow the same procedure as below. Apply LOCTITE 515 to housing bore. Install the seal (refer to Figure 5): o The seal cover doubles as the installation tool for the cassette seal. Flip the seal cover around and use the return on the seal cover to fit over the return on the steel cassette seal. Note the words ‘OIL SIDE’ and ‘AIR SIDE’ that are printed on the cassette seal. o Using longer M6 bolts and nuts, ‘walk’ the cassette seal into the bore of the outer housing by tightening the nuts diagonally opposite each other approx 1 turn each. IMPORTANT: Ensure the seal goes in straight. Page 46 MAN-006 REV-0 INSTALLATION & SERVICING OF SIBS® ON TOYOTA HILUX VEHICLES UNCONTROLLED COPY IF PRINTED. CHECK WEBSITE FOR LATEST VERSION Outer housing Figure 5 Installation of housing seal. Cassette seal shown (SAF P/N: 01-4083). Flip the seal retainer, and use longer M6 bolts and nuts (not shown) to ‘walk’ the seal into the housing bore. Ensure the seal goes in straight. Cassette seal SAF P/N: 01-4083 Seal retainer. Note: orientation is flipped to facilitate installation of cassette seal Use longer M6 bolts and nuts to ‘walk’ the housing seal in straight. • Continue tightening the nuts until the top surface of the seal is flush with the outer housing. • Remove the seal cover. • The seal cover must now be installed in the correct orientation. Refer to Figure 3. • Clean the surfaces of the outer housing and seal cover that will be in contact. • Apply LOCTITE 515 to the seal cover surface that will be in contact with the outer housing. Install the 8 x M6 bolts and torque to 15Nm. Note: the seal cover should be rigidly bonded to the outer housing to ensure it imparts stiffness to the brake assembly. Page 47 MAN-006 REV-0 INSTALLATION & SERVICING OF SIBS® ON TOYOTA HILUX VEHICLES UNCONTROLLED COPY IF PRINTED. CHECK WEBSITE FOR LATEST VERSION Inspection / Maintenance Strip Down All brake parts should be examined thoroughly and brake pads; rotors; piston brake fluid seals; and oil/dust seals replaced during reassembly, if required. With the fitting of new piston O-rings a slight binding of the brake may occur until seals have bedded. Therefore replacing seals on both side of the axle is recommended. Procedure • Remove the wheel. • Clean the external surface of the brake prior to disassembly. • Drain the SIBS® Fluid from the brake housing by removing the drain plugs from the inner housings. Important: When removing the outer housing on the rear brake assemblies, there should be no spring force on the outer housing. Use the EMMA™ pump to hold off the spring force and install the retractor bolts. The hydraulic pressure can then be released. Hint: if the EMMA™ pump is disconnected or not working, use a manual hydraulic pump e.g. Enerpac. Remove the outer housing (the same process is used for the front and rear brake assemblies) • Remove the Toyota grease cup using a screwdriver and a hammer. M8 cap screws. Use these as jacking bolts • Remove the housing bolts around the outer edge of the brake housing outer cover and remove cover, insert the 2 special M10 locating bolts with head removed(as used in the installation of SIBS® Braking System). • Remove the 2 x M8 x 1.25 x 45LG socket head screws that locate the rotor carrier to the hub / axle shaft. • Insert these two bolts into the 2 threaded jacking holes in the rotor carrier. Note: longer M8 x 1.25 bolts may be required to fully jack-off the rotor carrier from the hub / axle shaft Jacking holes Figure 7 Removal of outer housing / rotor carrier assemblies Page 48 MAN-006 REV-0 INSTALLATION & SERVICING OF SIBS® ON TOYOTA HILUX VEHICLES UNCONTROLLED COPY IF PRINTED. CHECK WEBSITE FOR LATEST VERSION • Remove the rotor carrier / outer housing / outer pads & rotor as one assembly. Hint: 1. Use M10x1.5 dowel pins to assist the removal of the outer housing. 2. Prevent the two inner housing pads from falling: have a colleague use a steel rule to retain them in the housing. CAUTION When the rotor and pads are removed they must be marked carefully and returned to their original locations. Mismatching may cause loss of brake efficiency, accelerated wear and/or increased pedal stroke. THE BRAKE PADS ARE DIRECTIONAL. Treat brake pads carefully to avoid damaging the friction material. • Once the outer housing has been removed, remove the brake pads from the inner housing. • Inspect the housing bolts for corrosion. Replace as required. Remove service pistons from inner housings • • • • • Inner housings do not need to be removed from the vehicle. Apply a bar clamp on the rubber brake hoses to stop fluid loss. Loosen the bleeder nipples. Remove the four 47 mm service pistons (front housings) and two 53 mm pistons (rear housings). Clamp the groove on the inside of the piston with inside pliers (can be made from flat steel bar). Service piston o-rings & BUW’s (refer Figure 8): o Each rear service piston has two o-rings: a primary EPDM o-ring of 3.53mm cross section and a wiper VITON o-ring of 1.78mm cross section. o Each front service piston has two o-rings and a BUW: a primary EPDM o-ring of 5.33mm cross section with a PTFE BUW (note orientation of BUW) and a wiper VITON o-ring of 1.78mm cross section. Assembly service pistons and seals (front and rear brakes): • Clean the service piston bores with Brakeclean. Buff with fine emery paper (#2400) to remove any corrosion. • O-ring kits are available (42-4000 – front brake; 42-4001 – rear brake) • Lubricate housing bore with Silicone grease. Page 49 MAN-006 REV-0 INSTALLATION & SERVICING OF SIBS® ON TOYOTA HILUX VEHICLES UNCONTROLLED COPY IF PRINTED. CHECK WEBSITE FOR LATEST VERSION • • Fit o-rings to pistons. Lubricate with Silicone grease. The primary pistons of the front brake have back-up washers. Ensure these are installed in the correct orientation – Refer Figure 8 below. Front BUW (note position) Brake fluid this side Rear service piston Front service piston Figure 8 O-ring and BUW arrangement on service pistons • Install pistons into housing. Ensure the bleed nipples are open. IMPORTANT The two service piston o-rings are dissimilar materials. Only use Silicone grease to lubricate the o-rings and bores prior to assembly. Do not use brake fluid or SIBS® fluid for this purpose. Detailed parts inspection Brake Housings • Ensure the brake housings are still firmly bolted to the axle or spindle. o Check for signs of leakage. o Replace mounting gasket, bolts and lock-tabs if required. • Use Brakeclean to clean piston bores. Inspect for signs of corrosion, wear or pitting. Use fine emery paper (#2400 grit) to remove any corrosion. • Smear piston bores with Silicone grease after cleaning. Do not use brake fluid or SIBS® fluid for this purpose. Page 50 MAN-006 REV-0 INSTALLATION & SERVICING OF SIBS® ON TOYOTA HILUX VEHICLES UNCONTROLLED COPY IF PRINTED. CHECK WEBSITE FOR LATEST VERSION Housing bolts Check heads of housing bolts. In corrosive environments it is recommended that all housing bolts be replaced. Note: stainless steel bolts (cap screws) are available as an alternative. (SAF P/N: 01-3237). Brake Pads Brake pads replacement: Front Wheel Original thickness 14.0 mm Rear Wheel Original thickness 14.0 mm Replace if < 11.0 mm Replace if < 12.5 mm Brake pads should be free of damage, distortion and/or blocked grooves. Before reusing brake pads, it is recommended to lightly ‘buff’ the surface of the pads with #240 grit wet-and-dry sand paper. This will help ensure consistent brake performance. Ensure front brake pads are 14 groove (24-2850 & 24-2860). WARNING Thickness of rear brake pads is critical. Brake pads below replacement thickness will result in increased travel of EMMA™ piston and reduced braking force. Rotor Inspect the spline for damage or wear. Replace rotor if the teeth of the spline are visibly stepped. Before replacing the rotor, lightly ‘buff’ both friction surfaces of the rotor using #240 grit wet-and-dry sand paper. This will help ensure consistent brake performance. Rotor carrier • • Inspect hub spline for damage and wear. Replace hub if the teeth of the spline are visibly stepped. Inspect wheel and drive studs for damage. Replace as required. Page 51 MAN-006 REV-0 INSTALLATION & SERVICING OF SIBS® ON TOYOTA HILUX VEHICLES UNCONTROLLED COPY IF PRINTED. CHECK WEBSITE FOR LATEST VERSION Wheel bearings and seals NOTE The rear bearing carrier seal, the rear axle shaft oil seal and the front bearing carrier seal are essential to seal the SIBS® brake units for effective operation. Any bearing grease or differential oil which mixes with the SIBS® Fluid may reduce braking efficiency. During assembly, the rear axle shaft oil seal must always be replaced. Replace the rear bearing carrier seal or the front bearing carrier seal when the rear pressed assembly or front pressed assembly are overhauled. Front wheel bearings and seals. Figure 9 On the front SIBS®, the standard Toyota bearing (a double taper-roller bearing in a bearing carrier) is modified to accept an additional seal running on the top surface. The seal spins with the hub and is located in position via a seal carrier. To change the bearing, follow the procedure set out in the Toyota Manual. Be sure to re-use a modified Toyota bearing 42-9012 and standard Toyota locking collars and ABS pulse wheels where fitted. Inner hub and seal Use a new seal (01-4073) in the seal carrier bolted to the hub. Page 52 MAN-006 REV-0 INSTALLATION & SERVICING OF SIBS® ON TOYOTA HILUX VEHICLES UNCONTROLLED COPY IF PRINTED. CHECK WEBSITE FOR LATEST VERSION SIBS front seal carrier bolted to hub (42-2012) Modified Toyota front bearing assembly 42-9012 SIBS front hub seal (01-4073) Rear wheel bearings and seals Figure 10 The rear SIBS® brake on Toyota Hilux KUN2* & 3* vehicles uses unitised taper roller bearings. The bearing is manufactured from a Timken bearing and should only be purchased from ABT. The outer bearing retainer, locking collar and bearing carrier are also manufactured by ABT. ABS pulse wheels and retainers are OE components. Use the SIBS® bearing carrier (42-2003) and seal (01-4075) Page 53 MAN-006 REV-0 INSTALLATION & SERVICING OF SIBS® ON TOYOTA HILUX VEHICLES UNCONTROLLED COPY IF PRINTED. CHECK WEBSITE FOR LATEST VERSION Bearing carrier Snap ring Figure 11a Arrangement of Timken unitized bearing in SIBS® rear brake assemblies. The OD of the bearing is restrained by a bearing collar pressed into the bearing carrier. A shaft seal is located in front of the bearing in the carrier. Bearing collar (on axle shaft) Shaft seal The bearing is pressed onto the shaft. A retaining collar is pressed onto the axle shaft after the bearing. Bearing retainer (pressed into bearing carrier) Figure 11b Closer view of Timken unitized bearing assembly. Parts used: 42-2050 (Bearing carrier) 42-3057 (Machined unit bearing) 42-2052 (Bearing collar) 42-2053 (Bearing retainer) 01-4075 (Shaft seal) To change a wheel bearing: • Cold chisel and remove the bearing retainer on the axle shaft • Press the shaft through the bearing assembly • Remove the outer housing from the bearing carrier • Using suitable tools, pull the bearing out of the bearing carrier assembly. This should take the bearing collar (pressed into the bearing carrier). Drilling or chiseling of the bearing collar may be required. Page 54 MAN-006 REV-0 INSTALLATION & SERVICING OF SIBS® ON TOYOTA HILUX VEHICLES UNCONTROLLED COPY IF PRINTED. CHECK WEBSITE FOR LATEST VERSION To assemble a new rear wheel bearing: • Use the following new components: o 42-3057 (Machined unit bearing) o 42-2052 (Bearing collar) o 42-2053 (Bearing retainer) o 01-4075 (Shaft seal) • Prepare a bearing carrier assembly: o Install a new shaft seal into the bearing carrier o Install a new Machined unit bearing. Pack the bearing with grease prior to installation. Timken recommend the use of a No 2 grease with an EP additive. Note: The bearing cup is attached to the bearing along the rib ring using adhesive. It may become detached as this is only to aid with assembly. If this happens, the bearing can still be used as long as the cup is matched to the correct cone and rib ring. o Insert a new bearing retainer as shown. Well greased bearing placed into bearing carrier Figure 12 Pressing in bearing retainer Figure 13a o Slide bearing carrier assembly over axle as shown. o Apply Loctite 515 between housing and bearing carrier. Page 55 MAN-006 REV-0 INSTALLATION & SERVICING OF SIBS® ON TOYOTA HILUX VEHICLES UNCONTROLLED COPY IF PRINTED. CHECK WEBSITE FOR LATEST VERSION Figure 13b o Slide on the bearing retainer. o (Timken recommend that the bearing and retainer are pressed at the same time). o Press onto axle using an appropriately sized spacer and the Toyota tool (P/N 09521-25011) Figure 13c o Press bearing and bearing retainer firmly against the axle shaft. Figure 13d o Finally attach the flange nuts to the mounting studs and the circlip to the axle. Page 56 MAN-006 REV-0 INSTALLATION & SERVICING OF SIBS® ON TOYOTA HILUX VEHICLES UNCONTROLLED COPY IF PRINTED. CHECK WEBSITE FOR LATEST VERSION Figure 14 To install ABS pulse wheel on ABS models: o Measure the position from the bearing carrier to the pulse wheel on the OE axle shaft assembly. Install the pulse wheel and bearing retainer to the SIBS® axle shaft assembly to the same position. EMMA™ Park Brake Inspection Inspection of EMMA™ pistons, Belleville washers and replacement of EMMA™ piston o-rings and back-up-rings will only be required every second Major service. Note: the EMMA™ covers are under spring tension. Take care when removing EMMA™ covers to avoid bending of the cover or pistons. To remove the EMMA™ covers, the rear inner housings should be removed from the axle. • Ensure that the retractor bolts are installed and tight in the spring covers (compressing the EMMA™ springs). This can be easily achieved by charging the EMMA™ system prior to installing the retractor bolts. • Clamp the flexible service hose to the rear axle to prevent leakage of brake fluid. Disconnect brake pipes and hoses from the housing. • Remove mounting lock nuts. Remove inner housing. • Remove the outer spring cover bolts by undoing slowly, in sequence. • Discard spring cover bolts. • Once all ten bolts are removed the retractor bolts can be wound out in sequence one turn at a time (relieving tension on EMMA™ springs). • Lift off the spring cover. • Remove the disc springs. Check for cracking and replace as required. On installation ensure the springs are well greased. Page 57 MAN-006 REV-0 INSTALLATION & SERVICING OF SIBS® ON TOYOTA HILUX VEHICLES UNCONTROLLED COPY IF PRINTED. CHECK WEBSITE FOR LATEST VERSION • • • • Inspect for signs of ATF in with the disc springs as this will indicate there is a leakage of ATF past the large EMMA™ o-ring. Push out the EMMA™ park brake pistons and check O-ring seal for damage or wear. Hint: manufacture a slide hammer from a retractor bolt for this purpose. Clean and inspect EMMA™ piston bores for corrosion, pitting or wear. While the spring cover is removed, inspect the link pipe. Replace with stainless alternative (24-2815) if required. 24-2010 - EMMA Piston 15-4060 – Backup Ring EMMA™ Large 15-4050 - O-ring EMMA™ Large 01-4051 - Backup Ring EMMA™ Small 24-4030 – O-ring EMMA™ Small Figure 15 EMMA™ Piston O-rings and backup ring assembled. The O-rings and backup rings must be installed as shown in above figure. Figure 16a Rear inner housing Figure 16b EMMA™ piston installation With spring cover removed, inspect Link pipe. Assembly is the reverse of the above procedure. • O-rings and BUW’s are included in kit 42-4001 (O-ring kit for one rear brake, LCV5). • Ensure the o-rings and BUW are correctly installed on the EMMA™ pistons (refer to figure below). Grease o-rings, BUW’s and pistons with Silicone grease. • Push pistons into housing. Care should be taken to ensure the BUW’s are not pinched during assembly. Page 58 MAN-006 REV-0 INSTALLATION & SERVICING OF SIBS® ON TOYOTA HILUX VEHICLES UNCONTROLLED COPY IF PRINTED. CHECK WEBSITE FOR LATEST VERSION • Grease the Belleville spring washers with bearing grease. • Stack Belleville spring washers (8 per piston) as shown in Figure 17 below. Note: springs must be stacked correctly to ensure correct brake application. • Place gasket and spring cover over springs. • Fit retractor bolts to the pistons. Carefully wind down in sequence (one turn at a time). Note: if the bolts are tightened individually the EMMA™ piston may retract from the bore. • Install spring cover retaining bolts (same as housing bolts). In corrosive environments it is advised to use new bolts or the stainless alternative (01-3237). • The spring cover retaining bolts should be tightened evenly to 61Nm (45 lb-ft). Belville washers x 8 (stack as shown) EMMA™ Piston Rear Housing Minor Bore Figure 17 Arrangement of Belleville springs. 8 springs are stacked in series behind each EMMA™ piston. Total of 32 springs required per rear brake assembly EMMA™ Filter The FILTER ELEMENT (01-5071) in the EMMA™ manifold should be changed at regular intervals. Safe Effect recommends changing every 1,000 hours Page 59 MAN-006 REV-0 INSTALLATION & SERVICING OF SIBS® ON TOYOTA HILUX VEHICLES UNCONTROLLED COPY IF PRINTED. CHECK WEBSITE FOR LATEST VERSION Figure 18 Position of Filter Element on typical manifold. Pump is mounted on rear left hand side of bonnet on right hand drive vehicles. Position of pump on left hand drive vehicles may differ. Filter Element FILTER ELEMENT (01-5071) is fitted to the side of the manifold as shown in Figure 18 above. To replace: • Use a large wrench and loosen the filter element • Remove the two top bolts and spacers from the bracket and loosen the bottom bolt. • Swing bracket away from the firewall. • Wipe the filter to remove dirt and prevent contamination of the fluid when the filter is removed. • Remove used filter and replace. • Re-install bracket. Ensure the wiring harness fitted near the pump unit will not rub on the bracket Page 60 MAN-006 REV-0 INSTALLATION & SERVICING OF SIBS® ON TOYOTA HILUX VEHICLES UNCONTROLLED COPY IF PRINTED. CHECK WEBSITE FOR LATEST VERSION SIBS® / EMMA™ TROUBLESHOOTING GUIDE Issue / Description Possible Cause Solution Low brake pedal Faulty master cylinder or Incorrect adjustment of booster Input / output rods Refer to Toyota Repair Manual for fault diagnosis Excessive brake pedal travel (sudden or creeping) and loss of braking efficiency Leaking or damaged brake line Replace brake line – refer to page 18 Air in the brake system Bleed the brake system refer to pages 34 Damaged service piston Replace piston and seals – refer to page 47 Spongy brake pedal Air in the brake system Bleed the brake system – refer to pages 34 Hard brake pedal Vacuum booster or vacuum pump faulty Check vacuum pressure not leaking Excessive force required to operate the brake pedal and loss of braking efficiency Damaged brake pads or polished rotor. Replace brake pads, lightly scour all rotors with #240 grit wet and dry sandpaper. Glazing of pads and rotor Alternative method: Perform SIBS® optimum performance procedure (TBN-018) and refill brakes with fresh SIBS® fluid Brakes drag Incorrectly adjusted vacuum booster/master cylinder push rod Refer to Toyota Repair Manual for adjustment Brakes shudder (at very Additives in SIBS® fluid have broken down and lost effectiveness Replace fluid end of stop only) Page 61 MAN-006 REV-0 INSTALLATION & SERVICING OF SIBS® ON TOYOTA HILUX VEHICLES UNCONTROLLED COPY IF PRINTED. CHECK WEBSITE FOR LATEST VERSION SIBS® / EMMA™ TROUBLESHOOTING GUIDE Issue / Description Brakes are not releasing fully after operation Possible Cause Seized or jammed service piston Replace or repair – Refer to page 46 Seized or jammed EMMA piston Replace or repair – Refer to page 55 Blocked or damaged brake line Replace brake line – refer to page 18 Damaged brake rotor/hub assembly Replace brake rotor and hub assembly – refer to page 46 EMMA™ park brake hydraulic system faulty Check system operating pressure and hydraulic system leaks. Check for leaks in system and fluid lines. Check for correct operation of EMMA™ Charge Module – refer to page 34 Faulty master cylinder Vehicle pulls to one side during braking Solution Incorrect tyre pressures Blocked or damaged brake line Contamination of SIBS® oil – damaged oil seals Seized or jammed pistons Damaged brake pads or polished rotor. Refer Toyota Repair Manual for diagnosis Adjust to correct pressures Replace brake line – refer to page 18 Isolate damaged seals and replace components and SIBS® oil Replace or repair – refer to page 46 Replace brake pads, lightly scour all rotors with #240 grit wet and dry sandpaper or Perform SIBS optimum performance procedure (TBN-018) Page 62 MAN-006 REV-0 INSTALLATION & SERVICING OF SIBS® ON TOYOTA HILUX VEHICLES UNCONTROLLED COPY IF PRINTED. CHECK WEBSITE FOR LATEST VERSION SIBS® / EMMA™ TROUBLESHOOTING GUIDE Brakes judder and/or pulsing pedal during braking Damaged brake rotor or brake pads resulting from loss of SIBS® oil from housing Check and identify cause and replace damaged components EMMA™ park brake will not release Cab door open (either side) Circuit breaker protecting motor has tripped. Close door and \or check door switch EMMA™ park brake hydraulic system faulty Check system operating pressure EMMA™ control switch will not operate If insufficient pressure check for hydraulic system leaks – replace faulty components Investigate cause of current overload and rectify. Reset circuit breaker. Check & replace EMMA™ control switch and wiring Oil leaks from EMMA™ spring covers Seals damaged, worn or backup rings fitted incorrectly Replace or reassemble seals Refer to page 55 Page 63 MAN-006 REV-0 INSTALLATION & SERVICING OF SIBS® ON TOYOTA HILUX VEHICLES UNCONTROLLED COPY IF PRINTED. CHECK WEBSITE FOR LATEST VERSION Material Safety Data Sheet Page: Infosafe No. LPU8Z Issue Date : January 2005 Product Name : SIBS COOLING FLUID 1 of 4 ISSUED by SAFEEFFE Classified as hazardous according to criteria of NOHSC 1. IDENTIFICATION OF THE SUBSTANCE/PREPARATION AND COMPANY Product Name Product Use Company Name Address Emergency Tel. Telephone Number/Fax SIBS COOLING FLUID Coolant for Sealed Integrated Braking System SAFE EFFECT PTY LTD PO Box 632 Balcatta WA 6914 Australia +61 8 9240 2713 Tel: +61 8 9240 2713 Fax: +61 8 9240 1577 2. COMPOSITION/INFORMATION ON INGREDIENTS Ingredients Name Liquid Hydrocarbons Paraffins & Naphthenes Ingredients determined not to be hazardous CAS Proportion 80-90 % Not required Balance 3. HAZARDS IDENTIFICATION Classified as hazardous according to NOHSC criteria. Not classified as dangerous goods according to the ADG Code. Risk Phrases R65 Harmful: may cause lung damage if swallowed. Safety Phrases S62 If swallowed, do not induce vomiting; seek medical advice immediately and show this container or label. 4. FIRST AID MEASURES Inhalation Ingestion Skin Eye First Aid Facilities Advice to Doctor Other Information Remove the source of contamination or move the victim to fresh air. Ensure airways are clear and have qualified person give oxygen through a facemask if breathing is difficult. If irritation develops and persists, seek medical attention. DO NOT induce vomiting. Immediately wash out mouth with water. Seek immediately medical attention. Remove contaminated clothing. Wash gently and thoroughly with water and non-abrasive soap. Ensure contaminated clothing is washed before re-use or discard. If irritation develops, seek medical attention. If contact with the eye(s) occur, wash with copious amounts of water, holding eyelids(s) open. Take care not to rinse contaminated water into the non-effected eye. If irritation develops and persists, seek medical attention. Eye wash and normal washroom facilities. Treat symptomatically. For advice, contact a Poisons Information Centre (Phone eg Australia 131 126; New Zealand 03 4747 000 [Not after May 2005] or 0800 764 766) or a doctor (at once). 5. FIRE FIGHTING MEASURES Extinguishing Media Water fog, carbon dioxide, foam or dry chemical. Do NOT use water jets. Cool fire exposed containers with water spray. Specific Hazards Combustible C1 liquid. Fire-exposed container may rupture/explode. Hazardous Under fire conditions this product may emit toxic and/or irritating fumes Combustion Products including oxides of carbon. Precautions in Self-Contained Breathing Apparatus (S.C.B.A) and full protective clothing connection with Fire should be worn to minimise exposure. 6. ACCIDENTAL RELEASE MEASURES Material Safety Data Sheet Page: Infosafe No. LPU8Z Issue Date : January 2005 Product Name : SIBS COOLING FLUID 2 of 4 ISSUED by SAFEEFFE Classified as hazardous according to criteria of NOHSC Remove all sources of ignition. Increase ventilation. Evacuate all unnecessary personnel. Wear full protective equipment and clothing to minimise exposure. If possible contain the spill. Place inert, non combustible, absorbent material onto spillage. Use clean non-sparking tools to collect the material and place into a suitable labelled container. If large quantities of this material enter the waterways contact the Environmental Protection Authority, or your local Waste Management Authority. 7. HANDLING AND STORAGE Handling Storage Repeated or prolonged contact with this material should be avoided in order to lessen the possibility of skin disorders. It is essential that all who come into contact with this material maintain high standards of personal hygiene ie. washing hands prior to eating, drinking or going to the toilet. Build-up of mists in the working atmosphere must be prevented. Combustible C1 liquid for storage and handling purposes. Store in a cool, dry, well-ventilated area, out of direct sunlight. Avoid sparks, flames, and other ignition sources. Store away from incompatible materials such as materials that support combustion (oxidising materials). Reference should be made to Australian Standard AS1940- The storage and handling of flammable and combustible liquids. 8. EXPOSURE CONTROLS, PERSONAL PROTECTION Exposure Limits Respiratory Protection Eye Protection Hand Protection Body Protection Eng. Controls Other Information No exposure standards have been established for this material by the National Occupational Health And Safety Commission (NOHSC). Avoid breathing of vapours or mists. Where ventilation is inadequate and vapours or mists are generated the use of an approved respirator with filter complying with AS/NZS 1715 and AS/NZS 1716 is recommended; however final choice of appropriate breathing protection is dependant upon actual airborne concentrations and the type of breathing protection required will vary according to individual circumstances. Expert advice may be required to make this decision. Reference should be made to Australian Standards AS/NZS 1715Selection, Use and Maintenance of Respiratory Protective Devices; and AS/NZS 1716- Respiratory Protective Devices. Safety glasses with side shields, goggles as appropriate recommended. Final choice of appropriate eye/face protection will vary according to individual circumstances i.e. methods of handling or engineering controls and according to risk assessments undertaken. Eye protection should conform with Australian/New Zealand Standard AS/NZS 1337 - Eye Protectors for Industrial Applications. Wear gloves of impervious material. Final choice of appropriate gloves will vary according to individual circumstances i.e. methods of handling or according to risk assessments undertaken. Reference should be made to AS/NZS 2161.1: Occupational protective gloves - Selection, use and maintenance. Wear appropriate clothing including chemical resistant apron where clothing is likely to be contaminated. It is advisable that a local supplier of personal protective clothing is consulted regarding the choice of material. Natural ventilation should be sufficient, however where vapours or mists are generated the use of a local exhaust ventilation system (drawing vapours/mists away from workers breathing zone) is recommended. No biological limit allocated. 9. PHYSICAL AND CHEMICAL PROPERTIES Appearance Melting Point Boiling Point Solubility in Water Specific Gravity (H2O=1) pH Value Vapour Pressure Viscosity Clear and bright liquid Not available. 238-257°C Immiscible 0.827 @ 15°C Not applicable 3 Pa @ 20°C 4 cSt @ 40°C 1.5 cSt @ 100°C Material Safety Data Sheet Page: Infosafe No. LPU8Z Issue Date : January 2005 Product Name : SIBS COOLING FLUID 3 of 4 ISSUED by SAFEEFFE Classified as hazardous according to criteria of NOHSC Flash Point Flammability 105°C (Opened cup) Classified as a Class C1 (COMBUSTIBLE LIQUID) for the purpose of storage and handling, in accordance with the requirements of AS1940. Remove all sources of heat and ignition. Ignition Temperature 232°C (ASTM E-659) Flammable Limits Not available. LEL Flammable Limits Not available. UEL 10. STABILITY AND REACTIVITY Stability Hazardous Polymerization Materials to Avoid Hazardous Decomposition Products Hazardous Reaction Conditions to Avoid Stable under normal conditions. Will not occur. Strong oxidising agents. Thermal decomposition and combustion produce noxious fumes containing oxides of carbon. Reacts with oxidising agents. Heat, direct sunlight, open flames or other sources of ignition. 11. TOXICOLOGICAL INFORMATION Toxicology Information Inhalation Ingestion Skin Eye Chronic Effects No toxicity data is available for this material. May cause irritation to the mucous membrane and upper airways, where material is heated and is used in poorly ventilated areas. Symptoms may include headache, dizziness and nausea. Harmful-may cause lung damage if swallowed. Subsequent to ingestion or vomiting, small amounts of liquid aspirated into the respiratory system may cause severe pulmonary injury that may lead to death. May also cause irritation to the gastrointestinal system. Symptoms may include nausea, vomiting, diarrhoea and abdominal pain. May cause irritation in contact with the skin, which may result in redness and itchiness, possibly leading to dermatitis. May cause eye irritation, resulting in redness, stinging and excessive tearing. Prolonged or repeated contact with this material may result in skin irritation possibly leading to dermatitis. 12. ECOLOGICAL INFORMATION Environ. Protection Mobility Persistence / Degradability Bioaccumulation Ecotoxicity No ecological data is available for this material. Avoid contaminating waterways, drains, sewers, or ground. No data available for this specific product. No data available for this specific product. No data available for this specific product. No data available for this specific product. 13. DISPOSAL CONSIDERATIONS Dispose of waste according to federal, E.P.A. and state regulations. Assure conformity with all applicable regulations. 14. TRANSPORT INFORMATION U.N. Number Proper Shipping Name DG Class Not classified as a Dangerous Good according to the Australian Code for the Transport of Dangerous Goods by Road and Rail. None Allocated None Allocated None Allocated Material Safety Data Sheet Page: Infosafe No. LPU8Z Issue Date : January 2005 Product Name : SIBS COOLING FLUID 4 of ISSUED by SAFEEFFE Classified as hazardous according to criteria of NOHSC Hazchem Code Packing Group None Allocated None Allocated 15. REGULATORY INFORMATION Risk Phrase Safety Phrase Poisons Schedule Hazard Category Packaging & Labelling R65 Harmful: may cause lung damage if swallowed. S62 If swallowed, do not induce vomiting; seek medical advice immediately and show this container or label. S5 Harmful Labelling requirements of the Standard for Uniform Scheduling of Drugs and Poisons do not apply to a poison that is packed and sold solely for industrial, laboratory or manufacturing purposes; however is labelled in accordance with the National Occupational Health and Safety Commission's 'National Code of Practice for the Labelling of Workplace Substances'. 16. OTHER INFORMATION SDS History MSDS Creation: January 2005 ...End Of MSDS... 4 Service History Record Sheet = Page 68 MAN-006 REV-0 INSTALLATION & SERVICING OF SIBS® ON TOYOTA HILUX VEHICLES UNCONTROLLED COPY IF PRINTED. CHECK WEBSITE FOR LATEST VERSION Notes Page 69 MAN-006 REV-0 INSTALLATION & SERVICING OF SIBS® ON TOYOTA HILUX VEHICLES UNCONTROLLED COPY IF PRINTED. CHECK WEBSITE FOR LATEST VERSION Appendix Included in this Appendix are the following documents. Technical Bulletins TBN-019: TBN-032: Adjustment of EMMATM Relief Valve Fitment of EMMATM Manual Release System Page 70 MAN-006 REV-0 INSTALLATION & SERVICING OF SIBS® ON TOYOTA HILUX VEHICLES UNCONTROLLED COPY IF PRINTED. CHECK WEBSITE FOR LATEST VERSION Technical Bulletin – TBN-019 Product EMMATM Brake Subject Adjustment of EMMATM relief valve to change the delay in application of EMMATM Brake Change Revision Issue Revision Issue Date Comments 00 01 30-August-2006 15-November-2007 Initial Release Updated to include Hilux TAF-010 Rev04 Page 1 15/11/2007 Technical Bulletin – TBN-019 Product: EMMATM Brake Subject: Adjustment of EMMATM relief valve to change the delay in application of EMMATM Brake Summary: • This procedure specifically relates to the newer EMMATM manifolds with one solenoid valve. o With this system there is no ‘HARD STOP’ option, only the ‘SOFT STOP’ option. o When EMMATM brake application is called for (either by pressing the operator button, or triggering the interlock - when fitted), a modulated brake application occurs as the pressure dumps via a relief valve. o This Procedure can be used to negate the effect of the relief valve to provide a ‘HARD STOP’ only. This is only recommended when the vehicle is operated at low speed, as full EMMATM application at higher speeds will cause the rear wheels to lock. • The Procedure can also be used to adjust the EMMATM relief valve if the application of the EMMATM brake is either too rapid (causing the brakes to lock) or too slow. • The relief valve is typically set to ~350psi Recommended tools: To carry out this procedure, the following items will be required: 1. Spanner 11/16” 2. Allen key 3/16” TAF-010 Rev04 Page 2 15/11/2007 Description: PRESSURE SWITCH 02-1007 EMMATM PUMP/HARNESS ASSY This is the system typically fitted to 78/79 series Landcruisers as well as Hilux models. This EMMATM system has one solenoid valve and internal cartridge filtration. FILTER RELIEF VALVE SOLENOID VALVE Functionality of this system is ‘SOFT STOP’ only, whereby a modulated brake application occurs as the pressure dumps via a relief valve. 02-1005 EMMATM PUMP/HARNESS ASSY This is the system typically fitted to 100 series Landcruisers and the photo shows the system in situ. Note the position of the pressure switch has moved, otherwise the components remain the same as 021007 above. PRESSURE SWITCH Procedure: 1. Lift the bonnet, locate the EMMATM unit. 2. Clean thoroughly around the relief valve and other hydraulic components Note: A small amount of ATF leakage through the cap is normal, however excessive leakage should be investigated. 3. Using a 11/16” spanner, loosen the locknut at the top of the relief valve. TAF-010 Rev04 Page 3 15/11/2007 If only a small adjustment is required: 4. Using a 3/16” Allen key, turn the adjusting screw only ¼ of a turn: o CLOCKWISE to INCREASE Relief Valve Pressure Setting – This will INCREASE the delay in EMMATM brake application. o ANTI-CLOCKWISE to REDUCE Relief Valve Pressure Setting – This will DECREASE the delay in EMMATM brake application. 5. Tighten the locknut and test drive the vehicle. Adjust again if necessary. Adjustment of relief valve using 11/16” spanner and 3/16” Allen key. If a ‘HARD STOP’ only is required: 6. Using a 3/16” Allen key, turn the adjusting screw ANTI-CLOCKWISE as far as the adjustment will allow – this relief valve has a minimum setting of 100psi. 7. Tighten the locknut 8. Test drive the vehicle. If EMMATM brake application is still delayed, the filter unit may need changing. WARNING It is not recommended to operate a vehicle at high speed with the minimum pressure setting on the relief valve, as full EMMATM brake application at high speed will cause the rear wheels to lock. Prepared by: Approved by: Issue Date: Issue Revision: Stuart Millgate Andrew Miller - Chief Engineer 15th November 2007 01 Advanced Braking Pty Ltd. Unit 1, 3 McDonald Street West Osborne Park WA 6017 AUSTRALIA PO Box 1177 Osborne Park WA 6916 TAF-010 Rev04 Tel: +61(08) 9273 4800 Fax: +61 (08) 9201 9986 Email: [email protected] Web: www.advancedbraking.com Page 4 15/11/2007 Technical Bulletin – TBN-032 Product EMMATM Brake Subject Fitment of EMMATM Brake Manual Release System Change Revision Issue Revision Issue Date Comments 0 16-November-2007 Initial Release TAF-010 Rev04 Page 1 15/11/2007 Technical Bulletin – TBN-032 Product: EMMATM Brake Subject: Fitment of EMMATM Brake Manual Release System Summary: The Manual Release System allows the EMMATM Brake to be released in the case of a power failure in the vehicle, eg flat battery, preventing the EMMATM system pump from operating. It will not be possible to move the vehicle if the EMMATM Brake is not released. The system consists of a hand pump, a quick release coupling, a three way valve, hoses and fittings. The hand pump can be either permanently fitted between the seats of the vehicle or can be coupled when needed to the system via a quick release coupling. The three way valve can be fitted under the driver’s or passenger’s seat. There are three hoses running from the three way valve, one to the EMMATM manifold, one to the hand pump (or quick release coupling) and one to the “T” piece on the rear differential. When the Manual Release System needs to be used, the operator rotates the lever of the three way valve closing the circuit between the EMMATM pump and EMMATM brake and opens the circuit between the hand pump and the EMMATM brake. The hand pump is then operated until the SIBS park brake /emergency brake is released and the vehicle can be moved. TAF-010 Rev04 Page 2 15/11/2007 Description: From Pump To Quick Release To Brake The original hydraulic line running under the vehicle from the EMMATM pump in the engine bay to the EMMATM brake at the rear is replaced by a 3 way valve and 3 hoses. The photo, left shows the 3 way valve bracketed to the underside of the vehicle below the cab. The pipe to the Quick Release connector runs up into the vehicle cab. The pipe to the brake continues back to the EMMA brake at the rear. The 3 way valve handle is shown in the photo on the left in its fixed location on the cab floor. The handle is in the position for normal vehicle operation. The red arrow shows the handle movement required to isolate the EMMATM pump circuit and allow the manual release system to be operated TAF-010 Rev04 Page 4 15/11/2007 The blue arrow in the photo, left, shows the direction of fluid flow during normal vehicle operation. Fluid is pumped from the EMMATM pump to the brake. From EMMATM Pump To Brake From Hand Pump The green arrow in the photo, left, shows the direction of fluid flow during manual release of the EMMATM brake. Fluid is pumped from the hand pump to the EMMATM brake To Brake TAF-010 Rev04 Page 5 15/11/2007 The quick release connector is shown located between the driver and passenger seats, next to the EMMATM brake control . From 3 way valve The photo, left, shows the hand pump and mating half of the quick release connector. TAF-010 Rev04 Page 6 15/11/2007 Procedure: 1. 2. 3. 4. Lift the bonnet, disconnect the battery. Locate EMMATM unit and clean thoroughly around the hydraulic connections Disconnect hydraulic pipe running from pump to T-piece on rear axle. Locate 3 way valve in suitable position on cab floor, drill holes (if required) and fix using brackets. 5. Connect a hose from the pump to 3 way valve and another from the 3 way valve to the T-piece. 6. Connect the hose with the Quick release connector to the 3 way valve and then route it into the vehicle cab. 7. Bleed EMMATM brakes and check operation. Operation of Manual Release System 1. 2. 3. 4. 5. 6. 7. Ensure hand pump is full of AT.Fluid Connect hand pump using Quick release connector Turn 3 way valve handle to manual release position Close valve on hand pump to allow pumping Pump hand pump upto 700-1000 psi to release EMMA brake Move vehicle as required Turn 3 way valve back to normal vehicle operation position to engage EMMA brakes. 8. Release pressure in handpump, then disconnect. 9. Bleed EMMA brake system before recommencing normal vehicle operation. WARNING The 3 way valve must not be turned to the manual release position during normal vehicle operation, as the EMMATM brake has been bypassed and will not function. Prepared by: Approved by: Issue Date: Issue Revision: Stuart Millgate Andrew Miller - Chief Engineer 16th November 2007 0 Advanced Braking Pty Ltd. Unit 1, 3 McDonald Street West Osborne Park WA 6017 AUSTRALIA PO Box 1177 Osborne Park WA 6916 TAF-010 Rev04 Tel: +61(08) 9273 4800 Fax: +61 (08) 9201 9986 Email: [email protected] Web: www.advancedbraking.com Page 7 15/11/2007