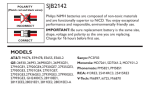
1
Service Manual
AUTOMATIC
TRANSMISSION
1992 - 1993
The information contained in this service manual
has been prepared for the professional automotive
technician involved in daily repair operations. lnformation in this manual is divided into groups by
transaxle or transmission models. Each group is
further divided to address individual components
within the group.
These groups contain general information, specification, removal and installation, disassembly and
reassembly procedures for the components. The
first page of each group contains an alphabetical
index to assist in finding the location of the
component. The information, descriptions and specifications were in effect at the time this manual
was released.
This BAcKup DSM manual 1s to be used ONLY as a BACKUP . please DO NOT REDISTRIBUTE
WHOLE SE~mms. This BACKUP was sold to you under the fact that yoU do ,ndeed OWN
a GENUINE DSM MANUAL. It CANNOT BE considered a REPLACEMENT (unless your or,g,nal
m?inUai was lost or destroyed.)
please See README.N or README.HTML for addltlonal lnformat,on
Thank YOU. [email protected]
WE SUPPORT
VOLUNTARY TECHNICIAN
CERTIFICATION THROUGH
Mitsubishi Motors Corporation reserves the right to make changes in
design or to make additions to or improvements in its products wlthout
imposing any obligations upon itself to install them on its products
previously manufactured.
(C) 1992 Mitsubishi Motors Corporation
Introduction
............................
Automatic Transaxle
F3A2 . . . . . . . . . . . . . . . . . . . . . . . . . . . . . . . . . . . .
FOREWORD
(I
GROUP INDEX
Printed in Japan
F4A2
...................................
F4A3, W4A3 . . . . . . . . . . . . . . . . . . . . . . . .
1
INTRODUCTION
CONTENTS
EXPLANATION OF MANUAL CONTENTS ........
FORM-IN-PLACE GASKET ....................................
Disassembly ........................................................
Form-In-Place Gasket Application ........................
Surface Preparation ............................................
2
6
6
6
6
SPECIAL TOOL NOTE ............................................ 5
TORQUE REFERENCES ........................................ 5
TRANSAXLE/TRANSMISSION MODEL TABLE 4
2
INTRODUCTION
EXPLANATION OF MANUAL CONTENTS
Maintenance and Servicing Procedures
(1) A diagram of the component parts is
provided near the front of each section in
order to give the reader a better understanding of the installed condition of
component parts.
(2) The numbers provided within the diagram
indicate the sequence for maintenance
and servicing procedures; the symbol m
indicates a non-reusable part; the tightening torque is provided where applicable.
‘.
Classification of
Service Points
0 Rernoval s t e p s :
The part designation number corresponds
to the number in the illustration to indicate
removal steps.
l Disassembly steps:
The part designation number corresponds
to the number in the illustration to indicate
disassembly steps.
l Installation steps:
Specified in case installation is impossible
in reverse order of removal steps. Omitted if installation is possible in reverse
order of removal steps.
l Reassembly steps:
Specified in case reassembly is impossible in reverse order of disassembly steps.
Omitted if reassembly is possible in reverse order of disassembly steps.
Major Maintenance/
When there are major points relative to maintenance and servicing procedures (such as essential
maintenance and service points, maintenance and
service standard values, information regarding the
use of special tools, etc.), these are arranged
together as major maintenance and service points
and explained in detail.
OAO: Indicates that there are essential points for
removal or disassembly.
+A4: Indicates that there are essenttal points for
installation or reassembly.
Symbols for Lubrication, Sealants and
Adhesives
Information concerning the locations for lubrication and for application of sealants and adhesives
is provided, by using symbols, in the diagram of
component parts, or on the page following the
component parts page, and explained.
TSB Revision
d..... Grease
(multipurpose grease unless there is
a brand or type specified)
4 Sealant or adhesive
..,.. Brake fluid, automatic transmission
fluid or air conditioner compressor oil
B
:m Engine oil or gear oil
3
INTRODUCTION
indicates the
.page number
‘-‘-
2’
.-
_
--(zDe;Es
]
tightening
Denotes non-reusable
part.
Operating procedures, cautions.
etc. on removal, installation, disassembly and reassembly are de-
1 TSB Revision
I
INTRODUCTION
TRANSAXLE/TRANSMISSION MODEL TABLE - MODEL 1992
Model
Code
Type
F3A21
FWD, 3-speed
Diff.
Center
Diff.
vcu
-
-
-
Mirage
-’
-
Mirage
X
)(
F4A2 1
-
Center
Diff.
Lock
Vehicle Model
X
-
-
-
Expq-LRV, Galant, Eclipse
F4A23
X
-
-
-
Expo
F4A33
X
-
-
Eclipse, 3000GT
F4A22
FWD, 4-speed
l---i
I x
W4A32
Full t; me 4WV,
-. - ‘-4-speed
I x
I
x
I
-
I Expo-LRV, Expo, Galant
W4A33
I/%V4AW2 Part t/me 4WO. 4-speed
I
I
\
1 R4ACl ) RWD. 4-speed
‘.
Diff.: Differential
VCU : Viscous Coupling
FWD: Front wheel drive
RWD: Rear wheel drive
4WD: Four wheel drive
,I
i
/‘
*-_’
:\c.
k&,<<” (’
id
:
-t
_2
-‘ri.
I rc
-
_ r(
;-
TRANSAXLE/TRANSMISSJtW-h+ihEL ,fAB/&‘- MODEL 1993
1 .Y
Vehicle Model
Full time 4WD, 4-speed
W4A33
V4AW2
R4ACl
Part time 4WD. 4-speed
RWD,
4-speed
X
X
x
-
Eclipse
-
X
X
X
Montero
-
-
-
-
Truck
Diff : Differential
VCU: Viscous Coupling
FWD: Front wheel drive
RWD: Rear wheel drive
4WD: Four wheel drive
TSB Revision
5
INTRODUCTION
SPECIAL TOOL NOTE
Please refer to the special tool cross reference chart which is located in the service manual at the beginnihg6f
each group, for a cross reference from the MMC special tool number to the special tool number that is
/ .,f
available in your market.
3
: : . . 1.,,,
/, ,,
TORQUE REFERENCES
General tightening torque is as shown in the following table.
The specific part tightening torque is shown at the beginning of each group.
Flange bolt
Bolt with spring washer
Head mark 4
Size mm
(dia. x pitch)
5 x 0.8
6x I.0
8 x 1.25
10x1.25
12x 1.25
14x 1.5
T
Head mark 7
Head mark 10 f Head mark 4 1. Head mark 7
Nm
ft.lbs.
Nm
ft.lbs.
-
-
9
11
20
36
55
8
14
26
40
5.0
9.0
18
34
62
92
TSB Revision
,;,
22
43
78
127
““-
-
-
11
14
30
55
10
22
40
24
50
90
6
INTRODUCTION
FORM-IN-PLACE GASKET
The transaxle and transmission have several areas where the form-in-place gasket (FIPG) is in use. TO ensure
that the gasket fully serves its purpose, it is necessary to observe some precautions when applying the
gasket. Bead size, continuity and location are of paramount importance. Too thin a bead could cause leaks.
Too thick a bead, on the other hand, could be squeezed out of location, causing blocking or narrowing of the
fluid feed line. To eliminate the possibility of leaks from a joint, therefore, it is absolutely necessary to apply
the gasket evenly without a break, while observing the correct bead size.
The FIPG used in the transaxle and transmission is a room temperature vulcanization (RTV) type and is
supplied in a 120-gram tube (Part No. MD997740). Since the RTV hardens as it reacts with the moisture in the
atmospheric air, it is normally used in the metallic flange areas.
Disassembly
The parts assembled with the FIPG can be easily disassembled without use of a special method. In some
cases, however, the sealant between the joined surfaces may have to be broken by lightly striking with a
mallet or similar tool. A flat gasket scraper may be lightly hammered in between the joined surfaces. In this
case, however, care must be taken to prevent damage to the joined surfaces.
Surface Preparation
Thoroughly remove all substances deposited on the gasket application surfaces, using a gasket scraper or
wire brush. Check to ensure that the surfaces to which the FIPG is to be applied is flat. Make sure that there
are no oils, greases and foreign substances deposited on the application surfaces. Do not forget to remove
the old sealant remained in the bolt holes.
Form-In-Place Gasket Application
When assembling parts with the FIPG, you must observe some precautions, but the procedure is very simple
as in the case of a conventional precut gasket.
Applied FIPG bead should be of the specified size and without breaks. Also be sure to encircle the bolt hole
circumference with a completely continuous bead. The FIPG can be wiped away unless it is hardened. While
the FIPG is still moist (in less than 15 minutes), mount the parts in position. When the parts are mounted,
make sure that the gasket is applied to the required area only.
The FIPG application procedure may vary on different areas. Observe the procedure described in the text
when applying the FIPG.
TSB Revision
AUTOMATIC
TRANSAXLE
F3A21 3
CONTENTS
ANNULUS GEAR AND TRANSFER
DRIVE GEAR SET ................................................
DIFFERENTIAL ....................................................
DRIVE SHAFT OIL SEAL ....................................
FRONT CLUTCH ....................................................
GENERAL INFORMATION ................................
KICKDOWN SERVO ............................................
54
56
61
46
2
LOW-REVERSE BRAKE ....................................
OIL PUMP ............................................................
PLANETARY GEAR ............................................
58
59
44
51
REAR CLUTCH
....................................................
48
SPECIAL TOOLS ....................................................
12
SPECIFICATIONS ................................................
Adjusting Pressure Plate,
Snap Rings and Spacers ....................................
Gear Ratio Table ................................................
Service Specifications ....................................
7
9
7
7
7
Transaxle Model Table ....................................
Torque Specifications ........................................ 1 1
8
Valve Body Spring Identification ....................
SPEEDOMETER GEAR ........................................ 60
TRANSAXLE ........................................................ 15
TRANSFER SHAFT / GOVERNOR .................... 62
VALVE BODY ........................................................ 63
23A-2
F3A2 - General Jnformation
GENERAL INFORMATION
Precautions to be taken when disassembling and reassembling the transmission
0
Because the automatic transaxle is composed of component parts of an especially high degree of
precision, these parts should be very carefully handled during disassembly and assembly so as not to scar
or scratch them.
0
A rubber mat should be placed on the workbench, and it should always be kept clean.
0
During disassembly, cloth gloves or shop towels should not be used. If such items must be used, either
use articles made of nylon, or use paper towels.
0
All disassembled parts must be thoroughly cleaned.
Metal parts may be cleaned with ordinary detergents, but must be thoroughly air dried.
0
Clean the clutch disc, resin thrust plate and rubber parts by using ATF (automatic transmission fluid), being
very careful that dust, dirt, etc. do not adhere to them.
0
Do not reuse gaskets, oil seals, or rubber parts.
Replace such parts with new ones at every reassembly. The O-ring of the oil level gauge need not be
replaced.
0
Do not use grease other than petrolatum jelly.
0
Apply ATF to friction components, rotating parts, and sliding parts before installation.
0
A new clutch disc should be immersed in ATF for at least two hours before installation.
0
Do not apply sealer or adhesive to gaskets.
0
When a bushing must be replaced, replace the assembly in which it is incorporated.
0
If the transaxle main unit is damaged, also disassemble and clean the cooler system.
TSB Revision
F3A2 - General Inform&ion
ECTIONAL VIEW - MODEL 1992
Planet gear set
Rear clutch
Oil pump
Front clutch
i\
\
Transfer idler gear
Torque
converter -
fer
gear
Transfer
- driven gear
TSB Revision
23A-4
F3A2 - General Information
;ECTIONAL VIEW - MODEL 1993
Transfer idler gear
Toraue
Converter housing
,
I
Rear cover
Transfer
drive gear
Transfer
driven gear
\
Transaxle case
\
Transfer shaft
\
Governor
Different/l w
1700014
1 TSB Revision
/
.:,I:.
F
Front clutch
Rear clutch
Low-reverse brake
II
/
(
PxAmulator
I I
I I 11 t Regulator I I I I
Oil filter ( r---7 /
jr-31
IIll’
L..ll
Kickdown
Kickdown
servo
23A-6
F3A2 - General Information
IYDRAULIC CONTROL SYSTEM - MODEL 1993
TSB Revision
F3A2 - SDecification
SPECIFICATIONS
TRANSAXLE MODEL TABLE - MODEL 1992
Transaxle model
F3A21-2-ERA4”’
Gear ratio type
A
Speedometer
gear ratio
31136
Final gear ratio
3.600
Vehicle model
C52A
Engine model
4G15
I
NOTE
“1: Model with torque converter clutch (TCC)
TRANSAXLE MODEL TABLE - MODEL 1993
Transaxle model
F3A21-2-ER18
Gear ratio type
A
Speedometer
gear ratio
31136
Final gear ratio
3.600
Vehicle model
CA2A, CB2A
Engine model
4G15
GEAR RATIO TABLE
A
I
1 st
2nd
3rd
Reverse
I
2.846
1.581
1 .ooo
2.176
I
SERVICE SPECIFICATIONS
mm (in .I
Standard
Transfer idler gear bearing preload
Input shaft end play
Transfer shaft preload
Low-reverse brake end play
Differential case end play
Oil pump gear side clearance
Front clutch snap ring clearance
Rear clutch snap ring clearance
Output flange bearing end play
Differential pinion backlash
Nm (ftlbs.)
TSB Revision
0.8 (6)
0.3 - 1 .o (012 - .039)
0.1 -0.15 (.004- .006)
0.8 - 1 .O (031 - .039)
O-0.15(0-.006)
0.03 - 0.05 LOO1 - ,002)
0.4 - 0.6 LO1 6 - ,023)
0.3 - 0.5 LO1 2 - ,020)
0 - 0.06 (0 - ,002)
0.025 - 0.150 LOO1 - .006)
23A-8
F3A2 - Specifications
VALVE BODY SPRING IDENTIFICATION
Spring
Wire
diameter
Free
height
Outside
diameter
Number of
loops
Throttle valve spring
32.05
(1.262)
9.5
i.374)
12
Kickdown valve spring
26.14
(1.029)
6.4
i.252)
19
Range control valve
spring
23.44
(.923)
8.4
(.331)
11
Torque converter control
valve spring
26.4
(1.039)
8.8
r.346)
12
1.1
(043)
Regulator valve spring
51, .4
(2.024)
15.4
(.606)
12
1.4
(.055)
l-2 shift valve spring
31.3
(1.232)
7.6
l.299)
10
2-3 control valve spring
50.80
(2.000)
6.6
(.260)
2-3 shift valve spring
23.71
(.933)
Line relief spring
17.3
(.681)
-0w relief spring
I
12.46
f.491)
0.9
(.035)
7.0
(.276)
I
6.6
(.260)
1.0
i.039,
10
8
I
I
3educing valve spring
:MODEL 1992 only>
40.35
(1.589)
6.8
(.268)
22
Iutch control valve spring
:MODEL 1992 only>
15.7
(.618)
6.2
(.244)
11
TSB Revision
0.5
(.020)
.7
0.6
(024)
0.7
(026)
F3A2 - Specifications
ADJUSTMENT PRESSURE PLATE, SNAP RINGS AND SPACERS
Part name
Tth;$e,ss
Identification
symbol
Part No.
,..I:
Pressure plate
(For adjustment
brake
end play) of low-reverse
5.6 (.220)
5.7 (224)
5.8 (228)
5.9 (232)
6.0 (236)
6.1 (240)
6.2 (244)
6.3 (248)
6.4 (252)
6.5 (.256)
6.6 (.260)
6.7 (264)
6.8 (268)
56
57
58
59
60
61
62
63
64
65
66
67
68
MD731720
MD731 721
MD727801
MD731 000
MD727802
MD731 001
MD727803
MD731 002
MD727804
MD731 003
M D727805
MD731004
MD731 005
Snap ring
[For adjustment of front clutch and
rear clutch clearance)
1.6 (063)
1.7 (067)
1.8 (071)
1.9 (075)
2.0 i.079)
2.1 (083)
2.2 (087)
2.3 (.091)
2.4 (.094)
None
Brown
Blue
None
Brown
Blue
None
Brown
Blue
2.5 (098)
2.6 (1’02)
2.7 (106)
2.8 (.I IO)
2.9 (.I 14)
3.0 (.I 18)
None
Brown
Blue
None
Brown
Blue
MD955630
MD730930
MD955631
MD730931
M D955632
MD730932
MD955633
MD730933
MD955634
MD730934
MD955635
M D730935
MD955636
MD730936
M D955637
1.88 (074)
1.94 (.076)
2.00 (.079)
2.06 (.081)
None
Brown
Blue
None
MD707501
MD707502
MD707563
MD707504
0.82 (032)
0.85 (033)
0.88 (035)
0.91 (.036)
0.94 (037)
0.97 (.038)
1 .oo f.039)
1.03 (041)
1.06 (042)
82
85
88
91
94
97
00
03
06
MD71 2638
MD71 2639
MD71 2640
MD71 2641
MD71 2642
MD71 2643
M D7 12644
MD71 2645
MD71 2646
jnap ring
For adjustment of output flange end play)
<pacer
For adjustment of transfer shaft preload)
TSB Revision
”
”
:
23A-10
F3A2 - Specifications
Part name
;hi$;s.s
Identification
symbol
gE?justment of transfer shaft preload)
1 1.09 .I2
(.043)
(.044)
1 .I5 (.045)
1.18 (.046)
1.21 (.048)
1.24 (.049)
1.27 (.050)
1.30 (.051)
1.33 (.052)
1.36 (.054)
1.39 (.055)
1.42 (.056)
1.45 (.057)
1.48 f.058)
1.51 l.059)
1.54 (.061)
1.57 t.062)
1.60 i.063)
1.63 (.064)
1.66 f.065)
1.69 (.067)
09 12
15
18
21
24
27
30
33
36
39
42
45
48
51
54
57
60
63
66
69
MD71 MD71 2647 2648
MD71 2649
MD71 2650
MD712651
MD71 2652
MD71 2653
MD71 2654
MD7 12655
MD71 2656
MD71 2657
MD71 2658
MD71 2659
MD71 2660
MD71 2661
MD71 2662
MD71 2663
MD71 2664
MD71 2665
MD71 2666
MD71 2667
Spacer
(For adjustment of differential case
end play)
1.31 i.052)
1.40 i.055)
1.49 (.059)
1.58 i.062)
1.67 (.066)
1.76 (.069)
1.85 (.073)
1.94 (.076)
2.03 (.080)
2.12 (.083)
E
None
C
B
A
F
H
cc
FF
II
M D706574
MD706573
MD706572
MD706571
MD706570
MD706575
MD700272
MD71 5956
MD71 5959
MD71 5962
Spacer
IFor adjustment of differential
minion backlash)
0.75 - 0.82
LO30 - -032)
0.83 - 0.92
(.033 - .036)
0.93 - 1 .oo
(.037 - ,039)
1.01 -1.08
(.040 - ,043)
1.09-1.16
LO43 - ,047)
-
MA1 80862
-
MA1 80861
-
MA1 80860
-
MA1 80875
-
MA1 80876
TSB Revision
Part No.
F3A2 - Specifications
TORQUE SPECIFICATIONS
Nm
Manual control shaft set screw
Sprag rod support bolts
Idler shaft lock plate bolt
Bearing retainer bolts
Oil pump
assembly mounting bolts
Converter housing bolts
Valve body assembly mounting bolts
Oil filter bolts
Oil pan bolts
Park/neutral position switch bolts
Manual control lever nut
Pump housing to reaction shaft support bolts
Differential drive
gear bolts
One-way clutch outer race lock plate bolts
Valve body bolts
Pressure check plug
Speedometer sleeve locking plate bolt
Drain plug
rhrottle cam bolt
fnd cover bolts
Sovernor set screw
TSB Revision
9
24
24
19
21
21
11
6
11
11
19
11
135
40
5
9
4
33
9
5
9
ft.lbs.
7
18
18
14
16
16
8
5
8
8
14
8
98
29
4
7
3
24
7
4
7
23A-12
F3A2 - SDecial Tools
SPECIAL TOOLS
tool name
Differential oil
seal installer
Oil pump remover
Oil seal installer
1 TSB Revision
F3A2 - Special Tools
23/g-43
compressor
Removal and installation of transfer idler
servo cover
own servo
cover remover
Installer-l 00
1 TSB Revision
MD99881 5
General service tool
nd installation of center support
M D998907-01
MD99891 3
Dial gauge
extension
MD998913-01
TSB Revision
Measurement of low-reverse brake end
play
F3A2 - Transaxle
TRANSAXLE
1. Toraue converter
2. Converter housing
3. Gasket
4. Oil pump
5. O-ring
6. Gasket
7. Thrust washer #I
8. Front clutch assemblv
-. --..-__
._10. Thrust bearing #4
11. Thrust washer #2
12. Rear clutch assembly
13. Spacer
14. Differential
‘:
’ ”
./
-
21Nm
16 ft.lbs.
q5
m3
i
21 Nm
J
16 ft.lha~
I”.
“““Y’YYulIIly
I,”
16. Clutch hub
17. Thrust race #7
1. Y.R Thrt
1st YV...
hearinn
I I II ..v.
II 83 SR
I, -
19. Kickdown band
7f1 Kirldnwn
r-in urn
L”.
I\I”I.“V..Im”*..II.
lb
’
213m
21.
22.
7.1
--.
24.
25.
26.
27.
28.
29.
Snap ring
Center support
Cl-rim
- .=
Wave spring
Return spring
Pressure plate
Brake di=Brake plate
Reaction plate
30. Reverse sun gear
31. Thrust bearing #9
32. Thrust race #I 0
33. Forward sun gear
34. Planetary carrier
35. Thrust bearing #I 2
TFA0054
TSB Revision
F3A2 - Transaxle
23A-16
36. Control cable
37.
38.
39.
40.
Spring washer
Control lever
Clamp
Park/neutral position
switch (PNP switch)
41. Bearing retainer
42. O-ring
43. Snap ring
44. Lock plate
45. O-ring
46. Idler gear shaft
47. Bearing inner race
48. Idler gear
49. Spacer
50. Clip
51. D-ring
52. Transfer shaft cover
53. Snap ring
54. Driven gear
55. Snap ring
56. Outer race
57. Bearing inner race
58. Gasket
38
Q
36
-19Nm
14 ft.lbs.
---II
CL8
I
0
24 Nm
18 ft.lbs.
49 48
m-24 klbs.
El---- 7 0
65"'
/
68. Accumulator piston
m74-
76
_ ,;/
7
1 TSB Revision
57
59. Snao rinu
60. Kickdown servo sleeve
61. Kickdown servo piston
62. Spring
63. Anchor rod
64. Output flange
65. Spacer
66. Outer race
67. Transfer shaft and
governor
ES----69
9Nm
7 ft.lb~.
- 1 - 56=
69. Spring (inner)’
70. Spring (outer)
71. d-ring
72. O-ring
73. Set screw
74. 0-rina
! 75. Dete? ball
8ft.lbs. - 76. Sbrina
77. Park&g sprag rod
78. Sprag rod support
m 79. Control shaft
80. Valve body
81. Oil filter
82. Gasket
83. Oil pan
8 3
84. Gasket
85. Drain plug
11 Nm
_ . -..-s. 86. Pulse generator
<MODEL 1992 only>
87. Transaxle case
I
TFA0935
F3A2 - Transaxle
DISASSEMBLY
17004f
(1) Prior to disassembling the transaxle, plug all open/ngs and
thoroughly clean the exterior of the assembly, preferably by
steam.
(2) Place the transaxle on the workbench with the uil pan
down.
(3j Remove the torque converter.
(4) Measuring input shaft end play before disassembly will
usually indicate when a thrust washer change is required
(except when major parts are replaced). Thrust washers are
located between the reaction shaft support and rear clutch
retainer, and between the reaction shaft support and front
1
clutch retainer.
Mount a dial indicator to the converter housing using the
special tool, with its plunger seated against the end of the
input shaft.
Move the input shaft in and out with pliers to obtain the end
play reading. Be careful not to scratch the input shaft.
Record the indicator reading for reference when reassembling the transaxle.
(5) Remove the cover holder, and remove the cover.
(6) Attach the dial indicator on the transaxle case with the
special tool.
Measure the transfer shaft end play and record the indicator
reading.
(7) Remove the pulse generator “A” and “B”.
<MODEL 1992 only>
TSB Revision
23A-18
F3A2 - Transaxle
(8) Remove the manual control lever, and then remove the
park/neutral position switch (PNP switch).
I
P
, Manual control
- ~ev%&/,\\W II
\
l,,, / L\ I /
\
TFAll805 1
(9) Remove the oil pan and oil pan gasket.
(lO)Remove the oil filter.
(1 l)Remove the clip of the solenoid valve connector.
<MODEL 1992 only>
TSB Revision
F3A2 - Transaxle
(12)Push catches and remove the solenoid valve connector.
<MODEL 1992 only>
W
Connector
175042: 3
(13)Disconnect the throttle cable from the throttle cam.
(14)Remove the valve body mounting bolts indicated by arrows
and remove the valve body from the transaxle case.
2
(15)Remove the two accumulator springs, then remove’ the
accumulator piston from the transaxle case.
(16)Remove the 14 bolts indicated by arrows and remove the
converter housing and gasket.
(17)Remove the six oil pump mounting bolts indicated by
arrows.
(18)Screw the special tools (MD998333-01 ) into the bolt holes
marked @ .
1 TSB Revision
23A-20
F3A2 - Transaxle
(19)Grasping the special tools, remove the oil pump. Then,
remove the gasket.
(20)Remove the spacer and differential from the transaxle case.
(21)Remove fiber thrust washer #I.
(22)Grasp and raise the input shaft to remove both the front and
rear clutch assemblies together.
(23)Remove thrust bearing #6.
TSB Revision
F3A2 - Transaxle
(24)Remove the clutch hub.
(25)Remove thrust race #7 and thrust bearing #8.
(26)Remove the kickdown drum.
(27)Remove the kickdown band.
Kickdown servo
cover
(28)Remove the snap ring.
(29)Set the special tools as shown in the illustration, and use
them to remove the kickdown servo cover.
TSB Revision
I
F3A2 - Transaxle
23A-22
(30)Remove the kickdown servo piston and spring.
(31)Remove the anchor rod.
(32)Remove the snap ring.
(33)Set the special tool on the center support and remove the
center support from the case.
Reverse sun gear /---II
(34)Remove reverse sun gear, thrust bearing #9, thrust race
#IO and forward sun gear together.
TSB Revision
I
F3A2 - Transaxle
(35)Remove the planetary gear set and thrust bearing #12.
(36)Remove the wave spring, return spring, reaction plate,
brake discs, and brake plates.
(37)Remove the idler shaft lock plate.
lock plate
(38)Loosen the transfer idler shaft with the special tool.
(39)Pull out the transfer idler gear shaft, and remove the
transfer idler gear, the two bearing inne.r races, and the
spacer.
I
23A-24
F3A2 - Transaxle
(40)Remove the bearing retainer.
(41)Remove the snap ring from the output flange bearing.
(42)Remove the output flange and thrust race #I3 from the
case.
(43)Remove the snap ring from the transfer shaft.
(44)Drive the transfer shaft out toward the torque converter
housing to remove the shaft and the transfer driven gear.
TSB Revision
F3A2 - Transaxle
(45)Remove the snap ring, and then the tapered roller bearing
inner and outer races.
(46)Remove the sprag rod support.
(47)Remove the set screw, and remove the manual control
shaft assembly. At this time, remove also the steel ball and
spring.
Set screw
+
1 -k Manual control
shaft
REASSEMBLY
(1) Before reassembling the transaxle, measure the end play in
the low-reverse brake and select a pressure plate to obtain
the specified end play. Use the following procedure.
(a) Install the brake reaction plate, brake plates and brake
discs in the transaxle case.
Caution
Blow off automatic transmission fluid from the plates
and discs with low-pressure compressed air.
(b) Install the pressure plate and mount the return spring.
TSB Revision
2344-26
F3A2 - Transaxle
spring
(c) Apply petrolatum jelly to the wave spring and attach the
wave spring on the low-reverse brake piston.
(d) Install the two O-rings removed during disassembly and
coat them with automatic transaxle fluid.
(e) Attach the special tool to the center support and install
the support in the transaxle case.
Caution
1. Install the center support, taking care that the
waved spring is not out of position.
2. Install the two O-rings in alignment with the oil
holes provided in the transaxle case.
(f) Remove the special tool
(g) Install the snap ring.
(h) Mount the special tool and dial indicator on the rear side
of the transaxle case.
Make sure that the dial indicator rod (MD998913-01) is
inserted into the transfer idler shaft hole, contacting the
brake reaction plate at a right angle.
MIT209038.
41
Idler
shaft -hole
MD99891 3-01
TSB Revision
F3A2 - Transaxle
(i)
Using a hand pump, feed air through the location shown
and, at the same time, read the dial indicator and select
a pressure plate to obtain the specified end play.
Standard value: 0.8 - 1.0 mm (.031 - ,039 in.)
(j) After a pressure plate of the appropriate thickness has
been selected, remove all the mounted parts.
(2) Place the transaxle case on the workbench with the oil pan
mounting surface up.
(3) Insert the output flange in position (with two ball bearings.
and transfer drive gear attached) from the inside of the
transaxle case.
(4) Install the snap ring in the groove of the output flange
bearing.
(5) Apply petrolatum jelly to the spacer and attach the spacer to
.I
the case.
- T o r q u e cckerter side
-Groove
(6) Install the bearing outer race and inner races in the transfer
idler gear.
TSB Revision
23A-28
F3A2 - Transaxle
(7) Install a new O-ring in the groove of the idler shaft, and
apply a very thin coat of automatic transmission fluid to the
O-ring.
(8) Place the transfer idler gear in the case, and insert and
screw the idler shaft into position.
(9) Screw in and tighten the idler shaft by using the special
tool.
MD998344-01
17014'
(10)lnser-t the special tool into the output flange and measure
the preload using a low reading torque wrench.
Adjust .the preload to the standard value by tightening or
loosening the transfer idler shaft.
Standard value: 0.8 Nm (.6 ftlbs.)
MD998343-01
(1 l)After completing the preload adjustment, install the idler
shaft lock plate. The clearance between the idler shaft and
the lock plate should be closed in the direction that will
prevent idler shaft looseness, and then tighten the lock
plate bolt to specified torque.
Tightening torque: 24 Nm (18 ft.lbs.)
Lock &ate
TSB Revision
F3A2 - Transaxle
(12)lnstall a new O-ring in the groove of the transaxle case, and
then install the bearing retainer.
(13)lnsert the transfer shaft in the case.
r
(14)Mount the special tool on the transmission case to support
the transfer shaft.
(15)Use the special tool to install the bearing inner race on the
transfer shaft.
(16)lnstall the tapered roller bearing outer race, and then the
snap ring.
L
TFA0703 1
(17)Use the special tool to install the transfer driven gear on the
transfer shaft.
TSB Revision
23A-30
F3A2 - Transaxle
(18)lnstall the snap ring on the end of the transfer shaft.
Thrust race #I 3
(19)Coat thrust race #13 with petrolatum jelly and attach it to
the output flange.
TSB Revision
F3A2 - Transaxle
(Select)
(Select)
1700047
IDENTIFICATION OF THRUST BEARINGS, THRUST RACES, AND THRUST WASHERS
mm (in.)
0 D.
I.D.
Thickness
Part No.
Identification
marking
O.D.
I.D.
Thickness
Part No.
Identification
marking
55.7
(2.193)
1.4
(.055)
l 1
#I
48.1
(1.906)
34.4
(1.354)
-
MD707271
#4
(2 5056,
(2.%6)
55.7
(2.193)
1.8
(.071)
l 2
II .E5,
$7,
2.4
C.094)
MD722552
#5
(23056,
55.7
(2.193)
2.2
t.087)
l 3
42.6
(1.677)
MD720753
#6
(1%2,
-
(23056,
55.7
(2.193)
2.6
(.102)
l 4
38.7
(1.524)
1.6
(.063)
M D704936
#7
(2.756,
55 7
(2.1931
1 .a
(.071)
MD707290
36.4
(1.433)
MD72001 0
#8
,2.%7,
-
(134757,
1 .o
(.039)
MD997854 (incl.*l)
-
MD728763
#9
(l.zl4,
(1.%2,
.%7)
1.2
LO471
MD997847 (incl.*l)
(1.3j5,
(1.%2,
1.2
(.047)
MD726764
#lO
48.9
(1.925)
(1.367,
1.4
(.055)
MD997848 (incl.*2)
(1.%6,
22.2
t.874)
-
MD727767
#II
48.9
(1.925)
(134757,
1.6
t.063)
MD997849 (incl.*2)
,2.%7,
36.4
(1.433)
-
MD72001 0
#I2
48.9
(1.9251
1.8
(.071)
MD997850 (incl.*3)
38.7
(1224)
0.8
LO311
MD704935
#13
&7,
48.9
(1.925)
48.9
(1 925)
I
I
48.9
(1.925)
48.9
(1.925)
48.9
,I ,925)
Cl
(134757,
I
I
2.0
f.079)
(2.%6,
#2
#3
(2.%6,
MD997851
(incl.*3)
(incl.*4)
I
I
2.2
t.087)
MD997852
(13657)
(1.34757,
2.4
LO941
MD997853 (Incl.*4)
I
TSB Revision
I
I
I
I
I
I
23A-32
F3A2 - Transaxle
(20)Apply petrolatum jelly to thrust bearing #I 2 and secure the
bearing on the planetary carrier.
rhrust
175011
(21)Mount the planetary carrier on the case.
(22)Attach thrust race #I 0 and thrust bearing #9 to the forward
sun gear. Then, assemble the reverse sun gear.
Reverse sun gear
,77006(
(23)lnstall the sun gear assembly assembled in step (22) in the
planetary carrier.
(24)Put the brake disc and brake plate in position.
1 TSB Revision
F3A2 - Transaxle
Pressur+z irake plate
plate
disc
1700052
(25)lnstall the brake pressure plate which was selected in Step
(I).
(26)lnstall the return spring.
(27)Apply petrolatum jelly to the wave spring and attach the
wave spring to the center support.
1750193
(28)lnstall the two new O-rings on the hydraulic pressure holes
of the center support.
Coat the O-rings with automatic transmission fluid.
TSB Revision
23A-34
F3A2 - Transaxle
(29)Attach .the special tool to the center support and install the
support in the transaxle case.
Caution
1. Install the center support, taking care that the
waved spring is not out of position.
2. Install the two O-rings in alignment with the oil
holes provided in the transmission case.
(30)Remove the special tool from center support.
(3l)lnstall the snap ring for the center support.
(32)lnstall the anchor rod, in the transaxle case.
(33)lnstall new seal rings in the grooves of the kickdown servo
piston and coat the rings with automatic transaxle fluid.
(34)lnsert the kickdown servo spring and piston in the transaxle
case.
ckdown servo piston
17200
O-ring
D-ring
(35)lnstall a new O-ring and D-ring on the kickdown servo
sleeve, and apply a very thin coat of automatic transaxle
fluid to the rings.
TSB Revision
F3A2 - Transaxle
(36)lnser-t the kickdown servo sleeve in the transaxle case and
install the snap ring.
(37)lnstall the kickdown band; attach the ends of the band to
the ends of the anchor rod and servo piston rod.
(38)When putting the kickdown drum in the kickdown band,
engage the splines of the kickdown drum with those of the
reverse sun gear.
(39)Apply petrolatum jelly to thrust bearing #8 and attach the
thrust bearing to the kickdown drum.
Thrust race #7
(40)Apply petrolatum jelly to thrust race #7 and attach the
thrust race to the rear clutch hub.
TSB Revision
F3A2 - Transaxle
23A-36
(4l)lnstall the rear clutch hub, engaging it with the forward sun
gear splines.
(42)Apply petrolatum jelly to thrust bearing #6 and attach it to
the clutch hub.
(43)Apply petrolatum jelly to thrust washer #2 and thrust
bearing #4 and attach the washer and bearing to the rear
clutch assembly.
I
17502001
(44)Mate the rear clutch assembly with the front clutch
assembly.
(45)lnstall the clutch assembly.
TSB Revision
F3A2 - Transaxle
(46)lnstall the differential.
I
.
(47)Attach thrust race #3 and thrust washer #I to the rear end’
face of the oil pump with petrolatum jelly.
(48)Attach the special tool to the transaxle case. Using the tool
as a guide, first install a new oil pump gasket and then the
oil pump in the case.
(49)Remove the special tool.
(50)Tighten the oil pump bolts to the specified torque.
(51)Measure the end play of the input shaft. If the measurement is out of specification, replace thrust race #3 and
thrust washer #I to meet the specification.
Standard value: 0.3 - 1.0 mm LO12 - .039 in.)
(52)Place approx. 10 mm (394 in.) long and 2.5 mm (.I0 in.) dia.
pieces of solder at the locations shown on the differential
assembly.
TSB Revision
23A-38
F3A2 - Transaxle
(53)Place approx. 10 mm (.394 in.) long and 2 mm (.08 in.) dia.
pieces of solder at the illustrated locations on the converter
housing. Place the outer race of transfer shaft front bearing
in position.
1750018
(54)lnstall the converter housing directly to the transaxle case
without installing the rubber coated metal gasket.
(55)Tighten the bolts to the specified torque.
(56)Loosen the bolts, remove the converter housing and
remove the flattened solder pieces.
I
2200048
(57)Measure the thickness of the flattened solder using a
micrometer. Add the measured solder thickness (T) to the
value 0.38 mm (.015 in.), which corresponds to the gasket
thickness. Then add to or subtract from that sum a value
corresponding to the specified preload or end play range.
The result obtained is the thickness of the spacer to be
selected.
For the transfer shaft, select a spacer whose thickness falls
within the range determined by the formulas below:
[T -t- 0.38 mm (.015 in.) + 0.1 mm (.004 in.)] to
[T +- 0.38 mm (.015 in.) + 0.15 mm (.006 in.)]
For the differential case spacer, determine the thickness
using the following formulas:
[T + 0.38 mm (.015 in.) - 0.15 mm (.006 in.)] to
[T + 0.38 mm (.015 in.) - 0 mm (0 in.)]
Transfer shaft preload:
0.1 ,- 0.15 m m (.004 - .006 in.)
Differential case end play:
0 - 0 . 1 5 m m (0 - .006 in.)
(58)Place the spacer for the transfer shaft which was selected
in Step (57) in the transfer shaft bearing hole in the
converter housing, and insert the bearing outer race in the
case.
TSB Revision
I
F3A2 - Transaxle
Spacer
EBk*89
(59)Place the spacer for the differential case which was
selected in Step (57) on the bearing outer race.
(6O)Coat the gasket surface of the transaxle case with ‘silicone
grease.
(6l)lnstall a new gasket on the transaxle case.
Caution
Do not reuse the gasket which was previously removed.
(62)lnstall the converter housing with the 14 bolts. Tighten the
bolts to the specified torque.
Specified torque: 21 Nm (16 ftlbs.)
(63)lnstall the parking sprag rod to the manual control shaft.
Then, insert the shaft in the transaxle as shown in the
illustration. In doing this work, do not install O-ring in the
O-ring groove.
(64)After installing a new O-ring on the manual control shaft
assembly, draw the shaft back into the case, then install the
set screw and gasket. Also install the detent steel ball, seat
and spring at the same time.
Manual control
1770051
(65)Place the case with the oil pan mounting surface up.
(66)lnstall the sprag rod support and tighten the two bolts to the
specified torque.
Specified torque: 24 Nm (18 ftlbs.)
TSB Revision
23A-40
F3A2 - Transaxle
(67)lnstall the O-rings in the O-ring grooves at three locations
on the valve body.
0-rina
(68)lnstall new seal rings in the groove of the accumulator
piston and coat the rings with automatic transmission fluid.
(69)lnstall the accumulator piston in the transmission case and
install t.he two springs.
(70)lnstall the valve body in the transaxle case while fitting the
detent plate pin in the gap between the lands of the manual
valve.
1
Oil pan gasket
surface of tynsaxle
case
\
\ r--Y
(71)Replace the O-ring of the solenoid valve connector with a
new one. <MODEL 1992 only>
(72)lnsert the solenoid valve connector into the case. Be sure
that the notched part of the connector faces as shown in
the illustration. <MODEL 1992 only>
90”
l!@iP
0
0
1750435
,B
---A
(73)Tighten the valve body mounting bolts (IO pieces) to the
specified torque.
A bolt ,..... 18 mm (.709 in.) long
B bolt . . . . . 25 mm (.984 in.) long
C bolt 40 mm (1.575 in.) long
TSB Revision
F3A2 - Transaxle
(74)lnstall the oil filter and tighten the four oil filter mounting’
bolts to the specified torque.
Specified torque: 11 Nm (8 ft.lbsJ
(75)lnstall the magnet to one of the recesses provided inside
the oil pan.
Be sure to remove metal particles from the magnets and’
clean the inside of the oil pan beforehand.
TFAO494
(76)Clean the gasket surfaces of both the transaxle case and oil
pan. Using a new oil pan gasket, install the oil pan by
tightening the 12 bolts to the specified torque.
(77)lnstall the park/neutral position switch (PNP switch) and
manual control lever, and tighten the manual control lever
nut to the specified torque.
TSB Revision
23A-42
MODEL 1992
F3A2 - Transaxle
(78)Adjust the park/neutral position switch by the following
procedure:
12mm
(a) Place the manual control lever in the “N” (neutral)
position.
(b) Turn the park/neutral position switch body until the 12
mm (.47 in.) wide end of the manual control lever aligns
with the switch body flange [I2 mm (.47 in.) wide
portion]. Alternatively turn the switch body until the 5
mm (.20 in.) hole in manual control lever aligns with the
5 mm (.20 in.) hole in the switch body.
(c) Tighten the attaching bolts to specified torque taking
care that switch body is not displaced.
Tightening torque: 11 Nm (8 ft.lbs.)
Section A-A
MODEL 1993
12mm
Section A-A
TFA079t
TSB Revision
F3A2 - Transaxle
(79)Check the continuity between terminals with the manual
control lever at each position.
The continuity between terminals should be as’dfo&vii~in
the table below.
MODEL 1992
Internal Connection in the Inhibitor Switch - MODEL 1992
Internal Connection in the Inhibitor Switch - MODEL 1993
1
p
2
3
I
Connected circuits
PRND2L
Terminal
No.
?
I
I
I
III
0
III
I
4
Ignition switch “ON” terminal
5
Ignition switch “ST” terminal
6
Backup lamp
Q
ignition switch “ON” terminal
7
1
8
9
10
I 6 I I 1 0 1 1 1
I
II
I
I 1 /Starter motor “S” terminal
I
III
II
I
I
b
0
11
TFA079:
Lack of continuity indicates a poorly adjusted switch or
faulty switch. Readjust the switch. If still without continuity,
replace the switch.
(80)Measure the distance between the ring gear end and the
converter housing end.
The torque converter has been properly installed if the
measurement is approx. 12 mm (.47 in.).
1 TSB Revision
I
23A-44
F3A2 - Oil Pump
OIL PUMP
DISASSEMBLY AND REASSEMBLY
2
11 Nm
8 ftlbs.
4
Disassembly steps
#E4 1. O-ring
eD4 2. Reaction shaft support
*Cg 3. Steel ball
(JA~J~B~ 4. Drivegear
(IAIJ eB4 5. Driven gear
6. Seal ring
*AC 7. Oil seal
8. Oil pump housing
9. Snap ring
10. Oil seal
1750261
DISASSEMBLY SERVICE POINT
(JAM DRIVE GEAR / DRIVEN GEAR REMOVAL
(1) Make reassembly alignment marks on the drive and driven
gears.
REASSEMBLY SERVICE POINTS
I)A4 OIL SEAL INSTALLATION
MD998334-01
TSB Revision
F3A2 - Oil Pump
m/pqgj
I)B4
DRIVEN GEAR / DRIVE GEAR SIDE CLE&R&NCE
MEASUREMENT
>
/I“(~
Standard value:
0.03 - 0.05 mm (.OOl - .002 in.)
175025!
I)c4 STEEL BALL LOCATION
1750126
eD4 REACTION SHAFT SUPPORT INSTALLATION
8 ft.lbs.
(1) Assemble the reaction shaft support and the pump housing, and tighten the five bolts by fingers.
(2) Insert the special tool (Guide Pin MD998336) in the oil
pump bolt hole and tighten the peripheries of the support
and housing with the special tool (Band MD998335) to
locate the support and housing.
(3) Tighten the five bolts to the specified torque.
(4) Make sure that the oil pump gear turns freely.
I)E4 O-RING INSTALLATION
(1) Install a new O-ring in the groove of the pump housing and
apply petrolatum jelly to the O-ring.
TSB Revision
23A-46
F3A2 - Front Clutch
FRONT CLUTCH
DISASSEMBLY AND REASSEMBLY
Disassembly steps
*C4 1. Snap ring
eB4 2. Clutch reaction plate
3. Clutch disc
~AI) +A4 4. Snap ring
5. Return spring
6. Front clutch piston
7. D-ring
8. D-ring
9. Front clutch retainer
1750262
TFAOOOI
TSB Revision
F3A2 - Front Clutch
DISASSEMBLY SERVICE POINT
OAr) S N A P R I N G REMOVAL
MD998337-01
(1) Compress the return spring with the special tool.
(2) Remove the snap ring.
1750264
REASSEMBLY SERVICE POINTS
I)A4 SNAP RING INSTALLATION
lD998337-01
(1) Compress the return spring with the special tool.
(2) Install the snap ring.
/
Shear
175026L I
I)B4 CLUTCH REACTION PLATE INSTALLATION
(1) Install the clutch reaction plate with their missing tooth
portions (@ in the illustration) in alignment.
NOTE
This design is to facilitate escape of automatic transmission
fluid and improve the cooling efficiency of the plate and
disc.
,
Clutch plates
(2) Install the innermost the reaction plate with their shear
droops directed as shown in the illustration.
lutch reaction
Cl&h disc
1760027
J
I)c4 SNAP RING SELECTION
(1) Check clearance between the snap ring and clutch reaction
plate. To check the clearance, hold entire circumference of
the clutch reaction plate down with 50 N (11 Ibs.) force. If
clearance is out of standard value, select a snap ring to
obtain the standard value.
Standard value: 0.7 - 0.9 mm (.028 - .035 in.)
TSB Revision
23A-48
F3A2 - Rear Clutch
REAR CLUTCH
DISASSEMBLY AND REASSEMBLY
TFA0704
Disassembly steps
I. Seal ring
*II4 2. Input shaft
3. O-ring
4. Snap ring
5. Thrust race
6. Seal ring
#C4 7. Snap ring
)BC 8. Clutch reaction plate
9. Clutch disc
#B4 10. Clutch plate
)B4 11. Clutch pressure plate
OAO #A4 12. Wave spring
13. Return spring
14. Rear clutch piston
15. Rear clutch retainer
16. D-ring
17. D-ring
17
3
- 10
I
TFAOOll
TSB Revision
I
F3A2 - Rear Clutch
DISASSEMBLY SERVICE POINT
QAo WAVE SPRING REMOVAL
MD998338
/
(1) Compress the return spring with the special tool.’
(2) Using a screwdriver, remove the wave spring.
1750274
REASSEMBLY SERVICE POINTS
)A4 WAVE SPRING INSTALLATION
(1) Compress clutch reaction plate with the special tool.
(2) Install the wave spring.
I)B4 CLUTCH PRESSURE PLATE / CLUTCH PLATE
CLUTCH REACTION PLATE INSTALLATION
(1) Install the clutch pressure plate, clutch plates and clutch
reaction plate with their missing tooth portions (@ in the
illustration) in alignment.
NOTE
This design is to facilitate escape of automatic transmission
fluid and improve the cooling efficiency of the plates and
disc.
/
/
Shear droop
\
(2) Install the clutch reaction plate with its shear droop directed
as shown in the illustration.
Clutch disc
Clutch reaction
Return spring -4
I
Clutch plate
1760028
#C4 SNAP RING SELECTION
(1) Check clearance between the snap ring and clutch reaction
plate. To check the clearance, hold entire circumference of
the clutch reaction plate down with 50 N (11 Ibs.) force. If
clearance is out of standard value, select a snap ring to
obtain the standard value.
Standard value: 0.4 - 0.6 mm (.016 - .024 in.)
\
/
175027$
TSB Revision
23A-50
F3A2. - Rear Clutch
I)D4 INPUT SHAFT INSTALLATION
(1) Install the input shaft with its oil groove aligned with the oil
hole in the rear clutch retainer.
TSB Revision
PLANETARY GEAR
DISASSEMBLY AND REASSEMBLY
fFA0522
Disassembly steps
1. Bolt
2. Lock plate
3. One-way clutch outer race
4. End plate
#B4 5. One-way clutch
6. End plate
7. Pinion shaft
8. Front thrust washer
9. Spacer bushing
10. Short pinion
11. Roller
QAO *A4 12. Thrust bearing
13. Planet carrier
TFA0524
TSB Revision
23A-52
F3A2 - Planetary Gear
DISASSEMBLY SERVICE POINT
cJA0 THRUST BEARING REMOVAL
(1) Remove the only one short pinion. Use care not to drop and
lose the 17 rollers in the short pinion. Do not remove the
other short pinions,
\
170255
(2) Remove the thrust bearing.
REASSEMBLY SERVICE POINTS
I)A4 THRUST BEARING INSTALLATION
(1) Install a new thrust bearing on the carrier. Make sure that it
fits correctly in the spot faced portion of the carrier.
(2) Apply Vaseline unsparingly to the inside surface of the short
pinion and attach the 17 rollers on the surface.
roller
(3) Line up the holes of the rear thrust washer and front thrust
washer “A” with the shaft hole of the carrier.
(4) Install the short pinion, spacer bushing and front thrust
washer and align the holes. Use care not to allow the rollers
to get out of position.
washer “A”
\
Rear thrust washer
17026C
TSB Revision
F3A2 - Planetary Gear
(5) Insert the pinion shaft. Make sure that the flattened .end of
pinion shaft is correctly fitted in the hole of the rear .thrust,-I
I
plate when the pinion shafts is inserted.
Notch
170261
I)B4 ONE-WAY CLUTCH INSTALLATION
(1) Push the one-way clutch into the outer race. Make sure that
arrow on the outside circumference of cage is directed
upward as shown in the illustration when the one-way
clutch is pushed in.
17026:
TSB Revision
23A-54
F3A2 - Annulus Gear and Transfer Drive Gear Set
ANNULUS GEAR AND TRANSFER DRIVE GEAR SET
DISASSEMBLY AND REASSEMBLY
Disassembly steps
*II4 1. Snap ring
cJArJI)Q 2. Bearing
c)BO #B4 3. Transfer drive gear
(IC~)#A~ 4. Bearing
5. Snap ring
6. Output flange
7. Annulus gear
170178
DISASSEMBLY SERVICE POINTS
qA0 BEARING REMOVAL
M D998348-0 1
OBo TRANSFER DRIVE GEAR REMOVAL
MD998348-0
$0 BEARING REMOVAL
TSB Revision
F3A2 - Annulus Gear and Transfer Drive Gear Set
REASSEMBLY SERVICE POINTS
I)A4 BEARING INSTALLATION
‘-”
_
TFA0502
I)B4 TRANSFER DRIVE GEAR INSTALLATION
Groove
(1) Install the transfer drive gear in proper direction. The
direction can be identified by the groove provided in one of
the pinion side surfaces.
Caution
Replace the output flange and transfer drive gear as a
set.
TFA0503
ec4 BEARING INSTALLATION
--
TFA0384
I)D4 SNAP RING SELECTION
(1) Select a snap ring, which should be the thickest one that
can be installed in groove.
Standard value: 0 - 0.06 mm (0 - .0024 in.)
TSB Revision
23A-56
F3A2 - Differential
DIFFERENTIAL
DISASSEMBLY AND REASSEMBLY
1
'6
lb
9
T
7
135 Nm
98 ftlbs.
Disassembly steps
)D4 I. B o l t
2. Differential drive gear
c)ArJ #C+ 3. Ball bearing
aBr)eB4 4. Lock pin
)A4 5. Pinion shaft
*A4 6. Pinion
$44 7. Washer
$A4 8. Side gear
*A4 9. Spacer
10. Differential case
160015
DISASSEMBLY SERVICE POINTS
gA0 B A L L B E A R I N G R E M O V A L
20107r
Lock pin
(jB0
LOCK PIN REMOVAL
(1) Drive out the lock pin with a punch inserted in hole “A”.
(2) Remove the pinion shaft from the case, and remove the
pinion gears and washers.
(3) Remove the side gears and spacers from the case.
Keep the removed gears and spacers for R.H. side use
separated from those for L.H. side use.
TSB Revision
F3A2 - Differential
REASSEMBLY SERVICE POINTS
I)A4 SPACER / SIDE GEAR / WASHER / PIN!qN / PIN?ON
SHAFT INSTALLATION
(1) With the spacers installed on the back of the differential
side gears, install the gears in the differential case. When
reusing the removed parts, install them in the original
positions noted during disassembly. When using new
differential side gears, install spacers of medium thickness
1 .O 207 mm (.039 -0003 in.).
(2) Install the washers to the back of the pinion gears, install
the gears in the differential case, and then insert the pinion
shaft.
(3) Measure the backlash between the side gear and pinion
gear. The backlash should be 0.025 to 0.150 mm (.OOlO to
.0059 in.) and the right and left gear pairs should have equal
backlash. If the backlash is not within the specified range,,
disassemble, and reassemble them using spacers selected
for correct backlash.
Backlash: 0.025 - 0.150 mm (.OOlO - .0059 in.)
I)B4 LOCK PIN INSTALLATION
Lock pin
Differential case
(I) Align the lock pin hole in the pinion shaft with that in the
case and press fit the lock pin until its protrusion is 3 mm
(.I2 in.) or less.
Caution
1. Do not reuse the lock pin.
2. Do not use a lock pin which requires only 2000 N
(440 Ibs.) or less force for installation.
chamfered
16002:
I)c4 BEARING INSTALLATION
Ball bearing
TFMOOOE
#D4 DRIVE GEAR TIGHTENING
(1) Apply automatic transmission fluid to the bolts and tighten
the bolts to the specified torque in the sequence shown in
the illustration.
16003C
L
1 TSB Revision
23A-58
F3A2 - Kickdown Servo
KICKDOWN SERVO
DISASSEMBLY AND REASSEMBLY
4
19 Nm
14 ftlbs.
Disassembly steps
1. Seal ring
2. Seal ring
3. Cover
;: bj;kdown servo rod
B
#
-8
5
1700055
6. Plug
7. Spring
8. Kickdown piston valve
9. Kickdown servo piston
1700055
TSB Revision
F3A2 - Low Reverse Brake
LOW-REVERSE BRAKE
DISASSEMBLY AND REASSEMBLY
Disassembly steps
1. Low-reverse brake piston
2. D-ring
3. D-ring
4. Center support
1 TSB Revision
I
23A-60
F3A2 - Speedometer Gear
SPEEDOMETER GEAR
DISASSEMBLY AND REASSEMBLY
Disassembly steps
+A4
1. O-ring
2. Spring pin
3. Driven gear
4. Oil seal
5. Sleeve
201078
Driven gear
O-ring
Oil seal
\I
\
Sleeve
I
REASSEMBLY SERVICE POINT
I)A4 SPRING PIN INSTALLATION
(1) Drive a new spring pin into the sleeve. Make sure that the
slit in the spring pin does not face the gear.
I
Spring pin
Slit
20107s
TSB Revision
F3A2 - Drive Shaft Oil Seal
DRIVE SHAFT OIL SEAL
DISASSEMBLY AND REASSEMBLY
Disassembly steps
1. Converter housing
2. Transmission case
*A4 3 . Oilseal
1750298
REASSEMBLY SERVICE POINT
+A4 O I L S E A L I N S T A L L A T I O N
TSB Revision
23A-62
F3A2 - Transfer Shaft / Governor
TRANSFER SHAFT / GOVERNOR
DISASSEMBLY AND REASSEMBLY
10
93
8
2
9Nm
7 ftlbs.
Disassembly steps
1. Seal ring
2. Set screw
3. Locknut
4. Governor body
eB4 5. Filter
6. Snap ring
7. Governor weight
8. Spring retainer
9. Governor spring
10. Governor valve
c$ArJ *A4 11. Taper roller bearing
12. Transfer shaft
TFA0505
DISASSEMBLY SERVICE POINT
cJA0 TAPER ROLLER BEARING REMOVAL
REASSEMBLY SERVICE POINTS
I)A4 TAPER ROLLER BEARING INSTALLATION
TFA0321
I)B4 FILTER INSTALLATION
(1) If dust has accumulated inside the filter, replace it with a
new one.
170121
TSB Revision
F3A2 - Valve Body
VALVE BODY
DISASSEMBLY AND REASSEMBLY
Viewed from A
6
9Nm
7
ft.lbs. 2
5Nm
4 ftlbs.
Disassembly steps
1. Manual valve
A-23
2. Throttle cam
3. Distance piece
4. Return spring
5. Bracket
6. Kickdown valve
7. Kickdown spring
8. Regulator plug “A”
9. Regulator plug “B”
*Gg 10. Lower valve body sub
assembly
11. Lower separating plate
+F4 12. Steel balls
eF4 13. Spring
eF4 14. Steel ball
eE4 15. Upper valve body sub
18.
19.
+C4 20.
&CC 21.
22.
23.
<MODEL 1992 only>
Stiffener plate
Upper separating plate
Steel ball
Spring
Spring guide
Intermediate plate
TFA0705
TSB Revision
23A-64
F3A2 - Valve Body
28
32
42
Viewed from B
5Nm
4 ftlbs.
24. Front end cover
25. Front end cover gasket
26. Front end plate
27. Front end plate gasket
28. Range control spring
29. Range control valve
30. Torque converter control spring
31. Torque converter control valve
32. Line pressure adjusting screw
33. Regulator spring
34. Regulator valve
35. l-2 shift spring
36. 1-2 shift plug
37. Filter
38. Engine brake valve
39. 2-3 control spring
40. Snap ring
41. 2-3 control valve
42. 2-3 shift spring
43. 2-3 shift valve
*B4 44. Stopper plate
45. Throttle valve
46. Throttle spring
47. Rear end cover
48. Gasket
49. 1-2 shift valve
50. 2-3 shift plug
51. Upper valve body
TFA0512
TSB Revision
F3A2 - Valve Body
56-
52
52. End cover
53. Accumulator plug
54. Accumulator spring
55. Accumulator spring
*A4 56. Stopper plate
57. Accumulator valve
58. Sleeve
59. Clutch control valve
60. Clutch control spring
61. Reducing spring
62. Reducing valve
63. Lower valve body
<MODEL 1992 only>
TFA0706
REASSEMBLY SERVICE POINTS
I)A4 STOPPER PLATE INSTALLATION
1 TSB Revision
23A-66
F3A2 - Valve Body
I)B4 STOPPER PLATE INSTALLATION
1700075
Steel ball
I;;\ 1 wSpriw
+c4
SPRING / STEEL BALL LOCATION
TFA0515
I)D4 STEEL BALLS LOCATION
+E4
UPPER VALVE BODY SUB ASSEMBLY
INSTALLATION
(1) Install the special tools on the upper valve body.
170008i
(2) Fasten the upper valve body, intermediate plate and upper
separating plate together with the eight bolts. Remove the
special tools.
TSB Revision
F3A2 - Valve Body
23A-67
I)F4 STEEL BALL / SPRING LOCATION
MD998266-01
’
I)G4
LOWER VALVE BODY SUB ASSEMBLY
INSTALLATION
(1) Install the special tools on the intermediate plate.
(2) Secure the lower valve body with the 13 bolts. Remove the
special tools.
TSB Revision
NOTES
AUTOMATIC
TRANSAXLE
F4A21, F4A22, F4A23
CONTENTS
ANNULUS GEAR AND TRANSFER
DRIVE GEAR SET ................................................
DIFFERENTIAL ....................................................
DRIVE SHAFT OIL SEAL ....................................
END CLUTCH ........................................................
FRONT CLUTCH ....................................................
GENERAL INFORMATION ................................
KICKDOWN SERVO ............................................
LOW-REVERSE BRAKE ....................................
69
71
77
64
58
2
75
74
OIL PUMP ............................................................
PLANETARY GEAR ............................................
REAR CLUTCH ....................................................
SPECIAL TOOLS ....................................................
56
66
61
15
7
SPECIFICATIONS ...............................................
.
ADJUSTING PRESSURE PLATE,
SNAP RINGS AND SPACERS ........................ 10
7
GEAR RATIO TABLE ........................................
8
SERVICE SPECIFICATIONS ............................
7
TRANSAXLE MODEL TABLE ........................
14
............................
TORQUE SPECIFICATIONS
9
VALVE BODY SPRING IDENTIFICATION ....
SPEEDOMETER GEAR ........................................ 76
TRANSAXLE ........................................................ 19
TRANSFER DRIVEN GEAR ................................
79
TRANSFER SHAFT ............................................
VALVE BODY ........................................................
78
80
23B-2
F4A2 - General Information
GENERAL INFORMATION
Precautions to be taken when disassembling and reassembling the transaxle
Because the automatic transaxle is composed of component parts of an especially high degree of
precision, these parts should be very carefully handled during disassembly and assembly so as not to scar
or scratch them.
A rubber mat should be placed on the workbench, and it should always be kept clean.
During disassembly, cloth gloves or shop towels should not be used. If such items must be used, either
use articles made of nylon, or use paper towels.
All disassembled parts must be thoroughly cleaned.
Metal parts may be cleaned with ordinary detergents, but must be thoroughly air dried.
Clean the clutch disc, resin thrust plate and rubber parts by using ATF (automatic transaxle fluid), being
very careful that dust, dirt, etc. do not adhere to them.
Do not reuse gaskets, oil seals, or rubber parts.
Replace such parts with new ones at every reassembly. The O-ring of the oil level gauge need not be
replaced.
Do not use grease other than petrolatum jelly.
Apply ATF to friction components, rotating parts, and sliding parts before installation.
A new clutch disc should be immersed in ATF for at least two hours before installation.
Do not apply sealer or adhesive to gaskets.
When a bushing must be replaced, replace the assembly in which it is incorporated.
If the transaxle main unit is damaged, also disassemble and clean the cooler system.
TSB Revision
F4A2 - General Information
iECTlONAL VIEW - F4A21
Torque
convey’
Oi’
,,(:,
Front clutch
Low-reverse
brake
I
Transfer
’ idler gear
- End clutch
Transfer
drive gear
Transfer
driven gear
Torque konverter
clutch
Pulse generator “6”
Differential
TFA0550
TSB Revision
23B-4
F4A2 - General Information
iECTlONAL VIEW - F4A22
Kickdown brake
Torque
converter
-“A
Oil pump
Front clutch
\
\
\
I
,
Rear
Pulse
generator “A”
I
,I
Low-reverse
brake
1
clutch /
Transfer
drive gear
Torque converter
clutch
Tranfer
driven gear
Transfer shaft
Differential
r
TSB Revision
Pulse generator “B”
F4A2 - Genera! Information
iECTlONAL VIEW - F4A23
Kickdown
brake
Oil pump
\
Front
clutch
I
Planetary
gear
Pulse
.generator “A”
I
I
Low-reverse
brake
I
Transfei
idler near
r
Torque converter
\
\
End clutch
Transfer
drive gear
Toraue cdnverter
clutbh
Tiansfer
driven gear
I
Transfer shaft
Pulse generator “B”
TRA0660
TSB Revision
23B-6
F4A2 - General Information
iYDRAULIC CONTROL SYSTEM
Kickdown servo
Torque converter
Front
clutch
To lubrication
(Rear)
Rear
clutch
Low-reverse
brake
End
clutch
‘----“‘:
valve
Torque
converter
II I/
10
Pressure
5 control valve
--Ine
-?.I;,.‘ L
TFA0070
TSB Revision
z-*7
F4A2 - Specifications
SPECIFICATIONS
TRANSAXLE MODEL TABLE - MODEL 1992
Transaxle model
Gear
ratio
Speedometer
gear ratio
F4A21-2-MRDI
URD
F4A22-2-U N D
A
A
A
31136
31136
28136
MPD3
MQD6
MPD
MPDI
F4A23-2-LN N
A
A
A
A
E3
29136
30136
29136
29136
28136
Finfear Vehicle model
C62A
C63A
NllW
E33A
E33A
D21A
D22A
N34W
4.062
4.367
4.350
4.007
4.007
4.007
4.007
3.900
Engine model
4G15
4G61-DOHC
4G93
4663
4G63-DOHC
4637
4G63-DOHC
4664
TRANSAXLE MODEL TABLE - MODEL 1993
Transaxle model
F4A22-2-MRF3
UNFl
MPE4
MQE
MPE
MPEI
F4A23-2-LNQ
Gear
ratio
Speedometer
gear ratio
A
A
A
A
A
A
B
31136
28136
29136
30136
29136
29136
28136
Final gear Vehicle model
ratio
CB5A
Nl IW
E33A
E33A
D21A
D22A
N 14W, N34W
4.007
4.350
4.007
4.007
4.007
4.007
3.900
GEAR RATIO TABLE
1 1st
2nd
3rd
4th
Reverse
A
B
2.846
1.581
1 .ooo
0.685
2.176
2.551
1.488
1 .ooo
0.685
2.176
TSB Revision
I
Engine model
4693
4693
4663
4G63-DOHC
4G37
4G63-DOHC
4664
23B-8
F4A2 - Specifications
SERVICE SPECIFICATIONS
mm (in.)
Standard
Transfer idler gear bearing preload
Nm (ftlbs.)
Input shaft end play
Transfer shaft end play
Low-reverse brake end play
Differential case end play
End clutch snap ring clearance
Oil pump gear side clearance
Front clutch snap ring clearance
Rear clutch snap ring clearance
Output flange bearing end play
Differential pinion backlash
Pulse generator resistance
Pressure control solenoid valve resistance
Shift control solenoid valve resistance
Torque converter clutch solenoid resistance
MODEL 1992 and MODEL 1993 - E33A, D21A. D22A
MODEL 1993-C35A. NllW, N14W. N34W
TSB Revision
F4A21, F4A22 0 . 8 (.6)
F4A23
1.5(1.1)
0.3 - 1 .o LO1 2 - ,039)
0 - 0.025 (0 - .OOl )
F4A22, F4A23
1 .O - 1.2 (.039 - .047)
F4A21
0.7 - 0.9 (.028 - .035)
O-0.15(0-.006)
F4A21, F4A22
0.4 - 0.65 LO1 6 - ,026)
F4A23
0.6 - 0.85 (.024- .031)
0.03 - 0.05 LOO1 - .002)
F4A22, F4A23
0.7 - 0.9 (.028 - .035)
F4A21 0.4 - 0.6 (.016 - .023)
F4A22, F4A23
0.4 - 0.6 (.016 - .023)
F4A21
0.3-0.5(.012-.020)
0 - 0.06 (0 - .002)
0.025 - 0.150 LOOI - .006)
245 ohm at 20°C (68°F)
Approx. 3 ohm at 20°C (68°F)
Approx. 22 ohm at 20°C (68°F)
Approx. 3 ohm at 20°C (68°F)
Approx. 13 ohm at 20°C (68°F)
F4A2 - Specifications
VALVE BODY SPRING IDENTIFICATION
Free height
Outside
diameter
&7)
(.&,
22.6
(.890)
9.0
(.354)
21.3
i.839)
(.I&
27.4
(1.079)
6.8
t.268)
27.5
(1.083)
1.%,
End clutch valve spring
(F4A2 1, F4A22)
24.4
(.961)
(.%I,
End clutch valve spring
(F4A23)
24.4
(961)
(.El,
26.6
(1.047)
&L,
33.4
(1.315)
$3,
32.1
(1.264)
(.%2,
26.8
(1.055)
$4,
17.3
(.681)
(.;ios,
Torque converter clutch control valve
spring (F4A21, F4A22)
15.7
i.618)
6.2
(.244)
Torque converter clutch control valve
spring (F4A23)
14.2
(.559)
I
Regulator valve spring
-mm (in.)
Number of
loops
11
Torque converter control valve spring
Pressure control valve spring
Rear clutch exhaust valve spring
2-3 shift valve spring
1-2 shift valve spring
Reducing valve spring
N-R control valve spring
Shift control valve spring
Relief spring
1 TSB Revision
Wire
diameter
I , .., ..<,:
-_
1.4. ’
(.055)
9.5
(.27l,
8
0.45
(.018)
12
(.:&
15
&z,
15.5
$23,
15.5
(.&%
13
(E4,
9
(.E,
8
(.%3,
22
(.kEL,
10
(.E3,
10.5
(.i%3,
9.5
(.%3,
I
23B-10
F4A2 - Specifications
ADJUSTMENT PRESSURE PLATE, SNAP RINGS AND SPACERS
Part name
Thickness
mm (in.)
Identification
symbol
Part No.
Pressure plate: F4A21
(For
brake adjustment
end play) of low-reverse
5.6 (.220)
5.7 (224)
5.8 (.228)
5.9 (.232)
6.0 (236)
6.1 (.240)
6.2 (.244)
6.3 (.248)
6.4 (.252)
6.5 (.256)
6.6 (260)
6.7 (.264)
6.8 (.268)
56
57
58
59
60
61
62
63
64
65
66
67
68
MD731 720
MD731721
MD727801
MD731 000
MD727802
MD731 001
MD727803
MD731002
MD727804
MD731 003
MD727805
MD731 004
MD731 005
Pressure plate: F4A22, F4A23
(For
brake adjustment
end play) of low-reverse
5.6 (.220)
5.7 (.224)
5.8 (.228)
5.9 (.232)
6.0 (.236)
6.1 (.240)
6.2 (.244)
6.3 (.248)
6.4 (.252)
6.5 (.256)
6.6 (.260)
6.7 (.264)
6.8 (.268)
6.9 (.272)
7.0 (.276)
56
57
58
59
60
61
62
63
64
65
66
67
68
69
70
MD731720
MD731 721
MD727801
MD731 000
MD727802
MD731001
M D727803
MD731 002
MD727804
MD731 003
MD727805
MD731 004
MD731 005
MD734766
M D734767
Snap ring
For adjustment of front clutch and
.ear clutch clearance)
1.6 (.063)
1.7 (.067)
1.8 (.071)
1.9 (.075)
2.0 (.079)
2.1 (.083)
2.2 (.087)
2.3 (.091)
2.4 t.094)
2.5 (.098)
2.6 (.102)
2.7 (.I 06)
2.8 (.I IO)
2.9 (.I 14)
3.0 (.I 18)
None
Brown
Blue
None
Brown
Blue
None
Brown
Blue
None
Brown
Blue
None
Brown
Blue
MD955630
MD730930
MD955631
MD730931
M D955632
M D730932
MD955633
MD730933
MD955634
MD730934
MD955635
MD730935
MD955636
MD730936
MD955637
TSB Revision
F4A2 - Specifications
Part name
Thickness
mm (in.)
Identification
symbol
Part No.
Snap ring
(For adjustment of end clutch clearance)
1.05 (041)
White
1.30 (.051)
1.55 (061)
1.80 (.071)
Yellow
None
Green
2.05 (081)
Pink
MD71 5800
MD71 5807’
MD715802
MD71 5803
MD720849
Snap ring
(For adjustment of output flange
bearing end play)
1.82 (.072)
1.88 (074)
1.94 (076)
2.00 f.079)
2.06 (081)
2.12 (.083)
None
Blue
Brown
None
Blue
Brown
MD722538
MD721014
MD721015
MD721016
MD721017
MD722539
Spacer
:For adjustment of transfer shaft preload)
1.20 (047)
20
1.23 (.048)
1.26 (.050)
1.29 (.051)
1.32 (.052)
1.35 (053)
1.38 (.054)
1.41 (.056)
1.44 (.057)
1.47 (.058)
1.50 l.059)
1.53 (.060)
1.56 (.061)
1.59 (.063)
1.62 (.064)
1.65 (.065)
1.68 (.066)
1.71 (.067)
1.74 i.069)
1.77 (.070)
1.80 (.071)
23
26
29
32
35
38
41
44
47
50
53
56
59
62
65
68
71
74
77
80
MD7231 60
MD723161
MD723162
MD7231 63
MD7231 64
MD7231 65
MD7231 66
MD723167
MD723168
MD727169
MD7231 70
MD723171
MD723172
MD7231 73
MD7231 74
MD723175
MD723176
MD7231 77
MD7231 78
MD723179
MD723180
1.31 (.052)
E
MD706574
None
C
B
A
F
H
cc
FF
II
M D706573
MD706572
MD706751
MD706570
MD706575
MD700272
MD71 5956
MD725959
MD71 5962
ipacer: F4A21
-or adjustment of differential case
t-d play)
1.40 (.055)
1.49 (.059)
1.58 (.062)
1.67 (.066)
1.76 (.069)
1.85 (.073)
1.94 (.076)
2.03 (080)
2.12 (.083)
TSB Revision
23B-12
F4A2 - Specifications
Part name
Thickness
mm (in.)
Identification
symbol
Part No.
Spacer: F4A22
(For adjustment of differential case
end play)
1.85 (.073)
1.94 (.076)
2.03 (080)
2.12 (.083)
2.21 (.087)
2.30 (.091)
2.39 (.094)
H
cc
FF
II
LL
00
RR
2.48 (098)
2.57 (.lOl)
uu
xx
M D700272
MD71 5956
MD71 5959
MD71 5962
MD71 5965
MD71 5968
MD71 5971
MD722736
MD731402
1 .I0 (043)
1 .I3 (044)
1 .I 6 (046)
1 .I 9 (.047)
J
D
K
L
G
M
Spacer: F4A23
(For adjustment of differential case
end play)
1.22 (048)
1.25 i.049)
1.28
1.31
1.34
1.37
(.050)
(.052)
(053)
(054)
1.40 (055)
1.43 (.056)
1.46 (.057)
1.49 (.059)
1.52 (.060)
1.55 (.061)
1.58 (062)
1.61 (.063)
1.64 (.065)
1.67 (066)
1.70 (.067)
1.73 (.068)
1.76 l.069)
1.79 (.070)
1.82 (.072)
1.85 (.073)
1.88 (.074)
1.91 (.075)
1.94 (.076)
1.97 (.078)
2.00 (.079)
2.03 (.080)
2.06 (.08’1)
2.09 (.082)
2.12 (.083)
2.15 (.085)
2.18 (.086)
1 TSB Revision
N
E
0
P
None
0
R
C
S
T
B
U
v
A
W
X
F
Y
Z
H
AA
BB
cc
DD
EE
FF
GG
HH
II
JJ
KK
MD71 0454
MD700270
MD7 10455
MD71 0456
MD700271
M D7 10457
MD710458
MD706574
MD71 0459
MD71 0460
MD706573
MD71 0461
MD71 0462
MD706572
M D7 10463
MD71 0464
MD706571
MD71 0465
MD71 0466
MD706570
M D7 10467
MD71 0468
MD706575
MD71 0469
M D7 10470
MD700272
MD710471
MD71 5955
MD71 5956
MD71 5957
MD71 5958
MD71 5959
MD71 5960
MD71 5961
MD71 5962
MD71 5963
MD71 5964
F4A2 - Specifications
Part name
Thickness
mm (in.)
Identification
symbol
Spacer: F4A23
(For adjustment of differential case
end play)
2.21
2.24
2.27
2.30
2.33
2.36
2.39
2.42
2.45
2.48
LL
MM
NN
00
PP
QQ
RR
ss
TT
uu
Spacer: F4A21
(For adjustment of differential
pinion backlash)
0.75 - 0.82
(.030 - ,032)
0.83 - 0.92
(.033 - ,036)
0.93 - 1 .oo
(037 - ,039)
1 .Ol - 1.08
(.040 - ,043)
1.09-1.16
(043 - ,047)
Spacer: F4A22, F4A23
[For adjustment of differential
oinion backlash)
(.087)
(088)
(.089)
(.091)
(.092)
t.093)
f.094)
(.095)
l.096)
i.098)
0.75 - 0.82
(.030 - ,032)
0.83 - 0.92
(033 - ,036)
0.93 - 1 .oo
(.037 - ,039)
1 .Ol - 1.08
(040 - ,043)
1.09-1.16
(043 - .047)
TSB Revision
Part No.
MD715965
MD71 5966
MD715967
MD71 5968
MD71 5969
MD71 5970
MD715971
MD722734
MD722735
MD722736
-
MA1 80862
-
MA1 80861
-
MA1 80860
MA1 80875
-
MA1 80876
-
MD722986
-
MD722985
-
MD722984
-
MD722982
-
MD722983
(
:
23B-14
F4A2 - Specifications
TORQUE SPECIFICATIONS
Manual control shaft set screw
Sprag rod support bolts
Idler shaft lock plate bolt
Transfer shaft lock nut
Bearing retainer bolts
Oil pump
assembly mounting bolts
Converter housing bolts
End clutch cover bolts
Valve body assembly mounting bolts
Oil filter bolts
Oil pan bolts
Kickdown servo lock nut
Park/neutral position switch bolts
Manual control lever nut
Pulse generator bolts
Pump housing to reaction shaft support bolts
Differential drive
gearbolts
One-way clutch outer race lock plate bolts
Valve body bolts
Pressure check plug
Speedometer sleeve locking plate bolt
Drain plug
End cover bolts
Solenoid valve mounting bolts
1 TSB Revision
Nm
ftlbs.
9
24
54
215
20
21
21
7
11
6
11
29
11
19
11
1
135
40
5
9
4
33
5
5
7
18
40
156
15
16
16
6
8
5
8
21
8
14
8
8
98
29
4
7
3
24
4
4
1
F4A2 - Special Tools
SPECIAL TOOLS
compressor
Measurement of low-reverse brake end
Transfer shaft
Differential oil
seal installer
M D998333-01
TSB Revision
Removal of oil pump
23B-16
F4A2 - Special Tools
compressor
compressor
MD998341
Kickdown servo
MD998341-01
M D998348-0 1
earing remover
TSB Revision
Removal of bearing
F4A2 - Special Tools
Tool
Number and
tool name
Replaced by OTC
tool number
Application
MD998814
Installer-200
M IT3041 80
Use with installer cap and installer adapter
MD99881 8
Installer
adapter (38)
General service tool
Installation of each bearing
M 0998905
Handle
M D998905-01
Removal and installation of center support
M D998906
Wrench adapter
MD998906-01
Preload measurement of transfer idler shaft
M D998907
Spring
compressor
M D998907-01
Disassembly and reassembly of front clutch
MD998908
Bearing
installer
MD998908-01
Press-in of transfer shaft rear bearing
MD99891 0
Bearing
installer
M D9989 1 O-01
Press-in of transfer shaft rear bearing
69
M D998819
Installer
adapter (40)
M D998824
Installer
adapter (50)
P
0
Gl3
1 TSB Revision
23B-18
Tool
F4A2 - SDecial Tools
Number and
tool name
Replaced by OTC
tool number
Application
MD99891 2
Handle
General service tool
Press-in of transfer shaft rear bearing
MD99891 3
Dial gauge
extension
MD99891 3-01
Measurement of low-reverse brake end
play
MD99891 5
Kickdown servo
wrench adapter
MD998916-l-01
Adjustment of kickdown servo
MD998916
Kickdown servo
adjust wrench
set
M D9989 16-2-O 1
M D9989 16-3-O 1
MD99891 8
Kickdown servo
wrench
MD998918
H
/
TSB Revision
F4A2 - Transaxle
TRANSAXLE
1. Torque converter
2. Converter housing
3. Gasket
4. Oil pump
V. v ,“‘J
6. Gasket
7. Thrust washer #1
8.
assembly
9. Front
Thrustclutch
race #3
10. Thrust bearing #4
11. Thrust washer #2
12. Rear clutch assembly
13. Spacer
14. Differential
8
I
21 Nm
16ft.lbs.
I
i
21 Nm
16 ft.lbs.
R
33
P
34
15. Thrust bearing #6
1f-i-. C-.l u --..
t c h..-huh 7. Thrust race #7
18. Thrust bearing #8
19. Kickdown band
24
--
Kickdown drum
Snap ring
Center support
O-ring
Wave spring
Return spring
Pressure plate
Brake disc
Brake plate
Reaction plate
30. Reverse sun gear
31. Thrust bearing #9
32. Thrust race #lO
33. Forward sun gear
34. Planetary carrier
35. Thrust bearing #12
20.
21.
22.
23.
24.
25.
26.
27.
28.
29.
TFA0051
TSB Revision
F4A2 - Transaxle
23B-20
7Nm
6 klbs.
60
54 Nm
40 ft.lbs.
-- -----
.
76
9Nm
la75
~67lTl
24 ftlbs.
c
i
’
T
\ 077 Fa
\
87
88
24Nm
18 ltlbs.
36.
37.
38.
39.
40.
Pulse generator
Spring washer
Control lever
Clamp
Park/neutral
position switch
41. Oil temperature sensor
42. End clutch cover
43. O-ring
44. Bearing
45. End clutch
46. Thrust washer
47. End clutch hub
48. Thrust bearing #13
49. End clutch shaft
33 Nm
24 ftlbs.
74
$3
50. Bearing retainer
51.
52.
53.
54.
55.
56.
57.
58.
59.
60.
61.
62.
63.
64.
Snap ring
Lock plate
Idler gear shaft
Bearing inner race
Idler gear
Bearing inner race
Spacer
Snap ring
Kickdown servo switch
Kickdown servo piston
Spring
Anchor rod
Output flange
Transfer shaft
TSB Revision
65.
66.
67.
68.
69.
70.
71.
72.
73.
74.
75.
76.
77.
78.
79.
Outer race
Gasket
O-ring
Clip (F4A21)
Valve body
Clamp
Gasket
Oil pan
Gasket
Drain plug
O-ring
Set screw
O-ring
Detent ball
Detent seat
80. Detent spring
81. Sprag rod support
82. Parking sprag rod
83. Control shaft
84. D-ring
85. Transfer shaft cover
86. Lock nut
87. Driven gear
88. Outer race
89. Spacer
90. Transmission case
NOTE:
Omnlz;3 and subsequent
*-marked parts
have the connector directly
attached, not via a harness.
TFA0051
F4A2 - Transaxle
DISASSEMBLY
(1) Prior to disassembling the transaxle, plug all openings and
thoroughly clean the exterior of the assembly, preferably by
steam.
(2) Place the transmission on the workbench with the oil pan
down.
(3) Remove the torque converter.
(4) Measuring input shaft end play before disassembly will
usually indicate when a thrust washer change is required
(except when major parts are replaced). Thrust washers”are
located between the reaction shaft support and rear clutch
retainer, and between the reaction shaft support and front
clutch retainer.
Mount a dial indicator to the converter housing using the
special tool, with its plunger seated against the end of the’
input shaft.
Move the input shaft in and out with pliers to obtain the end
play reading. Be careful not to scratch the input shaft.
Record the indicator reading for reference when reassembling the transaxle.
170046
(5) Remove pulse generators “A” and “B”
(6) Remove the manual control lever, and then remove the
park/neutral position switch.
TSB Revision
F4A2 - Transaxle
23B-22
MODEL 1992
I
Y/
Kickdown servo
switch
Snap ring
(7) Snap off the snap ring and remove the kickdown servo
switch.,
I
1750160
(8) Remove the oil pan and oil pan gasket.
(9) Remove the oil filter.
1 TSB Revision
F4A2 - Transaxle
3rature
....
(lO)Remove the oil temperature sensor bracket mounting bolts.
and remove the oil temperature sensor from its bracket.
Using a screwdriver, push out the rubber plug, workingfrom inside the case, and remove the oil temperature
sensor from the case.
175042
(1 l)Remove the clip from the solenoid valve connector (F4A21
only).
1 F4A22, F4A23
’
) F4A21
(12)With their catches pressed down, force the harness
grommet and connector into the transaxle case.
(13)Remove the valve body mounting bolts indicated by arrows
and remove the valve body from the transaxle case.
TSB Revision
23B-24
F4A2 - Transaxle
(14)Remove the end clutch cover.
(15)Remove the end clutch assembly.
(16)Remove the thrust washer from the input shaft end.
17)Remove the end clutch hub and the thrust bearing.
TSB Revision
F4A2 - Transaxle
238-25
(18)Pull out the end clutch shaft.
(19)Remove the 14 bolts indicated by arrows and remove the
converter housing and gasket.
(20)Remove the six oil pump mounting bolts indicated by
arrows.
(21)Screw the special tools (MD998333-01) into the bolt holes
marked @.
(22)Grasping the special tools, remove the oil pump. Then,
remove the gasket.
(23)Remove the spacer and differential from the transaxle case.
TSB Revision
238-26
F4A2 - Transaxle
(24)Remove fiber thrust washer #I
I
(25)Grasp and raise the input shaft to remove both the front and
rear clutch assemblies together.
(26)Remove thrust bearing #6.
(27)Remove the clutch hub.
(28)Remove thrust race #7 and thrust bearing #8.
TSB Revision
F4A2 - Transaxle
(29)Remove the kickdown drum.
(30)Remove the kickdown band.
(31)Using the special tools, push in the kickdown servo and
remove the snap ring.
(32)Remove the special tools and then remove the kickdown
servo piston, sleeve and spring.
(33)Remove the anchor rod.
TSB Revision
23B-28
F4A2 - Transaxle
(34)Remove the snap ring.
(35)Set the special tool on the center support and remove the
center support from the case.
Reverse sun gear
\
v
(36)Remove reverse sun gear, thrust bearing #9, thrust race
#IO and forward sun gear together.
(37)Remove the planetary gear set and thrust bearing #12.
(38)Remove the wave spring, return spring, reaction plate,
brake discs, and brake plates.
TSB Revision
F4A2 - Transaxle
(39)Sealant has been applied to the threads of the screws on
the bearing retainer. Tap the screw heads so the screws
can be easily loosened.
(40)Using an impact driver, loosen the screws and remove the
bearing retainer.
(41)Remove the idler shaft lock plate.
(42)Loosen the transfer idler shaft with the special tool.
17700
(43)Pull out the transfer idler shaft. Remove the transfer idle
gear and the two bearing inner races from inside the case.
TSB Revision
23B-30
F4A2 - Transaxle
(44)Remove the spacer.
(45)Remove the snap ring from the output flange bearing.
(46)Remove the output flange from the case.
(47)Remove the transfer shaft cover.
177003; I
(48)Straighten the locking tab of the transfer shaft lock nut
where it is bent.
TSB Revision
F4A2 - Trarisaxle
(49)Secure the transfer shaft on the end of the converter
housing.
(50)Remove the lock nut.
Caution
The lock nut is a left-handed screw.
(51)Drive out the transfer shaft toward the converter housing
end and remove the transfer shaft and transfer driven gear.
TFAOOl
(52)Remove the outer races from the transfer shaft bearing.
-4
1
(53)Remove the sprag rod support.
TSB Revision
23B-32
F4A2 - Transaxle
(54)Remove the set screw, and remove the manual control
shaft assembly. At this time, also remove the steel ball,
seat and spring.
Manual control
INSPECTION
Pulse generator connector
PULSE GENERATORS
(1) Measure the resistance between terminals 1 and 2 or 3 and
4.
1-2: Pulse generator “A”
3-4: Pulse generator “B”
Standard value: 245 ohm at 20°C (68°F)
(2) A too small resistance indicates a short circuit and a too
large resistance indicates an open circuit.
In either case, replace the pulse generator assembly.
1750010
1:
Pressure control
solenoid valve
2: Torque converter
clutch solenoid
3: ?Jf;c?Ltrol
,I solenoid
SOLENOID VALVES
(1) Measure the resistance between the terminals and valve
body of each solenoid valve.
Standard value: at 20°C (68°F)
Pressure control solenoid valve
Shift control solenoid valve
Torque converter clutch solenoid
MODEL 1992 and
MODEL 1993 - E33A, D21A, D22A
MODEL 1993 - CB5A, NIIW,
N14W, N34W
4: St$fkc?pol solenoid
Approx. 3 0
Approx. 22 fI
Approx. 13 0
Approx. 3 LR
(2) A too small or large resistance indicates a short or open
circuit.
In either case, replace the solenoid valve assembly.
(3) Connect a 12V battery between the terminal and body of
each solenoid valve and check the operating sound.
The valve is okay if an operating sound is heard. No
operating sound indicates that the valve is sticking or has
accumulated foreign matter. In this case, replace the
solenoid valve assembly.
TSB Revision
F4A2 - Transaxle
REASSEMBLY
(1) Before reassembling the transaxle, measure the end play in
the low-reverse brake and select a pressure plate to obtain
the specified end play. Use the following procedure.
(a) Install the brake reaction plate, brake plate, and brake
disc in the transaxle case.
Caution
Blow off automatic transmission fluid from the
plates and discs with low-pressure compressed air.
(b) Install the appropriate pressure plate and mount the
return spring.
Caution
Make sure that the return spring is mounted in the
correct direction.
~3 Oil pump side
\
Transaxle
model
No. of
brake discs
No. of
brake plates
F4A21
4
3
F4A22. F4A23
6
5
Brake plate Brake reactton plate ’
Brake disc
Pressure plate
Return spring
175020E
(c) Apply petrolatum jelly to the wave spring and attach the
wave spring on the center support.
(d) Install the two O-rings removed during disassembly and
coat them with automatic transmission fluid.
(e) Attach the special tool to the center support and install
the support in the transaxle case.
Caution
1. Install the center support, taking care that the
waved spring is not out of position.
2. Install the two O-rings in alignment with the oil
holes provided in the transaxle case.
(f) Remove the special tool.
(g) Install the snap ring.
TSB Revision
23B-34
F4A2 - Transaxle
MIT209038
(h) Mount the special tool and dial indicator on the rear side
of the transaxle case.
Make sure that the dial indicator rod (MD998913-01) is
inserted into the transfer idler shaft hole, contacting the
brake reaction plate at a right angle.
I I
'
Idler
shaft hole
1750211
MD99891 3-01
(i) Using a an
h d pump, feed air through the location shown
and, at the same time, read the dial indicator and select
a pressure plate to obtain the specified end play.
Standard value:
F4A21
0.7 - 0.9 mm (.028 - .035 in.)
F4A22, F4A23
1 .O - 1.2 mm (.039- .047 in.)
(j) After a pressure plate of the appropriate thickness has
been selected, remove all the mounted parts.
(‘2) Using the special tools, drive the transfer shaft bearing
outer races into position.
TSB Revision
F4A2 - Transaxle
(3) Insert the transfer shaft in the case.
L
I
(4) Mount the special tool on the transaxle case to support the
transfer shaft.
/
MD998319-01
(5) Install the thickest spacer [I.80 mm (.071 in.)].
\!
\ 175018:
.
(6) Install the transfer driven gear on the transfer shaft
(7) Remove the special tool and secure the transfer shaft in
position.
TSB Revision
23B-36
F4A2 - Transaxle
(8) Put on the lock nut and tighten it to specified torque.
Caution
The lock nut is a left-handed screw.
Tightening torque: 215 Nm (156 ftlbs.)
(9) Measure the end play while sliding the transfer shaft in and
out, and select a spacer to obtain the specified end play.
Standard value: 0 - 0.025 mm (0 - .OOl in.)
(lO)Bend the locking tab of the lock nut.
1
I
I
11)Place the transmission case on the workbench with the oil
pan mounting surface up.
12)lnsert the output flange in position (with two ball bearings
and transfer drive gear attached) from the inside of the
transaxle case.
(13)lnstall the snap ring in the groove of the output flange
bearing.
TSB Revision
F4A2 - Transaxle
(14)Apply petrolatum jelly to the spacer and attach the spacer to
the case.
I
Torque converter side
(15)lnstall the bearing outer race and inner races in the transfer
idler gear.
(16)Place the transfer idler gear in the case, and insert and
screw the idler shaft into position.
(17)Screw in and tighten the idler shaft by using the special
tool.
MD998344-01
(18)lnsert the special tool into the output flange and measure
the preload using a low reading torque wrench.
Adjust the preload to the standard value by tightening or
loosening the transfer idler shaft.
Standard value:
0.8 Nm (.6 ftlbs.)
F4A21, F4A22
1.5 Nm (1.1 ft.lbs.)
F4A23
TSB Revision
1
23B-38
F4A2 - Transaxle
(19)After completing the preload adjustment, install the idler
shaft lock plate. The clearance between the idler shaft and
the lock plate should be closed in the direction that will
prevent idler shaft looseness, and then tighten the lock
plate bolt to the specified torque.
Tightening torque: 54 Nm (40 ft.lbs.)
(20)lnstall the bearing retainer.
(21)Tighten the screw to specified torque.
Caution
The screw should not be reused.
Tightening torque: 20 Nm (15 ftlbs.)
(22)Lock the screw head in place using a chisel.
(23)Apply petrolatum jelly to thrust bearing #I 2 and secure the
bearing on the planetary carrier.
(24)Mount the planetary carrier on the case.
TSB Revision
F4A2 - Transaxle
(25)Attach thrust race #I 0 and thrust bearing #9 to the forward
sun gear. Then, assemble the reverse sun gear.
1770066
(26)lnstall the sun gear assembly assembled in step (25) in the
planetary carrier.
1 TSB Revision
23B-40
F4A2 - Transaxle
1750186
IDENTIFICATION OF THRUST BEARINGS, THRUST RACES, AND THRUST WASHERS
mm (in.)
I D.
Thickness
55 7
(2.193)
(.i!l545,
55.7
(2.193)
(.A&
55 7
(2 193)
2.2
f.087)
“3
55.7
(2.193)
2.6
*4
(
(2%
55 7
(2.193)
,.A;)
48.9
(1.925)
(1 .z7,
&3$
48 9
(1 925)
(I.&
(.A4271
48.9
(1.925)
48 9
Part No.
ldentlflcation
marking
0 D.
I.D.
Part No.
ldentificatlon
marklng
“I
#I
48.1
(I ,906)
34.4
(1.354)
MD707271
#4
(I 45075,
$7,
2.4
1.094)
MD722552
(F4A21, F4A22)
#5
(1 .t%)
$7,
1.8
(071)
MD720751
(F4A23)
#5
42 6
(I ,677)
(1%
MD720753
#6
38.7
1.6
$426,
(I 524)
t.063)
MD704936
#7
(2.&
36.4
(1.433)
MD72001 0
#8
(I.&
(I .%2,
MD728763
#9
2)
MD726764
#IO
MD997849 (rvz.*2)
MD727787
#II
*2
102)
MD707290 (F4A21)
MD729336 (F4A22. F4A23)
#2
MD997854 (Incl *I)
-
MD997847 (Incl “1)
MD997848 (Incl
l
TSB Revision
Thickness
F4A2 - Transaxle
(27)Put the brake disc and brake plate in position.
~3 Oil pump side
\
Brake plate Brake reactnon plate ’
Brake disc
Pressure plate
Return sprmg
175020E
(28)lnstall the pressure plate which was selected in Step (I).
(29)lnstall the return spring.
(30)Apply petrolatum jelly to the wave spring and attach the
wave spring to the center support.
L
-7
3-
175019:
3
1 TSB Revision
23B-42
F4A2 - Transaxle
(3l)lnstall the two new O-rings on the hydraulic pressure holes
of the center support.
Apply automatic transmission fluid to the O-rings.
1750194
(32)Attach the special tool to the center support. Install the
center support slowly in the transaxle case, grasping the
special tool.
Caution
1. During installation, take care not to let the wave
spring drop which was applied in Step (30).
2. Install the two O-rings in alignment with the oil
holes provided in the transaxle case.
(33)Remove the special tool from the center support.
(34)lnstall the snap ring to secure the center support. The snap
ring ends should not interfere with the pulse generator
mounting hole.
Pulse generator A
(35)lnstall the anchor rod, in the transaxle case.
,
(36)lnstall a new teflon seal ring and a new D-ring in the
grooves of the kickdown servo piston, and apply automatic
transaxle fluid to the rings.
(37)lnstall a new O-ring to the groove of kickdown servo sleeve,
and apply automatic transaxle fluid to the ring.
(38)Assemble the kickdown servo piston with the sleeve.
0-rinq
175222
servo sleeve
17
1 TSB Revision
F4A2 - Transaxle
~~f&#J3J
(39)Put the spring on the kickdown servo piston and sleeve
assembly, and insert them together in the transaxle case,
making sure that the end gap of the teflon seal ring of the
kickdown servo piston does not interfere with the fluid
apply hole provided in the servo bore of the transaxle case:
(40)Using the special tools, push in the kickdown servo piston
and sleeve assembly, and then install the snap ring.
(4l)lnstall the kickdown band; attach the ends of the band to
the ends of the anchor rod and servo piston rod.
NOTE
Install the band with the arrow mark foward oil pump side
(F4A23).
(42)When putting the kickdown drum in the kickdown band,
engage the splines of the kickdown drum with those of the
reverse sun gear. Place the kickdown band on the kickdown
drum and tighten the kickdown servo adjusting screw to
keep the band in position.
(43)Apply petrolatum jelly to thrust bearing #8 and attach the
thrust bearing to the kickdown drum.
TSB Revision
23B-44
F4A2 - Transaxle
(44)Apply petrolatum jelly to thrust race #7 and attach the
thrust race to the rear clutch hub.
(45)lnstall clutch hub, engaging it with the forward sun gear
splines.
(46)Apply petrolatum jelly to thrust bearing #6 and attach it to
the clutch hub.
(47)Apply petrolatum jelly to thrust washer #2 and thrust
bearing #4 and attach the washer and bearing to the rear
clutch assembly.
(48)Mate the rear clutch assembly with the front clutch
assembly.
Rear clutch
Front clutch
17502011
TSB Revision
F4A2 - Transaxle
(49)lnstall the clutch assembly.
-~
(50)lnstall the differential.
(51)Attach thrust race #3 and thrust washer #I on the rear end
face of the oil pump with petrolatum jelly.
(52)lnstall the special tool on the transaxle case. Using the
special tool as a guide, install a new oil pump gasket and the
oil pump in the case.
(53)Remove the special tool.
(54)Tighten the oil pump bolts to the specified torque.
(55)Measure the end play of the input shaft. If the measurement is out of specification, replace thrust race #3 and
thrust washer #I to meet the specification.
Standard value: 0.3 - 1.0 mm (.012 - .039 in.)
M IT2090
1 TSB Revision
23B-46
F4A2 - Transaxle
Solder
(56)Place approx. 10 mm (.394 in.) long and 2.5 mm (.I0 in.) dia.
pieces of solder at the locations shown on the differential
assembly.
(57)lnstall the converter housing directly to the transmission
case without installing the rubber coated metal gasket.
(58)Tighten the bolts to the specification.
(59)Loosen the bolts and remove the converter housing and
remove the pieces of flattened solder.
Spacer
(6O)Measure the thickness of the flattened solder using a
micrometer. Add the measured solder thickness (T) to the
value 0.38 mm (.015 in.), which corresponds to the gasket
thickness.
Then subtract from that sum a value corresponding to the
specified end play.
The result obtained is the thickness of the spacer to be
selected.
Select a spacer whose thickness falls within the range
determined by the formulas below:
[T + 0.38 mm (.015 in.) - 0.15 mm (.006 in.)] to
[T + 0.38 mm (.015 in.) - 0 mm (0 in.)]
(61)Place the spacer which was selected in Step (60) on the
outer race of the differential bearing.
170010RI
Apply silicone
(62)Apply silicone grease to all gasket surfaces of the transaxle
case.
175002'
TSB Revision
F4A2 - Transaxle
(63)lnstall a new gasket on the transaxle case.
Caution
Do not reuse the gasket which was previously removed.
(64)install converter housing and tighten the 14 bolts indicated
by arrows to specified torque.
Tightening torque: 21 Nm (16 ft.lbs.)
(65)lnstall the end clutch shaft, inserting the end that has the
longer splines first.
(66)lnstall the thrust washer on the return spring at the end
clutch side.
(67)lnstall the end clutch hub on the end clutch assembly.
(68)Attach thrust bearing #I3 to the end clutch hub with
petrolatum jelly.
[TSB
Revision
23B-48
F4A2 - Transaxle
(69)lnstall the end clutch assembly.
(70)lnstall new O-ring in the groove of the end clutch cover.
Check the bearing for smooth rotation and replace it if
defects are evident.
Apply an ample amount of automatic transmission fluid to
the bearing.
(71)Secure the end clutch cover by tightening its mounting
bolts to specified torque.
Tightening torque: 7 Nm (5 ftlbs.)
w O-ring groove
I
(72)lnstall the parking sprag rod to the manual control shaft.
Then, insert the shaft in the transaxle as shown in the
illustration. In doing this work, do not install O-ring in the
O-ring groove.
(73)After installing a new O-ring on the manual control shaft
assembly, draw the shaft back into the case, then install the
set screw and gasket. Also install the detent steel ball, seat
and spring at the same time.
Manual control
1750441
TSB Revision
F4A2 - Transaxle
(74)Place the case with the oil pan mounting surface up.
(75)lnstall the sprag rod support and tighten the two bolts to
specified torque.
Tightening torque: 24 Nm (18 ft.lbs.)
(76)lnstall the O-ring at the top of the valve body.
(77)Replace the O-ring of the solenoid valve connector with a
new one.
(78)When installing the valve body, insert the solenoid valve
connector in the case, while making sure that cut of
connector is positioned as shown in the illustration. (F4A21,
F4A22)
Oil pan
mounting
surface
1750431
(79)install the valve body in the transaxle case while fitting the
detent plate pin in the gap between the lands of the manual
valve.
(80)Tighten the valve body mounting bolts (10 pieces) to the
specified torque.
A bolt . . . . . 18 mm (.709 in.) long
B bolt . . . . . 25 mm (.984 in.) long
C bolt . . . . . 40 mm (1.575 in.) long
TSB Revision
I
23B-50
F4A2 - Transaxle
(8l)lnstall the oil filter and tighten the four oil filter mounting
bolts to the specified torque.
(82)lnstall five magnets in the five depressions provided inside
the oil pan.
Be sure to remove metal particles from the magnets and
clean the inside of the oil pan beforehand.
(83)Clean the gasket surfaces of the transaxle case and oil pan.
Install a new oil pan gasket and then the oil pan by
tightening the 12 bolts to the specified torque.
Tightening torque: 11 Nm (8 ft.lbs.)
(84)Adjust the kickdown servo by the following procedure:
(a) Fit the claw of the special tool in the notch of the piston
to prevent the piston from turning, and use adapter to
secure it as illustrated at left.
Caution
1. Do not push in the piston with the special tool.
2. When the adapter is installed to the transaxle
case, do not apply excessive torque but tighten
with a hand.
TSB Revision
F4A2 - Transaxle
(b) Loosen the lock nut until it is about to reach the V
groove in the adjusting rod. Tighten the special tool
(inner) until it touches the lock nut.
(c) Fit the special tool (outer) to the lock nut. Turn the outer
cylinder counterclockwise and the inner cylinder clockwise to lock the lock nut and the special tool (inner).
(d) Fit torque wrench to the special tool (inner) to tighten it
to a torque of 10 Nm (7.2 ft.lbs.) and loosen. Repeat this
sequence two times before tightening the special tool
(inner) to 5 Nm (3.6 ft.lbs.) torque.
Then back off the special tool (inner) 2 to 2% turns
(F4A21 and F4A22), or 2% to 2% turns (F4A23).
(e) Fit the special tool (outer) to the lock nut.
Turn the outer cylinder clockwise and the inner cylinder
counterclockwise to unlock the lock nut and the special
tool (inner).
Caution
When unlocking is carried out, apply equal force to
both special tools to loosen.
/
175047:
. . .
(f) Tighten the lock nut with a hand until it touches the
piston.
Then, use torque wrench to tighten the lock nut to
specified torque.
Lock nut: 29 Nm (21 ft.lbs.)
Caution
The lock nut may turn with the adjusting rod if
tightened quickly with socket wrench or torque
wrench.
(g) Remove the special tool for securing the piston. Install
the plug to the Low/Reverse pressure outlet and tighten
to specified torque.
I
23B-52
F4A2 - Transaxle
1!
(85)Set a new D-ring in the kickdown servo switch, push the
switch into the case and secure it with the snap ring.
175016C
(86)lnstall the park/neutral position switch and manual control
lever, and tighten the manual control lever nut to the
specified torque.
TSB Revision
F4A2 - Transaxle
JlODEL 1992
12mm
(47 in.)
Manual
k7G-J
(.47 in.)
z3l9453
(87)Adjust the park/neutral position switch as follows:
(a) Place the manual control lever in the “N” (neutral)
positi0.n.
(b) Turn the park/neutral position switch body until the 12
mm (.47 in.) wide end of the manual control
x , ..I.f&e@#gns
.$.Azld:‘&A ,.
with the switch body flange [I2 mm (47 1n.T wide
portion]. Alternatively, turn the switch body until the 5
mm (20 in.) hole in the manual control lever aligns with
the 5 mm (.20 in.) hole in the switch body.
(c) Tighten the attaching bolts to the specified torque
taking care that switch body is not displaced.
17513:
Section A-A
vlODEL 1993
12mm
Switch body
mm dia.
20 in.) hole
t--lzd 1 7 5 1 3 :
Section A-A
Manual
control lever
TFA079f
1 TSB Revision
Tightening torque: 11 Nm (8 ft.lbs.1
23B-54
F4A2 - Transaxle
(88)Check the continuity between terminals with the manual
control lever at each position.
The continuity between terminals should be as shown in
the table below.
VlODEL 1992
Internal Connection in the Inhibitor Switch - MODEL 1992
10
Ignition switch “ON” terminal
Q
11
MODEL 1993
Backup lamp
Internal Connection in the Inhibitor Switch - MODEL 1993
0
10
TFA079:
11
3
Transaxle control module
Transaxle control module
0 Transaxle control module
Lack of continuity indicates a poorly adjusted switch or
faulty switch. Readjust the switch. If still without continuity,
replace the switch.
TSB Revision
F4A2 - Transaxle
23BW5
(89)lnstall pulse generators “A” and “B” and tighten the bolt to
the specified torque.
Tightening torque: 11 Nm (8 ft.lbs.)
Pulse generator “B”
About
12mm
(.47 in.)
(90)After applying automatic transmission fluid to the outside
surface of the oil pump-side cylindrical portion of the torque
converter, install the torque converter carefully so as not to
give damage to the oil seal lip. Make certain that the torque
converter is in mesh with the oil pump drive gear.
(91)Measure the distance between the ring gear end and the
converter housing end.
The torque converter has been properly installed when the
measurement is about 12 mm (47 in.).
1 TSB Revision
‘I
23B-56
F4A2 - Oil Pump
OIL PUMP
DISASSEMBLY AND REASSEMBLY
2
11 Nm
8 ft.lbs.
Disassembly steps
+Eg 1. O-ring
#Dg 2. Reaction shaft support
eC4 3. Steel ball
(IAO~B~ 4. Drivegear
(IAI$ eB4 5. Driven gear
6. Seal ring
+A4 7. Oil seal
8. Oil pump housing
9. Snap ring
10. Oil seal
DISASSEMBLY SERVICE POINT
aA0 DRIVE GEAR / DRIVEN GEAR REMOVAL
(1) Make reassembly alignment marks on the drive and driven
gears.
REASSEMBLY SERVICE POINTS
I)A4 OIL SEAL INSTALLATION
MD998334-01
TSB Revision
F4A2 - O i l Puma
I)64
DRIVEN GEAR / DRIVE GEAR Sl,DE $LEe.R&&E
MEASUREMENT
Standard value:
0.03 - 0.05 mm (.OOl - .002 in.)
1750255
ec4 STEEL BALL LOCATION
1750121 6
I)Dg REACTION SHAFT SUPPORT INSTALLATION
(1) Assemble the reaction shaft support and the pump housing, and tighten the five bolts by fingers.
(2) Insert the special tool (Guide Pin MD998336-01) in the oil
pump bolt hole and tighten the peripheries of the support
and housing with the special tool (Band MD998335-01) to
locate the support and housing.
(3) Tighten the five bolts to the specified torque.
(4) Make sure that the oil pump gear turns freely.
I)E4 O-RING INSTALLATION
(1) Install a new O-ring in the groove of the pump housing and
apply petrolatum jelly to the O-ring.
1 TSB Revision
I
23B-58
F4A2 - Front Clutch
FRONT CLUTCH
DISASSEMBLY AND REASSEMBLY
1
T FA0029
Disassembly steps
*C4 1. Snap ring
#B4 2. Clutch reaction plate
3. Clutch disc
(IAO *A4 4. Snap ring
5. Return spring
6. Front clutch piston
7. D-ring
8. D-ring
9. Front clutch retainer
NO. of Clutch Discs and Clutch Reaction Plate
a-:-;;
1750213
[ TSB Revision
I
F4A2 - Front Clutch
DISASSEMBLY SERVICE POINT
t)Ao SNAP RING REMOVAL
MD998337-01
\
MD998907-01
;:.
(1) Compress the return spring with the special tool.
(2) Remove the snap ring.
MD998337-01
REASSEMBLY SERVICE POINTS
I)A4 SNAP RING INSTALLATION
MD998907-01 /
(1) Compress the return spring with the special tool.
(2) Install the snap ring.
Is
s
I)B4 CLUTCH REACTION PLATE INSTALLATION
(1) Install the clutch reaction plate with their missing tooth
portions (@ in the illustration) in alignment.
NOTE
This design is to facilitate escape of automatic transmission
fluid and improve the cooling efficiency of the plate and
disc.
TFA0498
F4A21
(2) Install the innermost the reaction plate with their shear
droops directed as shown in the illustration.
Identification of reaction plate
mm (in.)
F4A22 (except
F4A22-2-MQD6)
Plate
No.
Thick-
No. 1
I760021
1 WJZ& F4A23 Plate
Plate
.
. Plate-.
Shear
droop
N O.
l
ness
- -
F4A2;X&y3QD6,
Identification
- mark
- r
2
3.7
(.146)
None
3.1
(.122) B
3.7 (.146) None 3.7 (.I461 N o n e
TFAOSOC
)J
TSB Revision
23B-60
F4A2 - Front Clutch
175026:
#c4 SNAP RING SELECTION
(1) Check clearance between the snap ring and clutch reaction
plate. To check the clearance, hold entire circumference of
the clutch reaction plate down with 50 N (11 Ibs.) force. If
clearance is out of standard value, select a snap ring to
obtain the standard value.
Standard value:
F4A22, F4A23
0.7 - 0.9 mm (.028 - .035 in.)
F4A21
0.4 - 0.6 mm (.016 - .024 in.)
NOTE
To install the return spring snap rings, set the rings with
their end gaps 180” apart.
TSB Revision
pgm@j”s
F4A2 - Rear Clutch
REAR CLUTCH
No. of Clutch Discs and Plates
DISASSEMBLY AND REASSEMBLY
Clutch
disc
Model
1. Seal ring
*II4 2. Input shaft
3. O-ring
4. Snap ring
5. Thrust race
6. Seal ring
7. Snap ring
8. Clutch reaction plate
Clutch disc
Clutch plate
11. Clutch pressure plate
12. Wave spring
13. Return spring
14. Rear clutch piston
15. Rear clutch retainer
16. D-ring
17. D-ring
I
I
Disassembly steps
F4A2 1
2
F4A22. F4A23
3
Clutch
plate
I
I
1
2
7
12
13
I
;
I
1
W’
1::
”
8
/
I
TFAO 621
1311
93
-
1750215
1 TSB Revision
I
23B-62
F4A2 - Rear Clutch
DISASSEMBLY SERVICE POINT
OAo WAVE SPRING REMOVAL
(1) Compress the return spring with the special tool.
(2) Using a screwdriver, remove the wave spring.
REASSEMBLY SERVICE POINTS
I)A4 WAVE SPRING INSTALLATION
MD998337-01
MD998338
(1) Compress clutch reaction plate with the special tool.
(2) Install the wave spring.
I)B4 CLUTCH PRESSURE PLATE / CLUTCH PLATE /
CLUTCH REACTION PLATE INSTALLATION
(1) Install the clutch pressure plate, clutch plates and clutch
reaction plate with their missing tooth portions (@ in the
illustration) in alignment.
’ NOTE
This design is to facilitate escape of automatic transmission
fluid and improve the cooling efficiency of the plates and
disc.
/
\
,
TFA0498
*
Shear droop
Clutch disc
I
(2) Install the clutch reaction plate with its shear droop directed
as shown in the illustration.
Clutch reaction
Clutch plate
TFA050’
!I
+c4 SNAP RING SELECTION
(1) Check clearance between the snap ring and clutch reaction
plate. To check the clearance, hold entire circumference of
the clutch reaction plate down with 50 N (5 kg, 11 Ibs.)
force. If clearance is out of standard value, select a snap
ring to obtain the standard value.
Standard value:
F4A22, F4A23
0.4 - 0.6 mm (.016 - .024 in.)
0.3 - 0.5 mm (.012 - .020 in.)
F4A21
TSB Revision
‘I
F4A2 - Rear Clutch
I)D4 INPUT SHAFT INSTALLATION
the oil
0) Install the input shaft with its oil groove aligned with_a.
hole in the rear clutch retainer.
TSB Revision
23B-64
F4A2 - End Clutch
END CLUTCH
DISASSEMBLY AND REASSEMBLY
I
No. of Clutch Discs and Plates
I
I
I
F4A2 1, F4A22
I
F4A23
Clutch
plate
Clutch
disc
Model
3
3
I
4
I
4
I
8
6
TFA0607
3
Al--
4
2
Disassembly steps
9
’
,lml
13 m
I, Seal ring
)BC 2. Snap ring
3. Clutch reaction plate
4. Clutch disc
5. Clutch plate
bA4 6. Snap ring
7. Washer
8. Return spring
9. End clutch piston
GAO
10. Oil seal
II. D-ring
12. End clutch retainer
13. Oil seal
6
12
TFA0608
TSB Revision
F4A2 - End Clutch
DISASSEMBLY SERVICE POINT
(JAO END CLUTCH PISTON REMOVAL
(1) Remove the piston. If it is hard to remove, place the retainer
on the workbench with piston side down and blow air
through the oil passage in the back of retainer.
REASSEMBLY SERVICE POINTS
+A4 SNAP RING INSTALLATION
17506:
(1) Fit a new snap ring to the Guide of the special tool, and
install it to the retainer. Be sure to fit snap ring to the lowest
possible portion of the Guide.
Put the Installer over the Guide and use a press to install the
snap ring in the groove. If the snap ring is installed in the
groove, stop using the press. Do not use the press more
than necessary, Further, be sure not to support the portion
(center protruded portion) marked with arrows in the
illustration.
I)B4 SNAP RING SELECTION
(1) Check clearance between the snap ring and clutch reaction
plate. To check the clearance, hold entire circumference of
the clutch reaction plate down with 50 N (11 Ibs.) force. If
clearance is out of standard value, select a snap ring to
obtain the standard value.
Standard value:
0.4 - 0.65 mm (.016 - .026 in.)
F4A21, F4A22
0.6 - 0.85 mm (.024 - .031 in.)
F4A23
TSB Revision
23B-66
F4A2 - Planetary Gear
PLANETARY GEAR
DISASSEMBLY AND REASSEMBLY
6
5
I
4
I
I
TFA0522
Disassembly steps
*I24 1. Bolt
2. Lock plate (except F4A22-2-MQD6.
F4A23-2-LNN, LNQ)
3. One-way clutch outer race
4. End plate
#B4 5. One-way clutch
6. End plate
7. Pinion shaft
8. Front thrust washer
9. Spacer bushing
10. Short pinion
11. Roller
(IAIJ $A4 12. Thrust bearing
13. Planet carrier
TFA0524
TSB Revision
I
TFA0524
F4A2 - Planetary Gear
23lSW
DISASSEMBLY SERVICE POINT
~AI) THRUST BEARING REMOVAL
(1) Remove the only one short pinion. Use care not to drop and
lose the 17 rollers in the short pinion. Do not remove the
other short pinions.
(2) Remove the thrust bearing.
17025f
REASSEMBLY SERVICE POINTS
I)A4 THRUST BEARING INSTALLATION
(I) Install a new thrust bearing on the carrier. Make sure that it
fits correctly in the spot faced portion of the carrier.
(2) Apply Vaseline unsparingly to the inside surface of the short
pinion and attach the 17 rollers on the surface.
(3) Line up the holes of the rear thrust washer and front thrust
washer “A” with the shaft hole of the carrier.
(4) Install the short pinion, spacer bushing and front thrust
washer and align the holes. Use care not to allow the rollers
to get out of position.
washer “A”
Rear thrust washer
17026C
TSB Revision
23B-68
F4A2 - Planetary Gear
(5) Insert the pinion shaft. Make sure that the flattened end of
pinion shaft is correctly fitted in the hole of the rear thrust
plate when the pinion shafts is inserted.
Notch
I)64 ONE-WAY CLUTCH INSTALLATION
(1) Push the one-way clutch into the outer race. Make sure that
arrow on the outside circumference of cage is directed
upward as shown in the illustration when the one-way
clutch is pushed in.
17026:
I)c4 BOLT INSTALLATION
NOTE
Do not reuse the pre-coated bolt (F4A22 and F4A23).
TSB Revision
F4A2 - Planetary Gear
ANNULUS GEAR AND TRANSFER DRIVE GEAR SET
DISASSEMBLY AND REASSEMBLY
Disassemblv steps
*04 1. Snap ring
(IAI$~C~ 2. Bearing
OBrJ +B4 3. Transfer drive gear
(@#A4 4. Bearing
Cian rim
-. -.
6. Output frange
7. Annulus gear
170178
DISASSEMBLY SERVICE POlFjTS
OAo BEARING REMOVAL
-01
OBo TRANSFER DRIVE GEAR REMOVAL
MD998348-0 1
70111 I
(I&) BEARING REMOVAL
TSB Revision
23B-70
F4A2 - Planetary Gear
REASSEMBLY SERVICE POINTS
I)A4 BEARING INSTALLATION
r)B4 TRANSFER DRIVE GEAR INSTALLATION
Groove
(1) Install the transfer drive gear in proper direction. The
direction can be identified by the groove provided in one of
the pinion side surfaces.
Caution
Replace the output flange and transfer drive gear as a
set.
I)c4 BEARING INSTALLATION
I)D4 SNAP RING SELECTION
(1) Select a snap ring, which should be the thickest one that
can be installed in groove.
Standard value: 0 - 0.06 mm (0 - .0024 in.)
0
TSB Revision
23Biiiq
F4A2 - Differential
DIFFERENTIAL
DISASSEMBLY AND REASSEMBLY
135 Nm
98 ft.lbs.
I
1
\6
Disassembly steps
eD4 1. Bolt
2. Differential drive gear
~AIJ~C~ 3. Bearing
(IB~+B~ 4. Lock pin
+A4 5. Pinion shaft
+A4 6. Pinion
*A4 7. Washer
*A4 8. Sidegear
*A4 9. Spacer
10. Differential case
160119
DISASSEMBLY SERVICE POINTS
aA0 BALL BEARING REMOVAL
Press
164OOC
TSB Revision
23B-72
F4A2 - Differential
OBo LOCK PIN REMOVAL
Lock pin
(1) Drive out the lock pin with a punch inserted in hole “A“.
(2) Remove the pinion shaft from the case, and remove the
pinion gears and washers.
(3) Remove the side gears and spacers from the case.
Keep the removed gears and spacers for R.H. side use
separated from those for L.H. side use.
17
-
REASSEMBLY SERVICE POINTS
*A4 SPACER / SIDE GEAR / WASHER / PINION / PINION
SHAFT INSTALLATION
(1) With the spacers installed on the back of the differential
side gears, install the gears in the differential case. When
reusing the removed parts, install them in the original
positions noted during disassembly. When using new
differential side gears, install spacers of medium thickness
1 .O lo7 mm (.039 -0003 in.).
(2) Install the washers to the back of the pinion gears, install
the gears in the differential case, and then insert the pinion
shaft.
(3) Measure the backlash between the side gear and pinion
gear. The backlash should be 0.025 to 0.150 mm (.OOlO to
.0059 in.) and the right and left gear pairs should have equal
backlash. If the backlash is not within the specified range,
disassemble, and reassemble them using spacers selected
for correct backlash.
Backlash: 0.025 - 0.150 mm (.OOlO - .0059 in.)
I)B4 LOCK PIN INSTALLATION (F4A21)
Lock pin
Pinion shaft
Differential case
(1) Align the lock pin hole in the pinion shaft with that in the
case and press fit the lock pin until its protrusion is 3 mm
(0.12 in.) or less.
Caution
1. Do not reuse the lock pin.
2. Do not use a lock pin which requires only 2000 N
(440 Ibs.) or less force for installation.
chambered
160029
1 TSB Revision
F4A2 - Differential
Differential case
Pinion shaft
Lock pin
& Sink
TFA051C
#B4 LOCK PIN INSTALLATION (F4A22)
(1) Align the lock pin hole in the pinion shaft with that ip the
case and press fit the lock pin until its sink from- the
differential case end is 1 mm (04 in.) or more.
Caution
1. Do not reuse the lock pin.
2. Do not use a lock pin which requires only 2000 N
(440 Ibs.) or less force for installation.
+B4 LOCK PIN INSTALLATION (F4A23)
(1) Align the lock pin hole in pinion shaft with that in the case
and install the lock pin.
Caution
The lock pin should be lower than the differential case
flange surface.
ec4 BEARING INSTALLATION
.Ball bearing
TFMOOOE
Taper roller
bearing
TFM004C
eD4 BOLT TIGHTENING
(1) Apply automatic transmission fluid to the bolts and tighten
the bolts to the specified torque in the sequence shown in
the illustration.
16003C
1 TSB Revision
I
23B-74
F4A2 - Low Reverse Brake
LOW-REVERSE BRAKE
DISASSEMBLY AND REASSEMBLY
Q3
Disassembly steps
1. Low-reverse brake piston
2. D-ring
3. D-ring
4. Center support
TFA0386
TSB Revision
F4A2 - Kickdown Servo
KICKDOWN SERVO
DISASSEMBLY AND REASSEMBLY
I
Disassembly steps
1. O-ring
2. Kickdown servo sleeve
3.
4. Seal D-ring ring
5. Locknut
6. Kickdown servo rod
7. Kickdown servo piston
1750299
236-76
F4A2 - Speedometer Gear
SPEEDOMETER GEAR
DISASSEMBLY AND REASSEMBLY
u
I
c
Disassembly steps
1. O-ring
I)A4 2. Spring pin
P
.
3. Driven gear
4. Oil seal
5. Sleeve
“i
6
Driven gear
O-ring
\
Oil seal
\I
Sleeve
I
3
201078
REASSEMBLY SERVICE POINT
I)A4 SPRING PIN INSTALLATION
(1) Drive a new spring pin into the sleeve. Make sure that the
slit in the spring pin does not face the gear.
I
Spring pin
sit
201079
TSB Revision
F4A2 - Drive Shaft Oil Seal
DRIVE SHAFT OIL SEAL
DISASSEMBLY AND REASSEMBLY
Disassembly steps
1. Converter housing
2. Transmission case
+A4 3. Oil seal
REASSEMBLY SERVICE POINT
*A4 OIL SEAL INSTALLATION
MD998325-01
TSB Revision
23B-78
F4A2 - Transfer Shaft
TRANSFER SHAFT
DISASSEMBLY AND REASSEMBLY
Disassembly steps
QAO *A4 1. Bearing
2. Transfer shaft
TFA0656
DISASSEMBLY SERVICE POINT
c)Ao BEARING REMOVAL
MIT304180
TFAO507
TSB Revision
F4A2 - Transfer Driven Gear
TRANSFER DRIVEN GEAR
DISASSEMBLY AND REASSEMBLY
Disassembly steps
(IAI)+A~ 1. Bearing
2. Transfer driven gear
i
TFA0657
DISASSEMBLY SERVICE POINT
MD998348-01
@r) B E A R I N G R E M O V A L
REASSEMBLY SERVICE POINT
+A4 BEARING INSTALLATION
TSB Revision
23B-80
F4A2 - Valve Body
VALVE BODY
DISASSEMBLY AND REASSEMBLY
Viewed from A
16
5Nm
4 ft.lbs.
5Nm
1s 4ft.lbs.
I
I
Disassembly steps
1. Manual valve
)E4 2. Pressure control solenoid valve
I -4 3. Shift control solenoid valve “A”
#E4 4. Shift control solenoid valve “B”
‘----s
eE4
5. Torque converter clutch solenoid
6. Pipe
7. Valve stopper
8. N-D control sleeve
9. N-D control valve
*II4 10. Lower valve body sub assembly
11. Lower separating plate
12. Nut
13. Jet
4 14. Relief spring
$4 15. Steel ball
C 17. Upper valve body sub assembly
Q
5Nm
-4ft.lbs.
&A( 19. Teflon ball
+A4 20. N/D plate
21. Block
22. Upper separating plate
23. Dowel bushing
24. Intermediate plate
I f-‘HUDLJ
TSB Revision
23*8”1
F4A2 - Valve Body
47
I
27
B
26
36
3’9
Viewed from B
I
5Nm
4 Wbs.
5Nm
4 ft.lbs.
25. Front end cover
26. Pressure control spring
27. Pressure control valve
28. Torque converter control spring
29. Torque converter control valve
30. Adjusting screw
31. Regulator spring
32. Regulator valve
33. Shift control spring A
#A4 34. Stopper plate
35. Shift control plug
36. Rear clutch exhaust valve A
37. Rear clutch exhaust valve B
38. Rear clutch exhaust spring
39. 2-3/4-3 shift spring
40. 2-3/4-3 shift valve
41. Rear end cover
42. Shift control plug B
)A4 43. Stopper plate
44. Shift control valve
45. I-2 shift spring
46. 1-2 shift valve
47. Upper valve body
TFAO518
1 TSB Revision
I
F4A2 - Valve Body
23B-82
I’ P
60
59
48. Pin
49. Stopper
50. End clutch plug
51, End clutch spring
52. End clutch valve
53. End cover
54. Torque converter clutch control sleeve
55. Torque converter clutch control valve
56. Torque converter clutch control spring
57. N-R control valve
58. N-R control spring
59. Adjusting screw
T FAO54 1
60. Reducing spring
61. Reducing valve
62. Lower valve body
TFA0541
1 TSB Revision
.
F4A2 - Valve Body
23EE83
REASSEMBLY SERVICE POINTS
*A4 STOPPER PLATE / N-D PLATE / TEFLON BALL /
STEEL BALL LOCATION
I)64
UPPER VALVE BODY SUB ASSEMBLY
INSTALLATION
(1) Mount the special tools, and secure the upper separating
plate and intermediate plate with the eight mounting-bolts.
Then, demount the special tools.
175033:
#c4
I
MD998266-01
I
OIL FILTER / STEEL BALL / RELIEF SPRING
LOCATION
I)D4
LOWER VALVE BODY SUB ASSEMBLY
INSTALLATION
(1) Mount the special tools on the intermediate plate.
(2) Install the separating plate.
TSB Revision
23B-84
F4A2 - Valve Body
(3) Secure the lower valve body with the bolts. Then, remove
the special tools.
I)E4 SOLENOID VALVE ASSEMBLY INSTALLATION
(1) Install each solenoid valve in the position shown in the
figure.
Solenoid valve
Wiring color
Shift control solenoid valve “A”
Orange
(SCSV-A)
XSV-B
SCSV-A
TCC solenoid TFA,,28(
Shift control solenoid valve “B”
(SCSV-B)
Yellow
Torque converter clutch
solenoid (TCC solenoid)
Red
<MODEL 1992 and MODEL
1993 - E33A. D2 1 A, D22A>
Red/Black
r
Pressure control solenoid valve
(PCSV)
TSB Revision
<MODEL 1993 - CB5A,
Nl lW, N14W, N34W>
Blue
AUTOMATIC
TRANSAXLE
F4A33, W4A32, W4A33
CONTENTS
100
115
102
94
130
86
118
SPECIFICATIONS f............... . . . . . . . . . . . . . . . . . . . . . . . . . . . . . . .
Adjustment Pressure Plate,
Snap Rings and Spacers ....................................
Gear Ratio Table ................................................
Sealants and Adhesives ..... ..............................
Service Specifications ....................................
Torque Specifications ........................................
Transaxle Model Table . . . ....
. . .....
. . ......
. . ............
11
9
17
10
18
9
2
KICKDOWN SERVO ............................................ 105
LOW-REVERSE BRAKE .................................... 106
OIL PUMP ............................................................ 84
OIL PUMP DRIVE GEAR
- F4A-33-1 -MNNS, MNPE ................................ 131
PLANETARY GEAR ............................................ 96
REAR CLUTCH .................................................... 90
SPECIAL TOOLS .................................................... 19
Valve Body Spring Identification Chart ............
SPEEDOMETER GEAR ........................................
TRANSAXLE - 4WD ............................................
TRANSAXLE - FWD ............................................
TRANSFER - 4WD ................................................
TRANSFER CASE - 4WD ....................................
TRANSFER CASE ADAPTER - 4WD ................
TRANSFER SHAFT - FWD ................................
VALVE BODY ........................................................
10
107
52
23
119
127
124
113
108
ANNULUS GEAR AND TRANSFER
DRIVE GEAR SET ................................................
CENTER DIFFERENTIAL - 4WD ........................
DIFFERENTIAL ....................................................
END CLUTCH ........................................................
EXTENSION HOUSING - 4WD ........................
FRONT CLUTCH ....................................................
FRONT OUTPUT SHAFT - 4WD ........................
GENERAL INFORMATION ................................
9
23c-2
F4A3, W4A3 - General Information
GENERAL INFORMATION
Precautions to be taken when disassembling and reassembling the transaxle
0
Because the automatic transaxle is composed of component parts of an especially high degree of
precision, these parts should be very carefully handled during disassembly and assembly so as not to scar
or scratch them.
0
A rubber mat should be placed on the workbench, and it should always be kept clean.
0
During disassembly, cloth gloves or shop towels should not be-used. If such items must be used, either
use articles made of nylon, or use paper towels.
0
All disassembled parts must be thoroughly cleaned.
Metal parts may be cleaned with ordinary detergents, but must be thoroughly air dried.
0
Clean the clutch disc, resin thrust plate and rubber parts by using ATF (automatic transaxle fluid), being
very careful that dust, dirt, etc. do not adhere to them.
0
Do not reuse gaskets, oil seals, or rubber parts.
Replace such parts with new ones at every reassembly. The O-ring of the oil level gauge need not be
replaced.
0
Do not use grease other than petrolatum jelly.
0
Apply ATF to friction components, rotating parts, and sliding parts before installation.
0
A new clutch disc should be immersed in ATF for at least two hours before installation.
0
Do not apply sealer or adhesive to gaskets.
0
When a bushing must be replaced, replace the assembly in which it is incorporated.
0
If the transaxle main unit is damaged, also disassemble and clean the cooler system.
TSB Revision
23C-3
F4A3, W4A3 - General Information
;ECTIONAL VIEW - F4A33 with torque converter clutch
Torque
converter
Oil
Kickdown
brake
Planetary
gear
Low-reverse
brake
---. \
Front
clutch
'\
k
'.
Transfer
idler gear
Rear
Transfer
drive gear
End clutch
-/j Transfer shaft
Torque converter
clutch
Differential
4-wheel steering 011 pump drive gear
(Vehicles with 4-wheel steering system)
TFA0547
) TSB Revision
F4A3, W4A3 - General Information
iECTlONAL VIEW - F4A33 without torque converter clutch
Front
zh
Transfer
idler gear
Cl\
W -reverse
Oil pump
Ilk e
Kickdown
bra ke
Planetary
gear
Rear
clutch
Torque
converter -,
Transfer
‘drive gear
End clutch
Transfer shaft
Differential
TFAOl 01
1 TSB Revision
23C-5
F4A3, W4A3 - General Information
iECTlONAL VIEW - W4A32 with torque converter clutch
Oil pump
Torque converter
clutch
Kickdown
brake
\
PJv/reverse
k3: al<e
Planetary
gear
I
Front
clutch
\
\\\
Transfer
drive gear
I
Transfer
,idler gear
Torque
converter -
Rear output
shaft
Transfer
End
-clutch
1
Viscous
coupling
Center
differential
nt
put shaft
Differential
TFAOI 03
TSB Revision
23C-6
F4A3, W4A3 - General Information
iECTlONAL VIEW - W4A33 without torque converter clutch
Planetary
gear
Oil pump
\
7
Kickdown
brake
Front
clutch
\
\
\
Transfer
Transfer idler Clear
drive gear
Rear Low/reverse
clutch brake
I
i
End
Itch
1
Torque
converter ~
Rear output
shaft
Transfer
\
aInerenual
Differential
TFAOlO2
TSB Revision
23C-7
F4A3, W4A3 - General lnformatiori
YDRAULIC CONTROL SYSTEM (With torque converter clutch)
Kickdown servo
Torque convertor
Rear
clutch
Front
clutch
Low-reverse,
brake
I
End
clutch
1
18
F
12
2-314-3
shift valve
To lubrication c
-2 UII ’
pump
l!f
2
D ;
;;
Irv-M
~
Line
relief valve
\
\
\\
1-1
‘4 - I I
N-R control
valve
II
valve
II <psJ-//
I
TFA0070
TSB Revision
23C-8
F4A3, W4A3 - General Information
I-HYDRAULIC CONTROL SYSTEM (Without torque converter clutch)
Torque convertor
Kickdown servo
Front
I - I I ii0
Rear
Low-reverse
brake
End
clutch
-,
Shift control solenoid valve “A”
To lubrication
(Rear)
-F
Torque
convert
control
valve
\) 1 /
1 IShift control E”
I I I I I Isolenoid
//
/I
2
2
“II I
pump
J
tT---
--__-__
K
Oil filter
i”h
I F-DIG:
N-R control
valve
: : Line
:’ : relief valve
comroi
C,%l,Ynn;
J”IG?I l”l”
valve
‘53r-l
EX
Oil pan
TFA0078
1 TSB Revision
23C-9
F4A3, W4A3 - Specifications
SPECIFICATIONS
TRANSAXLE MODEL TABLE - MODEL 1992
Transaxle
model
F4A33-I-UP61*’
MNPZ
MNN3
MNN4
MNN5*2
W4A32-l-UNN
WNA
UQA2
W4A33-1 -UP6*’
Gear ratio
type
Speedometer
gear ratio
29136
28136
28136
28136
28136
28136
28136
30136
29136
1
Final gear
ratio
i
4.376
3.958
3.958
3.958
3.958
4.422
4.750
4.422
4.422
Vehicle model
Engine model
D22A
ZllA
F16A
F16A
F16A
N44W
N21W
E38A
D27A
4G63-DOHC TIC
6G72-DOHC
6672
6G72-DOHC
6G72-DOHC
4664
4693
4G63-DOHC
4G63-DOHC TIC
L
TRANSAXLE MODEL TABLE - MODEL 1993
Transaxle
model
Gear ratio
We
Speedometer
gear ratio
i
29136 28136
i
2
28136 28136
28J36
28J36
29136 28J36
F4A33-I-UP61*’
MNP8
MNP9
MNPC
MNPE*2
W4A32-I UNQ
WNFI
W4A33-1 -UP61 *’
:
NOTE
“I : Model without torque converter clutch (TCC)
“2: Model with 4-wheel steering oil pump drive gear
GEAR RATIO TABLE
1 st
2nd
3rd
4th
Reverse
A
B
2.551
1.488
1 .ooo
0.685
2.176
2.846
1.581
1.000
0.685
2.176
TSB Revision
Final gear
ratio
4.376
3.958
3.958
3.958
3.958
4.422
4.750
4.422
Vehicle model
Engine model
N24W. N44W
N21W
D27A
4664
4693
4G63-DOHC TIC
23C-10
F4A3, W4A3 - Specifications
SERVICE SPECIFICATIONS
mm (in.)
Item
Standard
Transfer driven gear preload (Center differential case preload)
Low-reverse brake end play
Input shaft end play
Differential case preload - F4A33
Front differential case end play ~ W4A32, W4A33
Differential gear and pinion backlash
Oil pump side clearance
Output flange bearing end play
Front clutch end play - F4A33, W4A33
- F4A32
Rear clutch end play - F4A33. W4A33
- F4A32
End clutch end play
Transfer drive gear end play
Front output shaft preload - W4A32, W4A33
Center differential side gear end play- W4A32, W4A33
Bevel gear set backlash - W4A32, W4A33
Driven bevel gear turning drive torque - W4A32, W4A33
Nm (ft.lbs)
Irive bevel gear shaft turning drive torque - W4A32, W4A33
Nm (ft.lbs)
0.075 - 0.135 (.0030 - .0053)
1 .O - 1.2 (.0394- .0472)
0.3-1.0(.0118-.0394)
0.075 - 0.135 (.0030 - .0053)
0.045 - 0.165 (.0018 - .0065)
0.025- 0.150 (.OOlO - .0059)
0.03 - 0.05 (0012 - .0020)
0 - 0.09 (0 - .0035)
0.8-1.0(.0315-.0394)
0.7 - 0.9 (.0276 - .0354)
1 .O- 1.2 (.0394 - .0472)
0.4 - 0.6 (.0157 - .0236)
0.60 - 0.85 (.0236 - .0335)
0 - 0.09 (0 - .0035)
0.055 - 0.115 (.0022 - .0045)
0.01 - 0.03 (.0004 - .0012)
0.08-0.13 (.0031 - .0051)
1 .O - 1.7 (.72 - 1.23)
1.7-2.5(1.23-1.81)
VALVE BODY SPRING IDENTIFICATION CHART
mm (in.)
Part name
Wire diameter
Regular valve spring
l-2 shift valve spring
Pressure control valve spring
Rear clutch exhaust valve spring
End clutch valve spring
2-3 shift valve spring
1.4 (.055)
0.6 (.024)
0.45 (.0177)
0.7 (.028)
0.6 (.024)
0.8 (.031)
N-R control valve spring
0.7 (-028)
Reducing valve spring
1.2 (.047)
Line relief spring
1 .o (.039)
Torque converter valve spring
1.3 (.051)
Shift control valve spring
0.5 (.020)
Torque converter clutch control valve spring 0.7 (.028)
e
TSB Revision
Outside diameter Length
15 (.59)
7.6 f.299)
7.6 C.299)
6.8 (.268)
6.6 (.260)
7.0 (.276)
9.2 (.362)
8.9 (.350)
7.0 (.276)
9.0 (.354)
5.7 (.224)
6.2 (.244)
i
52 (2.05)
26.6 (1.047)
21.3 (.839)
27.4 (1.079)
24.4 (.961)
27.5 (1.083)
32.1 (1.264)
29.5 (1.161)
17.3 (.681,)
22.6 t.890)
26.8 (1.055)
14.2 (.559)
No. of turns
11.5
13.5
8.5
12.5
15.5
15.5
8.5
12.5
10
3.5
22
3.5
23C-11
F4A3, W4A3 - Specifications
ADJUSTMENT PRESSURE PLATE, SNAP RINGS AND SPACERS
Part name
Thickness
mm (in.)
Identification
symbol
Part No.
Pressure plate - F4A33. W4A33
(For
brake adjustment
end play) of low-reverse
5.9 (232)
6.0 (.236)
6.1 (.240)
6.2 (.244)
6.3 (.248)
6.4 (.252)
6.5 (256)
6.6 (.260)
6.7 (.264)
6.8 (268)
6.9 (.272)
A
0
1
2
3
4
5
6
7
8
9
MD731 736
MD731 737
MD731 738
MD731 739
MD731740
MD731 588
MD731 741
MD731 742
MD731743
MD731 744
MD731 745
‘ressure plate - W4A32
:For adjustment of low-reverse
srake end play)
5.6 (220)
5.7 (224)
5.8 (228)
5.9 (232)
6.0 (.236)
6.1 (.240)
6.2 (.244)
6.3 (.248)
6.4 (.252)
6.5 (.256)
6.6 (260)
6.7 (.264)
6.8 (.268)
6.9 (.272)
7.0 (276)
Y
Z
8
9
0
1
2
3
4
5
6
7
X
A
B
MD731 720
MD731721
MD727801
MD731000
M D727802
MD731001
MD727803
MD731 002
MD727804
MD731003
MD727805
MD731 004
MD731 005
MD734766
MD734767
Snap ring - F4A33. W4A33
For adjustment of front clutch and
ear clutch end play)
1.3” (051)
1.4” (.055)
1.5 LO591
1.6 (.063)
1.7 (.067)
1.8 (071)
1.9 (.075)
2.0 l.079)
2.1 (.083)
2.2 (.087)
2.3 f.091)
2.4 f.094)
None
Blue
Brown
None
Blue
Brown
None
Blue
Brown
None
Blue
Brown
MD731747
MD731748
MD731749
MD731750
MD731 751
MD731 752
MD731 753
MD731 754
MD731 755
MD731 756
MD731 757
MD731 758
1.05 (.0413)
1.30 (.0512)
1.55 (.0610)
1.80 (.0709)
2.05 (0807)
White
Yellow
None
Green
Pink
MD71 5800
MD715801
MD71 5802
MD71 5803
MD720849
rear clutch only
;nap ring
‘or adjustment of end clutch end play)
TSB Revision
23C-12
F4A3, W4A3 - Specifications
Part name
Thickness
mm (in.)
Identification
symbol
Part No.
Snap ring - W4A32
(For adjustment of front clutch and
rear clutch end play)
1.6 (.063)
1.7(.067)
1.8(.071)
1.9 (.075)
2.0 (.079)
2.1 (.083)
2.2(.087)
2.3 (.091)
2.4(.094)
2.5(.098)
2.6(.102)
2.7 (.106)
2.8 (.llO)
2.9(.114)
3.0 (.118)
None
Brown
Blue
None
Brown
Blue
None
Brown
Blue
None
Brown
Blue
None
Brown
Blue
MD955630
M D730930
MD955631
MD730931
MD955632
MD730932
M D955633
M D730933
M D955634
M D730934
MD955635
M D730935
MD955636
MD730936
MD955637
Spacer - F4A33 (D22A). W4A32. W4A33
[For adjustment of transfer driven gear
oreload)
0.62 (.0244)
TSB Revision
0.65 (.0256)
0.68(.0268)
0.71 (.0280)
0.74 (.0291)
0.77 (.0303)
0.80(.0315)
0.83(.0327)
0.86(.0339)
0.89(.0350)
0.92 (.0362)
0.95 (.0374)
0.98(.0386)
1 .Ol (.0398)
1.04(.0409)
1.07 (.0421)
1 .l 0 (.0433)
1.13 (.0445)
1.16 (.0457)
1 .I9 (.0469)
1.22(.0480)
1.25(.0492)
1.28 (.0504)
1.31 (.0516)
62
65
68
71
74
77
80
83
86
89
92
95
98
01
04
07
IO
13
16
19
22
25
28
31
M D737444
MD737445
M D737446
MD737447
MD728802
M D728803
MD728804
MD728805
M D728806
MD728807
M D728808
MD728809
MD72881 0
MD72881 1
MD72881 2
MD72881 3
MD72881 4
MD72881 5
MD72881 6
MD72881 7
MD72881 8
MD72881 9
MD728820
MD728821
23C-13
F4A3, W4A3 - Specifications
Part name
Thickness
mm (in.)
Spacer - F4A33 (Zl 1 A, F16A)
(For adjustment of transfer driven gear
preload)
0.62 (0244)
0.65 (0256)
0.68 (0268)
0.71 (.0280)
0.74 (.0291)
0.77 (0303)
0.80 (.0315)
0.83 (.0327)
0.86 LO3391
0.89 (0350)
0.92 (0362)
0.95 (.0374)
0.98 (0386)
1 .Ol (.0398)
1.04 (.0409)
1.07 (.0421)
1 .I0 (0433)
1 .I3 (.0445)
1.16 (.0457)
1 .I9 t.0469)
1.22 (.0480)
1.25 (.0492)
1.28 (.0504)
1.31 (0516)
62
65
68
71
74
77
80
83
86
89
92
95
98
01
04
07
10
13
16
19
22
25
28
31
MD740866
MD740867
M D740868
MD740869
M D740870
MD740871
M D740872
MD740873
M D740874
MD740875
M D740876
MD740877
M D740878
MD740879
M D740880
MD740881
M D740882
M D740883
M D740884
MD740885
MD740886
MD740887
M D740888
MD740889
jr-rap ring
For adjustment of output flange
jearing end play)
1.76 (.0693)
1.82 (.0717)
1.88 (.0740)
1.94 (.0764)
2.00 (.0787)
2.06 (0811)
2.12 (0835)
2.18 (0858)
Brown
None
Blue
Brown
None
Blue
Brown
None
MD73331 4
MD722538
MD721014
MD721015
MD721 016
MD721017
MD722539
MD73331 5
TSB Revision
Identification
symbol
Part No.
23C-14
F4A3, W4A3 - Specifications
Part name
Ttmh$;:ne;;s
Identification
symbol
Spacer - F4A33 (D22A)
(For
adjustment of differential case
preload)
0.71 (.0280)
0.74 (.0291)
0.77 (.0303)
0.80 (0315)
0.83 (0327)
0.86 (.0339)
0.89 (0350)
0.92 (0362)
0.95 (0374)
0.98 (0386)
1 .Ol (0398)
1.04 (.0409)
1.07 (0421)
1.10 (.0433)
1.13 (0445)
1 .I6 (0457)
1.19 (0469)
1.22 (0480)
1.25 (.0492)
1.28 (0504)
1.31 (0516)
1.34 (0528)
1.37 f.0539)
71
74
77
80
83
86
89
92
95
98
01
04
07
J
D
K
L
G
M
N
E
0
P
Spacer - F4A33 (Zl 1 A, F16A)
‘For
adjustment of differential case
xeload)
0.71 (0280)
0.74 (.0291)
0.77 (0303)
0.80 (0315)
0.83 (0327)
0.86 (.0339)
0.89 (0350)
0.92 (0362)
0.95 (0374)
0.98 (.0386)
1 .Ol (0398)
1.04 (.0409)
1.07 (0421)
1 .I0 (0433)
1 .I3 (.0445)
1 .I6 (0457)
1.19 t.0469)
1.22 (.0480)
1.25 (.0492)
‘I .28 (.0504)
1.31 (0516)
1.34 (0528)
1.37 (.0539)
71
74
77
80
83
86
89
92
95
98
01
04
07
10
13
16
19
22
25
28
31
34
37
TSB Revision
Part No.
MD754475
MD727660
MD754476
MD727661
M D720937
M D720938
M D720939
MD720940
MD72094 1
M D720942
M D720943
MD720944
M D720945
MD71 0454
MD700270
MD710455
MD71 0456
MD700271
MD71 0457
MD7 10458
MD706574
MD71 0459
MD71 0460
MD754446
MD754447
MD754448
M D754449
M D740846
M D740847
M D740848
M D740849
M D740850
MD740851
M D740852
M D740853
MD740854
M D740855
MD740856
MD740857
M D740858
MD740859
M D740860
M D740861
MD740862
M D740863
M D740864
I
23G15
F4A3, W4A3 - Specifications
Part name
Thh;!,nness
Identification
symbol
Part No.
Spacer - W4A32. W4A33
(For play)
adjustment of differential case
end
1 .Ol
1.10
1.19
1.28
01
J
L
N
MD720943
MD7 10454
MD71 0456
MD71 0458
Spacer
(For adjustment of differential gear and
pinion backlash)
0.75 - 0.82
(.0295 - .0323)
-
MD722986
0.83
(0327- 0.92
.0362)
0.93 - 1 .oo
(.0366 - .0394)
1.01 -1.08
LO398 - .0425)
1.09-1.16
(.0429 - .0457)
-
MD722984
-
MD722982
-
MD722983
41
MD727941
34
MD727934
32
MD727932
30
MD727930
28
MD727928
73
MD724973
46
MD724946
81
MD720681
43
MD724943
72
MD724972
34
37
40
43
46
49
52
55
58
61
64
67
MD723600
MD723601
MD723602
MD723603
MD723604
MD723605
MD723606
MD723607
MD723608
MD723609
MD7261 70
MD7261 71
Spacer - W4A32. W4A33
(For adjustment of center differential front
side gear
end play)
Spacer - W4A32. W4A33
(For adjustment of center differential rear
side gear
end play)
Spacer -W4A32. W4A33
:For adjustment of drive bevel gear mount)
TSB Revision
i.0398)
(.0433)
t.0469)
(.0504)
MD722985
0.53 - 0.60
(.0209 - .0236)
0.69 - 0.76
(0272 - .0299)
0.85 - 0.92
(0335 - .0362)
1.01 -1.08
LO398 - .0425)
1.17-1.24
(0461 - .0498)
0.59 - 0.66
(0232 - .0260)
0.75 - 0.82
(.0295 - .0323)
0.93 - 1 .oo
(.0366 - .0394)
1.09-1.16
LO429 - .0457)
1.25-1.32
(.0492 - .0520)
1.34 (.0528)
1.37 l.0539)
1.40 (.0551)
1.43 (.0563)
1.46 (0575)
1.49 (.0587)
1.52 i.0598)
1.55 (.0610)
1.58 (.0622)
1.61 (.0634)
1.64 (.0646)
1.67 (0657)
23C-16
F4A3, W4A3 - Specifications
Part name
Thickness
mm (in.)
Identification
symbol
Spacer - W4A32. W4A33
(For adjustment
train
preload) of drive bevel gear
1.28 (.0504)
1.31 (.0516)
1.34 (.0528)
1.37 (.0539)
1.40 (0551)
1.43 (0563)
1.46 (.0575)
1.49 (.0587)
1.52 l.0598)
1.55 (0610)
1.58 (.0622)
1.61 (.0634)
1.64 (0646)
1.67 (.0657)
1.70 (.0669)
1.73 (0681)
1.76 (.0693)
1.79 (0705)
1.82 (0717)
1.85 (.0728)
B28
B31
B34
B37
B40
B43
B46
B49
B52
B55
B58
B61
B64
B67
B70
B73
876
B79
B82
B85
jpacer - W4A32. W4A33
For
of driven bevel gear
rain adjustment
preload)
1 .I9 (0469)
1.22 (0480)
1.25 (.0492)
1.28 (0504)
1.31 (0516)
1.34 (0528)
1.37 (.0539)
1.40 (.0551)
1.43 (0563)
1.46 (0575)
1.49 (0587)
1.52 (0598)
1.55 (.0610)
1.58 (.0622)
1.61 (0634)
1.64 (0646)
1.67 (.0657)
1.70 (0669)
1.73 (0681)
1.76 l.0693)
1.79 (0705)
1.82 (.0717)
1.85 (0728)
1.88 (.0740)
1.91 (0752)
1.94 (.0764)
19
22
25
28
31
34
37
40
43
46
49
52
55
58
61
64
67
70
73
76
79
82
85
88
91
94
Part No.
MD7261 67
MD7261 68
MD7261 69
MD724326
MD724327
MD724328
MD724329
MD724330
MD724331
MD724332
M D724333
M D724334
MD724335
M D724336
M D724337
M D724338
MD724339
MD724340
MD724341
MD724342
MD7261 72
MD722081
MD722082
MD722083
MD722084
MD722085
MD722086
MD722087
MD722088
MD722089
MD722090
MD722091
MD722092
MD722093
MD722094
MD722095
MD722096
MD722097
MD722098
MD722099
MD7221 00
MD722101
MD7221 02
MD722 103
MD7221 04
MD7221 05
TSB Revision
‘I
23C-17
F4A3, W4A3 - Specifications
Part name
Ttmh;::,f?;;s
Identification
symbol
Part No.
Spacer -W4A32. W4A33
(For adjustment of driven bevel gear mount)
0.13 (.0051)
0.16 (.0063)
0.19 (0075)
0.22 (.0087)
0.25 f.0098)
0.28 (.Ol 10)
0.31 (.0122)
0.34 (.0134)
0.37 (.0146)
0.40 (.0517)
0.43 (.0169)
0.46 (.0181)
0.49 (.0193)
0.52 (.0205)
13
16
19
22
25
28
31
34
37
40
43
46
49
52
MD720353
MD720354
MD720355
MD720356
MD720357
MD720358
MD720359
MD720360
MD720361
MD720362
MD720363
MD720364
MD720365
MD720366
Spacer -W4A32. W4A33
[For
adjustment of front output bearing
areload)
1.16 (.0457)
1 .I9 (.0469)
1.22 (.0480)
1.25 i.0492)
1.28 (.0504)
1.31 (0516)
1.34 (0528)
1.37 (.0539)
1.40 (0551)
1.43 (.0563)
1.46 (0575)
1.49 (.0587)
1.52 (.0598)
1.55 (0610)
1.58 (.0622)
1.61 (0634)
1.64 (.0646)
1.67 (.0657)
16
19
22
25
28
31
34
37
40
43
46
49
52
55
58
61
64
67
MD736929
MD736751
MD736931
MD7261 66
MD718517
MD71 5818
MD718519
MD71 8520
MD718521
MD71 8522
MD7 18523
MD7 18524
MD71 8525
MD71 5826
MD71 8527
MD7 18528
MD7 18529
MD7 18530
MD71 8531
MD72 1959
MD721960
1.70 (.0669)
70
1.73 (.0681)
1.76 f.0693)
73
76
SEALANTS AND ADHESIVES
cW4A32, W4A33>
Items
Specified sealants and adhesives
Transfer extension housing-Transfer adapter
MITSUBISHI Genuine Part No. MD997740 or
equivalent
Front bearing retainer bolts
Center differential flange bolts
3M Stud Locking Part No. 4170 or equivalent
Air breather
3M ATD Part No. 8001 or equivalent
TSB Revision
I
I
23C-18
F4A3, W4A3 - Specifications
TORQUE SPECIFICATIONS
TRANSAXLE
ft.lbs.
Nm
Air exhaust plug
Differential cover bolt
Differential drive gear bolt
Differential front bearing cap bolt
Differential rear bearing retainer bolt
End clutch cover bolt
Idler gear cover bolt
Idler shaft lock bolt
Park/neutral position switch (PNP switch) bolt
Kickdown servo lock nut
Manual control lever nut
Manual control shaft set screw
Oil drain bolt
Oil filter bolt
Oil lever gauge guide bolt
Oil pan bolt
Oil pressure check plug
Oil pump assembly mounting bolt
Oil pump bolt
Output bearing retainer bolt
Output flange bearing retainer bolt
Parking rod support bolt
Pulse generator bolt
Roll stopper bracket bolt
Shift control cable bracket bolt
Speedometer gear locking plate bolt
Transaxle mount bracket bolt
Valve body assembly mounting bolt
Valve body bolt
Center bearing retainer stopper bolt - W4A32, W4A33
Center differential drive gear bolt - W4A32, W4A33
33
11
135
70
35
11
11
38
11
29
19
9
33
6
24
11
5
21
11
24
20
24
11
49
24
5
70
11
5
5
75
Front bearing retainer bolt - W4A32, W4A33
49
24
8
98
51
26
8
8
28
8
21
14
7
24
5
18
8
4
16
8
18
15
18
8
35
18
4
51
8
4
4
54
35
Nm
ft.lbs.
5
150
19
33
33
39
39
4
108
14
24
24
28
28
TRANSFER - W4A32, W4A33
Cover mounting bolt
Driven bevel gear lock nut
Extension housing mounting bolt
Oil drain plug
Oil filler plug
Transfer case adapter mounting bolt
Transfer cover mounting bolt
TSB Revision
1
F4A3, W4A3 - Special Tools
SPECIAL TOOLS
bevel gear lock nut <4WD>
M D998266-01
Alignment of intermediate plate and valve
bodies
M D998303
Valve spring
compressor
MD998341-01
Installation and removal of kickdown servo
MD99831 6
Dial gauge
support
MIT209038
Measurement of input shaft end play
M D998266
Guide pin
1 TSB Revision
I
23C-20
F4A3. W4A3 - SDecial Tools
drive torque <4WD>
TSB Revision
F4A3, W4A3 - Special Tools
General service tool
Use with installer cap and adapter
MD998825
General service tool
MD998829
MD998829-01
TSB Revision
23C-21
23C-22
F4A3, W4A3 - Special Tools
Tool
Number and
tool name
Replaced by OTC
tool number
Application
MD998904
Bolt
MD998904
Pull-out idler shaft
M D998905
Handle
MD99890501
Removal and installation of center support
M D998907
Spring compressor
M D998907-01
Disassembly and reassembly of front clutch
and rear clutch
MD99891 5
Wrench adapter
MD99891 6-01
MD99891 6-I-01
Adjustment of kickdown servo
MD99891 6
Socket wrench
MD99891 6-2-01
M D9989 16-3-01
MD99891 7
Bearing remover
MD99891 7
Disassembly and reassembly of transfer
driven gear, bearing
MD99891 8
Kickdown servo
wrench
MD99891 8
Adjustment of kickdown servo
MD99891 9
Snap ring
installer
MD99891 9
Reassembly of end clutch
4
P
0
fs!3
R
69
ei?
TSB Revision
I
F4A3, W4A3 - Transaxle - F W D
TRANSAXLE - FWD
‘ONENTS
21 Nm
1
16ft.lbs.
214
23
I ’
17 18
I
15
1.
2.
3.
4.
5.
6.
7.
8.
9.
10.
16
’
Torque converter
Oil pump assembly
Gasket
Thrust washer #I
Front clutch assembly
Thrust race #3
Thrust bearing #4
Thrust washer #2
Rear clutch assembly
Thrust bearing #5
11. Rear clutch hub
12. Thrust race #6
13. Thrust bearing #7
14. Kickdown band
15. Kickdown drum
2;
25
36. Kickdown servo piston
37. Spring
38. Anchor rod
39. Detent assembly
40. Manual control shaft
41. Parking roller support
42. Oil pan
43. Gasket
16. Snap ring
44. Oil temperature sensor
17. Center support
18. Wave spring
19. Return spring
20. Pressure plate
21. Brake disc
22. Brake plate
23. Reaction plate
24. Reverse sun gear
25. Thrust bearing #8
26. Thrust race #9
27. Forward sun gear
28. Planetary carrier assembly
29. Thrust bearing #I 0
30. Output flange
31. Oil level gauge
32. Oil filler tube
45.
46.
47.
48.
33. Snap ring
34. Kickdown servo switch
35. Snap ring
Oil screen
Valve body assembly
Manual control lever
Park/neutral position switch
(PNP switch)
End clutch shaft
Bearing retainer
Thrust bearing #I 1
End clutch hub
Thrust washer
End cfutch assembly
O-ring
End clutch cover
Pulse generator
Lock bolt
Idler shaft
49.
50.
51.
52.
53.
54.
55.
56.
57.
58.
59.
60. Idler gear
61. Spacer
62. Gasket
TFA0409
TSB Revision
23C-24
F4A3, W4A3 - Transaxle - FWD
19 Nm
e 14ftJbs.
47
24Nm
18 ft.lbs.
11 Nm
8 ft.lbs.
0”
w
l?sL-
32
38
“4U
L&i
I
50
37
60
I
9Nm
7 ftlbs
II
61
5g
58
1
38 Nm
jj8ft.lbs.
1
64 35Nm
26 ft.lbs.
40
A
w
24 Nlm
18ft .Ibs. ---d
- 4 6
- 4 5
.llNm
8 ft.lbs.
“W
ilNm
8 ftlbs.
I
66
6Nm’
5ftlbs.
-
A@
&-IlNm
8 ftlbs.
11 Nm
8 ftlbs.
68
IJ
70 Nm
51 ft.lbs.
69
43
42
63. Idler gear cover
64. Differential bearing retainer
65. Outer race
66. Differential front bearing cap
67. Differential assembly
68. Gasket
69. Differential cover
70. Outer bearing retainer
71. Transfer shaft
72. Transaxle case
TSB Revision
NOTE:
On 1993 and subsequent models, *-marked parts
have the connecter directly attached, not via a harness.
TFA0653
F4A3, W4A3 - Transaxle - FWD
23C-25
DISASSEMBLY
1. Clean away any sand, mud, etc. adhered around the
transaxle.
2. Place the transaxle assembly on the workbench with the oil
pan down.
3. Remove the torque converter.
4. Use the special tool to mount the dial gauge on the
transmission case and measure the end play of the input
shaft.
5. Remove the pulse generator “A” and “B”.
AODEL 1992
6. Remove manual control lever then remove park/neutral
position switch (PNP switch).
TSB Revision
23C-26
F4A3, W4A3 - Transaxle - FWD
7. Remove the oil pan, magnets and gasket.
8. Remove the oil filter from the valve body.
I
T:A0109
9. Remove the 10 valve body mounting bolts.
IO. Remove the oil temperature sensor holder and remove the
oil temperature sensor harness from the clamp.
I
t
sensor
I
11. Press the finger of the solenoid valve harness grommet,
push the grommet into the case and remove the valve body
assembly.
12. Pull out the oil temperature sensor.
:
F4A3. W4A3 - Transaxle - FWD
23C-27
13. Remove the parking roller support.
14. Remove the set screw of the manual control shaft and
remove the manual control shaft assembly.
15. Remove the detent assembly.
16. Remove the differential cover and gasket.
17. Remove the differential front bearing cap.
TFA055C
18. Remove the differential bearing retainer, spacer and outer
race.
‘/
TFAOllG
19. Remove the differential assembly.
TSB Revision
23C-28
F4A3, W4A3 - Transaxle - F W D
20. Take out the end clutch cover installation bolts, then
remove the cover holder and end clutch cover.
21. Remove the end clutch assembly.
22. Remove the thrust plate.
23. Remove the end clutch hub.
24. Remove the thrust bearing #I 1.
NOTE
It may be stuck to the end clutch hub.
25. Pull out the end clutch shaft.
TSB Revision
F4A3, W4A3 - Transaxle - F W D
I
23G29
26. Remove the idler gear cover mounting bolts, then remove
the idler gear cover and gasket.
TFAOI 2~
27. Disengage the bolt stopper and remove the bolt.
28. Using the special tool, pull out the idler shaft and then
remove the idler gear and bearing inner race.
29. Remove the spacer.
30. Remove oil pump installation bolts.
TSB Revision
23C-30
F4A3, W4A3 - Transaxle - F W D
31. Use the special tool and remove the oil pump.
32. Remove thrust washer #I and thrust race #3.
33. Hold the input shaft and remove the front clutch assembly
and rear clutch assembly together.
ws\
iFA
34. Remove the thrust bearing #5.
\
\
,
\
I
/
35. Remove the clutch hub.
NOTE
The thrust race may be stuck to the clutch hub.
TSB Revision
I
F4A3, W4A3 - Transaxle - F W D
23C-31
36. Remove the thrust bearing #7.
37. Remove the kickdown drum.
38. Remove the kickdown band.
39. Remove the kickdown servo cover snap ring. Then remove
the kickdown servo switch.
TFA0137
40. Using the special tool, push in the kickdown servo and
remove the snap ring.
TSB Revision
23C-32
F4A3, W4A3 - Transaxle - F W D
41. Remove the kickdown servo piston.
42. Remove the anchor rod.
43. Remove the plug, then remove the air exhaust plug.
TFA0141
44. Remove the snap ring.
45. Using the special tool, remove the center support.
TSB Revision
F4A3, W4A3 - T r a n s a x l e - FWD
23G33
46. Remove reverse sun gear and forward sun gear together.
47. Remove planet carrier assembly.
48. Remove the wave spring, return spring, reaction plate,
brake discs, and brake plates.
49. Remove the screws and the rear bearing retainer.
.
50. Remove the snap ring and then remove the output flange
assembly.
TSB Revision
23C-34
F4A3, W4A3 - Transaxle - F W D
51. Remove the output bearing retainer mounting bolts and
then remove the output bearing retainer and outer race.
1
TFAO14S
52. Remove the transfer shaft.
53. Use a sliding hammer, etc., to remove the outer race.
54. Remove all oil seals.
,
MD998325-01
Differential
bearing
retainer
\ I
/
TFAOI 59
-I--
MB990938-0 1
REASSEMBLY
1. Using the special tool, install the oil seals to the differential
bearing retainer and transaxle case.
Special tool
Oil seal for differential
bearing retainer
MD998325-01
Oil seal for transaxle case
MD998325-01 (MD998803”)
*: Vehicles with 4-wheel steering oil pump
2. Use the special tool to press fit the outer race into the
transaxle case.
MB990934-01
1 TSB Revision
F4A3, W4A3 - Transaxle - F W D
23C-35
3. Install the transfer shaft
/
/ TFA015C
4.
Place solder with a length of approximately 10 mm (39 in.)
and diameter of 1.6 mm (.06 in.) on the output bearing
retainer at the position shown in the diagram and install the
outer race.
5.
Install the output bearing retainer and tighten the bolts to
the specified torque.
Output bearing retainer mounting bolts:
24 Nm (18 ftlbs.)
6. Loosen the bolts and remove the output bearing retainer.
TFA0149
7. Remove the outer race from the output bearing retainer and
remove the solder. If the solder is not crushed, repeat steps
(4) - (6),using the solder with diameter of 3 mm (.I 2 in.).
Measure the thickness of the crushed solder with a
micrometer and select a spacer with a thickness that will
provide the standard value for the preload.
Standard value: 0.075 - 0.135 mm LOO3 - .0053 in.)
8. Install the spacer selected in the previous item and the
outer race on the output bearing retainer.
9. Install a new O-ring around the outer circumference of the
outer bearing retainer.
10. Coat the O-ring with automatic transmission fluid and
tighten the output bearing retainer mounting bolts to the
specified torque.
Output bearing retainer mounting bolts:
24 Nm (18 ft.lbs.)
TFAOlGE
TSB Revision
23C-36
F4A3, W4A3 - Transaxle - F W D
11. Insert the output flange into the case and install a snap ring
around the bearing.
12. Install the bearing retainer using new bolts.
Bearing retainer mounting bolts: 20 Nm (15 ftlbs.)
13. Caulk the heads of the bolts.
aring #I 0
14. Apply a coating of petrolatum to thrust bearing #I 0 and
attach to the planetary carrier.
TFA017C
15. Assemble the planetary carrier.
TSB Revision
F4A3, W4A3 - T r a n s a x l e - MID
23C-37
16. Assemble the forward sun gear, thrust race #9, thrust
bearing #8 and reverse sun gear.
Thrust race #9
I4 \
1770066
17. Install both sun gears assembled in the previous item into
the planetary carrier.
18. Assemble the reaction plate, brake disc and brake plate.
TSB Revision
23C-38
F4A3, W4A3 - Transaxle - F W D
TFA0243
Identification of thrust bearings, thrust races and thrust washers
Unit: mm (in.)
D
d
t
Part No.
70 (2.76)
55.7 (2.193)
1.4 (.055)
"I
70 (2.76)
55.7 (2.193)
1.8 (.071)
"2
70 (2.76)
55.7 (2.193)
2.2 (087)
*3
70 (2.76)
55.7 (2.193)
2.6 (102)
"4
66 (2.60)
54 (2.13)
1.8 (.071)
MD731212
37
37
37
37
37
37
37
37
1.0
1.2
1.4
1.6
1.8
2.0
2.2
2.4
48.9
48.9
48.9
48.9
48.9
48.9
48.9
48.9
(1.925)
(1.925)
(1.925)
(1.925)
(1.925)
(1.925)
(1.925)
(1.925)
(1.46)
(1.46)
(1.46)
(1.46)
(1.46)
(1.46)
(1.46)
(1.46)
,039)
,047)
.055)
,063)
,071)
.079)
i.0871
(094)
MD997854
MD997847
MD997848
MD997849
MD997850
MD997851
MD997852
MD997853
(incl.
(incl.
(incl.
(incl.
(incl.
(incl.
iincl.
(incl.
Symbol
"I
*I
*2
*2
*3
"3
*4
*4
1 TSB Revision
d
Part No.
F4A3, W4A3 - Transaxle - FWD
23G39
19. Assemble the pressure plate used in disassembly and
install the return spring.
Caution
Position the return spring correctly when installing.
20. Apply a coating of petrolatum jelly to the wave spring and
attach it to the center support.
21. Mount the special tool on the center support, install 2 new
O-rings and push into the transaxle case.
Caution
1. Coat the O-rings with automatic transmission fluid
and align the -oil holes.
2. Do not move the wave spring out of position when
installing.
22. Install the snap ring.
23. Use a thickness gauge and measure the end play of the
low/reverse brake. Adjust to the standard value by selecting
the proper pressure plate.
Standard value: 1.0 - 1.2 mm (.039 - AM7 in.)
TFAO17
TSB Revision
23C-40
F4A3, W4A3 - Transaxle - FWD
24. Install the air exhaust plug, and then install the plug.
Air exhaust plug: 33 Nm (24 ftlbs.)
25. Install the anchor rod.
26. Install the kickdown servo spring, piston and sleeve.
Caution
The seal ring alignment hole of the kickdown servo
piston must not overlap the oil filler port (indicated by
the arrow in the diagram).
27. Use the special tool to push in the kickdown servo piston
and sleeve, and then install a snap ring.
28. Install the kickdown band.
Caution
Install so the arrow mark is facing toward the front.
TSB Revision
I
F4A3, W4A3 - Transaxle - FWD
23C-41
29. Install thrust bearing #4 and thrust washer #2 on the rear
clutch.
rhrust
TFA0269
30. Combine the rear clutch assembly and the front clutch
assembly.
TFA0270
31. Install thrust bearing #5 on the rear clutch hub.
Thrust bearing #5
TFA0271
32. Install the rear clutch hub on the rear clutch.
TFA0272
33. Install thrust race #6 on the end of the rear clutch hub.
TFA0273
23C-42
F4A3, W4A3 - Transaxle - FWD
34. Install thrust bearing #7 in the kickdown drum.
v
TFA027L
!I
35. Install the clutch assembly in the kickdown drum
TFA027E
36. Install the clutch assembly and kickdown drum into the
transaxle case at the same time.
Thrl
37. Adhere thrust race #3 and thrust washer #I to the back of
the oil pump with petrolatum.
38. Use the special tool to install a new oil pump gasket and oil
pump assembly.
Oil pump assembly mounting bolts: 21 Nm (16 ftlbs.)
TSB Revision
F4A3, W4A3 - Transaxle - F W D
23Ci43
39. Measure the end play of the input shaft. If not the standard
value, replace thrust race #3 and thrust washer #I and
adjust to the standard value.
Standard value: 0.3 - 1.0 mm (.012 - .039 in.)
40. Install the spacer, idler gear and bearing and then insert the
idler shaft.
Caution
Assemble so that the identification groove on the idler
gear faces the rear.
41. Tighten the idler shaft lock bolt together with the new lock
plat to the specified torque. Bend the three fingers of the
lock plate to prevent turning.
Idler shaft lock bolt: 38 Nm (28 ft.lbs.)
42. Install the idler gear cover and a new gasket.
Idler gear cover mounting bolt: 11 Nm (8 ft.lbs.)
TFA0124
43. Insert the end clutch shaft from the end with the long
spline.
TSB Revision
23C-44
F4A3, W4A3 - Transaxle - FWD
44. Fit the thrust washer on the return spring of the end clutch.
45. Install the end clutch hub on the end clutch assembly.
17502OL
46. Adhere thrust bearing #I to the end of the clutch hub with
petrolatum.
1750205
47. Install end clutch assembly.
TFA012C
48. Attach a new O-ring to the end clutch cover
TSB Revision
.I
F4A3, W4A3 - Transaxle - F W D
23C~45
49. Install the end clutch cover and tighten the bolts to the
specified torque.
End clutch cover mounting bolts: 11 Nm (8 ft.lbs.1
50. Install the differential assembly.
51. Place solder with a length of approximately 10 mm (39 in.)
and diameter of 1.6 mm (.06 in.) on the differential rear
bearing retainer at the position shown in the diagram and
install the outer race.
TFA018:
52. Install the differential rear bearing retainer and tighten the
bolts to the specified torque.
53. Loosen the bolts, remove the differential rear bearing
retainer and remove the solder. If the solder is not crushed,
repeat steps (51) - (53). using the solder with the diameter
of 3 mm.
Differential rear bearing retainer mounting bolts:
35 Nm (26 ftlbs.)
54. Measure the thickness of the crushed solder with a
micrometer and adjust by selecting a spacer with a
thickness that will provide the standard value for the end
play and preload.
Standard value: 0.075 - 0.135 mm (.003 - .0053 in.)
TSB Revision
23C-46
F4A3, W4A3 - Transaxle - FWD
55. Install a new O-ring on the differential rear bearing retainer,
coat the O-ring with automatic transmission fluid; then
install in the transaxle case and tighten the mounting bolts
to the specified torque.
Differential rear bearing retainer mounting bolts:
35 Nm (26 ftlbs.)
TFA059C
56. Install the front bearing cap and tighten the bolts to the
specified torque.
Differential front bearing cap mounting bolts:
70 Nm (51 ftlbs.)
57. Install the differential cover and a new gasket.
Differential cover mounting bolts: 11 Nm (8 ft.lbs.)
58. Install the detent assembly.
59. Install a new O-ring on the manual control shaft assembly,
coat the O-ring with automatic transaxle fluid and then
insert into the transaxle case.
60. Align the groove in the manual control shaft and the set
screw hole; then install the set screw.
Manual control shaft set screw: 9 Nm (7 ft.lbs.)
61. Install the parking roller support.
Parking roller support bolts: 24 Nm (18 ft.lbs.)
TSB Revision
F4A3, W4A3 - Transaxle - FWD
236-47
62. Insert the oil temperature sensor into the case.
63. Install an O-ring in the O-ring groove at the top of the valve
body assembly.
64. Replace the solenoid valve harness grommet O-ring with a
new one.
65. Pass the solenoid valve connector through the transaxle
case hole from the inside.
66. Push the solenoid valve harness grommet into the case
hole.
‘
A
B
67. Insert the knock pin of the valve body into the case, keeping
the detent plate pin in the manual valve groove. Temporarily
install the valve body, install the oil temperature sensor and
holder; then tighten the mounting bolts to the specified
torque.
A bolt: 1 8 mm (.709 in.)
B bolt: 25 mm (.984 in.)
C bolt: 40 mm (1.575 in.)
Valve body assembly mounting bolts: 11 Nm (8 ftlbs.)
Caution
Firmly fasten the solenoid valve and oil temperature
sensor harness at the position shown in the diagram.
Especially, be sure to route the pressure control
solenoid valve (PCSV) harness, which is separated from
other harness, as shown in the diagram and fasten the
harness with a clamp, Failure to fasten it may result in
contact with the detent plate or parking rod.
TFA07 11
1 TSB Revision
236-48
F4A3, W4A3 - Transaxle - F W D
WODEL 1993
‘A0824
68. Install the oil screen.
Oil filter mounting bolts: 6 Nm (5 ft.lbs.1
TFAOl OE
69. Install the magnets in the oil pan and install the oil pan.
Oil pan mounting bolts: 11 Nm (8 ft.lbs.)
70. Install park/neutral position switch (PNP switch) and manual
control lever.
Park/neutral position switch mounting bolts:
11 Nm (8 ftlbs.)
Manual control lever mounting bolt: 19 Nm (14 ft.lbs.)
71. Install the speedometer gear assembly.
VIODEL 1992
Speedometer gear locking plate mounting bolt:
5 Nm (4 ftlbs.)
TFAOl 0;
TSB Revision
F4A3, W4A3 - Transaxle - FWD
23c-49
72. Install the pulse generator A and B.
Pulse generator mounting bolts: 11 Nm (8 ft.lbs.1
Caution
Install the black tube on the output gear side and the
transparent tube on the end clutch side.
73. Install the oil filler tube and insert the level gauge.
Oil filter tube mounting bolt: 24 Nm (18 ftlbs.)
74. Install the brackets.
Transaxle mounting bracket bolts: 70 Nm (51 ft.lbs.1
75. Adjust the kickdown servo.
76. Adjust the kickdown servo by the following procedure:
(a) Fit the claw of the special tool in the notch of the piston
to prevent the piston from turning, and use adapter to
secure it as illustrated at left.
Caution
1. Do not push in the piston with the special tool.
2. When the adapter is installed to the transaxle case,
do not apply excessive torque but tighten with a
hand.
(b) Loosen the lock nut until it is about to reach the V
groove in the adjusting rod. Tighten the special tool
(inner) until it touches the lock nut.
w°CknUt 175046
TSB Revision
23C-50
F4A3, W4A3 - Transaxle - F W D
(c) Fit the special tool (outer) to the lock nut. Turn the outer
cylinder counterclockwise and the inner cylinder clockwise to lock the lock nut and the special tool (inner).
(d) Fit torque wrench to the special tool (inner) to tighten it
to a torque of 10 Nm (7.2 ft.lbs.) and loosen. Repeat this
sequence two times before tightening the special tool
(inner) to 5 Nm (3.6 ft.Ibs.) torque. Then back off the
special tool (outer) 2 to 2% turns.
(e) Fit the special tool (outer) to the lock nut.
Turn the outer cylinder clockwise and the inner cylinder
counterclockwise to unlock the lock nut and the special
tool (inner).
Caution
When unlocking is carried out, apply equal force to
both special tools to loosen.
(f) Tighten the lock nut with a ,hand until it touches the
piston.
Then, use torque wrench to tighten the lock nut to
specified torque.
Lock nut: 29 Nm (21 ft.lbs.)
Caution
The lock nut may turn with the adjusting rod if
tightened quickly with socket wrench or torque
wrench.
(g) Remove the special tool for securing the piston. Install
the plug to the Low/Reverse pressure outlet and tighten
to specified torque.
77. Install the kickdown servo switch and fasten with a snap
ring.
TFA0137
TSB Revision
F4A3, W4A3 - Transaxle - FWD
23C-51
78. Coat the oil pump drive hub with automatic transmission
fluid and install the torque converter. Push in firmly so that
dimension A in the diagram is the standard value.
Standard value: approx. 16.3 mm (.642 in.)
TSB Revision
23C-52
F4A3, W4A3 - T r a n s a x l e - 4WD
TRANSAXLE (4WD)
7
8
6
I. Torque converter
2. Oil pump assembly
3. Gasket
4. Thrust washer #I
5. Front clutch assembly
6. Thrust race #3
7. Thrust bearing #4
8. Thrust washer #2
9. Rear clutch assembly
10. Thrust bearing #5
11. Rear clutch hub
12. Thrust bearing #7
13. Thrust race #6
14. Kickdown band
15. Kickdown drum
16. Snap ring
17. Center support
18. Wave spring
19. Return spring
20. Pressure plate
21. Brake disc
22. Brake plate
23. Reaction plate
24. Reverse sun gear
25. Thrust bearing #8
26. Thrust race #9
27. Forward sun gear
28. Planetary carrier assembly
29. Thrust bearing #I 0
30. Output flange
31. Oil level gauge
32. Oil filler tube
33. Snap ring
34. Kickdown servo switch
35. Snap ring
37. Spring
38. Anchor rod
39. Detent assembly
40. Manual control shaft
41. Parking roller support
42. Oil pan
43. Gasket
44. Oil temperature sensor
45. Oil filter
46. Valve body assembly
47. Manual control lever
48. Park/neutral position switch
(PNP switch)
49. End clutch shaft
50. Bearing retainer
51. Thrust bearing #I 1
52. End clutch hub
53. Thrust washer
54. End clutch assembly
55. O-ring
56. End clutch cover
57. Pulse generator
58. Lock bolt
59. Idler shaft
60. Idler gear
61. Spacer
62. Gasket
TFA0409
TSB Revision
.I
236-53
F4A3, W4A3 - Tr lsaxle - 4WD
f
24 Nm
18ftlbs.
11 Nm
8 ftlbs.
56
19 Nm
14 ft.lbs.
55
I
4 7 -
E-
I
32
11 Nm
8 ft.lbs.
“48
\
I
35 Nm
26 ft.lbs.
64
1
8 ftlbs.
6’s
I
43
I ft.lbs
TG
3. Idler gear cover
4. Differential bearing retainer
5. Spacer
6. Differential front bearing cap
7. Differential assembly
8. Gasket
9. Differential cover
0. Output bearing retainer
6iim
’ -
k------; ;tlK
70 Nm
51 ftlbs.
I
11 Nm
8 ft.lbs.
71. Center differential assembly
72. Center bearing retainer
73. Stopper ring
74. Viscous coupling unit
75. Center bearing retainer
NOTE:
On 1993 and subsequent models, *-marked parts
76. Front output shaft
have the connecter directly attached, not via a harness.
77. Rear output shaft
TFA0411
78. Transaxle case
1 TSB Revision
23C-54
F4A3, W4A3 - Transaxle - 4WD
DISASSEMBLY
1. Clean away any sand, mud, etc. adhered around the
transaxle.
2. Place the transaxle assembly on the workbench with the oil
pan down.
3. Remove the torque converter.
4. Use the special tool to mount the dial gauge on the
transaxle case and measure the end play of the input shaft.
5. Remove the pulse generator “A” and “B”
AODEL 1992
6. Remove manual control lever then remove park/neutral
position switch (PNP switch).
1 TSB Revision
F4A3, W4A3 - Transaxle - 4WD
23C-55
7. Remove the oil pan, magnets and gasket,
8. Remove the oil filter from the valve body.
TFAOlOE
9. Remove the 10 valve body mounting bolts.
10. Remove the oil temperature sensor holder and remove the
oil temperature sensor harness from the clamp.
11. Press the finger of the solenoid valve harness grommet,
push the grommet into the case and remove the valve body
assembly.
12. Pull out the oil temperature sensor.
TFAOll;
1 TSB Revision
23C-56
F4A3. W4A3 - Transaxle - 4WD
13. Remove the parking roller support.
r
14. Remove the set screw of the manual control shaft and
remove the manual control shaft assembly.
15. Remove the detent assembly.
screw
TFAII114
-
16. Remove the differential cover and gasket.
17. Remove the differential front bearing cap.
li
18. Remove the differential bearing retainer, spacer and outer
race.
19. Remove the differential assembly.
TSB Revision
F4A3, W4A3 - Transaxle - 4WD
23C-57
20. Take out the end clutch cover installation bolts, then
remove the cover holder and end clutch cover.
21. Remove the end clutch assembly.
22. Remove the thrust plate.
23. Remove the end clutch hub.
24. Remove the thrust bearing #I 1.
NOTE
It may be stuck to the end clutch hub.
25. Pull out the end clutch shaft
TSB Revision
23C-58
F4A3, W4A3 - Transaxle - 4WD
26. Remove the idler gear cover mounting bolts, then remove
the idler gear cover and gasket.
TFAO124
27. Disengage the bolt stopper and remove the bolt.
28. Using the special tool, pull out the idler shaft and then
remove the idler gear and bearing inner race.
29. Remove the spacer
30. Remove oil pump installation bolts.
TSB Revision
F4A3, W4A3 - Transaxle - 4WD
23c-59
31. Use the special tool and remove the oil pump.
32. Remove thrust washer #I and thrust race #3.
33. Hold the input shaft and remove the front clutch assembly
and rear clutch assembly together.
34. Remove the thrust bearing #5
35. Remove the clutch hub.
NOTE
The thrust race may be stuck to the clutch hub.
TSB Revision
23C-60
F4A3, W4A3 - T r a n s a x l e - 4WD
36. Remove the thrust bearing #7
37. Remove the kickdown drum.
38. Remove the kickdown band.
39. Remove the kickdown servo cover snap ring. Then remove
the kickdown servo switch.
40. Using the special tool, push in the kickdown servo and
remove the snap ring.
TSB Revision
F4A3, W4A3 - Transaxle - 4WD.
23C-61
41. Remove the kickdown servo piston.
42. Remove the anchor rod.
43. Remove the plug, then remove the air exhaust plug.
44. Remove the snap ring.
45. Using the special tool, remove the center support.
TSB Revision
23C-62
F4A3, W4A3 - Transaxle - 4WD
46. Remove reverse sun gear and forward sun gear together.
47. Remove planet carrier assembly.
48. Remove the wave spring, return spring, reaction plate,
brake discs, and brake plates.
49. Remove the screws and the rear bearing retainer.
50. Remove the snap ring and then remove the output flange
assembly.
1 TSB Revision
F4A3, W4A3 - T r a n s a x l e - 4WD
23C-63
51. Remove the output bearing retainer mounting bolts and
then remove the output bearing retainer and outer race.
TFA0149
52. Insert a rod 8 mm (.31 in.) in diameter and 200 mm (7.87 in.)
in length from the hole shown in the figure and punch out
the rear output shaft.
- TiAOl5li
53. Using the special tool, remove the center differential.
54. Put a bolt (M6) into the center bearing retainer and, holding
that bolt, remove the center bearing retainer and outer race.
55. Remove the center bearing retainer stopper bolt.
23C-64
F4A3, W4A3 - T r a n s a x l e - 4WD
56. First remove the stopper ring and then put a bearing puller
or similar tool in the viscous coupling groove and pull out
the viscous coupling.
- ,’
/ I
1 TFA015E
57. Remove the front bearing retainer mounting bolt (MIO).
Then, screw a bolt (Ml 2) into the threaded hole of the front
bearing retainer and, holding that bolt, remove the front
bearing retainer and outer race.
TFA0151
58. Remove the front output shaft.
\
TFA0157
59. Using a sliding hammer or similar tool, remove the outer
race.
60. Remove the oil seals.
Outer race
‘I I
TFAOlSd
MD998325-01
REASSEMBLY
1. Using the special tool, install the oil seals to the differential
bearing retainer and transaxle case.
TFA0159
TSB Revision
F4A3, W4A3 - Transaxle - 4WD
I
23C-65
-‘
MD998803
2. Using the special tool, install the rear output shaft oil seal.
M 6990938-O 1
3. Using the special tool, press-fit the outer race in the
transaxle case.
4. Install the front output shaft assembly.
5.
1 TSB Revision
Position the solder approx. IO mm (40 in.) long by 1.6 mm
(.06 in.) in diameter in the front bearing retainer in the
position shown in the figure and then install the outer race.
23C-66
F4A3, W4A3 - Transaxle - 4WD
6. Install the front bearing retainer and tighten the bolt with
the specified torque.
-.-bearing retainer ffdLz‘- ’
-
TFA015E
Front bearing retainer mounting bolts:
49 Nm (35 ft.lbs.)
7. Loosen the bolts and remove the front bearing retainer.
8. Remove the outer race from the front bearing retainer and
remove the solder. If the solder does not break, perform the
work in steps 5 - 8 with large diameter solder. Measure the
thickness of the crushed solder with a micrometer and
select a spacer with the correct thickness so the preload
reaches the standard value.
Standard value: 0.055 - 0.115 mm (.0022 - .0045 in.)
9. Install the spacer selected in the previous step and the
outer race in the front bearing retainer.
IO. First install the front bearing retainer and apply sealant to
the bolts and then tighten with the specified torque.
Specified sealant:
3M Stud Locking Part No. 4170 or equivalent
Front bearing retainer mounting bolts:
49 Nm (35 ft.lbs.)
11. Using a bearing puller, support the viscous coupling and
insert in the case. Then, install the stopper ring.
12. Using the special tool, install the outer race in the center
bearing retainer.
TFAOl@
13. Install the center bearing retainer stopper bolt.
Center bearing retainer stopper bolt: 5 Nm (4 ftlbs.)
TSB Revision
F4A3, W4A3 - Transaxle - 4WD
236-67
14. Install the center bearing retainer so the projection of the
stopper bolt fits in the groove of the center bearing retainer.
I
15. Install the special tool in the center differential and install
the center differential in the transaxle case.
TFAOl52
16. Place solder with a length approximately 10 mm (39 in.)
and diameter of 1.6 mm (.06 in.) on the output bearing
retainer at the position shown in the diagram and install the
outer race.
I
TFA01671
17. Install the output bearing retainer and tighten the bolts to
the specified torque.
Output bearing retainer mounting bolts:
24 Nm (18 ft.lbs.)
18. Loosen the bolts and remove the output bearing retainer.
19. Remove the outer race from the output bearing retainer and
remove the solder. If the solder is not crushed, repeat steps
(4) - (6). using the solder with diameter of 3 mm (.I2 in.).
Measure the thickness of the crushed solder with a
micrometer and select a spacer with a thickness that will
provide the standard value for the preload.
Standard value: 0.075 - 0.135 mm (.003 - .0053 in.)
20. Install the spacer selected in the previous item and the
outer race on the output bearing retainer.
TSB Revision
23C-68
F4A3, W4A3 - Transaxle - 4WD
21. Install a new O-ring around the outer circumference of the
outer bearing retainer.
22. Coat the O-ring with automatic transmission fluid and
tighten the output bearing retainer mounting bolts to the
specified torque.
Output bearing retainer mounting bolts:
24 Nm (18 klbs.)
TFA0168
23. Insert the output flange into the case and install a snap ring
around the bearing.
24. Install the bearing retainer using new bolts.
Bearing retainer mounting bolts: 20 Nm (15 ftlbs.)
25. Caulk the heads of the bolts.
Thrust bearing #I 0
26. Apply a coating of petrolatum to thrust bearing #IO and
attach to the planetary carrier.
TFAOl701
TSB Revision
F4A3, W4A3 - Transaxle - 4WD
23G69
27. Assemble the planetary carrier.
28. Assemble the forward sun gear, thrust race #9, thrust
bearing #8 and reverse sun gear.
Thrust race #9
d;\
1770066
29. Install both sun gears assembled in the previous item into
the planetary carrier.
30. Assemble the reaction plate, brake disc and brake plate.
TSB Revision
23C-70
F4A3, W4A3 - Transaxle - 4WD
TFA0243
Identification of thrust bearings, thrust races and thrust washers
mm (in.)
TSB Revision
F4A3, W4A3 - Transaxle - 4WD
23C-71
31. Assemble the pressure plate used in disassembly and
install the return spring.
Caution
Position the return spring correctly when installing.
32. Apply a coating of petrolatum jelly to the wave spring and
attach it to the center support.
1750195
33. Mount the special tool on the center support, install 2 new
O-rings and push into the transaxle case.
Caution
1. Coat the O-rings with automatic transmission fluid
and align the oil holes.
2. Do not move the wave spring out of position when
installing.
34. Install the snap ring.
35. Use a thickness gauge and measure the end play of the
low/reverse brake. Adjust to the standard value by selecting
the proper pressure plate.
Standard value: 1.0 - 1.2 mm LO39 - .047 in.)
23C-72
F4A3, W4A3 - Transaxle - 4WD
36. Install the air exhaust plug, and then install the plug.
Air exhaust plug: 33 Nm (24 Mbs.)
I
/ /
I
I I
-
37. Install the anchor rod.
38. Install the kickdown servo spring, piston and sleeve.
Caution
The seal ring alignment hole of the kickdown servo
piston must not overlap the oil filler pot-t (indicated by
the arrow in the diagram).
39. Use the special tool to push in the kickdown servo piston
and sleeve, and then install a snap ring.
40. Install the kickdown band.
Caution
Install so the arrow mark is facing toward the front.
1 TSB Revision
F4A3, W4A3 - T r a n s a x l e - 4WD
23C-73
41. Install thrust bearing #4 and thrust washer #2 on the rear
clutch.
42. Combine the rear clutch assembly and the front clutch
assembly.
TFA027C
43. Install thrust bearing #5 on the rear clutch hub.
TFA0271
44. Install the rear clutch hub on the rear clutch.
45. Install thrust race #6 on the end of the rear clutch hub.
Thrust race 86
TFA02731
TSB Revision
23C-76
F4A3, W4A3 - T r a n s a x l e - 4WD
56. Fit the thrust washer on the return spring of the end clutch.
57. Install the end clutch hub on the end clutch assembly.
1750204
58. Adhere thrust bearing #I to the end of the clutch hub with
petrolatum.
1750205
59. Install end clutch assembly.
60. Attach a new O-ring to the end clutch cover.
F4A3. W4A3 - T r a n s a x l e - 4WD
23C-75
51. Measure the end play of the input shaft. If not the standard
value, replace thrust race #3 and thrust washer #I and
adjust to the standard value.
Standard value: 0.3 - 1.0 mm (.012 - .039 in.)
52. Install the spacer, idler gear and bearing and then insert the
idler shaft.
Caution
Assemble so that the identification groove on the idler
gear faces the rear.
53. Tighten the idler shaft lock bolt together with the new lock
plat to the specified torque. Bend the three fingers of the
lock plate to prevent turning.
Idler shaft lock bolt: 38 Nm (28 Wbs.)
54. Install the idler gear cover and a new gasket.
Idler gear cover mounting bolt: 11 Nm (8 ft.lbs.)
55. Insert the end clutch shaft from the end with the long
spline.
23C-74
F4A3, W4A3 - T r a n s a x l e - 4WD
46. Install thrust bearing #7 in the kickdown drum.
\\:
?/
TFA0274
47. Install the clutch assembly in the kickdown drum.
TFA027E
48. Install the clutch assembly and kickdown drum into the
transaxle case at the same time.
Thrt
49. Adhere thrust race #3 and thrust washer #I to the back of
the oil pump with petrolatum.
TFP
50. Use the special tool to install a new oil pump gasket and oil
pump assembly.
Oil pump assembly mounting bolts: 21 Nm (16 ftlbs.)
F4A3, W4A3 - Transaxle - 4WD
23C-77
61. Install the end clutch cover and tighten the bolts to the
specified torque.
End clutch cover mounting bolts: 11 Nm (8 ft.lbs.)
62. Install the differential assembly.
63. Place solder with a length of approximately IO mm (39 in.)
and diameter of 1.6 mm (06 in.) on the differential rear
bearing retainer at the position shown in the diagram and
install the outer race.
TFA018:
64. Install the differential rear bearing retainer and tighten the
bolts to the specified torque.
65. Loosen the bolts, remove the differential rear bearing
retainer and remove the solder. If the solder is not crushed,
repeat steps (51) - (53). using the solder with the diameter
of 3 mm.
Differential rear bearing retainer mounting bolts:
35 Nm (26 ftlbs.)
66. Measure the thickness of the crushed solder with a
micrometer and adjust by selecting a spacer with a
thickness that will provide the standard value for the end
play and preload.
Standard value: 0.075 - 0.135 mm (.003 - .0053 in.)
1
23C-78
F4A3. W4A3 - Transaxle - 4WD
67. Install a new O-ring on the differential rear bearing retainer,
coat the O-ring with automatic transmission fluid; then’
install in the transaxle case and tighten the mounting bolts
to the specified torque.
Differential rear bearing retainer mounting bolts:
35 Nm (26 ft.lbs.)
I
TFA0590
68. Install the front bearing cap and tighten the bolts to the
specified torque.
Differential front bearing cap mounting bolts:
70 Nm (51 ft.lbs.)
69. Install the differential cover and a new gasket.
Differential cover mounting volts: 11 Nm (8 ftlbs.)
70. Install the detent assembly.
(1,
71. Install a new O-ring on the manual control shaft assembly,
coat the O-ring with automatic transmission fluid and then
insert into the transaxle case.
72. Align the groove in the manual control shaft and the set
screw hole; then install the set screw.
Manual control shaft set screw: 9 Nm (7 ft.lbs.)
73. Install the parking roller support.
Parking roller support mounting bolts:
24 Nm (18 ftlbs.)
F4A3, W4A3 - T r a n s a x l e - 4WD
23c-79
74. Insert the oil temperature sensor into the case.
I
75. Install an O-ring in the O-ring groove at the top of the valve
body assembly.
TFA0188
76. Replace the solenoid valve harness grommet O-ring with a
new one.
77. Pass the solenoid valve connector through the transaxle
case hole from the inside.
78. Push the solenoid valve harness grommet into the case
hole.
79. Insert the knock pin of the valve body into the case, keeping
the detent plate pin in the manual valve groove. Temporarily
install the valve body, install the oil temperature sensor and
holder; then tighten the mounting bolts to the specified
torque.
A bolt:
18 mm (.709 in.)
B bolt: 25 mm (.984 in.)
C bolt: 40 mm (1.575 in.)
Valve body assembly mounting bolts: 11 Nm (8 ftlbs.)
Caution
Firmly fasten the solenoid valve and oil temperature
sensor harness at the position shown in the diagram.
Especially, be sure to route the pressure control
solenoid valve (PCSV) harness, which is separated from
other harness, as shown in the diagram and fasten the
harness with a clamp. Failure to fasten it may result in
contact with the detent plate or parking rod.
A
TFA071L
vision
23C-80
F4A3, W4A3 - Transaxle - 4WD
MODEL 1993
80. Install the oil screen.
Oil filter mounting bolts: 6 Nm (5 ftlbs.)
81. Install the magnets in the oil pan and install the oil pan.
Oil pan mounting bolts: 11 Nm (8 ft.lbs.)
82. Install park/neutral position switch (PNP switch) and manual
control lever.
Park/neutral position switch mounting bolts:
11 Nm (8 ft.lbs.)
Manual control lever mounting bolt:
19 Nm (14 ft.lbs.)
83. Install the speedometer gear assembly.
Speedometer gear locking plate mounting bo\t:
5 Nm (4 ftlbs.)
F4A3, W4A3 - Transaxle - 4WD
23G81
84. Install the pulse generator A and B.
Pulse generator mounting bolts: 11 Nm (8 ft.lbs.1
Caution
Install the black tube on the output gear side and the
transparent tube on the end clutch side.
85. Install the oil filler tube and insert the level gauge.
Oil filler tube mounting bolt: 24 Nm (18 ft.lbs.)
86. Install the brackets.
Transaxle mounting bracket bolts: 70 Nm (51 ft.lbs.1
87. Adjust the kickdown servo.
88. Adjust the kickdown servo by the following procedure:
(a) Fit the claw of the special tool in the notch of the piston
to prevent the piston from turning, and use adapter to
secure it as illustrated at left.
Caution
1. Do not push in the piston with the special tool.
2. When the adapter is installed to the transaxle case,
do not apply excessive torque but tighten with a
hand.
(b) Loosen the lock nut until it is about to reach the V
groove in the adjusting rod. Tighten the special tool
(inner) until it touches the lock nut.
TSB
Revision
23G82
F4A3. W4A3 - Transaxle - 4WD
(c) Fit the special tool (outer) to the lock nut. Turn the outer
cylinder counterclockwise and the inner cylinder clockwise to lock the lock nut and the special tool (inner).
(d) Fit torque wrench to the special tool (inner) to tighten it
to a torque of IO Nm (7.2 ft.lbs.) and loosen. Repeat this
sequence two times before tightening the special tool
(inner) to 5 Nm (3.6 ft.lbs.) torque. Then back off the
special tool (outer) 2 to 2% turns.
(e) Fit the special tool (outer) to the lock nut.
Turn the outer cylinder clockwise and the inner cylinder
counterclockwise to unlock the lock nut and the special
tool (inner).
Caution
When unlocking is carried out, apply equal force to
both special tools to loosen.
(f) Tighten the lock nut with a hand until it touches the
piston.
Then, use torque wrench to tighten the lock nut to
specified torque.
Lock nut: 29 Nm (21 ft.lbs.)
Caution
The lock nut may turn with the adjusting rod if
tightened quickly with socket wrench or torque
wrench.
(g) Remove the special tool for securing the piston. Install
the plug to the Low/Reverse pressure outlet and tighten
to specified torque.
89. Install the kickdown servo switch and fasten with a snap
ring.
F4A3. W4A3 - Transaxle - 4WD
23C-83
90. Insert the center shaft and hit it with a plastic hammer or
similar instrument to install it securely.
NOTE
Apply ATF to the oil seal lip and do not scratch it.
91. Coat the oil pump drive hub with automatic transmission
fluid and install the torque converter. Push in firmly so that
dimension A in the diagram is the standard value.
Standard value:
W4A33
approx. 16.3 mm (.642 in.)
W4A32
approx. 12.4 mm (.488 in.)
TSB Revision
23C-84
F4A3, W4A3 - Oil Pump
OIL PUMP
DISASSEMBLY AND REASSEMBLY
2
11 Nm
8 ft.lbs.
5
I
6
-3
Disassembly steps
#E4 1. O-ring
*Dq 2. Reaction shaft support
eC4 3. Steel ball
(IAIJ~B~ 4. Drivegear
c)ArJ eB4 5. Driven gear
6. Seal ring
*A4 7. Oil seal
8. Oil pump housing
9. Snap ring (with torque converter clutch only)
IO. Oil seal (with torque converter clutch only)
TFA0245
DISASSEMBLY SERVICE POINT
QAo DRIVE GEAR / DRIVEN GEAR REMOVAL
(1) Make reassembly alignment marks on the drive and driven
gears.
MD998334-01
REASSEMBLY SERVICE POINTS
I)A4 OIL SEAL INSTALLATION
F4A3, W4A3 - O i l P u m p
23C-85
I)B4
DRIVEN GEAR / DRIVE GEAR SIDE CLEARANCE
MEASUREMENT
Standard value: 0.03 - 0.05 mm (.OOl - ,002 in.)
I)c4 STEEL BALL LOCATION
I)D4 REACTION SHAFT SUPPORT INSTALLATION
(1) Assemble the reaction shaft support and the pump housing, and tighten the five bolts by fingers.
(2) Insert the special tool, Guide Pin MD998336-01, in the oil
pump bolt hole and tighten the peripheries of the support
and housing with the special tool, Band MD998335-01, to
locate the support and housing.
(3) Tighten the five bolts to the specified torque.
(4) Make sure that the oil pump gear turns freely.
11 Nm
/
-
TFA0201
I)E4 O-RING INSTALLATION
(1) Install a new O-ring in the groove of the pump housing and
apply petrolatum jelly to the O-ring.
TSB Revision
23C-86
F4A3, W4A3 - Front Clutch
FRONT CLUTCH
DISASSEMBLY AND REASSEMBLY - W4A32
08
TFA0029
6
lZi8
Disassembly steps
*CC 1, Snap ring
*BC 2. Clutch reaction plate
3. Clutch disc
~AI$ )A4 4. Snap ring
5. Return spring
6. Front clutch piston
7. D-ring
8. D-ring
9. Front clutch retainer
23C-87
F4A3, W4A3 - Front Clutch
IISASSEMBLY AND REASSEMBLY - F4A33, W4A33
8
TFA0422
Disassembly steps
*Q 1. Snap ring
*Bg 2. Clutch reaction plate
3. Clutch disc
*Bg 4. Clutch plate
)Bd 5. Clutch pressure plate
OArJ *A4 6. Snap ring
7. Return spring
8. Front clutch piston
9. D-ring
10. D-ring
11. Front clutch retainer
10
\
6
-
TFA0423
TSB Revision
1
23C-88
MD998337-01
F4A3, W4A3 - Front Clutch
DISASSEMBLY SERVICE POINT
OAo SNAP RING REMOVAL
MD998907-01 f
(1) Compress the return spring with the special tool.
(2) Remove the snap ring.
REASSEMBLY SERVICE POINTS
*A4 SNAP RING INSTALLATION
(1) Compress the return spring with the special tool.
(2) install the snap ring.
175026
I)B4 CLUTCH PLATE INSTALLATION
(1) Install the clutch plate with their missing tooth portions (@
in the illustration) in alignment.
NOTE
This design is to facilitate escape of automatic transmission
fluid and improve the cooling efficiency of the plate and
disc.
3
TFA049L
(2) Install the innermost plate with their shear droops directed
as shown in the illustration.
W4A32
cN4A32
Shea
I
TFA0500
:4A33. W4A33 Plate No. 4
Pla
shear drop
Thickness mm (in.)
Identification mark
1
5.0 i.197)
A
2
3.1 (.122)
I3
3
3.1 (.I221
B
4
I
3.7 (.I461
None
Plate No.
Thickness mm (in.)
1
5.0 (.I971
2
2.2 i.087)
3
I
I
I
TSB Revision
5
2.2 i.087)
I
2.2 i.087)
4
TFA042L
I
F4A33, W4A33
Plate No. 2
I
!3l
Plate No. 5
’v
Clut ch discs
Plate No.
I
3.8 (.150)
I
F4A3, W4A3 - Front Clutch
1750269
236-89
I)c$ SNAP RING SELECTION
(1) Check clearance between the snap ring and clutch reaction
plate. To check the clearance, hold entire circumference of
the clutch reaction plate down with 50 N (11 Ibs.) force. If
clearance is out of standard value, select a snap ring to
obtain the standard value.
Standard value:
W4A32
0.7 - 0.9 mm (.028 - .035 in.)
0.8 - 1.0 mm (.031 - ,039 in.)
F4A33, W4A33
NOTE
Position the gap of the snap ring approx. 180” away from
that of the return spring mounting snap ring.
TSB Revision
23c-90
F4A3, W4A3 - Rear Clutch
REAR CLUTCH
DISASSEMBLY AND REASSEMBLY - W4A32
Disassembly steps
1. Seal ring
*EC 2. Input shaft
3. O-ring
4. Snap ring
5. Thrust race
6. Seal ring
#D~I 7. Snap ring
)C4 8. Clutch reaction plate
9. Clutch disc
)Cc 10. Clutch plate
I)C4 11. Clutch pressure plate
(JAI) #A4 12. Wave spring
13. Return spring
14. Rear clutch piston
15. Rear clutch retainer
16. D-ring
17. D-ring
TFAO 621
WI6
13
11
9
8
v
II
II
lr
lid
1750215
TSB Revision
F4A3, W4A3 - Rear Clutch
IISASSEMBLY AND REASSEMBLY - F4A33, W4A33
TFAO418
-he number of seal rings varies with the transaxle model
Models with torque converter clutch
3
Models without torque converter clutch
1
TF A0490
Disassembly steps
1. Seal ring*
#E4 2. Input shaft
3. O-ring
4. Snap ring
5. Thrust race
6. Seal ring
)D4 7. Snap ring
#CC 8. Clutch reaction plate
9. Clutch disc
TSB Revision
)Q 10. Clutch plate
Wave spring
Snap ring
Return spring
Rear clutch piston
D-ring
D-ring
Rear clutch retainer
23c-92
F4A3, W4A3 - Rear Clutch
DISASSEMBLY SERVICE POINTS
~AI) WAVE SPRING REMOVAL
(1) Compress the return spring with the special tool.
(2) Using a screwdriver, remove the wave spring.
aB0 SNAP RING REMOVAL
MD998337-01
(1) Compress the return spring with the special tool.
(2) Using a screwdriver, remove the snap ring.
REASSEMBLY SERVICE POINTS
I)Ag WAVE SPRING INSTALLATION
(1) Compress clutch reaction plate with the special tool.
(2) Install the wave spring.
+Bg SNAP RING INSTALLATION
(1) Compress clutch reaction plate with the special tool.
(2) Install the snap ring.
w
TFA0231
+c4 CLUTCH PRESSURE PLATE / CLUTCH PLATE /
CLUTCH REACTION PLATE INSTALLATION
(1) Install the clutch pressure plate, clutch plates and clutch
reaction plate with their missing tooth portions (@I in the
illustration) in alignment.
NOTE
This design is to facilitate escape of automatic transmission
fluid and improve the cooling efficiency of the plates and
disc.
TFA0491
F4A3, W4A3 - Rear Clutch
Shear drou
Clutch disc
,
23c-93
(2) Install the clutch reaction plate with its shear droop directed
as shown in the illustration.
Wave
I
TFA0501
F4A33, W4A33
Clutch plate
Snap ring
Clutch reaction
TFA0282
+D4 SNAP RING SELECTION
(1) Check clearance between the snap ring and clutch reaction
plate. To check the clearance, hold entire circumference of
the clutch reaction plate down with 50 N (11 Ibs.) force. If
clearance is out of standard value, select a snap ring to
obtain the standard value.
Standard value:
0.4 - 0.6 mm (-016 - .024 in.)
W4A32
1.0 - 1.2 mm (.039 - .047 in.)
F4A33, W4A33
\
/
1750275
I)E4 INPUT SHAFT INSTALLATION
(1) Install the input shaft with its oil groove aligned with the oil
hole in the rear clutch retainer.
,
/
TSB Revision
23c-94
F4A3, W4A3 - End Clutch
END CLUTCH
DISASSEMBLY AND REASSEMBLY
TFA0607
Disassembly steps
1. Seal ring
)B4 2. Snap ring
3. Clutch reaction plate
4. Clutch disc
5. Clutch plate
#A4 6. Snap ring
7. Washer
8. Return spring
9. End clutch piston
OAO
10. Oil seal
11. D-ring
12. End clutch retainer
13. Oil seal
TSB Revision
6
12
TFA0608
F4A3, W4A3 - End Clutch
23c-95
DISASSEMBLY SERVICE POINT
aA0 END CLUTCH PISTON REMOVAL
(1) Remove the piston. If it is hard to remove, place the retainer
on the workbench with piston side down and blow air
through the oil passage in the back of retainer.
REASSEMBLY SERVICE POINTS
I)A4 SNAP RING INSTALLATION
(1) Using the special tool, fit the snap ring.
Caution
Make sure that the snap ring is fitted in position in the
groove.
+B4 SNAP RING SELECTION
(1) Check clearance between the snap ring and clutch reaction
plate. To check the clearance, hold entire circumference of
the clutch reaction plate down with 50 N (11 Ibs.) force. If
clearance is out of standard value, select a snap ring to
obtain the standard value.
Standard value: 0.6 - 0.85 mm (.024 - .031 in.)
1 TSB Revision
23C-96
F4A3, W4A3 - Planetary Gear
PLANETARY GEAR
D I S A S S E M B L Y A N D R E A S S E M B L Y - W4A32
RI
40 Nm
29 ft.lbs.
Disassembly steps
1. Bolt
2. One-way clutch outer race
3. End plate
)BC 4. One-way clutch
5. End plate
6. Pinion shaft
7. Front thrust washer
8. Spacer bushing
9. Short pinion
IO. Roller
c)Ar) *AC 11, Thrust bearing
12. Planetary carrier
TFA0713
TSB Revision
23C-97
F4A3, W4A3 - Planetary Gear
DISASSEMBLY AND REASSEMBLY - F4A33, W4A33
8
7
4
I
Disassembly steps
1. Thrust bearing
GBo +D4 2. Rivet
*Q 3. Wave washer
4. One way clutch outer race
5. End plate
*B4 6. One way clutch
7. End plate
8. Planetary carrier
TFA0491
DISASSEMBLY SERVICE POINTS
QAo T H R U S T B E A R I N G R E M O V A L
(1) Remove the only one short pinion. Use care not to drop and
lose the 17 rollers in the short pinion. Do not remove the
other short pinions.
170255
(2) Remove the thrust bearing.
\\
’
170251
TSB Revision
23C-98
F4A3, W4A3 - Planetary Gear
QBo RIVET REMOVAL
(1) Shift the stopper plate to ensure that the rivet head does
not hit it.
NOTE
Make sure that the stopper plate claw is not located at the
groove in the one-way clutch outer race.
(2) Using a pin punch, drive out the rivet.
TFA024;
REASSEMBLY SERVICE POINTS
I)A4 THRUST BEARING INSTALLATION
(1) Install a new thrust bearing on the carrier. Make sure that it
fits correctly in the spot faced portion of the carrier.
17025
(2) Apply Vaseline unsparingly to the inside surface of the short
pinion and attach the 17 rollers on the surface.
(3) Line up the holes of the rear thrust washer and front thrust
washer “A” with the shaft hole of the carrier.
(4) Install the short pinion, spacer bushing and front thrust
washer and align the holes. Use care not to allow the rollers
to get out of position.
\
Rear thrust washer
Front thrust
washer “A”
17026t
TSB Revision
1
F4A3, W4A3 - Planetary Gear
236-99
(5) Insert the pinion shaft. Make sure that the flattened end of
pinion shaft is correctly fitted in the hole of the rear thrust
plate when the pinion shafts is inserted.
I)B4 ONE-WAY CLUTCH INSTALLATION
(1) Push the one-way clutch into the outer race. Make sure that
arrow on the outside circumference of cage is directed
upward as shown in the illustration when the one-way
clutch is pushed in.
Arrow
170263
I)c4 WAVE WASHER INSTALLATION
(1) Install the wave washer to the rivet so that its indentation is
placed on the outer race side.
TFA050t
I)D4 RIVET INSTALLATION
(1) Stake the rivet using a punch and press.
NOTE
(1) Use a punch with a 60” tip angle.
(2) Stake the rivet with a load of 11,000 - 13,000 N (2,425 2,866 Ibs.).
7ri// TFA02601
TSB Revision
23C-100
F4A3, W4A3 - Annulus Gear and Transfer Drive Gear Set
ANNULUS GEAR AND TRANSFER DRIVE GEAR SET
/
DISASSEMBLY AND REASSEMBLY
Disassembly steps
*64 1. Snap ring
2. Stopper plate
@IJ *A4 3. Bearing
@rJ *A4 4. Bearing
(IA~J I)A4 5. Transfer drive gear
6. Snap ring
7. Output flange
8. Annulus gear
DISASSEMBLY SERVICE POINT
OAo BEARING / TRANSFER DRIVE GEAR REMOVAL
(1) Using the special tool, remove the transfer drive gear
together with two bearings from the output flange.
Caution
Install the special tool in position between the output
flange and bearings.
(2) Using the special tool, remove the bearings from both sides
of the transfer drive gear.
MD99891 7
\
b
TFA0225
TSB Revision
I
F4A3, W4A3 - Annulus Gear and Transfer Drive Gear Set
23C-101
REASSEMBLY SERVICE POINTS
*A4 TRANSFER DRIVE GEAR / BEARING INSTALLATION
(1) Using the special tool, press-fit the bearings into both sides
of the transfer drive gear.
I
I
,I
TFA022E
I
TFA042
(2) Using the special tool, install the transier drive gear to the
output flange.
MD998829-01
I)B4 SNAP RING SELECTION
(1) Measure the snap ring groove clearance and select the
appropriate spacer to obtain the specified end play.
Standard value: 0 - 0.09 mm (0 - .0035 in.)
1 TSB Revision
23C-102
F4A3, W4A3 - Differential
DIFFERENTIAL
DISASSEMBLY AND REASSEMBLY
135 Nm
98 ftlbs.
6
\
TFAO263
Disassembly steps
$E4 I. B o l t
2. Differential drive gear
(IAc) I)D4 3. Ball bearing (W4A32, W4A33)
c)Bg #CC 4. Taper roller bearing (F4A33)
cJCo+B4 5. Lock pin
*A4 6. Pinion shaft
*A4
*A4
)A4
)A4
7. Pinion
8.
9.
10.
11,
Washer
Sidegear
Spacer
Differential case
TFA0263
DISASSEMBLY SERVICE POINTS
aA0 BEARING REMOVAL
(1) Using the special tool, remove the bearing.
1 TSB Revision
I
F4A3, W4A3 - Differential
23C403
OBQ TAPER ROLLER BEARING REMOVAL
(1) Using the special tool, remove the taper roller bearing.
TFA0230
@f) LOCK PIN REMOVAL
(1) Using a‘ pin punch, drive out the lock pin.
NOTE
Sometimes the lock pin is removed with a light punch.
REASSEMBLY SERVICE POINTS
+A4 SPACER / SIDE GEAR WASHER / PINION / PINION
SHAFT INSTALLATION
(1) Fit the spacer to the back face of the side gear, then install
the gear into the differential case.
(2) Fit washer to back of pinion and rotate two pinions at the
same time into position to mesh with the side gear.
(3) Insert the pinion shaft.
(4) Measure the backlash between the side gear and pinion.
Standard value: 0.025 - 0.150 mm (.OOl - .0059 in.)
(5) If the backlash is out of specification, select the appropriate
spacer and disassemble and reassemble the gears as
necessary.
NOTE
Adjust so that the backlash in both side gears equals.
23C-104
F4A3. W4A3 - Differential
I)B4 LOCK PIN INSTALLATION
(1) Align the lock pin hole in pinion shaft with that in the case
and install the lock pin.
Caution
1. Do not reuse lock pins
2. Make the lock pin lower than the surface of the
differential case flange.
3. Press-fitting load is over 5,000 N (1,100 Ibs.)
MD998822-01
I)c4 TAPER ROLLER BEARING INSTALLATION
(1) Using the special tool, press-fit the bearings into both sides
of the differential case.
#D4 BEARING INSTALLATION
TFMOOOE
I)E4 BOLTS INSTALLATION
(1) Apply ATF to the differential drive gear bolts, install and
tighten with specified torque in the order shown in the
figure.
Differential drive gear bolt: 135 Nm (98 ft.lbs.1
160030
TSB Revision
23C-105
F4A3, W4A3 - Kickdown Servo
KICKDOWN SERVO
DISASSEMBLY AND REASSEMBLY
6
IIll
Disassembly steps
1. O-ring
2. Kickdown servo sleeve
3. D-ring
4. Seal ring
5. Lock nut
6. Kickdown servo rod
7. Kickdown servo piston
1750299
TSB Revision
23C-106
F4A3, W4A3 - Low-Reverse Brake
LOW-REVERSE BRAKE
03
1
Disassembly steps
1. Low-reverse brake piston
2. D-ring
3. D-ring
4. Center support
TSB Revision
23C-107
F4A3, W4A3 - Speedometer Gear
SPEEDOMETER GEAR
DISASSEMBLY AND REASSEMBLY
Disassembly steps
1. O-ring
+A4 2. Spring pin
3. Driven gear
4. Oil seal
5. Sleeve
201078
Driven gear
O-ring ,
Oil seal
I
Sleeve
REASSEMBLY SERVICE POINT
#A$ SPRING PIN INSTALLATION
(1) Drive a new spring pin into the sleeve. Make sure that the
slit in the spring pin does not face the gear.
Spring pin
.Slit
201076
1 TSB Revision
23C-108
F4A3, W4A3 - V a l v e B o d y
VALVE BODY
Viewed from A
DISASSEMBLY AND REASSEMBLY
8
6
steps
16
10
TSB Revision
1. Manual valve
eE4 2. Pressure control solenoid valve
eE4 3. Torque converter clutch solenoid
(Models with torque converter clutch)
#E4 4. Shift control solenoid valve “A”
)EC 5. Shift control solenoid valve “B”
6. Plate (Except models with torque converter
clutch)
7. Valve stopper
8. N-D control sleeve
9. N-D control valve
eD4 IO. Lower valve body sub assembly
11. Lower separating plate
12. Nut
13. Jet
$C4 14. Relief spring
$Q 15. Steel ball
#C4 16. Oil filter
eB4 17. Upper valve body sub assembly
*A4 18. Steel ball
+A4 19. Teflon ball
I)A4 20. N-D plate
21. Block
22. Upper separating plate
23. Intermediate plate
TFA0523
F4A3, W4A3 - Valve Body
23c-109
46
I
26
Viewed from B
TFAO518
Disassembly steps
24. Front end cover
25. Pressure control spring
26. Pressure control valve
27. Torque converter control spring
28. Torque converter control valve
29. Adjusting screw
30. Regulator spring
31. Regulator valve
32. Shift control spring
+A4 33. Stopper plate
34. Shift control plug
35. Rear clutch exhaust valve A
TSB Revision
36. Rear clutch exhaust valve B
37. Rear clutch exhaust spring
38. 2-314-3 shift spring
39. 2-314-3 shift valve
40. Rear end cover
41. Shift control plug B
+A4 42. Stopper plate
43. Shift control valve
44. l-2 shift spring
45. l-2 shift valve
46. Upper valve body
23C-110
F4A3, W4A3 - Valve Body
e
P
47. Pin
48. Stopper
49. End clutch plug
50. End clutch spring
51. End clutch valve
52. End cover
53. ;/;Fc;yxcept models with torque converter
54. Torque converter clutch control sleeve
55. Torque converter clutch control valve
56. Torque converter clutch control spring
57. N-R control valve
58. N-R control spring
59. Adjusting screw
60. Reducing spring
61. Reducing valve
62. Lower valve body
Models with torque
converter clutch
TFA0622
TSB Revision
F4A3, W4A3 - Valve Body
23C-111
+A4
STOPPER PLATE / N-D PLATE / TEFLON BALL /
STEEL BALL LOCATION
(1) Install the stopper plates, N-D plate, teflon ball, and steel
balls into the upper valve body as shown.
+64
UPPER VALVE BODY SUB ASSEMBLY
INSTALLATION
(1) Install the special tool and secure the upper separating plate
and intermediate plate with eight mounting bolts. Then,
remove the special tool.
MD9
1750332
I)c4
OIL FILTER / STEEL BALL / RELIEF SPRING
INSTALLATION
(1) Install the oil filter, two steel balls, and spring to the
intermediate plate.
I
MD998226-01
I
eD4
LOWER VALVE BODY SUB ASSEMBLY
INSTALLATION
(1) Mount the special tool to the intermediate plate.
(2) Install the separating plate.
1 TSB Revision
23C-112
F4A3, W4A3 - Valve Body
(3) Secure the lower valve body with mounting bolts and then
remove the special tool.
I)E4 SOLENOID VALVE ASSEMBLY INSTALLATION
(1) Install the solenoid valves as shown.
Solenbid valve
SCSV-B SCSV-A
TCC solenoid
TFA028C
Wire color
Shift control solenoid valve A (SCSV-A)
Orange
Shift control solenoid valve B (SCSV-B)
Yellow
Torque converter clutch solenoid (TCC solenoid)
Red
Pressure control solenoid valve (PCSV)
Blue
TSB Revision
F4A3, W4A3 - Transfer Shaft - FWD
23C-113
TRANSFER SHAFT - FWD
DISASSEMBLY AND REASSEMBLY
1
TFA0322
Disassembly steps
aA0 W ;: ;;=;g$p-a-ring
(40 *A4 3. Taper roller bearing
DISASSEMBLY SERVICE POINT
QAo TAPER ROLLER BEARING REMOVAL
MD998348-01
TFA032:
REASSEMBLY SERVICE POINTS
+A4 TAPER ROLLER BEARING INSTALLATION
I
1
TFA032!
i
1 TSB Revision
23G114
F4A3, W4A3 - Transfer Shaft - FWD
I)B4 TAPER ROLLER BEARING INSTALLATION
MD998822-01
TFA0324
F4A3, W4A3 - Center Differential - 4WD
23C-115
CENTER DIFFERENTIAL - 4WD
DISASSEMBLY AND REASSEMBLY
Disassembly steps
I. Transfer driven gear
OAO
@rJ eD4 2. Taper roller bearing
@I$ eC4 3. Taper roller bearing
+B4 4. Bolt
5. Center differential flange
W 6. Spacer
7. Side gear (front)
8. Pinion shaft
9. Pinion
10. Washer
II. Side gear (rear)
12. Clip
WV 13. Spacer
14. Center differential case
TFA0261
DISASSEMBLY SERVICE POINTS
OAo TRANSFER DRIVEN GEAR REMOVAL
(1) Remove the transfer driven gear.
NOTE
If it is hard to remove, use the special tool to remove it.
TSB Revision
23C-1 ‘I6
F4A3, W4A3 - Center Differential - 4WD
GBS, TAPER ROLLER BEARING REMOVAL
(1) Using the special tool, remove the taper roller bearing from
the transfer driven gear.
MD998348-01
$0 TAPER ROLLER BEARING REMOVAL
(1) Using the special tool, remove the taper roller bearing from
the center differential flange.
dlD998348-01
TFA0216
REASSEMBLY SERVICE POINTS
I)A4 SPACERS SELECTION
(1) install the spacer, side gear (rear), pinion, washer and pinion
shaft in the center differential case.
(2) While pressing the pinion shaft, select the thickest spacer
to gently rotate the pinion.
-FA218
(3) Install the side gear (front), spacer and center differential
flange and tighten the bolts with the specified torque.
Center differential drive gear bolt: 75 Nm (54 ft.lbs.1
(4) Using the front output shaft, rotate the side gear front and
select the thickest spacer to gently rotate the side gear
front.
w
TFA02 19
r)B4 BOLT INSTALLATION
(1) First apply sealant to the end [5 mm (.2 in.)] of the bolt
threads and then tighten to the specified torque in the order
shown in the figure.
Center differential drive gear bolt: 75 Nm (54 ft.lbs.)
Specified adhesive:
3M Stud Locking Part No. 4170 or equivalent
ITSBvision
I
F4A3, W4A3 - Center Differential - 4WD
23C-117
I)c4 TAPER ROLLER BEARING INSTALLATION
(1) Using the special tool, install the taper roller bearing on the
center differential flange.
eD4 TAPER ROLLER BEARING INSTALLATION
(1) Using the special tool, install the taper roller bearing on the
transfer driven gear.
TSB Revision
23C-118
F4A3, W4A3 - Front Output Shaft - 4WD
FRONT OUTPUT SHAFT - 4WD
DISASSEMBLY AND REASSEMBLY
Disassembly steps
(IAO )A4 I. Taper roller bearing
QAI) +A4 2. Taper roller bearing
3. Front output shaft
TFA0244
DISASSEMBLY SERVICE POINT
OAo TAPER ROLLER BEARINGS REMOVAL
(1) Using the special tool, remove the taper roller bearings on
both ends of the front output shaft.
REASSEMBLY SERVICE POINT
+A4 TAPER ROLLER BEARINGS INSTALLATION
(I) Using the special tool, press-fit the taper roller bearings on
both ends of the front output shaft.
MD9988
:
TFA& 1
MD998822-01
TSB Revision
I
F4A3, W4A3 - Transfer- - 4WD
23c-119
TRANSFER - 4WD
DISASSEMBLY AND REASSEMBLY
19 Nm
14 ft.lbs.
Disassembly steps
I. Cover
+E4 2. Cover gasket
)D4 3. Extension housing assembly
4. Oil guide
+C4 5. Transfer case sub assembly
#B4 6. Spacer
7. O-ring
#A4 8. Transfer case adapter sub assembly
,
I
REASSEMBLY SERVICE POINTS
I)A4 TRANSFER CASE ADAPTER SUB
ASSEMBLY
INSTALLATION
(1) Apply a light and uniform coat of machine blue or red lead to
the driven bevel gear teeth (both sides) using a brush.
221004! 3
TSB Revision
23C-120
F4A3, W4A3 - Transfer - 4WD
I)64 SPACER INSTALLATION
(1) Install the spacer that has been used.
22 10050
TRANSFER CASE SUB ASSEMBLY INSTALLATION
#c4
(1) With the matching marks in alignment, install the transfer
case adapter sub assembly to the transfer case sub
assembly.
(2) Tighten the transfer case adapter sub assembly to the
transfer case sub assembly to specified torque.
Transfer case adapter mounting bolt: 39 Nm (28 ft.lbs.)
(3) Using the special tool, turn the drive bevel gear shaft (one
turn in normal direction, one turn in reverse direction).
NOTE
Do not give the drive bevel gear shaft more than one turn in
either direction as this causes unclear tooth contact pattern.
I
TFM026;
(4) Make sure that the driven bevel gear and transfer case
matching marks are in alignment.
rl
TSB Revision
F4A3, W4A3 - Transfer - 4WD
23c-121
(5) Check to see if the drive bevel gear tooth contact is normal.
NOTE
Refer to the TOOTH CONTACT ADJUS TMENT PROCEDURES on next page (below) for the standard tooth
contact.
(6) Check to see if the drive bevel gear and driven bevel
backlash is as specified.
Standard value: Bevel gear set backlash
0 . 0 8 - 0.13 LOO31 - .0051 in.)
#D4 EXTENSION HOUSING INSTALLATION
(1) Apply sealant to the adapter flange surface and install the
extension housing.
Specified sealant:
Mitsubishi genuine sealant Part No. MD997740 or
equivalent
NOTE
Squeeze out sealant from the tube uniformly and continuously in adequante amount.
I)E4
SEALANT TO COVER GASKET APPLICATION
Specified sealant:
3M ATD Part No. 8660 or equivalent
G?
0
0
0
Apply sealant
(both sides)
TFM0246
TSB Revision
.
23C-122
F4A3, W4A3 - T r a n s f e r - 4WD
TOOTH CONTACT ADJUSTING PROCEDURES
1. Standard tooth contact pattern
A ....
B . .
c ....
D....
Small end side
Drive side tooth face
(Side on which force acts when running forward)
Big end side
Coast side tooth face
(Side on which force acts when reversing)
2210061
2. Tooth contact pattern produced when drive bevel gear
height is too large
Cause
The driven bevel is too close to the drive bevel gear.
221009:
,
Remedy
Use thicker bevel gear mount adjusting spacer to separate
the driven bevel gear more from the drive bevel gear.
221009:
3. Tooth contact pattern produced when driven bevel
gear height is too small
Cause
The driven bevel gear is too separated from the drive bevel
gear.
221009i
Remedy
Use thinner driven bevel gear mount adjusting spacer to
bring the driven bevel gear more closer to the drive bevel
gear.
2210095
TSB Revision
c
F4A3, W4A3 - T r a n s f e r - 4WD
Driven bevel
gear mount
adjusting
spacer
Driven bevel
gear preload
adjusting
spacer
23C-123
NOTE
(1) If correct tooth contact cannot be obtained even by
change of the driven bevel gear mount adjusting spacer,
increase or decrease the drive bevel gear preload
adjusting spacer and the drive bevel gear mount
adjusting spacer as described below and then adjust
tooth contact again.
l
When the driven bevel gear height is too small even if
the thinnest driven bevel gear mount adjusting spacer
0.13 mm (.0051 in.) is used:
Replace the drive bevel gear mount adjusting spacer
that is in use with one that is one rank thicker and
replace the drive bevel preload adjusting spacer that is
in use with one that is one rank thinner.
0 When the driven bevel gear height is too large even if
the thickest driven bevel gear mount adjusting spacer
0.52 (.025 in.) is used:
Replace the drive bevel gear mount adjusting spacer
that is in use with one that is one rank thinner and
replace the drive bevel gear preload adjusting spacer
that is in use with one that is one rank thicker.
Repeat above steps until the tooth contact pattern
equal or close to the standard pattern is obtained.
(2) If the tooth contact pattern cannot be adjusted close to
the standard pattern by above adjustment, replace the
drive bevel gear and driven bevel gear as a set and
readjust the tooth contact.
221012s
TSB Revision
23C-124
F4A3, W4A3 - Transfer Case AdaDter - 4WD
TRANSFER CASE ADAPTER - 4WD
DISASSEMBLY AND REASSEMBLY
50 Nm
09 ftlbs.
Disassembly steps
(~Ar)eBg 1. Locknut
(IBM *DC 2. Driven bevel gear
*CC 3. Taper roller bearing
$B4 4. Spacer
5. Collar
6. Outer race
$8
7. Outer race
8. Transfer case adapter
$Dr) #A4 9. Taper roller bearing
TEA0604
DISASSEMBLY SERVICE POINTS
OAo L O C K N U T R E M O V A L
(1) Unlock the lock nut. (Straighten the bent nut.)
(2) Holding the driven bevel gear in a vice and using the special
tool, remove the lock nut.
TSB Revision
F4A3, W4A3 - Transfer Case Adapter - 4WD
23C-125
DRIVEN BEVEL GEAR ASSEMBLY REMOVAL
OBo
(1) Using a press, remove the driven bevel gear assembly.
TFA029l
(Ice OUTER RACE REMOVAL
(1) Remove the outer race, striking lightly with a screwdriver,
etc.
(tIi)o TAPER ROLLER BEARING REMOVAL
REASSEMBLY SERVICE POINTS
#A4
,
MIT304180
TFAO307
vision
TAPER ROLLER BEARING INSTALLATION
23C-126
F4A3, W4A3 - Transfer Case Adapter - 4WD
t
.
n-
I)B4 SPACER SELECTION
(1) Use the existing spacer to assemble the transfer case
adapter.
(2) Using the special tool, check that the bevel gear rotating
drive torque is within standard range.
Standard value: 1.0 - 1.7 Nm (.72 - 1.23 ft.lbs.)
(3) If the rotating drive torque is outside of the standard range,
adjust using adjusting spacers.
ec4 TAPER ROLLER BEARING INSTALLATION
MIT304180
MD998822-01
TFAO311
I)04 DRIVEN BEVEL GEAR INSTALLATION
(1) Attach the driven bevel gear to the transfer case adapter
and then align their matching marks.
, Matching mark
TFM026' 9
eE4 LOCK NUT INSTALLATION
(I) Holding the driven bevel gear in a vice and using the special
tool, tighten the lock nut to specified torque.
Driven bevel gear lock nut: 150 Nm (108 ftlbs)
(2) Lock the lock nut at two positions.
TSB Revision
F4A3. W4A3 - Transfer Case - 4WD
23C-127
TRANSFER CASE - 4WD
DISASSEMBLY AND REASSEMBLY
39 Nm
29 ftlbs.
Disassembly steps
1. Transfer cover
2. O-ring
)E4 3. Spacer
4. Outer race
*DC 5. Drive bevel gear shaft
6. Outer race
#EC 7. Spacer
eC4 8. Oil seal
9. Transfer case
eB4 IO. Drive bevel gear
GAO *A4 11. Taper roller bearing
aA0 )A4 12. Taper roller bearing
TFAllf3lR
1 TSB Revision
23C-128
F4A3, W4A3 - Transfer Case - 4WD
DISASSEMBLY SERVICE POINT
(IAN TAPER ROLLER BEARINGS REMOVAL
TFA0297
TFA0298
REASSEMBLY SERVICE POINTS
+A4 TAPER ROLLER BEARING INSTALLATION
TFAOSO i
TFA030:
Matching mark
Matching mark
I)64 DRIVE BEVEL GEAR INSTALLATION
(1) Install the drive bevel gear to the drive bevel gear shaft with
their matching marks in alignment.
TFM0270
TSB Revision
I
F4A3, W4A3 - Transfer Case - 4WD
23c-129
I)c4 OIL SEAL INSTALLATION
-
- MD998200-01
22 10080
#D4
DRIVE BEVEL GEAR SHAFT INSTALLATION
(1) Install the drive bevel gear shaft to the transfer case and
align the matching mark on the transfer case with that on
the drive bevel gear shaft.
I)E4 SPACER SELECTION
i
TSB
(1) Use the existing spacer to assemble the transfer case.
(2) Using the special tool, check that the bevel gear rotating
drive torque is within standard range.
Standard value: 1.7 - 2.5 Nm (1.23 - 1.81 ft.lbs.1
(3) If the rotating drive torque is outside of the standard range,
adjust using adjusting spacers.
NOTE
For adjustment, use two spacers of which thickness is as
close as possible to each other.
Revision
23C-130
F4A3, W4A3 - Extension Housing - 4WD
EXTENSION HOUSING - 4WD
DISASSEMBLY AND REASSEMBLY
Disassembly steps
#B4 1. Air breather
2. Dust seal guard
)A4 3. Oil seal
4. Extension housing
TFA0602
REASSEMBLY SERVICE POINTS
+A4 OIL SEAL INSTALLATION
MD998822-01
43
TFAOS 1 E
!I
I)64 AIR BLEEDER INSTALLATION
(1) Install the air bleeder applying sealant to the inserting
portion.
Specified sealant:
3M SUPER WETHERSTRIP No. 8001 or equivalent
APP~
sealant
TSB Revision
F4A3, W4A3 -
Oil Pump Drive Gear - F4A33-I-MNN5, MNPE
23C-131
OIL PUMP DRIVE GEAR - F4A33-I-MNN5, MNPE
DISASSEMBLY AND REASSEMBLY
19 Nm
14ftJbs.
Disassembly steps
1. Front cover
2. Gasket
(IAO *A4 3. Bearing
~AE)+A~ 4. Bearing
5. Oil pump drive gear
6. Snap ring
TFA0667
I
DISASSEMBLY SERVICE POINT
(IAO BEARING REMOVAL
REASSEMBLY SERVICE POINT
I)A4 BEARING INSTALLATION
TFA0669
TSB Revision
NOTES