1
Rev
Description
1
SERVICE MANUAL
Date
ECO#
2/14/08
00239
Document Number:
040-00072
Form Instructions
Title
Operation
Description
Standards
Equipment
List
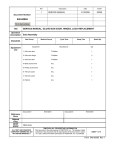
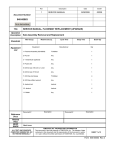
SERVICE MANUAL, TAIL LIGHT REPLACEMENT
Sub Assembly Removal and Replacement
Man Occup.
Machine Occup.
Equipment
Cycle Time
Setup Time
Manufacturer
Batch Qty
Qty
1- Tail Light Assemblies L/R
(Specify color(s) when ordering)
T3 Motion 024-00007
2- Torx driver size T15
Any
1
3- Phillips screw driver
Any
1
Document #
Description
& -00008
1
Description
Document #
Reference
Docs
Related
Files
RESP
ENGR
Mark Jones
ALL TEXT AND GRAPHICS
COMPUTER GENERATED, DO
NOT REVISE MANUALLY
T3MOTION, INC. PROPRIETARY INFORMATION
This document is the sole property of T3MOTION, Inc. The release of data
contained in this document and the reproduction of this document in whole
or in part, without the written permission of T3MOTION, Inc. is prohibited.
SHEET 1 of 12
Form 040-00072 Rev.1
SERVICE MANUAL
Item#
Part #
Description
Qty
1
024-00007 & -00008
TAIL LIGHT R/L
1
T3MOTION PROPRIETARY INFORMATION
Use or disclosure of data contained on this sheet is
subject to the restriction on the cover or title page of this
document.
Document No
Revision
040-00072
1
Sheet
2
SERVICE MANUAL
Serious electrical
shock can occur
if precautions are
not followed.
• ALWAYS TURN OFF POWER BREAKER IN GLOVE BOX AND REMOVE POWER
MODULES BEFORE PERFORMING ANY ELECTRICAL WORK.
Power breaker in glove box
Power modules
• ALSO SET THE PARKING BRAKE PRIOR TO ANY WORK.
Parking brake
T3MOTION PROPRIETARY INFORMATION
Use or disclosure of data contained on this sheet is
subject to the restriction on the cover or title page of this
document.
Document No
Revision
040-00072
1
Sheet
3
SERVICE MANUAL
WORK INSTRUCTIONS:
1.0
Recommended tools for replacing the tail light assembly.
See equipment table above for more details.
Close up of Torx style
driver.
Also commonly referred to
2
as a star driver.
2
3
2.0
Tail Light assembly. (One complete set of left and right.)
1
T3MOTION PROPRIETARY INFORMATION
Use or disclosure of data contained on this sheet is
subject to the restriction on the cover or title page of this
document.
Document No
Revision
040-00072
1
Sheet
4
SERVICE MANUAL
3.0
Use the Torx driver to remove the two screws holding the tail light housing face
and lens on.
4.0
The tail light housing face and lens will slide up and off of the tail light housing
base, usually coming off in two pieces.
T3MOTION PROPRIETARY INFORMATION
Use or disclosure of data contained on this sheet is
subject to the restriction on the cover or title page of this
document.
Document No
Revision
040-00072
1
Sheet
5
SERVICE MANUAL
5.0
Lift out the LED and reflector assembly.
6.0
Release the clip and pull the connector apart.
NOTE: If you are only replacing the LED light and reflector assembly, proceed to
step 10.0.
If you are also replacing the housing and or lens, continue with step 7.0.
T3MOTION PROPRIETARY INFORMATION
Use or disclosure of data contained on this sheet is
subject to the restriction on the cover or title page of this
document.
Document No
Revision
040-00072
1
Sheet
6
SERVICE MANUAL
7.0
Using the Phillips screw driver, remove the two screws holding the housing base
to the fender. Use caution to not allow the wiring to fall into the fender once the
housing base is removed.
8.0
These are the only parts that should have been removed. This is a right side set.
T3MOTION PROPRIETARY INFORMATION
Use or disclosure of data contained on this sheet is
subject to the restriction on the cover or title page of this
document.
Document No
Revision
040-00072
1
Sheet
7
SERVICE MANUAL
9.0
Install the new parts in the reverse order the old ones were removed. Mount the
housing base with the two Phillips head screws. Be careful not to pinch the
wiring between the housing base and the fender. Tighten screws until snug, do
not over tighten.
10.0
Connect the plug of the new light. Note how the clip snaps over the locking tab.
T3MOTION PROPRIETARY INFORMATION
Use or disclosure of data contained on this sheet is
subject to the restriction on the cover or title page of this
document.
Document No
Revision
040-00072
1
Sheet
8
SERVICE MANUAL
11.0
Route the wiring as shown before inserting the LED and reflector assembly.
Again, use care not to pinch the wiring when assembling.
Note that there is a left and a right LED/reflector part. Be sure to install them on
the correct sides. This is the right side unit. Be sure to match the part to the
picture. The light nacelles should point rearward, not upward.
T3MOTION PROPRIETARY INFORMATION
Use or disclosure of data contained on this sheet is
subject to the restriction on the cover or title page of this
document.
Document No
Revision
040-00072
1
Sheet
9
SERVICE MANUAL
12.0
Note the notch on the lens and corresponding tab inside the housing face.
These parts are the same and interchangeable between the left and right sides.
T3MOTION PROPRIETARY INFORMATION
Use or disclosure of data contained on this sheet is
subject to the restriction on the cover or title page of this
document.
Document No
Revision
040-00072
1
Sheet
10
SERVICE MANUAL
13.0
Attach the housing face and lens assembly to the housing base with the Torx
screws. Only tighten them until they are snug and there is no gap between the
housing base and the housing face.
Finished installation of right and left side tail lights:
Right
T3MOTION PROPRIETARY INFORMATION
Use or disclosure of data contained on this sheet is
subject to the restriction on the cover or title page of this
document.
Left
Document No
Revision
040-00072
1
Sheet
11
SERVICE MANUAL
14.0
Test. 14.1 -Turn power breaker On.
14.3 -Turn power key to On.
14.2 -Set parking brake.
Make sure the brake lights work.
14.4 -Test the tail lights by turning on light switch and releasing the parking brake.
If the lights do not work, check the connections and check the battery charge levels.
If lights still do not work, contact T3 Motion at: (714)-619-3600
T3MOTION PROPRIETARY INFORMATION
Use or disclosure of data contained on this sheet is
subject to the restriction on the cover or title page of this
document.
Document No
Revision
040-00072
1
Sheet
12