1
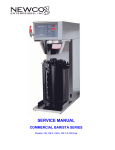
NEWCO ENTERPRISES, INC. * www.newcocoffee.com * www.thermalcarafes.com * 1.800.325.7867 * SERVICE MANUAL MODELS: KK & KKSG AIRPOT, 2.2L NEWCO ENTERPRISES, INC. * www.newcocoffee.com * www.thermalcarafes.com * 1.800.325.7867 * 16-Sep-15 2 NEWCO ENTERPRISES, INC. * www.newcocoffee.com * www.thermalcarafes.com * 1.800.325.7867 * CAUTION: It is important to read and follow the instructions very carefully before using KK series of airpots. KK airpots are designed to hold hot beverages “hot” and cold beverages “cold”. Do not use for other than intended purposes. Do not pour boiling water into KK airpot. Cleaning the KK airpot with a cleaner other than recommended cleaner may cause damage to the KK airpot. KK airpot is not intended to be used for dry ice, carbonated beverages, fruit juices or dairy products. Always carry KK airpot by the handle and in the upright position. Always completely pump out liquid. Do not pour out liquid by opening the lid and removing stem assembly as it may splatter or cause bodily harm. Always keep KK airpot away from children. Keep KK airpot away from heat source. Qualified person should repair KK airpot. Do not transport KK airpot filled with beverage in moving vehicle. Never carry KK airpot when lid is in open position, always close it with brew-thru stem in place before moving it. Never hold lid assembly or the spout while transporting. Always close the lid before transporting. HOW TO USE: Brewing Coffee 1. Press down on the lid-locking button and while holding it down, lift the lid upward until it is fully opened and rests on backstop. 2. To get better thermal efficiency, pre-heating of the vacuum liner is necessary. Rinse the interior of KK airpot with warm water and then discard water. 3. KK airpot has a brew-thru stem and it is not necessary to remove the brew-thru stem for brewing coffee into the KK airpot. 4. Position KK airpot under the brew basket. Brew coffee as per manufacturer’s instructions. 5. After finished brewing, remove KK airpot from the brewer and close the lid by pressing down on the lid. It will automatically lock the lid. Dispensing After closing the lid, KK airpot can be transported to desired location for serving coffee. Make sure to use the handle while transporting. 1. For lever actuated units, lift the dispensing lever in the “up” position by lifting it from the front until it locks into the dispensing position. 2. Position your cup under the spout and slowly press down on lever or push button on lid. You can control the speed of dispensing by controlling pressure on dispensing lever or button. 3. If your cup is not filled, you may press down on dispensing lever or button again until cup is filled. 4. If you wish to transport KK airpot to another location for serving coffee or cleaning, make sure to have dispensing lever in down position. To bring down the dispensing lever, simply push back on the protruding locking latch and the dispensing lever will fall down in rest position. 16-Sep-15 3 NEWCO ENTERPRISES, INC. * www.newcocoffee.com * www.thermalcarafes.com * 1.800.325.7867 * Cleaning and Maintenance KK series of airpots has three important areas that require cleaning and maintenance for better performance and to comply with recognized hygienic standards. Design of KK airpots has met all necessary requirements to comply with the standards and it is important that the end user take full advantage of this sanitation friendly designed KK airpot. Please follow the step-by-step cleaning procedure for optimum performance and proper sanitation. Cleaning the Liner: KK airpot liner is vacuum insulated and requires daily cleaning. The best method for cleaning vacuum liner is by using a coffee brewer for the hot water source. 1. Rinse brew basket and place fresh disposable coffee filter into the brew basket. 2. Place proper amount of cleaning compound or cleaning tablet in the center of the brew basket and slide it into the brewer. [Follow manufacture’s instructions for cleaning product usage.] 3. Open the KK airpot lid, leaving brew-thru stem in place, position KK airpot under the brew basket. 4. Pour clean cold water into the receiving tray [pour in style brewers] or press start button [automatic brewers]. 5. Wait until brew cycle is complete and let the airpot sit there for 10 to 15 minutes. 6. Remove brew basket and discard used filter. Clean the brew basket with the brush provided; rinse the brew basket twice with clean water. 7. Close the lid on the KK airpot and move it to the nearest sink. Position near the edge of the sink and slowly pump out the cleaning solution from the KK airpot. This will help clean the brew-thru stem and the pouring spout. 8. Remove the brew-thru stem; fill airpot with fresh clean water, and place brew-thru stem back. Close the lid and pump out clean water. Repeat this process again. 9. Now the inside of the brew-thru stem and the liner are clean. Remove the brew-thru stem and put aside. Pour clean water in the KK airpot, rinse and discard water. 10. Wipe down the brew-thru stem and the outer side of the KK airpot. 11. Place brew-thru stem back into the KK airpot and close the lid. Now your KK airpot is clean and ready for brewing coffee. Cleaning the Lid Assembly: The bellows mechanism that pumps the air into the KK airpot to push the coffee out of KK airpot and into the cup is located inside the lid assembly. This requires weekly cleaning as it may inhale some coffee residue inside of the bellow in reverse stroke action. Design of this lid allows access to the bellow without any tools so that it can be cleaned at the customer’s location. Push & hold front locking lever, lift up lid about 10 degrees and pull forward, figure-1. Fig-1 16-Sep-15 Hold the lid, as shown in figure-2, pull bottom lid cover away from lid housing while spreading the lid housing from the bellow plate. Fig-2 4 NEWCO ENTERPRISES, INC. * www.newcocoffee.com * www.thermalcarafes.com * 1.800.325.7867 * Cleaning the Lid Assembly - Continued: Remove the bellow cap by pulling away from bellow as shown in figure-3. Fig-3 Remove spring and clean with hot soapy water. Clean the bellow with warm soapy water with the help of a brush, figure-4. Make sure not to puncture the bellows. Fig-4 Rinse and let all parts air dry. Assemble in reverse order. Wipe outside of the lid with clean towel. Slide the lid back into the pivot post by holding the lid at 10-degree angle as shown in figure-1. Push on the top of the lid to close it in place. Cleaning the Brew-thru Stem Assembly: During the brewing and pumping of the coffee, coffee goes into the server through the middle stainless steel pipe and comes out through the outer stainless steel pipe via pouring spout and into the cup. These tubes and the pouring spout will have coffee residue build up which requires cleaning every week. Lift the lid assembly and remove the brew-thru stem assembly, figure-5. Fig-5 16-Sep-15 Remove the bottom gasket from the stainless steel tubes, figure-6. Fig-6 5 NEWCO ENTERPRISES, INC. * www.newcocoffee.com * www.thermalcarafes.com * 1.800.325.7867 * Cleaning the Brew-thru Stem Assembly - Continued: Remove any remaining silicone tubing, noting position for re-install later. Grab the brew-thru stem assembly as shown in the figure and pull it apart, figure-7. Fig-7 Remove the pouring spout from the brew-thru stem assembly by pulling away from the brew-thru stem assembly, figure-9. Fig-9 Clean inside housing of the brew-thru stem with hot soapy water and a brush, figure-8. Fig-8 Watch for the stainless steel ball resting inside of the housing. Remove it slowly and clean with hot soapy water. With the help of hot soapy water and a small thin black brush, clean inside of the brew-thru stem housing and pouring spout, figure-10. Fig-10 Rinse all brew-thru stem assembly parts with clean water twice and let them air dry. Assemble brew-thru stem assembly in reverse order. Place the brew-thru stem assembly into KK airpot and close lid. YOUR KK AIRPOT IS READY TO USE FOR BREWING FRESH COFFEE AND IT WILL STAY HOT FOR HOURS FOR YOUR ENJOYMENT 16-Sep-15 6 NEWCO ENTERPRISES, INC. * www.newcocoffee.com * www.thermalcarafes.com * 1.800.325.7867 * Replacing the Glass Liner: 1. Remove the brew-thru stem assembly and the lid assembly from the body of the airpot dispenser. 2. Turn the airpot dispenser upside down to gain access to the airpot’s locking nut and base assembly. 3. Remove the set screw located on the side of the airpot’s shell, unlock the locking nut [counter clockwise], and rotate the base assembly counter clockwise to remove it. 4. Replace the glass liner then follow step 3, in reverse order, putting it back together. Remove Push Down Pull Out Unscrew Counter Clockwise 16-Sep-15 7 NEWCO ENTERPRISES, INC. * www.newcocoffee.com * www.thermalcarafes.com * 1.800.325.7867 * Replacing the Glass Liner – Continued: 16-Sep-15 8