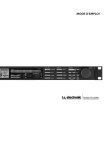
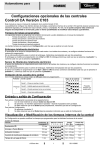
1
ITALIANO
ITALIANO
F200 / F400
Centrale antincendio
convenzionale 2/4 zone
MANUALE UTENTE
F200/F400 - Manuale per l'utente
Indice
Capitolo 1
Introduzione
3
1.1 Descrizione della centrale .................................................................................3
1.2 Caratteristiche funzionali...................................................................................3
1.3 Caratteristiche tecniche.....................................................................................4
Capitolo 2
Installazione
5
2.1 Avvertenze generali ..........................................................................................5
2.2 Alimentazione....................................................................................................5
2.3 Collegamenti ....................................................................................................6
2.3.1 Rivelatori antincendio, attivatori manuali, ripetitori ottici ........................7
2.3.2 Campane polarizzate, LED per quadro sinottico ...................................8
2.3.3 Sirene e segnalatori supplementari, fermi elettromagnetici ...................9
Capitolo 3
3.1
3.2
3.3
3.4
Capitolo 4
Programmazione
10
Inizializzazione della centrale..........................................................................10
Funzionamento a “Doppio consenso” (con preallarme) ..................................10
Regolazione del tempo di ritardo allarme........................................................10
Funzioni di test ................................................................................................11
Funzionamento
12
4.1 Descrizione del pannello .................................................................................12
4.2 Messa in “Fuori servizio” .................................................................................13
4.2.1 Fuori servizio linee di rivelazione e linea campane .............................13
4.2.2 Buzzer silenziato..................................................................................13
4.2.3 Fuori servizio uscita relè “ALLARME” ed uscita relè “GUASTO” .........13
4.3 Preallarme.......................................................................................................14
4.4 Allarme ............................................................................................................14
4.5 Segnalazione guasti........................................................................................15
4.5.1 Guasto sulle linee di rivelazione o sulla linea campane ......................15
4.5.2 Guasto sull’alimentazione ....................................................................15
4.6 Reset .............................................................................................................15
Capitolo 5
Manutenzione
16
5.1 Batterie............................................................................................................16
5.2 Pulizia .............................................................................................................16
5.3 Fusibili .............................................................................................................16
2
Introduzione
1
Introduzione
1.1
Descrizione della centrale
Le centrali antincendio F200 e F400 a microprocessore conforme alla normativa UNI
EN54 dotata di due/quattro linee controllate per rivelatori di fumo convenzionali ed attivatori
manuali di allarme, ed una linea per campane polarizzate.
Le linee sono dotate di uscite a collettore aperto di ripetizione allarme su quadro sinottico;
tramite due LED è possibile controllare l'apertura o il corto circuito di ogni linea, e possono
essere messe in fuori servizio o in test separatamente.
Un interruttore a chiave permette di impedire il controllo dell’impianto a persone non
autorizzate: messa in fuori servizio delle linee controllate e funzioni di test.
Dopo la rivelazione da parte di un solo rivelatore si attiva l’allarme dopo un ritardo
regolabile da zero fino ad un massimo di 7 minuti e trenta sec. Il funzionamento a “Doppio
consenso” prevede una condizione di preallarme, durante la quale la rivelazione di un solo
rivelatore non provoca allarmi, ma è necessario che si verifichi una ulteriore rivelazione di
incendio sulle linee per provocare l’allarme.
I guasti alla centrale ed alle linee sono segnalati dal LED "GUASTO” generale, dal relè
"GUASTO" e dall'uscita a collettore aperto per la segnalazione di guasto sul quadro sinottico;
ogni guasto viene memorizzato tramite il lampeggio del LED relativo alla linea che, dopo un
guasto, rientra in condizioni normali di lavoro.
La centrale provvede al monitoraggio della tensione di rete e, in caso di assenza, controlla
lo stato delle batterie, segnalando il loro esaurimento per circa un’ora, prima di andare in
blocco. Infine dispone di una modalità test per facilitare le operazioni d'installazione e di
verifica dell'impianto.
1.2
!
!
!
!
!
!
!
!
!
!
!
!
!
!
!
!
!
!
!
Caratteristiche funzionali
Conforme alle norme UNI EN 54
2(F200),4(F400) linee controllate per rivelatori di fumo fotoelettronici, rivelatori di incendio
termovelocimetrici ed attivatori manuali.
2/4 uscite a collettore aperto per ripetizione stato d'allarme su quadro sinottico.
Una linea controllata per campane polarizzate a 24Vcc a basso consumo.
Una uscita a collettore aperto per segnalazione di guasto generale su quadro sinottico.
Una uscita relè a scambio per segnalazione “ALLARME”.
Una uscita relè a scambio per segnalazione “GUASTO”.
Tempo di ritardo allarme regolabile da 0 a 7 minuti e 30 sec. con incrementi di trenta secondi.
Modalità di funzionamento a “Doppio consenso” (con preallarme).
Avvisatore acustico disattivabile per guasti o allarmi.
Interruttore a chiave per la limitazione di accesso.
Controllo presenza alimentazione di rete.
Controllo scarica batterie e blocco centrale.
Modalità test e fuori servizio per ciascuna linea.
Modalità test e fuori servizio per uscita relè “ALLARME” e “GUASTO” generale.
Modalità test e silenziato per buzzer interno.
Modalità test e fuori servizio per linea campane.
Test di accensione LED.
Segnalazione memoria guasti.
3
F200/F400 - Manuale per l'utente
1.3
!
!
!
!
Caratteristiche tecniche
Alimentazione:
Alimentatore / caricabatterie:
Portata contatti relè:
Contenitore metallico dimensioni:
HiLTRON
230V~ ±10%
24V
1A
250V 8A
265x285x120mm
®
S.r.l.
PROGETTAZIONE E PRODUZIONE APPARECCHIATURE ELETTRONICHE
DICHIARAZIONE
DI CONFORMITA’
COSTRUTTORE: HiLTRON S.r.l.
INDIRIZZO: Via Caserta al Bravo , 218 - 80144 - NAPOLI
MARCHIO UTILIZZATO:
CODICE DEL PRODOTTO: F200, F400
DESCRIZIONE DEL PRODOTTO: CENTRALE ANTINCENDIO CONVENZIONALE 4 ZONE
IL PRODOTTO SOPRA DESCRITTO RISULTA CONFORME AI REQUISITI PRESCRITTI NELLE SEGUENTI
NORME:
NORMA APPLICATA
TITOLO
EN50081-1
NORMA GENERICA DI EMISSIONE
Classe della norma generica: domestico, commerciale ed industriale leggero.
EN50082-1
NORMA GENERICA DI IMMUNITA’
Classe della norma generica: domestico, commerciale ed industriale leggero.
EN60335-1
NORMA PER LA SICUREZZA DEGLI APPARECCHI ELETTRICI D'USO DOMESTICO E
SIMILARE
EN54-2
NORMA DI PRODOTTO: SISTEMI DI RILEVAMENTO E DI ALLARME ANTINCENDIO
LA CONFORMITA' E' STATA VALUTATA SULLA BASE DI PROVE ESEGUITE SU CAMPIONI E CON
ALLESTIMENTO CHE RISPECCHIA LA CONFIGURAZIONE FUNZIONALE PREVISTA PER LA SUA
UTILIZZAZIONE, PERTANTO I PRODOTTI SODDISFANO I REQUISITI DELLA DIRETTIVA 89/336/CEE E, OVE
APPLICABILE, DELLA DIRETTIVA 73/23 CEE.
L’AMMINISTRATORE DELEGATO
DATA
22 Maggio 2000
4
Installazione
2
Installazione
2.1
Avvertenze generali
Non installare la centrale in luoghi esposti a temperature estreme o alle intemperie.
Per un fissaggio solido ed affidabile, è indispensabile assicurarsi che la superfice del muro
sia piana.
Fissare la centrale ad un'altezza che permetta un agevole accesso al pannello frontale.
I collegamenti alle morsettiere vanno effettuati dopo il montaggio dell'apparecchiatura.
I collegamenti vanno eseguiti secondo la normativa 46/90 sulla sicurezza antincendio.
!
!
!
!
!
2.2
Alimentazione
E’ importante sapere che l'alimentazione di tutto l’impianto deve essere fornita
necessariamente sia dalle due batterie 12V2Ah (o 12V7Ah) presenti all’interno della centrale,
sia dall’alimentatore/caricabatteria TM25/24, collegato alla tensione di rete 230V~.
ATTENZIONE !
La tensione di rete 230V~ dovrà essere collegata all'alimentatore/caricabatteria
TM25/24 tramite due conduttori di 1,5mmq a doppio isolamento provenienti da un
sezionatore (ad es. un interruttore magnetotermico) utilizzato esclusivamente per la
centrale antincendio. All'interno della centrale posizionare i due conduttori in maniera
sufficientemente ordinata, bloccandoli tramite il pressacavo in dotazione ed
eventualmente tramite fascette.
Sezionatore
Rete
230V~
50Hz
Ad impianto ultimato, collegare in serie le due batterie tramite il cavetto fornito in dotazione
(collegare il polo negativo [-] della 1° batteria col polo positivo [+] della 2°); collegare quindi i
due conduttori muniti di faston provenienti dall'alimentatore TM25/24 sui poli della serie di
batterie. Fare attenzione alla polarità di collegamento (Rosso = [+] positivo 1° batteria / Nero =
[-] negativo 2° batteria), onde evitare di danneggiare in modo serio i dispositivi collegati.
5
F200/F400 - Manuale per l'utente
ATTENZIONE !
Le batterie devono essere sempre collegate. Assicurarsi periodicamente del loro
efficiente stato di carica misurando la tensione ai capi della serie con un voltmetro,
dopo aver scollegato la tensione di rete dall’alimentatore TM25/24 tramite l’apposito
sezionatore. Nel caso in cui sia necessario sostituire le batterie è ugualmente
necessario scollegare la tensione di rete dall’alimentatore TM25/24.
Dopo aver collegato le batterie della centrale, ed eventualmente delle sirene
autoalimentate, si potrà dare corrente alla centrale tramite il sezionatore che collega la
tensione di rete sui morsetti dell’alimentatore/caricabatteria TM25/24.
I LED “RETE” presente sul pannello della centrale segnala la effettiva presenza della
tensione di rete.
Per ragioni di sicurezza e per il rispetto delle normative in vigore consigliamo di effettuare
e verificare il collegamento ad un'efficiente impianto di terra del contenitore metallico della
centrale, e di tutti gli altri dispositivi che ne avessero bisogno.
2.3
Collegamenti
1
2
3
4
5
6
7
8
9
10
11
12
13
14
15
16
17
18
19
20
21
22
23
24
25
26
F400
1-2
3-4-5
6-7-8
9 - 10
11 - 12
13 - 14
15 - 16
17 - 18
19 - 20
21 - 22
23 - 24
25 - 26
*
Linea controllata * per campane polarizzate: tensione a 24Vcc INVERTITA DI
POLARITA’, in condizione di allarme tale uscita si polarizza come visualizzato in
morsettiera. ATTENZIONE: corrente massima erogabile 700mA !
Uscita scambio relè ALLARME:
Uscita scambio relè GUASTI:
Uscita LED di ripetizione allarme LINEA 1 su quadro sinottico.
Uscita LED di ripetizione allarme LINEA 2 su quadro sinottico.
Uscita LED di ripetizione allarme LINEA 3 su quadro sinottico (solo F400).
Uscita LED di ripetizione allarme LINEA 4 su quadro sinottico (solo F400).
Uscita LED di ripetizione GUASTI su quadro sinottico.
Ingresso linea di rivelazione controllata * di LINEA 1.
Ingresso linea di rivelazione controllata * di LINEA 2.
Ingresso linea di rivelazione controllata * di LINEA 3 (solo F400).
Ingresso linea di rivelazione controllata * di LINEA 4(solo F400).
ATTENZIONE!
Se le linee controllate non sono utilizzate, i loro morsetti devono essere ponticellati
con la resistenza di terminazione di 3.300ohm (3K3ohm).
2.3.1
Rivelatori antincendio, attivatori manuali, ripetitori ottici
Su ogni linea di rivelazione è possibile collegare un massimo 20 rivelatori: possono essere
sia rivelatori di fumo fotoelettronici, sia rivelatori di incendio termovelocimetrici, sia misti.
Le linee sono dotate di un controllo di impedenza che riconosce sia il corto circuito, sia
6
Installazione
l'interruzione della linea, pertanto è sempre necessario inserire la resistenza di terminazione
del valore di 3300ohm (3K3ohm) sull'ultimo rivelatore collegato.
Tale resistenza va collegata direttamente sui morsetti della centrale nel caso in cui si
intenda lasciare libera una linea di zona.
Sulle stesse linee dei rivelatori, è inoltre possibile collegare un numero illimitato di
attivatori manuali. Essi vanno collegati in parallelo alla linea, inserendo una resistenza da
470ohm in serie al contatto NA del pulsante.
1
2
3
4
5
6
7
8
9
10
11
12
13
14
15
16
17
18
19
20
21
22
23
24
25
26
F400
2B
TERM
3K3ohm
Max. 20
rivelatori
2
FRTVC
3
1
4
6
TERM TERM
3K3ohm 3K3ohm
Esempio di zona
non utilizzata
5
470ohm
2watt
2
1
3
FRTVC
4
C NA NC
6
5
FPMC
1
2
3
4
5
6
+
R
R
SCR
+
Ingresso linea
TERM
Non connesso
3K3ohm
Non connesso
Connessa impulso negativo (fuori porta)
Negativo di alimentazione
Positivo uscita linea
7
F200/F400 - Manuale per l'utente
Una volta effettuati i collegamenti con la centrale è possibile realizzare i collegamenti con i
ripetitori ottici, i quali saranno installati, ad esempio, all’esterno di ogni stanza di un albergo,
oppure ovunque vi sia la necessità di segnalare, in prossimità del rivelatore stesso, l’attività di
rivelazione in corso.
FRFC
FRTVC
!
!
Rivelatore di fumo fotoelett. con autodiagn. della camera ottica
Rivelatore termovelocimetrico
-
2B
+
+
5
6
4
1
3
FFPC
oppure
FFPCB
2
2.3.2
Campane polarizzate, LEDs per il quadro sinottico
L’uscita CAMPANE a 24Vcc è costantemente in tensione, ma polarizzata inversamente
rispetto alla serigrafia in morsettiera. In condizione di allarme tale tensione si inverte, per
ottenere la polarizzazione come da serigrafia. Su questa uscita, quindi, vanno collegati tutti i
dispositivi di segnalazione che abbiano un diodo interno di polarizzazione. Tale linea è dotata
di un controllo di impedenza che determina sia i corto circuiti, sia l'interruzione della linea,
pertanto è sempre necessario inserire la resistenza di terminazione del valore di 3300ohm alla
fine della linea.
1
2
3
4
5
6
7
8
9
10
11
12
13
14
15
16
17
18
19
20
21
22
23
24
25
26
F400
LED1
LED2
LED3
LED4
LED5
2B
FCF
Quadro
sinottico
FCF
Usare diodo
tipo 1N4007
TERM
3K3ohm
8
ATTENZIONE!
Le uscite a collettore
aperto per il quadro
sinottico hanno il
POSITIVO in comune!
Installazione
2.3.3
Sirene e segnalatori supplementari, fermi elettromagnetici
Con l’uscita a scambio del relè ALLARME è possibile comandare l’accensione di eventuali
sirene supplementari e segnalatori luminosi; è inoltre possibile, in condizione di allarme,
interrompere la tensione verso i fermi elettro-magnetici o le sirene autoalimentate, che sono
invece continuamente alimentati in condizioni normali dell’impianto.
1
2
3
4
5
6
7
8
9
10
11
12
13
14
15
16
17
18
19
20
21
22
23
24
25
26
F400
SEI
24Vcc
2B
ATTENZIONE!
JP1=OFF per il
funzionamento a 24V
SP30/FIRE
2B
2B
FE50
2B
SA300/FIRE
9
F200/F400 - Manuale per l'utente
3
Programmazione
3.1
Inizializzazione della centrale
Dopo aver collegato le batterie e la tensione di rete, si illuminano i LED “GUASTO”
generale, “BATTERIA” e “RETE”: portare l'interruttore a chiave in posizione di servizio
“SBLOCCO TASTIERA” per qualche istante, finché non si ascolta un breve segnale del
buzzer; questa operazione consente l'entrata in servizio della centrale, che darà tensione alle
linee di rivelazione controllate.
NOTA: Questa operazione va ripetuta anche nel caso di blocco della centrale per
insufficiente alimentazione.
3.2
Funzionamento a “Doppio consenso” (con preallarme)
Con il ponticello P1 inserito è possibile abilitare il modo di funzionamento a “Doppio
consenso”: un solo sensore in allarme su di una linea di rilevazione pone la centrale in stato di
preallarme (par. 4.3), segnalato dal lampeggio del LED “ALLARME” di zona, dal lampeggio del
LED “ALLARME” generale, dall’intermittenza veloce del buzzer interno e l’intermittenza
dell’uscita a collettore aperto della zona relativa. Solo la segnalazione di un secondo rivelatore
fa entrare la centrale in stato di allarme (par.4.4).
3.3
Regolazione del tempo di ritardo allarme
Il tempo di ritardo dell'allarme, ossia il tempo che intercorre tra la rivelazione di incendio da
parte di un rivelatore (o due, nel funzionamento a “Doppio consenso”) e l'attivazione degli
allarmi (linea campane ed uscita relè “ALLARME”) può essere impostato tra 0 e 450 secondi (7
minuti e 30 sec.) tramite i dip switch presenti sulla scheda, ad intervalli di trenta secondi:
on
off
on
off
on
off
on
off
10
1 2 3 4
1 2 3 4
1 2 3 4
1 2 3 4
0'
on
off
2'
on
off
4'
on
off
6'
on
off
1 2 3 4
1 2 3 4
1 2 3 4
1 2 3 4
30''
on
off
2' 30''
on
off
4' 30''
on
off
6' 30''
on
off
1 2 3 4
1 2 3 4
1 2 3 4
1 2 3 4
1'
on
off
3'
on
off
5'
on
off
7'
on
off
1 2 3 4
1 2 3 4
1 2 3 4
1 2 3 4
1' 30''
3' 30''
5' 30''
7' 30''
Programmazione
3.4
Funzioni di TEST
Per eseguire le operazioni di test è necessario abilitare l’uso dei tasti tramite l’interruttore a
chiave, posizionandolo verso “SBLOCCO TASTIERA”; i vari test saranno eseguibili premendo
i diversi tasti contemporaneamente a quello di "TEST".
Test dei LED del pannello
!
!
Tenere preuto “TEST” per più di 2 secondi.
Si illuminano tutti i LED del pannello consentendo la verifica del loro corretto
funzionamento.
Test dell’uscita ausiliaria relè “ALLARME”
!
!
Premere "TEST" e “FUORI SERVIZIO”dell’uscita ausiliaria “ALLARME”.
Si aziona il relè “ALLARME” fino al rilascio dei pulsanti.
Test dell’uscita ausiliaria relè “GUASTO”
!
!
Premere "TEST" e “FUORI SERVIZIO” dell’uscita ausiliaria “GUASTO”.
Si aziona il relè “GUASTO” fino al rilascio dei pulsanti.
Test del buzzer
!
!
Premere "TEST" e “SILENZIATO" del buzzer.
Si attiva la segnalazione acustica fino al rilascio dei pulsanti. Se eventualmente il buzzer è
stato precedentemente silenziato, in questa operazione non ne sarà tenuto conto.
Test della linea CAMPANE
!
!
Premere "TEST" e FUORI SERVIZIO” della linea campane.
Si attiva la linea delle campane fino al rilascio dei pulsanti. Se eventualmente la linea è
stata precedentemente messa in fuori servizio, in questa operazione non ne sarà tenuto
conto.
Test delle linee di zona
Tale funzione consente di testare i rilevatori uno ad uno, senza la necessità di ritornare alla
centrale:
!
!
!
Premere "TEST" e "FUORI SERVIZIO” della linea di zona da testare.
Testare un rivelatore alla volta presente sulla linea in test: le condizioni di allarme e di
preallarme sono segnalate dalla centrale per una durata di circa 5 secondi; se
eventualmente la linea campane è stata messa in fuori servizio, non vengono attivati gli
allarmi, ad esclusione del buzzer che si attiva sempre in caso di allarme incendio.
Dopo l’allarme si riarma la linea di rivelazione, per poter testare un’altro rivelatore.
La condizione di guasto sulla linea viene segnalata in centrale; non viene memorizzato, e
dura fino al ristabilimento delle condizioni di normale funzionamento.
11
F200/F400 - Manuale per l'utente
4
Funzionamento
4.1
Descrizione del pannello
SBLOCCO
TASTIERA
ALLARME
F400
F200
ALLARMI
GUASTO
BUZZER
BLOCCO
TASTIERA
RETE
BATTERIA
USCITA
USCITA
AUSILIARIA AUSILIARIA
GUASTI
ALLARMI
FUORI
SERVIZIO
FUORI
SERVIZIO
RESET
TEST
ALLARME
IMMEDIATO
SILENZIATO
ZONA 1 ZONA 2 ZONA 3 ZONA 4
CAMPANE
ALLARME
ALLARME
ALLARME
ALLARME
GUASTO
GUASTO
GUASTO
GUASTO
GUASTO
LINEA CORTO
APERTA CIRCUITO
LINEA CORTO
APERTA CIRCUITO
LINEA CORTO
APERTA CIRCUITO
LINEA CORTO
APERTA CIRCUITO
LINEA CORTO
APERTA CIRCUITO
FUORI
SERVIZIO
FUORI
SERVIZIO
FUORI
SERVIZIO
FUORI
SERVIZIO
FUORI
SERVIZIO
13
Interruttore a chiave
Permette l’utilizzo dei tasti del pannello solo al personale autorizzato.
LED “RETE”:
acceso:
lampeggiante:
spento:
tensione di rete presente; centrale in funzione
tensione di rete assente; centrale in funzione con alimentazione fornita dalle batterie
tensione di rete assente, centrale non alimentata (nota: con LED “RETE” spento e LED
“GUASTO” generale e LED “BATTERIA “ accesi la centrale è in condizione di blocco)
LED “ALLARME” generale:
acceso:
stato di allarme
lampeggiante:
stato di preallarme
spento:
nessun allarme
per 5 sec. circa : allarme della zona in test (par.3.4)
LED “BATTERIA”:
acceso:
batterie scariche; scarsa tensione dell’alimentatore; guasto all'alimentatore
lampeggiante:
memoria guasto all'alimentatore
spento:
alimentazione regolare
LED “GUASTO” generale:
acceso:
guasto
spento:
nessun guasto (i guasti che si verificano nelle linee messe in “fuori servizio” non sono segnalati)
8
12
LED Buzzer
acceso:
spento:
lampeggio lento:
lampeggio veloce:
buzzer fuori servizio
buzzer non attivo ma in servizio
buzzer in funzione
buzzer silenziato
Buzzer
acceso:
intermitt. lenta:
intermitt. veloce:
beep ogni 10 sec:
centrale in allarme
guasto (con buzzer silenziato il LED buzzer lampeggia velocemente)
centrale in preallarme
guasto rete, guasto batteria, allarme o preallarme con buzzer silenziato
LED “ALLARME” di zona
spento:
nessun allarme sulla linea
lampeggio:
linea in preallarme
acceso:
linea in allarme
Funzionamento
LED linea CAMPANE e linee di ZONA aperte
acceso:
linea aperta
spento:
linea non aperta
lampeggiante:
memoria linea aperta
LED linea CAMPANE e linee di ZONA in corto circuito
acceso:
linea in corto circuito
spento:
linea non in corto circuito
lampeggiante:
memoria linea in corto circuito
LED “USCITA AUSILIARIA ALLARMI “ e “USCITA AUSILIARIA GUASTI”:
acceso:
uscita fuori servizio
spento:
uscita in servizio, non attivata
lampeggio lento:
uscita in servizio, attivata
lampeggio veloce: uscita non attiva perché in fuori servizio
LED linea CAMPANE silenziate
acceso:
linea campane fuori servizio
spento:
linea campane in servizio
lampeggio lento:
campane in funzione
lampeggio veloce: campane non in funzione perché silenziate
13
LED linee di ZONA fuori servizio
acceso:
linea in fuori servizio
spento :
linea in servizio
lampeggio:
linea in test
4.2
Messa in “Fuori servizio”
L’interruttore a chiave impedisce l'uso dei tasti del pannello alle persone non autorizzate.
Per accedere quindi alle funzioni descritte di seguito è necessario mantenere l'interruttore a
chiave in posizione di servizio “SBLOCCO TASTIERA”.
4.2.1
Fuori servizio linee di rilevazione e linea campane
In condizione di fuori servizio le linee continuano ad essere controllate ed eventuali guasti
o allarmi sono segnalati tramite i LED delle zone, ma senza azionare la linea campane, l’uscita
relè “ALLARME”, i LED “ALLARME” e “GUASTO” generale.
4.2.2
Buzzer silenziato
Con il buzzer silenziato vengono eliminate le segnalazioni acustiche di guasto e di
preallarme, ed al loro posto il LED del buzzer lampeggia velocemente ad indicare una
situazione di anomalia: quando però la centrale entra in condizione di allarme incendio il
buzzer è riattivato automaticamente e messo in stato di servizio; ad allarme in corso è possibile
ri-silenziare nuovamente il buzzer.
4.2.3
Fuori servizio uscita relè “ALLARME” ed uscita relè “GUASTO”
Quando queste uscite sono disattivate, la centrale non aziona il relativo relè, ma in caso di
allarme o di guasto provoca il lampeggio veloce del LED.
13
F200/F400 - Manuale per l'utente
4.3
Preallarme
Questa condizione si presenta solo quando è abilitato il funzionamento a “Doppio
consenso” con il ponticello P1 inserito (par. 3.3).
La segnalazione di incendio da parte di un rivelatore di una linea di zona pone la centrale in
condizione di preallarme:
!
!
!
!
Lampeggia il LED “ALLARME” generale.
Lampeggia il LED “ALLARME” della zona relativa.
Si attiva l'intermittenza sull’uscita a collettore aperto della zona relativa.
Si attiva l’intermittenza veloce del buzzer interno (se questo è stato silenziato, lampeggia
velocemente il LED del buzzer).
Una ulteriore segnalazione di incendio da parte di un altro rivelatore posto sulla stessa
linea di zona mette la centrale in condizione di allarme (par. 4.4).
Altrimenti, durante il preallarme è possibile, anche con chiave disinserita, azionare il
pulsante di "ALLARME IMMEDIATO" per passare alla condizione di allarme, attivando
direttamente le segnalazioni acustiche.
Dalla condizione di preallarme è possibile tornare in condizione di riposo eseguendo il
reset della centrale solo dopo aver ripristinato la segnalazione del rivelatore e quindi rimosso la
causa del preallarme.
4.4
Allarme
La centrale si pone in stato di allarme quando almeno un rivelatore (o almeno due rivelatori
nel funzionamento a “Doppio consenso”) segnalano la presenza di incendio:
!
!
!
!
Si accende il LED “ALLARME” della zona relativa.
Si attiva l'uscita a collettore aperto per il quadro sinottico relativa alla zona.
Si attiva il buzzer interno (se questo è stato silenziato lampeggia velocemente il LED del
buzzer).
Comincia il conteggio del tempo di ritardo allarme (par. 3.3).
Durante questo ritardo è possibile agire sul pulsante "ALLARME IMMEDIATO" (anche con
chiave disinserita) per terminare immediatamente il conteggio del tempo di ritardo e passare
alla successiva effettiva fase di allarme:
!
!
Si attiva la linea campane e l’uscita ausiliaria relè “ALLARME” (se queste sono state
messe in fuori servizio lampeggiano velocemente i relativi LED).
Si attiva la nota fissa del buzzer interno anche se precedentemente è stato silenziato (ad
allarme in corso è possibile ri-silenziare il buzzer).
Non è possibile eseguire test su una linea in allarme, nè metterla in fuori servizio.
Lo stato di allarme permane finché non si esegue il reset della centrale (par. 4.6), dopo
aver eliminato la causa che lo ha provocato.
14
Funzionamento
4.5
Segnalazione guasti
4.5.1
Guasto sulle linee di rivelazione o sulla linea campane
La condizione di guasto viene segnalata con l'accensione fissa del LED “GUASTO”
generale, con l’accensione di uno dei LED “LINEA APERTA” o “CORTO CIRCUITO”, con
l’attivazione del relè “GUASTI”, con ripetizione sull'uscita a collettore aperto “UG” per il quadro
sinottico e con l’intermittenza del buzzer.
Terminata la causa che ha determinato la condizione di guasto, la centrale torna in
condizione di riposo, ma il LED “GUASTO” della linea in cui si è verificata l'anomalia comincia a
lampeggiare, lasciando in tal modo memoria del guasto.
L'operazione di reset della centrale azzera la memorizzazione dei guasti.
Le linee poste in fuori servizio, pur continuando a segnalare i guasti con il LED relativo alla
linea di zona, non attivano tutte le altre segnalazioni.
Le linee in test segnalano il guasto regolarmente, ma non lo memorizzano.
4.5.2
Guasto sull’alimentazione
Quando la tensione 24V di alimentazione della centrale proveniente dall’alimentatore
TM25/24 scende di oltre il 10%, a causa di un malfunzionamento delle batterie in tampone, o
eventualmente in conseguenza ad un prolungato mancamento della tensione di rete, la
centrale si pone in condizione di attesa, segnalata con l’accensione fissa dei LED “GUASTO”
generale e LED “BATTERIA”, con l'uscita a collettore aperto di ripetizione guasto “UG”, con
l'attivazione del relè “GUASTI” e con l’intermittenza del buzzer.
Se questa condizione persiste per più di un’ora, la centrale entra in condizione di fuori
servizio, segnalata con l’accensione fissa dei LED “GUASTO” generale e LED “BATTERIA”, e
lo spegnimento del LED “RETE”. In questa condizione la centrale non è più in grado di
segnalare altri guasti , né di segnalare condizioni di allarme.
Se l'alimentazione torna su valori accettabili prima dell'esaurirsi completo delle batterie, la
centrale rientra in servizio e riprende il suo normale funzionamento, dopo aver emesso un
breve segnale del buzzer e conservando le impostazioni presenti al momento dell'interruzione
del servizio; altrimenti è necessario ripetere le operazioni di inizializzazione della centrale.
4.6
Reset
Questa operazione va effettuata per ripristinare la centrale da una condizione di allarme o
per cancellare le memorie guasti.
!
!
!
Sbloccare la tastiera spostando l’interruttore a chiave in posizione “SBLOCCO
TASTIERA”.
Premere entrambi i tasti "ALLARME IMMEDIATO" e "TEST" per alcuni istanti.
Durante questa operazione tutti i LED sul pannello si illuminano, si azzerano le memorie
guasti e vengono riarmati i rilevatori di incendio connessi alle linee di rivelazione.
Bloccare la tastiera spostando l’interruttore a chiave in posizione “BLOCCO TASTIERA”.
La centrale è nuovamente in servizio. L’operazione non ha influenza sull'eventuale stato
di fuori servizio delle uscite o delle linee di rivelazione.
15
F200/F400 - Manuale per l'utente
5
Manutenzione
5.1
Batterie
E’ necessario controllare periodicamente lo stato sia delle batterie collegate in tampone
all'alimentatore TM25/24, sia di quella installata all’interno delle sirene autoalimentate.
5.2
Pulizia
Per la pulizia della centrale utilizzare esclusivamente un panno morbido ed umido.
Evitare assolutamente diluenti e spugne abrasive.
5.3
Fusibili
F1 Uscita sirene
1A rapido
Lead free
Azienda con Sistema di
gestione per la Qualità
UNI EN ISO 9001:2000
16
Azienda con Sistema di
g estio n e a mb ie n tale
UNI EN ISO 14001:2004
EMC 89/336 CEE
MADE IN ITALY
Pb
RoHS
compliant
Raccolta separata
delle apparecchiature
elettriche ed elettroniche.
Il marchio CIA è registrato dalla HiLTRON Srl
ENGLISH
F200 / F400
2 / 4 zones fire-detection
conventional central unit
USER MANUAL
F200/F400 - User’s manual
Index
Chapter 1
Introduction
19
1.1 Description of the plant ...................................................................................19
1.2 features functional...........................................................................................19
1.3 features techniques .............................................................................
20
Chapter 2
Installation
21
2.1 Generic instruction ..........................................................................................21
2.2 Power supply ..................................................................................................21
2.3 Connecting ..................................................................................................22
2.3.1 Fireproof detector, Manual activator ,optical repeater .........................23
2.3.2 Polarize bell, LED for Synoptical panel ................................................24
2.3.3 Sirens and additional signallers, electromagpoweric lock ...................25
Chapter 3
Programmation
26
3.1 Initialization of the plant...................................................................................26
3.2 "Double step" operation (with pre-alarm) .........................................................26
3.3 Time«s regulation of the alarm delay ..............................................................26
3.4 Test function ....................................................................................................27
Chapter 4
Functioning
28
4.1 Description of the panel ..................................................................................28
4.2 Put in “out of order” .........................................................................................29
4.2.1 out of order ,lines of revelation and bell line ........................................29
4.2.2 Silent Buzzer........................................................................................29
4.2.3 "out of order"relay out ALARM and relay out failure .............................29
4.3 Pre-alarm ........................................................................................................30
4.4 Alarm .............................................................................................................30
4.5 Signaling failure...............................................................................................31
4.5.1 failure on the revelation line or bell line ...............................................31
4.6 Reset .............................................................................................................31
Chapter 5
Maintenance
32
5.1 Battery.............................................................................................................32
5.2 Cleaning ..........................................................................................................32
5.3 Fuse ............................................................................................................32
18
Introduction
1
Introduction
1.1
Central unit description
The F200 and F400 are a fireproof plant with microprocessor conform to the UNIEN54
normative, endowed by two/four zone check for revealing of smoke conventional and manual
activator of alarm, and a line for polarize bell .
The line are endowed by open collector output on repetition alarm on synoptical panel;
Through a led it’s possible to check the opening or the short circuit of every line, and separately,
you can put they in out of order or test.
A key interrupter allows to prevent the control of the plant to not authorized people :put in
out of order and test function.
After the revelation from only one detector the alarm is activated with an adjustable delay
by zero up to maximum 7 minutes and 30 second. The “Double consence” operating mode has
a condition of pre alarm, during this condition the revelation of only one detector doesn't
provoke alarm, but it's necessary that is verified another fire detection to provocate
alarm.
The failure of the plant and line are signalled by LED "failure” general, by relay "failure"and
open collector output for failure signaling of synoptical panel; every failure is memorized
through flash of relative led of the line, after failure, it return under normal condition of job.
The plant occupies of monitoring net voltage and, when is not powered by electricity , it
check the state of battery, signalling their exhaustion for one hour, before going to lock he has a
test modality to facilitate the installation and verification.
1.2
!
!
!
!
!
!
!
!
!
!
!
!
!
!
!
!
!
!
Operating features
Conforming to the norms UNI EN 54
2(F200),4(F400) line checked for revealing of smoke photo electronic, revealing of fire
thermoratemetric and manual activator .
2(F200),4(F400) open collector out for repetition alarm on synoptical panel.
An line checked for polarize bell at 24Vcc low consumption.
An output for general failure signaling on synoptical panel.
An output relay switch for signaling “ALARM”.
An output relay switch for signaling “failure”.
Alarm delay adjustable from zero at 7 minutes and 30 second. With increases of thirty second.
“Double consent ” modality(with pre alarm).
Alert sound (you can disarms it for failure or alarms).
Key interrupter to restrict access.
Check presence power supply.
Check battery low plant lock.
Test mode and out of order for every line .
Test mode and out of order for relay output “ALARM” and general “failure” .
Lower sound mode internal buzzer .
Test mode and out of order for bell line.
LED light test.
Signaling memory failures.
19
F200/F400 - User’s manual
1.3 Technical features
!
!
!
!
Power:
Power supply / charger:
Relay contact range:
Metallic box size:
230V~ ±10%
24V
1A
250V 8A
265x285x120mm
HiLTRON
®
S.r.l.
PROGETTAZIONE E PRODUZIONE APPARECCHIATURE ELETTRONICHE
DECLARATION
OF CONFORMITY
CONSTRUCTOR: HiLTRON S.r.l.
ADDRESS: Via Caserta al Bravo , 218 - 80144 - NAPOLI
USED MARK:
PRODUCT CODE: F200, F400
PRODUCT DESCRIPTION: Fire-detection conventional central unit
THE PRODUCT HERE DESCRIBED RESULT CONFORMING AT REQUISITE PRESCRIBED IN THE FOLLOWING
NORMS
APPLIED NORMS
TITLE
EN50081-1
GENERIC NORM OF EMISSION
Class of the generic norm: domestic, commercial and light industrial
EN50082-1
GENERIC NORM OF IMMUNITY
Class of the generic norm: domestic, commercial and light industrial .
EN60335-1
NORM FOR THE SAFETY OF THE ELECTRIC INSTRUMENTS FOR DOMESTIC USE
AND SIMILAR
EN54-2
NORM OF PRODUCT: SYSTEMS OF SURVEY AND FIREPROOF ALARM
THE CONFORMITY HAS BEEN VALUED WITH TESTS ON SAMPLES AND WITH PREPARATION THAT REFLECT
THE FUNCTIONAL CONFIGURATION FOR HER USE, INSOFAR THE PRODUCT SATISFY THE REQUISITE OF
DIRECTIVE 89/336/CEE E, WHERE APPLICABLE , OF DIRECTIVE 73/23 CEE.
MANAGING DIRECTOR
DATE
22 May 2000
20
Installation
2
Installation
2.1
General Instruction
Don't install the plant in places exposed to extreme temperatures or to the bad weather.
For a solid and reliable fixing, it is essential that the wall is plain.
Fix the central unit to a height that allows an easy access the frontal panel.
The connections to the terminal block must be effected after the assemblage of the
equipment.
The connections has to be made according to the normative 46/90 on the safety fireproof.
!
!
!
!
!
2.2
Power Supply
It s important to know that the power supply of the whole plant must necessarily be
furnishes both from the two batteries 12V2Ah (or 12V7Ah) present inside the plant, both from
the feeder it battery charger TM25/24, connected to the tension of power 230V ~.
ATTENTION !
The main power supply 230V ~ has to be connected to the power supplier / battery
charger TM25/24 through two conductors of 1,5mmq to double isolation coming from a
Switch exclusively used for the plant fireproof. Inside the plant to sufficiently position
the two conductors in way ordinate, stopping them through the press cable in
endowment and eventually through wrappers.
Switch
Power
230V~
50Hz
To completed plant, to connect in series the two batteries through the cable furnished in
endowment (connect the negative pole [-] of the 1° battery with the positive pole [+] of the 2°); to
connect therefore the two conductors provided of faston coming from the feeder TM25/24 on
the poles of the series of batteries. Be careful and watch the polarity of connection (Red = [+]
positive 1° battery / Black = [-] negative 2° battery).
21
F200/F400 - User’s manual
ATTENTION! The batteries must always have connected. Periodically make sure of
their efficient state of position measuring the tension to the heads of the series with a
voltmeter, after having disconnected the tension of power from the feeder TM25/24
through the special Switch. In the case in which is necessary to replace the batteries it is
equally necessary disconnect the tension of power from the feeder TM25/24.
After having connected the batteries of the plant, and eventually of the sirens fed auto, can
be given current to the central one through the Switch that connects the tension of power on the
clamps of the charger TM25/24. The LEDs “power” present on the panel of the plant it signals
the real presence of the tension of power. For safety reasons and for the respect of the
normative ones in vigor we advise to effect and to verify the connection to an efficient plant of
ground of the metallic container of the plant, and of all the other devices that they needed it.
2.3
Connections
1
2
3
4
5
6
7
8
9
10
11
12
13
14
15
16
17
18
19
20
21
22
23
24
25
26
F400
1-2
3-4-5
6-7-8
9 - 10
11 - 12
13 - 14
15 - 16
17 - 18
23 - 24
25 - 26
*
Checked line * for polarized bells: tension to 24Vdc Inverted Of Polarity, in
condition of alarm such output is polarized as visualized in terminal block.
ATTENTION: maximum tide disburses 700mA!
Output switch relay ALARM.
Output switch relay failure.
Output LED of repetition alarm LINE 1 on synoptical panel.
Output LED of repetition alarm LINE 2 on synoptical panel.
Output LED of repetition failure on synoptical panel.
Input line of checked revelation * of LINE 1.
Input line of checked revelation * of LINE 2.
Input line of checked revelation * of LINE 3 (only F400).
Input line of checked revelation * of LINE 4(only F400).
ATTENTION!
If the checked lines are not used, their clamps have to be bridge with the resistance
of termination of 3.300 ohm (3 K3 ohm).
2.3.1
Revealing fireproof, manual activators, optic repeaters
On every line of revelation it is possible to connect a maximum 20 detectors: you they can
be is revealing of smoke photo electronic, is revealing of fire thermoratemetric, is mixed.
The lines are endowed with a control of impedance that recognizes both the short circuits,
are the interruption of the line, therefore it is always necessary to insert the resistance of
termination of the value of 3300 ohm (3 K3 ohm) on the last connected detector.
Such resistance must directly be connected on the clamps of the plant in the case in which
he intends to leave a line of zone free.
On the same lines of the detectors, it is possible to connect a boundless number of beside
22
Installation
manual activators. they must be connected in parallel to the line inserting one resistance
from 470 ohm in series to the contact NA of the button .
1
2
3
4
5
6
7
8
9
10
11
12
13
14
15
16
17
18
19
20
21
22
23
24
25
26
F400
2B
TERM
3K3ohm
2
FRTVC
3
1
4
6
5
Example of zone
not used
470ohm
2watt
2
1
3
FRTVC
4
C NA NC
6
5
FPMC
TERM
3K3ohm
1
2
3
4
5
6
+
R
R
SCR
+
Access line absorption
Not connected
Not connected
Connected impelled negative (out door)
Negative of power supply
Exit line
23
F200/F400 - User’s manual
Once effected the connections with the plant it is possible to realize the connections with
the optic repeaters, which will be installed, for instance, to the outside of every room of a hotel,
or anywhere there is the necessity to signal, in proximity of the same detector, the activity of
revelation in progress.
FRFC
FRTVC
!
!
Revealing of smoke photoelectric with autodiagnostic of the optic room
Revealing thermoratemetric
-
2B
-
+
+
5
6
4
1
3
FFPC
or
FFPCB
2
2.3.2
Polarized bells, LEDs for the picture synoptical
FCF
The output Bells to 24 Vcc it is constantly in tension, but inversely polarized in comparison
to the serigrafia in terminal block. In condition of alarm such tension is reversed, to get the
polarization as from serigrafia. On this output, therefore, all the devices of signaling must be
connected that an inside diode of polarization has. Such line is endowed with a control of
impedance that determines both the short circuits, are the interruption of the line, therefore it is
always necessary to insert the resistance of termination of the value of 3300 ohm at the end of
the line.
1
2
3
4
5
6
7
8
9
10
11
12
13
14
15
16
17
18
19
20
21
22
23
24
25
26
F400
LED1
LED2
LED3
FCF
2B
Synoptical panel
FCF
Use diode
tipe 1N4007
TERM
3K3ohm
24
ATTENTION!
The outputs to collector
open for the picture
synoptical have the
Positive in common!
Installation
2.3.3
Sirens and additional signallers, firm electromagpoweric
With the exchange output of the relay Alarm is possible to command the lighting of
possible additional sirens and bright signallers; it is possible besides, in condition of alarm, to
interrupt the tension toward the electromagnetic locks or the sirens fed auto, that is continually
instead fed under normal conditions of the plant.
1
2
3
4
5
6
7
8
9
10
11
12
13
14
15
16
17
18
19
20
21
22
23
24
25
26
F400
24Vcc
FAS
2B
ATTENTION!
JP1 =OFF per il
functioning a 24V
SP30/FIRE
2B
2B
FE50
2B
SA300/FIRE
25
F200/F400 - User’s manual
3
Programmation
3.1
Initialization of the plant
After having connected the batteries and the tension of power, the LEDs are illuminated
“failure” general, “Battery” and “power”: to bring the key interrupter in position of service
“KEYBOARD UNLOCKED” for some instant, until a brief signal of the buzzer he is not listened;
this operation allows the entrance service of the plant, that will give tension to the lines of
revelation checked.
NOTE: This operation in the case of block of the plant must be repeated also for
insufficient power supply.
3.2
Operation to “Double consent” (with prealarm)
With the bridge inserted P1 is possible to train the way of operation to “Double consent”: an
only sensor in alarm on a line of survey sets the plant in state of prealarm (par. 4.3), signalled by
the I flash of the LED “Alarm” of zone, from the I flash of the LED “Alarm” general, from the fast
intermittence of the inside buzzer and the intermittence of the output to collector open of the
relative zone. Only the signaling of a second detector makes to enter the plant state of alarm
(par.4.4).
3.3
Alarm time delay regulation
The time of delay of the alarm or rather the time that it intervenes among the
revelation of fire from a detector (or two, in the operation to “Double consent”) and the
activation of the alarms (line bells and output relay “Alarm”) you can be planned
between 0 and 450 seconds (7 minutes and 30 sec.) through the dip switch present
on the card, to intervals of thirty seconds:
on
off
on
off
on
off
on
off
26
1 2 3 4
1 2 3 4
1 2 3 4
1 2 3 4
0'
on
off
2'
on
off
4'
on
off
6'
on
off
1 2 3 4
1 2 3 4
1 2 3 4
1 2 3 4
30''
on
off
2' 30''
on
off
4' 30''
on
off
6' 30''
on
off
1 2 3 4
1 2 3 4
1 2 3 4
1 2 3 4
1'
on
off
3'
on
off
5'
on
off
7'
on
off
1 2 3 4
1 2 3 4
1 2 3 4
1 2 3 4
1' 30''
3' 30''
5' 30''
7' 30''
Operating
3.4
TEST functions
Perform the operations of test is necessary to train the use of the keys through the key
interrupter, positioning I pour him/it “KEYBOARD UNLOCKED”; the various tests will be
executable contemporarily pressing the different keys to that of "Test."
Test of the LEDs of the panel
!
!
Hold pressed “Test” for more than 2 seconds.
All the LEDs of the panel turn on allowing the verification of their correct operation.
Test of the output auxiliary relay “Alarm”
!
!
Press "Test" and “out of order” of the auxiliary output “Alarm.”
You operates the relay “Alarm” up to the release of the buttons.
Test of the output auxiliary relay “failure”
!
!
Press "Test" and “out of order” of the auxiliary output “failure”.
You operates the relay “failure” up to the release of the buttons.
Test of buzzer
!
!
Press "Test" and “SILENT" of the buzzer.
You activates the acoustic signaling up to the release of the buttons. If eventually the
buzzer is s previously make silent, in this operation it won't be account kept of it.
Test of the line Bells
!
!
Press "Test" and out of order” of the line bells.
You activates the line of the bells up to the release of the buttons. If the line has eventually
been put previously in out of order, in this operation it won't be account kept of it
Test line of zone
Such function allows to make a will the revealing one to one, without the necessity to return
to the plant:
!
!
!
Press "Test" and "out of order” of the line of zone to be made a will.
Make a will one detector at a present time on the line in test: the conditions of alarm and pre
alarm are signalled by the plant for a duration of around 5 seconds; if eventually the line
bells you/he/she has been put in out of order, the alarms are not activated, to exclusion of
the buzzer that is always activated in case of alarm fire.
After the alarm the line of revelation rearms him to be able to make a will another revealing
The condition of failure on the line is signalled in central; he is not memorized, and hard up
to the reestablishment of the conditions of normal operation.
27
F200/F400 - User’s manual
4
Operating
4.1
Front panel description
KEYBOARD
UNLOCKED
ALARM
F400
F200
ALARMS
FAILURE
BUZZER
KEYBOARD
LOCKED
POWER
BATTERY
AUXILIARY
ALARM
OUTPUT
AUXILIARY
ALARM
OUTPUT
OUT OF
ORDER
OUT OF
ORDER
RESET
TEST
IMMEDIATE
ALARM
LOWER SOUND
ZONE 1 ZONE 2 ZONE 3 ZONE 4
BELLS
ALARM
ALARM
ALARM
ALARM
FAILURE
FAILURE
FAILURE
FAILURE
FAILURE
OPEN SHORT
LINE CIRCUIT
OPEN SHORT
LINE CIRCUIT
OPEN SHORT
LINE CIRCUIT
OPEN SHORT
LINE CIRCUIT
OPEN SHORT
LINE CIRCUIT
OUT OF
ORDER
OUT OF
ORDER
OUT OF
ORDER
OUT OF
ORDER
OUT OF
ORDER
13
Key interrupter
It allows the use of the keys of the alone panel to the authorized personnel.
LED “power”:
on:
flashing:
off:
tension power present ; central in operation
tension of absent power; central in operation with power supply furnished by the batteries
tension of absent power, central not fed (note: with LED “power” out and LED “failure” generale
e LED “Battery “I turned on the plant it is in condition of block)
LED “ALARM” general:
on:
state of alarm
Flashing
:
state of pre alarm
for 5 sec. around : alarm of zone in test (par.3.4)
off:
no alarm
LED “BATTERY”:
on:
low batteries; scarce tension of the feeder; failure to the feeder
flashing:
memory failure to the feeder
off:
regular power supply
LED “failure” general:
on:
failure
off:
any failure (the failures that are verified in the lines put in “out of order” they are not signalled)
LED Buzzer
on:
buzzer out of order
off:
buzzer not active but in service
slow flashing:
buzzer in operation
fast flashing:
buzzer silent
Buzzer
on:
Slow flashing:
Speed flashing:
beep every 10 sec:
8
28
plant in alarm
failure (with buzzer silent the LED buzzer flashes speed)
plant in pre alarm
power failure, battery failure, alarm or pre alarm with silent buzzer
LED “ALARM” of zone
off:
no alarm online
flashing:
line in pre alarm
on:
line in alarm
LED Bell line and line of ZONE open
on:
line open
Programmation
off:
flashing:
line not open
memory line open
LED Bells line and lines of Zone in short circuit
on:
line in short circuit
off:
line not in short circuit
flashing:
memory line in short circuit
LED “auxiliary alarm output “AND “AUXILIARY FAILURE OUTPUT”:
on:
output out of order
off:
output in service, not activated
Slow flashing:
output in service, activated
Fast flashing:
output not activate because in out of order
LED silent BELL line
on:
bell line out of order
off:
bell line in service
Slow flashing:
bell in service
Fast flashing:
bell not activate because in silent mode
13
LED lines of ZONE out of order
on:
line n o duty
off :
line in service
flashing: line in test
4.2
PUT in “out of order”
The key interrupter prevents the use of the keys of the panel the people not authorized. To
enter therefore to the functions described following it is necessary to maintain the key
interrupter in position of service “KEYBOARD UNLOCKED.”
4.2.1
Out of order lines of detection and bells line
In condition of out of order the lines continue to be checked and possible failures or alarms are
signalled through the LEDs of the zones, but without operating the line bells, the output relay “Alarm”, the
LEDs “Alarm” and “failure” general.
4.2.2
Silent Buzzer
With the silent buzzer is eliminated the acoustic signalings of failure and pre alarm, and to
their place the LED of the buzzer quickly flashes to point out a situation of anomaly: when
however the plant enters condition of alarm fire the buzzer him is automatically reactivated and
envoy in state of service; on alarm in progress it is possible silent again the buzzer.
4.2.3
Out of order output relay “Alarm” and output relay “failure”
When these outputs are disarmed, the plant doesn't operate the relative relay, but in case
of alarm or failure it provokes the I flash fast of the LED.
29
F200/F400 - User’s manual
4.3
Pre alarm
This condition he introduces only when the operation is trained to “Double consent” with
the bridge inserted P1 (par. 3.3). The signaling of fire from a detector of a line of zone sets the
plant in condition of pre alarm:
Flash “ALARM” LED general.
Flash “ALARM” LED relative zone.
You activates the intermittence on the output to collector open of the relative zone.
You activates the fast intermittence of the inside buzzer (if this has been silent, it quickly
flashes the LED of the buzzer).
!
!
!
!
A further signaling of fire from another detector set on the same line of zone puts the plant
in condition of alarm (par. 4.4). Otherwise, during the pre alarm is possible, also with
disconnected key, to operate the button of "IMMEDIATE ALARM" to pass to the condition of
alarm directly activating the acoustic signalings. From the condition of pre alarm is possible to
return in condition of rest performing only the reset of the central one after having restored the
signaling of the detector and therefore removed the cause of the pre alarm.
4.4
Alarm
The plant is set in state of alarm when at least a detector (or at least two detectors in
the operation to “Double consent”) they signal the presence of fire:
!
!
!
!
!
!
!
30
It ignites the LED “Alarm” of the relative zone.
You activates the output to open collector for the picture synoptical related to the zone.
You activates the inside buzzer (if this has been silent it quickly flashes the LED of the
buzzer).
The calculation of the time of delay alarm starts (par. 3.3).During this delay it is possible to
act on the button "Immediate Alarm" (also with disconnected key) to immediately finish the
calculation of the time of delay and to pass to the following real phase of alarm:
You activates the line bells and the output auxiliary relay “Alarm” (if these have been put in
out of order they quickly flash the relative LEDs).
You activates the fixed note of the inside buzzer even if previously him has been silent (to
alarm in progress it is possible ri-silenziare the buzzer).
It is not possible to perform test on a line in alarm, neither to put it in out of order. The state
of alarm remains until the reset of the plant it is not performed (par. 4.6), after having
eliminated the cause that has provoked it.
Operating
4.5
Signaling failures
4.5.1
I spoil on the lines of revelation or on the line bells
The condition of failure is signalled with the fixed lighting of the LED “failure” general, with
the lighting of one of the LEDs “Open Line” or “Short Circuit”, with the activation of the relay
“failures”, with repetition on the output to open collector “UG” for the picture synoptical and with
the intermittence of the buzzer. The cause that has determined the condition of failure
finished, the plant returns in condition of rest but the LED “failure” of the line in which the
anomaly is verified starts to flash leaving in such way memory of the failure. The operation of
reset of the plant resets the memorization of the failures. The lines set in out of order, also
keeping on signalling the failures with the LED related to the line of zone, they don't activate all
the other signalings. The lines in test regularly signal the failure, but they don't memorize it.
4.5.2
Failure on the power supply
When the tension 24V of power supply of the plant coming from the feeder TM25/24 goes
down of over 10%, because of a malfunction of the batteries in buffer, or eventually in
consequence to a prolonged lacking of the tension of power, the plant is set in condition of
attended, signalled with the fixed lighting of the LEDs “failure” general and LED “Battery”, with
the output to collector open of repetition failure “UG”, with the activation of the relay “failures”
and with the intermittence of the buzzer. If this condition persists for more than a hour, the plant
enters condition of out of order, signalled with the fixed lighting of the LEDs “failure” general
and LED “Battery”, and the turning off of the LED “power”. In this condition the plant is not able
to signal other failures anymore, neither to signal conditions of alarm. If the power supply
returns on acceptable values before becoming exhausted himself themselves complete of the
batteries, the plant it reenters in service and it takes back its normal operation, after having sent
forth a brief signal of the buzzer and preserving the present formulations during the interruption
of the service; otherwise it is necessary to repeat the operations of initialization of the plant.
4.6
Reset
This operation was to be effected for restoring the plant from a condition of alarm or to cancel
the memories failures.
!
!
!
!
Decontrol the keyboard moving the key interrupter in position “KEYBOARD UNLOCKED.”
Press both the keys "Immediate Alarm" and "Test" for some instants. During this operation
all the LEDs on the panel illuminate him, the memories are reseted failures and they are
rearmed the circumferentors of fire connected to the lines of revelation.
Stop the keyboard moving the key interrupter in position “Block Keyboard.”
The plant is again in service. The operation doesn't have influence on the possible state of
out of order of the outputs or of the lines of revelation.
31
F200/F400 - User’s manual
5
Maintenance
5.1
Batteries
It is necessary to periodically check the state both of the connected batteries in buffer
to the feeder TM25/24, both of that installed inside the sirens autofed.
5.2
Cleaning
For the cleaning of the plant to exclusively use a soft and damp cloth. To absolutely avoid
thinners and abrasive sponges.
5.3
Fuse
F1 output sirens
1A fast
Lead free
Quality management system
UNI EN ISO 9001:2000
32
Company complying with
Environmental management System
UNI EN ISO 14001:2004
EMC 89/336 CEE
MADE IN ITALY
Pb
RoHS
compliant
Partitioned picking
of electric and
electronic appliances
The CIA logos is registered by HiLTRON Srl
ITALIANO
FRANÇAIS
F200 / F400
Centrale détection incendie
conventionnelle 2/4 zones
MANUEL POUR L’USAGER
F200/F400 - Manuel pour l'usager
Sommaire
Chapitre 1
Introduction
35
1.1 Description de la centrale................................................................................35
1.2 Caractéristiques ..............................................................................................35
1.3 Caractéristiques tecniques..............................................................................36
Chapitre 2
Installation
37
2.1 Précautions ..................................................................................................37
2.2 Alimentation ..................................................................................................37
2.3 Connexions ..................................................................................................38
2.3.1 Detecteurs incendi, activants manuals, répéteurs optiques ................39
2.3.2 Cloches polarisées, LED pour cadre synoptique.................................40
2.3.3 Sirénes et signaleurs supplementairs, arrêts electromagnétiques ......41
Chapitre 3
3.1
3.2
3.3
3.4
Chapitre 4
Programmation
42
Mise en fonction de la centrale .......................................................................42
Fonctionnement par “Double consentement” (avec pre-alarme) ...................42
Réglage du temps de retard alarme................................................................42
Fonction test....................................................................................................43
Functionnement
44
4.1 Description du panneau ..................................................................................44
4.2 Mise en “Hors d'usage” ...................................................................................45
4.2.1 Hors d'usage lignes de detection et ligne cloches ...............................45
4.2.2 Buzzer silenziato..................................................................................45
4.2.3 Hors d'usage sortie relais “ALARME” et sortie relais “PANNE” ...........45
4.3 Pre-alarme ......................................................................................................46
4.4 Alarme.............................................................................................................46
4.5 Signalisation de pannes ..................................................................................47
4.5.1 Panne sur le lignes de detection ou sur la ligne cloches .....................47
4.5.2 Panne sur l'alimentation.......................................................................47
4.6 Reset .............................................................................................................47
Chapitre 5
Entretien
48
5.1 Batteries ..........................................................................................................48
5.2 Nettoyage........................................................................................................48
5.3 Fusibles...........................................................................................................48
34
Introduction
1
Introduction
1.1
Description de la centrale
Les centrales detection incendi F200 et F400 avec microprocesseur conforme à la norme
UNI En54 composée par deux/quatre zones controllées par détecteurs de fumé
convenctionnels et par activants manuals d'alarme, et par ligne pour cloches polarisées.
Les lignes sont equipées par sorties avec collecteur ouvert de répetition alarme sur cadre
synoptique; par deux LED est possible de controller l'ouverture ou le court-circuit de chaque
ligne qui peut être mise hors d'usage ou en test séparétament.
Un interrupteur à clef permet d'empêcher le côntrole de l'installation a personnes qui ne
sont pas autorisées: mise hors d'usage de les lignes controlées et fonctions de test.
La detection effectuée par un seul detecteur active l'alarme àpreso un retard réglable de
zero jusqu'à max. 7 minuts et 30 sec. Le fonctionnement à “Double consentement” prevoit une
conditions de pre-alarme pendant laquelle la retection d'un seul detecteur ne provoque pas
d'alarmes, mais il faut que une outre detection d'incendi sur les lignes pour causer l'alarme.
Les pannes à la centrale et à les lignes sont signalés par le LED "PANNE”, par le relais
"PANNE" et par la sortie avec colletteur ouvert pour la signalisation de panneo sur le cadre
synoptique; chaque panne est memorisé par le LED clignotant assigné al a ligne; tel Led
commence son fonctionnement normal de travail, àpres un panne.
La central effectue le monitorage de la tension de reseau et, en cas de assence de reseau,
elle effectue le contrôle de les condictions de les batteries, en ne signalant l'déchargement
pendant environ une heure avant de se bloquer. La centrale dispose aussi d'una modalité test
pour faciliter les operations d'installation et de côntrole de l'installation.
1.2
!
!
!
!
!
!
!
!
!
!
!
!
!
!
!
!
!
!
!
Caractéristiques
Realisé selon les réglementations EN54-2 et EN54-4
2(F200),4(F400) lignes controlées par détecteurs de fumé photoéléctronques, détecteurs d'incendi
thermo-velocimetriques et activants manuals.
2/4 Sortie avec collecteur ouvert pour répétition alarme sur cadre synoptique.
Une ligne controlé par cloches polarisées à 24Vcc à basse consommation.
Une sortie avec collecteur ouvert pourl es échecs sur cadre synoptique.
Sorties relais pour signalisation “ALARME”.
Sorties relais pour alarme pour signalisation"PANNE".
Temporisation retard d'alarme jusqu'à 7 minuts et 30 sec. avec incréments de 30 seconds.
Modalité de fonctionnement avec “Double consentement” (avec pre-alarme).
Signaleur acoustique desattivable pour pannes ou alarmes.
Interrupteur par clef pour limiter l'acces.
Contrôle presence alimentation de reseau.
Contrôle batteries dechargées et bloque de la centrale.
Modalité test et hors de service pour chaque ligne.
Modalité test et hors de service pour sortie relais “ALARME” et “PANNE” general.
Modalité test et silencieux pour buzzer interne.
Modalité test et hors de service pour ligne cloches.
Test de allumage du LED.
Signalisation memoire des pannes.
35
F200/F400 - Manuel pour l'usager
1.3
!
!
!
!
Caractéristiques tecniques
Alimentation:
Alimentateur / charge-batterie:
Poussée contacts relais:
Dimensions du boîtier métallique:
230V~ ±10%
24V 1A
250V 8A
265x285x120mm
®
PROGETTAZIONI E PRODUZIONI ELETTRONICHE
DÉCLARATION
DE CONFORMITÉ
CONSTRUCTEUR: HiLTRON S.r.l.
ADRESSE: Via Caserta al Bravo, 218-80144 Napoli
MARQUE UTILISÉ:
CODE DU PRODUIT: F200/F400
DESCRIPTION DU PRODUIT: CENTRALE DETECTION INCENDIE 2/4 ZONES
LE PRODUIT RÉSULTE CONFORME AVEC LES QUALITÉS VOULUES DA LE NORMES SUIVANTES:
NORME APPLIQUÉES
CENTRALE DETECTION INCENDIE CONVENTIONNELLE
EN50081-1
NORME GÉNÉRIQUE D'EMISSION
Classe de la norme générique: domestique, commerciale et industrielle légère.
EN50082-1
NORME GÉNÉRIQUE D'IMMUNITÉ’
Classe de la norme générique: domestique, commerciale et industrielle légère.
EN60335-1
NORME POUR LA SÉCURITÉ DES APPAREILLES ÉLECTRIQUES D'USO
DOMESTIQUE ET SIMILAIRE
EN54-2
NORME DE PRODUIT. SYSTEME DE DETECTION ET D’ALARME
INCENDI
L A CONFORMITÉ' EST ETÉ PESÉ SUR LA BASE DE PREUVES EXÉCUTÉS SUR UN ECHANTILLON AVEC UN INSTALLATION QUE REFLÈTE LA CONFIGURATION OPÉRATIONNELLE
PRÉVUE POUR SA UTILISATION: LES PRODUITS SATISFONT LES REQUÊTES DE LA DIRECTIVE
89/336/CEE ET, OÙ APPLICABLE, DE LA DIRECTIVE 73/23 CEE.
DATE
21 Mai 1999
36
L’ADMINISTRATEUR DÉLÉGU
Installation
2
Installation
2.1
Précautions
Ne pas installer la centrale pres de temperature extrèmes ou aux intempéries.
Pour fixer solidement la centrale, il est indispensable que la superficie du mur soit plate.
Fixer la centrale à un'hauteur qui permet un accès facilè au panneau frontale.
Les reliements aux serrecables doivent etre effectués apres le montage de l'appareil.
Les reliements doivent etre éffectués selon la norme 46/90 pour la sécurité incendi.
!
!
!
!
!
2.2
Alimentation
Il est trés important savoire que l'alimentation de toute l'installation est fournié soit par les
battéries 12V2Ah (ou 12V7Ah) présentes à l'interieur de la centrale, soit par
l'alimentateur/charge-batterie TM25/24, relié à la tension de réseau 230V~ .
ATTENTION !
La tension du réseau 230V~ devra etre relié à l'alimentateur/charge-batterie TM25/24
grace à deux conducteur de 1,5mm² à double isolament provenant d'un sectionateur
(ex. un interupteur magneto-thermique) utilisé exclusivement pour la centrale
detection incendio. Positioner les deux conducteurs à l'interieur de la centrale de façon
ordonnée, en les blocant avec le serre-cable en dotation ou bien avec les bandes.
Sectionneur
Reseau
230V~
50Hz
A la fin de l'installation, relier en série les deux batteries par le petit cable en dotation
(connecter le pole negatif [-] de la 1ere batterie avec le pole positif [+] de la 2eme); connecter
les deux conducteurs munis de faston provenant de l'alimentateur TM25/24 sur les poles de la
série des batteries. Faire attention à la polarité de raccordement (Rouge = [+] positif 1ere
batterie / Noire = [-] negatif 2eme batterie), afin d'éviter d'endommager de façon serieuse les
dispositifs de raccordement.
37
F200/F400 - Manuel pour l'usager
ATTENTION !
Les batteries doivent etre toujours reliées. Faire attention periodiquement de son bon
fonctionement de charge en mesurant la tension à ses éxtremites avec un tester, après
avoire enlevé la tension de réseau d'alimentation TM25/24 par le sectionateur. Au cas
ou il serait nécéssaire de changer la batterie il est obligatoire d'enlever la tension de
réseau de l'alimentateur TM25/24.
Apres avoir reliée la batterie de la centrale et des sirènes on poura activer la centrale par le
selectionateur qui connecte la tension de reseau sur les bornes de l'alimentateur/chargebatterie TM25/24.
Le LED “RESEAU” qui est sur le panneau de la centrale montre la presence de tension de
réseau.
Pour raisons de sécurité et en respecte de les normes en vigeur on conseille d'effectuer la
connexion entre un'installation de terre et le boîtier metallique de la centrale, et toutes outres
dispositifs qui ne ont besoin.
2.3
Connexions
1
2
3
4
5
6
7
8
9
10
11
12
13
14
15
16
17
18
19
20
21
22
23
24
25
26
F400
1-2
3-4-5
6-7-8
9 - 10
11 - 12
13 - 14
15 - 16
17 - 18
19 - 20
21 - 22
23 - 24
25 - 26
*
Ligne contrôlée * pour cloches polarisées: tension à 24Vcc INVERSION DE
POLARITÉ', en condition d'alarme telle sortie se polarise comment visualsé
dans le borne. ATTENTION: courant maximale erogable 700mA !
Sortie relais ALARME:
Sortie relais PANNE:
Sortie LED de répetition alarme LIGNE 1 sur cadre synoptique.
Sortie LED de répetition alarme LIGNE2 sur cadre synoptique.
Sortie LED de répetition alarme LIGNE 3 sur cadre synoptique.
Sortie LED de répetition alarme LIGNE 4 sur cadre synoptique.
Sortie LED de répetition PANNE sur cadre synoptique
Entrée ligne de detection contrôlée * de LIGNE 1.
Entrée ligne de detection contrôlée * de LIGNE 2.
Entrée ligne de detection contrôlée * de LIGNE 3 (uniquement F400).
Entrée ligne de detection contrôlée * de LIGNE 4 (uniquement F400).
ATTENTION!
Si les lignes contrôlées ne sont pas utilisées, les leurs bornes doivent être
connexés par barrettes la résistance de 3.300ohm (3K3ohm).
2.3.1
Détecteurs incendi, attivants manuals, répeteurs optiques
Pour chaque ligne de détection est possible connecter maximum 20 détecteurs: ils
peuvent être soit détecteurs de fumé photo-eléctroniques, soit détecteurs d’incendi
38
Installation
thermovelocimetriques, ou tous les deux types.
Les lignes sont equipées d’un contrôle d’impédance qui reconnaît soit les court-circuits,
soit l'interruption de la ligne; il faut donc toujour introduire la resistance di termination de la
valeur de 3300ohm (3K3ohm) sur le dernier détecteur connexe.
Telle résistance doit être connexée directement sur les bornes de la centrale dans le cas
ou on a besoin de une ligne d’zone libre
Sur les mêmes lignes des détecteurs, est aussi possible de connecter un numbre illimité
de activants manuals.Ils doivent être connexés en parallele à la ligne, en introduicant une
resistance de 470ohm en série au contact NO du bouton.
1
2
3
4
5
6
7
8
9
10
11
12
13
14
15
16
17
18
19
20
21
22
23
24
25
26
F400
2B
TERM
3K3ohm
Max. 20
détecteurs
2
FRTVC
3
1
4
6
5
TERM TERM
3K3ohm 3K3ohm
Example d‘une zone
ne pas utilsée
470ohm
2watt
2
1
3
FRTVC
4
C NA NC
6
5
FPMC
1
2
3
4
5
6
+
R
R
SCR
+
Entrèe ligne
Ne pas connexè
TERM
3K3ohm
Ne pas connexè
Connexè impulsion negatif (hors porte)
Negatif d’alimentation
Entrèe positif
39
F200/F400 - Manuel pour l'usager
Ápres avoir effectué les connexions avec la centrale il est possible de realiser les
connexions avec les répéteurs optiques, lesquels seront installés, par exemple, à l’externe de
chaque piéce d’un hotel, ou bien où il y a besoin d’une signalisation,en proximité du détecteur,
pour enregistrer l’activité du meme.
FRFC
FRTVC
!
!
Détecteur de fumé photoelect. avec autodiagnosts de la camera optique
Détecteur thermo-vélocimetrique
+
5
- +
2B
-
6
4
1
3
FFPC
ou
FFPCB
2
2.3.2
Cloches polarisées, LEDs pour le cadre synoptique
La sortie CLOCHES à 24Vcc est toujour en tension, si polarisée inversaù contraire par
rapport à l’indication du borne. En condition d’alarme telle tension s’inverte, pour obtenir la
polarisation comment selon les indications. Sur cette sortie, donc, doivent être connexés tous
les dispositifs de signalisation qui ont un diode interne de polarisation. Cette ligne est equipée
d’un contrôle d’impédance qui determine soit lescourt-circuits, soit l'interruption de la ligne. Il
faut toujoursio introduire la resistance de termination de la valeur de 3300ohm à la fin de la
ligne.
1
2
3
4
5
6
7
8
9
10
11
12
13
14
15
16
17
18
19
20
21
22
23
24
25
26
F400
LED1
LED2
LED3
LED4
LED5
2B
FCF
Cadre
sinoptique
FCF
Utiliser diode
type 1N4007
TERM
3K3ohm
40
ATTENTION!
Les sorties à collecteur
ouvert pour le cadre
synoptique ont le
POSITIF en commun!
Installation
2.3.3
Sirénes et signaleurs supplementairs, ârrets éléctromagnetiques
Avec la sortie du relais ALARME est possible commander la mise en fonction des
eventuelles sirénes suppleméntaires et signaleurs lumineux; il est possible, en condition
d’alarme, d’interrompre la tension vers les ârrets éléctro-magnétiques ou les sirénes autoalimentées qui sont toujours alimentées en conditions normales de l’installation.
1
2
3
4
5
6
7
8
9
10
11
12
13
14
15
16
17
18
19
20
21
22
23
24
25
26
F400
SEI
24Vcc
2B
ATTENTION!
JP1=OFF pour un
fonctionnement à 24V
SP30/FIRE
2B
2B
FE50
2B
SA300/FIRE
41
F200/F400 - Manuel pour l'usager
3
Programmation
3.1
Mise en fonction de la centrale
Ápres avoir connexé les batteries et la tension de reseau, les LEDS “PANNE” general,
“BATTERIE” et “RESEAU”s’allument: il faut positioner l'interrupteur à clef en position “BLOC
CLAVIER” pendant certains seconds, jusqu’àu moment où le buzzer émet un bref signal
sonore; cette operation permet la mise en fonction de la centrale, laquelle dinstribuirà la
tension à les lignes de détection controlées.
NOTE: Cette operation doit être répetée quand meme en cas de bloque de la
centrale causé par alimentation insuffisante.
3.2 Fonctionnement par “Double consentement” (avec prealarme)
Si on branche la barrette P1 il est possible habiliter la modalité de fonctionnement à
“Double consentement”: un seul capteur en alarme sur une ligne de détection cause la
condition de pre-alarme (par. 4.3)de la centrale, signalé par la LED “ALARME” clignotant de la
zone, par celui general, et par une rapide intermittance soit du buzzer interne soit de la sortie à
colletteur ouvert de la zone correspondante. Quand un deuxieme
détecteur s’active la centrale signalera un alarme (par.4.4).
3.3
Réglage du temps de retard d’alarme
Le temps de retard de l'alarme, c’est-à-dire le temps qui passe entre la détection d’incendi
par un détecteur (ou deux, en cas de fonctionnement à “Double consentement”) et la mise en
fonction des alarmes (ligne cloches et sortie relais “ALARME”) peut être programmé de 0
jusq’à 450 seconds (7 minuts et 30 sec.)grace à les”dip switch”de la carte, avec battements de
30 seconds:
on
off
on
off
on
off
on
off
42
1 2 3 4
1 2 3 4
1 2 3 4
1 2 3 4
0'
on
off
2'
on
off
4'
on
off
6'
on
off
1 2 3 4
1 2 3 4
1 2 3 4
1 2 3 4
30''
on
off
2' 30''
on
off
4' 30''
on
off
6' 30''
on
off
1 2 3 4
1 2 3 4
1 2 3 4
1 2 3 4
1'
on
off
3'
on
off
5'
on
off
7'
on
off
1 2 3 4
1 2 3 4
1 2 3 4
1 2 3 4
1' 30''
3' 30''
5' 30''
7' 30''
Programmation
3.4
Fonctions de TEST
Pour effectuer les operations de test il faut habiliter les boutons par l’interrupteur à clef, en
le posizionant vers “DE BLOQUE”; les differents test seront effectués en poussant les
differents boutons dans le mem temps ensamle avec celui de "TEST".
Test des LED du panneau
!
!
Tenir appuié le bouton “TEST” pendant environ 2 seconds.
Tous les LEDS du panneau s'allument en permettant de verifiér leur correct
fonctionnement.
Test de la sortie auxiliere relais “ALARME”
!
!
Appuyer sur "TEST" et “HORS D'USAGE”de la sortie supplementaire “ALARME”.
Le relais “ALARME”se mette en fonction jusq’à quand on laisse les boutons.
Test de la sortie supplementaire relais “PANNE”
!
Appuyer sur "TEST" et “HORS D'USAGE”de la sortie supplementaire “PANNE”.
!
Le relais “PANNE”se mette en fonction jusq’à quand on laisse les boutons.
!
Test du buzzer
!
!
Appuyer sur "TEST" et “SILENCIEUX" du buzzer.
La signalisation acoustique se mette en fonction jusq’à quand on laisse les boutons.
Test de la ligne CLOCHE
!
!
Appuyer sur "TEST" et “HORS D'USAGE” de la ligne cloche.
La ligne des cloche se mette en fonction jusq’à quand on laisse les boutons. Si la ligne a
eté deja mise hors d’usage on ne tien pas en compte dans cette operation.
Test de les lignes de zone
Cette fonction permet d’effectuer le test de chaque détecteur, sans la necessité de revenir
chaque fois à la centrale:
!
Appuyer sur "TEST" et “HORS D'USAGE” de la ligne de zone à tester.
!
Tester un détecteur par fois de ceux qui sont situés sur la ilgne en test: les conditions d’
alarme et de pre-alarme sont signalées da la centrale pour une temps d’environ 5
seconds; si on a dejà mise hors d’usage la ligne cloches, les alarmes ne seront pas
activés, sauf le buzzer qui s’active toujour en cas d’alarme incendi.
!
Ápres l’alarme il faut activer la ligne de detection pourt ester un nouveau détecteur.
La condition de panne sur la lgine est signalée en centrale; le panne ne est pas memorisé,
et il continue jusqu’à quand la condition de fonctionnement normal est rétabliée
43
F200/F400 - Manuel pour l'usager
4
Fonctionnement
4.1
Description du panneau
DÉBLOC
CLAVIER
F400
F200
ALARMES
PANNE
ALARME
BUZZER
BLOC
CLAVIER
RESEAU
BATTERIE
SORTIE
SORTIE
SUPPLEMENTAIRE SUPPLEMENTAIRE
ALARME
PANNE
CENTRALE
DÉTECTION INCENDI
4 ZONES
HORS
D'USAGE
HORS
D'USAGE
RESET
TEST
ALARME
IMMEDIATE
SILENCIEUX
ZONE 1 ZONE 2 ZONE 3 ZONE 4
CLOCHES
ALARME
ALARME
ALARME
ALARME
PANNE
PANNE
PANNE
PANNE
PANNE
LIGNE COURT
OUVERTE CIRCUIT
LIGNE COURT
OUVERTECIRCUITO
LIGNE COURT
OUVERTE CIRCUIT
LIGNE COURT
OUVERTE CIRCUIT
LIGNE COURT
OUVERTE CIRCUIT
HORS
D'USAGE
HORS
D'USAGE
HORS
D'USAGE
HORS
D'USAGE
HORS
D'USAGE
F400
13
Interrupteur par clef
Il permet d’utiliser les boutons du panneau exclusivement par qui possède la clef.
LED “RESEAU”:
Allumé:
Clignotant:
Éteint:
tension de reseau presente; centrale en marche
tension de reseau absente; centrale en marche avec alimentation par batteries
tension de reseau absente, centrale ne pas alimentée (note: avec LED “RESEAU” éteint et
LED “PANNE” general et LED “BATTERIE“ allumés la centrale est en condition de bloc)
LED “ALARME” general:
Allumé:
condition d'alarme
Clignotant:
conditionde pre-alarme
Éteint:
pas d'alarme
pour environ 5 sec.: alarme de la zone en test (par.3.4)
LED “BATTERIE”:
Allumé:
batteries déchargées; manque de tension de l’alimentateur; panne à l'alimentateur
Clignotant:
memoire panne alimentateur
Éteint:
alimentation normale
LED “PANNE” general:
Allumé:
panne
Éteint:
pas de panne (les panne sur les lignes “hors d’usage” ne sont pas signalés)
LED Buzzer
Allumé:
Éteint:
Clignotant lent:
Clignotant rapid:
buzzer hors d’usage
buzzer hors d’usage mais en service
buzzer en fonction
buzzer silencieux
Buzzer
En marche:
centrale in allarme
intermitt. lente:
guasto (con buzzer silenziato il LED buzzer lampeggia velocemente)
intermitt. rapide:
centrale in preallarme
beep chaque 10 sec: guasto rete, guasto batteria, allarme o preallarme con buzzer silenziato
8
44
LED “ALARME” de zone
Éteint:
pas d’alarme sur la ligne
Clignotant:
ligne en pre-alarme
Allumé:
ligne en alarme
Functionnement
LED ligne CLOCHES et lignes de ZONE ouvertes
Allumé:
ligne ouverte
Éteint:
ligne pas ouverte
Clignotant:
memoire ligne ouverte
LED ligne CLOCHES et lignes de ZONE en court circuit
Allumé:
ligne en court circuit
Éteint:
ligne pas en court circuit
Clignotant:
memoire ligne en court-circuit
LED “SORTIE SUPPLEMENTAIRE ALARMES “ et “SORTIE SUPPLEM. “PANNES”:
Allumé:
sortie hors d’usage
Éteint:
sortie en service, mais pas activée
Clignotant lent:
sortie en service, activée
Clignotant rapid:
sortie pas active: hors d’usage
LED ligne CLOCHES silencieuses
Allumé:
ligne cloches hors d’usage
Éteint:
ligne cloches en service
Clignotant lent:
cloches en fonction
Clignotant rapid:
cloches pas active: silencieuses
13
LED lignes de ZONE hors d’usage
Allumé:
ligne hors d’usage
Éteint :
ligne en service
Clignotant:
ligne en test
4.2
Mise en “Hors d’usage”
L’interrupteur par clef ne permet pas d'utiliser les boutons du panneau à qui ne a pas la
clef. Pour pouvoir effectuer toutes fonctions suivantes, il faut mantenir l'interrupteur par clef en
position de service: “DÉ BLOQUE CLAVIER”.
4.2.1
Hors d’usage des lignes de détection et ligne cloche
En condition de hors d’usagef les lignes sont toujours controllées et si il-y-ai des pannes
ou des alarmes, ils sont toujours signalés par les LED des zones, mais sans activation de la
ligne cloches, la sortie relais “ALARME”, les LED “ALARME” et “PANNE” general.
4.2.2
Buzzer silencieux
Avec le buzzer en modalité silencieuse toutes signalisations acoustiques sont eliminées
soit pour le panne soit pour le pre-alarme, mais le LED du buzzer clignote rapidement pour
signaler une situation anormale: quand la centrale entre en condition d’alarme incendi le
buzzer se mette en marche automatiquement en condition de service; quand on a un alarme il
est possible de remettire le buzzer en modalité silencieuse.
4.2.3
Hors d’usage sortie relais “ALARME” et sortie relais “PANNE”
Quand cettes sortie sont désactivées, la centrale ne actione pas le relais correspondant,
mais en cas d’alarme ou de panne le LED clignotera rapidement.
45
F200/F400 - Manuel pour l'usager
4.3
Pre-alarme
La condition de pre-alarme se verifique uniquement avec le fonctionnement à “Double
consentement” avec la barrette P1 introduite (par. 3.3).
La signalisation d’incendi par un détecteur d’une ligne de zone cause la condition de prealarme de la centrale:
!
!
!
!
La LED “ALARME” general clignote.
La LED “ALARME” de la zone correspondante s’allume.
L'intermittence sur la sortie à colletteur ouvert de la zone correspondante s’active.
L'intermittence rapide du buzzer interne s’active (si il est en modalité silencieuse, la LED
du buzzer clignote rapidement).
Une signalisation d’incendi supplementaire par un outre détecteur situé sur la meme ligne
de zone cause la condition d’alarme de la centrale (par. 4.4).
Pendant la phase de pre-allarme, meme si on a pas introduit la clef, il est possible d’activer
le bouton de "ALARME IMMEDIATE" pour passer à la condition d’alarme: toutes signalisations
acoustiques sont activées.
Au contraire si on veut passer à la condition de répos à partir da cela de pre-alarme il faut
effectuer le reset de la centrale àpres avoir énlevé la cause du pre-alarme.
4.4
Alarme
La centrale va en condition d’alarme quand au moin un détecteur (ou deux détecteurs en
modalité “Double consentement”) signale la presence d’un incendi:
!
!
!
!
La LED “ALARME” de la zone correspondante s’allume.
La sortie à collecteur ouverte pour le cadre synoptique de la zone correspondante
s’active.
Le buzzer interne s’active(si il est en modalité silencieuse, la LED du buzzer clignote
rapidement).
Le compte du temps de rétard d'alarme commence(par. 3.3).
Pendant cette periode il est possible appuyer sur le bouton "ALARME IMMEDIATE"
(meme si on a pas introduit la clef) pour terminer immediatement le compte du temps de retard
et passer à la phase d’alarme:
!
!
La ligne cloches et la sortie supplementaire relais “ALLARME” s’activent (si ils sont en
modalité hors d’usage, les LED correspondants clignotent rapidement).
Le buzzer interne emet le son fixe meme si il est en modalité silencieuse (pendant l’alarme
il est possible mettre le buzzer en modalité silencieuse).
C’est pas possible effectuer un test sur une ligne pendant la phase d’alarme, ni la mettre
hors d’usage.
La condition d’alarme reste jusqu’à on effectue le reset de la centrale (par. 4.6), àpres
avoir eliminé la cause.
46
Fonctionnement
4.5
Signalisation pannes
4.5.1
Panne sur les lignes de détection ou sur la ligne cloches
La condition de panne est signalée par l'allumage fixe de la LED “PANNE” general, par
l’allumage d’une untre les LED “LIGNE OUVERTE” ou “COURT CIRCUIT”, par l’activation du
relais “PANNE”, par repetition sur la sortie à collecteur ouvert “UG” pour le cadre synoptique et
par l’intermittence du buzzer.
Une fois terminée la cause de panne, la centrale va en condition de repos, mais la LED
“PANNE” de la ligne sur laquelle est passée le foncyionnement anormal commence à
clignoter, en enregistrant la memoire du panne.
L'operation de reset de la centrale mette à zero la memorisation des pannes.
Le lignes en hors d’usage, meme si continuent à signaler les pannes par la LED
correspondante à la ligne de zone, ne activent pas les outres signalisations.
Le lignes en test signalent le panne mais sans le memoriser.
4.5.2
Panne sur l’alimentation
Quand la tension 24V d’alimentation de la centrale par l’alimentateur TM25/24 decroît plus
du 10%, pour un mauvais fonctionnement des batteries en tampon, ou eventuellement par une
manque prolongée de la tension de reseau, la central se mette en condition d’ attente, signalée
par l’allumage fixe des LED “PANNE” general et LED “BATTERIE”, par la sortie avec colletteur
ouvert de repetition panne “UG”, par l'activation du relais “PANNE” et aussi par l’intermittence
du buzzer.
Si cette condition demeure pendant plus d’une heure, la centrale entre en condition de
hors d’usage, signalée par l’allumage fixe de les LED “PANNE” general et LED “BATTERIE”, et
la LED “RESEAU” s’eteinte. En cette condition la centrale ne signale plus des pannes, ni des
outres conditions d’alarme.
Si l'alimentation retourne à des valeurs normals avant que les batteries se déchergent, la
centrale commence son normal fonctionnement, àpres un bref signal du buzzer et en guardant
les impostations presentes au moment de l'interruption du service; en cas contraire il faudra
repeter les operations de mise en fonction de la centrale.
4.6
Reset
Cette operation doit être effectuée pour le rétablissement de la centrale à partir d’une
condition d’alarme ou pour annuler les memoires pannes.
!
!
!
Débloquer le clavier en ponant l’interrupteur par clef en position “DÉBLOQUE CLAVIER”.
Appuyer sur tous les deux boutons "ALARME IMMEDIATE" et "TEST" pendant certains
seconds.
Pendant cette operations toutes LED sur le panneau s’allument, les memoires pannes
s’annulent et les détecteurs incendi connexés sur les lignes de détection s’activent.
Bloquer le clavier en ponant l’interrupteur par clef en position “BLOQUE CLAVIER”.
La centrale est en service. Cette operation ne influi pas sur la condition de hors d’usage de
les sorties ou de les lignes de détection.
47
F200/F400 - Manuel pour l'usager
5
Entretien
5.1
Batteries
Il faut contrôler la condition soit de les batteries connexées en tampon à l'alimentateur
TM25/24, soit de celle ci installée à l’interieur de les sirénes auto-alimentées.
5.2
Nettoyage
Pour le nettoyage de la centrale il faut utiliser exclusivement un tissu doux et humide.
Ne pas utiliser détergents et tissu abrasif.
5.3
Fusibles
F1 Sortie sirénes
1A rapid
Lead free
Enterprise avec Système de
gestion pour la Qualitè
UNI EN ISO 9001:2000
48
Entreprise avec système de
gestion environnementale
UNI EN ISO 14001:2004
EMC 89/336 CEE
MADE IN ITALY
Pb
RoHS
compliant
Poubelle diversifièe pour
les appareillages
èlectriques et èlectroniques
La marque CIA est enregistrèe par la HILTRON srl
Central anti-incendio
convencional de 2/4 zonas
PARA EL USUARIO
ITALIANO
ESPAÑOL
F200 / F400
F200/F400 - Para el usuario
Indice
Capítulo 1
Introducción
51
1.1 Descripción dela central..................................................................................51
1.2 Características funcionales .............................................................................51
1.3 Características técnicas ..................................................................................52
Capítulo 2
Instalación
53
2.1 Advertencias generales...................................................................................53
2.2 Alimentación ..................................................................................................53
2.3 Conexiones ..................................................................................................54
2.3.1 Detectores antincendio, pulsadores, pilotos de acciòn........................55
2.3.2 Campanas polarizadas, LEDs para cuadro sinòptico ..........................56
2.3.3 Sirenas y señalizadores suplementarios, electroimanes .....................57
Capítulo 3
3.1
3.2
3.3
3.4
Capítulo 4
Programación
58
Inicialización de la central ...............................................................................58
Funcionamiento por “Doble detección” (con prealarma).................................58
Regulación del tiempo de retardo de alarma ..................................................58
Funciones de test............................................................................................59
Funcionamiento
60
4.1 Descripción del panel de control .....................................................................60
4.2 Puesta en “Fuera de servicio” .........................................................................61
4.2.1 Fuera de servicio líneas de detección y línea campanas ....................61
4.2.2 Buzzer silenciado.................................................................................61
4.2.3 Fuera de servicio salida relé “ALARMA” y salida relé “AVERIA”......... 61
4.3 Prealarma........................................................................................................62
4.4 Alarma.............................................................................................................62
4.5 Señalación averías..........................................................................................63
4.5.1 Avería en línea de detectores o em línea de campanas......................63
4.5.2 Anomalía en la alimentación................................................................63
4.6 Reset .............................................................................................................63
Capítulo 5
Mantenimiento
64
5.1 Baterías...........................................................................................................64
5.2 Limpieza..........................................................................................................64
5.3 Fusibles...........................................................................................................16
50
Introducciòn
1
Introducciòn
1.1
Descripción de la central
F200/F400 es una central anti-incendio microprocesada conforme ala normativa UNI
EN54 dotada de dos/cuatro linea controladas para detectores de humo convencionales y
pulsadores de alarma, y una línea para campanas polarizadas.
Las líneas están dotadas de salidas a colector abierto de repetición de alarma sobre
cuadro sinóptico; a través de 2 LED es posible controlar la apertura o el cortocircuito de cada
línea, y pueden ser puestas fuera de servicio o en test separadamente. Un interruptor de llave
permite impedir el control de la instalación a personas no autorizadas: puesta en fuera de
servicio de las líneas controladas y funciones de test.
Después de la detección por parte de un sólo detector se activa la alarma después de un
retardo regulable de cero hasta un máximo de 7 minutos y treinta segundos. El funcionamiento
por “Doble detección” permite una condición de prealarma, durante la cual la detección de un
sólo sensor no provoca alarma, es necesario que se verifique una ulterior detección de
incendio sobre la línea para provocar la alarma.
Las averías de central y líneas son señaladas por el LED "AVERIA” general,del relé
"AVERIA” y por la salida a colector abierto para la señalización de avería sobre un cuadro
sinóptico; cada avería es memorizada a través del parpadeo del LED correspondiente a la
línea que, después de una avería, vuelve a la condición normal de trabajo.
La central controla la tensión de red y, en caso de ausencia, controla el estado de las
baterías, señalando su agotamiento durante cerca de una hora, antes de pasar a bloqueo.
También dispone de una modalidad de test para facilitar las operaciones de instalación y
de verificación de la instalación.
1.2
!
!
!
!
!
!
!
!
!
!
!
!
!
!
!
!
!
!
!
Características funcionales
Conforme norma UNI EN 54
2(F200),4(F400) líneas controladas para detectores de fumo y pulsadores de alarma.
2/4 linea colector abierto para repetición del estado de alarma sobre cuadro sinóptico.
Una línea controlada para campanas polarizadas a 24Vcc.
Una salida a colector abierto para señalización de avería general sobre cuadro sinóptico.
Una salida de relé para señalización “ALARMA”.
Una salida relé para señalización “AVERIA”.
Tiempo de retardo de alarma regulable de 0 a 7 minutos y 30 seg. con incrementos de treinta
segundos.
Modalidad de funcionamiento por “Doble detección” (con prealarma).
Avisador acústico desactivable para averías o alarmas.
Interruptor por llave para la limitación de acceso.
Control de presencia de alimentación de red.
Control de descarga de batería y bloqueo de central.
Modalidad de test y puesta en fuera de servicio para cada linea.
Modalidad de test y puesta en fuera de servicio para salida relé “ALARMA” y “AVERIA” general.
Modalidad de test y silenciado para buzzer interno.
Modalidad de test y puesta en fuera de servicio para línea campanas.
Test de encendido LEDs.
Señalización memoria averías.
51
F200/F400 - para el usuario
1.3
!
!
!
!
Características técnicas
Alimentación:
Fuente de Alimentación:
Contactos relé:
Dimensiones del contenedor metálico:
HiLTRON
230V~ ±10%
24V
1A
250V 8A
265x285x120mm
®
S.r.l.
PROGETTAZIONE E PRODUZIONE APPARECCHIATURE ELETTRONICHE
DECLARACIÓN
DE LA CONFORMIDAD
CONSTRUCTOR: HiLTRON S.r.l.
DIRECCIÓN: Via Caserta al Bravo , 218 - 80144 - NAPOLI
MARCA USADA:
CÓDIGO DE PRODUCTO: F200, F400
DESCRIPCIÓN DEL PRODUCTO: Unidad central convencional de la Fuego-deteccio'n
EL PRODUCTO AQUÍ DESCRIBIÓ EL RESULTADO QUE SE CONFORMABA EN EL REQUISITO PRESCRITO EN
LAS NORMAS SIGUIENTES
NORMAS APLICADAS
TÍTULO
EN50081-1
NORMA GENÉRICA DE LA EMISIÓN
Clase de la norma genérica: domestic, anuncio y luz industriales
EN50082-1
NORMA GENÉRICA DE LA INMUNIDAD
Clase de la norma genérica: domestic, anuncio y luz industriales.
EN60335-1
NORMA PARA LA SEGURIDAD DE LOS INSTRUMENTOS ELÉCTRICOS PARA EL USO
DOMÉSTICO Y SIMILAR
EN54-2
NORMA DEL PRODUCTO: SISTEMAS DEL EXAMEN Y DEL ALARMA INCENDIO
LA CONFORMIDAD SE HA VALORADO CON LAS PRUEBAS EN MUESTRAS Y CON LA PREPARACIÓN QUE
REFLEJA LA CONFIGURACIÓN FUNCIONAL PARA SU USO, EN LA MEDIDA EN QUE EL PRODUCTO
SATISFACE EL REQUISITO DE 89/336/CEE DIRECTIVO E, DONDE APLICABLE, DEL DIRECTORIO 73/23 CEE.
DIRECTOR DE MANEJO
FECHA
22 Mayo 2000
52
Instalacion
2
Instalación
2.1
Advertencias generales
No instalar la central en lugares expuestos a temperaturas extremas o a la intemperie.
Para una fijación sólida y fiable, es indispensable asegurarse que la superfice del muro
sea plana.
Fijar la central a una altura que permita un ágil acceso al panel frontal.
Las conexiones al morsettiere deben efectuarse después del montaje del equipo.
Las conexiones deben realizarse en segundo lugar la normativa 46/90 sobre la seguridad
contra los incendios.
!
!
!
!
!
!
2.2
Alimentación
Es importante saber que la alimentación de toda la instalación debe ser suministrada
necesariamente sea por dos baterías de 12V2Ah (o 12V7Ah) a colocar en el interior de la
central, sea por la fuente de alimentación de la central, conectada a la tensión de red 230V~.
ATENCION !
La tensión de red 230V~ deberá ser conectada a la fuente de alimentación a través de
dos conductores de 1,5mm de doble aislamiento provenientes de un seccionador (por
ej. un interruptor magnetotérmico) utilizado exclusivamente para la central de incendio.
Al interior de la central colocar los dos conductores de modo ordenado, bloqueándolos
a través del prensacables suministrado.
Seccionador
Red
230V~
50Hz
Abaterías a traves del cable suministrado (conectar el polo negativo [-] de la 1ª batería con
el polo positivo [+] de la otra); conectar después los dos Ultimada la instalación, conectar en
serie las dos conductoes con conectores faston provenientes de la fuente en los polos de la
serie de baterías. Prestar atención a la polaridad de conexión (Rojo = [+] positivo 1° batería /
Negro = [-] negativo 2° batería), para evitar daños en los dispositivos conectados.
53
F200/F400 - Para el usuario
ATENCION !
Las baterías deben estar siempre conectadas. Asegurarse periódicamente de su buen
estado de carga midiendo la tensión en los extremos de la serie con un voltímetro,
despues de haber desconectado la tensión de red de la fuente de alimentación. En el
caso en que sea necesario sustituir las baterias es igualmente necesario desconectar
la tensión de red del alimentador.
Después de haber conectado las baterías, se podrá dar corriente a la central a través del
seccionador que conecta la tensión de red a los terminales de la fuente de alimentación
TM25/24.
EI LED “RED” presente sobre el panel de la central indica la presencia de la tensión de
red.
Por razones de seguridad y por el cumplimiento de las normativas en vigor aconsejamos
efectuar y comprobar la conexión a un eficaz instalo de tierra del containeur metálica de la
central, y de todos los demás dispositivos que tenían necesidad.
2.3
Conexiones
1
2
3
4
5
6
7
8
9
10
11
12
13
14
15
16
17
18
19
20
21
22
23
24
25
26
F400
1-2
3-4-5
6-7-8
9 - 10
11 - 12
13 - 14
15 - 16
17 - 18
19 - 20
21 - 22
23 - 24
25 - 26
*
Línea controlada * para campanas polarizadas: tension a 24Vcc INVERTIDA
DE POLARIDAD, en condicion de alarma esta salida se polariza como se
visualiza en el regletero. ATENCION: corriente máxima 700mA !
Salida relé ALARMA.
Salida relé AVERIAS (”Guasti”).
Salida LED de repetición alarma LINEA 1 sobre cuadro sinóptico.
Salida LED de repetición alarma LINEA 2 sobre cuadro sinóptico.
Salida LED de repetición alarma LINEA 3 sobre cuadro sinóptico.(F400)
Salida LED de repetición alarma LINEA 3 sobre cuadro sinóptico.(F400)
Salida LED de repetición AVERIAS sobre cuadro sinóptico.
Entrada línea de detección controlada * de LINEA 1.
Entrada línea de detección controlada * de LINEA 2.
Entrada línea de detección controlada * de LINEA 3 (F400).
Entrada línea de detección controlada * de LINEA 4(F400).
ATENCION!
Si las líneas controladas no son utilizadas, sus correspondientes terminales deben
ser puenteados con la resistencia de terminación de 3.300ohm (3K3ohm).
2.3.1
Detectores, pulsadores y pilotos de acción
Sobre cada línea de detección es posible conectar un máximo de 20 detectores: pueden
ser tanto detectores de humo ópticos y/o iónicos, como termovelocimétricos, como mixtos.
Las líneas están dotadas de un control de impedancia que reconoce tanto los
54
Instalación
cortocircuitos, como la interrupción de la línea, portanto es siempre necesario colocar la
resistencia de terminación de 3300ohm (3K3ohm) sobre el ultimo detector conectado.
Tal resistencia se conecta directamente en los terminales de la central en el caso en que
se desee dejar libre y sin uso una línea de zona.
Sobre la misma línea de detectores, es también posible conectar un número illimitado de
pulsadores de alarma. Se conectan en paralelo a la línea, colocando una resistencia de
470ohm 2 watios en serie con el contacto NA del pulsador.
1
2
3
4
5
6
7
8
9
10
11
12
13
14
15
16
17
18
19
20
21
22
23
24
25
26
F400
2B
TERM
3K3ohm
Max. 20
detectores
2
FRTVC
3
1
4
6
TERM TERM
3K3ohm 3K3ohm
Ejemplo de zona
no utilizada
5
470ohm
2watt
2
1
3
FRTVC
4
1
2
3
4
+
R
R
SCR
5
6
+
C NA NC
6
5
Admisiòn linea
No adjuntado
No adjuntado
Negativa conectada del
Impulso (Puerta del exterior)
Negativa de la alimentaciòn
Salida positiva
FPMC
TERM
3K3ohm
55
F200/F400 - Para el usuario
Una vez efectuados las conexiones con la central es posible realizar las conexiones con
los repetidores ópticos, que se instalarán, por ejemplo, fuera de cada habitación de un
albergue, o por todas partes haya el necessité de indicar, en proximidad del revelador incluso,
la actividad de revelación en curso.
FRFC
FRTVC
!
!
El revelar del humo fotoeléctrico con autodiagnostic del cuarto óptico
El revelar thermoratemetric
2B
-
+
-
+
5
6
4
1
3
FFPC
oppure
FFPCB
2
2.3.2
Campanas polarizadas y LEDs para cuadro sinóptico
La salida CAMPANE a 24Vcc está constantemente en tensión, pero polarizada
inversamente respecto a la serigrafía de la regleta. En alarma esta tensión se invierte, para
obtener la polarización como está serigrafiado. Sobre esta salida, por tanto, se conectan todos
los dispositivos de señalización que tengan un diodo interno de polarización. Tal línea
está dotada de un control de impedancia que determina tanto los cortocircuitos, como la
interrupción de la línea, portanto es siempre necesario colocar la resistencia de terminación
de 3300ohm al final de la línea.
1
2
3
4
5
6
7
8
9
10
11
12
13
14
15
16
17
18
19
20
21
22
23
24
25
26
F400
LED1
LED2
LED3
LED4
LED5
1 N 4 0 0 7
TERM
3K3ohm
56
FCF
2B
FCF
Cuadro
sinóptico
ATENCION!!
La salida a colector
abierto para el cuadro
sinóptico tiene el
POSITIVO en común!
Instalación
2.3.3
Sirenas y señalizadores suplementarios, electroimanes
Con la salida de cambio de relé ALLARME es posible comandar la activación de sirenas
suplementarias y señalizadores luminosos; además es posible, en alarma, interrumpir la
tensión hacia los electroimanes o la sirena exterior, que están contínuamente alimentadas en
condiciones normales de la instalación.
1
2
3
4
5
6
7
8
9
10
11
12
13
14
15
16
17
18
19
20
21
22
23
24
25
26
F400
SEI
24Vcc
2B
ATENCIÓn!
JP1=OFF par
el funcionamiento a 24V
SP30/FIRE
2B
2B
FE50
2B
SA300/FIRE
57
F200/F400 - Para el usuario
3
Programación
3.1
Inizializaciòn de la centrale
Después de haber conectado las baterías y la tensión de red, se iluminan los LEDs
“AVERIA” general, “BATERIA” y “RED”: colocar el interruptor de llave a la posición de servicio
“DESBLOQUEO TECLADO” por un instante, hasta que no se escuche una breve señal del
buzzer; esta operación permite la entrada en servicio de la central, que dará tensión a las
líneas de detección controladas.
NOTA: Esta operación debe ser realizada también en el caso de bloqueo de la
central por insuficiente alimentación.
3.2
Funcionamiento por “Doble detector” (con prealarma)
Con el puente P1 colocado es posible habilitar el modo de funcionamiento a “Doble
detector”: un único sensor en alarma sobre una línea de detección pone a la central en estado
de prealarma (apartado 4.3), señalado por el parpadeo del LED “ALARMA” de zona, del
parpadeo del LED “ALARMA” general, de la intermitencia rápida del buzzer interno y la
intermitencia de la salida a colector abierto de la zona relativa. Sólo la señalización de un
segundo detector hace entrar a la central en estado de alarma (apartado 4.4).
3.3
Regulación del tiempo de retardo de alarma
El tiempo de retardo de la alarma, es decir, el tiempo que transcurre entre la detección de
incendio por parte de un detector (o dos, en el funcionamiento a “Doble detector”) y la
activación de las alarmas (línea de campanas y salida de relé “ALLARME”) puede ser
regulado entre 0 y 450 segundos (7 minutos y 30 seg.) a través de dip switch presentes en la
tarjeta, a intervalos de treinta segundos:
on
off
on
off
on
off
on
off
58
1 2 3 4
1 2 3 4
1 2 3 4
1 2 3 4
0'
on
off
2'
on
off
4'
on
off
6'
on
off
1 2 3 4
1 2 3 4
1 2 3 4
1 2 3 4
30''
on
off
2' 30''
on
off
4' 30''
on
off
6' 30''
on
off
1 2 3 4
1 2 3 4
1 2 3 4
1 2 3 4
1'
on
off
3'
on
off
5'
on
off
7'
on
off
1 2 3 4
1 2 3 4
1 2 3 4
1 2 3 4
1' 30''
3' 30''
5' 30''
7' 30''
Programaciòn
3.4
Funciones de TEST
Para seguir las operaciones de test es necesario habilitar el uso de las teclas de la central
a través del interruptor de llave, posicionándolo haciaverso “DESBLOQUEO TECLADO”; los
distintos test se realizan pulsando distintas teclas a la vez que la de "TEST".
Test de los LEDs de la central
!
!
Mantener pulsado “TEST” durante más de 2 segundos.
Se iluminan todos los LEDs del panel permitiendo la verificación de su correcto
funcionamiento.
Test de la salida auxiliar del relé “ALARMAS”
!
!
Pulsar "TEST" y “FUERA DE SERVICIO”de la salida auxiliar “ALARMAS”.
Se acciona el relé “ALLARME” hasta soltar los pulsadores.
Test de la salida auxiliar del relé “AVERIAS”
!
!
Pulsar "TEST" y “FUERA DE SERVICIO”de la salida auxiliar “AVERIAS”.
Se acciona el relé “GUASTO“ (AVERIA) hasta soltar los pulsadores.
Test del buzzer
!
!
Pulsar "TEST" y “SILENCIADO" del buzzer.
Se activa la señalización acústica hasta soltar los pulsadores. Si el buzzer estaba
previamente silenciado, en esta operación no será tenido en cuenta.
Test de la línea CAMPANAS
!
!
Pulsar "TEST" y “ FUERA DE SERVICIO” de la línea Campanas.
Se activa la línea de las campanas hasta soltar los pulsadores. Si la línea estaba
anteriormente puesta fuera de servicio, en esta operación no será tenido en cuenta.
Test de las zonas
Esta función permite testar los detectores uno a uno, sin necesidad de ir a la central:
!
!
!
Presionar "TEST" y "FUERA DE SERVICIO” de la zona a testar.
Para probar un detector cada vez de la zona en test: las condiciones de alarma y de
prealarma son señaladas de la central durante unos 5 segundos; si eventualmente la
línea de campanas estaba puesta fuera de servicio, no se activan las alarmas, a
excepción del buzzer que se activa siempre en caso de alarma de incendio.
Tras la alarma se rearma la zona, para poder testar otro detector.
La condición de avería sobre la línea viene señalada en la central; no se memoriza, y dura
hasta el restablecimiento del normal funcionamiento.
59
F200/F400 - Para el usuario
4
Funcionamiento
4.1
Descripción del panel
DESBLOQUEDO
TECLADO
ALARMA
F400
F200
ALARMS
AVERIA
ZUMBADOR CAMPANAS
BLOQUEDO
TECLADO
RED
BATERIA
SALIDA
AUXILIAR
ALARMAS
SALIDA
AUXILIAR
ALARMAS
FUERA DE
SERVICIO
FUERA DE
SERVICIO
RESET
TEST
ALARMA
IMMEDIATA
SILENCIADO
ZONA 1 ZONA 2 ZONA 3 ZONA 4
ALARMA
ALARMA
ALARMA
ALLARME
AVERIA
AVERIA
AVERIA
AVERIA
GUASTO
LINEA CORTO
ABIERTA CIRCUITO
LINEA CORTO
ABIERTA CIRCUITO
LINEA CORTO
ABIERTA CIRCUITO
LINEA CORTO
ABIERTA CIRCUITO
LINEA CORTO
APERTA CIRCUITO
FUERA DE
SERVICIO
FUERA DE
SERVICIO
FUERA DE
SERVICIO
FUERA DE
SERVICIO
FUORI
SERVIZIO
13
LLave
Permite la utilización de las teclas del panel sólo al personal autorizado.
LED “RED”::
encendido:
intermitente:
apagado:
tensión de red presente; central en funcionamiento
tensión de red ausente; centrale en funcionamiento con alimentación de las baterías
tensión de red ausente, central no alimentada (nota: con LED “RED” apagado y LED “AVERIA”
general y LED “BATERIA “ encendidos la central está bloqueada)
LED “ALARMA” general:
encendido:
estado de alarma
intermitente:
estado de prealarma
apagado:
ninguna alarma
LED “BATERIA”:
encendido:
intermitente:
apagado:
durante unos 5 seg. aprox. : alarma de la zona en test (apart.3.4)
baterías descargadas; falta tensión del alimentador; avería del alimentador
memoria avería del alimentador
alimentación bien
LED “AVERIA” general:
encendido:
avería
apagado:
ninguna avería (las que se producen en las líneas puestas “fuera de servicio” no se indican)
8
60
LED Buzzer
encendido:
apagado:
parpadeo lento:
parpadeo veloz:
buzzer fuera de servicio
buzzer no activo pero en servicio
buzzer funcionante
buzzer silenciato
Buzzer
sonando:
intermitente lento:
intermitente veloz:
beep cada 10 seg.:
central en alarma
avería (con buzzer silenciado el LED buzzer lparpadea rápidamente)
central en prealarma
avería red, avería batería, alarma o prealarma con buzzer silenciado
LED “ALARMA” de zona
apagado:
ninguna alarma en la zona
intermitente:
zona en prealarma
encendido:
zona en alarma
Funcionamiento
LED línea CAMPANAS y líneas de ZONA abiertas
encendido:
línea abierta
apagado:
línea no abierta
intermitente:
memoria línea abierta
LED línea CAMPANAS y líneas de ZONA en corto circuito
encendido:
línea en cortocircuito
apagado:
línea no en cortocircuito
intermitente:
memoria línea en cortocircuito
LED “SALIDA AUXILIAR ALARMAS “ y “SALIDA AUXILIAR AVERIAS”:
encendido:
salida fuera de servicio
apagado:
salida en servicio, no activada
intermitente lento: salida en servicio, activada
intermitente veloz: salida no activa por estar fuera de servicio
LED línea CAMPANAS silenciada
encendido:
línea campanas fuera de servicio
apagado:
línea campanas en servicio
intermitente lento: campanas en funcionamiento
intermitente veloz: campanas no funcionantes por estar silenciadas
13
LED líneas de ZONA fuera de servicio
encendido:
línea fuera de servicio
apagado:
línea en servicio
intermitente:
línea en test
4.2
Puesta en “Fuera de servicio”
La llave impide el uso de las teclas del panel de la central a personas no autorizadas. Para
acceder entonces a las funciones descritas a continuación es necesario mantener la llave en
posición de servicio “DESBLOQUEO TECLADO”.
4.2.1
Puesta en fuera de servicio de zonas y línea de campanas
En condición de fuera de servicio las líneas continuan siendo controladas y posibles
averías o alarmas son señaladas a través de los LEDs de la zona, pero sin activar la línea de
campanas, la salida relé “ALLARME”, y los LEDs “ALARMA” y “AVERIA” general.
4.2.2
Buzzer silenciado
Con el buzzer silenciado se eliminan las señalizaciones acústicas de avería y de
prealarma, y en su lugar el LED del buzzer parpadea velozmente para indicar una situación de
anomaía: cuando la central entra en alarma de incendio el buzzer es reactivado
automáticamente y puesto en servicio; con alarma en curso es posible re-silenciar
nuevamente el buzzer.
4.2.3
Fuera de servicio salida relé “ALARME” y salida relè “AVERIA”
Cuando estas salidas son desactivadas, la central no acciona el correspondiente relé,
pero en caso de alarma o de avería provoca el parpadeo rápido del LED.
61
F200/F400 - Para el usuario
4.3
Prealarma
Esta condición se presenta sólo cuando se habilita el funcionamiento a “Doble detector”
con el puente P1 colocado (apartado 3.3).
La señalización de incendio por parte de un detector de una zona pone a la central en
condición de prealarma:
!
!
!
!
Parpadea el LED “ALARMA” general.
Parpadea el LED “ALARMA” de la zona correspondiente.
Se activa la intermitencia sobre la salida a colector abierto de la zona correspondiente.
Se activa la intermitencia rápida del buzzer interno (si estaba silenciado, parpadea
velozmente el LED del buzzer).
Una posterior señalización de incendio por parte de otro detector de la misma zona pone a
la central en alarma (apartado 4.4).
De otro modo, durante la prealarma es posible, también con llave desconectada, accionar
el pulsador de "ALARMA INMEDIATA" para pasar a la condición de alarma, activando
directamente las señalizaciones acústicas.
De la condición de prealarma es posible volver a la condición de reposo haciendo el reset
de la central sólo después de haber reestablecido la señalización de los detectores y por
consiguiente solucionado la causa de la prealarma.
4.4
Alarma
La central se pone en estado de alarma cuando al menos un detector (o al menos dos
detectores en el funcionamiento a “Doble detección”) señala la presencia de incendio:
!
!
!
!
Se enciende el LED “ALARMA” de la zona correspondiente.
Se activa la salida a colector abierto para el cuadro sinóptico relativa a la zona.
Se activa el buzzer interno (si estaba silenciado, parpadea velozmente el LED del
buzzer).
Comienza el tiempo de retardo de alarma (apartado 3.3).
Durante este retardo es posible actuar sobre el pulsador "ALARMA INMEDIATA" (incluso
con llave desconectada) para terminar inmediatamente el tiempo de retardo y pasar a la
sucesiva fase efectiva de alarma:
!
!
Se activa la línea de campanas y la salida auxiliar de relé “ALARMA” (si estaban puestas
fuera de servicio parpadean rápidamente los LEDs correspondientes).
Se activa el tono fijo del buzzer interno incluso aunque con anterioridad estuviera
silenciado (con alarma en curso es posible re-silenciar el buzzer).
No es posible poner en test una línea en alarma, ni ponerla fuera de servicio.
El estado de alarma permanece hasta que no se produce el reset de la central (apartado
4.6), después de haber eliminado la causa que lo ha provocado.
62
Funcionamiento
4.5
Señalizaciones de averías
4.5.1
Avería sobre las líneas de detección o sobre la línea de campanas
La condición de avería viene señalada con el encendido fijo del LED “AVERIA” general,
con el encendido de uno de los LEDs “LINEA ABIERTA” o “CORTOCIRCUITO”, con la
activación del relé “AVERIAS” (GUASTI), con repetición sobre la salida a colector abierto “UG”
para posible cuadro sinóptico y con la intermitencia del buzzer.
Terminada la causa que ha determinado la condición de avería, la central vuelve a la
condición de reposo, pero el LED “AVERIA” de la íinea en la que se produjo la anomalía
comienza a parpadear, dejando de este modo memoria de la avería.
La operación de reset de la central borra las memorias de averías.
Las líneas puestas en fuera de servicio, aún continuando la señalización de las averías
con el LED correspondiente a la zona, no activan las otras señalizaciones.
Las líneas en test señalan la avería, pero no la memorizan.
4.5.2
Fallo de alimentación
Cuando la tensión de 24Vcc de alimentación de la central proveniente de su alimentador
(TM25/24) desciende por debajo del 10%, a causa de un mal funcionamiento de las
baterías, o eventualmente como consecuencia de una prolongada ausencia de la tensión de
red, la central pasa a condición de espera, señalada con el encendido fijo de los LEDs
“AVERIA” general y “BATERIA”, con la salida a colector abierto de repetición de avería “UG”,
con la activación del relé “GUASTI” y con la intermitencia del buzzer.
Si esta condición persiste más de una hora, la central entra en condición de fuera de
servicio, señalada con el encendido fijo de los LEDs “AVERIA” general y “BATERIA”, y el
apagado del LED “RED”. En esta situación la central no puede señalar más averías, ni
tampoco alarmas. Si la alimentación vuelve a valores aceptables antes de agotarse
completamente las baterías, la central vuelve a dar servicio y retorna a su normal
funcionamiento, después de haber emitido una breve señal del buzzer y conservando los
parámetros presentes al momento de la interrupción del servicio; si no es así, es necesario
repetir las operaciones de inicialización de la central.
4.6
Reset
Esta operación se efectúa para restaurar la centrale a una funcionamiento normal tras
una alarma o para cancelar memorias de averías.
!
!
!
Desbloquear el panel de la central colocando la llave en posición “DESBLOQUEO
TECLADO”.
Presionar a la vez las teclas "ALARMA INMEDIATA" y "TEST" durante unos instantes.
Durante esta operación todos los LEDs del panel se iluminan, se ponen a cero las
memorias de averías y son rearmados los detectores de incendio conectados a las zonas.
Bloquear el teclado colocando la llave en posición “BLOQUEO TECLADO”.
La central está nuevamente en servicio. Esta operación no influye sobre posibles estados
de fuera de servicio de las salidas o de las zonas.
63
F200/F400 - Para el usuario
5
Mantenimiento
5.1
Baterías
Es necesario controlar periódicamente el estado
alimentador (TM25/24) de la central.
5.2
de las baterías conectadas al
Limpieza
Para la limpieza de la central utilizar exclusivamente un paño suave y húmedo.
Evitar diluyentes y agentes abrasivos.
5.3
Fusibles
F1 Salida sirenas
1A rápido
Lead free
Empresa con sistema de
gestion para calidad
UNI EN ISO 9001:2000
64
Empresa con sistema de
gestiòn ambiental
UNI EN ISO 14001:2004
EMC 89/336 CEE
MADE IN ITALY
Pb
RoHS
compliant
La marca CIA este registrada por el HILTRON srl
Cubo de basura diversificado
para los aparatos
elèctricos y electrònicos
298ADIEFS-3.02