1
9
Cambio de la batería
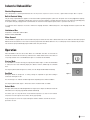
Venting / Ducting (Fig. 6)
Fig. 8
Twin rear outlets can accommodate two individual 5” ducts or one
10” lay flat duct to be attached.
This allows
for warm dry air to be
antes
de limpiar.
directed into different areas.
Desconecte la toma de corriente
No seguir estas instrucciones podría provocar incendios, descargas eléctricas, e incluso la
muerte.
Fig. 6
Desconecte el deshumidificador de la toma de corriente. El indicador de horas de operación utiliza una
batería para que pueda ser operativo si el aparato no está enchufado y se presiona el botón de horas. Para
cambiar esta batería, tendrá que desatornillar Maintenance
los cuatro (4) tornillos del panel de instrumentos. Desconecte
la batería agotada y sustitúyala por una nueva.Air
Vuelva
a colocar
Filter
(Fig. 7)el panel de instrumentos y los tornillos, sin
apretarlos en exceso.Limpieza
The air filter should be checked regularly. Operating the dehumidifier with a clogged filter will reduce efficiency. The filter can be
vacuum cleaned to remove dust. To access the filter media, slide
Desconecte la toma de corriente antes
de frame
limpiar.
the filter
up until it clears the dehumidifier cabinet. Remove
No seguir estas instrucciones podría
eléctricas,
e incluso
la
theprovocar
filter mediaincendios,
from behinddescargas
the frame and
vacuum. Reverse
procedure to re-install the filter and frame into the dehumidifier.
muerte.
Figure 8
Storage
Freezing temperatures and biological growth must be considered
before storing the dehumidifier. The dehumidifier should be
flushed with a biofungicide before storing. When storing the unit,
ensure that water has been removed from the reservoir and
hose. This will prevent damage caused by freezing temperatures
and to prevent biological growth. Use the pump purge button to
remove water and biofungicide chemicals from the dehumidifier.
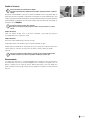
Stacking (Fig.9)
Fig. 7
Limpieza del exterior
Utilice una solución de jabón suave, no abrasivo ni inflamable y agua limpia para limpiar el
deshumidificador. Pase un trapo para secarlo.
The dehumidifiers can be stacked on top of each other. The
wheels from the upper unit must be resting in the cradle of
the lower unit. DO NOT STACK MORE THAN TWO HIGH.
Fig. 9
Limpieza del interior
Desconecte el deshumidificador de la toma de corriente.
Limpieza ligera: Saque el aire del filtro y rocíe el serpentín evaporador con agua.
Limpieza profunda: Desatornille los dos tornillos de la parte superior de la cubierta frontal. Abra la
cubierta. Rocíe los serpentines con agua. Cierre la cubierta y vuelva a colocar los tornillos
Cleaning
(figura 8).
Debe tenerse cuidado de no dañar láminas de la bobina,WARNING
ya que las láminas dañadas pueden
Service
A qualified refrigeration technician must service all refrigerant leaks.
restringir el flujo del aire y reducir la capacidad de la unidad para producir agua.
Almacenamiento
Las temperaturas bajo cero y el crecimiento biológico deben
considerarse
antes de almacenar el
Electrical
Shock Hazard
Plug into a grounded
prong
outlet.
Disconnect
power supply
before
cleaning.
deshumidificador. Para evitar el crecimiento biológico,
rocíe
un3limpiador
de evaporador sobre las
Do notTambién
remove
prong.
Failure
to followground
these
result de
in death,
bobinas y enjuague hacia el sistema de drenaje.
debe instructions
purgar el can
exceso
líquido de la
fire, or electrical shock.
Do
not
use
an
adapter.
bomba usando la función de purga manual para evitar problemas en ambientes de almacenamiento
bajo cero.
External Cleaning
WARNING: The dehumidifier uses a high pressure refrigerant
system and high voltage circuitry which could present a health
hazard resulting in death, serious bodily injury, and/or property
damage. Only qualified service people should service this unit.
CAUTION: Do not operate unit without the front hood secured in
place.
The serial data plate is located on the underside of the dehumidifier. For service information contact 1-800-565-3548.
Use a non-flammable mild, non-abrasive soap and clean
water solution to clean the dehumidifier. Wipe dry.
Internal Cleaning
Disconnect dehumidifier from power supply.
Light cleaning: Remove the air filter and spray evaporator
coil with water.Remove the two upper screws from the front
hood.
Heavy cleaning: Remove two upper screws from front hood.
Open hood. Spray water at coils. Close hood and replace
screws. (Fig. 8)
(2)
fantech