1
NVR5
4
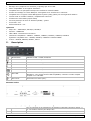
HDMI video output
port
Connect to a monitor that supports high-definition video output (HDMI port).
Note: Use an appropriate adapter (not incl.) to connect a monitor with VGA or
composite connectors.
5
VGA
VGA port
6
DC 12V IN
Connect to the power supply adapter (incl.).
6.
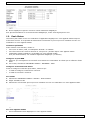
Installing a hard disk drive
Preparation
•
Make sure to unplug the device from the mains before servicing and do not touch any electronic circuitry to
avoid electrostatic discharge.
•
Obtain a suitable hard disk (not included), type SATA. The hard disk must be formatted.
•
•
You can install up to 2 with the quick lock system (shown below).
If you want to use a green hard disk, use only a disk designed especially for surveillance to ensure the
device works properly.
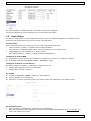
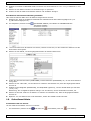
1. Loosen the screws and remove the top
cover.
2. Locate the hard disk connector and bracket
in the device. The screws are attached to
the bracket.
3. With the PCB side facing down, align the
hard disk with the hard disk power & sata
port, and insert the hard disk.
4. Fasten the hard disk to the bracket with the
built-in screws.
7.
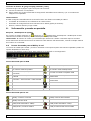
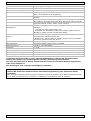
Connection Diagram
•
•
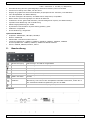
You can connect up to 16 IP cameras.
To ensure that automatic configuration works well, connect and switch on the IP cameras first. Only then
switch on the NVR.
•
•
This device requires a minimum of network installation knowledge.
To access the NVR remotely with your mobile device or laptop, you need to connect the NVR recorder to the
Internet. For details, please refer to the setup manual on
www.surveillance-download.com/user/network_setup/network_setup_recorder.pdf.
Connecting the IP camera (plug and play)
Refer to the illustration on page 2 for the setup diagram.
1. Connect the camera to a hub/switch.
2. Wait until the camera is configured automatically and the images appear on the monitor.
V. 01 – 14/04/2014
5
©Velleman nv