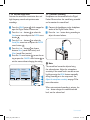
1
Conference Recording System LFH 0955 www.philips.com/dictation EN User manual DE Benutzerhandbuch 29 FR Manuel de l‘utilisateur 57 crs955_ifu_en-de-fr.indb 1 3 25/01/2008 12:14:24 crs955_ifu_en-de-fr.indb 2 25/01/2008 12:14:24 E N G LISH User manual 1 1.1 1.2 1.3 Welcome 4 What’s in the box 4 Overview – controls and connections 5 Overview – display indicators and symbols6 2 2.1 2.2 2.2.1 Get started Install the batteries Recharge the batteries Recharge the batteries using the Philips power supply Recharge the batteries through the USB cable Recharge the batteries through the docking station Insert and eject the memory card Format a new memory card Activate the Digital Pocket Memo Set the language Set the date and time Power-save mode 2.2.2 2.2.3 2.3 2.4 2.5 2.5.1 2.5.2 2.6 3 3.1 3.1.1 3.1.2 3.1.3 3.2 3.2.1 3.2.2 7 7 7 7 7 8 8 9 9 10 10 10 Using your Conference Recording System 11 Before recording 11 Conference recording: connect and position the conference microphones 11 Connect the remote control 12 Interview recording: connect the click-on interview microphone 12 Recording 13 Create a new recording 13 Add to a recording (append) 14 User manual crs955_ifu_en-de-fr.indb 3 3.2.3 3.2.4 3.2.5 3.2.6 3.2.7 3.3 3.3.1 3.3.2 3.4 3.4.1 3.4.2 3.4.3 Finish (lock) a recording Change the recording format Adjust the microphone sensitivity Set the sound filter Monitor recording Playback Overview playback functions Noise reduction Delete Delete a file Delete part of a recording Delete all dictations 14 14 15 16 16 17 17 18 18 18 19 19 4 Use more of your Conference Recording System Use Philips SpeechExec software Advanced configuration Download recordings to the PC Use voice-activated recording Work with index marks Insert an index mark Delete an index mark Delete all index marks Assign an author’s name Display and sound functions Setting the language Setting date and time Backlight Record lamp LCD contrast Device beep Menu list 20 20 20 21 21 22 22 22 23 23 24 24 24 25 25 26 26 27 4.1 4.1.1 4.1.2 4.2 4.3 4.3.1 4.3.2 4.3.3 4.4 4.5 4.5.1 4.5.2 4.5.3 4.5.4 4.5.5 4.5.6 4.6 3 25/01/2008 12:14:24 1 Welcome Congratulations on your purchase and welcome to Philips! To fully benefit from the support that Philips offers, visit our Website for support information such as user manuals, software downloads and more: www.philips.com/dictation. • The Philips Conference Recording System is a compact, easy-to-use solution for all your conference recording needs. • The Philips Conference Recording System is packaged with two high-quality omnidirectional conference microphones to capture every discussion in stereo quality. • For large conferences, the operating range of can be extended by connecting up to six microphones to record conferences with up to 32 participants. • The compact click-on interview microphone is the ideal solution for recording interviews in highquality stereo mode. 1.1 What’s in the box Digital Pocket Memo CD-ROM USB Docking Station 2 conference microphones Click-on interview microphone Y adapter Power supply SD memory card Mini USB cable Rechargeable batteries 4 crs955_ifu_en-de-fr.indb 4 Remote control Quick start guide, User manual User manual 25/01/2008 12:14:26 Overview – controls and connections 1 1 Interview microphone Digital Pocket Memo 5 Built-in microphone 6 Status LED 7 EOL (end-of-letter) button 8 REC (Record) button 9 REW (Rewind) button 10 FWD (Forward) button 11 Menu button 12 On/off switch 13 Microphone socket 14 Headphone / remote control socket 15 Display 16 Smart buttons 17 Index mark button 18 Volume control, plus/minus and menu navigation buttons 19 Speaker 20 Memory card slot 21 Battery compartment 22 Docking station connection slot 23 Power supply connection slot 24 USB connection slot USB Docking Station 25 Docking slot for the Pocket Memo 26 Charge indicator LED User manual crs955_ifu_en-de-fr.indb 5 2 EOL INDEX 3 4 REMOTE CONTROL Remote control 2 REC (Record) button 3 Index mark button 4 EOL (end-of-letter) button E N G LISH 1.2 13 14 5 6 7 8 9 10 11 15 16 17 18 19 12 20 21 22 23 24 28 25 26 27 29 30 5 25/01/2008 12:14:28 27 Download indicator LED 28 Power supply socket 29 Mini-USB socket for connection to the PC 30 Conference microphone 1.3 Overview – display indicators and symbols 8 9 10 11 -27h10m HQ #1 7 6 5 4 16 9:23 2 DPM 0955.MP3 PLAY 1 Current function of the left smart button 2 File name 3 Recording / playback time 4 Position bar 5 Current position in the recording 6 Left level meter 7 Recording number 8 Battery level indicator 9 Recording mode 10 Memory card is write-protected (locked) crs955_ifu_en-de-fr.indb 6 13 14 15 3 1 6 12 17 NEW 18 11 Voice-activated recording in progress 12 Remaining recording time 13 Recording is marked priority 14 Recording is marked finished (EOL) and locked 15 Right level meter 16 Recording contains index mark 17 Sensitivity level for voice-activated recording 18 Current function of the right smart button User manual 25/01/2008 12:14:28 2.1 Install the batteries The Digital Pocket Memo can be operated with the two rechargeable AAA batteries delivered with the product. Standard (non-rechargeable) AAA alkaline batteries may also be used. 1 The on/off switch of the Digital Pocket Memo must be in the OFF position. 2 Open the battery compartment on the back side of the Digital Pocket Memo by sliding it outwards then folding it up. 3 Insert the two AAA batteries. The correct polarity is indicated on the inside of the battery compartment cover. 1 2 1 2 2.2 Recharge the batteries The Digital Pocket Memo can be operated with the rechargeable Philips AAA batteries. To recharge these batteries, use the Philips power supply, the Docking Station or the USB cable. 2.2.1 Recharge the batteries using the Philips power supply 1 Connect the Philips power supply to the main power supply. 2 Connect the Digital Pocket Memo to the Philips power supply. DNote It is okay to continue using the Digital Pocket Memo during recharge. The batteries will be recharged while you work, and will continue recharging even when the Digital Pocket Memo is turned off. 4 Close the battery compartment by folding it back and sliding the battery compartment cover inside until it clicks. 2.2.2 Recharge the batteries through the USB cable When the Digital Pocket Memo is connected to a PC or notebook computer with the supplied USB cable, the rechargeable batteries are automatically recharged. If the USB port on the computer is high powered, a complete recharge cycle takes about 2.5 hours. DNote Do not mix battery types! Use two rechargeable batteries or two non-rechargeable alkaline batteries. The Digital Pocket Memo switches into PC Download mode and works like a loudspeaker and microphone for the connected PC. To continue recording on the Digital Pocket Memo User manual crs955_ifu_en-de-fr.indb 7 E N G LISH 2 Get started 7 25/01/2008 12:14:29 1 Make sure that the docking station is connected to the main power supply with the Philips power supply. 2 Insert the Digital Pocket Memo into the docking slot of the docking station and press it down firmly until it locks. The green LED lights up, indicating that the batteries of the Digital Pocket Memo are being recharged in fast recharge mode. 3 Record with the Digital Pocket Memo from the docking station, or switch it off when not being used. 4 When the green LED blinks, recharging is complete and you can remove the Digital Pocket Memo from the docking slot. 8 crs955_ifu_en-de-fr.indb 8 To eject the memory card: 1 Locate the memory card slot on the top back side of the Digital Pocket Memo. 2 Press the memory card in the Digital Pocket Memo until it clicks. 1 3 Release the memory card. It will slightly emerge from the memory card slot. Simply slide it out. 1 2 ips 2.2.3 Recharge the batteries through the docking station Your Digital Pocket Memo is packaged with a memory card already inserted and formatted. ck CImportant If the USB port of the computer does not supply enough power capacity (500 mA), disable USB quick charge in the menu of the Digital Pocket Memo and recharge the batteries using the power supply. 2.3 Insert and eject the memory card The Digital Pocket Memo operates with an SD (Secure Digital) memory card and supports SD cards with storage capacities of up to 2 GB. phil DNote The PC must be ON when charging battery via the USB cable connection. The Digital Pocket Memo may become warm during fast recharging. DNote When the Digital Pocket Memo is connected to the docking station, it is powered by the docking station and not by the batteries. If the Digital Pocket Memo is operated with rechargeable batteries, the batteries are automatically recharged while the Digital Pocket Memo is connected to the docking station. Unlo during USB charging, change the USB mode to USB supply by pressing the REC button for three seconds while the Digital Pocket Memo is connected to the PC. The Digital Pocket Memo automatically switches back to PC Download Mode after being disconnected from the PC. User manual 25/01/2008 12:14:29 DNote If the Digital Pocket Memo is turned to the ON position and there is no memory card inserted, a warning screen is displayed. The memory card that is packaged with the Digital Pocket Memo is already formatted and ready for use. If a memory card is inserted that is not formatted, the Digital Pocket Memo will offer the option to format it. Refer to the next chapter for more information. 2.4 Format a new memory card When a new, unformatted memory card (or a memory card that was formatted with a nonDigital Pocket Memo device) is inserted, the Digital Pocket Memo will display a prompt to format the memory card. A Format memory A Delete all ? Delete all ? Yes - format B All files will be lost ! Font BACK C NTIO OK ENTER ? format !! ATTE Language BACK Delet e all Yes - Volume E N G LISH To insert a memory card: 1 Locate the memory card slot on the top back side of the Digital Pocket Memo. 2 Slide the memory card into the slot. A small illustration under the memory card slot indicates the correct orientation. 2 3 Push the memory card in until you hear a click. ENTER N !! CANC EL 1 2 The Digital Pocket Memo will be unable to record without a properly formatted memory card. If a new card was inserted and the formatting process was cancelled, insert another card that can be formatted or has already been formatted. DNote Formatting is not possible if the memory card is in read-only mode (locked). 2.5 Activate the Digital Pocket Memo The Digital Pocket Memo is turned on and off by sliding the ON/OFF switch. When using it for the first time, you will be prompted to set the language, date and time. 1 To confirm and start the formatting process, press the OK smart button 1 . 2 To cancel the formatting process, remove the memory card or press the CANCEL smart button 2 . User manual crs955_ifu_en-de-fr.indb 9 9 25/01/2008 12:14:30 2.5.1 Set the language When using the Digital Pocket Memo for the first time, you will be prompted to set the language. 1 Press the + or – button 1 on the Digital Pocket Memo to select a language. 2 Press the OK smart button 2 to confirm your selection. The selected language will be displayed. 4 Press the + or – button 1 to select a 12-hour or 24-hour clock, AM or PM (if a 12-hour clock is selected), and to change the value of the hour and minute settings. 5 Press the → smart button 2 to confirm the date and time. The Digital Pocket Memo is now ready to function. DATE: 2007-1 0 01 DATE: 2007-10-01 DNote It is possible to change the language later using the menu. See Setting the language on page 24 for more information. LANGUAGE LANGUE SPRACHE IDIOMA INT FR DE ES LANG UA LANG GE UE SPRA CH IDIOM E A EXIT EXIT -/+ OK -/+ INT FR DE ES OK 2 1 2.5.2 Set the date and time After selecting the user interface language, the Digital Pocket Memo will prompt you to set the current date and time. 1 Press the + or – button 1 repeatedly to change the value for the year, month or day. 2 Press the → smart button 2 to advance the arrow (↑) to the next entry. 3 After setting the day, press the → smart button 2 to advance the settings to the correct time. 10 crs955_ifu_en-de-fr.indb 10 12/24: 12/24: TIME: 24 24 14:22 TIME: 14:22 OK OK 3 2 1 DNote If a mistake is made in the date/time settings, use the ← smart button 3 any time during the procedure to step back to make corrections. It is also possible to change the date and time later using the menu. See Setting date and time on page 24 for more information. 2.6 Power-save mode After four minutes of inactivity, the Digital Pocket Memo automatically goes into powersave mode and the LCD screen will display the date and time. Press any button to reactivate it. If the Digital Pocket Memo is not used for more than two hours, it turns off completely. Turn the unit on by moving the On/Off switch to the OFF position and then back to the ON position. User manual 25/01/2008 12:14:31 1 E N G LISH 3 Using your Conference Recording System DNote When an external microphone is connected to the Digital Pocket Memo, the built-in microphone is disabled. 3.1.1 Conference recording: connect and position the conference microphones 1 Make sure that the recorder is stopped. 2 Connect the plug of Y adapter to the microphone socket of the Digital Pocket Memo. 3 Connect the plug of each microphone to one socket of the Y adapter. 1 4 For optimal recording quality, position the microphones on the table so that all participants are not more that 2 meters or 6.5 feet away from the microphone. 2 User manual crs955_ifu_en-de-fr.indb 11 2 2.5 m / 8 ft. 3.1 Before recording The Digital Pocket Memo has a built-in monaural microphone that is used for recording when no external microphone is connected. To enhance sound quality and cover a wider range during recording, use the conference microphones (for conference recording) or the click-on interview microphone (for interviews). 2 m / 6.5 ft. 5 m / 16.5 ft. ETip For large conferences, the operating range can be extended by joining together and connecting three microphones on each of the two microphone sockets of the Y adapter. 3 4 5 3 11 25/01/2008 12:14:33 2.5 m / 8 ft. 4 3.1.2 Connect the remote control 1 Connect the plug of the remote control to the remote control socket of the Digital Pocket Memo. 2 m / 6.5 ft. 13 m / 42.5 ft. Connect and position up to 6 conference microphones 5 7 m / 23 ft. 2 m / 6.5 ft. D Note When the remote control is connected, all buttons on the Digital Pocket Memo are still usable except the REC button. 6 m / 20 ft. Connect and position up to 6 conference microphones 3.1.3 Interview recording: connect the click-on interview microphone 1 Make sure that the recorder is stopped. 2 Insert the connector of click-on interview microphone into the microphone socket of the Digital Pocket Memo. 12 crs955_ifu_en-de-fr.indb 12 User manual 25/01/2008 12:14:35 Recording 1 A memory card must be inserted into the memory card slot. See Insert and eject the memory card on page 8 for more information. 2 Slide the On/Off switch to the ON position to switch on the Digital Pocket Memo. 1 3 Press the NEW smart button 2 to create a new recording. D Note The NEW smart button is not displayed if the current recording is empty. HQ #1 -27h10m -2 # 1 7 10 h DPM DPM 0955.MP3 NEW PLAY 0955 .M P 3 NEW 2 1 4 Press the REC button 3 and start speaking. The status LED 4 glows in red while recording. D Note When the remote control is connected, the REC button on the Digital Pocket Memo is deactivated. User manual crs955_ifu_en-de-fr.indb 13 a -27h18m 4 f -27h18m 3 2 :3 4 2:34 DP M PLAY DPM 0955.MP3 PLAY HQ STOP g 09 55 .M P3 STOP 5 5 To stop recording, press the REC button or the STOP smart button 5 . m 9 :2 3 9:23 PLAY HQ c d e b HQ EOL INDEX 3.2.1 Create a new recording Follow these steps to create your first recording with the Digital Pocket Memo: E N G LISH The following information is displayed: a Remaining recording time b Recording mode c Current position in the recording d Recording time e File name f Recording level meter (left channel) g Recording level meter (right channel) REMOTE CONTROL 3.2 3 E Tips • Press the EOL button during recording to mark the present recording as finished and automatically continue recording into a new file. See Finish (lock) a recording on page 14 for more information. • An index mark can be set by pressing the INDEX button during record or playback. See Work with index marks on page 22 for more information. 13 25/01/2008 12:14:36 -27h18m HQ -27h18m 2 2 :3 4 DP M 2:34 PLAY DPM 0955.MP3 PLAY STOP 09 55 REMOTE CONTROL HQ EOL INDEX .M P3 3 3.2.3 Finish (lock) a recording When a recording is finished and no additional changes will be made, follow these steps to mark it as finished and protect it from being accidentally deleted: 1 Press the + or – button 1 while stopped to select the recording to be marked finished. 2 Press the end-of-letter (EOL) button 2 to lock the file and mark it as finished. The ┱ symbol is displayed. a crs955_ifu_en-de-fr.indb 14 -27h10m HQ HQ #2 #2 -27h10m 2 9 :2 3 DP M 9:23 BEGI BEGIN 09 55 N DPM 0955.MP3 .M P3 NEW NEW 1 E Tip Philips SpeechExec software can be configured to download finished files only from the Digital Pocket Memo to the PC. STOP 1 14 a b EOL INDEX 1 Press the + or – button 1 while stopped to select the file to be appended. 2 Press the REC button 2 and start speaking. The recording will automatically be appended to the end of the existing recording. 3 Press the STOP smart button 3 to stop recording. 3 To assign priority status to the recording, press the EOL button 2 again within half a second. The ! symbol is displayed, indicating that the file has priority status. b 4 To make changes to the recording, press the EOL button 2 again to remove the finished mark. REMOTE CONTROL 3.2.2 Add to a recording (append) Regardless of the current position in the recording, additions to a recording are always appended at the end of a file without overwriting the existing recording. Follow these steps to make additions to your recording: C Caution Locked files are deleted when the memory card is formatted or the delete-all-dictations function is used. 3.2.4 Change the recording format The recording format determines the audio quality of your recordings and affects the number of audio files that can fit on the memory card. The Digital Pocket Memo supports the following recording formats: User manual 25/01/2008 12:14:37 File format .pcm .mp3 .mp3 .ds2 (DSS QP) .dss (DSS SP) Channels recorded 2 channels 2 channels 2 channels Mono Mono Recording time (1 GB memory) 1.5 hours 18 hours 36 hours 85 hours 170 hours 1 Press the MENU button 1 while stopped to open the Digital Pocket Memo menu. 2 Press the + or – button 2 to select the Setup menu item and press the ENTER smart button. 3 3 Press the + or – button 2 to select the Record format menu item and press the ENTER smart button 3 . 4 Press the + or – button 2 to select a recording mode. 5 Press the OK smart button 4 to save the setting or press the CANCEL smart button 3 to exit the menu without changing the setting. Delete dictation A B Language Index set Record format Author Sound filter HQ <DSS> Setup Voice activation Language BACK ENTER BACK ENTER Recor d fo PCM rmat: <PCM C > XHQ <MP3 > HQ <MP3 > SP <DSS > QP <DS2> OK CANC EL 3.2.5 Adjust the microphone sensitivity Set the microphone sensitivity for the environment and your recording preferences. 1 Press the MENU button 1 repeatedly during recording to switch the microphone sensitivity between Private (low), Dictate (medium) and Conference (high). The microphone sensitivity can also be set in the setup menu: 1 Press the MENU button 1 while stopped to open the Digital Pocket Memo menu. 2 Press the + or – button 2 to select the Setup menu item and press the ENTER smart button 3 . 3 Press the + or – button 2 to select the Microphone menu item and press the ENTER smart button. 3 4 Press the + or – button 2 to choose the microphone sensitivity: Private (low), Dictate (medium) and Conference (high). 5 Press the OK smart button 4 to save the setting or press the CANCEL smart button 3 to exit the menu without changing the setting. 4 3 1 2 Delete dictation A Index set D Note PCM recording mode is not available by default and must be enabled through Philips SpeechExec Dictate. See Advanced configuration on page 20 for more information. crs955_ifu_en-de-fr.indb 15 B BACK e: rence C te Privat e OK Conference ENTER phon Dicta Microphone Language Micro Confe Device beep Setup BACK Record lamp Contrast Author User manual E N G LISH Recording mode PCM XHQ HQ QP SP ENTER 4 CANC EL 3 1 2 15 25/01/2008 12:14:38 3.2.6 Set the sound filter Activate the sound filter to minimize low- and high-frequency sounds and optimize voice recordings. 3.2.7 Monitor recording Headphones can be connected to the Digital Pocket Memo to hear the sound being recorded and to monitor the record level. 1 Press the MENU button 1 while stopped to open the Digital Pocket Memo menu. 2 Press the + or – button 2 to select the Setup menu item and press the ENTER smart button 3 . 3 Press the + or – button 2 to select the Sound filter menu item and press the ENTER smart button. 3 4 Press the + or – button 2 to choose between Voice (sound filter active), and Music (sound filter inactive). 5 Press the OK smart button 4 to save the setting or press the CANCEL smart button 3 to exit the menu without changing the setting. 1 Connect the headphones to the headphone socket of the Digital Pocket Memo. 2 Press the + or – button during recording to adjust the sound volume. Delete dictation A B Language Index set Record format Author Sound filter Setup Voice activation filter: C Music Voice Language BACK Sound Voice ENTER BACK ENTER OK 4 CANC EL 3 1 2 D Note The record level cannot be adjusted using the volume button. Adjust the microphone sensitivity if the record level is too low or too high by pressing the MENU button repeatedly during recording or in the setup menu. See Adjust the microphone sensitivity on page 15 for more information. When voice-activated recording is activate, the + or – button changes the record threshold level, not the volume level. 16 crs955_ifu_en-de-fr.indb 16 User manual 25/01/2008 12:14:40 The following information is displayed: a Current position in the dictation b Recording mode c Playback time d File name 2 Press the + or – button 1 to adjust the playback volume during playback. 3 Press the SPEED smart button 3 to adjust faster or slower file playback. 4 Press the STOP smart button 2 to stop playback. b HQ #2 -27h18m a -27h18m HQ 2:34 DPM 0955.MP3 DPM 0955.MP3 NEW STOP c DPM SPEED d STOP Fast rewind Press the REW button 1 briefly while stopped. Press the STOP smart button 3 to stop winding or the PLAY smart button 4 to stop winding and start playback. Fast Press the FWD button 2 briefly while forward stopped. Press the STOP smart button 3 to stop fast forward or the PLAY smart button 4 to stop fast forward and start playback. Rewind Press and hold the REW button 1 while playing or recording. Release the REW button to stop winding. Cue Press and hold the FWD button 2 while playing. Release the FWD button to cueplay. AutoPress the REW 1 button briefly while backspace playing or recording to recap the last second. -27h18m 2 :3 4 0:00 PLAY HQ 3.3.1 Overview playback functions E N G LISH 3.3 Playback 1 Press the + or – button 1 while stopped to select the recording to play back. Press the PLAY smart button 2 to start playback. 0955 HQ .M P 3 SPEED -27h10m 2 3 PLAY -27h10m 5 :1 6 5:16 DPM DPM 0955.MP3 1 HQ NEW PLAY 0955 .M P 3 NEW 1 2 3 E Tip Press and hold the MENU button for a few seconds to access additional information about files, the device and the memory card. User manual crs955_ifu_en-de-fr.indb 17 4 17 25/01/2008 12:14:41 3.3.2 Noise reduction The noise reduction function reduces interfering background noise and improves sound quality during playback. 1 Press the MENU button 1 while stopped to open the Digital Pocket Memo menu. 2 Press the + or – button 2 to select the Setup menu item and press the ENTER smart button 3 . 3 Press the + or – button 2 to select the Noise reduction menu item and press the ENTER smart button 3 . 4 Press the + or – button 2 to choose between On and Off. 5 Press the OK smart button 4 to save the setting or press the CANCEL smart button 3 to exit the sub-menu without changing the setting. Delete dictation A Device beep Author Microphone Setup BACK reduct ion: C Off On ENTER Noise On Noise reduction Language BACK B Contrast Index set ENTER OK 3.4 Delete D Note Before deleting a file, make sure that it is not marked finished and that the memory card is not set to read-only (locked). If the file is marked finished, unlock it by pressing the EOL button once. 3.4.1 Delete a file Follow these steps to delete a file entirely: 1 Press the + or – button 1 while stopped to select the file to be deleted. 2 Press the MENU button 2 to open the Digital Pocket Memo menu. The Delete dictation menu item is selected. 3 Press the ENTER smart button 3 to enter the sub menu. 4 Press the OK smart button 4 to delete the file permanently. Press the CANCEL smart button 3 to cancel the operation and leave the recording intact. 4 CANC EL 3 Delete dictation 1 Index set 2 Author Delete ? A Delet e dict ation: Delet e? !! ATTE Setup BACK Delete dictation: B Delete ? !! ATTENTION !! ENTER OK CANCEL NTIO OK N !! CANC EL 4 3 2 1 18 crs955_ifu_en-de-fr.indb 18 User manual 25/01/2008 12:14:42 A Author HQ Setup USB mode Delete section OK CANCEL #2 -27h18Bm -2 # 2 7 18 h m 2 :1 5 2:15 DPM DPM 0955.MP3 CANCEL HQ CANC 0955 EL 3 .M P 3 MAR K1 MARK 1 4 1 3.4.3 Delete all dictations E N G LISH 3.4.2 Delete part of a recording Follow these steps to delete a section from a recording: 1 Navigate to the beginning of the section to be deleted by playback or forward/rewind. 2 Press the MENU button 1 while stopped to open the Digital Pocket Memo menu. 3 Press the + or – button 2 to select the Delete section menu item and press the OK smart button 3 . 4 Press the MARK 1 smart button 4 . A cross symbol appears on the screen. C Caution Files marked finished (EOL) are deleted when the delete-all-dictations function is used. Follow these steps to delete all recordings: 1 Press the MENU button 1 while stopped to open the Digital Pocket Memo menu. 2 Press the + or – button 2 to select the Setup menu item and press the ENTER smart button 3 . 3 Press the + or – button 2 to select the Delete dictations menu item and press the ENTER smart button 3 . 4 Press the ENTER smart button 3 and the OK smart button 4 to confirm the deletion, or press the CANCEL smart button 3 to exit without deleting. 2 Delete dictation 5 Find the second mark position by playback or forward / rewind and press the MARK 2 smart button 5 . The second cross appears. 6 Press the DELETE smart button 5 and the OK smart button 6 to confirm the deletion of the marked section, or press the CANCEL smart button 5 to exit without deleting. HQ -27h18Am #2 HQ #2 -27h18Bm 3:38 DPM 0955.MP3 User manual crs955_ifu_en-de-fr.indb 19 CANCEL Author USB quick charge Setup Delete dictations Language BACK B Delete all ? ENTER BACK Delet e all ? Yes - Date & time ENTER C delete !! ATTE NTIO OK N !! CANC EL 4 3 1 2 -27 # 2 C18 h DPM 0955.MP3 MARK 2 Noise reduction m 3 :3 8 3:38 PLAY HQ A Index set DELETE Delet e? OK CANC EL 6 5 19 25/01/2008 12:14:43 4 Use more of your Conference Recording System 4.1 Use Philips SpeechExec software Philips SpeechExec software can be used for advanced configuration of the Digital Pocket Memo and automatic download, conversion and routing of dictation files. D Note For detailed information about SpeechExec software, refer to the SpeechExec quick reference guide. 20 crs955_ifu_en-de-fr.indb 20 4.1.1 Advanced configuration The Digital Pocket Memo Configuration Wizard is part of the Philips SpeechExec Dictate software and guides users through the device configurations and settings of their Digital Pocket Memo. The wizard assists users in configuring the time format, sound feedback, voice-activated recording, display appearance (standard or advanced display mode), the recording format, microphone sensitivity, author names, and file download to the PC. 1 Connect the Digital Pocket Memo to the PC using a USB cable. 2 Start Philips SpeechExec Dictate software. 3 Click Settings > General settings on the menu bar of SpeechExec to open the settings menu and select DPM/DT Configuration > DPM Wizard from the list on the left side. 4 Click the Start Wizard… button to open the wizard. Follow the on-screen instructions to customize the Digital Pocket Memo. 5 Click the Finish button to close the wizard and confirm the transfer of the new settings to the Digital Pocket Memo. D Note When the Digital Pocket Memo is connected to the PC for the first time, Windows detects the new hardware and automatically installs the required drivers. When the installation is complete, Windows may prompt you to restart the PC. User manual 25/01/2008 12:14:44 Use Philips SpeechExec software for automatic download, conversion and routing of files. 1 Make a recording with the Digital Pocket Memo. 2 Start Philips SpeechExec Dictate software. 3 Connect the Digital Pocket Memo to the PC using the USB cable or the optional USB docking station. 4 By default, the recordings on the Digital Pocket Memo will be downloaded automatically to the PC and moved to the Finished dictations folder of the work list. D Note How and which files are downloaded after a Digital Pocket Memo is connected can be configured in the settings menu of SpeechExec or with the Configuration Wizard. 4.2 Use voice-activated recording Voice-activated recording is a convenience feature for hands-free recording. When voice activated recording is enabled, recording will start when you begin speaking. When you stop speaking, the Digital Pocket Memo will automatically pause recording after three seconds of silence, and resume only when you begin speaking again. E N G LISH 4.1.2 Download recordings to the PC With USB mass storage support, the Digital Pocket Memo is automatically displayed as an external drive when it is connected to the computer. It can then be accessed easily with any Microsoft Windows program as a regular drive. 1 Press the MENU button 1 while stopped to open the Digital Pocket Memo menu. 2 Press the + or – button 2 to select the Setup menu item and press the ENTER smart button 3 . 3 Press the + or – button 2 to select the Voice activation menu item and press the ENTER smart button 3 . 4 Press the + or – button 2 to choose Off or On. 5 Press the OK smart button 4 to save the setting or press the CANCEL smart button 3 to exit the sub-menu without changing the setting. Delete dictation A B Language Index set Record format Author Sound filter Setup Voice activation Language BACK Off ENTER BACK ENTER Voice Off activa tion: C On OK 4 CANC EL 3 1 2 6 Press the REC button 5 and start speaking. The status LED 6 glows in red while recording. When the sound level is below the User manual crs955_ifu_en-de-fr.indb 21 21 25/01/2008 12:14:44 threshold sound level a , recording pauses after three seconds and the status LED flashes. 7 Press the + or – button 7 to adjust the threshold sound level a while recording. 8 Press the STOP smart 8 button to stop recording. 4.3 Work with index marks Index marks can be used to mark certain points in a recording as points of reference. A point of reference may be the beginning of a major section, or a part of the recording that you may want to revise later or access quickly. 4.3.1 Insert an index mark -27h18m DPM DPM 0955.MP3 STOP a PLAY 0955 6 5 2 :3 4 2:34 PLAY HQ .M P 3 STOP 1 Press the INDEX button 1 during recording or playback to insert an index mark a . The index number is displayed for two seconds. 8 7 -27h18m HQ HQ IN DE DP M INDEX 1 -27h18m X1 09 55 STOP .M P3 SPEE D DPM 0955.MP3 STOP EOL INDEX -27h18m REMOTE CONTROL HQ SPEED 1 a 4.3.2 Delete an index mark HQ #2 #2 -27h18m REMOTE CONTROL -27h18m HQ EOL INDEX 1 Play back, fast forward or fast rewind to the index mark to be deleted a . 2 Press the INDEX button 1 while stopped to delete the index mark. 2 :3 4 DP M 2:34 PLAY NEW a 22 crs955_ifu_en-de-fr.indb 22 09 55 PLAY DPM 0955.MP3 .M P3 NEW 1 User manual 25/01/2008 12:14:46 1 Press the MENU button 1 while stopped to open the Digital Pocket Memo menu. 2 Press the + or – button 2 to select the Delete indices menu item and press the ENTER smart button 3 . 3 Press the ENTER smart button 3 and the OK smart button 4 to confirm the deletion, or press the CANCEL smart button 3 to exit without deleting. A Author Delete all ? B Yes - delete USB mode Delete indices All indices will be lost ! BACK ENTER NTIO OK BACK C delete !! ATTE Delete all ? ENTER D Note Author names must first be set up with Philips SpeechExec software. See Advanced configuration on page 20 for more information. By default, the keyword category AUTHOR with the keywords ‘DPM 955’ and ‘- - -’ (empty) is available on the Digital Pocket Memo. Delet e all ? Yes - Setup 4.4 Assign an author’s name A keyword, such as the author’s name can be assigned to every recording. The keyword can be used to identify recordings and automatic file routing in Philips SpeechExec software. E N G LISH 4.3.3 Delete all index marks N !! CANC EL 4 3 1 2 D Note The Delete Indices menu item is available only if the current dictation has at least one index mark. To assign an author’s name to a recording: 1 Press the MENU button 1 while stopped to open the Digital Pocket Memo menu. 2 Press the + or – button 2 to select the Author menu item. 3 Press the ENTER smart button 3 to display the list of names. 4 Press the + or − button 2 to select a name. 5 Press the OK smart button 4 to confirm or the CANCEL smart button 3 to exit without assigning a name. Delete dictation A Author: Index set DPM 955 Author −−− DPM 955 B OK ENTER OK 955 −−− Setup BACK Autho r: DPM CANCEL 4 CANC EL 3 1 2 User manual crs955_ifu_en-de-fr.indb 23 23 25/01/2008 12:14:47 4.5 Display and sound functions 4.5.2 Setting date and time When using it for the first time, you will be prompted to set the date and times. If the settings are not correct follow these steps to set them: 4.5.1 Setting the language When using it for the first time, you will be prompted to set the language of the user interface. If the language is not correct follow these steps to change it: 1 Press the MENU button 1 while stopped to open the Digital Pocket Memo menu. 2 Press the + or – button 2 to select the Setup menu item and press the ENTER smart button 3 . 3 Press the + or – button 2 to select the Language menu item and press the ENTER smart button 3 . 4 Press the + or – button 2 to select a language. 5 Press the OK smart button 4 to save the setting or press the CANCEL smart button 3 to exit the sub-menu without changing the setting. Delete dictation A B Language English Index set Record format Author Sound filter Setup Voice activation Language BACK ENTER BACK ENTER Lang uage : Englis h França is Deuts ch Españo l OK C 1 Press the MENU button 1 while stopped to open the Digital Pocket Memo menu. 2 Press the + or – button 2 to select the Setup menu item and press the ENTER smart button 3 . 3 Press the + or – button 2 to select the Date & time menu item and press the ENTER smart button 3 . 4 Press the + or – button 2 repeatedly to change the value for the year, month or day. 5 Press the → smart button 3 to advance the arrow (↑) to the next entry. 6 After setting the day, press the → smart button 3 to advance the settings to the correct time. 7 Press the + or – button 2 to select a 12-hour or 24-hour clock, AM or PM (if a 12-hour clock is selected), and to change the value of the hour and minute settings. 8 Press the → smart button 3 to confirm the date and time. 4 CANC EL 3 Delete dictation 1 Index set Microphone 2 Author Noise reduction A Setup B ENTER BACK DATE: 2007-1 0 01 12/24: Date & time Language BACK Record format 24 14:22 ENTER C TIME: OK 4 3 1 2 24 crs955_ifu_en-de-fr.indb 24 User manual 25/01/2008 12:14:48 4.5.3 Backlight The display of the Digital Pocket Memo is by default backlit for eight seconds when a button is pressed. 1 Press the MENU button 1 while stopped to open the Digital Pocket Memo menu. 2 Press the + or – button 2 to select the Setup menu item and press the ENTER smart button 3 . 3 Press the + or – button 2 to select the Backlight menu item and press the ENTER smart button 3 . 4 Press the + or – button 2 to choose between 8 seconds, 20 seconds and Off. 5 Press the OK smart button 4 to save the setting or press the CANCEL smart button 3 to exit the sub-menu without changing the setting. 4.5.4 Record lamp When enabled, the status LED/record lamp glows red during recording. E N G LISH DNote If a mistake is made in the date/time settings, use the ← smart button 4 any time during the procedure to step back to make corrections. 1 Press the MENU button 1 while stopped to open the Digital Pocket Memo menu. 2 Press the + or – button 2 to select the Setup menu item and press the ENTER smart button 3 . 3 Press the + or – button 2 to select the Record lamp menu item and press the ENTER smart button 3 . 4 Press the + or – button 2 to choose between On and Off. 5 Press the OK smart button 4 to save the setting or press the CANCEL smart button 3 to exit the sub-menu without changing the setting. Delete dictation A B Sound filter Index set Voice activation Author Backlight Setup Record lamp Language BACK On ENTER BACK ENTER Recor d lam On p: C Off OK 4 CANC EL 3 1 2 Delete dictation A Record format Sound filter Author Voice activation Setup Backlight BACK BACK ight: on C 20 se c on Off OK 8 sec on ENTER Backl 8 sec Index set Language B ENTER 4 CANC EL 3 1 2 User manual crs955_ifu_en-de-fr.indb 25 25 25/01/2008 12:14:50 4.5.5 LCD contrast The contrast of the LCD screen can be adjusted for the level of light in your environment and your viewing preferences. 1 Press the MENU button 1 while stopped to open the Digital Pocket Memo menu. 2 Press the + or – button 2 to select the Setup menu item and press the ENTER smart button 3 . 3 Press the + or – button 2 to select the Contrast menu item and press the ENTER smart button 3 . 4 Press the + or – button 2 to adjust the contrast. 5 Press the OK smart button 4 to save the setting or press the CANCEL smart button 3 to exit the sub-menu without changing the setting. Delete dictation A Voice activation Backlight Author Record lamp MIN Contrast Language BACK ENTER BACK Contr ast C Index set Setup B OK ENTER MAX +− 4 CANC EL 4.5.6 Device beep The Digital Pocket Memo is by default set to give sound feedback (beeps) when: • the end of the file is reached during playback • an index mark is hit during fast forward or fast rewind • the battery level drops below 10% • available memory drops below two minutes • a command cannot be carried out 1 Press the MENU button 1 while stopped to open the Digital Pocket Memo menu. 2 Press the + or – button 2 to select the Setup menu item and press the ENTER smart button 3 . 3 Press the + or – button 2 to select the Device beep menu item and press the ENTER smart button 3 . 4 Press the + or – button 2 to choose between On and Off. 5 Press the OK smart button 4 to save the setting or press the CANCEL smart button 3 to exit the sub-menu without changing the setting. 3 1 2 Delete dictation A B Backlight Index set Record lamp Author Contrast Setup Device beep Language BACK BACK ENTER e beep : C Off OK On ENTER Devic On 4 CANC EL 3 1 2 26 crs955_ifu_en-de-fr.indb 26 User manual 25/01/2008 12:14:51 Menu list Press the MENU button DELETE DICTATION (see 3.4.1 page 18) INDEX SET / CLEAR (see 4.3 page 22) AUTHOR (KEYWORD) (see 4.4 page 23) USB MODE (see 2.2.2 page 7) DELETE ALL INDICES (see 4.3.3 page 23) DELETE SECTION (see 3.4.2 page 19) SETUP LANGUAGE (see 4.5.1 page 24) RECORD FORMAT (see 3.1.5 page 14) SOUND FILTER (VOICE/MUSIC) (see 3.2.6 page 16) VOICE ACTIVATION (see 4.3 page 21) BACKLIGHT (OFF / 8 s / 20 s) (see 4.5.3 page 25) RECORD LAMP ON / OFF (see 4.5.4 page 25) LCD CONTRAST (see 4.5.5 page 26) DEVICE BEEP ON / OFF (see 4.5.6 page 26) MICROPHONE SENSITIVITY (see 3.2.5 page 15) NOISE REDUCTION ON/OFF (see 3.3.2 page 18) DATE & TIME (see 4.5.2 page 24) USB QUICK CHARGE ON / OFF (see 2.2.2 page 7) DELETE ALL DICTATIONS (see 3.4.3 page 19) FORMAT MEMORY (see 2.3 page 9) PLAYBACK VOLUME DEVICE FONT (MODERN / CLASSIC) MAIN MENU D Note Some settings, such as defining author names or switching to simple display mode, are available only through Philips SpeechExec Dictate. See Advanced configuration on page 20 for more information. E N G LISH 4.6 SETUP MENU crs955_ifu_en-de-fr.indb 27 User manual 27 25/01/2008 12:14:52 Disclaimer and Notices Philips performs extensive testing with the most popular configurations. However, since PC addons and device drivers are updated continually, conflict-free operation cannot be guaranteed. 28 crs955_ifu_en-de-fr.indb 28 User manual 25/01/2008 12:14:52 1 1.1 1.2 1.3 Willkommen 30 Verpackungsinhalt 30 Übersicht über Bedienungselemente und Anschlüsse 31 Übersicht der Displaysymbole 32 2 2.1 2.2 2.2.1 2.2.2 2.2.3 2.3 Erste Schritte 33 Einsetzen der Batterien 33 Aufladen der Batterien 33 Aufladen mit dem Netzteil 33 Aufladen über das USB-Kabel 33 Aufladen über die Docking Station 34 Einsetzen und Auswerfen der Speicherkarte 34 2.4 Formatieren einer neuen Speicherkarte35 2.5 Aktivieren des Digital Pocket Memo 36 2.5.1 Einstellen der Sprache 36 2.5.2 Einstellen von Datum und Uhrzeit 36 2.6 Energiesparmodus 37 3 3.1 3.1.1 3.1.2 3.1.3 3.2 3.2.1 3.2.2 3.2.3 Verwendung des Conference Recording Systems Vor der Aufnahme Konferenzaufnahmen: Verbinden und Positionieren der Konferenzmikrofone Anschließen der Fernbedienung Interviewaufnahmen: Anschließen des Aufsteckmikrofons Aufnehmen Erstellen einer neuen Aufnahme Ergänzungen in ein Diktat einfügen Abschließen (Sperren) eines Diktats Benutzerhandbuch crs955_ifu_en-de-fr.indb 29 38 38 38 39 39 40 40 41 41 3.2.4 3.2.5 3.2.6 3.2.7 3.3 3.3.1 3.3.2 3.4 3.4.1 3.4.2 Ändern des Aufnahmeformats 42 Mikrofonempfindlichkeit einstellen 43 Klangfilter 43 Aufnahmen mithören 44 Wiedergabe 44 Überblick Wiedergabefunktionen 45 Rauschminderung 45 Löschen 46 Löschen eines Diktats 46 Löschen eines Abschnittes innerhalb eines Diktats 46 3.4.3 Alle Diktate löschen 47 4 4.1 4.1.1 4.1.2 4.2 4.3 4.3.1 4.3.2 4.3.3 4.4 4.5 4.5.1 4.5.2 4.5.3 4.5.4 4.5.5 4.5.6 4.6 Weitergehende Funktionen Verwenden von Philips SpeechExec Weitergehende Konfiguration Herunterladen von Aufnahmen auf den PC Sprachaktivierten Aufnahme Arbeiten mit Indexmarkierungen Einfügen einer Indexmarkierung Löschen einer Indexmarkierung Löschen aller Indexmarkierung Einen Autornamen zuweisen Display- und Toneinstellungen Sprache einstellen Datum und Uhrzeit einstellen Einstellen der Displaybeleuchtung Aufnahme-LED Kontrasteinstellungen Akustische Rückmeldung Menüübersicht D E U T SC H Benutzerhandbuch 48 48 48 49 49 50 50 50 51 51 52 52 52 53 53 54 54 55 29 25/01/2008 12:14:53 1 Willkommen Herzlichen Glückwunsch zu Ihrem Kauf und willkommen bei Philips! Besuchen Sie unsere Webseite für zusätzliche Informationen, wie Benutzerhandbücher, SoftwareDownloads und vieles mehr: www.philips.com/dictation. • Das Philips Conference Recording System ist eine kompakte, benutzerfreundliche Lösung für alle Ihre Konferenzaufnahmen. • Das Philips Conference Recording System beinhaltet zwei hochqualitative omnidirektionale Konferenzmikrofone, um alle Details einer Diskussion aufzunehmen. • Für große Konferenzen kann die Reichweite durch Verwendung von bis zu sechs Mikrofonen erweitert werden, um Konferenzen mit bis zu 32 Teilnehmer aufzuzeichnen. • Das kompakte Aufsteck-Interviewmikrofon ist die ideale Lösung für die Aufzeichnung von Interviews in bester Stereoqualität. 1.1 Verpackungsinhalt Digital Pocket Memo CD-ROM USB Docking Station 2 Konferenzmikrofone AufsteckInterviewmikrofon Y-Adapter Netzteil SD-Speicherkarte Mini-USBKabel Wiederaufladbare Batterien 30 crs955_ifu_en-de-fr.indb 30 Fernbedienung Kurzanleitung, Benutzerhandbuch Benutzerhandbuch 25/01/2008 12:14:55 Übersicht über Bedienungselemente und Anschlüsse 1 1 Interview-Aufsteckmikrofon Digital Pocket Memo 5 Integriertes Mikrofon 6 Status-LED 7 EOL-Taste (Briefende/End-of-letter) 8 REC-Taste (Aufnahme) 9 REW-Taste (Rücklauf ) 10 FWD-Taste (Vorlauf ) 11 Menü-Taste 12 Ein-/Ausschalter (OFF/ON) 13 Mikrofonanschluss 14 Kopfhörer- / Fernbedienungsanschluss 15 Display 16 Smart-Buttons 17 Index-Taste 18 Lautstärke-, Plus/Minus- und Menü-Navigationstasten 19 Lautsprecher 20 Speicherkarteneinschub 21 Batteriefach 22 Anschluss für die Docking Station 23 Netzteilanschluss 24 USB-Anschluss USB Docking Station 25 Einschub für das Digital Pocket Memo 26 Lade-LED Benutzerhandbuch crs955_ifu_en-de-fr.indb 31 2 EOL INDEX 3 4 REMOTE CONTROL Fernbedienung 2 REC-Taste (Aufnahme) 3 Index-Taste 4 EOL-Taste (Briefende/End-of-letter) 13 14 5 6 7 8 9 10 11 15 16 17 18 19 12 D E U T SC H 1.2 20 21 22 23 24 28 25 26 27 29 30 31 25/01/2008 12:14:57 27 Download-LED 28 Netzteilanschluss 29 Mini-USB-Anschluss für die PC-Verbindung 30 Konferenzmikrofon 1.3 Übersicht der Displaysymbole 8 9 10 11 12 -27H10M HQ #1 7 6 5 4 15 16 3 9:23 2 DPM 0955.MP3 1 13 14 WIEDERG Aktuelle Funktion des linken Smart-Buttons Dateiname Aufnahme- / Wiedergabedauer Positionsleiste Aktuelle Position in der Aufnahme Aufnahme-/Wiedergabepegel für den linken Kanal 7 Aufnahmenummer 8 Batteriestatusanzeige 9 Aufnahmeformat 10 Speicherkarte ist schreibgeschützt (gesperrt) 17 NEU 18 1 2 3 4 5 6 11 Sprachaktivierte Aufnahme ist aktiviert 12 Verbleibende Aufnahmedauer 13 Aufnahme mit Priorität gekennzeichnet 14 Aufnahme als abgeschlossen (EOL) und gesperrt gekennzeichnet 15 Aufnahme-/Wiedergabepegel für den rechten Kanal 16 Aufnahme enthält Indexmarkierungen 17 Empfindlichkeitsregler für sprachaktivierte Aufnahme 18 Aktuelle Funktion des rechten Smart-Buttons 32 Benutzerhandbuch crs955_ifu_en-de-fr.indb 32 25/01/2008 12:14:57 2.1 Einsetzen der Batterien Das Digital Pocket Memo kann mit den beiden wiederaufladbaren AAA-Batterien betrieben werden. Es können auch herkömmliche AlkaliBatterien verwendet werden. 1 Das Digital Pocket Memo muss ausgeschaltet sein. 2 Öffnen Sie das Batteriefach auf der Rückseite des Digital Pocket Memo. Schieben Sie dazu die Abdeckung nach außen und klappen Sie sie dann auf. 3 Legen Sie die beiden AAA-Batterien ein. Die richtige Polarität ist auf der Innenseite der Batteriefachabdeckung angegeben. 1 2 4 Schließen Sie das Batteriefach wieder, indem Sie es zuklappen und die Abdeckung wieder hinein schieben, bis Sie ein Klicken hören. 1 2 DHinweis Keine unterschiedlichen Batterietypen verwenden! Nehmen Sie entweder zwei aufladbare Batterien oder zwei nicht aufladbare Alkalibatterien. Benutzerhandbuch crs955_ifu_en-de-fr.indb 33 2.2 Aufladen der Batterien Das Digital Pocket Memo kann mit wiederaufladbaren AAA-Batterien 9154 von Philips betrieben werden. Benutzen Sie zum Aufladen dieser Batterien entweder das Philips-Netzteil 9146 oder die USB Docking Station 9120. 2.2.1 Aufladen mit dem Netzteil 1 Schließen Sie das mitgelieferte Netzteil an der Hauptstromversorgung an. 2 Verbinden Sie das Digital Pocket Memo mit dem Netzteil. D E U T SC H 2 Erste Schritte DHinweis Sie können das Digital Pocket Memo weiter benutzen. Die Batterien werden geladen während Sie arbeiten. Der Ladevorgang wird auch fortgesetzt, wenn Sie das Digital Pocket Memo ausschalten. 2.2.2 Aufladen über das USB-Kabel Schließen Sie das Digital Pocket Memo mit dem mitgelieferten USB-Kabel an einen PC oder ein Notebook an, um die wiederaufladbaren Batterien automatisch aufzuladen. Wenn der USB-Anschluss des PCs den High-PowerStandard unterstützt, dauert ein kompletter Ladevorgang etwa 2.5 Stunden. Das Digital Pocket Memo wechselt automatisch in den PC-Download-Modus und wird vom angeschlossenen PC als Lautsprecher und Mikrofon verwendet. Um während des Aufladens 33 25/01/2008 12:14:58 weiter auf dem Digital Pocket Memo Aufnahmen zu machen, wechseln Sie in den USB-Modus USB-Versorgung indem Sie für drei Sekunden die REC-Taste gedrückt halten während das Digital Pocket Memo mit dem PC verbunden ist. Das Digital Pocket Memo wechselt automatisch wieder in den PC-Download-Modus, wenn die Verbindung zum PC getrennt wird. DHinweis Der PC muss eingeschaltet sein, um die Batterien über das USB-Kabel aufzuladen. Das Digital Pocket Memo kann sich während des Aufladens erwärmen. CWichtig Wenn der USB-Anschluss Ihres PCs nicht genügend Strom liefert (500 mA), deaktiveren Sie USB-Schnelladen im Menü des Digital Pocket Memos und verwenden Sie zum Aufladen der Batterien das Netzteil. es nicht benutzen möchten. 6 Wenn die grüne LED-Anzeige anfängt zu blinken, ist das Aufladen abgeschlossen, und Sie können das Digital Pocket Memo von der Docking Station abnehmen. DHinweis Wenn das Digital Pocket Memo an die Docking Station angeschlossen ist, wird das Gerät durch die Docking Station und nicht von den Batterien mit Strom versorgt. Bei Verwendung von aufladbaren Batterien werden die Batterien automatisch geladen, wenn das Digital Pocket Memo an die Docking Station angeschlossen ist. 2.3 Einsetzen und Auswerfen der Speicherkarte Das Digital Pocket Memo wird mit einer SecureDigital-Speicherkarte (SD) betrieben. Es unterstützt SD-Karten mit einer Speicherkapazität von bis zu 2 GB. 2.2.3 Aufladen über die Docking Station 3 Vergewissern Sie sich, dass die Docking Station mit dem Netzteil an einer Steckdose angeschlossen ist. 4 Stecken Sie das Digital Pocket Memo auf den Anschluss der Docking Station, und drücken Sie es fest herunter, bis es einrastet. Die grüne LED-Anzeige leuchtet auf und gibt an, dass die Batterien des Digital Pocket Memo aufgeladen werden. 5 Benutzen Sie das Digital Pocket Memo wie gewohnt, oder schalten Sie es aus, wenn Sie 34 crs955_ifu_en-de-fr.indb 34 Das Digital Pocket Memo wird mit einer bereits eingesetzten und formatierten Speicherkarte geliefert. So werfen Sie die Speicherkarte aus: 1 Der Speicherkartensteckplatz befindet sich auf der Rückseite des Digital Pocket Memo. 2 Drücken Sie die Speicherkarte hinein, bis Sie ein Klicken hören. 1 3 Lassen Sie die Speicherkarte los. Sie schiebt sich etwas aus dem Speicherkartensteckplatz heraus und kann herausgezogen werden. Benutzerhandbuch 25/01/2008 12:14:58 2 ck Unlo ips phil So setzen Sie eine Speicherkarte ein: 1 Der Speicherkartensteckplatz befindet sich auf der Rückseite des Digital Pocket Memo. 2 Schieben Sie die Speicherkarte in den Steckplatz. Eine kleines Symbol neben dem Steckplatz zeigt die richtige Ausrichtung an. 2 3 Drücken Sie die Speicherkarte hinein, bis Sie ein Klicken hören. DHinweis Wenn Sie das Digital Pocket Memo einschalten und keine Speicherkarte eingesetzt ist, wird ein Warnhinweis auf dem Bildschirm angezeigt. 2.4 Formatieren einer neuen Speicherkarte Wenn Sie eine neue, unformatierte Speicherkarte (oder eine Speicherkarte, die mit einem anderen Gerät als einem Digital Pocket Memo formatiert wurde) einsetzen, werden Sie vom Digital Pocket Memo gefragt, ob Sie die Speicherkarte formatieren möchten. A 1 Drücken Sie den Smart-Button OK 1 , um dies zu bestätigen und das Formatieren zu starten. 2 Wenn Sie den Formatierungsvorgang abbrechen möchten, können Sie entweder die Speicherkarte entfernen oder den Smart-Button ABBRUCH 2 drücken. Karte formatieren A Alles löschen ? Ja - formatiere B Alle Dateien gehen verloren ! Schriftart Language ZURÜCK Die mit dem Digital Pocket Memo mitgelieferte Speicherkarte ist bereits formatiert und direkt verwendbar. Wenn Sie eine nicht formatierte Speicherkarte einsetzen, fragt Sie das Digital Pocket Memo, ob Sie die Speicherkarte formatieren möchten. Im nächsten Kapitel finden Sie dazu weitere Informationen. Alles löschen ? Lautstärke Alles ZURÜCK WÄHLEN lösche n? Ja - fo rmat iere !! AC C HTUN OK WÄHLEN D E U T SC H 1 G !! 1 ABBR UCH 2 Das Digital Pocket Memo kann ohne eine ordnungsgemäß formatierte Speicherkarte keine Aufnahmen aufzeichnen. Wenn Sie eine neue Karte einsetzen und die Formatierung abbrechen, müssen Sie eine andere Karte einsetzen, die formatiert werden kann oder bereits formatiert wurde. DHinweis Das Formatieren ist nicht möglich, wenn die Speicherkarte schreibgeschützt (gesperrt) ist. Benutzerhandbuch crs955_ifu_en-de-fr.indb 35 35 25/01/2008 12:14:59 2.5 Aktivieren des Digital Pocket Memo Das Digital Pocket Memo kann mit dem EIN-/ AUSSCHALTER aktiviert werden. Beim ersten Einschalten werden Sie vom Gerät aufgefordert, die Sprache für die Benutzeroberfläche und das aktuelle Datum sowie die aktuelle Zeit anzugeben. LANGUAGE LANGUE SPRACHE IDIOMA INT FR DE ES LANG UA LANG GE UE SPRA CH IDIOM E A EXIT EXIT -/+ OK -/+ INT FR DE ES OK 2 1 2.5.2 Einstellen von Datum und Uhrzeit Nach der Auswahl der Sprache werden Sie vom Digital Pocket Memo zur Angabe des aktuellen Datums und der aktuellen Zeit aufgefordert. 2.5.1 Einstellen der Sprache Wenn Sie das Digital Pocket Memo zum ersten Mal aktivieren, müssen Sie die Sprache für die Benutzeroberfläche auswählen. 1 Drücken Sie die Taste + oder – 1 auf dem Digital Pocket Memo, um eine Sprache auszuwählen. 2 Drücken Sie den Smart-Button OK 2 , um die Auswahl zu bestätigen. Die Benutzer oberfläche wird in der ausgewählten Sprache angezeigt. DHinweis Die Sprache kann auch zu einem späteren Zeitpunkt über das Menü geändert werden. Weitere Informationen finden Sie unter Sprache einstellen auf Seite 52. 36 crs955_ifu_en-de-fr.indb 36 1 Drücken Sie wiederholt die Taste + oder – 1 , um die Werte für Jahr, Monat bzw. Tag zu ändern. 2 Drücken Sie den Smart-Button → 2 , um den Pfeil (↑) zum nächsten Eintrag zu bewegen. 3 Nachdem Sie den Tag eingestellt haben, drücken Sie den Smart-Button → 2 , um die richtige Zeit einzustellen. 4 Drücken Sie wiederholt die Taste + oder – 1 , um das 12-Stunden oder 24-StundenFormat auszuwählen, AM oder PM (wenn das 12-Stunden-Format gewählt wurde) auszuwählen und die Werte für Stunden und Minuten zu ändern. 5 Drücken Sie den Smart-Button → 2 , um die Richtigkeit von Datum und Uhrzeit zu bestätigen. Das Digital Pocket Memo ist jetzt einsatzbereit. Benutzerhandbuch 25/01/2008 12:15:00 DATE: 2007-1 0 01 DATE: 2007-10-01 12/24: 12/24: TIME: 24 24 14:22 TIME: 14:22 OK OK 3 2 D E U T SC H 1 DHinweis Falls Sie einen Fehler gemacht haben, können Sie mit dem Smart-Button ← 3 jederzeit wieder zurück gehen und Korrekturen vornehmen. Sie können Datum und Uhrzeit auch später über das Menü des Digital Pocket Memo ändern. Weitere Informationen finden Sie unter Datum und Uhrzeit einstellen auf Seite 52. 2.6 Energiesparmodus Bleibt das Digital Pocket Memo länger als vier Minuten inaktiv, wechselt es automatisch in den Energiesparmodus. Auf dem LCD-Bildschirm werden dann Datum und Uhrzeit angezeigt. Sie können das Digital Pocket Memo durch Drücken einer beliebigen Taste wieder aktivieren. Wird das Digital Pocket Memo länger als 2 Stunden nicht benutzt, schaltet es sich ganz ab. In diesem Fall kann es wieder eingeschaltet werden, indem Sie den Aus-/Einschalter auf die Position OFF und dann auf die Position ON schieben. Benutzerhandbuch crs955_ifu_en-de-fr.indb 37 37 25/01/2008 12:15:00 1 3 Verwendung des Conference Recording Systems DHinweis Das interne Mikrofon wird deaktiviert, wenn ein externes Mikrofon an das Digital Pocket Memo angeschlossen wird. 3.1.1 Konferenzaufnahmen: Verbinden und Positionieren der Konferenzmikrofone 1 Das Digital Pocket Memo muss ausgeschaltet sein. 2 Verbinden Sie den Stecker des Y-Adapters mit dem Mikrofonanschluss des Digital Pocket Memos. 3 Verbinden Sie den Steck er der beider Mikrofone mit jeweils einen Anschluss des Y-Adapters. 1 4 Um eine optimale Aufnahmequalität zu erreichen, positionieren Sie die Mikrofone so auf dem Tisch, dass jeder Teilnehmer nicht weiter als 2 Meter von einem Mikrofon entfernt ist. 2 38 crs955_ifu_en-de-fr.indb 38 2 2.5 m / 8 ft 3.1 Vor der Aufnahme Das Digital Pocket Memo verfügt über ein eingebautes Mono-Mikrofon, das verwendet wird, wenn kein externes Mikrofon angeschlossen ist. Verwenden Sie die Konferenzmikrofone (für Konferenzaufnahmen) oder das Aufsteck-Mikrofon (für Interviews), um die Aufnahmequalität zu verbessern und einen größeren Bereich abzudecken. 2 m / 6.5 ft 5 m / 16.5 ft ETipp Für große Konferenzen kann die Reichweite erhöht werden, indem jeweils drei Mikrofone verbunden und an einem der beiden Mikrofonanschlüsse des Y-Adapters angeschlossen werden. 3 4 5 3 Benutzerhandbuch 25/01/2008 12:15:02 2.5 m / 8 ft 4 3.1.2 Anschließen der Fernbedienung 1 Verbinden Sie den Stecker der Fernbedienung mit dem Fernbedienungsanschluss des Digital Pocket Memos. 2 m / 6.5 ft D E U T SC H 13 m / 42.5 ft Verbinden und Positionieren von bis zu 6 Konferenzmikrofonen 5 7 m / 23 ft 2 m / 6.5 ft D Hinweis Bei angeschlossener Fernbedienung sind alle Tasten am Digital Pocket Memo verwendbar, ausgenommen die REC-Taste. 6 m / 20 ft 3.1.3 Interviewaufnahmen: Anschließen des Aufsteckmikrofons Verbinden und Positionieren von bis zu 6 Konferenzmikrofonen 1 Das Digital Pocket Memo muss ausgeschaltet sein. 2 Verbinden Sie den Stecker des Aufsteckmikrofons mit dem Mikrofonanschluss des Digital Pocket Memos. Benutzerhandbuch crs955_ifu_en-de-fr.indb 39 39 25/01/2008 12:15:04 Aufnehmen Das Display zeigt die folgenden Informationen: a Verbleibende Aufnahmedauer b Aufnahmeformat c Aktuelle Position in der Aufnahme d Aufnahmedauer e Dateiname f Aufnahmepegel (linker Kanal) g Aufnahmepegel (rechter Kanal) 3.2.1 Erstellen einer neuen Aufnahme Gehen Sie wie folgt vor, um eine Aufnahme mit dem Digital Pocket Memo zu erstellen: HQ -27h10m -27h10m HQ -27H18M 4 HQ -27H18M 3 2 :3 4 2:34 DP M WIEDE 09 55 RG DPM 0955.MP3 f DPM NEU 0955 WIEDE RG .M P 3 NEU 2 4 Drücken Sie die REC-Taste 3 und beginnen Sie zu diktieren. Die Status-LED 4 leuchtet während der Aufnahme rot. D Hinweis Bei angeschlossener Fernbedienung ist die REC-Taste am Digital Pocket Memo deaktiviert. crs955_ifu_en-de-fr.indb 40 a WIEDERG 1 40 c d e b STOP g .M P3 STOP 5 9 :2 3 9:23 DPM 0955.MP3 WIEDERG HQ 5 Um die Aufnahme zu beenden, die RECTaste 3 oder den Smart-Button STOP 5 drücken. EOL INDEX 1 Stellen Sie sicher, dass sich im Speicherkartensteckplatz eine Speicherkarte befindet. Weitere Informationen finden Sie unter Einsetzen und Auswerfen der Speicherkarte auf Seite 34. 2 Schieben Sie den Ein-/Ausschalter 1 auf die Position ON, um das Digital Pocket Memo einzuschalten. 3 Drücken Sie den Smart-Button NEU 2 , um eine neue Aufnahme zu erstellen. D Hinweis Der Smart-Button NEU wird nicht angezeigt, wenn die aktuelle Aufnahme leer ist. REMOTE CONTROL 3.2 E Tipps • Drücken Sie während der Aufnahme die EOL-Taste, um das aktuelle Diktat als abzuschließen und die Aufnahme automatisch in einer neuen Datei fortzusetzten. Weitere Informationen finden Sie unter Abschließen (Sperren) eines Diktats auf Seite 41. • Um eine Indexmarkierung einzufügen, drücken Sie während der Aufnahme oder Wiedergabe die INDEX-Taste. Weitere Informationen finden Sie unter Arbeiten mit Indexmarkierungen auf Seite 50. Benutzerhandbuch 25/01/2008 12:15:06 -27h18m HQ -27h18m 2 2 :3 4 DP M 2:34 WIED DPM 0955.MP3 WIEDERG 09 55 ERG STOP .M P3 STOP 3 REMOTE CONTROL HQ EOL INDEX 1 Drücken Sie im Stoppmodus die Taste + oder – 1 , um die Datei, in die Sie Ergänzungen einfügen möchten, auszuwählen. 2 Drücken Sie die REC-Taste 2 und beginnen Sie zu diktieren. Die Aufnahme wird automatisch am Ende der bestehenden Aufnahme hinzugefügt. 3 Zum Beenden der Aufnahme den SmartButton STOP 3 oder die REC-Taste 2 drücken. 3.2.3 Abschließen (Sperren) eines Diktats Wenn Sie fertig diktiert haben und keine weiteren Änderungen mehr vornehmen möchten, markieren Sie das Diktat wie folgt als fertig gestellt und schützen Sie es vor irrtümlichen Löschen: 1 Drücken Sie im Stoppmodus die Taste + oder – 1 , um das Diktat auszuwählen, das Sie als fertig gestellt markieren möchten. 2 Drücken Sie die EOL-Taste (Briefende/Endof-letter) 2 , um das Diktat zu sperren und als fertiggestellt zu markieren. Das Symbol ┱erscheint auf dem Display. a 3 Falls Sie das Diktat mit einer Priorität versehen möchten, drücken Sie die EOLTaste 2 innerhalb einer halben Sekunde noch einmal. Das Symbol ! wird angezeigt und gibt an, dass das Diktat Priorität hat. b 4 Wenn Sie Änderungen am Diktat vornehmen möchten, drücken Sie die EOLTaste 2 erneut, um die Markierung ‚fertig gestellt‘ wieder aufzuheben. D E U T SC H 3.2.2 Ergänzungen in ein Diktat einfügen Ergänzungen zu einem Diktat werden immer am Ende der Aufnahme eingefügt, ohne die bestehende Aufnahme zu überschreiben. -27h10m HQ HQ #2 #2 -27h10m 2 REMOTE CONTROL a b 9 :2 3 DP M 9:23 START 09 55 STAR T DPM 0955.MP3 EOL INDEX 1 .M P3 NEU NEU 1 E Tipp In der Philips SpeechExec Software können Sie einstellen, dass nur Diktate vom Digital Pocket Benutzerhandbuch crs955_ifu_en-de-fr.indb 41 41 25/01/2008 12:15:07 Memo auf den PC übertragen werden, die als ‚fertig gestellt‘ gekennzeichnet sind. C Achtung Gesperrte Dateien werden trotzdem gelöscht, wenn die Speicherkarte formatiert wird oder die Menüoption ‚Alle Diktate löschen‘ benutzt wird. 3.2.4 Ändern des Aufnahmeformats Das Aufnahmeformat bestimmt die Audio qualität der Aufnahmen und beeinflusst ebenfalls die Menge der auf die Speicherkarte passenden Audiodaten. Das Digital Pocket Memo unterstützt folgende Aufnahmeformate: Aufnahme format PCM XHQ HQ QP SP Dateiformat .pcm .mp3 .mp3 .ds2 (DSS QP) .dss (DSS SP) Aufnahmekanäle 2-Kanal 2-Kanal 2-Kanal Mono Mono Aufnahmezeit (1 GB-Karte) 1,5 Stunden 18 Stunden 36 Stunden 85 Stunden 170 Stunden 5 Drücken Sie den Smart-Button OK 4 , um die Einstellung zu speichern oder den SmartButton ABBRUCH 3 , um den Menüpunkt ohne Ändern der Einstellungen zu verlassen. Diktat löschen A B Language Index setzen Aufnahmeformat Autor Filter Einstellungen Language ZURÜCK WÄHLEN HQ <DSS> Sprachaktiviert ZURÜCK WÄHLEN Aufna hmef ormat PCM : <PCM C > XHQ <MP3 > HQ <MP3 > SP <DSS > QP <DS2> OK ABBR UCH 4 3 1 2 D Hinweis Das Format PCM ist standardmäßig nicht verfügbar und muss über Philips SpeechExec Dictate aktiviert werden. Weitere Informationen finden Sie unter Weitergehende Konfiguration auf Seite 48. 1 Drücken Sie im Stoppmodus die MENÜTaste 1 , um das Menü aufzurufen. 2 Drücken Sie die Taste + oder – 2 , um den Menüeintrag Einstellungen auszuwählen und drücken Sie den Smart-Button WÄHLEN 3 . 3 Drücken Sie die Taste + oder – 2 , um den Menüeintrag Aufnahmeformat auszuwählen und drücken Sie den Smart-Button WÄHLEN 3 . 4 Drücken Sie die Taste + oder – 2 , um ein Aufnahmeformat auszuwählen. 42 crs955_ifu_en-de-fr.indb 42 Benutzerhandbuch 25/01/2008 12:15:08 1 Drücken Sie während der Aufnahme wiederholt die MENÜ-Taste 1 , um die Mikrofonempfindlichkeit zu wechseln zwischen Privat (niedrig), Diktat (mittel) and Konferenz (hoch). Die Mikrofonempfindlichkeit kann auch über das Einstellungs-Menü angepasst werden: 1 Drücken Sie im Stoppmodus die MENÜTaste 1 , um das Menü aufzurufen. 2 Drücken Sie die Taste + oder – 2 , um den Menüeintrag Einstellungen auszuwählen und drücken Sie den Smart-Button WÄHLEN 3 . 3 Drücken Sie die Taste + oder – 2 , um den Menüeintrag Mikro-Empfindl. auszuwählen und drücken Sie den Smart-Button WÄHLEN 3 . 4 Drücken Sie die Taste + oder – 2 , um die Mikrofonempfindlichkeit auszuwählen: Privat (niedrig), Diktat (mittel) and Konferenz (hoch). 5 Drücken Sie den Smart-Button OK 3 , um die Einstellung zu speichern oder den SmartButton ABBRUCH 4 , um den Menüpunkt ohne Ändern der Einstellungen zu verlassen. 3.2.6 Klangfilter Aktivieren Sie den Klangfilter, um hoch- und niederfrequente Töne zu minimieren und Sprachaufnahmen zu optimieren. 1 Drücken Sie im Stoppmodus die MENÜTaste 1 , um das Menü aufzurufen. 2 Drücken Sie die Taste + oder – 2 , um den Menüeintrag Einstellungen auszuwählen und drücken Sie den Smart-Button WÄHLEN 3 . 3 Drücken Sie die Taste + oder – 2 , um den Menüeintrag Filter auszuwählen und drücken Sie den Smart-Button WÄHLEN 3 . 4 Drücken Sie die Taste + oder – 2 , um zwischen Sprache (Klangfilter aktiv) und Musik (Klangfilter deaktiviert) zu wählen. 5 Drücken Sie den Smart-Button OK 3 , um die Einstellung zu speichern oder den SmartButton ABBRUCH 4 , um den Menüpunkt ohne Ändern der Einstellungen zu verlassen. Diktat löschen A B Language Index setzen Aufnahmeformat Autor Filter Einstellungen Voice activation Filter : Sprac he C Musik Sprache Language ZURÜCK D E U T SC H 3.2.5 Mikrofonempfindlichkeit einstellen Stellen Sie die Mikrofonempfindlichkeit Ihrem Umfeld und Ihrem Diktierverhalten entsprechend ein. WÄHLEN ZURÜCK WÄHLEN OK 4 ABBR UCH 3 1 Diktat löschen A Aufnahme-Lampe B nz Kontrast Autor Piepton Einstellungen Mikro-Empfindl. Language WÄHLEN 2 ndl: C Dikta t Privat Konferenz ZURÜCK -Empfi Konfe re Index setzen ZURÜCK Mikro WÄHLEN OK 4 ABBR UCH 3 1 2 Benutzerhandbuch crs955_ifu_en-de-fr.indb 43 43 25/01/2008 12:15:10 3.2.7 Aufnahmen mithören Kopfhörer können an das Digital Pocket Memo angeschlossen werden, um die Aufnahme mitzuhören und die Aufnahmelautstärke zu kontrollieren. 1 Verbinden Sie den Stecker der Kopfhörer mit dem Kopfhöreranschluss des Digital Pocket Memos. 2 Drücken Sie während der Aufnahme die Taste + oder –, um die Ausgabelautstärke anzupassen. 3.3 Wiedergabe 1 Drücken Sie im Stoppmodus die Taste + oder – 1 , um das Diktat auszuwählen, das Sie wiedergeben möchten. Drücken Sie den Smart-Button WIEDERG 2 , um die Wiedergabe zu starten. Das Display zeigt die folgenden Informationen: a Aktuelle Position in der Aufnahme b Aufnahmeformat c Wiedergabezeit d Dateiname 2 Drücken Sie die Taste + oder – 1 , um die Wiedergabelautstärke zu verändern. 3 Drücken Sie den Smart-Button TEMPO 2 , um die Wiedergabegeschwindigkeit zu erhöhen oder zu verringern. 4 Drücken Sie den Smart-Button STOP 3 , um die Wiedergabe anzuhalten. D Hinweis Die Aufnahmelautstärke kann nicht über die Taste + oder – angepasst werden. Ändern Sie die Mikrofonempfindlichkeit, wenn die Aufnahmelautstärke zu niedrig oder zu hoch ist durch wiederholtes Drücken der MENÜ-Taste oder über das Einstellungsmenü. Weitere Informationen finden Sie unter Mikrofonempfindlichkeit einstellen auf Seite 43. Wenn sprachaktiviertes Aufnehmen aktiviert wurde, dient die Taste + oder – zum Anpassen der Aufnahmeschwelle und nicht zum Ändern der Ausgabelautstärke. 44 crs955_ifu_en-de-fr.indb 44 b -27h18m HQ a -27h18m HQ HQ -27h18m #2 2 :3 4 0:00 2:34 DPM 0955.DSS DPM 0955.DSS WIEDERG NEU STOP c DPM TEMPO d STOP 0955 .D S S TEMPO 2 3 1 E Tipp Halten Sie die MENÜ-Taste für einige Sekunden gedrückt, um zusätzliche Informationen zu Dateien, Gerät und Speicherkarte anzuzeigen. Benutzerhandbuch 25/01/2008 12:15:12 Schneller Rücklauf Drücken Sie im Stoppmodus kurz die REW-Taste 1 . Drücken Sie den SmartButton STOP 3 , um anzuhalten oder den Smart-Button WIEDERG 4 , um anzuhalten und die Wiedergabe zu starten. Schneller Drücken Sie im Stoppmodus kurz die Vorlauf FWD-Taste 2 . Drücken Sie den SmartButton STOP 3 , um anzuhalten oder den Smart-Button WIEDERG 4 , um anzuhalten und die Wiedergabe zu starten. Rücklauf Halten Sie im Wiedergabe- oder Aufnahmemodus die REW-Taste 1 gedrückt. Lassen Sie die REW-Taste los, um die Wiedergabe zu starten. Schnelle Halten Sie im Wiedergabe- oder AufnahWiedergabe memodus die FWD-Taste 2 gedrückt. Lassen Sie die FWD-Taste los, um die (Cue) Wiedergabe zu starten. Auto-Rück- Drücken Sie im Wiedergabe- oder Aufsprung nahmemodus kurz die REW-Taste 1 , um die letzten Sekunden zu wiederholen und die Wiedergabe zu starten. 3.3.2 Rauschminderung Mit dieser Funktion können Sie störende Hintergrundgeräusche während der Wiedergabe reduzieren und die Wiedergabequalität verbessern. 1 Drücken Sie im Stoppmodus die MENÜTaste 1 , um das Menü aufzurufen. 2 Drücken Sie die Taste + oder – 2 , um den Menüeintrag Einstellungen auszuwählen und drücken Sie den Smart-Button WÄHLEN 3 . 3 Drücken Sie die Taste + oder – 2 , um den Menüeintrag Rauschminderung auszuwählen und drücken Sie den Smart-Button WÄHLEN 3 . 4 Drücken Sie die Taste + oder – 2 , um zwischen Ein und Aus zu wählen. 5 Drücken Sie den Smart-Button OK 3 , um die Einstellung zu speichern oder den SmartButton ABBRUCH 4 , um den Menüpunkt ohne Ändern der Einstellungen zu verlassen. Diktat löschen A Autor Mikro-Empfindl. Language ZURÜCK -27h10m 5:16 DPM NEU WIEDE 0955 RG .M P 3 NEU Rauschminderung Ein ZURÜCK derung : C Aus WÄHLEN OK 4 ABBR UCH 3 1 -27h10m 5 :1 6 DPM 0955.MP3 WIEDERG HQ WÄHLEN Rausc hmin Ein Piepton Einstellungen HQ B Kontrast Index setzen D E U T SC H 3.3.1 Überblick Wiedergabefunktionen 2 1 2 3 4 Benutzerhandbuch crs955_ifu_en-de-fr.indb 45 45 25/01/2008 12:15:14 3.4 Löschen 3.4.2 Löschen eines Abschnittes innerhalb eines Diktats Gehen Sie wie folgt vor, um einen Abschnitt eines Diktats zu löschen: D Hinweis Stellen Sie vor dem Löschen eines Diktats sicher, dass das Diktat nicht als fertig gestellt markiert (EOL) und die Speicherkarte nicht schreibgeschützt (gesperrt) ist. Drücken Sie die EOL-Taste, um ein als ‚fertig gestellt‘ gekennzeichnetes Diktat löschen zu können. 3.4.1 Löschen eines Diktats Gehen Sie wie folgt vor, um ein einzelnes Diktat vollständig zu löschen: 1 Drücken Sie im Stoppmodus die Taste + oder – 1 , um das Diktat auszuwählen, das Sie löschen möchten. 2 Drücken Sie die MENÜ-Taste 2 , um das Menü aufzurufen. Der Menüeintrag Diktat löschen ist ausgewählt. 3 Drücken Sie den Smart-Button WÄHLEN 3 , um den Menüpunkt aufzurufen. 4 Drücken Sie den Smart-Button OK 4 , um das Diktat endgültig zu löschen. Drücken Sie den Smart-Button ABBRUCH 5 , um den Löschvorgang abzubrechen. Diktat löschen Löschen ? A Index setzen Diktat löschen: B Löschen ? Autor !! AC Einstellungen ZURÜCK Dikta t lösc hen: Lösche n? WÄHLEN !! ACHTUNG !! OK ABBRUCH HTUN OK G !! ABBR UCH 4 3 2 1 Navigieren Sie durch Wiedergabe, Vorlauf oder Rücklauf zum Anfang des zu löschenden Abschnitts. 2 Drücken Sie im Stoppmodus die MENÜTaste 1 , um das Menü aufzurufen. 3 Drücken Sie die Taste + oder – 2 , um den Menüeintrag Abschnitt löschen auszuwählen und drücken Sie den Smart-Button OK 3 . 4 Drücken Sie den Smart-Button MARK 1 4 . Auf dem Display wird ein X angezeigt. A Autor Einstellungen USB-Modus Abschnitt löschen OK ABBRUCH -27h18Bm HQ HQ #2 #2 2 :1 5 2:15 DPM DPM 0955.MP3 ABBRUCH -27h18m MARK 1 ABBR 0955 UCH 3 .M P 3 MAR K1 4 1 2 5 Suchen Sie die zweite zu markierende Position mittels Wiedergabe oder Vor‑/ Rücklauf und drücken Sie den Smart-Button MARK 2 5 . Ein zweites X wird angezeigt. 6 Drücken Sie den Smart-Button LÖSCHEN 5 und den Smart-Button OK 6 , um das Löschen des markierten Abschnitts zu bestätigen, oder drücken Sie den Smart-Button ABBRUCH 5 , um den Vorgang ohne Löschen zu beenden. 1 46 crs955_ifu_en-de-fr.indb 46 Benutzerhandbuch 25/01/2008 12:15:15 #2 -27h18Bm HQ #2 3:38 DPM 0955.MP3 DPM 0955.MP3 MARK 2 ABBRUCH Diktat löschen -27h18m C 3 :3 8 3:38 WIEDERG HQ #2 LÖSCHE LÖSCHEN OK N? ABBR UCH 6 5 A RauschminderungB Index setzen Datum & Zeit Autor USB Schnellladen Einstellungen Diktate löschen Language ZURÜCK WÄHLEN Alle löschen ? ZURÜCK WÄHLEN Alle lö schen ? Ja - lö schen !! AC C HTUN OK G !! ABBR UCH 4 3 1 2 3.4.3 Alle Diktate löschen D E U T SC H -27h18Am HQ C Achtung Auch gesperrte Dateien werden gelöscht, wenn die Menüoption ‚Alle Diktate löschen‘ benutzt wird. Gehen Sie wie folgt vor, um alle Diktate zu löschen: 1 Drücken Sie im Stoppmodus die MENÜTaste 1 , um das Menü aufzurufen. 2 Drücken Sie die Taste + oder – 2 , um den Menüeintrag Einstellungen auszuwählen und drücken Sie den Smart-Button WÄHLEN 3 . 3 Drücken Sie die Taste + oder – 2 , um den Menüeintrag Diktate löschen auszuwählen und drücken Sie den Smart-Button WÄHLEN 3 . 4 Drücken Sie den Smart-Button WÄHLEN 3 und den Smart-Button OK 4 , um das Löschen des markierten Abschnitts zu bestätigen, oder drücken Sie den SmartButton ABBRUCH 3 , um den Vorgang ohne Löschen zu beenden. Benutzerhandbuch crs955_ifu_en-de-fr.indb 47 47 25/01/2008 12:15:17 4 Weitergehende Funktionen 4.1 Verwenden von Philips SpeechExec Die beiliegende Philips SpeechExec Softare erlaubt eine weitergehende Konfiguration der Einstellungen des Digital Pocket Memos und ermöglicht einen automatischen Download, Umwandlung und Weiterleitung der Diktatdateien. D Hinweis Detaillierte Information zur SpeechExec Software entnehmen Sie bitte der SpeechExec Kurzanleitung oder Programmhilfe. 4.1.1 Weitergehende Konfiguration Der Konfigurationsassistent für das Digital Pocket Memo ist Teil der Philips SpeechExec Diktiersoftware und unterstützt die Benutzer bei der Konfiguration ihrer Geräte, wie beispielsweise Zeitformat, akustische Rückmeldungen, sprachaktivierte Aufnahme, Darstellung der Anzeige (Standard oder erweiterter Anzeigemodus), Aufnahmeformat, Mikrofonempfindlichkeit, Definition von Autorennamen und Herunterladen von Dateien auf den PC. 1 Schließen Sie das Digital Pocket Memo mit einem USB-Kabel an Ihrem PC an. 2 Starten Sie Software Philips SpeechExec Dictate. 3 Klicken Sie in der Menüleiste auf Einstellungen > Allgemeine Einstellungen, um das Menü Einstellungen zu öffnen. Wählen Sie dann DPM/DT Konfiguration > DPMAssistent aus der Liste auf der linken Seite. 4 Klicken Sie auf die Schaltfläche Assistent starten…, um den Assistenten zu öffnen. Folgen Sie den Anweisungen auf dem Bildschirm, um das Digital Pocket Memo entsprechend anzupassen. 5 Klicken Sie auf die Schaltfläche Fertig stellen, um den Assistenten zu schließen und die Übertragung der neuen Einstellungen auf das Digital Pocket Memo zu bestätigen. D Hinweis Wenn das Digital Pocket Memo zum ersten Mal an den PC angeschlossen wird, erkennt Windows ein neues Gerät und installiert automatisch die erforderlichen Treiber. Nach Abschluss der Installation werden Sie gegebenenfalls von Windows aufgefordert, den PC neu zu starten. 48 crs955_ifu_en-de-fr.indb 48 Benutzerhandbuch 25/01/2008 12:15:17 Die Philips SpeechExec Software ermöglicht darüber hinaus automatischen Download, Umwandlung und Weiterleitung der Diktatdateien. 1 Nehmen Sie ein Diktat mit dem Digital Pocket Memo auf. 2 Starten Sie Software Philips SpeechExec Dictate. 3 Schließen Sie das Digital Pocket Memo mit einem USB-Kabel oder der optionalen USB Docking Station an Ihrem PC an. 4 Die Diktate auf dem Digital Pocket Memo werden automatisch heruntergeladen und in den Ordner Fertig gestellt der Arbeitsliste verschoben. D Hinweis Welche Dateien wie heruntergeladen werden, nachdem ein Digital Pocket Memo angeschlossen wurde, kann im Menü Einstellungen von SpeechExec oder mit Hilfe des Konfigurationsassistenten konfiguriert werden. 4.2 Sprachaktivierten Aufnahme Das Digital Pocket Memo unterstützt sprachaktiverte Aufnahme für freihändiges Diktieren. Wenn die Funktion aktiviert ist und Sie eine Aufnahme starten, beginnt die tatsächliche Aufnahme erst, wenn Sie anfangen zu sprechen. Sobald Sie aufhören zu sprechen, unterbricht das Digital Pocket Memo die Aufnahme automatisch nach 3 Sekunden Ruhe und nimmt sie wieder auf, wenn Sie erneut zu sprechen beginnen. D E U T SC H 4.1.2 Herunterladen von Aufnahmen auf den PC Als USB-Massenspeichergerät wird das Digital Pocket Memo automatisch als externes Laufwerk erkannt, wenn Sie es an den PC anschließen. Das erlaubt den einfachen Zugriff mit dem Windows Explorer und jedem anderen Microsoft Windows-Programm. 1 Drücken Sie im Stoppmodus die MENÜTaste 1 , um das Menü aufzurufen. 2 Drücken Sie die Taste + oder – 2 , um den Menüeintrag Einstellungen auszuwählen und drücken Sie den Smart-Button WÄHLEN 3 . 3 Drücken Sie die Taste + oder – 2 , um den Menüeintrag Sprachaktiviert auszuwählen und drücken Sie den Smart-Button WÄHLEN 3 . 4 Drücken Sie die Taste + oder – 2 , um zwischen Aus und Ein zu wechseln. 5 Drücken Sie den Smart-Button OK 4 , um die Einstellung zu speichern oder den SmartButton ABBRUCH 3 , um den Menüpunkt ohne Ändern der Einstellungen zu verlassen. Diktat löschen A B Language Index setzen Aufnahmeformat Autor Filter Einstellungen Language ZURÜCK WÄHLEN Sprachaktiviert Aus ZURÜCK WÄHLEN Sprac haktiv Aus iert: C Ein OK 4 CANC EL 3 1 2 Benutzerhandbuch crs955_ifu_en-de-fr.indb 49 49 25/01/2008 12:15:18 6 Drücken Sie die REC-Taste 5 und beginnen Sie zu diktieren. Die Status-LED 6 leuchtet während der Aufnahme rot (im Überschreibmodus) oder grün (im Einfügemodus). Wenn die Lautstärke den Schwellenwert a unterschreitet wird die Aufnahme nach 3 Sekunden unterbrochen und die Status-LED blinkt. 7 Drücken Sie während der Aufnahme die Taste + oder – 7 , um den Schwellenwert a anzupassen. 8 Um die Aufnahme zu beenden den SmartButton STOP drücken. 8 -27h18m DPM STOP a WIEDE 0955 RG 6 5 2 :3 4 2:34 DPM 0955.MP3 WIEDERG HQ -27H18M HQ .M P 3 STOP 8 7 HQ IN DE DP M INDEX 1 STOP DPM 0955.MP3 STOP TEMPO a EOL INDEX -27h18m 4.3.1 Einfügen einer Indexmarkierung 1 Drücken Sie die INDEX-Taste 1 während der Aufnahme oder Wiedergabe, um eine Indexmarkierung einzufügen a . Die Indexnummer wird für zwei Sekunden angezeigt. -27H18M REMOTE CONTROL HQ 4.3 Arbeiten mit Indexmarkierungen Mit Indexmarkierungen können bestimmte Stellen in einem Diktat als besonders interessant markiert werden. Besonders interessante Stellen wären beispielsweise der Anfang eines Hauptabschnitts, ein später zu überarbeitender Teil des Diktats oder irgendeine andere Stelle, auf die Sie später schnell zugreifen möchten. X1 09 55 .M P3 TEMPO 1 4.3.2 Löschen einer Indexmarkierung 1 Navigieren Sie durch Wiedergabe, Vorlauf oder Rücklauf zu der Indexmarkierung a , die Sie löschen möchten. 2 Drücken Sie im Stoppmodus die INDEX-Taste 1 , um die Indexmarkierung zu löschen. 50 crs955_ifu_en-de-fr.indb 50 Benutzerhandbuch 25/01/2008 12:15:19 -27h18m 2 :3 4 DP M 2:34 WIED 09 55 ERG DPM 0955.MP3 WIEDERG .M P3 NEU NEU 1 a 4.3.3 Löschen aller Indexmarkierung 1 Drücken Sie im Stoppmodus die MENÜTaste 1 , um das Menü aufzurufen. 2 Drücken Sie die Taste + oder – 2 , um den Menüeintrag Indizes löschen auszuwählen und drücken Sie den Smart-Button WÄHLEN 3 . 3 Drücken Sie den Smart-Button WÄHLEN 3 und den Smart-Button OK 4 , um das Löschen aller Indizes zu bestätigen, oder drücken Sie den Smart-Button ABBRUCH 3 , um den Vorgang ohne Löschen zu beenden. A Autor Alle löschen ? B Ja - löschen Einstellungen USB-Modus Indizes löschen Alle Indizes gehen verloren ! WÄHLEN ZURÜCK WÄHLEN schen ? schen !! AC C HTUN OK Alle löschen ? ZURÜCK Alle lö Ja - lö G !! ABBR UCH 4 D Hinweis Autornamen müssen zunächst mit der Philips Speech Exec Software angelegt werden. Weitere Informationen finden Sie unter Weitergehende Konfiguration auf Seite 48. Standardmäßig stehen die Autornamen ‚DPM 955‘ und ‚- - -‘ (leer) zur Verfügung. D E U T SC H #2 EOL INDEX HQ #2 REMOTE CONTROL -27h18m HQ 4.4 Einen Autornamen zuweisen Jeder Aufnahme kann ein Schlagwort, wie z.B. der Name des Autors zugewiesen werden. Das Schlüsselwort dient zur Identifikation einzelner Aufnahmen und kann in der Philips SpeechExec Software für die automatische Weiterleitung von Diktatdateien verwendet werden. So weisen Sie einem Diktat einen Autornamen zu: 1 Drücken Sie im Stoppmodus die MENÜTaste 1 , um das Menü aufzurufen. 2 Drücken Sie die Taste + oder – 2 , um den Menüeintrag Autor auszuwählen. 3 Drücken Sie den Smart-Button WÄHLEN 3 , um die Liste der Autornamen anzuzeigen. 4 Drücken Sie die Taste + oder – 2 , um einen Namen auszuwählen. 5 Drücken Sie zum Bestätigen den SmartButton OK 4 oder den Smart-Button ABBRUCH 3 , um keinen Namen zuzuweisen. 3 1 2 D Hinweis Der Menüeintrag Indizes löschen ist nur vorhanden, wenn das aktuelle Diktat zumindest eine Indexmarkierung hat. Benutzerhandbuch crs955_ifu_en-de-fr.indb 51 Delete dictation A Author: Index set DPM 955 Author −−− DPM 955 B OK ENTER OK 955 −−− Setup BACK Autho r: DPM CANCEL 4 CANC EL 3 1 2 51 25/01/2008 12:15:22 4.5 Display- und Toneinstellungen 4.5.1 Sprache einstellen Wenn Sie das Digital Pocket Memo zum ersten Mal aktivieren, müssen Sie die Sprache für die Benutzeroberfläche auswählen. Gehen Sie wie folgt vor, um die Sprache später zu ändern: 1 Drücken Sie im Stoppmodus die MENÜTaste 1 , um das Menü aufzurufen. 2 Drücken Sie die Taste + oder – 2 , um den Menüeintrag Einstellungen auszuwählen und drücken Sie den Smart-Button WÄHLEN 3 . 3 Drücken Sie die Taste + oder – 2 , um den Menüeintrag Language (Sprache) auszuwählen und drücken Sie den Smart-Button WÄHLEN 3 . 4 Drücken Sie die Taste + oder – 2 , um eine Sprache auszuwählen. 5 Drücken Sie den Smart-Button OK 4 , um die Einstellung zu speichern oder den SmartButton ABBRUCH 3 , um den Menüpunkt ohne Ändern der Einstellungen zu verlassen. Delete dictation A B Language English Index set Record format Author Sound filter Setup Voice activation Language BACK ENTER BACK ENTER Lang uage : Englis h França is Deuts ch Españo l OK C 4 CANC EL 3 1 2 52 crs955_ifu_en-de-fr.indb 52 4.5.2 Datum und Uhrzeit einstellen Wenn Sie das Digital Pocket Memo zum ersten Mal aktivieren, müssen Sie die Datum und Uhrzeit einstellen. Gehen Sie wie folgt vor, um die Einstellungen später zu ändern: 1 Drücken Sie im Stoppmodus die MENÜTaste 1 , um das Menü aufzurufen. 2 Drücken Sie die Taste + oder – 2 , um den Menüeintrag Einstellungen auszuwählen und drücken Sie den Smart-Button WÄHLEN 3 . 3 Drücken Sie die Taste + oder – 2 , um den Menüeintrag Datum & Zeit auszuwählen und drücken Sie den Smart-Button WÄHLEN 3 . 4 Drücken Sie wiederholt die Taste + oder – 2 , um die Werte für Jahr, Monat bzw. Tag zu ändern. 5 Drücken Sie den Smart-Button → 3 , um den Pfeil (↑) zum nächsten Eintrag zu bewegen. 6 Nachdem Sie den Tag eingestellt haben, drücken Sie den Smart-Button → 3 , um die richtige Zeit einzustellen. 7 Drücken Sie wiederholt die Taste + oder – 2 , um das 12-Stunden oder 24-StundenFormat auszuwählen, AM oder PM (wenn das 12-Stunden-Format gewählt wurde) auszuwählen und die Werte für Stunden und Minuten zu ändern. 8 Drücken Sie den Smart-Button → 3 , um die Richtigkeit von Datum und Uhrzeit zu bestätigen. DHinweis Falls Sie einen Fehler gemacht haben, können Sie mit dem Smart-Button ← 4 jederzeit wieder zurück gehen und Korrekturen vornehmen. Benutzerhandbuch 25/01/2008 12:15:23 A Record format Index set Microphone Author Noise reduction Setup Date & time Language BACK ENTER BACK B DATE: 2007-1 0 01 12/24: 4.5.4 Aufnahme-LED Die Status-/Aufnahme-LED leuchtet während der Aufnahme rot, wenn Sie aktiviert ist. C TIME: 24 14:22 4 OK ENTER 3 1 2 4.5.3 Einstellen der Displaybeleuchtung Das Display des Digital Pocket Memo verfügt über eine Hintergrundbeleuchtung die standardmäßig für acht Sekunden leuchtet, wenn eine Taste gedrückt wird. 1 Drücken Sie im Stoppmodus die MENÜTaste 1 , um das Menü aufzurufen. 2 Drücken Sie die Taste + oder – 2 , um den Menüeintrag Einstellungen auszuwählen und drücken Sie den Smart-Button WÄHLEN 3 . 3 Drücken Sie die Taste + oder – 2 , um den Menüeintrag Beleuchtung auszuwählen und drücken Sie den Smart-Button WÄHLEN 3 . 4 Drücken Sie die Taste + oder – 2 , um zwischen 8 Sek, 20 Sek und Aus zu wechseln. 5 Drücken Sie den Smart-Button OK 4 , um die Einstellung zu speichern oder den SmartButton ABBRUCH 3 , um den Menüpunkt ohne Ändern der Einstellungen zu verlassen. Delete dictation A Index set Record format Voice activation Backlight BACK B Sound filter Voice activation Author Backlight Setup Record lamp Language BACK On ENTER BACK ENTER Recor d lam On p: C Off OK 4 CANC EL 3 1 2 ight: on C c on Off OK 8 sec on ENTER A Index set 20 se Setup Language Delete dictation Backl 8 sec Author BACK B Sound filter 1 Drücken Sie im Stoppmodus die MENÜTaste 1 , um das Menü aufzurufen. 2 Drücken Sie die Taste + oder – 2 , um den Menüeintrag Einstellungen auszuwählen und drücken Sie den Smart-Button WÄHLEN 3 . 3 Drücken Sie die Taste + oder – 2 , um den Menüeintrag Aufnahme-Lampe auszuwählen und drücken Sie den Smart-Button WÄHLEN 3 . 4 Drücken Sie die Taste + oder – 2 , um zwischen Aus und Ein zu wechseln. 5 Drücken Sie den Smart-Button OK 4 , um die Einstellung zu speichern oder den SmartButton ABBRUCH 3 , um den Menüpunkt ohne Ändern der Einstellungen zu verlassen. D E U T SC H Delete dictation ENTER 4 CANC EL 3 1 2 Benutzerhandbuch crs955_ifu_en-de-fr.indb 53 53 25/01/2008 12:15:24 4.5.5 Kontrasteinstellungen Der Kontrast des Displays kann an die Umgebungshelligkeit angepasst werden. 1 Drücken Sie im Stoppmodus die MENÜTaste 1 , um das Menü aufzurufen. 2 Drücken Sie die Taste + oder – 2 , um den Menüeintrag Einstellungen auszuwählen und drücken Sie den Smart-Button WÄHLEN 3 . 3 Drücken Sie die Taste + oder – 2 , um den Menüeintrag Kontrast auszuwählen und drücken Sie den Smart-Button WÄHLEN 3 . 4 Drücken Sie die Taste + oder – 2 , um den Kontrast anzupassen. 5 Drücken Sie den Smart-Button OK 4 , um die Einstellung zu speichern oder den SmartButton ABBRUCH 3 , um den Menüpunkt ohne Ändern der Einstellungen zu verlassen. Delete dictation A Voice activation Backlight Author Record lamp MIN Contrast Language BACK ENTER BACK Contr ast C Index set Setup B OK ENTER MAX +− 4 CANC EL 3 1 2 4.5.6 Akustische Rückmeldung Das Digital Pocket Memo gibt eine akustische Rückmeldung (Piepton), wenn • während der Wiedergabe das Ende der Datei erreicht wird • während des schnellen Vor- oder Rücklaufs auf eine Indexmarkierung getroffen wird • der Batterieladestand unter 10 % fällt • der verfügbar Speicher unter zwei Minuten fällt • ein Befehl nicht ausgeführt werden kann 1 Drücken Sie im Stoppmodus die MENÜTaste 1 , um das Menü aufzurufen. 2 Drücken Sie die Taste + oder – 2 , um den Menüeintrag Einstellungen auszuwählen und drücken Sie den Smart-Button WÄHLEN 3 . 3 Drücken Sie die Taste + oder – 2 , um den Menüeintrag Piepton auszuwählen und drücken Sie den Smart-Button WÄHLEN 3 . 4 Drücken Sie die Taste + oder – 2 , um zwischen Aus und Ein zu wechseln. 5 Drücken Sie den Smart-Button OK 4 , um die Einstellung zu speichern oder den SmartButton ABBRUCH 3 , um den Menüpunkt ohne Ändern der Einstellungen zu verlassen. Delete dictation A B Backlight Index set Record lamp Author Contrast Setup Device beep Language BACK BACK ENTER e beep : C Off OK On ENTER Devic On 4 CANC EL 3 1 2 54 crs955_ifu_en-de-fr.indb 54 Benutzerhandbuch 25/01/2008 12:15:26 Menüübersicht Drücken Sie die MENÜ-Taste DIKTAT LÖSCHEN (siehe 3.4.1 Seite 46) INDEX SETZEN / LÖSCHEN (siehe 4.3 Seite 50) AUTOR (SCHLÜSSELWORT) (siehe 4.4 Seite 51) USB-MODUS (siehe 2.2.2 Seite 33) ALLE INDIZES LÖSCHEN (siehe 4.4.3 Seite 51) ABSCHNITT LÖSCHEN (siehe 3.4.2 Seite 46) EINSTELLUNGEN LANGUAGE (siehe 4.5.1 Seite 52) AUFNAHMEFORMAT (siehe 3.1.5 Seite 42) FILTER (SPRACHE/MUSIK) (siehe 3.2.6 Seite 43) SPRACHAKTIVIERT (siehe 4.2 Seite 49) BELEUCHTUNG (AUS / 8 s / 20 s) (siehe 4.5.3 Seite 53) AUFNAHME-LAMPE EIN / AUS (siehe 4.5.4 Seite 53) KONTRAST (siehe 4.5.5 Seite 54) PIEPTON EIN / AUS (siehe 4.5.6 Seite 54) MIKROFONEMPFINDLICHK. (siehe 3.2.5 Seite 43) RAUSCHMINDERUNG EIN / AUS (siehe 3.3.2 Seite 45) DATUM & ZEIT (siehe 4.5.2 Seite 52) USB-SCHNELLLADEN EIN / AUS (siehe 2.2.2 Seite 33) ALLE DIKTATE LÖSCHEN (siehe 3.4.3 Seite 47) SPEICHERKARTE FORMATIEREN (siehe 2.3 Seite 35) WIEDERGABELAUTSTÄRKE SCHRIFTART (MODERN / KLASSISCH) HAUPTMENÜ D Hinweis Einige Einstellungen, wie das Wechseln zum einfachen Displaymodus und die Definition von Autorennamen können nur mit der Philips SpeechExec Dictate Software geändert werden. Weitere Informationen finden Sie unter Weitergehende Konfiguration auf Seite 48. D E U T SC H 4.6 MENÜ EINSTELLUNGEN crs955_ifu_en-de-fr.indb 55 Benutzerhandbuch 55 25/01/2008 12:15:27 Gegenerklärung und Hinweise Philips führt ausführliche Tests mit den gebräuchlichsten Konfigurationen durch. PC-Peripherie und Gerätetreiber ändern sich jedoch äußerst rasch, so dass ein konfliktfreies Funktionieren nicht garantiert werden kann. Philips haftet nicht für Datenverlust. 56 crs955_ifu_en-de-fr.indb 56 Benutzerhandbuch 25/01/2008 12:15:27 1 1.1 1.2 1.3 2 2.1 2.2 2.2.1 2.2.2 2.2.3 2.3 2.4 2.5 2.5.1 2.5.2 2.6 Bienvenue 58 Contenu de l’emballage 58 Aperçu général – commandes et connexions 59 Aperçu général – indicateurs et symboles de l’écran 60 Pour commencer 61 Mettre les piles en place 61 Recharger les piles 61 Recharger les piles avec l‘unité d‘alimentation Philips 61 Recharger les piles via le câble USB 61 Recharger les piles via la station d‘accueil 62 Mettre en place/retirer la carte mémoire62 Formater une nouvelle carte mémoire 63 Mettre le Digital Pocket Memo en service 64 Programmer la langue 64 Programmer la date et l‘heure 64 Mode économique 65 3 Utilisation de votre système 66 3.1 Avant un enregistrement 66 3.1.1 Enregistrement d’une réunion : mettez en place et connectez les micros de conférence 66 3.1.2 Connecter la télécommande 67 3.1.3 Enregistrement d’une interview : installez le micro amovible 67 3.2 Enregistrer 68 3.2.1 Créer un nouvel enregistrement 68 3.2.2 Compléter un enregistrement 69 Manuel de l‘utilisateur crs955_ifu_en-de-fr.indb 57 3.2.3 3.2.4 3.2.5 3.2.6 3.2.7 3.3 3.3.1 3.3.2 3.4 3.4.1 3.4.2 3.4.3 Terminer (verrouiller) un enregistrement69 Modifier le format d’enregistrement 70 Régler la sensibilité du microphone 70 Activer le filtre 71 Vérifier l’enregistrement 71 Lecture 72 Aperçu général des fonctions de lecture 73 Réduction du bruit 73 Supprimer 74 Supprimer une dictée 74 Supprimer une partie d‘une dictée 74 Supprimer toutes les dictées 75 4 Comment mieux tirer parti de votre système 76 Utiliser le logiciel Philips SpeechExec 76 Configuration avancée 76 Transférer des enregistrements sur le PC77 Utiliser le déclenchement vocal de l’enregistrement 77 Utiliser des index 78 Insérer un index 78 Supprimer un index 78 Supprimer tous les index 79 Attribuer un nom d’auteur 79 Fonctions affichage et son 80 Programmer la langue 80 Programmer la date et l‘heure 80 Rétro éclairage 81 Voyant enregistrement 81 Contraste de l’écran 82 Signal sonore 82 Paramètres du menu 83 4.1 4.1.1 4.1.2 4.2 4.3 4.3.1 4.3.2 4.3.3 4.4 4.5 4.5.1 4.5.2 4.5.3 4.5.4 4.5.5 4.5.6 4.6 FR A N Ç A I S Manuel de l‘utilisateur 57 25/01/2008 12:15:27 1 Bienvenue Félicitations pour votre achat et bienvenue dans l’univers Philips ! Pour pleinement profiter de l’assistance proposée par Philips, veuillez consulter notre site Internet pour obtenir des informations sur les manuels de l’utilisateur, les téléchargements de logiciels et bien d’autres choses encore, à l’adresse suivante : www.philips.com/dictation. • Compact et facile à utiliser, le système d’enregistrement de réunions Philips répond à tous vos besoins dans ce domaine. • L’équipement comprend deux microphones de conférence omnidirectionnels d’excellente qualité qui permettent d’enregistrer toute conversation en qualité stéréo. • Lorsque les participants sont nombreux, il est possible de connecter jusqu’à 6 micros pour augmenter la zone couverte (jusqu’à 32 participants). • Le microphone amovible, peu encombrant, est la solution idéale pour enregistrer des interviews en mode stéréo haute qualité. 1.1 Contenu de l’emballage Digital Pocket Memo CD-ROM Station d‘accueil USB 2 micros de conférence Micro amovible pour interview Adaptateur Y Alimentation Carte mémoire SD Câble mini USB Piles 58 crs955_ifu_en-de-fr.indb 58 Télécommande Guide de départ rapide, manuel de l’utilisateur Manuel de l‘utilisateur 25/01/2008 12:15:29 Aperçu général – commandes et connexions 1 1 Micro amovible pour interview Digital Pocket Memo 5 Microphone intégré 6 Voyant d’état 7 Bouton EOL (end-of-letter/fin de dictée) 8 Bouton REC (Enregistrer) 9 Bouton REW (Retour) 10 Bouton FWD (Avance) 11 Bouton Menu 12 Mise sous/hors tension 13 Connexion microphone 14 Connexion écouteurs/télécommande 15 Ecran à cristaux liquides 16 Boutons multifonctions 17 Bouton index 18 Contrôle du volume, +/- et menu navigation 19 Haut-parleur 20 Emplacement carte mémoire 21 Compartiment des piles 22 Connexion station d’accueil 23 Connexion alimentation 24 Connexion USB Station d’accueil USB 25 Emplacement pour le Digital Pocket Memo 26 Indicateur de charge Manuel de l‘utilisateur crs955_ifu_en-de-fr.indb 59 2 EOL INDEX 3 4 REMOTE CONTROL Télécommande 2 Bouton REC (Enregistrer) 3 Bouton Index 4 Bouton EOL (end-of-letter/fin de dictée) 13 14 5 6 7 8 9 10 11 15 16 17 18 19 12 20 FR A N Ç A I S 1.2 21 22 23 24 28 25 26 27 29 30 59 25/01/2008 12:15:31 30 Microphone de conférence 27 Indicateur de téléchargement 28 Prise pour l’alimentation secteur 29 Port mini-USB pour connexion avec le PC 1.3 Aperçu général – indicateurs et symboles de l’écran 8 9 10 11 -27h10m HQ #1 7 6 5 4 16 9:23 2 DPM 0955.MP3 LECTURE 1 Fonction actuelle du bouton multifonctions de gauche 2 Nom de fichier 3 Durée d’enregistrement / de lecture 4 Barre d‘état 5 Position actuelle dans l‘enregistrement 6 Barre de volume d’enregistrement du canal gauche 7 Numéro de l‘enregistrement 8 Témoin de charge des piles 9 Mode d‘enregistrement 10 Carte mémoire protégée en écriture (verrouillée) crs955_ifu_en-de-fr.indb 60 13 14 15 3 1 60 12 17 NOUVEAU 18 11 Déclenchement vocal activé 12 Durée d’enregistrement restante 13 Enregistrement marqué comme prioritaire 14 Enregistrement marqué comme terminé (EOL) et verrouillé 15 Barre de volume d’enregistrement du canal droit 16 Enregistrement avec index 17 Seuil de déclenchement vocal de l‘enregistrement 18 Fonction actuelle du bouton multifonctions de droite Manuel de l‘utilisateur 25/01/2008 12:15:32 2.1 Mettre les piles en place Le Digital Pocket Memo est alimenté par deux piles AAA, livrées avec le produit. Vous pouvez également utiliser des piles alcalines AAA standard (non rechargeables). 1 Vérifiez que le Digital Pocket Memo est hors tension. 2 Ouvrez le compartiment des piles, à l‘arrière du Digital Pocket Memo, en faisant coulisser le couvercle vers le haut puis en le soulevant. 3 Insérez les deux piles AAA en respectant la polarité comme indiqué à l‘intérieur du compartiment. 1 2 1 2 4 Refermez le compartiment des piles en rabattant le couvercle puis en le faisant coulisser vers le bas jusqu‘à ce que vous entendiez un clic. DNote Ne mélangez pas différents types de piles ! Utilisez soit deux piles rechargeables soit deux piles alcalines non rechargeables. Manuel de l‘utilisateur crs955_ifu_en-de-fr.indb 61 2.2 Recharger les piles Le Digital Pocket Memo peut être alimenté par les piles rechargeables Philips AAA. Pour les recharger, vous pouvez utiliser l‘unité d’alimentation secteur Philips, la station d‘accueil ou le câble USB. 2.2.1 Recharger les piles avec l‘unité d‘alimentation Philips 1 Branchez l‘unité d‘alimentation Philips sur le secteur. 2 Connectez le Digital Pocket Memo à l‘unité d‘alimentation secteur Philips. DNote Vous pouvez continuer à utiliser le Digital Pocket Memo. Les piles se rechargent pendant que vous travaillez et continueront à se charger même si vous mettez le Digital Pocket Memo hors tension. FR A N Ç A I S 2 Pour commencer 2.2.2 Recharger les piles via le câble USB Lorsque le Digital Pocket Memo est connecté à un PC ou un portable à l’aide du câble USB fourni, les piles se rechargent automatiquement. Si le port USB de votre ordinateur est à haute puissance, un cycle de charge complet prend environ 2h30. Le Digital Pocket Memo passe en mode Téléchargement PC et fait fonction de haut-parleur et de micro pour le PC auquel il est connecté. Pour continuer à enregistrer avec le Digital Pocket Memo pendant la charge USB, passez en mode Alimentation USB en appuyant sur le bouton REC 61 25/01/2008 12:15:32 1 Vérifiez que la station d’accueil est connectée au secteur via l’unité d’alimentation Philips. 2 Placez le Digital Pocket Memo dans la station d’accueil en appuyant fermement pour le verrouiller. Le voyant vert s’allume pour indiquer que les piles du Digital Pocket Memo sont en charge rapide. 3 Vous pouvez vous servir du Digital Pocket Memo en le laissant dans la station d’accueil ou le mettre hors tension si vous ne l’utilisez pas. 4 Lorsque le voyant vert clignote, les piles sont rechargées. Vous pouvez retirer le Digital Pocket Memo de la station d’accueil. 62 crs955_ifu_en-de-fr.indb 62 Mettre en place/retirer la carte mémoire Le Digital Pocket Memo fonctionne avec une carte mémoire SD (SecureDigital). Il accepte les cartes SD jusqu’à 2 Go. Votre Digital Pocket Memo vous est fourni avec une carte mémoire déjà mise en place et formatée. Pour éjecter une carte mémoire : 1 Localisez l’emplacement de la carte mémoire, en haut, à l’arrière du Digital Pocket Memo. 2 Appuyez sur la carte mémoire jusqu’à ce que vous entendiez un clic. 1 3 Relâchez la carte mémoire : elle sort légèrement de la fente. 1 2 ips 2.2.3 Recharger les piles via la station d‘accueil 2.3 ck CAttention Si le port USB de votre ordinateur n‘est pas compatible avec la norme haute alimentation (500 mA), désactiver Charge rapide USB à partir du menu du Digital Pocket Memo et chargez les piles avec l’unité d’alimentation secteur. phil DNote Le PC doit être sous tension pendant la charge des piles via le câble USB. Le Digital Pocket Memo peut chauffer pendant la charge rapide. DNote Lorsque le Digital Pocket Memo est connecté à la station d‘accueil, il est alimenté par la station d‘accueil et non par les piles. Si votre Digital Pocket Memo est équipé de piles rechargeables, celles-ci se rechargent automatiquement lorsque le Digital Pocket Memo est connecté à la station d‘accueil. Unlo pendant trois secondes lorsque le Digital Pocket Memo est connecté au PC. Le Digital Pocket Memo repasse automatiquement en mode Téléchargement PC une fois qu’il est déconnecté du PC. Manuel de l‘utilisateur 25/01/2008 12:15:33 2.4 DNote Si vous mettez le Digital Pocket Memo sous tension sans avoir inséré de carte mémoire, un message d’avertissement est affiché. 1 Pour confirmer et commencer le formatage, appuyez sur le bouton OK 1 . 2 Si vous voulez annuler l’opération, retirez la carte mémoire ou appuyez sur le bouton ANNULER 2 . La carte mémoire qui est fournie avec le Digital Pocket Memo est déjà formatée et prête à être utilisée. Si vous insérez une carte mémoire non formatée, le Digital Pocket Memo vous propose de la formater. Pour plus d’informations sur le formatage, reportez-vous au chapitre suivant. Formater une nouvelle carte mémoire Lorsque vous insérez dans le Digital Pocket Memo une nouvelle carte mémoire non formatée ou une carte qui a été formatée avec un autre appareil qu’un Digital Pocket Memo, celui-ci vous demande si vous voulez formater la carte mémoire. A Formater mémoireA Supprimer tout ? Supprimer tout ? Oui - formater B Volume Tous les fichiers seront supprimés ! Caractère Language RETOUR Suppr imer Oui - RETOUR ENTRER tout ? format C er !! ATTE NTIO OK ENTRER FR A N Ç A I S Pour insérer une carte mémoire : 1 Localisez l’emplacement de la carte mémoire en haut, à l’arrière du Digital Pocket Memo. 2 Insérez la carte mémoire dans la fente. Un petit symbole, à côté de la fente vous indique le sens d’insertion. 2 3 Poussez la carte mémoire jusqu’à ce que vous entendiez un clic. N !! ANNUL ER 1 2 Le Digital Pocket Memo ne pourra effectuer aucun enregistrement sans une carte mémoire correctement formatée. Si vous avez inséré une nouvelle carte mémoire puis annulé le formatage, vous devez insérer une autre carte qui peut être formatée ou l’a déjà été. DNote Il est impossible de formater une carte mémoire qui est en mode lecture seule (verrouillée). Manuel de l‘utilisateur crs955_ifu_en-de-fr.indb 63 63 25/01/2008 12:15:34 2.5 Mettre le Digital Pocket Memo en service Pour mettre le Digital Pocket Memo sous/hors tension, utilisez l‘interrupteur ON/OFF. Lors de la première utilisation, vous devrez indiquer la langue choisie ainsi que la date et l‘heure. DNote Vous pourrez modifier la langue plus tard à partir du menu. Pour plus d‘informations, reportezvous à la rubrique Programmer la langue page 80. 2.5.2 Programmer la date et l‘heure Une fois que vous avez choisi la langue de l’interface utilisateur, vous devez programmer la date et l‘heure actuelles sur le Digital Pocket Memo. 2.5.1 Programmer la langue Lors de la première utilisation vous devez choisir une langue. 1 Sélectionnez la langue voulue en appuyant sur les boutons + et – 1 du Digital Pocket Memo. 2 Appuyez sur le bouton OK 2 pour confirmer votre choix. L‘interface utilisateur est alors affichée dans la langue sélectionnée. LANGUAGE LANGUE SPRACHE IDIOMA INT FR DE ES LANG UA LANG GE UE SPRA CH IDIOM E A EXIT EXIT -/+ OK -/+ crs955_ifu_en-de-fr.indb 64 DATE: 2007-1 0 01 DATE: INT FR DE ES 2007-10-01 12/24: 12/24: TIME: 24 24 OK 2 TIME: 14:22 14:22 1 64 1 Modifiez les données affichées pour l‘année, le mois ou le jour en appuyant le nombre de fois nécessaire sur les boutons + ou – 1 . 2 Appuyez sur le bouton → 2 pour placer le curseur (↑) au niveau de l‘entrée suivante. 3 Une fois que vous avez programmé la date, appuyez sur le bouton → 2 pour placer le curseur au niveau de l‘heure. 4 A l‘aide des boutons + ou – 1 choisissez l‘affichage sur 12 ou 24 heures, AM (avant-midi) ou PM (après-midi) dans le cas de l‘affichage sur 12 heures, et réglez l‘heure et les minutes. 5 Appuyez sur le bouton → 2 pour confirmer la date et l‘heure saisies. Vous pouvez maintenant vous servir du Digital Pocket Memo. OK OK 3 2 1 Manuel de l‘utilisateur 25/01/2008 12:15:35 DNote En cas d‘erreur en cours de programmation, vous pouvez utiliser le bouton ← 3 à n‘importe quel moment pour revenir en arrière et corriger. Vous pourrez modifier plus tard la date et l‘heure à partir du menu. Pour plus d‘informations, reportez-vous à la rubrique Programmer la date et l‘heure page 80. FR A N Ç A I S 2.6 Mode économique Après quatre minutes d’inactivité, le Digital Pocket Memo se met automatiquement en mode économique et son écran à cristaux liquides affiche la date et l’heure. Appuyez sur n’importe quel bouton pour le réactiver. Si le Digital Pocket Memo n’est pas utilisé pendant plus de deux heures, il s’éteint complètement. Allumez-le en plaçant l’interrupteur On/Off sur la position OFF, puis sur la position ON. Manuel de l‘utilisateur crs955_ifu_en-de-fr.indb 65 65 25/01/2008 12:15:35 1 3 Utilisation de votre système 3.1 Avant un enregistrement Le Digital Pocket Memo comprend un micro monaural interne qui sert à enregistrer en l’absence de microphone externe. Nous vous conseillons d’utiliser les micros de conférence pour enregistrer une réunion ou le micro amovible pour les interviews afin d’obtenir un son de meilleure qualité et d’avoir une meilleure couverture. 2.5 m / 8 ft DNote Lorsqu’un micro externe est connecté au Digital Pocket Memo, le micro interne est désactivé. 2 2 m / 6.5 ft 5 m / 16.5 ft 3.1.1 Enregistrement d’une réunion : mettez en place et connectez les micros de conférence 1 Vérifiez que l’enregistreur est arrêté. 2 Branchez la prise de l’adaptateur en Y sur la sortie micro du Digital Pocket Memo 3 Branchez la prise de chaque micro sur une sortie de l’adaptateur en Y. 1 4 Pour obtenir une qualité d’enregistrement optimale, placez les micros sur une table de façon à ce qu’aucun participant ne soit à plus de 2 mètres du micro. 2 66 crs955_ifu_en-de-fr.indb 66 EConseil Lorsque les participants sont nombreux, vous pouvez couvrir un espace plus grand en reliant 3 micros entre eux puis en les branchant sur chacune des deux sorties micro de l’adaptateur Y. 3 4 5 3 Manuel de l‘utilisateur 25/01/2008 12:15:37 2.5 m / 8 ft 4 3.1.2 Connecter la télécommande 1 Branchez la fiche de la télécommande sur la sortie télécommande du Digital Pocket Memo. 2 m / 6.5 ft 13 m / 42.5 ft Reliez et utilisez jusqu’à 6 micros de conférence 5 FR A N Ç A I S 7 m / 23 ft 2 m / 6.5 ft D Note Lorsque la télécommande est connectée, tous les boutons du Digital Pocket Memo peuvent être utilisés sauf le bouton REC. 6 m / 20 ft Reliez et utilisez jusqu’à 6 micros de conférence 3.1.3 Enregistrement d’une interview : installez le micro amovible 1 Vérifiez que l’enregistreur est arrêté. 2 Branchez la fiche du micro amovible sur la sortie micro du Digital Pocket Memo. Manuel de l‘utilisateur crs955_ifu_en-de-fr.indb 67 67 25/01/2008 12:15:39 Enregistrer L’information suivante s’affiche : a Durée d’enregistrement restante b Mode d’enregistrement c Position dans l’enregistrement d Durée d’enregistrement e Nom de fichier f Volume d’enregistrement (canal gauche) g Volume d’enregistrement (canal droit) 1 Vérifiez qu‘une carte mémoire est insérée à l‘emplacement voulu. Pour plus d‘informa tions, reportez-vous à la rubrique Mettre en place/retirer la carte mémoire page 62. 2 Mettez le Digital Pocket Memo sous tension en faisant coulisser l‘interrupteur sur la position ON. 1 3 Appuyez sur le bouton multifonctions NOUVEAU 2 pour créer un nouvel enregistrement. D Note Le bouton multifonctions NOUVEAU n’est pas affiché si l’enregistrement actuel est vide. HQ #1 -27h10m -27 # 1 10 h m 9 :2 3 9:23 DPM DPM 0955.MP3 LECTURE HQ NOUVEAU LECTUR 0955 E .M P 3 NOUVE AU 2 1 4 Appuyez sur le bouton REC 3 et commencez à parler. Pendant l‘enregistrement, le voyant d‘état 4 est rouge. D Note Lorsque la commande à distance est connectée, le bouton REC du Digital Pocket Memo est désactivé. 68 crs955_ifu_en-de-fr.indb 68 c d e b a HQ -27h18m 4 DP M 09 55 LECTUR E DPM 0955.MP3 f -27h18m 3 2 :3 4 2:34 LECTURE HQ ARRET g EOL INDEX 3.2.1 Créer un nouvel enregistrement Pour enregistrer avec le Digital Pocket Memo, procédez comme indiqué ci-dessous : REMOTE CONTROL 3.2 .M P3 ARRET 5 5 Pour arrêter l’enregistrement, appuyez sur le bouton REC 3 ou sur le bouton multifonctions ARRÊT 5 . E Conseils • Appuyez sur le bouton EOL pendant l’enregistrement pour marquer l’enregistrement en cours comme terminé et continuer automatiquement à enregistrer dans un nouveau fichier. Pour plus d‘informations, reportez-vous à la rubrique Terminer (verrouiller) un enregistrement page 69. • Vous pouvez insérer un index en appuyant sur la touche INDEX pendant l’enregistrement ou la lecture. Pour plus d‘informations, reportezvous à la rubrique Utiliser des index page 78. Manuel de l‘utilisateur 25/01/2008 12:15:41 -27h18m HQ -27h18m 2 2 :3 4 DP M 2:34 LECTUR E DPM 0955.MP3 LECTURE 09 55 ARRET #2 -27h10m 2 9 :2 3 DP M DEBUT 09 55 DEBU T DPM 0955.MP3 .M P3 FR A N Ç A I S NOUV EAU NOUVEAU 1 ARRE T 3 3.2.3 Terminer (verrouiller) un enregistrement Lorsque vous avez terminé un enregistrement et ne souhaitez pas apporter d’autres modifications, suivez les indications données ciaprès pour qu’il soit marqué comme terminé et protégé contre toute suppression accidentelle : 1 Appuyez sur le bouton + ou – 1 quand l’appareil est arrêté pour sélectionner crs955_ifu_en-de-fr.indb 69 HQ #2 .M P3 1 Manuel de l‘utilisateur -27h10m HQ 9:23 REMOTE CONTROL HQ EOL INDEX a b EOL INDEX 1 Lorsque l’enregistreur est à l’arrêt, utilisez les boutons + ou – 1 pour sélectionner le fichier à compléter. 2 Appuyez sur le bouton REC 2 et commencez à parler. L’enregistrement sera automatiquement ajouté à la fin de l’enregistrement existant. 3 Appuyez sur le bouton multifonctions ARRÊT 3 pour arrêter d’enregistrer. l’enregistrement que vous souhaitez marquer comme terminé. 2 Appuyez sur le bouton EOL 2 pour que la dictée soit marquée comme terminée. Le symbole ┱ est affiché sur l‘écran. a 3 Si vous voulez que cette dictée soit marquée comme prioritaire, appuyez de nouveau sur le bouton EOL 2 dans la demi-seconde qui suit. Le symbole ! est affiché sur l‘écran. Il indique que la dictée est prioritaire pour la transcription. b 4 Si vous souhaitez la modifier, il vous faudra appuyer de nouveau sur la touche EOL 2 pour supprimer la marque terminée. REMOTE CONTROL 3.2.2 Compléter un enregistrement Quelle que soit votre position dans l’enregistrement, les ajouts sont toujours placés à la fin du fichier et n’effacent pas l’enregistrement existant. Pour compléter votre enregistrement, procédez comme suit : E Conseil Le logiciel SpeechExec peut être configuré pour transférer des fichiers uniquement marqués comme terminés du Digital Pocket Memo vers le PC. C Attention Les fichiers marqués comme terminés sont supprimés lorsque la carte mémoire est formatée ou lorsque la fonction ‘Supprimer toutes les dictées’ est utilisée. 69 25/01/2008 12:15:43 3.2.4 Modifier le format d’enregistrement Le format choisi détermine la qualité audio de vos enregistrements et le temps total d’enregistrement que vous pouvez sauvegarder sur votre carte mémoire. Le Digital Pocket Memo accepte les formats suivants: Mode d’enregistrement PCM XHQ HQ QP SP Canaux Format enregisfichier trement .pcm 2 canaux .mp3 2 canaux .mp3 2 canaux .ds2 (DSS QP) Mono .dss (DSS SP) Mono Temps d’enregistrement (mémoire 1 Go) 1,5 heures 18 heures 36 heures 85 heures 170 heures D Note Le mode d’enregistrement PCM n’est pas disponible par défaut et doit être activé via Philips SpeechExec Dictate. Pour plus d‘informations, reportez-vous à la rubrique Configuration avancée page 76. 1 Appuyez sur le bouton MENU 1 quand le Digital Pocket Memo est arrêté pour ouvrir le menu. 2 Appuyez sur le bouton + ou – 2 pour sélectionner l’option Installation du menu puis sur le bouton multifonctions ENTRER 3 . 3 Appuyez sur le bouton + ou – 2 pour sélectionner l’option Format enregistrement du menu et appuyez sur le bouton multifonctions ENTRER 3 . 4 Appuyez sur le bouton + ou – 2 pour choisir une mode d’enregistrement. 5 Appuyez sur le bouton multifonctions OK 70 crs955_ifu_en-de-fr.indb 70 4 pour enregistrer le paramétrage ou sur le bouton multifonctions ANNULER 3 pour quitter le sous-menu sans modifier le paramétrage. Supprimer dictée A Language Insérer index Format enregistr. Auteur Filtre Installation HQ <DSS> Déclenchem. vocal Language RETOUR B ENTRER RETOUR ENTRER Form at en regist PCM r.: <PCM C > XHQ <MP3 > HQ <MP3 > SP <DSS > QP <DS2> OK ANNUL ER 4 3 1 2 3.2.5 Régler la sensibilité du microphone Réglez la sensibilité du microphone en fonction de l’environnement sonore et de votre façon de dicter. 1 Appuyez répétitivement sur le bouton MENU 1 pendant l’enregistrement pour choisir la sensibilité du microphone: Privé (bas), Dictée (moyen) et Conférence (haut). Vous pouvez également régler la sensibilité du microphone à partir du menu: 1 Appuyez sur le bouton MENU 1 quand le Digital Pocket Memo est arrêté pour ouvrir le menu. 2 Appuyez sur le bouton + ou – 2 pour sélectionner l’option Installation du menu puis sur le bouton multifonctions ENTRER 3 . 3 Appuyez sur le bouton + ou – 2 pour sélectionner l’option Microphone du menu puis sur le bouton multifonctions ENTRER. 3 Manuel de l‘utilisateur 25/01/2008 12:15:44 4 Appuyez sur le bouton + ou – 2 pour choisir la sensibilité du microphone: Privé (bas), Dictée (moyen) et Conférence (haut). 5 Appuyez sur le bouton multifonctions OK 4 pour enregistrer le paramétrage ou sur le bouton multifonctions ANNULER 3 pour quitter le sous-menu sans modifier le paramétrage. Lamp témoin Insérer index Contraste Auteur Signal sonore Installation Microphone Language RETOUR B RETOUR phon e: Confé rence Dicté Conférence ENTRER Micro ENTRER C e B Auteur Filtre Installation Déclenchem. vocal Filtre : Voix C Musiq ue Voix ENTRER RETOUR ENTRER OK 4 ANNUL ER 3 1 ANNUL 4 ER 2 3 2 3.2.6 Activer le filtre Activez le filtre pour réduire les sons basse et haute fréquence et optimiser l’enregistrement des voix. 1 Appuyez sur le bouton MENU 1 quand le Digital Pocket Memo est arrêté pour ouvrir le menu. 2 Appuyez sur le bouton + ou – 2 pour sélectionner l’option Installation du menu puis sur le bouton multifonctions ENTRER 3 . 3 Appuyez sur le bouton + ou – 2 pour sélectionner l’option Filtre du menu puis sur le bouton multifonctions ENTRER. 3 4 Appuyez sur le bouton + ou – 2 pour choisir Voix (filtre activé) ou Musique (filtre désactivé). crs955_ifu_en-de-fr.indb 71 Format enregistr. RETOUR 1 Manuel de l‘utilisateur Language Insérer index Language Privé OK Supprimer dictée A 3.2.7 Vérifier l’enregistrement Vous pouvez connecter des écouteurs au Digital Pocket Memo pour entendre ce qui est enregistré et vérifier le niveau d’enregistrement. FR A N Ç A I S Supprimer dictée A 5 Appuyez sur le bouton multifonctions OK 4 pour enregistrer le paramétrage ou sur le bouton multifonctions ANNULER 3 pour quitter le sous-menu sans modifier le paramétrage. 1 Branchez les écouteurs sur la sortie correspondante du Digital Pocket Memo. 2 Pour régler le volume sonore pendant l’enregistrement, appuyez sur les boutons + ou –. 71 25/01/2008 12:15:46 D Note Vous ne pouvez pas régler le niveau d’enregistre- ment à l’aide du bouton de réglage du volume. Si le niveau d’enregistrement est trop faible ou trop élevé, réglez la sensibilité du micro. Appuyez répétitivement sur le bouton MENU pendant l’enregistrement pour choisir la sensibilité du microphone. Pour plus d‘informations, reportez-vous à la rubrique Régler la sensibilité du microphone page 70. Lorsque le déclenchement vocal de l’enregistrement est activé, toute action sur les boutons + ou – modifie le niveau du seuil d’enregistrement et non le volume. 3.3 Lecture 1 Appuyez sur le bouton + ou – 1 quand l’appareil est arrêté pour sélectionner l’enregistrement à lire. Appuyez sur le bouton multifonctions LECTURE 2 pour commencer la lecture. L’information ci-après s’affiche: a Position actuelle dans l’enregistrement b Mode d’enregistrement c Temps de lecture d Nom de fichier 2 Appuyez sur le bouton + ou – 1 pour régler le niveau sonore pendant la lecture. 3 Appuyez sur le bouton multifonctions VITESSE 3 pour régler la vitesse de lecture du fichier. 4 Appuyez sur le bouton multifonctions ARRÊT 2 pour arrêter la lecture. b HQ #2 -27h18m a -27h18m HQ 2:34 DPM 0955.MP3 DPM 0955.MP3 NOUVEAU ARRET c -27h18m 2 :3 4 0:00 LECTURE HQ DPM VITESSE ARRET 0955 .M P 3 2 VITES SE 3 d 1 E Conseil Pour accéder à des informations supplémentaires sur les fichiers, l‘appareil et la carte mémoire, appuyez en continu sur le bouton MENU. 72 crs955_ifu_en-de-fr.indb 72 Manuel de l‘utilisateur 25/01/2008 12:15:47 Retour Appuyez brièvement sur le bouton RETOUR 1 rapide quand l’appareil est arrêté. Appuyez sur le bouton multifonctions ARRÊT 3 pour arrêter le retour ou sur le bouton multifonctions LECTURE 4 pour arrêter le retour et commencer la lecture. Avance Appuyez brièvement sur le bouton AVANCE 2 rapide quand l’appareil est arrêté. Appuyez sur le bouton multifonctions ARRÊT 3 pour arrêter l’avance rapide ou sur le bouton multifonctions LECTURE 4 pour arrêter l’avance rapide et commencer la lecture. Retour Appuyez en continu sur le bouton RETOUR 1 pendant la lecture ou l’enregistrement. Relâchez le bouton RETOUR lorsque vous avez atteint la position voulue. Avance Appuyez en continu sur le bouton AVANCE 2 pendant la lecture ou l’enregistrement. Relâchez le bouton AVANCE pour commencer la lecture. Retour Appuyez brièvement sur le bouton RETOUR 1 automati- pendant la lecture ou l’enregistrement pour revenir que 3.3.2 Réduction du bruit Cette fonction réduit les bruits de fond parasites et améliore la qualité sonore de la lecture. 1 Appuyez sur le bouton MENU 1 quand le Digital Pocket Memo est arrêté pour ouvrir le menu. 2 Appuyez sur le bouton + ou – 2 pour sélectionner l’option Installation du menu puis sur le bouton multifonctions ENTRER 3 . 3 Appuyez sur le bouton + ou – 2 pour sélectionner l’option Réduction bruit du menu puis sur le bouton multifonctions ENTRER 3 . 4 Appuyez sur le bouton + ou – 2 pour choisir MARCHE ou ARRÊT. 5 Appuyez sur le bouton multifonctions OK 4 pour enregistrer le paramétrage ou sur le bouton multifonctions ANNULER 3 pour quitter le sous-menu sans modifier le paramétrage. FR A N Ç A I S 3.3.1 Aperçu général des fonctions de lecture en arrière d’une seconde et commencer la lecture. HQ -27h10m -27h10m 5 :1 6 5:16 DPM DPM 0955.MP3 LECTURE HQ NOUVEAU 0955 LECTUR E 1 .M P 3 NOUVE AU Supprimer dictée A Contraste Insérer index Signal sonore B Auteur Microphone Installation Reduction bruit Language RETOUR Marche ENTRER RETOUR ENTRER Reduc tion br uit : C e March Arrêt OK 4 ANNUL ER 3 2 1 3 2 4 Manuel de l‘utilisateur crs955_ifu_en-de-fr.indb 73 73 25/01/2008 12:15:48 3.4 Supprimer D Note Avant de supprimer une dictée, vérifiez qu‘elle n‘est pas marquée comme terminée et que la carte mémoire n‘est pas en lecture seule (verrouillée). Si la dictée est marquée comme terminée, déverrouillez-la en appuyant sur le bouton EOL une fois. 3.4.1 Supprimer une dictée Pour supprimer une dictée, procédez comme indiqué ci-dessous: 1 Appuyez sur le bouton + ou – 1 quand l’appareil est arrêté pour sélectionner le fichier que vous souhaitez supprimer. 2 Appuyez sur le bouton MENU 2 pour ouvrir le menu du Digital Pocket Memo. L’option Supprimer dictée du menu est sélectionnée. 3 Appuyez sur le bouton multifonctions ENTRER 3 pour entrer dans le sous-menu. 4 Appuyez sur OK 4 pour supprimer la dictée. Appuyez sur ANNULER 3 pour annuler l‘opération et conserver la dictée. Supprimer dictée A Supprimer dictée :B Suppr imer Insérer index Supprimer ? Suppr imer Supprimer ? Auteur !! ATTE Installation RETOUR !! ATTENTION !! ENTRER OK ANNULER dictée : ? NTIO OK N !! 4 ANNUL ER 3 2 1 74 crs955_ifu_en-de-fr.indb 74 3.4.2 Supprimer une partie d‘une dictée Pour supprimer une partie d‘une dictée, procédez comme indiqué ci-dessous: 1 Placez-vous au début de la section que vous souhaitez supprimer à l’aide des fonctions lecture ou avance/retour. 2 Appuyez sur le bouton MENU 1 quand le Digital Pocket Memo est arrêté pour ouvrir le menu. 3 Appuyez sur le bouton + ou – 2 pour sélectionner l’option Supprimer section du menu et appuyez sur le bouton multifonctions OK 3 . 4 Appuyez sur le bouton MARQUE 1 4 . Une croix s’affiche sur l‘écran. Auteur A HQ Installation Mode USB Supprimer section OK ANNULER #2 -27h18Bm -27 # 2 18 h m 2 :1 5 2:15 DPM DPM 0955.MP3 ANNULER HQ MARQUE1 ANNUL 0955 ER 3 .M P 3 MARQU E1 4 1 2 5 Placez-vous à la fin de la section à supprimer à l’aide des fonctions lecture ou avance / retour et appuyez sur le bouton multifonctions MARQUE 2 5 . Une deuxième croix s’affiche. 6 Pour confirmer que vous voulez la partie marquée, appuyez sur le bouton SUPPRIM 5 et sur le bouton OK 6 , ou appuyez sur le bouton ANNULER 5 pour sortir sans effacer. Manuel de l‘utilisateur 25/01/2008 12:15:50 -27h18Am HQ -27h18Bm HQ #2 #2 3:38 DPM 0955.MP3 ANNULER m 3 :3 8 3:38 MARQUE2 -27 # 2 C18 h DPM 0955.MP3 LECTURE HQ SUPP SUPPRIM OK RIMER ? ANNUL ER 6 5 Supprimer dictée A Réduction bruit Insérer index Date & heure Auteur Charge rapide USB Installation Supprimer dictées Language RETOUR B Supprimer tout ENTRER RETOUR ENTRER Suppr imer Oui - supp tout ? !! ATTE rimer C NTIO OK N !! 4 ANNUL ER 3 1 2 3.4.3 Supprimer toutes les dictées FR A N Ç A I S C Attention Les fichiers marqués comme terminés (EOL) sont supprimés quand la fonction ‘Supprimer toutes les dictées’ est utilisée. Suivez les instructions ci-après pour supprimer toutes les dictées: 1 Appuyez sur le bouton MENU 1 quand le Digital Pocket Memo est arrêté pour ouvrir le menu. 2 Appuyez sur le bouton + ou – 2 pour sélectionner l’option Installation du menu et appuyez sur le bouton multifonctions ENTRER 3 . 3 Appuyez sur le bouton + ou – 2 pour sélectionner l’option Supprimer les dictées puis sur le bouton multifonctions ENTRER 3 . 4 Appuyez sur le bouton multifonctions ENTRER 3 et sur le bouton multifonctions OK 4 pour confirmer la suppression, ou appuyez sur le bouton multifonctions ANNULER 3 pour quitter sans supprimer. Manuel de l‘utilisateur crs955_ifu_en-de-fr.indb 75 75 25/01/2008 12:15:52 4 Comment mieux tirer parti de votre système 4.1 Utiliser le logiciel Philips SpeechExec Le logiciel Philips SpeechExec peut être utilisé pour la configuration avancée du Digital Pocket Memo, pour le téléchargement automatique, la conversion et le routage des fichiers de dictée. D Note Pour plus d’informations sur le logiciel Philips SpeechExec, veuillez consulter le guide de référence rapide de SpeechExec. 4.1.1 Configuration avancée L’assistant de configuration du Digital Pocket Memo fait partie du logiciel de dictée Philips SpeechExec. Il guide l’utilisateur dans la configuration et les paramétrages de son Digital Pocket Memo : configuration du format de l’heure, du signal sonore, du déclenchement vocal de l’enregistrement, de l’affichage écran (mode standard ou avancé), du format de l’enregistrement, de la sensibilité du microphone, du nom des auteurs, et du téléchargement des fichiers sur un PC. 1 Connectez le Digital Pocket Memo à votre PC à l‘aide d‘un câble USB. 2 Démarrez le logiciel de dictée Philips SpeechExec Dictate. 3 Cliquez sur Paramètres > Paramètres généraux dans la barre de menu et sélectionnez Configuration DPM/DT > Assistant DPM à partir de la liste affichée sur la gauche. 4 Cliquez ensuite sur le bouton Démarrer l‘assistant. Suivez les instructions affichées pour personnaliser le Digital Pocket Memo en fonction de vos besoins. 5 Cliquez sur le bouton Terminer pour quitter l‘assistant et confirmer le transfert des nouveaux paramètres vers le Digital Pocket Memo. D Note Lorsque vous connectez le Digital Pocket Memo à votre PC pour la première fois, Windows détecte un nouveau matériel et installe automatiquement les pilotes nécessaires. Une fois l‘installation terminée, Windows peut vous demander de redémarrer votre PC. 76 crs955_ifu_en-de-fr.indb 76 Manuel de l‘utilisateur 25/01/2008 12:15:52 Utilisez le logiciel Philips SpeechExec pour le téléchargement automatique, la conversion et le routage des fichiers. 1 Effectuez un enregistrement avec le Digital Pocket Memo. 2 Démarrez le logiciel de dictée SpeechExec. 3 Connectez le Digital Pocket Memo à votre PC à l‘aide d‘un câble USB ou de la station d’accueil USB 9120 (option). 4 Par défaut, les enregistrements présents sur le Digital Pocket Memo seront téléchargés automatiquement sur le PC et déplacés dans le dossier Dictées terminées de la liste de travail. D Note Lorsqu‘un Digital Pocket Memo est connecté, vous pouvez configurer le téléchargement (quels fichiers doivent être téléchargés et comment) à partir du menu Paramètres de SpeechExec ou via l‘assistant de configuration. 4.2 Utiliser le déclenchement vocal de l’enregistrement Le déclenchement vocal de l’enregistrement est une fonction pratique pour les dictées « mains libres ». Lorsque cette fonction est activée, l’appareil ne commence à enregistrer que lorsque vous commencez à parler. Si vous cessez de parler, le Digital Pocket Memo arrête automatiquement d’enregistrer (au bout de 3 secondes de silence) et ne reprend l’enregistrement que lorsque vous recommencez à parler. 1 Appuyez sur le bouton MENU 1 quand le Digital Pocket Memo est arrêté pour ouvrir le menu. 2 Appuyez sur le bouton + ou – 2 pour sélectionner l’option Installation du menu puis sur le bouton multifonctions ENTRER 3 . 3 Appuyez sur le bouton + ou – 2 pour sélectionner l’option Déclenchement vocal du menu puis sur le bouton multifonctions ENTRER 3 . 4 Appuyez sur le bouton + ou – 2 pour choisir MARCHE ou ARRÊT. 5 Confirmez la nouvelle sélection en appuyant sur le bouton OK 4 ou conservez la sélection actuelle en appuyant sur le bouton ANNULER 3 . Supprimer dictée A Language Insérer index Format enregistr. Auteur Filtre Installation Déclenchem. vocal Language RETOUR B Désactivé ENTRER RETOUR ENTRER Décle nchm . vo Désac tivé FR A N Ç A I S 4.1.2 Transférer des enregistrements sur le PC Avec la connexion USB, le Digital Pocket Memo est automatiquement reconnu comme un péri phérique externe quand il est connecté à l’ordi nateur. Ainsi, il est facile d’accéder au contenu de l’appareil avec n’importe quel programme de Microsoft Windows comme à toute unité externe. cal : C Activ é OK 4 ANNUL ER 3 1 2 Manuel de l‘utilisateur crs955_ifu_en-de-fr.indb 77 77 25/01/2008 12:15:53 4.3.1 Insérer un index -27h18m HQ HQ IN DE DP M INDEX 1 -27h18m DPM DPM 0955.MP3 ARRET a 0955 LECTUR E 09 55 .M P3 T ARRET VITE SSE VITESSE 1 a 5 2 :3 4 2:34 LECTURE HQ ARRE DPM 0955.MP3 .M P 3 ARRET 8 7 4.3 Utiliser des index Vous pouvez insérer des index dans une dictée pour repérer des points intéressants, par exemple le début d’une partie importante, un passage que vous souhaitez corriger plus tard, ou un élément auquel vous souhaitez avoir accès rapidement et facilement. 4.3.2 Supprimer un index 1 Placez-vous à l’endroit où vous voulez supprimer un index, à l’aide des fonctions avance ou retour rapide a . 2 Appuyez sur le bouton INDEX 1 pendant que l’appareil est arrêté pour supprimer l’index. -27h18m HQ HQ #2 #2 EOL INDEX -27h18m -27h18m X1 -27h18m REMOTE CONTROL HQ 6 EOL INDEX 1 Appuyez sur le bouton INDEX 1 pendant l’enregistrement ou la lecture pour insérer un index a . Son numéro est affiché pendant deux secondes. REMOTE CONTROL 6 Appuyez sur le bouton REC 5 et commencez à parler. Le voyant d’état 6 est rouge pendant l’enregistrement. Si le niveau sonore est inférieur à un certain seuil a l’enregistrement s’arrête au bout de trois secondes et le voyant d’état clignote. 7 Appuyez sur le bouton + ou – 7 pour régler le seuil d’enregistrement a . 8 Appuyez sur le bouton multifonctions ARRÊT 8 pour arrêter l’enregistrement. 2 :3 4 DP M 2:34 E LECTURE NOUVEAU a 78 crs955_ifu_en-de-fr.indb 78 09 55 LECTUR DPM 0955.MP3 .M P3 NOUV EAU 1 Manuel de l‘utilisateur 25/01/2008 12:15:55 1 Appuyez sur le bouton MENU 1 quand le Digital Pocket Memo est arrêté pour ouvrir le menu. 2 Appuyez sur le bouton + ou – 2 pour sélectionner l’option Supprimer l’indexage du menu puis sur le bouton multifonctions ENTRER 3 . 3 Appuyez sur le bouton multifonctions ENTRER 3 et le bouton multifonctions OK 4 pour confirmer la suppression, ou appuyez sur le bouton multifonctions ANNULER 3 pour quitter sans supprimer. A Auteur Supprimer tout ? B Mode USB Suppr. l’indexage Tous les indices seront supprimés ! ENTRER RETOUR ENTRER supp tout ? rimer !! ATTE C NTIO OK Supprimer tout RETOUR Suppr imer Oui - Installation N !! 4 ANNUL ER 3 1 2 D Note L’option Supprimer l’indexage du menu est accessible uniquement si la dictée actuelle comporte au moins un index. D Note Les noms des auteurs doivent être définis au préalable avec le logiciel Philips SpeechExec. Pour plus d‘informations, reportez-vous à la rubrique Configuration avancée page 76. Par défaut, c’est la catégorie de mot-clé AUTEUR avec les motsclé ‘DPM 955’ et ‘- - -’ (vide = défaut) qui est définie sur le Digital Pocket Memo. Pour associer le nom d’un auteur à un enregistrement: 1 Appuyez sur le bouton MENU 1 quand le Digital Pocket Memo est arrêté pour ouvrir le menu. 2 Appuyez sur le bouton + ou – 2 pour sélectionner l’option AUTEUR du menu. 3 Appuyez sur le bouton multifonctions ENTRER 3 pour afficher la liste des noms. 4 Appuyez sur le bouton + ou − 2 pour sélectionner un nom. 5 Appuyez sur le bouton OK 4 pour confirmer ou le bouton multifonctions ANNULER 3 pour quitter sans sélectionner de nom. Supprimer dictée A Auteur: Insérer index DPM 955 Auteur −−− DPM 955 B 4.4 Attribuer un nom d’auteur Un mot-clé, comme le nom de l’auteur, peut être associé à chaque enregistrement. Le mot-clé peut être utilisé pour identifier les enregistrements et pour le routage des fichiers dans le logiciel Philips SpeechExec. Manuel de l‘utilisateur crs955_ifu_en-de-fr.indb 79 Auteu r: DPM OK ENTRER OK 955 −−− Installation RETOUR FR A N Ç A I S 4.3.3 Supprimer tous les index ANNULER 4 ANNUL ER 3 1 2 79 25/01/2008 12:15:57 4.5 Fonctions affichage et son 4.5.1 Programmer la langue Lors de la première utilisation, un message vous demande de programmer la date et l’heure. Si vous souhaitez les modifier plus tard, procédez comme suit: 1 Appuyez sur le bouton MENU 1 quand le Digital Pocket Memo est arrêté pour ouvrir le menu. 2 Appuyez sur le bouton + ou – 2 pour sélectionner l’option Installation du menu puis sur le bouton multifonctions ENTRER 3 . 3 Appuyez sur le bouton + ou – 2 pour sélectionner l’option Langue du menu puis sur le bouton multifonctions ENTRER 3 . 4 Appuyez sur le bouton + ou – 2 pour sélectionner une langue. 5 Confirmez la nouvelle sélection en appuyant sur le bouton OK 4 ou conservez la sélection actuelle en appuyant sur le bouton ANNULER 3 . Supprimer dictée A Language Insérer index Format enregistr. B Auteur Filtre Français Installation Déclenchem. vocal Language RETOUR ENTRER RETOUR ENTRER Lang uage : Englis h França is Deuts ch Españo l OK C 4 ANNUL ER 2 crs955_ifu_en-de-fr.indb 80 1 Appuyez sur le bouton MENU 1 quand le Digital Pocket Memo est arrêté pour ouvrir le menu. 2 Appuyez sur le bouton + ou – 2 pour sélectionner l’option Installation du menu puis sur le bouton multifonctions ENTRER 3 . 3 Appuyez sur le bouton + ou – 2 pour sélectionner l’option La date et l‘heure du menu puis sur le bouton multifonctions ENTRER 3 . 4 Modifiez les données affichées pour l‘année, le mois ou le jour en appuyant le nombre de fois nécessaire sur les boutons + ou – 2 . 5 Appuyez sur le bouton → 3 pour placer le curseur (↑) au niveau de l‘entrée suivante. 6 Une fois que vous avez programmé la date, appuyez sur le bouton → 3 pour placer le curseur au niveau de l‘heure. 7 A l‘aide des boutons + ou – 2 choisissez l‘affichage sur 12 ou 24 heures, AM (avantmidi) ou PM (après-midi) dans le cas de l‘affichage sur 12 heures, et réglez l‘heure et les minutes. 8 Appuyez sur le bouton → 3 pour confirmer la date et l‘heure saisies. 3 1 80 4.5.2 Programmer la date et l‘heure Lors de la première utilisation, un message vous demande de programmer la date et l’heure. Si vous souhaitez les modifier plus tard, procédez comme suit: DNote En cas d‘erreur en cours de programmation, vous pouvez utiliser le bouton ← 4 à n‘importe quel moment pour revenir en arrière et corriger. Manuel de l‘utilisateur 25/01/2008 12:15:58 Format enregistr. B Insérer index Microphone Auteur Réduction bruit Installation Date & heure Language RETOUR ENTRER RETOUR DATE: 2007-1 0 01 12/24: 4.5.4 Voyant enregistrement Lorsque la fonction est activée, le voyant état/enregistrement est rouge pendant l’enregistrement. C HEURE 24 : 14:22 4 OK ENTRER 3 1 2 4.5.3 Rétro éclairage Sur le Digital Pocket Memo, le rétro éclairage est actif, par défaut, pendant 8 secondes lorsque l’on appuie sur un bouton. 1 Appuyez sur le bouton MENU 1 quand le Digital Pocket Memo est arrêté pour ouvrir le menu. 2 Appuyez sur le bouton + ou – 2 pour sélectionner l’option Installation du menu puis sur le bouton multifonctions ENTRER 3 . 3 Appuyez sur le bouton + ou – 2 pour sélectionner l’option Eclairage du menu puis sur le bouton multifonctions ENTRER 3 . 4 Appuyez sur le bouton + ou – 2 pour choisir 8 secondes, 20 secondes et ARRÊT. 5 Confirmez la nouvelle sélection en appuyant sur le bouton OK 4 ou conservez la sélection actuelle en appuyant sur le bouton ANNULER 3 . 1 Appuyez sur le bouton MENU 1 quand le Digital Pocket Memo est arrêté pour ouvrir le menu. 2 Appuyez sur le bouton + ou – 2 pour sélectionner l’option Installation du menu puis sur le bouton multifonctions ENTRER 3 . 3 Appuyez sur le bouton + ou – 2 pour sélectionner l’option Lampe témoin du menu item puis sur le bouton multifonctions ENTRER 3 . 4 Appuyez sur le bouton + ou – 2 pour choisir MARCHE ou ARRÊT. 5 Confirmez la nouvelle sélection en appuyant sur le bouton OK 4 ou conservez la sélection actuelle en appuyant sur le bouton ANNULER 3 . Supprimer dictée A Filtre Insérer index Déclenchem. vocal Auteur Eclairage Installation Lampe témoin Language RETOUR B Marche ENTRER RETOUR ENTRER Lampe March témoi e FR A N Ç A I S Supprimer dictée A n: C Arrêt OK 4 ANNUL ER 3 1 Supprimer dictée A Format enregistr. B Insérer index Filtre Auteur Declenchm. vocal Installation RETOUR c Arrêt OK 8 sec ENTRER 2 C 20 se Eclairage Language RETOUR Eclair age: 8 sec ENTRER 4 ANNUL ER 3 1 2 Manuel de l‘utilisateur crs955_ifu_en-de-fr.indb 81 81 25/01/2008 12:16:01 4.5.5 Contraste de l’écran Le contraste de l’écran LCD peut être réglé en fonction des conditions lumineuses ambiantes et de vos préférences. 1 Appuyez sur le bouton MENU 1 quand le Digital Pocket Memo est arrêté pour ouvrir le menu. 2 Appuyez sur le bouton + ou – 2 pour sélectionner l’option Installation du menu puis sur le bouton multifonctions ENTRER 3 . 3 Appuyez sur le bouton + ou – 2 pour sélectionner l’option Contraste du menu puis sur le bouton multifonctions ENTRER 3 . 4 Appuyez sur le bouton + ou – 2 pour régler le contraste. 5 Confirmez la nouvelle sélection en appuyant sur le bouton OK 4 ou conservez la sélection actuelle en appuyant sur le bouton ANNULER 3 . Supprimer dictée A Déclenchem. vocalB Insérer index Eclairage Auteur Lampe témoin Installation C MIN Contraste Language RETOUR ENTRER RETOUR Contr aste OK ENTRER MAX +− 4 ANNUL ER 4.5.6 Signal sonore Par défaut, le Digital Pocket Memo émet un signal sonore lorsque: • vous arrivez à la fin du fichier en cours de lecture • vous atteignez un index pendant l’avance ou le retour rapide • la charge restante de vos piles est inférieure à 10 % • il vous reste moins de deux minutes de mémoire • une commande ne peut pas être exécutée 1 Appuyez sur le bouton MENU 1 quand le Digital Pocket Memo est arrêté pour ouvrir le menu. 2 Appuyez sur le bouton + ou – 2 pour sélectionner l’option Installation du menu puis sur le bouton multifonctions ENTRER 3 . 3 Appuyez sur le bouton + ou – 2 pour sélectionner l’option Signal sonore du menu puis sur le bouton multifonctions ENTRER 3 . 4 Appuyez sur le bouton + ou – 2 pour choisir MARCHE ou ARRÊT. 5 Confirmez la nouvelle sélection en appuyant sur le bouton OK 4 ou conservez la sélection actuelle en appuyant sur le bouton ANNULER. 3 1 2 Supprimer dictée A Eclairage Insérer index Lampe témoin Auteur Contraste Installation Signal sonore Language RETOUR B Marche ENTRER RETOUR ENTRER Signa l sono re: March e C Arrêt OK 4 ANNUL ER 3 1 2 82 crs955_ifu_en-de-fr.indb 82 Manuel de l‘utilisateur 25/01/2008 12:16:02 4.6 Paramètres du menu Appuyez sur le bouton MENU SUPPRIMER DICTÉE (rubrique 3.4.1 page 74) INSÉRER / SUPPRIMER INDEX (rubrique 4.3 page 78) AUTEUR (MOT-CLÉ) (rubrique 4.4 page 79) MODE USB (rubrique 2.2.2 page 61) SUPPRIMER L’INDEXAGE (rubrique 4.3.3 page 79) SUPPRIMER SECTION (rubrique 3.4.2 page 74) INSTALLATION LANGUAGE (LANGUE) (rubrique 4.5.1 page 80) FORMAT D’ENREGISTREMENT(rubrique 3.1.5 page 70) FILTRE (VOIX/MUSIQUE) (rubrique 3.2.6 page 71) DÉCLENCHEMENT VOCAL (rubrique 4.2 page 77) RETRO-ECLAIRAGE (rubrique 4.5.3 page 81) TÉMION D’ENREGISTREMENT (rubrique 4.5.4 page 81) CONTRASTE (rubrique 4.5.5 page 82) SIGNAL SONORE (rubrique 4.5.6 page 82) SENSIBILITÉ DU MICROPHONE (rubrique 3.2.5 page 70) RÉDUCTION BRUIT (rubrique 3.3.2 page 73) DATE & HEURE (rubrique 4.5.2 page 80) CHARGE RAPIDE USB (rubrique 2.2.2 page 61) SUPPR. TOUTES LES DICTÉES (rubrique 3.4.3 page 75) FORMATER LA MÉMOIRE (rubrique 2.3 page 63) VOLUME DE LECTURE CARACTÈRE (MODERNE/CLASSIQUE) MENU PRINCIPAL D Note Certains paramètres, tels que définir les noms d’auteurs ou passer à un mode d’affichage simple, son uniquement disponibles via Philips SpeechExec Dictate. Pour plus d‘informations, reportez-vous à la rubrique Configuration avancée page 76. FR A N Ç A I S MENU DE PARAMETRAGE crs955_ifu_en-de-fr.indb 83 Manuel de l‘utilisateur 83 25/01/2008 12:16:04 Déni de responsabilité et avertissements Philips a effectué de nombreux tests avec les configurations les plus courantes. Cependant, comme les additifs pour PC et les pilotes de périphériques sont constamment mis à jour, nous ne pouvons garantir un fonctionnement sans conflit. 84 crs955_ifu_en-de-fr.indb 84 Manuel de l‘utilisateur 25/01/2008 12:16:04 Technical data Digital Pocket Memo Connectivity • Docking connector: 8-pin female • USB: Mini USB 2.0 female (full speed, 12 Mbit/s) • DC in: 6 V • Microphone: 3.5 mm, impedance 2 kΩ • Headphone: 3.5 mm, impedance 8 Ω or more • Memory card: Secure Digital (SD) and Multimedia card (MMC) Display • Type: TFT-Transreflective • Diagonal screen size: 1.71 in. / 44 mm • Resolution: 128 × 128 pixels • Backlight color: white Speaker • Built-in: 30 mm round dynamic speaker • Output power: 200 mW Memory type • Secure Digital (SD)/Multimedia Card (MMC) up to 2 GB crs955_ifu_en-de-fr.indb 85 Recording specifications • Recording formats: • MP3 (MPEG-1 Audio Layer 3) • Digital Speech Standard / Quality Play (DSS QP) • Digital Speech Standard / Standard Play (DSS SP), • PCM (Puls-Code Modulation) • Recording modes: • XHQ (.mp3/two channels) • XHQ (.mp3/two channels) • DSS QP (.ds2/mono) • DSS SP (.dss/mono) • PCM (.wav/two channels) • Recording time (with 2GB card): • XHQ: 36 hours • HQ: 72 hours • DSS QP: 170 hours • DSS SP: 340 hours • PCM: 3.1 hours • Sampling frequency: • XHQ: 128 kbit/s • HQ: 64 kbit/s • DSS QP: 27 kbit/s • DSS SP: 13.5 kbit/s • PCM: 44.1 kHz • Compression rate: • XHQ: 44.1 kHz • HQ: 32 kHz • DSS QP: 16 kHz • DSS SP 12 kHz • PCM: 1141 kbit/s • Frequency response (Voice filter mode / Music filter mode): • XHQ: 300 - 8,000 Hz / 50 - 20,000 Hz • HQ: 300 - 8,000 Hz / 50 - 15,500 Hz • DSS QP: 300 - 7,000 Hz / • DSS SP: 300 - 5,700 Hz / • PCM: 300 - 8,000 Hz / 50 - 20,000 Hz Power • Battery type: two AAA batteries (LR03 or R03) or two Philips AAA Ni-MH rechargeable batteries (LFH 9154) • Battery life (DSS SP mode): • 17.5 hours with Philips Ni-MH rechargeable battery • 15 hours with Philips alkaline battery • Charging time (full charge): USB fast charging or power supply: 2.5 hours Dimensions • Product dimensions (WxDxH): 50 x 116 x 17 mm/2.0 x 4.6 x 0.7 in. • Weight: 106 g / 3.7 oz, including two Philips AAA batteries 25/01/2008 12:16:04 Conference Microphone 9172 Specifications • Design: Boundary layer microphone • Type: Electret condenser microphone • Output impedance: approx. 2.2 kOhm @ 1 kHz • Sensitivity: -38 dBV • Frequency response: 30 Hz – 18 kHz • Phantom supply voltage: 1,5 to 5 V/ 0,5mA Connectivity • Audio plug: 3.5mm • Audio jack (for cascading): 3.5 mm Dimensions • Product dimensions (W x D x H): 130 x 130 x 18 mm/5.1 x 5.1 x 0.7 in. • Net weight: 108 g / 3.8 oz Interview Microphone Specifications • Electret condenser microphone • Output impedance: approx. 2.2 kOhm @ 1 kHz • Sensitivity: -42 dBV • Frequency response: 40 Hz – 18 kHz • Phantom supply voltage: 1,5 to 5 V/ 0,5mA per channel • Audio plug: 3.5mm crs955_ifu_en-de-fr.indb 86 Dimensions • Product dimensions (W x D x H): 45 x 17 x 39 mm/1.8 x 0.7 x 1.5 in. • Net weight: 11 g / 0.4 oz Green specifications • Compliant to 2002/95/EC (RoHS) • Lead-free soldered product USB Docking Station Operation conditions • Temperature: 5° - 45° C / 41° - 113° F • Humidity: 10 % - 90 % Connectivity • Docking connector: 8-pin male • PC connector: Mini-USB female • DC in: 6 V Power • Power supply: 6 V DC / 850 mA • Power consumption: 800 mA max. Dimensions • Product dimensions (W x D x H): 78 x 78 x 35 mm/3.1 x 3.1 x 1.4 in. • Net weight: 135 g / 4.8 oz SpeechExec Pro Dictate PC requirements • Minimum: Pentium III, 500 MHz, 256 MB RAM • Recommended: Pentium VI, 1 GHz, 1 GB RAM • Hard disk space: 100 MB for SpeechExec, 250 MB for Microsoft .NET Framework • 1 free USB port • Operating system: Windows Vista, Windows XP (with SP 2), Windows 2000 (with SP 4) Package contents • Digital Pocket Memo 955 • Two conference microphones • Click-on interview microphone • Remote control • USB Docking Station 9120 • SpeechExec Pro Dictate Software • USB Smart Key • Power supply 9146 • Philips Secure Digital (SD) memory card • Philips rechargeable AAA Batteries 9154 • Interchangeable primary power adapters • Mini USB cable, Y adapter cable • Metal carry case • User manual Accessories • Transcription Set 7277 • Conference Microphone 9172 • Philips Secure Digital (SD) memory card • Stereo headphones 334 25/01/2008 12:16:04 Declaration of Conformity Tested to comply with FCC standards FOR HOME OR OFFICE USE Model Number: LFH 0955 Trade Name: Philips Conference Recording System Responsible Party: Philips Speech Processing Address: 64 Perimeter Center East, Atlanta, GA 30346, USA Telephone number:888-260-6261 Website: www.philips.com/dictation This device complies with Part 15 of the FCC Rules. Operation is subject to the following two conditions: 1) This device may not cause harmful interference. 2) This device must accept any interference received, including interference that may cause undesired operation. The CE mark confirms that the device corresponds to the relevant guidelines of the European Union. The cardboard used for packaging can be recycled. This electronic device contains recyclable material. crs955_ifu_en-de-fr.indb 87 25/01/2008 12:16:09 Discover the comprehensive range of high-end dictation products from Philips www.philips.com/dictation Specifications are subject to change without notice. Trademarks are the property of Royal Philips or their respective owners. © 2008 Royal Philips Electronics. All rights reserved. Document Version 1.1, 23/01/2008. 5103 109 9692.1 crs955_ifu_en-de-fr.indb 88 25/01/2008 12:16:09