1
EVOLUTION
User Guide
1
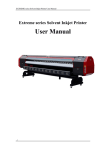
Thank you for purchasing EV Printer
This user guide includes equipment structure,
description, Technical parameters, operation manual,
safety information application of software, etc. Please
read this manual carefully.
We tried our best to edit this manual and test our
machine before market; however, we do not guaranty
errors existing. Please inform us if you find any.
2
Catalog
Chapter 1 Safety Information ------------------------------------- 4
Chapter 2 Technical Specifications -------------------------------- 7
Chapter 3 The printer main components ------------------------- 9
Chapter 4 How do I perform basic operation? ------------------ 15
1. How to install Printer? -------------------------------------- 15
2.How do I install PCI card and Driver? ---------------------- 18
3.How do I load media and do printer self test? ------------- 25
4.How to use Key Panel to control printer? ------------------- 26
Chapter 5 How to use software? --------------------------------- 28
1. How to use liyuPrint? --------------------------------------- 28
2. Glossary of key---------------------------------------------- 32
3. The interface of print head calibration --------------------- 33
4. Print Picture ------------------------------------------------- 36
Chapter 6 Maintenance ------------------------------------------- 37
1. Purging as printing (see as Fig.6) -------------------------- 37
2. Print head maintenance after printing --------------------- 39
3. Printer maintenance ---------------------------------------- 40
Chapter 7 Guarantee -------------------------------------------- 42
3
Appendix ---------------------------------------------------------- 43
Chapter 1 Safety Information
Please read the following directions thoroughly before
you start to use this machine.
1. You should place the printer in a room what is,
Clean and breezy with flat ground;
Anti-electromagnetic, quakeproof and without
heavy dust;
to keep the condition around at temperature:
19℃~25℃ and humidity: 40% RH ~70%RH.
2. Be connect the printer and PC to a reliable outlet well
grounded
Do not connect earth cables in the following
areas:
Gas pipes. Doing so may cause fire or an
explosion.
Earth terminals for telephone line or
lightening rod. Doing so may cause a large
flow of voltage if lightening occurs.
4
Water pipes or faucets. If there is a plastic
part in the pipe, the earth will not work
properly.
Advice: a pontil which is longer than one-meter
planted in the salted oil is for ground connection,
the other end of ground line with a M6 bolt is
connected at the right side bottom with a sign of
the printer. The ground line availability area is
should be larger than 1 square millimeter. Also,
the ground line should be conducting line.
3. Do not pull or plug the power cable between the
printer and PC, and be waiting 10 seconds before you
need to turn on the power again.
4. Adoption of good quality solvent ink is necessary for
the printer. If you want to use the ink of other brand
please contact the local dealer.
5. When using the machine, be care for that,
Do not press the machine cover by hand or
other heavy things;
5
Do remember to turn on / off by power switch
which is at the left of printer;
6. Printing directly on the printer plate without the
media is forbidden;
7. If you encounter the following questions, please cut
off the power at once and contact the local dealer,
Power switch is out of control or damaged;
Cannot operate it normally or some obvious
changes of machine function.
8. Computer requirement
CPU: at least PⅣ 2G
RAM: >256MB
Main board: credible brand suggested
Hard disk: >40GB, C disk partitioned at least
8GB~10GB
UPS: according to the printing scale
◆Option: 2000w manostat
OS: Windows XP
6
Chapter 2 Technical Specifications
MODEL
EV3208XL/EV3212XL
Print heads
8/12 Xaar pizeo heads
Print
360*720DPI 720*740DPI
resolution
Print heads
2mm ~ 3mm off media
height
Print size
3200mm/10.49ft
Media size
3250mm/10.66ft
Print speed
EV 3208: (36,24,18) m²/h (2p,3p,4p)
EV 3212: (44,28,22) m²/h (2p,3p,4p)
(bi-direction)
EV 3212S: (36,24,18) m²/h (2p,3p,4p)
Print direction
Ink type
Uni/bi-direction
Solvent
ink:
C,
M,
Y,
K
4colors,or
M,C,Y,K,LC,LM 6colors
Ink-supply
Using
type
continuously
Media type
force
pump
to
supply
ink
Normal PVC banner, vinyl, self-adhesive
7
vision vinyl etc.
Media
Rolling media or single paper
transmission
Print interface
PCI card Optical Fiber
External size
4700*850*1300mm
(W*D*H)
m/ft.
Weight
Power
370kg
110V/220V ± 10%, >10 A, 50/60 Hz
requirement
Environment
Temperature:20℃~28℃,Humidity:40%
RH ~70%RH
Other
Auto and manual purging print heads
characteristic
system;
Auto ink-supply system
Auto media feeding & take-up system
Auto pre-heater & dry system
Auto fans dry system
The technical Specifications above are changed without
notice.
8
Chapter 3 The printer main components
1. Framework
2. DC servo motor
9
3. Stepper Motor
10
4. Auto ink supply system
11
5. Carriage board
12
6. Right electrical box
13
7. Left electrical interface
14
Chapter 4 How do I perform basic operation?
1. How to install Printer?
Install the machine stand in the following steps:
A) Connect Crossbeam of machine stand to the left/right
column, and adjust the 4 wheels on the stand pillar to
touch ground, to make the machine stand stability;
B) Connect the left/right holder for paper roller to the
left/right column;
C) The end of vacuum soft tube should be through the hole
of the host machine bottom first, then connect to the
hole of the inhalant;
D) Place the host machine on the machine stand and
tightened well to be stable. Lock the truckles and
ensure that the host machine is stable without shake;
E) Connect the other end of the vacuum soft tube to the
waste ink box. Then hang the waste ink box on the left
column, the exit of the waste ink box should be
connected
to
the
vacuum
(user
provide
for
themselves);
Place roller for feeding paper on Left and right holder of
paper roller, then install the gear wheel cover, and place
15
Tension Roller on Left and right bracket for pulling paper.
Connect the drying fans bracket to the stand of printer,
and then place the rubber ring on the Tension Roller.
Note: if the PVC banner breadth is shorter, you can move
the rubber ring to the middle .Ensure that the rubber ring
is on the PVC banner so that PVC can move smoothly.
F) Connect Media Optical sensor cables, AC Motor cables
and fan power to corresponding plugs.
G) Connect Power cables to left side of printer.
16
17
2.How do I install PCI card and Driver?
Turn off your computer power first, and open cover of
your computer box, then insert PCI card into PCI port of
computer. If you don’t know well of this operation, please
contact a professional or after service personnel to do. So
as to prevent hardware damaged.
Please connect PCI control card to the printer with 15 pins
print cable and optical fiber when insertion of PCI card
finished. The optical fiber should be connecting to TX Port
of PCI card. The terminal which connects to the carriage
board should be RX Port.
18
15 pins print cable
19
Optical fiber
Carriage board
20
Connecting RX for Carriage board
Install PCI device referring to the following steps:
The graphical user interface of PCI device is similar to
Win2000’s. You will see Hardware Wizard first, then put
CD sent along with the printer into CD-ROM and choose
“Install from a list or specific location (Advanced)”.
21
Click the “NEXT”.
Choose “Don’t search. I will choose the driver to install”,
then “NEXT”.
22
Click “Have Disk”, to show “Install From Disk” interface.
Click “Browse” to choose LiYuPciDriver.inf document
under Driver directory in CD.
23
If
your
CD-ROM
is
E
disk,
please
to
choose
LiYuPciDriver.inf document under E: \Driver.
Then click “OK” in “Install From Disk” interface. Next
interface will show PCI Card installation type that you
need.
Choose “LYRIC JetPlot Cad” item in Model bar, to click
“NEXT”. At the same time Windows XP will install driver.
Restart the computer after installation finished. So
24
installation of PCI control card driver is over.
3.How do I load media and do printer self test?
A. lift up the pinch roller handle, load the media from
back side of printer to front and keep the side of the
media aligned with slot in the front of plate, then put
down the handle;
B. By the switch of the DC motor you can change the
rotate direction of the paper roller;
C. Use two clamps (steel slice) to hold brim of the media
Otherwise print heads might not damaged;
D. We must ensure that there is no object left on the
work plate.
E. Then turn on the printer, the printer should do self
test after power on. The carriage move from left to right
automatically one time and the principal axis with the
media move to-and-fro one time. After self test is over,
25
we can do calibration tests.
NOTE: if you print long image, you should calibrate the
parallel degree between roll paper side and feeding
direction to avoid the media displacement. You can
press the key panel to feed some media to check if the
media side is displacement or not.
4.How to use Key Panel to control printer?
key panel function introduction
PURGE: Press this key and exceed a second, the print
heads carriage will move purging position in the left of
26
the printer to wait manual purging. At the same time
you can use four Direction keys to clean each print head.
When you press one of the four keys, purge deep; when
you loosen the key, stop purging; when purging
finished, please press “ESC” key, then the carriage will
return the position where stayed before purging. Press
this key less than a second,
the print heads carriage
will move purging position to purge and then return
automatically. If you purged print heads as printing, the
printer would go on printing that not yet finished before
purging.
ESC: Press the key to exit pause and purging state.
PAUSE: During printing, you can be arbitrarily to press
it, then press “ESC”, return to print.
Direction key:
move;
make the print heads carriage
make paper roller turn.
27
Chapter 5 How to use software?
1. How to use liyuPrint?
A) Double click the icon of LiYuPrint on the desktop and
then start its program, main interface as follows:
4 colors
NOTE: press the ‘Print Monitor’ and ‘color calibration’ in
the left down, you can switch interface between Printer
Setup and print heads calibration.
28
6colors
B) System settings
Please choose the right number of print heads that you
use before printing by LiYuPrint. You can set it up via
system settings on the file menu.
29
4 colors system setup
Note: It must be right that you are using the number of
print heads of the printer at printer type. Otherwise
picture of printer output would be a mistake.
You can choose the bi-direction or the single
direction of print mode and setup the accuracy of preview
printing picture in system settings.
30
6 colors system setup
C) Glossary of setting item
Pass: Setup number of print pass.
Speed: Setup print speed. COMPACT SOLVEN EV series
printer offers eight speeds to choose. Speed 8 is the
fastest mode.
Step Calibration: Fill in number of step adjustment.
Bi-direction Calibration: Fill in number of bi-direction
adjustment.
Flash Frequency: The print head jets number of times
every second.
Flash Interval: During printing, the print head carriage
will move the left of the printer, flash position, to jet
31
every certain times that printing back and forth. The
times are flash interval. It is right to setup flash interval,
can help you to prevent effectively from clogging print
head.
Purge Frequency: When purging automatically, the
print head carriage will enter into the left of the printer,
purging area, then the printer will start automatically
vacuum that was joined on the printer. The print head
carriage proceeds to purge several times back and forth
above inhalant. The times are named purge frequency.
Purge Interval: Each certain time that printing back and
forth, the print head carriage will enter the left of the
printer and purge automatically then goes on printing.
The number of times is purge interval. It is right to
setup, can also help you to prevent effectively from
clogging print head.
2. Glossary of key
Direction Key: The left and right keys control the print
head carriage to move horizontally. The up and down
keys control the step motor to roll over media.
: Reset key, make the printer return the original
32
position.
Flash: The print head jets a few times every certain
time at the left of the printer to prevent to clog the print
head.
Purge: Cleaning print head function, the print head
carriage will enter into the left end of machine to purge
automatically.
Cancel: During printing, this key will stop operation of
printing.
Back: The printer will exit from flash state and manual
purging by clicking it.
Depth Purge: when you press one of four keys, the print
head carriage will move the left of printer, purging area,
and purge print head with corresponding color (2~3print
heads/color). At the same time, you can also click other
keys to purge print head. Click “Back”, the print head
carriage comes back after purging finished.
3. The interface of print head calibration
Press ‘color calibration’, you will find:
33
4 colors calibration interface
6 colors calibration interface
34
You must run each test of “printing test” in menu item
first---as follow picture, when you want to setup items in
the interface.
Horizontal
Calibration:
To
run
horizontal
test
of
“printing test” in the menu item, the printer will print
diagram of horizontal calibration test. The calibration
value is number of the aligning place in each test
diagram. And fill the value in corresponding item. (If
printer type of the system settings chooses 8, K2, C2,
M2 and Y2 items will not emergence.)
Vertical Calibration: The same method as horizontal
calibration.
The “printing test” includes also bi-direction test, step test,
check nozzle and test bar. Among the tests, you can refer
to method of horizontal calibration to operate bi-direction
35
test and step test. And fill in the calibration value.
Check nozzle test show if print head is clogged. Once
the print head is clogged, check nozzle picture will show
the problem.
Test bar can show the effect of calibrations, such as
horizontal, vertical, step bi-direction and etc. If one of
them not accurate enough, test bar will show the problem.
NOTE: when the calibration is over, the calibration value
will be saved in the LiYuPrint.dat under LiYuPrint. Please
backup this document. When document is damaged, you
can recover the calibration value.
4. Print Picture
Click file → open or tool bar
key, then choose *.prt or
*.prn document and open. Now the document that you
choose will show in picture preview area of the main
interface. Finally, please click
, the printer starts to
print.
During printing, a horizontal dotted line which is in picture
preview area shows degree of printing progress currently.
36
Chapter 6 Maintenance
Fig 6
1. Purging as printing (see as Fig.6)
① During printing, if you find out that the print head is
clogged, you should press “PURGE” key to purge the
print
head.
The
print
head
carriage
will
move
automatically to the purging area at the left end of the
machine.
② Press one of four color keys to purge print heads with
one color ink. If print head clogged heavy, you should
prolong time of purging.
③ After purging finished, press “back”, then go on.
④ You can also use the cleaner cloth that soaked with
cleaning solution and place it under print head for
several minutes or sweep print head gently to get rid of
37
clog of nozzle.
⑤ If heavy clogged and purging useless, you need
cleaning-up print head. Now tighten the valve to cut off
the ink flowing, then screw off the sealed cap, finally fill
a syringe up with cleaning solution to flush up the
nozzles of print head into the sealed cap.
⑥ After purging finished, fasten all of the 4 sealed caps
clockwise and loosen the valves (about 3~5 circles
anti-clockwise) for instauration ink supplying.
⑦ Repeat step ② , ③ and clean up the remained
cleaning solution in print head by vacuum till the solvent
ink jet out. Now you can return to print.
⑧ If print head clogged seriously, you must stop printing
and power off. Take down the print heads and soak them
into the cleaning solution for 8~24 hours then re-install
it, nozzles of the print head face down.
Note: Don’t hurt the print head surface when you take
down it! Be careful the top of the print head can’t be
touched by the cleaning solution. When you install the
print head, please adjust the distance among the print
heads again!
⑨ If above measures are useless, please contact the
38
local
dealer
at
once,
and
ask
for
professional
maintenance or replacement.
Note: be careful the airproof tube of connecting print
head.
Ⅳ When finishing one job every time, the printer come
back the home that is under the print head-pad plate,
which
to
protect
print
head.
So
please
purge
automatically several times before printing a job.
Note: Not work in 20 minutes, you can press flash to
protect print head; about in 12 hours, you should use the
print head-pad plate to protect print head.
2. Print head maintenance after printing
① After power off, move the print head carriage to the
left end, then to do followed as above step ⑤ Screw on
the 4 sealed caps but not tightened .
Note: after finishing purging purge print head, keep full
cleaning solution in the tube between valve and print
head. At the same time, please clean the nozzles of print
head to void the ink used previously to debase print
capability.
②Put the nozzle-pad plate into the right of the printer.
39
Then inject the cleaning solution into nozzle-pad plate.
Note: the cleaning solution can’t splash on the motor and
meet lines.
③ Move the print head carriage to the right end just
above the nozzle-pad plate and make them sealed well,
so good protection for the print head can be realized.
And keep the print head from dryness and dust.
Note: if the printer is not work exceed 12 hours, you
should inject some oil solution into the print head to keep
the print head wet. You also should push the print head
in the nozzle-pad plate very slowly.
3. Printer maintenance
keep the printer room order and cleanness;
keep the convey belt propriety tight. Open left cover,
you can adjust the convey belt tight degree. After
adjustment, you must tighten meet bolt;
Around the nozzles of print head, it must be cleanness,
not remained ink, no dust and fibre.
nozzles of surface;
40
You can’t hurt the
ⅣInk and cleaning solution are all stronger solvent. So
they can’t touch with electrical appliance and lead. If
there is some ink or cleaning solution on the bottom
plate and guide cover, you should clean them quickly.
Ⅳ the waste ink box will reserve some ink when purging.
In order to prevent vacuum, you should open the ball
valve of the waste ink box in time to swill waste ink. If
the waste ink is ropy, please inject some clean solution
into the waste ink box, before you swill waste ink from it.
Ⅳ Keep the work plate cleanness. Before power on, you
must check printer plate and ensure there are no any
sundries on it, such as bolt, to protect print head.
41
Chapter 7 Guarantee
7.1 Any EV series printer purchased from our authorized
dealer, we guarantee one year from the purchasing date
verified by Guarantee Card.
7.2 If you have any question under normal usage state,
the dealer will provide free charge for service in a year
guarantee period.
7.3 The following is exceed guarantee range,
Without valid Guarantee Card;
Damaged by unwarrantable operation or abnormal use;
Damaged by taking apart or refitting the printer not
allowed;
Because of FORCE MAJEURE or natural damage;
Consumptive parts are out of warranty (such as print
head, pinch roller, ink filter, rectangular guide and a
block).
7.4 The dealer will undertake the charged service out of
guarantee time.
7.5 The manufacturer just bears the obligation based on
machine itself, excluding any other loss induced from
troubled machine.
42
Appendix
Contents of Packing
One host machine
One set of accessories, see as the follows,
NO. Items
QTY.
1
Power cable
2
2
Print cable
1
3
Cleaner cloth and nylon tube 1bag & 2
4
Empty ink tank (one big/ one 2
small)
5
Pump soft tube
6
Operation
1
manual
and Per 1
Guarantee card
7
Inner
hexagon
spanner Per 1
(S=2,3,5,8)
8
“O”seal ring
8
9
Print software
1 set
10
PCI control card and driving 1 set
control software
11
Fans dry framework
1 set
One set of machine stand, see as the follows,
43
NO.
Items
QTY.
1
Left and right column
Per 1
2
Crossbeam of machine
1
stand
3
Roller for feeding paper
4
Left and right holder for
2
Per 1
paper roller
5
Waste ink box
1 set
6
Pull paper pole
1 set
7
Tighten kits
1 bag
8
Left, right bracket for
Per 1 set
pulling paper
9
The
cover
of
feeding
Per 1
gear wheel
10
Φ5.5*7.5 rubber ring
11/12/14
Location conditions and necessary tools:
Keep
the
room
cleanness
and
brightness,
temperature (20Ⅳ~30℃)、humidity (40%~70%);
One 1000W vacuum with use of dryness and wet,
connect tube of vacuum with tube of the printer;
44
Two 50ml glass syringes;
Some cleaner cloth with good quality;
In the workroom, you’d better install one big-power
exhaust fan, one thermometer and one hygrometer. In
dry area, one humidifier is also necessary.
45