1
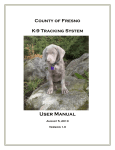
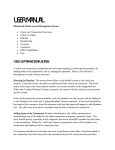
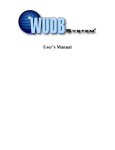
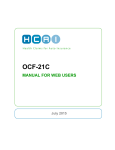
Self-Serve Check-Out User Guide
Fast, easy and convenient! Self Check-Out terminals allow customers to check-out their own items
quickly and simply. They also allow for increased privacy for customers. Step-by-step instructions
are displayed on a simple to use touchscreen. At the Self Check-Out terminals customers will be
able to check-out items and renew items that are present.
You will not be able to use the Self Check-Out Terminals if:
• You do not have a valid Mississauga Library card.
• Your card is marked Lost.
• Your non-resident card is expired or set to expire before the items are due.
• Your account has been blocked because bills/fines have reached $20. When there are
charges of $20 or more on your account, you will need to see staff to have your items checked
out.
For a Quick and Easy Check-Out:
All the instructions are provided on the screen. Please be sure to read the instructions as you
move from screen to screen.
1. Press the ‘START’ button to begin.
1
2. Scan your Library Card using the Barcode Reader or type your Library Card number using the
on-screen Number Pad.
3. Enter your PIN (typically the last 4 digits of your phone number) using the on-screen Number
Pad and then press OK.
2
4. Place up to three items (cover face up) on the antenna pad.
(See page 6 for more information about the “Your Account Information” section of this screen)
As the antenna pad reads the items, they will be listed on the screen…
(See page 7 for more information about the “Item Title and Due Date” section of this screen)
5. If you have additional items to check out, remove the existing items from the antenna pad and
place up to 3 items on the pad. Repeat the process as many times as needed.
6. Press the ‘Finish’ button when you have checked out all your items.
3
7. You will be offered a choice of finishing with a receipt or no receipt. If you choose “No” you will
return to the previous check out screen.
8. If you choose a receipt and have an email address registered with your library account, you will
have the option of one being printed or emailed to you. If you do not have an email address
registered, a receipt will be printed automatically.
4
If a printed receipt is requested…
If an emailed receipt is requested…
9. After a successful check out or after 30 seconds of inactivity, the terminal will automatically
reset and go to the Start screen.
5
Check-Out Screen Details – Your Account Information
1
4
2
5
3
1: Shows the total number of items that you currently have checked out on your account
2: Shows Hold Status:
Holds Available - The total number of items available on the hold pickup shelf
Holds Pending - The total number of items you have on hold but not yet available for
pick up
3: Shows User Status:
OK – Means that you have no overdue items and/or bills
Delinquent – Notes that you have overdue items and/or bills totalling less than $20
(Please note that the use of the word “Delinquent” is hard-coded in the ILS and
unfortunately cannot be changed.)
Remember that if you have charges $20 or more, then you will be blocked from using the self
check-out terminals and will need to speak with staff for assistance.
4: Shows the number of overdue items
5: Shows the amount owing on your account
6
Check-Out Screen Details – Item Title and Due Date Details
1
2
1: Shows a successful check out with the item’s title and due date.
Note that the text is in green with a green-circled checkmark
2: Shows an unsuccessful check out with a note to “See Staff”
Note that the text is in red with a red stop sign with an X
(Revised May 2014)
7