1
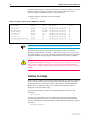
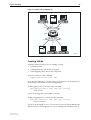
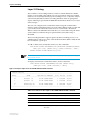
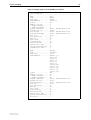
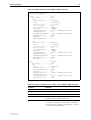
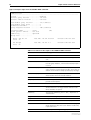
Getting Started
11
Chapter 2
Getting Started
The Rapier switch is supplied with default settings which allow it to operate
immediately as a switch, without any configuration. Even if this is all you want
to use the switch for, you should still gain access to the switch configuration, if
only to change the manager password to prevent unauthorised access.
To take advantage of the full range of advanced Layer 2 switching features, the
switch configuration must be changed. Layer 3 routing capabilities may also
require detailed configuration. The switch has both a Command Line Interface
(CLI) and a Graphical User Interface (GUI) for configuration and management.
Before you can use the GUI, you will need to login to the switch and use its CLI
to allocate an IP address.
Simple Switching
If all you want the switch to do is switch traffic on your LAN, you need not
perform any configuration. Simply power up the switch and connect devices to
the switch ports. Switch learning is enabled by default, and all valid packets
will be forwarded (“Layer 2 Switching Process” on page 46).
Command Line Interface
To use the command line interface (CLI) for configuring the switch, the first
thing you need to do after physically installing the switch is to start a terminal
session to access the switch (see Table 1 and the Rapier Switch Quick Install
Guide).
To start a terminal session, do one of the following:
Software Release 2.5.1
C613-02025-00 REV B
■
Connect a VT100-compatible terminal to the RS-232 Terminal Port, set the
communications parameters on the terminal (Table 1 on page 12), and
press [Enter] a few times until the switch’s login prompt appears; or
■
Connect to the COM port of a PC running terminal emulation software
such as Windows Terminal or HyperTerminal to the RS-232 Terminal Port,
set the communications parameters on the terminal emulation software
(Table 1 on page 12), and press [Enter] a few times until the switch’s login
prompt appears.