1
UB-2818 1009FAWi full touch RGBW
remote controller User Manual
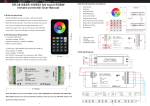
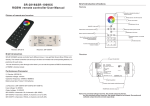
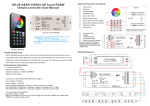
3.Brief introduction of buttons
①
②
③
④
⑤
Color wheel
Indicator
ON/OFF button
R/G/B/W button
Save color button
⑥
⑦
⑧
⑨
⑩
Play & Pause button
Return previous status button
Speed down & speed up button
Brightness button
Zone button
Bottom
USB port
OFF
ON
Indicator will be on while remote is charging.
Indicator will be off while it’s full power.
3
5
-3
12
6VDC
①
Learning button
②
Jumper
③
12-36VDC input
④
4 channels output
⑤
Press 3 seconds, release,
the wifi module will restore to
factory settings
UB-1009FAWi
Reset
Switch
1
Learning
Switch
R
PRI:
Uin=12-36VDC
4
Iin=20.5A
SEC:
Uout=4x(12-36)VDC
Iout=4x5A
Pout=4x(60-180)W
W
2
T EMP RANGE:-20℃-+50℃
Remote: UB-2818
Receiver: UB-1009FAWi
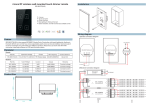
4.Wiring Diagram
1.Brief introduction
modes into corresponding buttons (1-8 buttons) for each zone. You can choose any color through
color wheel. There is a USB port to charge internal battery.
N
L
110-240V
UB-2818 RGBW remote controller is full touch remote controller which has 8 different zones. It
can get Red/ Green/ Blue/ White color directly. The remote controller can save up to 8 colors or 8
Power Supply
Input 12-36VDC
2.Performance Parameter
2.1 Sender: (UB-2818)
Operation voltage: 3.6VDC
12-36VDC
Operation frequency: 434MHZ / 868MHZ
Battery: Lithium battery.
Reset
Switch
2.2 Receiver: (UB-1009FAWi)
Learning
Switch
Input voltage: 12-36VDC
Output voltage: 12-36VDC
UB-1009FAWi
R
PRI:
Uin=12-36VDC
Iin=20.5A
SEC:
Uout=4x(12-36)VDC
Iout=4x5A
Pout=4x(60-180)W
W
TEMP RANG E:-20℃-+50℃
UB-1009FAWi: 4 channels x 5A, 4channels x (60-180W
R
R
G
G
B
B
W
1
W
2
5.Operation
button to dim down whole brightness of LED lighting, touch
8. Touch
up whole brightness of LED lighting.
3
1. Do wiring according to connection diagram
2. Learning process
a. Wake up the remote control by touching ON/OFF button.
b. Press at learning button on receiver.
c. Touch any zone button on remote control.
d.Then touch color wheel.
e.Connected LED light will blink to confirm zone designation.
f . Press at learning button on receiver over 5 seconds until LED light flash, then delete the
learned ID.
9. Touch
press
one.
Note: To choose a master from slaves by jumper for each zone.
Short circuit for master.
Open circuit for slave.
Each zone only can set 1 slave to be master . After a period of time , the master will do
synchronization operation to keep the same color or mode of all slaves in one zone.
3. Touch
button is to switch on/off of each corresponding color.
Hold your finger on
color. There are total 8 levels of brightness.
button to dim brightness of each corresponding
Note: If you press R, then press G, then it is mix color of R and G. If you want to get G color
directly, please press R to switch off of R first. Then press G.
4. Touch
button is to play mode or do pause operation of mode. There are 10 build-in
modes in this button.
button is for saving color or mode at 1-8 buttons. Each zone (Each receiver) can
5. Touch
save 8 modes or 8 colors. Operation is show as below:
Choose zone number
favorite mode to button
----> Touch
button, mode is running -----> save
in 1 zone-----> touch
(over 2 seconds) to save
program into zone until the blue indicator on.
Choose zone number
----> Touch color wheel
-----> save favorite color to button
save color into zone until the blue indicator on.
to get favorite color
in 1 zone-----> touch (over 2 seconds) to
If you want to play your saved color or mode, choose zone number from 1 to 8, then touch
then touch saved number in that zone. Then it will play.
6. Touch
button to return previous color or running mode.
button to speed down when mode is running, touch
7. Touch
when mode is running.
button to speed up
,
button to dim
button one by one, such as press button 1,2,3,4,5,6, then
button, then saved color or mode in button 1,2,3,4,5,6 will run chasing mode one by