1
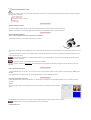
User Manual for the Marratech client software
© Marratech AB
Table of contents
General
Introduction
Startup Guide Windows
Startup Guide Mac OS X
Joining a Meeting
Audio and Video
Locking a Meeting Room
The Whiteboard
The Whiteboard Tools
The Whiteboard Text Tools
The Whiteboard Drawing Tools
The Whiteboard File Handling
The Whiteboard Screen Capture
The Whiteboard Application Sharing
The Whiteboard Additional Functions
The Participants Module
The Private Window
The Chat
The Viewer
Direct Calls
Recording
Playback
Indexing
Appendix
Release Notes for Marratech 5.0
Video Options
Video Follows Audio
Advanced Audio Options
Audio Setup Guide
Audio Setup Guide Playback
Audio Setup Guide Recording
Audio Setup Guide Mic Boost
Audio Setup Troubleshooting
Private Window Options
Web Slides
Network Performance
Firewall Guide
CPU performance
Uninstalling
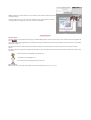
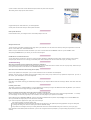
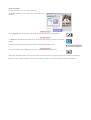
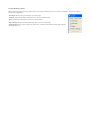
Introduction
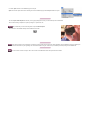
The Marratech client is a freely available software that is easily installed on your computer. Marratech gives you access to a secure group work environment with
crystal clear voice over IP, an interactive whiteboard, the ability to share information and documents, talk and chat in groups or in private and - if desired - the
opportunity to see each other by using web cameras.
Once installed on your computer, Marratech lets you enter a meeting by simply clicking a link on a web page.
Marratech combines the following:
What's new?
Marratech 5.0 offers new functionality and many improvements. Here are a few of them:
New name, Marratech Pro becomes simply "Marratech"!
Walkie Talkie mode is on by default for new users. To speak, press the microphone button and keep it pressed in. To stop speaking, let the button go. This
new mode saves bandwidth and improves voice quality.
Should you want to keep the microphone button pressed in, to use the whiteboard and talk at the same time, press CTRL when clicking the microphone.
New user interface making it possible to hide unused tools. It also removes separate windows such as the viewer and private chats and integrates then in the
main interface.
Use the button in the lower right corner to switch to the whiteboard!
Participant video size can be enlarged.
Audio bandwidth limitation now implemented. If many people have the microphone button pressed simultaneously, then the codec will reduce in quality in
order to avoid network congestion.
Remote application control. Enables you to give control of your application to another participant.
Improved application sharing. Our VNC based application sharing now uses a transparent rectangle to select what is to be shared.
Additionally, Marratech 5.0 can connect to an external VNC server, enabling new training scenarios.
Application sharing is now available for Linux users as well.
AES 256 bit encryption ensures the privacy of your meetings with even higher encryption levels.
Now includes the ability to specify the capacity of your uplink, thus avoiding any possible saturation of your DSL/Cable connection, where upload is often
slower than download.
Improved new video rendering code for Mac OS X.
Improved compability with Mac OS X Tiger.
Marratech has two different interfaces. Choose the interface that best matches your skills and needs.
Flexible: This new interface combines all the functionality into one window, but lets you close and open the
various components, matching your meeting scenario.
The size of the Participants video can also be made larger and application sharing is now available from this
mode.
Expert: This interface is meant for expert users. In this interface, all the modules are separate and they can
be toggled separately.
Keep in mind that even if you choose not to view the whiteboard or chat (for example) they are still active
and being updated in the background, ready for you to make them visible again.
About this manual
Commands, buttons and menu alternatives are always given in bold + italic, applications and menu names are given in italic. Useful hints and tips are highlighted with
this icon:
This manual has been written using Marratech 5.0 for Windows while using the Flexible interface. The same main functionality can also be found in the Linux (Redhat)
and Mac (OS X) versions.
The manual covers the most common functionality and preference settings. For the sake of simplicity, the screen shots will focus on the new, default, Flexible
interface.
The table of contents on the right acts as a guide through the pages. We recommend reading at least the Startup Guide for Windows or Mac before joining a meeting
the first time.
Windows specific hints are highlighted by the Windows logo.
Linux specific hints are highlighted by Tux.
Mac OS X specific hints are highlighted by the Mac OS X logo.
Other information
Marratech hosts a user forum where many questions are answered and discussed, please join our community!
Getting Started - Windows
This guide is a condensed version of the manual and is recommended for first time users. We recommend first reading through this page, then browse through the
rest of the manual. In this guide:
System Requirements
How to install and start
Quick Steps to Joining an E-meeting
Practical Tips
Troubleshooting
System Requirements
On Windows, the Marratech client software requires a 1GHz PIII processor along with Windows 2000 or XP (Pro and Home editions) along with a minimum of 512
MB of ram. Frequent users are recommended to use Windows 2000 or XP.
Marratech recommends the use of USB web cameras such as the Logitech Quickcam 4000 or Notebook Pro along with an analog headset such as the the
Plantronics .Audio40.
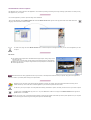
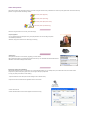
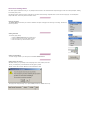
How to Install and Start
Step 1: Install your web camera and your headset
1. Many cameras require that you insert the accompanying CD before connecting the
camera. Please follow the instructions bundled with your camera.
2. Connect your headset to your computer, matching the microphone and headphone plugs carefully.
Marratech strongly recommends the use of a good headset. See the 'Recommended Hardware' in the Support section of www.marratech.com
For conference rooms, good echo canceling microphones are also available.
Step 2: Install the Marratech client software
1. Download the Marratech client from www.marratech.com/download. Be sure you are using the latest version! You can now verify this by using Help menu, Update
option in Marratech.
2. Run the Marratech installer program and follow the simple installation instructions.
Step 3: Running Marratech the first time
From the Start menu, select Programs and the Marratech program group.
From there, choose the Marratech program icon.
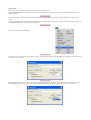
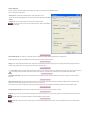
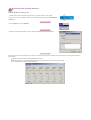
The first time you use Marratech, the Startup Wizard will appear. Fill in your identity and contact information. Choose the internet connection speed that best
matches your own.
a) Video
If you have a web camera connected, this step will help you test it.
Click Preview to see a test picture of you camera. Click Source to access the lighting and color settings for your camera.
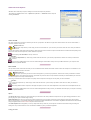
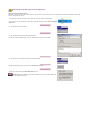
b) Bookmarked servers
To join an web meeting with Marratech, you need to access a Marratech Manager server. In this step, if you know your server's name and web address (or IP
Number), add it here. ( for example http://www.myserver.com:8000/ ).
Click Add to confirm. The server you have added will now show up in the Viewer's list of available server's in the Marratech client.
Marratech's public servers are added by default and can be used for general testing purposes.
c) Voice settings
This step is very important, as it will affect how you are heard and how you hear others.
This has a big impact on the overall user experience.
First, choose what sound devices to use. Be sure to choose the ones your headset is
connected to. Normally, the output channel is called Wave and the input channel is called
Microphone.
Please avoid using your web camera's built-in microphone. It often gives unpleasant distorted sound.
Finally, set the volume level for what you hear. Marratech has automatic input volume control, meaning it will adjust your volume level for your microphone
automatically.
d) Recording
Simply choose a location where you wish to store your recordings on your computer.
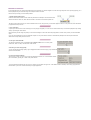
Quick Steps to Joining a web meeting
1. Choose Marratech from your Start Menu.
2. From the Viewer*, click on the appropriate server's web site or enter the web address manually for example: http://emeetingportal.com/
3. Enter your username and password, if necessary.
4. Choose the appropriate web meeting room
5. Click on the join link to enter the web meeting room. After joining, press on the microphone button to speak and press the camera button to let others see you.
To keep the microphone pressed in, press the CTRL key when clicking it.
6.Press the whiteboard button in the lower left corner of the application in order to switch from the Viewer to the Whiteboard.
7. Use the File menu to open images, text files, MS Word or PowerPoint documents.
8. Use the pointer and marker to bring attention in the Whiteboard.
8. To lead others to your whiteboard page, press the Lead Page Changes button.
* Note that you can also join web-meetings from your favorite web browser like Internet Explorer, Firefox and Opera etc. just by clicking on an web meeting link.
Practical Tips
Join early
Joining your meeting early gives you the opportunity to test your and your colleagues volume settings, prepare the agenda and load your documents in the
Whiteboard.
Voice
Some tips for better voice quality during your meeting:
Be sure you are using the right audio input and output device.
Avoid using your web camera's built-in microphone.
Use only the microphone when you need to speak. Un-press the microphone buttons at other times.
Avoid breathing in the microphone by placing it a little away from the corner of your mouth, not directly in front of your mouth.
Video
To adjust the quality of your own image, you can choose to raise your bandwidth and your image quality (Tools, Options, Video panel).
The maximum bandwidth setting is controlled by the configuration of the e-meeting room you have entered.
The image quality setting affects the sharpness of the image, higher image quality will give slower video updates,lower image quality will give a faster image.
Use the whiteboard
A picture is worth a million words! Use the Whiteboard to explain, sketch and present.
Write an agenda.
Take meeting minutes. Import pictures, MS Word and PowerPoint documents. Copy/paste
directly from MS Excel. Use the pointer and the marker actively to stress important
information.
Hold a private discussion
Click the P button next to your colleague's name to chat and talk privately to him or her.
Add your favorite server
To add a new server to the Viewer's bookmark page, simply add it to your bookmarks. To do this, switch to the Viewer by clikcing on the globe button on the lower
left icon. From the Slides menu, select Edit Bookmarks...
Write in an easy to remember name and the exact location of your server in the URL field. Press the Add button to add it to your list and OK to confirm.
After pressing the Refresh button in your Viewer, your new server will now appear.
Use Marratech in a conference/class room
You can easily setup any conference or class room for a group of people to participate in a Marratech e-meeting. Simply connect a speaker, an echo canceling
microphone (The Clear One Accumic II is strongly recommended) and a camera. Participants from all over the world can now join your meeting or lecture.
Troubleshooting
Other users cannot hear me when I speak and my microphone is switched on.
Some headsets have mute buttons attached to the headset. Ensure that you are not muted and if there is a volume control, turn it up fully. Finally, double check your
sound input and output devices as well as the input/output channels in the Tools, Options, Audio panel.
Other users can hear themselves when meeting with me. (Echo)
Never use open speakers and a microphone. If you do not have a headset, be sure to at least have normal headphones. Otherwise, sound may go from your
speakers into the microphone, leading to echo, which you may not hear, but is very unpleasant for everyone else.
Be sure you and your colleagues have the right input device and input channel selected.
My voice is breaking up and / or there seems to be a delay in sending or receiving voice.
Entering a meeting room not configured for your bandwidth (i.e. you are using a slow DSL but have entered a room configured for higher bandwidth - 1 or 1.5 Mb/s)
can cause skipping voice and/or very long delays in the conversation. This usually happens if your upload link is overloaded.
In the Tools menu, select Options and choose the Audio panel. From here, select the low bandwidth audio compression and press Apply. Then, choose the Video
panel and reduce your bandwidth and image quality to no more than 50 kb/s. Press OK.
If you continue to experience degraded voice quality, here are some more tips:
Have everyone (including yourself) stop sending video.
Ensure that all applications using the Internet have be closed down and there are no "live updates/synchronizing applications" running in the background.
Try leaving that meeting room and enter a meeting room with lower bandwidth settings
If the problems do not disappear, talk to your e-meeting administrator and ask for a lower bandwidth meeting room to meet in for you and your group.
Note: The Marratech client features packet loss indicators. If you see a lot of orange bars under the participants, you may be suffering from packet loss (i.e. network
overload)
I cannot access meeting rooms from my home network and other internet applications work fine.
Your personal firewall may have blocked access to the Internet for Marratech. Configure your programs settings in your personal firewall to allow Marratech access to
the Internet. (You may see a Marratech warning dialog when this occurs.) More information on this is also available in our user forums.
I cannot access meeting rooms from my company network.
Your corporate firewall may be blocking the meeting. Check out the short Firewall Guide at the end of the manual. (You may see a Marratech warning dialog when
this occurs.)
I get a warning for too low bandwidth on my USB bus.
Try to avoid using a USB web camera along with a USB headset. In some cases, the USB bus carrying both your voice and your video will be overloaded, causing
warnings, quality loss or other hard to troubleshoot problems. Newer USB 2.0 computers are more robust to such issues.
Other problems
Other stability or performance problems are often solved by upgrading to the latest version of Marratech and your operating system as well as shutting down unused
applications. Be sure your computer meets or exceeds our minimum requirements found on www.marratech.com
Getting Started Mac OS X
This guide is a condensed version of the manual and is recommended for first time users. We recommend first reading through this page, then browse through the
rest of the manual. In this guide:
System Requirements
How to install and start
Quick Steps to Joining an E-meeting
Practical Tips
Troubleshooting
System Requirements
On the Mac, the Marratech client requires a G4 processor along with Mac OS 10.3 or higher along with a minimum of MB of ram.
Marratech recommends the use of the Apple iSight firewire camera along with a USB headset such as the Plantronics DSP-300.
How to Install and Start
Step 1: Install your iSight camera and your USB headset or headphones
1. Before starting Marratech, be sure that your iSight camera is connected.
Connecting the camera after starting the software will not work. Other firewire cameras have been tested, but Marratech recommends the Apple iSight for its ease of
use.
2. Before starting Marratech, be sure to connect a USB headset or a Griffin iMic with a headset. Plug these in and select them (in the System Preferences) as your
primary input and output device.
If you do not have a USB headset or a Griffin iMic with a headset, then use normal headphones, such as the ones provided with the iPod along with the
iSight camera's built-in microphone.
For conference rooms, good echo canceling microphones are also available.
Not using a headset or headphones will cause echo, which is disturbing to the other participants. Unfortunately, the iSight's echo canceling does not work with
Marratech.
Step 2: Install the Marratech Client
1. Download Marratech from www.marratech.com/download. Be sure you are using the latest version! You can verify this by using the Help menu, Update option in
Marratech.
2. Run the Marratech client installer program you have downloaded and follow the simple installation instructions.
Step 3: Running Marratech the first time
From the Applications folder, double click the Marratech icon. The first time you use Marratech, the Startup Wizard will appear. Fill in your identity and contact
information.
a) Video
If you have an iSight connected, this step will help you test it. Make sure that you have selected DV Video as capture
device.
Click Preview to see a test picture from your camera. The default settings should work. Close the preview window to continue.
The Marratech User Forum has hints on different settings for this preview window.
b) Bookmarked servers
To join an web meeting with Marratech, you need to access a Marratech Manager server. In this step, if you know your server's name and web address (or IP
Number), add it here. (for example http://www.myserver.com:8000/ ).
Click Add to confirm. The server you have added will now show up in the Viewer's list of available server's in the Marratech client.
Marratech's public servers are added by default and can be used for general testing purposes.
c) Voice settings
This step is very important, as it will affect how you are heard and how you hear others. This has a big impact on the
overall user experience.
First, choose what sound devices to use. Be sure to choose your USB headset, the Griffin iMic or the built-in device if you are using headphones.
Finally, set the volume level for what you hear. Marratech now has automatic input volume control, meaning it will adjust your volume level for your microphone
automatically.
d) Recording
Simply choose a location where you wish to store your recordings on your computer.
Quick Steps to Joining an E-meeting
1. Double-click the Marratech icon from your Applications folder.
2. From the Viewer*, click on the appropriate server's web site or enter the web address manually for example: http://emeetingportal.com/
3. Enter your username and password, if necessary.
4. Choose the appropriate web meeting room
5. Click on the join link to enter the web meeting room. After joining, press on the microphone button to speak and press the camera button to let others see you.
To keep the microphone pressed in, press the CTRL key when clicking it.
6.Press the whiteboard button in the lower left corner of the application in order to switch from the Viewer to the Whiteboard.
7. Use the File menu to open images, text files and PDF documents.
8. Use the pointer and marker to bring attention in the Whiteboard.
8. To lead others to your whiteboard page, press the Lead Page Changes button.
* Note that you can also join e-meetings from Mozilla, Camino or Opera. Safari does not support handling of MIME types at the time of publishing. For info, consult
our user forums.
Practical Tips
Join early
Joining your meeting early gives you the opportunity to test your and your colleagues' volume settings, prepare the agenda and load your documents in the
Whiteboard.
Voice
Some tips for better voice quality during your meeting:
Be sure you are using the right audio input and output device. Starting Marratech without the proper devices plugged in may cause it to use the wrong ones.
Use only the microphone when you need to speak.
Un-press the microphone buttons at other times.
Avoid breathing in the microphone by placing it a little away from the corner of your mouth, not directly in front.
Video
To adjust the quality of your own image, you can choose to raise your bandwidth and your image quality (Marratech menu, Preferences, Video panel).
The maximum bandwidth setting is controlled by the configuration of the e-meeting room you have entered. The image quality setting affects the sharpness of the
image, higher image quality will give slower video updates, lower image quality will give a faster image.
Use the Whiteboard
A picture is worth a million words! Use the whiteboard to explain, sketch and present. Write an agenda.
Take meeting minutes. Import pictures, PDF documents.
Copy/paste directly from Safari, MS Excel or your favorite application.
Use the pointer and the marker actively to stress important information.
Hold a private discussion
Press the P button next to your colleague's name to chat and talk privately to him or her.
Add your favorite server
To add a new server to the Viewer's bookmarks page, simply add it to your bookmarks. To do this, switch to the Viewer by clikcing on the globe button on the lower
left icon. From the Slides menu, select Edit Bookmarks...
Write in an easy to remember name and the exact location of your server in the URL field. Press the Add button to add it to your list and OK to confirm.
After pressing the Refresh button in your Viewer, your new server will now appear.
Use Marratech in a conference/class room
You can easily setup any conference or class room for a group of people to participate in a Marratech e-meeting. Simply connect a speaker, an echo canceling
microphone (The Clear One Accumic II is strongly recommended) and a camera. Participants from all over the world can now join your meeting or lecture.
Troubleshooting
Other users cannot hear me when I speak and my microphone is switched on.
Some headsets have mute buttons attached to the headset. Ensure that you are not muted and if there is a volume control, turn it up fully. Finally, double check your
sound input and output devices in the Marratech menu, Preferences, Audio panel.
Other users can hear themselves when meeting with me. (Echo)
Never use open speakers and a microphone. If you do not have a headset, be sure to at least have normal headphones.
Otherwise, sound may go from your speakers into the microphone, leading to echo, which you may not hear, but is very unpleasant for everyone else. Try to use, at
the minimum, a pair of headphones, such as iPod headphones.
My audio is constantly breaking up.
On the Mac, we recommend connecting your USB headset (or iMic) directly to your computer's USB connector and avoid using a USB hub. These often cause audio
quality loss.
I suddenly lose all audio.
This problem is caused by an overloaded USB bus. Try to avoid bluetooth syncs and limit your usage of other USB devices while using Marratech. If you do lose all
audio, shut Marratech down and unplug and replug your USB headset (or iMic)
My voice is breaking up and/or there seems to be a delay in sending or receiving voice.
Entering a meeting room not configured for your bandwidth (i.e. you are using a slow DSL but have entered a room configured for higher bandwidth - 1 or 1.5 Mb/s)
can cause skipping voice and/or very long delays in the conversation. This usually happens if your upload link is overloaded.
Open the Marratech menu, Preferences, Audio tab. From here, select the low bandwidth audio compression and press Apply. Then, choose the Video tab and
reduce your bandwidth and image quality to no more than 50 kb/s. Press OK.
If you continue to experience degraded voice quality, here are some more tips:
Have everyone (including yourself) stop sending video.
Ensure that all applications using the Internet have be closed down and there are no "live updates/synchronizing applications" running in the background.
Try leaving that meeting room and enter a meeting room with lower bandwidth settings
If the problems do not disappear, talk to your e-meeting administrator and ask for a lower bandwidth meeting room to meet in for you and your group.
Note: The Marratech client features packet loss indicators. If you see a lot of orange bars under the participants, you may be suffering from packet loss (i.e. network
overload)
I cannot access meeting rooms from my home network and other internet applications work fine.
Your personal firewall may have blocked access to the Internet for Marratech. Configure your programs settings in your personal firewall to allow Marratech access to
the Internet. (You may see a Marratech warning dialog when this occurs.) More information on this is also available in our user forums.
I cannot access meeting rooms from my company network.
Your corporate firewall may be blocking the meeting. Check out the short Firewall Guide at the end of the manual. (You may see a Marratech warning dialog when
this occurs.)
Other problems
Other stability or performance problems are often solved by upgrading to the latest version of Marratech and your operating system as well as shutting down unused
applications. Be sure your computer meets or exceeds our minimum requirements found on www.marratech.com.
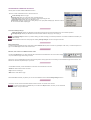
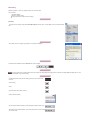
Joining a meeting
Meeting rooms are hosted on a server running the Marratech Manager. To access an meeting, you can do the following:
Start the Marratech client and use the Viewer to find your desired meeting room. If it is not in your bookmark list, you
can surf to it by typing a web address, such as this:
http://emeetingportal.com/
or
http://123.45.67.89:8000/
On Windows, your e-meetings can be accessed via your regular web browser (Internet Explorer, Netscape Navigator, Mozilla etc.).
If your network permits it, you can access Marratech's public servers located at:
http://www.marratech.com/meetings/
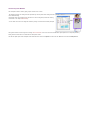
The server you choose may be password protected. Please enter your name and password.
The server you connected to shows how many seats (number of simultaneous users) are available for use. This
number can be increased by expanding the license.
Server's may instead have a limited number of simultaneous e-meeting rooms.
The number to the left of the name of the e-meeting rooms shows how many users that are connected to the room
in question.
Note that an e-meeting room can be locked "from the inside". Look at the chapter on locking rooms for more
information regarding this.
Just click on the name/link to connect to the e-meeting in question.
If you would like information or to join without one or several media use Info.
Useful for users joining with low bandwidth network connections, as they can remove the video.
This dialogue box indicates that there might be a firewall blocking the data from the server
to your computer.
See the Firewall Guide for details.
Once you've joined, the main Marratech client window will open:
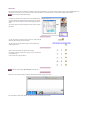
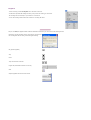
Audio and Video
After joining the meeting, you may want to send audio and video:
The Marratech client features audio and video controls in the lower right part of the
application.
Press the Microphone button to speak to all the other participants. Unpress the button when you are done speaking.
The Speaker button should be pressed by default. It lets you hear the others speak. Unpress it to mute all the other participants
speaking.
To the right of the audio and video buttons, you will find a slider to raise and lower other people's volumes.
If you have a web camera, press the Camera button to be seen by all other participants in the e-meeting room.
Unpressing the camera button will freeze your image for up to 90 seconds, but will not transmit any new images. After 90 seconds your frozen image will disappear.
Marratech has a list of recommended headsets, microphones and conference room setups on its web server and strongly recommends consulting this list.
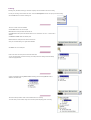
Locking a meeting room
Locking an meeting room requires moderator priveleges. If this is not the case, these menu alternatives are grayed out. Talk to your system administrator.
Once all participants have joined your meeting, simply lock the door behind you. You can even disconnect an unwanted user from an meeting room.
Use Access Control, Lock Room on the Tools menu when all participants has joined the room. (on
the Window menu under Mac OS X)
A check mark indicates that the room is locked.
The link for the room is disabled and the word Locked is added..
Uncheck the Lock Room menu alternative to unlock the room if a participant leaves the room and needs to get back in again.
The room is automatically unlocked when the last participant leaves the room after a meeting.
To disconnect a participant use Access Control, Kick User on the Tools menu and select who you
would like to disconnect. (Window menu under Mac OS X)
The disconnected user will be presented with a dialog box showing who has disconnected him or
her.
If you are connected to a Marratech Manager 3.0 server, both of these features are directly
available from the viewer's welcome page. To open this page:
1. Select the viewer from the Whiteboard / Viewer selector button.
2. Press the Star icon to open the welcome page.
If you are a moderator, lock and kick functionality is aslo available from the Manager's welcome
page.
The Whiteboard
The Whiteboard is ideal for sharing and commenting documents and drawings, taking meeting minutes, scribbling and sketching, etc. It supports multiple pages which
in turn can be used simultaneously by several users.
This chapter will go through all of the Whiteboard's functionality.
To view the Whiteboard, click on the Whiteboard selector button in the lower
left corner.
The Whiteboard can import images, text and MS Word and PowerPoint documents (it can also share/present all other windows on your computer for others to view!).
While Mac users can not import MS Office documents, but these can be easily saved as PDF, a format supported on the Mac OS X version of Marratech.
Copy/paste is also supported extensively and works from MS Word, Excel, PowerPoint etc.
The main tools are found above the drawing area.
Palettes for changing colors, fonts and text styles are also found beside the main tools along with the controls for the Screen Capture and Application Sharing
functions.
Use the menu or the Left and Right buttons above the drawing area to switch between the different whiteboard pages.
The Object menu provides functionality for moving objects back and forward as well as grouping them.
There is an Undo function under the Edit menu (in several steps).
The Whiteboard supports GIF, Animated GIF, JPG and PNG image file formats.
The Whiteboard Tools
Here is an introduction to the Whiteboard tools.
These are the two most commonly used Whiteboard tools:
Telepointer
Markup pen
Hold down <shift> while using the Markup pen to mark in straight lines.
In the top left corner you have access to the most commonly used file/page functions:
Create new Whiteboard page
Open Whiteboard document
Save the current page
You can follow and/or lead the page changes of all the participants in the Whiteboard:
Follow Page Changes
Lead Page Changes
The Lead Page Changes function is very useful when leading a group through your PowerPoint or Keynote presentation.
Buttons for presenting an application window from your screen:
Desktop sharing
Select Window to Capture
Update Captured Window
Take control of remote desktop
There are two controls for to determine how to view the Whiteboard content:
Miniview
Zoom control (new as of version 4.0)
The section of tools consists of:
Selection
Text
Freehand drawing
Lines
Arrows
Circles/ovals, hollow
Circles/ovals, filled
And the following button have these functions:
Squares/rectangles, hollow
Squares/rectangles, filled
Color picker
Group objects
Ungroup objects
Import video snapshot
The Font button will bring up all the text/font parameters:
Font
Style
Size
The font size can also be changed quickly from its own small menu.
Page selection
Note that an asterisk (*) before the page name means that your computer has not yet downloaded the page.
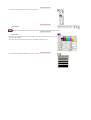
Color palette
These colors can be assigned to text and any drawn objects. Select from the palette or make your own hue by
mixing Red, Green and Blue.
As of version 4.0 of the Marratech client you can also set the Alpha (transparency) value.
You can choose from different line widths for lines, arrows, circles etc.
The Whiteboard Text Tools
To write in the Whiteboard, click on the text tool and click in the Whiteboard work area where you would like
to write.
You may drag the right margin setting to the desired position:
The text will now automatically wrap to the next line as you type.
Text can be moved by first selecting either a part of a text block by highlighting the text with the text tool, or the whole text block by
clicking on it using the selection tool. Then use Cut and Paste (on the Edit menu) to move the text.
The font, color, style and size of the text can be set in a similar way. First select the text in question and then apply the formatting.
These attributes apply to the whole text object block.
There are three different font types to choose from in the Whiteboard.
The text handling also has left-justified tabulator stops every eight character.
This is to aid you when setting up tables. Just press the <tab> key between the columns.
The Whiteboard Drawing Tools
To draw in the Whiteboard, simply click on the desired drawing tool. Move the mouse cursor over the work area. Start drawing the object by holding down the mouse
button and release it when you have achieved the desired result
Choose a tool by clicking on its button.
Move the cursor over the work area.
Hold down the mouse button and draw the desired shape.
To alter the shape, use the Selection Tool and click on it. Then move it by dragging the actual shape or
change its size/proportions by dragging the small "handles". You can also apply a new color or line width.
If you want to be aided in drawing straight lines (in 45 degree increments) and true circles/squares, hold down the <shift> key while drawing.
To move more than one object at the same time you must group them first.
Select the desired objects with the Selection Tool by outlining them all at once or selecting them with the CTRL key. Then use Group
from the Object menu to "glue" them together. Use Ungroup to separate the different objects again.
The order between objects can also be changed. If you have two objects and would like to move one of them behind the other do like
this: Start by selecting the top one.
Choose To Back on the Object menu to move the black rectangle behind the gray circle in this example:
The same applies to when moving an object to the front of another, use To Front for that.
Note that the behavior when selecting objects has changed as of version 4.0 of the Marratech client. Previously an object was moved "on top" when selection it, that is
not the case any more as it keeps its order.
A useful tip is to Group these two objects now so that you don't alter their order when you continue to work on the page.
The Whiteboard File Handling
The Whiteboard can open and import a number of different file formats, images (GIF, JPG and PNG), MS Word and PowerPoint (Marratech for Windows) and Adobe
PDF files (Marratech for Mac OS X).
Save and open Whiteboard documents using Save, Save Page and Open on the File menu.
To save the entire Whiteboard and all of its pages, use Save.
To save only the current Whiteboard page, use Save Page.
To save a selected image (GIF, JPEG or PNG), select the image and choose Save Image. Images are saved in
their original format.
Use File, Open to open a Marratech Whiteboard document, text document or image.
Windows users can open MS Word and MS PowerPoint files directly in the Whiteboard. To do this, MS Office
must be installed on your computer.
One Whiteboard page is created for each Word page or PowerPoint slide.
Marratech for Mac OS X can open PDF files directly into the Whiteboard.
All Mac OS X applications capable of printing can export to the PDF format.
Marratech also has extensive copy/paste capabilities. You can copy/paste from MS Excel, Word, PowerPoint etc.
When opening an MS Word document on a Windows machine, you may open the whole document, or a range of pages
from it.
You can also select what range of pages to open when opening Adobe PDF files in the Mac OS X version of
Marratech.
With MS PowerPoint documents, you may also scale the slides to a smaller or larger size.
When working with MS Excel we recommend the use of copy/paste, or using the functions for window capture or
sharing.
The Import function differs from Open as it brings text or image files into the current whiteboard page.
In contrast, Open creates a new whiteboard page for every file.
Open also sets the opened document in the background of the whiteboard page, whereas Import creates an object.
The File, Import, Video Snapshot function lets you bring high quality pictures from your camera directly into the whiteboard.
This is useful for taking a snapshot of a product prototype, an injured hand, etc.
Keep in mind that you must be sending video to import a Video Snapshot.
This useful tool is also available directly from the Whiteboard's tool bar:
There are also functions on the Edit menu for pasting and copying both text and images from other applications into the Whiteboard. Using the clipboard you
can even insert a whole window by first "grabbing" the current active window using Alt + Print Screen (on Windows) and then pasting it into the Whiteboard.
To choose where to insert an object, click in the work area of the Whiteboard where the object should be inserted.
The Whiteboard Screen Capture
The Whiteboard can do screen captures of other applications. This is useful for presenting or discussing text, images, drawings, spread sheets, etc. directly from any
other application on your computer.
First, start the application you wish to capture and bring into the whiteboard.
Then, from the Whiteboard, use the Window Capture Tool. Press the Window Selection button (picture to the right) and hold the mouse button down while
dragging to the desired window and then release.
On a Mac OS X, simply click on the Window Selection button. A camera shaped cursor will appear with which you can click on the application you wish
to capture.
More Details
The resulting image will presented on the Whiteboard's background layer, making it easy to draw
and write on top of it.
"Only" the owner of the document can make changes to the original document in the application.
Although only the owner can modify the original document, other participants can draw and write
over the captured window.
Remember that this can be any application window on your machine, in the example above Adobe Photoshop is captured. Simply be sure the application in
question is visible on your desktop before clicking on the capture button.
Windows users can also select a sub-window within an application if necessary (for example, the actual spread sheet in MS Excel, leaving out the
toolbars and menus). Go to the title bar of a Windows application if you would like to present the whole window.
On Mac OS X you can press <space> on the keyboard before selecting what window to capture, this will let you select an area of your screen to capture.
To update, click on the Update button (or press <ctrl> + <d>) in the Whiteboard. On Mac OS X, simply use the Window Selection button again as the
Update function is not available.
Note that you can press <ctrl> on the keyboard before selecting a window and the captured window will be put into the system clipboard. Then you can paste
the window as a normal image and avoid having it in the background layer of the whiteboard page.
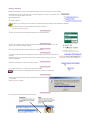
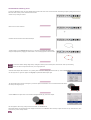
The Whiteboard Application Sharing
Marratech 5.0 introduces the ability share a live application and handover control to one of them. The application sharing function enables you to show applications in
real time to all the other participants. Application Sharing is very useful for on the fly updates of external documents or for online training.
Application Sharing can be done fromWindows, Mac and Linux. The Application Sharing tool streams the chosen desktop area to the other participants'
Whiteboards.
Before starting, start the application you wish to show and place it on your desktop.
Then, in the whiteboard, turn on the Lead Page Changes function. This will lead the other participants to the application
sharing page you are about to create.
After pressing the Application Sharing button, the sharing mode will appear onscreen. It removes the large video window
and replaces it with an overview of what you are sharing. The whiteboard will also be hidden.
This will make it easier to select the application you would like to present to the others. There is a small miniature Whiteboard in the sharing tool that will show you
what the others are seeing.
Using Application Sharing. The area under the Shared Desktop rectangle is being sent to the other participants.
Move the Shared Desktop rectangle over the application you want to share.
Press Play to start sharing the area under the Shared Desktop rectangle.
The Play button will start sending the Shared Desktop rectangles contents.
The Stop button will stop sending the Shared Desktop rectangles contents.
The Eject button will halt application sharing and return you to the full Marratech interface.
You can resize the Shared Desktop rectangle to match your needs.
To give control of your Shared Desktop are to another participant, select him or her from the Allow Control list.
ONLY GIVE CONTROL TO SOMEONE YOU TRUST! Allowing someone to control your computer has serious
implications. Never leave your computer unattended when allowing control.
The participant you have given control to will now be able to click the steering wheel icon in the Whiteboard's
button bar and take control of the Shared Desktop area.
Switch back to "<Nobody>", Stop or Eject to stop the application sharing's remote control feature.
Special considerations
Application Sharing requires bandwidth. If you are using it frequently, be sure to use an e-meeting room in which the Whiteboard media is configured for higher
bandwidth limits. Using Application Sharing on an Internet connection with low upload speed will of course lead to worsened quality in the audio and video.
Application Sharing requires more resources. You may notice that it uses more processor power than the traditional screen capture in Marratech.
If you feel your system is too slow when sharing an application, try not sending video at the same time. This will reduce your processor load.
You may bring up the whiteboard and use it to annotate over the application being presented. This is a very good way of writing notes or bringing attention to
special details or dialog boxes.
Sharing a large area will be slower than a small area. Try to limit and optimize what you want to show so that the updates will be faster.
Marratech builds upon VNC to make application sharing possible. This has interesting benefits, such as the ability to use an external VNC server instead of
your local computer. It makes it possible to hold software training on a another computer than your own. This is possible by opening the Options menu item under
Tools and selecting the VNC tab. Simply specify an external VNC server and port.
To share your desktop area with better color quality, open the Options menu item under Tools and select the VNC tab. Change the Depth to 16. This will
require more bandwidth.
The Whiteboard Additional Functions
Here we present a number of additional Whiteboard functions.
There are a number of additional functions on the Document menu:
Create New Page: Adds a new page.
Rename Page: Allows you to change the name of a Whiteboard page.
Clear Page: Erases all text, images, etc. but leaves an empty page, keeping its name.
Delete Current Page: Deletes the current Whiteboard page.
Delete Pages: Using this command opens a dialog where you can quickly delete multiple pages. Hold down <shift> or
<ctrl> to mark and delete multiple pages.
Follow and Lead Page Changes
Follow Page Changes: Enables your Whiteboard to follow the page changes by those that have decided to lead. This is selected by default.
Lead Page Changes: Enables your Whiteboard to lead the the other members to the page you are changing to.
The Lead Page Changes function is very useful for leading your audience through your PowerPoint presentation. Your audience's Whiteboards will follow your
page transition instantly.
Marratech leads the others to the active page when enabling Lead Page Changes. No need to change back and forth.
Delete and Clear Page
To delete an object on a Whiteboard page, simply select it with the Selection Tool and press the <delete> key (backspace on Mac OS X) . To delete all objects from a
page, use the Clear Page command on the Document menu.
Miniviews, Zoom and the size of Whiteboard work surface
By clicking the Miniview button you will be presented with a small miniature of the Whiteboard. This can be used for keeping
an eye on a Whiteboard page while working on another.
Note that you can have multiple Miniviews open and that way being able to follow progress that users are making on several whiteboard pages at the same time. The
Miniviews can be resized and placed freely on your screen.
Use the Zoom functionality to scale the Whiteboard, useful when users have different screen sizes.
50-200% are switches between those zoom levels.
Page zooms to fit a whole page.
Width zooms to fit the width of a page.
Note that the Zoom functionality only affects your own view of the Whiteboard, with or without Lead Page Changes turned on.
Note that you can also move the boundaries between the various modules. Just use the mouse and click.
If you need more work space in the Whiteboard you can switch to the Expert interface, from which you can maximize the
Whiteboard area to cover your whole screen.
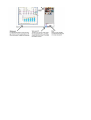
The Participants Module
The Participants module is useful for getting a quick overview of who is online.
The participants that are not sending video are represented by name only while those sending video also
have a thumbnail image.
Note that the name of the participant turns red when he or she is sending audio (or blue when sending
Private Audio - see chapter Private Window).
You can switch who is seen in the large video window by clicking on the thumbnail of another particpant.
The big Video window can also change source through Video Follows Audio. This can be turned off in the Marratech options/preferences or temporarily blocked by
holding down the mouse button on a thumbnail in the Participants module.
The size and update speed of the Participant's video thumbnails can be set from the Options menu item under the Tools menu and select the Participants tab.
The Private Window
The Marratech client has a powerful one-to-one function that can be used to send audio and text messages (Chat) to a single recipient.
The private window can be opened by right-clicking a user or using the Private 'P' button.
Talk to the other party by using the Phone button.
If you wish to mute the audio from the other participants, you can press the Mute Public Audio button. This new feature is useful for having a private conversation
during an ongoing meeting.
If the participant's name is in blue, then the person you are talking with is also sending private audio while red indicates the use of normal public audio (everyone in
the meeting can hear).
To learn more about sending text messages, consult the Chat chapter.
The Chat
The Chat is a handy tool used for text based conversations. Write what you would like to say to the whole group and press <enter> or press the Send button. The
Chat module is useful when you do not want to use audio, during a presentation or lecture for instance. It is also useful for getting people's attention.
Use the Chat to moderate large meetings.
You will find the Chat tool in the lower left corner in the Flexible interface.
Your own messages are displayed with your member name in red while
messages you receive are in blue. A time stamp is displayed before the
name.
The Chat can also show event messages when someone joins or leaves
the session
You can add "smileys" to show what mood you are in as well as send web
addresses (URL's) directly linked to the Viewer.
The link content can also be copied for usage in other applications by
middle clicking the link.
Smileys can be used in public and private chat messages.
For example, to make the "happy smiley" just type a colon, a hyphen and
a right parenthesis :-)
Or just a colon and a right parenthesis :)
Clear the Chat area using Clear Messages on the Edit menu.
Note that you can move the boundary between the Participants list and the Chat with your mouse:
The same applies for the boundary between the Whiteboard and the Participants/Video modules.
The Viewer
The built-in web browser, Viewer, is used for choosing which e-meeting to join. A list of defined servers running Marratech Manager is presented to you when
launching the Marratech client.
At any time, to display the Viewer, simply select the Viewer "globe" button in the lower left corner of the application.
To add a new server to the Viewer's bookmark page, simply add it to your bookmarks. To do this, switch to the Viewer by clikcing on the globe button on the lower left
icon. From the Slides menu, select Edit Bookmarks...
Write in an easy to remember name and the exact location of your server in the URL field. Press the Add button to add it to your list and OK to confirm.
After pressing the Refresh button in your Viewer, your new server will now appear.
You also view the help pages (just choose Help on the Help menu to activate) and log (just type "log:" in the URL field) files generated by Marratech. The Viewer is
not intended to replace your usual web browser as it can only show basic HTML 4.0 web pages.
Direct Calls
Direct, person to person, calls can be made without connecting to a Marratech Manager server.
Unlike the Private Window functionality, where you "only" have access to private audio and chat, this allows you to access all available media, audio, video, chat,
whiteboard and web.
UDP ports 50500 to 50511 must be opened in the firewalls between the hosts. The Direct Call functionality does not support Network Address Translation (NAT)
networks.
The Marratech Manager offers much better support for firewalls and NAT and is recommended for extranet usage. We always recommend communicating via a server
running Marratech Manager which supports most firewall configurations.
First, open the File menu and select Direct Call.
Enter the Host name or IP number of the remote participant's machine. Your own IP number is shown in the Local Host field for convenience. The other party that you
are "calling" must do the same step.
Direct Call also supports encryption. Choose an encryption algorithm (DES, 56 bits or Blowfish, 128 bits) and how you want to access the encryption key. Choose
between Prompt user (mutually agree on a key to use in advance) or Retrieve from server where the key is retrieved from a file on a secure web server.
Recording
Marratech is able to to record your meetings and let you review them later.
This is useful for:
Net-based learning
Review of meeting content
Lets people whom were absent view the meeting.
Recording
To quickly record a meeting, simply select Instant Recording from the File menu. In Expert Mode you have to open the Viewer
first.
Then, decide upon an encryption key (optional for un-encrypted e-meetings):
A VCR-like panel will appear. Press the Record button to start recording.
Join the e-meeting a few minutes ahead so that your computer gets all the Whiteboard pages before you start the recording (Whiteboard pages with a * in the
name are not available on your local machine).
A counter that shows how far into the recording you are (in hours, minutes and
seconds).
Start recording.
Pause.
Stop (also closes the recording controls).
Same as the Stop function.
The recording mechanism will show up in the Participants module as VCR record.
That changes to VCR RECORD when it is recording and back to VCR record while
it is in Pause mode.
You can close the Viewer window while recording if you so desire.
Saving the recording
Playback
To view a recording, use the Start Playback item on the Viewer´s File menu.
You will then be presented with a dialog box where you may choose the recording you want to view.
The recordings can be found locally on your machine or on a file server.
You can view recordings while in offline mode or while in an e-meeting with others.
After you click Finish, the playback toolbar is added to the Marratech client where you can choose from the following functions:
Note that you may be prompted to enter an encryption key ("password") for
the recording if this was done during a secure/encrypted e-meeting.
Play (start the playback).
Stop.
Pause.
Jump one minute back or forward.
Progress bar (click beside the marker to move 10%).
Index.
Stops the playback and closes the VCR controls.
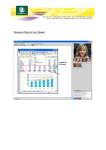
Indexing
Recordings may be indexed, allowing you and others to quickly reach the desired section of the recording.
To index your recording, from the Viewer's file menu, choose the Start Playback menu item and open your desired recording.
Click the Index button to access the indexing tools.
There are a number of functions available:
Use the Add function to enter an index point.
Insert will add an index point before the selected one.
Using Add while an index point is selected will create one on a second level. Use <ctrl> + a mouse click to
deselect.
Use Remove and Edit to delete and edit the points.
Load will restore the index points from the last saved version.
Save your work while indexing on a regular basis with Save.
Click Add to enter a new index point
Enter a name for the new index point as well as the desired time.
You can also skip through or pause the recording at a certain point and the dialog box will automatically
contain the appropriate time.
Continue to add index points using Add and Insert. Selecting a point and clicking Add will create an
additional, subordinate level:
These tools make it possible to create a useful multilevel index for a recording.
To use the index you have created, simply click on the index points while playing back a recording.
Note that index points folders do not have a time assigned to them.
Marratech 5.0 Release Notes
System Requirements
For the latest minimum requirements, please consult the support section at www.marratech.com
License
The Marratech client software is free to download and use.
How to Install
For step by step information on how to install the Marratech client, please consult the following:
Quick Start Guide Windows
Quick Start Guide Mac OS X
How to upgrade
You may keep the 4.1, 4.0 or 3.4 version installed on your system. However, we recommend uninstalling them to avoid any possible confusion.
Marratech 5.0 will reuse the preferences from the previous version. If you would like to remove these preferences and start off from a completely new install, do the
following:
Simply remove the Documents and Settings/..username../.marratech folder.
Simply remove the ~/.marratech directory
Simply remove the Library/Marratech folder found in your user's home directory.
Important changes:
Here are the important changes that will affect usage for Marratech users:
One window interface. The interface now integrates all windows. The Viewer and the Whiteboard can be switched from the lower left corner tab. This means
users will need to press the lower tab button to view the Whiteboard.
Walkie-Talkie Mode. To save bandwidth, increase voice quality and make the Video Follows Audio work, Walkie-Talkie Mode is default. To speak, you need
to keep the microphone button pressed in with your mouse. If you want to keep it clicked in to work in other areas of Marratech, press CTRL while pressing
the microphone button.
Voice quality is now dynamically steered by the audio bandwidth limit set in the meeting room and the network conditions.
You can now specify the capacity of your uplink, thus avoiding any possible saturation of your DSL/Cable connection, where upload is often slower than
download.
What else is new in 5.0?
New name, Marratech Pro becomes simply "Marratech"!
New name, Marratech E-meeting Portal becomes "Marratech Manager"!
Walkie-Talkie Mode. To save bandwidth, increase voice quality and make the Video Follows Audio work, Walkie-Talkie Mode is default. To speak, you need
to keep the microphone button pressed in with your mouse. If you want to keep it clicked in to work in other areas of Marratech, press CTRL while pressing
the microphone button.
One window interface. The interface now integrates all windows. The Viewer and the Whiteboard can be switched from the lower left corner tab. This means
users will need to press the lower tab button to view the Whiteboard.
Participant video size can be enlarged.
Voice quality is now dynamically steered by the audio bandwidth limit set in the meeting room and the network conditions.
Remote application control. Enables you to give control of your application to another participant.
Improved application sharing. Our VNC based application sharing now uses a transparent rectangle to select what is to be shared.
Additionally, Marratech 5.0 can connect to an external VNC server, enabling new training scenarios.
Application sharing is now available for Linux users as well.
AES 256 bit encryption ensures the privacy of your meetings with even higher encryption levels.
Improved new video rendering code for Mac OS X.
Now compatible with Mac OS X Tiger.
Linux now has better support for selecting different audio devices if multiple are installed.
Linux now has improved stability is compatible with more audio devices.
Known Issues in 5.0
Meeting rooms hosted on Manager 3.0 servers using AES 256 bit encryption will not be compatible with older versions of the client.
Application sharing between 4.1.x and 5.0 clients is not possible.
Audio bandwidth limitation requires 5.0 clients.
DV cameras are not supported on Linux and Windows. DV video cameras (i.e. non webcams) work on Mac OS X, but consume more CPU.
Mac OS X users need to use Mac OS X v10.3 or higher with all available updates. Jaguar is no longer supported.
The following libraries are required for Application sharing on Linux: gtk 2.0, gdk 2.0 If these libraries are missing, application sharing will be disabled and you
can not share your desktop but you will still be able to view application sharing from others.
User Forum
Join our user community at http://www.marratech.com/forum/
Video Options
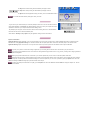
There are a number of settings related to video capturing and rendering in the Video tab of the Marratech Options.
Here is a description of these options:
Capture Device: Choose which installed camera or video capture device to use.
You can also change settings (brightness, color, that are device driver dependent under Device
Settings.
Compression: You may choose between H.261 and JPEG software encoders.
H.261 is better for video since it can reach higher frame rates. JPEG is well adapted for
transmitting still images.
Requested Bandwidth: This slider lets you adjust the amount of bandwidth to use within the limits permitted by the e-meeting room.
Reducing this value may help if the participants have trouble hearing you because of network overload.
Quality: A lower image quality value indicates more compression (more blockiness and lower quality image). A lower image quality will also give higher frame rate.
A higher image quality will give a less blocky picture but will result in lower frame rates.
Use Scaling is a Mac only feature. Many Mac cameras only grab in 320 x 240 pixels, instead of the standard CIF (352 x 288), causing a gray frame around the
video image. Clicking this feature will scale the image to remove the frame. The feature is only recommended for high-speed dual processor Macs.
Limit Capture Frame Rate: Limits the amount of images captured. This gives a lower frame rate but is recommended for slower computers as it saves processor
resources.
Video Follows Audio: Makes the Video window follow the person currently speaking. This can be temporarily overridden by holding down the mouse button while
pointing it at a user in the Participants module. (Read more about this feature here)
For this feature to work, Silence Suppression should be used by all participants and only participants that are talking should be using the microphone button.
Limit Rendering Frame Rate. Use this function to reduce video speed on your screen, thus saving processor resources.
Lip-Synch. Lip-synch is used to synchronize the video images to the voice of the speaker. If you have a slow computer, un-clicking this option may save resources.
For full lip-synch to be achieved, 300 kilobits of video bandwidth per sender is required.
The Marratech client uses a feature called Congestion Control that automatically lowers the amount of video and whiteboard data in case of a bad network
connection.
Video Follows Audio
Video Follows Audio is a useful meeting feature that enables the Video window to automatically change to the current speaker. This can be temporarily overridden by
holding down the mouse button while pointing it at a user in the Participants module.
Here's what to do in order to get it working properly:
First of all, the function must be turned on - check under Tools, Options, Video. (Marratech menu, Preferences on Mac OS X)
Marratech decides whom to display listening to who is talking at the moment.
To then ensure that Video Follows Audio works you should ask your colleagues to unpress the microphone button when not talking.
Advanced Audio Options
Marratech offers a wide variety of options, enabling users to tune their setup to their preference.
These options are available from the Tools -> Options menu (Marratech - > Preferences on Mac OS X) and
selecting the Audio tab.
OUTPUT VOLUME
The Output Volume section controls the volume that you hear from your speakers. The slider to the right has the same function as the one in the main interface; it
controls the volume of what you hear.
Windows and Linux
Choose which Output Device (i.e. audio card) you want to hear the audio from. If you have many such devices, select the one to which your headset is
connected.
You may then choose an Output Channel from this device. These devices may have more than one output channel that tend to use different names depending on the
brand, but the most common Output Device is often called Wave or Speaker.
Avoid anything called Stereo Mix, as this may cause echo.
Mac OS X
Choose which Output Device (i.e. audio card) you want to hear the audio from. If you have many output devices, select the one to which your head set is
connected.
If you are using a USB headset, be sure to connect it before starting the client software. Always connect your USB audio device to your computer. Avoid
using powered or unpowered USB hubs.
INPUT VOLUME
The Input Volume section controls the volume that you hear. The Marratech client software has automatic volume control for the microphone. For information on how
to turn this off, please read further in this section.
Windows and Linux
Choose which Input Device you which to use when sending audio. If you have many Input Devices, select the one to which your headset is connected.
You may then choose an Input Channel from this device. Input Devices may have more than one Input Channel and while they are named differently from one brand
to another, the proper one is usually called "Microphone".
Avoid using your web camera's built in microphone. The quality of those microphones is usually poor and may make you hard to understand.
Mac OS X
Choose which Input Device (i.e. audio card) you want to hear the audio from. If you have many Input Devices, select the one to which your head set is
connected.
When using the Mac's built-in microphone or the iSight's microphone, be sure to use normal headphones as well, to avoid echo. iPod headphones work fine.
If you are using a USB headset, be sure to connect it before starting Marratech. Always connect your USB audio device directly to your computer. Avoid using
powered or unpowered USB hubs.
Options
The Push To Talk function will make your right mouse button (Or CTRL-click on Mac OS X) activate the microphone over any region belonging to Marratech. This is
good for giving short, quick comments during a meeting.
Walkie-Talkie Mode forces the user to keep the mouse button pressed down on the microphone to talk. This can be bypassed by CTRL clicking the microphone
button to keep it pressed in, or by disabling it altogether by unchecking the Walkie Talkie Mode box. The benefits of using Walkie-Talkie Mode are two-fold, bandwidth
savings are significant and the Video Follows Audio option will work as it should.
The Audio Loopback feature will playback (i.e. make you hear) all the audio you send from your microphone. This feature is useful when making a recording and
wanting to be sure your audio levels are correct. This feature is disabled every time you restart the application.
Testing your audio
The Audio Options panel offers the possibility to test your audio playback and recording. The test button, situated in the Options/Preferences, will bring up a window
that lets you do the following:
Record button - The red circle button will let you speak a short sentence and record it
Play button - The green arrow button will let you hear what you have just recorded and repeat it until you press stop.
Stop button - The black square will stop the repeating playback.
Marratech button - The Marratech button will playback a test voice in a loop, enabling you to test your output volume without testing.
Output Volume slider will let you adjust the output volume accordingly during your tests.
Advanced Settings
The advanced settings should only be used in troubleshooting or in special cases that require fine tuning. In this extra window, you can:
Silence Suppression - It enables Video Follows Audio and saves bandwidth by detecting what is voice and what is silence. Marratech's silence suppression fills
silences with white noise, offering a more comfortable silence.
AGC (Automatic Gain Control) - AGC let's Marratech adjust the volume to a level that is right for you. If you wish to disable this feature, un check the AGC box. When
doing this, you may control the volume levels at an OS level without the influence of Marratech.
Audio Setup Guide
This guide is meant to offer extra help in setting up your audio. This guide focuses mainly on Windows since it has many setup options that can lead to audio setup
problems. The guide includes the following sections:
Audio Setup Guide (Playback)
Audio Setup Guide (Recording)
Audio Setup Guide (Microphone Boost)
Audio Setup Guide (Troubleshooting)
Here are a few general rules on how to set your audio settings:
Proper equipment
It is very important that every participant use a good quality headset or an echo canceling microphone
recommended by Marratech.
Otherwise, background noises and echo will disrupt your meeting.
Audio Drivers
Most problems with audio can be solved by upgrading your device drivers.
Many manufacturers have very practical support pages from which you can download and install the latest drivers.
Marratech recommends installing the latest version
Selecting the proper device (Windows)
Windows will sometimes change your audio device (i.e. sound card) without asking you. For example, when you install a web camera, the camera's built-in
microphone may become the primary input device, even though it offers poor quality sound.
To verify your primary audio device, do the following:
1. Open the Windows Control Panel (found in the Settings section of the Start menu)
2. Open the Sounds and Audio Devices application from the Control Panel.
3. Select the Audio tab.
4. Select the Default device for both Sound playback and Sound recording.
5. Check the Use only default devices check box.
6. Press OK to save your changes and close this window.
Audio Setup Guide Playback (Windows)
Setting the playback levels (what you hear)
1. Double click the volume control widget in your system tray. (It may be another color than yellow)
If it is not in your tray, open the Windows Control Panel, choose the Audio tab and select the Sound Playback
Volume button.
2. From the Options menu, select Properties.
3. Under the Show the following volume controls list, please select all listed components and click OK.
4. You will now see the volume settings for all of your devices. These may vary from computer to computer. Here are some tips on how to set the various devices for
optimum quality:
Mute all of the devices except for the main Volume and Wave devices.
Take extra special care to mute the microphone (available on some computers), since you do not wish to hear yourself.
As an extra precaution, put all of the muted sliders to zero.
Audio Setup Guide Recording (Windows)
Setting the recording levels- What others will hear
1. Double click the volume control widget in your system tray. (It may be another color than yellow)
If it is not in your tray, open the Windows Control Panel, choose the Audio tab and select the Sound
Recording Volume button.
2. In the Options menu, select Properties.
3. In the Properties window, select the Recording radio button.
4. Under the Show the following volume controls list, select all listed components and click OK.
5. You will now see the volumes for all of your recording devices (your computer may have more than two). Do
the following:
Select only the Microphone.
Never select Stereo Mix. This will cause echo!!!
Mute all other sources and as an extra precaution, lower their levels to zero.
Audio Setup Guide Microphone Boost (Windows)
How to boost your microphone volume
Sometimes, a microphone or microphone input may have a very low volume. A way to solve this is to turn on the Microphone Gain function available on some sound
devices. Here is how to turn this on:
1. Double click the volume control widget in your system tray. (It may be another color than yellow)
If it is not in your tray, open the Windows Control Panel, choose the Audio tab and select the Sound Playback
Volume button.
2. In the Options menu, select Properties.
3. In the Properties window, select the Recording radio button.
4. Under the Show the following volume controls list, select all listed components and click OK.
5. In the Options menu, the Advanced Controls item should be checked.
6. Under the Microphone device, you will now see an Advanced button, click it.
7. Select (or if needed unselect) the Microphone Boost check box.
The Advanced button is sometimes found under the "Playback" section of the audio properties. This
depends on your computer manufacturer.
Audio Setup Guide Troubleshooting
In some cases, extra help may be needed to resolve certain audio problems. Here are some hints on how to solve the most common problems encountered:
PROBLEM
SOLUTION
We have difficulty hearing each other because of
skips and hacks in the audio.
This could be the result of an overloaded network or computer. An easy way to determine if this is the
problem is to ask everybody to stop sending video.
Read more about this in the Startup Guides at the beginning of the manual and in the network
performance chapter.
How do I find out if our audio problems are caused
by network problems?
1. Put your mouse over the person currently speaking and from whom your are experiencing
trouble.
2. Open a Private Window to that user by pressing the "P" button.
3. Press the information button, "I" in the private conversation window.
4. This will bring up a network statistics window. You will be able to see packet loss statistics for
audio under the Audio panel.
If you see a large percentage of packet loss, long round trip times or high amount of jitter, reduce
your video and lower your audio quality.
Read more about this in the Startup Guides at the beginning of the manuals and in the network
performance chapter.
The video window does not show the person that is
speaking.
1. Make sure your Video follows Audio function is on.
2. Is someone else sending audio inadvertently? Ask that person to stop sending audio or to turn on
and calibrate is silence suppression
More help can be found in the support forum at www.marratech.com/forum.
Private Window Options
Marratech offers some tweaking of the private window behavior. These options are available from the Tools -> Options menu (Marratech - > Preferences on Mac OS
X) and selecting the Private tab.
Time Stamps: Adds a time stamp to the messages you receive and send.
Auto Popup: Brings private messages and audio to the front on your screen. (Recommended)
Smileys: Converts various text string to icons. See more in the Chat chapter.
Beep on Messages: Will play out the default system beep when you receive a private message.
Compact Video: Reduces the size of the video in the private window. Un checking this box will make the video appear significantly
larger (Expert Mode only).
The Viewer Sending Slides
The Viewer supports collaborative surfing, i.e. one participant can lead others on the World Wide Web. Simple web pages can be sent to other participants, enabling
to see exactly what you see.
The Marratech Viewer supports the HTML 4.0 standard, but may have trouble accessing complicated Active X, Flash and Javascript pages. It is well adapted to
simple HTML slides, used in many distance education courses.
Receiving web slides
The Receive Slides function allows you to enable or disable the reception of web pages sent out during an e-meeting. This feature is
turned on by default.
Sending web slides
To send web pages (slides):
1. Select the Enable Transmit item on the Slides menu.
2. Check the Send box in the Viewer. (Button on Mac)
3. Surf to the address you wish the others to follow.
Sending a local HTML file
To send a web page located on your file system, use the File-> Choose file button.
Sending secure web content
Marratech will alert you if you attempt to send a web page from a secure (HTTPS) connection.
This way it is unlikely that you will distribute secure web pages by mistake.
Yes will continue with the transfer. No will turn off the distribution of slides.
These pages are managed through Tools, Options, Viewer (Preferences, Viewer under OS X).
Network Performance
If, after determining that your computer meets Marratech's recommendation, you still hear clipped voice, suffer from long delays and receive poor image quality, you or
another participant may be connected through an inadequate network connection.
Here are some tips to help you avoid network problems:
1. Activate network status meters
Enable the "Show Network Status" function under the preferences for Participants. This will add two small
network loss meters to each user, which will make it easier to see which user that causes packet loss.
The left of the two meters show how you receive information from the user, the right is how your information appears at the user. If any data is lost, these will indicate
(in approximate terms) how much.
2. Turn off the video
A quick way to determine if the current e-meeting room is not properly configured (i.e. it uses too much network resources) is to have all the participants stop sending
video by unpressing the camera button.
Please note that your video image may take up to 30 seconds to disappear. If this solves the audio quality problem, read the next tip to lower your video bandwidth
speed.
If not, one of the participants may have an inadequate computer or a very slow network connections. Have different participants use the microphone buttons at
different times to help identify where the issue is.
3. Lower your video bandwidth
Try lowering the maximum amount of bandwidth assigned Options, Video on the Tools menu (under
Preferences, Video on a Mac). Have the others do this as well.
4. Decrease your video image quality
You can also decrease the image quality to gain a slightly better refresh rate even though you just lowered the
maximum video bandwidth.
5. Look at the networks statistics
There are also a number of functions to more precisely determine packet loss, etc. in the Information window
that is accessible by pressing the "I" button in the private window.
To get complete network statistics (to send to your IT support), open the Viewer and type "info:" in the address location, followed by enter. Simply copy/paste all of
this information if you need to communicate with your support organisation.
Firewall Guide
Marratech E-meetings normally work fine with the default settings on the smaller firewalls designed for small office or home use. Larger organizations often have a
more strict configuration where everything not explicitly allowed is denied. This is a quick look on how to configure the firewall for a Marratech E-meeting - for a more
in-depth look, we have a firewall guide on our support pages.
Connecting to a server running Marratech Manager
Only two steps are needed to allow a Marratech client to connect to a Marratech Manager through a firewall.
First, the client must be allowed to connect to the HTTP and the HTTPS ports defined in the Marratech Manager. If the server runs on the standard web ports, this is
usually already set up in some way. The client can use a web proxy server, which is defined in the client preferences window.
Second, the client must be allowed to send traffic to all UDP data ports defined in Marratech Manager (default is 52000 to 52999) AND it must be allowed to receive
returning traffic.
As the client will initiate all connections, both of these rules can be set up using a Dynamic state rule.
Please consult www.marratech.com for how to safely configure your firewall.
Direct Call
The Marratech client software has an option to run point-to-point with another Marratech Pro client. This have several limitations: It does not support NAT and can't be
used with dynamic state rules in the firewall. You may get it to work by setting up port forwarding for the UDP ports used (50500-50511). However, running Direct call
through NAT or a firewall is not a supported scenario by Marratech.
Read more about Direct Call.
CPU Performance
The minimum system requirement for using Marratech is a Pentium III 1 GHz processor with 512 MB of RAM.
The minimum recommendation for Mac users is OS 10.3 or higher , a G4 1 GHz processor and 512 MB of RAM.
Here are 9 hints to improve Marratech's performance on your computer
1. Terminate other applications
Take special care to terminate applications that you will not be using, not forgetting hidden ones, such as those found in your system tray. These applications may be
using memory and processor power that Marratech needs to perform properly.
System tray applications can often be terminated by right-clicking them and choosing Exit or Quit.
On Windows NT 4 and 2000, the Windows Task Manager is useful for monitoring the CPU load. Open it
with <shift> + <ctrl> + <Esc>. Choose the Processes tab and sort the processes by CPU load.
TaskInfo2000 is a useful shareware application that works under Windows 98.
On Mac, you may use the Process Viewer (Under Applications, Utilities)
2. Upgrade your operating system and drivers
By upgrading to your manufacturer's latest drivers and operating system patches, you will often notice increased speed and stability. Running Windows Update (On
Windows) or System Update (on Mac) frequently is recommended.
3. Your processor speed settings
Be sure your processor is at maximum speed. Newer computers may have a battery save mode or power conservation mode that reduces your system's performance.
4. Limit your Participants Refresh rate
Using the Low Update Rate option for the Participants module saves processor power.
5. Limit Capture Frame Rate
The frame rate for the video capture can also be limited to lower the CPU load. This will save a lot of CPU on
slower Macs.
6. Limit your video display frame rate
Limiting the amount of video being displayed in Marratech is also a good way of saving CPU resources.
Enabling Limit Rendering Frame Rate will limit the amount of video displayed, and thus relieve computer resources.
7. Disable the Lip-Synch option
The Lip-Synch functionality can also be disabled to save CPU resources.
8. Disable resize video (Expert Mode only)
Another video-related feature that can cause higher CPU load is the Resizable Window function (Tools,
Options, Video).
Some machines' performance may suffer when the Resizable Window option is active. Deselect this to save on CPU power.
The Lip-Synch functionality can also raise the CPU load to some extent..
9. Disable Use Scaling
The Use Scaling function for scaling your video image on the Mac may use up your computer resources.
Be sure to use this option with care.
Opening several Private Windows with video in them can also cause high CPU loads.
If the hints and tips above doesn't help, the most likely cause is a driver related problem. Check and if necessary update the audio and graphics cards drivers,
as well as the drivers for video grabber cards and USB cameras.
Un Install the Marratech Client
To un install Marratech on Windows, do the following:
Quit the application.
Use the Add/Remove Programs found in the Windows Control panel.
Locate Marratech and click the Remove button.
To uninstall Marratech on Mac OS X, simply open the Applications folder and drag the Marratech icon to the trash can.
To uninstall Marratech on Linux, simply run the uninstaller located at <installdir>/UninstallerData/UninstallMarratech or delete the Marratech client directory
manually.